巧用python之--模仿PLC(PLC模拟器)
工作中用到了VM(VisionMaster4.3)有时候需要和PLC打交道,但是PLC毕竟是别人的,不方便修改别人的程序,这时候需要一个灵活的PLC模拟器是多么好呀!
先说背景:
PLC型号
汇川Easy521:
Modbus TCP 192.168.1.10:502
在汇川Easy521中Modbus保持寄存器=D寄存器 ,在modbus协议中 0-4区 3区就是 保持寄存器(R/W)
那么事情很简单了:只需要做一个ModbusTCP的服务端 就能模拟PLC:
Modbus RTU是主从结构 分 Modbus 主机 / 从机 Master / Slave;
RTU模式主从 主机会轮询从机 问一次答一次; 一般电脑做主机 PLC做从机;
但是当电脑同时连接很多台PLC,电脑做主机,主动询问PLC那么电脑的压力会很大;
这时候电脑可以做从机,多个PLC做主机,电脑端成了被动,那么电脑压力会小很多;
(适用于MODBUS RTU &TCP) 扯远了;
好了这里只说Modbus_TCP 粗略的说Modbus_TCP的报文实际就是RTU 增加文件头去掉CRC校验;
注意下面说的Tcp都指得是modbusTCP;;;
客户端 服务器 Client/Server
VisionMaster4.3只支持Modbus> TcpClient
TcpClient按主从结构分是主机/(Master), PLC扮演的是 Modbus> TcpServer (Slave)
所以在Modbustcp这里,服务器是modbus从机,客户端是modbus主机;
由 TcpClient(VM) 去 轮询 TcpServer(PLC);
好了,搞清楚原理了,下来就是,模拟一个TcpServer(PLC);就是一个可以用的PLC模拟器.
当然你用Modsim/ModScan也可以,但是操作不便;
;因为之前就做过一些用hsl库C#,模拟modbusTCPServer,这里程序放出来吧;
using System;
using System.Collections.Generic;
using System.ComponentModel;
using System.Data;
using System.Drawing;
using System.Linq;
using System.Net;
using System.Text;
using System.Threading.Tasks;
using System.Windows.Forms;using System;
using System.Collections.Generic;
using System.Net;
using System.Runtime.Remoting.Contexts;
using System.Threading;using HslCommunication;namespace MB_TCPServer
{public partial class Form1 : Form{HslCommunication.ModBus.ModbusTcpServer modbusTcpServer;public Form1(){InitializeComponent();modbusTcpServer  = new HslCommunication.ModBus.ModbusTcpServer();modbusTcpServer.ServerStart(502);modbusTcpServer.Write("50", (UInt16)1);modbusTcpServer.Write("60", (UInt16)1);modbusTcpServer.Write("61", (UInt16)1);OperateResult <UInt16> intReg_100 = modbusTcpServer.ReadUInt16("50");                    // 读取输入寄存器100的值if (intReg_100.IsSuccess){Console.WriteLine("success!");Console.WriteLine("");}else{Console.WriteLine("failed:" + intReg_100.Message);}List<string> ipAddresses = GetIpAddresses();//调用Console.WriteLine(ipAddresses.Count);//有几个ipforeach (string ipAddress in ipAddresses){Console.WriteLine(ipAddress);//ip分别有哪些comboBox_me_ip.Items.Add(ipAddress);}comboBox_me_ip.SelectedItem   = 1; }private void button1_Click(object sender, EventArgs e){}public static List<string> GetIpAddresses(){List<string> ipAddresses = new List<string>();try{// 获取本地主机名string hostName = Dns.GetHostName();// 使用主机名获取IP地址信息IPHostEntry hostEntry = Dns.GetHostEntry(hostName);// 获取IP地址列表foreach (IPAddress ipAddress in hostEntry.AddressList){// 确保IP地址不是IPv6的环回地址或者IPv4的环回地址if (!ipAddress.IsIPv4MappedToIPv6 && ipAddress.AddressFamily != System.Net.Sockets.AddressFamily.InterNetworkV6){ipAddresses.Add(ipAddress.ToString());}}}catch (Exception ex){}return ipAddresses;/*List<string> ipAddresses = GetIpAddresses();//调用Console.WriteLine(ipAddresses.Count);//有几个ipforeach (string ipAddress in ipAddresses){Console.WriteLine(ipAddress);//ip分别有哪些}*/}private void button_trig_Click(object sender, EventArgs e){modbusTcpServer.Write("50", (UInt16)10);    OperateResult<UInt16> intReg_100 = modbusTcpServer.ReadUInt16("50");                    // 读取输入寄存器100的值if (intReg_100.IsSuccess){Console.WriteLine("success!");Console.WriteLine(intReg_100.Content);textBox_trig.Text= intReg_100.Content.ToString();}else{Console.WriteLine("failed:" + intReg_100.Message);}}private void button2_Click(object sender, EventArgs e){modbusTcpServer.Write("50", (UInt16)0);OperateResult<UInt16> intReg_100 = modbusTcpServer.ReadUInt16("50");                    // 读取输入寄存器100的值if (intReg_100.IsSuccess){Console.WriteLine("success!");Console.WriteLine(intReg_100.Content);textBox_trig.Text = intReg_100.Content.ToString();}else{Console.WriteLine("failed:" + intReg_100.Message);}}private void button3_Click(object sender, EventArgs e){button_trig_Click(null,null);Thread.Sleep(200);// 太快vm反应不过来button2_Click(null, null);}}
}
可以看出实际有用的只有这些:其余都是 winform界面;
using HslCommunication;
namespace MB_TCPServer
{public partial class Form1 : Form{HslCommunication.ModBus.ModbusTcpServer modbusTcpServer;public Form1(){modbusTcpServer  = new HslCommunication.ModBus.ModbusTcpServer();modbusTcpServer.ServerStart(502);modbusTcpServer.Write("50", (UInt16)1);modbusTcpServer.Write("60", (UInt16)1);modbusTcpServer.Write("61", (UInt16)1);OperateResult <UInt16> intReg_100 = modbusTcpServer.ReadUInt16("50");                    if (intReg_100.IsSuccess){Console.WriteLine("success!");Console.WriteLine("");}else{Console.WriteLine("failed:" + intReg_100.Message);}}}
}
要求很简单就是要一个 界面带按钮可以修改 模拟TcpServer(PLC);内指定寄存器的数值 读取指定数值即可.
但是那天出门只带了一个平板笔记本,且没转VS虽然有程序但无法编译,所以python登场.
.虽然python有modbus库 minimalmodbus pymodbus ;等但是没有hsl好用 因为之前用hsl ;
直接用pythonnet在python里面调用 .net 版的hsl,实际python也有hsl但是需要授权,C# 版7.001以及以下版本是免费的,对于干这件事情是绰绰有余的,这里对hsl作者表示感谢;;;
于是就有了如下 产物: 有界面 有按钮 有结果显示 有数字显示 可以模拟 PLC的程序 且一共200行;
当然必须安装pythonnet ,且依赖的外部 .net dll文件要和.py程序在一个目录
import os,sys,time
import tkinter as tk
from tkinter import messagebox#import win32api,win32con,win32guifrom ctypes import *
#需要安装 pywin32
def cmd(s="pause"):os.system(s)
def p(s):print(s);return s
win = tk.Tk()
win.title("(汇川Easy521): PLC模拟器")
win.geometry('960x280')
win.config(background ="#00aa00")
winscrwidth=win.winfo_screenwidth()# 基础库
import os,sys,time
from ctypes import *
def cmd(s="pause"):os.system(s)
#C语言那一套 拿过来 C#那一套数据类型拿过来
import clr,System
from System import String, Char, Int32,UInt16, Int64, Environment, IntPtr#导包
print(clr.AddReference("HslCommunication"))
#现在可以当python自己的库来用了
import HslCommunicationmodbusTcpServer  = HslCommunication.ModBus.ModbusTcpServer();
modbusTcpServer.ServerStart(502);#必须指定泛型 否则无效 UInt16(65535)
#初始化寄存器 指定3区 设定初始值
modbusTcpServer.Write("x=3;100", UInt16(0));# 触发 1 2 3 4对应4流道
modbusTcpServer.Write("x=3;101", UInt16(0));# 料号 0 1 2
modbusTcpServer.Write("x=3;105", UInt16(0));# 结果 11(OK) 12(NG) 13(ERROR)
modbusTcpServer.Write("x=3;106", UInt16(0));# 心跳0/1# 获取时间的函数
def gettime():# 获取当前时间dstr.set(f"""{time.strftime("%H:%M:%S")}  >>127.0.0.1:502""")try: #必须try 否则要在界面控件创建完成后销毁前调用 图省事try完事intReg_100 = modbusTcpServer.ReadUInt16("100");#返回的是 Oper类型 不是int数值 intReg_101 = modbusTcpServer.ReadUInt16("101");intReg_105 = modbusTcpServer.ReadUInt16("105");intReg_106 = modbusTcpServer.ReadUInt16("106");entry1.delete(0, "end");entry1.insert(0,f'{intReg_100.Content}')#entry2.delete(0, "end");entry2.insert(0,f'{intReg_101.Content}')#entry3.delete(0, "end");entry3.insert(0,f'{intReg_105.Content}')#entry4.delete(0, "end");entry4.insert(0,f'{intReg_106.Content}')#    Reg=intReg_105.Contentif(Reg==0):rrr.config(text='None'); rrr.config(bg='#00aa00')if(Reg==11):rrr.config(text='ok');   rrr.config(bg='#00ff00')if(Reg==12):rrr.config(text='ng');   rrr.config(bg='#ff0000')if(Reg==13):rrr.config(text='Error');rrr.config(bg='#ffff00')##except:pass# 每隔 1s 调用一次 gettime()函数来获取时间win.after(200, gettime)
# 生成动态字符串
dstr = tk.StringVar()
# 利用 textvariable 来实现文本变化
lb = tk.Label(win,textvariable=dstr,fg='green',font=("微软雅黑",18))
lb.pack()
gettime()# 调用生成时间的函数tk.Label(win,text='触发(D100[1]):',fg='black',font=("微软雅黑",15)).place (x=0,y=40, width=150, height=30)
entry1 = tk.Entry(win)# 创建输入框控件
entry1.place (x=300,y=40, width=60, height=30)#relx=0.01,relheight=0.4
#.pack(padx=20, pady=20)# 放置输入框,并设置位置
entry1.delete(0, "end")
entry1.insert(0,'0')# 插入默认文本
print(entry1.get())# 得到输入框字符串
# entry1.delete(0, tk.END)# 删除所有字符#-----------------------------------------------------------------------------
def button_click_100():#按钮modbusTcpServer.Write("x=3;105", UInt16(0));#结果清零modbusTcpServer.Write("x=3;100", UInt16(1));pass
button_100 = tk.Button(win,text="触发写1",command=button_click_100)
button_100.place (x=380,y=40, width=60, height=30)def button_click_100_2():modbusTcpServer.Write("x=3;105", UInt16(0));#结果清零modbusTcpServer.Write("x=3;100", UInt16(2));pass
button_100 = tk.Button(win,text="触发写2",command=button_click_100_2)
button_100.place (x=380+80,y=40, width=60, height=30)def button_click_100_3():modbusTcpServer.Write("x=3;105", UInt16(0));#结果清零modbusTcpServer.Write("x=3;100", UInt16(3));pass
button_100 = tk.Button(win,text="触发写3",command=button_click_100_3)
button_100.place (x=380+80+80,y=40, width=60, height=30)def button_click_100_4():modbusTcpServer.Write("x=3;105", UInt16(0));#结果清零modbusTcpServer.Write("x=3;100", UInt16(4));pass
button_100 = tk.Button(win,text="触发写4",command=button_click_100_4)
button_100.place (x=380+80+80+80,y=40, width=60, height=30)def button_click_101():#按钮 触发写0modbusTcpServer.Write("x=3;100", UInt16(0));pass
button_100 = tk.Button(win,text="触发写0",command=button_click_101)
button_100.place (x=380+80+80+80+80,y=40, width=60, height=30)def button_click_102():#按钮 触发写0modbusTcpServer.Write("x=3;105", UInt16(0));#结果清零modbusTcpServer.Write("x=3;100", UInt16(1));time.sleep(0.2)modbusTcpServer.Write("x=3;100", UInt16(0));pass
button_100 = tk.Button(win,text="触发写1(延时200)写0",command=button_click_102)
button_100.place (x=380+80+80+80+80+80,y=40, width=160, height=30)
#-----------------------------------------------------------------------------
#-----------------------------------------------------------------------------
def button_click_200():#按钮modbusTcpServer.Write("x=3;101", UInt16(0));pass
button_100 = tk.Button(win,text="料号写0",command=button_click_200)
button_100.place (x=380,y=40+40, width=60, height=30)def button_click_201():#按钮 触发写0modbusTcpServer.Write("x=3;101", UInt16(1));pass
button_100 = tk.Button(win,text="料号写1",command=button_click_201)
button_100.place (x=380+80,y=40+40, width=60, height=30)def button_click_202():#按钮 触发写0modbusTcpServer.Write("x=3;101", UInt16(2));pass
button_100 = tk.Button(win,text="料号写2",command=button_click_202)
button_100.place (x=380+80+80,y=40+40, width=160, height=30)
#-----------------------------------------------------------------------------tk.Label(win,text='料号(D101[0/1/2]):',fg='black',font=("微软雅黑",15)).place (x=0,y=40+40, width=180, height=30)
entry2 = tk.Entry(win)# 创建输入框控件
entry2.place (x=300,y=40+40, width=60, height=30)#relx=0.01,relheight=0.4
#.pack(padx=20, pady=20)# 放置输入框,并设置位置
entry2.delete(0, "end")# 插入默认文本
entry2.insert(0,'0')
print(entry2.get())# 得到输入框字符串
# entry1.delete(0, tk.END)# 删除所有字符
#relx、rely relheight、relwidth anchor=NEtk.Label(win,text='结果:(D105[11(OK)/12(NG)]):',fg='black',font=("微软雅黑",15)).place (x=0,y=40+40+40, width=280, height=30)entry3 = tk.Entry(win)# 创建输入框控件
entry3.place (x=300,y=40+40+40, width=60, height=30)#relx=0.01,relheight=0.4
#.pack(padx=20, pady=20)# 放置输入框,并设置位置
entry3.delete(0, "end")# 插入默认文本
entry3.insert(0,'0')
print(entry3.get())# 得到输入框字符串rrr=tk.Label(win,text='ok',fg='black',font=("微软雅黑",15))
rrr.place (x=400,y=40+40+40, width=150, height=30)
#rrr.config(text='ok');rrr.config(bg='#00ff00')
#rrr.config(text='ng');rrr.config(bg='#ff0000')
rrr.config(text='None');rrr.config(bg='#00aa00')tk.Label(win,text='心跳:(D106[0/1]):',fg='black',font=("微软雅黑",15)).place (x=0,y=40+40+40+40, width=180, height=30)entry4 = tk.Entry(win)# 创建输入框控件
entry4.place (x=300,y=40+40+40+40, width=60, height=30)#relx=0.01,relheight=0.4
#.pack(padx=20, pady=20)# 放置输入框,并设置位置
entry4.delete(0, "end")# 插入默认文本
entry4.insert(0,'0')
print(entry4.get())# 得到输入框字符串def QueryWindow():if messagebox.showwarning("窗口关闭?"):win.destroy()
win.protocol('WM_DELETE_WINDOW', QueryWindow)
win.mainloop()
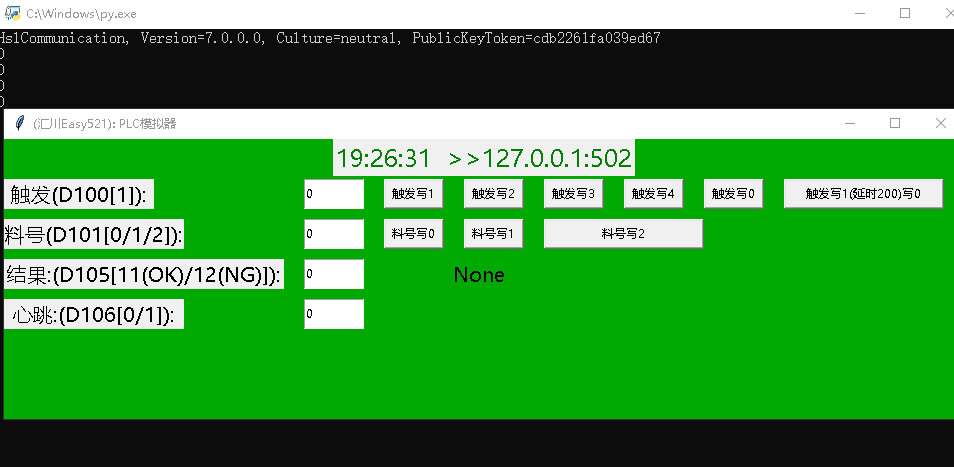
这样VM 写电脑IP 或者 127.0.0.1:502 就可以把这个程序当成PLC连接了.
在手上没有PLC的情况下很方便使用.
接下来分享一下其他用法:
比如监视PLC值:(为了方便不写界面): 这样就可以实时观察到PLC的值
import os,sys,time,win32api,win32con,win32gui
def cmd(s="pause"):os.system(s)
from ctypes import *
import clr,System#C语言那一套 拿过来 C#那一套数据类型拿过来
from System import String, Char, Int32,UInt16, Int64, Environment, IntPtr
print(clr.AddReference("HslCommunication"))#导包
import HslCommunication#现在可以当python自己的库来用了
modbus = HslCommunication.ModBus.ModbusTcpNet( "192.168.1.10" );#modbus = HslCommunication.ModBus.ModbusTcpNet( "127.0.0.1" );
while 1:cmd("cls")time.sleep(0.5)for i in range(15):time.sleep(0.3)intReg_100 = modbus.ReadUInt16("100");Reg_100 = intReg_100.Content;intReg_101 = modbus.ReadUInt16("101");Reg_101 = intReg_101.Content;intReg_105 = modbus.ReadUInt16("105");Reg_105 = intReg_105.Content;intReg_106 = modbus.ReadUInt16("106"); Reg_106 = intReg_106.Content;print(f"""{time.strftime("%H:%M:%S")}   \n\nD100:{Reg_100}  D101:{Reg_100}  D105:{Reg_100}  D106:{Reg_100}   \n""")#intReg_100.IsSuccess,intReg_100.Content, #     intReg_101.IsSuccess,intReg_101.Content,#     intReg_105.IsSuccess,intReg_105.Content,#     intReg_106.IsSuccess,intReg_106.Content)>#pip install pywin32 numpy pythonnet -i https://pypi.tuna.tsinghua.edu.cn/simple
下来在分享一个socket的脚本 用来调试VM很方便.
def p(P):print(P);
import os,sys,time,socket,_thread,threading关闭时间=60*2
from threading import Timer
def close_window():print("cl")os._exit(0)#root.destroy()  # 销毁主窗口#print("窗口已关闭")
Timer(关闭时间, close_window).start()#def thread_it(func, *args):t = threading.Thread(target=func, args=args)t.setDaemon(True);t.start();
def Thread_ConnectSocket(ip="",prot=0,sendData="",recv_flag=True):是否发送成功标志=Falsewhile True:try:global tcp_client_sockettcp_client_socket = socket.socket(socket.AF_INET, socket.SOCK_STREAM)tcp_client_socket.connect((ip, prot))while True:try:tcp_client_socket.send(sendData.encode("utf-8"))#发送print(f'>>{ip}:({prot})"{sendData}"!')if (recv_flag):#print(f'等待对方回复!')recv_content = tcp_client_socket.recv(1024)#接收result = recv_content.decode("utf-8")print(f'收到对方发来的"{result}"!')   print(f'done!')是否发送成功标志=Truebreakexcept:是否发送成功标志=Falsebreakexcept socket.error:print("未连接,尝试重连中..")time .sleep(1)if (是否发送成功标志):print(f'finish!')breakipport=("127.0.0.1", 7930)#右侧IP=ipport[0]
PROT=ipport[1] #IP,PROT def Tcp_Send(S=""):#B_左(7931)thread_it(Thread_ConnectSocket,IP,PROT,S)import tkinter as tkroot = tk.Tk()#root.iconbitmap('mfc.ico')
root.geometry('400x400+100+100')
#root.resizable(0,0)
root.title("")
lb__a = tk.Label(root,text=f"(7931) :{IP} : {PROT}",fg='green',font=("微软雅黑",16))
lb__a.pack()def gettime():dstr.set(time.strftime("%H:%M:%S"))try:passroot.after(1000, gettime)# 每隔 1s 调用一次.except:passdstr = tk.StringVar()# 定义动态字符串
lb = tk.Label(root,textvariable=dstr,fg='green',font=("微软雅黑",20))
lb.pack()
gettime()# 0 800V 一体轭
# 1 800V 中柱
# 2 800V 边柱
##------------------------------料号0---------------------------------------------------------
#---------------------------------------------------------------------------------------------
def Cam0():Tcp_Send("0")
button = tk.Button(root,text=' 料号0:800V 一体轭',bg='#7CCD7C',width=20, height=2,command=Cam0)
button.place(relx=0.15,rely=0.2, width=260, height=30)#------------------------------料号1---------------------------------------------------------
#---------------------------------------------------------------------------------------------def Cam1():Tcp_Send("1")#Tcp_SendB Tcp_SendA #B_左(7931)  A_右(7930)
button = tk.Button(root,text='料号1:800V 中柱',bg='#7CCD7C',width=20, height=2,command=Cam1)
#button.pack()
button.place(relx=0.15,rely=0.3, width=260, height=30)#------------------------------料号2---------------------------------------------------------
#---------------------------------------------------------------------------------------------def Cam2():Tcp_Send("2")#Tcp_SendB Tcp_SendA #B_左(7931)  A_右(7930)
button = tk.Button(root,text='料号2:800V 边柱',bg='#7CCD7C',width=20, height=2,command=Cam2)
#button.pack()
button.place(relx=0.15,rely=0.4, width=260, height=30)#------------------------------料号:    噢噢噢噢---------------------------------------------------------
#---------------------------------------------------------------------------------------------def CamT1():Tcp_Send("T1")
button = tk.Button(root,text='拍照1',bg='#7CCD7C',width=20, height=2,command=CamT1)
button.place(relx=0.15,rely=0.5, width=260, height=30)def CamT2():Tcp_Send("T2")
button = tk.Button(root,text='拍照2',bg='#7CCD7C',width=20, height=2,command=CamT2)
button.place(relx=0.15,rely=0.6, width=260, height=30)def CamT3():Tcp_Send("T3")
button = tk.Button(root,text='拍照3',bg='#7CCD7C',width=20, height=2,command=CamT3)
button.place(relx=0.15,rely=0.7, width=260, height=30)def CamT4():Tcp_Send("T4")
button = tk.Button(root,text='拍照4',bg='#7CCD7C',width=20, height=2,command=CamT4)
button.place(relx=0.15,rely=0.8, width=260, height=30)#---------------------------------------------------------------------------------------------
#------------------------------料号2---------------------------------------------------------
#---------------------------------------------------------------------------------------------root.mainloop()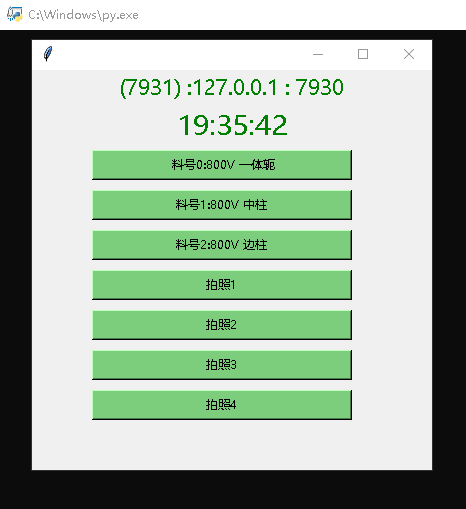
虽然是工作用到的,但只是自己测试工具;放出来也不影响..
相关文章:
巧用python之--模仿PLC(PLC模拟器)
工作中用到了VM(VisionMaster4.3)有时候需要和PLC打交道,但是PLC毕竟是别人的,不方便修改别人的程序,这时候需要一个灵活的PLC模拟器是多么好呀! 先说背景: PLC型号 汇川Easy521: Modbus TCP 192.168.1.10:502 在汇川Easy521中Modbus保持寄存器D寄存器 ,在modbus协议中 0-4区…...

【计算机网络】用户从输入网址到网页显示,期间发生了什么?
1.URL解析 浏览器分解URL:https://www.example.com/page 协议:https域名:www.example.com路径:/page 2.DNS查询: 浏览器向DNS服务器发送查询请求,将域名解析为对应的IP地址。 3.CDN检查(如果有)&#…...

【计算机哲学故事1-3】默认设置:在有限的系统里,决定你想成为什么
她盯着屏幕上熟悉的蓝色窗户,语气里透着一丝无奈:“我发现,不管买多少次新电脑,开机那一刻,看到的永远是同一张桌面。” 我坐在她旁边,看着那台刚装好的电脑,笑了笑:“所以你在感慨…...

【嵌入式开发-UART】
嵌入式开发-UART ■ UART简介 ■ UART简介...

C++ 算法学习之旅:从入门到精通的秘籍
在编程的浩瀚宇宙中,C 算法宛如璀璨的星辰,照亮我们前行的道路。作为一名 C 算法小白,或许你和我一样,怀揣着对算法的好奇与憧憬,却又在学习的道路上感到迷茫。别担心,今天我就和大家分享一下如何学习各种基…...
计算机网络常识:缓存、长短连接 网络初探、URL、客户端与服务端、域名操作 tcp 三次握手 四次挥手
缓存: 缓存是对cpu,内存的一个节约:节约的是网络带宽资源 节约服务器的性能 资源的每次下载和请求都会造成服务器的一个压力 减少网络对资源拉取的延迟 这个就是浏览器缓存的一个好处 表示这个html页面的返回是不要缓存的 忽略缓存 需要每次…...
软件逆向工程核心技术:脱壳原理与实战分析
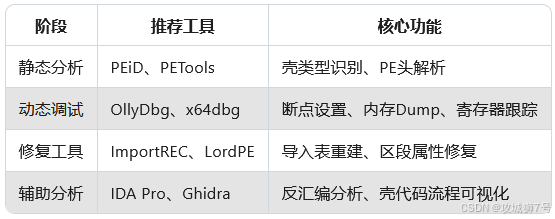
目录 一、脱壳技术概述:从保护到还原的逆向之旅 1.1 脱壳技术的本质与核心价值 1.2 壳的分类与核心技术解析 1.3 学习路径:从压缩壳到加密壳的渐进式突破 二、脱壳三步法:系统化逆向工程框架 2.1 核心流程总览 2.2 实战案例࿱…...

前端面经 作用域和作用域链
含义:JS中变量生效的区域 分类:全局作用域 或者 局部作用域 局部作用域:函数作用域 和 块级作用域ES6 全局作用域:在代码中任何地方都生效 函数中定义函数中生效,函数结束失效 块级作用域 使用let或const 声明 作用域链:JS查…...

华为OD机试真题——荒岛求生(2025A卷:200分)Java/python/JavaScript/C/C++/GO最佳实现
2025 A卷 200分 题型 本专栏内全部题目均提供Java、python、JavaScript、C、C、GO六种语言的最佳实现方式; 并且每种语言均涵盖详细的问题分析、解题思路、代码实现、代码详解、3个测试用例以及综合分析; 本文收录于专栏:《2025华为OD真题目录…...

【Python 字符串】
Python 中的字符串(str)是用于处理文本数据的基础类型,具有不可变性、丰富的内置方法和灵活的操作方式。以下是 Python 字符串的核心知识点: 一、基础特性 定义方式: s1 单引号字符串 s2 "双引号字符串" s…...

基础编程题目集 6-9 统计个位数字
本题要求实现一个函数,可统计任一整数中某个位数出现的次数。例如-21252中,2出现了3次,则该函数应该返回3。 函数接口定义: int Count_Digit ( const int N, const int D ); 其中N和D都是用户传入的参数。N的值不超过int的范围&…...

LeetCode[226] 翻转二叉树
思路: 使用递归,归根结底还是左右节点互相倒,那么肯定需要一个temp节点在中间传递,最后就是递归,没什么说的 代码: /*** Definition for a binary tree node.* public class TreeNode {* int …...

【CTFer成长之路】举足轻重的信息搜集
举足轻重的信息搜集 信息搜集 常见的搜集 题目描述: 一共3部分flag docker-compose.yml version: 3.2services:web:image: registry.cn-hangzhou.aliyuncs.com/n1book/web-information-backk:latestports:- 80:80启动方式 docker-compose up -d 题目Flag n1book{info_…...

AI——认知科学中的认知架构建立步骤与方法
认知科学中的认知架构建立步骤与方法 认知架构(Cognitive Architecture)是模拟人类心智活动的计算框架,旨在整合感知、记忆、推理、学习等核心认知功能。其建立需结合心理学理论、神经科学证据和计算建模技术。以下是建立认知架构的系统方法…...
Linux开发工具【中】
目录 一、vim 1.1 插入模式 1.2 底行模式 1)set nu 2)set nonu 3) /XXX n 4)!command 5)vs other 1.3 补充 1) 批量化操作 2)批量化替换 : 3)快速定位&am…...

Ceph PG unfound/lost 问题排查与解决
Ceph PG unfound/lost 问题排查与解决 背景现象排查过程经验总结参考命令结语 背景 Ceph 集群出现 HEALTH_ERR,提示有 PG 对象丢失(unfound),并且 repair 无法自动修复。 现象 ceph health detail 显示: HEALTH_ERR …...
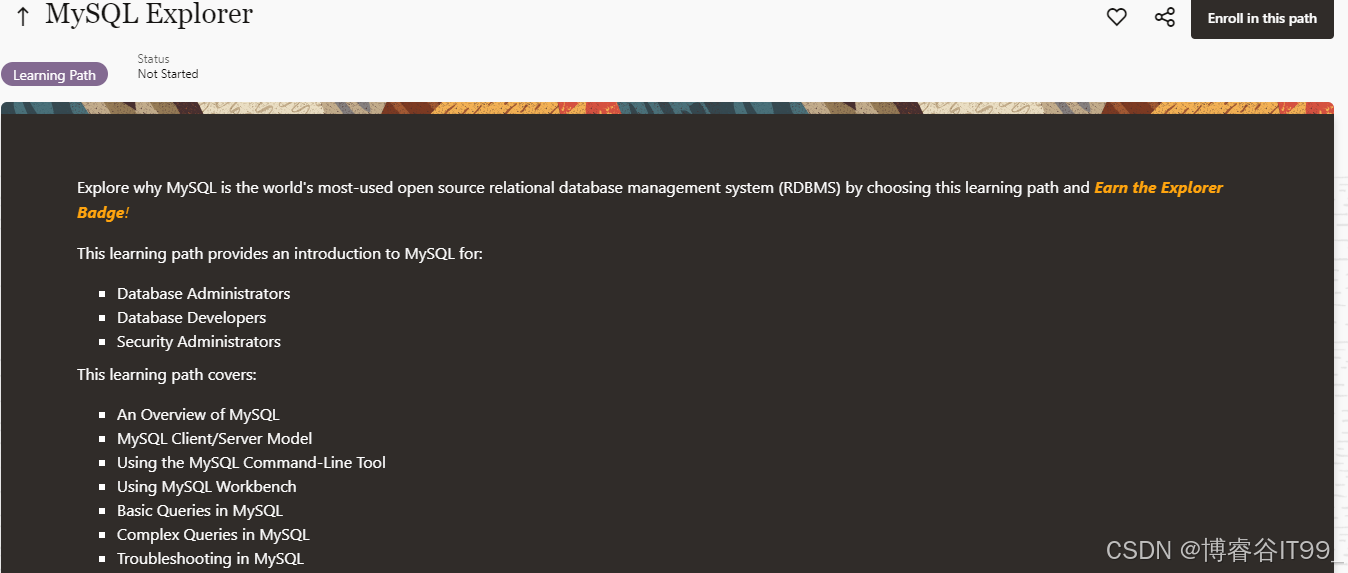
MySQL OCP 认证限时免费活动 7 月 31 日 前截止!!!
为庆祝 MySQL 数据库发布 30 周年,Oracle 官方推出限时福利:2025 年 4 月 20 日至 7 月 31 日期间,所有人均可免费报考 MySQL OCP(Oracle Certified Professional)认证考试。该认证验证持证者在 MySQL 数据库管理、优化…...

Python Cookbook-7.8 使用 Berkeley DB 数据库
任务 你想将一些数据做持久化处理,而且也想体验一下BerkeleyDB数据库的简洁和高效。 解决方案 如果以前在你的计算机中安装过 BerkeleyDB,Python标准库附带的bsddb包(以及可选的 bsddb3,用于访间Berkeley DBrelease 3.2数据库)可以被用来作…...

STM32智能手表:基于FreeRTOS
引言 随着物联网和可穿戴设备的快速发展,智能手表作为典型代表,集成了传感器数据采集、实时显示、无线通信等多项功能。本文将深入剖析一个基于STM32和FreeRTOS的智能手表项目,从硬件架构到软件设计,逐步讲解如何构建一个完整的嵌…...
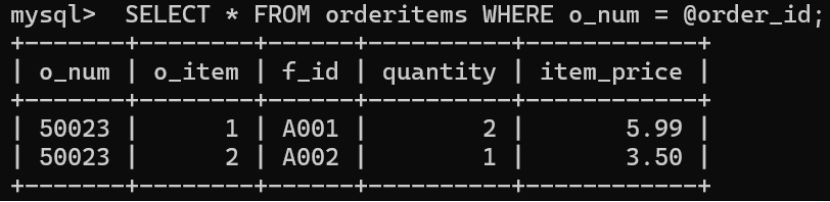
学习笔记:数据库——事务
1.内容: 基于现有数据库设计检查点实验,观察比较提交前后执行结果并分析。 2.实现 源码 -- 开启事务 START TRANSACTION;-- 插入一条订单记录(客户ID为10002) INSERT INTO orders (o_date, c_id) VALUES (NOW(), 10002);-- 获…...

C++命名空间、内联与捕获
命名空间namespace 最常见的命名空间是std,你一定非常熟悉,也就是: using namespace std;命名空间的基本格式 注意,要在头文件里面定义! namespace namespace_name{data_type function_name(data_type parameter){data_type result;//function contentreturn result;}…...
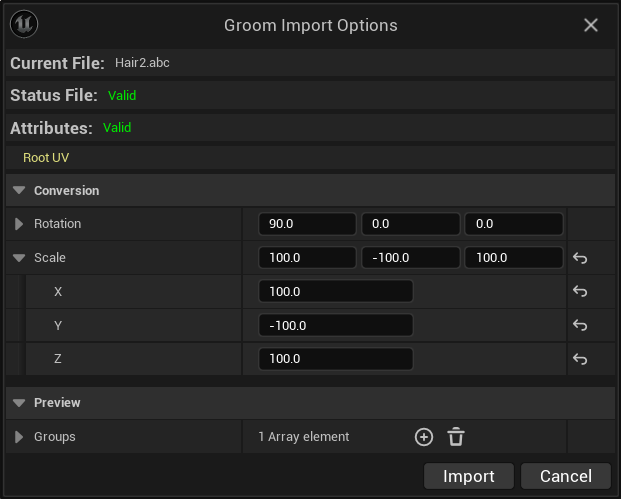
UE5 Daz头发转Blender曲线再导出ABC成为Groom
先安装Daz to Blender Import插件 【神器】 --DAZ一键导入blender插件的详细安装和使用,自带骨骼绑定和控制器,多姿势动画,Importer桥接插件_哔哩哔哩_bilibili 然后安装DAZHairConverter插件 一分钟将DAZ头发转化成Blender粒子毛发_哔哩哔…...
知识点总结归纳)
【进阶】C# 委托(Delegate)知识点总结归纳
1. 委托的基本概念 定义:委托是一种类型安全的函数指针,用于封装方法(静态方法或实例方法)。 核心作用:允许将方法作为参数传递,实现回调机制和事件处理。 类型安全:委托在编译时会检查方法签…...

【贪心算法】贪心算法四
贪心算法四 1.最长回文串2.增减字符串匹配3.分发饼干4.最优除法点赞👍👍收藏🌟🌟关注💖💖 你的支持是对我最大的鼓励,我们一起努力吧!😃😃 1.最长回文串 题目链接: 409. 最长回文串 题目分析: 给一个包含大小字母的字符串,从里面挑选出来一些字母构成一个…...
【漫话机器学习系列】240.真正类率(True Positive Rate,TPR)
理解真正类率(True Positive Rate,TPR):公式、意义与应用 在机器学习与深度学习模型评估中,"真正类率"(True Positive Rate,简称TPR)是一个非常重要的指标。TPR反映了分类…...
Linux的基础开发工具
目录 前言: 1、包管理器yum 1.1 软件包的依赖 1.2 镜像源 1.3 查找/安装/卸载软件 2、编辑器vim 2.1 命令模式(默认) 2.1.1 撤销与反撤销 2.1.2 光标定位 2.1.3 复制&&剪切(删除)&&粘贴 2.1.4 替换 2.1.5 插入模式 2.1.6 V-Block模式 …...

【Electron】electron-vue 借助 element-ui UI 库助力桌面应用开发
前面文章我们讲过 electron 让可以用 HTML、JS、CSS 开发桌面应用程序。而 electron-vue 是一个结合了 electron 与 vue 的套件。这样我们就能方便地使用 vue 快速开发桌面应用。但是,vue 只是在 js 这层面做了大量的便捷的操作。对 UI 并未过多涉及。此时如果您在开…...
Linux基础(最常用基本命令)
1.查看文件ls 1.1 格式 ls 选项 参数,如:ls -lah ~/ 1.2 选项设置: -l:list 以列表方式显示文件 -h:human-readable 以人类可读的方式显示文件大小(会将纯数字转换为kb,mb) -a:all 显示所有的…...
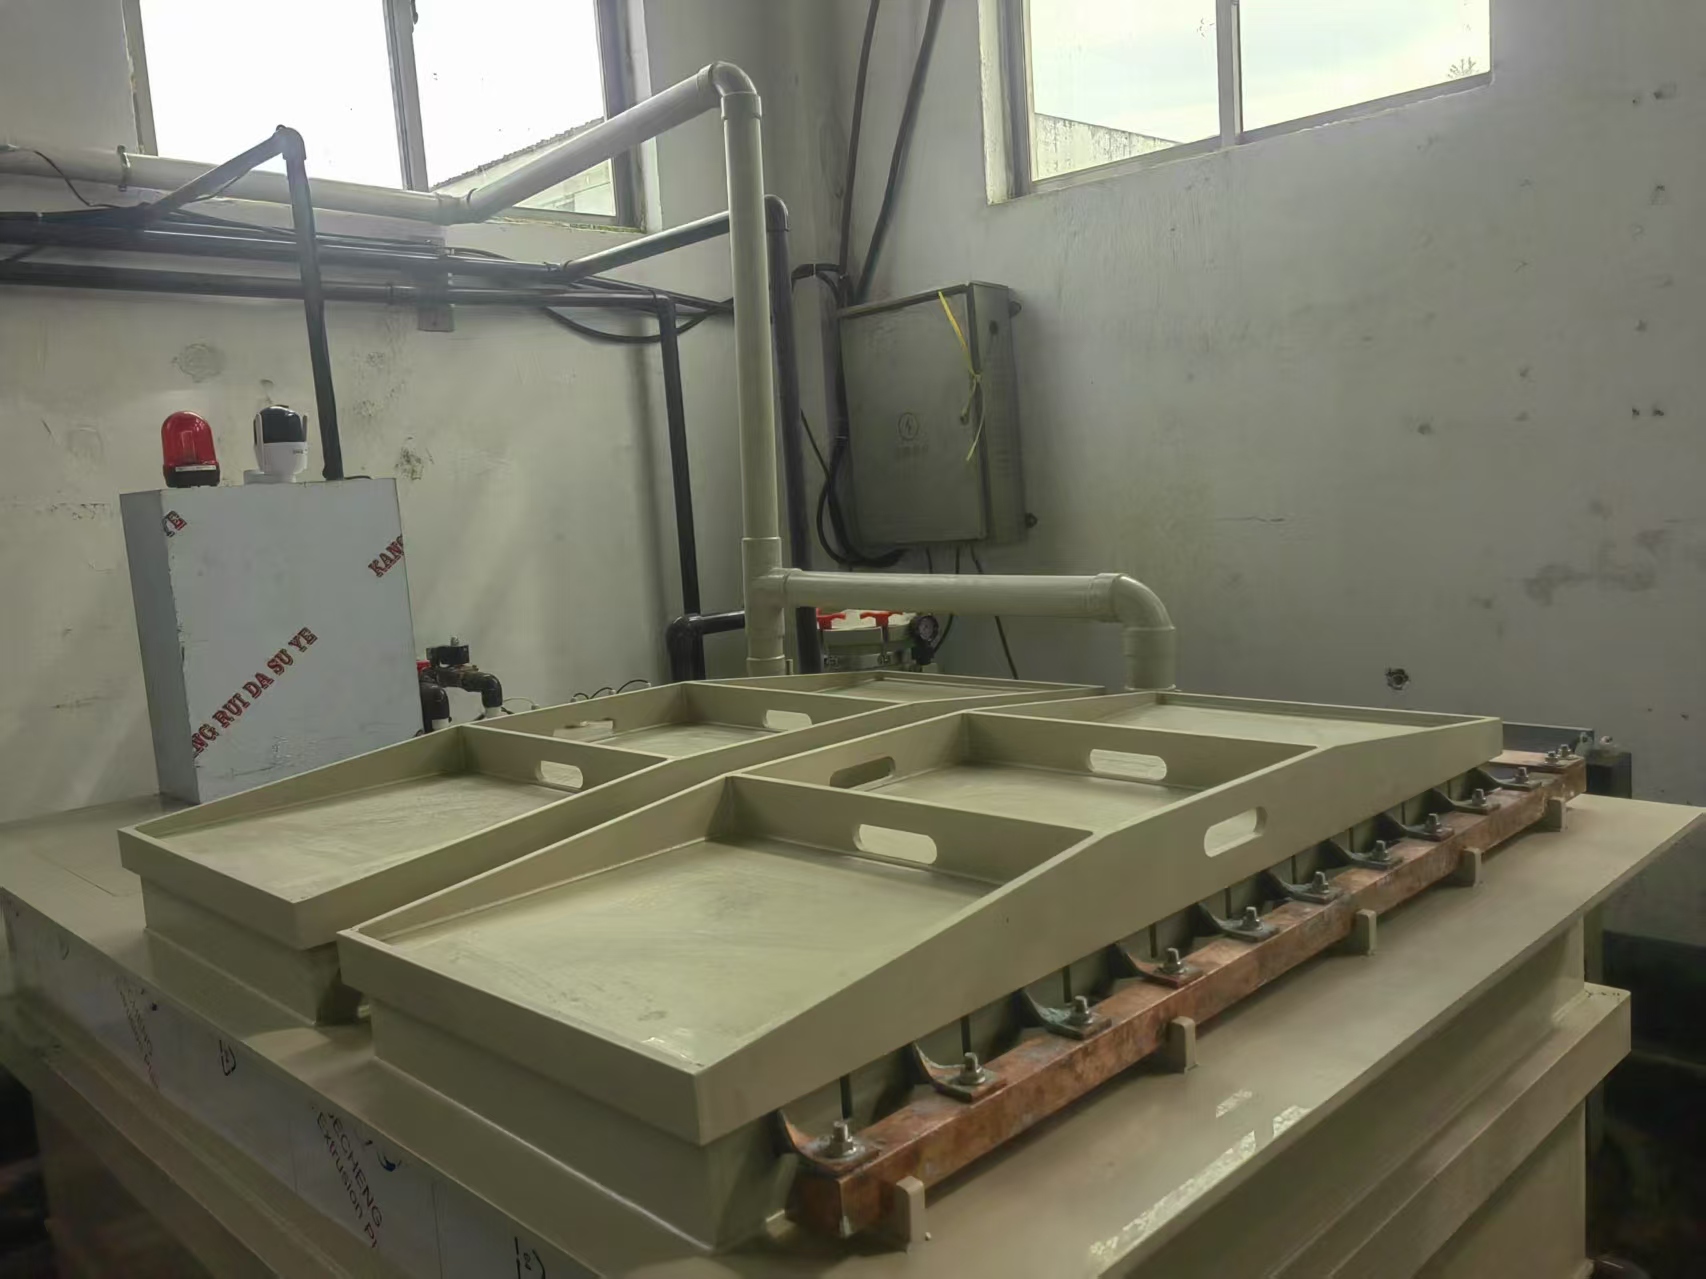
含铜废水循环利用体系
在工业绿色转型浪潮中,含铜废水回收技术正以"资源再生智能管控"的双核驱动模式,重构传统水处理产业的价值链。该体系通过构建"精准分离-梯级利用-智慧运维"的闭环系统,不仅突破了重金属废水处理的技术桎梏,更…...

移动端返回指定页面
onLoad(() > { // #ifdef APP-PLUS || MP-ALIPAY || H5 onBackPress(() > { uni.switchTab({ url: ‘/pages/my/my’, }) return true }) // #endif }) onUnload(() > { // #ifdef MP-WEIXIN uni.switchTab({ url: ‘/pages/my/my’, }) // #endif })...