cs231n assignment3 q5 Self-Supervised Learning for Image Classification
文章目录
- 嫌墨迹直接看代码
- Q5 Self-Supervised Learning for Image Classification
- compute_train_transform CIFAR10Pair.__getitem__()
- 题面
- 解析
- 代码
- 输出
- simclr_loss_naive
- 题面
- 解析
- 代码
- 输出
- sim_positive_pairs
- 题面
- 解析
- 代码
- 输出
- compute_sim_matrix
- 题面
- 解析
- 代码
- 输出
- simclr_loss_vectorized
- 题面
- 解析
- 代码
- 输出
- train
- 题面
- 解析
- 代码
- 输出
- 结语
嫌墨迹直接看代码
Q5 Self-Supervised Learning for Image Classification
compute_train_transform CIFAR10Pair.getitem()
题面


解析
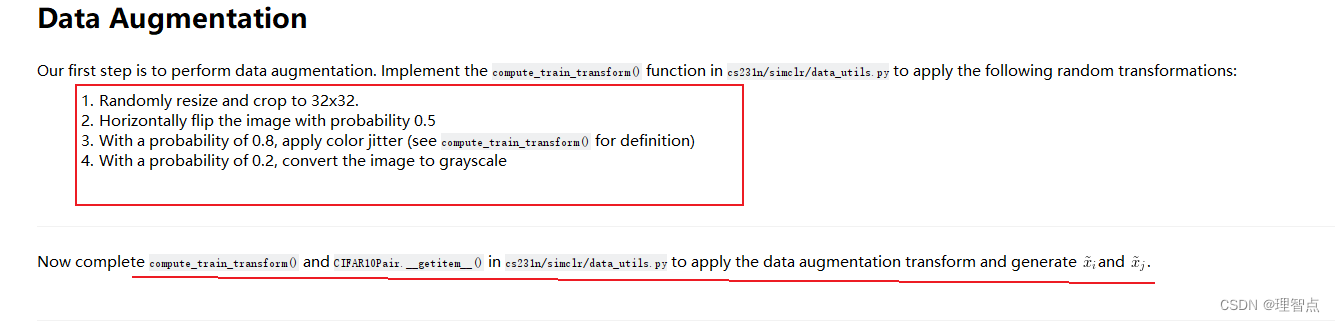
这里就是让我们对图片进行转换,具体的转换步骤在上面都写了,我们只需要查阅相应的api进行调用就好了
代码
def compute_train_transform(seed=123456):"""This function returns a composition of data augmentations to a single training image.Complete the following lines. Hint: look at available functions in torchvision.transforms"""random.seed(seed)torch.random.manual_seed(seed)# Transformation that applies color jitter with brightness=0.4, contrast=0.4, saturation=0.4, and hue=0.1color_jitter = transforms.ColorJitter(0.4, 0.4, 0.4, 0.1)train_transform = transforms.Compose([############################################################################### TODO: Start of your code. ## ## Hint: Check out transformation functions defined in torchvision.transforms ## The first operation is filled out for you as an example.############################################################################### Step 1: Randomly resize and crop to 32x32.transforms.RandomResizedCrop(32),# Step 2: Horizontally flip the image with probability 0.5transforms.RandomHorizontalFlip(p=0.5),# Step 3: With a probability of 0.8, apply color jitter (you can use "color_jitter" defined above.transforms.RandomApply(torch.nn.ModuleList([color_jitter]), p=0.8),# Step 4: With a probability of 0.2, convert the image to grayscaletransforms.RandomGrayscale(p=0.2),############################################################################### END OF YOUR CODE ###############################################################################transforms.ToTensor(),transforms.Normalize([0.4914, 0.4822, 0.4465], [0.2023, 0.1994, 0.2010])])return train_transformdef compute_test_transform():test_transform = transforms.Compose([transforms.ToTensor(),transforms.Normalize([0.4914, 0.4822, 0.4465], [0.2023, 0.1994, 0.2010])])return test_transformclass CIFAR10Pair(CIFAR10):"""CIFAR10 Dataset."""def __getitem__(self, index):img, target = self.data[index], self.targets[index]img = Image.fromarray(img)x_i = Nonex_j = Noneif self.transform is not None:############################################################################### TODO: Start of your code. ## ## Apply self.transform to the image to produce x_i and x_j in the paper ###############################################################################x_i = self.transform(img)x_j = self.transform(img)############################################################################### END OF YOUR CODE ###############################################################################if self.target_transform is not None:target = self.target_transform(target)return x_i, x_j, target输出
注意这里我不知道为啥本地跑出来的结果是有误差的,但是同样的代码放到colab上跑就没事了,很奇怪我只能说


simclr_loss_naive
题面

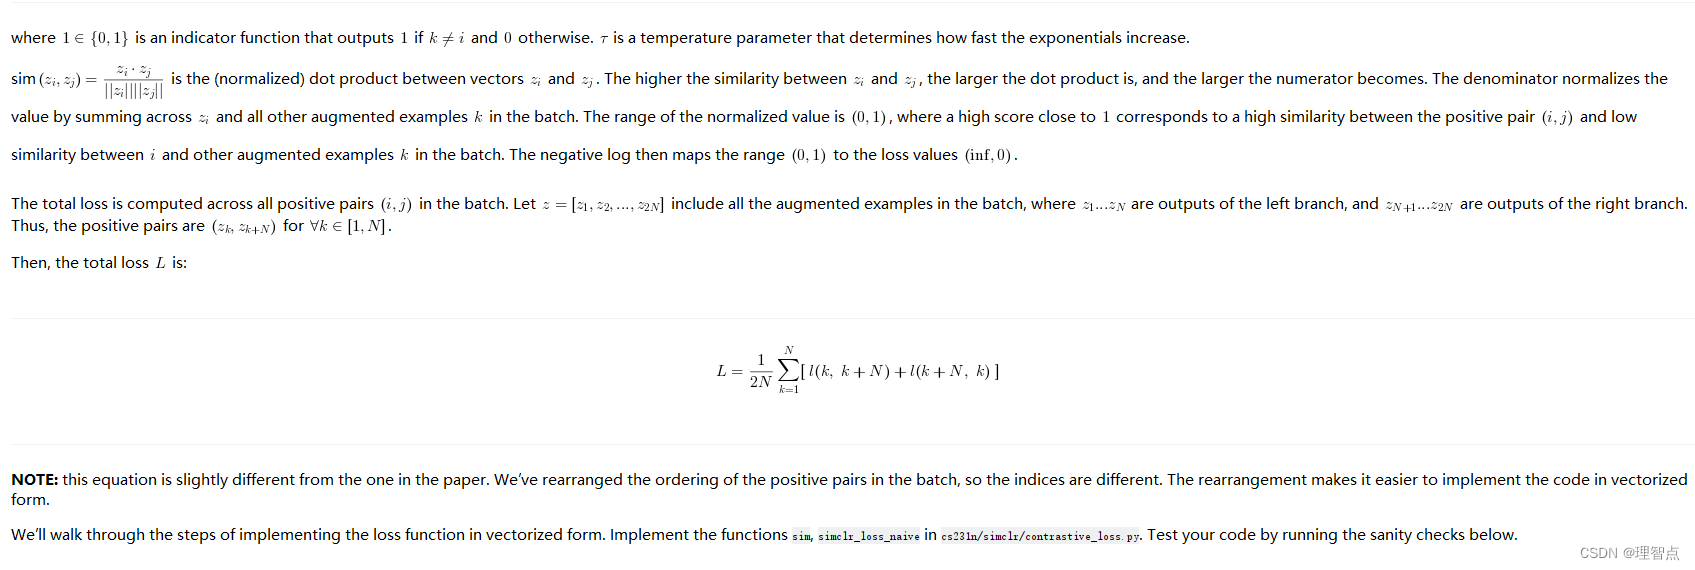


让我们用简单的方法来计算SimCLR的loss
解析
看看上面的题面,一步一步来就好了
代码
def sim(z_i, z_j):"""Normalized dot product between two vectors.Inputs:- z_i: 1xD tensor.- z_j: 1xD tensor.Returns:- A scalar value that is the normalized dot product between z_i and z_j."""norm_dot_product = None############################################################################### TODO: Start of your code. ## ## HINT: torch.linalg.norm might be helpful. ################################################################################ torch.linalg.norm 相对于对一个向量求范数,返回的是一个标量norm_dot_product = torch.dot(z_i, z_j) / (torch.linalg.norm(z_i) * torch.linalg.norm(z_j))############################################################################### END OF YOUR CODE ###############################################################################return norm_dot_productdef simclr_loss_naive(out_left, out_right, tau):"""Compute the contrastive loss L over a batch (naive loop version).Input:- out_left: NxD tensor; output of the projection head g(), left branch in SimCLR model.- out_right: NxD tensor; output of the projection head g(), right branch in SimCLR model.Each row is a z-vector for an augmented sample in the batch. The same row in out_left and out_right form a positive pair. In other words, (out_left[k], out_right[k]) form a positive pair for all k=0...N-1.- tau: scalar value, temperature parameter that determines how fast the exponential increases.Returns:- A scalar value; the total loss across all positive pairs in the batch. See notebook for definition."""N = out_left.shape[0] # total number of training examples# Concatenate out_left and out_right into a 2*N x D tensor.out = torch.cat([out_left, out_right], dim=0) # [2*N, D]total_loss = 0for k in range(N): # loop through each positive pair (k, k+N)z_k, z_k_N = out[k], out[k + N]############################################################################### TODO: Start of your code. ## ## Hint: Compute l(k, k+N) and l(k+N, k). ################################################################################ *****START OF YOUR CODE (DO NOT DELETE/MODIFY THIS LINE)*****# 计算 l(k, k+N)# 计算左边的分子left_numerator = (sim(z_k, z_k_N) / tau).exp()# 计算左边的分母中需要进行sim运算的元素left_need_sim = out[np.arange(2 * N) != k]# 计算左边的分母left_denominator = torch.tensor([sim(z_k, z_i) / tau for z_i in left_need_sim]).exp().sum()# 计算左边的结果left = -(left_numerator / left_denominator).log()# 计算 l(k+N, k)# 计算右边的分子right_numerator = (sim(z_k_N, z_k) / tau).exp()# 计算右边的分母中需要进行sim运算的元素right_need_sim = out[np.arange(2 * N) != k + N]# 计算右边的分母right_denominator = torch.tensor([sim(z_k_N, z_i) / tau for z_i in right_need_sim]).exp().sum()# 计算右边的结果right = -(right_numerator / right_denominator).log()total_loss += left + right# *****END OF YOUR CODE (DO NOT DELETE/MODIFY THIS LINE)*****############################################################################### END OF YOUR CODE ################################################################################ In the end, we need to divide the total loss by 2N, the number of samples in the batch.total_loss = total_loss / (2 * N)return total_loss
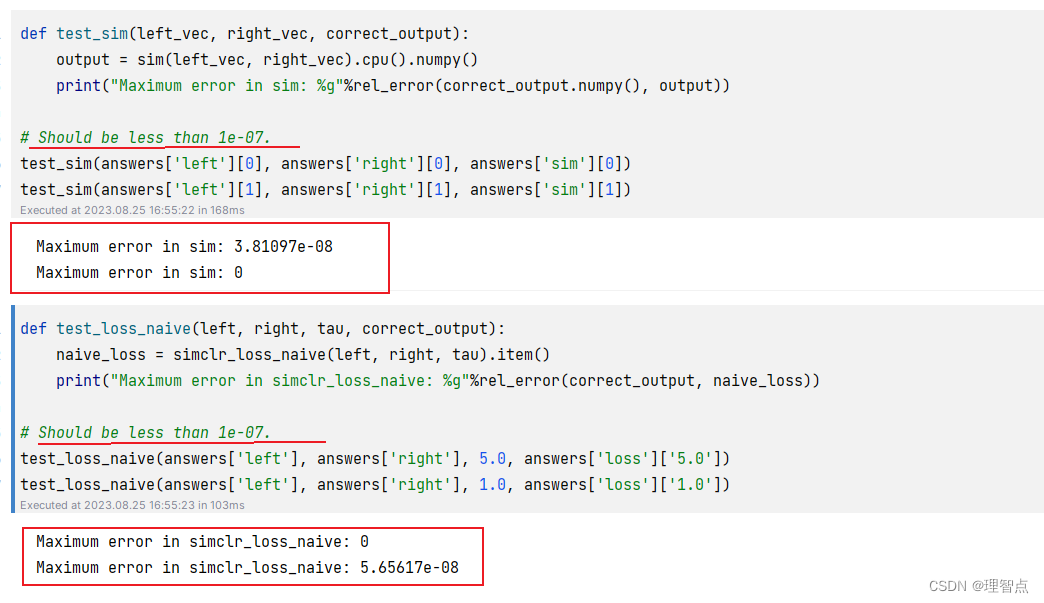
输出
sim_positive_pairs
题面
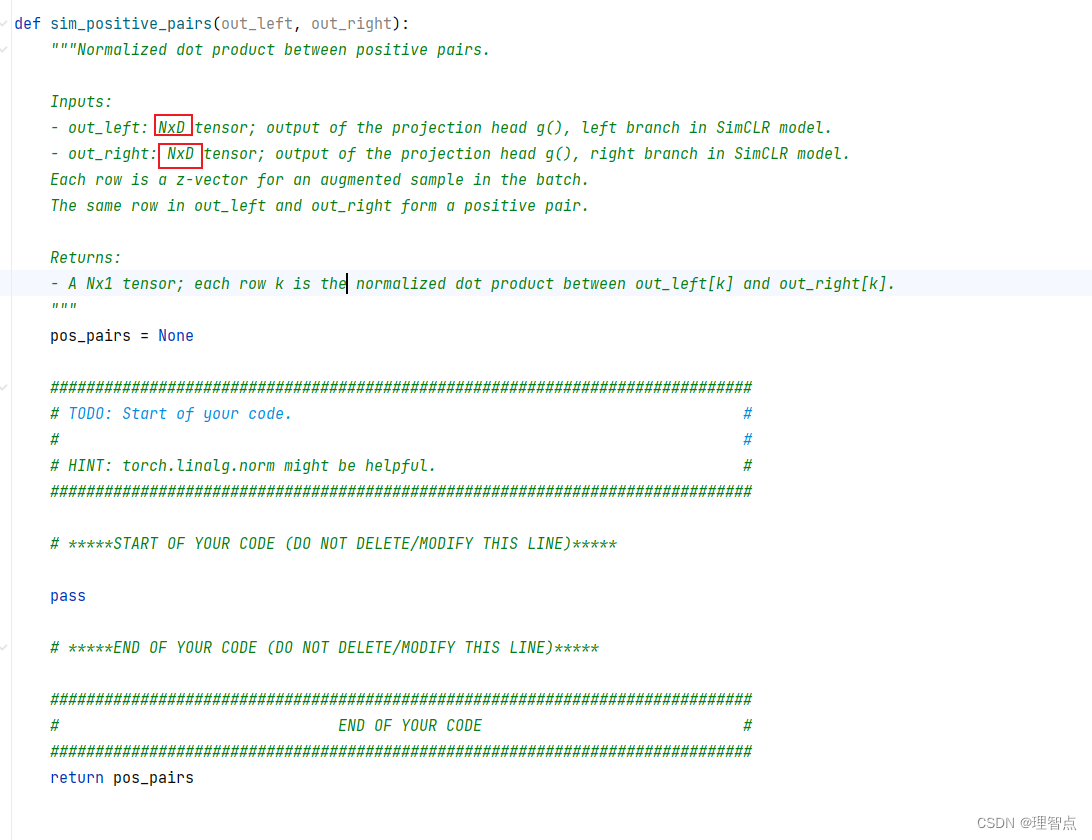
这里跟之前的区别在于之前只需要算两个向量之间的sim,现在算的是两个矩阵之间的sim
解析
看代码注释吧
代码
def sim_positive_pairs(out_left, out_right):"""Normalized dot product between positive pairs.Inputs:- out_left: NxD tensor; output of the projection head g(), left branch in SimCLR model.- out_right: NxD tensor; output of the projection head g(), right branch in SimCLR model.Each row is a z-vector for an augmented sample in the batch.The same row in out_left and out_right form a positive pair.Returns:- A Nx1 tensor; each row k is the normalized dot product between out_left[k] and out_right[k]."""pos_pairs = None############################################################################### TODO: Start of your code. ## ## HINT: torch.linalg.norm might be helpful. ################################################################################ *****START OF YOUR CODE (DO NOT DELETE/MODIFY THIS LINE)*****# 看看公式,sim 是一个除法,但是可以看做两个除法相乘norm_left = out_left / torch.linalg.norm(out_left, dim=1, keepdim=True)norm_right = out_right / torch.linalg.norm(out_right, dim=1, keepdim=True)pos_pairs = torch.sum(norm_left * norm_right, dim=1, keepdim=True)# *****END OF YOUR CODE (DO NOT DELETE/MODIFY THIS LINE)*****############################################################################### END OF YOUR CODE ###############################################################################return pos_pairs
输出

compute_sim_matrix
题面
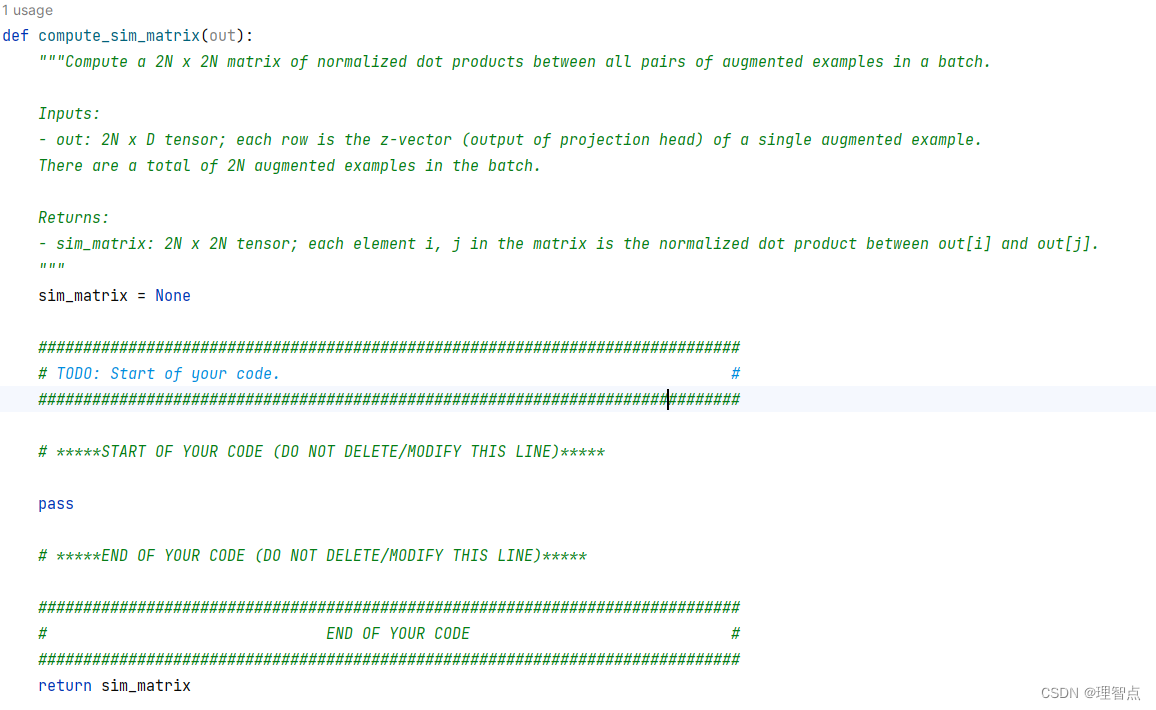
这个任务应该就是让我们输出sim_matrix,matrix是一个2N * 2N的矩阵,matrix[i,j]表示sim(i,j)
所以就处理下直接乘以自己的转置就好了
解析
看上面或者看代码,理解一下
代码
def compute_sim_matrix(out):"""Compute a 2N x 2N matrix of normalized dot products between all pairs of augmented examples in a batch.Inputs:- out: 2N x D tensor; each row is the z-vector (output of projection head) of a single augmented example.There are a total of 2N augmented examples in the batch.Returns:- sim_matrix: 2N x 2N tensor; each element i, j in the matrix is the normalized dot product between out[i] and out[j]."""sim_matrix = None############################################################################### TODO: Start of your code. ################################################################################ *****START OF YOUR CODE (DO NOT DELETE/MODIFY THIS LINE)*****out_norm = out / torch.linalg.norm(out, dim=1, keepdim=True)sim_matrix = out_norm @ out_norm.T# *****END OF YOUR CODE (DO NOT DELETE/MODIFY THIS LINE)*****############################################################################### END OF YOUR CODE ###############################################################################return sim_matrix
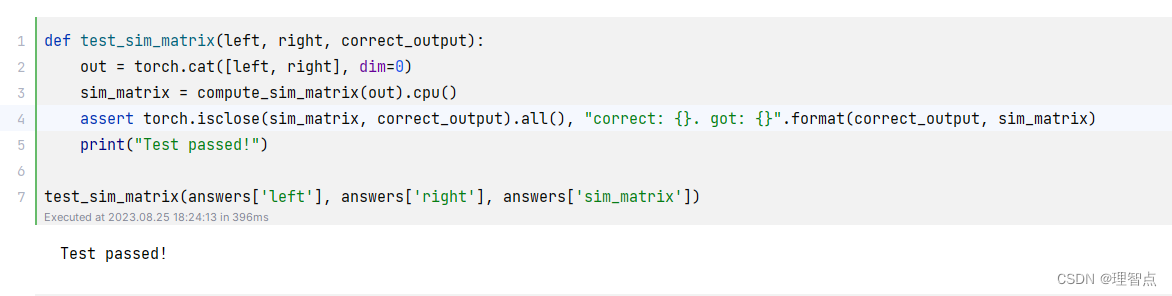
输出
simclr_loss_vectorized
题面
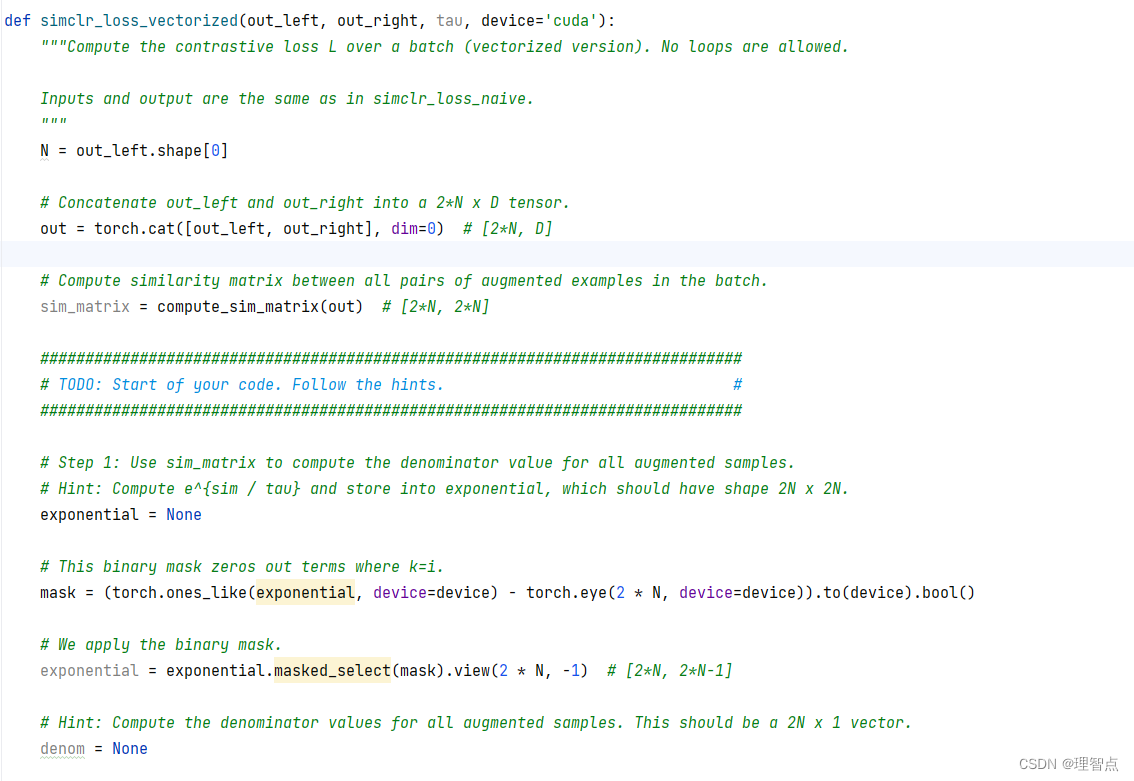

就是让我们实现序列化的计算loss,按照步骤一步一步来就好了
解析
看注释吧
代码
def simclr_loss_vectorized(out_left, out_right, tau, device='cuda'):"""Compute the contrastive loss L over a batch (vectorized version). No loops are allowed.Inputs and output are the same as in simclr_loss_naive."""N = out_left.shape[0]# Concatenate out_left and out_right into a 2*N x D tensor.out = torch.cat([out_left, out_right], dim=0) # [2*N, D]# Compute similarity matrix between all pairs of augmented examples in the batch.sim_matrix = compute_sim_matrix(out) # [2*N, 2*N]############################################################################### TODO: Start of your code. Follow the hints. ################################################################################ Step 1: Use sim_matrix to compute the denominator value for all augmented samples.# Hint: Compute e^{sim / tau} and store into exponential, which should have shape 2N x 2N.exponential = (sim_matrix / tau).exp().to(device)# This binary mask zeros out terms where k=i.mask = (torch.ones_like(exponential, device=device) - torch.eye(2 * N, device=device)).to(device).bool()# We apply the binary mask.exponential = exponential.masked_select(mask).view(2 * N, -1) # [2*N, 2*N-1]# Hint: Compute the denominator values for all augmented samples. This should be a 2N x 1 vector.denom = exponential.sum(dim=1)# Step 2: Compute similarity between positive pairs.# You can do this in two ways: # Option 1: Extract the corresponding indices from sim_matrix. # Option 2: Use sim_positive_pairs().# *****START OF YOUR CODE (DO NOT DELETE/MODIFY THIS LINE)*****# 计算出所有的正样本对的相似度sim_pairs = sim_positive_pairs(out_left, out_right).to(device)# 拼接矩阵,因为正样本对是对称的,所以拼接两次sim_pairs = torch.cat([sim_pairs, sim_pairs], dim=0)# *****END OF YOUR CODE (DO NOT DELETE/MODIFY THIS LINE)*****# Step 3: Compute the numerator value for all augmented samples.numerator = None# *****START OF YOUR CODE (DO NOT DELETE/MODIFY THIS LINE)*****numerator = (sim_pairs / tau).exp()# *****END OF YOUR CODE (DO NOT DELETE/MODIFY THIS LINE)*****# Step 4: Now that you have the numerator and denominator for all augmented samples, compute the total loss.loss = None# *****START OF YOUR CODE (DO NOT DELETE/MODIFY THIS LINE)*****loss = torch.mean(-torch.log(numerator / denom))# *****END OF YOUR CODE (DO NOT DELETE/MODIFY THIS LINE)*****############################################################################### END OF YOUR CODE ###############################################################################return loss
输出

train
题面

解析
这里就是让我们将x_i和x_j变成经过处理的gi 和 gj ,然后计算loss就好了
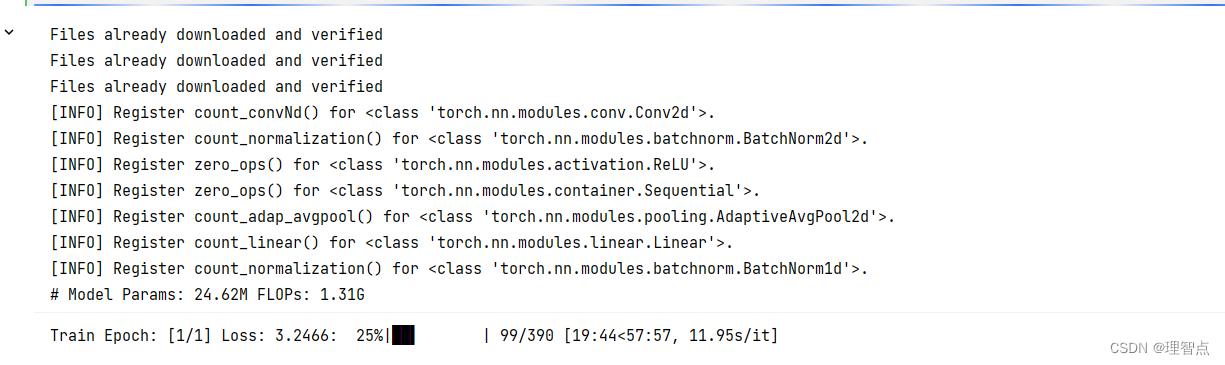
注意一下,这个训练预计要吃5G的显存,如果你的显卡显存不够,量力而行,我的显卡是1060显存3个g,所以为了训练这个模型他额外吃了系统内存,但是降低了训练速度。
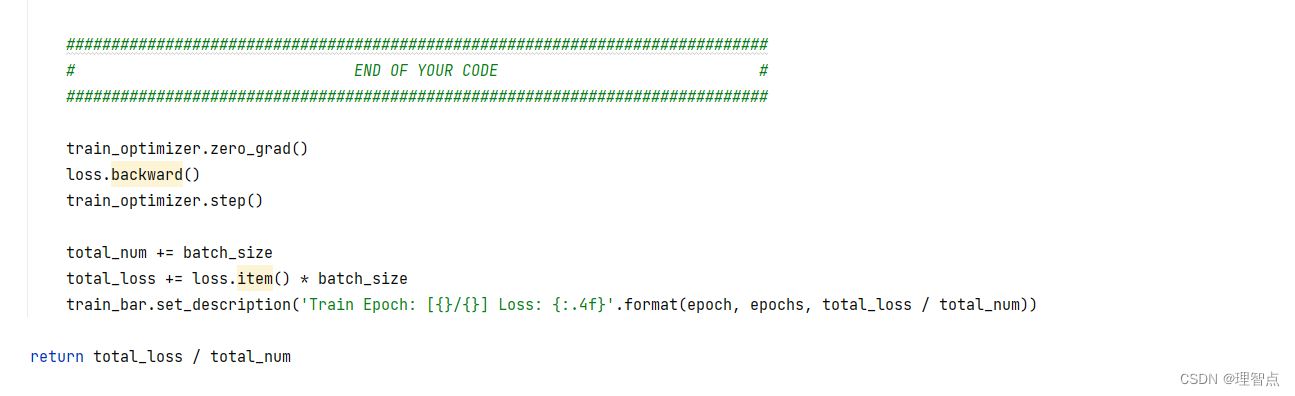
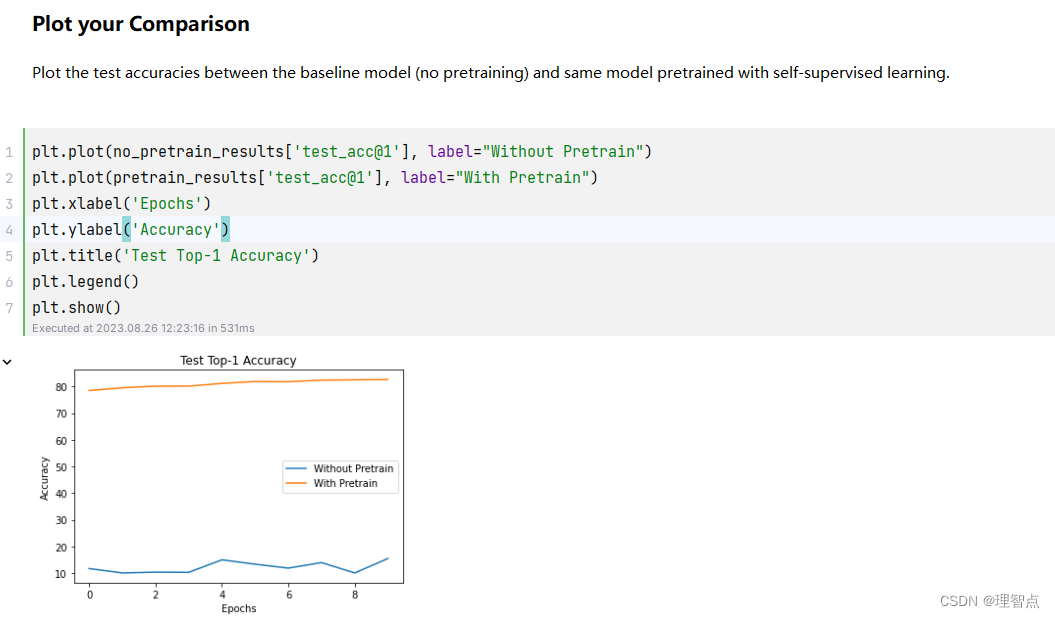
代码
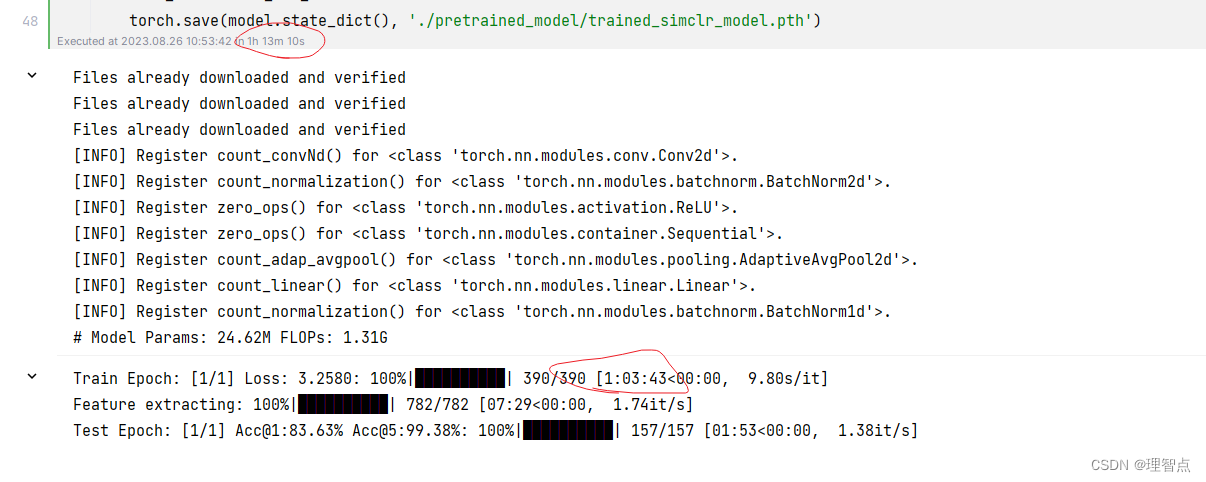
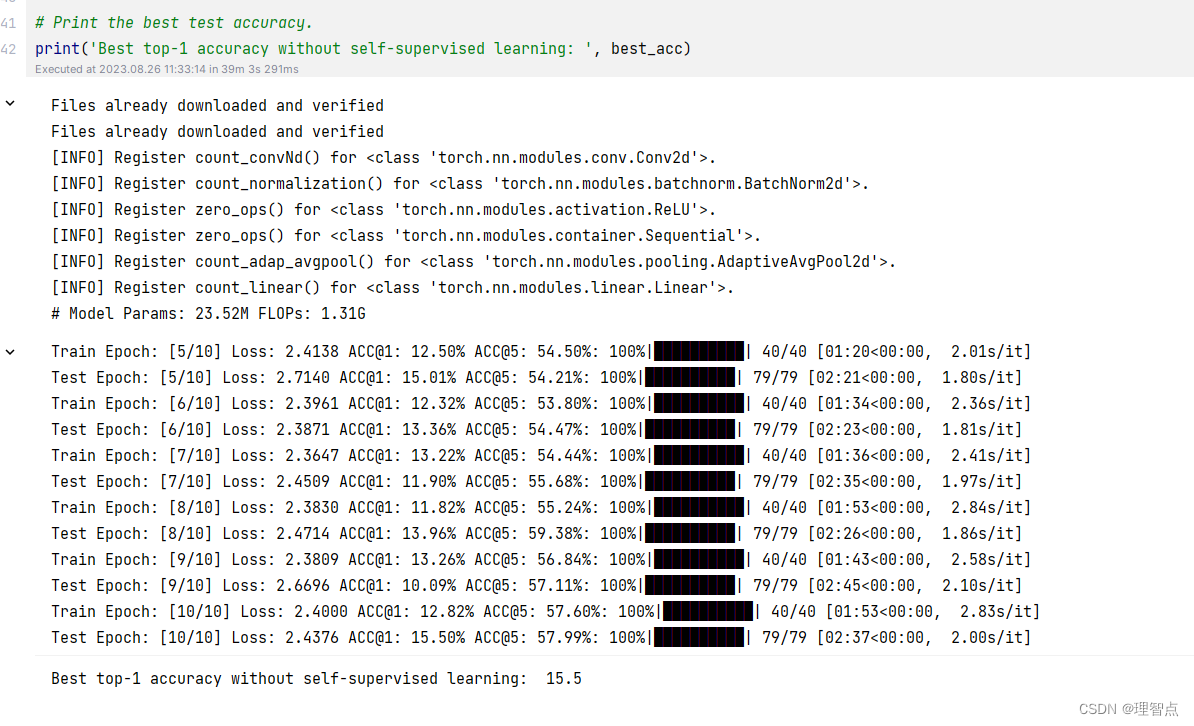
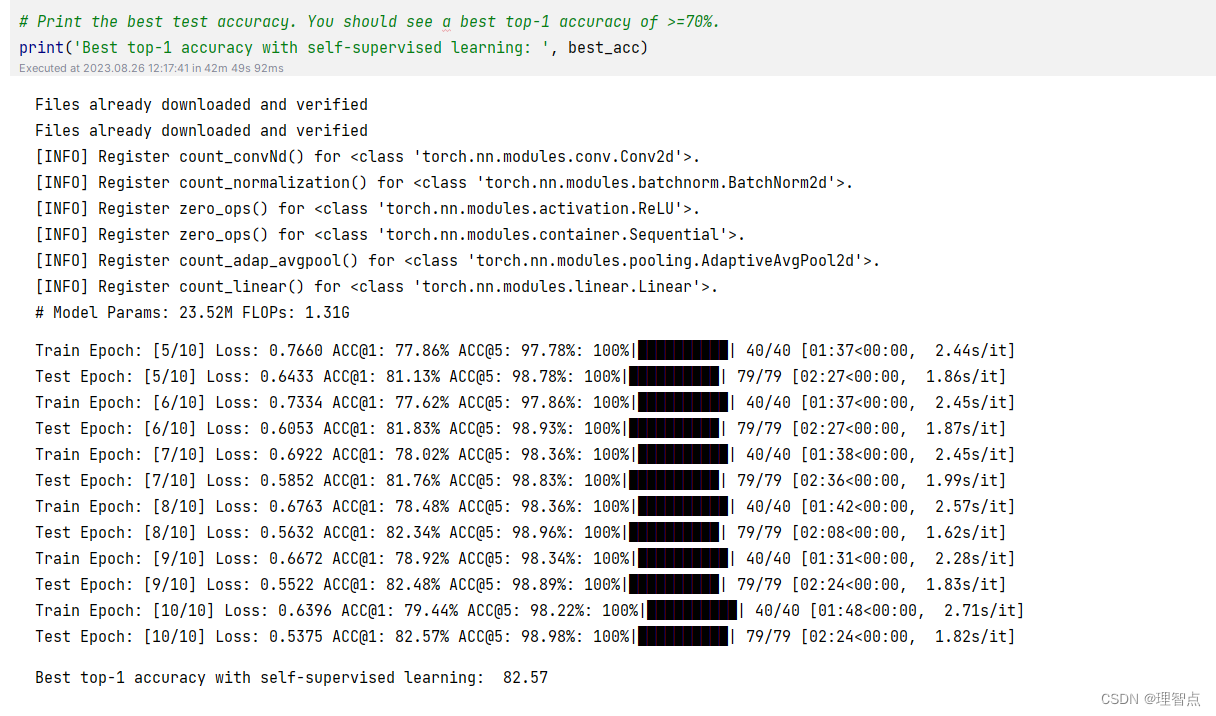
输出
训练了差不多一个小时
结语
这样这个实验就做完了,虽然自己实现了simSLR,但是感觉对这个模型的总体还不是特别清楚,细节部分倒是清楚了,等到时候所有cs231n作业做完再回过头理解一下吧
相关文章:
cs231n assignment3 q5 Self-Supervised Learning for Image Classification
文章目录 嫌墨迹直接看代码Q5 Self-Supervised Learning for Image Classificationcompute_train_transform CIFAR10Pair.__getitem__()题面解析代码输出 simclr_loss_naive题面解析代码输出 sim_positive_pairs题面解析代码输出 compute_sim_matrix题面解析代码输出 simclr_lo…...

电商首屏设计
1、主图最后成图效果 1.1 最后效果 1.2 主图尺寸,建多大的空白画布 1.3 如何让猜你喜欢展示跟搜索系统不一样的界面 2、实际操作方案 2.1 矩形屏信息 宽度为765 px 高度为770px; 2.2 第一步 矩形屏 2.3 第二步 填充颜色到空白 2.4 Crty j 复制图层 …...

SpringBoot集成Redis
Redis 的介绍 Redis(Remote Dictionary Server)是一个开源的内存数据结构存储系统,它被广泛地应用于缓存、计数器、限速器、消息队列、分布式锁等多种场景中。Redis 支持多种数据结构,包括字符串、散列、列表、集合和有序集合等&…...

qt 的基础学习计划列表
1 第一天 (qt 的基础) 什么是qt hello程序,空窗口 添加按钮(对象树、父子关系) 按钮的功能(信号和槽) 信号和槽的拓展2 第二天 各个控件 最简单的记事本界面(菜单栏、状态栏、工具…...

CSS中如何改变鼠标指针样式(cursor)?
聚沙成塔每天进步一点点 ⭐ 专栏简介⭐ CSS中改变鼠标指针样式(cursor)⭐ 示例:⭐ 写在最后 ⭐ 专栏简介 前端入门之旅:探索Web开发的奇妙世界 记得点击上方或者右侧链接订阅本专栏哦 几何带你启航前端之旅 欢迎来到前端入门之旅…...
SpringMVC-2-Spring MVC拦截器详解:从入门到精通
SpringMVC-2-Spring MVC拦截器详解:从入门到精通 今日目标 能够编写拦截器并配置拦截器 1.拦截器【理解】 1 拦截器介绍 1.1 拦截器概念和作用 拦截器(Interceptor)是一种动态拦截方法调用的机制,在SpringMVC中动态拦截控制器方…...

探索AIGC人工智能(Midjourney篇)(一)
文章目录 案例图片 Midjourney注册 创建Discord账号 下载客户端 添加Midjourney到自己的服务器 用Midjourney画一只会飞的鸭子 Midjourney绘画指令 Midjourney绘画指令_激发Midjourney的创造力 Midjourney绘画指令_Seed指令 Midjourney光线关键词,打造震撼…...
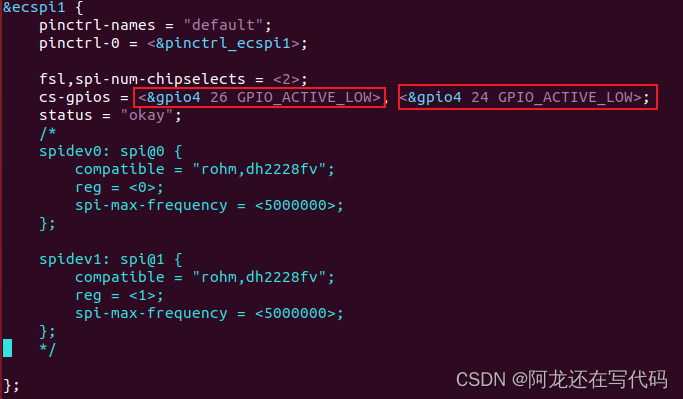
【IMX6ULL驱动开发学习】11.Linux之SPI驱动
参考:驱动程序开发:SPI设备驱动_spi驱动_邓家文007的博客-CSDN博客 目录 一、SPI驱动简介 1.1 SPI架构概述 1.2 SPI适配器(控制器)数据结构 1.2 SPI设备数据结构 1.3 SIP设备驱动 1.4 接口函数 二、SPI驱动模板 一、SPI驱动…...
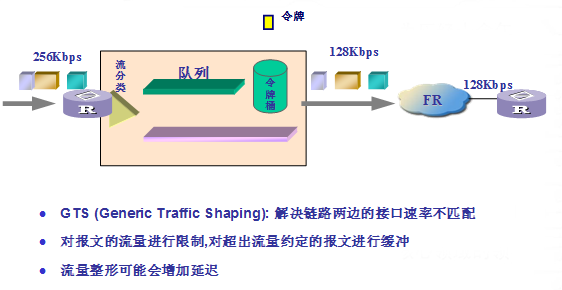
什么是网络中的服务质量 (QoS),其相关技术和关键指标有哪些?
QoS(Quality of Service,服务质量)指一个网络能够利用各种基础技术,为指定的网络通信提供更好的服务能力,是网络的一种安全机制,是用来解决网络延迟和阻塞等问题的一种技术。QoS的保证对于容量有限的网络来…...
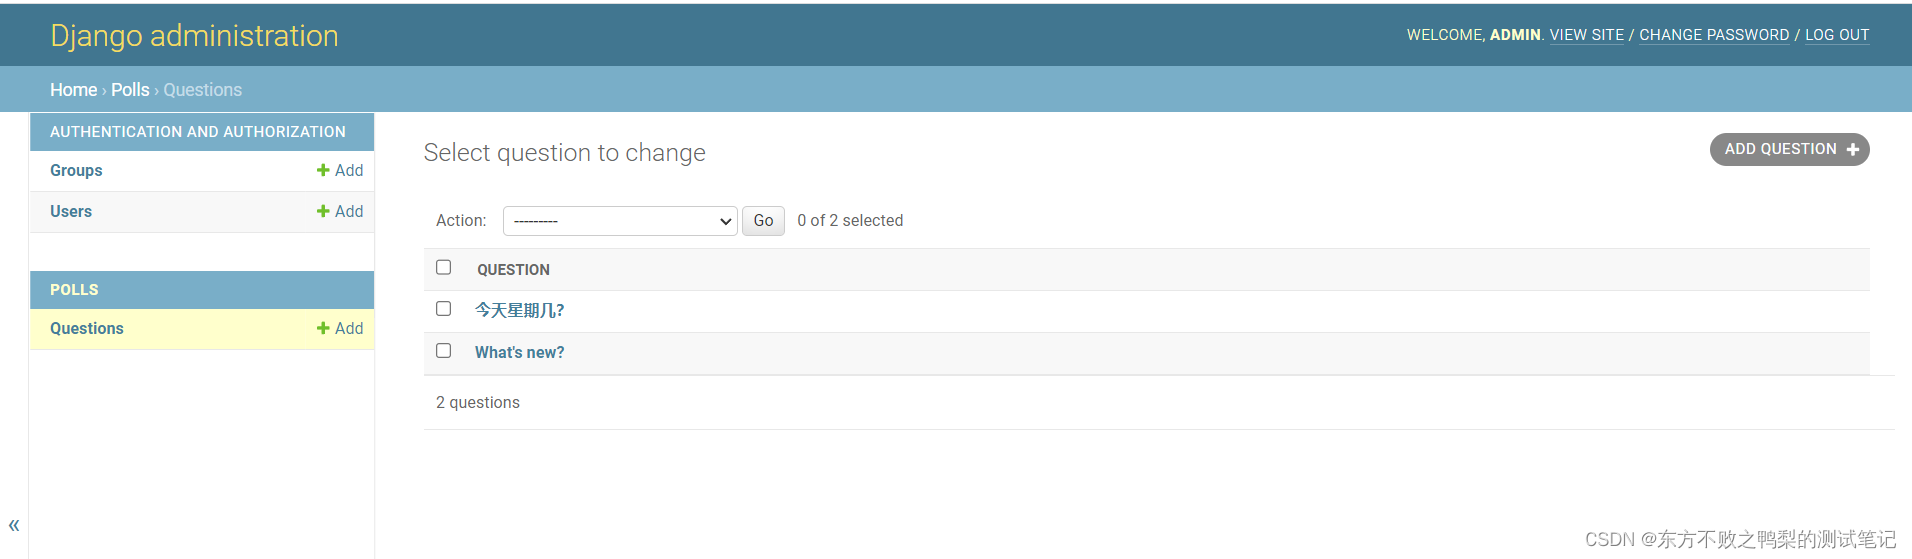
Django(4)-Django 管理页面
创建一个管理员账号 python manage.py createsuperuser运行项目,访问http://127.0.0.1:8080/admin,可以看到管理员界面 管理页面加上投票应用 polls/admin.py from django.contrib import admin# Register your models here. from .models import …...
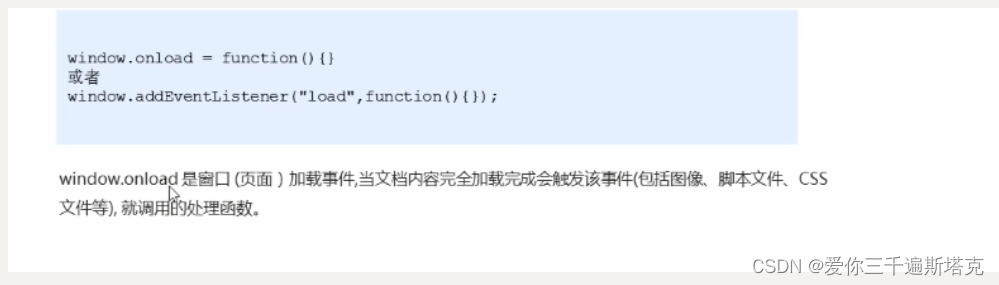
js的使用之时间如何定义,窗口加载事件
1.时间如何定义 1.1 date的其他的属性 带出星期几的写法 var arr [星期日,星期一,星期二,星期三,星期四,星期五,星期六,星期天] var day date.getDay(); console.log(arr[day]); 1.2 日期的格式化 1.3 时分秒的写法 固定写法:如果想要写成00:00:00这种形式&am…...

会声会影2023全新中文专业版下载安装教程
熟练使用会声会影视频编辑工具,对视频创作过程的帮助是极大的。大家可以放心大胆地去研究会声会影的视频编辑技巧,会声会影2023与以往版本会声会影版本最大的区别是:账户制管理。可以通过账户添加或移除设备,非常便捷。该软件一直…...

excel处理公式获得最终值--------------gxl
/*** 读取单元格内容 包括计算公式的结果,引用公式的结果* param cell* return*/public static String getCellValue(Cell cell){System.out.println(cell);String value null;if(cell ! null){System.out.println(cell.getCellType());switch (cell.getCellType()…...

变量函数及销毁函数中的变量-PHP8知识详解
今天分享php8知识详解中的变量函数及销毁函数中的变量,以及相应的示例代码。 1、变量函数 变量函数,是指通过变量来访问的函数。当变量后有圆括号时,PHP将自动寻找与变量的值同名的函数,然后执行该函数。 变量函数引用…...
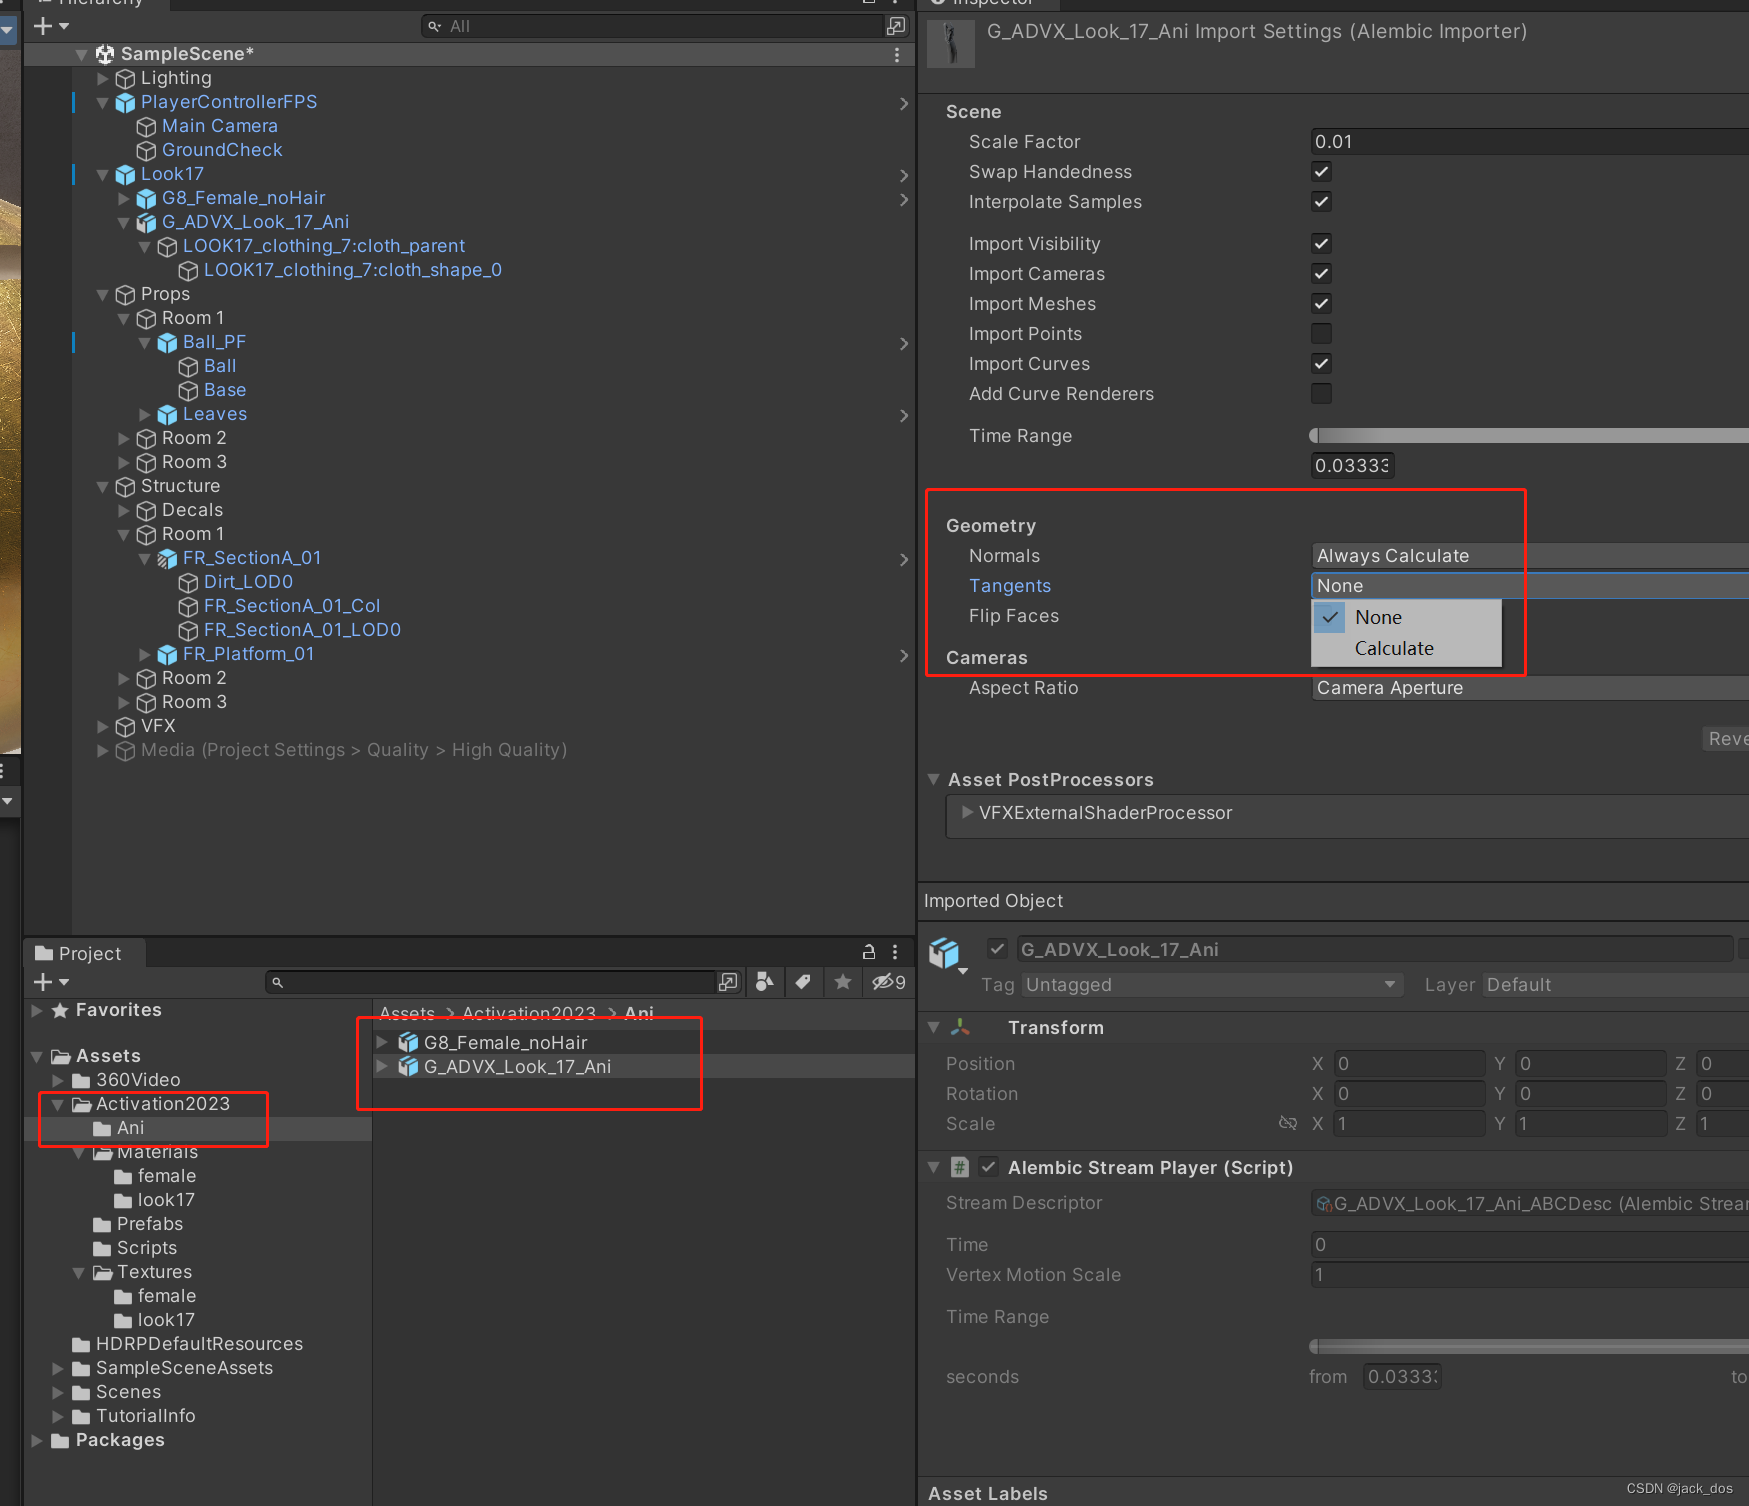
Unity Alembic闪烁问题
最近在做项目时,发现Clo3D导出的服装abc动画,导入到Unity中后(已提前导入Alembic插件),运行时屏幕会闪烁(变黑)。 经过几轮测试,发现是切线的问题。解决办法很简单。将abc文件上的Tangents属性值改为None即可。...

结构型模式-适配器模式
适配器模式* 定义:适配器模式(Adapter Pattern)是作为两个不兼容的接口之间的桥梁。这种类型的设计模式属于结构型模式,它结合了两个独立接口的功能。 这种模式涉及到一个单一的类,该类负责加入独立的或不兼容的接口…...

数据结构:线性表之-顺序表
目录 1.线性表概念 1.1 什么是顺序列表 1.2 线性表 2.顺序表实现 将有以下功能: 详细过程 顺序表的动态存储 顺序表初始化 尾插 扩容 头插 更改后的尾插 尾删 头删 打印 释放内存 优化顺序表 (任意位置插入删除) 优化后的头插尾插 优化后的头删尾…...

请你说说json 序列化功能
JSON(JavaScript Object Notation)是一种轻量级的数据交换格式,易于人阅读和编写,同时也易于机器解析和生成。JSON基于JavaScript编程语言,是一种文本格式,完全独立于语言。 JSON序列化是将复杂的对象结构…...
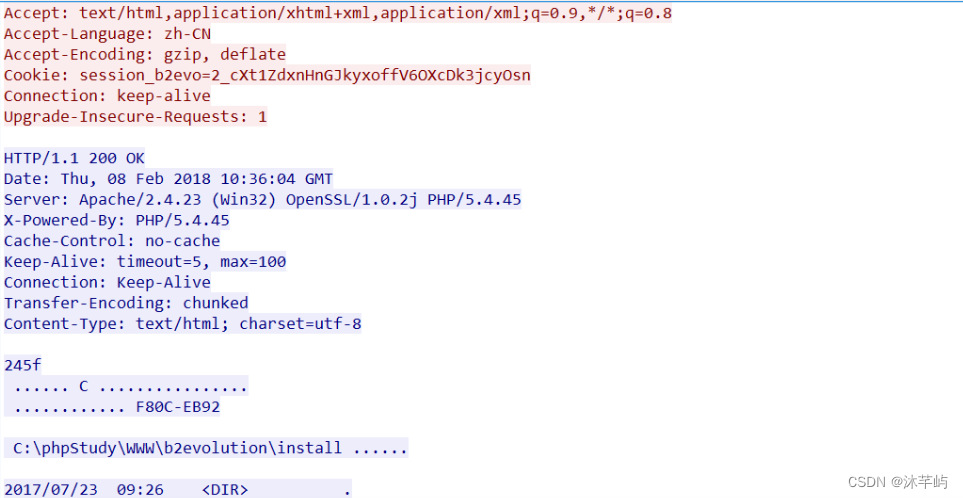
Wireshark流量分析
目录 1.基本介绍 2.基本使用 1)数据包筛选: 2)筛选ip: 3)数据包还原 4)数据提取 3.wireshark实例 1.基本介绍 在CTF比赛中,对于流量包的分析取证是一种十分重要的题型。通常这类题目都是会提供一个包含…...

spring cloud整合spring boot,整合nacos、gateway、open-feign等组件
补充: 想看具体详情的可以看我的github链接:codeking01/platform-parent: spring cloud整合spring boot、nacos、gateway、open feign等组件 (github.com) 由于我升级了jdk17,所以用上了spring boot 3.0.2了。 踩坑无数,一堆无用文…...
)
Hive3.1.3安装避坑指南:从下载到配置的完整流程(含MySQL元数据迁移)
Hive3.1.3企业级部署实战:MySQL元数据管理与性能调优全解析 在大数据生态系统中,Hive始终扮演着数据仓库核心组件的角色。尽管实时计算框架日益流行,但据统计,超过78%的企业级数据仓库仍在使用Hive处理TB级以上的历史数据分析任务…...

告别手动标注!用RexUniNLU零样本模型自动提取电商评论情感
告别手动标注!用RexUniNLU零样本模型自动提取电商评论情感 1. 电商评论分析的痛点与解决方案 电商平台每天产生海量用户评论,这些评论蕴含着宝贵的用户反馈和市场洞察。传统的情感分析方法通常面临两大难题: 标注成本高:需要大…...

2026考公全攻略:在校生如何选岗、如何备考、如何上岸一次讲清
很多在校生最近都在问:现在开始准备公务员考试,还来得及吗先说结论:来得及,但前提是你要走对路径这几年考公环境已经发生明显变化报考人数持续增加岗位信息越来越透明单纯刷题已经不再有效考公正在从拼努力,变成拼策略…...

极简安装方案:树莓派部署OpenClaw轻量版对接云端Qwen3-32B
极简安装方案:树莓派部署OpenClaw轻量版对接云端Qwen3-32B 1. 为什么选择树莓派OpenClaw轻量版? 去年夏天,我突发奇想:能不能用树莓派做个24小时在线的AI管家?既能控制智能家居,又能处理简单办公任务。但…...

腾讯游戏卡顿终极解决方案:ACE-Guard资源限制器完整指南
腾讯游戏卡顿终极解决方案:ACE-Guard资源限制器完整指南 【免费下载链接】sguard_limit 限制ACE-Guard Client EXE占用系统资源,支持各种腾讯游戏 项目地址: https://gitcode.com/gh_mirrors/sg/sguard_limit 你是否在玩《地下城与勇士》、《英雄…...
——GDI 设备上下文(HDC)完全指南)
通用GUI编程技术——Win32 原生编程实战(十八)——GDI 设备上下文(HDC)完全指南
通用GUI编程技术——Win32 原生编程实战(十八)——GDI 设备上下文(HDC)完全指南 前面一系列文章我们聊了对话框、控件、资源这些内容,我们的窗口已经能够显示各种控件了。但你可能已经发现了一个问题:我们所…...

Flink技术实践-超时异常踩坑与优化
一、背景介绍在Flink实时计算的生产环境中,最令人头疼的往往不是复杂的业务逻辑,而是那些突如其来的“超时异常”。这些异常就像是系统中的“幽灵”,通常在业务高峰期或网络抖动时出现,导致作业重启、数据延迟甚至数据丢失。最近几…...
)
R语言新手必看:clusterProfiler功能富集分析从安装到实战(附常见报错解决方案)
R语言实战:clusterProfiler功能富集分析全流程指南 第一次接触功能富集分析时,我被那些密密麻麻的基因列表和复杂的生物学术语搞得晕头转向。直到发现了clusterProfiler这个神器,它就像生物信息学分析中的瑞士军刀,把复杂的富集过…...

【深度解析】Claude Auto Dream:从“短期对话”到“项目级心智模型”的记忆系统升级
摘要 本文从 Anthropic 新增的 Auto Dream(/dream)功能出发,系统解析大模型“跨会话记忆一致性”这一核心难题,剖析 Auto Memory Auto Dream 组合背后的技术逻辑,并给出如何在自己项目里实现“类 Auto Dream 记忆管理…...

微信小程序--动态切换登录注册标签页
1、try.js的 1.1、data函数 添加 activeTab: login, // 当前激活的标签,默认为登录 1.2、添加一个函数 // 切换登录/注册标签switchTab(e) {const tab e.currentTarget.dataset.tab;this.setData({activeTab: tab});}, 2、try.wxml的代码 <!--pages/try/…...