跟着cherno手搓游戏引擎【12】渲染context和首个三角形
渲染上下文:
目的:修改WindowsWindow的结构,把glad抽离出来
WindowsWindow.h:新建m_Context
#pragma once
#include "YOTO/Window.h"
#include <YOTO/Renderer/GraphicsContext.h>
#include<GLFW/glfw3.h>
#include"YOTO/Log.h"struct GLFWwindow;
namespace YOTO {class WindowsWindow :public Window{public :WindowsWindow(const WindowProps& props);virtual ~WindowsWindow();void OnUpdate() override;inline unsigned int GetWidth() const override { return m_Data.Width; };inline unsigned int GetHeight() const override { return m_Data.Height; };inline void SetEventCallback(const EventCallbackFn& callback)override{ m_Data.EventCallback = callback; };void SetVSync(bool enable) ;bool IsVSync()const;//返回windowinline virtual void* GetNativeWindow() const { return m_Window; }private: virtual void Init(const WindowProps& props);virtual void ShutDown();private:GLFWwindow* m_Window;GraphicsContext* m_Context;struct WindowData {std::string Title;unsigned int Width, Height;bool VSync;EventCallbackFn EventCallback;};WindowData m_Data;};
}
WindowsWindow.cpp:把glad的API全部替换成m_Context的方法:
#include "ytpch.h"
#include "WindowsWindow.h"#include"YOTO/Event/ApplicationEvent.h"
#include"YOTO/Event/MouseEvent.h"
#include"YOTO/Event/KeyEvent.h"#include"Platform/OpenGL/OpenGLContext.h"
namespace YOTO {static bool s_GLFWInitialized = false;Window* Window::Creat(const WindowProps& props) {return new WindowsWindow(props);}WindowsWindow::WindowsWindow(const WindowProps& props) {Init(props);}WindowsWindow::~WindowsWindow() {ShutDown();}void WindowsWindow::Init(const WindowProps& props) {m_Data.Title = props.Title;m_Data.Width = props.Width;m_Data.Height = props.Height;YT_CORE_INFO("WindowsWindow:创建了{0},{1},{2}", props.Title, props.Width, props.Height);if (!s_GLFWInitialized) {int success = glfwInit();YT_CLIENT_ASSERT("WindowsWindow:不能创建新的glfw,{0}",success );glfwSetErrorCallback([](int error_code, const char* description) {YT_CORE_ERROR("WindowsWindow:GLFW错误:错误码({0}):{1} ", error_code, description);});s_GLFWInitialized = true;}m_Window = glfwCreateWindow((int)props.Width, (int)props.Height, m_Data.Title.c_str(), nullptr, nullptr);m_Context = new OpenGLContext(m_Window);m_Context->Init();glfwSetWindowUserPointer(m_Window, &m_Data);SetVSync(true);//GLFW回调,每次改变调用lambda里的部分//窗口大小回调glfwSetWindowSizeCallback(m_Window, [](GLFWwindow* window, int width, int height) {WindowData& data=*(WindowData*)glfwGetWindowUserPointer(window);data.Width = width;data.Height = height;WindowResizeEvent event(width, height);//调用回调函数data.EventCallback(event);});//窗口关闭回调glfwSetWindowCloseCallback(m_Window, [](GLFWwindow* window) {WindowData& data = *(WindowData*)glfwGetWindowUserPointer(window);WindowCloseEvent event;data.EventCallback(event);});//键盘按键回调glfwSetKeyCallback(m_Window, [](GLFWwindow* window, int key, int scancode, int action, int mods) {WindowData& data = *(WindowData*)glfwGetWindowUserPointer(window);switch (action) {case GLFW_PRESS:{KeyPressedEvent event(key, 0);data.EventCallback(event);break;}case GLFW_RELEASE:{KeyReleasedEvent event(key);data.EventCallback(event);break;}case GLFW_REPEAT:{KeyPressedEvent event(key, 1);data.EventCallback(event);break;}}});//鼠标按键回调glfwSetMouseButtonCallback(m_Window, [](GLFWwindow* window, int button, int action, int mods) {WindowData& data = *(WindowData*)glfwGetWindowUserPointer(window);switch (action){case GLFW_PRESS:{MouseButtonPressedEvent event(button);data.EventCallback(event);break;}case GLFW_RELEASE:{MouseButtonReleasedEvent event(button);data.EventCallback(event);break;}}});//滚轮回调glfwSetScrollCallback(m_Window, [](GLFWwindow* window, double xoffset, double yoffset) {WindowData& data = *(WindowData*)glfwGetWindowUserPointer(window);MouseScrolledEvent event((float)xoffset, (float)yoffset);data.EventCallback(event);});//鼠标位置回调glfwSetCursorPosCallback(m_Window, [](GLFWwindow* window, double xpos, double ypos) {WindowData& data = *(WindowData*)glfwGetWindowUserPointer(window);MouseMovedEvent event((float)xpos, (float)ypos);data.EventCallback(event);});//字符回调glfwSetCharCallback(m_Window, [](GLFWwindow* window, unsigned int codepoint) {WindowData& data = *(WindowData*)glfwGetWindowUserPointer(window);KeyTypedEvent event(codepoint);data.EventCallback(event);});}void WindowsWindow::ShutDown() {glfwDestroyWindow(m_Window);}void WindowsWindow::OnUpdate(){//轮询事件glfwPollEvents();//交换缓冲区m_Context->SwapBuffers();}void WindowsWindow::SetVSync(bool enable) {if (enable)glfwSwapInterval(1);elseglfwSwapInterval(0);m_Data.VSync = enable;}bool WindowsWindow::IsVSync() const {return m_Data.VSync;}
}
新建类:OpenGLContext和GraphicsContext文件如下结构:
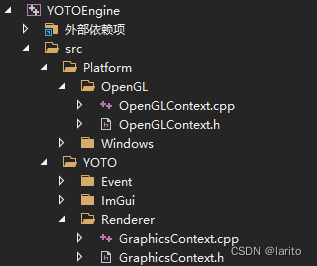
GraphicsContext.h:作为基类
#pragma oncenamespace YOTO {class GraphicsContext{public:virtual void Init()=0;virtual void SwapBuffers()=0;};
}
OpenGLContext.h:继承基类
#pragma once
#include"YOTO/Renderer/GraphicsContext.h"
#include"YOTO/Log.h"
struct GLFWwindow;
namespace YOTO {class OpenGLContext:public GraphicsContext{public:OpenGLContext(GLFWwindow * windowHandle);virtual void Init()override;virtual void SwapBuffers()override;private:GLFWwindow* m_WindowHandle;};}
OpenGLContext.cpp:实现Opengl的上下文:
#include "ytpch.h"
#include "OpenGLContext.h"
#include<GLFW/glfw3.h>
#include<glad/glad.h>
#include<gl/GL.h>
namespace YOTO {OpenGLContext::OpenGLContext(GLFWwindow* windowHandle):m_WindowHandle(windowHandle){YT_CORE_ASSERT(windowHandle, "handle为空");}void OpenGLContext::Init(){glfwMakeContextCurrent(m_WindowHandle);//在运行时获取OpenGL函数地址并将其保存在函数指针中供以后使用int status = gladLoadGLLoader((GLADloadproc)glfwGetProcAddress);YT_CORE_ASSERT(status, "glad初始化错误");}void OpenGLContext::SwapBuffers(){glfwSwapBuffers(m_WindowHandle);}
}
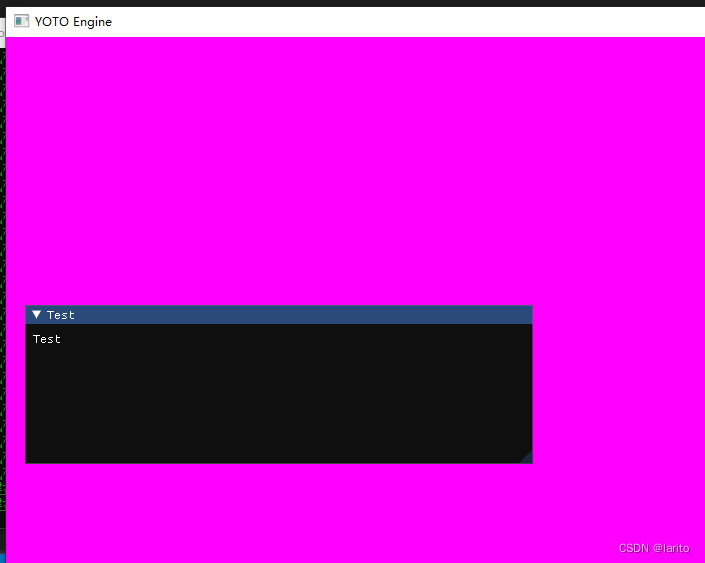
测试:正常显示
绘制三角形:
Application.h:添加缓冲区索引
#pragma once
#include"Core.h"
#include"Event/Event.h"
#include"Event/ApplicationEvent.h"
#include "YOTO/Window.h"
#include"YOTO/LayerStack.h"
#include"YOTO/ImGui/ImGuiLayer.h"
namespace YOTO {class YOTO_API Application{public:Application();virtual ~Application();void Run();void OnEvent(Event &e);void PushLayer(Layer* layer);void PushOverlay(Layer* layer);inline static Application& Get() {return * s_Instance;}inline Window& GetWindow() { return *m_Window; }private:bool  OnWindowClosed(WindowCloseEvent& e);std::unique_ptr<Window>  m_Window;ImGuiLayer *  m_ImGuiLayer;bool m_Running = true;LayerStack m_LayerStack;unsigned int m_VertexArray, m_VertexBuffer, m_IndexBuffer;static Application* s_Instance;};//在客户端定义Application* CreateApplication();
}
Application.cpp:设置缓冲区然后绘制
#include"ytpch.h"
#include "Application.h"#include"Log.h"
#include<glad/glad.h>
#include"Input.h"namespace YOTO {
#define BIND_EVENT_FN(x) std::bind(&x, this, std::placeholders::_1)Application* Application::s_Instance = nullptr;Application::Application() {YT_CORE_ASSERT(!s_Instance, "Application需要为空!")s_Instance = this;//智能指针m_Window = std::unique_ptr<Window>(Window::Creat());//设置回调函数m_Window->SetEventCallback(BIND_EVENT_FN(Application::OnEvent));//new一个Layer,放在最后层进行渲染m_ImGuiLayer = new ImGuiLayer();PushOverlay(m_ImGuiLayer);  //unsigned int id;//glGenBuffers(1, &id);//顶点数组:glGenVertexArrays(1, &m_VertexArray);glBindVertexArray(m_VertexArray);//顶点缓冲区glGenBuffers(1, &m_VertexBuffer);glBindBuffer(GL_ARRAY_BUFFER,m_VertexBuffer);float vertices[3 * 3] = {-0.5f,-0.5f,0.0f,0.5f,-0.5f,0.0f,0.0f,0.5f,0.0f,};//把数据传送给gpu,GL_STATIC_DRAW不断的用新数据刷新数组。告诉opengl这个缓冲区的数据布局glBufferData(GL_ARRAY_BUFFER, sizeof(vertices), vertices, GL_STATIC_DRAW);//启用数据的索引0glEnableVertexAttribArray(0);//设置缓冲区数据格式:缓冲区序号、顶点属性的大小、什么数据类型、会不会被归一化、glVertexAttribPointer(0, 3, GL_FLOAT, GL_FALSE, 3 * sizeof(float),nullptr);//创建索引缓冲区glGenBuffers(1, &m_IndexBuffer);glBindBuffer(GL_ELEMENT_ARRAY_BUFFER, m_IndexBuffer);unsigned int indices[3] = { 0,1,2 };//设置缓冲区格式glBufferData(GL_ELEMENT_ARRAY_BUFFER, sizeof(indices), indices, GL_STATIC_DRAW);//着色器//shader}Application::~Application() {}/// <summary>/// 所有的Window事件都会在这触发,作为参数e/// </summary>/// <param name="e"></param>void Application::OnEvent(Event& e) {//根据事件类型绑定对应事件EventDispatcher dispatcher(e);dispatcher.Dispatch<WindowCloseEvent>(BIND_EVENT_FN(Application::OnWindowClosed));//输出事件信息YT_CORE_INFO("Application:{0}",e);for (auto it = m_LayerStack.end(); it != m_LayerStack.begin();) {(*--it)->OnEvent(e);if (e.m_Handled)break;}}bool Application::OnWindowClosed(WindowCloseEvent& e) {m_Running = false;return true;}void Application::Run() {WindowResizeEvent e(1280, 720);if (e.IsInCategory(EventCategoryApplication)) {YT_CORE_TRACE(e);}if (e.IsInCategory(EventCategoryInput)) {YT_CORE_ERROR(e);}while (m_Running){glClearColor(0.2f, 0.2f, 0.2f,1);glClear(GL_COLOR_BUFFER_BIT);glBindVertexArray(m_VertexArray);glDrawElements(GL_TRIANGLES,3,GL_UNSIGNED_INT,nullptr); for (Layer* layer : m_LayerStack) {layer->OnUpdate();}//将ImGui的刷新放到APP中,与Update分开m_ImGuiLayer->Begin();for (Layer* layer : m_LayerStack) {layer->OnImGuiRender();}m_ImGuiLayer->End();m_Window->OnUpdate();}}void Application::PushLayer(Layer* layer) {m_LayerStack.PushLayer(layer);layer->OnAttach();}void Application::PushOverlay(Layer* layer) {m_LayerStack.PushOverlay(layer);layer->OnAttach();}
}
OpenGLContext.cpp:显示显卡的基本信息:
#include "ytpch.h"
#include "OpenGLContext.h"
#include<GLFW/glfw3.h>
#include<glad/glad.h>
#include<gl/GL.h>
namespace YOTO {OpenGLContext::OpenGLContext(GLFWwindow* windowHandle):m_WindowHandle(windowHandle){YT_CORE_ASSERT(windowHandle, "handle为空");}void OpenGLContext::Init(){glfwMakeContextCurrent(m_WindowHandle);//在运行时获取OpenGL函数地址并将其保存在函数指针中供以后使用int status = gladLoadGLLoader((GLADloadproc)glfwGetProcAddress);YT_CORE_ASSERT(status, "glad初始化错误");// 将我们窗口的上下文设置为当前线程的主上下文glfwMakeContextCurrent(m_WindowHandle);// 获取显卡OpenGL函数定义的地址int statu = gladLoadGLLoader((GLADloadproc)glfwGetProcAddress);YT_CORE_ASSERT(status, "Failed to initialize Glad!");YT_CORE_INFO("OpenGL 信息:");YT_CORE_INFO("	Vendor:{0}", (const char*)glGetString(GL_VENDOR));YT_CORE_INFO("	显卡名:{0}", (const char*)glGetString(GL_RENDERER));YT_CORE_INFO("	版本:{0}", (const char*)glGetString(GL_VERSION));}void OpenGLContext::SwapBuffers(){glfwSwapBuffers(m_WindowHandle);}
}
测试:
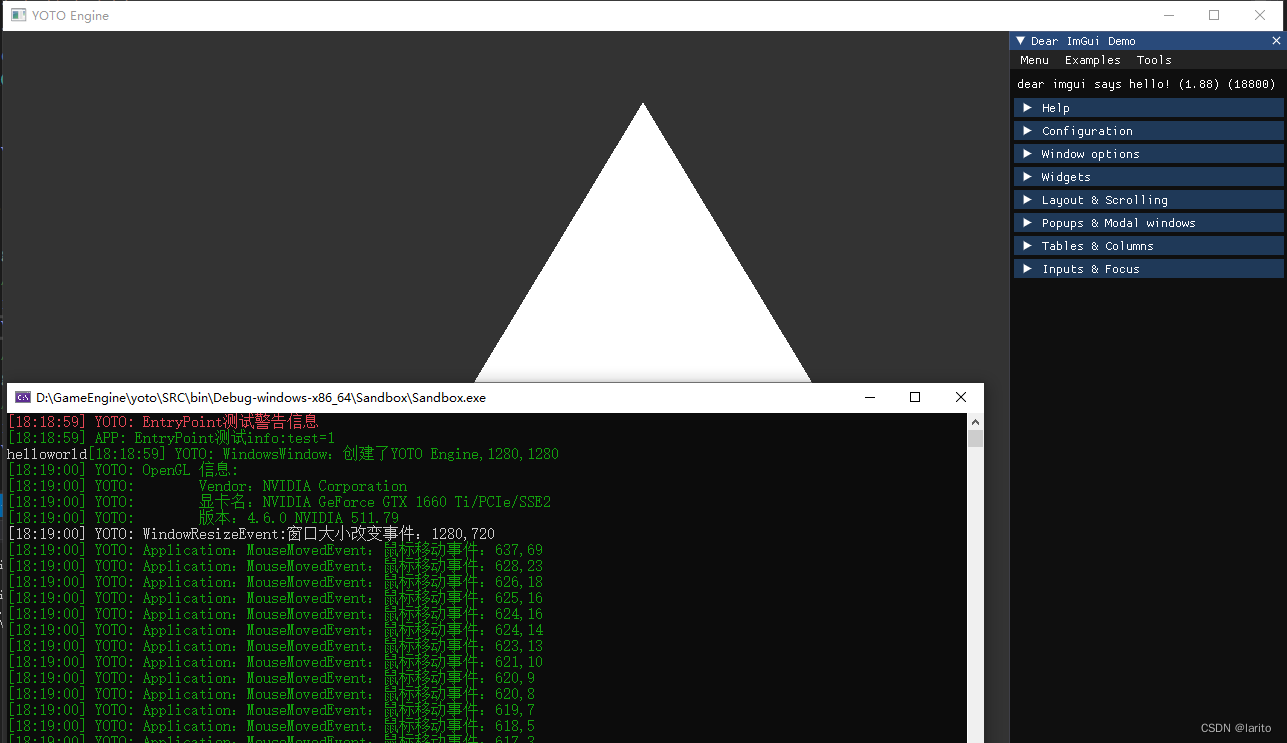
cool !
相关文章:

跟着cherno手搓游戏引擎【12】渲染context和首个三角形
渲染上下文: 目的:修改WindowsWindow的结构,把glad抽离出来 WindowsWindow.h:新建m_Context #pragma once #include "YOTO/Window.h" #include <YOTO/Renderer/GraphicsContext.h> #include<GLFW/glfw3.h> #include…...

MybatisPlus二级映射和关联对象ResultMap
文章目录 一、业务背景1. 数据库表结构2. 需求 二、使用映射直接得到指定结构三、其他文件1. Mapper2. Service3. Controller 四、概念理解一级映射二级映射聚合 五、标签使用1. \<collection\> 标签2. \<association\> 标签 在我们的教程中,我们设计了…...

低代码开发业务在AIGC时代的应用
随着人工智能和图形计算能力的快速发展,低代码开发平台在AIGC(人工智能,物联网,大数据和云计算)时代中扮演着至关重要的角色。本文将介绍低代码开发业务的概念和优势,探讨其在AIGC时代的应用及其对传统软件…...
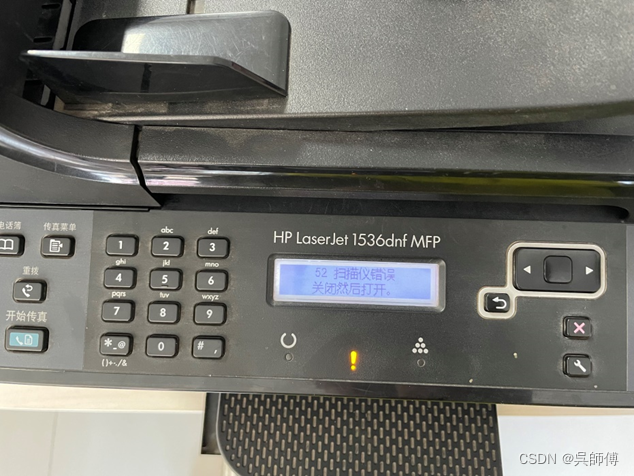
惠普1536dnf MFP报52扫描仪错误维修
如果您使用的惠普HP LaserJet 1536dnf MFP打印机可能会遇到“52扫描仪错误”的提示。这个错误可能会阻止你使用打印机的扫描功能。在这里,我将提供一些有用的解决方法来帮助大家去解决这个问题。-----吴中函 故障描述: 一台某单位正在使用的惠普HP LaserJet 1536dnf MFP黑白…...

【MIdjourney】五个特殊物体关键词
1.碳酸(Carbonate) 这一词语的本意是指包含碳(C)、氧(O)和氢(H)元素的化合物。而在MIdjourney中添加该词汇会使得生成的图片具有水滴效果且富有动态感。 2.灯丝(Filament) Filament效果可能包括更逼真的…...
2024/1/27 备战蓝桥杯 1
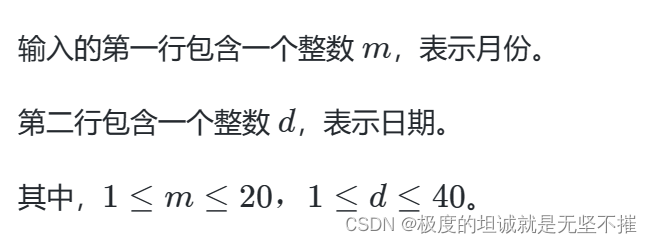
目录 求和 0求和 - 蓝桥云课 (lanqiao.cn) 成绩分析 0成绩分析 - 蓝桥云课 (lanqiao.cn) 合法日期 0合法日期 - 蓝桥云课 (lanqiao.cn) 时间加法 0时间加法 - 蓝桥云课 (lanqiao.cn) 扫雷 0扫雷 - 蓝桥云课 (lanqiao.cn) 大写 0大写 - 蓝桥云课 (lanqiao.cn) 标题…...

初学数据结构:Java对象的比较
目录 1. PriorityQueue中插入对象2. 元素的比较2.1 基本类型的比较2.2 对象比较的问题 3. 对象的比较3.1 基于Comparable接口类的比较3.2 基于比较器比较3.3 三种方式对比 4. 集合框架中PriorityQueue的比较方式5. 使用PriorityQueue创建大小堆,解决TOPK问题 【本节…...

mac 10.15.7 Unity 2021.3.14 XCode 12.4 -> Unity IOS 自动安装 Cocoapods 失败解决方法
自己这两天在用Unity开发IOS时,遇到了安装Cocoapods失败的问题,记录一下问题及解决方法,便于自己后续查看,以及有相同遭遇的人查看 发生场景:打开 unity,触发自动安装 Cocoapods -> 安装失败(…...

Elasticsearch 中使用MustNot等同于不登录遇到的坑
1、在写关键词推荐时,需要把当前文章过滤掉,不能再推荐自己的文章,所以再es中需要用到 MustNot属性查询 /// <summary> /// 服务中心es检索 /// </summary> /// <param name="input"></param> /// <returns></…...

java抽象工厂实战与总结
文章目录 一、工厂模式(三种)1.简单工厂模式1.1 概念:1.2 使用场景:1.3 模型图解:1.4 伪代码: 2.工厂方法模式2.1 概念:2.2 使用场景:2.3 模型图解:2.4 伪代码 3.抽象工厂…...
 | 选择框)
Compose | UI组件(六) | 选择框
文章目录 前言Checkbox 复选框的含义Checkbox 复选框的使用Switch 单选框的含义Switch 单选框的使用Slider 滑竿组件的含义Slider 滑竿组件的使用 总结 前言 随着移动端的技术不断更新迭代,Compose也运用的越来越广泛,很多人都开始学习Compose 本文主要…...

C++拷贝构造函数、赋值学习整理:
拷贝构造函数: 概念: 构造函数的第一个参数,是类本身的const引用(一般情况下没有其他参数,少数情况:其他参数必须有默认值!)称此类构造函数为拷贝构造函数 特征: 1&am…...
[亲测源码]ps软件网页版在线使用 PS网站程序源码 photoshop网页版源码 网页版的ps软件源码
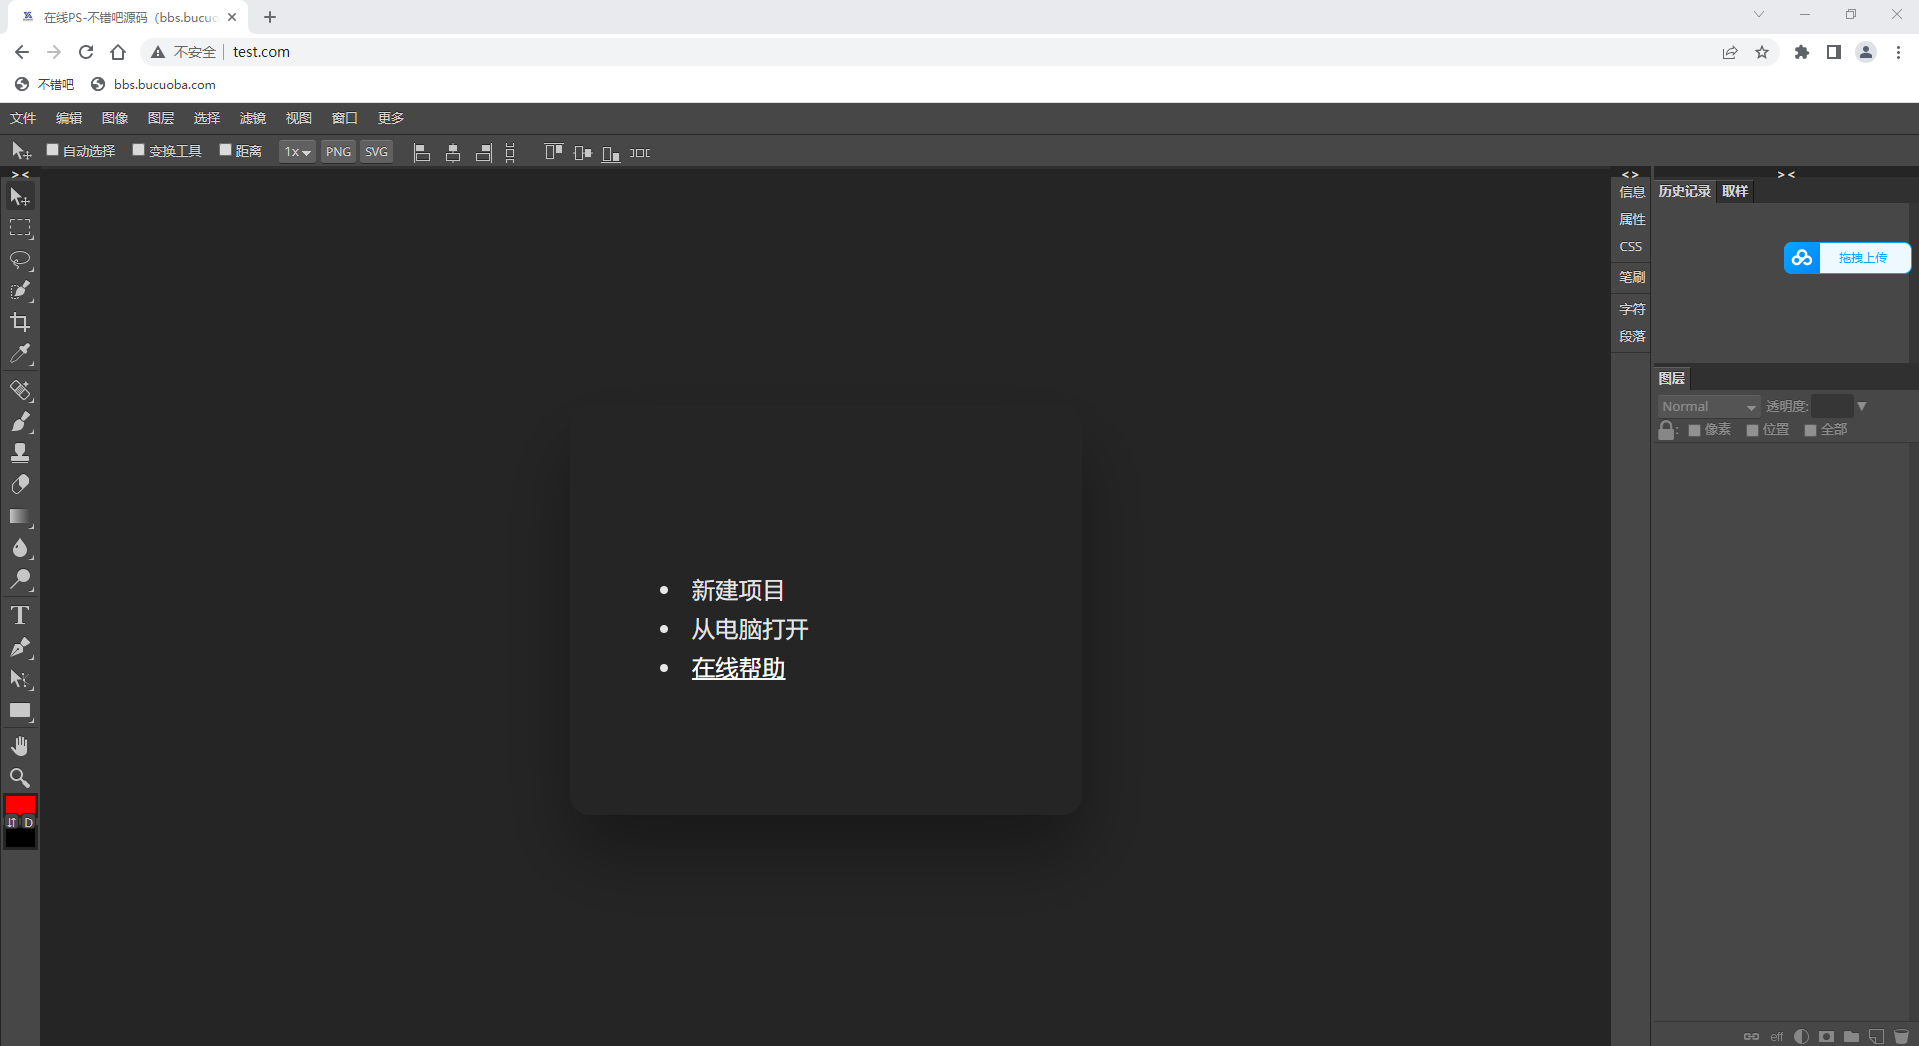
在线PS作图修图网页版PHP网站源码,PHP在线照片图片处理PS网站程序源码photoshop网页版。 有很多朋友们都是在用PS作图的,众所周知在使用和学习PS时是需要下载软件的,Photoshop软件对电脑配置也是有一定要求的,今天就为大家带来一…...
前端大厂面试题探索编辑部——第二期
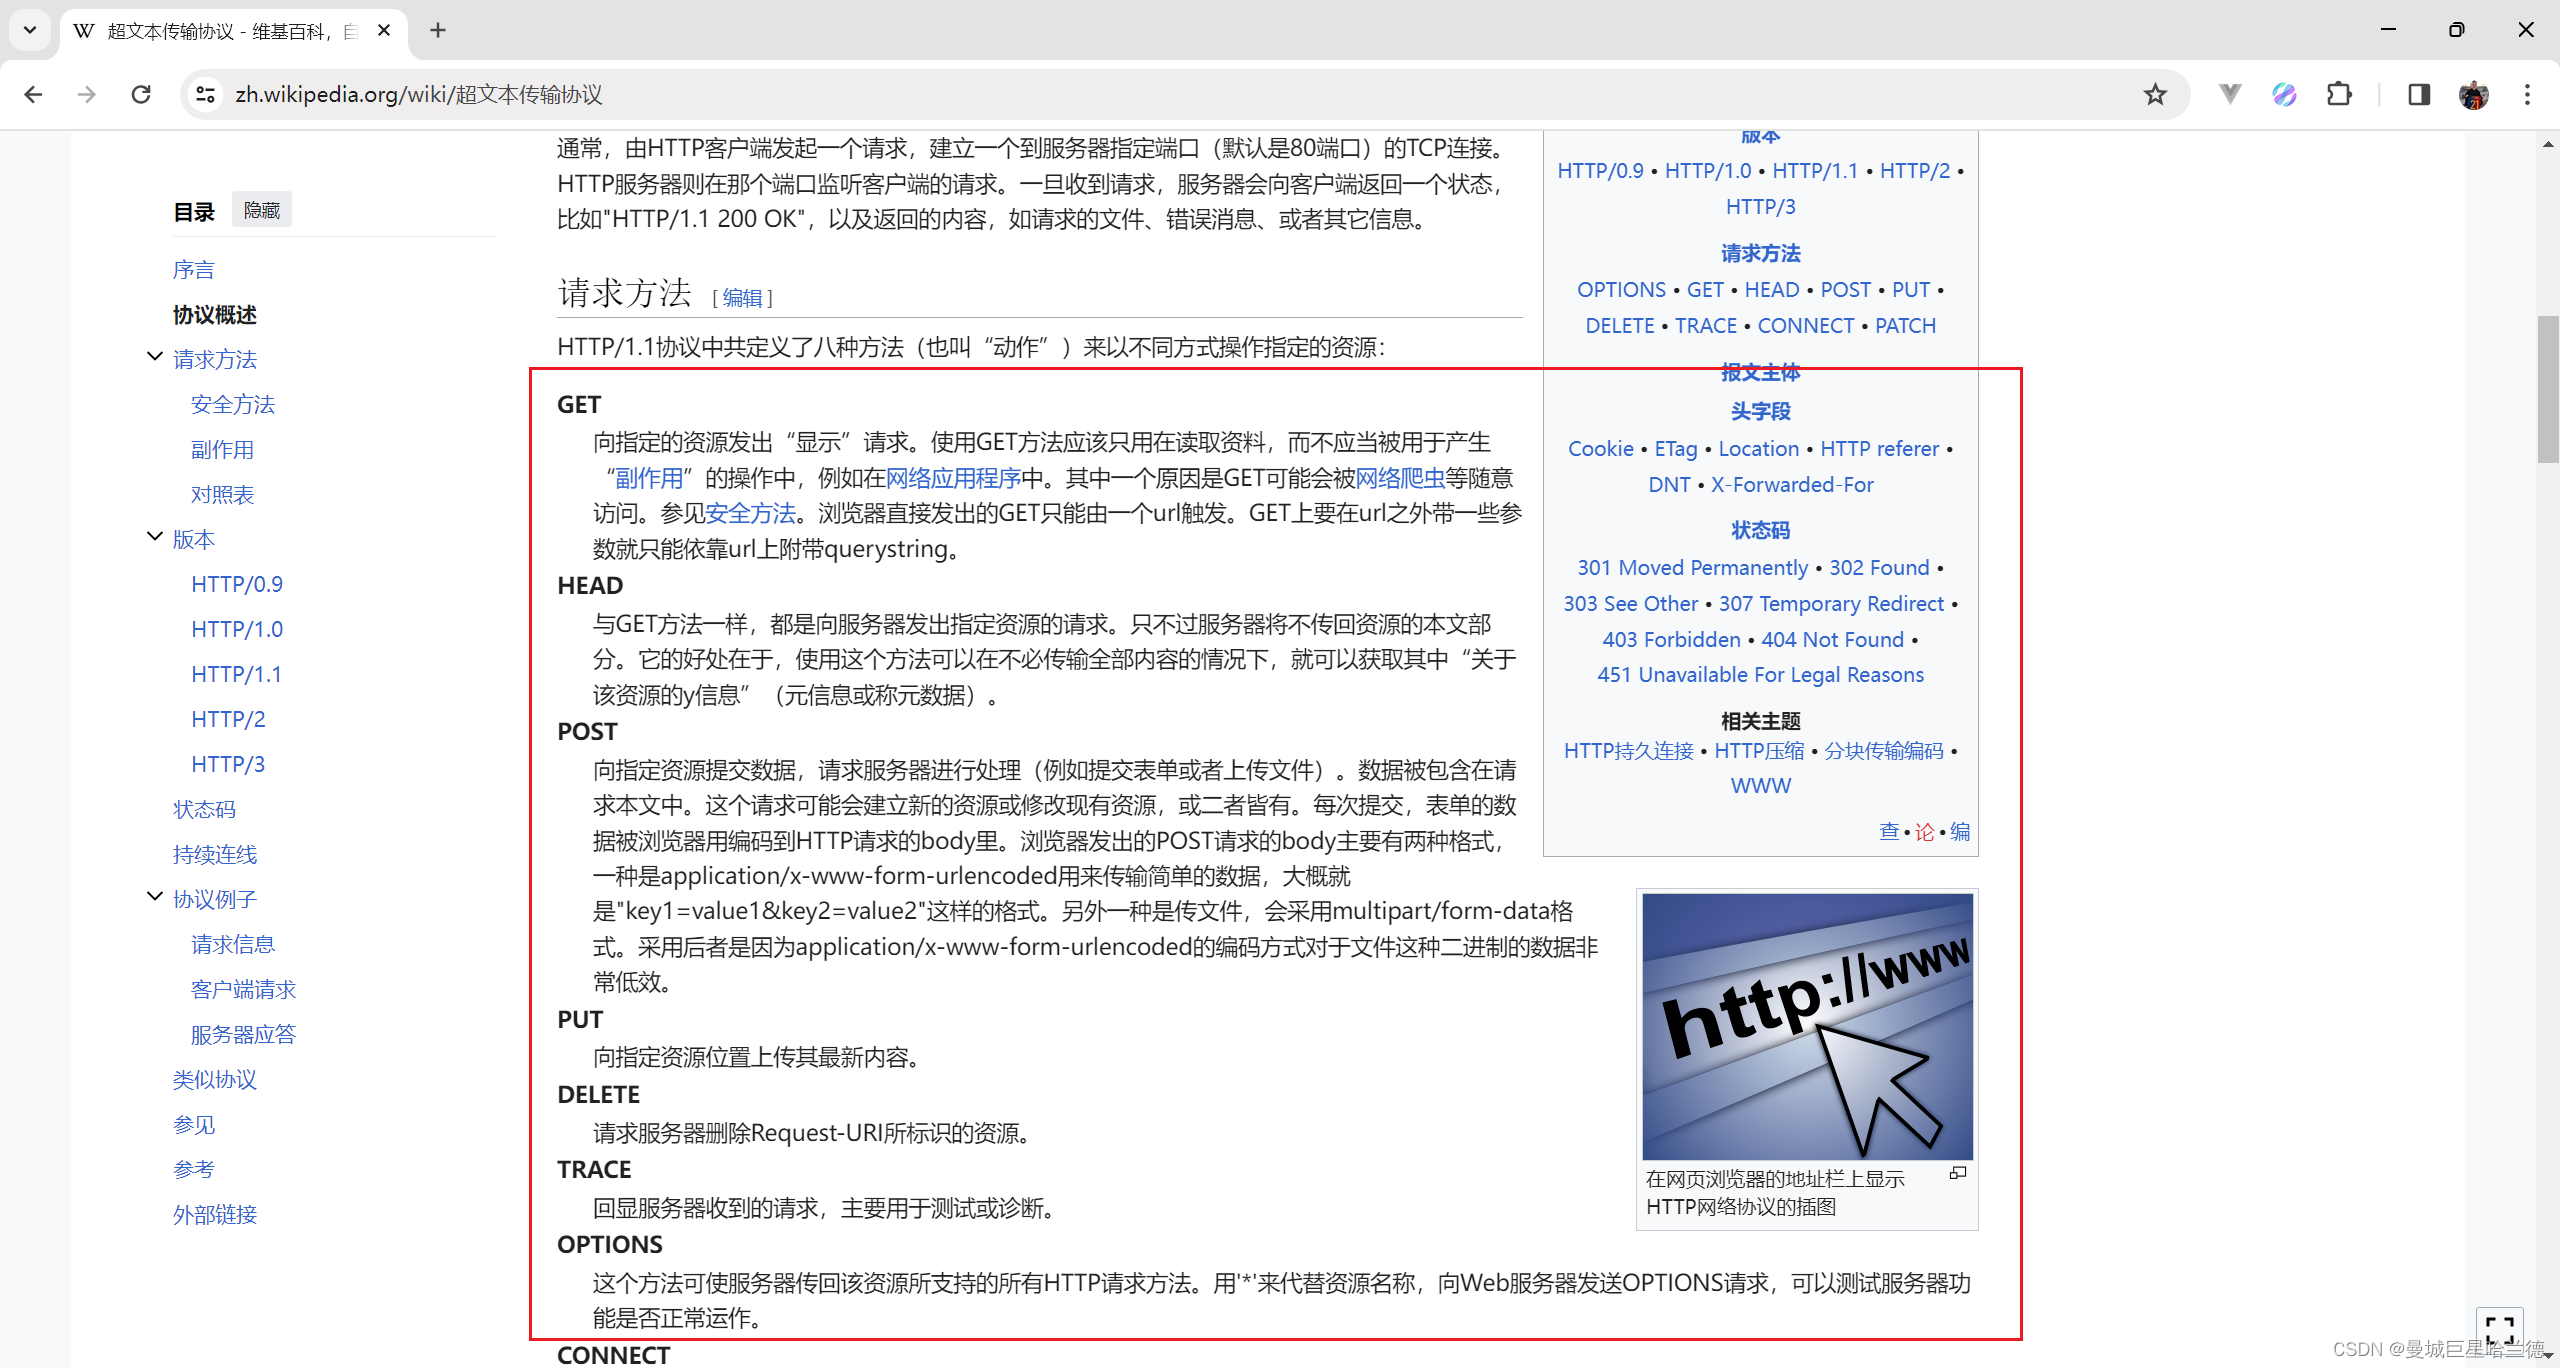
目录 题目 单选题1 题解 关于TCP 关于UDP 单选题2 题解 A选项的HTTP是否是无状态协议 B选项的HTTP支持的方法 C选项的关于HTTP的状态码 D选项HTTP协议的传输格式 题目 单选题1 1.以下哪个描述是关于 TCP 和 UDP 的区别() A. TCP 是无连接的…...

yaml学习笔记
文章目录 yaml语言学习yaml 简介yaml 和json 区别基本语法数据类型YAML 对象YAML 数组锚点和引用纯量 参考文档 yaml语言学习 最近发现在学习k8s中各种配置文件 都是使用的yaml 这种格式, 包括 docker-compose.yaml 也都是用这个格式配置部署项目信息,我就了解了一下这个语法就…...
深度强化学习(王树森)笔记04
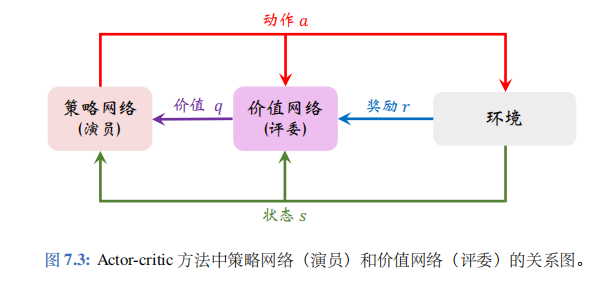
深度强化学习(DRL) 本文是学习笔记,如有侵权,请联系删除。本文在ChatGPT辅助下完成。 参考链接 Deep Reinforcement Learning官方链接:https://github.com/wangshusen/DRL 源代码链接:https://github.c…...

openssl3.2/test/certs - 074 - CT entry
文章目录 openssl3.2/test/certs - 074 - CT entry概述笔记setup074.shsetup074_sc1.shsetup074_sc2.shsetup074_sc3.shEND openssl3.2/test/certs - 074 - CT entry 概述 openssl3.2 - 官方demo学习 - test - certs 笔记 setup074.sh #! /bin/bash# \file setup074.sh# o…...

Angular组件(一) 分割面板ShrinkSplitter
Angular组件(一) 分割面板ShrinkSplitter 前言 分割面板在日常开发中经常使用,可将一片区域,分割为可以拖拽整宽度或高度的两部分区域。模仿iview的分割面板组件,用angular实现该功能,支持拖拽和[(ngModel)]双向绑定的方式控制区…...

抖音详情API:视频内容获取与解析技巧
一、引言 抖音是一款广受欢迎的短视频分享平台,每天都有大量的用户在抖音上分享自己的生活点滴和创意作品。对于开发者而言,如何获取并解析抖音上的视频内容,是一项极具挑战性的任务。本文将详细介绍抖音详情API,以及如何使用它来…...

SpringBoot中实现阿里云OSS对象存储
背景 在业务中我们往往需要上传文件如图片,文件上传,是指将本地图片、视频、音频等文件上传到服务器上,可以供其他用户浏览或下载的过程。文件上传在项目中应用非常广泛,我们经常发抖音、发朋友圈都用到了文件上传功能。 实现文件…...
:手搓截屏和帧率控制)
Python|GIF 解析与构建(5):手搓截屏和帧率控制
目录 Python|GIF 解析与构建(5):手搓截屏和帧率控制 一、引言 二、技术实现:手搓截屏模块 2.1 核心原理 2.2 代码解析:ScreenshotData类 2.2.1 截图函数:capture_screen 三、技术实现&…...
【大模型RAG】拍照搜题技术架构速览:三层管道、两级检索、兜底大模型
摘要 拍照搜题系统采用“三层管道(多模态 OCR → 语义检索 → 答案渲染)、两级检索(倒排 BM25 向量 HNSW)并以大语言模型兜底”的整体框架: 多模态 OCR 层 将题目图片经过超分、去噪、倾斜校正后,分别用…...

19c补丁后oracle属主变化,导致不能识别磁盘组
补丁后服务器重启,数据库再次无法启动 ORA01017: invalid username/password; logon denied Oracle 19c 在打上 19.23 或以上补丁版本后,存在与用户组权限相关的问题。具体表现为,Oracle 实例的运行用户(oracle)和集…...
)
Java 语言特性(面试系列1)
一、面向对象编程 1. 封装(Encapsulation) 定义:将数据(属性)和操作数据的方法绑定在一起,通过访问控制符(private、protected、public)隐藏内部实现细节。示例: public …...

【Java学习笔记】Arrays类
Arrays 类 1. 导入包:import java.util.Arrays 2. 常用方法一览表 方法描述Arrays.toString()返回数组的字符串形式Arrays.sort()排序(自然排序和定制排序)Arrays.binarySearch()通过二分搜索法进行查找(前提:数组是…...
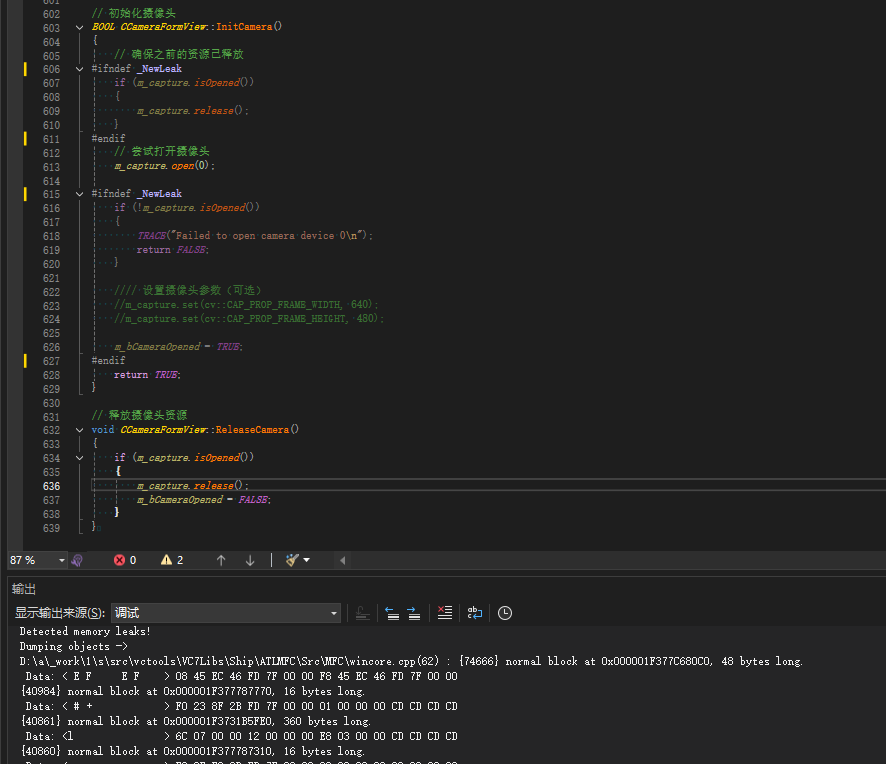
MFC内存泄露
1、泄露代码示例 void X::SetApplicationBtn() {CMFCRibbonApplicationButton* pBtn GetApplicationButton();// 获取 Ribbon Bar 指针// 创建自定义按钮CCustomRibbonAppButton* pCustomButton new CCustomRibbonAppButton();pCustomButton->SetImage(IDB_BITMAP_Jdp26)…...
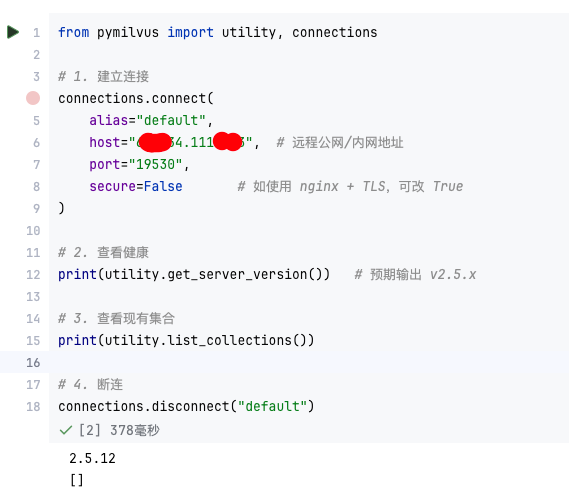
【大模型RAG】Docker 一键部署 Milvus 完整攻略
本文概要 Milvus 2.5 Stand-alone 版可通过 Docker 在几分钟内完成安装;只需暴露 19530(gRPC)与 9091(HTTP/WebUI)两个端口,即可让本地电脑通过 PyMilvus 或浏览器访问远程 Linux 服务器上的 Milvus。下面…...

OkHttp 中实现断点续传 demo
在 OkHttp 中实现断点续传主要通过以下步骤完成,核心是利用 HTTP 协议的 Range 请求头指定下载范围: 实现原理 Range 请求头:向服务器请求文件的特定字节范围(如 Range: bytes1024-) 本地文件记录:保存已…...

ios苹果系统,js 滑动屏幕、锚定无效
现象:window.addEventListener监听touch无效,划不动屏幕,但是代码逻辑都有执行到。 scrollIntoView也无效。 原因:这是因为 iOS 的触摸事件处理机制和 touch-action: none 的设置有关。ios有太多得交互动作,从而会影响…...

图表类系列各种样式PPT模版分享
图标图表系列PPT模版,柱状图PPT模版,线状图PPT模版,折线图PPT模版,饼状图PPT模版,雷达图PPT模版,树状图PPT模版 图表类系列各种样式PPT模版分享:图表系列PPT模板https://pan.quark.cn/s/20d40aa…...
