Pytorch的named_children, named_modules和named_children
在 PyTorch 中,named_children、named_modules 和 named_parameters 是用于获取神经网络模型组件和参数的三种不同的方法。下面是它们各自的作用和区别:
named_parameters:递归地列出所有参数名称和tensornamed_modules:递归地列出所有子层,其中第一个返回值就是模型本身named_children:列出模型的第一层级的子层,不往下进行深入递归
1. named_children:
named_children返回一个生成器,它包含模型中所有直接子模块的名称和模块对。- 它只返回一层级的子模块,不递归到更深层次的子模块。
- 这个方法通常用于迭代模型的直接子模块,并对其进行操作或检查。
示例:
from torchvision.models import resnet18model = resnet18()
# Print each layer name and its module
# Note that named_children method only returns the first level submodules
for name, layer in model.named_children():print(name.ljust(10), '-->', type(layer))
输出:
conv1      --> <class 'torch.nn.modules.conv.Conv2d'>
bn1        --> <class 'torch.nn.modules.batchnorm.BatchNorm2d'>
relu       --> <class 'torch.nn.modules.activation.ReLU'>
maxpool    --> <class 'torch.nn.modules.pooling.MaxPool2d'>
layer1     --> <class 'torch.nn.modules.container.Sequential'>
layer2     --> <class 'torch.nn.modules.container.Sequential'>
layer3     --> <class 'torch.nn.modules.container.Sequential'>
layer4     --> <class 'torch.nn.modules.container.Sequential'>
avgpool    --> <class 'torch.nn.modules.pooling.AdaptiveAvgPool2d'>
fc         --> <class 'torch.nn.modules.linear.Linear'>
2. named_modules:
named_modules返回一个生成器,它包含模型中所有模块的名称和模块对,包括子模块的子模块。- 它递归地遍历整个模型,返回所有模块的名称和引用。
- 这个方法适用于当你需要对模型中的所有模块进行操作或检查时,无论它们位于哪一层级。
示例:
from torchvision.models import resnet18model = resnet18()
# The first layer is the model itself
for name, layer in model.named_modules():print(name.ljust(15), '-->', type(layer))
输出:
                --> <class 'torchvision.models.resnet.ResNet'>
conv1           --> <class 'torch.nn.modules.conv.Conv2d'>
bn1             --> <class 'torch.nn.modules.batchnorm.BatchNorm2d'>
relu            --> <class 'torch.nn.modules.activation.ReLU'>
maxpool         --> <class 'torch.nn.modules.pooling.MaxPool2d'>
layer1          --> <class 'torch.nn.modules.container.Sequential'>
layer1.0        --> <class 'torchvision.models.resnet.BasicBlock'>
layer1.0.conv1  --> <class 'torch.nn.modules.conv.Conv2d'>
layer1.0.bn1    --> <class 'torch.nn.modules.batchnorm.BatchNorm2d'>
layer1.0.relu   --> <class 'torch.nn.modules.activation.ReLU'>
layer1.0.conv2  --> <class 'torch.nn.modules.conv.Conv2d'>
layer1.0.bn2    --> <class 'torch.nn.modules.batchnorm.BatchNorm2d'>
layer1.1        --> <class 'torchvision.models.resnet.BasicBlock'>
layer1.1.conv1  --> <class 'torch.nn.modules.conv.Conv2d'>
layer1.1.bn1    --> <class 'torch.nn.modules.batchnorm.BatchNorm2d'>
layer1.1.relu   --> <class 'torch.nn.modules.activation.ReLU'>
layer1.1.conv2  --> <class 'torch.nn.modules.conv.Conv2d'>
layer1.1.bn2    --> <class 'torch.nn.modules.batchnorm.BatchNorm2d'>
layer2          --> <class 'torch.nn.modules.container.Sequential'>
layer2.0        --> <class 'torchvision.models.resnet.BasicBlock'>
layer2.0.conv1  --> <class 'torch.nn.modules.conv.Conv2d'>
layer2.0.bn1    --> <class 'torch.nn.modules.batchnorm.BatchNorm2d'>
layer2.0.relu   --> <class 'torch.nn.modules.activation.ReLU'>
layer2.0.conv2  --> <class 'torch.nn.modules.conv.Conv2d'>
layer2.0.bn2    --> <class 'torch.nn.modules.batchnorm.BatchNorm2d'>
layer2.0.downsample --> <class 'torch.nn.modules.container.Sequential'>
layer2.0.downsample.0 --> <class 'torch.nn.modules.conv.Conv2d'>
layer2.0.downsample.1 --> <class 'torch.nn.modules.batchnorm.BatchNorm2d'>
layer2.1        --> <class 'torchvision.models.resnet.BasicBlock'>
layer2.1.conv1  --> <class 'torch.nn.modules.conv.Conv2d'>
layer2.1.bn1    --> <class 'torch.nn.modules.batchnorm.BatchNorm2d'>
layer2.1.relu   --> <class 'torch.nn.modules.activation.ReLU'>
layer2.1.conv2  --> <class 'torch.nn.modules.conv.Conv2d'>
layer2.1.bn2    --> <class 'torch.nn.modules.batchnorm.BatchNorm2d'>
layer3          --> <class 'torch.nn.modules.container.Sequential'>
layer3.0        --> <class 'torchvision.models.resnet.BasicBlock'>
layer3.0.conv1  --> <class 'torch.nn.modules.conv.Conv2d'>
layer3.0.bn1    --> <class 'torch.nn.modules.batchnorm.BatchNorm2d'>
layer3.0.relu   --> <class 'torch.nn.modules.activation.ReLU'>
layer3.0.conv2  --> <class 'torch.nn.modules.conv.Conv2d'>
layer3.0.bn2    --> <class 'torch.nn.modules.batchnorm.BatchNorm2d'>
layer3.0.downsample --> <class 'torch.nn.modules.container.Sequential'>
layer3.0.downsample.0 --> <class 'torch.nn.modules.conv.Conv2d'>
layer3.0.downsample.1 --> <class 'torch.nn.modules.batchnorm.BatchNorm2d'>
layer3.1        --> <class 'torchvision.models.resnet.BasicBlock'>
layer3.1.conv1  --> <class 'torch.nn.modules.conv.Conv2d'>
layer3.1.bn1    --> <class 'torch.nn.modules.batchnorm.BatchNorm2d'>
layer3.1.relu   --> <class 'torch.nn.modules.activation.ReLU'>
layer3.1.conv2  --> <class 'torch.nn.modules.conv.Conv2d'>
layer3.1.bn2    --> <class 'torch.nn.modules.batchnorm.BatchNorm2d'>
layer4          --> <class 'torch.nn.modules.container.Sequential'>
layer4.0        --> <class 'torchvision.models.resnet.BasicBlock'>
layer4.0.conv1  --> <class 'torch.nn.modules.conv.Conv2d'>
layer4.0.bn1    --> <class 'torch.nn.modules.batchnorm.BatchNorm2d'>
layer4.0.relu   --> <class 'torch.nn.modules.activation.ReLU'>
layer4.0.conv2  --> <class 'torch.nn.modules.conv.Conv2d'>
layer4.0.bn2    --> <class 'torch.nn.modules.batchnorm.BatchNorm2d'>
layer4.0.downsample --> <class 'torch.nn.modules.container.Sequential'>
layer4.0.downsample.0 --> <class 'torch.nn.modules.conv.Conv2d'>
layer4.0.downsample.1 --> <class 'torch.nn.modules.batchnorm.BatchNorm2d'>
layer4.1        --> <class 'torchvision.models.resnet.BasicBlock'>
layer4.1.conv1  --> <class 'torch.nn.modules.conv.Conv2d'>
layer4.1.bn1    --> <class 'torch.nn.modules.batchnorm.BatchNorm2d'>
layer4.1.relu   --> <class 'torch.nn.modules.activation.ReLU'>
layer4.1.conv2  --> <class 'torch.nn.modules.conv.Conv2d'>
layer4.1.bn2    --> <class 'torch.nn.modules.batchnorm.BatchNorm2d'>
avgpool         --> <class 'torch.nn.modules.pooling.AdaptiveAvgPool2d'>
fc              --> <class 'torch.nn.modules.linear.Linear'>
3. named_parameters:
named_parameters返回一个生成器,它包含模型中所有参数的名称和参数值对。- 它递归地遍历模型,返回所有可训练参数的名称和参数张量。
- 这个方法用于获取和检查模型中的参数,例如在打印模型参数、保存模型或加载模型时使用。
示例:
from torchvision.models import resnet18model = resnet18()
for name, param in model.named_parame
conv1.weight              --> torch.Size([64, 3, 7, 7])
bn1.weight                --> torch.Size([64])
bn1.bias                  --> torch.Size([64])
layer1.0.conv1.weight     --> torch.Size([64, 64, 3, 3])
layer1.0.bn1.weight       --> torch.Size([64])
layer1.0.bn1.bias         --> torch.Size([64])
layer1.0.conv2.weight     --> torch.Size([64, 64, 3, 3])
layer1.0.bn2.weight       --> torch.Size([64])
layer1.0.bn2.bias         --> torch.Size([64])
layer1.1.conv1.weight     --> torch.Size([64, 64, 3, 3])
layer1.1.bn1.weight       --> torch.Size([64])
layer1.1.bn1.bias         --> torch.Size([64])
layer1.1.conv2.weight     --> torch.Size([64, 64, 3, 3])
layer1.1.bn2.weight       --> torch.Size([64])
layer1.1.bn2.bias         --> torch.Size([64])
layer2.0.conv1.weight     --> torch.Size([128, 64, 3, 3])
layer2.0.bn1.weight       --> torch.Size([128])
layer2.0.bn1.bias         --> torch.Size([128])
layer2.0.conv2.weight     --> torch.Size([128, 128, 3, 3])
layer2.0.bn2.weight       --> torch.Size([128])
layer2.0.bn2.bias         --> torch.Size([128])
layer2.0.downsample.0.weight --> torch.Size([128, 64, 1, 1])
layer2.0.downsample.1.weight --> torch.Size([128])
layer2.0.downsample.1.bias --> torch.Size([128])
layer2.1.conv1.weight     --> torch.Size([128, 128, 3, 3])
layer2.1.bn1.weight       --> torch.Size([128])
layer2.1.bn1.bias         --> torch.Size([128])
layer2.1.conv2.weight     --> torch.Size([128, 128, 3, 3])
layer2.1.bn2.weight       --> torch.Size([128])
layer2.1.bn2.bias         --> torch.Size([128])
layer3.0.conv1.weight     --> torch.Size([256, 128, 3, 3])
layer3.0.bn1.weight       --> torch.Size([256])
layer3.0.bn1.bias         --> torch.Size([256])
layer3.0.conv2.weight     --> torch.Size([256, 256, 3, 3])
layer3.0.bn2.weight       --> torch.Size([256])
layer3.0.bn2.bias         --> torch.Size([256])
layer3.0.downsample.0.weight --> torch.Size([256, 128, 1, 1])
layer3.0.downsample.1.weight --> torch.Size([256])
layer3.0.downsample.1.bias --> torch.Size([256])
layer3.1.conv1.weight     --> torch.Size([256, 256, 3, 3])
layer3.1.bn1.weight       --> torch.Size([256])
layer3.1.bn1.bias         --> torch.Size([256])
layer3.1.conv2.weight     --> torch.Size([256, 256, 3, 3])
layer3.1.bn2.weight       --> torch.Size([256])
layer3.1.bn2.bias         --> torch.Size([256])
layer4.0.conv1.weight     --> torch.Size([512, 256, 3, 3])
layer4.0.bn1.weight       --> torch.Size([512])
layer4.0.bn1.bias         --> torch.Size([512])
layer4.0.conv2.weight     --> torch.Size([512, 512, 3, 3])
layer4.0.bn2.weight       --> torch.Size([512])
layer4.0.bn2.bias         --> torch.Size([512])
layer4.0.downsample.0.weight --> torch.Size([512, 256, 1, 1])
layer4.0.downsample.1.weight --> torch.Size([512])
layer4.0.downsample.1.bias --> torch.Size([512])
layer4.1.conv1.weight     --> torch.Size([512, 512, 3, 3])
layer4.1.bn1.weight       --> torch.Size([512])
layer4.1.bn1.bias         --> torch.Size([512])
layer4.1.conv2.weight     --> torch.Size([512, 512, 3, 3])
layer4.1.bn2.weight       --> torch.Size([512])
layer4.1.bn2.bias         --> torch.Size([512])
fc.weight                 --> torch.Size([1000, 512])
fc.bias                   --> torch.Size([1000])
总结来说,named_children 用于获取模型的直接子模块,named_modules 用于获取模型的所有模块(包括嵌套的子模块),而 named_parameters 用于获取模型中的所有参数。这些方法在模型调试、分析和优化时非常有用。
相关文章:

Pytorch的named_children, named_modules和named_children
在 PyTorch 中,named_children、named_modules 和 named_parameters 是用于获取神经网络模型组件和参数的三种不同的方法。下面是它们各自的作用和区别: named_parameters:递归地列出所有参数名称和tensornamed_modules:递归地列…...
3.28总结
1.java学习记录 1.方法的重载 重载换而言之其实就是函数名不变,但是其中的参数需要改变,可以三个方面改变(参数类型,参数顺序,参数个数这三个方面入手,这样可以运用的) 但是:注意…...

C# 命名空间的两种定义哦写法与区别
这两种写法在C#中都是有效的,但是它们代表了不同的语法风格和C#版本特性。 第一种写法: namespace Nebula.PDF; public class PdfDocument {}这是C# 9.0及更高版本中引入的顶级语句(top-level statements)特性。它允许你直接在文…...

Rustdesk客户端编译后固定密码不稳定时好时坏
环境: rustdesk1.19 问题描述: Rustdesk客户端编译后固定密码不稳定时好时坏 解决方案: 出现固定密码不稳定的问题可能有多种原因,下面是一些可能的解决方法: 密码强度:确保所设置的固定密码足够强大…...
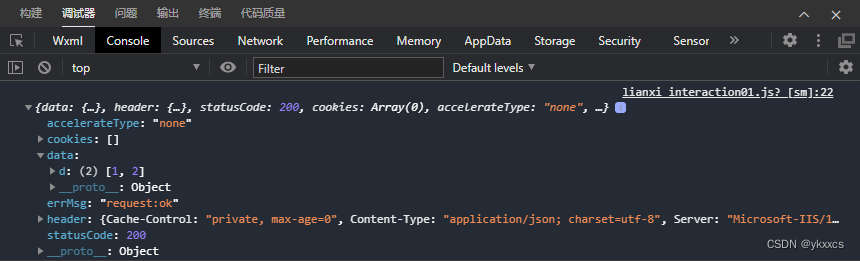
小程序利用WebService跟asp.net交互过程发现的问题并处理
最近在研究一个项目,用到asp.net跟小程序交互,简单的说就是小程序端利用wx.request发起请求。获取asp.net 响应回来的数据。但经常会报错。点击下图的测试按钮 出现如下错误: 百思不得其解,试了若干方法,都不行。 因为…...
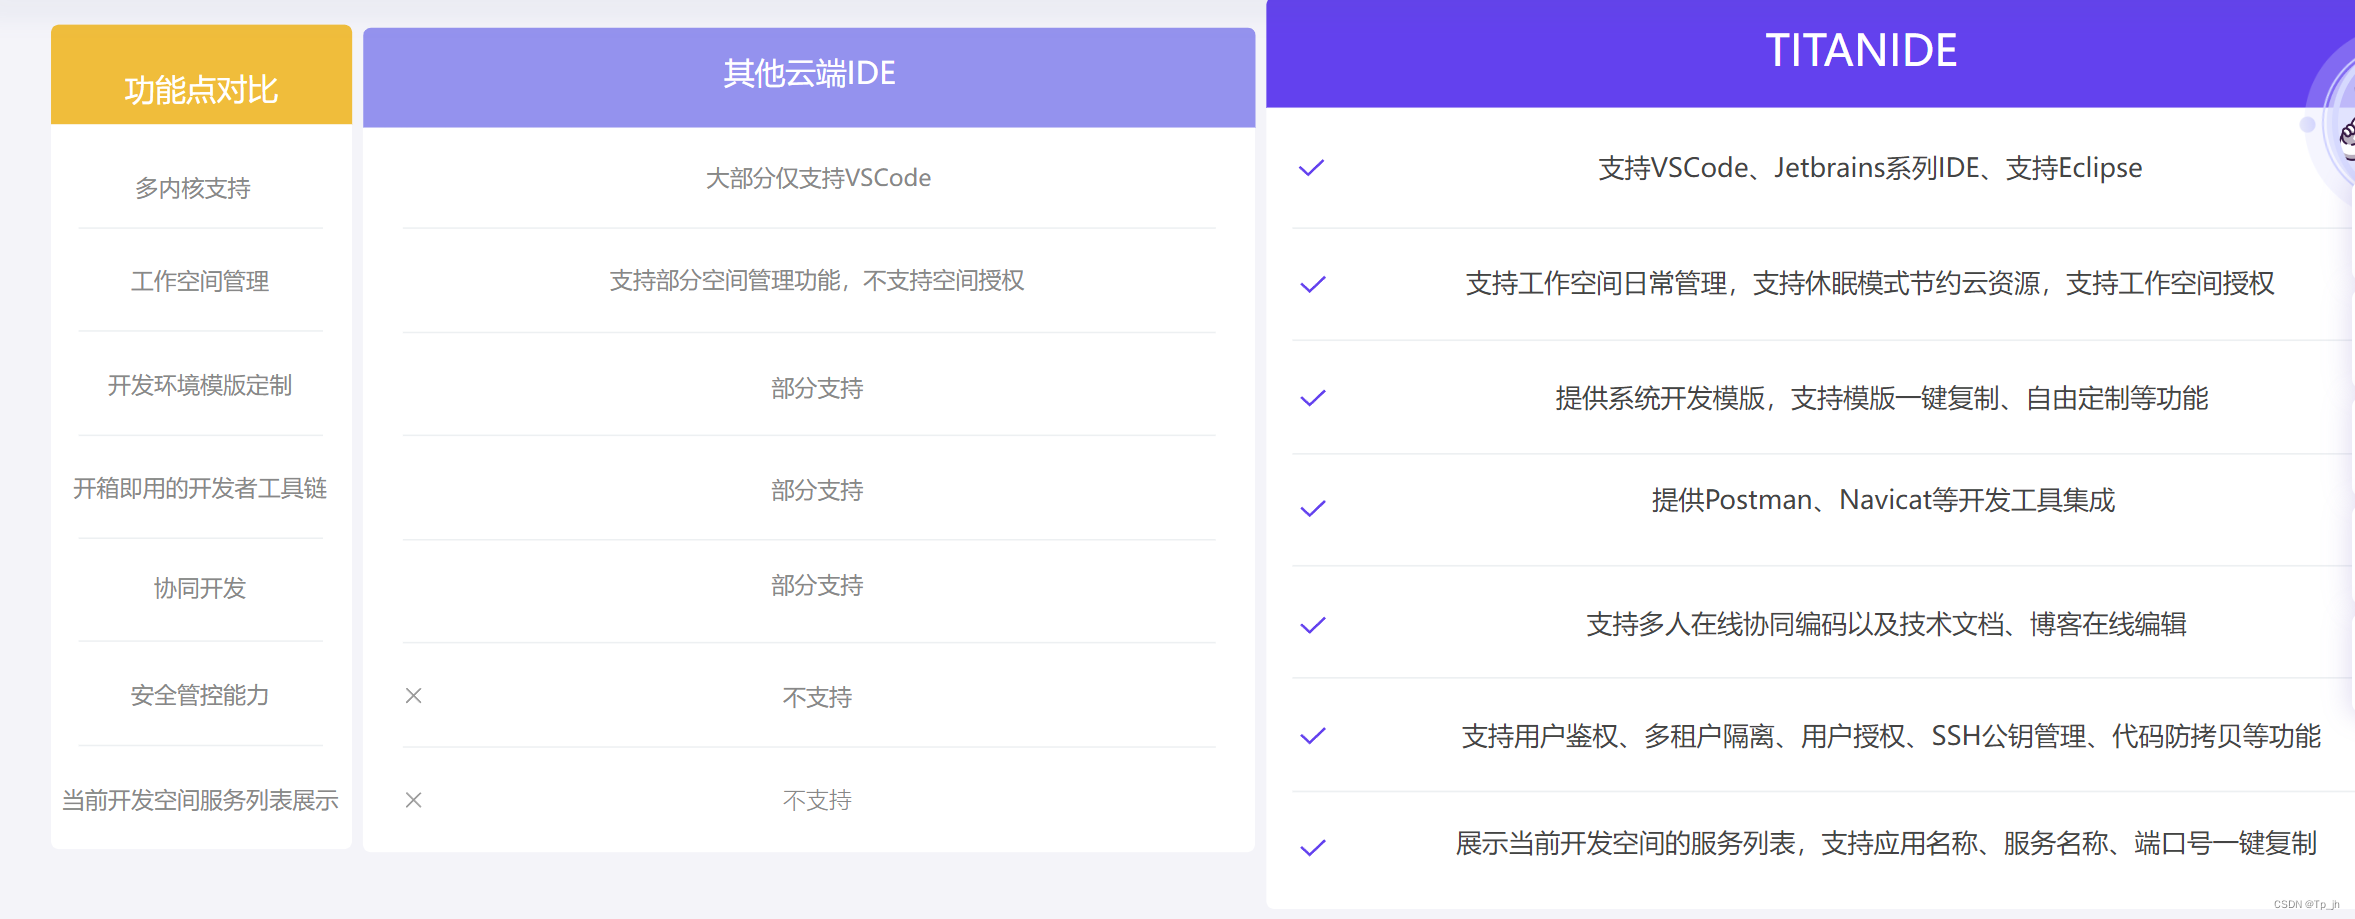
TitanIDE与传统 IDE 比较
与传统IDE的比较 TitanIDE 和传统 IDE 属于不同时代的产物,在手工作坊时代,一切都是那么的自然,开发者习惯 Windows 或 MacOS 原生 IDE。不过,随着时代的变迁,软件行业已经步入云原生时代,TitanIDE 是顺应…...
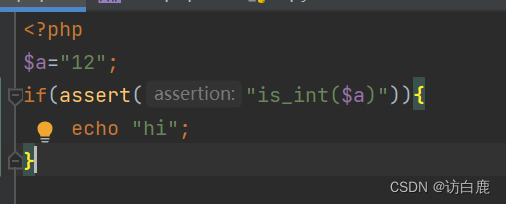
反序列化动态调用 [NPUCTF2020]ReadlezPHP1
在源代码上看到提示 访问一下看看 代码审计一下 <?php #error_reporting(0); class HelloPhp {public $a;public $b;public function __construct(){$this->a "Y-m-d h:i:s";$this->b "date";}public function __destruct(){$a $this->a;…...
Hadoop面试重点
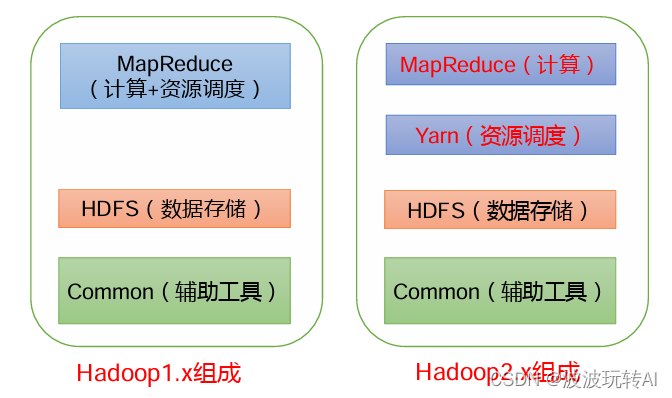
文章目录 1. Hadoop 常用端口号2.Hadoop特点3.Hadoop1.x、2.x、3.x区别 1. Hadoop 常用端口号 hadoop2.xhadoop3.x访问HDFS 端口500709870访问 MR 执行情况端口80888088历史服务器1988819888客户端访问集群端口90008020 2.Hadoop特点 高可靠:Hadoop底层维护多个数…...

【ONE·基础算法 || 分治·快排并归】
总言 主要内容:编程题举例,理解分治的思想(主要是对快排、并归的应用)。 文章目录 总言1、基本介绍2、颜色分类(medium)2.1、题解 3、快速排序(medium)3.1、题解ÿ…...
注册新用户)
Python 从0开始 一步步基于Django创建项目(11)注册新用户
1、修改C:\D\Python\Python310\study\snap_gram\users路径下的urls.py 添加‘注册新用户’URL。 #注册新用户 path(register/,views.register,nameregister), 2、修改C:\D\Python\Python310\study\snap_gram\users路径下的views.py 编写URL对应的视图函数register。 def r…...

银行监管报送系统介绍(十二):非居民金融账户涉税信息报送
国家税务总局、财政部、中国人民银行、中国银行业监督管理委员会、中国证券监督管理委员会、国家金融监督管理总局2017年5月9日发布、2017年7月1日起施行的《非居民金融账户涉税信息尽职调查管理办法》。 一、《管理办法》出台的背景是什么? 受二十国集团&…...
土壤有机质空间分布数据
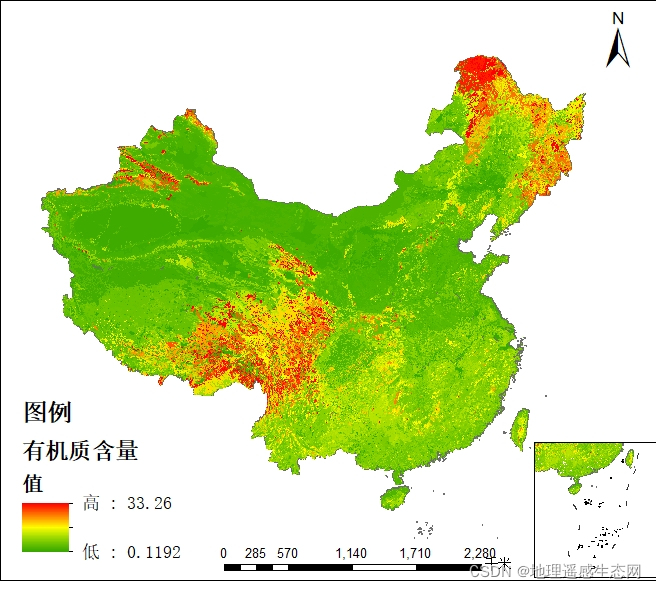
土壤有机质(soil organic matter)是土壤中含碳有机化合物的总称,包括土壤固有的和外部加入的所有动植物残体及其分解产物和合成产物。主要来源于动植物及微生物残体,可分为腐殖质和非腐殖物质。一般占土壤固相总重的10%以下&#…...
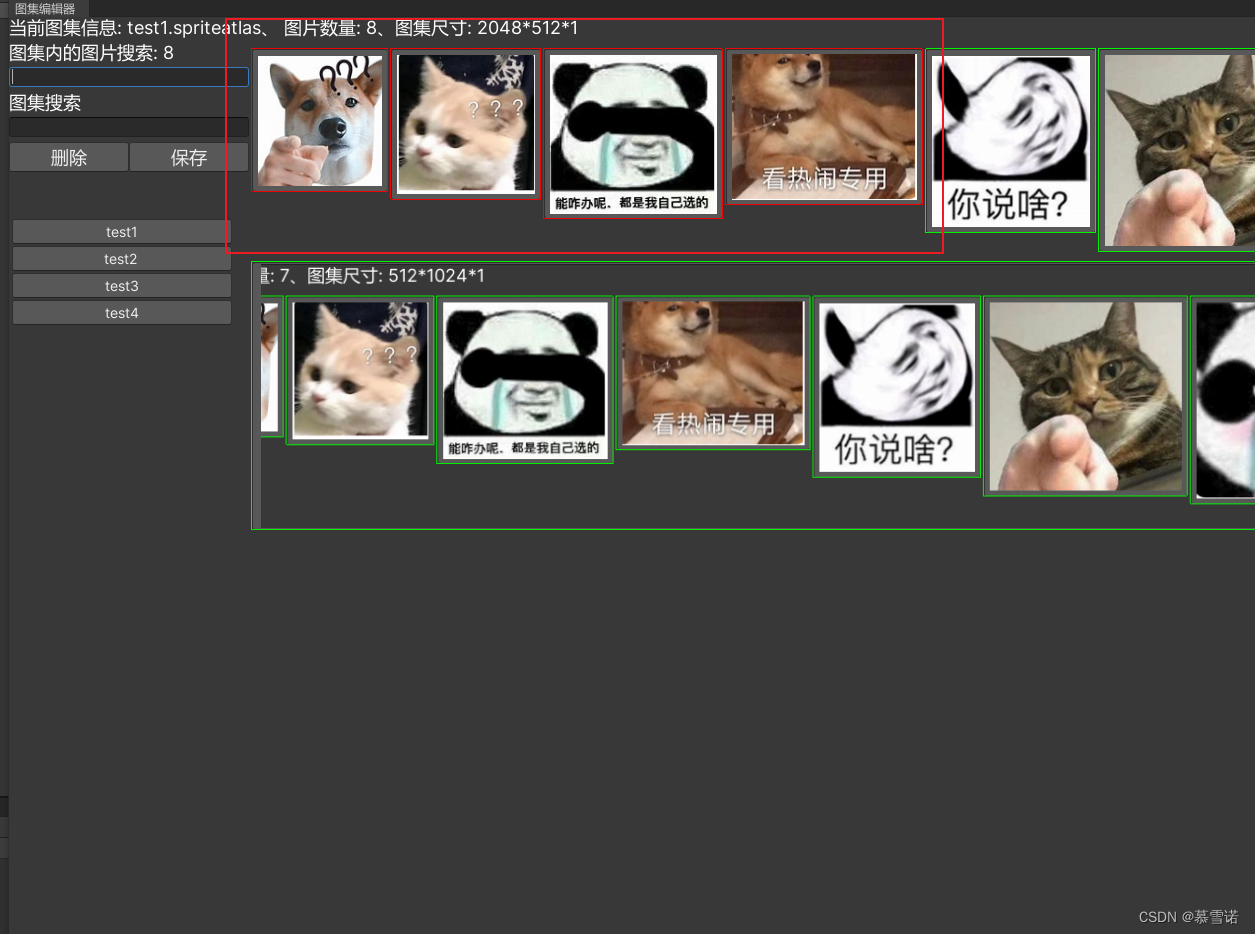
Unity图集编辑器
图集编辑器 欢迎使用图集编辑器新的改变编辑器图片 欢迎使用图集编辑器 Unity图集操作很是费劲 无法批量删除和添加图集中的图片 新的改变 自己写了一个图集编辑器 客: 支持批量删除 左键点击图片代表选中 右键点击图标定位到资产支持批量添加 选中图片拖拽到编…...
)
【JS笔记】JavaScript语法 《基础+重点》 知识内容,快速上手(六)
面向对象OOP 首先,我们要明确,面向对象不是语法,是一个思想,是一种 编程模式面向: 面(脸),向(朝着)面向过程: 脸朝着过程 》 关注着过程的编程模…...
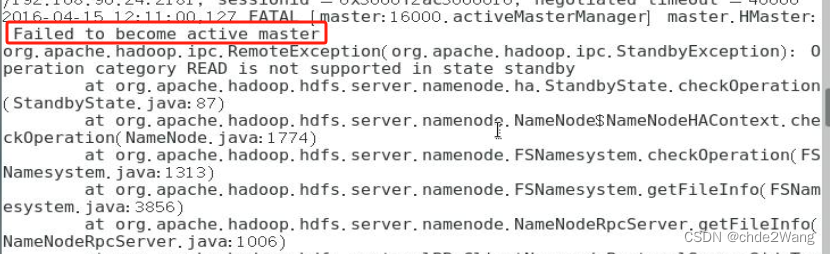
hbase启动错误-local host is“master:XXXX“ destination is:master
博主的安装前提: zookeeper安装完成,且启动成功 hdfs高可用安装,yarn高可用安装,且启动成功 报错原因:端口配置不对 解决方案: 输入:hdfs getconf -confKey fs.default.name 然后把相应的…...
基于SpringBoot的“招生管理系统”的设计与实现(源码+数据库+文档+PPT)
基于SpringBoot的“招生管理系统”的设计与实现(源码数据库文档PPT) 开发语言:Java 数据库:MySQL 技术:SpringBoot 工具:IDEA/Ecilpse、Navicat、Maven 系统展示 系统功能结构图 系统首页界面图 学生注册界面图 …...

Chinese-LLaMA-Alpaca-2模型量化部署测试
简介 Chinese-LLaMA-Alpaca-2基于Meta发布的可商用大模型Llama-2开发, 是中文LLaMA&Alpaca大模型的第二期项目. 量化 模型的下载还是应用脚本 bash hfd.sh hfl/chinese-alpaca-2-13b --tool aria2c -x 8应用llama.cpp进行量化, 主要参考该教程. 其中比较折腾的是与BLAS…...

flutter 打包成web应用后怎么通过url跳转页面
在 Flutter 中,如果你想要在打包成 Web 应用后通过 URL 跳转页面,你可以利用 Flutter 提供的路由导航系统和 URL 策略。以下是具体步骤: 1. 配置路由 在 Flutter 应用中定义路由,一种简单的方式是使用 MaterialApp 构造器的 rou…...
【设计模式】中介者模式的应用
文章目录 1.概述2.中介者模式的适用场景2.1.用户界面事件2.2.分布式架构多模块通信 3.总结 1.概述 中介者模式(Mediator Pattern)是一种行为型设计模式,它用于解决对象间复杂、过度耦合的问题。当多个对象(一般是两个以上的对象&…...

【微服务篇】分布式事务方案以及原理详解
分布式事务是指事务参与者、资源服务器、事务管理器分布在不同的分布式系统的多个节点之上的事务。在微服务架构、大型分布式系统和云计算等环境中,由于系统间调用和资源访问的复杂性,分布式事务变得尤为重要。 应用场景 跨系统交易:当交易…...

基于苏格拉底式提问的LLM深度推理:从概念澄清到工程实践
1. 项目概述:当AI学会“苏格拉底式提问”最近在探索如何让大语言模型(LLM)的推理能力更上一层楼时,我遇到了一个非常有意思的开源项目:jumasheff/socratic-rules。这个名字本身就充满了哲学与技术碰撞的火花——“苏格…...

对话记忆与上下文管理:Spring AI 实现多轮会话与持久化存储
系列导读 你现在看到的是《Spring AI 企业级集成与场景实践:从零搭建智能应用》的第 3/10 篇,当前这篇会重点解决:教会读者如何在 Spring AI 中优雅地管理对话上下文,避免重复输入和 Token 浪费。 上一篇回顾:第 2 篇《多模型适配实战:在 Spring AI 中统一管理 OpenAI、…...

Java微服务全解:快速上手SpringCloud+SpringCloudAlibaba!
SpringCloud想必每一位Java程序员都不会陌生,很多人一度把他称之为“微服务全家桶”,它通过简单的注解,就能快速地架构微服务,这也是SpringCloud的最大优势。但是最近有去面试过的朋友就会发现,现在面试你要是没有Spri…...

picdone
链接:https://pan.quark.cn/s/849b9ab09851支持对图片进行基础的裁剪、格式转换,背景去除、尺寸调整、体积压缩、添加水印、证件照处理的功能,处理好后可直接下载PNG到本地。...

30.【Verilog】Verilog 除法器设计
第一步:分析与整理Verilog 除法器设计 1. 除法器原理(定点)与十进制竖式除法类似,以 27 5 为例(二进制): 取被除数高位(与除数同宽,如 3bit),与除…...

好用的四川企业用工风险咨询生产厂家
行业痛点分析在四川企业用工风险咨询领域,企业面临诸多技术挑战。首先,许多企业虽意识到用工风险的存在,但却不清楚风险具体所在。测试显示,超过七成企业未系统排查过自身用工风险,社保未足额缴纳、合同存在漏洞、规章…...

DuckyClaw工具链解析:智能家居硬件安全与固件提取实战
1. 项目概述:从“DuckyClaw”看智能家居的硬件安全研究最近在翻看一些开源硬件项目时,一个名为“DuckyClaw”的仓库引起了我的注意。这个项目托管在涂鸦智能(Tuya)的官方GitHub组织下,名字本身就很有意思——“鸭子爪”…...
)
学术写作AI工具排雷指南:5款主流产品深度评测(涵盖毕业与发刊需求)
每逢毕业季,无论是图书馆还是自习室,总能看到为论文熬夜奋战的身影。随着人工智能的发展,使用AI工具辅助提升科研效率已成为许多本硕博学生的常规操作。然而,不少人却陷入了一个误区:以为随便找个对话型AI就能搞定一切…...

企业真正缺的不是模型,而是“AI 协作系统”
过去两年,大模型的发展速度远远超出了很多人的预期。 模型越来越强,推理成本越来越低,开源生态也越来越成熟。 很多企业因此开始接入 AI,希望通过大模型提升效率。 但真正进入业务阶段后,一个问题开始越来越明显&am…...

解读民法典基本规定第十条
民法典: 第一编 总则,第一章 基本规定 第十条 处理民事纠纷,应当依照法律;法律没有规定的,可以适用习惯,但是不得违背公序良俗。 一句话核心 先按国法判,国法没写明白,就按当地老规矩、民间习俗…...