WPF+Mvvm项目入门完整教程-仓储管理系统(二)
目录
- 一、搭建一个主界面框架
- 二、实现步骤
- 1.主界面区域划分
- 2.主界面区域实现
一、搭建一个主界面框架
主要实现主界面的框架样式和基础功能。这里特别说明一下,由于MvvmLight 已经过时不在维护,本项目决定将MvvmLight框架变更为 CommunityToolkit.Mvvm 框架,使用方法和 MvvmLight 一样,具体配置大家可以参考像 MvvmLight 一样使用 CommunityToolkit.Mvvm 工具包 这篇文章。本节实现效果如下所示:

二、实现步骤
1.主界面区域划分
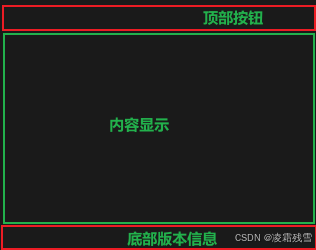
这里我们分析一下,主界面一共分成上中下三个区域,最上面的为系统功能按钮,中间区域显示内容信息,底部显示系统版本版权信息等。分割效果图如下:
2.主界面区域实现
MainWindow.xaml 文件完整代码如下:
<Window x:Class="CommonProject_DeskTop.MainWindow"xmlns="http://schemas.microsoft.com/winfx/2006/xaml/presentation"xmlns:x="http://schemas.microsoft.com/winfx/2006/xaml"xmlns:d="http://schemas.microsoft.com/expression/blend/2008"xmlns:mc="http://schemas.openxmlformats.org/markup-compatibility/2006"xmlns:local="clr-namespace:CommonProject_DeskTop"xmlns:behavior="http://schemas.microsoft.com/xaml/behaviors"xmlns:viewmodel="clr-namespace:CommonProject_DeskTop.ViewModel" mc:Ignorable="d" Title="通用基础案例"DataContext="{Binding Source={StaticResource Locator},Path=Main}" MinWidth="1200" MinHeight="700"ResizeMode="CanResize" Background="#1F1F1F" AllowsTransparency="True" WindowStyle="None" WindowStartupLocation="CenterScreen"><Window.Resources><ResourceDictionary><ResourceDictionary.MergedDictionaries><ResourceDictionary Source="/Assets/Styles/SystemButton.xaml"/></ResourceDictionary.MergedDictionaries></ResourceDictionary></Window.Resources><Grid x:Name="MainContent" ClipToBounds="True" Background="Transparent"><Grid.RowDefinitions><RowDefinition Height="40"/><RowDefinition Height="*"/><RowDefinition Height="30"/></Grid.RowDefinitions><!--顶部系统菜单按钮--><Grid Background="#1F2336" MouseDown="DragMoveWindow"><!--绘制多边形形状作为标题背景底色--><Polygon Points="0 0,280,0,220 40 20 40 0 40" StrokeThickness="0" Stroke="White" HorizontalAlignment="Left"><Polygon.Fill><SolidColorBrush Color="Gray"/></Polygon.Fill></Polygon><TextBlock Text="仓储管理系统" TextAlignment="Left" VerticalAlignment="Center" FontSize="20" Foreground="Gold" Margin="35 0 0 0"/><!--系统按钮--><StackPanel HorizontalAlignment="Right" Orientation="Horizontal" Margin="0 0 10 0" VerticalAlignment="Center" ><Button Content="" ToolTip="登录" Style="{StaticResource SystemButtonStyle}" Command="{Binding ButtonClickCmd}" CommandParameter="{Binding RelativeSource={RelativeSource Mode=Self},Path=ToolTip}"/><Button Content="" ToolTip="最小化" Style="{StaticResource SystemButtonStyle}" Command="{Binding ButtonClickCmd}" CommandParameter="{Binding RelativeSource={RelativeSource Mode=Self},Path=ToolTip}"/><Button Content="" ToolTip="最大化" Style="{StaticResource SystemButtonStyle}" Command="{Binding ButtonClickCmd}" CommandParameter="{Binding RelativeSource={RelativeSource Mode=Self},Path=ToolTip}"/><Button Content="" ToolTip="关闭" Style="{StaticResource SystemButtonStyle}" Command="{Binding ButtonClickCmd}" CommandParameter="{Binding RelativeSource={RelativeSource Mode=Self},Path=ToolTip}"/></StackPanel></Grid><Grid Grid.Row="1"><Grid><Grid.ColumnDefinitions><ColumnDefinition Width="130"/><ColumnDefinition Width="*"/></Grid.ColumnDefinitions><Rectangle Fill="#111111"/><ListBox Margin="0 5 0 0" Background="Transparent" Foreground="White" BorderThickness="0" FontSize="16" Name="listMenu"><behavior:Interaction.Triggers><behavior:EventTrigger EventName="SelectionChanged"><behavior:InvokeCommandAction Command="{Binding RelativeSource={RelativeSource AncestorType=ListBox}, Path=DataContext.MenuClickCmd}" CommandParameter="{Binding ElementName=listMenu,Path=SelectedItem}"/></behavior:EventTrigger></behavior:Interaction.Triggers><ListBox.ItemContainerStyle><Style TargetType="ListBoxItem"><Setter Property="Template"><Setter.Value><ControlTemplate TargetType="ListBoxItem"><StackPanel Height="35" Orientation="Horizontal" Background="Transparent" Name="container" Cursor="Hand"><Rectangle Fill="DarkRed" VerticalAlignment="Stretch" Width="5" Visibility="Hidden" Name="leftSlideRectangle"/><ContentPresenter VerticalAlignment="Center" Margin="15 0 0 0"/></StackPanel><ControlTemplate.Triggers><Trigger Property="IsSelected" Value="True"><Setter Property="Visibility" Value="Visible" TargetName="leftSlideRectangle"/><Setter Property="Background" Value="#3a3a3a" TargetName="container"/></Trigger><Trigger Property="IsMouseOver" Value="True"><Setter Property="Visibility" Value="Visible" TargetName="leftSlideRectangle"/><Setter Property="Opacity" Value="0.5" TargetName="leftSlideRectangle"/><Setter Property="Background" Value="#1a1a1a" TargetName="container"/></Trigger></ControlTemplate.Triggers></ControlTemplate></Setter.Value></Setter></Style></ListBox.ItemContainerStyle><ListBoxItem Content="首页"/><ListBoxItem Content="物资管理"/><ListBoxItem Content="仓库设置"/><ListBoxItem Content="库位管理"/><ListBoxItem Content="客户管理"/><ListBoxItem Content="供应商管理"/><ListBoxItem Content="物资入库"/><ListBoxItem Content="物资出库"/><ListBoxItem Content="入库管理"/><ListBoxItem Content="出库管理"/></ListBox></Grid></Grid><!--底部版本信息--><Grid Grid.Row="2" Background="#424242"><Grid.ColumnDefinitions><ColumnDefinition/><ColumnDefinition/><ColumnDefinition/><ColumnDefinition Width="*"/></Grid.ColumnDefinitions><StatusBarItem Grid.Column="0" FontSize="10" Foreground="#F5F5F5" HorizontalAlignment="Center" Content="版权@2024"/><StatusBarItem Grid.Column="1" FontSize="10" Foreground="#F5F5F5" HorizontalAlignment="Center" Content="XXXXXXXXX有限公司"/><StatusBarItem Grid.Column="3" HorizontalAlignment="Center" ><TextBlock Text="{Binding DateTimeStr}" FontSize="10" Foreground="#EBEBEB"/></StatusBarItem></Grid></Grid>
</Window>
2、MainWindow.xaml.cs 后端代码如下:
using CommonProject_DeskTop.ViewModel;
using CommunityToolkit.Mvvm.Messaging;
using Microsoft.Extensions.DependencyInjection;
using System;
using System.Collections.Generic;
using System.Diagnostics;
using System.Linq;
using System.Text;
using System.Threading.Tasks;
using System.Windows;
using System.Windows.Controls;
using System.Windows.Data;
using System.Windows.Documents;
using System.Windows.Input;
using System.Windows.Media;
using System.Windows.Media.Imaging;
using System.Windows.Navigation;
using System.Windows.Shapes;namespace CommonProject_DeskTop
{/// <summary>/// MainWindow.xaml 的交互逻辑/// </summary>public partial class MainWindow : Window{public MainWindow(){InitializeComponent();//消息注册RegisterMessage();}private void RegisterMessage(){注册一个系统菜单功能消息WeakReferenceMessenger.Default.Register<string>(this, HandleMessage);}private void HandleMessage(object recipient, string message){switch (message){case "MainWindowClose":AppClose();break;case "MainWindowMax":MainWindowMax();break;case "MainWindowMin":MainWindowMin();break;}}/// <summary>/// 窗体最小化/// </summary>private void MainWindowMin(){this.WindowState = WindowState.Minimized;}/// <summary>/// 窗体最大化/// </summary>private void MainWindowMax(){if (this.WindowState == WindowState.Maximized){this.WindowState = WindowState.Normal;}else{this.WindowState = WindowState.Maximized;}}/// <summary>/// 退出系统/// </summary>private void AppClose(){//DataCenter.Instance.Dispose();string appName = AppDomain.CurrentDomain.SetupInformation.ApplicationName.Replace(".exe", "");foreach (var item in Process.GetProcessesByName(appName)){item.Kill();}}/// <summary>/// 窗体拖拽方法/// </summary>/// <param name="sender"></param>/// <param name="e"></param>private void DragMoveWindow(object sender, MouseButtonEventArgs e){this.WindowState = WindowState.Normal;if (e.LeftButton == MouseButtonState.Pressed && this.WindowState != WindowState.Maximized){this.DragMove();}}}
}
3、MainViewModel.cs 文件代码如下:
using CommunityToolkit.Mvvm.ComponentModel;
using CommunityToolkit.Mvvm.Input;
using CommunityToolkit.Mvvm.Messaging;
using System;
using System.Collections.Generic;
using System.Linq;
using System.Text;
using System.Threading.Tasks;
using System.Windows;
using System.Windows.Controls;
using System.Windows.Threading;namespace CommonProject_DeskTop.ViewModel
{public class MainViewModel : ObservableObject{#region 属性[ObservableProperty]private string dateTimeStr;public string DateTimeStr{get { return dateTimeStr; }set { SetProperty(ref dateTimeStr, value); }}#endregion#region 命令public RelayCommand<string> ButtonClickCmd { get; set; }public RelayCommand<object>MenuClickCmd { get; set; }#endregion#region 方法#region 系统按钮方法private void FunMenu(string p){switch (p){case "最小化":WindowMin();break;case "最大化":WindowMax();break;case "关闭":AppClose();break;}}private void AppClose(){WeakReferenceMessenger.Default.Send("MainWindowClose");}private void WindowMax(){WeakReferenceMessenger.Default.Send("MainWindowMax");}private void WindowMin(){WeakReferenceMessenger.Default.Send("MainWindowMin");}#endregion#region 菜单按钮方法private void MenuChange(object obj){var menu =obj as ListBoxItem;switch (menu.Content.ToString()){case "首页":MessageBox.Show(menu.Content.ToString(), "");break;case "物资管理":MessageBox.Show(menu.Content.ToString(), "");break;case "仓库设置":MessageBox.Show(menu.Content.ToString(),"");break;case "库位管理":MessageBox.Show(menu.Content.ToString(), "");break;case "客户管理":MessageBox.Show(menu.Content.ToString(), "");break;case "供应商管理":MessageBox.Show(menu.Content.ToString(), "");break;case "物资入库":MessageBox.Show(menu.Content.ToString(), "");break;case "物资出库":MessageBox.Show(menu.Content.ToString(), "");break;case "入库管理":MessageBox.Show(menu.Content.ToString(), "");break;case "出库管理":MessageBox.Show(menu.Content.ToString(), "");break;}}#endregionprivate void CreateTimer(){#region 系统时间定时器获取时间数据DispatcherTimer cpuTimer = new DispatcherTimer{Interval = new TimeSpan(0, 0, 0, 1, 0)};cpuTimer.Tick += DispatcherTimer_Tick;cpuTimer.Start();#endregion}private void DispatcherTimer_Tick(object sender, EventArgs e){DateTimeStr = DateTime.Now.ToString("yyyy年MM月dd日 HH:mm:ss");}#endregionpublic MainViewModel(){ButtonClickCmd = new RelayCommand<string>(FunMenu);MenuClickCmd = new RelayCommand<object>(MenuChange);//创建定时器CreateTimer();}}
}
4、SystemButton.xaml 样式文件代码如下:
<ResourceDictionary xmlns="http://schemas.microsoft.com/winfx/2006/xaml/presentation"xmlns:x="http://schemas.microsoft.com/winfx/2006/xaml"><Style TargetType="Button" x:Key="SystemButtonStyle"><Setter Property="FontSize" Value="14"/><Setter Property="Height" Value="36"/><Setter Property="Width" Value="50"/><Setter Property="Margin" Value="3 0 3 0"/><Setter Property="Foreground" Value="Gainsboro"/><Setter Property="Tag" Value="#3F3F41"/><Setter Property="Template"><Setter.Value><ControlTemplate TargetType="Button"><Grid Background="Transparent" Height="{TemplateBinding Height}" Width="{TemplateBinding Width}" Name="back"><Border Name="hover" Background="{TemplateBinding Background}" Visibility="Collapsed"/><TextBlock Text="{TemplateBinding Content}" FontFamily="{DynamicResource iconfont}" VerticalAlignment="Center" HorizontalAlignment="Center" Name="txt"/></Grid><ControlTemplate.Triggers><Trigger Property="IsMouseOver" Value="True"><Setter Property="Visibility" Value="Visible" TargetName="hover"/></Trigger></ControlTemplate.Triggers></ControlTemplate></Setter.Value></Setter><Style.Triggers><Trigger Property="IsMouseOver" Value="True"><Setter Property="Background" Value="{Binding Tag,RelativeSource={RelativeSource Mode=Self}}"/></Trigger></Style.Triggers></Style>
</ResourceDictionary>
相关文章:
WPF+Mvvm项目入门完整教程-仓储管理系统(二)
目录 一、搭建一个主界面框架二、实现步骤1.主界面区域划分2.主界面区域实现 一、搭建一个主界面框架 主要实现主界面的框架样式和基础功能。这里特别说明一下,由于MvvmLight 已经过时不在维护,本项目决定将MvvmLight框架变更为 CommunityToolkit.Mvvm …...

SkyWalking入门搭建【apache-skywalking-apm-10.0.0】
Java学习文档 视频讲解 文章目录 一、准备二、服务启动2-1、Nacos启动2-2、SkyWalking服务端启动2-3、SkyWalking控制台启动2-4、自定义服务接入 SkyWalking 三、常用监控3-1、服务请求通过率3-2、服务请求拓扑图3-3、链路 四、日志配置五、性能剖析六、数据持久化6-1、MySQL持…...

exo项目目录架构
目录 .yml 文件是 YAML(YAML Aint Markup Language) exo项目目录架构 文件作用 topology、viz:项目拓扑结构可视化相关的代码或工具。 项目目录架构 文件作用 .yml 文件是 YAML(YAML Aint Markup Language) 文件的扩展名,YAML 是一种人类可读的数据序列化标准,通…...

mysql中where与on区别
WHERE子句 作用范围:WHERE子句主要用于过滤FROM子句返回的结果集。它可以在SELECT、UPDATE、DELETE语句中使用,以限制哪些行被包含在最终的查询结果中,或者哪些行被更新或删除。应用场景:当需要基于某些条件过滤结果集时…...
)
filebeat把日志文件上传到Es中配置(ES7版本)
默认的filebeat配置会把所有的索引都放到一个文件中,通过摸索发现可以自定义索引的名字、模板、生命周期 (重点注意)该配置文件只适应于ES版本是7,不适应于8的版本,两个版本的配置文件差异很大 /app/logs/info.log日…...

Vue Router基础
Router 的作用是在单页应用(SPA)中将浏览器的URL和用户看到的内容绑定起来。当用户在浏览不同页面时,URL会随之更新,但页面不需要从服务器重新加载。 1 Router 基础 RouterView RouterView 用于渲染当前URL路径对应的路由组件。…...

Apache压测工具ab(Apache Bench)工具的下载安装和使用示例
场景 Jmeter进行http接口压力测试: Jmeter进行http接口压力测试_接口压测两万量-CSDN博客 上面讲压测工具Jmeter的使用,下面介绍另外一个ab(Apache Bench)压测工具的使用。 apache bench apache bench是apache自带的压力测试工具。 ab不仅可以对ap…...

IPIDEA与Python爬虫:联手解锁全球电商数据宝库
IPIDEA与Python爬虫:联手解锁全球电商数据宝库 如何运用代理IP在电商领域进行高效数据采集。特别是在遭遇访问限制的情况下,如何优雅地绕过那些恼人的访问管理机制。当然,在我们的探险之旅中,开源神器PlugLink也将适时出场&#…...

Fine-BI学习笔记
官方学习文档:快速入门指南- FineBI帮助文档 FineBI帮助文档 (fanruan.com) 1.零基础入门 1.1 功能简介 完成四个流程:新建分析主题、添加数据、分析数据、分享协作。 示例数据获取:5分钟上手FineBI - FineBI帮助文档 (fanruan.com) 1.2 …...

AI 辅助编程 Coding AI 辅助研发组织的技术蓝图
简简单单 Online zuozuo:欢迎商业合作 简简单单 Online zuozuo 简简单单 Online zuozuo 简简单单 Online zuozuo 简简单单 Online zuozuo :本心、输入输出、结果 简简单单 Online zuozuo :联系我们:VX :tja6288 / EMAIL: 347969164@qq.com 文章目录 AI 辅助编程 Coding A…...

VScode 批量操作
VScode 批量操作 批量修改 按住 alt/option 键, 选择需要批量操作的位置 如果是多行,则按住 altshift 键 可以直接操作 但是有时候比如变量命名,可能需要递增操作的命名 需要下载插件 Increment Selection 按照1的方法多选光标之后&am…...

【Linux】管道通信和 system V 通信
文章目录 一、进程通信原理(让不同进程看到同一份资源)二、管道通信2.1 管道原理及其特点2.1 匿名管道和命名管道 三、共享内存通信3.1 共享内存原理3.2 创建和关联共享内存3.3 去关联、ipc 指令和删除共享内存 四、消息队列和信号量(了解&am…...

Python | Leetcode Python题解之第279题完全平方数
题目: 题解: class Solution { public:// 判断是否为完全平方数bool isPerfectSquare(int x) {int y sqrt(x);return y * y x;}// 判断是否能表示为 4^k*(8m7)bool checkAnswer4(int x) {while (x % 4 0) {x / 4;}return x % 8 7;}int numSquares(i…...

mysql定时备份
为什么写这篇文章 最近项目里面需要定时备份mysql的数据,网上找了下,找到了一些比较好的解决方案。但是发现有几个地方与自己不匹配,我期望有如下 备份过程不能锁表,网上很多都是会锁表备份定时任务无法执行,但是手动…...

数据结构:逻辑结构与物理结构
逻辑结构与物理结构 逻辑结构1. 集合结构2. 线性结构3. 树形结构4. 图形结构 物理结构1. 顺序存储结构2. 链式存储结构 示例逻辑结构的示例:线性表物理结构的示例 结论 逻辑结构 逻辑结构描述了数据元素之间的逻辑关系,它是数据结构的抽象描述ÿ…...

pycharm报错:No module named pip/No module named pytest
1、问题概述? 今天在执行一个python脚本的时候,控制台提示:No module named pytest,就是没有pytest模块,于是我使用pip命令进行安装,命令如下; pip install pytest 结果又提示No module named pip,说我没有pip模块,没办法,再安装pip 2、安装pip-方式1 在pycharm的T…...

Linux:Linux权限
目录 1. Linux权限的概念 2. Linux权限管理 2.1 文件访问者的分类 2.2 文件类型和访问权限 2.2.1 文件类型 2.2.2 基本权限 2.3 文件权限值的表示方法 2.4 文件访问权限的相关设置方法 2.4.1 chmod 2.4.2 chown 2.4.3 chgrp 2.4.4 umask 3. file指令 4. Linux目…...

新版Glide检测生命周期原理
本文章使用的是glide 4.15.1 public class RequestManagerRetriever implements Handler.Callback {rivate final LifecycleRequestManagerRetriever lifecycleRequestManagerRetriever;public RequestManagerRetriever(Nullable RequestManagerFactory factory, GlideExperim…...

Ansible的脚本-----playbook剧本【上】
目录 1.playbook剧本组成 2.playbook剧本实战演练 2.1 实战演练一:给被管理主机安装httpd服务 2.2 实战演练二:定义、引用变量 2.3 实战演练三:指定远程主机sudo切换用户 2.4 实战演练四:when条件判断 2.5 实战演练五&…...

sql注入学习与防护
一、SQL注入分类 SQL注入根据攻击方式的不同,可以分为以下几种类型: 数字型注入字符型注入报错注入布尔盲注时间盲注联合查询注入基于堆叠的查询注入 二、SQL注入流程 发现注入点猜测字段数确定显示字段获取数据库信息获取数据库中的表获取表中的字段获…...
)
别再手动点菜单了!用这招让Cadence Virtuoso Schematic效率翻倍(附Net高亮快捷键配置)
电路设计效率革命:Cadence Virtuoso Schematic高阶快捷键配置指南 在集成电路设计的浩瀚宇宙中,Cadence Virtuoso如同设计师手中的光刻机,每一次精准操作都直接影响最终芯片的性能与可靠性。然而,当面对数百个晶体管组成的复杂模…...

SkillVLA:通过技能复用应对双-臂操纵中的组合多样性
26年3月来自新加坡国立、北京中关村学院、上海创新研究院、上海AI实验室、上海交大和复旦的论文“SkillVLA: Tackling Combinatorial Diversity in Dual-Arm Manipulation via Skill Reuse”。 视觉-语言-动作(VLA)模型近期取得的进展,已充分…...

销售怎么通过各种方法获取电话号码
第一种就是那个用爬虫电话号码,然后再打电话给客户。第二种是在别人的挪车电话看车挪车电话,然后再打电话找客户。第三就是。扫楼一顿顿的扫,第四就是这个那种商店,一个个的去问陌拜地推一个个的问店子要不要贷款,去问…...
:这份内部测试SOP已被3家头部科技公司紧急采购)
DeepSeek-R1补全能力封测倒计时(仅剩72小时开放API灰度权限):这份内部测试SOP已被3家头部科技公司紧急采购
更多请点击: https://intelliparadigm.com 第一章:DeepSeek-R1代码补全能力封测全景概览 DeepSeek-R1 是深度求索(DeepSeek)推出的高性能开源推理模型,在代码补全场景中展现出显著的上下文理解力与多语言泛化能力。本…...

如何快速上手DeepPurpose?5分钟完成你的第一个药物-靶点相互作用预测模型
如何快速上手DeepPurpose?5分钟完成你的第一个药物-靶点相互作用预测模型 【免费下载链接】DeepPurpose A Deep Learning Toolkit for DTI, Drug Property, PPI, DDI, Protein Function Prediction (Bioinformatics) 项目地址: https://gitcode.com/gh_mirrors/de…...

正视孩童情绪波动,耐心陪伴平稳疏导
孩子的情绪就像夏天的天气,前一秒还晴空万里,后一秒可能就乌云密布。面对突如其来的哭闹、发脾气或者闷闷不乐,很多家长会急着“灭火”——要么讲道理,要么直接制止。但其实,情绪波动本身不是问题,它是孩子…...

UE5项目打包后RenderTarget导出图片全黑?手把手教你解决伽马校正与资产打包问题
UE5打包后RenderTarget导出图片全黑的终极解决方案当你花了整整三天时间调试RenderTarget导出功能,终于在编辑器里看到完美的截图效果,却在打包成可执行文件后发现所有导出的图片都变成了一片漆黑——这种从云端跌入谷底的感觉,每个UE开发者都…...

抖音批量下载助手:一键构建你的专属视频素材库
抖音批量下载助手:一键构建你的专属视频素材库 【免费下载链接】douyinhelper 抖音批量下载助手 项目地址: https://gitcode.com/gh_mirrors/do/douyinhelper 还在为手动保存抖音视频而烦恼吗?想要批量获取心仪创作者的精彩内容却无从下手&#x…...

关于内卷,几个值得深想的洞察
首先声明:这篇不劝躺平,也不教内卷——只是想说清楚,你到底在一个什么样的游戏里。 你以为内卷是“资源不足”,其实是“分配方式” 很多人对内卷有个本质上的认知错误:以为内卷是因为资源不够,大家为了抢资…...

从Figma设计到Python GUI:Tkinter-Designer如何重塑可视化开发范式
从Figma设计到Python GUI:Tkinter-Designer如何重塑可视化开发范式 【免费下载链接】Tkinter-Designer An easy and fast way to create a Python GUI 🐍 项目地址: https://gitcode.com/gh_mirrors/tk/Tkinter-Designer 在Python GUI开发领域&am…...