Apollo 配置变更原理
我们经常用到apollo的两个特性:
1.动态更新配置:apollo可以动态更新@Value的值,也可以修改environment的值。
2.实时监听配置:实现apollo的监听器ConfigChangeListener,通过onChange方法来实时监听配置变化。
你知道apollo客户端是如何实现这些功能的吗?使用过程中,需要注意什么呢?
大致流程
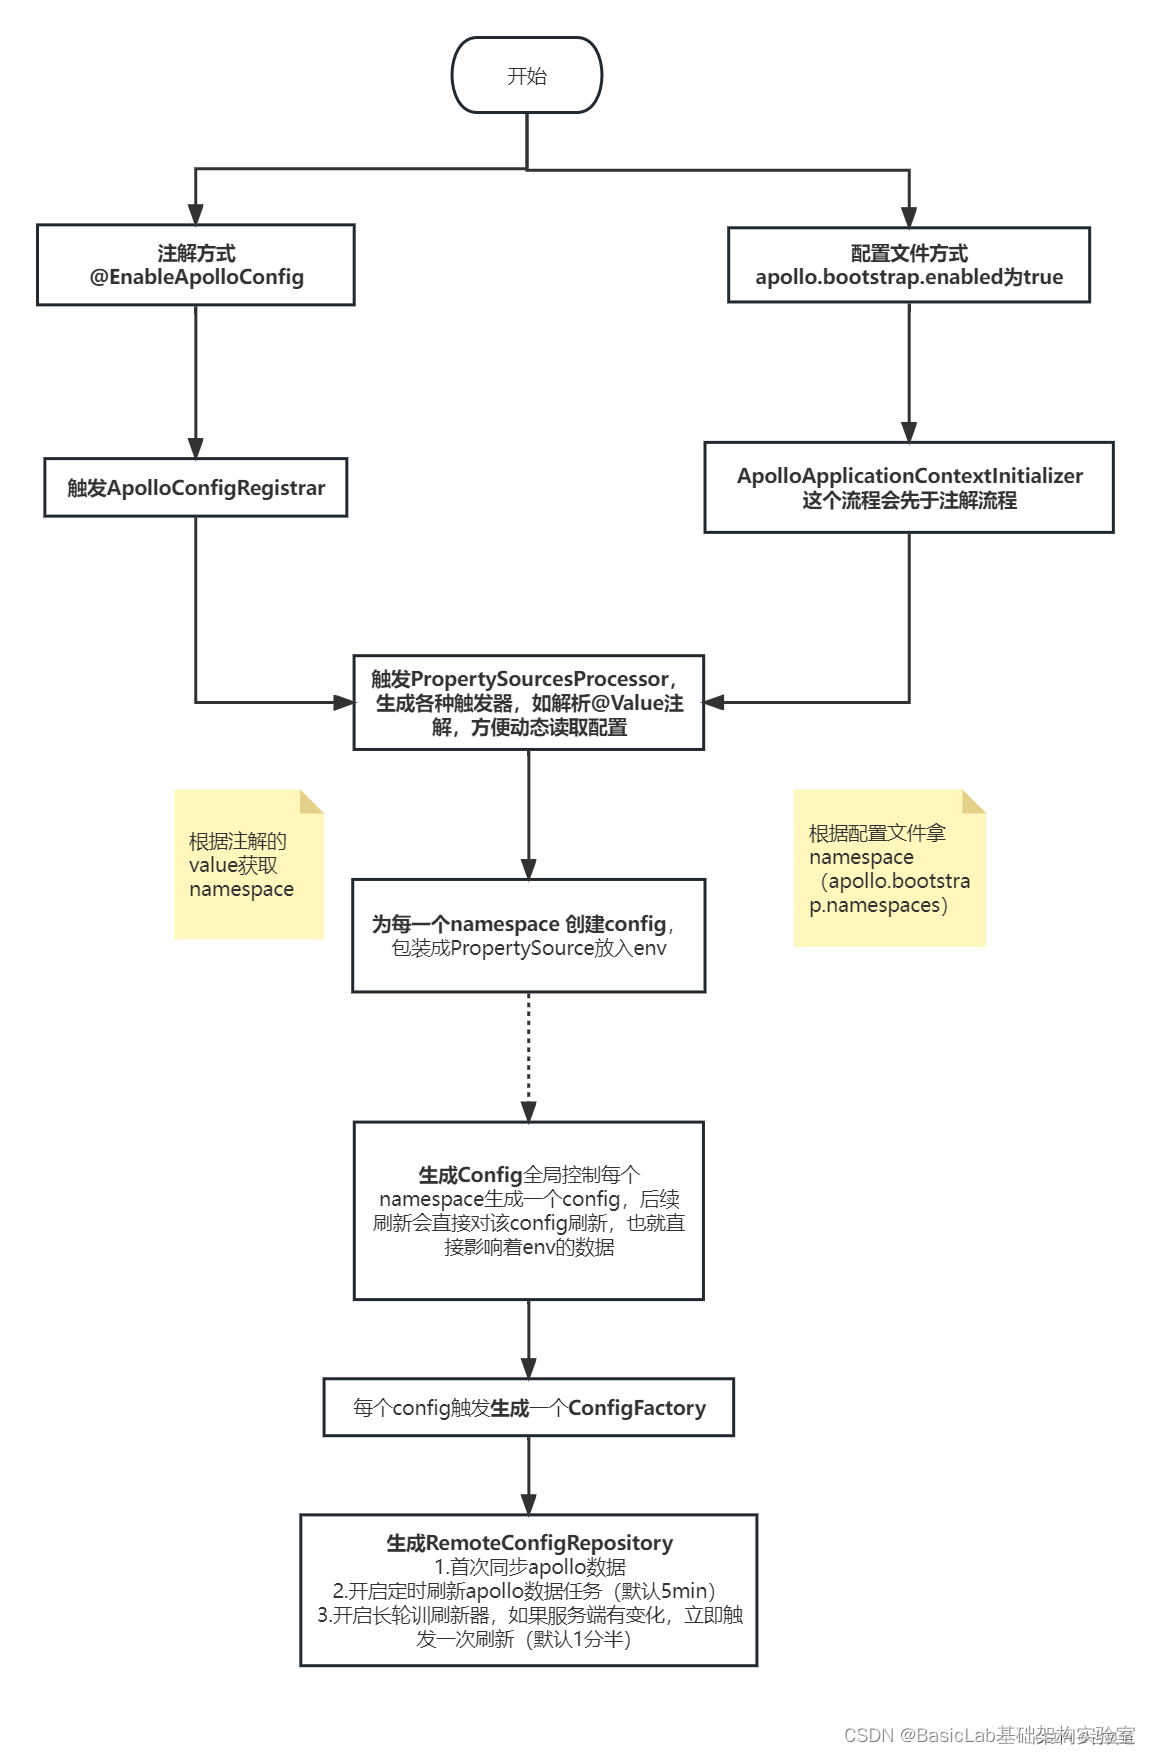
在启动spring容器时,即会先后触发ApolloApplicationContextInitializer和ApolloConfigRegistrar为监听的namespace生成对应的config,并封装成propertySource放入env,后续更新就直接操作config,env的数据就被联动更新。
所以我们可以认为有两种方式(注解、配置)使用apollo,两者之间存在一些隐性关系(看到最后你会发现是坑哦)。
方式一:启动配置文件使用apollo——ApolloApplicationContextInitializer
com.ctrip.framework.apollo.spring.boot.ApolloApplicationContextInitializer#initialize(org.springframework.context.ConfigurableApplicationContext)
publicvoidinitialize(ConfigurableApplicationContext context){ConfigurableEnvironment environment = context.getEnvironment();//必须开启apollo.bootstrap.enabledString enabled = environment.getProperty(PropertySourcesConstants.APOLLO_BOOTSTRAP_ENABLED,"false");if(!Boolean.valueOf(enabled)){logger.debug("Apollo bootstrap config is not enabled for context {}, see property: ${{}}", context,PropertySourcesConstants.APOLLO_BOOTSTRAP_ENABLED);return;}logger.debug("Apollo bootstrap config is enabled for context {}", context);//!!!生成config,刷新器,将config塞入environment配置列表最前面(顺序决定优先级)initialize(environment);}protectedvoidinitialize(ConfigurableEnvironment environment){if(environment.getPropertySources().contains(PropertySourcesConstants.APOLLO_BOOTSTRAP_PROPERTY_SOURCE_NAME)){//already initializedreturn;}//从apollo.bootstrap.namespaces获取namespace,默认还是applicationString namespaces = environment.getProperty(PropertySourcesConstants.APOLLO_BOOTSTRAP_NAMESPACES,ConfigConsts.NAMESPACE_APPLICATION);logger.debug("Apollo bootstrap namespaces: {}", namespaces);List<String> namespaceList =NAMESPACE_SPLITTER.splitToList(namespaces);//生成名为ApolloBootstrapPropertySources的CompositePropertySource ,所有namespace共用该propertysource,namespace的顺序也是优先级顺序CompositePropertySource composite =newCompositePropertySource(PropertySourcesConstants.APOLLO_BOOTSTRAP_PROPERTY_SOURCE_NAME);for(String namespace : namespaceList){//生成config(该部分公用,后续分析)Config config =ConfigService.getConfig(namespace);//封装为propertsourcecomposite.addPropertySource(configPropertySourceFactory.getConfigPropertySource(namespace, config));}//最后添加到environment中,这里决定了优先级比注解高environment.getPropertySources().addFirst(composite);}开启配置方式(apollo.bootstrap.enabled为true),则会触发ApolloAutoConfiguration 创建对应的处理器监听器,如动态修改@Value数据
@Configuration@ConditionalOnProperty(PropertySourcesConstants.APOLLO_BOOTSTRAP_ENABLED)@ConditionalOnMissingBean(PropertySourcesProcessor.class)publicclassApolloAutoConfiguration{@BeanpublicConfigPropertySourcesProcessorconfigPropertySourcesProcessor(){returnnewConfigPropertySourcesProcessor();}}publicclassConfigPropertySourcesProcessorextendsPropertySourcesProcessorimplementsBeanDefinitionRegistryPostProcessor{@OverridepublicvoidpostProcessBeanDefinitionRegistry(BeanDefinitionRegistry registry)throwsBeansException{Map<String,Object> propertySourcesPlaceholderPropertyValues =newHashMap<>();// to make sure the default PropertySourcesPlaceholderConfigurer's priority is higher than PropertyPlaceholderConfigurerpropertySourcesPlaceholderPropertyValues.put("order",0);BeanRegistrationUtil.registerBeanDefinitionIfNotExists(registry,PropertySourcesPlaceholderConfigurer.class.getName(),PropertySourcesPlaceholderConfigurer.class, propertySourcesPlaceholderPropertyValues);BeanRegistrationUtil.registerBeanDefinitionIfNotExists(registry,ApolloAnnotationProcessor.class.getName(),ApolloAnnotationProcessor.class);BeanRegistrationUtil.registerBeanDefinitionIfNotExists(registry,SpringValueProcessor.class.getName(),SpringValueProcessor.class);BeanRegistrationUtil.registerBeanDefinitionIfNotExists(registry,ApolloJsonValueProcessor.class.getName(),ApolloJsonValueProcessor.class);processSpringValueDefinition(registry);}/*** For Spring 3.x versions, the BeanDefinitionRegistryPostProcessor would not be* instantiated if it is added in postProcessBeanDefinitionRegistry phase, so we have to manually* call the postProcessBeanDefinitionRegistry method of SpringValueDefinitionProcessor here...*/privatevoidprocessSpringValueDefinition(BeanDefinitionRegistry registry){SpringValueDefinitionProcessor springValueDefinitionProcessor =newSpringValueDefinitionProcessor();springValueDefinitionProcessor.postProcessBeanDefinitionRegistry(registry);}}方式二:使用注解@EnableApolloConfig开启apollo
通过导入ApolloConfigRegistrar,触发PropertySourcesProcessor。
【创建application的beandefinition以后】
publicvoidregisterBeanDefinitions(AnnotationMetadata importingClassMetadata,BeanDefinitionRegistry registry){AnnotationAttributes attributes =AnnotationAttributes.fromMap(importingClassMetadata.getAnnotationAttributes(EnableApolloConfig.class.getName()));//从注解@EnableApolloConfig的value获取namespaceString[] namespaces = attributes.getStringArray("value");int order = attributes.getNumber("order");//在PropertySourcesProcessor添加namespace,order信息PropertySourcesProcessor.addNamespaces(Lists.newArrayList(namespaces), order);Map<String,Object> propertySourcesPlaceholderPropertyValues =newHashMap<>();// to make sure the default PropertySourcesPlaceholderConfigurer's priority is higher than PropertyPlaceholderConfigurerpropertySourcesPlaceholderPropertyValues.put("order",0);BeanRegistrationUtil.registerBeanDefinitionIfNotExists(registry,PropertySourcesPlaceholderConfigurer.class.getName(),PropertySourcesPlaceholderConfigurer.class, propertySourcesPlaceholderPropertyValues);//创建PropertySourcesProcessor为namespace生成config等BeanRegistrationUtil.registerBeanDefinitionIfNotExists(registry,PropertySourcesProcessor.class.getName(),PropertySourcesProcessor.class);BeanRegistrationUtil.registerBeanDefinitionIfNotExists(registry,ApolloAnnotationProcessor.class.getName(),ApolloAnnotationProcessor.class);BeanRegistrationUtil.registerBeanDefinitionIfNotExists(registry,SpringValueProcessor.class.getName(),SpringValueProcessor.class);BeanRegistrationUtil.registerBeanDefinitionIfNotExists(registry,SpringValueDefinitionProcessor.class.getName(),SpringValueDefinitionProcessor.class);BeanRegistrationUtil.registerBeanDefinitionIfNotExists(registry,ApolloJsonValueProcessor.class.getName(),ApolloJsonValueProcessor.class);}PropertySourcesProcessor初始化config(namespace排序),自动更新spring @Value的值
【在创建完所有beandefinition后触发】
publicvoidpostProcessBeanFactory(ConfigurableListableBeanFactory beanFactory)throwsBeansException{//1.初始化config,刷新器,关联environmentinitializePropertySources();//2.初始化AutoUpdateConfigChangeListener,自动更新spring @Value的值initializeAutoUpdatePropertiesFeature(beanFactory);}privatevoidinitializePropertySources(){if(environment.getPropertySources().contains(PropertySourcesConstants.APOLLO_PROPERTY_SOURCE_NAME)){//already initializedreturn;}//生成名为ApolloPropertySources的CompositePropertySource ,所有namespace共用该propertysourceCompositePropertySource composite =newCompositePropertySource(PropertySourcesConstants.APOLLO_PROPERTY_SOURCE_NAME);//排序ImmutableSortedSet<Integer> orders =ImmutableSortedSet.copyOf(NAMESPACE_NAMES.keySet());Iterator<Integer> iterator = orders.iterator();while(iterator.hasNext()){int order = iterator.next();//按照order为每个namespace创建config(公用部分,后续分析)for(String namespace :NAMESPACE_NAMES.get(order)){Config config =ConfigService.getConfig(namespace);composite.addPropertySource(configPropertySourceFactory.getConfigPropertySource(namespace, config));}}// clean upNAMESPACE_NAMES.clear();// 在environment的ApolloBootstrapPropertySources后面或者直接在第一个位置加上前面封装的compsite propertysource,保证注解优先级低于配置方式if(environment.getPropertySources().contains(PropertySourcesConstants.APOLLO_BOOTSTRAP_PROPERTY_SOURCE_NAME)){// ensure ApolloBootstrapPropertySources is still the firstensureBootstrapPropertyPrecedence(environment);environment.getPropertySources().addAfter(PropertySourcesConstants.APOLLO_BOOTSTRAP_PROPERTY_SOURCE_NAME, composite);}else{environment.getPropertySources().addFirst(composite);}}创建Config的系列操作
触发创建RemoteConfigRepository(内部包含首次同步apollo,启动定时刷新器,长轮训刷新器)
创建RemoteConfigRepository
之前说的 ConfigService.getConfig(namespace) ,获取不到config,就会创建一个config,最终创建RemoteConfigRepository。看其构造方法,除了各种属性赋值后,还会调用三个方法,它们很关键哈。
public RemoteConfigRepository(String namespace) {m_namespace = namespace;m_configCache = new AtomicReference<>();m_configUtil = ApolloInjector.getInstance(ConfigUtil.class);m_httpUtil = ApolloInjector.getInstance(HttpUtil.class);m_serviceLocator = ApolloInjector.getInstance(ConfigServiceLocator.class);remoteConfigLongPollService = ApolloInjector.getInstance(RemoteConfigLongPollService.class);m_longPollServiceDto = new AtomicReference<>();m_remoteMessages = new AtomicReference<>();m_loadConfigRateLimiter = RateLimiter.create(m_configUtil.getLoadConfigQPS());m_configNeedForceRefresh = new AtomicBoolean(true);m_loadConfigFailSchedulePolicy = new ExponentialSchedulePolicy(m_configUtil.getOnErrorRetryInterval(),m_configUtil.getOnErrorRetryInterval() * 8);gson = new Gson();// 首次同步apollothis.trySync();// 定时刷新配置(大部分情况返回304,定时刷新在于可以防止长轮询失败)this.schedulePeriodicRefresh();// 长轮询刷新配置(最主要的实时获取配置的途径)this.scheduleLongPollingRefresh();
}
首次同步apollo
@Override
protected synchronized void sync() {Transaction transaction = Tracer.newTransaction("Apollo.ConfigService", "syncRemoteConfig");try {ApolloConfig previous = m_configCache.get();// 根据你设定的apollo地址,appId,maxRetries等信息,发送get请求,获取当前apollo配置信息ApolloConfig current = loadApolloConfig();// 更新本地的apollo配置信息if (previous != current) {logger.debug("Remote Config refreshed!");m_configCache.set(current);// 刷新配置的任务可能会调用该方法,获取配置,并且通知客户端的监听器this.fireRepositoryChange(m_namespace, this.getConfig());}if (current != null) {Tracer.logEvent(String.format("Apollo.Client.Configs.%s", current.getNamespaceName()),current.getReleaseKey());}transaction.setStatus(Transaction.SUCCESS);} catch (Throwable ex) {transaction.setStatus(ex);throw ex;} finally {transaction.complete();}
}
开启定时刷新配置
private void schedulePeriodicRefresh() {logger.debug("Schedule periodic refresh with interval: {} {}",m_configUtil.getRefreshInterval(), m_configUtil.getRefreshIntervalTimeUnit());m_executorService.scheduleAtFixedRate(new Runnable() {@Overridepublic void run() {Tracer.logEvent("Apollo.ConfigService", String.format("periodicRefresh: %s", m_namespace));logger.debug("refresh config for namespace: {}", m_namespace);// 和上述首次同步的trySync是同一个方法trySync();Tracer.logEvent("Apollo.Client.Version", Apollo.VERSION);}//时间间隔默认是5分钟}, m_configUtil.getRefreshInterval(), m_configUtil.getRefreshInterval(),m_configUtil.getRefreshIntervalTimeUnit());
}
开启长轮询刷新配置
public boolean submit(String namespace, RemoteConfigRepository remoteConfigRepository) {boolean added = m_longPollNamespaces.put(namespace, remoteConfigRepository);m_notifications.putIfAbsent(namespace, INIT_NOTIFICATION_ID);if (!m_longPollStarted.get()) {// 开启拉取  startLongPolling();}return added;
}private void doLongPollingRefresh(String appId, String cluster, String dataCenter) {final Random random = new Random();ServiceDTO lastServiceDto = null;while (!m_longPollingStopped.get() && !Thread.currentThread().isInterrupted()) {if (!m_longPollRateLimiter.tryAcquire(5, TimeUnit.SECONDS)) {// 等待5秒try {TimeUnit.SECONDS.sleep(5);} catch (InterruptedException e) {}}// 获取各种信息,发起请求,看apollo中配置有无变更......//200说明 配置发生变化,则主动获取新配置,且调用ConfigChangeListener的实现类的onChange方法    if (response.getStatusCode() == 200 && response.getBody() != null) {updateNotifications(response.getBody());updateRemoteNotifications(response.getBody());transaction.addData("Result", response.getBody().toString());notify(lastServiceDto, response.getBody());}//需要重新长链接//长链接可以监听服务端动态,不需要频繁与服务器建连访问,可以降低资源消耗,也可以得到及时变更通知if (response.getStatusCode() == 304 && random.nextBoolean()) {lastServiceDto = null;}......} finally {transaction.complete();}}
}
notify方法会最终进入fireRepositoryChange
sync->fireRepositoryChange
该方法是之前介绍的sync()方法里面提到的,两类刷新配置的任务都会执行此方法,来通知各个监听器,有哪些配置变更。
1.获取新配置
2.统计各种配置的变更
3.通知各个监听器
protected void fireRepositoryChange(String namespace, Properties newProperties) {// 遍历所有的监听器for (RepositoryChangeListener listener : m_listeners) {try {// 把最新的配置信息传递给监听器listener.onRepositoryChange(namespace, newProperties);} catch (Throwable ex) {Tracer.logError(ex);logger.error("Failed to invoke repository change listener {}", listener.getClass(), ex);}}
}@Override
public synchronized void onRepositoryChange(String namespace, Properties newProperties) {if (newProperties.equals(m_configProperties.get())) {return;}ConfigSourceType sourceType = m_configRepository.getSourceType();Properties newConfigProperties = new Properties();newConfigProperties.putAll(newProperties);// 整理且更新配置信息,确定配置的变更类型Map<String, ConfigChange> actualChanges = updateAndCalcConfigChanges(newConfigProperties, sourceType);//check double checked resultif (actualChanges.isEmpty()) {return;}// 调用各个ConfigChangeListener实现类的onChange方法,发送配置信息this.fireConfigChange(new ConfigChangeEvent(m_namespace, actualChanges));Tracer.logEvent("Apollo.Client.ConfigChanges", m_namespace);
}private Map<String, ConfigChange> updateAndCalcConfigChanges(Properties newConfigProperties,ConfigSourceType sourceType) {// 初次统计变化的配置  List<ConfigChange> configChanges =calcPropertyChanges(m_namespace, m_configProperties.get(), newConfigProperties);ImmutableMap.Builder<String, ConfigChange> actualChanges =new ImmutableMap.Builder<>();/** === Double check since DefaultConfig has multiple config sources ==== **///1. 为配置设置旧值for (ConfigChange change : configChanges) {change.setOldValue(this.getProperty(change.getPropertyName(), change.getOldValue()));}//2. 更新 m_configProperties,该处本地env配置被更新updateConfig(newConfigProperties, sourceType);clearConfigCache();//3. 遍历所有的新配置,最后确认各个配置的type(ADDED/MODIFIED/DELETED)for (ConfigChange change : configChanges) {change.setNewValue(this.getProperty(change.getPropertyName(), change.getNewValue()));switch (change.getChangeType()) {case ADDED:if (Objects.equals(change.getOldValue(), change.getNewValue())) {break;}if (change.getOldValue() != null) {change.setChangeType(PropertyChangeType.MODIFIED);}actualChanges.put(change.getPropertyName(), change);break;case MODIFIED:if (!Objects.equals(change.getOldValue(), change.getNewValue())) {actualChanges.put(change.getPropertyName(), change);}break;case DELETED:if (Objects.equals(change.getOldValue(), change.getNewValue())) {break;}if (change.getNewValue() != null) {change.setChangeType(PropertyChangeType.MODIFIED);}actualChanges.put(change.getPropertyName(), change);break;default://do nothingbreak;}}return actualChanges.build();
}
总结两种方式的异同
相同之处:
1.创建config的流程和最终关联environment的方式。
2.默认情况下,都是使用application namespace。
不同之处:
1.注解模式优先级低于配置方式。
2. 注解可以在多个地方使用,可以批量设置注解的namespace的优先级;配置文件只能按照配置的顺序来决定优先级。
可能存在的坑
1.如果配置方式和注解方式同时使用,则优先从配置方式里面的namespace读取配置,没有则会从注解的namespace读取配置,不要误以为只会用配置文件指定的namespace!!!
2.如果只是监听application 这个namespace,可以使用ConfigService.getAppConfig(),如果是监听其他XXX namespace,一定要用ConfigService.getAppConfig(“XXX”),不然,就会因为你是用的api触发监听application!!!也就是,即便你只用了配置方式,明确了使用XXXnamespace,还是会以application作为兜底!!!
相关文章:
Apollo 配置变更原理
我们经常用到apollo的两个特性:1.动态更新配置:apollo可以动态更新Value的值,也可以修改environment的值。2.实时监听配置:实现apollo的监听器ConfigChangeListener,通过onChange方法来实时监听配置变化。你知道apollo…...
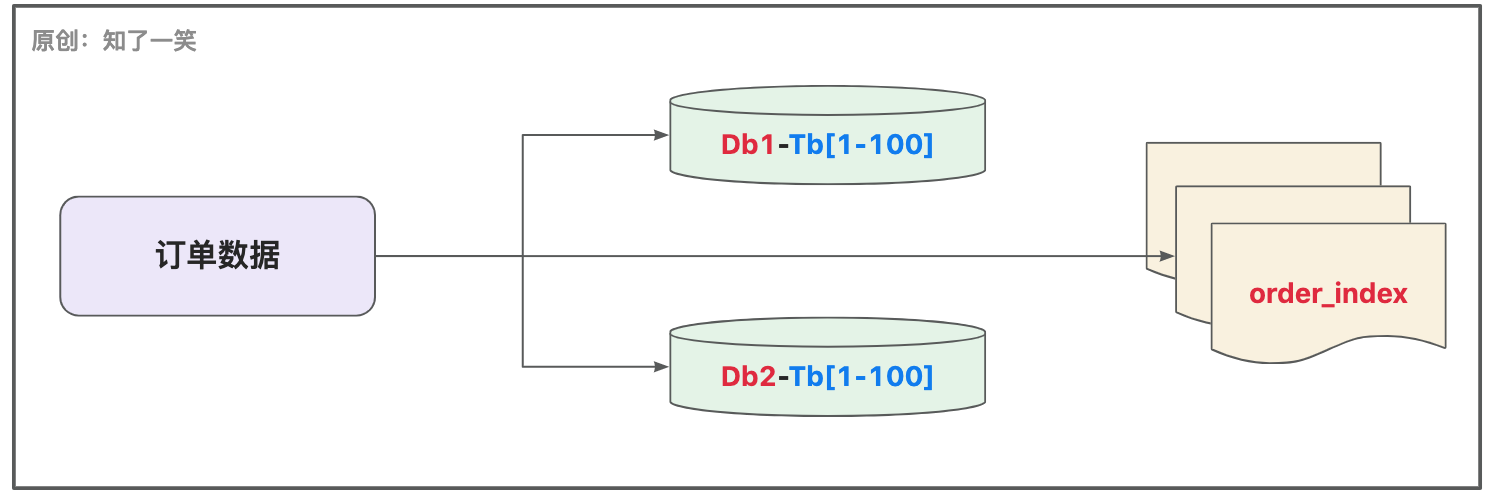
聊聊「订单」业务的设计与实现
订单,业务的核心模块; 一、背景简介 订单业务一直都是系统研发中的核心模块,订单的产生过程,与系统中的很多模块都会高度关联,比如账户体系、支付中心、运营管理等,即便单看订单本身,也足够的复…...

血细胞智能检测与计数软件(Python+YOLOv5深度学习模型+清新界面版)
摘要:血细胞智能检测与计数软件应用深度学习技术智能检测血细胞图像中红细胞、镰状细胞等不同形态细胞并可视化计数,以辅助医学细胞检测。本文详细介绍血细胞智能检测与计数软件,在介绍算法原理的同时,给出Python的实现代码以及Py…...
)
高速PCB设计指南(十五)
掌握IC封装的特性以达到最佳EMI抑制性能 将去耦电容直接放在IC封装内可以有效控制EMI并提高信号的完整性,本文从IC内部封装入手,分析EMI的来源、IC封装在EMI控制中的作用,进而提出11个有效控制EMI的设计规则,包括封装选择、引脚结…...

GPT-4:我不是来抢你饭碗的,我是来抢你锅的
目录 一、GPT-4,可媲美人类 二、它和ChatGPT 有何差别? 01、处理多达2.5万字的长篇内容 02、分析图像的能力,并具有「幽默感」 03、生成网页 三、题外话 四、小结 GPT-4的闪亮登场,似乎再次惊艳了所有人。 看了GPT-4官方的…...

Scala环境安装【傻瓜式教程】
文章目录安装scala环境依赖Java环境安装下载sacla的sdk包安装Scala2.12检查安装是否成功idea配置idea安装scala插件项目配置新建maven项目添加框架支持选择scala创建测试类安装scala环境依赖 Java环境安装 sacla环境安装之前需要先确认Java jdk安装完成 java具体安装步骤略&…...

js实现一个简单的扫雷
目录先看下最终的效果:首先来分析一个扫雷游戏具有哪些功能分析完成后我们就开始一步步的实现1. 相关html和css2. 我们使用类来完成相应功能3. 之后我们则是要定义一个地图4. 对地图进行渲染5. 对开始按钮添加点击事件6. 现在我们可以实现鼠标左击扫雷的功能7. 给单…...
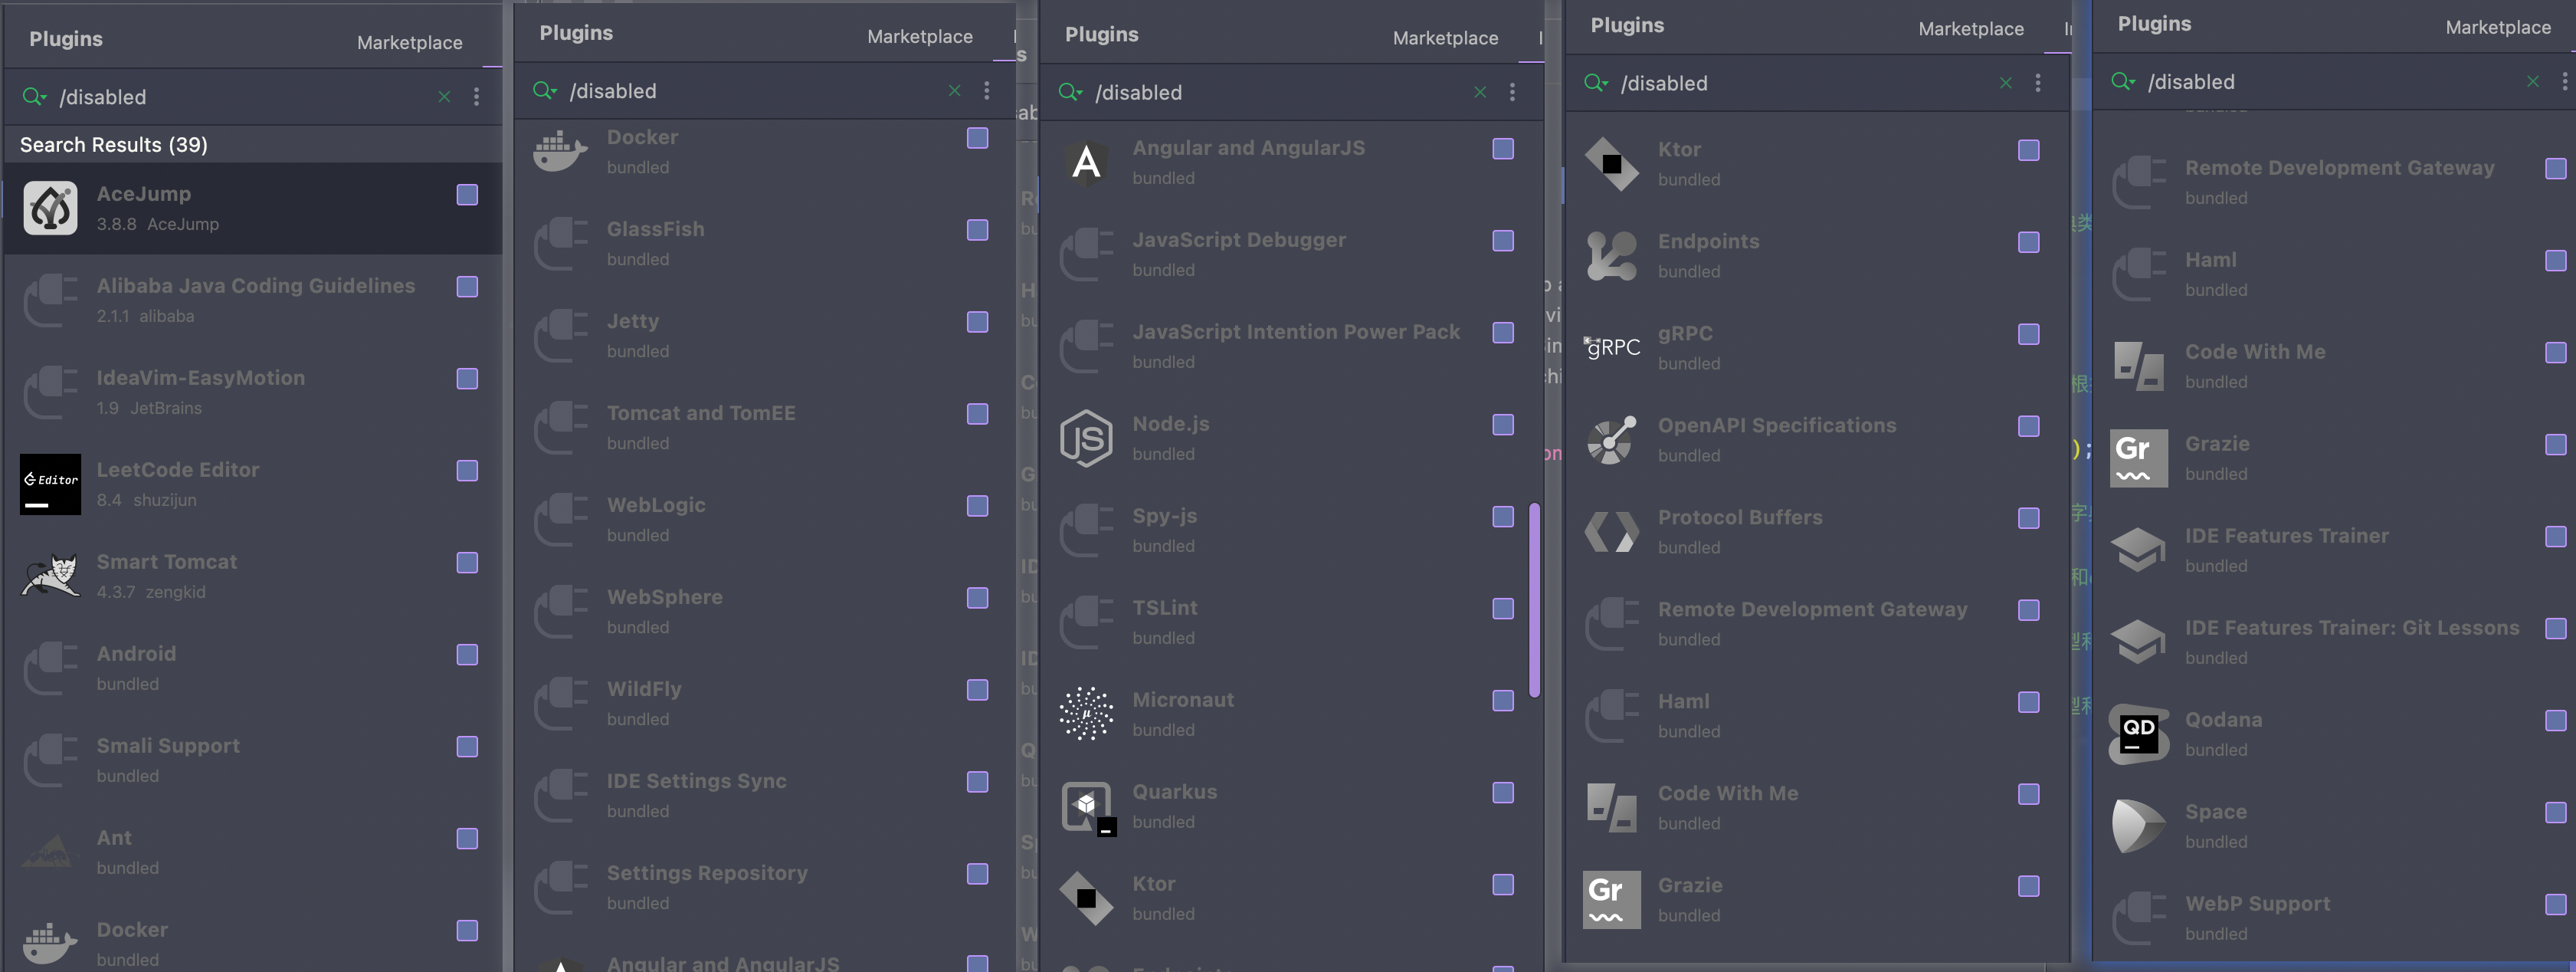
禁用非必需插件,让 IDEA 飞起
文章首发于个人博客,欢迎访问关注:https://www.lin2j.tech IDEA 为我们提供了众多的插件,但是这些插件并不都是必须的。如果电脑的性能不够强,反而会带来一些不必要的资源消耗。 因此这里整理了一些不常用的插件,可以…...
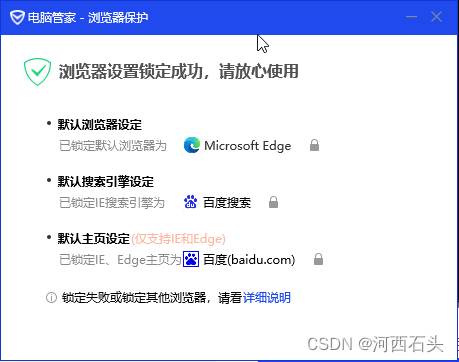
解决win10任何程序打开链接仍然为老旧IE的顽固问题[修改默认浏览器]
文章目录一、问题与修改原因1、着手修改吧2、弯路上探索3、发现祸根二、后话文章原出处: https://blog.csdn.net/haigear/article/details/129344503一、问题与修改原因 我们发现,很多程序默认的网页打开浏览器都是IE,这个很是郁闷ÿ…...

计算机网络体系结构——“计算机网络”
各位CSDN的uu们你们好呀,今天小雅兰来学习一个全新的知识点,就是计算机网络啦,下面,开始虚心学习。 计算机网络的概念 计算机网络的功能 计算机网络的组成 计算机网络的分类 标准化工作 计算机网络的性能 计算机网络的概念 …...
基于微信小程序的校园二手交易平台小程序
文末联系获取源码 开发语言:Java 框架:ssm JDK版本:JDK1.8 服务器:tomcat7 数据库:mysql 5.7/8.0 数据库工具:Navicat11 开发软件:eclipse/myeclipse/idea Maven包:Maven3.3.9 浏览器…...

Linux lvm管理讲解及命令
♥️作者:小刘在C站 ♥️个人主页:小刘主页 ♥️每天分享云计算网络运维课堂笔记,努力不一定有收获,但一定会有收获加油!一起努力,共赴美好人生! ♥️夕阳下,是最美的绽放࿰…...

GPT-4,终于来了!
就在昨天凌晨,OpenAI发布了多模态预训练大模型GPT-4。 这不昨天一觉醒来,GPT-4都快刷屏了,不管是在朋友圈还是网络上都看到了很多信息和文章。 GPT是Generative Pre-trained Transformer的缩写,也即生成型预训练变换模型的意思。…...

面部表情识别3:Android实现表情识别(含源码,可实时检测)
面部表情识别3:Android实现表情识别(含源码,可实时检测) 目录 面部表情识别3:Android实现表情识别(含源码,可实时检测) 1.面部表情识别方法 2.人脸检测方法 3.面部表情识别模型训练 4.面部表情识别模型Android部署 &#x…...

【IT女神勋章挑战赛名单公布】:看看谁获奖啦!
致敬女性开发者,为那些IT女神而战!「IT女神勋章挑战赛」已落下帷幕,博主们的比拼结果也已新鲜出炉,快来看看此次征文中,有哪些精彩文章不容错过!活动官网:https://activity.csdn.net/creatActiv…...
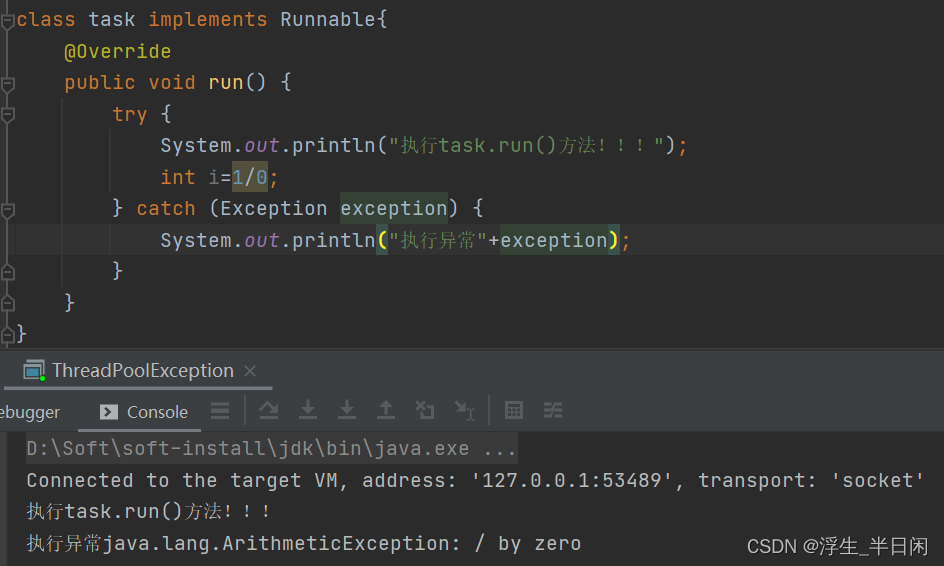
ThreadPool线程池源码解析
ThreadPool线程池源码解析 文章目录前言一、基本使用二、执行流程三、源码分析ThreadPoolExecutor 中重要属性ThreadPoolExecutor 内部类Workerexecute()方法addWorker(command, true)方法runWorker(worker )方法getTask()方法shutdown和shutdownNow四、…...

Python中 5个非常有用的单行代码
Python中 5个非常有用的单行代码1. 什么是单行代码?2. 了解和使用单行代码的好处3. 5个单行代码示例参考作为开发人员,你想提高生产力吗?掌握这 5 个 Python 一行代码,你就能写出简洁的代码。 这篇博客将介绍5个非常有用的初学者可…...

蓝牙模块各种工作模式
摘要:本文主要归纳总结蓝牙模块的不同工作模式,通过蓝牙模块不同的工作模式了解其扮演不同角色时工作的一个基本原理,为更深入的研究蓝牙模块底层的工作机制和技术方案进行铺垫。 1、主设备工作模式 主设备是能够搜索别人并主动建立连接的一…...

修剪灌木[蓝桥杯2022初赛]
题目描述 爱丽丝要完成一项修剪灌木的工作。 有 N 棵灌木整齐的从左到右排成一排。 爱丽丝在每天傍晚会修剪一棵灌木,让灌木的高度变为 0 厘米。 爱丽丝修剪灌木的顺序是从最左侧的灌木开始,每天向右修剪一棵灌木。 当修剪了最右侧的灌木后,…...
)
Python的知识点运用-1(日期转换)
问:如何将 星期一, 三月 13, 2023转换成2023-03-13看到这个问题,你的第一反应是什么???反正我是懵逼的。不过后面一想,时间模块可以。在这个问题后面,群友又问了一个问题,如何在本地…...
:基于Saga模式的状态追踪与可视化诊断平台搭建)
Dify异步任务治理实战(生产环境已稳定运行417天):基于Saga模式的状态追踪与可视化诊断平台搭建
第一章:Dify异步任务治理实战总览Dify 作为低代码 AI 应用开发平台,其后台大量依赖异步任务处理机制——包括模型推理、数据集嵌入、工作流编排、知识库切分与向量化等。当业务规模扩大时,未经治理的异步任务易引发队列积压、资源争抢、失败任…...

DYPlayer嵌入式MP3控制库:UART协议封装与资源优化实践
1. DYPlayer库深度技术解析:面向嵌入式系统的DY-XXXX系列MP3模块UART控制框架1.1 库定位与工程价值DYPlayer是一个专为DY-XXXX系列MP3播放模块设计的C硬件抽象层(HAL)库,其核心目标是将底层UART二进制协议封装为面向对象、可移植、…...

【Dify企业级异步架构避坑手册】:92%开发者踩过的3类状态不一致陷阱,含完整时序图与补偿代码模板
第一章:Dify企业级异步架构避坑手册导论在构建高并发、可扩展的AI应用平台时,Dify 的异步任务调度机制是核心能力之一,但其默认配置与生产环境之间存在显著鸿沟。企业级部署中,常见问题包括 Celery worker 消息积压、Redis 连接泄…...

写作效率翻倍,Typora 1.12.3 最新版本更新安装
Typora 1.12.3 是一款极简、所见即所得的跨平台 Markdown 编辑器,主打无干扰写作、实时渲染、全格式支持,1.12.3 为 2025 年 11 月稳定版,修复大量兼容性与导出问题。 一、核心定位 所见即所得:输入 Markdown 语法(**加…...

Linux进程等待机制:wait与waitpid系统调用详解
1. 进程等待机制:父进程对子进程生命周期的精确管控在 Linux 系统编程中,进程创建(fork())与退出(exit())仅构成生命周期管理的起点与终点。真正体现系统调度严谨性与资源回收可靠性的,是父进程…...

ESP32硬件脉冲计数器库:PCNT外设深度封装与工业应用
1. 项目概述ESP32PulseCounter_Modified 是一个面向 Arduino 框架的轻量级硬件脉冲计数器封装库,专为 ESP32 系列 SoC 的 PCNT(Pulse Counter)外设模块深度定制。该库并非简单封装 ESP-IDF 原生 API,而是基于对 ESP32 脉冲计数硬件…...

实战指南:将VDEAI多光谱数据集高效转换为YOLO格式
1. 理解VDEAI多光谱数据集与YOLO格式 VDEAI数据集是一个包含可见光(RGB)和红外(IR)图像对的多光谱车辆数据集,常用于自动驾驶和军事侦察等场景。每张图片都配有详细的标注文件,记录着车辆的位置、类别等信息…...

RMBG-2.0开发者沙盒:在线Colab Notebook免安装体验+代码可一键运行
RMBG-2.0开发者沙盒:在线Colab Notebook免安装体验代码可一键运行 想体验目前最强的开源抠图模型,但又不想在本地折腾环境?今天给大家介绍一个零门槛的解决方案:直接在浏览器里运行RMBG-2.0(BiRefNet)抠图…...

深度解析HtmlToWord:基于Office Interop的HTML转Word技术实现
深度解析HtmlToWord:基于Office Interop的HTML转Word技术实现 【免费下载链接】HtmlToWord Convert html to word using Microsoft.Office.Interop.Word 项目地址: https://gitcode.com/gh_mirrors/ht/HtmlToWord 在Web应用开发中,将HTML内容转换…...

春联生成模型Python爬虫数据增强实战
春联生成模型Python爬虫数据增强实战 马上就要过年了,你有没有想过,让AI帮你写一副独一无二的春联?这听起来很酷,但很多朋友在尝试训练自己的春联生成模型时,都会遇到一个头疼的问题:训练数据太少了。网上…...