基于System.js的微前端实现(插件化)
目录
写在前面
一、微前端相关知识
(一)概念
(二) 优势
(三) 缺点
(四)应用场景
(五)现有框架
1. qiankun
2. single-spa
3. SystemJS
二、需求分析
三、流程概览
(一)子项目改造
(二)npm包
(三)system.js插件封装
(四)主项目改造
四、子项目改造
(一)子项目创建
(二)webpack5设置
(三)其他
五、npm包
(一)npm包内容
(二)npm包发布
六、基于system.js的插件工具封装
(一)封装
(二)使用
七、主项目改造
(一)安装依赖
(二)指定路由
八、实现效果
九、开源项目地址
(一)主项目
(二)子项目
(三)xu-demo-data
写在前面
本文所有技术实现的相关代码都已开源,想clone或者fork,请直接拉到文章末尾。
另外,技术实现借鉴了国内开源软件 kubevela,非常感谢kubevela的各位大佬能开源质量如此之高的代码。且因为本人是行业菜鸡,代码中如有语法错误或其他问题,请在评论区指正,感谢各位。
一、微前端相关知识
微前端(Micro Frontends)是一种前端架构的模式,旨在将大型前端应用拆分为多个独立的、可组合的小型前端模块。这些模块可以由不同的团队独立开发、部署和维护,最终在用户界面中无缝集成。微前端的核心思想类似于后端的微服务架构,通过模块化的方式降低系统复杂性,提高开发效率和扩展性。
(一)概念
-
独立部署:每个前端模块可以独立开发和部署,不依赖于其他模块。各个模块之间通过预定义的接口进行通信。
-
技术无关:不同的前端模块可以使用不同的技术栈(如React、Vue、Angular等),这使得团队能够根据具体需求和技术栈选择合适的工具。
-
团队独立:微前端允许不同的团队负责不同的模块,降低了团队间的耦合度。每个团队可以独立管理其代码库、开发流程和发布节奏。
-
界面组合:微前端架构通过组合不同的模块构建完整的用户界面。这可以通过在浏览器中动态加载不同的模块来实现,通常使用iframe、模块联邦(Module Federation)或自定义加载逻辑。
-
渐进迁移:微前端使得大型遗留系统可以逐步迁移到新技术中,减少一次性重构的风险和成本。
(二) 优势
- 扩展性强:每个模块独立开发和部署,能够快速迭代和扩展功能。
- 灵活性高:不同模块可以选择不同的技术和工具,而不影响整个系统。
- 提高团队效率:独立团队可以并行开发,减少依赖和协调。
(三) 缺点
- 性能问题:由于多个模块的组合可能导致资源加载和渲染效率问题,需要特别注意优化。
- 共享状态和通信:不同模块间的数据共享和通信需要标准化和规范化,避免耦合过高。
- 样式和UI一致性:虽然模块独立开发,但最终呈现给用户的界面需要保持一致的用户体验和样式规范。
(四)应用场景
- 随着技术的发展,前端应用可能需要从旧的技术栈迁移到新的技术栈。然而,对于大型应用,一次性迁移的风险和成本往往较高。微前端使得可以逐步迁移——某些模块可以采用新的技术栈,而其他部分保持不变。这种方式降低了技术迁移的风险和成本。
- 微前端允许这些团队各自独立开发、部署和维护自己的模块,而不影响其他团队。这种方式有助于减少依赖、加快开发节奏,并使应用更加易于扩展。
(五)现有框架
1. qiankun
qiankun 是一个基于 single-spa 的微前端框架,专注于子应用的加载、沙箱隔离以及跨应用的通信管理。qiankun 提供了开箱即用的解决方案来管理多个微前端应用,并在容器应用中将它们集成到一起。它的插件化功能可以帮助不同技术栈的子应用共存。
官网地址:
qiankun - qiankun![]() https://qiankun.umijs.org/zh
https://qiankun.umijs.org/zh
2. single-spa
single-spa 是一个流行的微前端框架,它允许多个前端框架(如 React、Vue、Angular)在同一个应用中共存,并实现独立加载和渲染。single-spa 的插件化机制允许开发者将每个子应用打包成独立的模块,单独部署和运行。
官网地址:
https://zh-hans.single-spa.js.org/docs/getting-started-overview![]() https://zh-hans.single-spa.js.org/docs/getting-started-overview
https://zh-hans.single-spa.js.org/docs/getting-started-overview
3. SystemJS
SystemJS 是一种模块加载器,通常用于微前端架构中实现动态模块加载。通过 SystemJS,应用可以在运行时按需加载不同的子应用或插件,而不是在构建时打包所有内容。它常与 single-spa 等微前端框架一起使用。
GitHub地址:
GitHub - systemjs/systemjs: Dynamic ES module loaderDynamic ES module loader. Contribute to systemjs/systemjs development by creating an account on GitHub.![]() https://github.com/systemjs/systemjs
https://github.com/systemjs/systemjs
二、需求分析
年初,公司产品经理提出了一个概念,叫js热加载热更新,需要什么js文件就动态加载什么js文件。因为目前公司的产品,有两个代码仓库,一个用于企业版,一个用于做开源版。开源版的核心代码与企业版的核心代码无差别,但在定制化和某些功能的支持上,企业版更占据优势。但是,同时维护两个仓库的很多分支又比较耗费人力物力,无论是企业功能下方开源,还是开源功能合并企业都比较繁琐,且合并过程中也有一些风险,因此就想到用这种热更新的模式,开源版与企业版的代码一致,但是企业版可以通过js热加载的方式动态导入一些前端页面或者功能用于实现和开源版的差异化,但这部分企业版的功能又不能放在开源代码中,因为直接放的话,有懂前端的开源用户就可以很轻松的破解代码了,因此想到了动态加载js这个方法来注入前端代码,以防止可以很轻易的就破解代码。
在经历调研后,发现微前端这个东西貌似很符合我们的需求,但是因为主项目的版本过于老旧(umi 2.X),并不能适配当下主流的微前端插件,而且有些定制化的需求跟主流微前端的插件又不相吻合,所以,在这个背景之下,我参考借鉴了 kubevela 的插件实现方式,最终使用SystemJS实现了插件功能。
kubevela项目地址:
https://github.com/kubevela/kubevela![]() https://github.com/kubevela/kubevela
https://github.com/kubevela/kubevela
三、流程概览
(一)子项目改造
子项目的改造就一个重点----打包。因为涉及到很多东西,比如插件元数据设置与拷贝,版本更新,数据传输,以及webpack5打包后的文件类型等,都有许多讲究。
(二)npm包
制作插件需要一个npm依赖包作为数据传递的中转站,子项目打包后会返回一个函数,这个函数在主项目中也有引用,通过system.js导入子项目后,在主项目调用该函数,即可获取子项目中传入的数据,也就是react的组件。从而串通整个流程。
(三)system.js插件封装
当你完成子项目与npm后,就需要封装system.js用来将子项目打包后的代码动态导入到主项目里。
(四)主项目改造
主项目的改动其实就比较小了,安装system.js与自己制作的npm依赖,再划定一些路由用于渲染该插件,主项目的使命就算完成了。
四、子项目改造
(一)子项目创建
这一步很好理解,使用脚手架创建一个react应用,然后再针对于react应用进行webpack5的打包改造。或者直接从github上下载一个使用webpack5打包的react模板。
package.json文件,这里面有我所有依赖的版本信息,需要的可自行查阅。
{"name": "plugin-template","version": "1.0.0","description": "插件体系模板文件","scripts": {"dev": "cross-env NODE_ENV=development webpack serve --config ./build/webpack.dev.config.js --open","build": "cross-env NODE_ENV=production webpack --config ./build/webpack.prod.config.js","build:report": "cross-env NODE_ENV=production REPORT=true webpack --config ./build/webpack.prod.config.js","eslint:init": "eslint --init","prepare": "husky install","lint-staged": "lint-staged","commitlint": "commitlint -e","eslint:fix": "eslint --ext .js,.vue --fix src"},"keywords": [],"author": "xuzhonglin12138","license": "ISC","devDependencies": {"@babel/core": "^7.15.5","@babel/plugin-transform-runtime": "^7.15.0","@babel/preset-env": "^7.15.6","@babel/preset-react": "^7.14.5","@commitlint/cli": "^13.2.1","@commitlint/config-conventional": "^13.2.0","babel-loader": "^8.2.2","babel-plugin-import": "^1.13.8","cache-loader": "^4.1.0","copy-webpack-plugin": "^10.0.0","core-js": "3","cross-env": "^7.0.3","css-loader": "^6.3.0","dart-sass": "^1.25.0","eslint": "^8.1.0","eslint-config-prettier": "^8.3.0","eslint-plugin-prettier": "^4.0.0","eslint-plugin-react": "^7.26.1","eslint-plugin-react-hooks": "^4.2.0","eslint-webpack-plugin": "^3.0.1","html-webpack-plugin": "^5.3.2","http-proxy-middleware": "^3.0.0","husky": "^7.0.4","less": "^4.2.0","less-loader": "^12.2.0","lint-staged": "^11.2.4","mini-css-extract-plugin": "1.6.2","postcss": "^8.3.8","postcss-loader": "^6.1.1","postcss-preset-env": "^6.7.0","prettier": "^2.4.1","replace-in-file-webpack-plugin": "^1.0.6","sass-loader": "^12.1.0","style-loader": "^3.3.0","terser-webpack-plugin": "^5.3.10","thread-loader": "^3.0.4","webpack": "^5.53.0","webpack-bundle-analyzer": "^4.4.2","webpack-cli": "^4.8.0","webpack-dev-server": "^4.2.1","webpack-merge": "^5.8.0"},"dependencies": {"@ant-design/icons": "^5.5.1","@babel/runtime": "^7.15.4","@babel/runtime-corejs3": "^7.15.4","@swc/core": "^1.7.6","antd": "5.19.3","axios": "^0.24.0","js-cookie": "^3.0.5","react": "^16.8.6","react-dom": "^16.8.6","react-intl-universal": "^2.11.3","swc-loader": "^0.2.6","xu-demo-data": "3.0.1"}
}
子项目改造的最重要的一点就是改造打包入口文件。如下:

左侧是打包的入口,右侧是本地启动的入口,可以看到左侧没有输出点,而是通过插件 xu-demo-data 调用了一个类里的方法,将两个组件以参数的形式传入了这个类中。右侧则是正常react应用的入口文件。至于这个 RainbondRootPagePlugin 是什么,咱们暂时按下不表。后面会提到。
(二)webpack5设置
webpack5的配置和其他项目的配置其实大同小异。如果对webpack5不了解的可以看我另一篇文章,了解一些基本的配置信息。
webpack的基本介绍与使用-CSDN博客文章浏览阅读1.6k次,点赞28次,收藏30次。Webpack 是一个现代 JavaScript 应用程序的静态模块打包器(module bundler)。当 webpack 处理应用程序时,它会递归地构建一个依赖关系图,其中包含应用程序需要的每个模块,然后将所有这些模块打包成一个或多个 bundle。_webpackhttps://blog.csdn.net/qq_45799465/article/details/140628293?spm=1001.2014.3001.5502
//文件名 webpack.base.config.jsconst path = require('path')
const webpack = require('webpack')
const MiniCssExtractPlugin = require("mini-css-extract-plugin")
const ESLintPlugin = require('eslint-webpack-plugin')
const TerserPlugin = require("terser-webpack-plugin");
const { getEntryFile, getPluginId } = require('./utils');const NODE_ENV = process.env.NODE_ENVmodule.exports = {entry: getEntryFile(),context: path.join(process.cwd(), 'src'),// cache: {//   type: 'filesystem',//   buildDependencies: {//     config: [__filename],//   },// },module: {rules: [{test: /\.(png|jpe?g|gif|svg)$/,exclude: /node_modules/,type: 'asset/resource',generator: NODE_ENV === 'development' ? {} : {publicPath: `plugins/${getPluginId()}/img/`,outputPath: 'img/',filename: NODE_ENV === 'development' ? '[hash][ext]' : '[name][ext]',},},{test: /\.css$/,use: ["style-loader", "css-loader"]},{test: /\.(woff|woff2|eot|ttf|otf)(\?v=\d+\.\d+\.\d+)?$/,exclude: /node_modules/,type: 'asset/resource',generator: NODE_ENV === 'development' ? {} : {publicPath: `plugins/${getPluginId()}/fonts`,outputPath: 'fonts/',filename: NODE_ENV === 'development' ? '[hash][ext]' : '[name][ext]',},},{exclude: /(node_modules)/,test: /\.[jt]sx?$/,use: [{loader: 'swc-loader',options: {jsc: {baseUrl: path.resolve(__dirname, 'src'),target: 'es2015',loose: false,parser: {syntax: 'ecmascript', jsx: true, decorators: false,dynamicImport: true,},},},},'babel-loader']}]},plugins: [new ESLintPlugin({extensions: ['js', 'jsx']}),new webpack.ProgressPlugin(),],resolve: {alias: {"@": path.join(__dirname, '..', 'src')},extensions: ['.js', '.jsx', '.json'],modules: [path.resolve(process.cwd(), 'src'), 'node_modules'],unsafeCache: true,},optimization: {runtimeChunk: false,minimize: true,minimizer: [new TerserPlugin({extractComments: false})],}
}
//webpack.prod.config.jsconst path = require('path')
const { merge } = require('webpack-merge')
const baseConfig = require('./webpack.base.config')
const MiniCssExtractPlugin = require("mini-css-extract-plugin")
const BundleAnalyzerPlugin = require('webpack-bundle-analyzer').BundleAnalyzerPlugin
const CopyWebpackPlugin = require('copy-webpack-plugin');
const ReplaceInFileWebpackPlugin = require('replace-in-file-webpack-plugin');
const { hasReadme, getPackageJsonInfo, getPluginId, getTodayDate } = require('./utils');const REPORT = process.env.REPORT
const prodConfig = {mode: 'production',devtool: 'eval-source-map',output: {clean: true,path: path.join(__dirname, '..', 'dist'),filename: '[name].js',library: {type: 'amd',},},module: {rules: [{test: /\.less$/,exclude: /node_modules/,use: ['style-loader',{loader: 'css-loader',options: {modules: true}},'postcss-loader','less-loader']}]},externals: ['lodash','moment','react','react-dom','xu-demo-data'],plugins: [new MiniCssExtractPlugin({filename: '[name].[contenthash].css',}),new CopyWebpackPlugin({patterns: [{ from: hasReadme() ? 'README.md' : '../README.md', to: '.', force: true },{ from: 'pluginData.json', to: '.' },{ from: '../LICENSE', to: '.', noErrorOnMissing: true },{ from: '../CHANGELOG.md', to: '.', force: true, noErrorOnMissing: true },{ from: '**/*.json', to: '.' }],}),new ReplaceInFileWebpackPlugin([{dir: 'dist',files: ['pluginData.json', 'README.md'],rules: [{search: /\%VERSION\%/g,replace: getPackageJsonInfo().version,},{search: /\%TODAY\%/g,replace: getTodayDate(),},{search: /\%PLUGIN_ID\%/g,replace: getPluginId(),},],},]),]
}if (REPORT) {prodConfig.plugins.push(new BundleAnalyzerPlugin())
}module.exports = merge(baseConfig, prodConfig)这基本都是一些基础的配置,用到了一些插件,以及一些方法在后面我都会贴出来,大家看看大概就好,这里唯一需要注意的是:
output: {clean: true,path: path.join(__dirname, '..', 'dist'),filename: '[name].js',library: {type: 'amd',},},ouput选项中,有个library选项,type选择 amd 格式 :
library: { type: 'amd' }:配置 Webpack 将输出的文件打包为 AMD(异步模块定义)模块。这种模块格式通常用于浏览器端的 JavaScript 应用,能够异步加载依赖项。
(三)其他
webpack的 externals 选项就是打包时排除某些依赖,对于子项目来说,要尽可能的减少依赖,以减小打包体积,而且子项目是与主项目共用某些依赖的,因此,这些依赖都可以排除打包,然后在使用 system.js 进行动态导入。(后续会在system.js 插件制作中展示)
externals: ['lodash','moment','react','react-dom','xu-demo-data'],五、npm包
(一)npm包内容
这就是npm包的全部内容,可以看到我只是定义了两个类,然后 RainbondRootPagePlugin 继承了RainbondOtherPagePlugin ,在类中定义了一些函数,仅此而已。
RainbondRootPagePlugin 也就是子项目打包入口中所使用的那个类。
npm包地址:
xu-demo-data - npm111111. Latest version: 3.0.1, last published: 18 days ago. Start using xu-demo-data in your project by running `npm i xu-demo-data`. There are no other projects in the npm registry using xu-demo-data.![]() https://www.npmjs.com/package/xu-demo-data
https://www.npmjs.com/package/xu-demo-data
export class RainbondOtherPagePlugin {constructor() {this.meta = {};this.OtherPages = undefined;}addOtherPage(page) {this.OtherPages = page;return this;}
}export class RainbondRootPagePlugin extends RainbondOtherPagePlugin {constructor() {super();this.root = undefined;}init(meta) {}setRootPage(root) {this.root = root;return this;}
}
(二)npm包发布
很简单,初始化,写代码,打包,登录npm账号,上传。具体操作流程可以看我这篇文章,里面有详细的解释
发布NPM包详细流程_npm发包流程-CSDN博客文章浏览阅读500次,点赞7次,收藏11次。首先需要制作一个npm包。按照以下步骤依次执行。相信这一步不需要过多的解释,就是创建了一个文件夹,然后初始化了一下文件夹。然后在生成的package.json文件夹中更改一下自己的配置,例如包名、版本、描述等。然后创建src文件夹,在对应的地方写下你自己的函数即可。_npm发包流程https://blog.csdn.net/qq_45799465/article/details/140853512?spm=1001.2014.3001.5502
六、基于system.js的插件工具封装
(一)封装
import System from 'systemjs/dist/system.js';
import _ from 'lodash';
import moment from 'moment';
import react from 'react';
import * as ReactDom from 'react-dom';
import * as RbdData from 'xu-demo-data';
import { RainbondRootPagePlugin, RainbondEnterprisePagePlugin } from 'xu-demo-data'export const SystemJS = System;
const cache = {};
const initializedAt = Date.now();SystemJS.registry.set('plugin-loader', SystemJS.newModule({ locate: locateWithCache }));SystemJS.config({baseURL: '/public',defaultExtension: 'js',packages: {plugins: {defaultExtension: 'js',},},meta: {'/*': {esModule: true,authorization: false,loader: 'plugin-loader',}},
});export function exposeToPlugin(name, component) {SystemJS.registerDynamic(name, [], true, function (require, exports, module) {module.exports = component;});
}
exposeToPlugin('lodash', _);
exposeToPlugin('moment', moment);
exposeToPlugin('react', react);
exposeToPlugin('react-dom', ReactDom);
exposeToPlugin('xu-demo-data', RbdData);export async function importPluginModule(meta, regionName) {const path = `/console/regions/${regionName}/static/plugins/${meta.name}`const module = await SystemJS.import(path);return module
}export async function importAppPagePlugin(meta, regionName, type) {const xu = await importPluginModule(meta, regionName).then(function (pluginExports) {const plugin = pluginExports.plugin ? (pluginExports.plugin) :type == 'enterprise' ? new RainbondEnterprisePagePlugin() : new RainbondRootPagePlugin();plugin.init(meta);plugin.meta = meta;return plugin;});return xu
}export function locateWithCache(load, defaultBust = initializedAt) {const { address } = load;const path = extractPath(address);if (!path) {return `${address}?_cache=${defaultBust}`;}const version = cache[path];const bust = version || defaultBust;return `${address}?_cache=${bust}`;
}function extractPath(address) {const match = /\/public\/(plugins\/.+\/module)\.js/i.exec(address);if (!match) {return;}const [_, path] = match;if (!path) {return;}return path;
}
这里有几个重点:
首先,exposeToPlugin 这个函数的作用就是动态导入一些依赖,这也正好和子项目打包中排除的那些依赖相对应,也就相当于子项目用的依赖是和主项目一致的。
也就是说子项目和主项目的这些 共用的依赖的版本要一致 !!!
export function exposeToPlugin(name, component) {SystemJS.registerDynamic(name, [], true, function (require, exports, module) {module.exports = component;});
}
exposeToPlugin('lodash', _);
exposeToPlugin('moment', moment);
exposeToPlugin('react', react);
exposeToPlugin('react-dom', ReactDom);
exposeToPlugin('xu-demo-data', RbdData);其次,importPluginModule 函数调用的 SystemJS.import 就是引入js文件的关键函数。而这个path,指向的就是线上地址的打包后的入口文件地址。 如果对 SystemJS 不了解的同学可以去看看我上面贴的SystemJS的github地址。
export async function importPluginModule(meta, regionName) {const path = `/console/regions/${regionName}/static/plugins/${meta.name}`const module = await SystemJS.import(path);return module
}export async function importAppPagePlugin(meta, regionName, type) {const xu = await importPluginModule(meta, regionName).then(function (pluginExports) {const plugin = pluginExports.plugin ? (pluginExports.plugin) :type == 'enterprise' ? new RainbondEnterprisePagePlugin() : new RainbondRootPagePlugin();plugin.init(meta);plugin.meta = meta;return plugin;});return xu
}
(二)使用
导出,然后使用就可以了。
import { importAppPagePlugin } from '../../utils/importPlugins'; importPlugin = (meta, regionName) => {importAppPagePlugin(meta, regionName, 'enterprise').then(res => {this.setState({ app: res, pluginLoading: false })}).catch(err => {this.setState({errInfo: err?.response?.data?.message || err?.message || "An unexpected error occurred.",pluginLoading: false,error: true})})}
七、主项目改造
(一)安装依赖
这里没有什么多说的,安装的 SystemJS 版本以及 npm 包版本如下:

(二)指定路由
动态路由。

路由代码
RbdPlugins.js
//RbdPlugins.jsimport React, { Component } from 'react';
import { Spin, Card, Button } from 'antd';
import { connect } from 'dva';
import { importAppPagePlugin } from '../../utils/importPlugins';
import { getRainbondInfo } from '../../services/api';
import PageHeaderLayout from '../../layouts/PageHeaderLayout';
import RbdPluginsCom from '../../components/RBDPluginsCom'
import Global from '@/utils/global';
import PluginUtil from '../../utils/pulginUtils';
import styles from './index.less';@connect(({ user, teamControl, global }) => ({user: user.currentUser,
}))
export default class Index extends Component {constructor(props) {super(props);this.state = {app: {},plugins: {},loading: true,pluginLoading: true,error: false,errInfo: '',};}componentDidMount() {this.getPluginsList();}importPlugin = (meta, regionName) => {importAppPagePlugin(meta, regionName, 'enterprise').then(res => {this.setState({ app: res, pluginLoading: false })}).catch(err => {this.setState({errInfo: err?.response?.data?.message || err?.message || "An unexpected error occurred.",pluginLoading: false,error: true})})}getPluginsList = () => {const type = PluginUtil.getCurrentViewPosition(window.location.href);type === 'Platform' ? this.loadEnterpriseClusters() : this.loadPluginList();};loadEnterpriseClusters = () => {const { dispatch } = this.props;const enterpriseId = Global.getCurrEnterpriseId();dispatch({type: 'region/fetchEnterpriseClusters',payload: { enterprise_id: enterpriseId },callback: (res) => {if (res.status_code === 200 && res.list?.[0]?.region_name) {this.loadPluginList(res.list[0].region_name);}},});};loadPluginList = (regionName) => {const {dispatch,match,isCom,user,} = this.props;let pluginId= ''if(isCom){pluginId = Global.getComponentPluginType()}else{pluginId = match.params.pluginId}const enterpriseId = Global.getCurrEnterpriseId() || user?.enterprise_id;const currentRegionName = regionName || Global.getCurrRegionName();dispatch({type: 'global/getPluginList',payload: { enterprise_id: enterpriseId, region_name: currentRegionName },callback: (res) => {if (res && res.list) {const plugin = res.list.find((item) => item.name === pluginId) || {};this.setState({ plugins: plugin, loading: false }, () => {if (plugin.plugin_type === 'JSInject') {this.importPlugin(plugin, currentRegionName);}});}},handleError: () => {this.setState({ plugins: {}, loading: false });},});};render() {const { plugins, loading } = this.state;const {isCom = false} = this.propsreturn (<>{!loading ? (isCom ? <RbdPluginsCom {...this.state}/> :<PageHeaderLayout title={plugins?.name} content={plugins?.description} pluginSVg={plugins?.icon}><RbdPluginsCom {...this.state}/></PageHeaderLayout>) : (<div style={{ width: '100%', height: 500, display: 'flex', justifyContent: 'center', alignItems: 'center' }}><Spin size="large" /></div>)}</>);}
}
RbdPluginsCom.js
import React, { Component } from 'react';
import { Spin, Card, Button } from 'antd';
import Result from '../Result';
import PluginsUtiles from '../../utils/pulginUtils'
import Global from '../../utils/global'
import styles from './index.less';export default class index extends Component {constructor(props) {super(props);this.state = {};}// 判断是否为多视图插件isMultiViewPlugin = () => {const { plugins } = this.props;const str = PluginsUtiles.isCurrentPluginMultiView(window.location.href, plugins.plugin_views)return str}// 渲染插件rbdPluginsRender = () => {const { app, plugins, pluginLoading, error, errInfo, dispatch, reduxInfo } = this.props;const key = this.isMultiViewPlugin()const AppPagePlugin = app[key] ? app[key] : falsereturn pluginLoading ? (<div style={{ width: '100%', height: 500, display: 'flex', justifyContent: 'center', alignItems: 'center' }}><Spin size="large" tip="插件内容加载中..." /></div>) : (error ? (<Card style={{ marginTop: 20 }}><Resulttype="error"title='插件加载失败'description={`错误信息:${errInfo}`}actions={<Button onClick={() => { console.log('点了一下'); }}>查看文档</Button>}style={{marginTop: 48,marginBottom: 16}}/>,</Card>) : (AppPagePlugin &&<AppPagePlugincolorPrimary={Global.getPublicColor('primary-color')}currentLocale='en'/>));}// 渲染iframeiframeRender = () => {const { app, plugins, pluginLoading, error, errInfo } = this.props;return <div style={{ height: '100vh' }}><iframesrc={plugins?.fronted_path}style={{ width: '100%', height: '100%' }}id={plugins?.name}sandbox="allow-same-origin allow-scripts allow-popups allow-forms"scrolling="auto"frameBorder="no"border="0"marginWidth="0"marginHeight="0"/></div>}render() {const { plugins } = this.props;return (<>{plugins?.plugin_type === 'JSInject'?(this.rbdPluginsRender()) : (this.iframeRender())}</>)}
}
八、实现效果


/console/regions/rainbond/static/plugins/app-view?_cache=1728984496265 这个地址存放的就是子项目打包后的入口文件,这里也成功渲染出来了。
到此为止,所有的流程都已经串通了,插件功能也实现了。
九、开源项目地址
(一)主项目
https://github.com/goodrain/rainbond-ui/tree/V6.0![]() https://github.com/goodrain/rainbond-ui/tree/V6.0
https://github.com/goodrain/rainbond-ui/tree/V6.0
(二)子项目
https://github.com/xuzhonglin12138/plugin-template/tree/main![]() https://github.com/xuzhonglin12138/plugin-template/tree/main
https://github.com/xuzhonglin12138/plugin-template/tree/main
(三)xu-demo-data
xu-demo-data - npm111111. Latest version: 3.0.1, last published: 18 days ago. Start using xu-demo-data in your project by running `npm i xu-demo-data`. There are no other projects in the npm registry using xu-demo-data.![]() https://www.npmjs.com/package/xu-demo-data
https://www.npmjs.com/package/xu-demo-data
相关文章:
基于System.js的微前端实现(插件化)
目录 写在前面 一、微前端相关知识 (一)概念 (二) 优势 (三) 缺点 (四)应用场景 (五)现有框架 1. qiankun 2. single-spa 3. SystemJ…...

MedSAM2调试安装与使用记录
目录 前言一、环境准备多版本cuda切换切换cuda版本二 安装CUDNN2.1 检查cudnn 二、使用步骤1.安装虚拟环境2.测试Gradio3.推理 总结 前言 我们在解读完MedSAM之后,迫不及待想尝尝这个技术带来的福音,因此验证下是否真的那么6。这不,新鲜的使…...

Linux 进程终止和进程等待
目录 0.前言 1. 进程终止 1.1 进程退出的场景 1.2 进程常见退出方法 1.2.1 正常退出 1.2.2 异常退出 2. 进程等待 2.1 进程等待的重要性 2.2 进程等待的方法 2.2.1 wait() 方法 2.2.2 waitpid() 方法 2.3 获取子进程 status 2.4 阻塞等待和非阻塞等待 2.4.1 阻塞等待 2.4.2 非阻…...

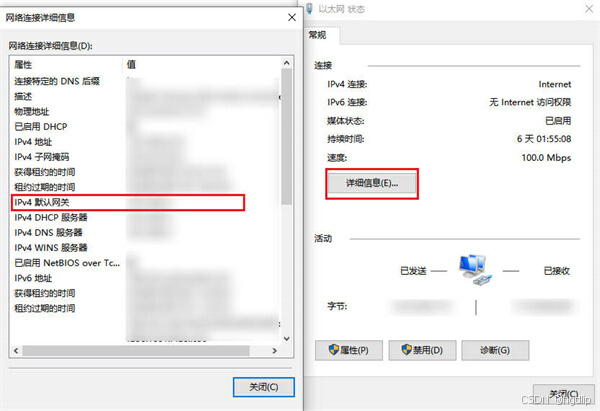
如何查看默认网关地址:详细步骤
在日常的网络配置与故障排查中,了解并正确查看默认网关地址是一项基础且至关重要的技能。默认网关是连接本地网络与外部网络(如互联网)的关键节点,它扮演着数据包转发的重要角色。无论是家庭网络、办公室网络还是更复杂的网络环境…...

什么是方法的返回值?方法有哪几种类型?静态方法为什么不能调用非静态成员?静态方法和实例方法有何不同?
什么是方法的返回值?方法有哪几种类型? 方法的返回值 是指我们获取到的某个方法体中的代码执行后产生的结果!(前提是该方法可能产生结果)。返回值的作用是接收出结果,使得它可以用于其他的操作! 我们可以…...

Qt开发——Qt项目打包、整合以及生成安装包保姆级教程(Windows系统)
目录 Windows下打包Qt项目 1.Qt系统环境变量的配置 2.打包 3.打包整合为一个.exe文件 4.生成安装包 做完了一个Qt项目之后,要干嘛呢,很显然要打包给别人,让别人也能使用这个软件,本期我们就来学习Qt打包,本期内容分…...

大数据-180 Elasticsearch - 原理剖析 索引写入与近实时搜索
点一下关注吧!!!非常感谢!!持续更新!!! 目前已经更新到了: Hadoop(已更完)HDFS(已更完)MapReduce(已更完&am…...

大数据-172 Elasticsearch 索引操作 与 IK 分词器 自定义停用词 Nginx 服务
点一下关注吧!!!非常感谢!!持续更新!!! 目前已经更新到了: Hadoop(已更完)HDFS(已更完)MapReduce(已更完&am…...

【Java后端】之 ThreadLocal 详解
想象一下,你有一个工具箱,里面放着各种工具。在多人共用这个工具箱的时候,很容易出现混乱,比如有人拿走了你的锤子,或者你找不到合适的螺丝刀。为了避免这种情况,最好的办法就是每个人都有自己独立的工具箱…...
)
2.链表(代码随想录——python版本)
2.链表(代码随想录——python版本) 链表的概念: 链表是由指针串联在一起的线性结构,一个节点(node)由两部分组成: 数据域——用来存储数据;指针域——用来指向下一个节点…...

6个解决“由于找不到vcruntime140_1.dll无法继续执行代码”问题的方法
vcruntime140_1.dll丢失的问题在Windows操作系统中相对常见,它通常与Microsoft Visual C Redistributable有关。本文将详细解读vcruntime140_1.dll丢失的原因、解决方法以及预防措施,帮助用户更好地应对这一问题。 一,vcruntime140_1.dll文件…...

常用数据库获取表,视图,列,索引信息
一、分页获取数据库用户的所有表 (1)、Oracle,OceanBase(Oracle内核版),DM 使用ALL_TABLES,需要添加当前用户作为查询条件 select a3.* from (select a2.* from (select a1.*, rownum rn1 from ( select t1.table_name, t2.comments fro…...

架构设计笔记-16-嵌入式系统架构设计理论与实践
目录 知识要点 嵌入式微处理器 存储器(memory) 内(外)总线逻辑 嵌入式操作系统(Embedded Operating System,EOS) 通用中间件 嵌入式中间件的一般架构 典型嵌入式中间件系统 案例分析 1…...

SpringSecurity使用介绍
1、SpringSecurity 1.1 SpringSecurity简介 Spring Security是基于Spring的安全框架,提供了包含认证和授权的落地方案;Spring Security底层充分利用了Spring IOC和AOP功能,为企业应用系统提供了声明式安全访问控制解决方案;SpringSecurity可…...

# Js 回调函数
Js 回调函数 文章目录 Js 回调函数回调函数的定义和使用回调函数的常见用途异步操作事件处理 回调函数的优点和缺点优点缺点 回调地狱解决回调地狱的方法使用 Promise使用 async/await 应用函数式编程中的回调函数高阶函数函数柯里化 异步编程中的回调函数回调函数的错误处理传…...

COOLSHELL文章:从Code Review 谈如何做技术【阅读笔记】
从Code Review 谈如何做技术原文链接:https://coolshell.cn/articles/11432.html#google_vignette 工程师需要有责任心和修养,不是做出来就了事,而是要做漂亮。 这也是山寨和工业的区别,只以做出来为标准是劳动密集型的装配生产线…...

3.1.1 ReactOS系统中二叉树创建一个MEMORY_AREA节点
二叉树中创建一个MEMORY_AREA节点: 二叉树中创建一个MEMORY_AREA节点: MmCreateMemoryArea() 参数AddressSpace是MADDRESS SPACE结构指针,所指向的数据结构代表着一个进程的用 户空间。 参数BaseAddress是个指针,用来给定和返回内…...

三、Linux 安装全攻略
Linux 安装全攻略 在当今的科技时代,Linux 操作系统以其稳定性、安全性和高度的可定制性而备受青睐。本文将详细介绍 Linux 的安装过程,包括关键步骤和下载资源获取方式,帮助你顺利踏上 Linux 之旅。 一、为什么选择 Linux Linux 有许多优…...

Ansible自动化工具
一、Ansible概述 1.1 什么是Ansible Ansible 是一个开源的自动化工具,用于配置管理、应用程序部署和任务自动化。它让你可以通过编写简单的 YAML 文件(剧本,Playbooks),轻松管理和配置多个服务器。Ansible 的特点是无…...

Flutter Container组件
Over the past few years, I’ve been fortunate to collaborate with interior designers, and there’s a distinct flair to their approach to crafting captivating interiors. It’s not just about arranging furniture randomly; they meticulously plan layouts, sele…...

KubeSphere 容器平台高可用:环境搭建与可视化操作指南
Linux_k8s篇 欢迎来到Linux的世界,看笔记好好学多敲多打,每个人都是大神! 题目:KubeSphere 容器平台高可用:环境搭建与可视化操作指南 版本号: 1.0,0 作者: 老王要学习 日期: 2025.06.05 适用环境: Ubuntu22 文档说…...

观成科技:隐蔽隧道工具Ligolo-ng加密流量分析
1.工具介绍 Ligolo-ng是一款由go编写的高效隧道工具,该工具基于TUN接口实现其功能,利用反向TCP/TLS连接建立一条隐蔽的通信信道,支持使用Let’s Encrypt自动生成证书。Ligolo-ng的通信隐蔽性体现在其支持多种连接方式,适应复杂网…...

【WiFi帧结构】
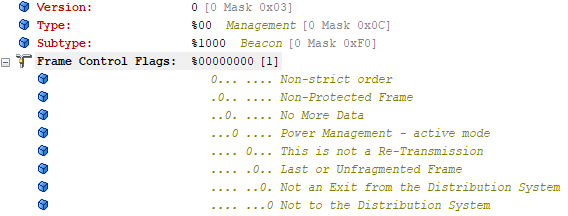
文章目录 帧结构MAC头部管理帧 帧结构 Wi-Fi的帧分为三部分组成:MAC头部frame bodyFCS,其中MAC是固定格式的,frame body是可变长度。 MAC头部有frame control,duration,address1,address2,addre…...

Go 语言接口详解
Go 语言接口详解 核心概念 接口定义 在 Go 语言中,接口是一种抽象类型,它定义了一组方法的集合: // 定义接口 type Shape interface {Area() float64Perimeter() float64 } 接口实现 Go 接口的实现是隐式的: // 矩形结构体…...

C#中的CLR属性、依赖属性与附加属性
CLR属性的主要特征 封装性: 隐藏字段的实现细节 提供对字段的受控访问 访问控制: 可单独设置get/set访问器的可见性 可创建只读或只写属性 计算属性: 可以在getter中执行计算逻辑 不需要直接对应一个字段 验证逻辑: 可以…...

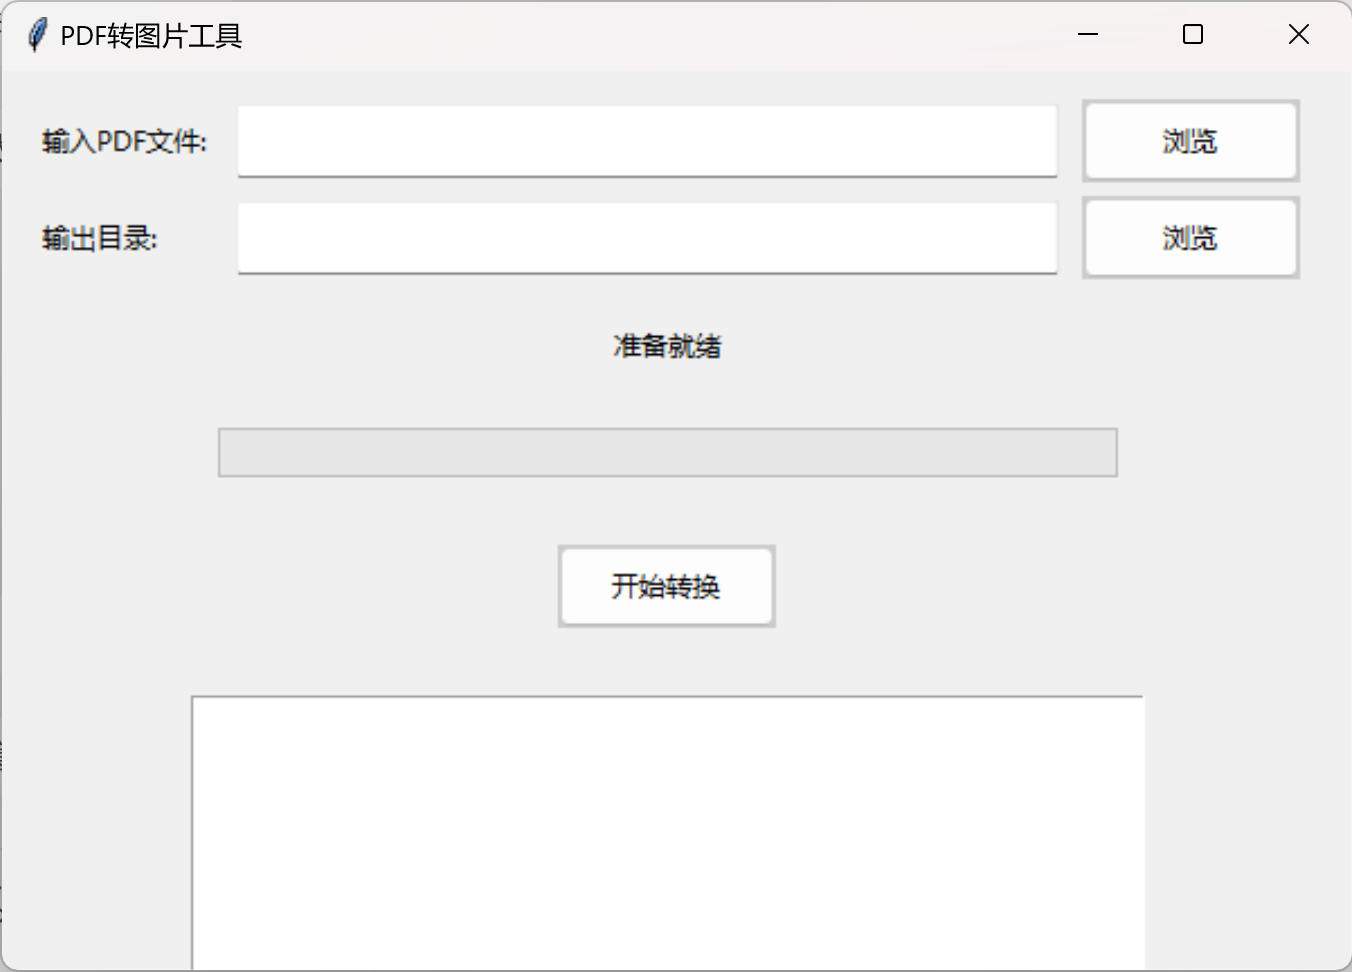
免费PDF转图片工具
免费PDF转图片工具 一款简单易用的PDF转图片工具,可以将PDF文件快速转换为高质量PNG图片。无需安装复杂的软件,也不需要在线上传文件,保护您的隐私。 工具截图 主要特点 🚀 快速转换:本地转换,无需等待上…...

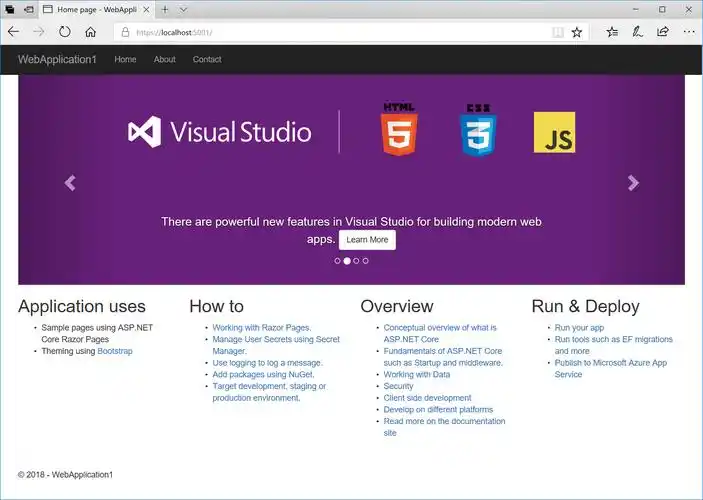
Razor编程中@Html的方法使用大全
文章目录 1. 基础HTML辅助方法1.1 Html.ActionLink()1.2 Html.RouteLink()1.3 Html.Display() / Html.DisplayFor()1.4 Html.Editor() / Html.EditorFor()1.5 Html.Label() / Html.LabelFor()1.6 Html.TextBox() / Html.TextBoxFor() 2. 表单相关辅助方法2.1 Html.BeginForm() …...

手机平板能效生态设计指令EU 2023/1670标准解读
手机平板能效生态设计指令EU 2023/1670标准解读 以下是针对欧盟《手机和平板电脑生态设计法规》(EU) 2023/1670 的核心解读,综合法规核心要求、最新修正及企业合规要点: 一、法规背景与目标 生效与强制时间 发布于2023年8月31日(OJ公报&…...

HTML前端开发:JavaScript 获取元素方法详解
作为前端开发者,高效获取 DOM 元素是必备技能。以下是 JS 中核心的获取元素方法,分为两大系列: 一、getElementBy... 系列 传统方法,直接通过 DOM 接口访问,返回动态集合(元素变化会实时更新)。…...

API网关Kong的鉴权与限流:高并发场景下的核心实践
🔥「炎码工坊」技术弹药已装填! 点击关注 → 解锁工业级干货【工具实测|项目避坑|源码燃烧指南】 引言 在微服务架构中,API网关承担着流量调度、安全防护和协议转换的核心职责。作为云原生时代的代表性网关,Kong凭借其插件化架构…...
