前端 图片上鼠标画矩形框,标注文字,任意删除
效果:

页面描述:
对给定的几张图片,每张能用鼠标在图上画框,标注相关文字,框的颜色和文字内容能自定义改变,能删除任意画过的框。
实现思路:
1、对给定的这几张图片,用分页器绑定展示,能选择图片;
2、图片上绑定事件@mousedown鼠标按下——开始画矩形、@mousemove鼠标移动——绘制中临时画矩形、@mouseup鼠标抬起——结束画矩形重新渲染;
开始画矩形:鼠标按下,记录鼠标按下的位置。遍历标签数组,找到check值为true的标签,用其样式和名字创建新的标签,加入该图片的矩形框们的数组。注意,监听鼠标如果是按下后马上抬起,结束标注。
更新矩形:识别到新的标签存在,鼠标移动时监听移动距离,更新当前矩形宽高,用canvas绘制实时临时矩形。
结束画矩形:刷新该图片的矩形框们的数组,触发重新渲染。
3、在图片上v-for遍历渲染矩形框,盒子绑定动态样式改变宽高;
4、右侧能添加、修改矩形框颜色和文字;
5、列举出每个矩形框名称,能选择进行删除,还能一次清空;
<template>
<div class="allbody"><div class="body-top"><button class="top-item2" @click="clearAnnotations">清空</button></div><div class="body-btn"><div class="btn-content"><div class="image-container"><!-- <img :src="imageUrl" alt="Character Image" /> --><img :src="state.imageUrls[state.currentPage - 1]" @mousedown="startAnnotation" @mousemove="updateAnnotation" @mouseup="endAnnotation" /><!-- 使用canvas覆盖在图片上方,用于绘制临时矩形 --><canvas ref="annotationCanvas"></canvas><div v-for="annotation in annotations[state.currentPage - 1]" :key="annotation.id" class="annotation" :style="annotationStyle(annotation)"><div class="label">{{ annotation.label }}</div></div></div><Paginationv-model:current="state.currentPage"v-model:page-size="state.pageSize"show-quick-jumper:total="state.imageUrls.length":showSizeChanger="false":show-total="total => `共 ${total} 张`" /></div><div class="sidebar"><div class="sidebar-title">标签</div><div class="tags"><div class="tags-item" v-for="(tags, index2) in state.tagsList" :key="index2" @click="checkTag(index2)"><div class="tags-checkbox"><div :class="tags.check === true ? 'checkbox-two' : 'notcheckbox-two'"></div></div><div class="tags-right"><input class="tags-color" type="color" v-model="tags.color" /><input type="type" class="tags-input" v-model="tags.name" /><button class="tags-not" @click="deleteTag(index2)"><DeleteOutlined style="color: #ff0202" /></button></div></div></div><div class="sidebar-btn"><button class="btn-left" @click="addTags()">添加</button></div><div class="sidebar-title">数据</div><div class="sidebars"><div class="sidebar-item" v-for="(annotation, index) in annotations[state.currentPage - 1]" :key="annotation.id"><div class="sidebar-item-font">{{ index + 1 }}.{{ annotation.name }}</div><button class="sidebar-item-icon" @click="removeAnnotation(annotation.id)"><DeleteOutlined style="color: #ff0202" /></button> </div></div></div></div></div>
</template>
<script lang="ts" setup>import { DeleteOutlined } from '@ant-design/icons-vue';import { Pagination } from 'ant-design-vue';interface State {tagsList: any;canvasX: number;canvasY: number;currentPage: number;pageSize: number;imageUrls: string[];};const state = reactive<State>({tagsList: [], // 标签列表canvasX: 0,canvasY: 0,currentPage: 1,pageSize: 1,imageUrls: [apiUrl.value + '/api/File/Image/annexpic/20241203Q9NHJ.jpg', apiUrl.value + '/api/file/Image/document/20241225QBYXZ.jpg'],});interface Annotation {id: string;name: string;x: number;y: number;width: number;height: number;color: string;label: string;border: string;};const annotations = reactive<Array<Annotation[]>>([[]]);let currentAnnotation: Annotation | null = null;//开始标注function startAnnotation(event: MouseEvent) {// 获取当前选中的标签var tagsCon = { id: 1, check: true, color: '#000000', name: '安全帽' };// 遍历标签列表,获取当前选中的标签for (var i = 0; i < state.tagsList.length; i++) {if (state.tagsList[i].check) {tagsCon.id = state.tagsList[i].id;tagsCon.check = state.tagsList[i].check;tagsCon.color = state.tagsList[i].color;tagsCon.name = state.tagsList[i].name;}}// 创建新的标注currentAnnotation = {id: crypto.randomUUID(),name: tagsCon.name,x: event.offsetX,y: event.offsetY,width: 0,height: 0,color: '#000000',label: (annotations[state.currentPage - 1].length || 0) + 1 + tagsCon.name,border: tagsCon.color,};annotations[state.currentPage - 1].push(currentAnnotation);//记录鼠标按下的位置state.canvasX = event.offsetX;state.canvasY = event.offsetY;//监听鼠标如果是按下后马上抬起,结束标注const mouseupHandler = () => {endAnnotation();window.removeEventListener('mouseup', mouseupHandler);};window.addEventListener('mouseup', mouseupHandler);}//更新标注function updateAnnotation(event: MouseEvent) {if (currentAnnotation) {//更新当前标注的宽高,为负数时,鼠标向左或向上移动currentAnnotation.width = event.offsetX - currentAnnotation.x;currentAnnotation.height = event.offsetY - currentAnnotation.y;}//如果正在绘制中,更新临时矩形的位置if (annotationCanvas.value) {const canvas = annotationCanvas.value;//取得类名为image-container的div的宽高const imageContainer = document.querySelector('.image-container');canvas.width = imageContainer?.clientWidth || 800;canvas.height = imageContainer?.clientHeight || 534;const context = canvas.getContext('2d');if (context) {context.clearRect(0, 0, canvas.width, canvas.height);context.strokeStyle = currentAnnotation?.border || '#000000';context.lineWidth = 2;context.strokeRect(state.canvasX, state.canvasY, currentAnnotation?.width || 0, currentAnnotation?.height || 0);}}}function endAnnotation() {//刷新annotations[state.currentPage - 1],触发重新渲染annotations[state.currentPage - 1] = annotations[state.currentPage - 1].slice();currentAnnotation = null;}function annotationStyle(annotation: Annotation) {//如果宽高为负数,需要调整left和top的位置const left = annotation.width < 0 ? annotation.x + annotation.width : annotation.x;const top = annotation.height < 0 ? annotation.y + annotation.height : annotation.y;return {left: `${left}px`,top: `${top}px`,width: `${Math.abs(annotation.width)}px`,height: `${Math.abs(annotation.height)}px`,border: `2px solid ${annotation.border}`,};}// 选择标签function checkTag(index2: number) {state.tagsList.forEach((item, index) => {if (index === index2) {item.check = true;} else {item.check = false;}});}// 删除标签function deleteTag(index: number) {state.tagsList.splice(index, 1);}function addTags() {state.tagsList.push({ id: state.tagsList.length + 1, check: false, color: '#000000', name: '' });}// 移除某个标注function removeAnnotation(id: string) {const index = annotations[state.currentPage - 1].findIndex(a => a.id === id);if (index !== -1) {annotations[state.currentPage - 1].splice(index, 1);}}// 清空所有标注function clearAnnotations() {annotations[state.currentPage - 1].splice(0, annotations[state.currentPage - 1].length);}onMounted(() => {for (let i = 0; i < state.imageUrls.length; i++) {annotations.push([]);}});</script>
<style>.body-top {display: flex;flex-direction: row;align-items: center;justify-content: center;margin-bottom: 10px;width: 85%;}.top-item1 {width: 70px;height: 28px;line-height: 26px;text-align: center;background-color: #028dff;border: 1px solid #028dff;border-radius: 5px;font-size: 14px;color: #fff;margin-left: 20px;}.top-item2 {width: 70px;height: 28px;line-height: 26px;text-align: center;background-color: rgb(255, 2, 2);border: 1px solid rgb(255, 2, 2);border-radius: 5px;font-size: 14px;color: #fff;margin-left: 20px;}.body-btn {margin: 0;padding: 10px 13px 0 0;min-height: 630px;display: flex;background-color: #f5f5f5;}.btn-content {flex-grow: 1;padding: 10px;box-sizing: border-box;display: flex;flex-direction: column;align-items: center;}.image-container {height: 500px;margin: 40px;}.image-container img {height: 500px !important;}.ant-pagination {margin-bottom: 18px;}.number-input {width: 70px;border: 1px solid #ccc;border-radius: 4px;text-align: center;font-size: 16px;background-color: #f9f9f9;outline: none;color: #66afe9;}.sidebar {display: flex;flex-direction: column;width: 280px;height: 640px;background-color: #fff;padding: 10px;border-radius: 7px;}.sidebar-title {font-size: 16px;font-weight: 600;margin-bottom: 10px;}.sidebars {overflow: auto;}.sidebar .tags {margin-bottom: 10px;}.tags-item {display: flex;flex-direction: row;align-items: center;}.tags-checkbox {width: 24px;height: 24px;border-radius: 50px;border: 1px solid #028dff;display: flex;flex-direction: column;align-items: center;justify-content: center;margin-right: 7px;}.checkbox-two {background-color: #028dff;width: 14px;height: 14px;border-radius: 50px;}.notcheckbox-two {width: 14px;height: 14px;border-radius: 50px;border: 1px solid #028dff;}.tags-right {display: flex;flex-direction: row;align-items: center;background-color: #f5f5f5;border-radius: 5px;padding: 5px;width: 90%;}.tags-color {width: 26px;height: 26px;border-radius: 5px;}.tags-input {border: 1px solid #fff;width: 153px;margin: 0 10px;}.tags-not {border: 1px solid #f5f5f5;font-size: 12px;}.sidebar-btn {display: flex;flex-direction: row;align-items: center;justify-content: right;}.btn-left {width: 60px;height: 28px;line-height: 26px;text-align: center;border: 1px solid #028dff;border-radius: 5px;font-size: 14px;color: #028dff;}.btn-right {width: 60px;height: 28px;line-height: 26px;text-align: center;background-color: #028dff;border: 1px solid #028dff;border-radius: 5px;font-size: 14px;color: #fff;margin-left: 10px;}.sidebar-item {display: flex;justify-content: space-between;align-items: center;padding-right: 2px;}.sidebar-item-font {margin-right: 10px;}.sidebar-item-icon {font-size: 12px;border: 1px solid #fff;}.image-annotator {display: flex;height: 100%;}.image-container {flex: 1;position: relative;overflow: auto;}.image-container img {max-width: 100%;height: auto;}.annotation {position: absolute;box-sizing: border-box;}canvas {position: absolute;top: 0;left: 0;width: 100%;height: 100%;pointer-events: none; /* 防止遮挡鼠标事件 */}
</style>
相关文章:

前端 图片上鼠标画矩形框,标注文字,任意删除
效果: 页面描述: 对给定的几张图片,每张能用鼠标在图上画框,标注相关文字,框的颜色和文字内容能自定义改变,能删除任意画过的框。 实现思路: 1、对给定的这几张图片,用分页器绑定…...
)
为什么HTTP请求后面有时带一个sign参数(HTTP请求签名校验)
前言 最近在开发过程中,发现前端有很多的接口发送请求时都会携带signxxxx参数,但是后端明明没有写,也不需要这个参数,后面才知道,这个前面是为了给http请求签名,主要是为了防止请求体和请求参数被拦截篡改…...

第二十八周机器学习笔记:PINN求正反解求PDE文献阅读——反问题、动手深度学习
第二十八周周报 一、文献阅读题目信息摘要Abstract网络架构实验——Data-driven discovery of partial differential equations(偏微分方程的数据驱动发现)1. Continuous time models(连续时间模型)例子:(Navier–Stok…...
计算机毕业设计hadoop+spark知网文献论文推荐系统 知识图谱 知网爬虫 知网数据分析 知网大数据 知网可视化 预测系统 大数据毕业设计 机器学习
温馨提示:文末有 CSDN 平台官方提供的学长联系方式的名片! 温馨提示:文末有 CSDN 平台官方提供的学长联系方式的名片! 温馨提示:文末有 CSDN 平台官方提供的学长联系方式的名片! 作者简介:Java领…...

C#Struct堆栈
Struct若其内部含有堆对象,Struct的该对象放在堆上; Struct当做参数传递时,其堆属性作为引用传递,值属性还是作为值传递; struct TS { public int[] t1; public int t2; } public void TF1(TS t) { int[] t1 t.t1; …...

页面转 PDF 功能的实现思路与使用方法
引言 在 Web 开发中,有时我们需要将页面的特定部分转换为 PDF 格式,以便用户下载和保存。本文将详细介绍如何使用 html2canvas 和 jspdf 这两个强大的库来实现这一功能,并且结合实际代码讲解其实现思路与使用方法。完整源码(src/…...

【保姆级教程】基于OpenCV+Python的人脸识别上课签到系统
【保姆级教程】基于OpenCVPython的人脸识别上课签到系统 一、软件安装及环境配置1. 安装IDE:PyCharm2. 搭建Python的环境3. 新建项目、安装插件、库 二、源文件编写1. 采集人脸.py2. 训练模型.py3. 生成表格.py4. 识别签到.py5. 创建图形界面.py 三、相关函数分析1.…...

docker-compose部署下Fastapi中使用sqlalchemy和Alembic
本篇介绍使用Fastapi sqlalchemy alembic 来完成后端服务的数据库管理,并且通过docker-compose来部署后端服务和数据库Mysql。包括: 数据库创建,数据库用户创建数据库服务发现Fastapi 连接数据库Alembic 连接数据库服务健康检查 部署数据…...

Oracle:ORA-00904: “10“: 标识符无效报错详解
1.报错Oracle语句如下 SELECT YK_CKGY.ID,YK_CKGY.DJH,YK_CKGY.BLRQ,YK_CKGY.ZBRQ,YK_CKGY.SHRQ,YK_CKGY.YT,YK_CKGY.ZDR,YK_CKGY.SHR,YK_CKGY.BZ,YK_CKGY.JZRQ,YK_CKGY.ZT,YK_CKGY.CKLX,(case YK_CKGY.CKLXwhen 09 then药房调借when 02 then科室退药when 03 then损耗出库when…...

C语言#define定义宏
目录 一、什么是宏以及宏的声明方式 1.宏常量: 2.宏函数: 二、宏的替换原则 三、宏设计的易犯错误 ERROR1:尾部加分号(当然有些特定需要加了分号,这里说明一般情况) ERROR2:宏函数定义时&…...

SpringBoot操作spark处理hdfs文件
SpringBoot操作spark处理hdfs文件 1、导入依赖 <!-- spark依赖--><dependency><groupId>org.apache.spark</groupId><artifactId>spark-core_2.12</artifactId><version>3.2.2</version></dependency><depend…...

消息队列架构、选型、专有名词解释
私人博客传送门 消息队列专有名词解释 | 魔筝炼药师 MQ选型 | 魔筝炼药师 MQ架构 | 魔筝炼药师 MQ顺序消息 | 魔筝炼药师...

用OpenCV实现UVC视频分屏
分屏 OpencvUVC代码验证后话 用OpenCV实现UVC摄像头的视频分屏。 Opencv opencv里有很多视频图像的处理功能。 UVC Usb 视频类,免驱动的。视频流格式有MJPG和YUY2。MJPG是RGB三色通道的。要对三通道进行分屏显示。 代码 import cv2 import numpy as np video …...

Allure 集成 pytest
Allure 是一个强大的测试报告工具,与 pytest 集成可以生成详细的测试报告,包括测试步骤、测试数据、截图、错误堆栈等。 1. 安装 Allure 和相关依赖 安装 pytest-allure-adaptor 插件: pip install allure-pytest确保本地已安装 Allure 工具。…...

【Python】构建智能语音助手:使用Python实现语音识别与合成的全面指南
随着人工智能技术的迅猛发展,语音助手已成为人们日常生活中不可或缺的一部分。从智能手机到智能家居设备,语音交互提供了便捷高效的人机交互方式。本文旨在全面介绍如何利用Python编程语言及其强大的库——SpeechRecognition和gTTS,构建一个基…...

在 Arthas 中调用 Spring Bean 方法
获取 Spring 应用上下文 使用工具类 如果你的项目中有一个工具类实现了 ApplicationContextAware 接口,如 cn.shutdown.pf.utils.SpringContextUtils,可以使用该类获取 ApplicationContext: Component public final class SpringContextUt…...

Nginx入门笔记
Nginx入门笔记 一、Nginx基本概念二、代理1、正向代理2、反向代理 三、准备工作1、CentOS 7安装nginx(1). 安装必要的依赖(2)下载nginx(3)编译安装(4)编译并安装 Nginx(5)启动nginx …...

【单片机】实现一个简单的ADC滤波器
实现一个 ADC的滤波器,PT1 滤波器(也称为一阶低通滤波器),用于对输入信号进行滤波处理。 typedef struct PT1FilterSettings PT1FilterSettings; struct PT1FilterSettings {//! last Filter output valueuint32_t filtValOld;//…...

开源 vGPU 方案 HAMi 解析
开源 vGPU 方案 HAMi 一、k8s 环境下 GPU 资源管理的现状与问题 (一)资源感知与绑定 在 k8s 中,资源与节点紧密绑定。对于 GPU 资源,我们依赖 NVIDIA 提供的 device-plugin 来进行感知,并将其上报到 kube-apiserver…...

备考蓝桥杯:顺序表详解(静态顺序表,vector用法)
目录 1.顺序表的概念 2.静态顺序表的实现 总代码 3.stl库动态顺序表vector 测试代码 1.顺序表的概念 要理解顺序表,我们要先了解一下什么是线性表 线性表是n个具有相同特征的数据元素的序列 这就是一个线性表 a1是表头 a4是表尾 a2是a3的前驱 a3是a2的后继 空…...
使用rpicam-app通过网络流式传输视频)
树莓派超全系列教程文档--(62)使用rpicam-app通过网络流式传输视频
使用rpicam-app通过网络流式传输视频 使用 rpicam-app 通过网络流式传输视频UDPTCPRTSPlibavGStreamerRTPlibcamerasrc GStreamer 元素 文章来源: http://raspberry.dns8844.cn/documentation 原文网址 使用 rpicam-app 通过网络流式传输视频 本节介绍来自 rpica…...
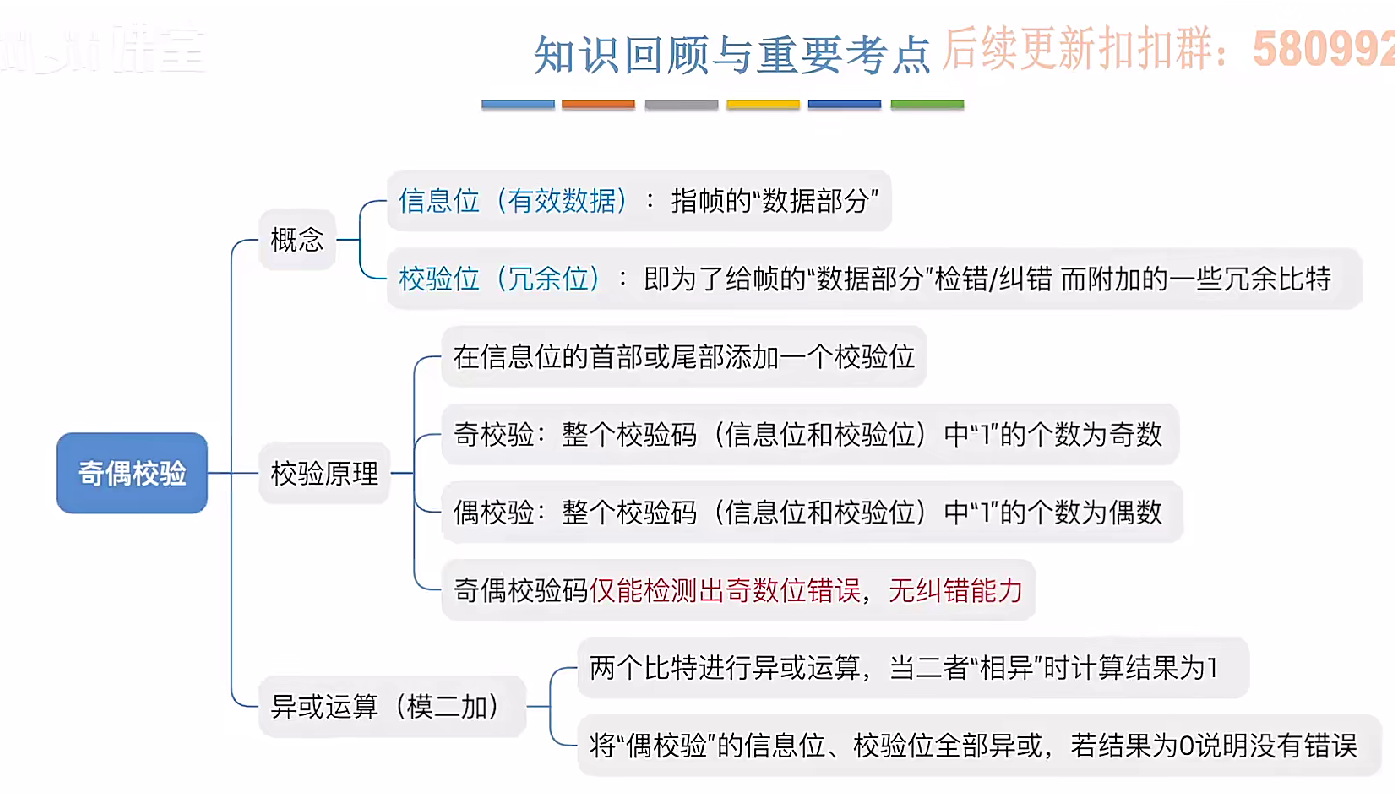
3.3.1_1 检错编码(奇偶校验码)
从这节课开始,我们会探讨数据链路层的差错控制功能,差错控制功能的主要目标是要发现并且解决一个帧内部的位错误,我们需要使用特殊的编码技术去发现帧内部的位错误,当我们发现位错误之后,通常来说有两种解决方案。第一…...
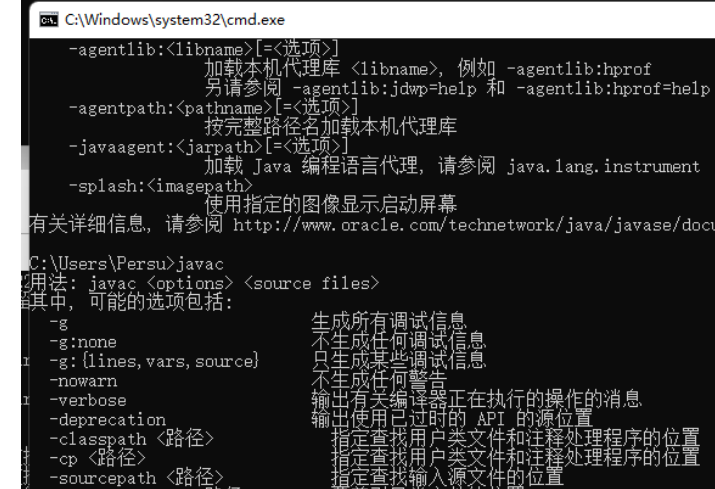
python/java环境配置
环境变量放一起 python: 1.首先下载Python Python下载地址:Download Python | Python.org downloads ---windows -- 64 2.安装Python 下面两个,然后自定义,全选 可以把前4个选上 3.环境配置 1)搜高级系统设置 2…...
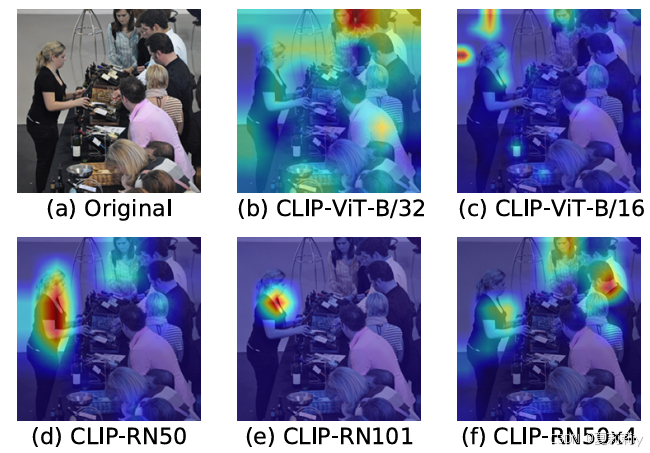
[ICLR 2022]How Much Can CLIP Benefit Vision-and-Language Tasks?
论文网址:pdf 英文是纯手打的!论文原文的summarizing and paraphrasing。可能会出现难以避免的拼写错误和语法错误,若有发现欢迎评论指正!文章偏向于笔记,谨慎食用 目录 1. 心得 2. 论文逐段精读 2.1. Abstract 2…...

CRMEB 框架中 PHP 上传扩展开发:涵盖本地上传及阿里云 OSS、腾讯云 COS、七牛云
目前已有本地上传、阿里云OSS上传、腾讯云COS上传、七牛云上传扩展 扩展入口文件 文件目录 crmeb\services\upload\Upload.php namespace crmeb\services\upload;use crmeb\basic\BaseManager; use think\facade\Config;/*** Class Upload* package crmeb\services\upload* …...
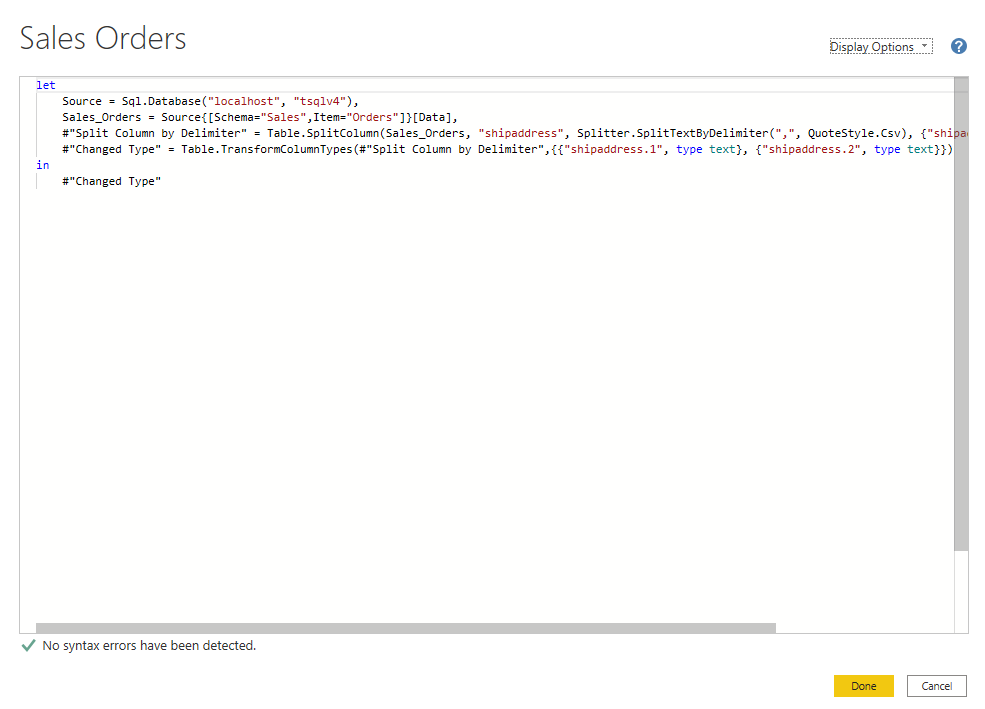
微软PowerBI考试 PL300-在 Power BI 中清理、转换和加载数据
微软PowerBI考试 PL300-在 Power BI 中清理、转换和加载数据 Power Query 具有大量专门帮助您清理和准备数据以供分析的功能。 您将了解如何简化复杂模型、更改数据类型、重命名对象和透视数据。 您还将了解如何分析列,以便知晓哪些列包含有价值的数据,…...

Hive 存储格式深度解析:从 TextFile 到 ORC,如何选对数据存储方案?
在大数据处理领域,Hive 作为 Hadoop 生态中重要的数据仓库工具,其存储格式的选择直接影响数据存储成本、查询效率和计算资源消耗。面对 TextFile、SequenceFile、Parquet、RCFile、ORC 等多种存储格式,很多开发者常常陷入选择困境。本文将从底…...

#Uniapp篇:chrome调试unapp适配
chrome调试设备----使用Android模拟机开发调试移动端页面 Chrome://inspect/#devices MuMu模拟器Edge浏览器:Android原生APP嵌入的H5页面元素定位 chrome://inspect/#devices uniapp单位适配 根路径下 postcss.config.js 需要装这些插件 “postcss”: “^8.5.…...
LINUX 69 FTP 客服管理系统 man 5 /etc/vsftpd/vsftpd.conf
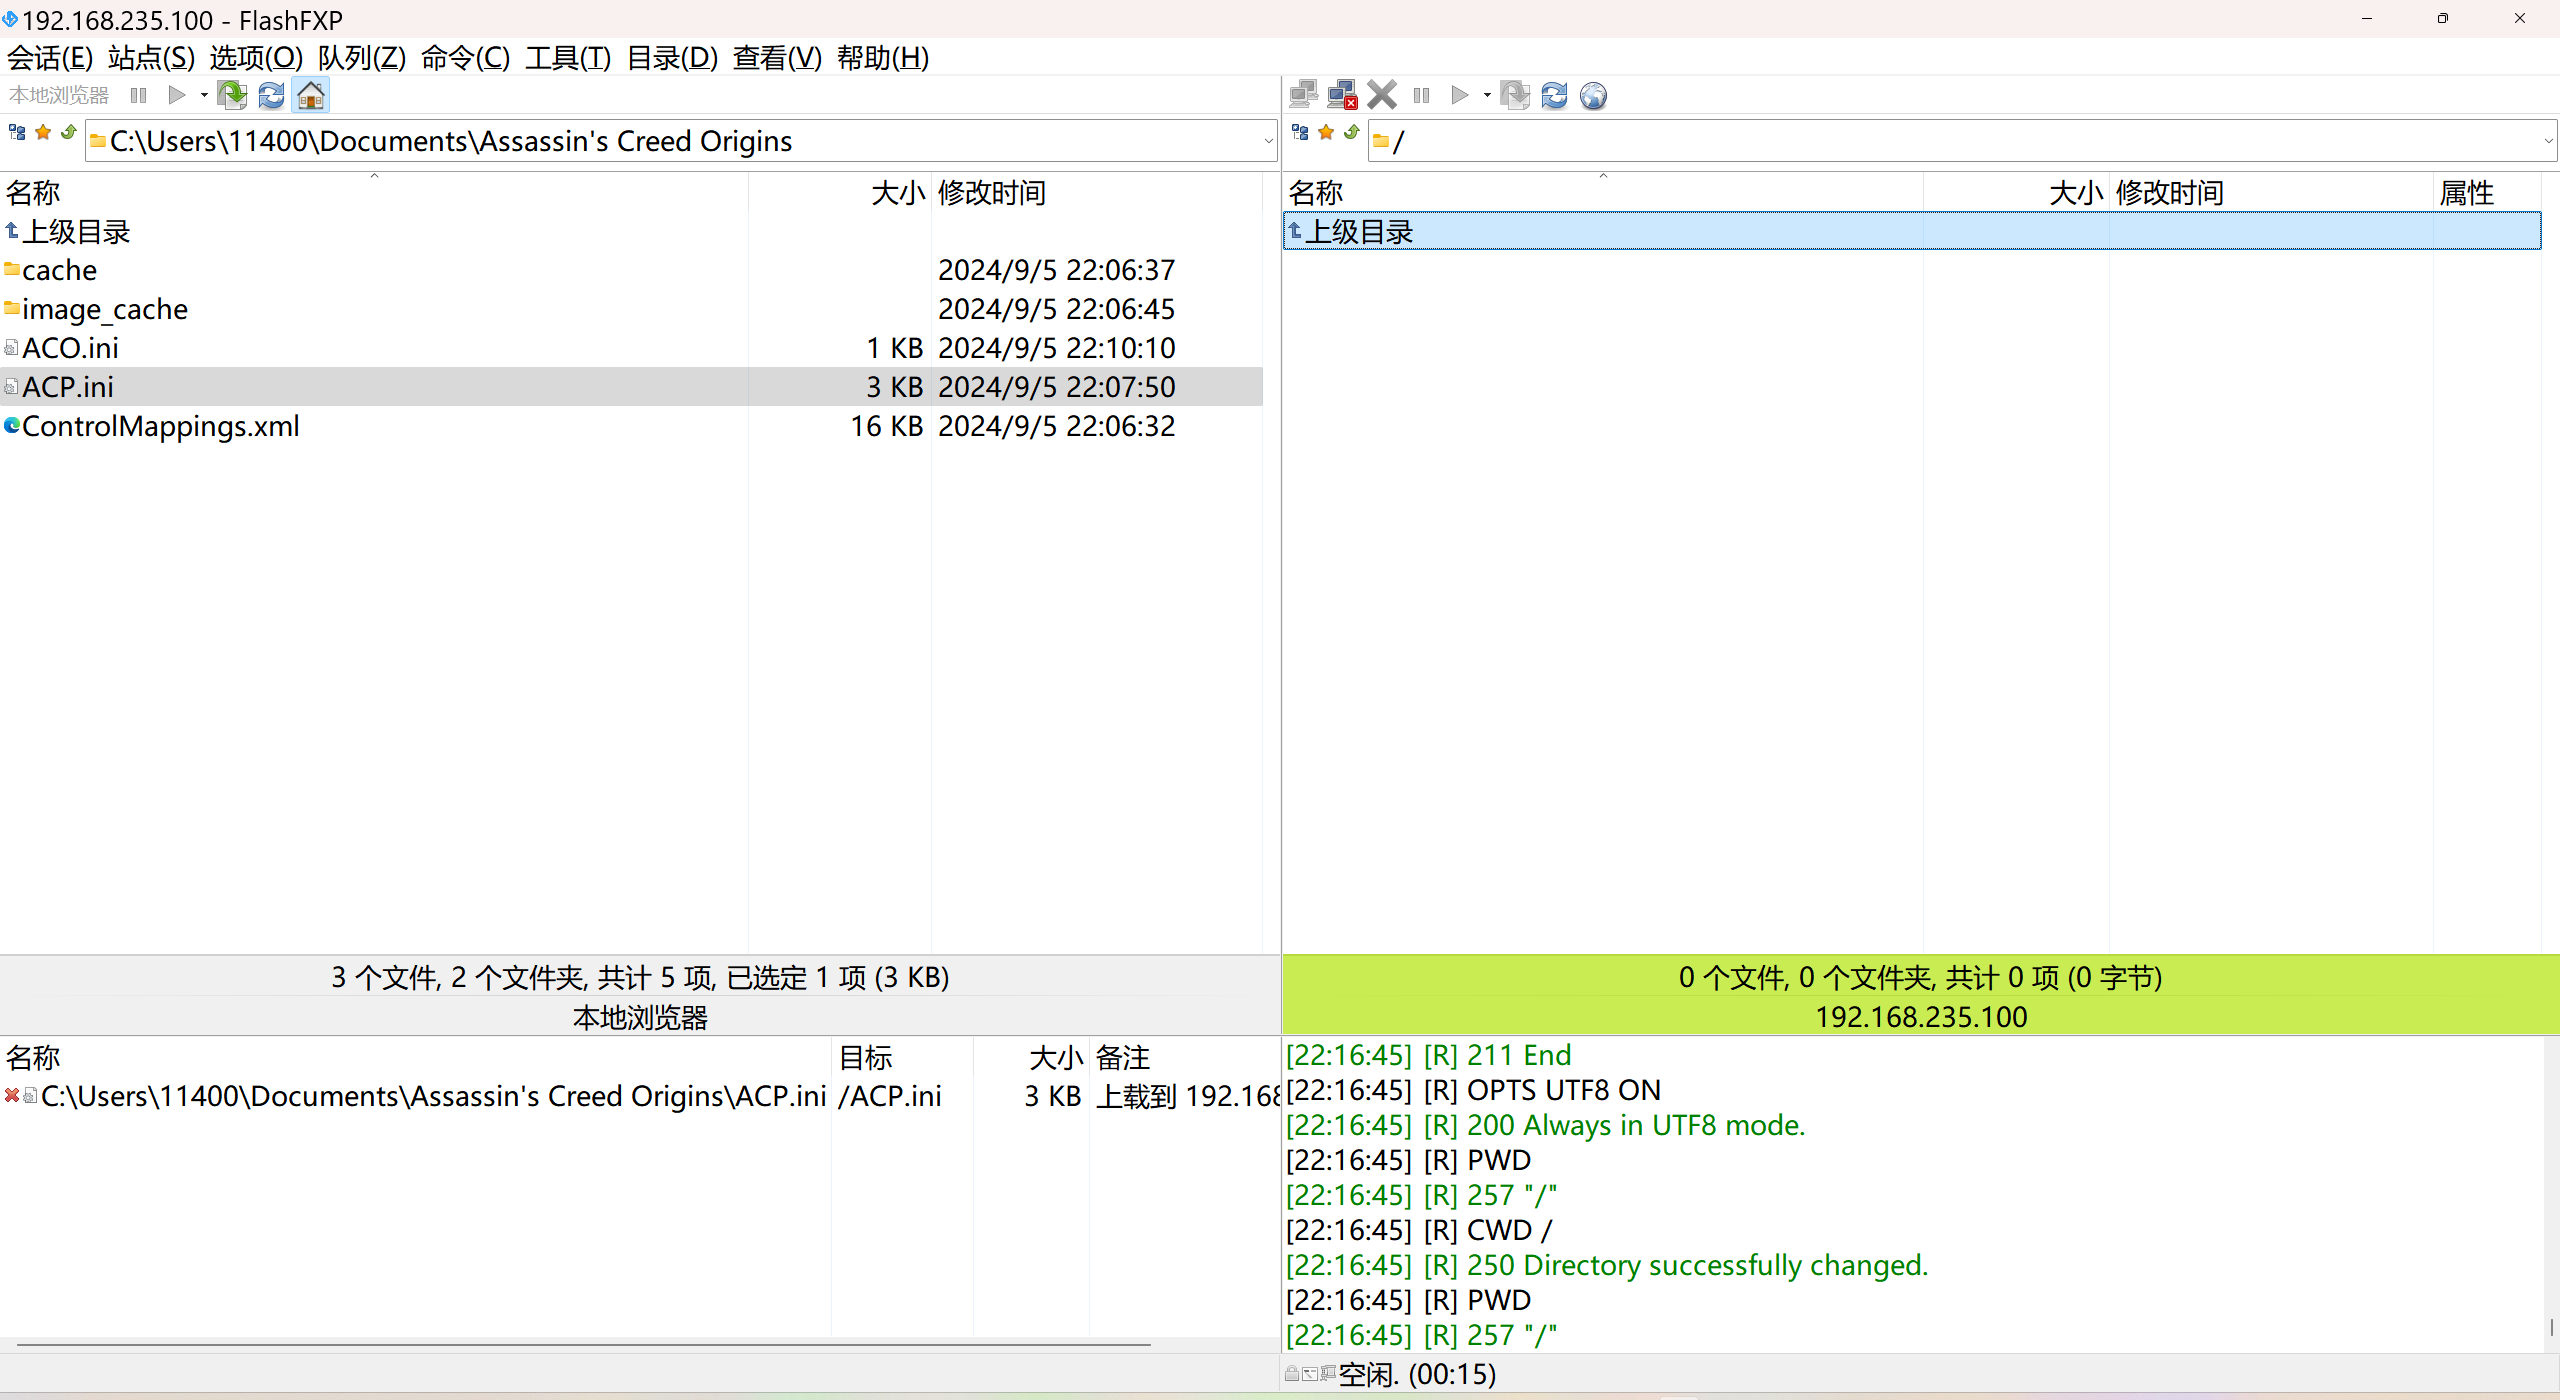
FTP 客服管理系统 实现kefu123登录,不允许匿名访问,kefu只能访问/data/kefu目录,不能查看其他目录 创建账号密码 useradd kefu echo 123|passwd -stdin kefu [rootcode caozx26420]# echo 123|passwd --stdin kefu 更改用户 kefu 的密码…...

关于uniapp展示PDF的解决方案
在 UniApp 的 H5 环境中使用 pdf-vue3 组件可以实现完整的 PDF 预览功能。以下是详细实现步骤和注意事项: 一、安装依赖 安装 pdf-vue3 和 PDF.js 核心库: npm install pdf-vue3 pdfjs-dist二、基本使用示例 <template><view class"con…...
