Android SystemUI——CarSystemBar添加到窗口(十)
上一篇文章我们看到了车载状态栏 CarSystemBar 视图的创建流程,这里我们继续分析将车载状态栏添加到 Windows 窗口中。
一、添加状态栏到窗口
前面我们已经分析了构建视图对象容器和构建视图对象内容,接下来我们继续分析 attachNavBarWindows() 方法将视图对象添加到 Window 中。
1、CarSystemBar
源码位置:/packages/apps/Car/SystemUI/src/com/android/systemui/car/systembar/CarSystemBar.java
attachNavBarWindows
private final SystemBarConfigs mSystemBarConfigs;private void attachNavBarWindows() {mSystemBarConfigs.getSystemBarSidesByZOrder().forEach(this::attachNavBarBySide);
}
attachNavBarWindows() 会调用 SystemBarConfigs 的 getSystemBarSidesByZOrder() 方法获取到当前存在的所有 SystemBar 所对应的 Side。
2、SystemBarConfigs
源码位置:/packages/apps/Car/SystemUI/src/com/android/systemui/car/systembar/SystemBarConfigs.java
private final List<@SystemBarSide Integer> mSystemBarSidesByZOrder = new ArrayList<>();protected List<Integer> getSystemBarSidesByZOrder() {return mSystemBarSidesByZOrder;
}
可以看到这里返回一个 List<@SystemBarSide Integer> 类型的数组,下面看一下 mSystemBarSidesByZOrder 数据的赋值。
sortSystemBarSidesByZOrder
private final Map<@SystemBarSide Integer, SystemBarConfig> mSystemBarConfigMap = new ArrayMap<>();private void sortSystemBarSidesByZOrder() {// 获取SystemBarConfig列表List<SystemBarConfig> systemBarsByZOrder = new ArrayList<>(mSystemBarConfigMap.values());systemBarsByZOrder.sort(new Comparator<SystemBarConfig>() {@Overridepublic int compare(SystemBarConfig o1, SystemBarConfig o2) {// 进行大小比较return o1.getZOrder() - o2.getZOrder();}});// 存储排序后SystemBar的Side数值。systemBarsByZOrder.forEach(systemBarConfig -> {mSystemBarSidesByZOrder.add(systemBarConfig.getSide());});
}
这里首先对 SystemBarConfig 列表根据序号对 SystemBar 进行排序,并将排序后 SystemBar 的 Side 数值保存到 mSystemBarSidesByZOrder 数组中。而该函数是在 SystemBarConfigs 构造函数中进行调用,并且在调用之前还要填充 mSystemBarConfigMap 数据。
SystemBarConfigs
@Inject
public SystemBarConfigs(@Main Resources resources) {mResources = resources;// 初始化数据populateMaps();// 读取SystemBar所对应的SystemBarConfig的配置信息readConfigs();……// 使用SystemBarConfig的ZOrder属性对SystemBarConfig的Size进行排序sortSystemBarSidesByZOrder();
}
readConfigs
private void readConfigs() {mTopNavBarEnabled = mResources.getBoolean(R.bool.config_enableTopSystemBar);mBottomNavBarEnabled = mResources.getBoolean(R.bool.config_enableBottomSystemBar);mLeftNavBarEnabled = mResources.getBoolean(R.bool.config_enableLeftSystemBar);mRightNavBarEnabled = mResources.getBoolean(R.bool.config_enableRightSystemBar);// 顶部栏可用if (mTopNavBarEnabled) {SystemBarConfig topBarConfig =new SystemBarConfigBuilder().setSide(TOP)// 顶部栏高度.setGirth(mResources.getDimensionPixelSize(R.dimen.car_top_system_bar_height))// 系统栏类型.setBarType(mResources.getInteger(R.integer.config_topSystemBarType))// 系统栏Z轴序列.setZOrder(mResources.getInteger(R.integer.config_topSystemBarZOrder)).setHideForKeyboard(mResources.getBoolean(R.bool.config_hideTopSystemBarForKeyboard)).build();mSystemBarConfigMap.put(TOP, topBarConfig);}// 底部栏可用if (mBottomNavBarEnabled) {SystemBarConfig bottomBarConfig =new SystemBarConfigBuilder().setSide(BOTTOM).setGirth(mResources.getDimensionPixelSize(R.dimen.car_bottom_system_bar_height)).setBarType(mResources.getInteger(R.integer.config_bottomSystemBarType)).setZOrder(mResources.getInteger(R.integer.config_bottomSystemBarZOrder)).setHideForKeyboard(mResources.getBoolean(R.bool.config_hideBottomSystemBarForKeyboard)).build();mSystemBarConfigMap.put(BOTTOM, bottomBarConfig);}// 左侧栏不可用if (mLeftNavBarEnabled) {SystemBarConfig leftBarConfig =new SystemBarConfigBuilder().setSide(LEFT).setGirth(mResources.getDimensionPixelSize(R.dimen.car_left_system_bar_width)).setBarType(mResources.getInteger(R.integer.config_leftSystemBarType)).setZOrder(mResources.getInteger(R.integer.config_leftSystemBarZOrder)).setHideForKeyboard(mResources.getBoolean(R.bool.config_hideLeftSystemBarForKeyboard)).build();mSystemBarConfigMap.put(LEFT, leftBarConfig);}// 右侧栏不可用if (mRightNavBarEnabled) {SystemBarConfig rightBarConfig =new SystemBarConfigBuilder().setSide(RIGHT).setGirth(mResources.getDimensionPixelSize(R.dimen.car_right_system_bar_width)).setBarType(mResources.getInteger(R.integer.config_rightSystemBarType)).setZOrder(mResources.getInteger(R.integer.config_rightSystemBarZOrder)).setHideForKeyboard(mResources.getBoolean(R.bool.config_hideRightSystemBarForKeyboard)).build();mSystemBarConfigMap.put(RIGHT, rightBarConfig);}
}
这里首先获取状态了的可用状态,从 config.xml 文件中获取对应数据。
<!-- 配置应该显示哪些系统条 -->
<bool name="config_enableTopSystemBar">true</bool>
<bool name="config_enableLeftSystemBar">false</bool>
<bool name="config_enableRightSystemBar">false</bool>
<bool name="config_enableBottomSystemBar">true</bool>
可以看到,这里配置了状态栏的显示状态,所以修改进度条的显示位置可以通过修改该数据实现。 同样其他相关的配置信息也都可以在对应的配置文件中找到。
3、添加状态栏
我们知道 attachNavBarWindows() 方法最终会循环 mSystemBarSidesByZOrder 集合的内容,用该集合的子项作为参数,依次调用 attachNavBarBySide() 方法。
attachNavBarBySide
private void attachNavBarBySide(int side) {switch (side) {case SystemBarConfigs.TOP:// 如果顶部栏视图容器不为空,将顶部栏视图容器添加到Window中if (mTopSystemBarWindow != null) {mWindowManager.addView(mTopSystemBarWindow,mSystemBarConfigs.getLayoutParamsBySide(SystemBarConfigs.TOP));}break;case SystemBarConfigs.BOTTOM:if (mBottomSystemBarWindow != null && !mBottomNavBarVisible) {mBottomNavBarVisible = true;mWindowManager.addView(mBottomSystemBarWindow,mSystemBarConfigs.getLayoutParamsBySide(SystemBarConfigs.BOTTOM));}break;case SystemBarConfigs.LEFT:if (mLeftSystemBarWindow != null) {mWindowManager.addView(mLeftSystemBarWindow,mSystemBarConfigs.getLayoutParamsBySide(SystemBarConfigs.LEFT));}break;case SystemBarConfigs.RIGHT:if (mRightSystemBarWindow != null) {mWindowManager.addView(mRightSystemBarWindow,mSystemBarConfigs.getLayoutParamsBySide(SystemBarConfigs.RIGHT));}break;default:return;}
}
该方法就是根据对应的 type 判断当前视图容器的具体类型,到底是顶部栏、底部栏、左侧栏还是右侧栏,根据类型配合类型相对应的参数将该视图容器添加到 WindowManager 中。
二、状态栏配置
状态栏配置类 SystemBarConfig 为 SystemBarConfigs 的内部类。
1、SystemBarConfig
// 系统条将开始出现在HUN的顶部的z轴顺序
private static final int HUN_ZORDER = 10;private static final int[] BAR_TYPE_MAP = {InsetsState.ITYPE_STATUS_BAR, // 状态栏对应的系统装饰窗口类型InsetsState.ITYPE_NAVIGATION_BAR, // 导航栏对应的系统装饰窗口类型InsetsState.ITYPE_CLIMATE_BAR, // 左侧栏对应的系统装饰窗口类型InsetsState.ITYPE_EXTRA_NAVIGATION_BAR // 右侧栏对应的系统装饰窗口类型private static final class SystemBarConfig {private final int mSide;private final int mBarType;private final int mGirth;private final int mZOrder;private final boolean mHideForKeyboard;private int[] mPaddings = new int[]{0, 0, 0, 0};private SystemBarConfig(@SystemBarSide int side, int barType, int girth, int zOrder,boolean hideForKeyboard) {mSide = side;mBarType = barType;mGirth = girth;mZOrder = zOrder;mHideForKeyboard = hideForKeyboard;}private int getSide() {return mSide;}private int getBarType() {return mBarType;}private int getGirth() {return mGirth;}private int getZOrder() {return mZOrder;}private boolean getHideForKeyboard() {return mHideForKeyboard;}private int[] getPaddings() {return mPaddings;}private WindowManager.LayoutParams getLayoutParams() {WindowManager.LayoutParams lp = new WindowManager.LayoutParams(isHorizontalBar(mSide) ? ViewGroup.LayoutParams.MATCH_PARENT : mGirth,isHorizontalBar(mSide) ? mGirth : ViewGroup.LayoutParams.MATCH_PARENT,mapZOrderToBarType(mZOrder),WindowManager.LayoutParams.FLAG_NOT_FOCUSABLE| WindowManager.LayoutParams.FLAG_NOT_TOUCH_MODAL| WindowManager.LayoutParams.FLAG_WATCH_OUTSIDE_TOUCH| WindowManager.LayoutParams.FLAG_SPLIT_TOUCH,PixelFormat.TRANSLUCENT); // 设置窗口半透明(全透明:TRANSPARENT)lp.setTitle(BAR_TITLE_MAP.get(mSide));//顶部栏为new int[]{InsetsState.ITYPE_STATUS_BAR, InsetsState.ITYPE_TOP_MANDATORY_GESTURES}//底部栏为new int[]{InsetsState.ITYPE_NAVIGATION_BAR, InsetsState.ITYPE_BOTTOM_MANDATORY_GESTURES}//providesInsetsTypes这个字段很重要,只有设置对这个字段,系统才会认定该窗口是对应的装饰窗口lp.providesInsetsTypes = new int[]{BAR_TYPE_MAP[mBarType], BAR_GESTURE_MAP.get(mSide)};lp.setFitInsetsTypes(0);lp.windowAnimations = 0;lp.gravity = BAR_GRAVITY_MAP.get(mSide);return lp;}private int mapZOrderToBarType(int zOrder) {// 顶部栏窗口类型为TYPE_STATUS_BAR_ADDITIONAL,底部栏TYPE_NAVIGATION_BAR_PANELreturn zOrder >= HUN_ZORDER ? WindowManager.LayoutParams.TYPE_NAVIGATION_BAR_PANEL: WindowManager.LayoutParams.TYPE_STATUS_BAR_ADDITIONAL;}private void setPaddingBySide(@SystemBarSide int side, int padding) {mPaddings[side] = padding;}
}
这里主要用来配置状态栏类型及对应的视图内容,其中状态栏位置和标题等信息是在上面的 populateMaps() 方法中赋值。
populateMaps
public static final int TOP = 0;
public static final int BOTTOM = 1;
public static final int LEFT = 2;
public static final int RIGHT = 3;private static void populateMaps() {// 将系统栏位置与Gravity值关联BAR_GRAVITY_MAP.put(TOP, Gravity.TOP);BAR_GRAVITY_MAP.put(BOTTOM, Gravity.BOTTOM);BAR_GRAVITY_MAP.put(LEFT, Gravity.LEFT);BAR_GRAVITY_MAP.put(RIGHT, Gravity.RIGHT);// 将系统栏位置与标题字符串关联BAR_TITLE_MAP.put(TOP, "TopCarSystemBar");BAR_TITLE_MAP.put(BOTTOM, "BottomCarSystemBar");BAR_TITLE_MAP.put(LEFT, "LeftCarSystemBar");BAR_TITLE_MAP.put(RIGHT, "RightCarSystemBar");// 将系统栏位置与手势类型关联BAR_GESTURE_MAP.put(TOP, InsetsState.ITYPE_TOP_MANDATORY_GESTURES);BAR_GESTURE_MAP.put(BOTTOM, InsetsState.ITYPE_BOTTOM_MANDATORY_GESTURES);BAR_GESTURE_MAP.put(LEFT, InsetsState.ITYPE_LEFT_MANDATORY_GESTURES);BAR_GESTURE_MAP.put(RIGHT, InsetsState.ITYPE_RIGHT_MANDATORY_GESTURES);
}
2、SystemBarConfigBuilder
private static final class SystemBarConfigBuilder {private int mSide;private int mBarType;private int mGirth;private int mZOrder;private boolean mHideForKeyboard;private SystemBarConfigBuilder setSide(@SystemBarSide int side) {mSide = side;return this;}private SystemBarConfigBuilder setBarType(int type) {mBarType = type;return this;}private SystemBarConfigBuilder setGirth(int girth) {mGirth = girth;return this;}private SystemBarConfigBuilder setZOrder(int zOrder) {mZOrder = zOrder;return this;}private SystemBarConfigBuilder setHideForKeyboard(boolean hide) {mHideForKeyboard = hide;return this;}private SystemBarConfig build() {return new SystemBarConfig(mSide, mBarType, mGirth, mZOrder, mHideForKeyboard);}
}
SystemBarConfigBuilder 同样是 SystemBarConfigs 的内部类,它实现了构建者模式(Builder Pattern),用于简化 SystemBarConfig 对象的创建。
相关文章:
)
Android SystemUI——CarSystemBar添加到窗口(十)
上一篇文章我们看到了车载状态栏 CarSystemBar 视图的创建流程,这里我们继续分析将车载状态栏添加到 Windows 窗口中。 一、添加状态栏到窗口 前面我们已经分析了构建视图对象容器和构建视图对象内容,接下来我们继续分析 attachNavBarWindows() 方法将视…...

《重生到现代之从零开始的C++生活》—— 类和对象1
类 我嘞个豆,类可是太重要了,简直是重中之重 class为定义类的关键字,stack为类的名字,{}为类的主题 class stack {void add (int a,int b){return ab;}//类的方法,成员函数int _c;int _d;//类的属性,成…...

《FMambaIR:一种基于混合状态空间模型和频域的方法用于图像恢复》学习笔记
paper:(PDF) FMambaIR: A Hybrid State Space Model and Frequency Domain for Image Restoration 目录 摘要 一、引言 二、相关工作 1、图像恢复 2、频率学习 3、状态空间模型(SSM) 三、框架 1、基本知识 2、整体框架 3、F-Mamba…...

每日十题八股-2025年1月18日
1.服务器处理并发请求有哪几种方式? 2.讲一下io多路复用 3.select、poll、epoll 的区别是什么? 4.epoll 的 边缘触发和水平触发有什么区别? 5.redis,nginx,netty 是依赖什么做的这么高性能? 6.零拷贝是什么…...

海康威视摄像头RTSP使用nginx推流到服务器直播教程
思路: 之前2020年在本科的时候,由于项目的需求需要将海康威视的摄像头使用推流服务器到网页进行直播。这里将自己半个月琢磨出来的步骤给大家发一些。切勿转载!!!! 使用网络摄像头中的rtsp协议---------通…...

搭建一个基于Spring Boot的书籍学习平台
搭建一个基于Spring Boot的书籍学习平台可以涵盖多个功能模块,例如用户管理、书籍管理、学习进度跟踪、笔记管理、评论和评分等。以下是一个简化的步骤指南,帮助你快速搭建一个基础的书籍学习平台。 — 1. 项目初始化 使用 Spring Initializr 生成一个…...

Go 语言的slice是如何扩容的?
Go 语言中的 slice 是一种灵活、动态的视图,是对底层数组的抽象。当对 slice 进行追加元素等操作导致其长度超过容量时,就会发生扩容。 一、扩容的基本原理 当 slice 需要扩容时,Go 语言会根据当前的容量来确定新的容量。一般来说ÿ…...

Apache Hive--排序函数解析
在大数据处理与分析中,Apache Hive是一个至关重要的数据仓库工具。其丰富的函数库为数据处理提供了诸多便利,排序函数便是其中一类非常实用的工具。通过排序函数,我们能够在查询结果集中为每一行数据分配一个排名值,这对于数据分析…...

Java 接口安全指南
Java 接口安全指南 概述 在现代 Web 应用中,接口(API)是前后端交互的核心。然而,接口的安全性常常被忽视,导致数据泄露、未授权访问等安全问题。本文将详细介绍 Java 中如何保障接口安全,涵盖以下内容&am…...

合合信息名片全能王上架原生鸿蒙应用市场,成为首批数字名片类应用
长期以来,名片都是企业商务沟通的重要工具。随着企业数字化转型,相较于传统的纸质名片,数字名片对于企业成员拓展业务、获取商机、提升企业形象等方面发挥着重要作用。近期,合合信息旗下名片全能王正式上线原生鸿蒙应用市场&#…...

38.【3】CTFHUB web sql 报错注入
进入靶场 按照提示输入1 显示查询正确 既然是报错注入,先判断整形还是字符型注入 先输入1 and 11 再输入1 and 12 都显示查询正确,可知此为字符串型注入,不是数字型注入 然后就不会了 求助AI和其他wp 由以上2张搜索结果知updatexml是适用…...

RC2在线加密工具
RC2是由著名密码学家Ron Rivest设计的一种传统对称分组加密算法,它可作为DES算法的建议替代算法。RC2是一种分组加密算法,RC2的密钥长度可变,可以从8字节到128字节,安全性选择更加灵活。 开发调试上,有时候需要进行对…...

NVIDIA 下 基于Ubuntun20.04下 使用脚本安装 ros2-foxy 和 使用docker安装 ros2-foxy
一、前提介绍: 本文主要采用两种方式在NVIDIA 下基于 Ubuntun20.04安装 ros2-foxy。 使用环境: NVIDIA 为 Jetson 系列下 Jetson Xavier NX; Ubuntun版本:20.04 二、安装方法: 1、使用脚本编译方式: 使…...

STL容器-- list的模拟实现(附源码)
STL容器-- list的模拟实现(附源码) List的实现主要考察我们对list这一容器的理解,和代码的编写能力,通过上节对list容器的使用,我们对list容器已经有了一些基本的了解,接下来就让我们来实现一些list容器常见…...

python——句柄
一、概念 句柄指的是操作系统为了标识和访问对象而提供的一个标识符,在操作系统中,每个对象都有一个唯一的句柄,通过句柄可以访问对象的属性和方法。例如文件、进程、窗口等都有句柄。在编程中,可以通过句柄来操作这些对象&#x…...

KubeSphere 与 Pig 微服务平台的整合与优化:全流程容器化部署实践
一、前言 近年来,为了满足越来越复杂的业务需求,我们从传统单体架构系统升级为微服务架构,就是把一个大型应用程序分割成可以独立部署的小型服务,每个服务之间都是松耦合的,通过 RPC 或者是 Rest 协议来进行通信,可以按照业务领域来划分成独立的单元。但是微服务系统相对…...

ESP8266-01S、手机、STM32连接
1、ESP8266-01S的工作原理 1.1、AP和STA ESP8266-01S为WIFI的透传模块,主要模式如下图: 上节说到,我们需要用到AT固件进行局域网应用(ESP8266连接的STM32和手机进行连接)。 ESP8266为一个WiFi透传模块,和…...

Web开发 -前端部分-CSS-2
一 长度单位 代码实现: <!DOCTYPE html> <html lang"zh-CN"><head><meta charset"UTF-8"><meta name"viewport" content"widthdevice-width, initial-scale1.0"><title>Document<…...

【QT用户登录与界面跳转】
【QT用户登录与界面跳转】 1.前言2. 项目设置3.设计登录界面3.1 login.pro参数3.2 界面设置3.2.1 登录界面3.2.2 串口主界面 4. 实现登录逻辑5.串口界面6.测试功能7.总结 1.前言 在Qt应用程序开发中,实现用户登录及界面跳转功能是构建交互式应用的重要步骤之一。下…...

记录一次关于spring映射postgresql的jsonb类型的转化器事故,并使用hutool的JSONArray完成映射
事件的起因是这样的,那次事故发生的起因是因为WebFlux和postgreSQL去重新做鱼皮的鱼图图项目(鱼图图作业)。 在做到picture表的时候,发现postgreSQL中有个jsonb的类型可以更好的支持json数组。 出于锻炼新技术的目的,…...

XML Group端口详解
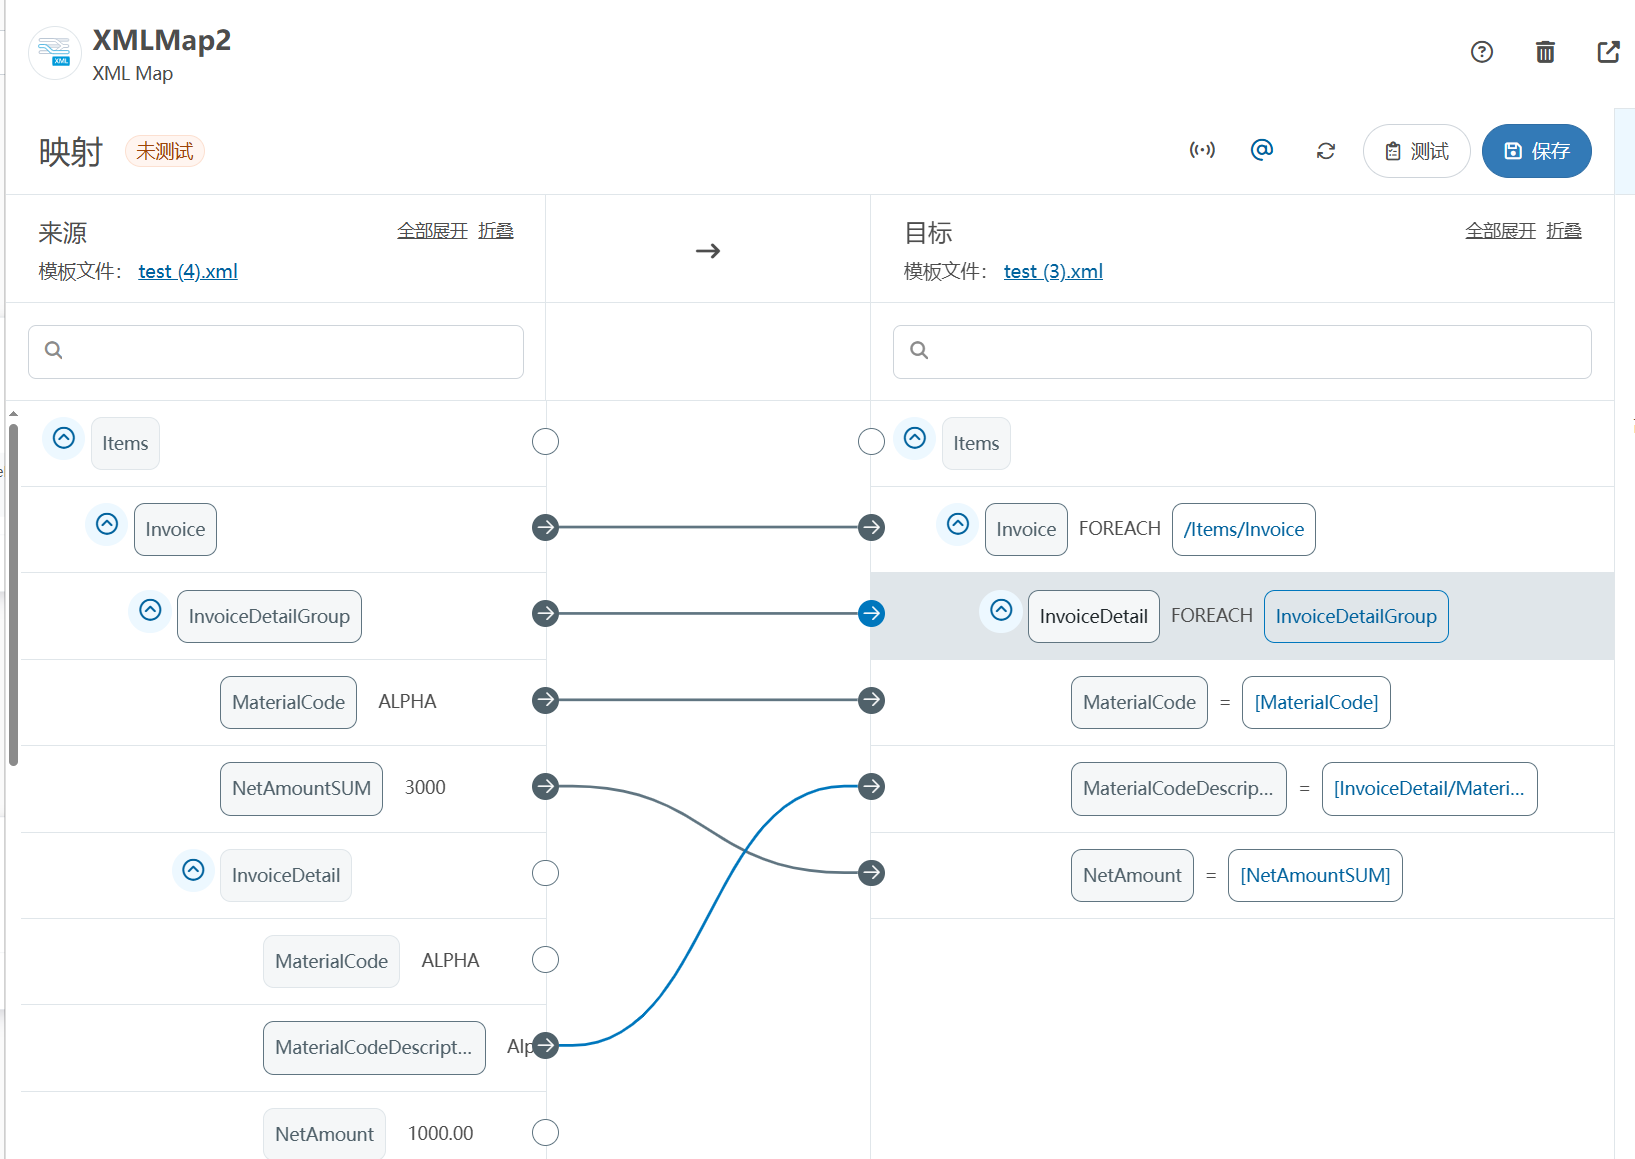
在XML数据映射过程中,经常需要对数据进行分组聚合操作。例如,当处理包含多个物料明细的XML文件时,可能需要将相同物料号的明细归为一组,或对相同物料号的数量进行求和计算。传统实现方式通常需要编写脚本代码,增加了开…...

conda相比python好处
Conda 作为 Python 的环境和包管理工具,相比原生 Python 生态(如 pip 虚拟环境)有许多独特优势,尤其在多项目管理、依赖处理和跨平台兼容性等方面表现更优。以下是 Conda 的核心好处: 一、一站式环境管理:…...

手游刚开服就被攻击怎么办?如何防御DDoS?
开服初期是手游最脆弱的阶段,极易成为DDoS攻击的目标。一旦遭遇攻击,可能导致服务器瘫痪、玩家流失,甚至造成巨大经济损失。本文为开发者提供一套简洁有效的应急与防御方案,帮助快速应对并构建长期防护体系。 一、遭遇攻击的紧急应…...

PHP和Node.js哪个更爽?
先说结论,rust完胜。 php:laravel,swoole,webman,最开始在苏宁的时候写了几年php,当时觉得php真的是世界上最好的语言,因为当初活在舒适圈里,不愿意跳出来,就好比当初活在…...
)
【位运算】消失的两个数字(hard)
消失的两个数字(hard) 题⽬描述:解法(位运算):Java 算法代码:更简便代码 题⽬链接:⾯试题 17.19. 消失的两个数字 题⽬描述: 给定⼀个数组,包含从 1 到 N 所有…...

Cilium动手实验室: 精通之旅---20.Isovalent Enterprise for Cilium: Zero Trust Visibility
Cilium动手实验室: 精通之旅---20.Isovalent Enterprise for Cilium: Zero Trust Visibility 1. 实验室环境1.1 实验室环境1.2 小测试 2. The Endor System2.1 部署应用2.2 检查现有策略 3. Cilium 策略实体3.1 创建 allow-all 网络策略3.2 在 Hubble CLI 中验证网络策略源3.3 …...

MVC 数据库
MVC 数据库 引言 在软件开发领域,Model-View-Controller(MVC)是一种流行的软件架构模式,它将应用程序分为三个核心组件:模型(Model)、视图(View)和控制器(Controller)。这种模式有助于提高代码的可维护性和可扩展性。本文将深入探讨MVC架构与数据库之间的关系,以…...

【数据分析】R版IntelliGenes用于生物标志物发现的可解释机器学习
禁止商业或二改转载,仅供自学使用,侵权必究,如需截取部分内容请后台联系作者! 文章目录 介绍流程步骤1. 输入数据2. 特征选择3. 模型训练4. I-Genes 评分计算5. 输出结果 IntelliGenesR 安装包1. 特征选择2. 模型训练和评估3. I-Genes 评分计…...

MySQL 8.0 事务全面讲解
以下是一个结合两次回答的 MySQL 8.0 事务全面讲解,涵盖了事务的核心概念、操作示例、失败回滚、隔离级别、事务性 DDL 和 XA 事务等内容,并修正了查看隔离级别的命令。 MySQL 8.0 事务全面讲解 一、事务的核心概念(ACID) 事务是…...

消防一体化安全管控平台:构建消防“一张图”和APP统一管理
在城市的某个角落,一场突如其来的火灾打破了平静。熊熊烈火迅速蔓延,滚滚浓烟弥漫开来,周围群众的生命财产安全受到严重威胁。就在这千钧一发之际,消防救援队伍迅速行动,而豪越科技消防一体化安全管控平台构建的消防“…...
