SpringSecurity:授权服务器与客户端应用(入门案例)
文章目录
- 一、需求概述
- 二、基本授权登录功能实现
- 1、授权服务器开发
- 2、客户端开发
- 3、功能测试
- 三、自定义授权服务器登录页
- 1、授权服务器开发
- 2、功能测试
- 四、自定义授权服务器授权页
- 1、授权服务器开发
- 2、功能测试
- 五、客户端信息保存数据库
- 1、授权服务器开发
- 2、功能测试
一、需求概述


maven需要3.6.0以上版本
二、基本授权登录功能实现
1、授权服务器开发
- 1、pom依赖
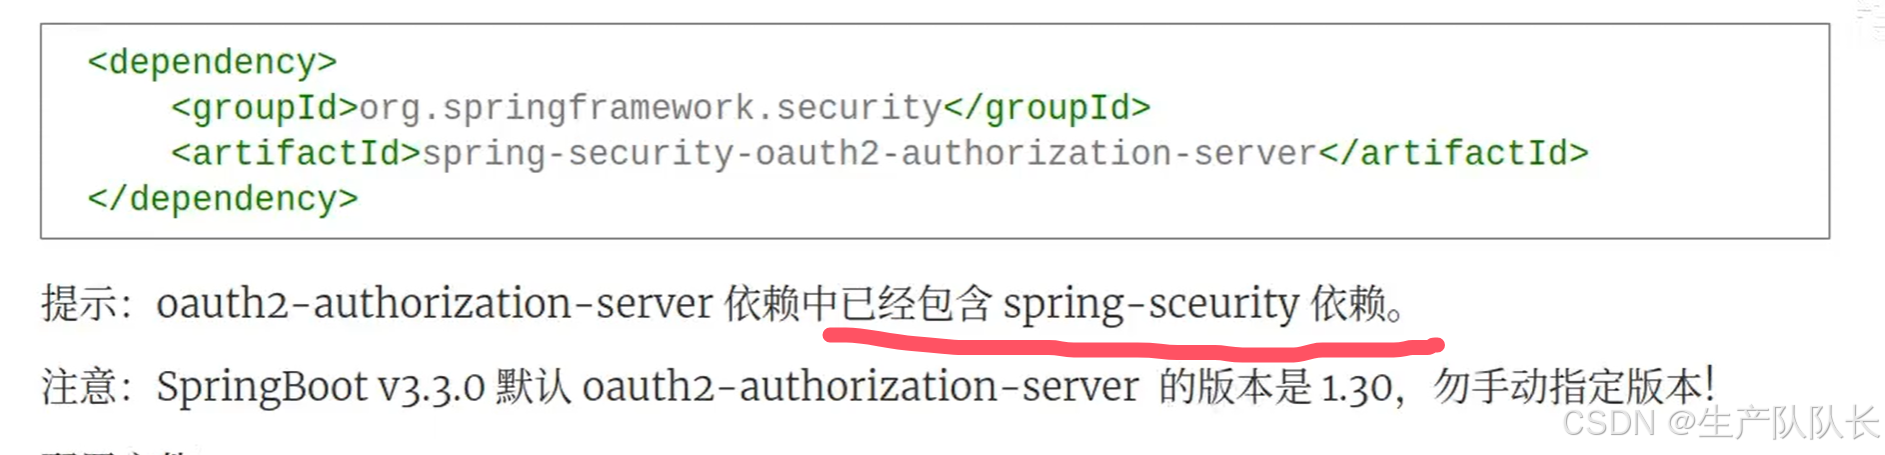
<dependency><groupId>org.springframework.security</groupId><artifactId>spring-security-oauth2-authorization-server</artifactId></dependency>
- 2、yml配置
server:port: 9000logging:level:org.springframework.security: tracespring:security:# 授权服务器的账号密码user:name: adminpassword: 1111oauth2:authorizationserver:# 客户端配置client:myclient:registration:client-id: pzjclient-secret: "{noop}123456"client-authentication-methods:- "client_secret_basic"authorization-grant-types:- "authorization_code"- "refresh_token"# 客户端的回调地址redirect-uris:- "http://localhost:8080/login/oauth2/code/myclient"# 客户端的应用首页post-logout-redirect-uris:- "http://localhost:8080/"scopes:- "openid"- "profile"require-authorization-consent: true- 3、启动服务端
2、客户端开发
- 1、pom依赖
<!-- spring security 安全认证 --><dependency><groupId>org.springframework.boot</groupId><artifactId>spring-boot-starter-security</artifactId></dependency><!-- oauth2 客户端 --><dependency><groupId>org.springframework.boot</groupId><artifactId>spring-boot-starter-oauth2-client</artifactId></dependency>
- 2、yml配置
# Spring配置
spring:security:oauth2:client:registration:myclient:provider: sasclient-id: pzjclient-secret: 123456# 重定向的url地址,这个地址为默认的redirect-uri: http://localhost:8080/login/oauth2/code/myclientauthorization-grant-type: "authorization_code"scope:- openid- profileprovider:sas:# 以下地址是默认配置在 AuthorizationServerSettings builder方法中# 授权服务器地址authorization-uri: http://oauth2-server:9000/oauth2/authorize# 获取token的地址token-uri: http://oauth2-server:9000/oauth2/token# 用于验证JWT签名的、oauth2授权服务器的公钥集合jwk-set-uri: http://oauth2-server:9000/oauth2/jwks- 3、SecurityConfig
@EnableWebSecurity
@Configuration
public class SecurityConfig {@Beanprotected SecurityFilterChain filterChain(HttpSecurity http) throws Exception{http.authorizeHttpRequests(auth -> auth.anyRequest().authenticated());http.oauth2Login(Customizer.withDefaults());return http.build();}
}
- 4、接口
@RestController
public class HelloController {@GetMapping("/hello")public String hello(){return "<h1>hello,spring authorization server!</h1>";}
}
3、功能测试
浏览器访问:http://localhost:8080/hello
会跳转到

点击浏览器的×,进入登陆页

登陆后,进入授权确认页面

点击submit按钮,就会访问到我们的hello接口

三、自定义授权服务器登录页
1、授权服务器开发
- root pom
<dependency><groupId>org.springframework.boot</groupId><artifactId>spring-boot-starter-thymeleaf</artifactId></dependency>
- SecurityConfig
@EnableWebSecurity
@Configuration
public class SecurityConfig {/*** 开启自定义登录页* @param http* @return* @throws Exception*/@Beanprotected SecurityFilterChain filterChain(HttpSecurity http) throws Exception{http.authorizeHttpRequests(auth -> auth.anyRequest().authenticated());http.formLogin(form -> form.loginPage("/login").loginProcessingUrl("/login").permitAll());return http.build();}
}
- controller接口
@Controller
public class LoginController {@GetMapping("/login")public String login(){return "login";}
}
- login.html 页面
<!DOCTYPE html>
<html lang="en" xmlns:th="https://www.thymeleaf.org">
<head><meta charset="UTF-8"><title>授权服务器登陆页</title>
</head>
<body>
<h2>Spring授权服务器登陆</h2>
<form th:action = "@{/login}" method="post">用户名:<input type="text" name="username"/><br>密码:<input  type="text" name="password"/><br><input type="submit" value="登陆"><input type="reset" value="取消">
</form>
</body>
</html>
2、功能测试
访问:http://localhost:8080/hello,会自动跳转到授权服务器的登录页

四、自定义授权服务器授权页
1、授权服务器开发
- SecurityConfig
/*** 自定义授权所需配置,否则无法正常转到授权页* @param http* @return* @throws Exception*/@Beanprotected SecurityFilterChain serverFilterChain(HttpSecurity http) throws Exception{// 授权服务器的安全交给security管理OAuth2AuthorizationServerConfiguration.applyDefaultSecurity(http);// 自定义授权服务器的配置http.getConfigurer(OAuth2AuthorizationServerConfigurer.class)//使用自定义授权页.authorizationEndpoint(auth -> auth.consentPage("/consent"))// 启用oidc.oidc(Customizer.withDefaults());//未认证的请求重定向到 login 页http.exceptionHandling(e -> e.authenticationEntryPoint(new LoginUrlAuthenticationEntryPoint("/login")));return http.build();}
- controller接口
@Controller
public class ConsentController {@Resourceprivate RegisteredClientRepository registeredClientRepository;@GetMapping("/consent")public String consent(HttpServletRequest request, Principal principal,@RequestParam(OAuth2ParameterNames.CLIENT_ID) String clientId,@RequestParam(OAuth2ParameterNames.STATE) String state){//获取认证的用户nameString principalName = principal.getName();//根据客户端ID获取客户端应用RegisteredClient registeredClient = registeredClientRepository.findByClientId(clientId);//获取客户端应用名String clientName = registeredClient.getClientName();//获取回调地址String redirectUri = registeredClient.getRedirectUris().iterator().next();//获取scopesSet<String> scopes = registeredClient.getScopes();request.setAttribute("principalName",principalName);request.setAttribute("clientName",clientName);request.setAttribute("clientId",clientId);request.setAttribute("state",state);request.setAttribute("scopes",scopes);return "consent";}
- consent.html 页面
<!DOCTYPE html>
<html lang="en"  xmlns:th="https://www.thymeleaf.org">
<head><meta charset="UTF-8"><title>授权确认</title>
</head>
<body>
<h2>自定义授权确认页</h2>
<form th:action="@{/oauth2/authorize}" method="post"><div><span th:text="${clientName}" style="font-style: italic;color: blue"></span>希望获取账号<span th:text="${principalName}" style="font-style: italic;color: blue"></span>的以下权限:<ol><li th:each="scope:${scopes}"><input type="checkbox" name="scope" th:value="${scope}" checked/><span th:text="${scope}"></span></li></ol></div><input type="hidden" name="client_id" th:value="${clientId}"/><input type="hidden" name="state" th:value="${state}"/><input type="submit" th:value="同意"/>
</form>
</body>
</html>
2、功能测试
访问:http://localhost:8080/hello

五、客户端信息保存数据库
1、授权服务器开发
- SecurityConfig中注入三个DAO实现类
@Beanpublic RegisteredClientRepository registeredClientRepository(JdbcTemplate jdbcTemplate){// 返回基于数据库的 RegisteredClientRepository 接口实现类对象(对应 oauth2_registered_client 表)return new JdbcRegisteredClientRepository(jdbcTemplate);}@Beanpublic OAuth2AuthorizationService oAuth2AuthorizationService(JdbcTemplate jdbcTemplate,RegisteredClientRepository registeredClientRepository){// (对应 oauth2_authorization 表)return new JdbcOAuth2AuthorizationService(jdbcTemplate,registeredClientRepository);}@Beanpublic OAuth2AuthorizationConsentService oAuth2AuthorizationConsentService(JdbcTemplate jdbcTemplate,RegisteredClientRepository registeredClientRepository){// (对应 oauth2_authorization_consent 表)return new JdbcOAuth2AuthorizationConsentService(jdbcTemplate,registeredClientRepository);}
- 创建三张表
SET FOREIGN_KEY_CHECKS=0;-- ----------------------------
-- Table structure for oauth2_authorization
-- ----------------------------
DROP TABLE IF EXISTS `oauth2_authorization`;
CREATE TABLE `oauth2_authorization` (`id` varchar(100) NOT NULL,`registered_client_id` varchar(100) NOT NULL,`principal_name` varchar(200) NOT NULL,`authorization_grant_type` varchar(100) NOT NULL,`authorized_scopes` varchar(1000) DEFAULT NULL,`attributes` blob,`state` varchar(500) DEFAULT NULL,`authorization_code_value` blob,`authorization_code_issued_at` timestamp NULL DEFAULT NULL,`authorization_code_expires_at` timestamp NULL DEFAULT NULL,`authorization_code_metadata` blob,`access_token_value` blob,`access_token_issued_at` timestamp NULL DEFAULT NULL,`access_token_expires_at` timestamp NULL DEFAULT NULL,`access_token_metadata` blob,`access_token_type` varchar(100) DEFAULT NULL,`access_token_scopes` varchar(1000) DEFAULT NULL,`oidc_id_token_value` blob,`oidc_id_token_issued_at` timestamp NULL DEFAULT NULL,`oidc_id_token_expires_at` timestamp NULL DEFAULT NULL,`oidc_id_token_metadata` blob,`refresh_token_value` blob,`refresh_token_issued_at` timestamp NULL DEFAULT NULL,`refresh_token_expires_at` timestamp NULL DEFAULT NULL,`refresh_token_metadata` blob,`user_code_value` blob,`user_code_issued_at` timestamp NULL DEFAULT NULL,`user_code_expires_at` timestamp NULL DEFAULT NULL,`user_code_metadata` blob,`device_code_value` blob,`device_code_issued_at` timestamp NULL DEFAULT NULL,`device_code_expires_at` timestamp NULL DEFAULT NULL,`device_code_metadata` blob,PRIMARY KEY (`id`)
) ENGINE=InnoDB DEFAULT CHARSET=utf8;-- ----------------------------
-- Table structure for oauth2_authorization_consent
-- ----------------------------
DROP TABLE IF EXISTS `oauth2_authorization_consent`;
CREATE TABLE `oauth2_authorization_consent` (`registered_client_id` varchar(100) NOT NULL,`principal_name` varchar(200) NOT NULL,`authorities` varchar(1000) NOT NULL,PRIMARY KEY (`registered_client_id`,`principal_name`)
) ENGINE=InnoDB DEFAULT CHARSET=utf8;-- ----------------------------
-- Table structure for oauth2_registered_client
-- ----------------------------
DROP TABLE IF EXISTS `oauth2_registered_client`;
CREATE TABLE `oauth2_registered_client` (`id` varchar(100) NOT NULL,`client_id` varchar(100) NOT NULL,`client_id_issued_at` timestamp NOT NULL DEFAULT CURRENT_TIMESTAMP,`client_secret` varchar(200) DEFAULT NULL,`client_secret_expires_at` timestamp NULL DEFAULT NULL,`client_name` varchar(200) NOT NULL,`client_authentication_methods` varchar(1000) NOT NULL,`authorization_grant_types` varchar(1000) NOT NULL,`redirect_uris` varchar(1000) DEFAULT NULL,`post_logout_redirect_uris` varchar(1000) DEFAULT NULL,`scopes` varchar(1000) NOT NULL,`client_settings` varchar(2000) NOT NULL,`token_settings` varchar(2000) NOT NULL,PRIMARY KEY (`id`)
) ENGINE=InnoDB DEFAULT CHARSET=utf8;- 通过
springboot test,创建数据库数据
@SpringBootTest
public class ServerTestApp {@Resourceprivate RegisteredClientRepository registeredClientRepository;@Testpublic void saveClient(){RegisteredClient client = RegisteredClient.withId(UUID.randomUUID().toString())
//				客户端ID	clientId.clientId("pzj")
//				客户端secret	clientSecret.clientSecret("{bcrypt}"+new BCryptPasswordEncoder().encode("123456"))
//				客户端应用名	clientName.clientName("myclient")
//				客户端身份的验证方法	clientAuthenticationMethods.clientAuthenticationMethods(methods -> methods.add(ClientAuthenticationMethod.CLIENT_SECRET_BASIC))
//				授权类型	authorizationGrantTypes.authorizationGrantTypes(types -> {types.add(AuthorizationGrantType.AUTHORIZATION_CODE);types.add(AuthorizationGrantType.REFRESH_TOKEN);})
//				客户端应用回调地址.redirectUris(uris -> uris.add("http://localhost:8080/login/oauth2/code/myclient"))
//				客户端应用首页地址	postLogoutRedirectUris.postLogoutRedirectUris(uris -> uris.add("http://localhost:8080"))
//				授权范围	scopes.scopes(scopes -> {scopes.add("openid");scopes.add("profile");})
//				客户端settings	clientSettings.clientSettings(ClientSettings.builder().requireAuthorizationConsent(true).build()).build();registeredClientRepository.save(client);}
}
- 注释application.yml的client配置

2、功能测试
访问:http://localhost:8080/hello
操作同上,观察数据库数据


工程名:authorization-project
相关文章:
SpringSecurity:授权服务器与客户端应用(入门案例)
文章目录 一、需求概述二、基本授权登录功能实现1、授权服务器开发2、客户端开发3、功能测试 三、自定义授权服务器登录页1、授权服务器开发2、功能测试 四、自定义授权服务器授权页1、授权服务器开发2、功能测试 五、客户端信息保存数据库1、授权服务器开发2、功能测试 一、需…...

没用的文章又➕1
次次登陆GitHub都让我抓心挠肝,用了热度最高的法子也不抵事儿。谁说github上全是大神了,也要有我这样的小菜鸟。下面是我的失败记录… 查询目标网站的DNS 在whois上输入目标网站github.com,在查询结果当中选取任意一个DNS将地址和名称添加在…...

BiGRU双向门控循环单元多变量多步预测,光伏功率预测(Matlab完整源码和数据)
代码地址:BiGRU双向门控循环单元多变量多步预测,光伏功率预测(Matlab完整源码和数据) BiGRU双向门控循环单元多变量多步预测,光伏功率预测 一、引言 1.1、研究背景和意义 随着全球对可再生能源需求的不断增长,光伏…...

谷歌浏览器多开指南:如何完成独立IP隔离?
对于跨境电商来说,在进行社交媒体营销、广告投放等业务活动时,往往需要同时登录多个账号来提高运营效率和提升营销效果。然而,如果这些账号共享相同的 IP 地址,很容易被平台检测为关联账号,进而触发安全验证甚至封禁。…...

Django开发入门 – 3.用Django创建一个Web项目
Django开发入门 – 3.用Django创建一个Web项目 Build A Web Based Project With Django By JacksonML 本文简要介绍如何利用最新版Python 3.13.2来搭建Django环境,以及创建第一个Django Web应用项目,并能够运行Django Web服务器。 创建该Django项目需…...

【Java】多线程和高并发编程(三):锁(下)深入ReentrantReadWriteLock
文章目录 4、深入ReentrantReadWriteLock4.1 为什么要出现读写锁4.2 读写锁的实现原理4.3 写锁分析4.3.1 写锁加锁流程概述4.3.2 写锁加锁源码分析4.3.3 写锁释放锁流程概述&释放锁源码 4.4 读锁分析4.4.1 读锁加锁流程概述4.4.1.1 基础读锁流程4.4.1.2 读锁重入流程4.4.1.…...

讲解ES6中的变量和对象的解构赋值
在 ES6 中,解构赋值是一种非常方便的语法,它使得从数组或对象中提取值变得更加简洁和直观。解构赋值支持变量赋值,可以通过单独提取数组或对象的元素来赋值给变量。 下面我将分别讲解 数组解构 和 对象解构 的基本用法和一些高级特性。 1. …...

DeepSeek Coder + IDEA 辅助开发工具
开发者工具 我之前用的是Codegeex4模型,现在写一款DeepSeek Coder 本地模型 DeepSeek为什么火,我在网上看到一个段子下棋DeepSeek用兵法赢了ChatGpt,而没有用技术赢,这就是AI的思维推理,深入理解孙子兵法,…...
4.安全组和NACL)
云计算——AWS Solutions Architect – Associate(saa)4.安全组和NACL
安全组一充当虚拟防火墙对于关联实例,在实例级别控制入站和出站流量。 网络访问控制列表(NACL)一充当防火墙关联子网,在子网级别控制入站和出站流量。 在专有网络中,安全组和网络ACL(NACL)一起帮助构建分层网络防御。 安全组在实例级别操作…...

动量+均线组合策略关键点
动量均线组合策略关键点: 趋势确认: MA系统判断主趋势方向动量指标判断趋势强度 入场条件: 价格站上重要均线(如20日线)动量指标向上并保持高位短期均线上穿长期均线 出场条件: 价格跌破均线系统动量指标见顶回落短期均线下…...

Blazor-<select>
今天我们来说说<select>标签的用法,我们还是从一个示例代码开始 page "/demoPage" rendermode InteractiveAuto inject ILogger<InjectPage> logger; <h3>demoPage</h3> <select multiple>foreach (var item in list){<…...

Synchronized使用
文章目录 synchronized使用基本概念使用方法实现原理锁的粒度并发编程注意事项与Lock锁对比比较线程安全性与性能 synchronized使用 当涉及到多线程编程时,保证数据的正确性和一致性是至关重要的。而synchronized关键字是Java语言中最基本的同步机制之一࿰…...

OpenStack四种创建虚拟机的方式
实例(Instances)是在云内部运行的虚拟机。您可以从以下来源启动实例: 一、上传到镜像服务的镜像(Image) 使用已上传到镜像服务的镜像来启动实例。 二、复制到持久化卷的镜像(Volume) 使用已…...
)
Expo运行模拟器失败错误解决(xcrun simctl )
根据你的描述,问题主要涉及两个方面:xcrun simctl 错误和 Expo 依赖版本不兼容。以下是针对这两个问题的解决方案: 解决 xcrun simctl 错误 错误代码 72 通常表明 simctl 工具未正确配置或路径未正确设置。以下是解决步骤: 确保 …...

Docker从入门到精通- 容器化技术全解析
第一章:Docker 入门 一、什么是 Docker? Docker 就像一个超级厉害的 “打包神器”。它能帮咱们把应用程序和它运行所需要的东东都整整齐齐地打包到一起,形成一个独立的小盒子,这个小盒子在 Docker 里叫容器。以前呢,…...

开启对话式智能分析新纪元——Wyn商业智能 BI 携手Deepseek 驱动数据分析变革
2月18号,Wyn 商业智能 V8.0Update1 版本将重磅推出对话式智能分析,集成Deepseek R1大模型,通过AI技术的深度融合,致力于打造"会思考的BI系统",让数据价值触手可及,助力企业实现从数据洞察到决策执…...

RabbitMQ 消息顺序性保证
方式一:Consumer设置exclusive 注意条件 作用于basic.consume不支持quorum queue 当同时有A、B两个消费者调用basic.consume方法消费,并将exclusive设置为true时,第二个消费者会抛出异常: com.rabbitmq.client.AlreadyClosedEx…...

防御保护作业二
拓扑图 需求 需求一: 需求二: 需求三: 需求四: 需求五: 需求六: 需求七: 需求分析 1.按照要求进行设备IP地址的配置 2.在FW上开启DHCP功能,并配置不同的全局地址池,为…...

Spring Boot中实现多租户架构
文章目录 Spring Boot中实现多租户架构多租户架构概述核心思想多租户的三种模式优势挑战租户识别机制1. 租户标识(Tenant Identifier)2. 常见的租户识别方式3. 实现租户识别的关键点4. 租户识别示例代码5. 租户识别机制的挑战数据库隔离的实现1. 数据库隔离的核心目标2. 数据…...

【AI-27】DPO和PPO的区别
DPO(Direct Preference Optimization)和 PPO(Proximal Policy Optimization)有以下区别: 核心原理 DPO:基于用户偏好或人类反馈直接优化,核心是对比学习或根据偏好数据调整策略,将…...

为什么92%的Sora 2初学者卡在第4步?——帧一致性崩塌诊断工具包+时间轴锚点校准法
更多请点击: https://kaifayun.com 第一章:Sora 2视频生成的核心原理与环境准备 Sora 2并非OpenAI官方发布的模型,而是社区基于Sora技术理念构建的开源复现与增强框架,其核心依托于时空联合建模的扩散变换器(Spacetim…...

Allegro等长设置翻车实录:拓扑模板法的3个坑与手工PinPair的救赎
Allegro等长设计避坑指南:从拓扑模板到精准PinPair的实战演进在高速PCB设计中,等长匹配如同精密钟表里的齿轮啮合,差之毫厘便可能导致整个系统时序崩塌。当设计从简单的点对点结构升级到多负载复杂拓扑时,Allegro用户常陷入两种典…...

Unity安卓构建72小时实战指南:从零到真机运行
1. 这不是“又一本Unity教程”,而是我带三个新人从零上线第一款安卓游戏的真实路径你点开这个标题,大概率正站在两个路口之间:一边是满屏“30天速成Unity”“零基础做爆款”的短视频封面,一边是你刚下载完Unity Hub、卡在Android …...

Kerberos身份认证原理与实战排错指南
1. 为什么今天还要花时间搞懂 Kerberos?——一个被低估的“老协议”正在悄悄支撑着你的日常你每天登录公司内网查邮件、访问财务系统提交报销、用 Jenkins 构建代码、甚至在 Windows 域环境中打开一台同事的共享文件夹……这些看似顺滑的操作背后,大概率…...

新能源车轻量化为什么开始盯上高强镁合金?
续航,是悬在每一台纯电动汽车头上的达摩克利斯之剑。多充一度电、多堆一些正极材料,是一条路;但还有另一条路——把车造得更轻。 SAE(美国汽车工程师学会)的测算已经被反复引用:整车每减重100千克ÿ…...

机器学习与SHAP在教育公平研究中的应用:精准定位学业困境根源
1. 项目概述:当机器学习遇见教育公平,我们如何精准定位学业困境的根源?在拉丁美洲的教育研究领域,一个长期困扰政策制定者和研究者的核心问题是:究竟是什么因素,在复杂的社会经济背景下,系统性地…...

学术写作创新突破!2026全流程AI论文工具精选指南
2026 年 AI 论文写作工具已进入全流程闭环 学术合规时代,千笔 AI(综合评分 99 分)中文学术场景标杆;Grammarly Academic与Elicit为英文论文写作首选;按需求匹配度 - 数据可信度 - 成本承受力三维模型选型,…...

Unity发行版DLL调试实战:DnSpy无源码IL级断点指南
1. 这不是“反编译”,而是Unity游戏开发者的日常调试手段你有没有遇到过这样的情况:接手一个Unity发行版游戏,想快速验证某个功能逻辑是否按预期执行,或者排查一个偶发的崩溃,但手头只有打包后的Assembly-CSharp.dll&a…...
)
Postgresql基础实践教程(九)
⭐️⭐️⭐️⭐️⭐️ 完整数据详见 练习数据免费 ⭐️⭐️⭐️⭐️⭐️ 七十二、WITH查询(公用表表达式CTE) 1. SELECT 中的 WITH 2. 递归查询 3. 公用表表达式的物化 4. WITH中的数据修改语句 WITH提供了一种在主查询中写辅助语句的方法。这些语…...

Ubuntu经常安装软件
1、垃圾清理工具stacer sudo apt updatesudo apt install stacer apt cleanapt autocleanapt autoremove 2、类似与everything的工具Fsearcch 1sudo add-apt-repository ppa:christian-boxdoerfer/fsearch-stable 2sudo apt update 3sudo apt install fsearch (注…...