halcon机器视觉深度学习对象检测,物体检测
目录
- 效果图
- 操作步骤
- 软件版本
- halcon参考代码
- 本地函数 get_distinct_colors()
- 本地函数 make_neighboring_colors_distinguishable()
效果图


操作步骤
首先要在Deep Learning Tool工具里面把图片打上标注文本,
然后训练模型,导出模型文件
这个是模型
model_训练-250215-111516_opt.hdl
模型配置参数
model_训练-250215-111516_opt_dl_preprocess_params.hdict
软件版本
- 使用的版本 halcon 23.11
- Deep Learning Tool-24.05.1
halcon参考代码
*
* Inference can be done on a GPU or CPU.
* See the respective system requirements in the Installation Guide.
* If possible a GPU is used in this example.
* In case you explicitly wish to run this example on the CPU,
* choose the CPU device instead.
query_available_dl_devices (['runtime', 'runtime'], ['gpu', 'cpu'], DLDeviceHandles)
if (|DLDeviceHandles| == 0)throw ('No supported device found to continue this example.')
endif
* Due to the filter used in query_available_dl_devices, the first device is a GPU, if available.
*第一个设备是 GPU(如果可用)
DLDevice := DLDeviceHandles[0]
* * *************************************************
* **   设置推理路径和参数   ***
* *************************************************
*
* 我们将对示例图像进行推理。
* 在实际应用程序中,新传入的图像(不用于训练或评估)
* 将在此处使用。
*
* 在此示例中,我们从 file 中读取图像。* 用我训练的图片
ImageDir :=  'G:/机器视觉_测试项目/家具目标检测/images - 副本'*
* Set the paths of the retrained model and the corresponding preprocessing parameters.
* Example data folder containing the outputs of the previous example series.
ExampleDataDir := 'detect_pills_data'* Use the pretrained model and preprocessing parameters shipping with HALCON.*使用 HALCON 附带的预训练模型和预处理参数。*PreprocessParamFileName := 'detect_pills_preprocess_param.hdict'* RetrainedModelFileName := 'detect_pills.hdl'*whl 测试我自己训练的模型和参数,图片配置dir1223:='G:/机器视觉_测试项目/家具目标检测/'imgConfigHdict:='model_训练-250215-111516_opt_dl_preprocess_params.hdict'PreprocessParamFileName:= dir1223+imgConfigHdict*识别模型* RetrainedModelFileName := dir1223+ 'best_model.hdl'RetrainedModelFileName :=dir1223+ 'model_训练-250215-111516_opt.hdl'*
* Batch Size used during inference.推理批次大小
BatchSizeInference := 1
*
* Postprocessing parameters for the detection model.检测模型的后处理参数。
MinConfidence := 0.6
MaxOverlap := 0.2
MaxOverlapClassAgnostic := 0.7
*
* ********************
* **   推理   ***
* ********************
*
* Check if all necessary files exist.
*check_data_availability (ExampleDataDir, PreprocessParamFileName, RetrainedModelFileName, UsePretrainedModel)
*
*  读取重新训练的模型。
read_dl_model (RetrainedModelFileName, DLModelHandle)
*
* Set the batch size. 设置批处理大小。
set_dl_model_param (DLModelHandle, 'batch_size', BatchSizeInference)
*
* Initialize the model for inference.初始化模型以进行推理。
set_dl_model_param (DLModelHandle, 'device', DLDevice)
*
* Set postprocessing parameters for model.设置模型的后处理参数。
set_dl_model_param (DLModelHandle, 'min_confidence', MinConfidence)
set_dl_model_param (DLModelHandle, 'max_overlap', MaxOverlap)
set_dl_model_param (DLModelHandle, 'max_overlap_class_agnostic', MaxOverlapClassAgnostic)
*
* Get the parameters used for preprocessing.获取用于预处理的参数。
read_dict (PreprocessParamFileName, [], [], DLPreprocessParam)
* * 使用显示所需的数据集参数创建字典。
DLDataInfo := dict{}
get_dl_model_param (DLModelHandle, 'class_names', ClassNames)* 目标对象,标签名称
DLDataInfo.class_names := ClassNames
get_dl_model_param (DLModelHandle, 'class_ids', ClassIDs)
DLDataInfo.class_ids := ClassIDs
* 设置可视化的通用参数。
GenParam := dict{scale_windows: 1.2,display_labels:true}*读取目录里面的若干图片文件list_files (ImageDir, ['files' ], ImageFiles)*获取图片尺寸,whl测试read_image(img1,ImageFiles[0])        get_image_size (img1, Width, Height)* dev_open_window (1, 1, Width, Height, 'black', WindowID1)dev_open_window (1, 1, 900, 900*Height/(Width*1.0), 'black', WindowID1)*视频文件读取*grab_image_from_video()* open_framegrabber()* 读取视频帧
*grab_image_start([])
*grab_image(Image)
*grab_image_stop([])*
* 以 BatchSizeInference 大小批量循环访问所有图像以进行推理
for BatchIndex := 0 to floor(|ImageFiles| / real(BatchSizeInference)) - 1 by 1* * Get the paths to the images of the batch.Batch := ImageFiles[BatchIndex * BatchSizeInference:(BatchIndex + 1) * BatchSizeInference - 1]* 读取图片read_image (ImageBatch, Batch)* * Generate the DLSampleBatch.gen_dl_samples_from_images (ImageBatch, DLSampleBatch)* * Preprocess the DLSampleBatch.preprocess_dl_samples (DLSampleBatch, DLPreprocessParam)* * 在 DLSampleBatch 上应用 DL 模型。apply_dl_model (DLModelHandle, DLSampleBatch, [], DLResultBatch)* * Postprocessing and visualization.后处理和可视化* Loop over each sample in the batch.循环处理批次中的每个样品for SampleIndex := 0 to BatchSizeInference - 1 by 1* * Get sample and according results.获取样本和相应的结果。DLSample := DLSampleBatch[SampleIndex]DLResult := DLResultBatch[SampleIndex]* *whl测试
KeysForDisplay:='bbox_result'* * 显示检测结果.* dev_display_dl_data (DLSample, DLResult, DLDataInfo, 'bbox_result', GenParam, WindowHandleDict)*whl测试,ocr_detection_score_map_character*
* This procedure displays the content of the provided DLSample and/or DLResult
* depending on the input string KeysForDisplay.
* DLDatasetInfo is a dictionary containing the information about the dataset.
* The visualization can be adapted with GenParam.
*
* ** Set the default values: ***
Params := dict{}
*
* Define the screen width when a new window row is started.
Params.threshold_width := 1024
* Since potentially a lot of windows are opened,
* scale the windows consistently.
Params.scale_windows := 0.8
* Set a font and a font size.
Params.font := 'mono'
Params.font_size := 14
*
Params.line_width := 2
Params.map_transparency := 'cc'
Params.map_color_bar_width := 140
*
* Define parameter values specifically for 3d_gripping_point_detection
Params.gripping_point_color := '#00FF0099'
Params.gripping_point_size := 6
Params.region_color := '#FF000040'
Params.gripping_point_map_color := '#83000080'
Params.gripping_point_background_color := '#00007F80'
*
* Define parameter values specifically for anomaly detection
* and Global Context Anomaly Detection.
Params.anomaly_region_threshold := -1
Params.anomaly_classification_threshold := -1
Params.anomaly_region_label_color := '#40e0d0'
Params.anomaly_color_transparency := '40'
Params.anomaly_region_result_color := '#ff0000c0'
*
* Define segmentation-specific parameter values.
Params.segmentation_max_weight := 0
Params.segmentation_draw := 'fill'
Params.segmentation_transparency := 'aa'
Params.segmentation_exclude_class_ids := []
*
* Define bounding box-specific parameter values.
Params.bbox_label_color := '#000000' + '99'
Params.bbox_display_confidence := 1
Params.bbox_text_color := '#eeeeee'
*
* By default, display a description on the bottom.
Params.display_bottom_desc := true
*
* By default, show a legend with class IDs.
Params.display_legend := true
*
* By default, show the anomaly ground truth regions.
Params.display_ground_truth_anomaly_regions := true
*
* By default, show class IDs and color frames for classification ground truth/results.
Params.display_classification_ids := true
Params.display_classification_color_frame := true
*
* By default, show class labels for detection ground truth/results.
Params.display_labels := true
*
* By default, show direction of the ground truth/results instances for detection with instance_type 'rectangle2'.
Params.display_direction := true
*
* By default, use color scheme 'Jet' for the heatmap display.
Params.heatmap_color_scheme := 'jet'
* ** Set user-defined values: ***
*
* Overwrite default values by given generic parameters.
if (GenParam != [])get_dict_param (GenParam, 'keys', [], GenParamNames)for ParamIndex := 0 to |GenParamNames| - 1 by 1GenParamName := GenParamNames[ParamIndex]get_dict_param (Params, 'key_exists', GenParamName, KeyExists)if (not KeyExists)throw ('Unknown generic parameter: ' + GenParamName + '.')endifParams.[GenParamName] := GenParam.[GenParamName]endfor
endif
*
if (|DLSample| > 1 or |DLResult| > 1)throw ('Only a single dictionary for DLSample and DLResult is allowed')
endif
*
* Get the dictionary keys.
get_dict_param (DLSample, 'keys', [], SampleKeys)
if (DLResult != [])get_dict_param (DLResult, 'keys', [], ResultKeys)
endif
*
* Get image ID if it is available.
get_dict_param (DLSample, 'key_exists', 'image_id', ImageIDExists)
if (ImageIDExists)get_dict_tuple (DLSample, 'image_id', ImageID)ImageIDString := 'image ID ' + ImageIDImageIDStringBraces := '(image ID ' + ImageID + ')'ImageIDStringCapital := 'Image ID ' + ImageID
elseImageIDString := ''ImageIDStringBraces := ImageIDStringImageIDStringCapital := ImageIDString
endif
* AdditionalGreenClassNames := []
KeyIndex := 0* whl添加if*
* Check if DLDatasetInfo is valid.* whl添加
DLDatasetInfo:=DLDataInfo* Check if DLDatasetInfo contains necessary keys.ClassKeys := ['class_names', 'class_ids']get_handle_param (DLDatasetInfo, 'key_exists', ClassKeys, ClassKeysExist)if (min(ClassKeysExist) == 0)* In that case we expect that the class names and ids are never used.elseget_handle_param (DLDatasetInfo, 'keys', [], DLDatasetInfoKeys)for Index := 0 to |ClassKeys| - 1 by 1if (find_first(DLDatasetInfoKeys,ClassKeys[Index]) == -1)throw ('Key ' + ClassKeys[Index] + ' is missing in DLDatasetInfo.')endifendfor* * Get the general dataset information, if available.get_handle_tuple (DLDatasetInfo, 'class_names', ClassNames)get_handle_tuple (DLDatasetInfo, 'class_ids', ClassIDs)* * 为类定义不同的颜色*   get_dl_class_colors (ClassNames, AdditionalGreenClassNames, Colors)* 函数get_dl_class_colors 替代者,开始* Define distinct colors for the classes.
NumColors := |ClassNames|
* Get distinct colors without randomness makes neighboring colors look very similar.
* We use a workaround to get deterministic colors where subsequent colors are distinguishable.
get_distinct_colors (NumColors, false, 0, 200, ColorsRainbow)tuple_inverse (ColorsRainbow, ColorsRainbow)
make_neighboring_colors_distinguishable (ColorsRainbow, Colors)
* If a class 'OK','ok', 'good' or 'GOOD' or a class specified in AdditionalGreenClassNames is present set this class to green.
* Only the first occurrence found is set to a green shade.
tuple_union (['good', 'GOOD', 'ok', 'OK'], AdditionalGreenClassNames, ClassNamesGood)
for IndexFind := 0 to |ClassNamesGood| - 1 by 1GoodIdx := find_first(ClassNames,ClassNamesGood[IndexFind])if (GoodIdx != -1 and |ClassNames| <= 8)* If number of classes is <= 8, swap color with a green color.CurrentColor := Colors[GoodIdx]GreenIdx := floor(|ClassNames| / 2.0)* Set to pure green.Colors[GoodIdx] := '#00ff00'* Write original color to a green entry.Colors[GreenIdx] := CurrentColorbreakelseif (GoodIdx != -1 and |ClassNames| > 8)* If number of classes is larger than 8, set the respective color to green.Colors[GoodIdx] := '#00ff00'breakendif
endfor
* 函数get_dl_class_colors 替代者,结束endif*
* ** Set window parameters: ***
* *
* ** Display the data: ***
*
* Display data dictionaries.
KeyIndex := 0*while (KeyIndex < |KeysForDisplay|)* * if (KeysForDisplay[KeyIndex] == 'bbox_result' or KeysForDisplay[KeyIndex] == 'ocr_detection_result')* * Result bounding boxes on image.图像上的结果边界框。get_dl_sample_image (Image, SampleKeys, DLSample, 'image')* get_dl_sample_image (ImageBatch, SampleKeys, DLSample, 'image')* * Get or open next window.训练时的图片宽高get_image_size (Image, WidthImage, HeightImage)* get_next_window (Params.font, Params.font_size, Params.display_bottom_desc, WidthImage, HeightImage, 0, Params.scale_windows, Params.threshold_width, PrevWindowCoordinates, WindowHandleDict, KeysForDisplay[KeyIndex], CurrentWindowHandle, WindowImageRatio, PrevWindowCoordinates)*原始代码,whl测试注释,训练时的压缩后图片* dev_display (Image)*whl添加,获取窗口尺寸* get_window_extents(WindowID1,Row,Column,Window_Width,Window_Height)*图片原图本身尺寸,非训练设置压缩的图片尺寸get_image_size (ImageBatch, WidthBig, HeightBig)*whl添加,比值*应该先把训练时图片的原始框点转换图片本身尺寸时的坐标就可以了imgRate:=1imgHeightBeiWidth:=1if(1)*宽度,乘以1.0转为小数,可以让除得到小数结果imgRate:=WidthBig/(WidthImage*1.0)* 高度占宽度的比值imgHeightBeiWidth:=HeightBig/(HeightImage*1.0)endif*whl 添加,显示原图片* 调整图像尺寸* zoom_image_size(ImageBatch,imgZoom,800,800*HeightBig/(WidthBig*1.0),'constant')* zoom_image_size(ImageBatch,imgZoom,800,800*HeightBig/(WidthBig*1.0),'constant')dev_clear_window()*whl 添加,显示原图片 dev_display(ImageBatch)*让窗口适应图片的尺寸,窗口跟图片一样大*   dev_resize_window_fit_image (ImageBatch, 0, 0, -1, -1)* dev_re* dev_open_window_fit_image (ImageBatch, 0, 0, -1, -1, WindowID1)*dev_resize_window_fit_size (0, 0, -1, -1, -1, -1)*full_domain(ImageBatch,ImageBatch)* dev_set_window(WindowID1)* dev_set_part*whl 添加测试WindowImageRatio:=1CurrentWindowHandle:=WindowID1*目标对象分类文本* className:=DLResult.bbox_class_name*显示目标对象框 *dev_display_result_detection (DLResult, ResultKeys, Params.line_width, ClassIDs, TextConf, Colors, Params.bbox_label_color, WindowImageRatio, 'top', Params.bbox_text_color, Params.display_labels, DisplayDirectionTemp, CurrentWindowHandle, BboxClassIndex)*dev_display_result_detection (DLResult, ResultKeys, Params.line_width, ClassIDs, TextConf, Colors, Params.bbox_label_color, WindowImageRatio, 'top', Params.bbox_text_color, Params.display_labels, DisplayDirectionTemp, CurrentWindowHandle, BboxClassIndex)*目标文本显示set_display_font (WindowID1, 12, 'mono', 'false', 'false')  *提取函数,显示目标对象框,识别分类文本,开始
InstanceType := ''
MaskExists := false
if (find(ResultKeys,'bbox_row1') != -1)   *进这个get_dict_tuple (DLResult, 'bbox_row1', BboxRow1)get_dict_tuple (DLResult, 'bbox_col1', BboxCol1)get_dict_tuple (DLResult, 'bbox_row2', BboxRow2)get_dict_tuple (DLResult, 'bbox_col2', BboxCol2)InstanceType := 'rectangle1'*1进入,0不进入if(1)     *whl 添加,乘以系数*高度BboxRow1:=BboxRow1*imgHeightBeiWidth        BboxRow2:=BboxRow2*imgHeightBeiWidth*宽度BboxCol1:=BboxCol1*imgRateBboxCol2:=BboxCol2*imgRate*whl 添加,重置为1imgRate:=1endifelseif (find(ResultKeys,'bbox_phi') != -1)get_dict_tuple (DLResult, 'bbox_row', BboxRow)get_dict_tuple (DLResult, 'bbox_col', BboxCol)get_dict_tuple (DLResult, 'bbox_length1', BboxLength1)get_dict_tuple (DLResult, 'bbox_length2', BboxLength2)get_dict_tuple (DLResult, 'bbox_phi', BboxPhi)get_dict_tuple (DLResult, 'bbox_class_id', BboxClasses)InstanceType := 'rectangle2'
elsethrow ('Result bounding box data could not be found in DLResult.')
endif
if (find(ResultKeys,'mask') != -1)get_dict_object (InstanceMask, DLResult, 'mask')MaskExists := true
endif
if (InstanceType != 'rectangle1' and InstanceType != 'rectangle2' and not MaskExists)throw ('Result bounding box or mask data could not be found in DLSample.')
endif*whl注释
get_dict_tuple (DLResult, 'bbox_class_id', BboxClasses)* whl 添加,显示检测对象名称*whl添加
ShowLabels:=true
ShowDirection:=true
TextColor:='#eeeeee'TextConf:=''if (|BboxClasses| > 0)* * Get text and text size for correct positioning of result class IDs.if (ShowLabels)Text := BboxClasses + TextConfget_string_extents (CurrentWindowHandle, Text, Ascent, Descent, _, _)TextOffset := (Ascent + Descent) / WindowImageRatioendif* * Generate bounding box XLDs.if (InstanceType == 'rectangle1')tuple_gen_const (|BboxRow1|, 0.0, BboxPhi)*画目标框线,乘以 imgRategen_rectangle2_contour_xld (BboxRectangle, 0.5 * (BboxRow1 + BboxRow2), 0.5 * (BboxCol1 + BboxCol2), BboxPhi, 0.5 * (BboxCol2 - BboxCol1), 0.5 * (BboxRow2 - BboxRow1))* gen_rectangle2_contour_xld (BboxRectangle, 0.5 * (BboxRow1  + BboxRow2)*imgRate, 0.5 * (BboxCol1 + BboxCol2)*imgRate, BboxPhi, 0.5 * (BboxCol2 - BboxCol1)*imgRate, 0.5 * (BboxRow2 - BboxRow1)*imgRate)if (ShowLabels)LabelRowTop := BboxRow1LabelRowBottom := BboxRow2 - TextOffsetLabelCol := BboxCol1endifelseif (InstanceType == 'rectangle2')gen_rectangle2_contour_xld (BboxRectangle, BboxRow, BboxCol, BboxPhi, BboxLength1, BboxLength2)if (ShowLabels)LabelRowTop := BboxRow - TextOffsetLabelRowBottom := BboxRowLabelCol := BboxColendifif (ShowDirection)if (ShowDirection == -1)ArrowSizeFactorLength := 0.4ArrowSizeFactorHead := 0.2MaxLengthArrow := 20HalfLengthArrow := min2(MaxLengthArrow,BboxLength1 * ArrowSizeFactorLength)ArrowBaseRow := BboxRow - (BboxLength1 - HalfLengthArrow) * sin(BboxPhi)ArrowBaseCol := BboxCol + (BboxLength1 - HalfLengthArrow) * cos(BboxPhi)ArrowHeadRow := BboxRow - (BboxLength1 + HalfLengthArrow) * sin(BboxPhi)ArrowHeadCol := BboxCol + (BboxLength1 + HalfLengthArrow) * cos(BboxPhi)ArrowHeadSize := min2(MaxLengthArrow,min2(BboxLength1,BboxLength2)) * ArrowSizeFactorHeadelseArrowHeadSize := 20.0ArrowBaseRow := BboxRowArrowBaseCol := BboxColArrowHeadRow := BboxRow - (BboxLength1 + ArrowHeadSize) * sin(BboxPhi)ArrowHeadCol := BboxCol + (BboxLength1 + ArrowHeadSize) * cos(BboxPhi)endifgen_arrow_contour_xld (OrientationArrows, ArrowBaseRow, ArrowBaseCol, ArrowHeadRow, ArrowHeadCol, ArrowHeadSize, ArrowHeadSize)endifelseif (MaskExists)area_center (InstanceMask, _, MaskRow, MaskCol)LabelRowTop := MaskRow - TextOffsetLabelRowBottom := MaskRowLabelCol := MaskColelsethrow ('Unknown instance_type: ' + InstanceType)endif* get_contour_style (CurrentWindowHandle, ContourStyle)dev_set_contour_style ('stroke')get_line_style (CurrentWindowHandle, Style)*whl添加LineWidthBbox:=1LineWidths := [LineWidthBbox + 2,LineWidthBbox]dev_set_line_width (LineWidthBbox)* * Collect ClassIDs of the bounding boxes.tuple_gen_const (|BboxClasses|, 0, BboxClassIndices)* * Draw bounding boxes.for IndexBbox := 0 to |BboxClasses| - 1 by 1ClassID := find(ClassIDs,BboxClasses[IndexBbox])BboxClassIndices[IndexBbox] := ClassID* First draw in black to make the class-color visible.CurrentColors := ['black',Colors[ClassID]]if (MaskExists)select_obj (InstanceMask, MaskSelected, IndexBbox + 1)dev_set_draw ('fill')dev_set_color (Colors[ClassID] + '80')dev_display (MaskSelected)dev_set_draw ('margin')endiffor IndexStyle := 0 to |CurrentColors| - 1 by 1dev_set_color (CurrentColors[IndexStyle])dev_set_line_width (LineWidths[IndexStyle])if (InstanceType != '')select_obj (BboxRectangle, RectangleSelected, IndexBbox + 1)dev_display (RectangleSelected)if (InstanceType == 'rectangle2' and ShowDirection)select_obj (OrientationArrows, ArrowSelected, IndexBbox + 1)dev_display (ArrowSelected)endifendifendforendfor* * Draw text of bounding boxes.if (ShowLabels)* For better visibility the text is displayed after all bounding boxes are drawn.* Get text and text size for correct positioning of result class IDs.* Text := BboxClasses + TextConf*whl 对象文本*bbox_class_name标签,bbox_confidence置信度得分whlObjectClassName:=DLResult.bbox_class_name*四舍五入,保留10位小数tuple_string(DLResult.bbox_confidence, '.10f', StringConfidence)     *截取字符串tuple_substr (StringConfidence, 0, 3, Substring)Text :=whlObjectClassName+ Substring* Select text color.if (TextColor == '')TextColorClasses := Colors[BboxClassIndices]elsetuple_gen_const (|BboxClassIndices|, TextColor, TextColorClasses)endif* Select correct position of the text.LabelRow := LabelRowTop*whl注释
*         if (TextPositionRow == 'bottom')*     LabelRow := LabelRowBottom* endif*whl添加,标签字体背景色BoxLabelColor:='#00000099'  * BoxLabelColor:='#05E600'* Display text.显示对象标签文本         dev_disp_text (Text, 'image', LabelRow, LabelCol, TextColorClasses, ['box_color', 'shadow', 'border_radius'], [BoxLabelColor,'false', 0])endif* dev_set_contour_style (ContourStyle)set_line_style (CurrentWindowHandle, Style)
else* Do nothing if no results are present.BboxClassIndices := []
endif*显示目标对象框,识别分类文本,结束*whl 注释,不执行if代码里面的代码endif* KeyIndex := KeyIndex + 1
*endwhile      * whl测试,目标框显示,结束             *whl注释* WindowHandles := WindowHandleDict.bbox_result* dev_set_window (WindowHandles[0])* set_display_font (WindowHandles[0], 16, 'mono', 'true', 'false')* whl测试* set_display_font (WindowID1, 16, 'mono', 'true', 'false')*whl注释,不显示绿色的检测文本列表*  dev_disp_text (Text, 'window', 'top', 'left', TextColor, ['box_color', 'shadow'], [TextBoxColor,'false'])set_display_font (WindowID1, 16, 'mono', 'true', 'false')  * dev_disp_text ('Press Run (F5) to continue', 'window', 'bottom', 'right', 'black', [], [])* 拆分字符串,图片路径     tuple_split(Batch,'\\',fileWordArr)Wordlength:=|fileWordArr|*取最后一个字符串fileShortName:=fileWordArr[Wordlength-1]*显示文件名dev_disp_text (fileShortName, 'window', 'bottom', 'left', 'magenta', [], [])*将窗口保存为本地图片文件* dump_window(WindowID1,'png','G:/机器视觉_测试项目/家具目标检测/videoImages/2')stop ()endfor
endfor
*
* Close windows used for visualization.关闭用于可视化的窗口
*dev_close_window_dict (WindowHandleDict)
*
*
set_display_font (WindowID1, 24, 'mono', 'true', 'false')       dev_disp_text ('程序结束', 'window', 'bottom', 'right', 'green', ['box_color'], [ 'blue'])
本地函数 get_distinct_colors()
*
* We get distinct color-values first in HLS color-space.
* Assumes hue [0, EndColor), lightness [0, 1), saturation [0, 1).
*
* Parameter checks.
* NumColors.
if (NumColors < 1)throw ('NumColors should be at least 1')
endif
if (not is_int(NumColors))throw ('NumColors should be of type int')
endif
if (|NumColors| != 1)throw ('NumColors should have length 1')
endif
* Random.
if (Random != 0 and Random != 1)tuple_is_string (Random, IsString)if (IsString)Random := Random == 'true' or 'false'elsethrow ('Random should be either true or false')endif
endif
* StartColor.
if (|StartColor| != 1)throw ('StartColor should have length 1')
endif
if (StartColor < 0 or StartColor > 255)throw ('StartColor should be in the range [0, 255]')
endif
if (not is_int(StartColor))throw ('StartColor should be of type int')
endif
* EndColor.
if (|EndColor| != 1)throw ('EndColor should have length 1')
endif
if (EndColor < 0 or EndColor > 255)throw ('EndColor should be in the range [0, 255]')
endif
if (not is_int(EndColor))throw ('EndColor should be of type int')
endif
*
* Color generation.
if (StartColor > EndColor)EndColor := EndColor + 255
endif
if (NumColors != 1)Hue := (StartColor + int((EndColor - StartColor) * real([0:NumColors - 1]) / real(NumColors - 1))) % 255
elseHue := mean([StartColor,EndColor])
endif
if (Random)Hue := Hue[sort_index(rand(NumColors))]Lightness := int((5.0 + rand(NumColors)) * 255.0 / 10.0)Saturation := int((9.0 + rand(NumColors)) * 255.0 / 10.0)
elseLightness := int(gen_tuple_const(NumColors,0.55) * 255.0)Saturation := int(gen_tuple_const(NumColors,0.95) * 255.0)
endif
*
* Write colors to a 3-channel image in order to transform easier.
gen_image_const (HLSImageH, 'byte', 1, NumColors)
gen_image_const (HLSImageL, 'byte', 1, NumColors)
gen_image_const (HLSImageS, 'byte', 1, NumColors)
get_region_points (HLSImageH, Rows, Columns)
set_grayval (HLSImageH, Rows, Columns, Hue)
set_grayval (HLSImageL, Rows, Columns, Lightness)
set_grayval (HLSImageS, Rows, Columns, Saturation)
*
* Convert from HLS to RGB.
trans_to_rgb (HLSImageH, HLSImageL, HLSImageS, ImageR, ImageG, ImageB, 'hls')
*
* Get RGB-values and transform to Hex.
get_grayval (ImageR, Rows, Columns, Red)
get_grayval (ImageG, Rows, Columns, Green)
get_grayval (ImageB, Rows, Columns, Blue)
Colors := '#' + Red$'02x' + Green$'02x' + Blue$'02x'
return ()
*
本地函数 make_neighboring_colors_distinguishable()
*
* Shuffle the input colors in a deterministic way
* to make adjacent colors more distinguishable.
* Neighboring colors from the input are distributed to every NumChunks
* position in the output.
* Depending on the number of colors, increase NumChunks.
NumColors := |ColorsRainbow|
if (NumColors >= 8)NumChunks := 3if (NumColors >= 40)NumChunks := 6elseif (NumColors >= 20)NumChunks := 4endifColors := gen_tuple_const(NumColors,-1)* Check if the Number of Colors is dividable by NumChunks.NumLeftOver := NumColors % NumChunksColorsPerChunk := int(NumColors / NumChunks)StartIdx := 0for S := 0 to NumChunks - 1 by 1EndIdx := StartIdx + ColorsPerChunk - 1if (S < NumLeftOver)EndIdx := EndIdx + 1endifIdxsLeft := [S:NumChunks:NumColors - 1]IdxsRight := [StartIdx:EndIdx]Colors[S:NumChunks:NumColors - 1] := ColorsRainbow[StartIdx:EndIdx]StartIdx := EndIdx + 1endfor
elseColors := ColorsRainbow
endif
return ()
相关文章:

halcon机器视觉深度学习对象检测,物体检测
目录 效果图操作步骤软件版本halcon参考代码本地函数 get_distinct_colors()本地函数 make_neighboring_colors_distinguishable() 效果图 操作步骤 首先要在Deep Learning Tool工具里面把图片打上标注文本, 然后训练模型,导出模型文件 这个是模型 mod…...

英文字体:极简现代浓缩未来派科技海报标题排版无衬线字体 PODIUM Sharp Font
PODIUM Sharp 是 2012 年设计的 DUDU 字体的扩展版本。多年后,我决定通过添加新的母版和粗细来重建和开发这种字体。最后,PODIUM Sharp 由 234 种款式组成:从超压缩发际线到超扩展重度。 这个项目的主要目的是在我在旧波兰标本中发现的不同模…...

Java中JDK、JRE,JVM之间的关系
Java中的JDK、JRE和JVM是三个核心概念,其关系可概括为JDK > JRE > JVM,具体如下: 一、定义与作用 JDK(Java Development Kit) 定义:Java开发工具包,用于开发和编译Java程序。包含内容&…...

elasticsearch在windows上的配置
写在最前面: 上资源 第一步 解压: 第二步 配置两个环境变量 第三步 如果是其他资源需要将标蓝的文件中的内容加一句 xpack.security.enabled: false 不同版本的yaml文件可能配置不同,末尾加这个 xpack.security.enabled: true打开bin目…...

vscode 配置 Copilot 提示GHE.com连接失败
步骤一:打开设置并进入 settings.json 点击菜单栏中的 “文件” -> “首选项” -> “设置”。 在搜索设置栏中输入 “Copilot: Advanced”。 点击搜索结果下方的 “在 settings.json 中编辑” 链接,这会打开 settings.json 文件。 步骤二&#…...

Pycharm+CodeGPT+Ollama+Deepseek
首先,体验截图: 接着: 1、下载Ollama: Download Ollama on macOS 2、下载模型 以1.5b为例,打开命令行,输入: ollama run deepseek-r1:1.5b 3、Pycharm安装Code GPT插件 打开PyCharm,找到文…...

Unreal5从入门到精通之在编辑器中更新 UserWidgets
前言 在虚幻中创建越来越复杂和灵活的 UserWidget 蓝图时,一个问题是它们在编辑器中的外观与它们在游戏中的最终外观可能有很大不同。 库存面板示例 假设你想创建一个通用的库存显示小部件。我们可以在整个 UI 中使用它,无论我们需要在哪里显示某些内容。 标题,描述所显示…...

C语言修炼手册
目录 第一章 分支与循环语句 1. 悬空else问题 2. 循环输入问题 3. getchar缓冲区溢出问题 4. goto语句坑点 第二章 函数 1.为什么要有库函数 2.函数嵌套 3.链式访问 4.回调函数 5.函数递归 6.字符转换函数 7.模拟实现字符串拷贝strcpy 8.模拟实现字符串的长度s…...

Linux部署ollama
1、下载ollama wget https://github.com/ollama/ollama/releases/download/v0.1.47/ollama-linux-amd64或者curl -fsSL https://ollama.com/install.sh | sh2、安装ollama install ollama-linux-amd64 /usr/local/bin/ollama3、启动ollama vi /etc/systemd/system/ollama.se…...

跨语言语义理解与生成:多语言预训练方法及一致性优化策略
网罗开发 (小红书、快手、视频号同名) 大家好,我是 展菲,目前在上市企业从事人工智能项目研发管理工作,平时热衷于分享各种编程领域的软硬技能知识以及前沿技术,包括iOS、前端、Harmony OS、Java、Python等…...

最新华为 HCIP-Datacom(H12-821)2025.2.20
最新 HCIP-Datacom(H12-821),完整题库请扫描上方二维码访问。 如图所示为某OSPF网络,已知R1和R2已,成功建立邻接关系,现一工程师在R2上配置了图中命令。那么在R2上查看LSDB时,可能存在以下哪些LSA? A&…...

TS语言自定义脚手架
初始化 新建文件夹初始化命令 npm init -ytsc --initnpm i types/nodenpm i typescript# 处理别名npm i -D tsc-alias -y 表示选项都为yes 安装ts相关依赖 新建相关文件 bin 文件夹 src文件夹 commands 文件夹 (命令 utils 文件夹 (封装方法) index.t…...

深度学习-122-大语言模型LLM之基于langchian自定义国内联网查询工具并创建智能代理
文章目录 1 访问百度1.1 百度检索1.2 库baidusearch2 自定义工具@tool装饰器3 使用工具创建智能代理3.1 语言模型与工具结合3.2 方式一create_react_agent3.3 方式二create_tool_calling_agent3.4 给代理添加记忆4 参考附录1 访问百度 1.1 百度检索 from bs4 import Beautifu…...

Docker Desktop 入门教学
引言 Docker Desktop 是 Docker 官方为开发者提供的桌面应用程序,支持在 Windows 和 macOS 上轻松构建、运行和共享容器化应用程序。它集成了 Docker 引擎、Docker CLI 客户端以及 Docker Compose 等工具,方便您在本地开发和测试。 一、快速安装 1. 系…...

PyCharm 中的 %reset -f 功能:一键重置控制台变量
在 PyCharm 的日常使用中,我们经常需要在控制台中测试和运行各种代码片段。随着时间的推移,控制台中会积累大量的变量和输出,这可能会使得环境变得混乱,影响我们的开发效率。为了解决这个问题,IPython 提供了一个非常有…...

ollama-chat-ui-vue,一个可以用vue对接ollama的开源项目,可接入deepSeek
ollama-chat-ui-vue 使用vue3 vite elementUi 搭建的前端chat,通过ollama可与模型对话,目前支持独立思考,切换模型(联网查询后续支持) github地址:ollama-chat-ui-vue 制作不易github点点star,谢谢 前置工作 安装ollama,ollama官网地址 安装完olla…...

在Logback中拦截和修改日志
事实上,Logback并没有提供修改日志的直接方法,但有一种解决方法可以通过使用过滤器来实现我们的目标,即使它看起来有点黑客。 假设你记录了某个用户的某个id号数百次,它分散在整个应用程序中,现在你有了一个新的要求,要求你必须加密这个id号。当然,你足够聪明,可以为此…...

Compose 定制UI视图
Compose 定制UI视图 概述MaterialThemeMaterialTheme与CompositionLocalMaterialThemeCompositionLocal 定制主题方案 概述 新建一个新项目时,Compose会在项目中生成 ui/theme 目录,目录中有四个文件,分别如下 Color.kt:颜色配置…...

《STL 六大组件之容器探秘:深入剖析 string》
目录 一、string 类简介二、string 类的常用接口1. 构造函数(constructor function)2. 与容量相关的接口(capacity)3. 与迭代器有关的接口(iterator)4. 与元素访问有关的接口(element access&am…...

DeepSeek 助力 Vue 开发:打造丝滑的点击动画(Click Animations)
前言:哈喽,大家好,今天给大家分享一篇文章!并提供具体代码帮助大家深入理解,彻底掌握!创作不易,如果能帮助到大家或者给大家一些灵感和启发,欢迎收藏关注哦 💕 目录 Deep…...

[特殊字符] 智能合约中的数据是如何在区块链中保持一致的?
🧠 智能合约中的数据是如何在区块链中保持一致的? 为什么所有区块链节点都能得出相同结果?合约调用这么复杂,状态真能保持一致吗?本篇带你从底层视角理解“状态一致性”的真相。 一、智能合约的数据存储在哪里…...

华为云AI开发平台ModelArts
华为云ModelArts:重塑AI开发流程的“智能引擎”与“创新加速器”! 在人工智能浪潮席卷全球的2025年,企业拥抱AI的意愿空前高涨,但技术门槛高、流程复杂、资源投入巨大的现实,却让许多创新构想止步于实验室。数据科学家…...
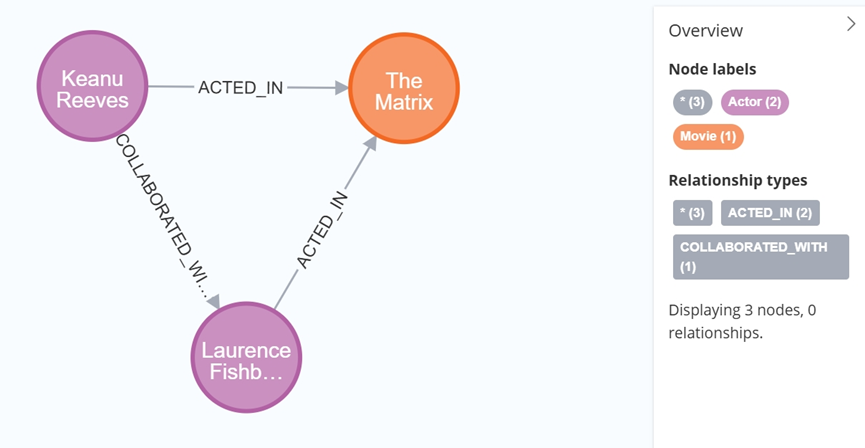
大数据学习栈记——Neo4j的安装与使用
本文介绍图数据库Neofj的安装与使用,操作系统:Ubuntu24.04,Neofj版本:2025.04.0。 Apt安装 Neofj可以进行官网安装:Neo4j Deployment Center - Graph Database & Analytics 我这里安装是添加软件源的方法 最新版…...
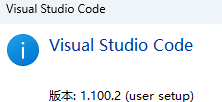
无法与IP建立连接,未能下载VSCode服务器
如题,在远程连接服务器的时候突然遇到了这个提示。 查阅了一圈,发现是VSCode版本自动更新惹的祸!!! 在VSCode的帮助->关于这里发现前几天VSCode自动更新了,我的版本号变成了1.100.3 才导致了远程连接出…...

JVM垃圾回收机制全解析
Java虚拟机(JVM)中的垃圾收集器(Garbage Collector,简称GC)是用于自动管理内存的机制。它负责识别和清除不再被程序使用的对象,从而释放内存空间,避免内存泄漏和内存溢出等问题。垃圾收集器在Ja…...
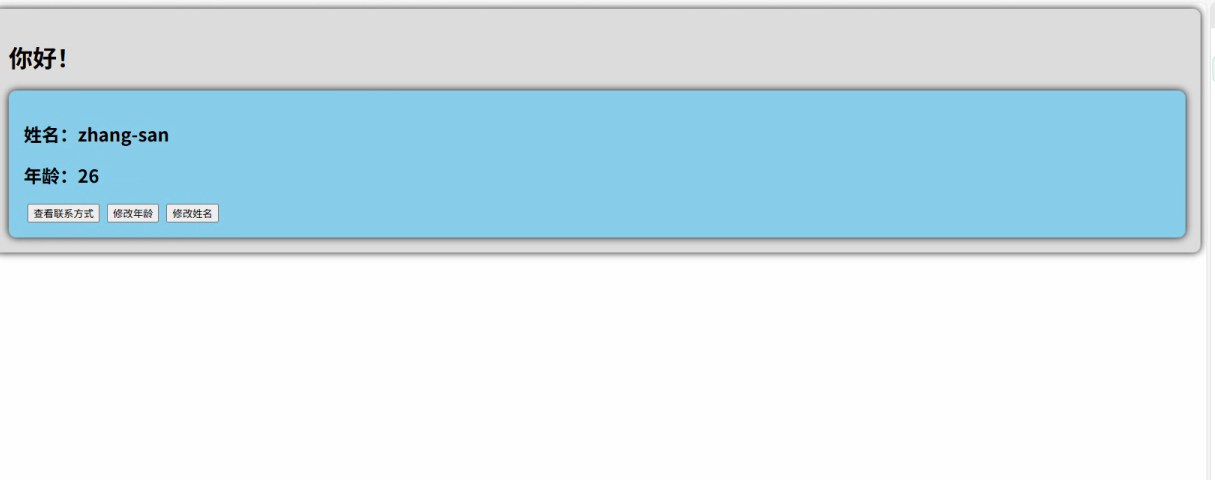
2.Vue编写一个app
1.src中重要的组成 1.1main.ts // 引入createApp用于创建应用 import { createApp } from "vue"; // 引用App根组件 import App from ./App.vue;createApp(App).mount(#app)1.2 App.vue 其中要写三种标签 <template> <!--html--> </template>…...
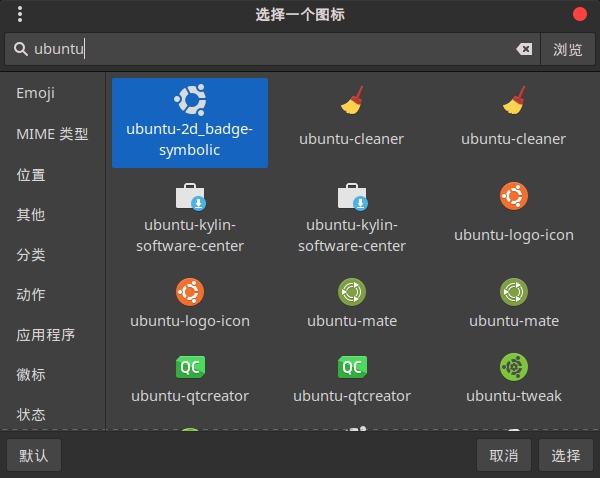
Cinnamon修改面板小工具图标
Cinnamon开始菜单-CSDN博客 设置模块都是做好的,比GNOME简单得多! 在 applet.js 里增加 const Settings imports.ui.settings;this.settings new Settings.AppletSettings(this, HTYMenusonichy, instance_id); this.settings.bind(menu-icon, menu…...

06 Deep learning神经网络编程基础 激活函数 --吴恩达
深度学习激活函数详解 一、核心作用 引入非线性:使神经网络可学习复杂模式控制输出范围:如Sigmoid将输出限制在(0,1)梯度传递:影响反向传播的稳定性二、常见类型及数学表达 Sigmoid σ ( x ) = 1 1 +...
听写流程自动化实践,轻量级教育辅助
随着智能教育工具的发展,越来越多的传统学习方式正在被数字化、自动化所优化。听写作为语文、英语等学科中重要的基础训练形式,也迎来了更高效的解决方案。 这是一款轻量但功能强大的听写辅助工具。它是基于本地词库与可选在线语音引擎构建,…...

#Uniapp篇:chrome调试unapp适配
chrome调试设备----使用Android模拟机开发调试移动端页面 Chrome://inspect/#devices MuMu模拟器Edge浏览器:Android原生APP嵌入的H5页面元素定位 chrome://inspect/#devices uniapp单位适配 根路径下 postcss.config.js 需要装这些插件 “postcss”: “^8.5.…...
