容器化安装环境EFK搭建
容器化安装环境
Docker中安装并启动ElasticSearch
前置配置
第一步:在宿主机上执行echo “net.ipv4.ip_forward=1” >>/usr/lib/sysctl.d/00-system.conf
2.第二步:重启network和docker服务
[root@localhost /]# systemctl restart network && systemctl restart docker
安装ElasticSearch
1.下载镜像
docker pull elasticsearch:7.6.2
2.创建挂载的目录
mkdir -p /mydata/elasticsearch/config
mkdir -p /mydata/elasticsearch/data
mkdir -p /mydata/elasticsearch/plugins
echo "http.host: 0.0.0.0" >> /mydata/elasticsearch/config/elasticsearch.yml
3.创建容器并启动
chmod -R 777 /mydata/elasticsearch/data /mydata/elasticsearch/config /mydata/elasticsearch/plugins
docker run --name elasticsearch -p 9200:9200  -p 9300:9300 \
-e "discovery.type=single-node" \
-e ES_JAVA_OPTS="-Xms84m -Xmx512m" \
-v /mydata/elasticsearch/config/elasticsearch.yml:/usr/share/elasticsearch/config/elasticsearch.yml \
-v /mydata/elasticsearch/data:/usr/share/elasticsearch/data \
-v /mydata/elasticsearch/plugins:/usr/share/elasticsearch/plugins \
-d elasticsearch:7.6.2其中elasticsearch.yml是挂载的配置文件,data是挂载的数据,plugins是es的插件,如ik,而数据挂载需要权限,需要设置data文件的权限为可读可写,需要下边的指令。
chmod -R 777 要修改的路径-e "discovery.type=single-node" 设置为单节点
特别注意:
-e ES_JAVA_OPTS="-Xms256m -Xmx256m" \ 测试环境下,设置ES的初始内存和最大内存,否则导致过大启动不了ES
访问查看
4.修改配置
进入容器&打开文件
docker exec -it elasticsearch bash
cd config
vi elasticsearch.yml
进入config目录里创建elasticsearch.yml文件,并使用vi命令插入如下内容:
http.host: 0.0.0.05.重启es并设置密码
配置x-pack 不然会报错
-
进入
docker exec -it elasticsearch bash目录,执行以下命令:
./bin/elasticsearch-setup-passwords interactive -
会出现以下错误信息:
Unexpected response code [500] from calling GET http://127.0.0.1:9200/_security/_authenticate?pretty It doesn't look like the X-Pack security feature is enabled on this Elasticsearch node. Please check if you have enabled X-Pack security in your elasticsearch.yml configuration file. -
我们需要配置文件中开启x-pack验证,修改
config/elasticsearch.yml配置文件,在尾部添加以下内容,然后重启elasticsearch:
xpack.security.enabled: true./bin/elasticsearch -d -
重复第1步,为
elastic、apm_system、kibana、logstash_system、beats_system、remote_monitoring_user设置密码,这里我设置了统一密码:123456,具体操作:
cd bin
elasticsearch-setup-passwords interactive
// 输出
Initiating the setup of passwords for reserved users elastic,apm_system,kibana,kibana_system,logstash_system,beats_system,remote_monitoring_user.
You will be prompted to enter passwords as the process progresses.
Please confirm that you would like to continue [y/N]YEnter password for [elastic]:
Reenter password for [elastic]:
Enter password for [apm_system]:
Reenter password for [apm_system]:
Enter password for [kibana_system]:
Reenter password for [kibana_system]:
Enter password for [logstash_system]:
Reenter password for [logstash_system]:
Enter password for [beats_system]:
Reenter password for [beats_system]:
Enter password for [remote_monitoring_user]:
Reenter password for [remote_monitoring_user]:
Changed password for user [apm_system]
Changed password for user [kibana_system]
Changed password for user [kibana]
Changed password for user [logstash_system]
Changed password for user [beats_system]
Changed password for user [remote_monitoring_user]
Changed password for user [elastic]
5.先不加用户密码进行访问:curl 127.0.0.1:9200:
{"error": {"root_cause": [{"type": "security_exception","reason": "missing authentication credentials for REST request [/]","header": {"WWW-Authenticate": "Basic realm=\"security\" charset=\"UTF-8\""}}],"type": "security_exception","reason": "missing authentication credentials for REST request [/]","header": {"WWW-Authenticate": "Basic realm=\"security\" charset=\"UTF-8\""}},"status": 401
}
![[外链图片转存失败,源站可能有防盗链机制,建议将图片保存下来直接上传(img-QMh0KUIX-1690629954044)(C:\Users\Gary\AppData\Roaming\Typora\typora-user-images\image-20230728222331492.png)]](https://img-blog.csdnimg.cn/1dbf2b5e6b8e4cfa972106eb874273ce.png)
6.CURL密码访问Elasticsearch
curl -u elastic:123456 127.0.0.1:9200
# 或者
curl -u elastic 127.0.0.1:9200
Enter host password for user 'elastic': 123456
成功打印:
![[外链图片转存失败,源站可能有防盗链机制,建议将图片保存下来直接上传(img-S02ZiQAk-1690629954044)(C:\Users\Gary\AppData\Roaming\Typora\typora-user-images\image-20230728222634939.png)]](https://img-blog.csdnimg.cn/b2c41624ea094bf2a13d4ff3854acb49.png)
![[外链图片转存失败,源站可能有防盗链机制,建议将图片保存下来直接上传(img-fn5OOxtx-1690629954046)(C:\Users\Gary\AppData\Roaming\Typora\typora-user-images\image-20230728222840197.png)]](https://img-blog.csdnimg.cn/b4354dc4cf3747dcb4d7dc8132cf8f70.png)
安装 elasticsearch-head
此时如果想查看es的服务是否启动正常,还可以基于docker来安装es的插件。过程基本一样,先docker去拉取插件,然后docker运行容器:
docker pull mobz/elasticsearch-head:5执行docker命令后,也可以使用docker ps -a来查看是否成功启动。不过更好的方式是和es服务链接上。因此接下来首先需要修改es的config目录的配置文件elasticsearch.yml,在其后面增加两行语句:
http.cors.enabled: true
http.cors.allow-origin: "*"
主要目的就是允许跨域请求。
由于修改了配置文件,所以需要重启一下es的服务。直接运行如下语句:
docker restart elasticsearch
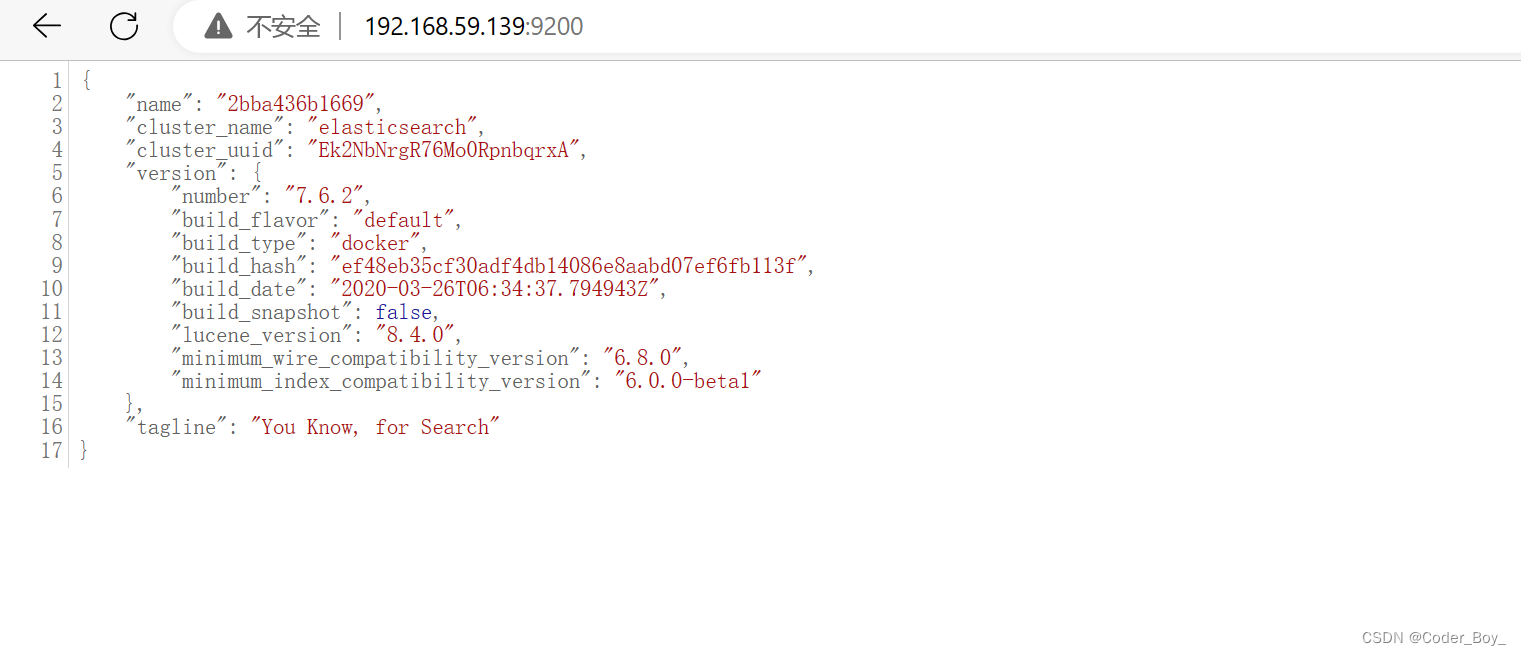
到此就可以使用网页浏览器来查看es的运行状况了。打开一个浏览器,地址栏上输入安装es插件的服务器ip地址和其端口号:
![[外链图片转存失败,源站可能有防盗链机制,建议将图片保存下来直接上传(img-IiSVlM5b-1690629954046)(C:\Users\Gary\AppData\Roaming\Typora\typora-user-images\image-20230729123550710.png)]](https://img-blog.csdnimg.cn/4fc004f8908b4f3aa157a31af3725d74.png)
安装Kibana
7.6版本Kibana启动 参数 ELASTICSEARCH_URL
![[外链图片转存失败,源站可能有防盗链机制,建议将图片保存下来直接上传(img-Vfn99aQ6-1690629954047)(C:\Users\Gary\AppData\Roaming\Typora\typora-user-images\image-20230728215000421.png)]](https://img-blog.csdnimg.cn/dbaec0206a08426494fdc518a8a753f4.png)
docker pull kibana:7.6.2docker run --name kibana -e ELASTICSEARCH_HOSTS=http://自己的IP地址:9200 -p 5601:5601 -d kibana:7.6.2
//docker run --name kibana -e ELASTICSEARCH_URL=http://自己的IP地址:9200 -p 5601:5601 -d kibana:7.6.2或者 docker run --name kibana -d --link YOUR_ELASTICSEARCH_CONTAINER_NAME_OR_ID:elasticsearch -p 5601:5601 kibana:7.6.2
YOUR_ELASTICSEARCH_CONTAINER_NAME_OR_ID:Elasticsearch容器的名字或容器ID
修改配置
1、进入容器&打开文件
docker exec -it kibana bash
cd config
vi kibana.yml
2、编辑文件
IpAddress:docker inspect es查看es容器内部的ip地址 (link启动容器需要查看)server.name: kibana
server.host: "0.0.0.0"
elasticsearch.hosts: [ "http://192.168.59.139:9200" ]
xpack.monitoring.ui.container.elasticsearch.enabled: true
elasticsearch.username: "elastic"
elasticsearch.password: "123456"
i18n.locale: "zh-CN"
3、退出&重启
exit
docker restart kibana
![[外链图片转存失败,源站可能有防盗链机制,建议将图片保存下来直接上传(img-W81x5PRL-1690629954048)(C:\Users\Gary\AppData\Roaming\Typora\typora-user-images\image-20230728230020037.png)]](https://img-blog.csdnimg.cn/1ae9de9289764a7190ef49cd8ef4f6f8.png)
![[外链图片转存失败,源站可能有防盗链机制,建议将图片保存下来直接上传(img-9BJUnFQB-1690629954048)(C:\Users\Gary\AppData\Roaming\Typora\typora-user-images\image-20230728215146378.png)]](https://img-blog.csdnimg.cn/114934d5b5f14666a613cfd7329ef7d5.png)
然后访问页面
http://自己的IP地址:5601/app/kibana
![[外链图片转存失败,源站可能有防盗链机制,建议将图片保存下来直接上传(img-gEOwfk6E-1690629954049)(C:\Users\Gary\AppData\Roaming\Typora\typora-user-images\image-20230728225732152.png)]](https://img-blog.csdnimg.cn/67b8c9ed59e44513a3b490e544b47ad2.png)
![[外链图片转存失败,源站可能有防盗链机制,建议将图片保存下来直接上传(img-Gx1DKQhx-1690629954050)(C:\Users\Gary\AppData\Roaming\Typora\typora-user-images\image-20230728225920623.png)]](https://img-blog.csdnimg.cn/1e09407bef42499eaf0908590bcefba7.png)
kibana操作ElasticSearch
文档操作
1. _cat
GET /_cat/node 查看所有节点
GET /_cat/health 查看es健康状况
GET /_cat/master 查看主节点
GET /_cat/indices 查看所有索引
![[外链图片转存失败,源站可能有防盗链机制,建议将图片保存下来直接上传(img-neHMiQEE-1690629954050)(C:\Users\Gary\AppData\Roaming\Typora\typora-user-images\image-20230729161116597.png)]](https://img-blog.csdnimg.cn/c3f3c9f58e9b48c0a0802c792c80dd9d.png)
2. 保存文档
保存一个数据,保存在那个索引的那个类型下,指定用唯一的标识,customer为索引,external为类型,1为标识。其中PUT和POST都可以,POST新增。如果不指定ID,会自动生成ID,指定ID就会修改这个数据,并新增版本号。PUT可以新增可以修改,PUT必须指定ID,一般都用来修改操作,不指定ID会报错。
PUT customer/external/1
{"name":"张三"
}返回结果
{"_index" : "customer","_type" : "external","_id" : "1","_version" : 3,"result" : "updated","_shards" : {"total" : 2,"successful" : 1,"failed" : 0},"_seq_no" : 1001,"_primary_term" : 2
}
3. 查询文档
GET customer/external/1结果:
{"_index" : "customer", //在那个索引"_type" : "external", //在那个类型"_id" : "1", //记录ID"_version" : 1, //版本号"_seq_no" : 0, //并发控制字段,每次更新就+1,可用于乐观锁"_primary_term" : 1, //主分片重新分配,如重启,就会变化"found" : true, //true就是找到数据了"_source" : { //数据"name" : "张三"}
}
4. 更新文档
POST操作带_update会对比原来的数据,如果是一样的那就不会更新了
POST customer/external/1/_update
{"doc":{"name":"你好"}
}
POST操作不带_update会直接更新操作
POST customer/external/1
{"name":"你好"
}
5. 删除文档
DELETE customer/external/1
安装FileBeat
拉取 镜像
docker pull elastic/filebeat:7.6.2
拉取完成之后,先不着急启动,在启动之前需要完成先建立一份映射的配置文filebeat.docker.yml,选择目录创建filebeat.docker.yml
#=========================== Filebeat inputs ==============
filebeat.inputs:
- input_type: logenable: truepaths:  # 采集日志的路径这里是容器内的path- /usr/share/filebeat/logs/*.logmultiline.pattern: '^[0-9]{4}-[0-9]{2}-[0-9]{2}'multiline.negate: truemultiline.match: aftermultiline.timeout: 10s# 为每个项目标识,或者分组,可区分不同格式的日志tags: ["pre-logs"]# 这个文件记录日志读取的位置,如果容器重启,可以从记录的位置开始取日志registry_file: /usr/share/filebeat/data/fields:logsource: node1logtype: pre#-------------------------- Elasticsearch output ---------
output.elasticsearch:hosts: ["http://192.168.59.139:9200"]
为什么不直接去filbeat容器里面去改配置文件呢?因为filebeat容器的配置文件是只读的不可更改,所以只能通过映射配置文件的方式修改。
docker run --user=root -d \
-v /home/filebeat/filebeat.docker.yml:/usr/share/filebeat/filebeat.yml \
-v /home/logs:/usr/share/filebeat/logs \
-v /home/data:/usr/share/filebeat/data \
--link elasticsearch \
--link kibana  \
--name filebeat    elastic/filebeat:7.6.2
docker run --name filebeat -d --user root \
-v /Users/lihaodong/Desktop/log:/usr/share/filebeat/logs \
-v /usr/local/src/elk/filebeat/config/filebeat.yml:/usr/share/filebeat/filebeat.yml \
-v /usr/local/src/elk/filebeat/data:/usr/share/filebeat/data \
docker.elastic.co/beats/filebeat:7.6.2
建立好配置文件之后,启动filebeat容器
docker run --user=root -d \
-v /home/filebeat.docker.yml:/usr/share/filebeat/filebeat.yml \
-v /home/logs:/usr/share/filebeat/logs \
-v /home/data:/usr/share/filebeat/data \
--link elasticsearch \
--link kibana  \
--name filebeat  elastic/filebeat:7.6.2
docker run --name filebeat -d --user root \
-v /Users/lihaodong/Desktop/log:/usr/share/filebeat/logs \
-v /usr/local/src/elk/filebeat/config/filebeat.yml:/usr/share/filebeat/filebeat.yml \
-v /usr/local/src/elk/filebeat/data:/usr/share/filebeat/data \
docker.elastic.co/beats/filebeat:7.6.2
这里 -v 就是挂载目录的意思就是将自己本地的目录挂载到容器当中,第一个挂载映射的是配置文件,第二个是要收集的日志目录,如果不挂载日志目录的话,filebeat是不会收集日志的,因为在容器里面根本找不到要收集的路径。–user=root 指定启动用户,因为读取文件可能没有权限,link起的别名等信息可以在同一网络中通过别名访问。
docker run --name filebeat -d --user root \
-v /Users/lihaodong/Desktop/log:/usr/share/filebeat/logs \
-v /usr/local/src/elk/filebeat/config/filebeat.yml:/usr/share/filebeat/filebeat.yml \
-v /usr/local/src/elk/filebeat/data:/usr/share/filebeat/data \
docker.elastic.co/beats/filebeat:7.6.2
![[外链图片转存失败,源站可能有防盗链机制,建议将图片保存下来直接上传(img-9yJ6qKCh-1690629954051)(C:\Users\Gary\AppData\Roaming\Typora\typora-user-images\image-20230729143255435.png)]](https://img-blog.csdnimg.cn/e8749afcef264654a4d7bfde56ec4f45.png)
可以看到filebeat已经成功启动了,如果启动失败的话可以看filebeat的配置文件es和kibana的host是否正确。
在收集日志的目录下面添加日志文件,或者更新日志,然后去kibana查看是否有filebeat的索引生成(必须是添加或者更新日志,原有的数据不会同步)。
手动创建模拟下,可以看到被filebeat加载收集了
![[外链图片转存失败,源站可能有防盗链机制,建议将图片保存下来直接上传(img-iKs3GaiS-1690629954052)(C:\Users\Gary\AppData\Roaming\Typora\typora-user-images\image-20230729141059774.png)]](https://img-blog.csdnimg.cn/f7dfb681974f48689c63b52254a6cc56.png)
通过elasticsearch-head查看日志索引状态

Kibana中可以看到已经有生成了索引并且有数据了,在Discover查看具体数据
注意:参考下一节内容预先配置下索引
参考: 配置filebeat.yml文件
#============================== Kibana =====================================# Starting with Beats version 6.0.0, the dashboards are loaded via the Kibana API.
# This requires a Kibana endpoint configuration.
setup.kibana:# Kibana Host# Scheme and port can be left out and will be set to the default (http and 5601)# In case you specify and additional path, the scheme is required: http://localhost:5601/path# IPv6 addresses should always be defined as: https://[2001:db8::1]:5601host: "192.168.110.130:5601"  #指定kibanausername: "elastic"   #用户password: "${ES_PWD}"  #密码,这里使用了keystore,防止明文密码# Kibana Space ID# ID of the Kibana Space into which the dashboards should be loaded. By default,# the Default Space will be used.#space.id:#================================ Outputs =====================================# Configure what output to use when sending the data collected by the beat.#-------------------------- Elasticsearch output ------------------------------
output.elasticsearch:# Array of hosts to connect to.hosts: ["192.168.110.130:9200","192.168.110.131:9200"]# Protocol - either `http` (default) or `https`.#protocol: "https"# Authentication credentials - either API key or username/password.#api_key: "id:api_key"username: "elastic"  #es的用户password: "${ES_PWD}" # es的密码#这里不能指定index,因为我没有配置模板,会自动生成一个名为filebeat-%{[beat.version]}-%{+yyyy.MM.dd}的索引
简单介绍如何配置索引
在Kibana中配置索引
[外链图片转存失败,源站可能有防盗链机制,建议将图片保存下来直接![上传(img-46fzLZR8-1690629954053)(C:\Users\Gary\AppData\Roaming\Typora\typora-user-images\image-20230729134437175.png)]](https://img-blog.csdnimg.cn/04eef367d9244d8cb3945a8073405b82.png)
配置筛选字段 这里按照时间
![[外链图片转存失败,源站可能有防盗链机制,建议将图片保存下来直接上传(img-oUojWREy-1690629954054)(C:\Users\Gary\AppData\Roaming\Typora\typora-user-images\image-20230729134607496.png)]](https://img-blog.csdnimg.cn/86e8b4fa12624d7daea2215b39d6df21.png)
创建成功了
![[外链图片转存失败,源站可能有防盗链机制,建议将图片保存下来直接上传(img-y1Jh8aRY-1690629954055)(C:\Users\Gary\AppData\Roaming\Typora\typora-user-images\image-20230729134727148.png)]](https://img-blog.csdnimg.cn/ec5c3fd6f52d43bdbc4baab64d4134fc.png)
查看最终索引数据
![[外链图片转存失败,源站可能有防盗链机制,建议将图片保存下来直接上传(img-0N85yCKJ-1690629954055)(C:\Users\Gary\AppData\Roaming\Typora\typora-user-images\image-20230729134908936.png)]](https://img-blog.csdnimg.cn/4076aa3dbf4940208a390fb7b9a7fcf4.png)
![[外链图片转存失败,源站可能有防盗链机制,建议将图片保存下来直接上传(img-Z5iQQ7BH-1690629954056)(C:\Users\Gary\AppData\Roaming\Typora\typora-user-images\image-20230729135040590.png)]](https://img-blog.csdnimg.cn/c6480f333118458d97829367e7e2a960.png)
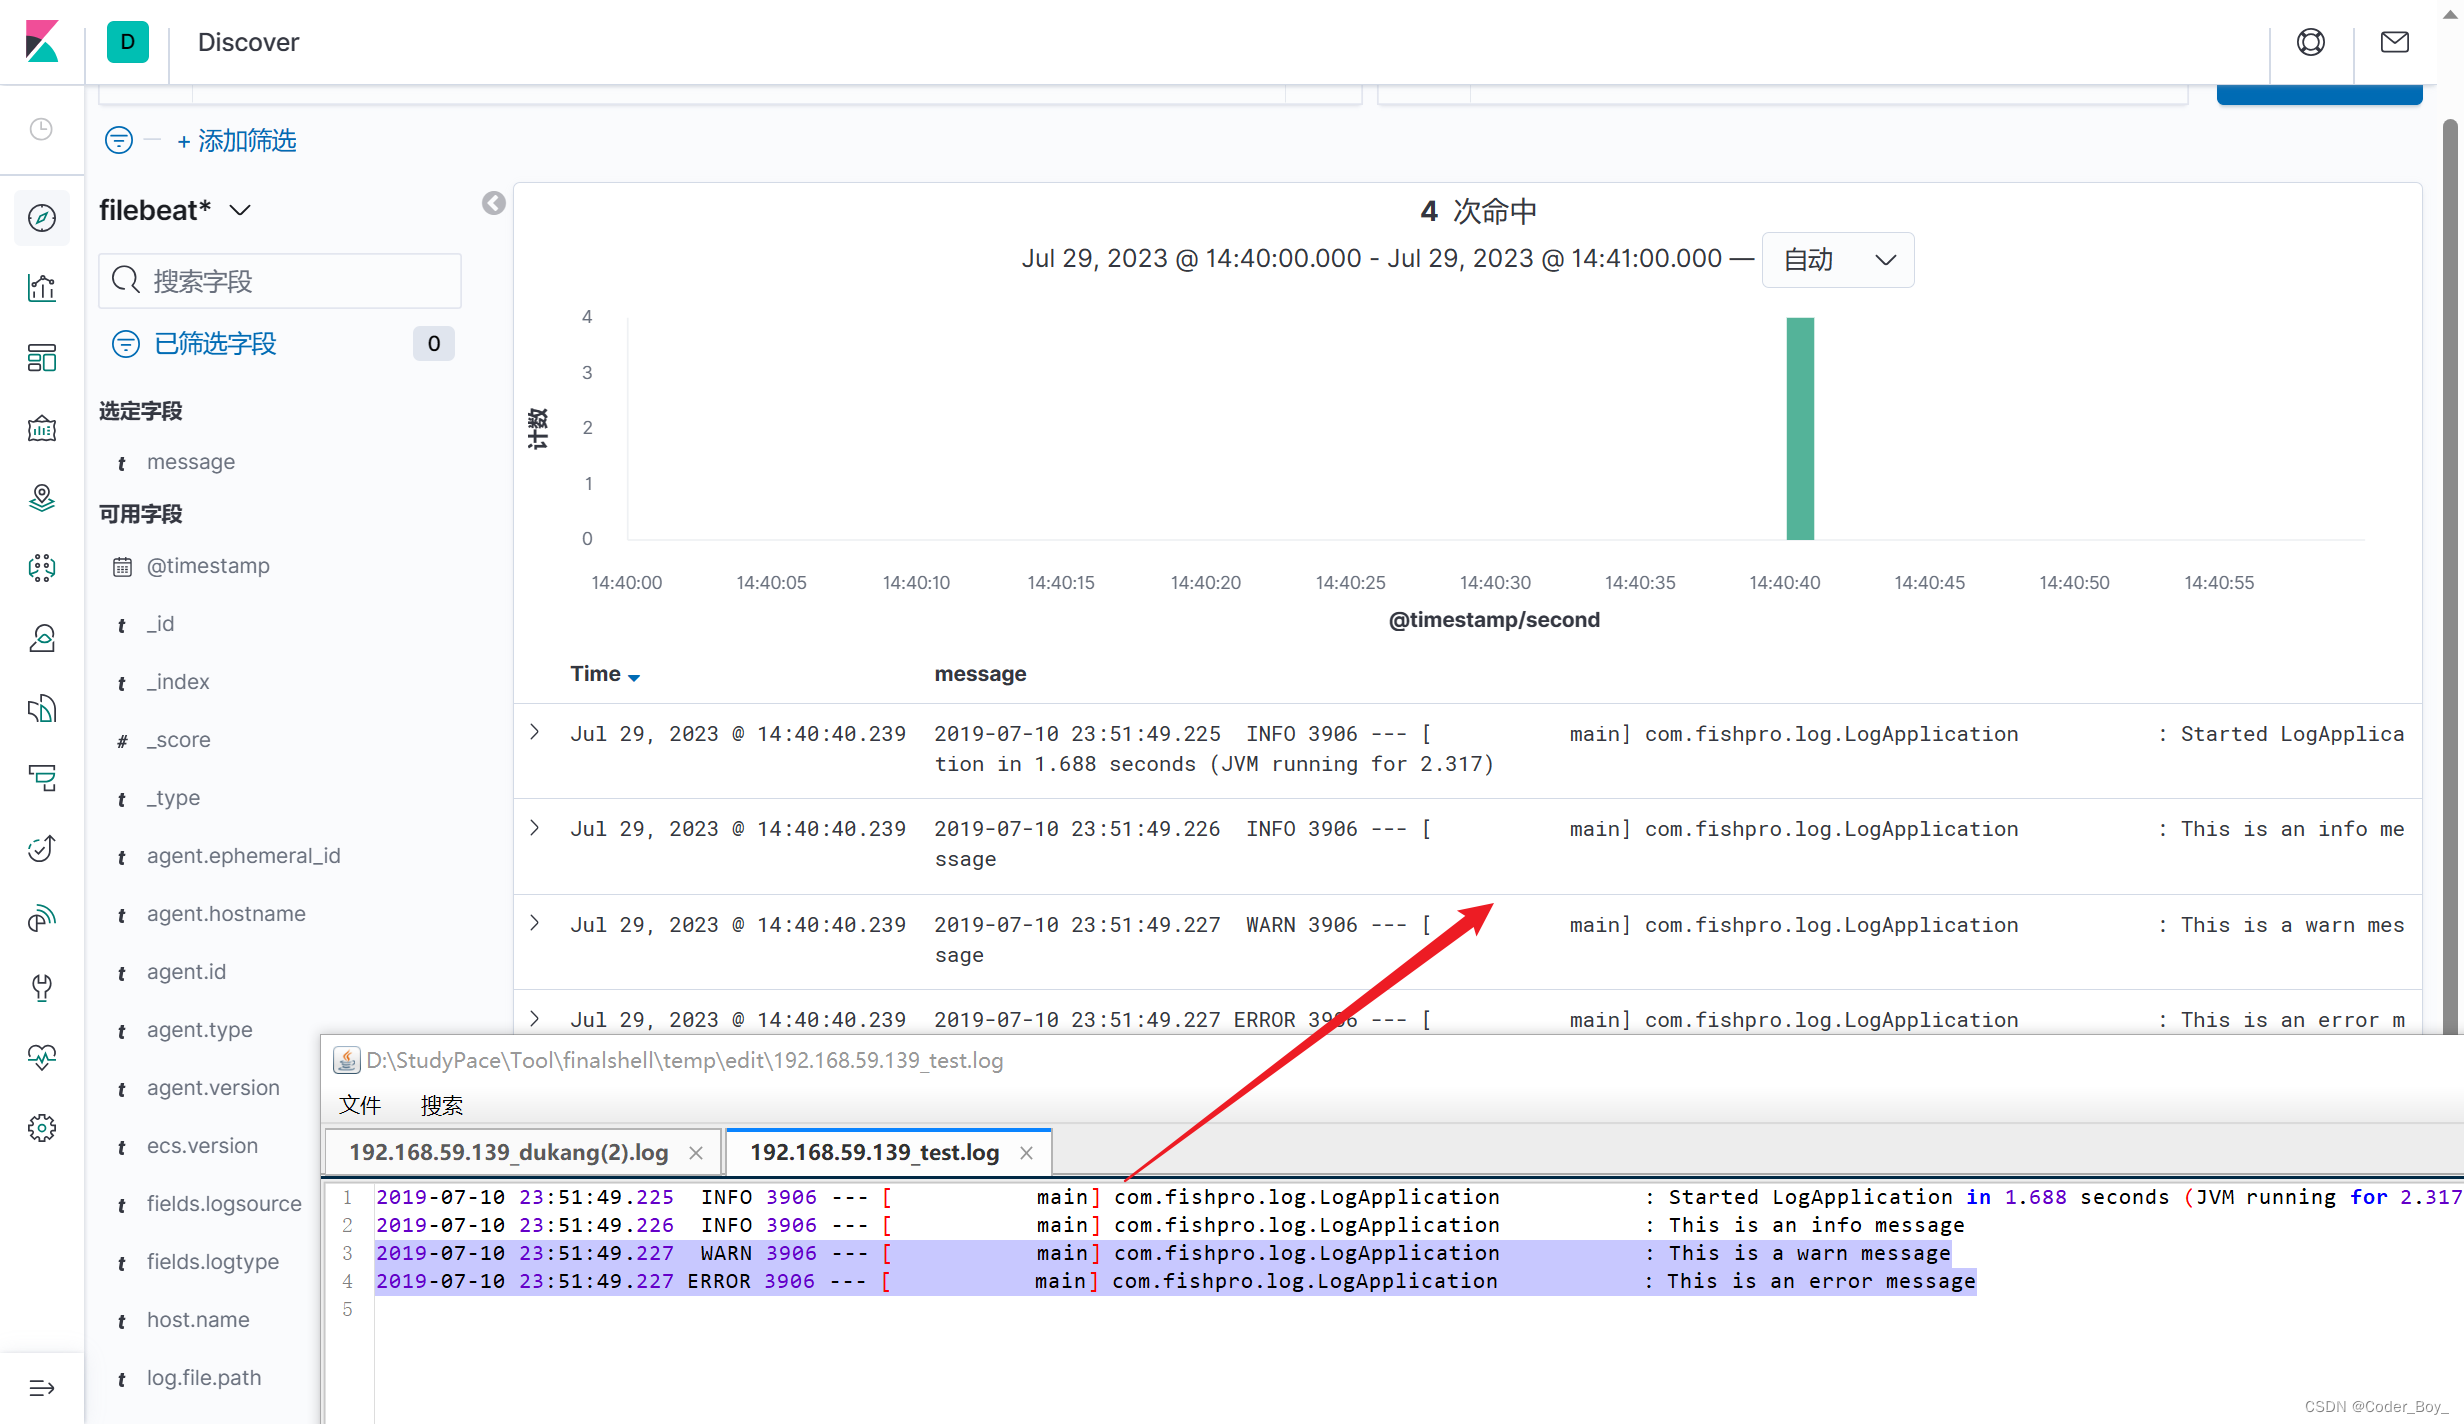
模拟手动添加日志 查看控制台实时采集了
![[外链图片转存失败,源站可能有防盗链机制,建议将图片保存下来直接上传(img-PjlNhHg6-1690629954056)(C:\Users\Gary\AppData\Roaming\Typora\typora-user-images\image-20230729135903199.png)]](https://img-blog.csdnimg.cn/fe21e32d2e8a4504b128d558b38247eb.png)
我们到Kibana里查询下 可以看到最终的日志信息
![[外链图片转存失败,源站可能有防盗链机制,建议将图片保存下来直接上传(img-LYw4sBjP-1690629954057)(C:\Users\Gary\AppData\Roaming\Typora\typora-user-images\image-20230729141619481.png)]](https://img-blog.csdnimg.cn/8efb2a4f15d3418893c8404cfcdd3660.png)
可以通过搜索或者日期筛选,字段筛选,等等各种操作查看你需要的日志信息。或者可以在 日志目录下 查看日志
![[外链图片转存失败,源站可能有防盗链机制,建议将图片保存下来直接上传(img-XwQjKMfs-1690629954057)(C:\Users\Gary\AppData\Roaming\Typora\typora-user-images\image-20230729143618408.png)]](https://img-blog.csdnimg.cn/48ade78d3b4e426f9f92db8c115cc49d.png)
Kibana基本操作
清理配置的索引数据
![[外链图片转存失败,源站可能有防盗链机制,建议将图片保存下来直接上传(img-cW9kqEko-1690629954058)(C:\Users\Gary\AppData\Roaming\Typora\typora-user-images\image-20230729150317075.png)]](https://img-blog.csdnimg.cn/1c2e15ef6c2a410082c3919df52bd0cd.png)
日志可视化
![[外链图片转存失败,源站可能有防盗链机制,建议将图片保存下来直接上传(img-mBiIINzI-1690629954058)(C:\Users\Gary\AppData\Roaming\Typora\typora-user-images\image-20230729151230595.png)]](https://img-blog.csdnimg.cn/2cc0182e07d24ed28f016cc2e7f30d88.png)
![[外链图片转存失败,源站可能有防盗链机制,建议将图片保存下来直接上传(img-ICcYfhdn-1690629954059)(C:\Users\Gary\AppData\Roaming\Typora\typora-user-images\image-20230729151300902.png)]](https://img-blog.csdnimg.cn/b1210387db1a42fb96c86a056fb02c50.png)
![[外链图片转存失败,源站可能有防盗链机制,建议将图片保存下来直接上传(img-ZnooMAeJ-1690629954059)(C:\Users\Gary\AppData\Roaming\Typora\typora-user-images\image-20230729151322305.png)]](https://img-blog.csdnimg.cn/b12c37718f1242efae997952b810340b.png)
![[外链图片转存失败,源站可能有防盗链机制,建议将图片保存下来直接上传(img-fPVBUvFF-1690629954060)(C:\Users\Gary\AppData\Roaming\Typora\typora-user-images\image-20230729151431138.png)]](https://img-blog.csdnimg.cn/5e320b18e53a4a21b8ca81d1cfbcacbe.png)
保存这个视图,并加入仪表盘中
![[外链图片转存失败,源站可能有防盗链机制,建议将图片保存下来直接上传(img-iWkxRv0K-1690629954060)(C:\Users\Gary\AppData\Roaming\Typora\typora-user-images\image-20230729152040699.png)]](https://img-blog.csdnimg.cn/b5ba599b09ab40df8e744473b91be4c5.png)
![[外链图片转存失败,源站可能有防盗链机制,建议将图片保存下来直接上传(img-BS2hS2pe-1690629954061)(C:\Users\Gary\AppData\Roaming\Typora\typora-user-images\image-20230729152058283.png)]](https://img-blog.csdnimg.cn/d2debca16b6946d49a9b601bee36dbc6.png)
![[外链图片转存失败,源站可能有防盗链机制,建议将图片保存下来直接上传(img-7cEKzyww-1690629954061)(C:\Users\Gary\AppData\Roaming\Typora\typora-user-images\image-20230729152232717.png)]](https://img-blog.csdnimg.cn/8711a4b3b6784bdf9f5d1a491e33ce3d.png)
实战练习
- 通过rsyslog收集本机所有日志
- 通过filebeat收集日志,给到elasticsearch
- Elasticsearch分析日志
- Elasticsearch将分析结果给到kibana
通过rsyslog收集本机所有日志
先安装rsyslog,yum -y install rsyslog
![[外链图片转存失败,源站可能有防盗链机制,建议将图片保存下来直接上传(img-N8OV6dda-1690629954062)(C:\Users\Gary\AppData\Roaming\Typora\typora-user-images\image-20230729152455284.png)]](https://img-blog.csdnimg.cn/ada83b7e9c79441d8b4c04a3d8005650.png)
然后修改配置文件
修改配置文件
[root@VM-20-10-centos ~]# vim /etc/rsyslog.conf
解封2行
module(load="imudp") # needs to be done just once
input(type="imudp" port="514")
新增一行
# Save boot messages also to boot.log
local7.*                                                /var/log/boot.log
#以下为新增,即将所有日志都收集到一个文件
*.*                                                     /var/log/baism.log
![[外链图片转存失败,源站可能有防盗链机制,建议将图片保存下来直接上传(img-qsXKnqSc-1690629954062)(C:\Users\Gary\AppData\Roaming\Typora\typora-user-images\image-20230729152646371.png)]](https://img-blog.csdnimg.cn/96c0fa396f5942b4a65e78f3330daed2.png)
最后启动rsyslog
systemctl restart rsyslog
查询下看看
![[外链图片转存失败,源站可能有防盗链机制,建议将图片保存下来直接上传(img-TYBKtVJx-1690629954063)(C:\Users\Gary\AppData\Roaming\Typora\typora-user-images\image-20230729153003394.png)]](https://img-blog.csdnimg.cn/149eecfe175e48889f38cc53c999c229.png)
利用之前的搭建好的filebeat,rsyslog会不断追加日志信息到 - /var/log/baism.log
docker run --name filebeat2 -d --user root \
-v /var/log:/usr/share/filebeat/logs \
-v /usr/local/src/elk/filebeat2/config/filebeat.yml:/usr/share/filebeat/filebeat.yml \
-v /usr/local/src/elk/filebeat2/data:/usr/share/filebeat/data \
docker.elastic.co/beats/filebeat:7.6.2
启动容器化开始收集日志文件中的数据
![[外链图片转存失败,源站可能有防盗链机制,建议将图片保存下来直接上传(img-W7GFnoKT-1690629954064)(C:\Users\Gary\AppData\Roaming\Typora\typora-user-images\image-20230729173013346.png)]](https://img-blog.csdnimg.cn/ba7bfa348dd14efc83896d9fa577cb32.png)
打开浏览器重新查看,此时 elasticsearch-head更新索引 发现新增索引
![[外链图片转存失败,源站可能有防盗链机制,建议将图片保存下来直接上传(img-dCSjOWSH-1690629954064)(C:\Users\Gary\AppData\Roaming\Typora\typora-user-images\image-20230729162500014.png)]](https://img-blog.csdnimg.cn/d45ff761d3684c4fa865a27e9c66c00a.png)
对应的Kibana也会更新 新增了索引 我配置下新增的索引即可查看系统日志
![[外链图片转存失败,源站可能有防盗链机制,建议将图片保存下来直接上传(img-IkrmKSFn-1690629954065)(C:\Users\Gary\AppData\Roaming\Typora\typora-user-images\image-20230729162642073.png)]](https://img-blog.csdnimg.cn/9cf40a151d5a451b8bbc86e584e6ab6e.png)
![[外链图片转存失败,源站可能有防盗链机制,建议将图片保存下来直接上传(img-Gor1lcHU-1690629954066)(C:\Users\Gary\AppData\Roaming\Typora\typora-user-images\image-20230729162855062.png)]](https://img-blog.csdnimg.cn/f5a03da155df490b903da9fc28c4d5e5.png)
![[外链图片转存失败,源站可能有防盗链机制,建议将图片保存下来直接上传(img-yefnSagL-1690629954066)(C:\Users\Gary\AppData\Roaming\Typora\typora-user-images\image-20230729163009254.png)]](https://img-blog.csdnimg.cn/46f7feae983d44a3a7031d94b3785a1b.png)
查看日志数据
![[外链图片转存失败,源站可能有防盗链机制,建议将图片保存下来直接上传(img-fi6Mhydf-1690629954066)(C:\Users\Gary\AppData\Roaming\Typora\typora-user-images\image-20230729172626038.png)]](https://img-blog.csdnimg.cn/624887e7ff794e49a5f1dca29ac438b0.png)
目前默认收集路径是容器内的 /usr/share/filebeat/logs 文件夹
![[外链图片转存失败,源站可能有防盗链机制,建议将图片保存下来直接上传(img-recMvkLk-1690629954067)(C:\Users\Gary\AppData\Roaming\Typora\typora-user-images\image-20230729172738432.png)]](https://img-blog.csdnimg.cn/2fd06f579e70407d9540e2e93c5c9fea.png)
如果有不同文件夹 可以分开收集吗?大家可以试试
启动后进入容器创建syslog文件夹 用于存放系统日志文件
docker exec -it filebeat3 bash
/usr/share/filebeat/logs
mkdir  syslog
那么启动容器的命令改为
docker run --name filebeat3 -d --user root \
-v /home/logs:/usr/share/filebeat/logs/syslog \
-v /usr/local/src/elk/filebeat3/config/filebeat.yml:/usr/share/filebeat/filebeat.yml \
-v /usr/local/src/elk/filebeat3/data:/usr/share/filebeat/data \
docker.elastic.co/beats/filebeat:7.6.2
信息采集模板改为
filebeat.inputs:
- input_type: logenable: truepaths:  # 采集日志的路径这里是容器内的path - /usr/share/filebeat/logs/syslog/*.logmultiline.pattern: '^[0-9]{4}-[0-9]{2}-[0-9]{2}'multiline.negate: truemultiline.match: aftermultiline.timeout: 10s# 为每个项目标识,或者分组,可区分不同格式的日志tags: ["pre-logs3"]# 这个文件记录日志读取的位置,如果容器重启,可以从记录的位置开始取日志registry_file: /usr/share/filebeat/data/fields:logsource: node1logtype: pre#-------------------------- Elasticsearch output ---------
output.elasticsearch:hosts: ["http://192.168.59.139:9200"]
最终验证结果
![[外链图片转存失败,源站可能有防盗链机制,建议将图片保存下来直接上传(img-gZ27rqzv-1690629954068)(C:\Users\Gary\AppData\Roaming\Typora\typora-user-images\image-20230729183248733.png)]](https://img-blog.csdnimg.cn/11c33e3e033f4a7ebb14a0ec037dae0b.png)
![[外链图片转存失败,源站可能有防盗链机制,建议将图片保存下来直接上传(img-10os2AXG-1690629954068)(C:\Users\Gary\AppData\Roaming\Typora\typora-user-images\image-20230729183426303.png)]](https://img-blog.csdnimg.cn/97331ec33f6e417caea251552d6e6f8b.png)
看着似乎可以 ,其实不行 关键看看这里
![[外链图片转存失败,源站可能有防盗链机制,建议将图片保存下来直接上传(img-2qDuVp0J-1690629954069)(C:\Users\Gary\AppData\Roaming\Typora\typora-user-images\image-20230729185808221.png)]](https://img-blog.csdnimg.cn/147f087cdfb74f1bbe6e927bf3918132.png)
rest-high-level-client整合ElasticSearch
1.导入依赖
<!-- 修改springboot默认整合的es的版本 --><properties><java.version>1.8</java.version><elasticsearch.version>7.6.2</elasticsearch.version></properties><!-- elasticsearch-rest-high-level-client --><dependency><groupId>org.elasticsearch.client</groupId><artifactId>elasticsearch-rest-high-level-client</artifactId><version>7.6.2</version></dependency><dependency><groupId>com.alibaba</groupId><artifactId>fastjson</artifactId><version>1.2.68</version></dependency>
2.编写配置类
@Configuration
public class ElasticSearchClientConfig {@Beanpublic RestHighLevelClient restHighLevelClient(){RestHighLevelClient client = new RestHighLevelClient(RestClient.builder(new HttpHost("自己的IP地址", 9200, "http")));return client;}
}
3.进行es的索引操作
@Autowired@Qualifier("restHighLevelClient")private RestHighLevelClient client;//index名字,静态一般都是放在另一个类中的public static final String ES_INDEX="han_index";//创建索引@Testpublic void createIndex() throws IOException {//1. 创建索引CreateIndexRequest index = new CreateIndexRequest(ES_INDEX);//2. 客户端执行请求,请求后获得相应CreateIndexResponse response = client.indices().create(index, RequestOptions.DEFAULT);//3.打印结果System.out.println(response.toString());}//测试索引是否存在@Testpublic void exitIndex() throws IOException{//1.GetIndexRequest request = new GetIndexRequest(ES_INDEX);boolean exists = client.indices().exists(request, RequestOptions.DEFAULT);System.out.println("是否存在"+exists);}//删除索引@Testpublic void deleteIndex() throws IOException{DeleteIndexRequest request = new DeleteIndexRequest(ES_INDEX);AcknowledgedResponse response = client.indices().delete(request, RequestOptions.DEFAULT);System.out.println("是否删除"+response);}
![[外链图片转存失败,源站可能有防盗链机制,建议将图片保存下来直接上传(img-ESEWWtfU-1690629954070)(C:\Users\Gary\AppData\Roaming\Typora\typora-user-images\image-20230729175834562.png)]](https://img-blog.csdnimg.cn/7bcbf8440e8e47f4846d27884b245d98.png)
4.es的文档操作
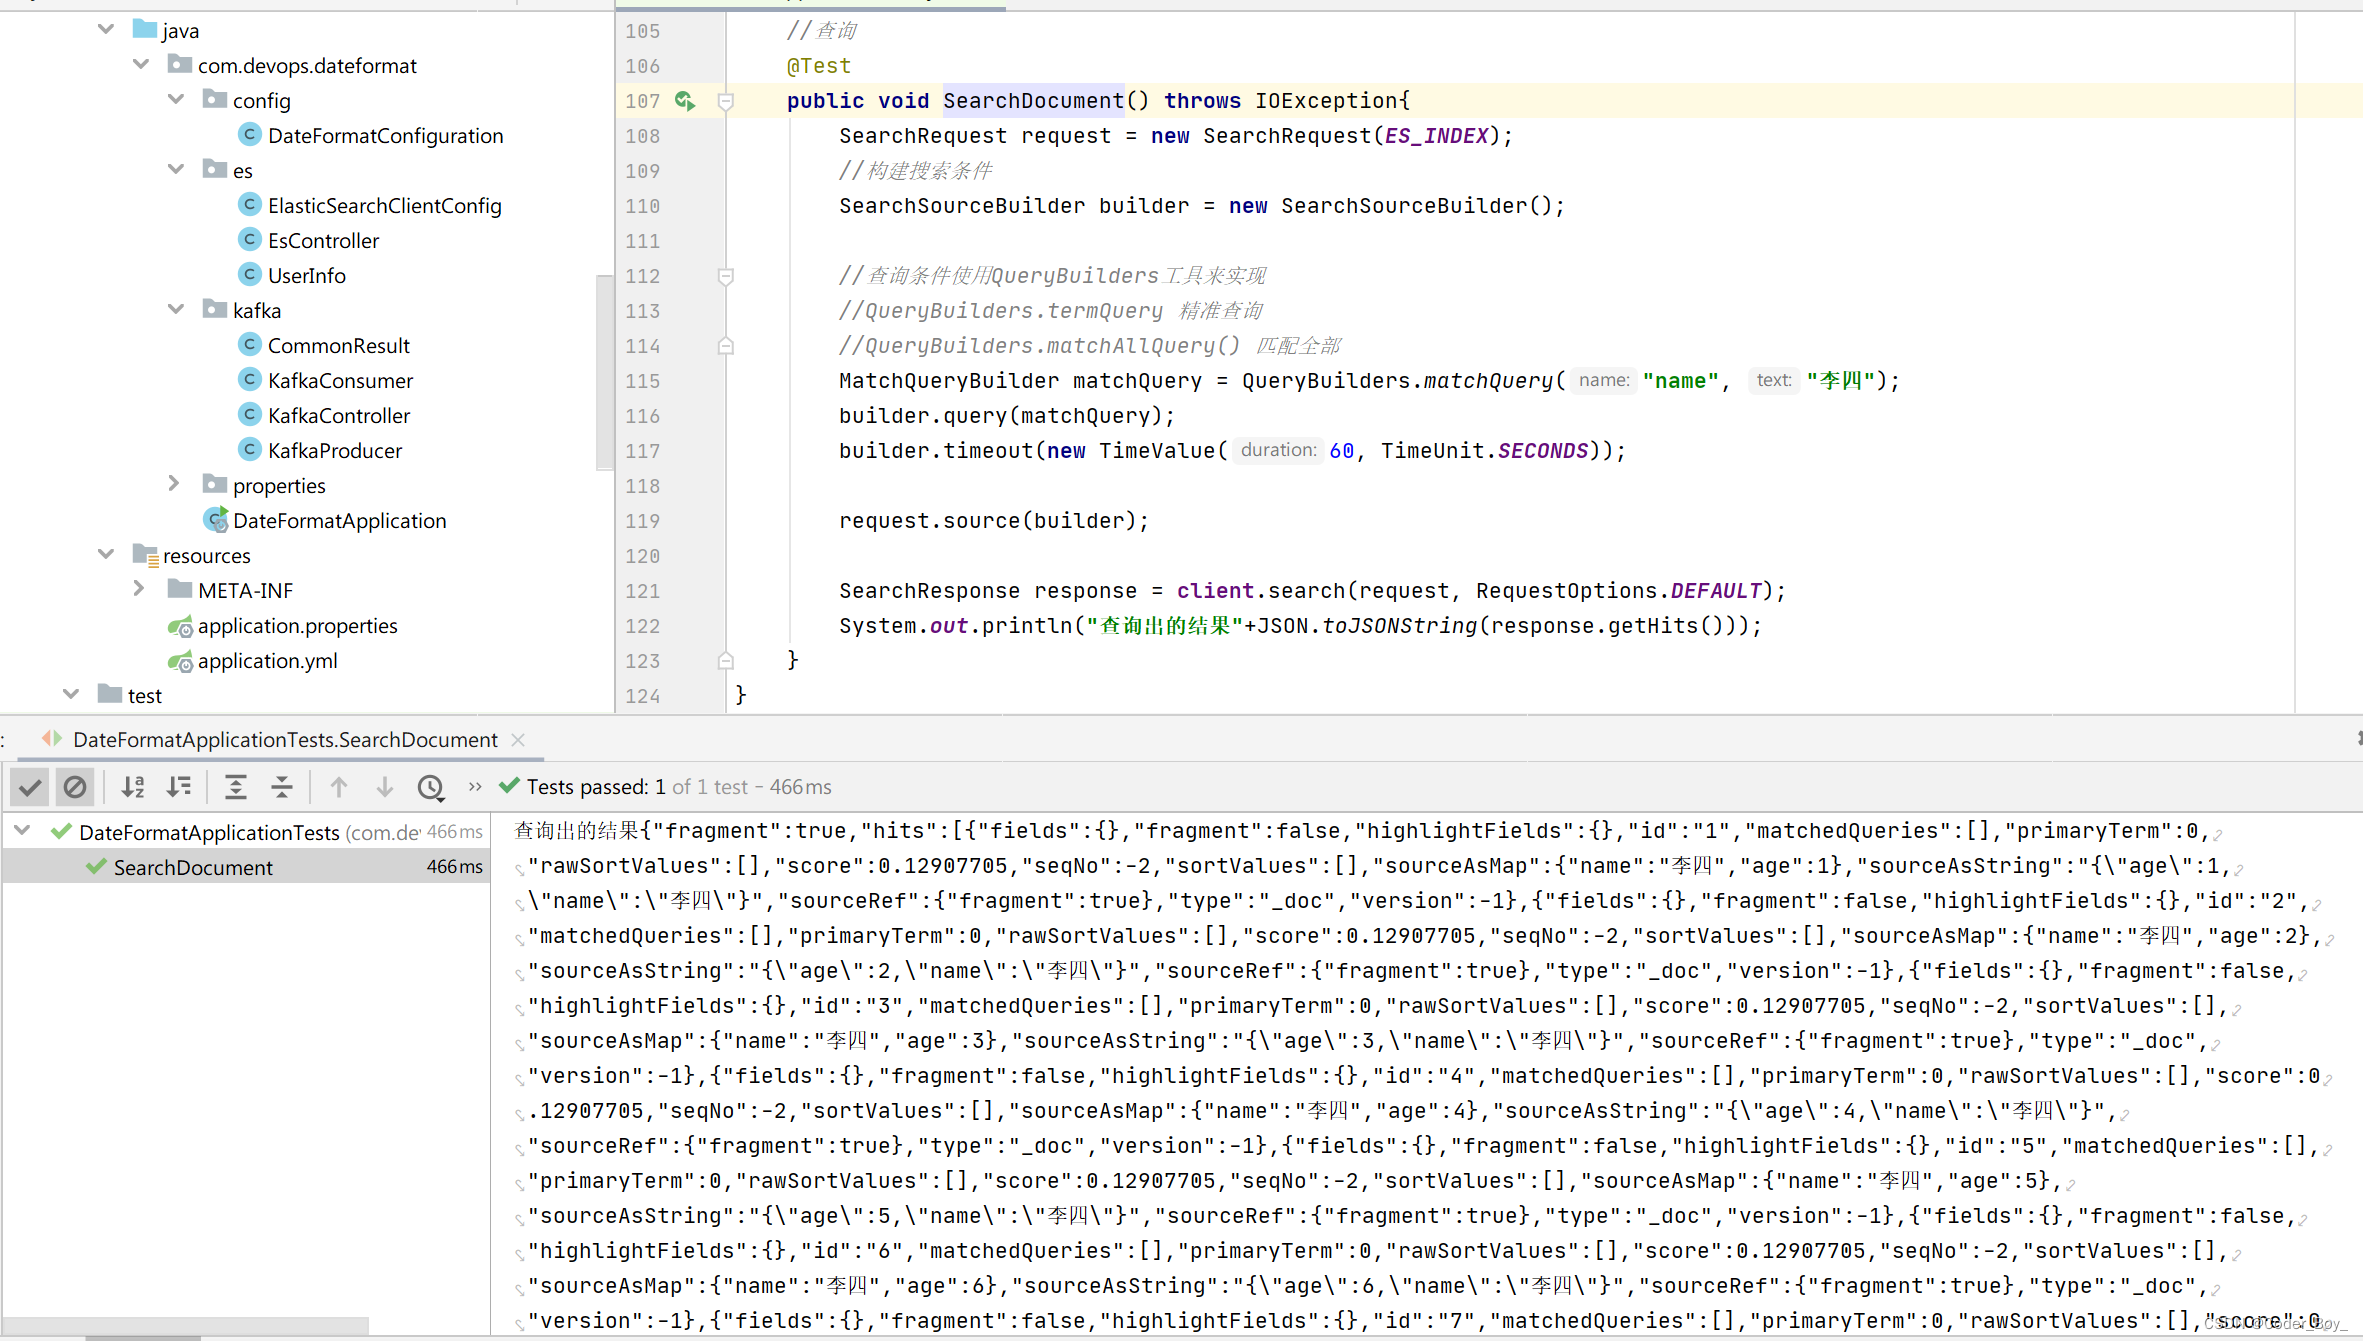
@Autowired@Qualifier("restHighLevelClient")private RestHighLevelClient client;public static final String ES_INDEX="han_index";//创建文档@Testpublic void createDocument() throws IOException {//创建对象UserInfo userInfo = new UserInfo("张三",12);//创建请求IndexRequest request = new IndexRequest(ES_INDEX);//规则request.id("1").timeout(TimeValue.timeValueSeconds(1));//将数据放到请求中request.source(JSON.toJSONString(userInfo), XContentType.JSON);//客户端发送请求,获取相应的结果IndexResponse response = client.index(request, RequestOptions.DEFAULT);//打印一下System.out.println(response.toString());System.out.println(response.status());}//判断是否存在@Testpublic void exitDocument() throws IOException {GetRequest request = new GetRequest(ES_INDEX, "1");//不获取返回的_source 的上下文request.fetchSourceContext(new FetchSourceContext(false));request.storedFields("_none");boolean exists = client.exists(request, RequestOptions.DEFAULT);System.out.println(exists);}//获取文档信息@Testpublic void getDocument() throws IOException {GetRequest request = new GetRequest(ES_INDEX, "1");GetResponse response = client.get(request, RequestOptions.DEFAULT);System.out.println("获取到的结果"+response.getSourceAsString());}//更新文档@Testpublic void updateDocument() throws IOException {//创建对象UserInfo userInfo = new UserInfo("李四",12);UpdateRequest request = new UpdateRequest(ES_INDEX, "1");request.timeout("1s");request.doc(JSON.toJSONString(userInfo),XContentType.JSON);UpdateResponse response = client.update(request, RequestOptions.DEFAULT);System.out.println(response.status());}//删除文档@Testpublic void deleteDocument() throws IOException{DeleteRequest request = new DeleteRequest(ES_INDEX, "1");request.timeout("1s");DeleteResponse response = client.delete(request, RequestOptions.DEFAULT);System.out.println(response.status());}//批量添加@Testpublic void bulkDocument() throws IOException{BulkRequest request = new BulkRequest();request.timeout("10s");ArrayList<UserInfo> userInfos = new ArrayList<>();userInfos.add(new UserInfo("李四",1));userInfos.add(new UserInfo("李四",2));userInfos.add(new UserInfo("李四",3));userInfos.add(new UserInfo("李四",4));userInfos.add(new UserInfo("李四",5));userInfos.add(new UserInfo("李四",6));userInfos.add(new UserInfo("李四",7));//进行批处理请求for (int i = 0; i <userInfos.size() ; i++) {request.add(new IndexRequest(ES_INDEX).id(""+(i+1)).source(JSON.toJSONString(userInfos.get(i)),XContentType.JSON));}BulkResponse response = client.bulk(request, RequestOptions.DEFAULT);System.out.println(response.hasFailures());}//查询@Testpublic void SearchDocument() throws IOException{SearchRequest request = new SearchRequest(ES_INDEX);//构建搜索条件SearchSourceBuilder builder = new SearchSourceBuilder();//查询条件使用QueryBuilders工具来实现//QueryBuilders.termQuery 精准查询//QueryBuilders.matchAllQuery() 匹配全部MatchQueryBuilder matchQuery = QueryBuilders.matchQuery("name", "李四");builder.query(matchQuery);builder.timeout(new TimeValue(60, TimeUnit.SECONDS));request.source(builder);SearchResponse response = client.search(request, RequestOptions.DEFAULT);System.out.println("查询出的结果"+JSON.toJSONString(response.getHits()));}
相关文章:
容器化安装环境EFK搭建
容器化安装环境 Docker中安装并启动ElasticSearch 前置配置 第一步:在宿主机上执行echo “net.ipv4.ip_forward1” >>/usr/lib/sysctl.d/00-system.conf 2.第二步:重启network和docker服务 [rootlocalhost /]# systemctl restart network &&…...
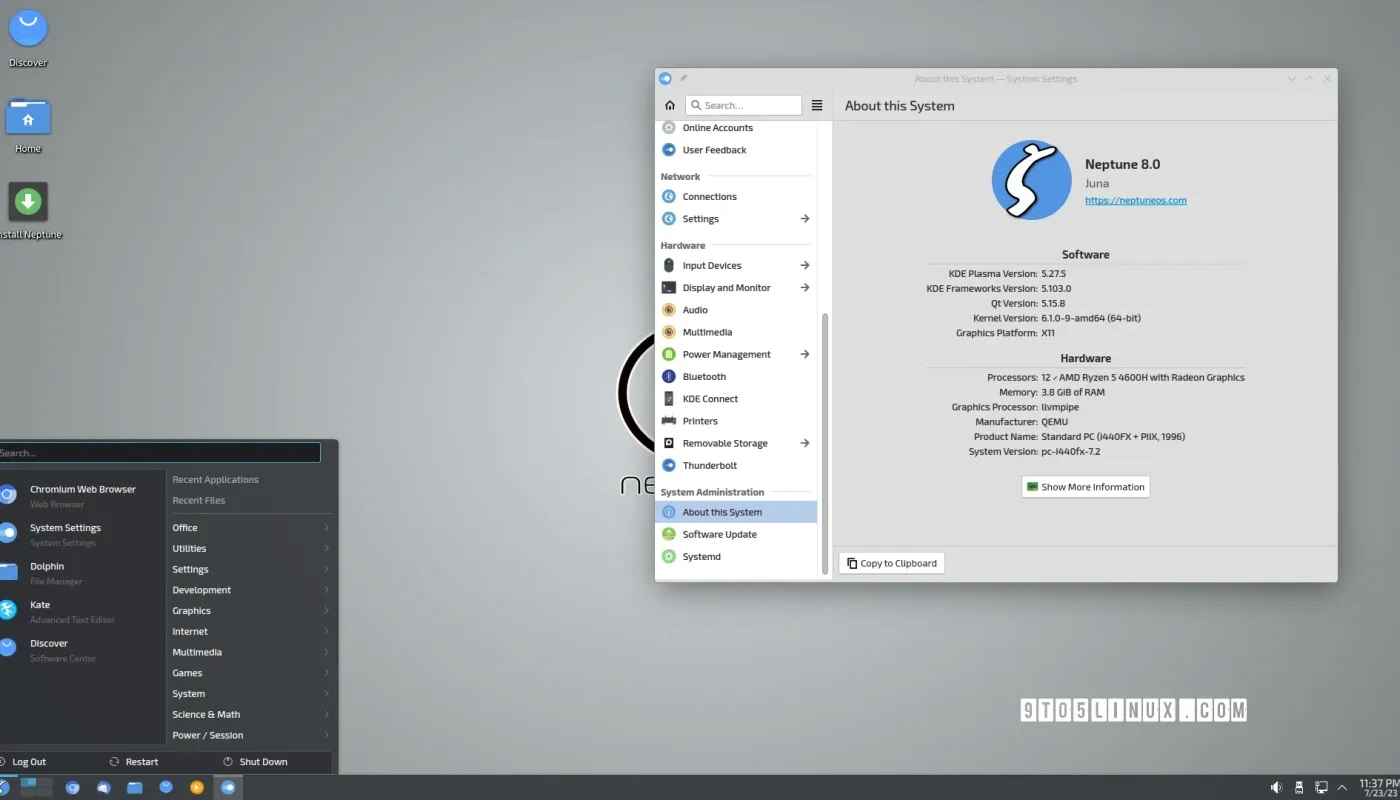
基于 Debian GNU/Linux 12 “书虫 “的Neptune 8.0 “Juna “来了
导读Neptune Linux 发行版背后的团队发布了 Neptune 8.0,作为这个基于 Debian 的 GNU/Linux 发行版的重大更新,它围绕最新的 KDE Plasma 桌面环境构建。 Neptune 8.0 被命名为 “Juna”,是在Neptune 7.5 发布 11 个月后发布的,也是…...
 Spatial Reference System篇 OGRSpatialReference类)
GDAL C++ API 学习之路 (4) Spatial Reference System篇 OGRSpatialReference类
class OGRSpatialReference #include <ogr_spatialref.h> OGRSpatialReference 是 GDAL/OGR 库中的一个重要类,用于管理和操作地理空间数据的空间参考系统(Spatial Reference System,SRS)。它提供了一系列功能&…...
RS232转Profinet网关rs232转网口需要如何设置
大家好,今天我要给大家带来一个很有意思的案例分享。你们猜猜,这回我们要用捷米的一款神奇的网关JM-RS485/232-PN做什么呢?没错,我们要把一台扫码枪设备通过这个RS232转PROFINET网关,接入到一台西门子S7-1200PLC的Prof…...
LaTex的下载与安装超详细windows版
1.LaTex的下载 (texlive下载TexStudio下载) (1)texlive下载: 这里清华镜像下载 (2)TexStudio下载: 点这里下载镜像 可以根据不同的系统选择不同的版本 2 .LaTex的安装 &#…...

MySQL | 存储过程快速入门
文章目录 一、概述1.1 MySQL存储过程和函数的概念1.2 优势和适用场景 二、存储过程基础2.1 存储过程与传统SQL查询的区别2.2 创建和调用存储过程创建存储过程调用存储过程 2.3 参数传递与返回值创建带有输出参数的存储过程调用带有输出参数的存储过程 2.4 流程控制语句IF语句WH…...

C# 图表控件库 ScottPlot
推荐使用ScottPlot原因: 1.图形界面简洁,样式丰富 2.代码较少 3.官方提供多种实例源码,并可以直接通过图形界面查看,便于快速开发 Github源码链接:https://github.com/ScottPlot/ScottPlot 官网WindowFrom Demo实例…...
013 怎么查看自己电脑的wifi密码
方法一:查看当前电脑连接的无线密码 步骤1: 打开windows命令行窗口,输入:ncpa.cpl 快速打开“控制面板”中的“网络连接”,如下图: 步骤2: 右键,打开“状态” 步骤3:…...

深入了解 LoRaWAN® MAC 命令
本文深入探讨了用于 LoRaWAN 网络管理的 MAC 命令。它面向终端设备软件开发人员和使用 LoRa 构建设备的团队经理,这些设备实现了LoRaWAN 链路层规范 v1.0.4。本文帮助您了解不同类型的 MAC 命令、每个命令的用途以及如何解释这些命令。 已经使用LoRaMAC-Node™等软件来处理 MA…...

跨境电商与隐擎fox指纹浏览器:保障安全与效率的完美结合
随着全球化的发展,跨境电商已成为各国贸易的重要组成部分。然而,随之而来的风险和挑战也日益增多,其中之一就是关联浏览器和多开浏览器可能带来的安全隐患。为了确保跨境电商的顺利运营和数据安全,隐擎fox指纹浏览器作为一种防关联…...
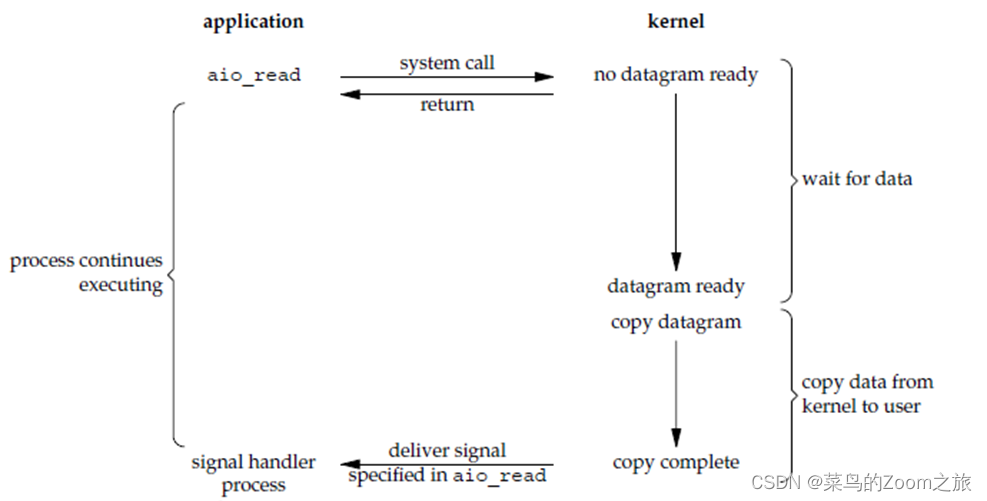
【网络编程】五种网络IO模式
对于一次IO访问(以read为例),数据会先被拷贝到操作系统内核的缓冲区中,然后才会从操作系统内核的缓冲区拷贝到应用程序的地址空间。所以说,当一个read操作发生时,会经历两个阶段: 1、等待数据准…...

面试总结-2023版
本文受众主要为,互联网技术研发人员。 技术面试一般三面和HRBP面不太会卡人,主要都是停在了一面和二面上。我这次换工作前期主要是一面通过率比较低,后面主要是二面通过低。 总结影响面试通过的几点因素: 是否真的招人…...
bigemap在草原行业的应用案例
一.为什么选择Bigemap 1.使用软件一般都用于套坐标以及空间规划图,方便于项目选址和居民建房报建 2.在卫星图上找到用地范围,然后打点,导出点位范围的2000坐标,用于汇报出图 3.CGCS2000坐标系通过矢量转换转成地方坐标系...
DevOps系列文章之 java调用python脚本
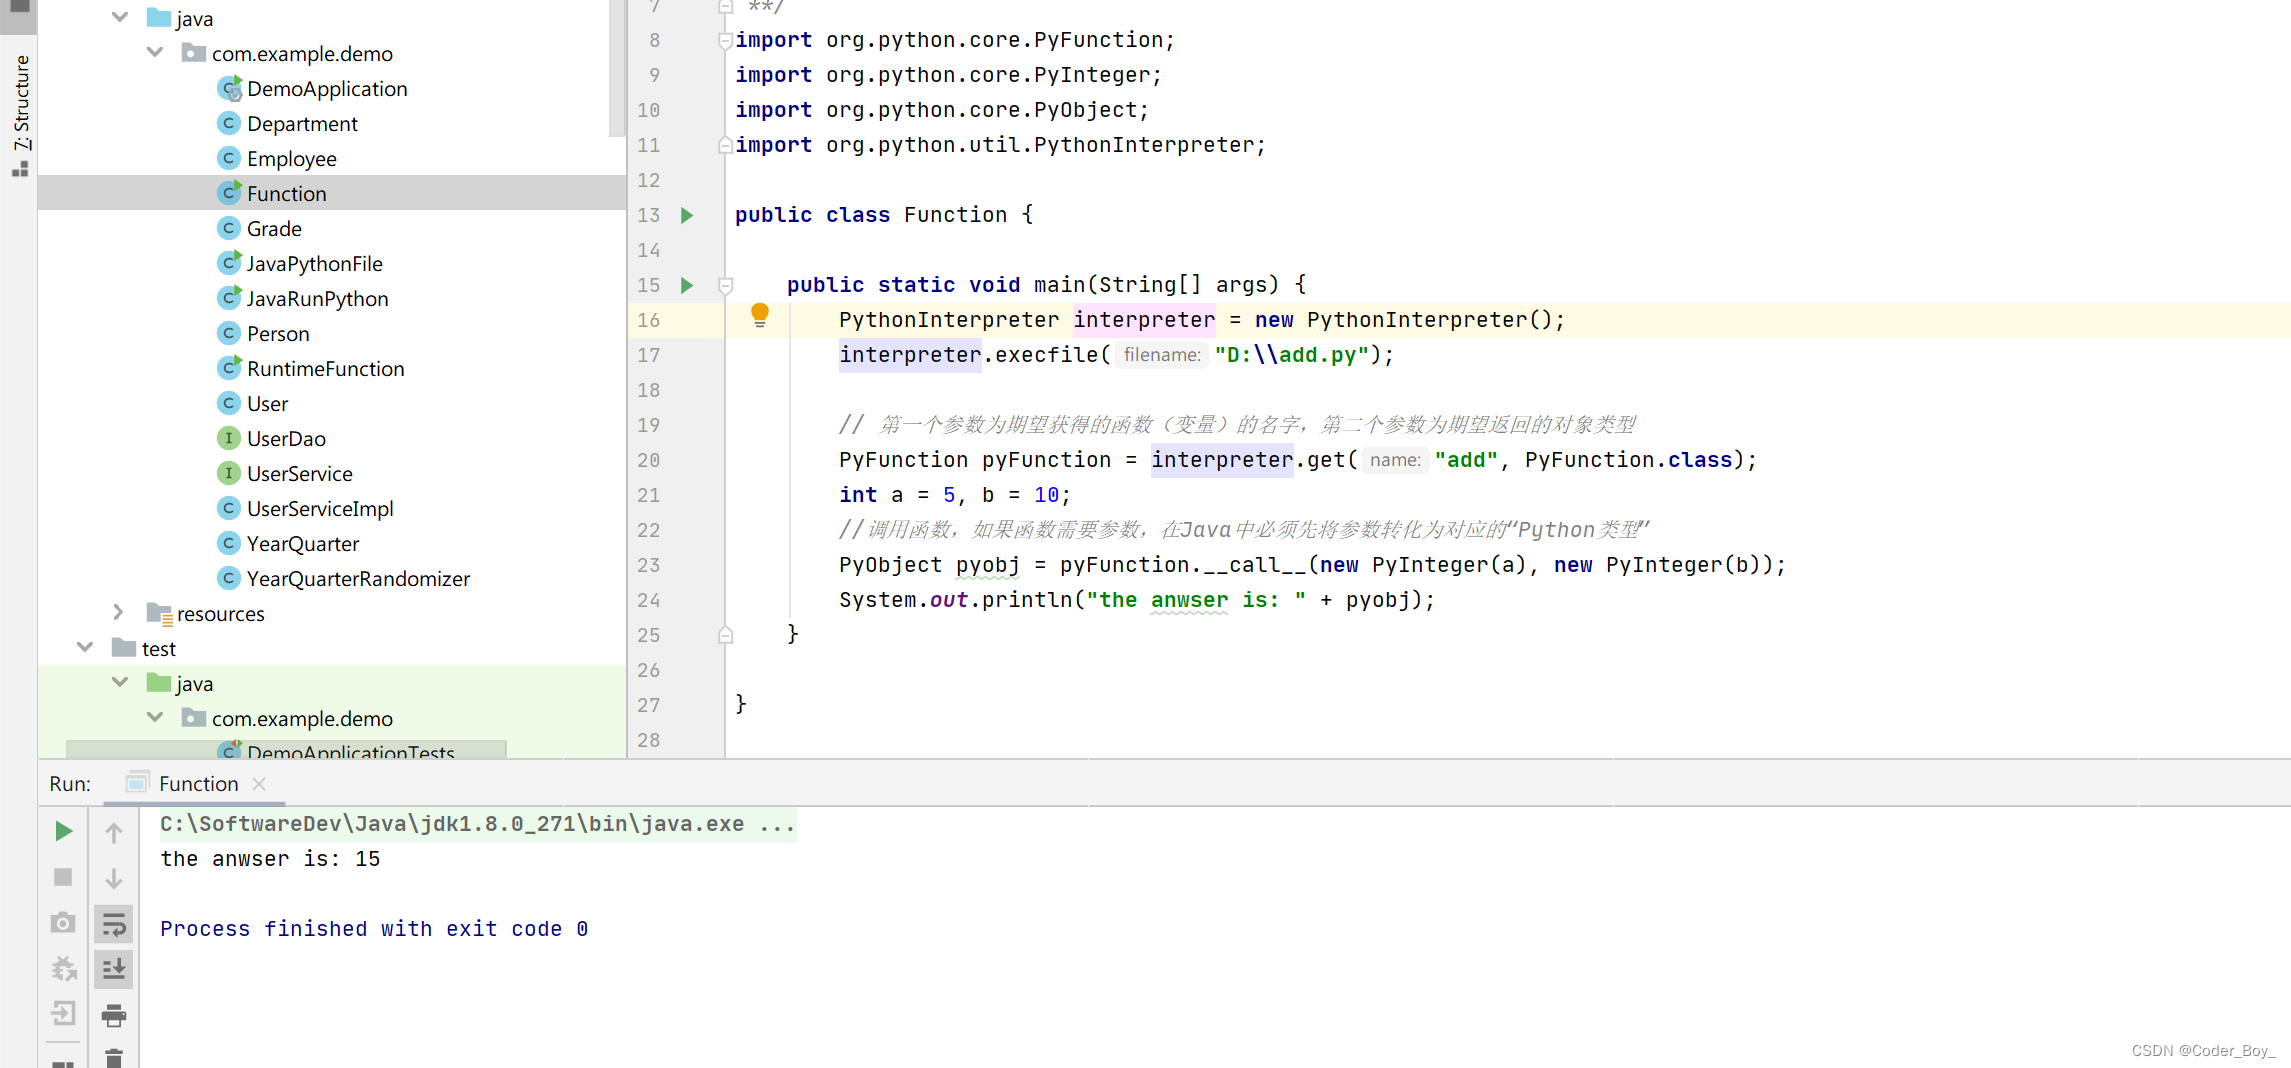
在java类中直接执行python语句 在java类中直接调用本地python脚本 使用Runtime.getRuntime()执行python脚本文件(推荐) 调用python脚本中的函数 简单介绍 官网地址 首页 | (jython.org) Jython项目提供了Java中的Python实现, 为Python提供了…...

PHP异步框架总结
目前主要有: 国产 swoole workerman 国外 framework-x revoltrevolt reactphp amphp async...

vsto excel 可以异步写入值么
在 VSTO (Visual Studio Tools for Office) 中,Excel 可以使用异步方式写入值。异步编程允许您在后台线程中执行耗时的操作,而不会阻塞主线程,从而提高程序的响应性能。 从 .NET 4.5 开始,可以使用异步和 await 关键字来简化异步…...
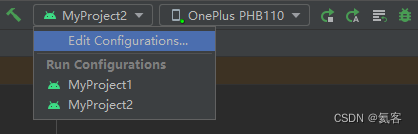
Android Gradle 骚操作,将两个项目合并到一个项目中
1. 前言 在工作中,由于各种原因,导致需要将两个可单独运行的App项目,合并到一个git仓库里,且单独的App项目里还有其他Module模块。 如果只是将两个项目复制到同一个文件夹下,还是得单独打开各个项目,是很不…...
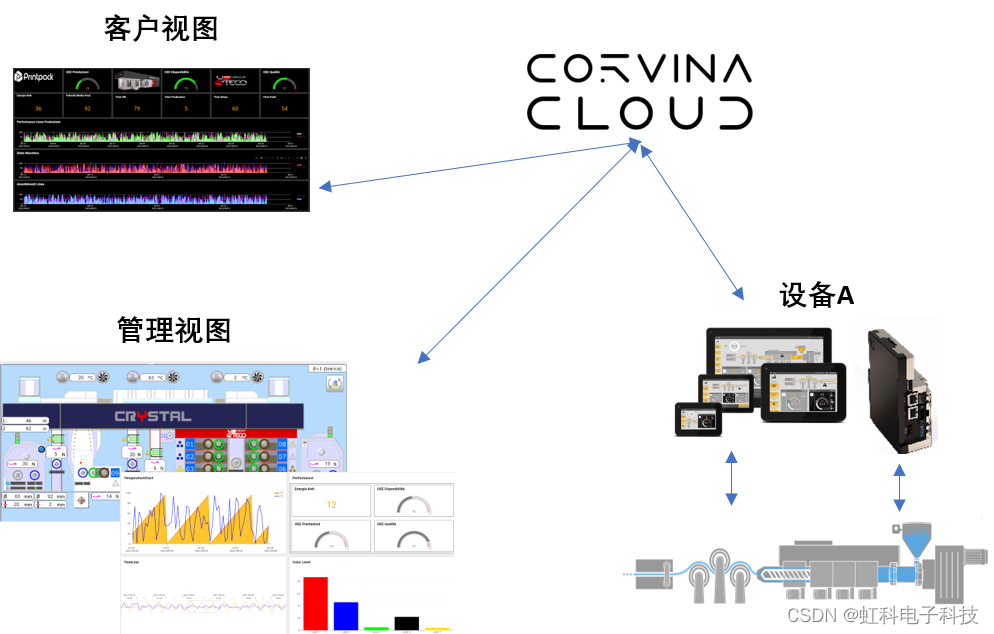
虹科案例|如何分析设备故障时间和次数,打破生产瓶颈?
虹科设备绩效管理系统 保障生产设备的稳定性和可靠性 生产设备的稳定性和可靠性是保证企业正常生产的重要条件之一,设备故障的频发严重影响企业的正常生产,那么如何分析设备故障时间和次数,查找设备故障原因,协助企业打破生产瓶…...
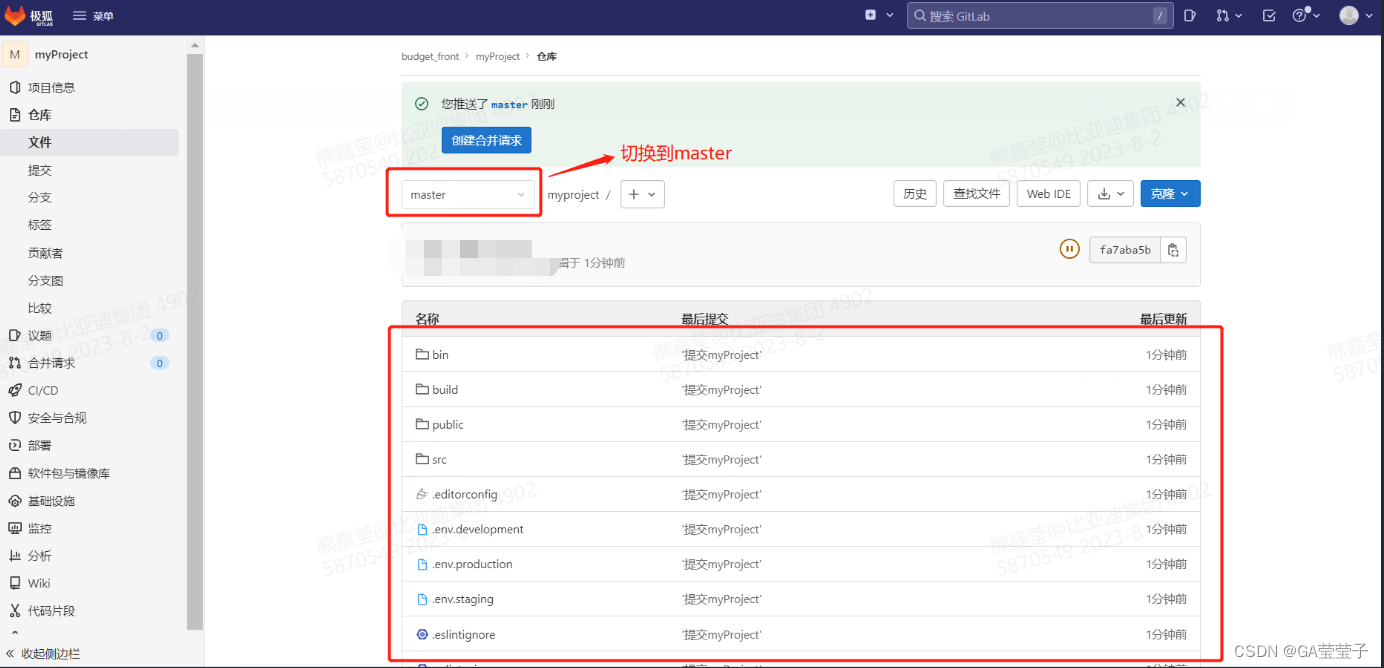
SVN代码迁移到Git方法
1.在SVN上新增一个项目 一、点击新建项目 二、创建空白项目 三、填入项目信息 四、myProject项目模板创建成功 2.将代码提交到Git 一、新建一个文件夹myProject,将从SVN下载过来的代码复制一份拷贝到该文件夹下,注意:不要把.SVN文件拷…...

Linux更换阿里云yum源
1、备份 cd /etc/yum.repos.d/ mv CentOS-Base.repo CentOS-Base.backup2、下载新的CentOS-Base.repo 到/etc/yum.repos.d/ wget -O /etc/yum.repos.d/CentOS-Base.repo https://mirrors.aliyun.com/repo/Centos-7.repo如果出现解析错误 Could not resolve host: mirrors.a…...

终极AMD Ryzen调试指南:SMUDebugTool让你的处理器发挥最大潜力
终极AMD Ryzen调试指南:SMUDebugTool让你的处理器发挥最大潜力 【免费下载链接】SMUDebugTool A dedicated tool to help write/read various parameters of Ryzen-based systems, such as manual overclock, SMU, PCI, CPUID, MSR and Power Table. 项目地址: ht…...

从‘马鞍波’到‘圆形磁场’:深入浅出图解SVPWM如何让电机转得更平滑、更省电
从‘马鞍波’到‘圆形磁场’:深入浅出图解SVPWM如何让电机转得更平滑、更省电 想象一下,当你按下电动车的加速踏板时,电机如何从静止状态平稳过渡到高速旋转?这背后隐藏着一项关键技术——空间矢量脉宽调制(SVPWM&…...

别再只把JWT当登录令牌了:结合CTF案例,聊聊它在API安全与密钥管理中的那些“坑”
JWT安全实战:从CTF漏洞到企业级API防护策略 在数字化身份认证领域,JSON Web Token(JWT)早已超越简单的登录令牌角色,成为现代分布式系统的核心安全组件。但许多开发者对其认知仍停留在基础使用层面,忽视了背…...
)
告别环境报错!Windows下ESP8266开发环境保姆级搭建指南(含MSYS2、Python包避坑)
Windows下ESP8266开发环境零失败搭建全攻略 第一次接触ESP8266开发时,最令人头疼的莫过于环境配置。明明按照官方文档一步步操作,却总在某个环节卡住——Python包安装失败、工具链不兼容、串口识别异常...这些问题消耗了开发者大量时间。本文将彻底解决…...

终极AMD Ryzen调试指南:5个场景掌握SMUDebugTool硬件调优
终极AMD Ryzen调试指南:5个场景掌握SMUDebugTool硬件调优 【免费下载链接】SMUDebugTool A dedicated tool to help write/read various parameters of Ryzen-based systems, such as manual overclock, SMU, PCI, CPUID, MSR and Power Table. 项目地址: https:/…...

碧蓝航线自动化助手:3小时解放你的游戏时间
碧蓝航线自动化助手:3小时解放你的游戏时间 【免费下载链接】AzurLaneAutoScript Azur Lane bot (CN/EN/JP/TW) 碧蓝航线脚本 | 无缝委托科研,全自动大世界 项目地址: https://gitcode.com/gh_mirrors/az/AzurLaneAutoScript 还在为碧蓝航线中重复…...

如何通过智能包装系统提升全链条的数字化与协同效率?
本段聚焦全链条数字化升级的核心路径,通过 智能包装系统实现 原材料到成品的数据共享与流程对齐。以原材料入库、生产、成品出库为主线,建立统一的数据模型、模块化接口与可追溯闭环,推动 协同优化与成本控制。结合 中科天工智能包装设备与 中…...

汽车供应链客户定位方法拆解:复杂B2B能力如何被客户看懂
从B2B表达方法看,汽车供应链客户定位可以理解为一个“客户判断结构化”的问题。企业不是简单输出自我介绍,而是要把技术能力、项目经验、质量体系、协同机制与证据材料,转化为客户不同角色都能使用的判断信息。很多汽车供应商在做客户定位时&…...

Vue3 + Vitest 浏览器测试 从零开发指南
一、我们要做什么? 写一个 Vue3 计数器组件(显示名字 点按钮数字1)写 Vitest 自动化测试(让电脑自动验证功能是否正确)全程不用弹浏览器,在终端就能看到测试结果 ✅二、准备工作(只需要 1 个软…...

离线绘图新选择:draw.io桌面版,让敏感数据不再“上网”
离线绘图新选择:draw.io桌面版,让敏感数据不再“上网” 【免费下载链接】drawio-desktop Official electron build of draw.io 项目地址: https://gitcode.com/GitHub_Trending/dr/drawio-desktop 你是否曾因为网络不稳定而无法绘制重要的流程图&…...