6.7.tensorRT高级(1)-使用onnxruntime进行onnx模型推理过程
目录
- 前言
- 1. python-ort
- 2. C++-ort
- 总结
前言
杜老师推出的 tensorRT从零起步高性能部署 课程,之前有看过一遍,但是没有做笔记,很多东西也忘了。这次重新撸一遍,顺便记记笔记。
本次课程学习 tensorRT 高级-使用 onnxruntime 进行 onnx 模型推理过程
课程大纲可看下面的思维导图

1. python-ort
这节课我们学习 onnxruntime 案例
1. onnx 是 Microsoft 开发的一个中间格式,而 onnxruntime 简称 ort 是 Microsoft 为 onnx 开发的推理引擎
2. 允许使用 onnx 作为输入进行直接推理得到结果
3. onnxruntime 有 python/c++ 接口,支持 CPU、CUDA、tensorRT 等不同后端,实际 CPU 上比较常用
4. ort 甚至在未来还提供了训练功能
5. 学习使用 onnxruntime 推理 YoloV5 并拿到结果
我们来看案例,先把 onnx 导出来,如下所示:

导出之后,我们再执行 pytorch 推理,如下所示:

执行成功,执行后的效果图如下所示:

我们再来看下 python-ort 推理的效果,代码如下:
import onnxruntime
import cv2
import numpy as npdef preprocess(image, input_w=640, input_h=640):scale = min(input_h / image.shape[0], input_w / image.shape[1])ox = (-scale * image.shape[1] + input_w + scale  - 1) * 0.5oy = (-scale * image.shape[0] + input_h + scale  - 1) * 0.5M = np.array([[scale, 0, ox],[0, scale, oy]], dtype=np.float32)IM = cv2.invertAffineTransform(M)image_prep = cv2.warpAffine(image, M, (input_w, input_h), flags=cv2.INTER_LINEAR, borderMode=cv2.BORDER_CONSTANT, borderValue=(114, 114, 114))image_prep = (image_prep[..., ::-1] / 255.0).astype(np.float32)image_prep = image_prep.transpose(2, 0, 1)[None]return image_prep, M, IMdef nms(boxes, threshold=0.5):keep = []remove_flags = [False] * len(boxes)for i in range(len(boxes)):if remove_flags[i]:continueib = boxes[i]keep.append(ib)for j in range(len(boxes)):if remove_flags[j]:continuejb = boxes[j]# class mismatch or image_id mismatchif ib[6] != jb[6] or ib[5] != jb[5]:continuecleft,  ctop    = max(ib[:2], jb[:2])cright, cbottom = min(ib[2:4], jb[2:4])cross = max(0, cright - cleft) * max(0, cbottom - ctop)union = max(0, ib[2] - ib[0]) * max(0, ib[3] - ib[1]) + max(0, jb[2] - jb[0]) * max(0, jb[3] - jb[1]) - crossiou = cross / unionif iou >= threshold:remove_flags[j] = Truereturn keepdef post_process(pred, IM, threshold=0.25):# b, n, 85boxes = []for image_id, box_id in zip(*np.where(pred[..., 4] >= threshold)):item = pred[image_id, box_id]cx, cy, w, h, objness = item[:5]label = item[5:].argmax()confidence = item[5 + label] * objnessif confidence < threshold:continueboxes.append([cx - w * 0.5, cy - h * 0.5, cx + w * 0.5, cy + h * 0.5, confidence, image_id, label])boxes = np.array(boxes)lr = boxes[:, [0, 2]]tb = boxes[:, [1, 3]]boxes[:, [0, 2]] = lr * IM[0, 0] + IM[0, 2]boxes[:, [1, 3]] = tb * IM[1, 1] + IM[1, 2]# left, top, right, bottom, confidence, image_id, labelboxes = sorted(boxes.tolist(), key=lambda x:x[4], reverse=True)return nms(boxes)if __name__ == "__main__":session = onnxruntime.InferenceSession("workspace/yolov5s.onnx", providers=["CPUExecutionProvider"])image = cv2.imread("workspace/car.jpg")image_input, M, IM = preprocess(image)pred = session.run(["output"], {"images": image_input})[0]boxes = post_process(pred, IM)for obj in boxes:left, top, right, bottom = map(int, obj[:4])confidence = obj[4]label = int(obj[6])cv2.rectangle(image, (left, top), (right, bottom), (0, 255, 0), 2)cv2.putText(image, f"{label}: {confidence:.2f}", (left, top+20), 0, 1, (0, 0, 255), 2, 16)cv2.imwrite("workspace/python-ort.jpg", image)
我们简单分析下上述代码,首先我们在主函数中创建了一个 InferenceSession,把 onnx 路径塞进去,然后提供了一个 providers,在这里使用的是 CPU 后端
拿到 session 以后,读取图像并进行预处理,将预处理后的图像作为输入塞到 session.run 中拿到推理结果,
session.run 第一个参数是 output_names,是一个数组,意思是你想要哪几个节点作为输出,你就把对应节点名填入,第二个参数是 input 的 dict,如果你有多个输入,需要用一个 name + tensor 的方式对应,参数填写完成后交给 run 推理拿到一个 list,你指定了几个 output,它 return 的 list 中就有几个元素,由于我们只指定了一个 output,因此我们直接取 list 的第 0 项作为我们的 pred 的 tensor
有了这个 tensor 后,我们做了一个后处理将 tensor 恢复成框,变成框后绘制到图像上并存储下来,这个推理过程也就结束了
可以看到 onnxruntime 在 python 上你要使用它还是比较简单的,只需要创建 session 然后 run 就行,所以还是非常方便非常好用的,当你有一个模型想推理测试的时候你可以用 onnxruntime 来简单尝试一下
更多细节可参照 YOLOv5推理详解及预处理高性能实现
推理效果图如下:

2. C+±ort
我们接下来分析下 C++ 的程序,看看在 C++ 中的 onnxruntime 是怎么推理的
二话不说我们先去 make run 一下:

执行成功,它输出了 5 个框,推理图如下:
可以看到 C++ 的推理效果和 Python 的推理效果是一模一样的,因为预处理、框架、后处理都是一样的,那么推理的结果必定是相同的
我们来简单看下代码,完整的示例代码如下:
#include <onnxruntime_cxx_api.h>// system include
#include <stdio.h>
#include <math.h>#include <iostream>
#include <fstream>
#include <vector>
#include <memory>
#include <functional>
#include <unistd.h>#include <opencv2/opencv.hpp>
using namespace std;static const char* cocolabels[] = {"person", "bicycle", "car", "motorcycle", "airplane","bus", "train", "truck", "boat", "traffic light", "fire hydrant","stop sign", "parking meter", "bench", "bird", "cat", "dog", "horse","sheep", "cow", "elephant", "bear", "zebra", "giraffe", "backpack","umbrella", "handbag", "tie", "suitcase", "frisbee", "skis","snowboard", "sports ball", "kite", "baseball bat", "baseball glove","skateboard", "surfboard", "tennis racket", "bottle", "wine glass","cup", "fork", "knife", "spoon", "bowl", "banana", "apple", "sandwich","orange", "broccoli", "carrot", "hot dog", "pizza", "donut", "cake","chair", "couch", "potted plant", "bed", "dining table", "toilet", "tv","laptop", "mouse", "remote", "keyboard", "cell phone", "microwave","oven", "toaster", "sink", "refrigerator", "book", "clock", "vase","scissors", "teddy bear", "hair drier", "toothbrush"
};static std::tuple<uint8_t, uint8_t, uint8_t> hsv2bgr(float h, float s, float v){const int h_i = static_cast<int>(h * 6);const float f = h * 6 - h_i;const float p = v * (1 - s);const float q = v * (1 - f*s);const float t = v * (1 - (1 - f) * s);float r, g, b;switch (h_i) {case 0:r = v; g = t; b = p;break;case 1:r = q; g = v; b = p;break;case 2:r = p; g = v; b = t;break;case 3:r = p; g = q; b = v;break;case 4:r = t; g = p; b = v;break;case 5:r = v; g = p; b = q;break;default:r = 1; g = 1; b = 1;break;}return make_tuple(static_cast<uint8_t>(b * 255), static_cast<uint8_t>(g * 255), static_cast<uint8_t>(r * 255));
}static std::tuple<uint8_t, uint8_t, uint8_t> random_color(int id){float h_plane = ((((unsigned int)id << 2) ^ 0x937151) % 100) / 100.0f;;float s_plane = ((((unsigned int)id << 3) ^ 0x315793) % 100) / 100.0f;return hsv2bgr(h_plane, s_plane, 1);
}bool exists(const string& path){#ifdef _WIN32return ::PathFileExistsA(path.c_str());
#elsereturn access(path.c_str(), R_OK) == 0;
#endif
}vector<unsigned char> load_file(const string& file){ifstream in(file, ios::in | ios::binary);if (!in.is_open())return {};in.seekg(0, ios::end);size_t length = in.tellg();std::vector<uint8_t> data;if (length > 0){in.seekg(0, ios::beg);data.resize(length);in.read((char*)&data[0], length);}in.close();return data;
}void inference(){auto engine_data = load_file("yolov5s.onnx");Ort::Env env(ORT_LOGGING_LEVEL_INFO, "onnx");Ort::SessionOptions session_options;auto mem = Ort::MemoryInfo::CreateCpu(OrtArenaAllocator, OrtMemTypeDefault);session_options.SetIntraOpNumThreads(1);session_options.SetGraphOptimizationLevel(GraphOptimizationLevel::ORT_ENABLE_EXTENDED);Ort::Session session(env, "yolov5s.onnx", session_options);auto output_dims = session.GetOutputTypeInfo(0).GetTensorTypeAndShapeInfo().GetShape();const char *input_names[] = {"images"}, *output_names[] = {"output"};int input_batch = 1;int input_channel = 3;int input_height = 640;int input_width = 640;int64_t input_shape[] = {input_batch, input_channel, input_height, input_width};int input_numel = input_batch * input_channel * input_height * input_width;float* input_data_host = new float[input_numel];auto input_tensor = Ort::Value::CreateTensor(mem, input_data_host, input_numel, input_shape, 4);///// letter boxauto image = cv::imread("car.jpg");float scale_x = input_width / (float)image.cols;float scale_y = input_height / (float)image.rows;float scale = std::min(scale_x, scale_y);float i2d[6], d2i[6];i2d[0] = scale;  i2d[1] = 0;  i2d[2] = (-scale * image.cols + input_width + scale  - 1) * 0.5;i2d[3] = 0;  i2d[4] = scale;  i2d[5] = (-scale * image.rows + input_height + scale - 1) * 0.5;cv::Mat m2x3_i2d(2, 3, CV_32F, i2d);cv::Mat m2x3_d2i(2, 3, CV_32F, d2i);cv::invertAffineTransform(m2x3_i2d, m2x3_d2i);cv::Mat input_image(input_height, input_width, CV_8UC3);cv::warpAffine(image, input_image, m2x3_i2d, input_image.size(), cv::INTER_LINEAR, cv::BORDER_CONSTANT, cv::Scalar::all(114));cv::imwrite("input-image.jpg", input_image);int image_area = input_image.cols * input_image.rows;unsigned char* pimage = input_image.data;float* phost_b = input_data_host + image_area * 0;float* phost_g = input_data_host + image_area * 1;float* phost_r = input_data_host + image_area * 2;for(int i = 0; i < image_area; ++i, pimage += 3){// 注意这里的顺序rgb调换了*phost_r++ = pimage[0] / 255.0f;*phost_g++ = pimage[1] / 255.0f;*phost_b++ = pimage[2] / 255.0f;}///// 3x3输入,对应3x3输出int output_numbox = output_dims[1];int output_numprob = output_dims[2];int num_classes = output_numprob - 5;int output_numel = input_batch * output_numbox * output_numprob;float* output_data_host = new float[output_numel];int64_t output_shape[] = {input_batch, output_numbox, output_numprob};auto output_tensor = Ort::Value::CreateTensor(mem, output_data_host, output_numel, output_shape, 3);Ort::RunOptions options;session.Run(options, (const char* const*)input_names, &input_tensor, 1, (const char* const*)output_names, &output_tensor, 1);// decode boxvector<vector<float>> bboxes;float confidence_threshold = 0.25;float nms_threshold = 0.5;for(int i = 0; i < output_numbox; ++i){float* ptr = output_data_host + i * output_numprob;float objness = ptr[4];if(objness < confidence_threshold)continue;float* pclass = ptr + 5;int label     = std::max_element(pclass, pclass + num_classes) - pclass;float prob    = pclass[label];float confidence = prob * objness;if(confidence < confidence_threshold)continue;float cx     = ptr[0];float cy     = ptr[1];float width  = ptr[2];float height = ptr[3];float left   = cx - width * 0.5;float top    = cy - height * 0.5;float right  = cx + width * 0.5;float bottom = cy + height * 0.5;float image_base_left   = d2i[0] * left   + d2i[2];float image_base_right  = d2i[0] * right  + d2i[2];float image_base_top    = d2i[0] * top    + d2i[5];float image_base_bottom = d2i[0] * bottom + d2i[5];bboxes.push_back({image_base_left, image_base_top, image_base_right, image_base_bottom, (float)label, confidence});}printf("decoded bboxes.size = %d\n", bboxes.size());// nmsstd::sort(bboxes.begin(), bboxes.end(), [](vector<float>& a, vector<float>& b){return a[5] > b[5];});std::vector<bool> remove_flags(bboxes.size());std::vector<vector<float>> box_result;box_result.reserve(bboxes.size());auto iou = [](const vector<float>& a, const vector<float>& b){float cross_left   = std::max(a[0], b[0]);float cross_top    = std::max(a[1], b[1]);float cross_right  = std::min(a[2], b[2]);float cross_bottom = std::min(a[3], b[3]);float cross_area = std::max(0.0f, cross_right - cross_left) * std::max(0.0f, cross_bottom - cross_top);float union_area = std::max(0.0f, a[2] - a[0]) * std::max(0.0f, a[3] - a[1]) + std::max(0.0f, b[2] - b[0]) * std::max(0.0f, b[3] - b[1]) - cross_area;if(cross_area == 0 || union_area == 0) return 0.0f;return cross_area / union_area;};for(int i = 0; i < bboxes.size(); ++i){if(remove_flags[i]) continue;auto& ibox = bboxes[i];box_result.emplace_back(ibox);for(int j = i + 1; j < bboxes.size(); ++j){if(remove_flags[j]) continue;auto& jbox = bboxes[j];if(ibox[4] == jbox[4]){// class matchedif(iou(ibox, jbox) >= nms_threshold)remove_flags[j] = true;}}}printf("box_result.size = %d\n", box_result.size());for(int i = 0; i < box_result.size(); ++i){auto& ibox = box_result[i];float left = ibox[0];float top = ibox[1];float right = ibox[2];float bottom = ibox[3];int class_label = ibox[4];float confidence = ibox[5];cv::Scalar color;tie(color[0], color[1], color[2]) = random_color(class_label);cv::rectangle(image, cv::Point(left, top), cv::Point(right, bottom), color, 3);auto name      = cocolabels[class_label];auto caption   = cv::format("%s %.2f", name, confidence);int text_width = cv::getTextSize(caption, 0, 1, 2, nullptr).width + 10;cv::rectangle(image, cv::Point(left-3, top-33), cv::Point(left + text_width, top), color, -1);cv::putText(image, caption, cv::Point(left, top-5), 0, 1, cv::Scalar::all(0), 2, 16);}cv::imwrite("image-draw.jpg", image);delete[] input_data_host;delete[] output_data_host;
}int main(){inference();return 0;
}
可以看到它就是拿的 tensorRT 的 yolov5 的推理代码,只不过是把 tensorRT 给干掉了
在 inference 函数中首先定义了一个 Ort::Env 日志,然后定义了一个 Ort::SessionOptions 可设置一些参数,接着就是跟 Python 相同的步骤创建了一个 Ort::Session,通过 session 获取 output_dims,通过 Ort::Value::CreateTensor 创建输入图像的 tensor
下面就是和之前一样的图像预处理工作,接着创建一个 output_tensort 用于接收推理结果,然后调用 session.run 执行推理拿到预测结果,后面的内容就跟我们之前的完全一样,无非是 decode + nms + draw_bbox
所以 onnxruntime 在 python 和 c++ 上都是一个非常方便,非常简单的推理工具,大家可以去使用它,去挖掘它来解决我们平时工作中遇到的一些问题
总结
本次课程学习了 onnxruntime 推理,无论在 python 还是 c++ 上都比较简单,无非是创建一个 session,然后把输入数据塞进去,执行 session.run 推理即可拿到结果,如果我们平时想做一些简单的 onnx 推理验证时可以使用它
相关文章:
6.7.tensorRT高级(1)-使用onnxruntime进行onnx模型推理过程
目录 前言1. python-ort2. C-ort总结 前言 杜老师推出的 tensorRT从零起步高性能部署 课程,之前有看过一遍,但是没有做笔记,很多东西也忘了。这次重新撸一遍,顺便记记笔记。 本次课程学习 tensorRT 高级-使用 onnxruntime 进行 on…...

360未来安全研究院笔试题
笔试时间:2020.04.16,15:00-17:30。 岗位:Linux 安全开发工程师(实习生) 题型: 能力测试——逻辑题(20个5分=100分) 专业测试——客观题(40个2分=80分) 专业测试——在线编程题(2个25分=50分) 逻辑题 一共40道题目,很多逻辑推断题,包含数字找规律和图片找…...

Linux SSH 远程连接主机,并执行命令
应用场景 当需要远程到另一台Linux上,并在另一台机器上执行 Shell 命令,则需要注意命令的书写格式 示例说明 远程到 192.158.157.47 机器上,并执行命令 cd /tmp && ./zabbixagent_install.sh && echo Success 1、错误方式…...
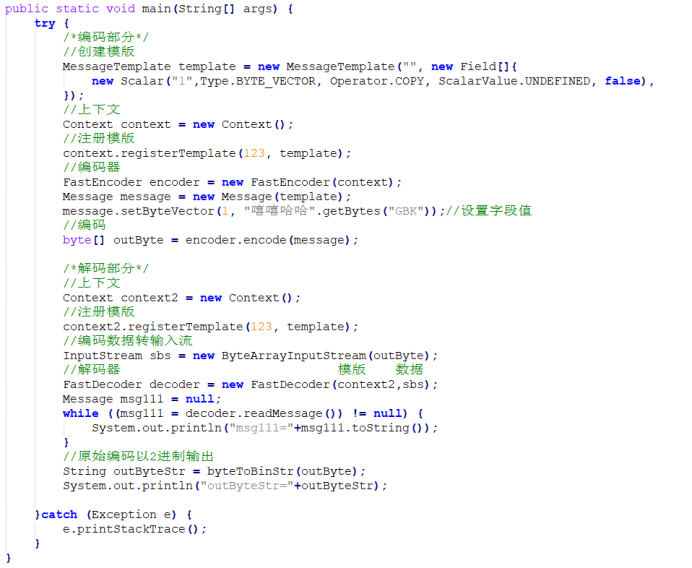
FAST协议详解1 不同数据类型的编码与解码
一、概述 FAST协议里不同的数据类型在编码时有非常大的区别,比如整数只需要将二进制数据转为十进制即可,而浮点数则需要先传小数点位数,再传一个整数,最后将二者结合起来才是最终结果。本篇使用openfast自设了一些数据并编码成FA…...

黑马大数据学习笔记5-案例
目录 需求分析背景介绍目标需求数据内容DBeaver连接到Hive建库建表加载数据 ETL数据清洗数据问题需求实现查看结果扩展 指标计算需求需求指标统计 可视化展示BIFineBI的介绍及安装FineBI配置数据源及数据准备 可视化展示 P73~77 https://www.bilibili.com/video/BV1WY4y197g7?…...
)
网络编程——TCP/IP协议族(IP协议、TCP协议和UDP协议……)
TCP/IP协议族 一、IP协议 1、IP协议简介 IP协议又称网际协议 特指为实现在一个相互连接的网络系统上从源地址到目的地传输数据包(互联网数据包)所提供必要功能的协议,是网络层中的协议。 2、特点 不可靠:它不能保证IP数据包能成功地到达它的目的地,仅…...

Oracle SQL存储过程能够返回表吗
使用Oracle游标返回表数据 在Oracle存储过程中,我们可以使用游标来返回表的数据。游标是一种类似于指针的数据类型,可以用来遍历和操作结果集。以下是一个示例的Oracle存储过程,通过游标返回表数据: CREATE OR REPLACE PROCEDUR…...

2 Vue使用v-bind来代替{{}}取值
注意!当两个具有共同id的标签都要从数据层拿值时,需要使用div标签,赋予他们共同的id,不然其中有一个会拿不到数据! v-bind用来绑定前标签的属性,然后对属性赋值。{{}}用来对前后标签中的文本赋值。使用方法…...
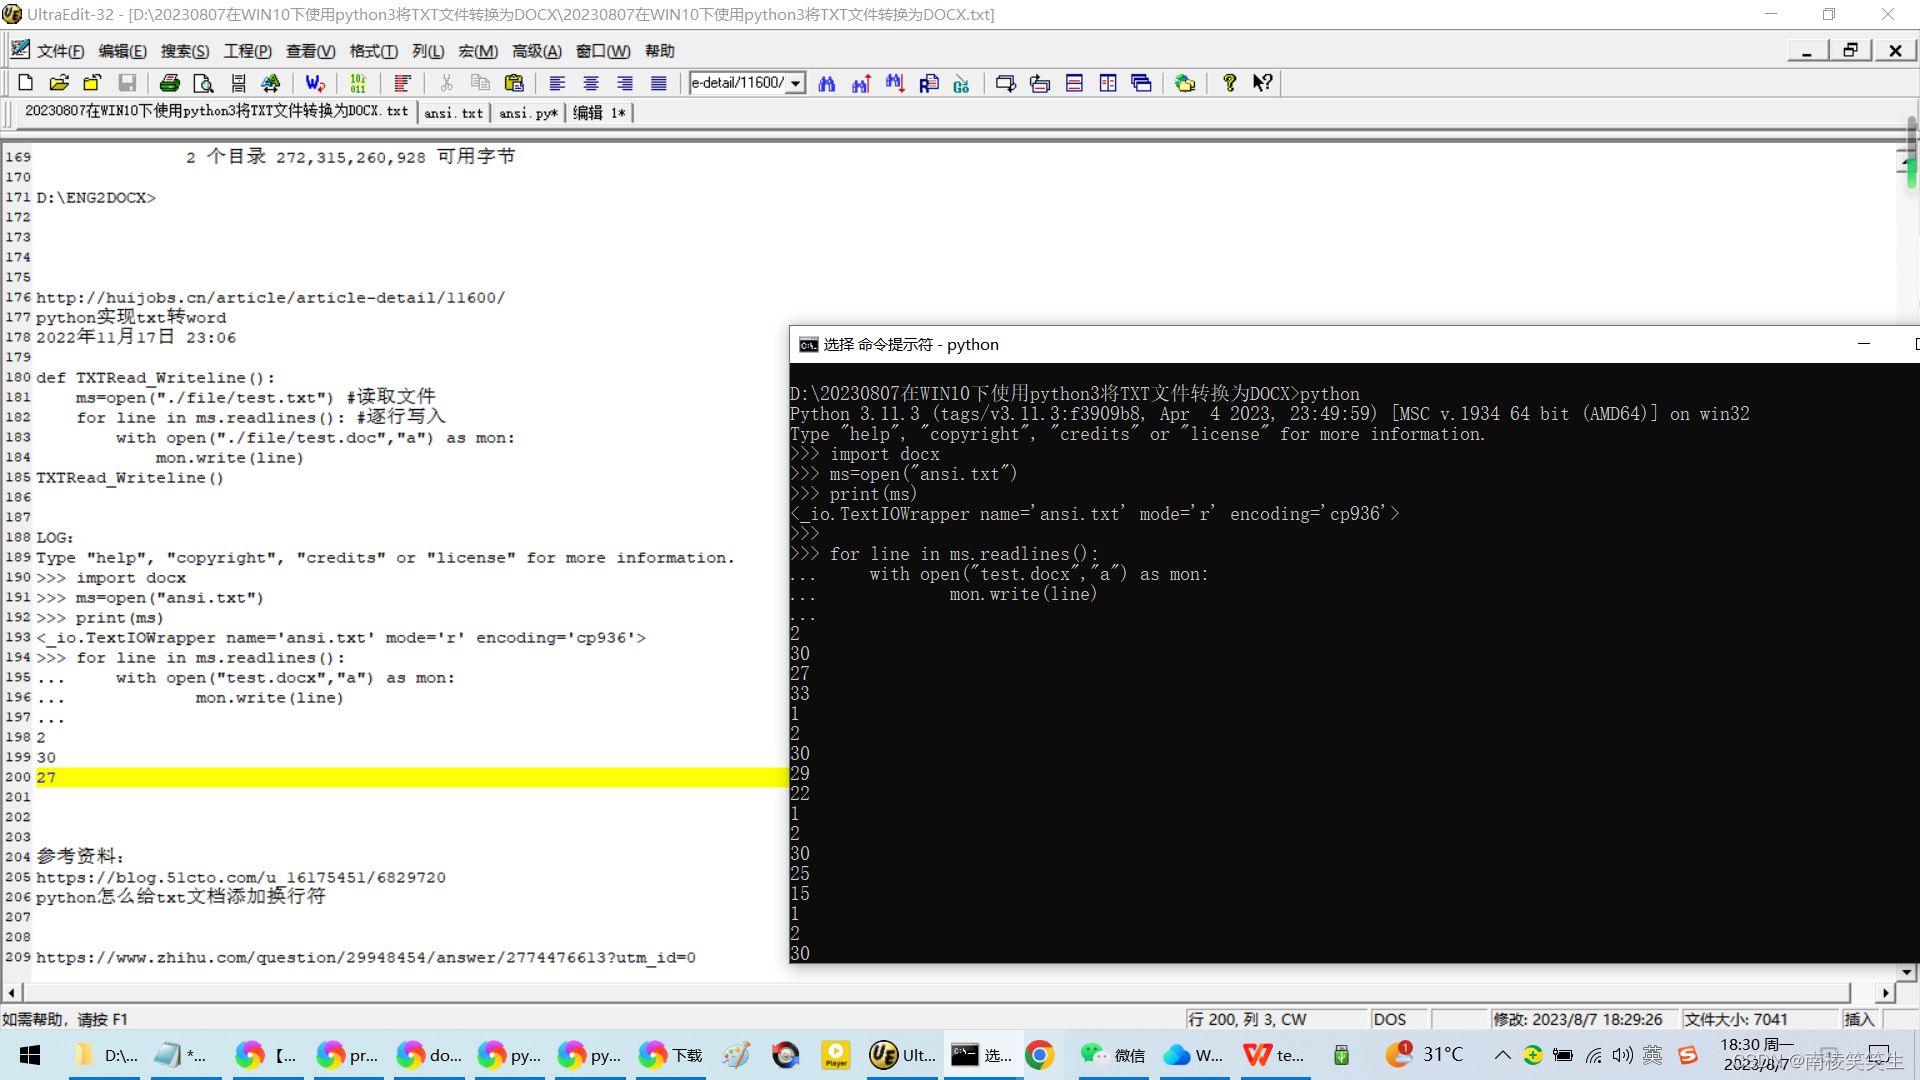
20230807在WIN10下使用python3将TXT文件转换为DOCX(在UTF8编码下转换为DOCX有多一行的瑕疵)
20230807在WIN10下使用python3将TXT文件转换为DOCX(在UTF8编码下转换为DOCX有多一行的瑕疵) 2023/8/7 12:58 https://translate.google.com/?slen&tlzh-CN&opdocs 缘起,由于google的文档翻译不支持SRT/TXT格式的字幕,因此…...

Flutter(八)事件处理与通知
1.原始指针事件处理 一次完整的事件分为三个阶段:手指按下、手指移动、和手指抬起,而更高级别的手势(如点击、双击、拖动等)都是基于这些原始事件的。 Listener 组件 Flutter中可以使用Listener来监听原始触摸事件 Listener({…...

Java,python,c#,js,c++搞量化交易的接口大全
股票基金api接口地址:https://stockapi.com.cn 不想自己写的:https://stockapi.com.cn 除了牛逼,只剩下牛逼,除了方便,只剩下方便,python不是唯一的量化编程语言 接口说明:日线macd指标 https:/…...
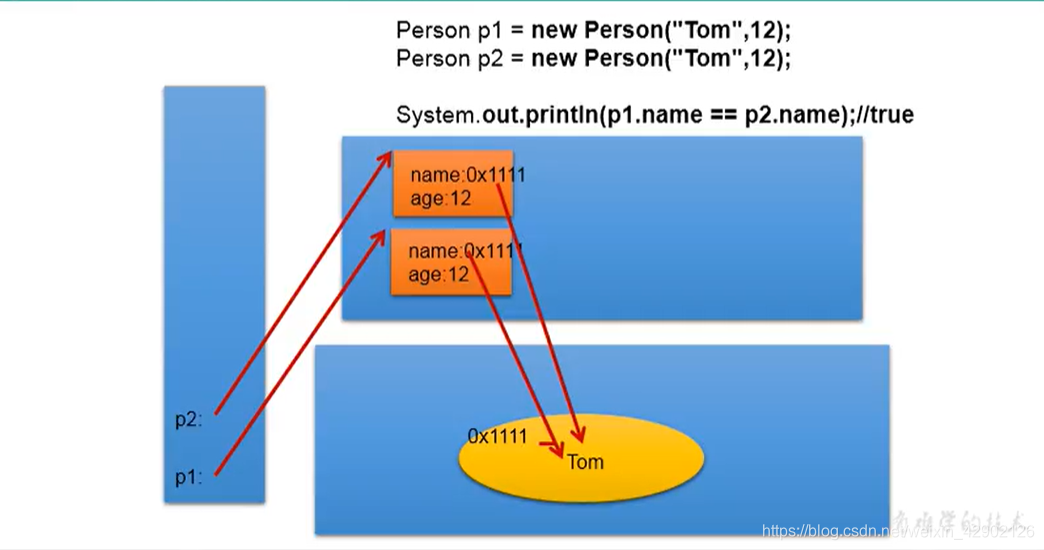
javaAPI(一):String
String的特性 String底层源码 1、String声明为final,不可被继承 2、String实现了Serializable接口:表示字符支持序列化 实现了Comparable接口:表示String可以比较大小 3、String内部定义了final char[] value用于存储字符串 4、通过字面量的…...

数据互通,版本管理优化图文档与BOM数据
在现代企业的产品开发过程中,图文档和BOM数据是不可或缺的关键要素。图文档记录了产品的设计和工程信息,而BOM数据则明确了产品所需物料的清单和规格。然而,由于数据的复杂性和版本变更的频繁性,图文档与BOM数据之间的协作和管理常…...

【CSS】旋转中的视差效果
效果 index.html <!DOCTYPE html> <html lang"en"><head><meta charset"UTF-8"/><meta http-equiv"X-UA-Compatible" content"IEedge"/><meta name"viewport" content"widthdevice-…...
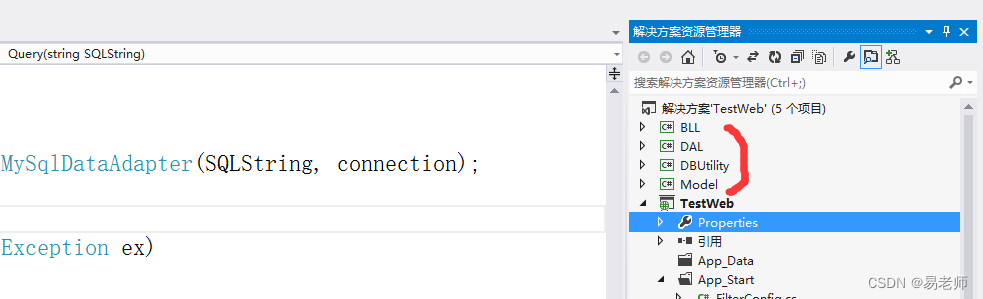
【ASP.NET MVC】使用动软(一)(9)
一、解决的问题 前文为解决数据库操作设计的 TestMysql 类,仅简单地封装了一个Query函数,代码如下: public class TestMysql{public static string SqlserverConnectStr "server127.0.0.1;charsetutf8;user idroot;persistsecurityin…...
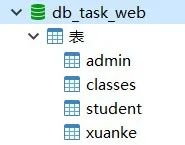
【Jsp课设】3款基于JavaWeb的学生选课管理系统
项目介绍:后端采用JspServlet。前端使用的是Layui的一个网站模板。开发一个在线的学生选课管理系统,用于课程设计的使用。 项目类型:JavaWeb源码 用户类型:2个角色(管理员学生) 主要技术:JspSe…...

系统架构设计师笔记第35期:表现层框架设计
表现层框架设计是指在软件系统中,将用户界面(UI)和用户交互逻辑与后端业务逻辑分离,使用特定的框架来组织和管理表现层的功能和结构。下面是表现层框架设计的一般步骤和常用技术: 确定需求和功能:首先&…...
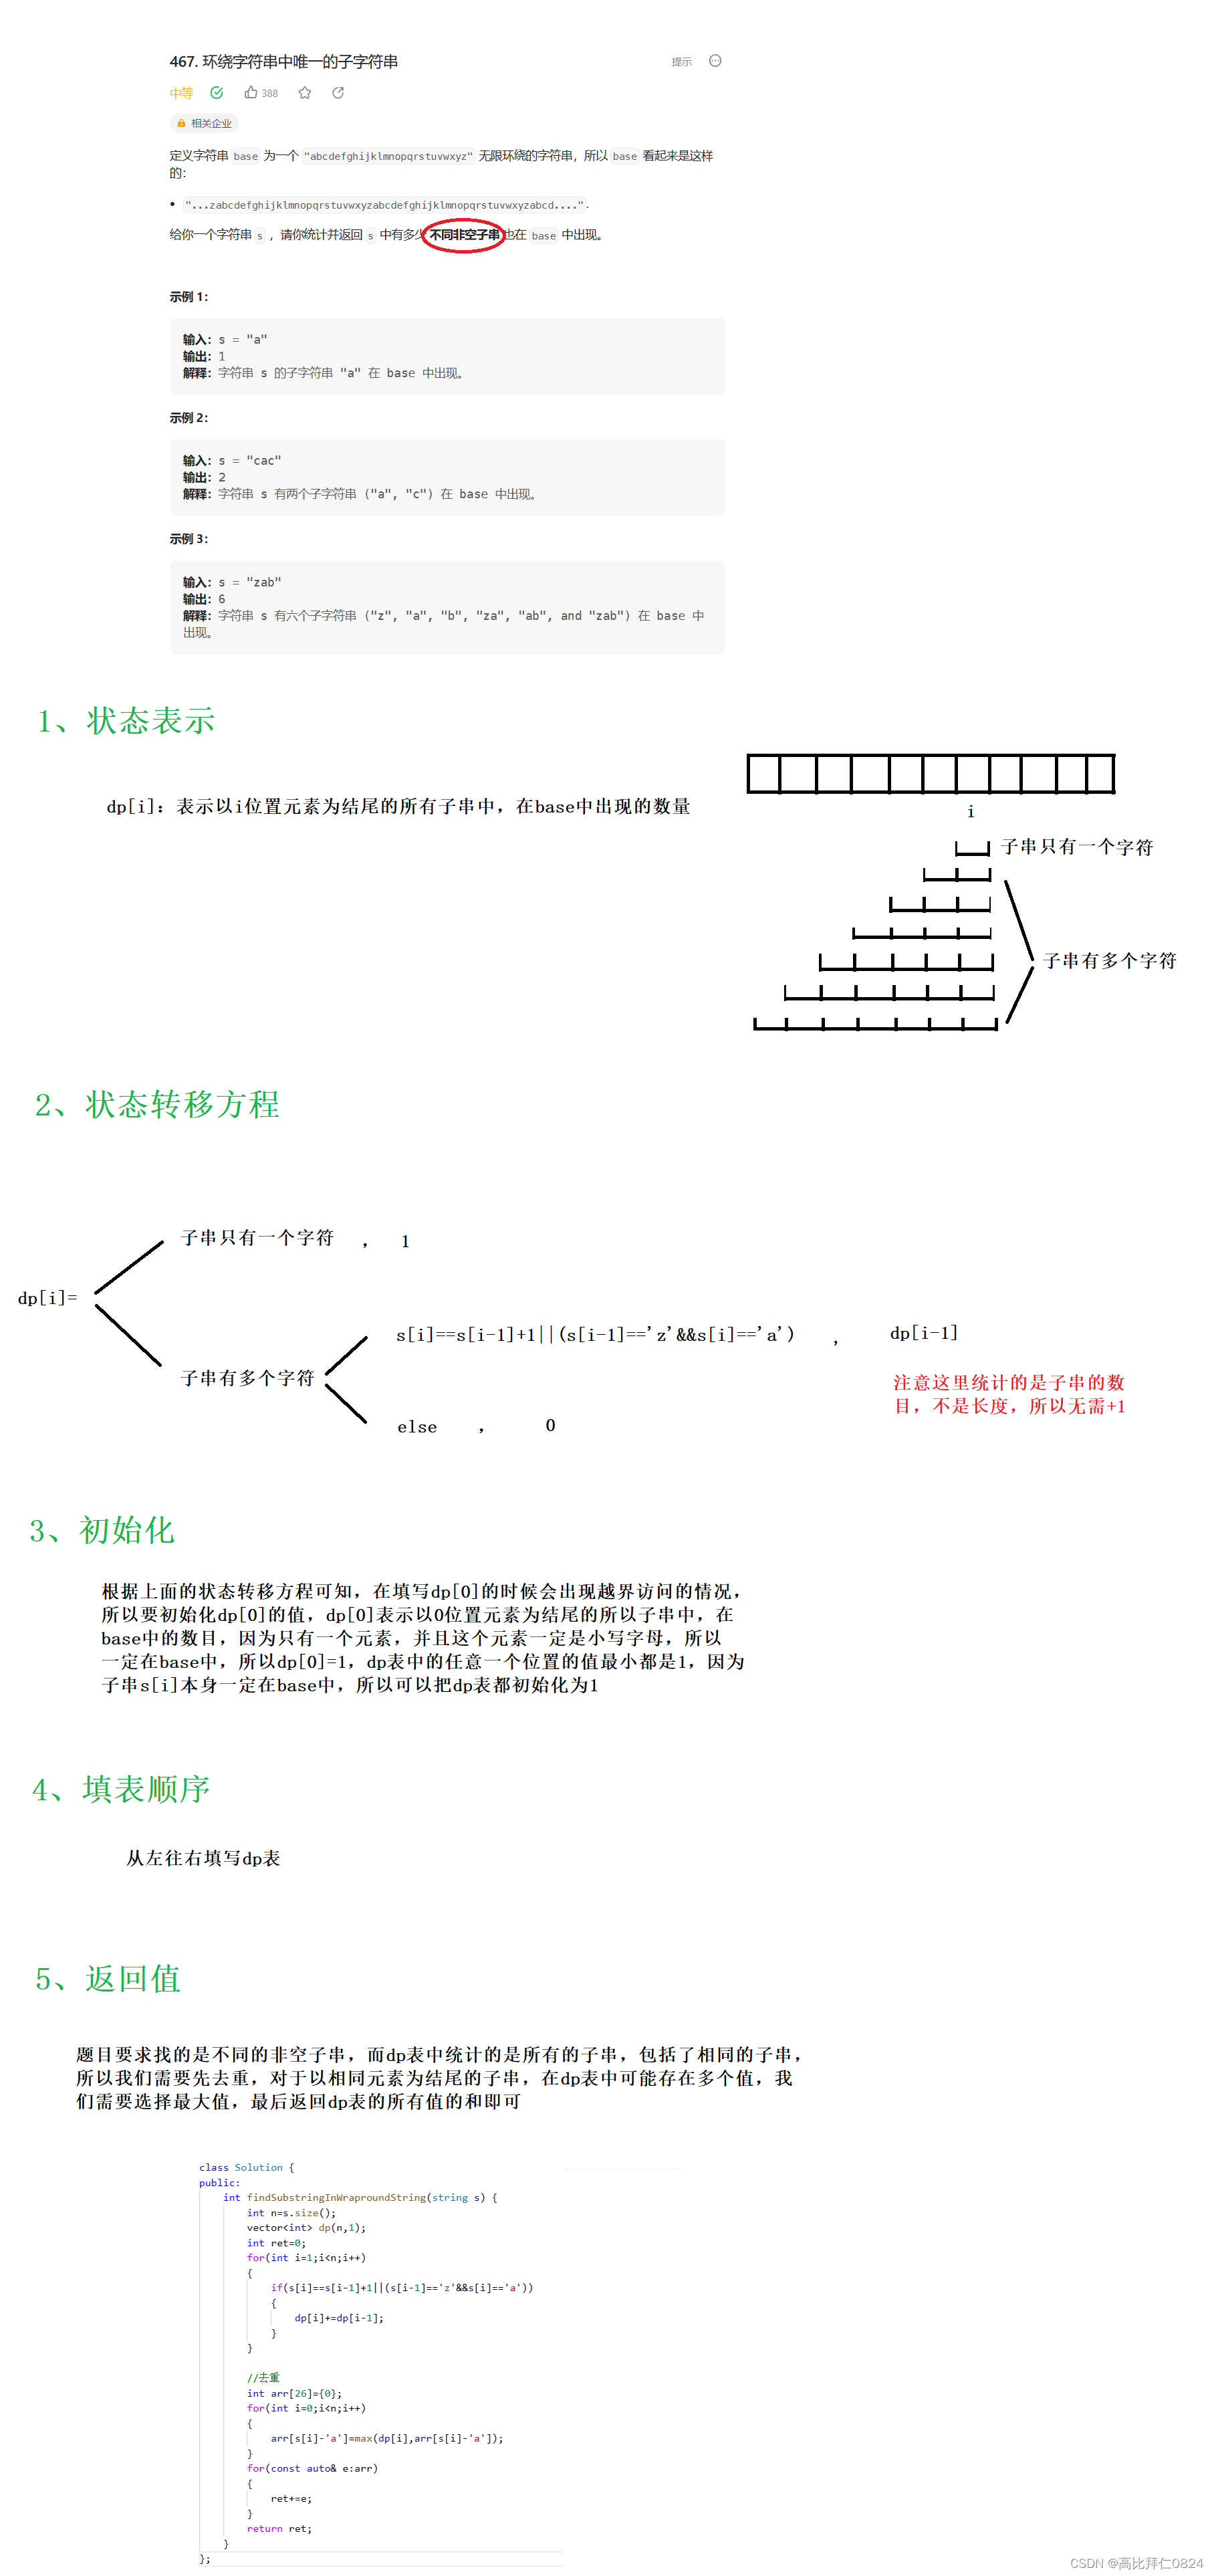
力扣 -- 467. 环绕字符串中唯一的子字符串
一、题目 二、解题步骤 下面是用动态规划的思想解决这道题的过程,相信各位小伙伴都能看懂并且掌握这道经典的动规题目滴。 三、参考代码 class Solution { public:int findSubstringInWraproundString(string s) {int ns.size();vector<int> dp(n,1);int re…...
: 制作 Debian rootfs)
Hi3798MV200 恩兔N2 NS-1 (四): 制作 Debian rootfs
目录 Hi3798MV200 恩兔N2 NS-1 (一): 设备介绍和刷机说明Hi3798MV200 恩兔N2 NS-1 (二): HiNAS海纳思使用和修改Hi3798MV200 恩兔N2 NS-1 (三): 制作 Ubuntu rootfsHi3798MV200 恩兔N2 NS-1 (四): 制作 Debian rootfs 关于 Debian rootfs Debian 没有像 Ubuntu 提供 Ubuntu-…...
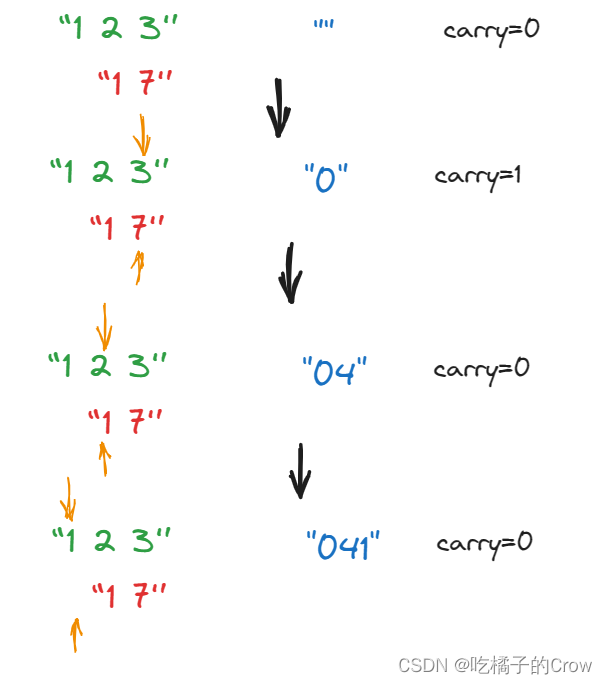
面试热题(字符串相加)
给定两个字符串形式的非负整数 num1 和num2 ,计算它们的和并同样以字符串形式返回。 你不能使用任何內建的用于处理大整数的库(比如 BigInteger), 也不能直接将输入的字符串转换为整数形式。 输入:num1 "11"…...

内存屏障核心解析:从指令重排到 StoreLoad 屏障的本质
多核并发编程中,内存屏障是保证可见性与顺序性的核心。本文将用最通俗的方式拆解四种内存屏障,重点剖析StoreLoad为何是最强且代价最高的屏障,并说明它在Java中的体现。 一、问题背景:CPU为什么会乱序执行? 为了提升指…...

OpenClaw与多模型协同策略:释放AI组合的强大力量
OpenClaw与多模型协同策略:释放AI组合的强大力量 在AI技术快速发展的今天,单一模型已经难以满足复杂任务的需求。OpenClaw作为一个强大的AI智能体平台,通过多模型协同策略,将不同模型的优势结合起来,实现了11>2的效…...
)
阿里通义实验室FunAudioLLM实战:如何用SenseVoice快速搭建多语言语音识别系统(附避坑指南)
阿里通义实验室FunAudioLLM实战:如何用SenseVoice快速搭建多语言语音识别系统(附避坑指南) 在语音技术快速发展的今天,多语言语音识别已成为企业数字化转型的关键能力。阿里通义实验室开源的FunAudioLLM项目,特别是其中…...

AI入门指南:盘点那些媲美ChatGPT的国产大模型工具
1. 国产AI大模型崛起:为什么你需要关注它们? 最近两年,AI大模型的发展速度让人瞠目结舌。作为AI领域的从业者,我亲眼见证了国产大模型从追赶到并驾齐驱的整个过程。很多人可能不知道,现在国内已经有好几款大模型在实际…...

Dify 私有化部署实战:Linux openEuler 环境下的 Docker Compose 安装指南
1. 环境准备与系统配置 在开始Dify私有化部署之前,我们需要确保openEuler系统环境满足基本要求。我去年在国产化项目中首次接触openEuler时,发现这个华为推出的Linux发行版对ARM架构有很好的支持,特别适合企业级应用部署。 1.1 硬件需求检查 …...
)
Unity3D RPG游戏开发:从零搭建一个完整的战斗系统(含NavMesh实战)
Unity3D RPG游戏战斗系统深度实战:从NavMesh到技能连招 在独立游戏开发领域,RPG战斗系统的实现质量往往决定了游戏的核心体验。不同于平台跳跃或射击游戏的即时反馈,RPG战斗需要平衡策略性、操作感和数值成长——这正是许多开发者面临的挑战。…...

告别截图焦虑!这7款ChromeFK插件,让你一键搞定网页长截图和翻译
告别截图焦虑!7款Chrome插件打造高效网页信息处理工作流 每次遇到需要保存的网页内容,你是否还在反复调整滚动条手动拼接截图?面对满屏英文资料时,是否依然在翻译软件和浏览器之间来回切换?在这个信息过载的时代&#…...

【超全】基于微信小程序的在线小说阅读平台【包括源码+文档+调试】
💕💕发布人: 码上青云 💕💕各类成品Java毕设 。javaweb,ssm,springboot等项目,欢迎咨询。 💕💕程序开发、技术解答、代码讲解、文档, ἱ…...

YOLOv8模型训练脚本打包成exe?小心这个RuntimeError坑,附PyInstaller避坑指南
YOLOv8模型打包实战:从RuntimeError解决到PyInstaller高级配置 在计算机视觉项目的实际部署中,将训练好的YOLOv8模型或训练脚本打包成独立的Windows可执行文件(.exe)是许多开发者的刚需。这不仅能简化部署流程,还能保护…...

5G终端开发者必看:NR协议中T3247 Timer的30分钟封锁机制详解
5G终端开发者必看:NR协议中T3247 Timer的30分钟封锁机制详解 在5G NR协议栈中,安全机制设计始终是终端开发的核心挑战之一。当终端在接入过程中遭遇完整性保护失败时,网络会通过T3247 Timer触发保护性封锁,这种机制直接影响终端用…...