face_recognition人脸识别与人脸检测
1、安装face_recognition库
pip install face_recognitionface_recognition库的人脸识别是基于业内领先的C++开源库dlib中的深度学习模型,安装face_recognition库的同时会一并安装dlib深度学习框架。
2、face_recognition库的使用
1)load_image_file加载要识别的人脸图像
这个方法主要是用于加载要识别的人脸图像,返回的数据是numpy数组,记录了图片的所有像素的特征向量。
obama_image = face_recognition.load_image_file("ZXH.jpg")2)face_locations定位图中所有人脸的像素位置
该方法返回值是一个列表形式,列表中每一行是一张人脸的位置信息,包括[top,right,bottom,left]。
import face_recognition
import cv2image = face_recognition.load_image_file("ZXH.jpg")
face_locations = face_recognition.face_locations(image)
for face_location in face_locations:top, right, bottom, left = face_location  star = (left, top)end = (right, bottom)cv2.rectangle(image, star, end, (0, 0, 255), thickness=2)
cv2.imshow('window', image)
cv2.waitKey()
3)face_encodings获取图像中所有面部编码信息
该方法返回值是一个编码列表,参数仍是要识别的图像对象。每张人脸的编码信息是一个128维向量。
import face_recognitionimage = face_recognition.load_image_file("ZXH.jpg")
face_encodings = face_recognition.face_encodings(image)
for face_encoding in face_encodings:print("信息编码长度为:{}\n编码信息为:{}".format(len(face_encoding), face_encoding))
4)compare_faces由面部编码信息进行面部识别匹配
该方法主要用于匹配两个面部特征编码,利用这两个特征向量的内积来衡量相似度,根据阈值确定是否是同一个人。
第一个参数是多张脸的面部编码列表,第二个参数是单张脸面部编码,compare_faces会将第二个参数中的编码信息与第一个参数中的所有编码信息依次匹配,返回一个布尔列表。
tolerance值可根据实际效果调整,值越小,匹配越严格。
import face_recognition# ZXH.jpg为多人合照
image1 = face_recognition.load_image_file("ZXH.jpg")
# ZXH1.jpg为单人照
image2 = face_recognition.load_image_file("ZXH1.jpg")
# 获取多人图片的面部编码信息
known_face_encodings = face_recognition.face_encodings(image1)# 要进行识别的单张图片的特征,只需要拿到第一个人脸的编码信息
compare_face_encoding = face_recognition.face_encodings(image2)[0]
# 注意第二个参数,只能是单个面部特征编码,不能列表
matches = face_recognition.compare_faces(known_face_encodings, compare_face_encoding,tolerance=0.39)print(matches)
5)face_distance获得比较面部的欧式距离
该方法给定面部编码列表,将其与已知面部编码比较,获得每个比较面部的欧式距离,距离就是面孔的相似程度,返回一个列表。
face_distances = face_recognition.face_distance(known_face_encodings, face_encoding)
# 参数:
# know_face_encodings:已知多目标编码列表
# face_encoding:要比较的人脸编码
完整代码
import face_recognition
import cv2
import numpy as np
import pyzed.sl as sl# Get a reference to webcam #0 (the default one)
# video_capture = cv2.VideoCapture(0)cam = sl.Camera()
init = sl.InitParameters()
init.camera_resolution = sl.RESOLUTION.HD720
init.depth_mode = sl.DEPTH_MODE.PERFORMANCE
status = cam.open(init)
if status != sl.ERROR_CODE.SUCCESS:print(repr(status))exit(1)runtime = sl.RuntimeParameters()
mat = sl.Mat()print("  Quit : CTRL+C\n")# Load a sample picture and learn how to recognize it.
obama_image = face_recognition.load_image_file("ZXH.jpg")
obama_face_encoding = face_recognition.face_encodings(obama_image)[0]# Load a second sample picture and learn how to recognize it.
biden_image = face_recognition.load_image_file("CW.jpg")
biden_face_encoding = face_recognition.face_encodings(biden_image)[0]# Create arrays of known face encodings and their names
known_face_encodings = [obama_face_encoding,biden_face_encoding
]
known_face_names = ["ZXH","CW"
]# Initialize some variables
face_locations = []
face_encodings = []
face_names = []
process_this_frame = Truewhile True:# Grab a single frame of video# ret, frame = video_capture.read()if (cam.grab(runtime) == sl.ERROR_CODE.SUCCESS):cam.retrieve_image(mat, sl.VIEW.LEFT)frame = mat.get_data()# 将图像从BGR格式转换为RGB格式# frame = cv2.cvtColor(image, cv2.COLOR_BGR2RGB)# Only process every other frame of video to save time# if process_this_frame:# Resize frame of video to 1/4 size for faster face recognition processingsmall_frame = cv2.resize(frame, (0, 0), fx=0.25, fy=0.25)# Convert the image from BGR color (which OpenCV uses) to RGB color (which face_recognition uses)rgb_small_frame = small_frame[:, :, ::-1]cv2.imwrite("new.jpg", rgb_small_frame)rgb_small_frame = face_recognition.load_image_file("new.jpg")# Find all the faces and face encodings in the current frame of videoface_locations = face_recognition.face_locations(rgb_small_frame)face_encodings = face_recognition.face_encodings(rgb_small_frame, face_locations)face_names = []for face_encoding in face_encodings:# See if the face is a match for the known face(s)matches = face_recognition.compare_faces(known_face_encodings, face_encoding)name = "Unknown"# # If a match was found in known_face_encodings, just use the first one.# if True in matches:#     first_match_index = matches.index(True)#     name = known_face_names[first_match_index]# Or instead, use the known face with the smallest distance to the new faceface_distances = face_recognition.face_distance(known_face_encodings, face_encoding)best_match_index = np.argmin(face_distances)if matches[best_match_index]:name = known_face_names[best_match_index]face_names.append(name)process_this_frame = not process_this_frame# Display the resultsfor (top, right, bottom, left), name in zip(face_locations, face_names):# Scale back up face locations since the frame we detected in was scaled to 1/4 sizetop *= 4right *= 4bottom *= 4left *= 4# Draw a box around the facecv2.rectangle(frame, (left, top), (right, bottom), (0, 0, 255), 2)# Draw a label with a name below the facecv2.rectangle(frame, (left, bottom - 35), (right, bottom), (0, 0, 255), cv2.FILLED)font = cv2.FONT_HERSHEY_DUPLEXcv2.putText(frame, name, (left + 6, bottom - 6), font, 1.0, (255, 255, 255), 1)# Display the resulting imagecv2.imshow('Video', frame)# Hit 'q' on the keyboard to quit!if cv2.waitKey(1) & 0xFF == ord('q'):break# Release handle to the webcam
cv2.destroyAllWindows()
cam.close()
问题1:
compute_face_descriptor(): incompatible function arguments. The following argument types are supported:1. (self: _dlib_pybind11.face_recognition_model_v1, img: numpy.ndarray[(rows,cols,3),numpy.uint8], face: _dlib_pybind11.full_object_detection, num_jitters: int = 0, padding: float = 0.25) -> _dlib_pybind11.vector2. (self: _dlib_pybind11.face_recognition_model_v1, img: numpy.ndarray[(rows,cols,3),numpy.uint8], num_jitters: int = 0) -> _dlib_pybind11.vector3. (self: _dlib_pybind11.face_recognition_model_v1, img: numpy.ndarray[(rows,cols,3),numpy.uint8], faces: _dlib_pybind11.full_object_detections, num_jitters: int = 0, padding: float = 0.25) -> _dlib_pybind11.vectors...
解决办法:
改变尺寸后的图像无法进行编码,先将其保存成图片,再打开,即可进行编码。
# BGR2RGB
rgb_small_frame = small_frame[:, :, ::-1]
cv2.imwrite("new.jpg", rgb_small_frame)
rgb_small_frame = face_recognition.load_image_file("new.jpg")
参考链接 Github开源人脸识别项目face_recognition - 知乎
Python中因为浅拷贝导致调用face_recognition.encodings(img)出现的典型问题_vivisol的博客-CSDN博客
相关文章:

face_recognition人脸识别与人脸检测
1、安装face_recognition库 pip install face_recognition face_recognition库的人脸识别是基于业内领先的C开源库dlib中的深度学习模型,安装face_recognition库的同时会一并安装dlib深度学习框架。 2、face_recognition库的使用 1)load_image_file加…...
vue3获得url上的参数值
1、引入 import { useRoute } from vue-router2、获得const route useRoute() console.log(route.query.number)...

chapter15:springboot与监控管理
Spring Boot与监控管理视频 1. 简介 通过引入spring-boot-starter-actuator, 可以使用SpringBoot为我们提供的准生产环境下的应用监控和管理功能。我们可以通过http, jmx, ssh协议来进行操作,自动得到审计、健康及指标信息等。 步骤: 引入spring-boo…...

http历史版本
1,HTTP0.9 最早的http版本,后来才被定义为0.9版本。 这时候通信采用的是纯文本格式; 只支持get请求,且在服务器响应之后就关闭连接; 没有请求头的概念,功能比较简单。 2,HTTP1.0 这个版本增…...
【Go语言】Golang保姆级入门教程 Go初学者chapter2
【Go语言】变量 VSCode插件 setting的首选项 一个程序就是一个世界 变量是程序的基本组成单位 变量的使用步骤 [外链图片转存失败,源站可能有防盗链机制,建议将图片保存下来直接上传(img-zuxG8imp-1691479164956)(https://cdn.staticaly.com/gh/hudiework/imgmain/image-20…...
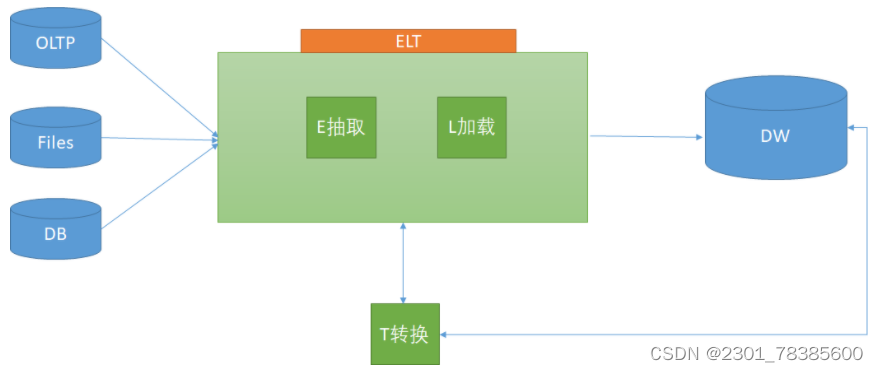
关于ETL的两种架构(ETL架构和ELT架构) qt
ETL,是英文 Extract-Transform-Load 的缩写,用来描述将数据从来源端经过抽取(extract)、转换(transform)、加载(load)至目的端的过程。ETL一词较常用在数据仓库…...

【Linux】进程间通信——管道
目录 写在前面的话 什么是进程间通信 为什么要进行进程间通信 进程间通信的本质理解 进程间通信的方式 管道 System V IPC POSIX IPC 管道 什么是管道 匿名管道 什么是匿名管道 匿名管道通信的原理 pipe()的使用 匿名管道通信的特点 拓展代码 命名管道 什么是命…...
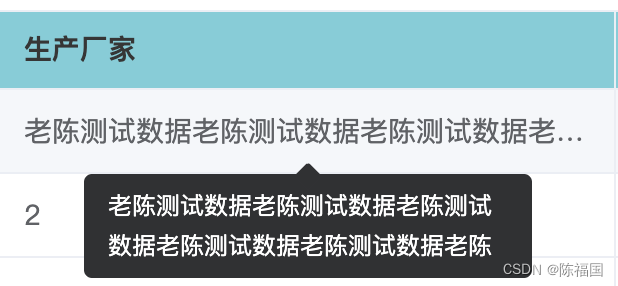
Element-plus中tooltip 提示框修改宽度——解决方案
tooltip 提示框修改宽度方法: 在element中,想要设置表格的内容,超出部分隐藏,鼠标悬浮提示 可以在el-table 上添加show-overflow-tooltip属性 同时可以通过tooltip-options配置提示信息 如下图代码 <el-tableshow-overflo…...
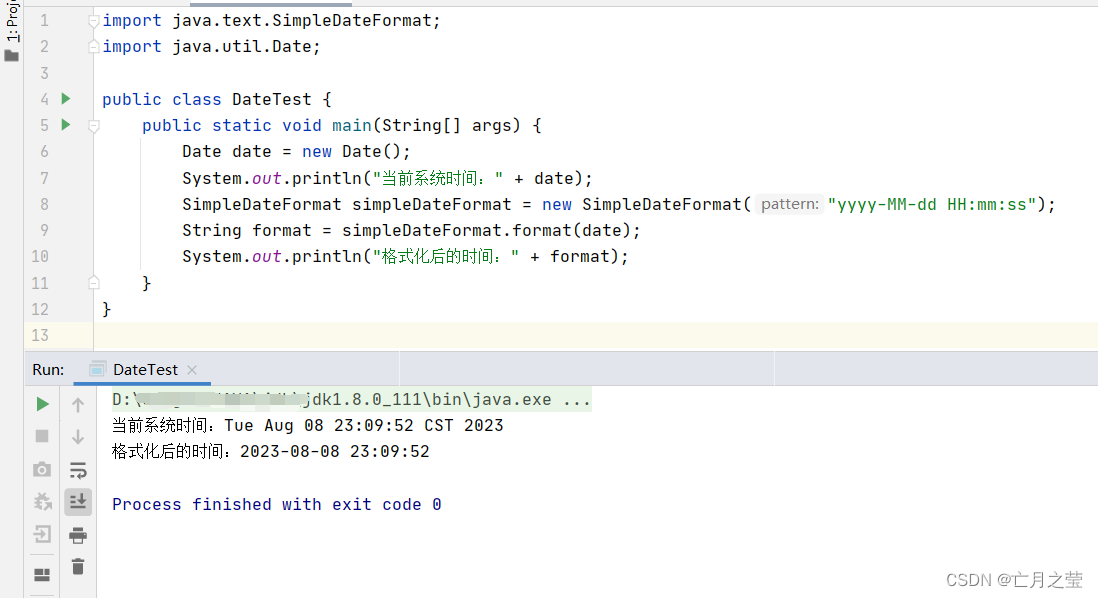
java实现当前系统时间格式化
import java.text.SimpleDateFormat; import java.util.Date;public class DateTest {public static void main(String[] args) {Date date new Date();System.out.println("当前系统时间:" date);SimpleDateFormat simpleDateFormat new SimpleDateFo…...

篇十一:享元模式:共享细粒度对象
篇十一:“享元模式:共享细粒度对象” 设计模式是软件开发中的重要工具,享元模式(Flyweight Pattern)是结构型设计模式的一种。享元模式旨在通过共享细粒度的对象,减少内存消耗和提高性能。在设计模式学习中…...
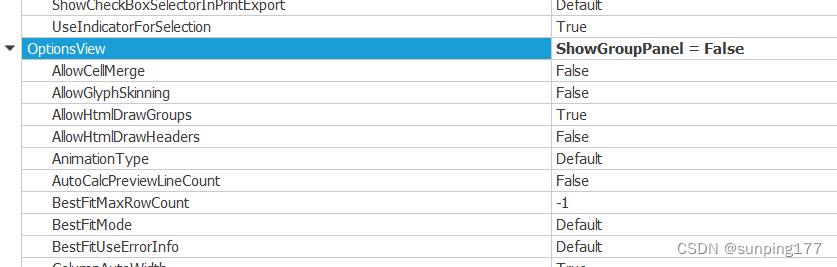
Dev控件 Gridcontrol,gridview 实现多选功能
在网上看了好多实现dev控件GridControl多选功能的方法,都很麻烦,其实GridControl有一个自带的实现多选功能的控件,很简单。 实现效果如下 无需代码代码,使用GridControl中自带的多选功能,在界面直接设置即可 1.找到要…...
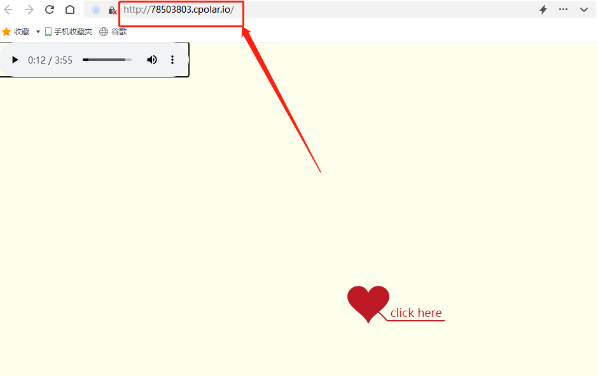
内网穿透:如何通过公网访问本地Web服务器?
文章目录 前言1. 首先安装PHPStudy2.下载一个开源的网页文件3. 选择“创建网站”并将网页内容指向下载好的开源网页文件4. 打开本地网页5. 打开本地cpolar客户端6. 保存隧道设置 生成数据隧道 前言 随着科技进步和时代发展,计算机及互联网已经深深融入我们的生活和…...

在qemu中挂载镜像文件
将镜像文件作为交换分区 创建镜像文件: dd if/dev/zero ofswap.img bs512 count131072 qemu-system-arm -nographic -M vexpress-a9 -m 64M -kernel arch/arm/boot/zImage -append "rdinit/linuxrc consolettyAMA0 loglevel8" -dtb arch/arm/boot/dts/…...

报错注入(主键重复)攻击原理
基本原理 利用数据表中主键不能重复的特点,通过构造重复的主键,使得数据库报错,并将报错结果返回到前端。 SQL说明函数 以pet数据表为例进行说明 rond(): 返回[0,1)区间内的任意浮点数。 count(): 返回每个组的列行数。 如࿰…...

Golang基础教程
Golang基础教程 golang简介安装golanggolang开发工具go常用命令golang开发 vscode快捷键如何编写golang代码golang标识符、关键字、命名规则golang变量go语言常量go语言数据类型go语言布尔类型go语言数字类型golang字符串golang格式化输出golang运算符go语言中的流程控制golan…...
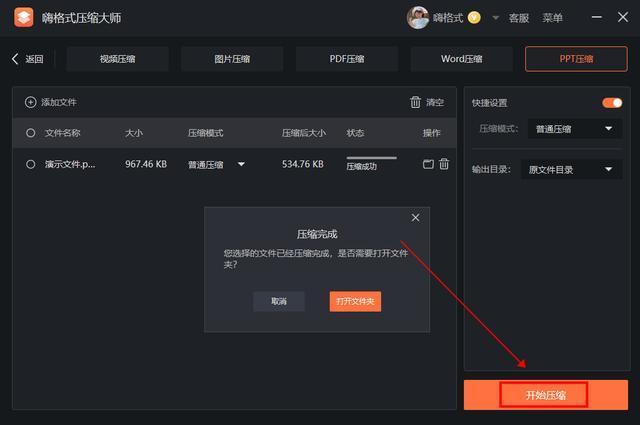
ppt压缩文件怎么压缩最小?文件压缩技巧分享
在日常的工作和学习中,难免会遇到PPT太大,需要将其压缩变小的情况,但很多朋友还不知道怎么压缩PPT文件,下面就给大家分享几个简单的方法,分分钟缩小过大的PPT文件。 一、PowerPoint PowerPoint就是微软公司的演示文稿…...
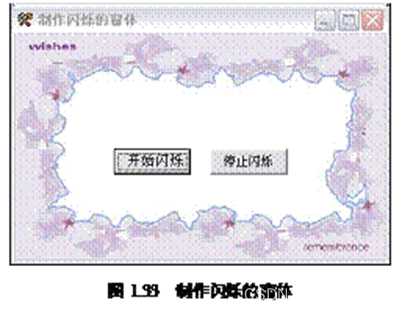
实例033 制作闪烁的窗体
实例说明 Windows系统中,当程序在后台运行时,如果某个窗口的提示信息需要用户浏览,该窗口就会不停的闪烁,这样就会吸引用户的注意。同样,如果在自己的程序中使某个窗口不停的闪烁就会吸引用户的注意。本例设计了一个闪…...
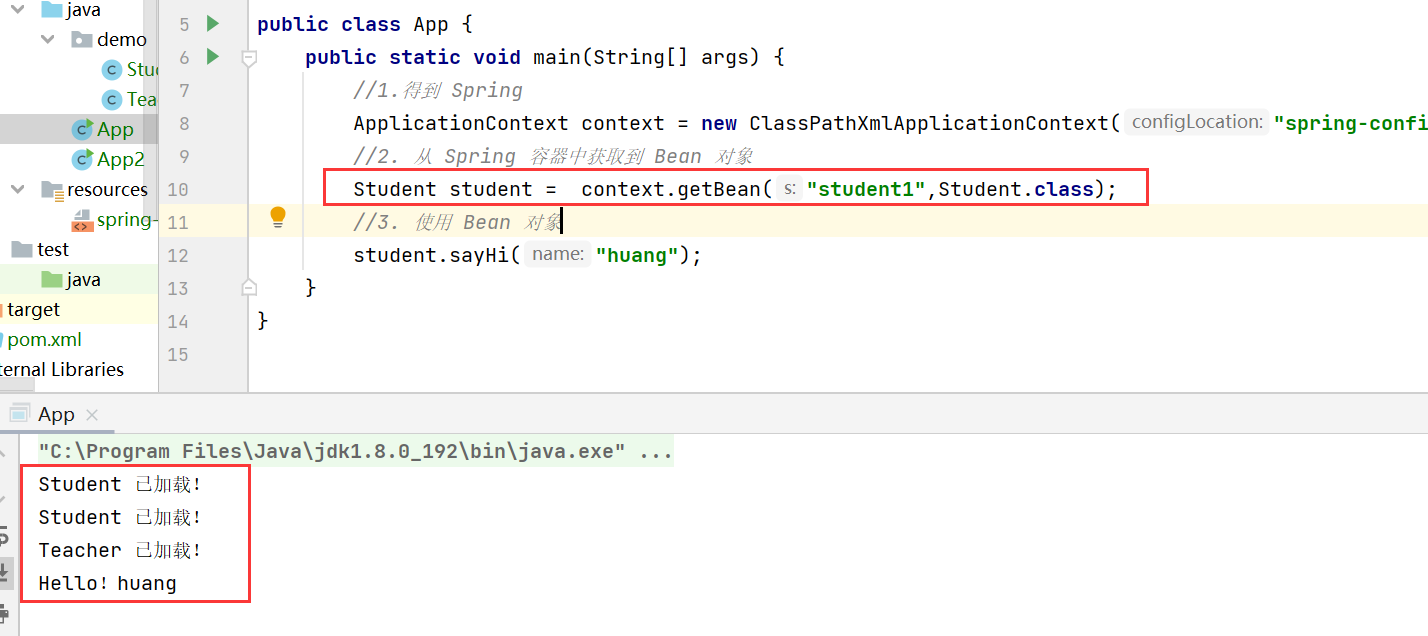
【JavaEE进阶】Spring创建与使用
文章目录 一. 创建 Spring 项目1.1 创建一个Maven项目1.2 添加Spring依赖1.4. 创建一个启动类 二. 将 Bean 对象存放至 Spring 容器中三. 从 Spring 容器中读取到 Bean1. 得到Spring对象2. 通过Spring 对象getBean方法获取到 Bean对象【DI操作】 一. 创建 Spring 项目 接下来使…...
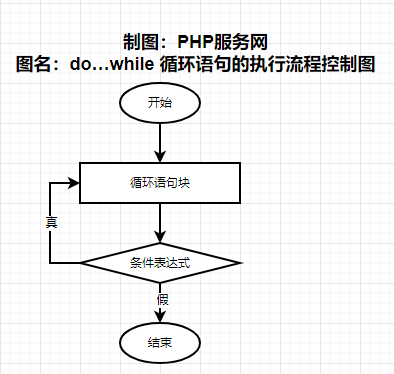
PHP8的循环控制语句-PHP8知识详解
我们在上一节讲的是条件控制语句,本节课程我们讲解循环控制语句。循环控制语句中,主要有for循环、while循环、do...while循环和foreach循环。 在编写代码时,经常需要反复运行同一代码块。我们可以使用循环来执行这样的任务,而不是…...

第八次作业
一,.什么是数据认证,有什么作用,有哪些实现的技术手段? 数据认证是指保证数据的真实性、完整性和可信度,以确保数据不被篡改或伪造。其作用包括但不限于: 保护关键数据不被恶意篡改或损坏 提供数据来源的可靠性和安全…...

家庭宽带上网背后的隐形功臣:一文拆解光猫/路由器里的NAT和DHCP是怎么协同工作的
家庭网络中的隐形守护者:NAT与DHCP如何编织你的数字生活 当你躺在沙发上用手机追剧时,是否想过为什么所有家庭设备都能和平共处在同一网络?192.168.1.x这串神秘数字背后,藏着两套精密的协议系统——它们像建筑物的水电管线般隐形却…...

用 ai 生成带货/电商短视频,有哪些工具比较好用?下面推荐几个
在 2026 年,短视频内容已成为驱动电商转化的核心引擎。然而,许多商家仍面临本土化适配难、制作周期长、精品成本高等痛点。本文将针对“怎么用 ai 生成带货视频,有哪些工具比较好用?”以及“AI 生成电商短视频的工具有哪些&#x…...

以 AIGC 贯通设计 — 生产 — 营销:集之互动推动服装电商供应链进入全域协同新阶段
在快时尚主导、高频上新成为标配、流量窗口以周甚至以天计算的今天,服装电商的核心竞争力早已从单一的产品力、营销力,转向全链路供应链效率的竞争。当前行业普遍面临的痛点不再是某一环节的短板,而是全链路割裂:设计端与市场需求…...

写给前端的 CANN-ops-fft:昇腾FFT算子库到底是啥?
写给前端的 CANN-ops-fft:昇腾FFT算子库到底是啥? 之前做信号处理,兄弟问我:“哥,我想做频域分析,昇腾上有现成的 FFT 库吗?” 好问题。今天一次说清楚。 ops-fft 是啥? ops-fft Op…...

Crypto-JS WordArray 数据结构终极指南:深入解析加密算法的核心基石
Crypto-JS WordArray 数据结构终极指南:深入解析加密算法的核心基石 【免费下载链接】crypto-js JavaScript library of crypto standards. 项目地址: https://gitcode.com/gh_mirrors/cr/crypto-js 你是否曾在使用 Crypto-JS 进行加密操作时,困惑…...
)
保姆级教程:用ENVI+SNAP搞定哨兵1号雷达数据预处理(附水稻监测实战)
从零掌握哨兵1号雷达数据处理:ENVI与SNAP双软件协同实战指南 当第一次接触哨兵1号雷达数据时,许多研究者都会被其独特的成像机制和处理流程所困扰。与光学遥感不同,雷达数据需要经过一系列专业预处理才能用于分析。本文将带你系统掌握ENVI和…...

Python之rf-phate包语法、参数和实际应用案例
一、RF‑PHATE 包核心功能 RF‑PHATE 是一个有监督降维与可视化包,核心是把随机森林(RF)特征重要性与 PHATE(基于热扩散的流形嵌入) 结合,生成标签导向的低维嵌入,凸显与响应变量相关的结构、抑…...

PPTist完全手册:零成本打造专业演示文稿的终极方案
PPTist完全手册:零成本打造专业演示文稿的终极方案 【免费下载链接】PPTist PowerPoint-ist(/pauəpɔintist/), An online presentation application that replicates most of the commonly used features of MS PowerPoint, allowing for t…...

抓包科普小知识
1、什么是抓包 抓包就是将网络传输发送与接收的数据包进行截获、重发、编辑、转存等操作,通过抓包可以: 分析网络问思路就是设置一个中间人进程负责抓包,每次目标进程之间的会话都先与中间人进程通信,再进行转发。业务分析分析网…...

LiveSplit终极指南:速度跑者的专业计时解决方案
LiveSplit终极指南:速度跑者的专业计时解决方案 【免费下载链接】LiveSplit A sleek, highly customizable timer for speedrunners. 项目地址: https://gitcode.com/gh_mirrors/li/LiveSplit LiveSplit是一款专为速度跑者设计的专业计时软件,通过…...