Python——添加照片边框
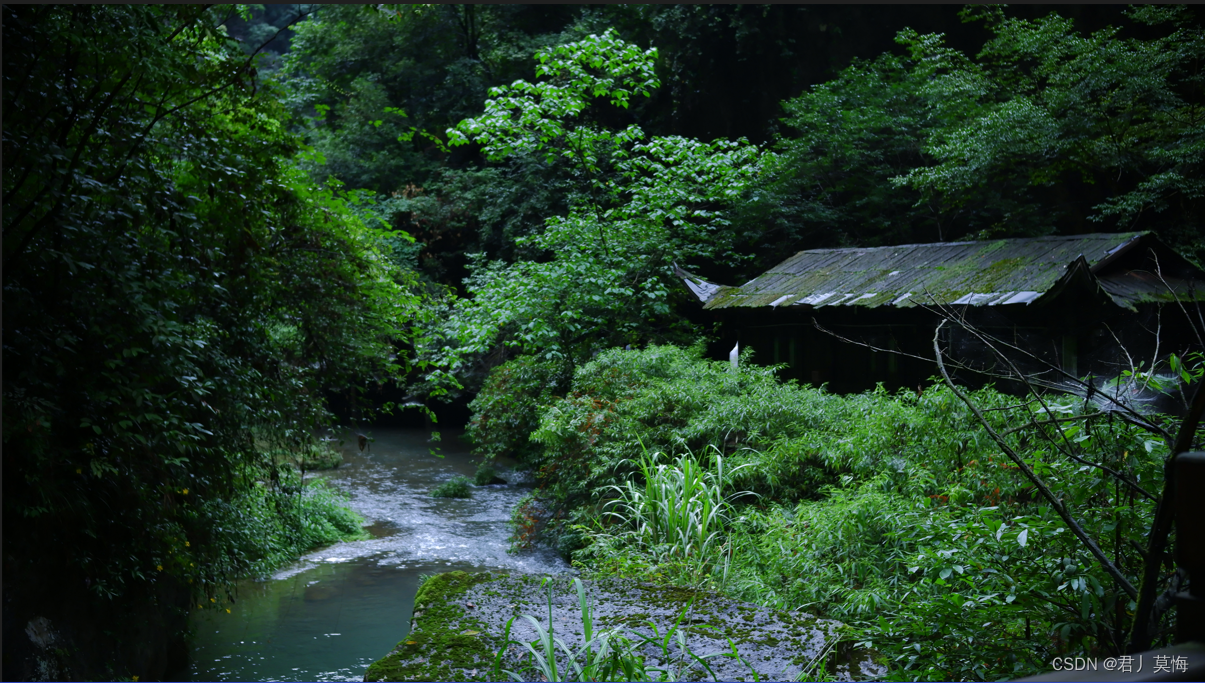
原图:
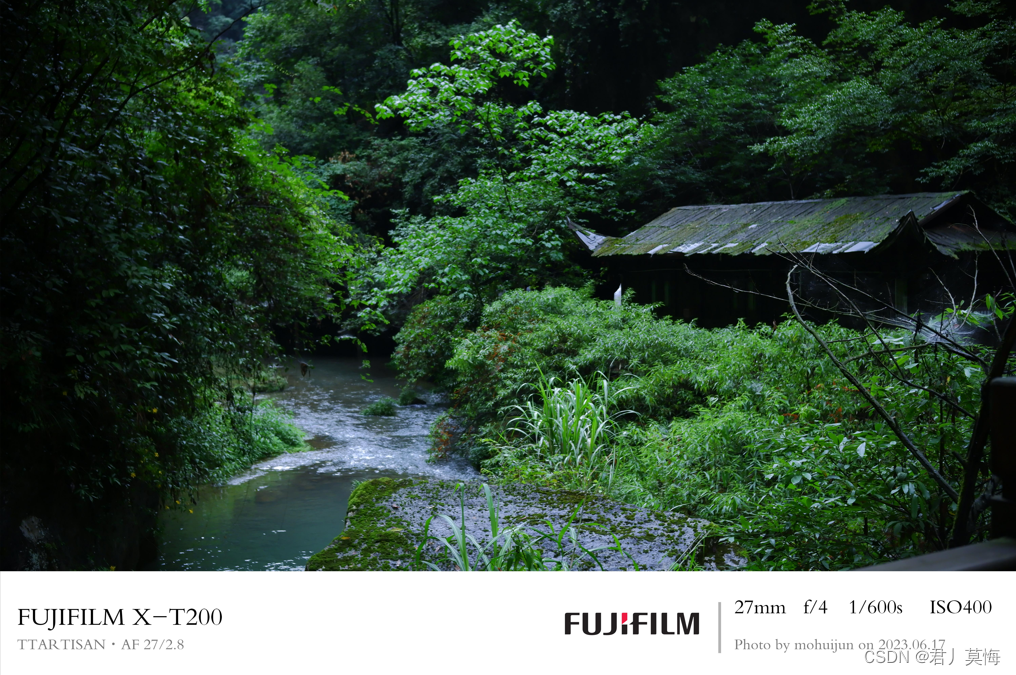
添加边框后:
 添加边框会读取照片的exif信息如时间、相机型号、品牌以及快门焦段等信息,将他们显示在下面的边框中。
获取当前py文件路径
import os
#get path that py file located
def Get_Currentpath():file_path = os.path.abspath(__file__)dir_path = os.path.dirname(file_path)return dir_path
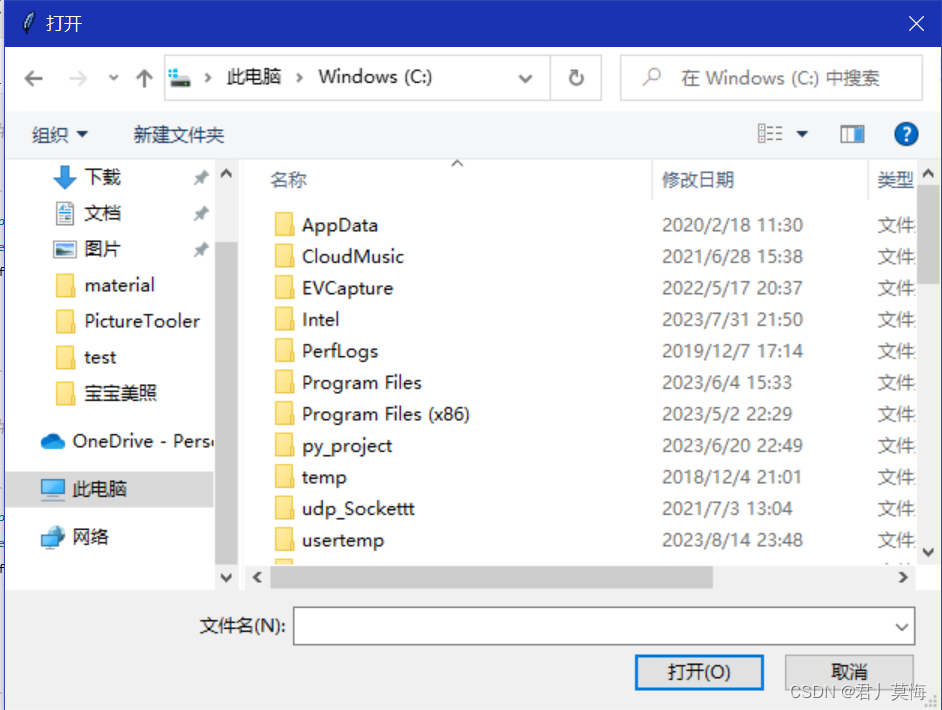
弹窗获取所选择文件路径
如下图使用tkinter库掉出弹窗选择指定图片,并获取所选择图片的绝对路径
import tkinter
#get file path that choosed
def Get_FilePath():root = tkinter.Tk()root.withdraw()f_path = filedialog.askopenfilename()return f_path
弹窗获取用户所选择的保存路径
将处理后的图片存储到所选的路径并指定文件名

def save_filePath():# 创建文件对话框root = tkinter.Tk()root.withdraw()# 弹出保存文件对话框file_path = filedialog.asksaveasfilename(defaultextension=".jpg", filetypes=[("JPG File", "*.jpg"), ("PNG file","*.png"),("All Files", "*.*")])print(file_path)# 如果用户选择了文件路径,则返回路径if file_path:return file_pathelse:pass
创建文字图片
def createfond(size=160,str=' ',color=(0,0,0)):lopath = Get_Currentpath()fondpath = lopath+r'\material\方正楷体简体.TTF'dignum=0alphanum=0othernum=0for i in str:if i.isdigit():dignum+=1elif i.isalpha():alphanum+=1else:othernum+=1`在这里插入代码片`othernum = len(str)-dignumx=int(dignum*size*0.6)+int(alphanum*size*0.6)+int(othernum*size*0.5)y=int(size*1.2)img = Image.new("RGBA",(x,y),'white')draw = ImageDraw.Draw(img)#创建一个绘画对象fnt = ImageFont.truetype(fondpath,size)draw.text((0,0),str,fill=color,font=fnt)#img.show()return img,x,y
获取字体ttf文件路径
fondpath = lopath+r'\material\方正楷体简体.TTF'
计算文字所占用的空间大小从而生成合适大小的image图像
x=int(dignum*size*0.6)+int(alphanum*size*0.6)+int(othernum*size*0.5)y=int(size*1.2)img = Image.new("RGBA",(x,y),'white')
使用imageDraw 和 ImageFont方法在image图像上写文本
from PIL import Image
from PIL import ImageFont
from PIL import ImageDraw    draw = ImageDraw.Draw(img)#创建一个绘画对象
fnt = ImageFont.truetype(fondpath,size)
draw.text((0,0),str,fill=color,font=fnt)
生成文字图片如下

最后返回的是处理好的文本图像变量和图像的长和高
return img,x,y
创建边框
#creat the border
def CreateBorder(logopath,color = (255,255,255)):Src_path = Get_FilePath()pictype = picturetype.picturesize.size_16_9img = Image.open(Src_path)#get exif dataexif_dict = piexif.load(Src_path)exif_bytes = piexif.dump(exif_dict)exif_mes = img._getexif()# 获取时间信息if "Exif" in exif_dict:exif_data = exif_dict["Exif"]#拍摄日期if piexif.ExifIFD.DateTimeOriginal in exif_data:datetime_original_0 = str(exif_data[piexif.ExifIFD.DateTimeOriginal].decode("utf-8"))#print("DateTimeOriginal:", datetime_original)datetime_original = datetime_original_0.replace(':','.',2)datetime_original = datetime_original[0:10]print(datetime_original)else:   datetime_original = ' '#焦距if piexif.ExifIFD.FocalLength in exif_data:FocalLength = str(int(exif_data[piexif.ExifIFD.FocalLength][0]/100))+"mm"#print("focal length:",FocalLength)else:FocalLength = ' '#ISOif piexif.ExifIFD.ISOSpeedRatings in exif_data:ISO = 'ISO'+str(exif_data[piexif.ExifIFD.ISOSpeedRatings])#print("ISO:",ISO)else:ISO = ' '#快门时间if piexif.ExifIFD.ExposureTime in exif_data:exposure_time = exif_data[piexif.ExifIFD.ExposureTime]shutter_speed = exposure_time[0] / exposure_time[1]shutter_speed = int(1/shutter_speed)shutter_speed = '1/'+str(shutter_speed)+'s'else:shutter_speed = ' '#光圈if piexif.ExifIFD.FNumber in exif_data:f_number = exif_data[piexif.ExifIFD.FNumber]fnumber = 'f/'+str(int(f_number[0] / f_number[1]))#print("光圈",fnumber)else:fnumber = ' '#镜头品牌if piexif.ExifIFD.LensMake in exif_data:lensmaker = exif_data[piexif.ExifIFD.LensMake].decode("utf-8")#print('镜头品牌:',lensmaker)else:lensmaker = ' '#镜头型号if piexif.ExifIFD.LensModel in exif_data:lensmodel = exif_data[piexif.ExifIFD.LensModel].decode("utf-8")#print("镜头型号",lensmodel)else:lensmodel = ' 'camera_model = str(exif_dict["0th"].get(piexif.ImageIFD.Model).decode("utf-8"))camera_make = str(exif_dict["0th"].get(piexif.ImageIFD.Make).decode("utf-8"))print(camera_make,camera_model)signature = "Photo by mohuijun"else:pass#get width and highPicWidth = img.size[0]PicHigh = img.size[1]#picture is 16:9if int(PicWidth/16)==int(PicHigh/9):pictype = picturetype.picturesize.size_16_9lowwidth = int(PicWidth/3*2-PicHigh)Highwidth = 0letfWidth = 0rightwidth = 0borderhigh = lowwidthborderwide = PicWidthlogoimg = Image.open(logopath)logowidth = int(PicWidth/7)logohigh = int(logowidth/4.3)logoimg.thumbnail((logowidth,logohigh))#create new picNewPicWidth = PicWidth + letfWidth + rightwidthNewPicHigh = PicHigh + Highwidth + lowwidth#logo locationlogo_x = int(borderwide/20*11)logo_y = int((borderhigh-logohigh)/2)+PicHigh#create new pictureimg_new = Image.new('RGB', (NewPicWidth, NewPicHigh), color)#create exif messageimg_focallength,focallengthwid,focallengthhigh = createfond(size=120,str=FocalLength)img_data,datawid,datahigh = createfond(size=90,str=signature+' on '+datetime_original,color=(120,120,120))img_ISO,ISOwid,ISOhigh = createfond(size=120,str=ISO)img_shuttime,shutwid,shuthigh = createfond(size=120,str=shutter_speed)img_FNnumber,FNnumberwid,FNnumberhigh = createfond(size=120,str=fnumber)img_Lens,lenwid,lenhigh = createfond(size=90,str=(lensmaker+'·'+lensmodel),color=(120,120,120))# create '|'img_symbal,symbalwid,symbalhigh = createfond(size=350,str='|',color=(180,180,180))#create camera modeimg_camera,camerawid,camerahigh = createfond(150,str = camera_make+' '+camera_model)#create signature#img_signature,signaturewid,signaturehigh = createfond(size = 100,str = signature,color=(120,120,120))symbal_x = logo_x+logowidthsymbal_y = int((borderhigh-symbalhigh)/2)+PicHigh#exif message locationfocallength_x = symbal_x+symbalwidfocallength_y = symbal_y+int(symbalhigh/10)FNnumber_x = focallength_x+focallengthwidFNnumber_y = symbal_y+int(symbalhigh/10)shuttime_x = FNnumber_x+FNnumberwidshuttime_y = symbal_y+int(symbalhigh/10)ISO_x = shuttime_x+shutwidISO_y = symbal_y+int(symbalhigh/10)data_x = focallength_xdata_y = symbal_y+int(symbalhigh/3*2)Lens_x = 100Lens_y = symbal_y+int(symbalhigh/3*2)camera_x = 100camera_y = symbal_y+int(symbalhigh/5)img_new.paste(img, (letfWidth, Highwidth))#paste logoimg_new.paste(logoimg,(logo_x,logo_y))#paste exif messageimg_new.paste(img_focallength,(focallength_x,focallength_y))#img_new.paste(img_data,(data_x,data_y))img_new.paste(img_FNnumber,(FNnumber_x,FNnumber_y))img_new.paste(img_ISO,(ISO_x,ISO_y))img_new.paste(img_shuttime,(shuttime_x,shuttime_y))img_new.paste(img_Lens,(Lens_x,Lens_y))img_new.paste(img_data,(data_x,data_y))img_new.paste(img_symbal,(symbal_x,symbal_y))img_new.paste(img_camera,(camera_x,camera_y))Des_path = save_filePath()try:img_new.save(Des_path,exif=exif_bytes)except:print("地址无效")
获取所选图像绝对路径并打开
Src_path = Get_FilePath()pictype = picturetype.picturesize.size_16_9img = Image.open(Src_path)
使用piexif库获取图片的exif信息,得到拍摄时间、相机型号、光圈、快门等数据信息
import piexif#get exif data
exif_dict = piexif.load(Src_path)
exif_bytes = piexif.dump(exif_dict)
exif_mes = img._getexif()
# 获取时间信息
if "Exif" in exif_dict:exif_data = exif_dict["Exif"]#拍摄日期if piexif.ExifIFD.DateTimeOriginal in exif_data:datetime_original_0 = str(exif_data[piexif.ExifIFD.DateTimeOriginal].decode("utf-8"))#print("DateTimeOriginal:", datetime_original)datetime_original = datetime_original_0.replace(':','.',2)datetime_original = datetime_original[0:10]print(datetime_original)else:   datetime_original = ' '#焦距if piexif.ExifIFD.FocalLength in exif_data:FocalLength = str(int(exif_data[piexif.ExifIFD.FocalLength][0]/100))+"mm"#print("focal length:",FocalLength)else:FocalLength = ' '#ISOif piexif.ExifIFD.ISOSpeedRatings in exif_data:ISO = 'ISO'+str(exif_data[piexif.ExifIFD.ISOSpeedRatings])#print("ISO:",ISO)else:ISO = ' '#快门时间if piexif.ExifIFD.ExposureTime in exif_data:exposure_time = exif_data[piexif.ExifIFD.ExposureTime]shutter_speed = exposure_time[0] / exposure_time[1]shutter_speed = int(1/shutter_speed)shutter_speed = '1/'+str(shutter_speed)+'s'else:shutter_speed = ' '#光圈if piexif.ExifIFD.FNumber in exif_data:f_number = exif_data[piexif.ExifIFD.FNumber]fnumber = 'f/'+str(int(f_number[0] / f_number[1]))#print("光圈",fnumber)else:fnumber = ' '#镜头品牌if piexif.ExifIFD.LensMake in exif_data:lensmaker = exif_data[piexif.ExifIFD.LensMake].decode("utf-8")#print('镜头品牌:',lensmaker)else:lensmaker = ' '#镜头型号if piexif.ExifIFD.LensModel in exif_data:lensmodel = exif_data[piexif.ExifIFD.LensModel].decode("utf-8")#print("镜头型号",lensmodel)else:lensmodel = ' 'camera_model = str(exif_dict["0th"].get(piexif.ImageIFD.Model).decode("utf-8"))camera_make = str(exif_dict["0th"].get(piexif.ImageIFD.Make).decode("utf-8"))print(camera_make,camera_model)signature = "Photo by mohuijun"
else:pass
获取图片的高和宽度,计算照片比例,如果原图为16:9则填充边框变成3:2
#get width and highPicWidth = img.size[0]PicHigh = img.size[1]#picture is 16:9if int(PicWidth/16)==int(PicHigh/9):pictype = picturetype.picturesize.size_16_9lowwidth = int(PicWidth/3*2-PicHigh)Highwidth = 0letfWidth = 0rightwidth = 0borderhigh = lowwidthborderwide = PicWidth
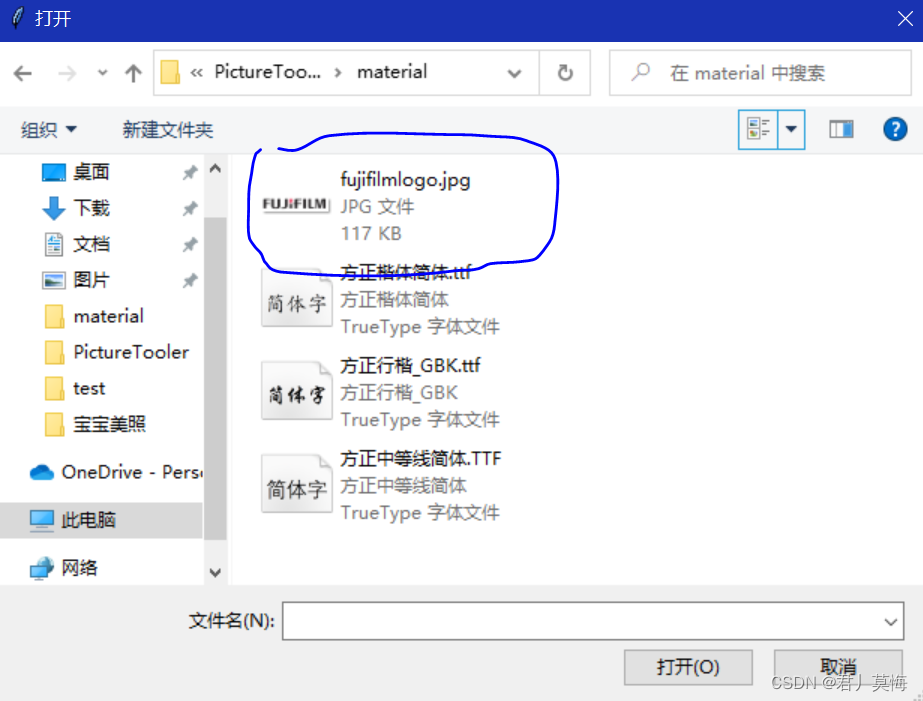
依据相机品牌logo的路径获取相机品牌logo图像
#get logo piclogoimg = Image.open(logopath)logowidth = int(PicWidth/7)logohigh = int(logowidth/4.3)logoimg.thumbnail((logowidth,logohigh))#create new picNewPicWidth = PicWidth + letfWidth + rightwidthNewPicHigh = PicHigh + Highwidth + lowwidth#logo locationlogo_x = int(borderwide/20*11)logo_y = int((borderhigh-logohigh)/2)+PicHigh
创建一个信息图片image作为处理后的图片
#create new pictureimg_new = Image.new('RGB', (NewPicWidth, NewPicHigh), color)
使用上面所述的创建文字图像方法依次创建相机信息的图像
#create exif messageimg_focallength,focallengthwid,focallengthhigh = createfond(size=120,str=FocalLength)img_data,datawid,datahigh = createfond(size=90,str=signature+' on '+datetime_original,color=(120,120,120))img_ISO,ISOwid,ISOhigh = createfond(size=120,str=ISO)img_shuttime,shutwid,shuthigh = createfond(size=120,str=shutter_speed)img_FNnumber,FNnumberwid,FNnumberhigh = createfond(size=120,str=fnumber)img_Lens,lenwid,lenhigh = createfond(size=90,str=(lensmaker+'·'+lensmodel),color=(120,120,120))# create '|'img_symbal,symbalwid,symbalhigh = createfond(size=350,str='|',color=(180,180,180))#create camera modeimg_camera,camerawid,camerahigh = createfond(150,str = camera_make+' '+camera_model)
计算文字图像需要摆放的位置
symbal_x = logo_x+logowidthsymbal_y = int((borderhigh-symbalhigh)/2)+PicHigh#exif message locationfocallength_x = symbal_x+symbalwidfocallength_y = symbal_y+int(symbalhigh/10)FNnumber_x = focallength_x+focallengthwidFNnumber_y = symbal_y+int(symbalhigh/10)shuttime_x = FNnumber_x+FNnumberwidshuttime_y = symbal_y+int(symbalhigh/10)ISO_x = shuttime_x+shutwidISO_y = symbal_y+int(symbalhigh/10)data_x = focallength_xdata_y = symbal_y+int(symbalhigh/3*2)Lens_x = 100Lens_y = symbal_y+int(symbalhigh/3*2)camera_x = 100camera_y = symbal_y+int(symbalhigh/5)
效果图下

将所有文字图像和原图按照指定位置和大小复制到新的图像中
#paste orignial pictureimg_new.paste(img, (letfWidth, Highwidth))#paste logoimg_new.paste(logoimg,(logo_x,logo_y))#paste exif messageimg_new.paste(img_focallength,(focallength_x,focallength_y))#img_new.paste(img_data,(data_x,data_y))img_new.paste(img_FNnumber,(FNnumber_x,FNnumber_y))img_new.paste(img_ISO,(ISO_x,ISO_y))img_new.paste(img_shuttime,(shuttime_x,shuttime_y))img_new.paste(img_Lens,(Lens_x,Lens_y))img_new.paste(img_data,(data_x,data_y))img_new.paste(img_symbal,(symbal_x,symbal_y))img_new.paste(img_camera,(camera_x,camera_y))
获取保存路径并保存
Des_path = save_filePath()try:img_new.save(Des_path,exif=exif_bytes)except:print("地址无效")
主函数 创建图片边框
Local_path = Get_Currentpath()
LOGOPATH = Local_path+r'\material\fujifilmlogo.jpg'
CreateBorder(logopath=LOGOPATH)
附全部代码
import tkinter
import os
from tkinter import filedialog
from PIL import Image
from PIL import ImageFont
from PIL import ImageDraw
import exifread
import piexif
#get path that py file located
def Get_Currentpath():file_path = os.path.abspath(__file__)dir_path = os.path.dirname(file_path)return dir_path
#get file path that choosed
def Get_FilePath():root = tkinter.Tk()root.withdraw()f_path = filedialog.askopenfilename()return f_path
#set path to  save
def save_filePath():# 创建文件对话框root = tkinter.Tk()root.withdraw()# 弹出保存文件对话框file_path = filedialog.asksaveasfilename(defaultextension=".jpg", filetypes=[("JPG File", "*.jpg"), ("PNG file","*.png"),("All Files", "*.*")])print(file_path)# 如果用户选择了文件路径,则返回路径if file_path:return file_pathelse:pass
#create font
def createfond(size=160,str=' ',color=(0,0,0)):lopath = Get_Currentpath()fondpath = lopath+r'\material\方正楷体简体.TTF'dignum=0alphanum=0othernum=0for i in str:if i.isdigit():dignum+=1elif i.isalpha():alphanum+=1else:othernum+=1othernum = len(str)-dignumx=int(dignum*size*0.6)+int(alphanum*size*0.6)+int(othernum*size*0.5)y=int(size*1.2)img = Image.new("RGBA",(x,y),'white')draw = ImageDraw.Draw(img)#创建一个绘画对象fnt = ImageFont.truetype(fondpath,size)draw.text((0,0),str,fill=color,font=fnt)#img.show()return img,x,y
#creat the border
def CreateBorder(logopath,color = (255,255,255)):Src_path = Get_FilePath()pictype = picturetype.picturesize.size_16_9img = Image.open(Src_path)#get exif dataexif_dict = piexif.load(Src_path)exif_bytes = piexif.dump(exif_dict)exif_mes = img._getexif()# if exif_mes is not None:#         camera_info = exif_mes.get(0x010F)  # 0x010F表示相机品牌和型号的标记#         print(camera_info)# 获取时间信息if "Exif" in exif_dict:exif_data = exif_dict["Exif"]#拍摄日期if piexif.ExifIFD.DateTimeOriginal in exif_data:datetime_original_0 = str(exif_data[piexif.ExifIFD.DateTimeOriginal].decode("utf-8"))#print("DateTimeOriginal:", datetime_original)datetime_original = datetime_original_0.replace(':','.',2)datetime_original = datetime_original[0:10]print(datetime_original)else:   datetime_original = ' '#焦距if piexif.ExifIFD.FocalLength in exif_data:FocalLength = str(int(exif_data[piexif.ExifIFD.FocalLength][0]/100))+"mm"#print("focal length:",FocalLength)else:FocalLength = ' '#ISOif piexif.ExifIFD.ISOSpeedRatings in exif_data:ISO = 'ISO'+str(exif_data[piexif.ExifIFD.ISOSpeedRatings])#print("ISO:",ISO)else:ISO = ' '#快门时间if piexif.ExifIFD.ExposureTime in exif_data:exposure_time = exif_data[piexif.ExifIFD.ExposureTime]shutter_speed = exposure_time[0] / exposure_time[1]shutter_speed = int(1/shutter_speed)shutter_speed = '1/'+str(shutter_speed)+'s'else:shutter_speed = ' '#光圈if piexif.ExifIFD.FNumber in exif_data:f_number = exif_data[piexif.ExifIFD.FNumber]fnumber = 'f/'+str(int(f_number[0] / f_number[1]))#print("光圈",fnumber)else:fnumber = ' '#镜头品牌if piexif.ExifIFD.LensMake in exif_data:lensmaker = exif_data[piexif.ExifIFD.LensMake].decode("utf-8")#print('镜头品牌:',lensmaker)else:lensmaker = ' '#镜头型号if piexif.ExifIFD.LensModel in exif_data:lensmodel = exif_data[piexif.ExifIFD.LensModel].decode("utf-8")#print("镜头型号",lensmodel)else:lensmodel = ' '# if  piexif.ExifIFD. in exif_data:#     makernote = exif_data[piexif.ExifIFD.DeviceSettingDescription].decode("utf-8")#     print("相机:",makernote)#get camera modecamera_model = str(exif_dict["0th"].get(piexif.ImageIFD.Model).decode("utf-8"))#camera_model = camera_model[2:-1]camera_make = str(exif_dict["0th"].get(piexif.ImageIFD.Make).decode("utf-8"))#camera_make = camera_make[2:-1]print(camera_make,camera_model)#get camera maker#print("camera:",camera_model)signature = "Photo by mohuijun"else:pass#get width and highPicWidth = img.size[0]PicHigh = img.size[1]#picture is 16:9if int(PicWidth/16)==int(PicHigh/9):lowwidth = int(PicWidth/3*2-PicHigh)Highwidth = 0letfWidth = 0rightwidth = 0borderhigh = lowwidthborderwide = PicWidth#create border#get logo piclogoimg = Image.open(logopath)logowidth = int(PicWidth/7)logohigh = int(logowidth/4.3)logoimg.thumbnail((logowidth,logohigh))#create new picNewPicWidth = PicWidth + letfWidth + rightwidthNewPicHigh = PicHigh + Highwidth + lowwidth#logo locationlogo_x = int(borderwide/20*11)logo_y = int((borderhigh-logohigh)/2)+PicHigh#create new pictureimg_new = Image.new('RGB', (NewPicWidth, NewPicHigh), color)#create exif messageimg_focallength,focallengthwid,focallengthhigh = createfond(size=120,str=FocalLength)img_data,datawid,datahigh = createfond(size=90,str=signature+' on '+datetime_original,color=(120,120,120))img_ISO,ISOwid,ISOhigh = createfond(size=120,str=ISO)img_shuttime,shutwid,shuthigh = createfond(size=120,str=shutter_speed)img_FNnumber,FNnumberwid,FNnumberhigh = createfond(size=120,str=fnumber)img_Lens,lenwid,lenhigh = createfond(size=90,str=(lensmaker+'·'+lensmodel),color=(120,120,120))# create '|'img_symbal,symbalwid,symbalhigh = createfond(size=350,str='|',color=(180,180,180))#create camera modeimg_camera,camerawid,camerahigh = createfond(150,str = camera_make+' '+camera_model)#create signature#img_signature,signaturewid,signaturehigh = createfond(size = 100,str = signature,color=(120,120,120))symbal_x = logo_x+logowidthsymbal_y = int((borderhigh-symbalhigh)/2)+PicHigh#exif message locationfocallength_x = symbal_x+symbalwidfocallength_y = symbal_y+int(symbalhigh/10)FNnumber_x = focallength_x+focallengthwidFNnumber_y = symbal_y+int(symbalhigh/10)shuttime_x = FNnumber_x+FNnumberwidshuttime_y = symbal_y+int(symbalhigh/10)ISO_x = shuttime_x+shutwidISO_y = symbal_y+int(symbalhigh/10)data_x = focallength_xdata_y = symbal_y+int(symbalhigh/3*2)Lens_x = 100Lens_y = symbal_y+int(symbalhigh/3*2)# signature_x = 100# signature_y = Lens_ycamera_x = 100camera_y = symbal_y+int(symbalhigh/5)#paste singnature picture#img_new.paste(img_signature,(signature_x,signature_y))#paste orignial pictureimg_new.paste(img, (letfWidth, Highwidth))#paste logoimg_new.paste(logoimg,(logo_x,logo_y))#paste exif messageimg_new.paste(img_focallength,(focallength_x,focallength_y))#img_new.paste(img_data,(data_x,data_y))img_new.paste(img_FNnumber,(FNnumber_x,FNnumber_y))img_new.paste(img_ISO,(ISO_x,ISO_y))img_new.paste(img_shuttime,(shuttime_x,shuttime_y))img_new.paste(img_Lens,(Lens_x,Lens_y))img_new.paste(img_data,(data_x,data_y))img_new.paste(img_symbal,(symbal_x,symbal_y))img_new.paste(img_camera,(camera_x,camera_y))Des_path = save_filePath()try:img_new.save(Des_path,exif=exif_bytes)except:print("地址无效")Local_path = Get_Currentpath()
LOGOPATH = Local_path+r'\material\fujifilmlogo.jpg'
CreateBorder(logopath=LOGOPATH)
相关文章:
Python——添加照片边框
原图: 添加边框后: 添加边框会读取照片的exif信息如时间、相机型号、品牌以及快门焦段等信息,将他们显示在下面的边框中。 获取当前py文件路径 import os #get path that py file located def Get_Currentpath():file_path os.path.abspa…...

《高性能MySQL》——查询性能优化(笔记)
文章目录 六、查询性能优化6.1 查询为什么会慢6.2 慢查询基础:优化数据访问6.2.1 是否向数据库请求了不需要的数据查询不需要的记录多表关联时返回全部列总是取出全部列重复查询相同的数据 6.2.2 MySQL 是否在扫描额外的记录响应时间扫描的行数与返回的行数扫描的行…...

【Linux操作系统】编译过程中遇到的问题-为什么加-c?执行文件提示无法执行二进制文件?main函数参数argc和*argv[]的作用和理解?
在使用GCC编译器进行程序开发时,我们经常会遇到一些编译过程中的问题, 比如为什么要加上"-c"选项,以及为什么生成的可执行文件无法执行等问题。 本篇博客将详细介绍这些问题,并给出相应的代码和解释,帮助读者…...

【数据结构与算法——TypeScript】图结构(Graph)
【数据结构与算法——TypeScript】 图结构(Graph) 认识图结构以及特性 什么是图? 在计算机程序设计中,图结构 也是一种非常常见的数据结构。 但是,图论其实是一个非常大的话题 认识一下关于图的一些内容 图的抽象数据类型一些算法实现。 什么是图?…...

C语言字符串拷贝函数详解及示例代码
目录 简介字符串拷贝函数 strcpy字符串拷贝函数 strcpy_s使用示例注意事项结束语 1. 简介 字符串拷贝是C语言中常用的操作之一。当需要将一个字符串复制到另一个字符串数组中时,可以使用字符串拷贝函数来实现。C语言提供了多种字符串拷贝函数,其中最常…...
IntelliJ IDEA热部署:JRebel插件的安装与使用
热部署 概述JRebel 概述 热部署,指修改代码后,无需停止应用程序,即可使修改后的代码生效,其有利于提高开发效率。 热部署方式: 手动热部署:修改代码后,重新编译项目,然后启动应用程…...
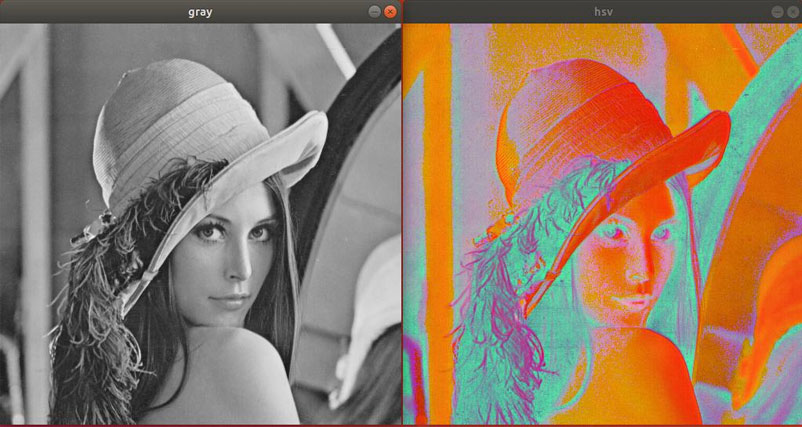
iTOP-3568开发板使用OpenCV处理图像-颜色转换
本小节代码在配套资料“iTOP-3568 开发板\03_【iTOP-RK3568 开发板】指南教程 \04_OpenCV 开发配套资料\05”目录下,如下图所示: cv2.cvtColor()函数功能: 将一幅图像从一个色彩空间转换到另一个色彩空间。 函数原型: cv2.cvt…...

Python技巧----解压序列/可迭代对象赋值给多个变量
1 、解压序列赋值给多个变量 我们这里说的不是正常情况的一一赋值比如下面 >>> data = [ ACME, 5, 9, (2012, 12, 1) ] >>> name, shares, price, date = data >>> name ACME...
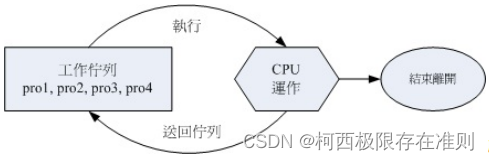
16.3.2 【Linux】程序的管理
程序之间是可以互相控制的。举例来说,你可以关闭、重新启动服务器软件,服务器软件本身是个程序, 你既然可以让她关闭或启动,当然就是可以控制该程序。 使用kill-l或者是man 7 signal可以查询到有多少个signal。主要的讯号代号与名…...

Linux命令200例:date用于显示和设置系统的日期和时间
🏆作者简介,黑夜开发者,全栈领域新星创作者✌。CSDN专家博主,阿里云社区专家博主,2023年6月csdn上海赛道top4。 🏆数年电商行业从业经验,历任核心研发工程师,项目技术负责人。 &…...
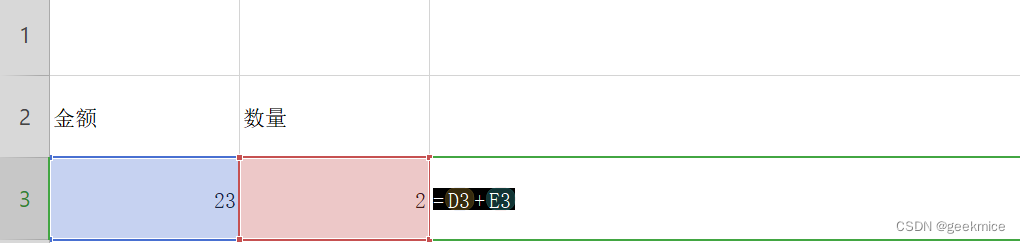
excel入门
上下左右移动 enter:换行,向下移动 shiftenter:向上移动 tab:向右移动 shifttab:向左移动 合并居中操作 开始-》合并居中 CtrlM 内容过长盖过了下一个单元格内容 双击列与列之间线 同时修改多行或者多列宽度或者高度 修改单行高度宽度 选中某一行拉取指定高…...

单模光纤模场强度分布以及高斯近似的MATLAB仿真
已知纤芯半径5um,数值孔径NA 0.1,波长 用波长和数值孔径计算归一化常数V 之前我们在单模光纤特征方程及其MATLAB数值求解中,用线性关系拟合过V和W,这里直接用拟合结果 U用V和W计算 clc clear close alla 5e-6;%纤芯半径 NA …...
Springboot 在 redis 中使用 BloomFilter 布隆过滤器机制
一、导入SpringBoot依赖 在pom.xml文件中,引入Spring Boot和Redis相关依赖 <!-- Google Guava 使用google的guava布隆过滤器实现--><dependency><groupId>com.google.guava</groupId><artifactId>guava</artifactId><vers…...

什么是管理的本质?
管理不是一门硬科学。与(通常)存在正确答案的化学或代数不同,管理是流动的,主观的,并且对于如何运用其原理存在不同的观点。但究竟什么是管理?大多数学者都有相同定义的变体,包括利用资源来实现…...
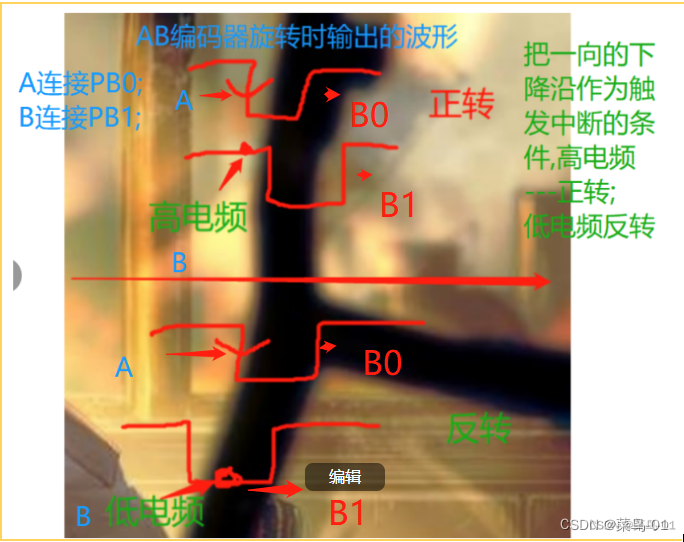
02:STM32--EXTI外部中断
目录 一:中断 1:简历 2:AFIO 3:EXTI 编辑 4:NVIC基本结构 5:使用步骤 二:中断的应用 A:对外式红外传感计数器 1:连接图编辑 2:函数介绍 3:硬件介绍 4:计数代码 B;旋转编码计数器 1:连接图 2:硬件介绍 3:旋转编码器代码: 一:中断 1:简历 中断:在主程…...

CLickhouse核心特性
目录 CLickhouse核心特性 1 完备的DBMS功能 2 列式存储与数据压缩 3 向量化执行引擎 4 关系模型与SQL查询 5 多样化的表引擎 6 多线程与分布式 7 多主架构 8 在线查询 9 数据分片与分布式查询 Clickhouse适用场景 Clickhouse不适用场景 Clickhouse名称含义 CLickh…...
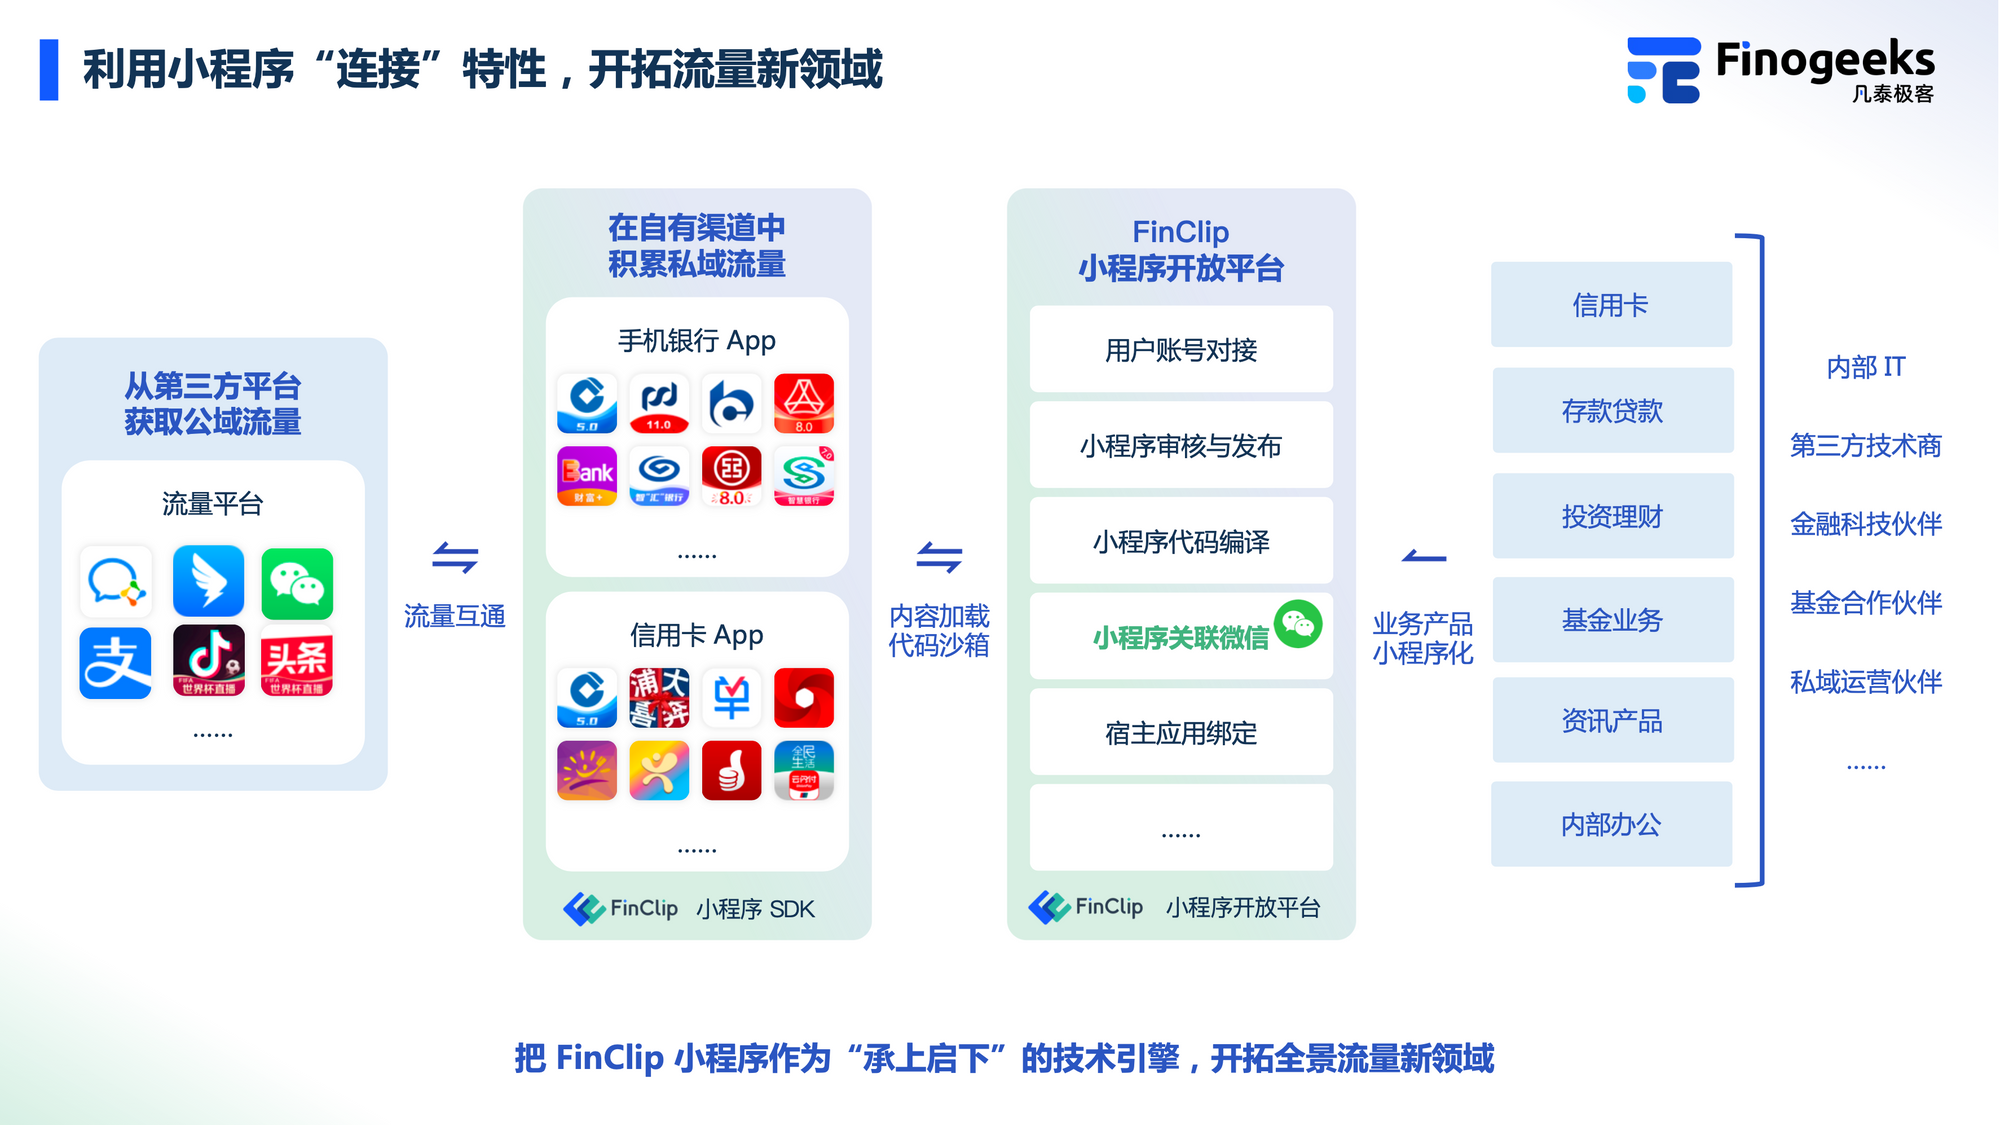
如何运用小程序技术闭环运营链路?
如何通过线上小程序获取用户线索,提高企业抗风险能力,建立有效的营销数字化系统一直是困扰每一个小程序开发者与运营者的问题。 当我们选择使用小程序设计自己的运营流程时,从「推广」到「转化」,再到最终的「留存」都是运营过程…...

使用chatGPT-4 畅聊量子物理学(二)
Omer 量子力学的主导哲学或模型或解释是什么? ChatGPT 量子力学是一门描述微观世界中粒子行为的物理学理论,但它的解释和哲学观点在学术界存在多种不同的观点和争议。以下是几种主要的哲学观点或解释: 哥本哈根解释:这是最为广泛…...
读《Flask Web开发实战》(狼书)笔记 | 第1、2章
前言 2023-8-11 以前对网站开发萌生了想法,又有些急于求成,在B站照着视频敲了一个基于flask的博客系统。但对于程序的代码难免有些囫囵吞枣,存在许多模糊或不太理解的地方,只会照葫芦画瓢。 而当自己想开发一个什么网站的时&…...
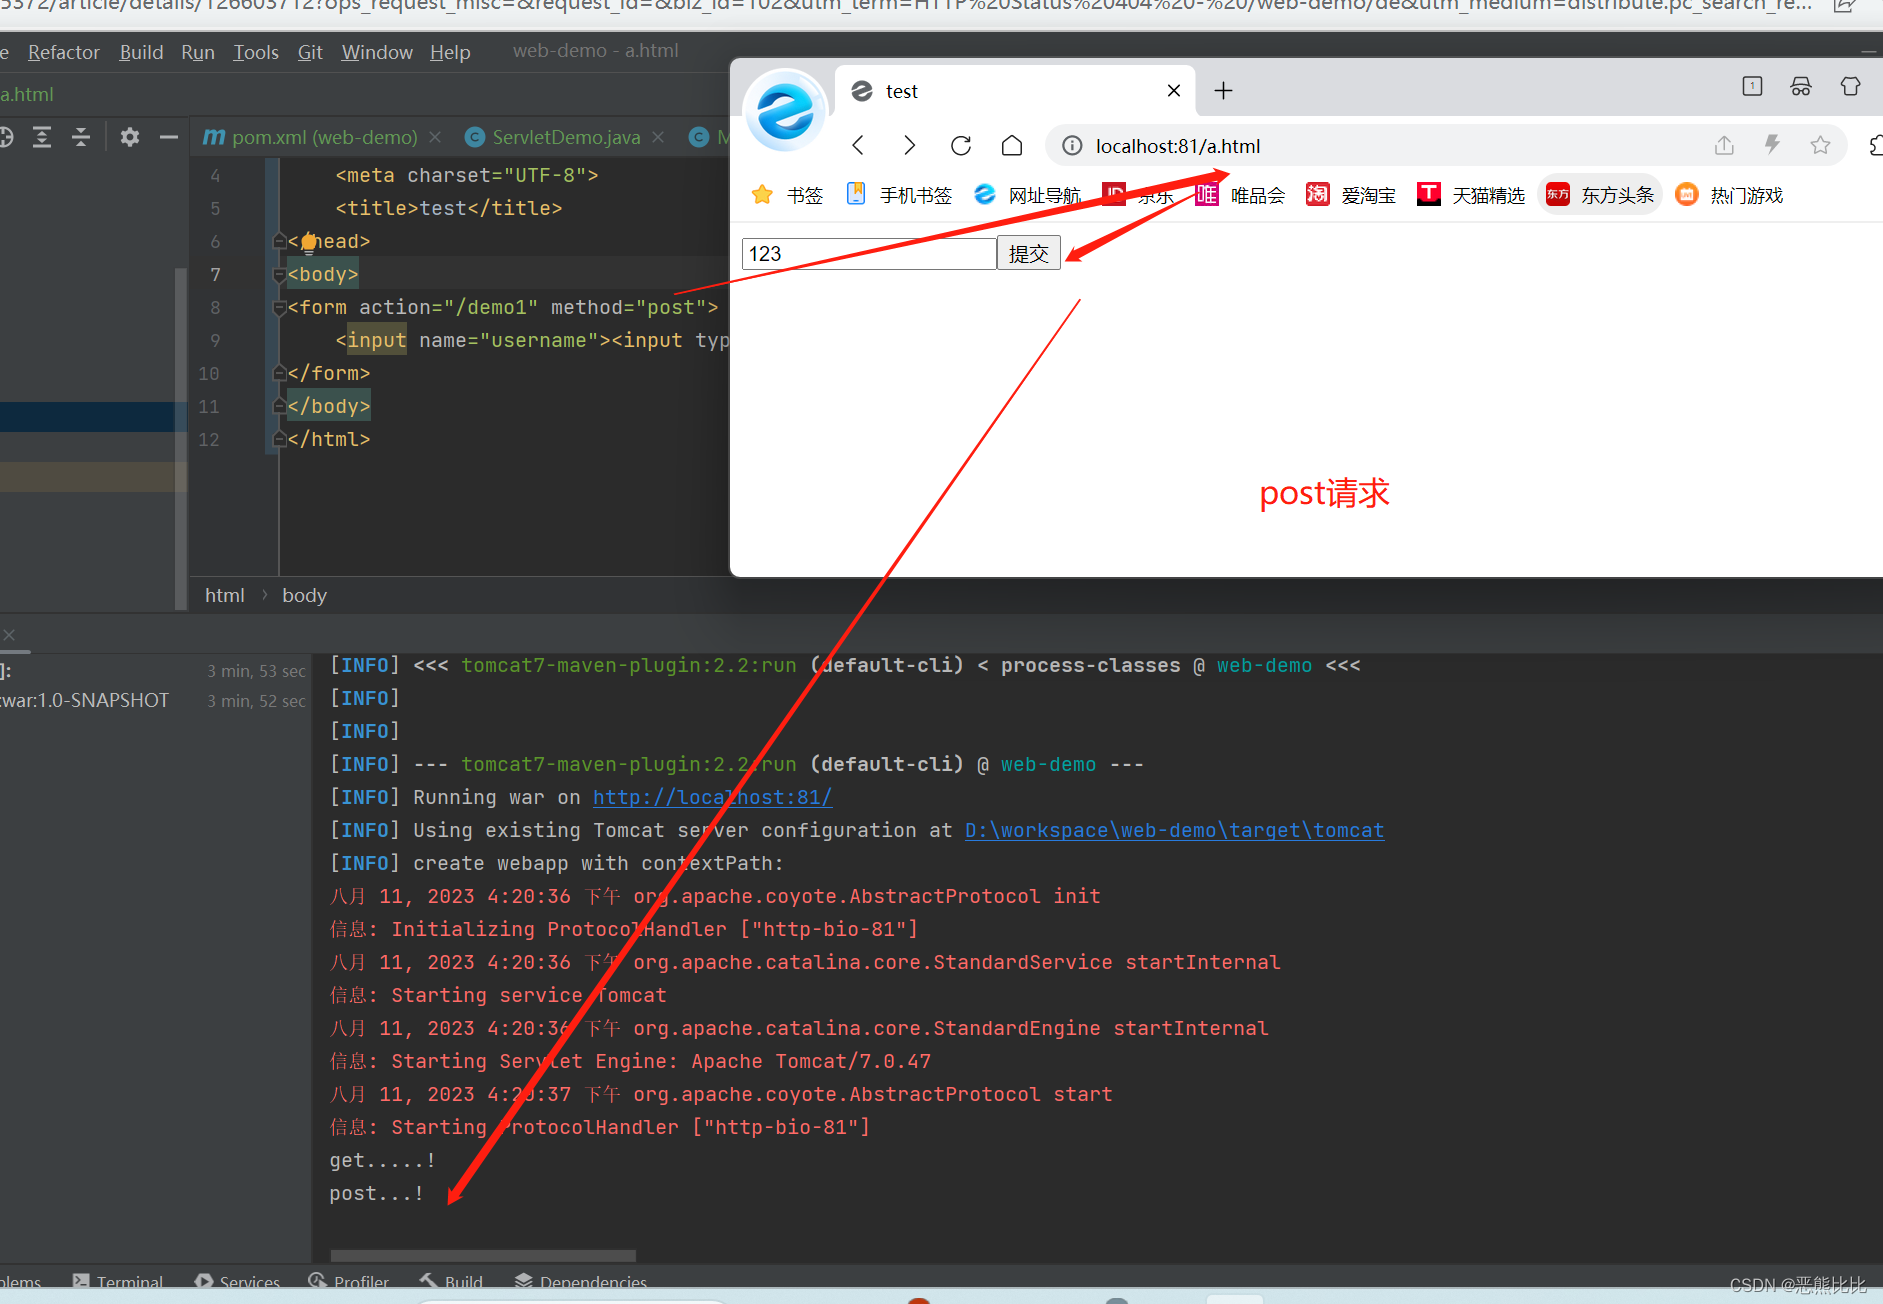
Tomcat+Http+Servlet
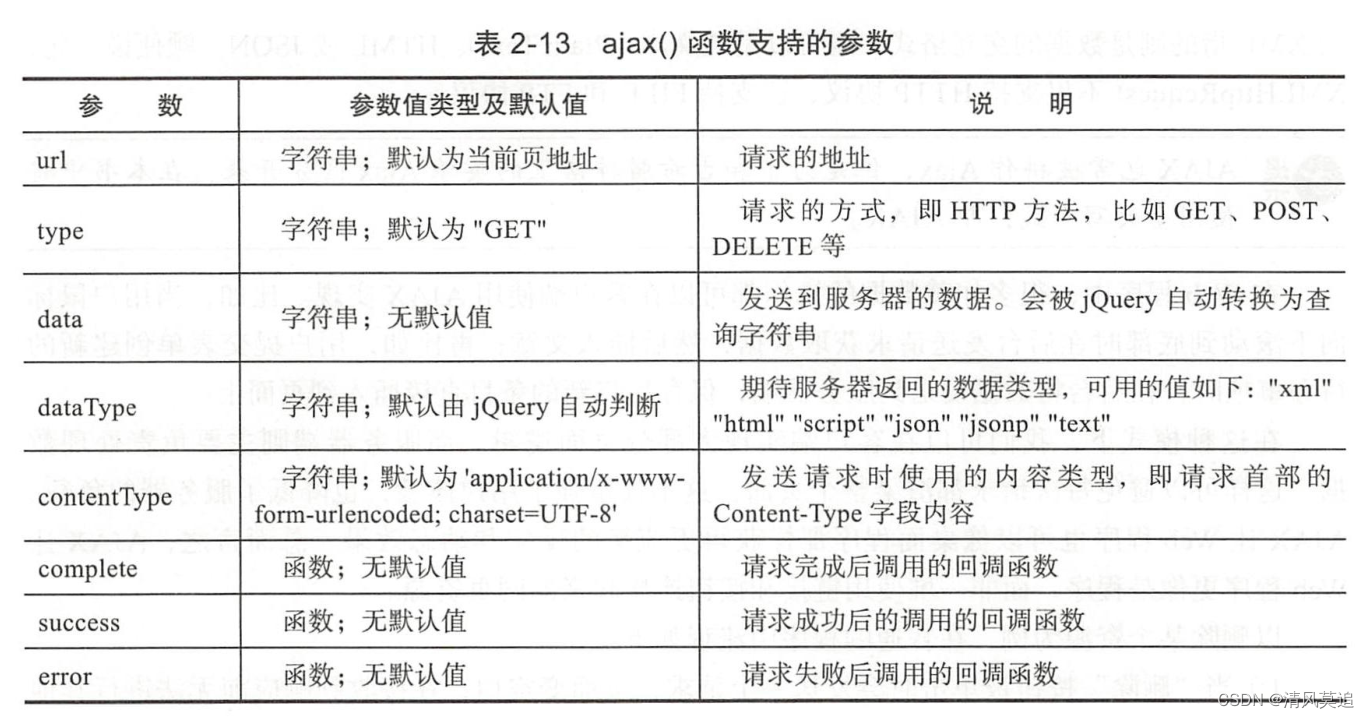
文章目录 1.HTTP1.1 请求和响应HTTP请求:请求行请求头请求体HTTP响应:响应行(状态行)响应头响应体 2. Apache Tomcat2.1 基本使用2.2 IDEA中创建 Maven Web项目2.3 IDEA中使用Tomcat 3. Servlet3.1 Servlet快速入门3.2 Servlet执行…...
 —— SPI相关概念)
STM32单片机学习(27) —— SPI相关概念
文章目录概述SPI通信的核心特性I2C和SPI的简单对比SPI学习的补充说明SPI硬件电路设计SPI的四条通信线SPI通信的片选线低电平选中不支持广播通信SPI通信的时序结构(重点)SPI通信的比特序通信空闲状态,SPI时钟极性采样时机,SPI时钟相…...

51单片机驱动ST7735S彩屏避坑指南:从5秒刷屏到流畅贪吃蛇的优化实战
51单片机驱动ST7735S彩屏性能优化实战:从卡顿到流畅游戏的蜕变之路当一块128x160分辨率的ST7735S彩屏遇上传统的51单片机,这种组合看似矛盾却又充满挑战。许多开发者初次尝试时会发现,原本在STM32等平台上运行流畅的显示驱动,移植…...

【UniApp小程序开发】解决无法使用Vue自定义指令的完美替代方案:权限组件封装
在 UniApp 开发中,你是否遇到过这样的困惑:明明在 Vue Web 项目中用得顺手的 v-permission 自定义指令,一到小程序端就完全失效?本文将深入剖析其原因,并提供一套可直接复用的组件化解决方案,让你在小程序中…...

光轮智能 谢晨 访谈总结机器人仿真数据产业
光轮智能 谢晨 访谈总结机器人仿真关于创始人关于数据数据金字塔数据痛点仿真数据的重要性仿真数据的质量b站链接地址公司官网关于创始人 清华物理;哥伦比亚金融;英伟达智驾仿真;小鹏智驾仿真;现为光轮智能CEO 关于数据 数据的…...

PCL 基于强度的双边滤波【2026最新版】
目录 一、算法原理 1、计算步骤 2、算法源码 3、函数解析 4、参考文献 二、代码实现 三、结果展示 四、滤波后未发生变化的原因 五、解决办法 六、结果展示 七、相关链接 本文由CSDN点云侠原创,博客长期更新,本文最近一次更新时间为:2026年5月24日。 一、算法原理 1、计算…...
)
告别SVN恐惧症:美术策划也能轻松上手的Unity PlasticSCM极简入门(附团队项目拉取实战)
告别SVN恐惧症:美术策划也能轻松上手的Unity PlasticSCM极简入门(附团队项目拉取实战) 在游戏开发团队中,版本控制系统是协作的基石,但传统工具如SVN往往让非技术成员望而生畏。当美术资源频繁更新、策划案不断迭代时&…...
)
告别杂乱!用FileMenu Tools 8.4.2一键清理Windows 11右键菜单(附隐藏技巧)
Windows 11右键菜单精简指南:用FileMenu Tools打造高效工作流每次在文件上点击右键时,那个缓慢弹出的冗长菜单是否让你感到烦躁?随着安装的软件越来越多,Windows的右键菜单往往会变得臃肿不堪,严重影响工作效率。今天&…...

基于Cynthion逆向USB协议,为DP100电源开发Linux控制软件
1. 项目概述:用Cynthion嗅探USB,为DP100电源打造Linux软件作为一名长期在Linux环境下折腾硬件和嵌入式开发的爱好者,我经常遇到一个头疼的问题:很多不错的桌面小设备,比如电源、示波器、逻辑分析仪,它们的官…...
提升你的图表专业度?)
从科研图表到商业报表:如何用Matplotlib的legend()提升你的图表专业度?
从科研图表到商业报表:如何用Matplotlib的legend()提升你的图表专业度? 在数据驱动的决策时代,图表不仅是科研论文中的证据载体,更是商业汇报中的说服工具。我曾见证一位生物统计学家将同一组临床试验数据呈现给三种不同受众&…...
)
保姆级教程:手把手教你搞定ESXi 6.7安装前的BIOS设置(VT-x/VT-d/AES全开)
从零开始:ESXi 6.7安装前的BIOS设置终极指南当你第一次接触企业级虚拟化平台时,那种既兴奋又忐忑的心情我完全理解。作为过来人,我记得自己第一次在Dell PowerEdge服务器上安装ESXi时,光是搞清楚BIOS里那些晦涩的选项就花了整整一…...