Spring Security登录表单配置(3)
1、登录表单配置
1.1、快速入门
理解了入门案例之后,接下来我们再来看一下登录表单的详细配置,首先创建一个新的Spring Boot项目,引入Web和Spring Security依赖,代码如下:
<dependency><groupId>org.springframework.boot</groupId><artifactId>spring-boot-starter-security</artifactId>
</dependency>
<dependency><groupId>org.springframework.boot</groupId><artifactId>spring-boot-starter-web</artifactId>
</dependency>
项目创建好之后,为了方便测试,需要在application.yml中添加如下配置,将登录用户名和密码固定下来:
spring:security:user:name: buretuzipassword: 123456
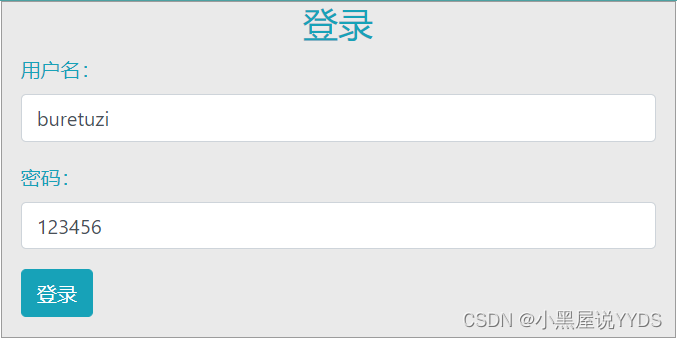
接下来,我们在resources/static目录下创建一个login.html页而,这个是我们自定义的登录页面:
 <!DOCTYPE html>
<html lang="en">
<head><meta charset="UTF-8"><title>登录</title><link href="//maxcdn.bootstrapcdn.com/bootstrap/4.1.1/css/bootstrap.min.css" rel="stylesheet" id="bootstrap-css"><script src="//maxcdn.bootstrapcdn.com/bootstrap/4.1.1/js/bootstrap.min.js"></script><script src="//cdnjs.cloudflare.com/ajax/libs/jquery/3.2.1/jquery.min.js"></script>
</head>
<style>#login .container #login-row #login-column #login-box {border: 1px solid #9c9c9c;background-color: #EAEAEA;}
</style>
<body><div id="login"><div class="container"><div id="login-row" class="row justify-content-center align-items-center"><div id="login-column" class="col-md-6"><div id="login-box" class="col-md-12"><form id="login-form" class="form" action="/dologin" method="post"><h3 class="text-center text-info">登录</h3><div class="form-group"><label for="username" class="text-info">用户名:</label><br><input type="text" name="uname" id="username" class="form-control"></div><div class="form-group"><label for="password" class="text-info">密码:</label><br><input type="text" name="passwd" id="password" class="form-control"></div><div class="form-group"><input type="submit" name="submit" class="btn btn-info btn-md" value="登录"></div></form></div></div></div></div></div>
</body>
</html>
这个logmt.html中的核心内容就是一个登录表单,登录表单中有三个需要注意的地方:
- form的action,这里给的是/doLogin,表示表单要提交到/doLogin接口上。
- 用户名输入框的name属性值为uname,当然这个值是可以自定义的,这里采用了uname。
- 密码输入框的name属性值为passwd, passwd也是可以自定义的。
login.html定义好之后,接下来定义两个测试接口,作为受保护的资源。当用户登录成功 后,就可以访问到受保护的资源。接口定义如下:
package com.intehel.demo.controller;import org.springframework.web.bind.annotation.RequestMapping;
import org.springframework.web.bind.annotation.RestController;@RestController
public class LoginController {@RequestMapping("/index")public String index(){return "login";}@RequestMapping("/hello")public String hello(){return "hello";}}
最后再提供一个Spring Security的配置类:
package com.intehel.demo.config;import org.springframework.context.annotation.Configuration;
import org.springframework.security.config.annotation.web.builders.HttpSecurity;
import org.springframework.security.config.annotation.web.configuration.WebSecurityConfigurerAdapter;@Configuration
public class SecurityConfig extends WebSecurityConfigurerAdapter {@Overrideprotected void configure(HttpSecurity http) throws Exception {http.authorizeRequests().anyRequest().authenticated().and().formLogin().loginPage("/loginNew.html").loginProcessingUrl("/doLogin").defaultSuccessUrl("/index").failureUrl("/loginNew.html").usernameParameter("uname").passwordParameter("passwd").permitAll().and().csrf().disable();}}
在Spring Security中,如果我们需要自定义配置,基本上都是继承自WebSecurityConfigurerAdapter来实现的,当然WebSecurityConfigurerAdapter本身的配置还是比较复杂,同时也是比较丰富的,这里先不做过多的展开,仅就结合上面的代码来解释,在下节中将会对这里的配置再做更加详细的介绍。
- 首先configure方法中是一个链式配置,当然也可以不用链式配置,每一个属性配置完毕后再从重新开始写起;
- authorizeRequests()方法表示开启权限配置(该方法的含义其实比较复杂,在后面还会再次介绍该方法),.anyRequest().authenticated()表示所有的请求都要认证之后才能访问;
- 有的读者会对and()方法表示疑惑,and()方法会返回HttpSecurityBuilder对象的一个 子类(实际上就是HttpSecurity),所以and()方法相当于又回到HttpSecuiity实例,重新开启 新一轮的配置。如果觉得and()方法很难理解,也可以不用and()方法,在.anyRequest().authenticated。配置完成后直接用分号(;)结束,然后通过http.formLogin()继续配置表单登录。
- formLogin()表示开启表单登录配置,loginPage用来配置登录页面地址; loginProcessingUrl用来配置登录接口地址;defaultSuccessUrl表示登录成功后的跳转地址; failureUrl表示登录失败后的跳转地址;usernameParameter表示登录用户名的参数名称; passwordParameter表示登录密码的参数名称;permitAll表示跟登录相关的页面和接口不做拦截, 直接通过。需要注意的是,loginProcessingUrl、usernameParameter、passwordParameter 需要和login-html中登录表单的配置一致。
- 最后的csrf().disable()表示禁用CSRF防御功能,Spring Security自带了 CSRF防御机制,但是我们这里为了测试方便,先将CSRF防御机制关闭,在后面将会详细介绍CSRF攻击与防御问题。
配置完成后,启动Spring Boot项目,浏览器地址栏中输入http://localhost:8080/index,会自动跳转到http://localhost:8080/loginNew.html页面,如图2-5所示。输入用户名和密码进行登录(用 户名为buretuzi,密码为123456),登录成功之后,就可以访问到index页面了,如图2-6所示。
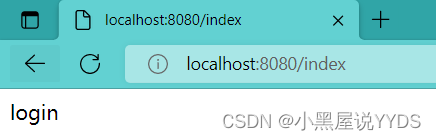
经过上面的配置,我们已经成功自定义了一个登录页面出来,用户在登录成功之后,就可以访问受保护的资源了。
1.2、配置细节
当然,前面的配置比较粗糙,这里还有一些配置的细节需要和读者分享一下。
在前面的配置中,我们用defaultSuccessUrl表示用户登录成功后的跳转地址,用failureUrl 表示用户登录失败后的跳转地址。关于登录成功和登录失败,除了这两个方法可以配置之外, 还有另外两个方法也可以配置。
1.2.1、登录成功
当用户登录成功之后,除了 defaultSuccessUrl方法可以实现登录成功后的跳转之外, successForwardUrl也可以实现登录成功后的跳转,代码如下:
@Configuration
public class SecurityConfig extends WebSecurityConfigurerAdapter {@Overrideprotected void configure(HttpSecurity http) throws Exception {http.authorizeRequests().anyRequest().authenticated().and().formLogin().loginPage("/loginNew.html").loginProcessingUrl("/doLogin").successForwardUrl("/index").failureUrl("/loginNew.html").usernameParameter("uname").passwordParameter("passwd").permitAll().and().csrf().disable();}}
defaultSuccessUrl 和 successForwardUrl 的区别如下:
- defaultSuccessUrl表示当用户登录成功之后,会自动重定向到登录之前的地址上, 如果用户本身就是直接访问的登录页面,则登录成功后就会重定向到defaultSuccessUrl指定的页面中。例如,用户在未认证的情况下,访问了/hello页面,此时会自动重定向到登录页面, 当用户登录成功后,就会自动重定向到/hello页面;而用户如果一开始就访问登录页面,则登录成功后就会自动重定向到defaultSuccessUrl所指定的页面中.
- successForwardUrl则不会考虑用户之前的访问地址,只要用户登录成功,就会通过服务器端跳转到successForwardUrl所指定的页面;
- defaultSuccessUrl有一个重载方法,如果重载方法的第二个参数传入true,则 defaultSuccessUrl的效果与successForwardUrl类似,即不考虑用户之前的访问地址,只要登录成功,就重定向到defaultSuccessUrl所指定的页面。不同之处在于,defaultSuccessUrl是通过重定向实现的跳转(客户端跳转),successForwardUrl则是通过服务器端跳转实现的。
无论是 defaultSuccessUrl 还是 successForwardUrl,最终所配置的都是 AuthenticationSuccessHandler接口的实例。
Spring Security中专门提供了 AuthenticationSuccessHandler接口用来处理登录成功事项:
public interface AuthenticationSuccessHandler {default void onAuthenticationSuccess(HttpServletRequest request, HttpServletResponse response, FilterChain chain, Authentication authentication) throws IOException, ServletException{onAuthenticationSuccess(request, response, authentication);chain.doFilter(request, response);}void onAuthenticationSuccess(HttpServletRequest request, HttpServletResponse response, Authentication authentication) throws IOException, ServletException;}
由上述代码可以看到,AuthenticationSuccessHandler接口中一共定义了两个方法,其中一 个是default方法,此方法是Spring Security 5.2开始加入进来的,在处理特定的认证请求 AuthenticationFilter中会用到;另外一个非default方法,则用来处理登录成功的具体事项,其 中request和response参数好理解,authentication参数保存了登录成功的用户信息。我们将在后面的章节中详细介绍authentication参数。
AuthenticationSuccessHandler接口共有三个实现类,如图2-7所示。
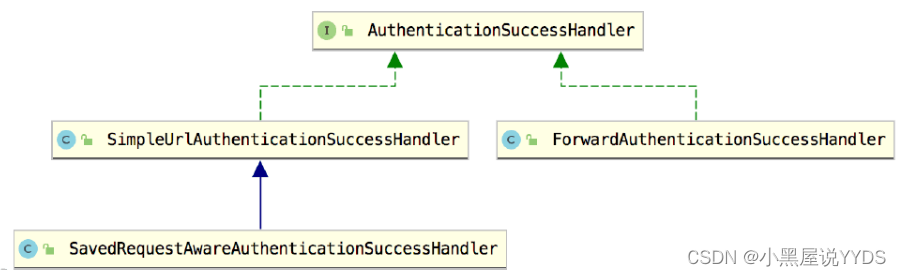
(1) SimpleUrlAuthenticationSuccessHandler继承自 AbstractAuthenticationTargetUrlRequestHandler,通过 AbstractAuthenticationTargetUrlRequestHandler 中的 handle 方法实现请求重定向。
(2)SavedRequestAwareAuthenticationSuccessHandler在 SimpleUrlAuthenticationSuccessHandler的基础上增加了请求缓存的功能,可以记录之前请求的地址,进而在登录成功后重定向到一开始访问的地址。
(3) ForwardAuthenticationSuccessHandler的实现则比较容易,就是一个服务端跳转。
我们来重点分析 SavedRequestAwareAuthenticationSuccessHandler和ForwardAuthenticationSuccessHandler的实现。
当通过defaultSuccessUrl来设置登录成功后重定向的地址时,实际上对应的实现类就是 SavedRequestAwareAuthenticationSuccessHandler。
public class SavedRequestAwareAuthenticationSuccessHandler extendsSimpleUrlAuthenticationSuccessHandler {protected final Log logger = LogFactory.getLog(this.getClass());private RequestCache requestCache = new HttpSessionRequestCache();@Overridepublic void onAuthenticationSuccess(HttpServletRequest request,HttpServletResponse response, Authentication authentication)throws ServletException, IOException {SavedRequest savedRequest = requestCache.getRequest(request, response);if (savedRequest == null) {super.onAuthenticationSuccess(request, response, authentication);return;}String targetUrlParameter = getTargetUrlParameter();if (isAlwaysUseDefaultTargetUrl()|| (targetUrlParameter != null && StringUtils.hasText(request.getParameter(targetUrlParameter)))) {requestCache.removeRequest(request, response);super.onAuthenticationSuccess(request, response, authentication);return;}clearAuthenticationAttributes(request);// Use the DefaultSavedRequest URLString targetUrl = savedRequest.getRedirectUrl();logger.debug("Redirecting to DefaultSavedRequest Url: " + targetUrl);getRedirectStrategy().sendRedirect(request, response, targetUrl);}public void setRequestCache(RequestCache requestCache) {this.requestCache = requestCache;}
}
这里的核心方法就是onAuthenticationSuccess:
- 首先从requestcache中获取缓存下来的请求,如果没有获取到缓存请求,就说明用户在访问登录页面之前并没有访问其他页面,此时直接调用父类的onAuthenticationSuccess方法来处理,最终会重定向到defaultSuccessUrl指定的地址。
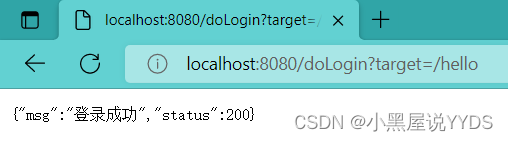
- 接下来会获取一个targetUrlParameter,这个是用户显式指定的、希望登录成功后重定向的地址,例如用户发送的登录请求是http://localhost:8080/doLogin?target=/hello,这就表示当用户登录成功之后,希望自动重定向到/hello这个接口,getTargetUrlParameter就是要获取重定向地址参数的key,也就是上面的target,拿到target之后,就可以获取到重定向地址了。
- 如果 targetUrlParameter 存在,或者用户设置了 alwaysUseDefaultTargetUrl 为 true, 这个时候缓存下来的请求就没有意义了。此时会直接调用父类的onAuthenticationSuccess方法完成重定向口 targetUrlParameter存在,则直接重定向到targetUrlParameter指定的地址;alwaysUseDefaultTargetUrl 为 true,则直接重定向到 defaultSuccessUrl 指定的地址;如果 targetUrlParameter 存在并且 alwaysUseDefaultTargetUrl 为 true,则重定向到 defaultSuccessUrl 指定的地址。
- 如果前面的条件都不满足,那么最终会从缓存请求savedRequest中获取重定向地址, 然后进行重定向操作。
这就是SavedRequestAwareAuthenticationSuccessHandler的实现逻辑,升发者也可以配置 自己的 SavedRequestAwareAuthenticationSuccessHandler,代码如下:
@Configuration
public class SecurityConfig extends WebSecurityConfigurerAdapter {@Overrideprotected void configure(HttpSecurity http) throws Exception {http.authorizeRequests().anyRequest().authenticated().and().formLogin().loginPage("/loginNew.html").loginProcessingUrl("/doLogin").successForwardUrl("/index").failureUrl("/loginNew.html").usernameParameter("uname").passwordParameter("passwd").permitAll().and().csrf().disable();}SavedRequestAwareAuthenticationSuccessHandler successHandler(){SavedRequestAwareAuthenticationSuccessHandler handler = new SavedRequestAwareAuthenticationSuccessHandler();handler.setDefaultTargetUrl("/index");handler.setTargetUrlParameter("target");return handler;}}
注意在配置时指定了 targetUrlParameter为target,这样用户就可以在登录请求中,通过 target来指定跳转地址了,然后我们修改一下前面login.html中的form表单:
<form id="login-form" class="form" action="/doLogin?target=/hello" method="post"><h3 class="text-center text-info">登录</h3><div class="form-group"><label for="username" class="text-info">用户名:</label><br><input type="text" name="uname" id="username" class="form-control"></div><div class="form-group"><label for="password" class="text-info">密码:</label><br><input type="text" name="passwd" id="password" class="form-control"></div><div class="form-group"><input type="submit" name="submit" class="btn btn-info btn-md" value="登录"></div>
</form>
在form表单中,action修改/doLogin?target=/hello,这样当用户登录成功之后,就始终跳转到/hello接口了。
当我们通过successForwardUrl来设置登录成功后重定向的地址时,实际上对应的实现类 就是 ForwardAuthenticationSuccessHandler,ForwardAuthenticationSuccessHandler 的源码特别简单,就是一个服务端转发,代码如下:
public class ForwardAuthenticationSuccessHandler implements AuthenticationSuccessHandler {private final String forwardUrl;public ForwardAuthenticationSuccessHandler(String forwardUrl) {Assert.isTrue(UrlUtils.isValidRedirectUrl(forwardUrl),() -> "'" + forwardUrl + "' is not a valid forward URL");this.forwardUrl = forwardUrl;}public void onAuthenticationSuccess(HttpServletRequest request, HttpServletResponse response, Authentication authentication) throws IOException, ServletException {request.getRequestDispatcher(forwardUrl).forward(request, response);}}
由上述代码可以看到,主要功能就是调用getRequestDispatcher方法进行服务端转发。 AuthenticationSuccessHandler默认的三个实现类,无论是哪一个,都是用来处理页面跳转的,有时候页面跳转并不能满足我们的需求,特别是现在流行的前后端分离开发中,用户登录成功后,就不再需要页面跳转了,只需要给前端返回一个JSON数据即可,告诉前端登录成功还是登录失败,前端收到消息之后自行处理。像这样的需求,我们可以通过自定义 AuthenticationSuccessHandler 的实现类来完成:
package com.intehel.demo.handler;import com.fasterxml.jackson.databind.ObjectMapper;
import org.springframework.security.core.Authentication;
import org.springframework.security.web.authentication.AuthenticationSuccessHandler;
import javax.servlet.ServletException;
import javax.servlet.http.HttpServletRequest;
import javax.servlet.http.HttpServletResponse;
import java.io.IOException;
import java.util.HashMap;
import java.util.Map;public class MyAuthenticationSuccessHandler implements AuthenticationSuccessHandler {@Overridepublic void onAuthenticationSuccess(HttpServletRequest request, HttpServletResponse response, Authentication authentication)throws IOException, ServletException {response.setContentType("application/json;charset=UTF-8");Map<String,Object> resp = new HashMap<String,Object>();resp.put("status",200);resp.put("msg","登录成功");ObjectMapper om = new ObjectMapper();String s = om.writeValueAsString(resp);response.getWriter().write(s);}}
在自定义的 MyAuthenticationSuccessHandler中,重写 onAuthenticationSuccess方法,在该方法中,通过HttpServletResponse对象返回一段登录成功的JSON字符串给前端即可。最后, 在 SecurityConfig中配置自定义的 MyAuthenticationSuccessHandler,代码如下:
@Configuration
public class SecurityConfig extends WebSecurityConfigurerAdapter {@Overrideprotected void configure(HttpSecurity http) throws Exception {http.authorizeRequests().anyRequest().authenticated().and().formLogin().loginPage("/loginNew.html").loginProcessingUrl("/doLogin").successHandler(new MyAuthenticationSuccessHandler()).failureUrl("/loginNew.html").usernameParameter("uname").passwordParameter("passwd").permitAll().and().csrf().disable();}}
配置完成后,重启项目,此时,当用户成功登录之后,就不会进行页面跳转了,而是返回一段JSON字符串:
1.2.2、登录失败
接下来看登录失败的处理逻辑。为了方便在前端页面展示登录失败的异常信息,我们首先在项目的pom.xml文件中引入thymeleaf依赖,代码如下:
<dependency><groupId>org.springframework.boot</groupId><artifactId>spring-boot-starter-thymeleaf</artifactId><version>2.0.7.RELEASE</version>
</dependency>
然后在resources/templates目录下新建mylogin.html,代码如下:
 <!DOCTYPE html>
<html lang="en" xmlns:th="http://www.thymeleaf.org">
<head><meta charset="UTF-8"><title>登录</title><link href="//maxcdn.bootstrapcdn.com/bootstrap/4.1.1/css/bootstrap.min.css" rel="stylesheet" id="bootstrap-css"><script src="//maxcdn.bootstrapcdn.com/bootstrap/4.1.1/js/bootstrap.min.js"></script><script src="//cdnjs.cloudflare.com/ajax/libs/jquery/3.2.1/jquery.min.js"></script>
</head>
<style>#login .container #login-row #login-column #login-box {border: 1px solid #9c9c9c;background-color: #EAEAEA;}
</style>
<body>
<div id="login"><div class="container"><div id="login-row" class="row justify-content-center align-items-center"><div id="login-column" class="col-md-6"><div id="login-box" class="col-md-12"><form id="login-form" class="form" action="/doLogin?target=/hello" method="post"><h3 class="text-center text-info">登录</h3><div th:text="${SPRING SECURITY LAST EXCEPTION}"></div><div class="form-group"><label for="username" class="text-info">用户名:</label><br><input type="text" name="uname" id="username" class="form-control"></div><div class="form-group"><label for="password" class="text-info">密码:</label><br><input type="text" name="passwd" id="password" class="form-control"></div><div class="form-group"><input type="submit" name="submit" class="btn btn-info btn-md" value="登录"></div></form></div></div></div></div>
</div>
</body>
</html>
mylogin.html和前面的login.html基本类似,前面的login.html是静态页面,这里的 mylogin.html是thymeleaf模板页面,mylogin.html页面在form中多了一个div,用来展示登录失败时候的异常信息,登录失败的异常信息会放在request中返回到前端,开发者可以将其直接提取岀来展示。
既然mylogm.html是动态页面,就不能像静态页面那样直接访问了,需要我们给mylogin.html页面提供一个访问控制器:
package com.intehel.demo.controller;import org.springframework.stereotype.Controller;
import org.springframework.web.bind.annotation.RequestMapping;@Controller
public class MyLoginController {@RequestMapping("/mylogin.html")public String myLogin(){return "mylogin";}}
最后再在SecurityConfig中配置登录页面,代码如下:
@Configuration
public class SecurityConfig extends WebSecurityConfigurerAdapter {@Overrideprotected void configure(HttpSecurity http) throws Exception {http.authorizeRequests().anyRequest().authenticated().and().formLogin().loginPage("/mylogin.html").loginProcessingUrl("/doLogin").defaultSuccessUrl("/index.html").failureUrl("/mylogin.html").usernameParameter("uname").passwordParameter("passwd").permitAll().and().csrf().disable();}
}
failureUrl表示登录失败后重定向到mylogin.html页面。重定向是一种客户端跳转,重定向不方便携带请求失败的异常信息(只能放在URL中)。
如果希望能够在前端展示请求失败的异常信息,可以使用下面这种方式:
@Configuration
public class SecurityConfig extends WebSecurityConfigurerAdapter {@Overrideprotected void configure(HttpSecurity http) throws Exception {http.authorizeRequests().anyRequest().authenticated().and().formLogin().loginPage("/mylogin.html").loginProcessingUrl("/doLogin").defaultSuccessUrl("/index.html").failureForwardUrl("/mylogin.html").usernameParameter("uname").passwordParameter("passwd").permitAll().and().csrf().disable();}}
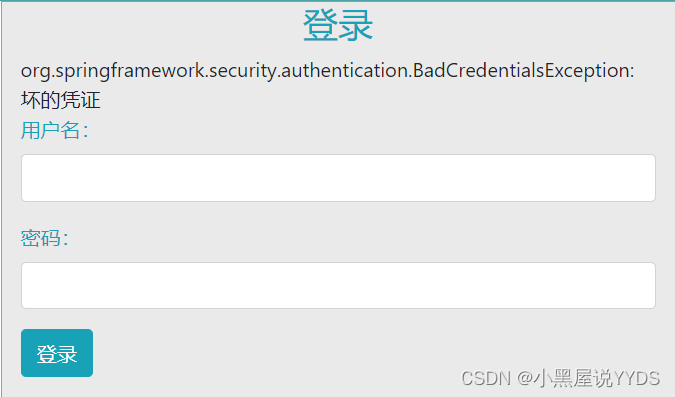
failureForwardUrl方法从名字上就可以看出,这种跳转是一种服务器端跳转,服务器端跳转的好处是可以携带登录异常信息,如果登录失败,自动跳转回登录页面后,就可以将错误信息展示出来,如图2-8所示。
无论是 failureUrl 还是 failureForwardUrl,最终所配置的都是 AuthenticationFailureHandler 接口的实现。Spring Security中提供了 AuthenticationFailureHandler 接口,用来规范登录失败的 实现:
public interface AuthenticationFailureHandler {void onAuthenticationFailure(HttpServletRequest request, HttpServletResponse response, AuthenticationException exception) throws IOException, ServletException;}
AuthenticationFailureHandler 接口中只有一个 onAuthenticationFailure 方法,用来处理登录 失败请求,request和response参数很好理解,最后的exception则表示登录失败的异常信息。 Spring Security 中为 AuthenticationFailureHandler 一共提供了五个实现类,如图:

- SimpleUrlAuthenticationFailureHandler默认的处理逻辑就是通过重定向跳转到登录页 面,当然也可以通过配置forwardToDestination属性将重定向改为服务器端跳转,failureUrl方法的底层实现逻辑就是 SimpleUrlAuthenticationFailureHandler。
- ExceptionMappingAuthenticationFailureHandler可以实现根据不同的异常类型,映射到不同的路径。
- ForwardAuthenticationFailureHandler表示通过服务器端跳转来重新回到登录页面, failureForwardUrl 方法的底层实现逻辑就是 ForwardAuthenticationFailureHandler。
- AuthenticationEntryPointFailureHandler是 Spring Security 5.2 新引进的处理类,可以 通过AuthenticationEntryPoint来处理登录异常。
- DelegatingAuthenticationFailureHandler可以实现为不同的异常类型配置不同的登录失败处理回调。
这里举一个简单的例子。假如不使用failureForwardUrl 方法,同时又想在登录失败后通过服务器端跳转回到登录页面,那么可以自定义SimpleUrlAuthenticationFailureHandler配置,并将forwardToDestination属性设置为true,代码如下:
@Configuration
public class SecurityConfig extends WebSecurityConfigurerAdapter {@Overrideprotected void configure(HttpSecurity http) throws Exception {http.authorizeRequests().anyRequest().authenticated().and().formLogin().loginPage("/mylogin.html").loginProcessingUrl("/doLogin").defaultSuccessUrl("/index.html").failureHandler(failureHandler()).usernameParameter("uname").passwordParameter("passwd").permitAll().and().csrf().disable();}SimpleUrlAuthenticationFailureHandler failureHandler(){SimpleUrlAuthenticationFailureHandler handler = new SimpleUrlAuthenticationFailureHandler("/mylogin.html");handler.setUseForward(true);return handler;}}
这样配置之后,如果用户再次登录失败,就会通过服务端跳转重新回到登录页面,登录页而也会展示相应的错误信息,效果和failureForwardUrl 一致。
SimpleUrlAuthenticationFailureHandler的源码也很简单,我们一起来看一下实现逻辑(源码比较长,这里列出来核心部分):
public class SimpleUrlAuthenticationFailureHandler implements AuthenticationFailureHandler {protected final Log logger = LogFactory.getLog(getClass());private String defaultFailureUrl;private boolean forwardToDestination = false;private boolean allowSessionCreation = true;private RedirectStrategy redirectStrategy = new DefaultRedirectStrategy();public SimpleUrlAuthenticationFailureHandler() {}public SimpleUrlAuthenticationFailureHandler(String defaultFailureUrl) {setDefaultFailureUrl(defaultFailureUrl);}public void onAuthenticationFailure(HttpServletRequest request,HttpServletResponse response, AuthenticationException exception)throws IOException, ServletException {if (defaultFailureUrl == null) {logger.debug("No failure URL set, sending 401 Unauthorized error");response.sendError(HttpStatus.UNAUTHORIZED.value(),HttpStatus.UNAUTHORIZED.getReasonPhrase());} else {saveException(request, exception);if (forwardToDestination) {logger.debug("Forwarding to " + defaultFailureUrl);request.getRequestDispatcher(defaultFailureUrl).forward(request, response);} else {logger.debug("Redirecting to " + defaultFailureUrl);redirectStrategy.sendRedirect(request, response, defaultFailureUrl);}}}protected final void saveException(HttpServletRequest request,AuthenticationException exception) {if (forwardToDestination) {request.setAttribute(WebAttributes.AUTHENTICATION_EXCEPTION, exception);} else {HttpSession session = request.getSession(false);if (session != null || allowSessionCreation) {request.getSession().setAttribute(WebAttributes.AUTHENTICATION_EXCEPTION,exception);}}}public void setDefaultFailureUrl(String defaultFailureUrl) {Assert.isTrue(UrlUtils.isValidRedirectUrl(defaultFailureUrl),() -> "'" + defaultFailureUrl + "' is not a valid redirect URL");this.defaultFailureUrl = defaultFailureUrl;}protected boolean isUseForward() {return forwardToDestination;}public void setUseForward(boolean forwardToDestination) {this.forwardToDestination = forwardToDestination;}}
从这段源码中可以看到,当用户构造SimpleUrlAuthenticationFailureHandler对象的时候, 就传入了 defaultFailureUrl也就是登录失败时要跳转的地址。在onAuthenticationFailure方法中,如果发现defaultFailureUrl为null,则直接通过response返回异常信息,否则调用 saveException 方法。在 saveException 方法中,如果 fowardToDestination 属性设置为ture,表示通过服务器端跳转回到登录页面,此时就把异常信息放到request中。再回到 onAuthenticationFailure方法中,如果用户设置fowardToDestination 为 true,就通过服务器 端跳转回到登录页面,否则通过重定向回到登录页面。
如果是前后端分离开发,登录失败时就不需要页面跳转了,只需要返回JSON字符串给前端即可,此时可以通过自定义AuthenticationFailureHandler的实现类来完成,代码如下:
package com.intehel.demo.handler;import com.fasterxml.jackson.databind.ObjectMapper;
import org.springframework.security.core.AuthenticationException;
import org.springframework.security.web.authentication.AuthenticationFailureHandler;
import javax.servlet.ServletException;
import javax.servlet.http.HttpServletRequest;
import javax.servlet.http.HttpServletResponse;
import java.io.IOException;
import java.util.HashMap;
import java.util.Map;public class MyAuthenticationFailureHandler implements AuthenticationFailureHandler {@Overridepublic void onAuthenticationFailure(HttpServletRequest request, HttpServletResponse response, AuthenticationException exception)throws IOException, ServletException {response.setContentType("application/json;charset=UTF-8");Map<String,Object> resp = new HashMap<String,Object>();resp.put("status",500);resp.put("msg","登录失败"+exception.getMessage());ObjectMapper om = new ObjectMapper();String s = om.writeValueAsString(resp);response.getWriter().write(s);}}
然后在SecurityConfig中进行配置即可:
package com.intehel.demo.config;import com.intehel.demo.handler.MyAuthenticationFailureHandler;
import org.springframework.context.annotation.Configuration;
import org.springframework.security.config.annotation.web.builders.HttpSecurity;
import org.springframework.security.config.annotation.web.configuration.WebSecurityConfigurerAdapter;@Configuration
public class SecurityConfig extends WebSecurityConfigurerAdapter {@Overrideprotected void configure(HttpSecurity http) throws Exception {http.authorizeRequests().anyRequest().authenticated().and().formLogin().loginPage("/mylogin.html").loginProcessingUrl("/doLogin").defaultSuccessUrl("/index.html").failureHandler(new MyAuthenticationFailureHandler()).usernameParameter("uname").passwordParameter("passwd").permitAll().and().csrf().disable();}}
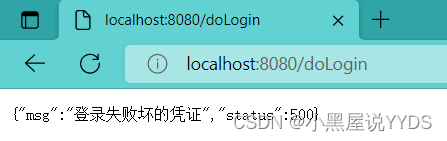
配置完成后,当用户再次登录失败,就不会进行页而跳转了,而是直接返回JSON字符串, 如图2-10所示。
1.2.3、注销登录
Spring Security中提供了默认的注销页面,当然开发者也可以根据自己的需求对注销登录进行定制。
@Configuration
public class SecurityConfig extends WebSecurityConfigurerAdapter {@Overrideprotected void configure(HttpSecurity http) throws Exception {http.authorizeRequests().anyRequest().authenticated().and().formLogin().loginPage("/mylogin.html").loginProcessingUrl("/doLogin").defaultSuccessUrl("/index.html").failureHandler(new MyAuthenticationFailureHandler()).usernameParameter("uname").passwordParameter("passwd").permitAll().and().logout().logoutUrl("/logout").invalidateHttpSession(true).clearAuthentication(true).logoutSuccessUrl("/mylogin.html").and().csrf().disable();}}
- 通过.logout()方法开启注销登录配置。
- logoutUrl指定了注销登录请求地址,默认是GET请求,路径为/logout。
- invalidateHttpSession 表示是否使 session 失效,默认为 true。
- clearAuthentication表示是否清除认证信息,默认为true。
- logoutSuccessUrl表示注销登录后的跳转地址。
配置完成后,再次启动项目,登录成功后,在浏览器中输入http://localhost:8080/logout就可以发起注销登录请求了,注销成功后,会自动跳转到mylogin.html页面。
如果项目有需要,开发者也可以配置多个注销登录的请求,同时还可以指定请求的方法。
package com.intehel.demo.config;import com.intehel.demo.handler.MyAuthenticationFailureHandler;
import org.springframework.context.annotation.Configuration;
import org.springframework.security.config.annotation.web.builders.HttpSecurity;
import org.springframework.security.config.annotation.web.configuration.WebSecurityConfigurerAdapter;
import org.springframework.security.web.util.matcher.AntPathRequestMatcher;
import org.springframework.security.web.util.matcher.OrRequestMatcher;@Configuration
public class SecurityConfig extends WebSecurityConfigurerAdapter {@Overrideprotected void configure(HttpSecurity http) throws Exception {http.authorizeRequests().anyRequest().authenticated().and().formLogin().loginPage("/mylogin.html").loginProcessingUrl("/doLogin").defaultSuccessUrl("/index.html").failureHandler(new MyAuthenticationFailureHandler()).usernameParameter("uname").passwordParameter("passwd").permitAll().and().logout().logoutRequestMatcher(new OrRequestMatcher(new AntPathRequestMatcher("/logout1","GET"),new AntPathRequestMatcher("/logout2","POST"))).invalidateHttpSession(true).clearAuthentication(true).logoutSuccessUrl("/mylogin.html").and().csrf().disable();}}
上面这个配置表示注销请求路径有两个:
- 第一个是/logout1,请求方法是GET。
- 第二个是/logout2,请求方法是POST。
使用任意一个请求都可以完成登录注销。
如果项目是前后端分离的架构,注销成功后就不需要页面跳转了,只需将注销成功的信息返回给前端即可,此时我们可以自定义返回内容:
@Configuration
public class SecurityConfig extends WebSecurityConfigurerAdapter {@Overrideprotected void configure(HttpSecurity http) throws Exception {http.authorizeRequests().anyRequest().authenticated().and().formLogin().loginPage("/mylogin.html").loginProcessingUrl("/doLogin").defaultSuccessUrl("/index.html").failureHandler(new MyAuthenticationFailureHandler()).usernameParameter("uname").passwordParameter("passwd").permitAll().and().logout().logoutRequestMatcher(new OrRequestMatcher(new AntPathRequestMatcher("/logout1","GET"),new AntPathRequestMatcher("/logout2","POST"))).invalidateHttpSession(true).clearAuthentication(true).logoutSuccessHandler((req,resp,auth)->{resp.setContentType("application/json;charset=UTF-8");Map<String,Object> result = new HashMap<String,Object>();result.put("status",200);result.put("msg","注销成功!");ObjectMapper om = new ObjectMapper();String s = om.writeValueAsString(result);resp.getWriter().write(s);}).and().csrf().disable();}}
配置 logoutSuccessHandler 和 logoutSuccessUrl 类似于前面所介绍的 successHandler 和defaultSuccessUrl之间的关系,只是类不同而已,因此这里不再赘述,读者可以按照我们前面的分析思路自行分析。
配置完成后,重启项目,登录成功后再去注销登录,无论是使用/logout1还是/logout2进行注销,只要注销成功后,就会返回一段JSON字符串。
如果开发者希望为不同的注销地址返回不同的结果,也是可以的,配置如下:
 @Configuration
public class SecurityConfig extends WebSecurityConfigurerAdapter {@Overrideprotected void configure(HttpSecurity http) throws Exception {http.authorizeRequests().anyRequest().authenticated().and().formLogin().loginPage("/mylogin.html").loginProcessingUrl("/doLogin").defaultSuccessUrl("/index.html").failureHandler(new MyAuthenticationFailureHandler()).usernameParameter("uname").passwordParameter("passwd").permitAll().and().logout().logoutRequestMatcher(new OrRequestMatcher(new AntPathRequestMatcher("/logout1","GET"),new AntPathRequestMatcher("/logout2","POST"))).invalidateHttpSession(true).clearAuthentication(true).defaultLogoutSuccessHandlerFor((req,resp,auth)->{resp.setContentType("application/json;charset=UTF-8");Map<String,Object> result = new HashMap<String,Object>();result.put("status",200);result.put("msg","使用logout1注销成功!");ObjectMapper om = new ObjectMapper();String s = om.writeValueAsString(result);resp.getWriter().write(s);},new AntPathRequestMatcher("/logout1","GET")).defaultLogoutSuccessHandlerFor((req,resp,auth)->{resp.setContentType("application/json;charset=UTF-8");Map<String,Object> result = new HashMap<String,Object>();result.put("status",200);result.put("msg","使用logout2注销成功!");ObjectMapper om = new ObjectMapper();String s = om.writeValueAsString(result);resp.getWriter().write(s);},new AntPathRequestMatcher("/logout1","GET")).and().csrf().disable();}}
通过defaultLogoutSuccessHandlerFor方法可以注册多个不同的注销成功回调函数,该方法第一个参数是注销成功回调,第二个参数则是具体的注销请求。当用户注销成功后,使用了哪个注销请求,就给出对应的响应信息。
相关文章:
Spring Security登录表单配置(3)
1、登录表单配置 1.1、快速入门 理解了入门案例之后,接下来我们再来看一下登录表单的详细配置,首先创建一个新的Spring Boot项目,引入Web和Spring Security依赖,代码如下: <dependency><groupId>org.sp…...

代理模式(初学)
代理模式 一、什么是代理模式 代理模式:为其他对象提供一种代理以控制对这个对象的访问 二、简单例子 这里面的骏骏就起到了代理的身份,而贵贵则是被代理的身份。 三、代码实现 1、用一个接口(GivingGifts)来保存送礼物的动作…...

Spring底层架构核心概念
BeanDefinition BeanDefinition表示Bean定义,BeanDefinition中存在很多属性用来描述一个Bean的特点。比如: class,表示Bean类型scope,表示Bean作用域,单例或原型等lazyInit:表示Bean是否是懒加载initMeth…...

为什么高精度机器人普遍使用谐波减速器而不是普通减速器?
机器人作为一种能够代替人类完成各种工作的智能设备,已经广泛应用于工业生产、医疗卫生、军事防卫等领域。其中,机器人的关节传动系统是机器人运动的核心,而减速器作为关节传动系统中的重要组成部分部分,对机器人的性能和技术水平…...

特殊类的设计
目录 一、设计一个类,不能被拷贝二、设计一个类,只能在堆上创建对象三、设计一个类,只能从栈上创建对象四、设计一个类,不能被继承五、设计一个类,只能创建一个对象(单例模式)5.1 饿汉模式5.2 懒…...
HTTP 协议的基本格式(部分)
要想了解HTTP,得先知道什么是HTTP,那么HTTP是什么呢?HTTP (全称为 "超文本传输协议") 是一种应用非常广泛的 应用层协议。那什么是超文本呢?那就是除了文本,还有图片,声音,视频等。 …...

Android 第三方app https 抓包
工具选择 Charles 或 Fiddler 都可以 在PC上安装工具并进行设置 Charles Fiddler 设置按官网说明设置一下好。 Charles设置 Fiddler设置 Android Api Level > 24 SSL特殊设置 当Android 的 Api Level > 24时需要修改一下app的一起配置 1.在项目中添加 Android/src/…...

Linux-gitlab常用命令
gitlab常用命令 1、查看gitlab状态2、gitlab启动3、gitlab关闭 1、查看gitlab状态 gitlab-ctl status2、gitlab启动 gitlab-ctl start3、gitlab关闭 gitlab-ctl stop...
)
android 13.0 Settings主页动态显示和隐藏设置项(一级菜单显示和隐藏)
1.前言 在13.0定制化开发Settings时,有产品需求要求对主页设置项需要动态控制显示和隐藏,这就需要用定义两个页面来区分加载不同settings页面 接下来分析下相关的实现流程 实现思路: 1.用系统变量控制显示和隐藏某些项 2.增加一个自定义页面来适配不同页面 2.Settings主页动态…...

Android MJPEG播放器
MJPEG Android MJPEG播放 支持http mjpeg直播流播放; 支持编码MP4保存视频; 资源 名字资源jar下载GitHub查看Gitee查看 Maven 1.build.grade allprojects {repositories {...maven { url https://jitpack.io }} }2./app/build.grade dependencies {implementation com.g…...

Ubuntu - 安装 MySQL 8
以下是在 Ubuntu 上安装 MySQL 8 的完整步骤: 步骤 1:更新包列表 首先,打开终端并执行以下命令来确保包列表是最新的: sudo apt update 步骤 2:安装 MySQL 8 服务器 接下来,使用以下命令安装 MySQL 8 …...
谷歌浏览器跨域及--disable-web-security无效解决办法
谷歌浏览器跨域设置 (1)创建一个目录,例如我在C盘创建MyChromeDevUserData文件夹 (2) 在桌面选择谷歌浏览器右键 -> 属性 -> 快捷方式 -> 目标,添加--disable-web-security --user-data-dirC:\M…...

IT售前“楠“知识之这!就是售前-尚文网络xUP楠哥
进Q群11372462领取专属报名福利 !!! # 何为售前工程师 售前工程师在一个IT信息化团队中起到了呈上启下的绝对重要作用!站在销售团队的视角,需要售前工程师从技术维度支持销售业务的开展;站在对立面用户的…...

JS元编程
如果说常规编程是写代码去操作数据,那么元编程就是写代码去操作其他代码。 1 属性的特性 JS的属性有名字和值,但每个属性也有3个关联的特性: 可写(writable)特性指定是否可修改属性的值。 可枚举(enume…...

通过Gunicorn、Supervisor和Nginx更好地运行Django
文章目录 通过runserver运行Django通过Gunicorn运行Django通过Nginx来做反向代理通过Supervisor来托管gunicorn和nginx 同步发布在个人站点:https://panzhixiang.cn 通过runserver运行Django 相信用过Django做开发的人对于python manage.py runserver 这个命令一定…...

[SQL] union all
UNION ALL 是一个用于合并多个查询结果集的操作符。它将多个 SELECT 查询的结果合并成一个结果集,并且保留所有的行,包括重复的行。 具体语法如下: SELECT column1, column2, ... FROM table1 UNION ALL SELECT column1, column2, ... FROM…...
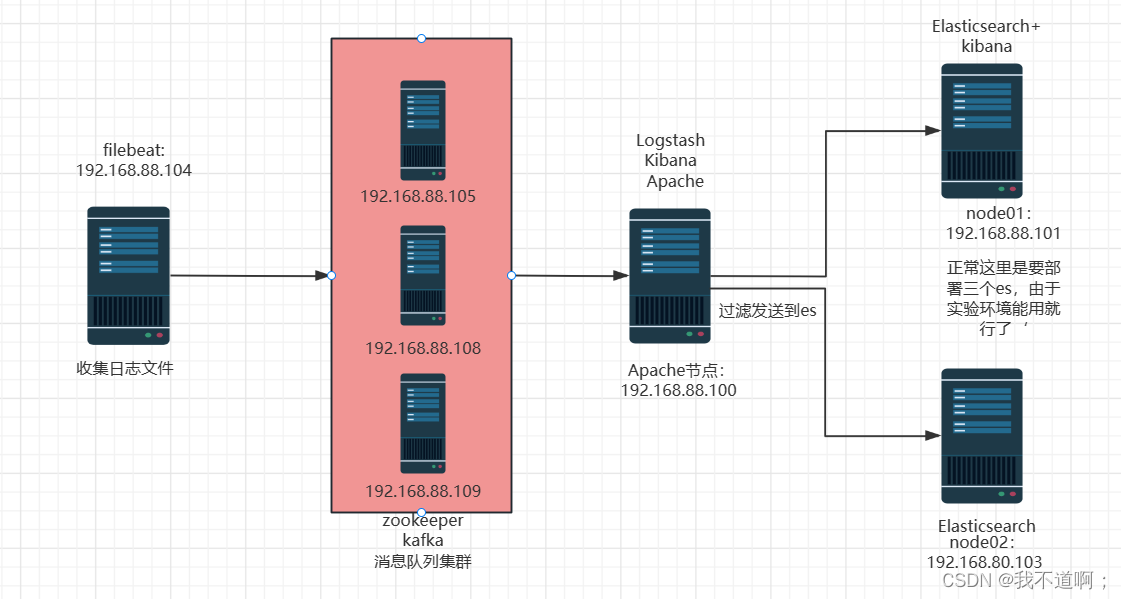
Filebeat+Kafka+ELK日志分析架构
目录 一、zookeeper: 1. zookeeper 定义: 2. Zookeeper 工作机制: 3. Zookeeper 特点: 4. Zookeeper 数据结构: 5. Zookeeper 应用场景: 5.1 统一命名服务: 5.2 统一配置管理: 5.3 统一集群管理: 5.4 服务器动态上下线: 5.5 软负载均衡: 6. Zookeeper 选…...

RK3568驱动指南|第六篇-平台总线-第55章 初识设备树
瑞芯微RK3568芯片是一款定位中高端的通用型SOC,采用22nm制程工艺,搭载一颗四核Cortex-A55处理器和Mali G52 2EE 图形处理器。RK3568 支持4K 解码和 1080P 编码,支持SATA/PCIE/USB3.0 外围接口。RK3568内置独立NPU,可用于轻量级人工…...

【ELK 使用指南 1】ELK + Filebeat 分布式日志管理平台部署
ELK和EFLK 一、前言1.1 日志分析的作用1.2 需要收集的日志1.3 完整日志系统的基本特征 二、ELK概述2.1 ELK简介2.2 为什么要用ELK?2.3 ELK的组件 三、ELK组件详解3.1 Logstash3.1.1 简介3.1.2 Logstash命令常用选项3.1.3 Logstash 的输入和输出流3.1.4 Logstash配置文件 3.2 E…...

Springboot高频应用注解
本文旨在记录开发中遇到的SpringBoot高频注解,并针对其具体应用记录。 一、LOMBOK相关注解 Slf4j 目的在于使用Log的日志功能,可以在JAVA中自动生成日志记录器!使用时在类上添加Slf4j注解后即可以在类中调用log方法如 可以 调用 log.info …...

QEMU跨架构神器:5分钟搞定Win10到银河麒麟的SSH端口映射
QEMU跨架构神器:5分钟搞定Win10到银河麒麟的SSH端口映射 在跨平台开发与测试中,如何在Windows主机上快速访问ARM架构虚拟机的SSH服务?传统网络配置往往需要复杂的桥接或NAT规则,而QEMU的hostfwd参数只需一行命令即可实现端口映射…...

PlayIntegrityFix终极指南:2025年如何彻底解决Android设备认证问题
PlayIntegrityFix终极指南:2025年如何彻底解决Android设备认证问题 【免费下载链接】PlayIntegrityFix Fix Play Integrity (and SafetyNet) verdicts. 项目地址: https://gitcode.com/GitHub_Trending/pl/PlayIntegrityFix 还在为Google Play设备认证失败而…...

实战:利用 AI 自动生成‘常见追问列表’,提前在页面底部布局搜索答案
在数字内容日益爆炸的今天,用户对于信息的获取不再满足于单向的阅读。他们总会有进一步的疑问,寻求更深层次的理解或关联信息。传统的FAQ(常见问题解答)列表,往往是人工编辑、静态固化的,难以跟上内容更新的…...

Mermaid Live Editor:文本驱动的图表创作革命
Mermaid Live Editor:文本驱动的图表创作革命 【免费下载链接】mermaid-live-editor Edit, preview and share mermaid charts/diagrams. New implementation of the live editor. 项目地址: https://gitcode.com/GitHub_Trending/me/mermaid-live-editor 一…...

深度拆解Web3:不是泡沫,是互联网的下一场范式革命
提到Web3,有人觉得是加密货币的噱头,有人称之为下一代互联网的终极形态。在概念炒作与行业乱象的裹挟下,很多人对Web3的认知停留在表面,既看不清它的核心价值,也摸不透它的真实边界。事实上,Web3并非凭空诞…...

从 i.MX6ULL 谈 ARM Cortex-A7 与 ARMv7-A 架构核心知识点
在嵌入式开发领域,NXP 的 i.MX6ULL 是一款应用极为广泛的 32 位工业级处理器,凭借低功耗、高性价比的特性成为物联网、工业控制、智能终端等场景的优选方案。而深入理解 i.MX6ULL 的核心架构,绕不开其搭载的 ARM Cortex-A7 内核与 ARMv7-A 指…...

基于Qwen3-ASR的语音爬虫:音频内容自动化采集与分析
基于Qwen3-ASR的语音爬虫:音频内容自动化采集与分析 1. 引言 你有没有遇到过这样的情况:需要从海量的音频内容中提取有价值的信息,却苦于手动处理效率太低?无论是市场调研、舆情监控,还是内容分析,传统的…...
)
告别VMware!物理机迁移Proxmox全攻略(含Linux网卡配置避坑指南)
告别VMware!物理机迁移Proxmox全攻略(含Linux网卡配置避坑指南) 虚拟化技术正在经历一场静默革命——越来越多的企业开始从商业闭源的VMware生态转向开源的Proxmox VE平台。这种迁移不仅能显著降低许可成本,还能获得更灵活的部署方…...
|线路+站点分离|SHP格式|覆盖所有开通城市)
2025年全国地铁线路与站点矢量数据(高德地图源)|线路+站点分离|SHP格式|覆盖所有开通城市
🔍 数据简介 本数据集基于高德地图2025年1月最新公开数据提取,完整覆盖中国大陆所有已开通城市轨道交通的城市包含: 地铁/轻轨/市域铁路/有轨电车等所有轨道交通车型运营中、试运行线路 数据严格按线路(Line) 与 站点&…...

【开源】专业的 Seedance 2.0 分镜提示词生成专家
前几天发布的seedance 2.0 提示语分镜工具,帮佬做剧本搞分镜,不少人喜欢,有佬要求能不能开源,好的!那么就开源: 这是一个专业的 Seedance 2.0 分镜提示词生成专家,帮助用户将想法转化为专业的 A…...