TensorRT学习笔记--常用卷积、激活、池化和FC层算子API
目录
1--Tensor算子API
1-1--卷积算子
1-2--激活算子
1-3--池化算子
1-4--FC层算子
2--代码实例
3--编译运行
1--Tensor算子API
TensorRT提供了卷积层、激活函数和池化层三种最常用算子的API:
// 创建一个空的网络
nvinfer1::INetworkDefinition* network = builder->createNetworkV2(0U); // 添加卷积层算子
nvinfer1::IConvolutionLayer* conv1 = network->addConvolutionNd(*data, 64, nvinfer1::DimsHW{3, 3}, weightMap["features.0.weight"], weightMap["features.0.bias"]);// 添加激活算子
nvinfer1::IActivationLayer* relu1 = network->addActivation(*conv1->getOutput(0), nvinfer1::ActivationType::kRELU);// 添加池化算子
nvinfer1::IPoolingLayer* pool1 = network->addPoolingNd(*relu1->getOutput(0), nvinfer1::PoolingType::kMAX, nvinfer1::DimsHW{2, 2});
1-1--卷积算子
IConvolutionLayer* addConvolutionNd(ITensor& input, int32_t nbOutputMaps, Dims kernelSize, Weights kernelWeights, Weights biasWeights
)
第一个参数表示输入的Tensor数据;
第二个参数表示卷积层输出的特征图数,即通道数channel;
第三个参数表示使用的卷积核大小;
第四个参数和第五个参数表示加载的权重;
1-2--激活算子
IActivationLayer* addActivation(ITensor& input, ActivationType type
)
第一个参数表示输入的Tensor数据;
第二个参数表示使用的激活函数类型,包括以下激活函数:
enum class ActivationType : int32_t
{kRELU = 0,             //!< Rectified linear activation.kSIGMOID = 1,          //!< Sigmoid activation.kTANH = 2,             //!< TanH activation.kLEAKY_RELU = 3,       //!< LeakyRelu activation: x>=0 ? x : alpha * x.kELU = 4,              //!< Elu activation: x>=0 ? x : alpha * (exp(x) - 1).kSELU = 5,             //!< Selu activation: x>0 ? beta * x : beta * (alpha*exp(x) - alpha)kSOFTSIGN = 6,         //!< Softsign activation: x / (1+|x|)kSOFTPLUS = 7,         //!< Parametric softplus activation: alpha*log(exp(beta*x)+1)kCLIP = 8,             //!< Clip activation: max(alpha, min(beta, x))kHARD_SIGMOID = 9,     //!< Hard sigmoid activation: max(0, min(1, alpha*x+beta))kSCALED_TANH = 10,     //!< Scaled tanh activation: alpha*tanh(beta*x)kTHRESHOLDED_RELU = 11 //!< Thresholded ReLU activation: x>alpha ? x : 0
};
1-3--池化算子
IPoolingLayer* addPoolingNd(ITensor& input, PoolingType type, Dims windowSize
)
第一个参数表示输入的Tensor数据;
第二个参数表示使用的池化类型;
第三个参数表示池化窗口的大小;
提供的池化类型包括:
enum class PoolingType : int32_t
{kMAX = 0,              // Maximum over elementskAVERAGE = 1,          // Average over elements. If the tensor is padded, the count includes the paddingkMAX_AVERAGE_BLEND = 2 // Blending between max and average pooling: (1-blendFactor)*maxPool + blendFactor*avgPool
};
1-4--FC层算子
IFullyConnectedLayer* addFullyConnected(ITensor& input, int32_t nbOutputs, Weights kernelWeights, Weights biasWeights
)
第一个参数表示输入的Tensor数据;
第二个参数表示输出的通道数;
第三个参数和第四个参数表示加载的权重;
2--代码实例
基于算子 API 搭建 VGG11:(完整可运行的代码参考:liujf69/TensorRT-Demo)
核心程序代码:
// 创建builder和config
nvinfer1::IBuilder* builder = nvinfer1::createInferBuilder(gLogger);
nvinfer1::IBuilderConfig* config = builder->createBuilderConfig();// 基于builder创建network
nvinfer1::INetworkDefinition* network = builder->createNetworkV2(0U); // 一开始是空的// 调用API搭建Network
// 创建输入
nvinfer1::ITensor* data = network->addInput(this->INPUT_BLOB_NAME, dt, nvinfer1::Dims3{3, this->INPUT_H, this->INPUT_W});
// 搭建卷积层
nvinfer1::IConvolutionLayer* conv1 = network->addConvolutionNd(*data, 64, nvinfer1::DimsHW{3, 3}, weightMap["features.0.weight"], weightMap["features.0.bias"]);
conv1->setPaddingNd(nvinfer1::DimsHW{1, 1});
// 搭建激活层
nvinfer1::IActivationLayer* relu1 = network->addActivation(*conv1->getOutput(0), nvinfer1::ActivationType::kRELU);
// 搭建池化层
nvinfer1::IPoolingLayer* pool1 = network->addPoolingNd(*relu1->getOutput(0), nvinfer1::PoolingType::kMAX, nvinfer1::DimsHW{2, 2});
pool1->setStrideNd(nvinfer1::DimsHW{2, 2});
...
// 搭建FC层
nvinfer1::IFullyConnectedLayer* fc1 = network->addFullyConnected(*pool1->getOutput(0), 4096, weightMap["classifier.0.weight"], weightMap["classifier.0.bias"]);
...// 基于config和network生成engine
builder->setMaxBatchSize(maxBatchSize);
config->setMaxWorkspaceSize(1 << 20);
nvinfer1::ICudaEngine* engine = builder->buildEngineWithConfig(*network, *config);
...
主程序代码:
#include "NvInfer.h"
#include "cuda_runtime_api.h"
#include <fstream>
#include <iostream>
#include <map>
#include <sstream>
#include <vector>
#include <chrono>
#include "logging.h"
#include <iostream>#define CHECK(status) \do\{\auto ret = (status);\if (ret != 0)\{\std::cerr << "Cuda failure: " << ret << std::endl;\abort();\}\} while (0)static Logger gLogger; // 日志class VGG_Demo{
public:VGG_Demo(){this->prob = new float[OUTPUT_SIZE];}~VGG_Demo(){delete[] prob;}int serialize();void APIToModel(unsigned int maxBatchSize, nvinfer1::IHostMemory** modelStream);nvinfer1::ICudaEngine* createEngine(unsigned int maxBatchSize, nvinfer1::IBuilder* builder, nvinfer1::IBuilderConfig* config, nvinfer1::DataType dt);std::map<std::string, nvinfer1::Weights> loadWeights(const std::string file);void doInference(nvinfer1::IExecutionContext& context, float* input, float* output, int batchSize);void deserialize(float* data);void load_engine();const char* INPUT_BLOB_NAME = "data"; // 输入名称const char* OUTPUT_BLOB_NAME = "prob"; // 输出名称const int INPUT_H = 224; // 输入数据高度const int INPUT_W = 224; // 输入数据宽度const int OUTPUT_SIZE = 1000; // 输出大小std::string engine_file = "./vgg.engine";char* trtModelStream = nullptr;float* prob = nullptr;size_t size = 0;
};int VGG_Demo::serialize(){nvinfer1::IHostMemory* modelStream  = nullptr;this->APIToModel(1, &modelStream); // 调用API构建networkassert(modelStream != nullptr);// 保存std::ofstream p("./vgg.engine", std::ios::binary);if (!p) {std::cerr << "could not open plan output file" << std::endl;return -1;}p.write(reinterpret_cast<const char*>(modelStream->data()), modelStream->size());modelStream->destroy();return 1;
}void VGG_Demo::APIToModel(unsigned int maxBatchSize, nvinfer1::IHostMemory** modelStream){// 创建builder和confignvinfer1::IBuilder* builder = nvinfer1::createInferBuilder(gLogger);nvinfer1::IBuilderConfig* config = builder->createBuilderConfig();nvinfer1::ICudaEngine* engine = this->createEngine(maxBatchSize, builder, config, nvinfer1::DataType::kFLOAT);assert(engine != nullptr);// 序列化*modelStream = engine->serialize();// 销毁engine->destroy();builder->destroy();config->destroy();
}nvinfer1::ICudaEngine* VGG_Demo::createEngine(unsigned int maxBatchSize, nvinfer1::IBuilder* builder, nvinfer1::IBuilderConfig* config, nvinfer1::DataType dt){// 加载权重std::map<std::string, nvinfer1::Weights> weightMap = loadWeights("../weights/vgg.wts");nvinfer1::Weights emptywts{nvinfer1::DataType::kFLOAT, nullptr, 0};nvinfer1::INetworkDefinition* network = builder->createNetworkV2(0U); // 创建一个空的networknvinfer1::ITensor* data = network->addInput(this->INPUT_BLOB_NAME, dt, nvinfer1::Dims3{3, this->INPUT_H, this->INPUT_W}); // 创建输入assert(data);// 使用卷积、激活和池化三种算子,按顺序连接三种算子,并用对应的权重初始化nvinfer1::IConvolutionLayer* conv1 = network->addConvolutionNd(*data, 64, nvinfer1::DimsHW{3, 3}, weightMap["features.0.weight"], weightMap["features.0.bias"]);assert(conv1);conv1->setPaddingNd(nvinfer1::DimsHW{1, 1});nvinfer1::IActivationLayer* relu1 = network->addActivation(*conv1->getOutput(0), nvinfer1::ActivationType::kRELU);assert(relu1);nvinfer1::IPoolingLayer* pool1 = network->addPoolingNd(*relu1->getOutput(0), nvinfer1::PoolingType::kMAX, nvinfer1::DimsHW{2, 2});assert(pool1);pool1->setStrideNd(nvinfer1::DimsHW{2, 2});conv1 = network->addConvolutionNd(*pool1->getOutput(0), 128, nvinfer1::DimsHW{3, 3}, weightMap["features.3.weight"], weightMap["features.3.bias"]);conv1->setPaddingNd(nvinfer1::DimsHW{1, 1});relu1 = network->addActivation(*conv1->getOutput(0), nvinfer1::ActivationType::kRELU);pool1 = network->addPoolingNd(*relu1->getOutput(0), nvinfer1::PoolingType::kMAX, nvinfer1::DimsHW{2, 2});pool1->setStrideNd(nvinfer1::DimsHW{2, 2});conv1 = network->addConvolutionNd(*pool1->getOutput(0), 256, nvinfer1::DimsHW{3, 3}, weightMap["features.6.weight"], weightMap["features.6.bias"]);conv1->setPaddingNd(nvinfer1::DimsHW{1, 1});relu1 = network->addActivation(*conv1->getOutput(0), nvinfer1::ActivationType::kRELU);conv1 = network->addConvolutionNd(*relu1->getOutput(0), 256, nvinfer1::DimsHW{3, 3}, weightMap["features.8.weight"], weightMap["features.8.bias"]);conv1->setPaddingNd(nvinfer1::DimsHW{1, 1});relu1 = network->addActivation(*conv1->getOutput(0), nvinfer1::ActivationType::kRELU);pool1 = network->addPoolingNd(*relu1->getOutput(0), nvinfer1::PoolingType::kMAX, nvinfer1::DimsHW{2, 2});pool1->setStrideNd(nvinfer1::DimsHW{2, 2});conv1 = network->addConvolutionNd(*pool1->getOutput(0), 512, nvinfer1::DimsHW{3, 3}, weightMap["features.11.weight"], weightMap["features.11.bias"]);conv1->setPaddingNd(nvinfer1::DimsHW{1, 1});relu1 = network->addActivation(*conv1->getOutput(0), nvinfer1::ActivationType::kRELU);conv1 = network->addConvolutionNd(*relu1->getOutput(0), 512, nvinfer1::DimsHW{3, 3}, weightMap["features.13.weight"], weightMap["features.13.bias"]);conv1->setPaddingNd(nvinfer1::DimsHW{1, 1});relu1 = network->addActivation(*conv1->getOutput(0), nvinfer1::ActivationType::kRELU);pool1 = network->addPoolingNd(*relu1->getOutput(0), nvinfer1::PoolingType::kMAX, nvinfer1::DimsHW{2, 2});pool1->setStrideNd(nvinfer1::DimsHW{2, 2});conv1 = network->addConvolutionNd(*pool1->getOutput(0), 512, nvinfer1::DimsHW{3, 3}, weightMap["features.16.weight"], weightMap["features.16.bias"]);conv1->setPaddingNd(nvinfer1::DimsHW{1, 1});relu1 = network->addActivation(*conv1->getOutput(0), nvinfer1::ActivationType::kRELU);conv1 = network->addConvolutionNd(*relu1->getOutput(0), 512, nvinfer1::DimsHW{3, 3}, weightMap["features.18.weight"], weightMap["features.18.bias"]);conv1->setPaddingNd(nvinfer1::DimsHW{1, 1});relu1 = network->addActivation(*conv1->getOutput(0), nvinfer1::ActivationType::kRELU);pool1 = network->addPoolingNd(*relu1->getOutput(0), nvinfer1::PoolingType::kMAX, nvinfer1::DimsHW{2, 2});pool1->setStrideNd(nvinfer1::DimsHW{2, 2});// 使用全连接层算子nvinfer1::IFullyConnectedLayer* fc1 = network->addFullyConnected(*pool1->getOutput(0), 4096, weightMap["classifier.0.weight"], weightMap["classifier.0.bias"]);assert(fc1);relu1 = network->addActivation(*fc1->getOutput(0), nvinfer1::ActivationType::kRELU);fc1 = network->addFullyConnected(*relu1->getOutput(0), 4096, weightMap["classifier.3.weight"], weightMap["classifier.3.bias"]);relu1 = network->addActivation(*fc1->getOutput(0), nvinfer1::ActivationType::kRELU);fc1 = network->addFullyConnected(*relu1->getOutput(0), 1000, weightMap["classifier.6.weight"], weightMap["classifier.6.bias"]);fc1->getOutput(0)->setName(OUTPUT_BLOB_NAME); // 设置输出名称network->markOutput(*fc1->getOutput(0)); // 标记输出// 生成enginebuilder->setMaxBatchSize(maxBatchSize);config->setMaxWorkspaceSize(1 << 20);nvinfer1::ICudaEngine* engine = builder->buildEngineWithConfig(*network, *config);std::cout << "build out" << std::endl;// 生成engine后释放networknetwork->destroy();// 释放权重内存for (auto& mem : weightMap) free((void*) (mem.second.values)); return engine;
}std::map<std::string, nvinfer1::Weights> VGG_Demo::loadWeights(const std::string file){std::cout << "Loading weights: " << file << std::endl;std::map<std::string, nvinfer1::Weights> weightMap; // 权重名称和权重类的哈希表std::ifstream input(file);assert(input.is_open() && "Unable to load weight file.");// 首先读取权重block的个数int32_t count;input >> count;assert(count > 0 && "Invalid weight map file.");// 遍历权重blockwhile (count--){nvinfer1::Weights wt{nvinfer1::DataType::kFLOAT, nullptr, 0}; // 初始化一个权重对象uint32_t size;// Read name and type of blobstd::string name;input >> name >> std::dec >> size; // std::dec表示使用十进制表示权重的sizewt.type = nvinfer1::DataType::kFLOAT; // 设置权重的类型// 拷贝权重值uint32_t* val = reinterpret_cast<uint32_t*>(malloc(sizeof(val) * size));for (uint32_t x = 0, y = size; x < y; ++x){ // 拷贝size大小input >> std::hex >> val[x];}// 完成哈希映射wt.values = val;wt.count = size;weightMap[name] = wt;}return weightMap;
}void VGG_Demo::deserialize(float* data){load_engine(); // 加载enginenvinfer1::IRuntime* runtime = nvinfer1::createInferRuntime(gLogger);assert(runtime != nullptr);nvinfer1::ICudaEngine* engine = runtime->deserializeCudaEngine(this->trtModelStream, this->size);assert(engine != nullptr);nvinfer1::IExecutionContext* context = engine->createExecutionContext();assert(context != nullptr);delete[] this->trtModelStream; // 手动释放trtModelStream// 执行推理for (int i = 0; i < 10; i++){ // 记录推理10次的时间auto start = std::chrono::system_clock::now();doInference(*context, data, this->prob, 1);auto end = std::chrono::system_clock::now();std::cout << std::chrono::duration_cast<std::chrono::milliseconds>(end - start).count() << "ms" << std::endl;}// 销毁context->destroy();engine->destroy();runtime->destroy();// 打印推理结果std::cout << "\nOutput:\n\n";for (unsigned int i = 0; i < 10; i++){ // 打印10个std::cout << this->prob[i] << ", ";if (i % 10 == 0) std::cout << i / 10 << std::endl;}std::cout << std::endl;
}void VGG_Demo::load_engine(){std::ifstream file(this->engine_file, std::ios::binary);if(file.good()){file.seekg(0, file.end);this->size = file.tellg();file.seekg(0, file.beg);this->trtModelStream = new char[size];assert(this->trtModelStream);file.read(this->trtModelStream, size);file.close();}
}void VGG_Demo::doInference(nvinfer1::IExecutionContext& context, float* input, float* output, int batchSize){const nvinfer1::ICudaEngine& engine = context.getEngine();assert(engine.getNbBindings() == 2);void* buffers[2];const int inputIndex = engine.getBindingIndex(this->INPUT_BLOB_NAME);const int outputIndex = engine.getBindingIndex(this->OUTPUT_BLOB_NAME);CHECK(cudaMalloc(&buffers[inputIndex], batchSize * 3 * this->INPUT_H * this->INPUT_W * sizeof(float)));CHECK(cudaMalloc(&buffers[outputIndex], batchSize * this->OUTPUT_SIZE * sizeof(float)));// 创建streamcudaStream_t stream;CHECK(cudaStreamCreate(&stream));// Host to deviceCHECK(cudaMemcpyAsync(buffers[inputIndex], input, batchSize * 3 * INPUT_H * INPUT_W * sizeof(float), cudaMemcpyHostToDevice, stream));context.enqueue(batchSize, buffers, stream, nullptr);// device to hostCHECK(cudaMemcpyAsync(output, buffers[outputIndex], batchSize * OUTPUT_SIZE * sizeof(float), cudaMemcpyDeviceToHost, stream));cudaStreamSynchronize(stream);// 释放cudaStreamDestroy(stream);CHECK(cudaFree(buffers[inputIndex]));CHECK(cudaFree(buffers[outputIndex]));
}int main(int argc, char** argv){// 判断参数是否准确if(argc != 2){std::cerr << "arguments not right!" << std::endl;std::cerr << "./vgg_demo -s   // serialize model to plan file" << std::endl;std::cerr << "./vgg_demo -d   // deserialize plan file and run inference" << std::endl;return -1;}VGG_Demo vgg_demo1;if(std::string(argv[1]) == "-s"){ // 序列化vgg_demo1.serialize();}else if(std::string(argv[1]) == "-d"){ // 反序列化并推理// 生成测试数据float data[3 * 224 * 224];for (int i = 0; i < 3 * 224 * 224; i++) data[i] = 1;vgg_demo1.deserialize(data);}else{std::cerr << "wrong arguments!" << std::endl;;return -1;}return 0;
}
3--编译运行
mkdir build && cd build
cmake ..
make ./vgg_demo -s
./vgg_demo -d
相关文章:

TensorRT学习笔记--常用卷积、激活、池化和FC层算子API
目录 1--Tensor算子API 1-1--卷积算子 1-2--激活算子 1-3--池化算子 1-4--FC层算子 2--代码实例 3--编译运行 1--Tensor算子API TensorRT提供了卷积层、激活函数和池化层三种最常用算子的API: // 创建一个空的网络 nvinfer1::INetworkDefinition* network …...

【Edabit 算法 ★☆☆☆☆☆】 Less Than 100?
【Edabit 算法 ★☆☆☆☆☆】 Less Than 100? language_fundamentals math validation Instructions Given two numbers, return true if the sum of both numbers is less than 100. Otherwise return false. Examples lessThan100(22, 15) // true // 22 15 37lessTha…...

C++中的智能指针:更安全、更便利的内存管理
在C++编程中,动态内存管理一直是一个重要且具有挑战性的任务。传统的C++中,程序员需要手动分配和释放内存,这往往会导致内存泄漏和悬挂指针等严重问题。为了解决这些问题,C++11引入了智能指针(Smart Pointers)这一概念,它们是一种高级的内存管理工具,可以自动管理内存的…...
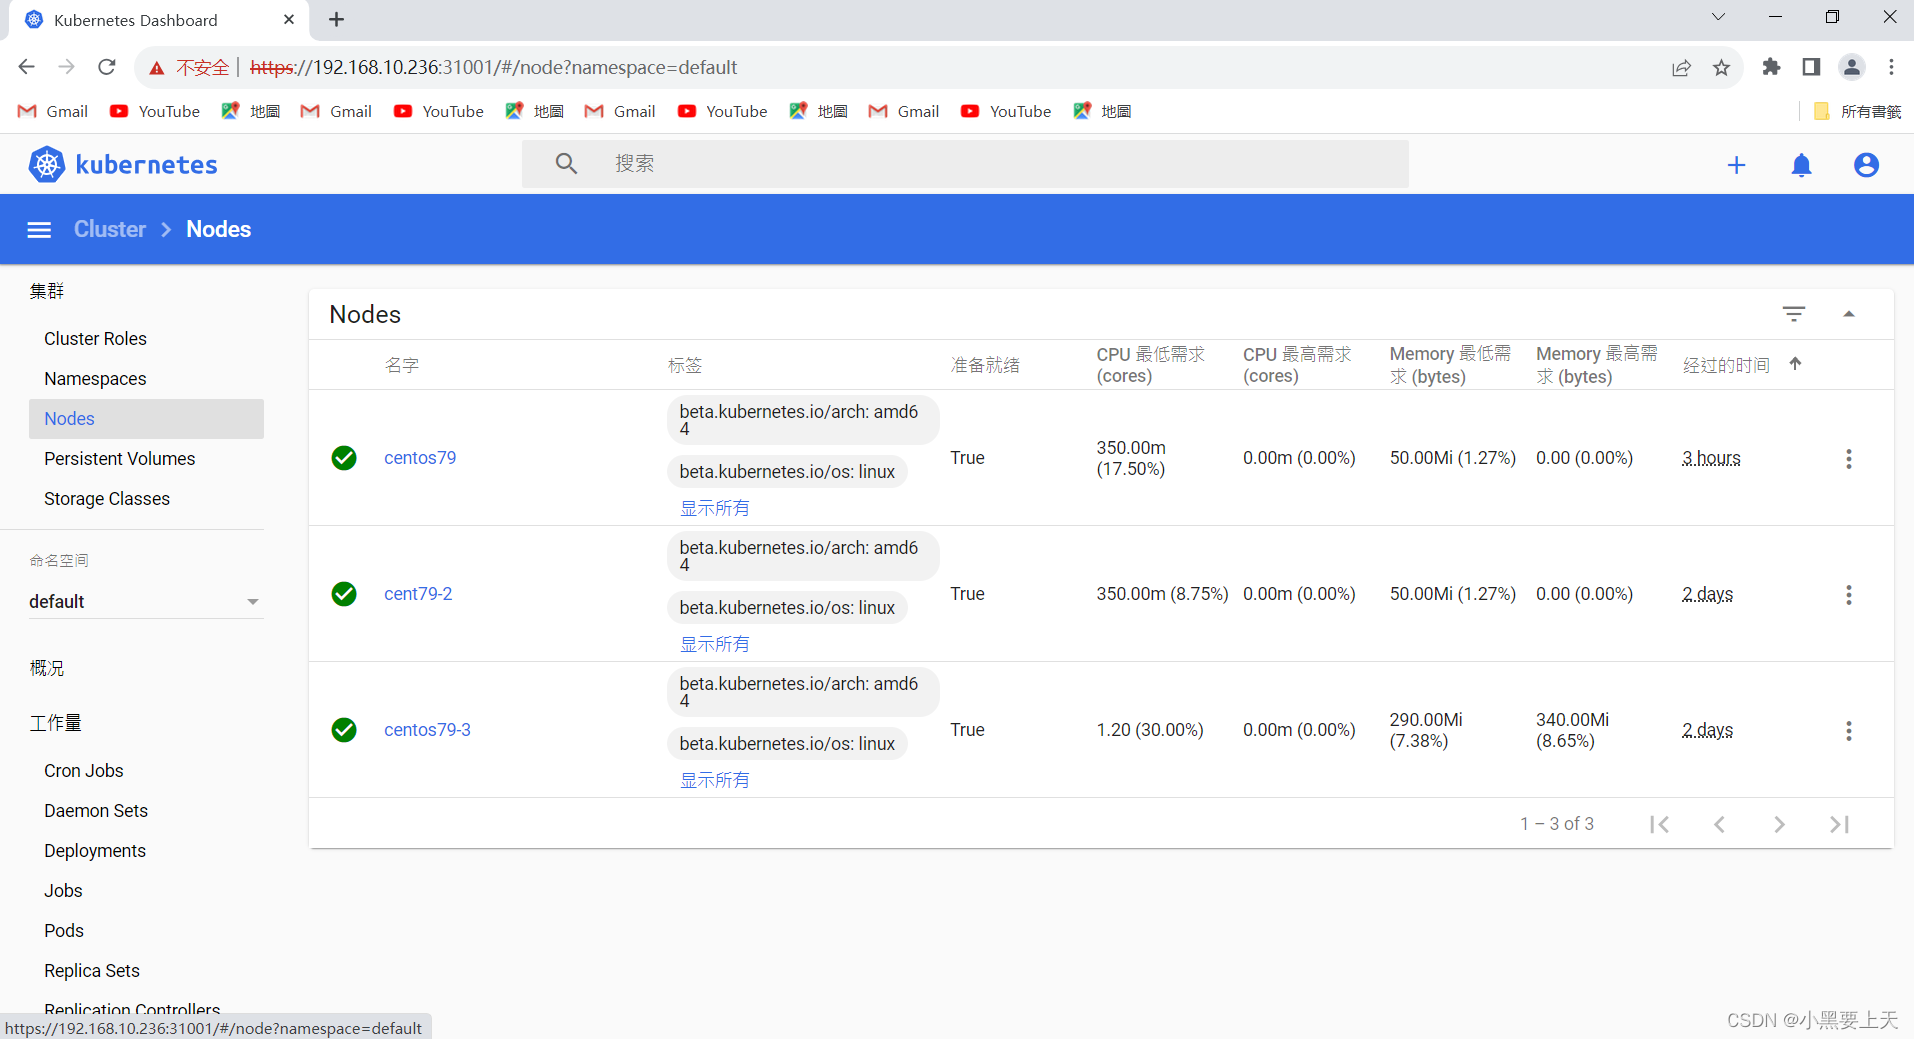
google登录k8s dashboard ui显示“您的连接不是私密连接”问题解决梳理
1.问题描述 OS Version:CentOS Linux release 7.9.2009 (Core) K8S Version:Kubernetes v1.20.4 k8s dashboard ui安装完毕后,通过google浏览器登录返现https网页,发现非官方的https网页无法打开 网址:https://192.168.10.236:31001 2.原…...
MIPS指令集摘要
目录 MIPS指令R I J三种格式 MIPS五种寻址方式 立即数寻址 寄存器寻址 基址寻址 PC相对寻址 伪直接寻址 WinMIPS64汇编指令 助记 从内存中加载数据 lb lbu lh lhu lw lwu ld l.d lui 存储数据到内存 sb sh sw sd s.d 算术运算 daddi daddui dadd…...

数据可视化素材分享 | 数十图表、无数模板
很多人在后台求分享报表、源代码,其实何必这么麻烦,在奥威BI数据可视化平台上点击即可获得大量的可视化素材,如数十种可视化图表,适用于不同分析场景;又如大量不同主题的BI数据可视化报表模板,套用后替换数…...

Hadoop3教程(三十二):(生产调优篇)NameNode故障恢复与集群的安全模式
文章目录 (159)NameNode故障处理(160)集群安全模式&磁盘修复集群安全模式磁盘修复等待安全模式 参考文献 (159)NameNode故障处理 如果NameNode进程挂了并且存储的数据也丢失了,如何恢复Nam…...
ios兼容)
uniapp下载附件保存到手机(文件、图片)ios兼容
downloadFile(file),其中file为下载的文件地址uni.downloadFile图片使用uni.saveImageToPhotosAlbum【安卓、ios都合适】文件使用uni.openDocument【安卓图片也可以用这个,ios会失败】 // 下载文件 export function downloadFile(file) {let acceptArr …...

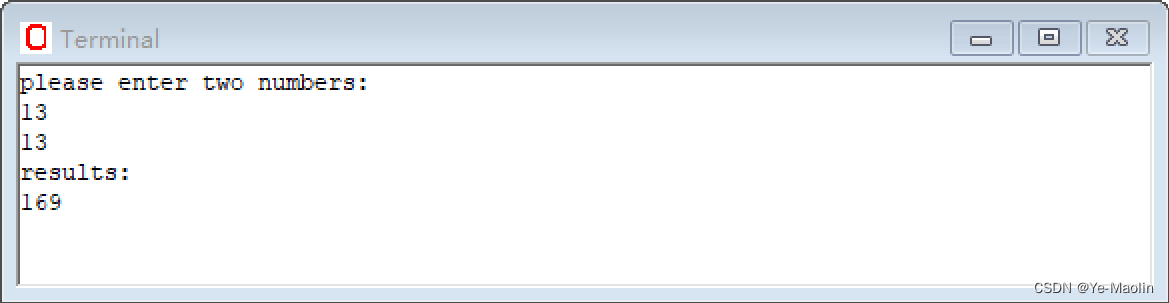
【Edabit 算法 ★☆☆☆☆☆】 Basketball Points
【Edabit 算法 ★☆☆☆☆☆】 Basketball Points language_fundamentals math numbers Instructions You are counting points for a basketball game, given the amount of 2-pointers scored and 3-pointers scored, find the final points for the team and return that …...
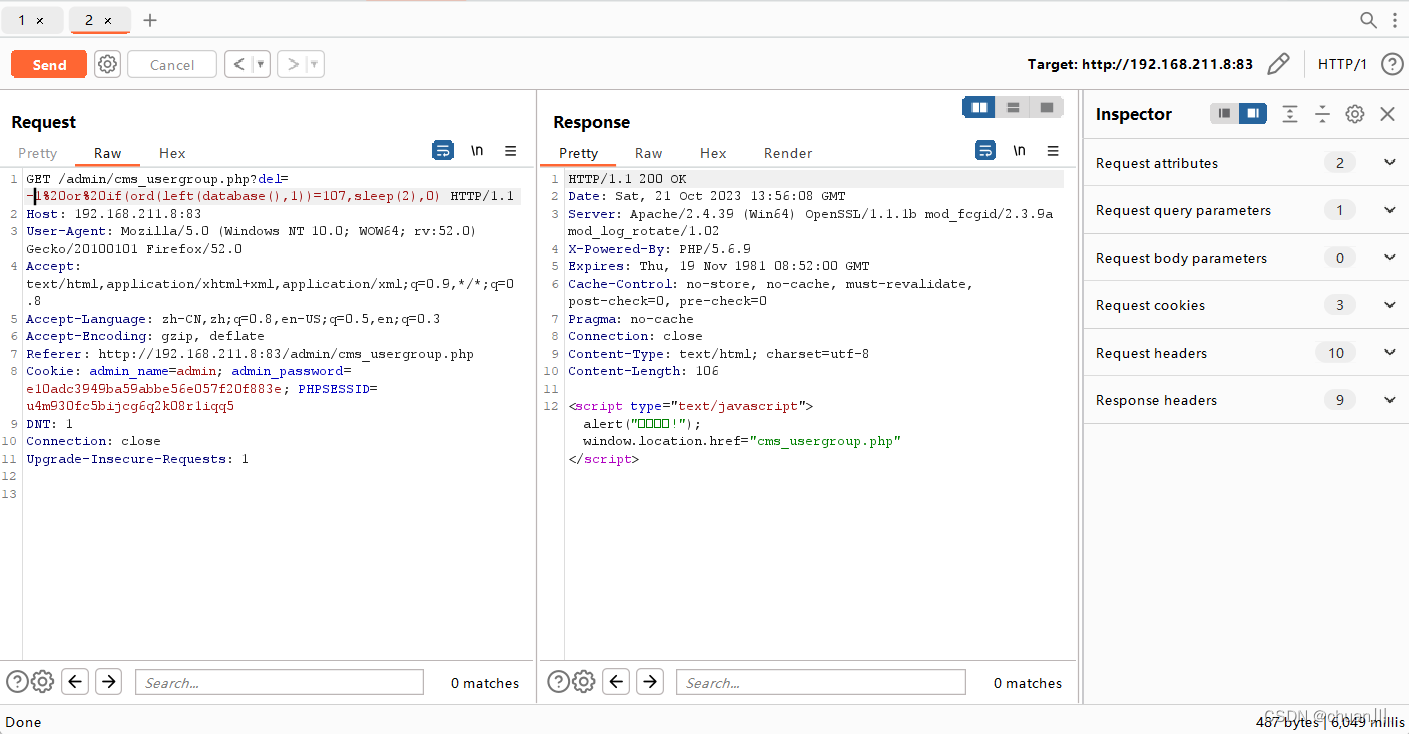
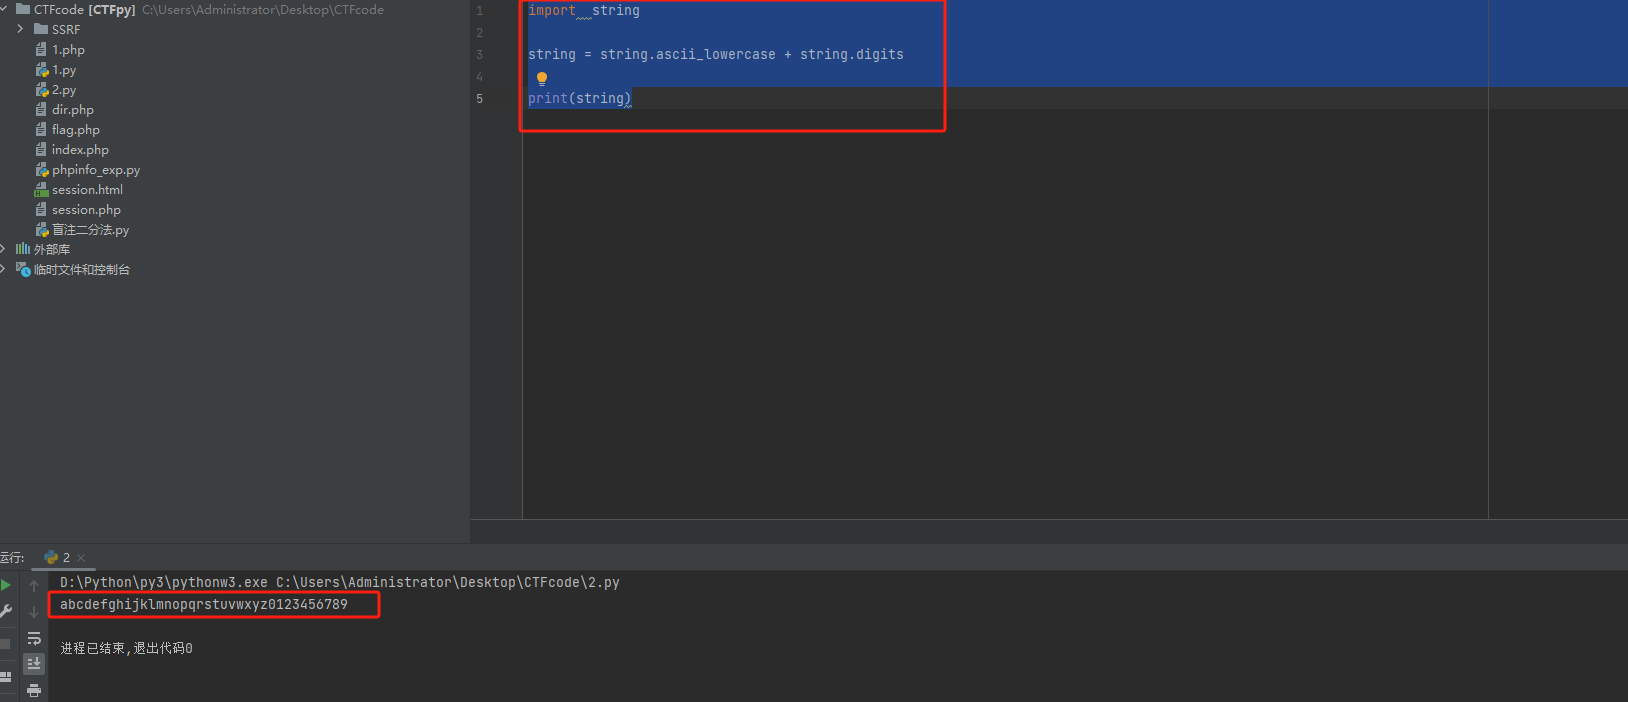
Web攻防04_MySQL注入_盲注
文章目录 MYSQL-SQL操作-增删改查盲注概念盲注分类盲注语句参考&更多盲注语句/函数 注入条件-数据回显&错误处理PHP开发项目-注入相关条件:基于延时:基于布尔:基于报错: CMS案例-插入报错&删除延时-PHP&MYSQL1、x…...

Flask自定义装饰和g的使用
1. 在commons.py文件中新增一个装饰器类: 注:一定要加入wraps进行装饰否则,装饰器在给多个函数进行装饰时会报错 from functools import wraps from flask import session, current_app, g# 定义登陆装饰器,封装用户的登陆数据 def user_log…...
)
【汇编】汇编语言基础知识(学习笔记)
一、汇编语言概述 汇编语言是直接在硬件之上工作的编程语言,首先要了解硬件奈统的结构,才能有效的应用汇编语言对其编程。 二、汇编语言的产生 机器语言:机器语言是机器指令的集合 汇编语言的主体是汇编指令 汇编指令和机器指令的差别在…...

前端 | FormData 用法详解
前端 | FormData 用法详解 介绍 FormData 是 Ajax2.0 对象用以将数据编译成键值对,以便于 XMLHttpRequest 来发送数据。XMLHttpRequest Level 2 提供的一个接口对象,可以使用该对象来模拟和处理表单并方便的进行文件上传操作 如果表单属性设为 mu…...

linux常见命令-文件目录类
9.4 文件目录类 (1)pwd 指令:显示当前工作目录的绝对路径 (2)Is指令:查看当前目录的所有内容信息 基本语法: ls [选项,可选多个] [目录或是文件] 常用选项:-a:显示当前目录所有的文件和目录,包括隐藏的…...
2023 10月8日 至 10 月16日学习总结
1.做的题目 [RootersCTF2019]I_<3_Flask_双层小牛堡的博客-CSDN博客 [NCTF2019]SQLi regexp 盲注-CSDN博客 [网鼎杯 2018]Comment git泄露 / 恢复 二次注入 .DS_Store bash_history文件查看-CSDN博客 PHP LFI 利用临时文件Getshell_双层小牛堡的博客-CSDN博客 …...
【Java 进阶篇】深入了解 Bootstrap 表格和菜单
表格和菜单是网页设计中的重要组成部分,它们用于展示数据、导航和用户交互。Bootstrap 是一个强大的前端框架,提供了丰富的表格样式和菜单组件,使开发者能够轻松创建功能丰富的网页。在本文中,我们将深入探讨 Bootstrap 中表格和菜…...

java的for循环中遇到异常抛出后继续循环执行
java的for循环中遇到异常抛出后继续循环执行 Test public void loopTryCatchTest() throws Exception {Map<String, Object> a new HashMap();a.put("a", "1");a.put("b", null);a.put("c", "3");for (Map.Entry<…...
【Javascript】构造函数之new的作用
目录 new的作用 把对象返回了回来 无new 有new 把构造函数的this指向了要返回的对象 无new编辑 有new new的执行流程 new的作用 创建了新空对象将构造函数的作用域赋值给新对象(this指向新对象)执行构造函数代码 (为这个新对象添加属性)返回新对…...
粘包和半包问题及解决办法
粘包问题是指数据在传输时,在一条消息中读取到了另一条消息的部分数据,这种现象就叫做粘包。 半包问题是指数据在传输时,接收端只收到了部分数据,而非完整的数据,就叫做半包。 产生粘包和半包问题原因: …...
MySQL数据库查询实战操作
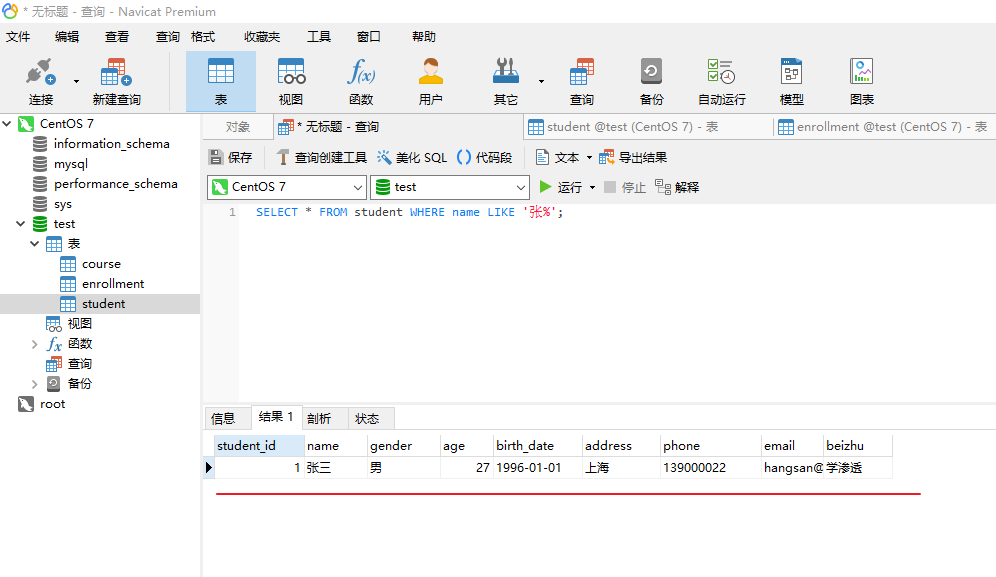
前置条件: 创建库:MySQL基本操作之创建数据库-CSDN博客 创建表:MySQL基本操作之创建数据表-CSDN博客 目录 常规查询常用函数union查询一、常规查询 1、查询所有姓名以 "张" 开头的学生: SELECT * FROM student WHERE name LIKE 张%; 这条语句使用 LIKE 运算…...

如何彻底掌握Dism++:Windows系统维护的终极解决方案
如何彻底掌握Dism:Windows系统维护的终极解决方案 【免费下载链接】Dism-Multi-language Dism Multi-language Support & BUG Report 项目地址: https://gitcode.com/gh_mirrors/di/Dism-Multi-language 还在为Windows系统维护而烦恼吗?磁盘空…...

Sentry 私有化部署与全栈监控实战指南
1. 为什么选择Sentry进行全栈监控? 在当今快速迭代的互联网产品开发中,系统稳定性直接影响用户体验和业务收益。我曾经负责过一个电商项目,上线初期由于缺乏有效的错误监控,用户支付失败的问题整整隐藏了3天才被发现,直…...

最速终端音乐体验:spotify-player极速配置与性能优化指南
最速终端音乐体验:spotify-player极速配置与性能优化指南 【免费下载链接】spotify-player A Spotify player in the terminal with full feature parity 项目地址: https://gitcode.com/GitHub_Trending/sp/spotify-player spotify-player是一款极速、易用且…...

5个场景让你的Mac音质焕然一新:eqMac音频均衡器完全指南
5个场景让你的Mac音质焕然一新:eqMac音频均衡器完全指南 【免费下载链接】eqMac macOS System-wide Audio Equalizer & Volume Mixer 🎧 项目地址: https://gitcode.com/gh_mirrors/eq/eqMac 还在为MacBook音质平平而烦恼?无论是视…...
)
告别虚拟机!用Termux在安卓手机上跑Ubuntu的保姆级教程(含自动登录配置)
告别虚拟机!用Termux在安卓手机上跑Ubuntu的保姆级教程(含自动登录配置) 每次出差都要背着沉重的笔记本,或是临时需要调试代码却发现手边没有电脑?现在,你的安卓手机就能变身便携Linux工作站。想象一下&…...

从QNX到Android Auto:车载Camera软件栈全解析,高通8155平台上的IFE、BPS、IPE都干了啥?
车载摄像头技术栈深度解析:从传感器到多屏协同的完整链路 在智能座舱系统中,摄像头已从简单的倒车影像工具演变为支撑DMS(驾驶员监控)、OMS(乘员监控)、AVM(全景环视)等高级功能的核…...

Fish-Speech-1.5在JavaWeb项目中的集成实战
Fish-Speech-1.5在JavaWeb项目中的集成实战 电商客服系统每天需要处理成千上万的用户咨询,人工语音回复成本高且响应慢。Fish-Speech-1.5的语音合成能力能否为JavaWeb项目带来智能语音解决方案? 1. Fish-Speech-1.5技术简介 Fish-Speech-1.5是当前最先进…...

Excel中的UNIQUE和SORT函数实战解析
在日常工作中,Excel作为数据处理和分析的利器,经常遇到需要处理重复数据或进行数据排序的需求。最近,我在StackOverflow上看到一个关于使用Excel中的UNIQUE()和SORT()函数的问题,引发了我对这些函数更深入的思考。本文将通过这个实际案例,详细探讨如何使用这些函数来实现数…...

暴雪胜诉禁令致《魔兽世界》Turtle WoW经典服务器宣布关闭
《魔兽世界》Turtle WoW经典服务器关闭上周,颇受欢迎的《魔兽世界》私服Turtle WoW收到了暴雪的停止运营通知。此前,一名法官裁定暴雪在去年9月提起的版权侵权诉讼中胜诉。法庭文件显示,双方达成了一项和解协议,其中规定“某些方需…...

GBase 8a之聚合函数: 计算峰度功能的实现
主要解决问题(1) 目前系统缺少求峰度的功能。特编写可以实现该功能的so以应对。部署方式(1) 将文件libkurtosis.so 放在集群对应的$GBASE_HOME/lib/gbase/plugin $GCLUSTER_HOME/lib/gbase/plugin 目录下 (2&#x…...