Docker 搭建 LNMP + Wordpress
@[TOC](Docker 搭建 LNMP + Wordpress
- 一、项目介绍
- 1.1、项目环境
- 1.2、 服务器环境
- 1.3、 任务需求
- 二、部署Nginx
- 2.1、建立工作目录
- 2.2、 编写 Dockerfile 脚本
- 2.3、准备 nginx.conf 配置文件
- 2.4、生成镜像
- 2.5、创建自定义网络
- 三、部署Mysql
- 3.1、建立工作目录
- 3.2、编写 Dockerfile
- 3.3、准备 my.cnf 文件
- 3.4、创建镜像
- 3.5、 使用新的镜像运行容器并测试
- 四、部署PHP
- 4.1、创建工作目录并上传代码包
- 4.2、 编写 Dockerfile 脚本
- 4.3、准备 php.ini、php-fpm.conf、www.conf 配置文件
- 4.3.1、 php.ini
- 4.3.2、 php-fpm.conf
- 4.4、 生成镜像
- 4.5、运行容器
- 4.6、数据库授权
- 4.7、运行Wordpress
一、项目介绍
1.1、项目环境
公司在实际的生产环境中,需要使用 Docker 技术在一台主机上创建 LNMP 服务并运行 Wordpress 网站平台。然后对此服务进行相关的性能调优和管理工作。
所有安装包下载:
wget http://101.34.22.188/lnmp_wordpress/mysql-boost-5.7.20.tar.gz
wget http://101.34.22.188/lnmp_wordpress/nginx-1.12.0.tar.gz
wget http://101.34.22.188/lnmp_wordpress/php-7.1.10.tar.bz2
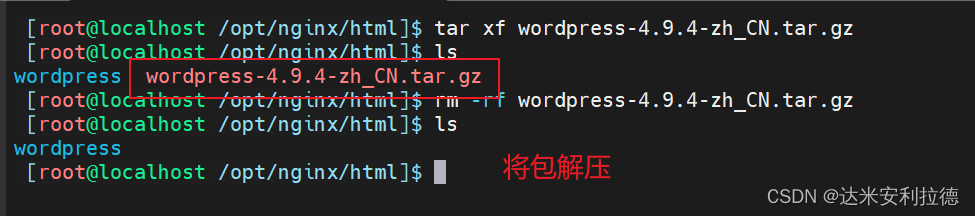
wget http://101.34.22.188/lnmp_wordpress/wordpress-4.9.4-zh_CN.tar.gz
> 或者
wget -r -np http://101.34.22.188/lnmp_wordpress/1.2、 服务器环境
容器 操作系统 IP地址 主要软件
| nginx | CentOS 7.9 x86_64 | 172.111.0.10 | Docker-Nginx |
|---|---|---|---|
| mysql | Centos 7.9 x86_64 | 172.111.0.20 | Docker-Mysql |
| php | Centos 7.9 x86_64 | 172.111.0.30 | Docker-php |
| 宿主机 | Centos 7.9 x86_64 | 192.168.11.11 | Docker 19.03 |
1.3、 任务需求
- 使用 Docker 构建 LNMP 环境并运行 Wordpress 网站平台。
- 限制 Nginx 容器最多使用 500MB 的内存和 1G 的 Swap。
- 限制 Mysql 容器写 /dev/sda 的速率为 10 MB/s。
- 将所有容器进行快照,然后将 Docker 镜像打包成 tar 包备份到本地。
[root ~]# systemctl disable --now firewalld
[root ~]# setenforce 0
setenforce: SELinux is disabled
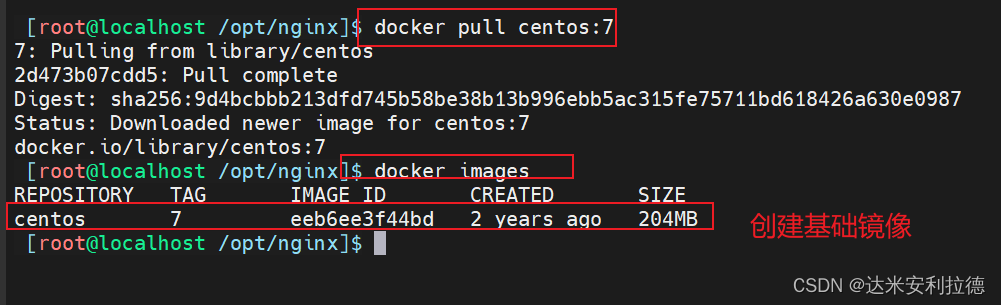
[root ~]# docker pull centos:7
#从公有仓库中下载 centos7 作为系统基础镜像
[root ~]# docker images
REPOSITORY TAG IMAGE ID CREATED SIZE
centos 7 eeb6ee3f44bd 4 weeks ago 204MB二、部署Nginx
2.1、建立工作目录
在docker容器中拉取centoos7作为基础镜像
docker pull centos:7[root ~]$ mkdir /opt/nginx[root ~]$ cd /opt/nginx/[root /opt/nginx]$ lsnginx-1.24.0.tar.gz

2.2、 编写 Dockerfile 脚本
[root /opt/nginx/html]$ touch Dockerfile
[root /opt/nginx/html]$ ls
Dockerfile wordpress[root nginx]# vim Dockerfile
FROM centos:7 AS first
MAINTAINER this is nginx image <wl 20231021>ADD nginx-1.24.0.tar.gz /opt/
RUN yum -y install pcre-devel zlib-devel openssl-devel gcc gcc-c++ make && \
useradd -M -s /sbin/nologin nginx && \
cd /opt/nginx-1.24.0 && \
./configure --prefix=/usr/local/nginx --user=nginx --group=nginx --with-http_stub_status_module && \
make && \
make installFROM centos:7
COPY --from=first /usr/local/nginx/ /usr/local/nginx/
RUN useradd -M -s /sbin/nologin nginxEXPOSE 80
EXPOSE 443CMD ["/usr/local/nginx/sbin/nginx", "-g", "daemon off;"]
2.3、准备 nginx.conf 配置文件
vim nginx.conf#user  nobody;
worker_processes  2;#error_log  logs/error.log;
#error_log  logs/error.log  notice;
#error_log  logs/error.log  info;#pid        logs/nginx.pid;events {use epollworker_connections  1024;
}http {include       mime.types;default_type  application/octet-stream;#log_format  main  '$remote_addr - $remote_user [$time_local] "$request" '#                  '$status $body_bytes_sent "$http_referer" '#                  '"$http_user_agent" "$http_x_forwarded_for"';#access_log  logs/access.log  main;sendfile        on;#tcp_nopush     on;#keepalive_timeout  0;keepalive_timeout  65;#gzip  on;server {listen       80;server_name  www.byyb.com;charset utf-8;#access_log  logs/host.access.log  main;location / {root   html;index  index.php index.html;}#error_page  404              /404.html;# redirect server error pages to the static page /50x.html#error_page   500 502 503 504  /50x.html;location = /50x.html {root   html;}# proxy the PHP scripts to Apache listening on 127.0.0.1:80##location ~ \.php$ {#    proxy_pass   http://127.0.0.1;#}# pass the PHP scripts to FastCGI server listening on 127.0.0.1:9000#location ~ \.php$ {root           html;fastcgi_pass   172.18.0.30:9000;fastcgi_index  index.php;fastcgi_param  SCRIPT_FILENAME  /usr/local/nginx/html$fastcgi_script_name;include        fastcgi_params;}# deny access to .htaccess files, if Apache's document root# concurs with nginx's one##location ~ /\.ht {#    deny  all;#}}# another virtual host using mix of IP-, name-, and port-based configuration##server {#    listen       8000;#    listen       somename:8080;#    server_name  somename  alias  another.alias;#    location / {#        root   html;#        index  index.html index.htm;#    }#}# HTTPS server##server {#    listen       443 ssl;#    server_name  localhost;#    ssl_certificate      cert.pem;#    ssl_certificate_key  cert.key;#    ssl_session_cache    shared:SSL:1m;#    ssl_session_timeout  5m;#    ssl_ciphers  HIGH:!aNULL:!MD5;#    ssl_prefer_server_ciphers  on;#    location / {#        root   html;#        index  index.html index.htm;#    }#}}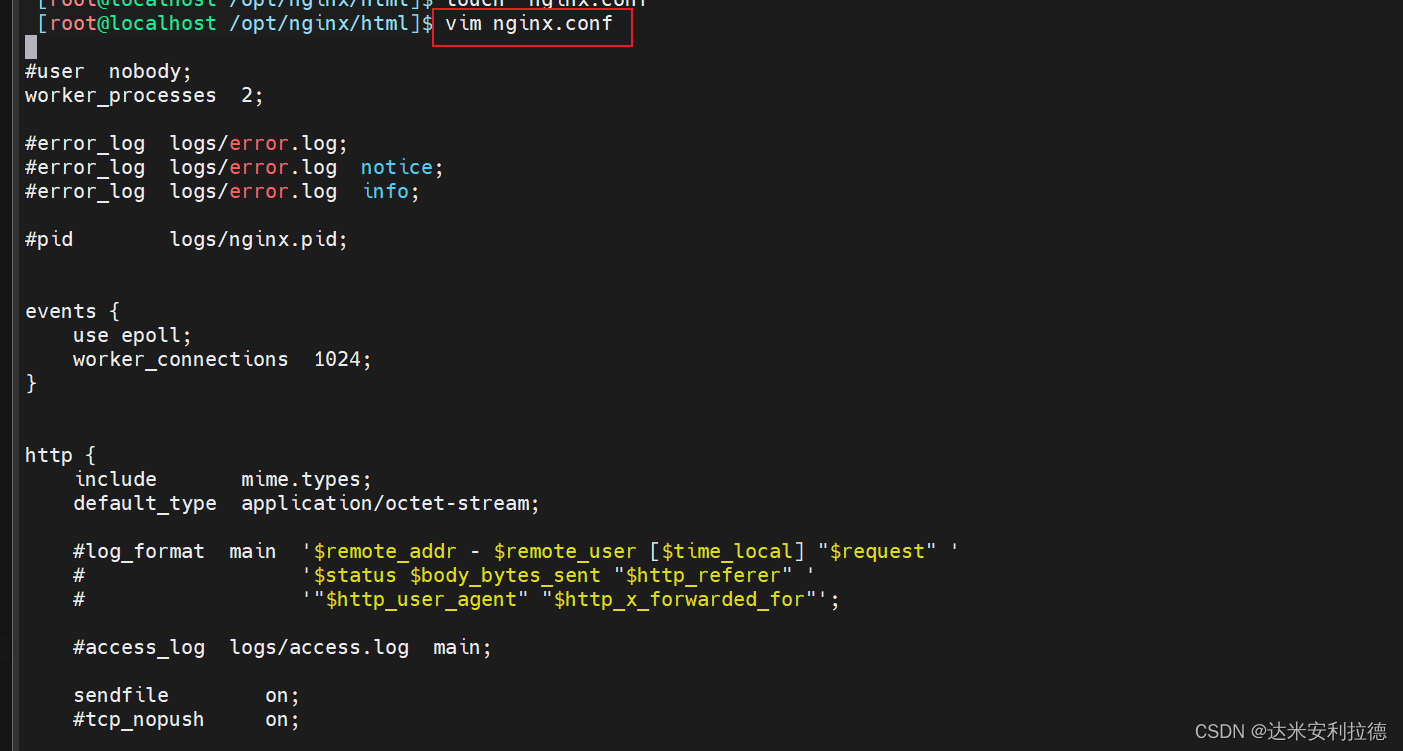
2.4、生成镜像
[root nginx]# docker build -t nginx:lnmp .
[root nginx]# docker images
REPOSITORY TAG IMAGE ID CREATED SIZE
nginx lnmp 35a6404fcfa1 5 seconds ago 522MB
centos 7 eeb6ee3f44bd 4 weeks ago 204MB
2.5、创建自定义网络
docker network create --subnet=172.18.0.0/16 --opt "com.docker.network.bridge.name"="docker1"  lnmpnetwork启动镜像容器
docker run -d --name nginx -p 80:80 -v /opt/nginx/html/:/usr/local/nginx/html/ -v /opt/nginx/nginx.conf:/usr/local/nginx/conf/nginx.conf --network lnmpnetwork --ip 172.18.0.10 nginx:lnmp
三、部署Mysql
3.1、建立工作目录
[root nginx]# mkdir /opt/mysql
[root nginx]# cd /opt/mysql/
[root mysql]# rz -E
rz waiting to receive.
#传入mysql安装包mysql-boost-5.7.41.tar.gz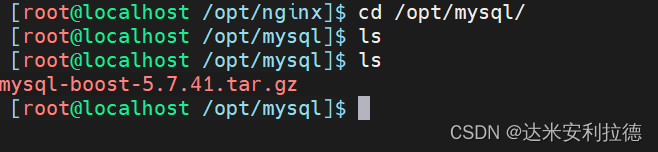
3.2、编写 Dockerfile
[root mysql]# vim Dockerfile FROM centos:7 AS first
MAINTAINER this is mysql image <wl 20231021>
ADD mysql-boost-5.7.41.tar.gz /opt/
RUN yum -y install gcc gcc-c++ ncurses ncurses-devel bison cmake make openssl-devel && \
cd /opt/mysql-5.7.41/ && \
cmake \
-DCMAKE_INSTALL_PREFIX=/usr/local/mysql \
-DMYSQL_UNIX_ADDR=/usr/local/mysql/mysql.sock \
-DSYSCONFDIR=/etc \
-DSYSTEMD_PID_DIR=/usr/local/mysql \
-DDEFAULT_CHARSET=utf8 \
-DDEFAULT_COLLATION=utf8_general_ci \
-DWITH_INNOBASE_STORAGE_ENGINE=1 \
-DWITH_ARCHIVE_STORAGE_ENGINE=1 \
-DWITH_BLACKHOLE_STORAGE_ENGINE=1 \
-DWITH_PERFSCHEMA_STORAGE_ENGINE=1 \
-DMYSQL_DATADIR=/usr/local/mysql/data \
-DWITH_BOOST=boost \
-DWITH_SYSTEMD=1 && make -j 2 && make installFROM centos:7
COPY --from=first /usr/local/mysql/ /usr/local/mysql/
ADD my.cnf /etc/my.cnf
ENV PATH=/usr/local/mysql/bin:/usr/local/mysql/lib:$PATH
RUN useradd -M -s /sbin/nologin mysql && \
chown mysql:mysql /etc/my.cnf && \
chown -R mysql:mysql /usr/local/mysql/ && \
/usr/local/mysql/bin/mysqld \
--initialize-insecure \
--user=mysql \
--basedir=/usr/local/mysql \
--datadir=/usr/local/mysql/data
EXPOSE 3306
CMD ["/usr/local/mysql/bin/mysqld"]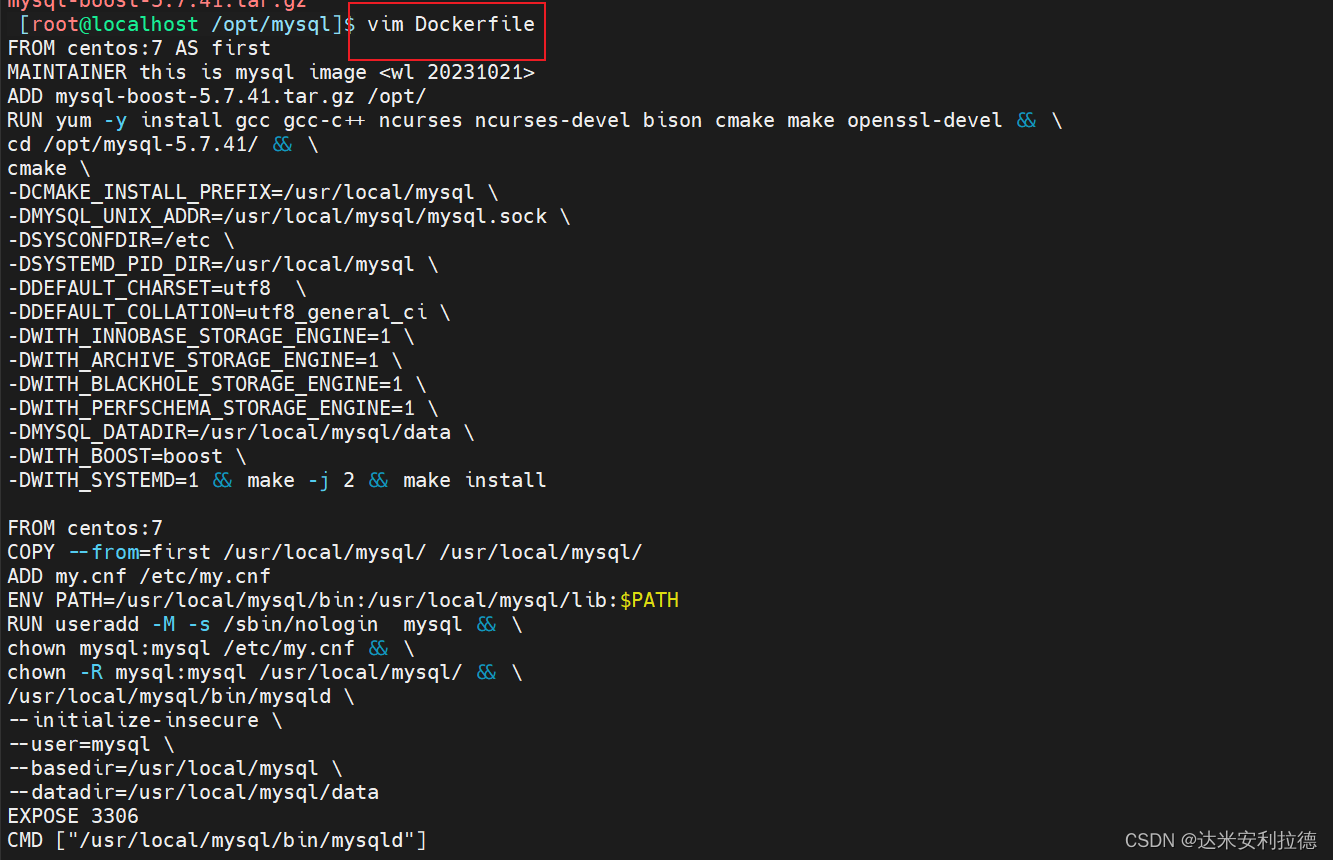
3.3、准备 my.cnf 文件
[root mysql]# vim my.cnf[client]
port = 3306
socket=/usr/local/mysql/mysql.sock[mysql]
port = 3306
socket = /usr/local/mysql/mysql.sock
auto-rehash[mysqld]
user = mysql
basedir=/usr/local/mysql
datadir=/usr/local/mysql/data
port = 3306
character-set-server=utf8
pid-file = /usr/local/mysql/mysqld.pid
socket=/usr/local/mysql/mysql.sock
bind-address = 0.0.0.0
skip-name-resolve
max_connections=2048
default-storage-engine=INNODB
max_allowed_packet=16M
server-id = 1sql_mode=NO_ENGINE_SUBSTITUTION,STRICT_TRANS_TABLES,NO_AUTO_CREATE_USER,NO_AUTO_VALUE_ON_ZERO,NO_ZERO_IN_DATE,NO_ZERO_DATE,ERROR_FOR_DIVISION_BY_ZERO,PIPES_AS_CONCAT,ANSI_QUOTES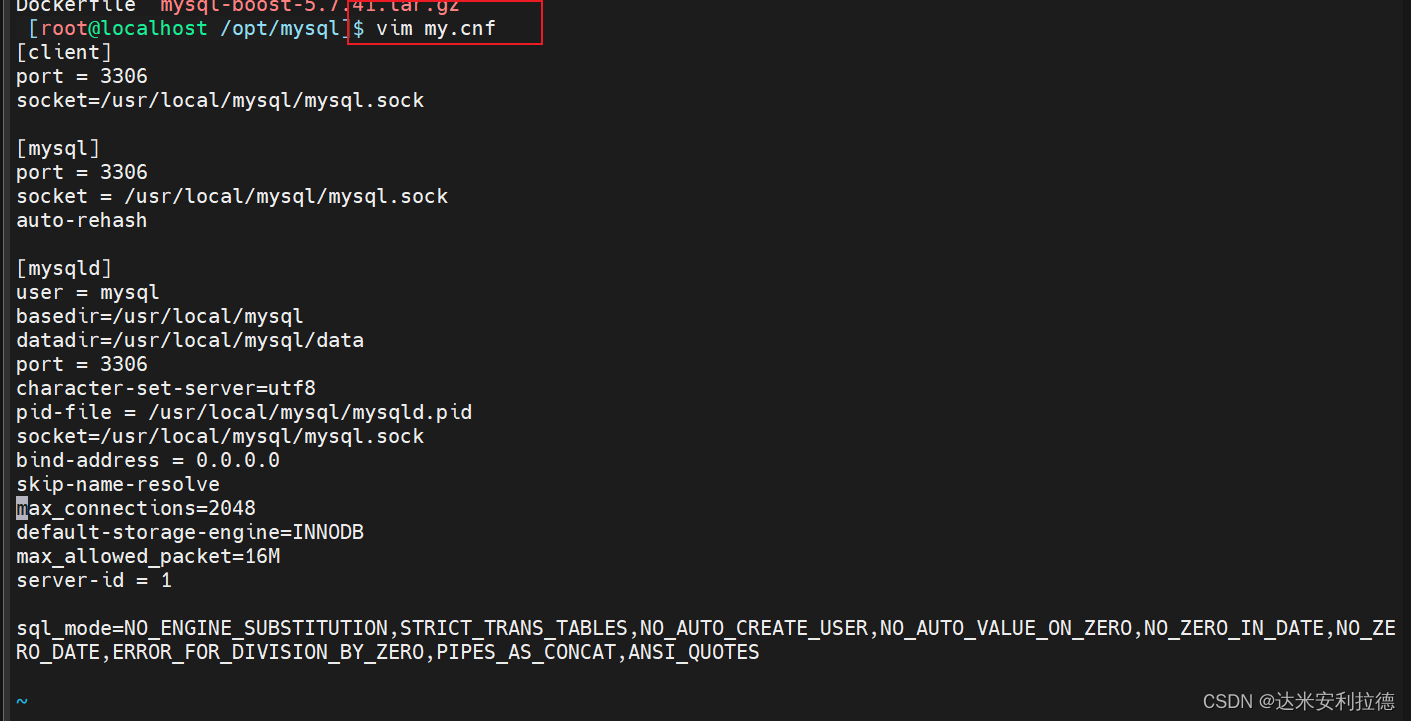
3.4、创建镜像
docker build -t mysql:lnmp .
#名称:标签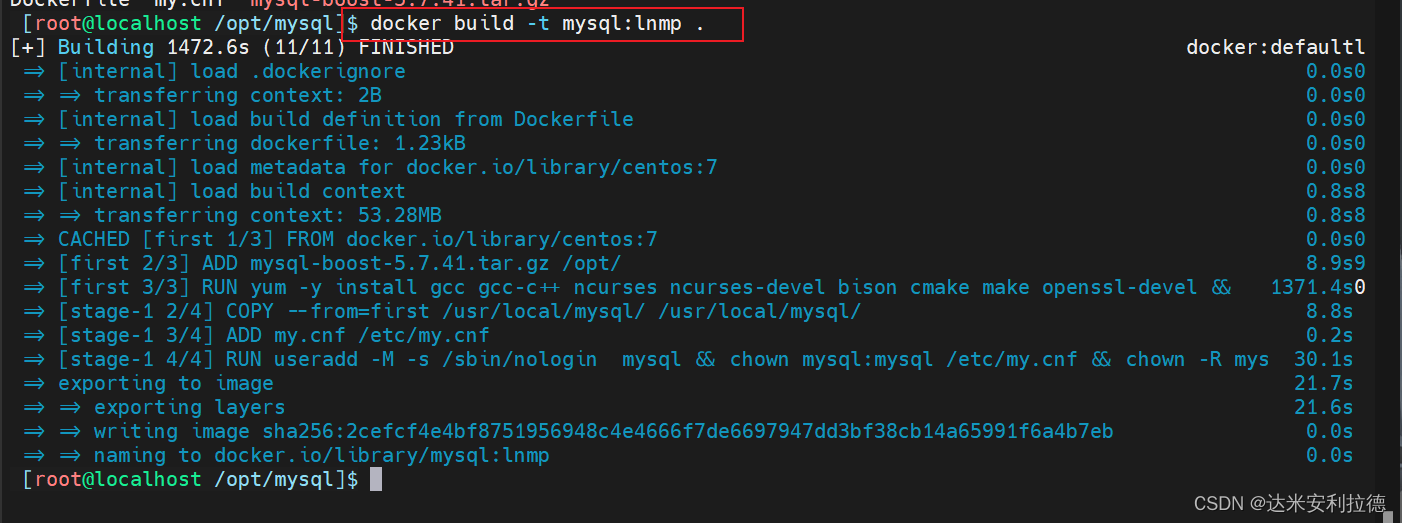
3.5、 使用新的镜像运行容器并测试
docker run -d --name mysql --privileged -v /usr/local/mysql --network lnmpnetwork --ip 172.18.0.20 mysql:lnmp- `--name=mysql`:指定容器的名称为mysql。
- `-d`:以后台模式运行容器。
- `--privileged`:在容器内部启用特权模式,可以执行一些底层操作。
- `-v /usr/local/mysql`:将宿主机的`/usr/local/mysql`目录挂载到容器的相应位置。
- `--net mynetwork`:将容器连接到名为mynetwork的网络。
四、部署PHP
4.1、创建工作目录并上传代码包
mkdir /opt/php
cd /opt/php上传 php-7.1.10.tar.bz2 到 /opt/php 目录中
4.2、 编写 Dockerfile 脚本
vim DockerfileFROM centos:7 AS first
MAINTAINER this is php image <wl 20231021>
ADD php-7.1.10.tar.bz2 /opt/
RUN yum -y install gd \
libjpeg libjpeg-devel \
libpng libpng-devel \
freetype freetype-devel \
libxml2 libxml2-devel \
zlib zlib-devel \
curl curl-devel \
openssl openssl-devel \
gcc gcc-c++ make pcre-devel && \
cd /opt/php-7.1.10/ && \
./configure \
--prefix=/usr/local/php \
--with-mysql-sock=/usr/local/mysql/mysql.sock \
--with-mysqli \
--with-zlib \
--with-curl \
--with-gd \
--with-jpeg-dir \
--with-png-dir \
--with-freetype-dir \
--with-openssl \
--enable-fpm \
--enable-mbstring \
--enable-xml \
--enable-session \
--enable-ftp \
--enable-pdo \
--enable-tokenizer \
--enable-zip && make -j 2 && make install && \
cp /opt/php-7.1.10/php.ini-development /usr/local/php/lib/php.ini && \
sed -i -e '939c date.timezone = Asia/Shanghai'  -e '1170c mysqli.default_socket = /usr/local/mysql/mysql.sock' /usr/local/php/lib/php.ini && \
cd /usr/local/php/etc/ && \
cp  php-fpm.conf.default php-fpm.conf && \
sed -i '17 s/^;//' php-fpm.conf && \
cd /usr/local/php/etc/php-fpm.d/ && \
cp www.conf.default www.conf && \
sed -i -e '23c user = nginx' -e '24c group = nginx' -e '36c listen = 172.18.0.30:9000' -e '62c listen.allowed_clients = 172.18.0.10' www.confFROM centos:7
COPY --from=first /usr/local/php/ /usr/local/php/
RUN yum -y install gd \
libjpeg-devel \
libpng-devel \
freetype-devel \
libxml2-devel \
zlib-devel \
curl-devel \
openssl-devel && \
useradd -M -s /sbin/nologin nginx && \
rm -rf /var/cache/yum/*
EXPOSE 9000
CMD ["/usr/local/php/sbin/php-fpm", "-F"]
4.3、准备 php.ini、php-fpm.conf、www.conf 配置文件
4.3.1、 php.ini
该配置文件模板位于安装目录的 php-7.1.10/php.ini-development 位置
[root php]# vim php.ini#939行,取消注释,修改
date.timezone = Asia/Shanghai
#1170行,修改
mysqli.default_socket = /usr/local/mysql/mysql.sock
[root php]# egrep -v "^;" php.ini | egrep -v "^$"
[PHP]
engine = On
short_open_tag = Off
precision = 14
output_buffering = 4096
zlib.output_compression = Off
implicit_flush = Off
unserialize_callback_func =
serialize_precision = -1
disable_functions =
disable_classes =
zend.enable_gc = On
expose_php = On
max_execution_time = 30
max_input_time = 60
memory_limit = 128M
error_reporting = E_ALL
display_errors = On
display_startup_errors = On
log_errors = On
log_errors_max_len = 1024
ignore_repeated_errors = Off
ignore_repeated_source = Off
report_memleaks = On
track_errors = On
html_errors = On
variables_order = "GPCS"
request_order = "GP"
register_argc_argv = Off
auto_globals_jit = On
post_max_size = 8M
auto_prepend_file =
auto_append_file =
default_mimetype = "text/html"
default_charset = "UTF-8"
doc_root =
user_dir =
enable_dl = Off
file_uploads = On
upload_max_filesize = 2M
max_file_uploads = 20
allow_url_fopen = On
allow_url_include = Off
default_socket_timeout = 60
[CLI Server]
cli_server.color = On
[Date]
date.timezone = Asia/Shanghai
[filter]
[iconv]
[intl]
[sqlite3]
[Pcre]
[Pdo]
[Pdo_mysql]
pdo_mysql.cache_size = 2000
pdo_mysql.default_socket=
[Phar]
[mail function]
SMTP = localhost
smtp_port = 25
mail.add_x_header = On
[SQL]
sql.safe_mode = Off
[ODBC]
odbc.allow_persistent = On
odbc.check_persistent = On
odbc.max_persistent = -1
odbc.max_links = -1
odbc.defaultlrl = 4096
odbc.defaultbinmode = 1
[Interbase]
ibase.allow_persistent = 1
ibase.max_persistent = -1
ibase.max_links = -1
ibase.timestampformat = "%Y-%m-%d %H:%M:%S"
ibase.dateformat = "%Y-%m-%d"
ibase.timeformat = "%H:%M:%S"
[MySQLi]
mysqli.max_persistent = -1
mysqli.allow_persistent = On
mysqli.max_links = -1
mysqli.cache_size = 2000
mysqli.default_port = 3306
mysqli.default_socket = /usr/local/mysql/mysql.sock
mysqli.default_host =
mysqli.default_user =
mysqli.default_pw =
mysqli.reconnect = Off
[mysqlnd]
mysqlnd.collect_statistics = On
mysqlnd.collect_memory_statistics = On
[OCI8]
[PostgreSQL]
pgsql.allow_persistent = On
pgsql.auto_reset_persistent = Off
pgsql.max_persistent = -1
pgsql.max_links = -1
pgsql.ignore_notice = 0
pgsql.log_notice = 0
[bcmath]
bcmath.scale = 0
[browscap]
[Session]
session.save_handler = files
session.use_strict_mode = 0
session.use_cookies = 1
session.use_only_cookies = 1
session.name = PHPSESSID
session.auto_start = 0
session.cookie_lifetime = 0
session.cookie_path = /
session.cookie_domain =
session.cookie_httponly =
session.serialize_handler = php
session.gc_probability = 1
session.gc_divisor = 1000
session.gc_maxlifetime = 1440
session.referer_check =
session.cache_limiter = nocache
session.cache_expire = 180
session.use_trans_sid = 0
session.sid_length = 26
session.trans_sid_tags = "a=href,area=href,frame=src,form="
session.sid_bits_per_character = 5
[Assertion]
zend.assertions = 1
[COM]
[mbstring]
[gd]
[exif]
[Tidy]
tidy.clean_output = Off
[soap]
soap.wsdl_cache_enabled=1
soap.wsdl_cache_dir="/tmp"
soap.wsdl_cache_ttl=86400
soap.wsdl_cache_limit = 5
[sysvshm]
[ldap]
ldap.max_links = -1
[mcrypt]
[dba]
[opcache]
[curl]
[openssl]4.3.2、 php-fpm.conf
该配置文件位于 /usr/local/php/etc/php-fpm.conf.default
[root php]# vim php-fpm.conf #17行,删除注释符号“;”
pid = run/php-fpm.pid
[root php]# egrep -v "^;" php-fpm.conf | egrep -v "^$"
[global]
pid = run/php-fpm.pid
include=/usr/local/php/etc/php-fpm.d/*.conf4.4、 生成镜像
[root php]# docker build -t php:lnmp .
[root php]# docker images
REPOSITORY TAG IMAGE ID CREATED SIZE
php lnmp 985842f961f1 About a minute ago 1.2GB
mysql lnmp 49da8f7299af 12 minutes ago 9.98GB
nginx lnmp 35a6404fcfa1 26 minutes ago 522MB
centos 7 eeb6ee3f44bd 4 weeks ago 204MB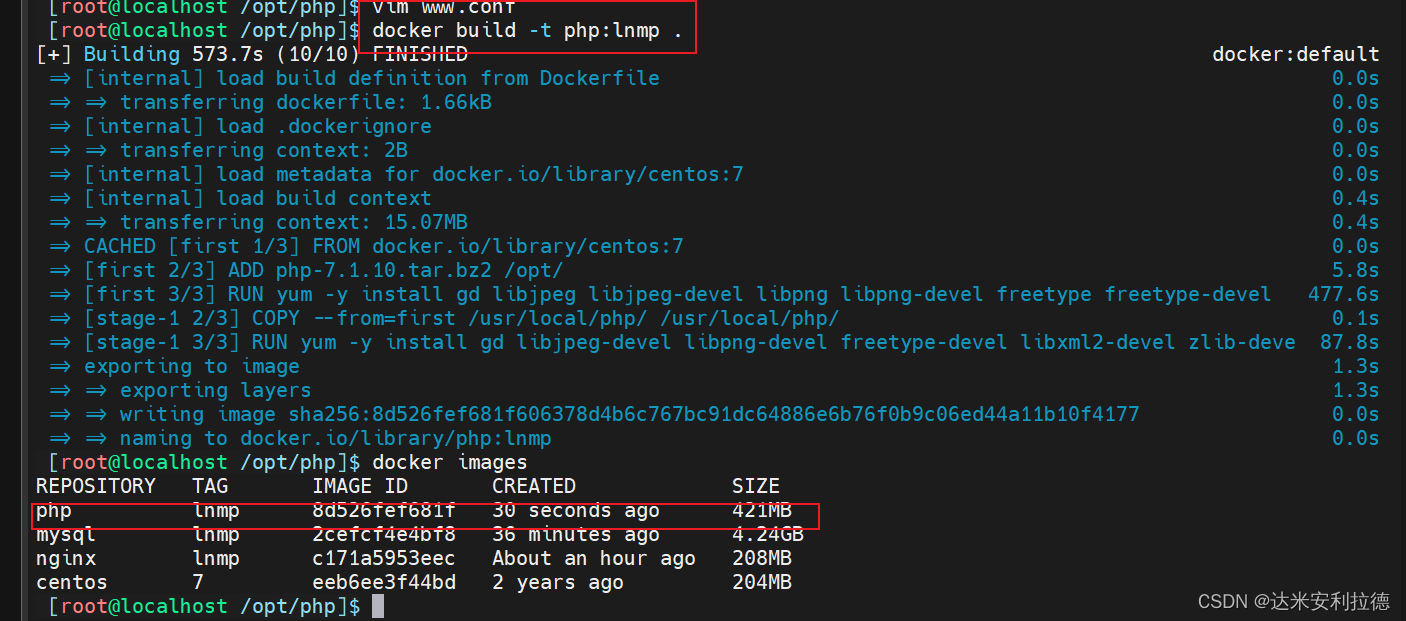
4.5、运行容器
docker run -d --name=php -p 9000:9000 --volumes-from mysql --volumes-from nginx --network lnmpnetwork --ip 172.18.0.30 php:lnmp

4.6、数据库授权
docker exec -it mysql /bin/bash
mysqlcreate database wordpress;grant all  on wordpress.* to 'wordpress'@'172.18.0.%' identified by 'admin123';
grant all  on wordptess.* to 'root'@'172.18.0.%' identified by 'admin123';
grant all  on wordpress.* to 'wordpress'@'localhost' identified by 'admin123';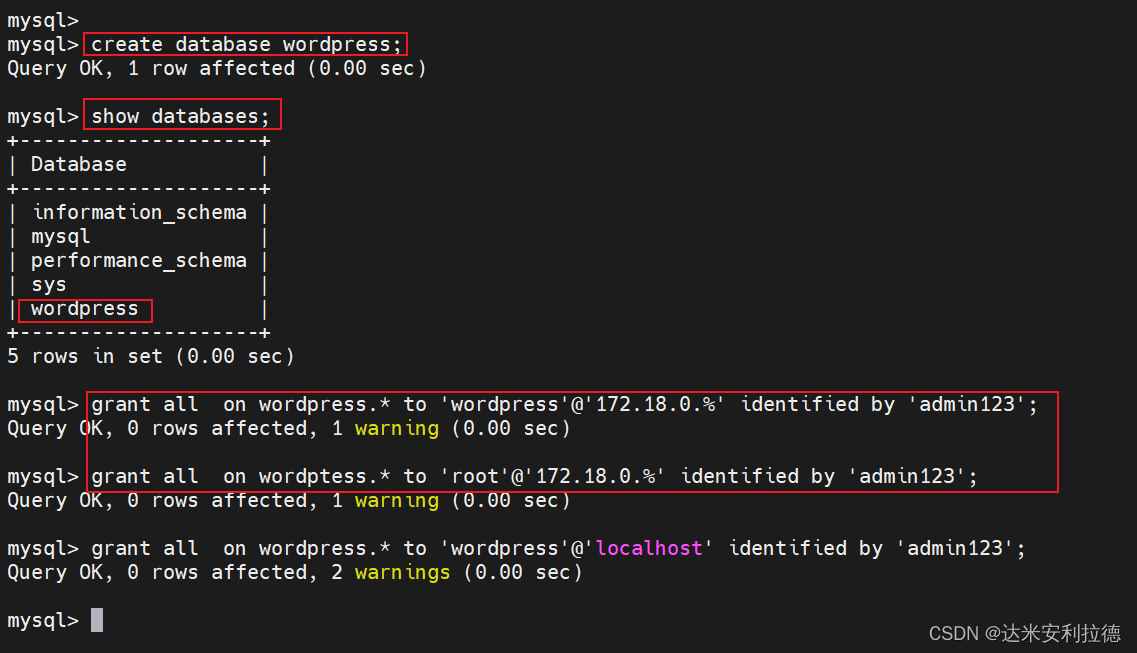
4.7、运行Wordpress
浏览器访问:
http://192.168.11.11/wordpress/index.php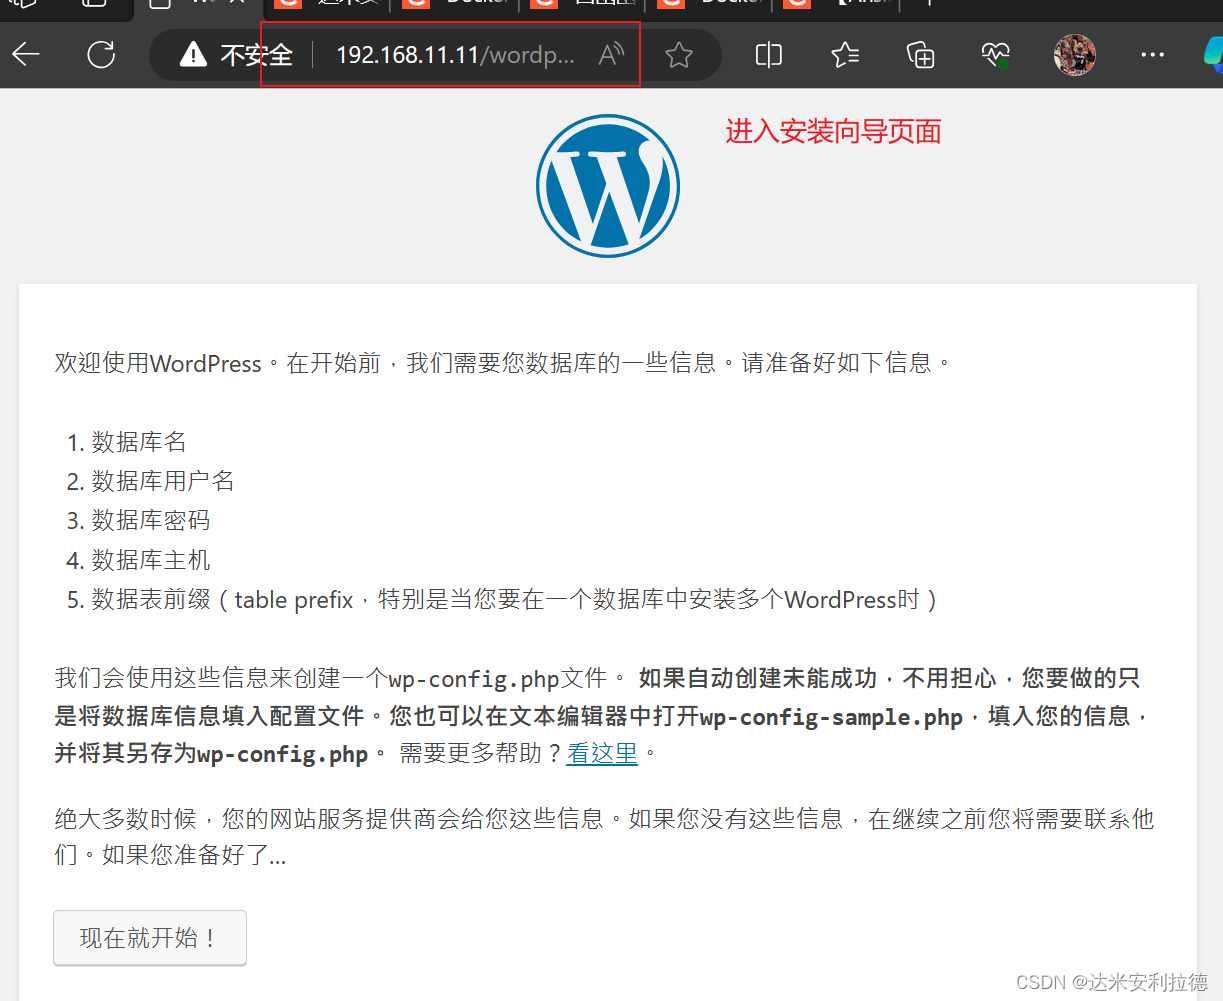


v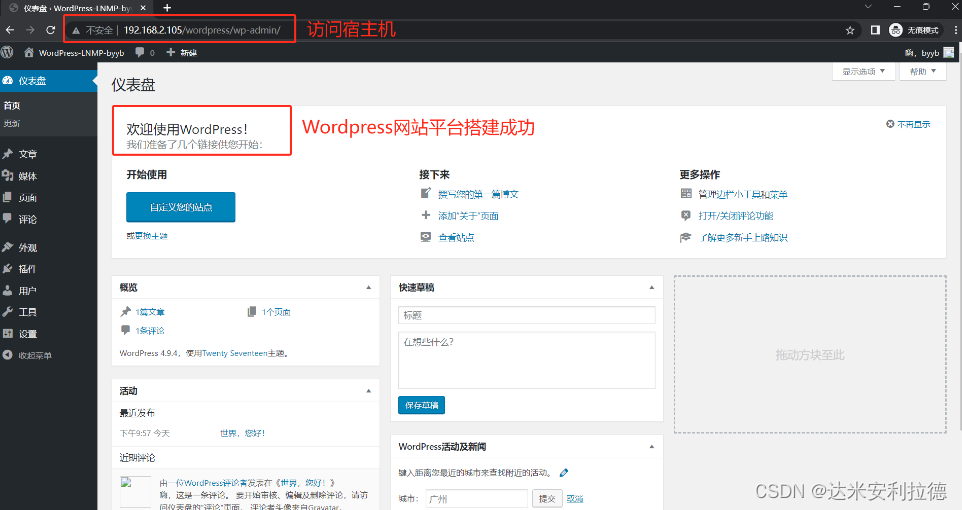
相关文章:
Docker 搭建 LNMP + Wordpress
[TOC](Docker 搭建 LNMP Wordpress 一、项目介绍1.1、项目环境1.2、 服务器环境1.3、 任务需求 二、部署Nginx2.1、建立工作目录2.2、 编写 Dockerfile 脚本2.3、准备 nginx.conf 配置文件2.4、生成镜像2.5、创建自定义网络 三、部署Mysql3.1、建立工作目录3.2、编写 Dockerfi…...
大数据调度最佳实践 | 从Airflow迁移到Apache DolphinScheduler
迁移背景 有部分用户原来是使用 Airflow 作为调度系统的,但是由于 Airflow 只能通过代码来定义工作流,并且没有对资源、项目的粒度划分,导致在部分需要较强权限控制的场景下不能很好的贴合客户需求,所以部分用户需要将调度系统从…...

node实战——搭建带swagger接口文档的后端koa项目(node后端就业储备知识)
文章目录 ⭐前言⭐初始化项目⭐配置router目录自动扫描路由⭐swagger文件配置自动生成json文件⭐封装扫描目录路由加入swagger⭐配置项目入口总文件⭐运行效果⭐总结⭐结束⭐前言 大家好,我是yma16,本文分享关于node实战——搭建带swagger接口文档的后端koa项目(node后端就…...
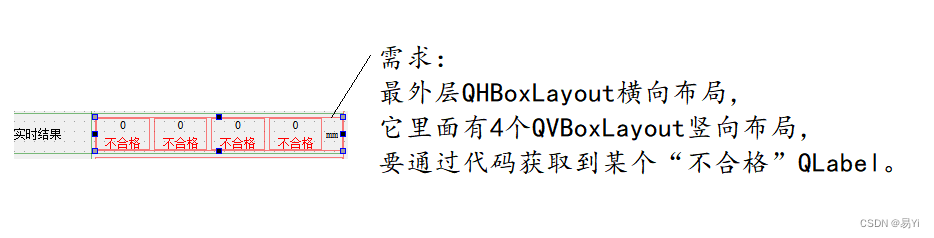
Qt篇——子控件QLayoutItem与实际控件的强转
方法:使用qobject_cast<QLabel*>() ,将通过itemAt(i)获取到的子控件(QLayoutItem)强转为子控件的实际类型(如QLineEdit、QLabel等)。 场景举例: QLabel *label qobject_cast<QLabel*>(ui->horizontalLayout_40->itemAt(0…...

Css3使用
CSS3是CSS(层叠样式表)的最新版本,它引入了许多新特性,使网页设计更加灵活和富有创意。在本文中,我们将介绍CSS3的一些新特性,包括选择器、布局、动画和变形效果。 一、选择器 CSS3引入了一些新的选择器&…...
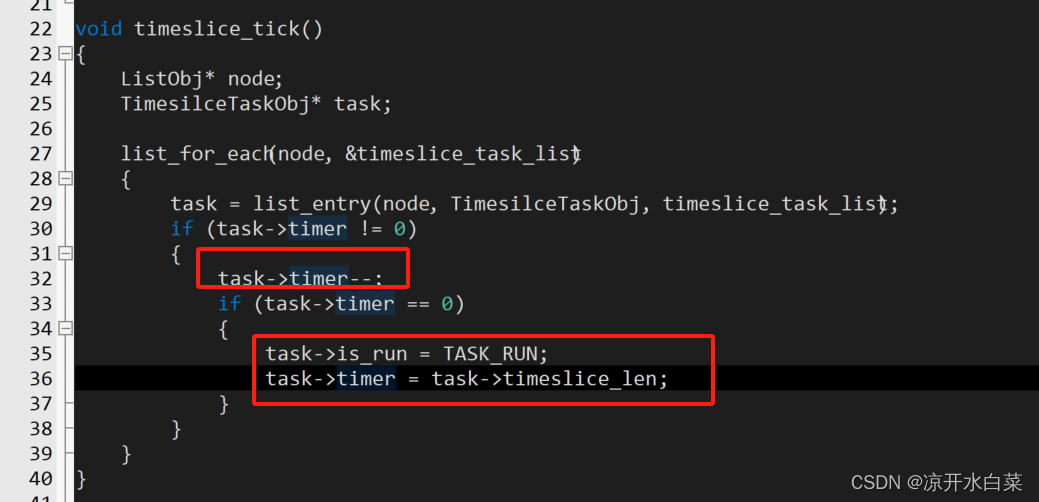
【嵌入式开源库】timeslice的使用,完全解耦的时间片轮询框架构
完全解耦的时间片轮询框架构 简介项目代码timeslice.htimeslice.clist.hlist.c 创建工程移植代码实验函数说明timeslice_task_inittimeslice_task_addtimeslice_tak_deltimeslice_get_task_num 结尾 简介 timeslice是一个时间片轮询框架,他是一个完全解耦的时间片轮…...
)
人工智能期末考试(刷题篇部分题有答案)
参考: 人工智能 经典考试试题及答案 - 百度文库 大学人工智能期末考试题库 - 百度文库 人工智能【期末复习题】 - 百度文库 人工智能期末试题及答案完整版 - 百度文库 一、选择题 AI的缩写是 Artificial Intelligence反演归结(消解)证明…...

手写Vue渲染器render函数
使用js对象来描述UI更加的灵活。“这种对象”在vue框架中被称为虚拟DOM,渲染函数内部可以创建虚拟DOM,然后vue.js可以将其内容进行渲染。 1.渲染器的介绍 渲染器的作用就是把虚拟DOM渲染为真实DOM 思考下,我们有一个虚拟 DOM,如…...
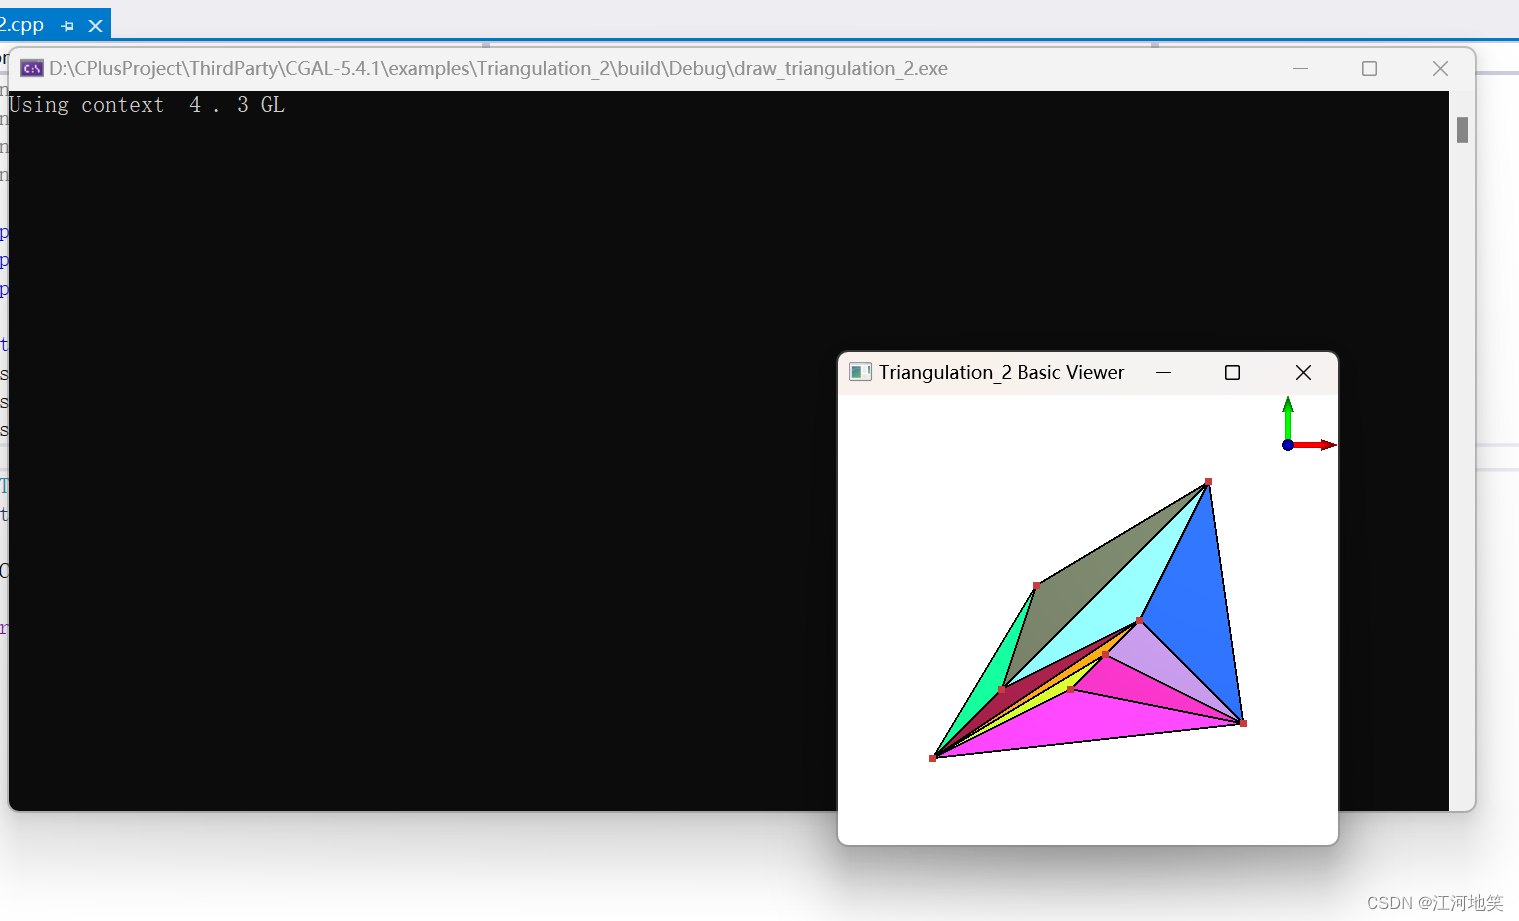
CGAL+QT
先安装CGAL和QT 安装完QT其中MSVC 这两个没配置 1、x32配置选择的是 x64配置选择的是 2、CGAL 5.4.5 - Manual: Using CGAL on Windows (with Visual C) 参数文章配置一些环境变量 3、 测试 新建build 进行cmake QT、Boost、CGAL都自动匹配上了(环境变量已经配…...

GBase8a SSL 配置
GBase8a SSL 配置 GBase8a MPP Cluster 支持 SSL 标准协议, SSL 协议是一种安全性更高的协议标准, 它加入了数字签名和数字证书来实现客户端和服务器的双向身份验证,保证了通信双方更加安全的数据传输。 配置客户端使用 SSL 安全连接的方式连…...
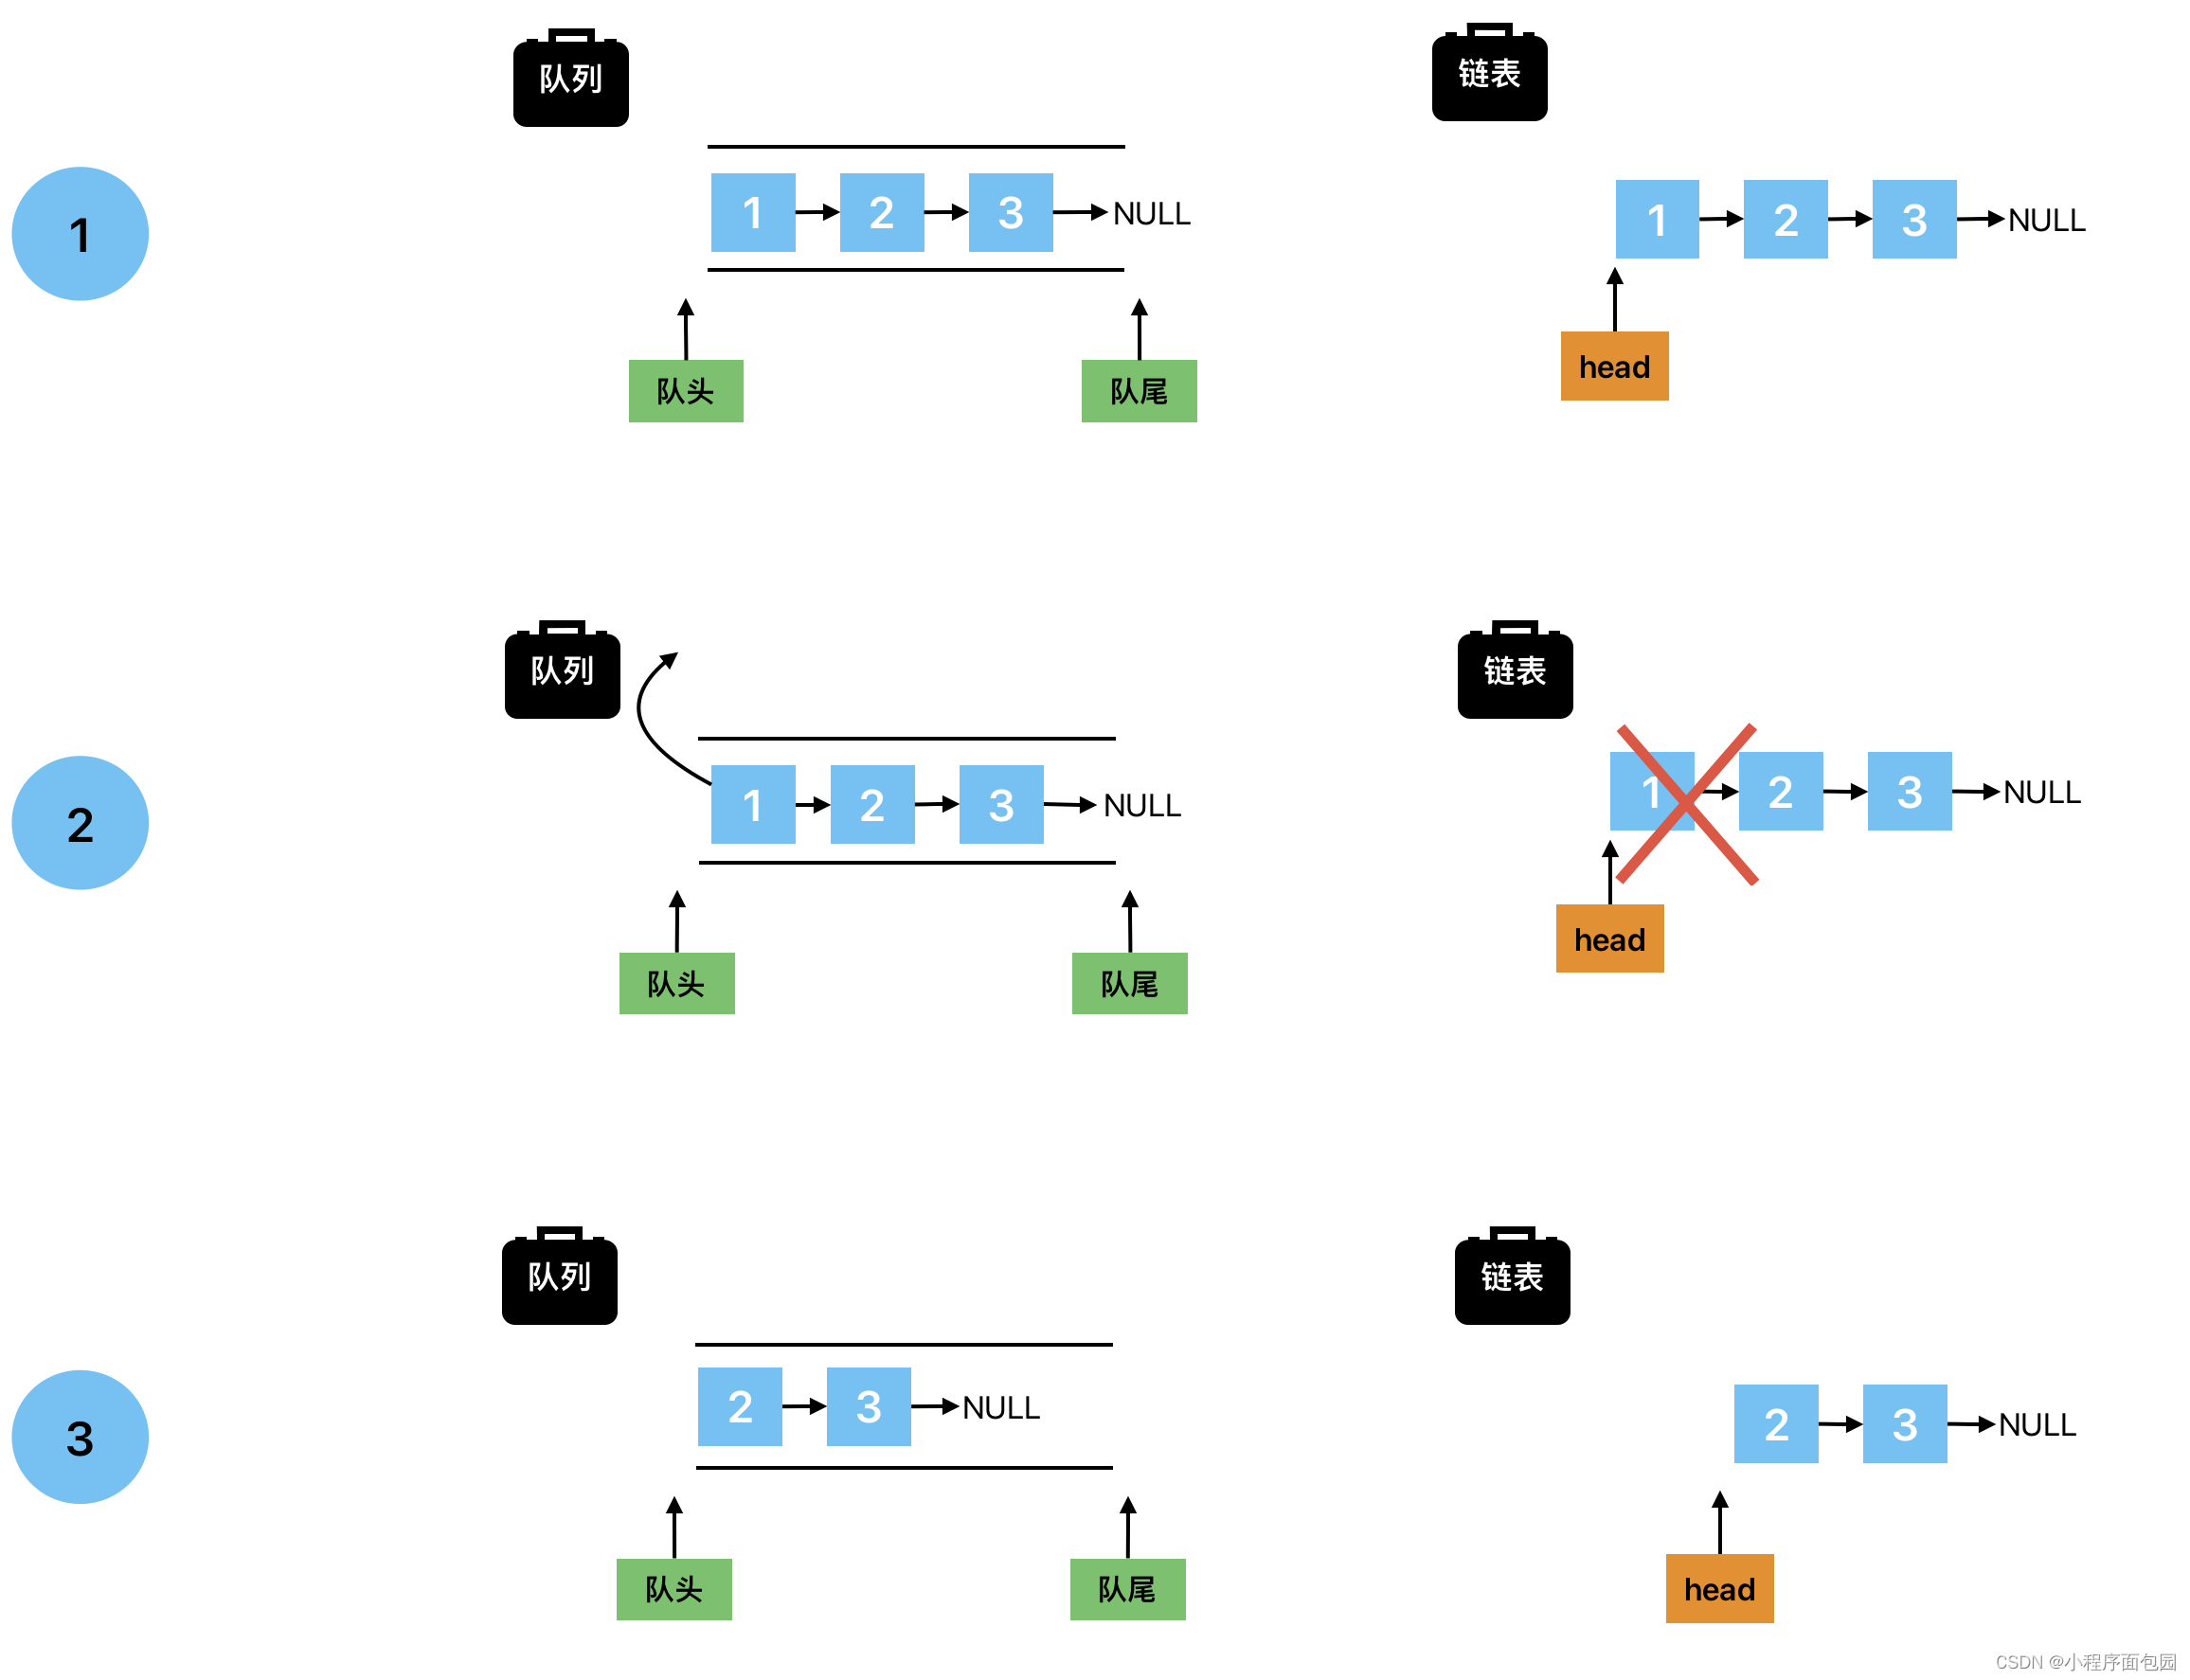
数据结构之队列(源代码➕图解➕习题)
前言 在学过栈之后,会了解到栈的底层是根据顺序表或者链表来构建的,那么我们今天要学习的队列是否也是基于顺序表和链表呢?那我们直接进入正题吧! 1. 队列的概念(图解) 还是跟上节一样,依旧用图…...
社区迭代|ETLCloud社区新增“论坛”啦!
ETLCloud社区是谷云科技RestCloud旗下面向开发工程师、集成研发人员等技术人员提供全方位交流和学习的开放式平台,也是ETLCloud在产品生态赋能上的一大亮点,旨在能够帮助更多的用户更快捷高效的掌握技能,也为企业提供集成人才培养赋能&#x…...

ohos的代码同步以及添加自己的代码
首先我们需要获取到官方的repo工具,命令如下curl -s https://gitee.com/oschina/repo/raw/fork_flow/repo-py3 > ./repo,这里我们就拿到repo工具了,这个repo可以放任意地方,也可以放 /usr/local/bin/repo下,这样可以…...
进阶使用)
Python的Pandas库(二)进阶使用
Python开发实用教程 DataFrame的运算 DataFrame重载了运算符,支持许多的运算 算术运算 运算方法运算说明df.add(other)对应元素的加,如果是标量,就每个元素加上标量df.radd(other)等效于otherdfdf.sub(other)对应元素相减,如果…...

如何才能从程序员到架构师?
1 引言 小团队一般 10 人左右,其中常常是技术最牛的人做架构师(或TL)。所以,架构师在广大码农中的占比大概平均不到 10%。而架构师也可以分为初级、中级、高级三档,江湖上真正高水平的软件架构师就更少了。 所以&…...

dvadmin-打包发布-nginx-静态服务器配置-防火墙设置
文章目录 1.下载nginx2.nginx常用命令3.dvadmin打包发布4.防火墙设置 1.下载nginx 也从作者下载的网址下载:https://download.csdn.net/download/m0_67316550/88470098 2.nginx常用命令 注意:一定要在dos窗口启动,不要直接双击nginx.exe&a…...

Win10中Pro/E鼠标滚轮不能缩放该怎么办?
Pro/E安装好后,鼠标滚轮不能缩放模型,该怎么办?问题多发生在win8/win10上,新装了PROE,发现滑动鼠标中键不能放大缩小。 彩虹图纸管理软件_图纸管理系统_图纸文档管理软件系统_彩虹EDM【官网】彩虹EDM图纸管理软件系统…...
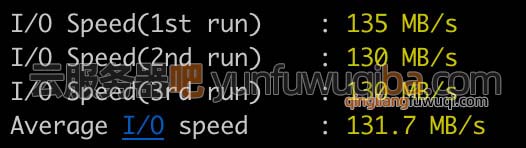
腾讯云轻量应用服务器性能如何?值得入手吗?
腾讯云轻量应用服务器性能怎么样?轻量服务器的CPU内存计算性能和同规格的标准型云服务器CVM性能处于同一水准,性能很不错,具有100%CPU性能,并且价格很优惠,值得买。腾讯云百科txybk.com分享腾讯云轻量应用服务器性能测…...
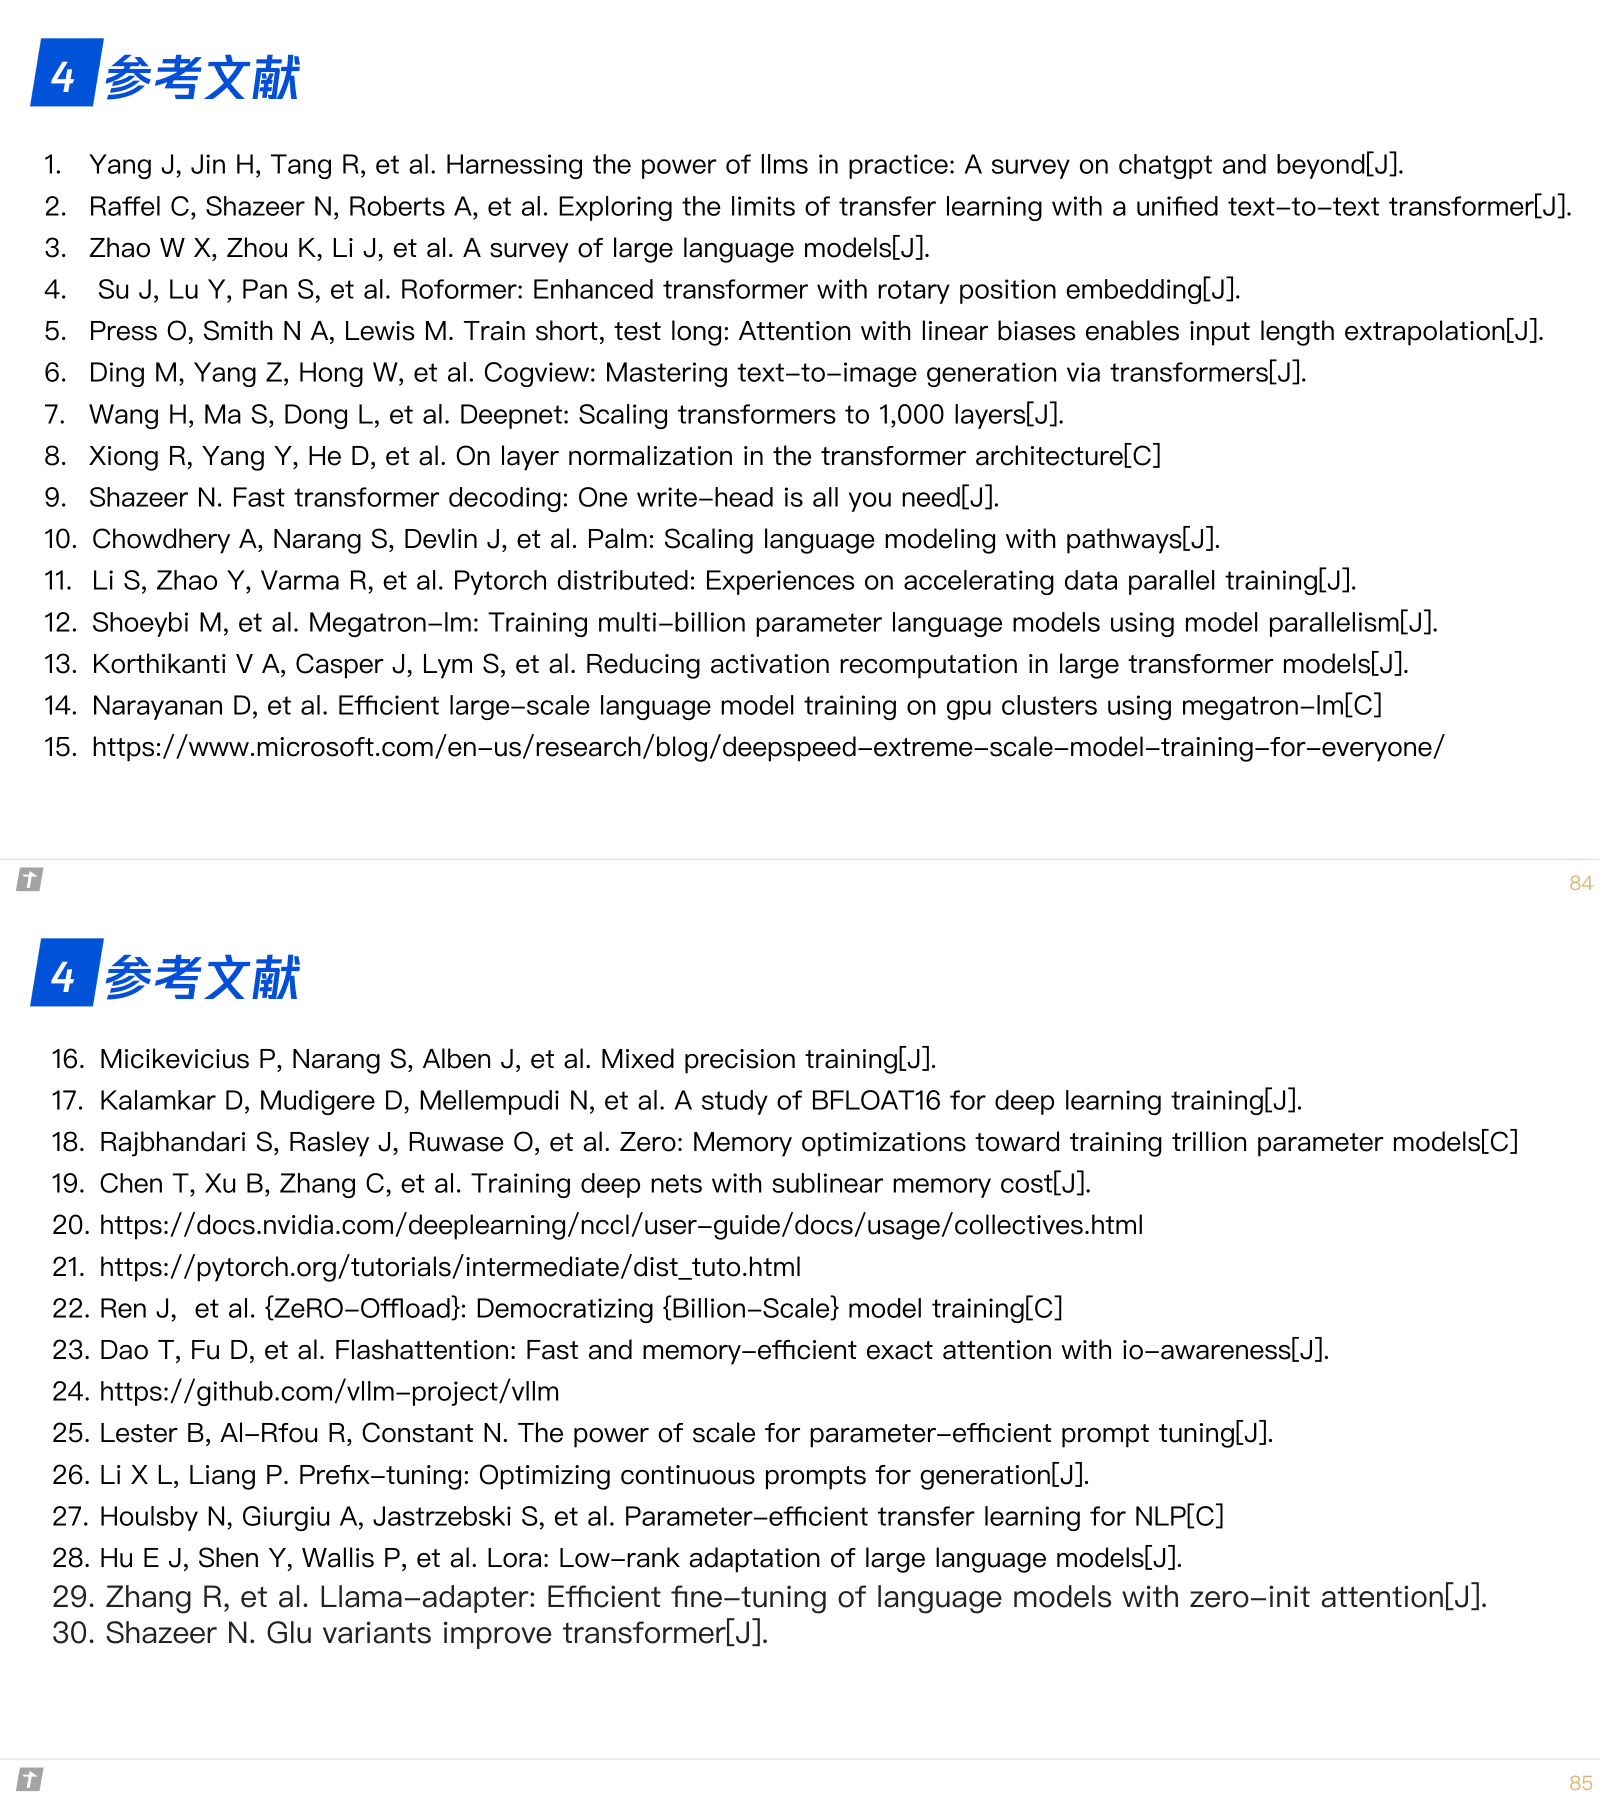
主流大语言模型的技术细节
主流大语言模型的技术原理细节从预训练到微调https://mp.weixin.qq.com/s/P1enjLqH-UWNy7uaIviWRA 比较 LLaMA、ChatGLM、Falcon 等大语言模型的细节:tokenizer、位置编码、Layer Normalization、激活函数等。2. 大语言模型的分布式训练技术:数据并行、…...

面试经典150题——Day22
文章目录 一、题目二、题解 一、题目 6. Zigzag Conversion The string “PAYPALISHIRING” is written in a zigzag pattern on a given number of rows like this: (you may want to display this pattern in a fixed font for better legibility) P A H N A P L S I I G …...

[源码开源] 被抄袭后我选择把 3w 用户日活千人的小游戏源码直接公开
小红书上最火的猜数字微信小程序游戏「谁输谁洗碗」开源啦,上线一个月累计注册用户超 3w ,支持双人对战的猜谜游戏,包含猜数字、猜颜色、每日挑战和残局解谜等多种游戏模式。 最近真的忙,辛苦做的游戏被人直接 1:1 照搬ÿ…...

OFA图像描述系统实战:快速搭建图片转文字工具,避免常见权限错误
OFA图像描述系统实战:快速搭建图片转文字工具,避免常见权限错误 1. 项目介绍:让图片自己“说话”的智能工具 你有没有遇到过这样的场景?手头有一堆产品图片,需要为每张图配上文字描述,手动编写不仅耗时耗…...

终极指南:OPAL外部数据源配置与API策略源实战
终极指南:OPAL外部数据源配置与API策略源实战 【免费下载链接】opal Policy and data administration, distribution, and real-time updates on top of Policy Agents (OPA, Cedar, ...) 项目地址: https://gitcode.com/gh_mirrors/opal1/opal OPAL…...

5个实用技巧:掌握FastBle日志系统的完整调试指南
5个实用技巧:掌握FastBle日志系统的完整调试指南 【免费下载链接】FastBle Android Bluetooth Low Energy (BLE) Fast Development Framework. It uses simple ways to filter, scan, connect, read ,write, notify, readRssi, setMTU, and multiConnection. 项目…...

使用 Applications Manager 实现 AWS 云监控:保障业务应用高效运行
随着企业加速将应用和服务迁移至云端,Amazon Web Services(AWS)凭借其可扩展性、可靠性及成本效益,成为主流选择。然而,云环境日益复杂,企业亟需强大的监控系统,以确保应用稳定运行。Applicatio…...

javaweb共享汽车调度管理系统 新能源共享汽车租赁管理系统的设计与实现
目录同行可拿货,招校园代理 ,本人源头供货商功能模块分析技术实现要点新能源特色功能项目技术支持源码获取详细视频演示 :文章底部获取博主联系方式!同行可合作同行可拿货,招校园代理 ,本人源头供货商 功能模块分析 用户管理模块 用户注册、登录、个人…...

南麟 SA9120 单通道 H 桥直流有刷电机驱动专用芯片 SOP8封装
产品描述南麟 SA9120 是上海南麟电子推出的单通道 H 桥直流有刷电机驱动专用芯片,采用成熟高压工艺设计,集成度高、外围电路简单,可直接驱动中小功率直流电机、步进电机绕组及电磁阀等感性负载,具备优异的抗干扰与带载能力&#x…...

提升效率:用快马ai生成ubuntu一键自动化安装openclaw的脚本
最近在Ubuntu上安装OpenClaw时,发现手动操作既耗时又容易出错。经过一番摸索,我总结出一套自动化方案,用脚本把整个流程优化到了极致。这里分享下具体实现思路和效率提升的关键点。 环境检测与适配 脚本首先会检查Ubuntu版本和架构࿰…...

场景深耕,生态共生——视程空间,让边缘算力真正落地千行百业
在AI算力产业飞速发展的今天,“有算力”已不再是核心竞争力,“能落地、能适配、能创造价值”才是破局关键。当前,众多算力企业陷入“重参数、轻场景”的内卷,导致大量算力产品停留在实验室,无法真正适配产业一线需求。…...

Linux实时查看CUDA显卡使用情况的常用命令详解
在 Linux 系统中,你可以使用以下几个常用命令来实时查看 CUDA 显卡的情况:1. nvidia-smi 命令nvidia-smi(NVIDIA System Management Interface)是 NVIDIA 提供的一个命令行工具,它可以实时显示 NVIDIA GPU 的状态信息&…...