深入浅出理解ResNet网络模型+PyTorch实现
温故而知新,可以为师矣!
一、参考资料
原始论文:Identity Mappings in Deep Residual Networks
原论文地址:Deep Residual Learning for Image Recognition
ResNet详解+PyTorch实现
PyTorch官方实现ResNet
【pytorch】ResNet18、ResNet20、ResNet34、ResNet50网络结构与实现
残差网络ResNet笔记
ResNet详解与实现
Highway Networks
重读《Deep Residual Learning for Image Recognition》之进一步理解残差网络的神秘(附Pytorch代码)
二、相关介绍
1. 深度网络
随着网络层数的加深,网络的表达能力会更强,这是因为卷积核的作用是提取图像的特征,然而一个卷积核是不够的,一个卷积核只能反应图像的某一个特征,所以我们需要多个卷积核,这些不同的卷积核可以提取到图像不同的特征,从而让模型学习图像特征的能力更强。因此有足够的卷积核和足够的参数才可以更好表述原始图像的特征。
因此,深度网络有两个优势特点:
- 特征的等级随着网络深度的加深而变高;
- 越深的深度使网络的表达能力更强。
2. 网络模型命名
现在很多网络结构都是一个命名+数字,数字代表网络深度,网络深度指的是网络的权重层,包括卷积层和全连接层,不包括池化层和BN层。
3. BN批量规范化层
批量规范化层(Batch Normalization,简称BN),将一批数据的feature map满足均值为0,方差为1的分布规律。
在图像预处理过程中,通常会对图像进行标准化处理,这样能够加速网络的收敛。如下图所示,对于Conv1来说,输入是满足某一分布的特征矩阵;但对于Conv2而言,输入的feature map就不一定满足某一分布规律(注意这里所说满足某一分布规律并不是指某一个feature map的数据要满足分布规律,理论上是指整个训练样本集所对应feature map的数据要满足分布规律)。而BN的目的就是使feature map满足均值为0,方差为1的分布规律。

三、ResNet相关介绍
ResNet详解
深度残差网络(Deep residual network, ResNet)是在 2015年由微软实验室提出,斩获当年ImageNet竞赛中分类任务第一名,目标检测第一名,获得COCO数据集中目标检测第一名,图像分割第一名。ResNet的提出是CNN图像史上的一件里程碑事件,由于其在公开数据上展现的优势,作者何凯明也因此摘得CVPR2016最佳论文奖。
1. 引言
网络的深度为什么重要?
因为CNN能够提取low/mid/high-level的特征,网络的层数越多,意味着能够提取到不同level的特征越丰富。并且,越深的网络提取的特征越抽象,越具有语义信息。
为什么不能简单地增加网络层数?
在ResNet网络提出之前,传统的卷积神经网络都是通过将一系列卷积层与池化层进行堆叠得到的。一般我们会觉得网络越深,特征信息越丰富,模型效果应该越好。
但实验证明,传统的卷积网络或者全连接网络在信息传递的时候或多或少会存在信息丢失、信息损耗等问题,简单地增加网络深度存在网络退化问题,同时还有导致梯度消失或者梯度爆炸,导致很深的网络无法训练。
1.1 梯度消失/爆炸问题
随着网络层数加深,反向传播过程中出现梯度消失或者梯度爆炸的问题。反向传播是用来对网络的权重进行调整,包括卷积核的值,隐藏层的权重和偏置,这些都需要反向传播来调整;反向传播主要是计算变化因子来调整权重,而变化因子的计算首先需要计算目标函数(预测值和真实值的差的平方和)对每层网络权重的偏导数。因此,在求反向传播求梯度时利用了链式法则,梯度值会进行一系列的连乘,也就会出现剧烈的缩减或者变大,这种现象就阻碍了模型收敛。
若每一层的误差梯度小于1,在反向传播过程中,每向前传播一次,都要乘以一个小于1的误差梯度,网络越深,所乘的小于1的系数越多,梯度越趋近于0,则会发生“梯度消失”;反之,若每一层的误差梯度大于1,在反向传播过程中,每向前传播一次,都要乘以一个大于1的误差梯度,网络越深,梯度越来越大,则会发生“梯度爆炸”。
梯度消失:0.99^1000=0.00004317
梯度爆炸:1.01^1000=20959.155
解决办法
为了解决梯度消失或梯度爆炸问题,ResNet论文提出通过数据预处理(数据标准化处理),使用标准权重初始化,在网络中使用 BN(Batch Normalization)层来解决。
1.2 网络退化问题(Degradation problem)
随着网络越来越深,训练变得原来越难,网络的优化变得越来越难。理论上,越深的网络,效果应该更好;但实际上,由于训练难度,过深的网络会产生退化问题,效果反而不如相对较浅的网络。随着网络层数增多,网络准确度出现饱和,甚至出现下降,这被称为退化问题。

解决办法
为了解决深层网络中的退化问题,使神经网络某些层跳过下一层神经元的连接,隔层相连,弱化每层之间的强联系,这种神经网络被称为 残差网络 (ResNets)。ResNet论文提出了 residual结构(残差结构)来减轻退化问题,下图是使用residual结构的卷积网络,可以看到随着网络的不断加深,效果并没有变差,而是变的更好了。(虚线是train error,实线是test error)。

ResNet相比于VGGNet,最大的区别在于有很多的旁路将输入直接连接到后面的层,这种结构也被称为shortcut或者skip connections。
2. 残差映射

如上图所示,左图称为恒等映射,右图称为残差映射。左图中,假设原始输入为x,理想映射为f(x),左图虚线框中的部分需要直接拟合出该映射 f(x),而右图虚线框中的部分需要拟合出残差映射 f(x)-x,残差映射在现实中往往更容易优化。右图中的 f(x) 为理想映射,当右图虚线框内上方的加权运算(如放射)的权重和偏置参数设为0,f(x)即为恒等映射。实际中,当理想映射f(x)极限接近恒等映射时,残差映射也易于捕捉恒等映射的细微波动。
四、Residual残差结构
1. plain与residual网络
由多个 残差块组成的神经网络就是残差网络 。其结构如下图所示:

实验表明,这种模型结构对于训练非常深的神经网络,效果很好。另外,为了便于区分,我们把 非残差网络 称为 Plain Network。
2. Residual残差结构简介
如下图所示,residual残差结构使用了一种 short cut 的连接方式(也可理解为“捷径”),让特征矩阵隔层相加,所谓相加是特征矩阵相同位置上的数值进行相加。一般称x为 identity Function,它是一个跳跃连接;称F(x)为ResNet Function,注意F(x)和x形状要相同。在残差块中,输入可通过跨层数据路线更快地向前传播。

实际应用中,残差结构的 short cut 不一定是隔一层连接,也可以中间隔多层,ResNet所提出的残差网络中就是隔多层。
残差网络是由一系列残差块组成的。ResNet18/34的残差结构是BasicBlock,用的是2个3x3的卷积。ResNet50/101/152的残差结构是Bottleneck,用的是 1x1+3x3+1x1 的卷积。如下图所示,ResNet中两种不同的residual残差结构,左侧残差结构称为 BasicBlock,右侧残差结构称为 Bottleneck。

跟VggNet类似,ResNet也有多个不同层的版本,而残差结构也有两种对应浅层和深层网络:
| ResNet | 残差结构 | |
|---|---|---|
| 浅层网络 | ResNet18/34 | BasicBlock |
| 深层网络 | ResNet50/101/152 | Bottleneck |
下面是 ResNet 18/34 和 ResNet 50/101/152 具体的实线/虚线残差结构图:
-
ResNet 18/34

-
ResNet 50/101/152s

ResNet沿用了VGG完整的3×3卷积层设计。 首先,BasicBlock残差结构有2个相同输出通道数的3×3卷积层。 每个卷积层后接一个BN批量规范化层和ReLU激活函数。 然后,通过跨层数据通路,跳过这2个卷积运算,将输入直接加在最后的ReLU激活函数前。 这样的设计要求2个卷积层的输出与输入形状一样,从而使它们可以相加。 如果想改变通道数,就需要引入一个额外的1×1卷积层来将输入变换成需要的形状后再做相加运算。

3. BasicBlock残差结构
对于18-layer、34-layer网络层数较少的ResNet,由BasicBlock构成,其进行两层间的残差学习,两层卷积核分别是3x3,3x3。basic_block=identity_block,此结构保证了输入和输出相等,实现网络的串联。

import torch.nn as nn
import math
import torch.utils.model_zoo as model_zoo# 这个文件内包括6中不同的网络架构
__all__ = ['ResNet', 'resnet18', 'resnet34', 'resnet50', 'resnet101','resnet152']# 每一种架构下都有训练好的可以用的参数文件
model_urls = {'resnet18': 'https://s3.amazonaws.com/pytorch/models/resnet18-5c106cde.pth','resnet34': 'https://s3.amazonaws.com/pytorch/models/resnet34-333f7ec4.pth','resnet50': 'https://s3.amazonaws.com/pytorch/models/resnet50-19c8e357.pth','resnet101': 'https://s3.amazonaws.com/pytorch/models/resnet101-5d3b4d8f.pth','resnet152': 'https://s3.amazonaws.com/pytorch/models/resnet152-b121ed2d.pth',
}# 常见的3x3卷积
def conv3x3(in_planes, out_planes, stride=1):"3x3 convolution with padding"return nn.Conv2d(in_planes, out_planes, kernel_size=3, stride=stride,padding=1, bias=False)class BasicBlock(nn.Module):# 残差结构中,主分支的卷积核个数是否发生变化,不变则为1expansion = 1def __init__(self, inplanes, planes, stride=1, downsample=None): # downsample对应虚线残差结构# inplanes代表输入通道数,planes代表输出通道数。super(BasicBlock, self).__init__()# Conv1self.conv1 = conv3x3(inplanes, planes, stride)# stride=1为实线残差结构,不需要改变大小,stride=2为虚线残差结构# stride=1,output=(input-3+2*1)/ 1 + 1 = input 输入和输出的shape不变# stride=2,output=(input-3+2*1)/ 2 + 1 = input = input/2 + 0.5 = input/2(向下取整)self.bn1 = nn.BatchNorm2d(planes) # 使用BN时不使用偏置self.relu = nn.ReLU(inplace=True)# Conv2self.conv2 = conv3x3(planes, planes)self.bn2 = nn.BatchNorm2d(planes)# 下采样self.downsample = downsampleself.stride = stridedef forward(self, x):residual = xout = self.conv1(x)out = self.bn1(out)out = self.relu(out)out = self.conv2(out)out = self.bn2(out)if self.downsample is not None: # 虚线残差结构,需要下采样residual = self.downsample(x) # 捷径分支 short cut# F(x)+xout += residualout = self.relu(out)return outBasicBlock类中的 init() 函数定义网络架构,forward() 函数定义前向传播,实现的功能是残差块。

4. Bottleneck残差结构
对于50-layer、101-layer和152-layer网络层数较多的ResNet,由Bottleneck构成,其进行三层间的残差学习,三层卷积核分别是1x1,3x3和1x1。对于深层的 Bottleneck,1×1的卷积核起到降维和升维(特征矩阵深度)的作用,同时可以大大减少网络参数。具体来说,第一层的1× 1的卷积核的作用是对特征矩阵进行降维操作,将特征矩阵的深度由256降为64;第三层的1× 1的卷积核是对特征矩阵进行升维操作,将特征矩阵的深度由64升成256。降低特征矩阵的深度主要是为了减少参数的个数。先降维后升维,是为了主分支上输出的特征矩阵和捷径分支上输出的特征矩阵形状相同,以便进行加法操作。

值得注意的是,隐含层的feature map的通道数量是比较小的,并且是输出feature map通道数量的1/4。如下图所示,三层卷积核中的前两个卷积核对应的隐含层通道数为64,最后一个卷积核对应的输出层通道数为256,隐含层的通道数是输出层通道数的1/4。

# ResNet50/101/152的残差结构,用的是1x1+3x3+1x1的卷积核
class Bottleneck(nn.Module):"""注意:原论文中,在虚线残差结构的主分支上,第一个1x1卷积层的步距是2,第二个3x3卷积层步距是1。但在pytorch官方实现过程中是第一个1x1卷积层的步距是1,第二个3x3卷积层步距是2,这么做的好处是能够在top1上提升大概0.5%的准确率。可参考 Resnet v1.5 https://ngc.nvidia.com/catalog/model-scripts/nvidia:resnet_50_v1_5_for_pytorch"""# 残差结构中第三层卷积核个数是第一/二层卷积核个数的4倍expansion = 4      # 输出通道数的倍乘def __init__(self, inplanes, planes, stride=1, downsample=None):super(Bottleneck, self).__init__()# conv1   1x1self.conv1 = nn.Conv2d(inplanes, planes, kernel_size=1, bias=False)self.bn1 = nn.BatchNorm2d(planes)# conv2   3x3self.conv2 = nn.Conv2d(planes, planes, kernel_size=3, stride=stride,padding=1, bias=False)# stride=stride根据传入的进行调整,因为实线中的第二层是1,虚线中是2self.bn2 = nn.BatchNorm2d(planes)# conv3   1x1  self.conv3 = nn.Conv2d(planes, planes * 4, kernel_size=1, bias=False)self.bn3 = nn.BatchNorm2d(planes * 4)self.relu = nn.ReLU(inplace=True)self.downsample = downsampleself.stride = stridedef forward(self, x):residual = xout = self.conv1(x)out = self.bn1(out)out = self.relu(out)out = self.conv2(out)out = self.bn2(out)out = self.relu(out)out = self.conv3(out)out = self.bn3(out)if self.downsample is not None:  # 捷径分支 short cutresidual = self.downsample(x)out += residualout = self.relu(out)return out
Bottleneck 类是另一种blcok类型,init() 函数定义网络架构,forward() 函数定义前向传播。该block中有三个卷积,分别是1x1,3x3,1x1,分别完成的功能是压缩维度,卷积,恢复维度。因此,Bottleneck 类实现的功能是对通道数进行压缩,再放大。注意:这里的plane不再是输出的通道数,输出通道数应该就是 p l a n e ∗ e x p a n s i o n plane*expansion plane∗expansion,即 4 ∗ p l a n e 4*plane 4∗plane。

5. 残差结构计算量
可以计算一下,假设两个残差结构的输入特征和输出特征矩阵的通道数都是256维,如下图:

如果不考虑bias偏置项,CNN参数量计算公式为: D K ∗ D K ∗ M ∗ N D_K*D_K*M*N DK∗DK∗M∗N
如果采用BasicBlock残差结构,参数量为:3×3x256×256+3×3x256×256=1179648。
如果采用Bottleneck残差结构,参数量为:1×1×256×64+3×3×64×64+1×1×64×256=69632。总结:很显然,搭建深层网络时,使用Bottleneck残差结构更合适。
五、ResNet网络
ResNet网络是参考了VGG19网络,在其基础上进行了修改,并通过短路机制加入了残差单元,如下图所示。ResNet相比普通网络每两层间增加了短路机制,这就形成了残差学习。

ResNet相对于VGG19网络,主要变化体现在:ResNet直接使用stride=2的卷积做下采样(特征图的大小减半,通道数翻倍),并且用 global average pool 层替换了全连接层。这体现了ResNet的一个重要设计原则:当feature map大小降低一半时,feature map的通道数增加一倍,这保持了网络层的复杂度。
1. ResNet网络结构
ResNet一般有4个stack,每一个stack里面都是block的堆叠,所以[3, 4, 6, 3]就是每一个stack里面堆叠block的个数,故而造就了不同深度的ResNet。
- resnet18: ResNet(BasicBlock, [2, 2, 2, 2])
- resnet34: ResNet(BasicBlock, [3, 4, 6, 3])
- resnet50:ResNet(Bottleneck, [3, 4, 6, 3])
- resnet101:ResNet(Bottleneck, [3, 4, 23, 3])
- resnet152:ResNet(Bottleneck, [3, 8, 36, 3])

如上图所示,ResNet50分为 conv1,conv2_x,conv3_x,conv4_x,conv5_x共5大层,网络层数为: 1 + 1 + 3 ∗ 3 + 4 ∗ 3 + 6 ∗ 3 + 3 ∗ 3 = 50 1+1+3*3+4*3+6*3+3*3=50 1+1+3∗3+4∗3+6∗3+3∗3=50,前面一层卷积层+一层池化层+4组卷积,不考虑最后面的全连接、池化层。
下面是 ResNet 18/34 和 ResNet 50/101/152 具体的实线/虚线残差结构图:
-
ResNet 18/34

-
ResNet 50/101/152s

2. ResNet网络创新点
-
搭建超深的网络结构(可突破1000层)。
-
提出 Residual 结构(残差结构 )来减轻退化问题。
-
使用 BN层来解决梯度消失或梯度爆炸问题。使用 BN 加速训练(丢弃dropout)。
在图像预处理过程中通常会对图像进行标准化处理,这样能够加速网络的收敛。BN的目的就是使feature map满足均值为0,方差为1的分布规律。
3. 核心代码
# 整个网络的框架部分
class ResNet(nn.Module):# block = BasicBlock or Bottleneck# layers为残差结构中conv2_x~conv5_x中残差块个数,是一个列表,如34层中的是[3,4,6,3]def __init__(self, block, layers, num_classes=1000): self.inplanes = 64 super(ResNet, self).__init__()# 1.conv1self.conv1 = nn.Conv2d(3, 64, kernel_size=7, stride=2, padding=3,bias=False)self.bn1 = nn.BatchNorm2d(64)self.relu = nn.ReLU(inplace=True)# 2.conv2_xself.maxpool = nn.MaxPool2d(kernel_size=3, stride=2, padding=1)self.layer1 = self._make_layer(block, 64, layers[0])# 3.conv3_xself.layer2 = self._make_layer(block, 128, layers[1], stride=2)# 4.conv4_xself.layer3 = self._make_layer(block, 256, layers[2], stride=2)# 5.conv5_xself.layer4 = self._make_layer(block, 512, layers[3], stride=2)self.avgpool = nn.AvgPool2d(7)self.fc = nn.Linear(512 * block.expansion, num_classes)# 初始化权重for m in self.modules():if isinstance(m, nn.Conv2d):n = m.kernel_size[0] * m.kernel_size[1] * m.out_channelsm.weight.data.normal_(0, math.sqrt(2. / n))elif isinstance(m, nn.BatchNorm2d):m.weight.data.fill_(1)m.bias.data.zero_()def _make_layer(self, block, planes, blocks, stride=1):downsample = Noneif stride != 1 or self.inplanes != planes * block.expansion:downsample = nn.Sequential(nn.Conv2d(self.inplanes, planes * block.expansion,kernel_size=1, stride=stride, bias=False),nn.BatchNorm2d(planes * block.expansion),)layers = []layers.append(block(self.inplanes, planes, stride, downsample))# 每个blocks的第一个residual结构保存在layers列表中。self.inplanes = planes * block.expansionfor i in range(1, blocks):# 通过循环将剩下的一系列实线残差结构添加到layerslayers.append(block(self.inplanes, planes)) # Sequential将一系列网络结构组合在一起return nn.Sequential(*layers)def forward(self, x):x = self.conv1(x)x = self.bn1(x)x = self.relu(x)x = self.maxpool(x)x = self.layer1(x)x = self.layer2(x)x = self.layer3(x)x = self.layer4(x)x = self.avgpool(x)x = x.view(x.size(0), -1) # 将输出结果展成一行x = self.fc(x)return xResNet一共有5个阶段,第一阶段是一个7x7的卷积,stride=2,然后再经过池化层,得到的特征图大小变为原图的1/4。_make_layer() 函数用来产生4个layer,可以根据输入的layers列表来创建网络。
# resnet18
def resnet18(pretrained=False):"""Constructs a ResNet-18 model.# https://download.pytorch.org/models/resnet18-f37072fd.pthArgs:pretrained (bool): If True, returns a model pre-trained on ImageNet"""model = ResNet(BasicBlock, [2, 2, 2, 2])if pretrained:model.load_state_dict(model_zoo.load_url(model_urls['resnet18']))return model# resnet34
def resnet34(pretrained=False):"""Constructs a ResNet-34 model.# https://download.pytorch.org/models/resnet34-333f7ec4.pthArgs:pretrained (bool): If True, returns a model pre-trained on ImageNet"""model = ResNet(BasicBlock, [3, 4, 6, 3])if pretrained:model.load_state_dict(model_zoo.load_url(model_urls['resnet34']))return model# resnet50
def resnet50(pretrained=False):"""Constructs a ResNet-50 model.# https://download.pytorch.org/models/resnet50-19c8e357.pthArgs:pretrained (bool): If True, returns a model pre-trained on ImageNet"""model = ResNet(Bottleneck, [3, 4, 6, 3])if pretrained:model.load_state_dict(model_zoo.load_url(model_urls['resnet50']))return model# resnet101
def resnet101(pretrained=False):"""Constructs a ResNet-101 model.# https://download.pytorch.org/models/resnet101-5d3b4d8f.pthArgs:pretrained (bool): If True, returns a model pre-trained on ImageNet"""model = ResNet(Bottleneck, [3, 4, 23, 3])if pretrained:model.load_state_dict(model_zoo.load_url(model_urls['resnet101']))return model# resnet152
def resnet152(pretrained=False):"""Constructs a ResNet-152 model.# https://download.pytorch.org/models/resnet152-394f9c45.pthArgs:pretrained (bool): If True, returns a model pre-trained on ImageNet"""model = ResNet(Bottleneck, [3, 8, 36, 3])if pretrained:model.load_state_dict(model_zoo.load_url(model_urls['resnet152']))return model
六、最基本的ResNet18
ResNet18网络的具体构成
PyTorch实现ResNet18
ResNet18结构、各层输出维度
ResNet 18 的结构解读「建议收藏」
Resnet 18网络模型[通俗易懂]
Resnet 18网络模型
Resnet-18网络图示理解
1. ResNet18网络结构
18-layer的ResNet命名为ResNet18,其网络深度是18层,具体是指带有权重的18层,包括:卷积层和全连接层,不包括池化层和BN层。如下图所示,卷积层有17个,FC层1个,所以是18层。

虚线的 short cut 通过1×1的卷积核进行了维度处理(特征矩阵在长宽方向下采样,深度方向调整成下一层残差结构所需要的channel)。
- channel通道减半。通过1x1卷积调整通道数,实线表示残差块中的通道数没有变化,虚线表示通道数变化,例如64->128。
- 特征矩阵shape减半。将步长调整成2,实现下采样。

提示:
BN 表示批量归一化RELU 表示激活函数lambda x:x 这个函数的意思是输出等于输入identity 表示残差1个resnet block 包含2个basic block
1个resnet block 需要添加2个残差在resnet block之间残差形式是1*1conv,在resnet block内部残差形式是lambda x:x
resnet block之间的残差用实线箭头表示,resnet block内部的残差用虚线箭头表示3*3conv s=2,p=1 特征图尺寸会缩小
3*3conv s=1,p=1 特征图尺寸不变
(1)conv1卷积层
首先,经过一个卷积层。该卷积层的卷积核的大小为7x7,步长为2,padding为3,输出通道为64。根据公式:
n o u t = ⌊ n i n + 2 p − k s ⌋ + 1 n_{out}=\left\lfloor\frac{n_{in}+2p-k}{s}\right\rfloor+1 nout=⌊snin+2p−k⌋+1
我们可以算出最后输出数据的大小为64x112x112。
(2)maxpooling池化层

最大池化层,这一层的卷积核的大小是3x3,步长为2,padding为1。最后输出数据的大小为64x56x56。也就是说,这一层不改变数据的通道数量,而特征矩阵shape减半。
(3)conv2_x卷积层(Resnet block1)
该卷积层的卷积核大小为3x3,步长为1,padding为1。最后通过两次卷积计算,输出数据大小为64x56x56,这一层不改变数据的大小和通道数。

(4)conv3_x卷积层(Resnet block2)
通过一个1x1的卷积层升维,并经过一个下采样。最终输出为128x28x28。输出的channel通道翻倍,输出的特征矩阵shape减半。

(5)conv4_x卷积层(Resnet block3)
通过一个1x1的卷积层,并经过一个下采样。最终输出为256x14x14。输出的channel通道翻倍,输出的特征矩阵shape减半。

(6)Resnet block4(conv5_x卷积层)
和上述同理,最终输出为512x7x7。输出的channel通道翻倍,输出的特征矩阵shape减半。

(7)avgpooling层
最终输出为512x1x1。
(8)FC层
七、源码分析
ResNet网络结构详解,网络搭建,迁移学习
pytorch图像分类篇:6. ResNet网络结构详解与迁移学习简介
1. model.py
import torch.nn as nn
import torch# ResNet18/34的残差结构,用的是2个3x3的卷积核
class BasicBlock(nn.Module):expansion = 1  # 残差结构中,主分支的卷积核个数是否发生变化,不变则为1def __init__(self, in_channel, out_channel, stride=1, downsample=None, **kwargs):  # downsample对应虚线残差结构super(BasicBlock, self).__init__()self.conv1 = nn.Conv2d(in_channels=in_channel, out_channels=out_channel,kernel_size=(3, 3), stride=(stride, stride),padding=1, bias=False)# stride=1为实线残差结构,不需要改变大小,stride=2为虚线残差结构# stride=1,output=(input-3+2*1)/ 1 + 1 = input   输入和输出的shape不变# stride=2,output=(input-3+2*1)/ 2 + 1 = input = input/2 + 0.5 = input/2(向下取整)self.bn1 = nn.BatchNorm2d(out_channel)   # 使用BN时不使用偏置self.relu = nn.ReLU()self.conv2 = nn.Conv2d(in_channels=out_channel, out_channels=out_channel,kernel_size=(3, 3), stride=(1, 1), padding=1, bias=False)self.bn2 = nn.BatchNorm2d(out_channel)self.downsample = downsampledef forward(self, x):identity = xif self.downsample is not None:  # 虚线残差结构,需要下采样identity = self.downsample(x)  # 捷径分支 short cutout = self.conv1(x)out = self.bn1(out)out = self.relu(out)out = self.conv2(out)out = self.bn2(out)out += identityout = self.relu(out)return out# ResNet50/101/152的残差结构,用的是1x1+3x3+1x1的卷积核
class Bottleneck(nn.Module):"""注意:原论文中,在虚线残差结构的主分支上,第一个1x1卷积层的步距是2,第二个3x3卷积层步距是1。但在pytorch官方实现过程中是第一个1x1卷积层的步距是1,第二个3x3卷积层步距是2,这么做的好处是能够在top1上提升大概0.5%的准确率。可参考 Resnet v1.5 https://ngc.nvidia.com/catalog/model-scripts/nvidia:resnet_50_v1_5_for_pytorch"""expansion = 4  # 残差结构中第三层卷积核个数是第一/二层卷积核个数的4倍def __init__(self, in_channel, out_channel, stride=1, downsample=None,groups=1, width_per_group=64):super(Bottleneck, self).__init__()width = int(out_channel * (width_per_group / 64.)) * groupsself.conv1 = nn.Conv2d(in_channels=in_channel, out_channels=width,kernel_size=(1, 1), stride=(1, 1), bias=False)  # squeeze channelsself.bn1 = nn.BatchNorm2d(width)# -----------------------------------------self.conv2 = nn.Conv2d(in_channels=width, out_channels=width, groups=groups,kernel_size=(3, 3), stride=(stride, stride), bias=False, padding=1)# stride=stride根据传入的进行调整,因为实线中的第二层是1,虚线中是2self.bn2 = nn.BatchNorm2d(width)# -----------------------------------------self.conv3 = nn.Conv2d(in_channels=width, out_channels=out_channel * self.expansion,  # 卷积核个数变为4倍kernel_size=(1, 1), stride=(1, 1), bias=False)  # unsqueeze channelsself.bn3 = nn.BatchNorm2d(out_channel * self.expansion)self.relu = nn.ReLU(inplace=True)self.downsample = downsampledef forward(self, x):identity = xif self.downsample is not None:identity = self.downsample(x)  # 捷径分支 short cutout = self.conv1(x)out = self.bn1(out)out = self.relu(out)out = self.conv2(out)out = self.bn2(out)out = self.relu(out)out = self.conv3(out)out = self.bn3(out)out += identityout = self.relu(out)return out# 整个网络的框架部分
class ResNet(nn.Module):# block = BasicBlock or Bottleneck# block_num为残差结构中conv2_x~conv5_x中残差块个数,是一个列表,如34层中的是[3,4,6,3]def __init__(self,block,blocks_num,num_classes=1000,include_top=True,  # 方便在resnet网络的基础上搭建其他网络,这里用不到groups=1,width_per_group=64):super(ResNet, self).__init__()self.include_top = include_topself.in_channel = 64self.groups = groupsself.width_per_group = width_per_groupself.conv1 = nn.Conv2d(3, self.in_channel, kernel_size=(7, 7), stride=(2, 2),padding=3, bias=False)self.bn1 = nn.BatchNorm2d(self.in_channel)self.relu = nn.ReLU(inplace=True)self.maxpool = nn.MaxPool2d(kernel_size=3, stride=2, padding=1)self.layer1 = self._make_layer(block, 64, blocks_num[0])self.layer2 = self._make_layer(block, 128, blocks_num[1], stride=2)self.layer3 = self._make_layer(block, 256, blocks_num[2], stride=2)self.layer4 = self._make_layer(block, 512, blocks_num[3], stride=2)if self.include_top:self.avgpool = nn.AdaptiveAvgPool2d((1, 1))  # output size = (1, 1),自适应平均池化下采样self.fc = nn.Linear(512 * block.expansion, num_classes)for m in self.modules():if isinstance(m, nn.Conv2d):nn.init.kaiming_normal_(m.weight, mode='fan_out', nonlinearity='relu')# channel为残差结构中第一层卷积核个数,block_num表示该层一共包含多少个残差结构,如34层中的是3,4,6,3def _make_layer(self, block, channel, block_num, stride=1):downsample = None# ResNet50/101/152的残差结构,block.expansion=4if stride != 1 or self.in_channel != channel * block.expansion:  # layer2,3,4都会经过这个结构downsample = nn.Sequential(  # 生成下采样函数,这里只需要调整conv2的特征矩阵的深度nn.Conv2d(self.in_channel, channel * block.expansion, kernel_size=(1, 1), stride=(stride, stride), bias=False),nn.BatchNorm2d(channel * block.expansion))layers = []# #首先将第一层残差结构添加进去,block = BasicBlock or Bottlenecklayers.append(block(self.in_channel,  # 输入特征矩阵的深度64channel,  # 残差结构对应主分支上的第一个卷积层的卷积核个数downsample=downsample,  # 50/101/152对应的是高宽不变,深度4倍,对应的虚线残差结构stride=stride,groups=self.groups,width_per_group=self.width_per_group))self.in_channel = channel * block.expansionfor _ in range(1, block_num):# 通过循环将剩下的一系列实线残差结构添加到layerslayers.append(block(self.in_channel,channel,groups=self.groups,width_per_group=self.width_per_group))# Sequential将一系列网络结构组合在一起return nn.Sequential(*layers)def forward(self, x):x = self.conv1(x)x = self.bn1(x)x = self.relu(x)x = self.maxpool(x)x = self.layer1(x)x = self.layer2(x)x = self.layer3(x)x = self.layer4(x)if self.include_top:x = self.avgpool(x)x = torch.flatten(x, 1)x = self.fc(x)return xdef resnet18(num_classes=1000, include_top=True):# https://download.pytorch.org/models/resnet18-f37072fd.pthreturn ResNet(BasicBlock, [2, 2, 2, 2], num_classes=num_classes, include_top=include_top)def resnet34(num_classes=1000, include_top=True):# https://download.pytorch.org/models/resnet34-333f7ec4.pthreturn ResNet(BasicBlock, [3, 4, 6, 3], num_classes=num_classes, include_top=include_top)def resnet50(num_classes=1000, include_top=True):# https://download.pytorch.org/models/resnet50-19c8e357.pthreturn ResNet(Bottleneck, [3, 4, 6, 3], num_classes=num_classes, include_top=include_top)def resnet101(num_classes=1000, include_top=True):# https://download.pytorch.org/models/resnet101-5d3b4d8f.pthreturn ResNet(Bottleneck, [3, 4, 23, 3], num_classes=num_classes, include_top=include_top)def resnet152(num_classes=1000, include_top=True):# https://download.pytorch.org/models/resnet152-394f9c45.pthreturn ResNet(Bottleneck, [3, 8, 36, 3], num_classes=num_classes, include_top=include_top)def resnext50_32x4d(num_classes=1000, include_top=True):# https://download.pytorch.org/models/resnext50_32x4d-7cdf4587.pthgroups = 32width_per_group = 4return ResNet(Bottleneck, [3, 4, 6, 3],num_classes=num_classes,include_top=include_top,groups=groups,width_per_group=width_per_group)def resnext101_32x8d(num_classes=1000, include_top=True):# https://download.pytorch.org/models/resnext101_32x8d-8ba56ff5.pthgroups = 32width_per_group = 8return ResNet(Bottleneck, [3, 4, 23, 3],num_classes=num_classes,include_top=include_top,groups=groups,width_per_group=width_per_group)
2. train.py
import os
import sys
import jsonimport torch
import torch.nn as nn
import torch.optim as optim
from torchvision import transforms, datasets
from tqdm import tqdmfrom model import resnet34def main():device = torch.device("cuda:0" if torch.cuda.is_available() else "cpu")print("using {} device.".format(device))data_transform = {"train": transforms.Compose([transforms.RandomResizedCrop(224),transforms.RandomHorizontalFlip(),transforms.ToTensor(),transforms.Normalize([0.485, 0.456, 0.406], [0.229, 0.224, 0.225])]),"val": transforms.Compose([transforms.Resize(256),      #原图的长宽比固定不动,把最小边长缩放到256transforms.CenterCrop(224),      #中心裁剪transforms.ToTensor(),transforms.Normalize([0.485, 0.456, 0.406], [0.229, 0.224, 0.225])])}data_root = os.path.abspath(os.path.join(os.getcwd(), "../"))  # get data root pathimage_path = os.path.join(data_root, "data_set", "flower_data")  # flower data set pathassert os.path.exists(image_path), "{} path does not exist.".format(image_path)train_dataset = datasets.ImageFolder(root=os.path.join(image_path, "train"),transform=data_transform["train"])train_num = len(train_dataset)# {'daisy':0, 'dandelion':1, 'roses':2, 'sunflower':3, 'tulips':4}flower_list = train_dataset.class_to_idxcla_dict = dict((val, key) for key, val in flower_list.items())# write dict into json filejson_str = json.dumps(cla_dict, indent=4)with open('class_indices.json', 'w') as json_file:json_file.write(json_str)batch_size = 4nw = min([os.cpu_count(), batch_size if batch_size > 1 else 0, 8])  # number of workersprint('Using {} dataloader workers every process'.format(nw))train_loader = torch.utils.data.DataLoader(train_dataset,batch_size=batch_size, shuffle=True,num_workers=nw)validate_dataset = datasets.ImageFolder(root=os.path.join(image_path, "val"),transform=data_transform["val"])val_num = len(validate_dataset)validate_loader = torch.utils.data.DataLoader(validate_dataset,batch_size=batch_size, shuffle=False,num_workers=nw)print("using {} images for training, {} images for validation.".format(train_num,val_num))net = resnet34()# load pretrain weights# download url: https://download.pytorch.org/models/resnet34-333f7ec4.pthmodel_weight_path = "./resnet34-pre.pth"assert os.path.exists(model_weight_path), "file {} does not exist.".format(model_weight_path)net.load_state_dict(torch.load(model_weight_path, map_location='cpu'))# for param in net.parameters():#     param.requires_grad = False# change fc layer structurein_channel = net.fc.in_featuresnet.fc = nn.Linear(in_channel, 5)net.to(device)# define loss functionloss_function = nn.CrossEntropyLoss()# construct an optimizerparams = [p for p in net.parameters() if p.requires_grad]optimizer = optim.Adam(params, lr=0.0001)epochs = 3best_acc = 0.0save_path = './resNet34.pth'train_steps = len(train_loader)for epoch in range(epochs):# trainnet.train()running_loss = 0.0train_bar = tqdm(train_loader, file=sys.stdout)for step, data in enumerate(train_bar):images, labels = dataoptimizer.zero_grad()logits = net(images.to(device))loss = loss_function(logits, labels.to(device))loss.backward()optimizer.step()# print statisticsrunning_loss += loss.item()train_bar.desc = "train epoch[{}/{}] loss:{:.3f}".format(epoch + 1,epochs,loss)# validatenet.eval()acc = 0.0  # accumulate accurate number / epochwith torch.no_grad():val_bar = tqdm(validate_loader, file=sys.stdout)for val_data in val_bar:val_images, val_labels = val_dataoutputs = net(val_images.to(device))# loss = loss_function(outputs, test_labels)predict_y = torch.max(outputs, dim=1)[1]acc += torch.eq(predict_y, val_labels.to(device)).sum().item()val_bar.desc = "valid epoch[{}/{}]".format(epoch + 1,epochs)val_accurate = acc / val_numprint('[epoch %d] train_loss: %.3f  val_accuracy: %.3f' %(epoch + 1, running_loss / train_steps, val_accurate))if val_accurate > best_acc:best_acc = val_accuratetorch.save(net.state_dict(), save_path)print('Finished Training')if __name__ == '__main__':main()
3. predict.py
import os
import jsonimport torch
from PIL import Image
from torchvision import transforms
import matplotlib.pyplot as pltfrom model import resnet34def main():device = torch.device("cuda:0" if torch.cuda.is_available() else "cpu")data_transform = transforms.Compose([transforms.Resize(256),transforms.CenterCrop(224),transforms.ToTensor(),transforms.Normalize([0.485, 0.456, 0.406], [0.229, 0.224, 0.225])])# load imageimg_path = "../tulip.jpg"assert os.path.exists(img_path), "file: '{}' dose not exist.".format(img_path)img = Image.open(img_path)plt.imshow(img)# [N, C, H, W]img = data_transform(img)# expand batch dimensionimg = torch.unsqueeze(img, dim=0)# read class_indictjson_path = './class_indices.json'assert os.path.exists(json_path), "file: '{}' dose not exist.".format(json_path)with open(json_path, "r") as f:class_indict = json.load(f)# create modelmodel = resnet34(num_classes=5).to(device)# load model weightsweights_path = "./resNet34.pth"assert os.path.exists(weights_path), "file: '{}' dose not exist.".format(weights_path)model.load_state_dict(torch.load(weights_path, map_location=device))# predictionmodel.eval()with torch.no_grad():# predict classoutput = torch.squeeze(model(img.to(device))).cpu()predict = torch.softmax(output, dim=0)predict_cla = torch.argmax(predict).numpy()print_res = "class: {}   prob: {:.3}".format(class_indict[str(predict_cla)],predict[predict_cla].numpy())plt.title(print_res)for i in range(len(predict)):print("class: {:10}   prob: {:.3}".format(class_indict[str(i)],predict[i].numpy()))plt.show()if __name__ == '__main__':main()
相关文章:

深入浅出理解ResNet网络模型+PyTorch实现
温故而知新,可以为师矣! 一、参考资料 原始论文:Identity Mappings in Deep Residual Networks 原论文地址:Deep Residual Learning for Image Recognition ResNet详解PyTorch实现 PyTorch官方实现ResNet 【pytorch】ResNet18、…...
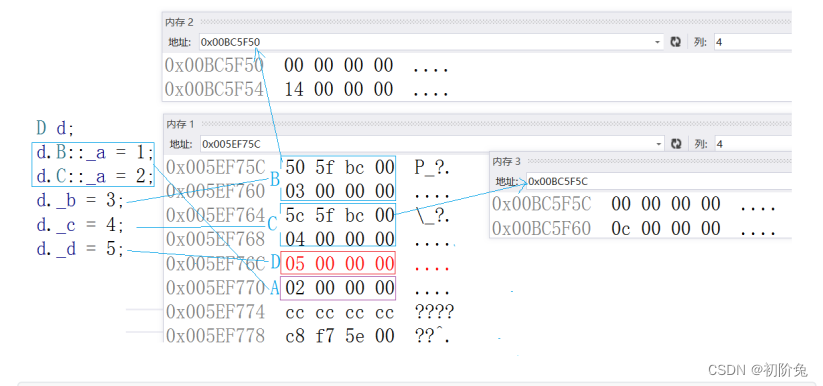
【C++】万字一文全解【继承】及其特性__[剖析底层化繁为简](20)
前言 大家好吖,欢迎来到 YY 滴C系列 ,热烈欢迎! 本章主要内容面向接触过C的老铁 主要内容含: 欢迎订阅 YY滴C专栏!更多干货持续更新!以下是传送门! 目录 一.继承&复用&组合的区别1&…...

微信小程序之自定义组件开发
1、前言 从小程序基础库版本 1.6.3 开始,小程序支持简洁的组件化编程。所有自定义组件相关特性都需要基础库版本 1.6.3 或更高。开发者可以将页面内的功能模块抽象成自定义组件,以便在不同的页面中重复使用;也可以将复杂的页面拆分成多个低耦…...
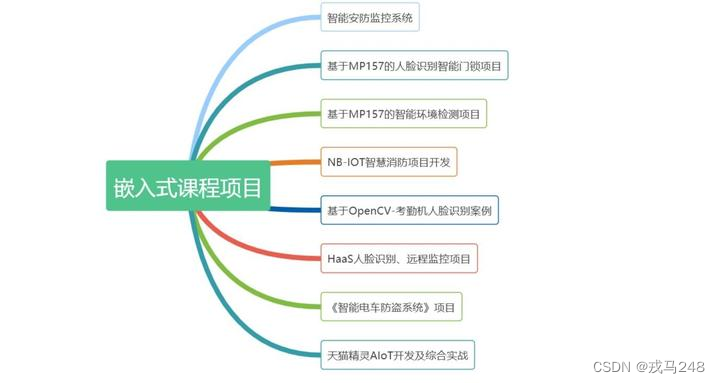
MCU系统的调试技巧
MCU系统的调试技巧对于确保系统稳定性和性能至关重要。无论是在嵌入式系统开发的初期阶段还是在产品维护和优化的过程中,有效的调试技巧可以帮助开发人员快速发现和解决问题,本文将讨论一些MCU系统调试的技巧。 首先,使用调试工具是非常重要…...

【机器学习基础】机器学习概述
目录 前言 一、机器学习概念 二、机器学习分类 三、机器学习术语 🌈嗨!我是Filotimo__🌈。很高兴与大家相识,希望我的博客能对你有所帮助。 💡本文由Filotimo__✍️原创,首发于CSDN📚。 &#x…...

Python Selenium 执行 JavaScript
简介 Selenium是一个用于自动化浏览器操作的工具,可以模拟人工操作,执行各种浏览器操作,包括点击、输入文字、提交表单等。而JavaScript是一种常用的脚本语言,用于在网页上添加交互性和动态性。在Python中使用Selenium执行JavaSc…...
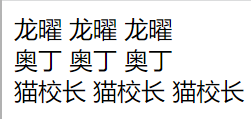
HTML的表单标签和无语义标签的讲解
HTML的表单标签 表单是让用户输入信息的重要途径, 分成两个部分: 表单域: 包含表单元素的区域. 重点是 form 标签. 表单控件: 输入框, 提交按钮等. 重点是 input 标签 form 标签 使用form进行前后端交互.把页面上,用户进行的操作/输入提交到服务器上 input 标签 有很多形态,能…...

8.spark自适应查询-AQE之自适应调整Shuffle分区数量
目录 概述主要功能自适应调整Shuffle分区数量原理默认环境配置修改配置 结束 概述 自适应查询执行(AQE)是 Spark SQL中的一种优化技术,它利用运行时统计信息来选择最高效的查询执行计划,自Apache Spark 3.2.0以来默认启用该计划。…...

【Java 进阶篇】Java Filter 快速入门
欢迎来到这篇有关 Java Filter 的快速入门指南!如果你是一名 Java 开发者或者正在学习 Java Web 开发,Filter 是一个强大的工具,可以帮助你管理和控制 Web 应用程序中的请求和响应。本文将向你解释 Filter 的基本概念,如何创建和配…...
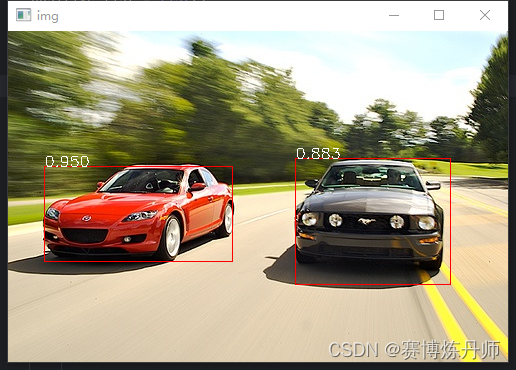
Pytorch R-CNN目标检测-汽车car
概述 目标检测(Object Detection)就是一种基于目标几何和统计特征的图像分割,它将目标的分割和识别合二为一,通俗点说就是给定一张图片要精确的定位到物体所在位置,并完成对物体类别的识别。其准确性和实时性是整个系统的一项重要能力。 R-CNN的全称是Region-CNN(区域卷积神经…...

【PG】PostgreSQL13主从流复制部署(详细可用)
目录 版本 部署主从注意点 1 主库上创建复制用户 2 主库上修改pg_hba.conf文件 3 修改文件后重新加载配置使其生效 4 主库上修改配置文件 5 重启主库pg使参数生效 6 部署从库 7 备份主库数据至从库 停止从库 备份从库的数据库目录 新建数据库数据目录data 创建和…...

学习pytorch15 优化器
优化器 官网如何构造一个优化器优化器的step方法coderunning log出现下面问题如何做反向优化? 官网 https://pytorch.org/docs/stable/optim.html 提问:优化器是什么 要优化什么 优化能干什么 优化是为了解决什么问题 优化模型参数 如何构造一个优化器…...

[算法日志]图论刷题 沉岛思想的运用
[算法日志]图论刷题: 沉岛思想的运用 leetcode 695 岛屿最大面积 给你一个大小为 m x n 的二进制矩阵 grid . 岛屿 是由一些相邻的 1 (代表土地) 构成的组合, 这里的「相邻」要求两个 1 必须在 水平或者竖直的四个方向上 相邻. 你可以假设 grid 的四个边缘都被 0(…...

Web服务器的搭建
网站需求: 1.基于域名www.openlab.com可以访问网站内容为 welcome to openlab!!! 2.给该公司创建三个网站目录分别显示学生信息,教学资料和缴费网站,基于www.openlab.com/student 网站访问学生信息,www.openlab.com/data网站访问教…...
如何使用 GTX750 或 1050 显卡安装 CUDA11+
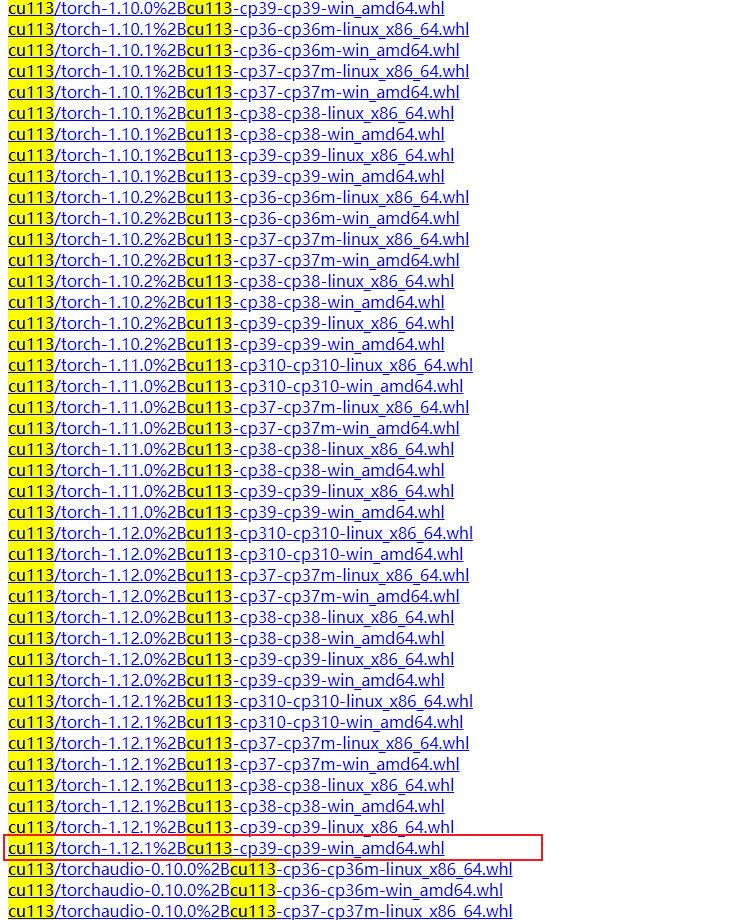
前言 由于兼容性问题,使得我们若想用较新版本的 PyTorch,通过 GPU 方式训练模型,也得更换较新版本得 CUDA 工具包。然而 CUDA 的版本又与电脑显卡的驱动程序版本关联,如果是低版本的显卡驱动程序安装 CUDA11 及以上肯定会失败。 比…...

跟着森老师学React Hooks(1)——使用Vite构建React项目
Vite是一款构建工具,对ts有很好的支持,最近也是在前端越来越流行。 以往的React项目的初始化方式大多是通过脚手架create-react-app(本质是webpack),其实比起Vite来构建,启动会慢一些。 所以这次跟着B站的一个教程,使用…...
强力解决使用node版本管理工具 NVM 出现的问题(找不到 node,或者找不到 npm)
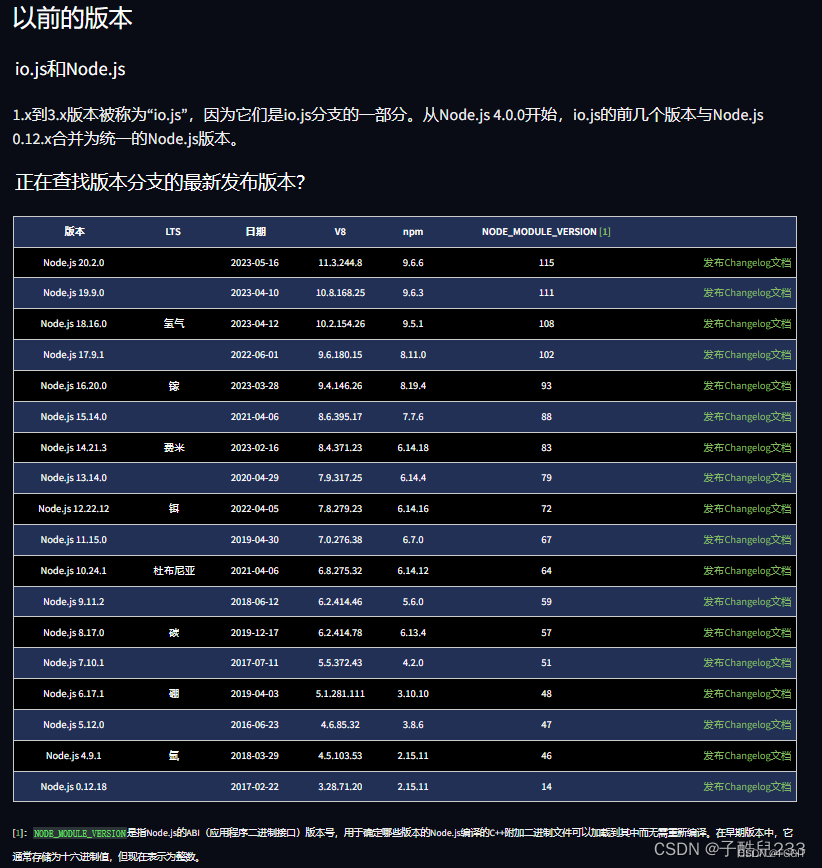
强力解决使用node版本管理工具 NVM 出现的问题(找不到 node,或者找不到 npm) node与npm版本对应关系 nvm是好用的Nodejs版本管理工具, 通过它可以方便地在本地调换Node版本。 2020-05-28 Node当前长期稳定版12.17.0,…...

Docker指定容器使用内存
Docker指定容器使用内存 作者:铁乐与猫 如果是还没有生成的容器,你可以从指定镜像生成容器时特意加上 run -m 256m 或 --memory-swap512m来限制。 -m操作指定的是物理内存,还有虚拟交换分区默认也会生成同样的大小,而–memory-…...

做什么数据表格啊,要做就做数据可视化
是一堆数字更易懂,还是图表更易懂?很明显是图表,特别是数据可视化图表。数据可视化是一种将大量数据转化为视觉形式的过程,通过图形、图表、图像等方式呈现数据,以便更直观地理解和分析。 数据可视化更加生动、形象地…...

CSS特效003:太阳、地球、月球的旋转
GPT能够很好的应用到我们的代码开发中,能够提高开发速度。你可以利用其代码,做出一定的更改,然后实现效能。 css实战中,这种球体间的旋转,主要通过rotate()旋转函数来实现。实际上,蓝色的地球和黑色的月球…...
)
React Native 导航系统实战(React Navigation)
导航系统实战(React Navigation) React Navigation 是 React Native 应用中最常用的导航库之一,它提供了多种导航模式,如堆栈导航(Stack Navigator)、标签导航(Tab Navigator)和抽屉…...

R语言AI模型部署方案:精准离线运行详解
R语言AI模型部署方案:精准离线运行详解 一、项目概述 本文将构建一个完整的R语言AI部署解决方案,实现鸢尾花分类模型的训练、保存、离线部署和预测功能。核心特点: 100%离线运行能力自包含环境依赖生产级错误处理跨平台兼容性模型版本管理# 文件结构说明 Iris_AI_Deployme…...
【开发技术】.Net使用FFmpeg视频特定帧上绘制内容
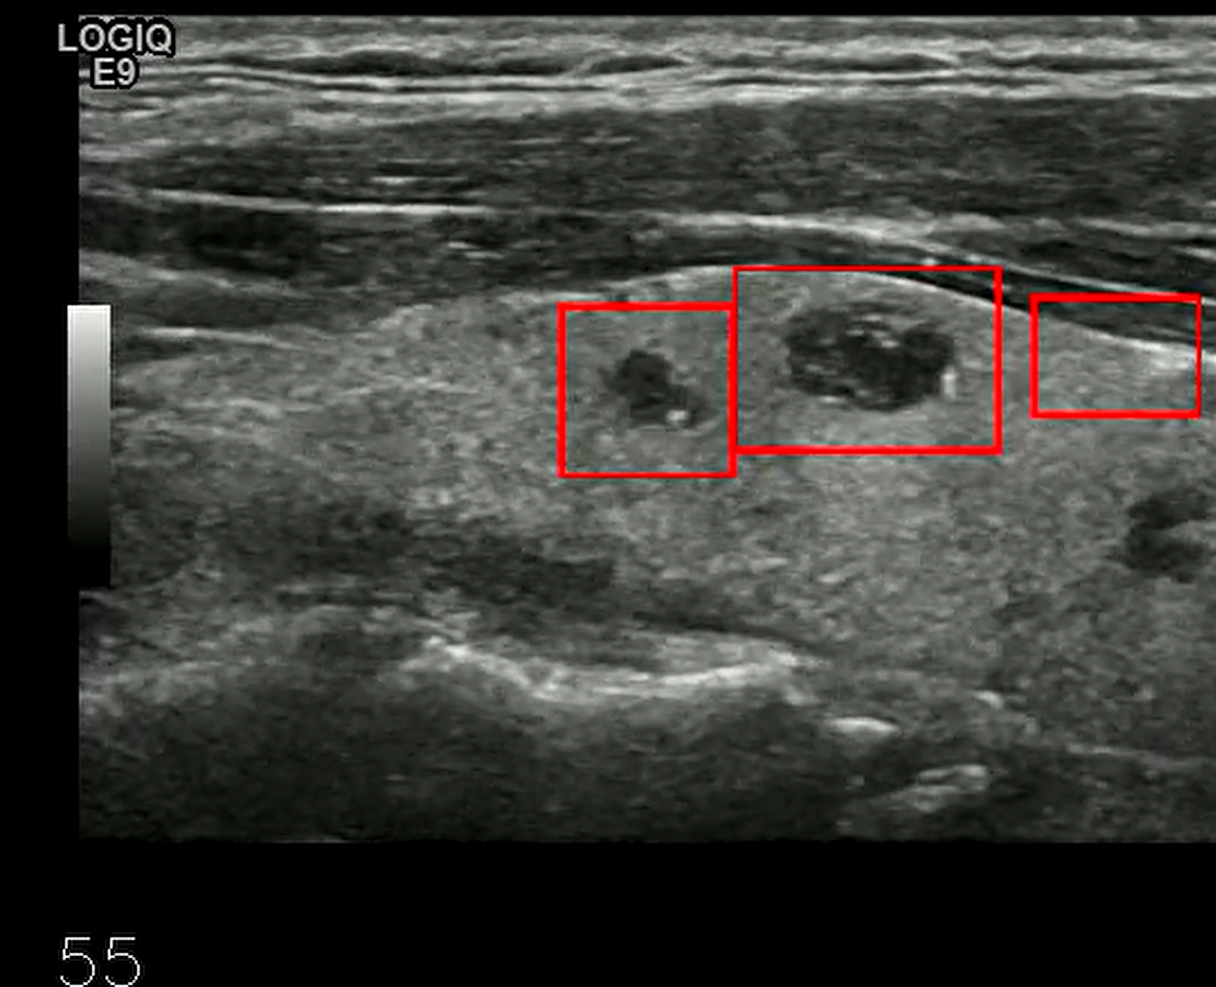
目录 一、目的 二、解决方案 2.1 什么是FFmpeg 2.2 FFmpeg主要功能 2.3 使用Xabe.FFmpeg调用FFmpeg功能 2.4 使用 FFmpeg 的 drawbox 滤镜来绘制 ROI 三、总结 一、目的 当前市场上有很多目标检测智能识别的相关算法,当前调用一个医疗行业的AI识别算法后返回…...
基于TurtleBot3在Gazebo地图实现机器人远程控制
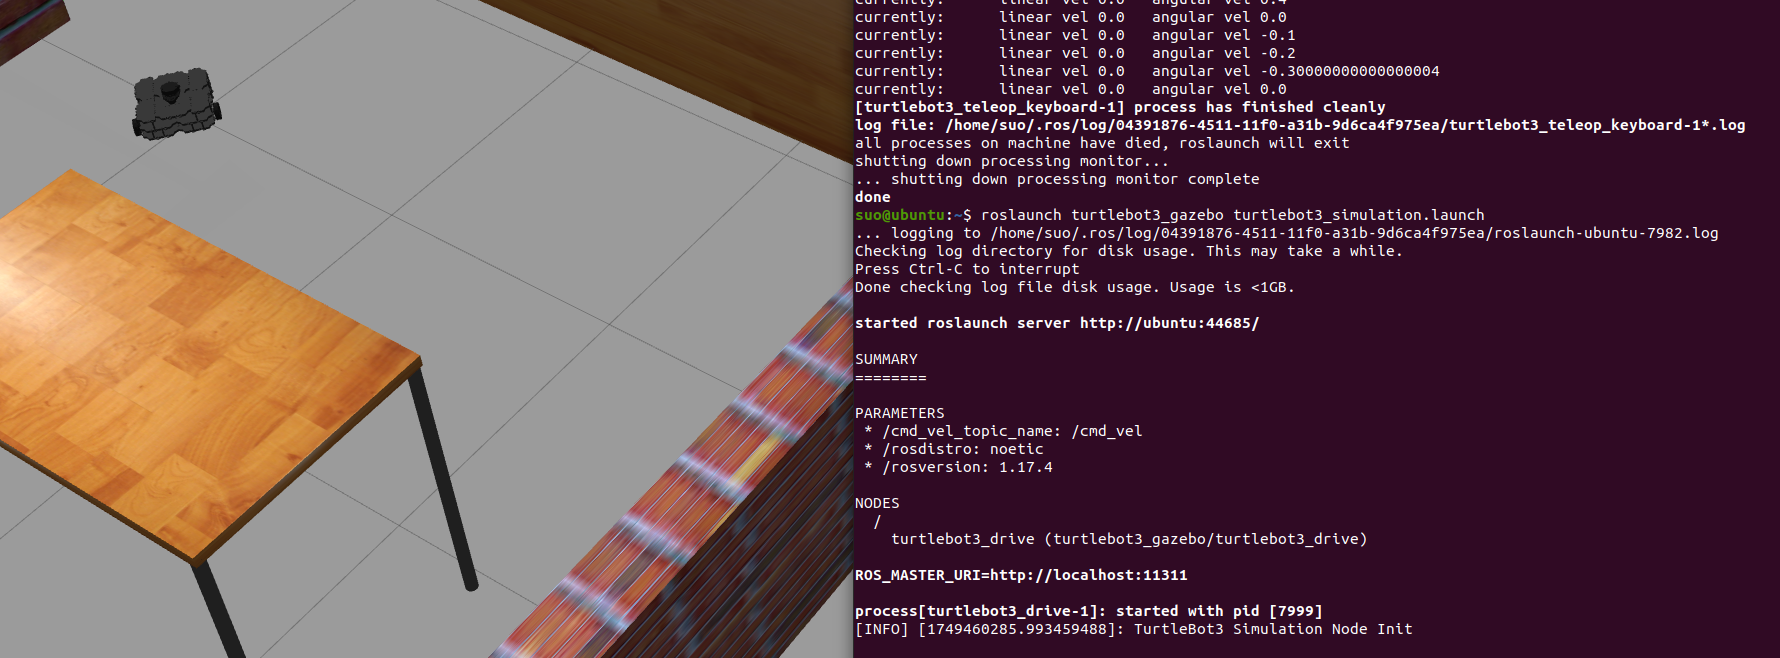
1. TurtleBot3环境配置 # 下载TurtleBot3核心包 mkdir -p ~/catkin_ws/src cd ~/catkin_ws/src git clone -b noetic-devel https://github.com/ROBOTIS-GIT/turtlebot3.git git clone -b noetic https://github.com/ROBOTIS-GIT/turtlebot3_msgs.git git clone -b noetic-dev…...
使用Spring AI和MCP协议构建图片搜索服务
目录 使用Spring AI和MCP协议构建图片搜索服务 引言 技术栈概览 项目架构设计 架构图 服务端开发 1. 创建Spring Boot项目 2. 实现图片搜索工具 3. 配置传输模式 Stdio模式(本地调用) SSE模式(远程调用) 4. 注册工具提…...

Python Einops库:深度学习中的张量操作革命
Einops(爱因斯坦操作库)就像给张量操作戴上了一副"语义眼镜"——让你用人类能理解的方式告诉计算机如何操作多维数组。这个基于爱因斯坦求和约定的库,用类似自然语言的表达式替代了晦涩的API调用,彻底改变了深度学习工程…...

群晖NAS如何在虚拟机创建飞牛NAS
套件中心下载安装Virtual Machine Manager 创建虚拟机 配置虚拟机 飞牛官网下载 https://iso.liveupdate.fnnas.com/x86_64/trim/fnos-0.9.2-863.iso 群晖NAS如何在虚拟机创建飞牛NAS - 个人信息分享...

解决:Android studio 编译后报错\app\src\main\cpp\CMakeLists.txt‘ to exist
现象: android studio报错: [CXX1409] D:\GitLab\xxxxx\app.cxx\Debug\3f3w4y1i\arm64-v8a\android_gradle_build.json : expected buildFiles file ‘D:\GitLab\xxxxx\app\src\main\cpp\CMakeLists.txt’ to exist 解决: 不要动CMakeLists.…...

Kafka主题运维全指南:从基础配置到故障处理
#作者:张桐瑞 文章目录 主题日常管理1. 修改主题分区。2. 修改主题级别参数。3. 变更副本数。4. 修改主题限速。5.主题分区迁移。6. 常见主题错误处理常见错误1:主题删除失败。常见错误2:__consumer_offsets占用太多的磁盘。 主题日常管理 …...

API网关Kong的鉴权与限流:高并发场景下的核心实践
🔥「炎码工坊」技术弹药已装填! 点击关注 → 解锁工业级干货【工具实测|项目避坑|源码燃烧指南】 引言 在微服务架构中,API网关承担着流量调度、安全防护和协议转换的核心职责。作为云原生时代的代表性网关,Kong凭借其插件化架构…...
