实验六:Android的网络编程基础
实验六:Android 的网络编程基础
6.1 实验目的
本次实验的目的是让大家熟悉 Android 开发中的如何获取天气预报,包括了
解和熟悉 WebView、WebService 使用、网络编程事件处理等内容。
6.2 实验要求
-
熟悉和掌握 WebView 使用
-
了解 Android 的网络编程
-
熟悉和掌握 WebService 使用
6.3 实验内容
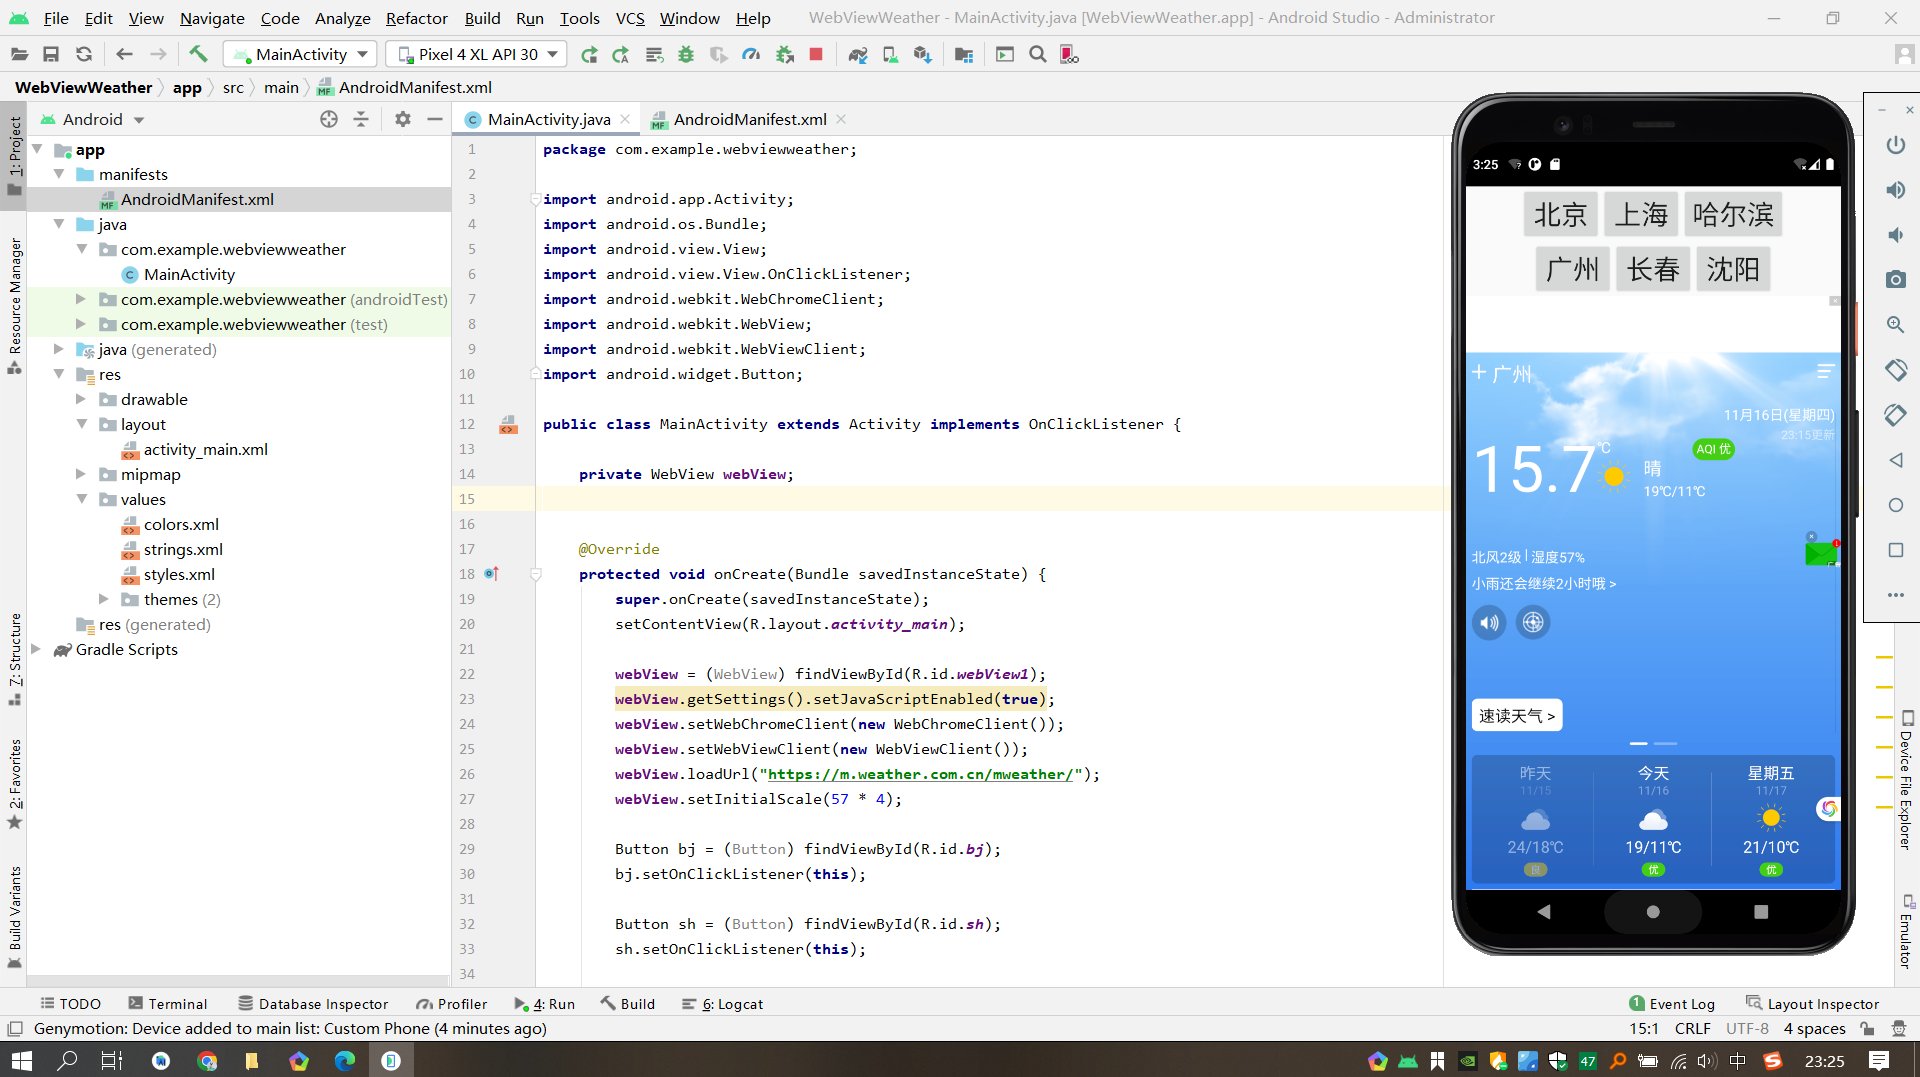
【练习 6.1】基于 Webview 的获取天气预报
1. 项目结构
项目名:WebViewWeather
项目结构:
res/layout/activity_main.xml:主布局文件res/values/strings.xml:字符串资源文件src/com/example/webview/MainActivity.java:主Activity文件AndroidManifest.xml:Android清单文件
2. 主布局文件 (activity_main.xml)
<?xml version="1.0" encoding="utf-8"?>
<LinearLayout xmlns:android="http://schemas.android.com/apk/res/android"android:orientation="vertical"android:gravity="center_horizontal"android:layout_width="fill_parent"android:layout_height="fill_parent"><!-- 按钮布局 --><LinearLayoutandroid:orientation="horizontal"android:layout_width="wrap_content"android:layout_height="wrap_content"><!-- 按钮:北京 --><Buttonandroid:id="@+id/bj"android:layout_width="wrap_content"android:layout_height="wrap_content"android:text="@string/bj"android:textSize="30dp" /><!-- 按钮:上海 --><Buttonandroid:id="@+id/sh"android:layout_width="wrap_content"android:layout_height="wrap_content"android:text="@string/sh"android:textSize="30dp" /><!-- 按钮:哈尔滨 --><Buttonandroid:id="@+id/heb"android:layout_width="wrap_content"android:layout_height="wrap_content"android:text="@string/heb"android:textSize="30dp" /></LinearLayout><LinearLayoutandroid:orientation="horizontal"android:layout_width="wrap_content"android:layout_height="wrap_content"><!-- 按钮:广州 --><Buttonandroid:id="@+id/gz"android:layout_width="wrap_content"android:layout_height="wrap_content"android:text="@string/gz"android:textSize="30dp" /><!-- 按钮:长春 --><Buttonandroid:id="@+id/cc"android:layout_width="wrap_content"android:layout_height="wrap_content"android:text="@string/cc"android:textSize="30dp" /><!-- 按钮:沈阳 --><Buttonandroid:id="@+id/sy"android:layout_width="wrap_content"android:layout_height="wrap_content"android:text="@string/sy"android:textSize="30dp"android:layout_gravity="right" /></LinearLayout><!-- WebView组件 --><WebViewandroid:id="@+id/webView1"android:layout_width="match_parent"android:layout_height="0dip"android:focusable="false"android:layout_weight="1"/>
</LinearLayout>
3. 字符串资源文件 (strings.xml)
<resources><string name="app_name">WebViewWeather</string><string name="go">GO</string><string name="bj">北京</string><string name="sh">上海</string><string name="gz">广州</string><string name="heb">哈尔滨</string><string name="cc">长春</string><string name="sy">沈阳</string>
</resources>
4. 主Activity文件 (MainActivity.java)
package com.example.webviewweather;import android.app.Activity;
import android.os.Bundle;
import android.view.View;
import android.view.View.OnClickListener;
import android.webkit.WebChromeClient;
import android.webkit.WebView;
import android.webkit.WebViewClient;
import android.widget.Button;public class MainActivity extends Activity implements OnClickListener {private WebView webView;@Overrideprotected void onCreate(Bundle savedInstanceState) {super.onCreate(savedInstanceState);setContentView(R.layout.activity_main);webView = (WebView) findViewById(R.id.webView1);webView.getSettings().setJavaScriptEnabled(true);webView.setWebChromeClient(new WebChromeClient());webView.setWebViewClient(new WebViewClient());webView.loadUrl("http://m.weather.com.cn/mweather/");webView.setInitialScale(57  4);Button bj = (Button) findViewById(R.id.bj);bj.setOnClickListener(this);Button sh = (Button) findViewById(R.id.sh);sh.setOnClickListener(this);Button heb = (Button) findViewById(R.id.heb);heb.setOnClickListener(this);Button cc = (Button) findViewById(R.id.cc);cc.setOnClickListener(this);Button sy = (Button) findViewById(R.id.sy);sy.setOnClickListener(this);Button gz = (Button) findViewById(R.id.gz);gz.setOnClickListener(this);}@Overridepublic void onClick(View view) {switch (view.getId()) {case R.id.bj:openUrl("101010100");break;case R.id.sh:openUrl("101020100");break;case R.id.heb:openUrl("101050101");break;case R.id.cc:openUrl("101060101");break;case R.id.sy:openUrl("101070101");break;case R.id.gz:openUrl("101280101");break;}}private void openUrl(String id) {webView.loadUrl("http://m.weather.com.cn/mweather/" + id + ".shtml");}
}
5. Android清单文件 (AndroidManifest.xml)
<?xml version="1.0" encoding="utf-8"?>
<manifest xmlns:android="http://schemas.android.com/apk/res/android"package="com.example.webview" ><uses-permission android:name="android.permission.INTERNET"/><applicationandroid:allowBackup="true"android:icon="@mipmap/ic_launcher"android:label="@string/app_name"android:supportsRtl="true"android:theme="@style/AppTheme" ><activity android:name=".MainActivity" ><intent-filter><action android:name="android.intent.action.MAIN" /><category android:name="android.intent.category.LAUNCHER" /></intent-filter></activity></application>
</manifest>
6.运行效果
【练习 6.2】基于 WebService 的手机归属地查询
1. 添加 ksoap2-android 库
-
在 ksoap2-android 的项目下载网站 下载
ksoap2-android-assembly-2.4-jar-with-dependencies.jar。- 如果难以下载,可以在随书光盘中找到该 JAR 包。
-
将下载的
ksoap2-androidJAR 包添加到工程的lib目录下。 -
右键点击 JAR 包,选择 “Add as library”,将 ksoap2-android 集成到 Android 项目中。
2. WebService 配置
-
打开 http://ws.webxml.com.cn/WebServices/MobileCodeWS.asmx。
-
点击 “getMobileCodeInfo” 进入说明页,获取以下关键信息:
- 作用域 TargetNameSpace =
http://WebXml.com.cn/ - 查询的方法名为 “getMobileCodeInfo”,需要带上 “mobileCode” 与 “userID” 两个参数。
- 返回的结果存在 “getMobileCodeInfoResult” 中。
- 作用域 TargetNameSpace =
-
在 http://ws.webxml.com.cn/WebServices/MobileCodeWS.asmx?wsdl 可以访问其 WSDL 说明。
3. 资源文件布局
- 创建
activity_web_client.xml文件,定义界面布局。
<?xml version="1.0" encoding="utf-8"?>
<LinearLayout xmlns:android="http://schemas.android.com/apk/res/android"xmlns:tools="http://schemas.android.com/tools"android:layout_width="match_parent"android:layout_height="match_parent"android:paddingBottom="@dimen/activity_vertical_margin"android:paddingLeft="@dimen/activity_horizontal_margin"android:paddingRight="@dimen/activity_horizontal_margin"android:paddingTop="@dimen/activity_vertical_margin"android:orientation="vertical"tools:context="com.example.webservicephonelocationlookup.WebClient"><LinearLayoutandroid:layout_width="match_parent"android:layout_height="wrap_content"android:orientation="horizontal"><TextViewandroid:layout_width="wrap_content"android:layout_height="wrap_content"android:text="输入手机号:" /><EditTextandroid:layout_width="150dp"android:layout_height="wrap_content"android:id="@+id/etphone" /><Buttonandroid:layout_width="wrap_content"android:layout_height="wrap_content"android:text="搜索"android:id="@+id/btnsearch" /></LinearLayout><TextViewandroid:layout_width="wrap_content"android:layout_height="wrap_content"android:text="查询结果:" /><TextViewandroid:id="@+id/tvinfo"android:layout_width="wrap_content"android:layout_height="wrap_content"/>
</LinearLayout>
4. Java 代码
- 创建
WebClient.java文件,实现 WebService 调用逻辑。
package com.example.webservicephonelocationlookup;import android.os.AsyncTask;import androidx.appcompat.app.AppCompatActivity;import android.os.Bundle;
import android.view.View;
import android.widget.Button;
import android.widget.EditText;
import android.widget.TextView;import org.ksoap2.SoapEnvelope;
import org.ksoap2.SoapFault;
import org.ksoap2.serialization.SoapObject;
import org.ksoap2.serialization.SoapSerializationEnvelope;
import org.ksoap2.transport.HttpTransportSE;
import org.xmlpull.v1.XmlPullParserException;import java.io.IOException;public class WebClient extends AppCompatActivity {private static final String SERVER_URL = "http://ws.webxml.com.cn/WebServices/MobileCodeWS.asmx?wsdl";private static final String NAMESPACE = "http://WebXml.com.cn/";private static final String METHOD_NAME = "getMobileCodeInfo";private EditText etPhone;private Button btnSearch;private TextView tvInfo;@Overrideprotected void onCreate(Bundle savedInstanceState) {super.onCreate(savedInstanceState);setContentView(R.layout.activity_web_client);etPhone = (EditText) findViewById(R.id.etphone);btnSearch = (Button) findViewById(R.id.btnsearch);tvInfo = (TextView) findViewById(R.id.tvinfo);btnSearch.setOnClickListener(new View.OnClickListener() {@Overridepublic void onClick(View v) {String phoneNumber = etPhone.getText().toString();if (phoneNumber.length() > 0) {getPhoneLocation(phoneNumber);}}});}private void getPhoneLocation(String phoneNumber) {new AsyncTask<String, Void, String>() {@Overrideprotected String doInBackground(String... params) {String location = "";final HttpTransportSE httpSe = new HttpTransportSE(SERVER_URL);httpSe.debug = true;SoapObject soapObject = new SoapObject(NAMESPACE, METHOD_NAME);soapObject.addProperty("mobileCode", params[0]);soapObject.addProperty("userID", "");final SoapSerializationEnvelope envelope = new SoapSerializationEnvelope(SoapEnvelope.VER10);envelope.setOutputSoapObject(soapObject);envelope.dotNet = true;// 获取返回信息try {httpSe.call(NAMESPACE + METHOD_NAME, envelope);if (envelope.getResponse() != null) {SoapObject result = (SoapObject) envelope.bodyIn;location = result.getProperty("getMobileCodeInfoResult").toString();}} catch (XmlPullParserException | SoapFault | IOException e) {e.printStackTrace();}return location;}@Overrideprotected void onPostExecute(String result) {tvInfo.setText(result);}}.execute(phoneNumber);}
}
5. AndroidManifest.xml 配置
- 在
AndroidManifest.xml中添加 INTERNET 权限。
<uses-permission android:name="android.permission.INTERNET"/>
- 配置应用程序的入口 Activity。
<activity android:name="com.example.webservice.WebClient"><intent-filter><action android:name="android.intent.action.MAIN" /><category android:name="android.intent.category.LAUNCHER" /></intent-filter>
</activity>
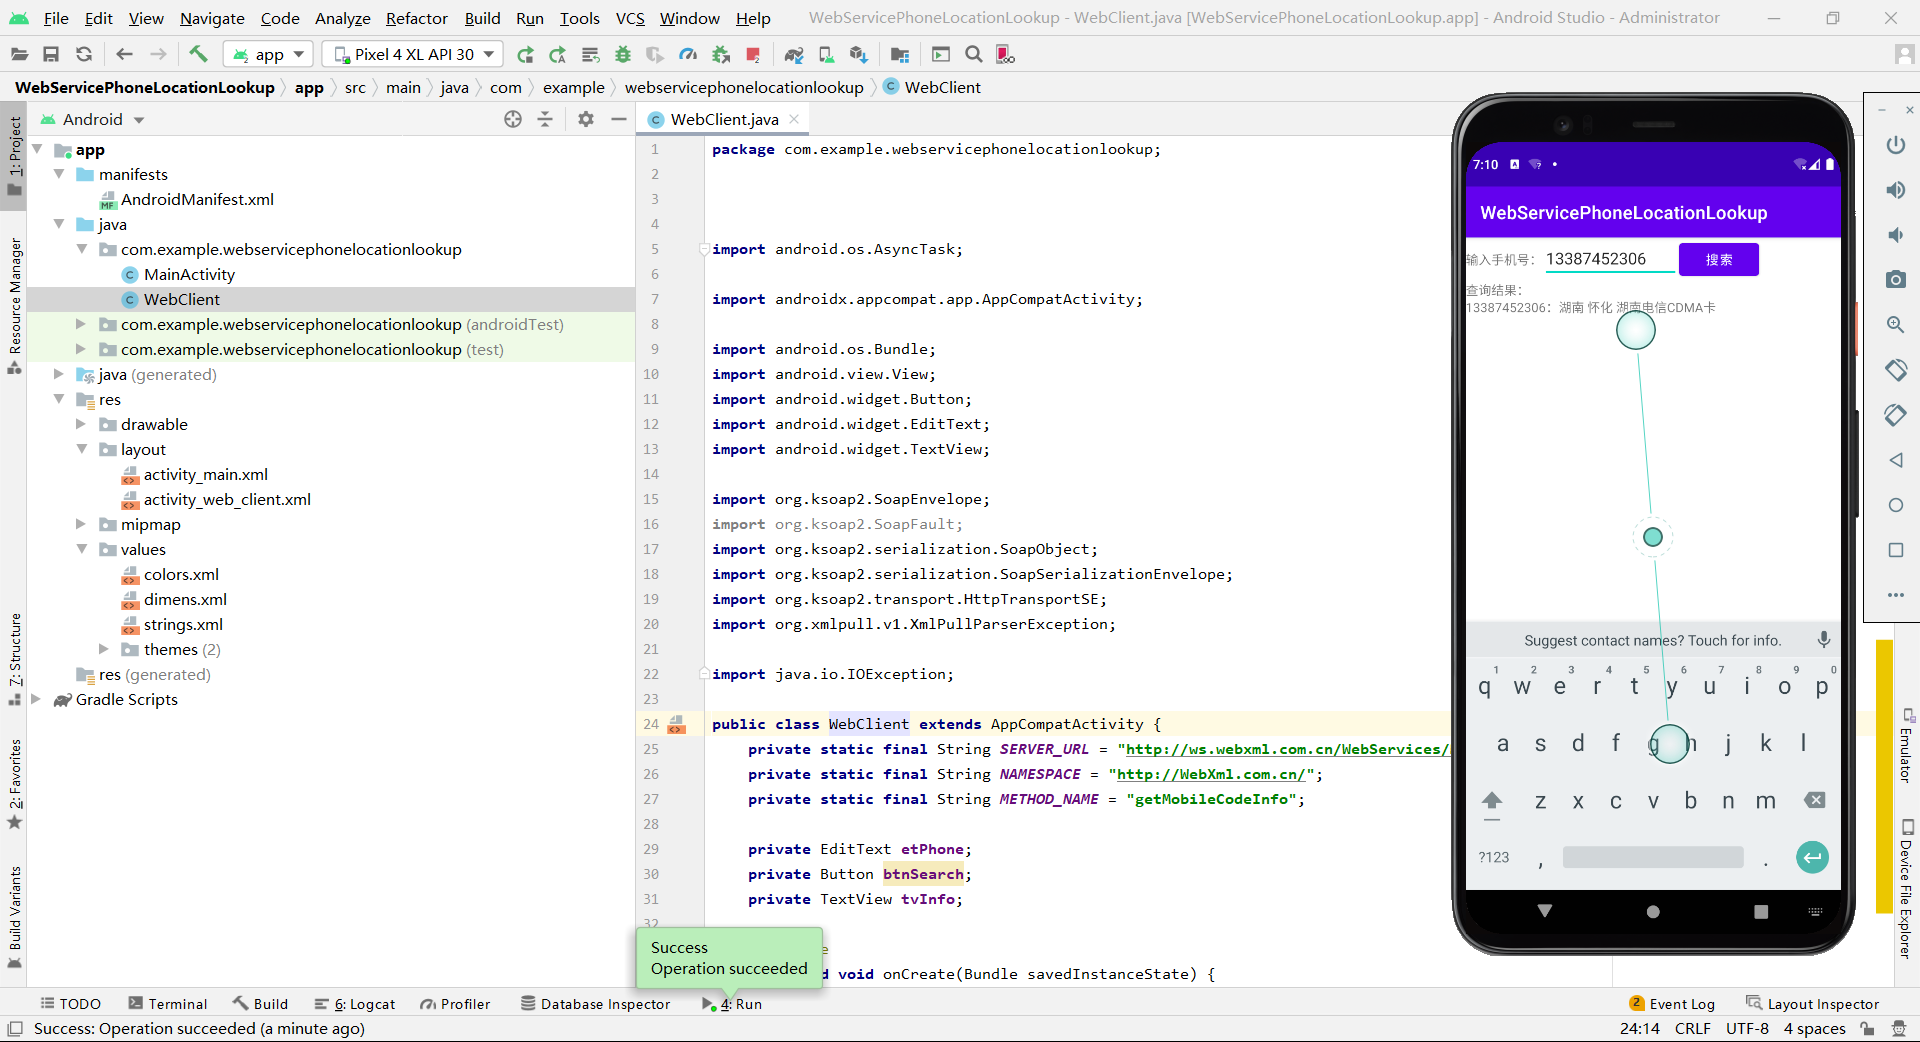
6. 运行效果
- 在模拟器或真机上运行应用程序,输入手机号码,点击搜索按钮,查看查询结果。
【拓展】编写 Android 程序,实现使用系统内置游览器打开指定网页。
步骤 1: 创建新项目
- 打开 Android Studio,选择 “Start a new Android Studio project”。
- 选择 “Empty Activity” 模板,点击 “Next”。
- 命名项目为 “WebBrowserDemo”,选择语言为 “Java”,点击 “Finish”。
步骤 2: 修改布局文件
- 打开
activity_main.xml文件,用以下代码替换其中的内容:
<?xml version="1.0" encoding="utf-8"?>
<LinearLayout xmlns:android="http://schemas.android.com/apk/res/android"android:layout_width="fill_parent"android:layout_height="fill_parent"android:gravity="center_horizontal"android:orientation="vertical"><EditTextandroid:id="@+id/ed"android:layout_width="match_parent"android:layout_height="200px"></EditText><Buttonandroid:id="@+id/bu1"android:layout_width="286dp"android:layout_height="wrap_content"android:text="Go" /><WebViewandroid:id="@+id/webView1"android:layout_width="match_parent"android:layout_height="0dip"android:layout_weight="1"android:focusable="false" />
</LinearLayout>
步骤 3: 编写 Java 代码
- 打开
MainActivity.java文件,用以下代码替换其中的内容:
package com.example.webbrowserdemo;import android.app.Activity;
import android.os.Bundle;
import android.view.View;
import android.view.View.OnClickListener;
import android.webkit.WebChromeClient;
import android.webkit.WebView;
import android.webkit.WebViewClient;
import android.widget.Button;
import android.widget.EditText;
import android.widget.Toast;public class MainActivity extends Activity{private WebView webView; //声明 WebView 组件的对象String url="";@Overrideprotected void onCreate(Bundle savedInstanceState) {super.onCreate(savedInstanceState);setContentView(R.layout.activity_main);webView=(WebView)findViewById(R.id.webView1); //获取WebView 组件webView.getSettings().setJavaScriptEnabled(true); //设置 JavaScript可用webView.setWebChromeClient(new WebChromeClient()); //处理JavaScript 对话框webView.setWebViewClient(new WebViewClient()); //处理各种通知和请求事件,如果不使用该句代码,将使用内置浏览器访问网页webView.setInitialScale(57*4); //放网页内容放大 4 倍Button bu1=(Button)findViewById(R.id.bu1);EditText editText=findViewById(R.id.ed);bu1.setOnClickListener(new OnClickListener() {@Overridepublic void onClick(View v) {url=editText.getText().toString();openUrl(url);}});}//打开网页的方法private void openUrl(String id){if (!url.equals("")){webView.loadUrl("http://"+id+"/"); //}else {Toast.makeText(this,"网址不能为空",Toast.LENGTH_LONG).show();}}
}
步骤 4: 运行应用
-
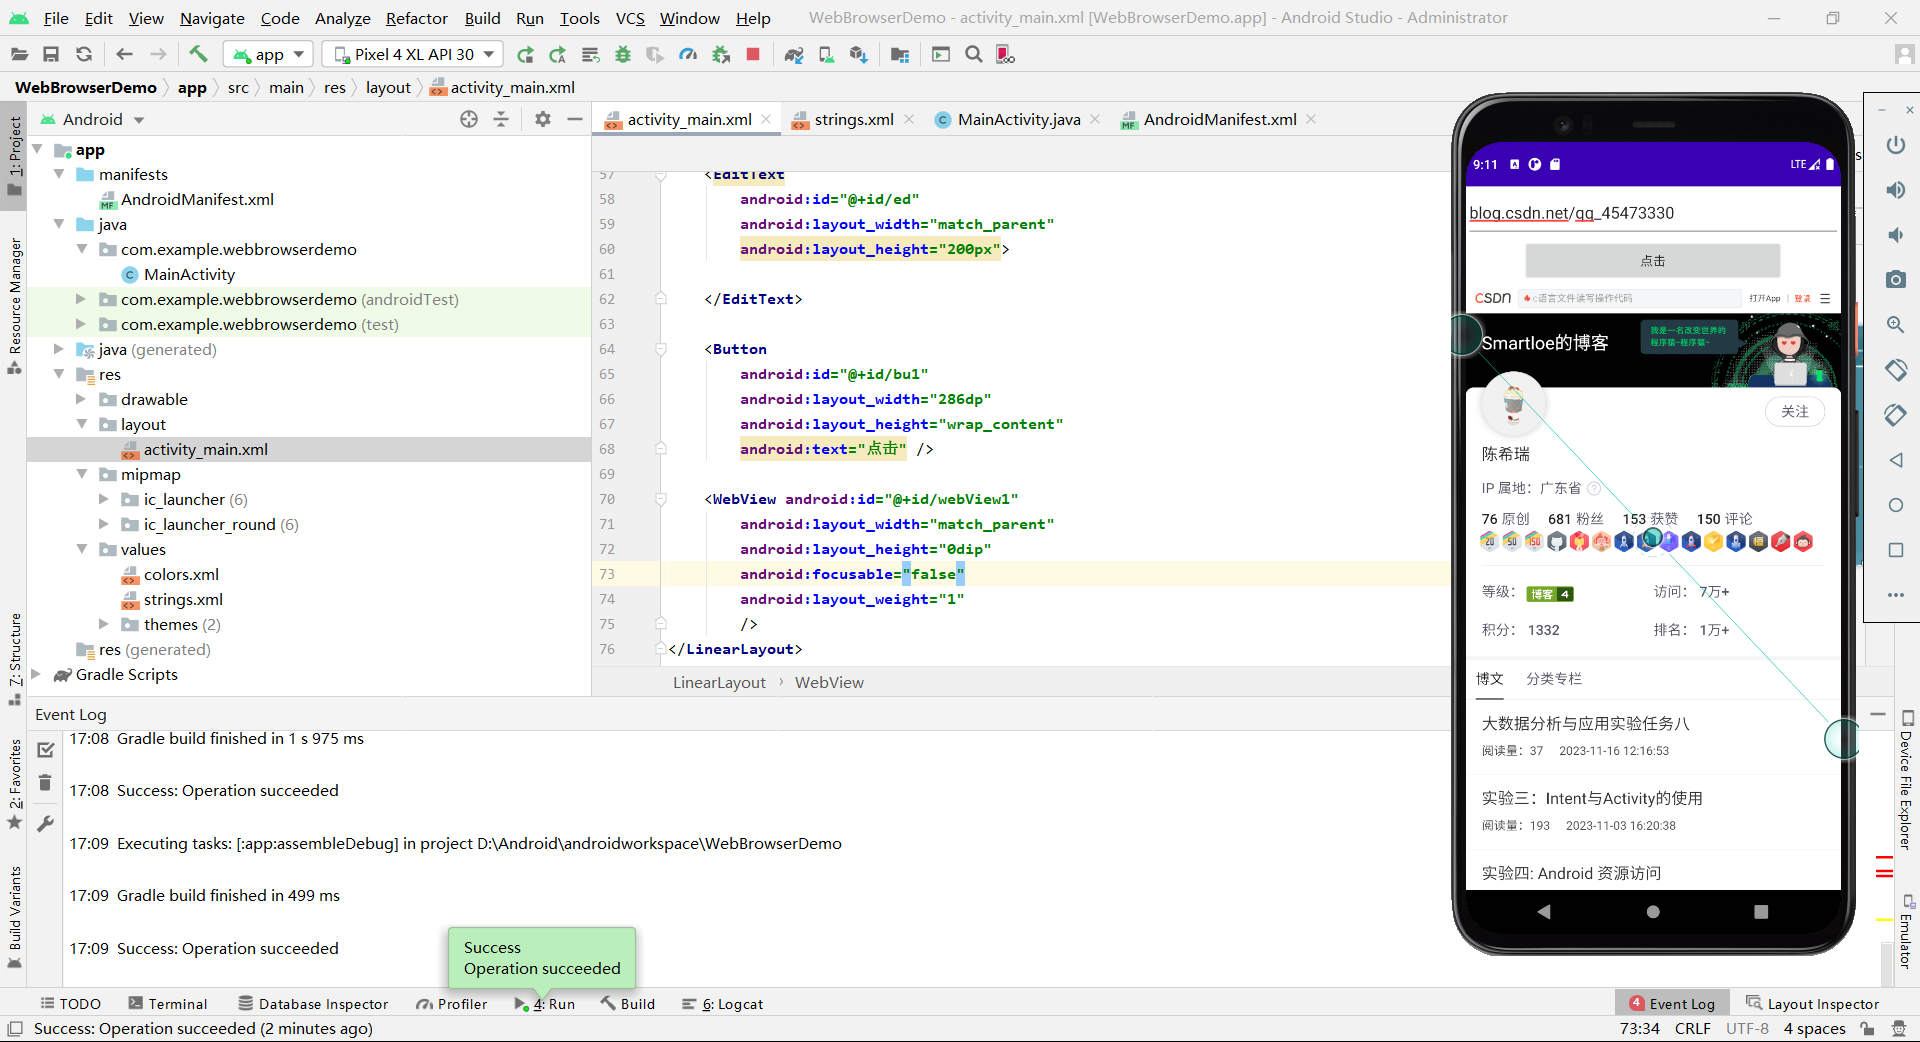
运行应用程序,点击 “打开网页” 按钮。
-
系统将使用内置浏览器打开指定网页。
【拓展】编写 Android 程序,实现从指定网站下载文件。
步骤 1: 创建新的 Android 项目
- 打开 Android Studio。
- 选择 “Start a new Android Studio project”。
- 选择 “Empty Activity” 模板,然后点击 “Finish”。
步骤 2: 修改布局文件
打开 res/layout/activity_main.xml 文件,并使用以下 XML 代码替换默认的布局:
<?xml version="1.0" encoding="utf-8"?>
<RelativeLayout xmlns:android="http://schemas.android.com/apk/res/android"xmlns:tools="http://schemas.android.com/tools"android:layout_width="match_parent"android:layout_height="match_parent"tools:context=".MainActivity"><Buttonandroid:id="@+id/downloadButton"android:layout_width="wrap_content"android:layout_height="wrap_content"android:layout_centerInParent="true"android:text="下载文件" />
</RelativeLayout>
步骤 3: 在 MainActivity.java 中添加代码
打开 MainActivity.java 文件,修改 onCreate 方法和添加新的方法:
package com.example.filedownloader;import android.os.AsyncTask;
import android.os.Bundle;
import android.os.Environment;
import android.view.View;
import android.widget.Button;
import android.widget.Toast;import androidx.appcompat.app.AppCompatActivity;import java.io.BufferedInputStream;
import java.io.FileOutputStream;
import java.io.IOException;
import java.io.InputStream;
import java.net.HttpURLConnection;
import java.net.URL;public class MainActivity extends AppCompatActivity {private static final String DOWNLOAD_URL = "https://image.baidu.com/search/detail?ct=503316480&z=undefined&tn=baiduimagedetail&ipn=d&word=%E7%99%BE%E5%BA%A6%E5%9B%BE%E7%89%87&step_word=&lid=7733045057659531704&ie=utf-8&in=&cl=2&lm=-1&st=undefined&hd=undefined&latest=undefined©right=undefined&cs=505978886,3280506511&os=2821336839,1523677687&simid=3395585618,291075366&pn=0&rn=1&di=7264239678495129601&ln=1594&fr=&fmq=1700213057065_R&fm=&ic=undefined&s=undefined&se=&sme=&tab=0&width=undefined&height=undefined&face=undefined&is=0,0&istype=0&ist=&jit=&bdtype=0&spn=0&pi=0&gsm=1e&objurl=https%3A%2F%2Fp3.itc.cn%2Fq_70%2Fimages03%2F20211117%2F1270baf1c2f84fa19a99ef82c52d454c.png&rpstart=0&rpnum=0&adpicid=0&nojc=undefined&dyTabStr=MCwxLDIsMyw2LDQsNSw4LDcsOQ%3D%3D";@Overrideprotected void onCreate(Bundle savedInstanceState) {super.onCreate(savedInstanceState);setContentView(R.layout.activity_main);Button downloadButton = findViewById(R.id.downloadButton);downloadButton.setOnClickListener(new View.OnClickListener() {@Overridepublic void onClick(View view) {new DownloadFileTask().execute(DOWNLOAD_URL);}});}private class DownloadFileTask extends AsyncTask<String, Void, Boolean> {@Overrideprotected Boolean doInBackground(String... urls) {String fileUrl = urls[0];try {URL url = new URL(fileUrl);HttpURLConnection urlConnection = (HttpURLConnection) url.openConnection();urlConnection.connect();InputStream inputStream = urlConnection.getInputStream();int totalSize = urlConnection.getContentLength();int downloadedSize = 0;byte[] buffer = new byte[1024];int bufferLength;String fileName = "示例图片.png"; // 文件保存的名称FileOutputStream fileOutputStream = new FileOutputStream(Environment.getExternalStorageDirectory().getPath() + "/" + fileName);while ((bufferLength = inputStream.read(buffer)) > 0) {fileOutputStream.write(buffer, 0, bufferLength);downloadedSize += bufferLength;}fileOutputStream.close();return true;} catch (IOException e) {e.printStackTrace();return false;}}@Overrideprotected void onPostExecute(Boolean result) {if (result) {Toast.makeText(MainActivity.this, "文件下载成功", Toast.LENGTH_SHORT).show();} else {Toast.makeText(MainActivity.this, "文件下载失败", Toast.LENGTH_SHORT).show();}}}
}
步骤 4: 添加 Internet 和存储权限
确保在 AndroidManifest.xml 文件中添加了 Internet 和存储权限:
<uses-permission android:name="android.permission.INTERNET" />
<uses-permission android:name="android.permission.WRITE_EXTERNAL_STORAGE" />
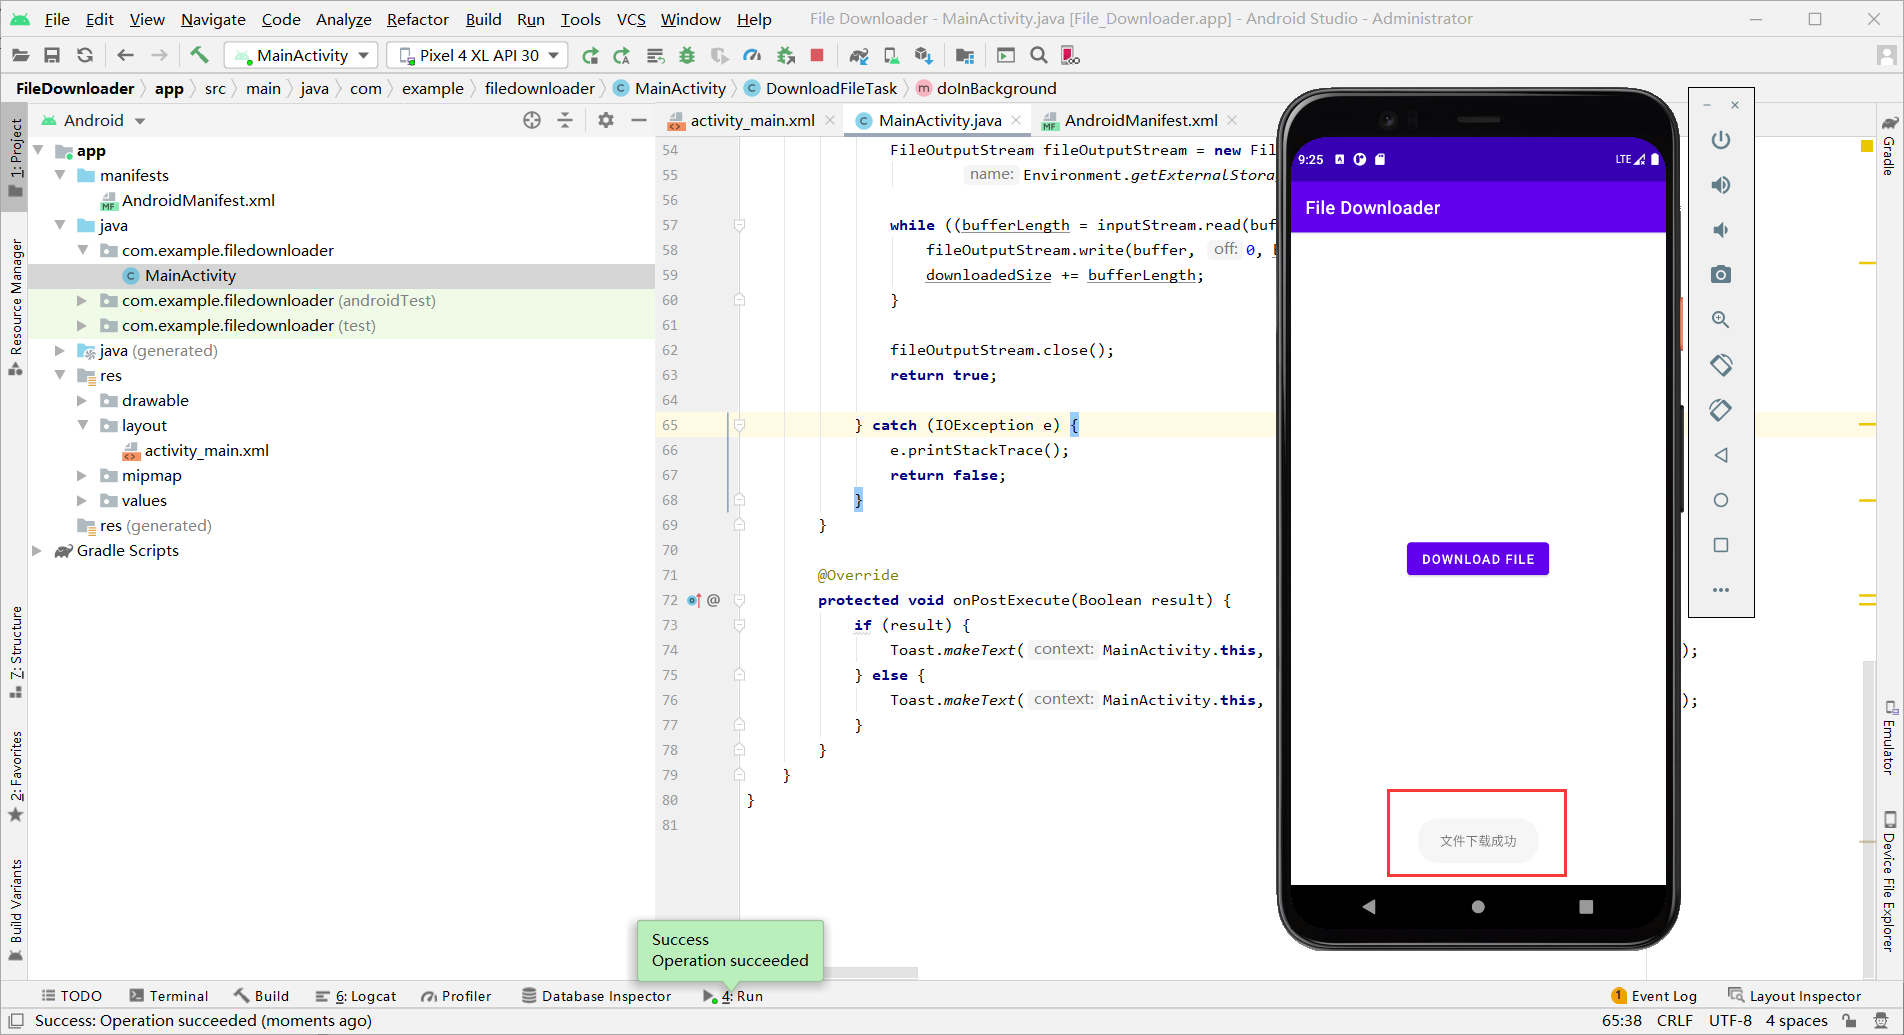
步骤 5: 运行应用
相关文章:
实验六:Android的网络编程基础
实验六:Android 的网络编程基础 6.1 实验目的 本次实验的目的是让大家熟悉 Android 开发中的如何获取天气预报,包括了 解和熟悉 WebView、WebService 使用、网络编程事件处理等内容。 6.2 实验要求 熟悉和掌握 WebView 使用 了解 Android 的网络编程…...

09-流媒体-FLV解复用
整体方案: 采集端:摄像头采集(YUV)->编码(YUV转H264)->写封装(H264转FLV)->RTMP推流 客户端:RTMP拉流->解封装(FLV转H264)…...

信息的浏览
万维网(WWW)是目前Internet上最流行的一种服务,它是建立在Internet上的多媒体集合信息系统。它利用超媒体的信息获取技术,通过一种超文本的表达方式,将所有WWW上的信息连接在一起。我们使用浏览器浏览网上的信息。 ▶浏览器 浏览器是指可以…...

vue directive自定义指令实现弹窗可拖动
vue2 创建一个js文件 // draggable.js export default {// 定义 Vue 插件install(Vue) {Vue.directive(draggable, { // 全局指令名为 v-draggableinserted(el) {el.onmousedown function (ev) {// 获取鼠标按下时的偏移量(鼠标位置 - 元素位置)const…...

07-流媒体-RTMP推流
整体方案: 采集端:摄像头采集(YUV)->编码(YUV转H264)->写封装(H264转FLV)->RTMP推流 客户端:RTMP拉流->解封装(FLV转H264)…...
Neo4j安装(Docker中安装Neo4j)
天行健,君子以自强不息;地势坤,君子以厚德载物。 每个人都有惰性,但不断学习是好好生活的根本,共勉! 文章均为学习整理笔记,分享记录为主,如有错误请指正,共同学习进步。…...

面试求职者
顾x文 SQLite3数据的使用实现了多线程UDP数据收发功能Qt多线程的同步和异步熟悉GDB的调试了解Mysql的性能优化熟悉常见算法:快速排序、希尔排序、归并排序基于Nginx C Mysql Python ICE开发熟练Boost库负责搭建后台服务端,使用Nginx展示前端界面&am…...
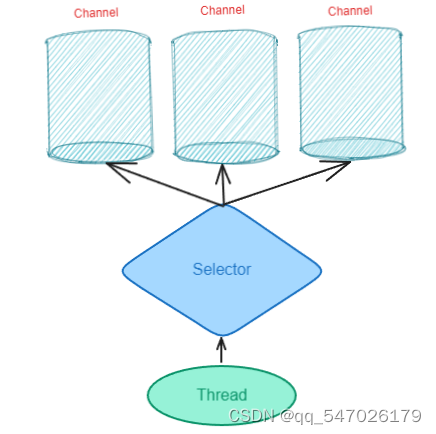
Java NIO 详解
一、NIO简介 NIO 是 Java SE 1.4 引入的一组新的 I/O 相关的 API,它提供了非阻塞式 I/O、选择器、通道、缓冲区等新的概念和机制。相比与传统的 I/O 多出的 N 不是单纯的 New,更多的是代表了 Non-blocking 非阻塞,NIO具有更高的并发性、可扩…...

css设置下划线
css中设置下划线的方法 在CSS中可以使用text-decoration属性或border-bottom属性来给字体设置下划线样式。 1、使用text-decoration:underline;设置下划线样式 CSS的text-decoration属性用于指定添加到文本的修饰,其underline属性值可以定义文本下的一条线。 语…...

【献给过去的自己】栈实现计算器(C语言)
背景 记得在刚学C语言时,写了一篇栈实现计算器-CSDN博客文章。偶然间看到了文章的阅读量以及评论,居然有1.7w的展现和多条博友的点评,反馈。 现在回过头来看,的确有许多不严谨的地方,毕竟当时分享文章时,还…...

如何利用ChatGPT撰写学术论文?
在阅读全文前请注意,本文是利用ChatGPT“辅助完成”而不是“帮写”学术论文,请一定要注意学术规范! 本文我将介绍如何使用清晰准确的“指令”让ChatGPT帮助我们在论文写作上提高效率,希望通过本文的指导,读者能够充分…...

【PG】PostgreSQL高可用方案repmgr管理之配置文件
1 配置文件 1.1 配置文件格式 repmgr.conf是一个纯文本文件,每行包含一个参数/值组合。 空格是无关紧要的(除了在带引号的参数值内),并且空行将被忽略。#将该行的其余部分指定为注释。不是简单标识符或数字的参数值应该用单引号…...

labelme自动标注工具
可以实现多图中相同目标的追踪,自动标注目标位置,速度极快,有需要评论...

【C++学习手札】模拟实现vector
🎬慕斯主页:修仙—别有洞天 ♈️今日夜电波:くちなしの言葉—みゆな 0:37━━━━━━️💟──────── 5:28 🔄 ◀️ ⏸ ▶️ ☰…...

Python将图片按照表格形式排列
图片按照表格的形式排列,可以使用图像处理库Pillow来实现 事例代码 from PIL import Image, ImageDraw# 创建一个画布,用来存放排列后的图片 canvas Image.new(RGB, (800, 600), white)# 读取图片 im1 Image.open(image1.jpg) im2 Image.open(image…...

Linux 简要命令记录
1、设置时区: #设为上海: timedatectl set-timezone Asia/Shanghai #搜索特定时区 timedatectl list-timezone2、修改时间: #设定系统时间 date -s "2023-11-16 22:30:00" #同步写入BIOS hwclock -w3、fdisk分区 rootheihei:~# …...

深度学习与深度强化学习
1. 深度学习中卷积层的作用是什么?全连接层的作用是什么?二者有什么联系和区别? 在深度学习中,卷积层(Convolutional Layer)和全连接层(Fully Connected Layer)是神经网络中常见的两…...

C++函数重载中形参是引用类型和常量引用类型的调用方法
void fun(int &a) {cout<<"调用func(int &a)<<endl; }void fun(const int &a) {cout<<"调用func(const int &a)<<endl; }int main() {// 1.调用引用类型的函数int a10;func(a);// 2.调用常量引用类型的函数,因为…...
Quest 3期间Sui上游戏处理了数百万笔交易
Sui固有的可扩展性和低且可预测的gas费使其成为Web3游戏的理想平台。在Quest 3中,参与的游戏项目处理了数百万笔交易,这毫无疑问地展示了Sui卓越的能力。 Quest 3的主题是游戏,让开发者有机会向潜在玩家介绍他们激动人心的创作。鼓励这些玩家…...

Python中如何定义类、基类、函数和变量?
在Python中,定义类、基类、函数和变量是非常常见的操作。以下是简单的示例: 定义类: class Animal:def __init__(self, name):self.name namedef make_sound(self):passclass Dog(Animal):def make_sound(self):return "Woof!"上…...

AI 卖课博主年赚 120 万?原本我想打假,算完账我破防了
AI 卖课博主年赚 120 万?原本我想打假,算完账我破防了 大家好,我是马彪。 昨天晚上刷到一个博主,说自己一年赚了120万,其中90万来自卖课,才5万粉丝。我想这不扯淡呢吗,肯定又是吹牛想割韭菜。 现…...

Zabbix 6.0部署避坑指南:为什么你的Ubuntu安装总卡在数据库初始化这一步?
Zabbix 6.0部署避坑指南:为什么你的Ubuntu安装总卡在数据库初始化这一步? 如果你正在Ubuntu上部署Zabbix 6.0,却反复在数据库初始化这一步失败,这篇文章就是为你准备的。不同于常规的安装教程,我们将聚焦于那些看似简…...

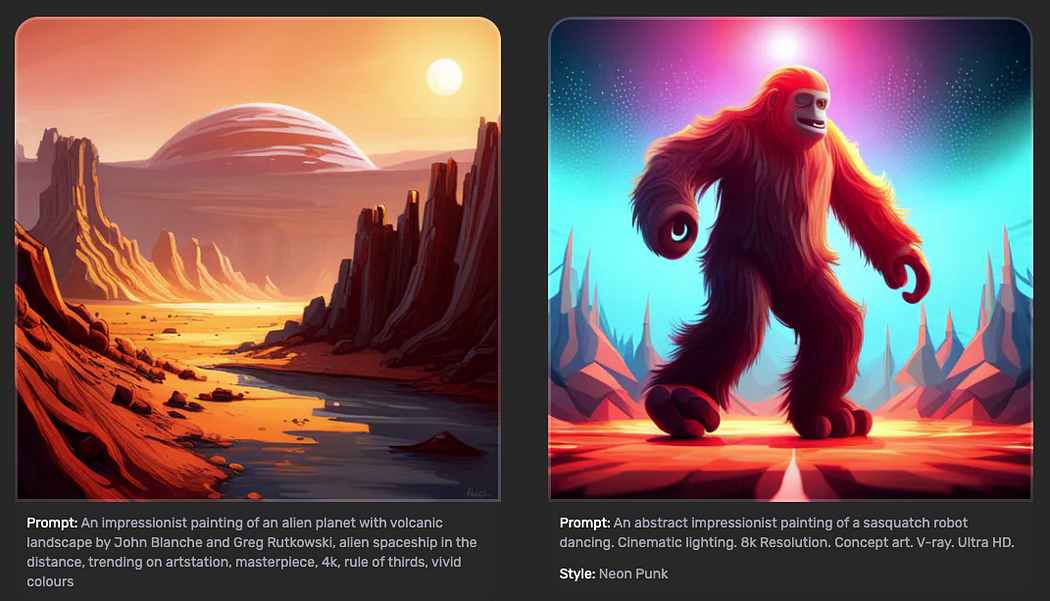
Z-Image-Turbo LoRA Web服务安全加固:禁用前端覆盖负面提示+后端content policy双层防护
Z-Image-Turbo LoRA Web服务安全加固:禁用前端覆盖负面提示后端content policy双层防护 1. 项目概述与安全挑战 造相-Z-Image-Turbo 亚洲美女LoRA Web服务是一个基于Z-Image-Turbo模型的图片生成平台,集成了laonansheng/Asian-beauty-Z-Image-Turbo-To…...

DataX限速配置避坑指南:搞懂channel、byte和record参数,让你的数据同步又快又稳
DataX性能调优实战:深度解析限速参数配置与避坑策略 凌晨三点,数据仓库的告警铃声又一次响起——DataX同步任务因超时失败,这已经是本周第三次了。作为团队里负责数据同步的工程师,我盯着监控面板上那条迟迟无法完成的曲线&#x…...

从信任根到信任链:构建坚不可摧的数字信任体系
1. 信任根:数字世界的安全基石 想象一下你正在建造一座摩天大楼。无论设计多么精妙,如果地基不牢固,整栋建筑都可能坍塌。在数字安全领域,**信任根(Root of Trust, RoT)**就是这样的地基。它是一个密码系统…...

Ubuntu 20.04上为Franka Panda安装libfranka 0.8.0:我如何绕开实时内核的版本陷阱
Ubuntu 20.04下Franka Panda的libfranka 0.8.0安装实战:实时内核版本选择的深度解析 当我在实验室第一次启动Franka Panda机械臂时,完全没预料到会在看似简单的环境配置环节耗费整整三天时间。作为一款广泛应用于科研和工业场景的协作机器人,…...

P3C黄山版突破式迁移指南:无缝升级Java代码规范检查体系
P3C黄山版突破式迁移指南:无缝升级Java代码规范检查体系 【免费下载链接】p3c Alibaba Java Coding Guidelines pmd implements and IDE plugin 项目地址: https://gitcode.com/gh_mirrors/p3/p3c 在Java开发团队中,代码规范检查工具的升级往往伴…...

MATLAB与AI结合:使用Qwen3.5-4B-Claude-4.6-Opus-Reasoning-Distilled-GGUF进行科学计算与数据分析
MATLAB与AI结合:使用Qwen3.5-4B-Claude-4.6-Opus-Reasoning-Distilled-GGUF进行科学计算与数据分析 1. 科研与工程中的智能计算新范式 想象一下这样的场景:你正在处理一组复杂的实验数据,需要快速实现滤波、拟合和可视化。传统方式可能需要…...

5分钟掌握:billd-desk跨平台远程控制高效解决方案
5分钟掌握:billd-desk跨平台远程控制高效解决方案 【免费下载链接】billd-desk 基于Vue3 WebRTC Nodejs Flutter搭建的远程桌面控制 项目地址: https://gitcode.com/gh_mirrors/bi/billd-desk 还在为远程办公的卡顿和限制而烦恼吗?当你急需远程…...

XHS-Downloader:构建高效采集流程的无水印内容批量管理方案
XHS-Downloader:构建高效采集流程的无水印内容批量管理方案 【免费下载链接】XHS-Downloader 小红书(XiaoHongShu、RedNote)链接提取/作品采集工具:提取账号发布、收藏、点赞、专辑作品链接;提取搜索结果作品、用户链接…...