软著项目推荐 深度学习 opencv python 实现中国交通标志识别
文章目录
- 0 前言
- 1 yolov5实现中国交通标志检测
- 2.算法原理
- 2.1 算法简介
- 2.2网络架构
- 2.3 关键代码
- 3 数据集处理
- 3.1 VOC格式介绍
- 3.2 将中国交通标志检测数据集CCTSDB数据转换成VOC数据格式
- 3.3 手动标注数据集
- 4 模型训练
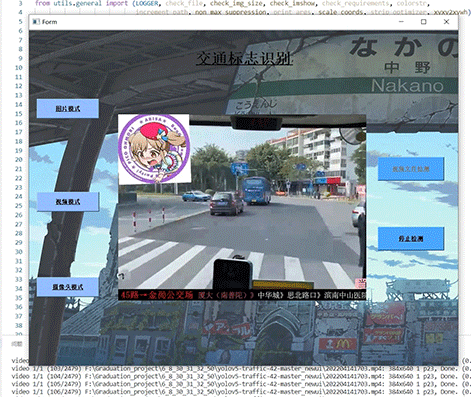
- 5 实现效果
- 5.1 视频效果
- 6 最后
0 前言
🔥 优质竞赛项目系列,今天要分享的是
🚩 基于深度学习的中国交通标志识别算法研究与实现
该项目较为新颖,适合作为竞赛课题方向,学长非常推荐!
🥇学长这里给一个题目综合评分(每项满分5分)
- 难度系数:4分
- 工作量:4分
- 创新点:3分
🧿 更多资料, 项目分享:
https://gitee.com/dancheng-senior/postgraduate
1 yolov5实现中国交通标志检测
整个互联网基本没有国内交通标志识别的开源项目(都是国外的),今天学长分享一个中国版本的实时交通标志识别项目,非常适合作为竞赛项目~
2.算法原理
2.1 算法简介
YOLOv5是一种单阶段目标检测算法,该算法在YOLOv4的基础上添加了一些新的改进思路,使其速度与精度都得到了极大的性能提升。主要的改进思路如下所示:
输入端:在模型训练阶段,提出了一些改进思路,主要包括Mosaic数据增强、自适应锚框计算、自适应图片缩放;
基准网络:融合其它检测算法中的一些新思路,主要包括:Focus结构与CSP结构;
Neck网络:目标检测网络在BackBone与最后的Head输出层之间往往会插入一些层,Yolov5中添加了FPN+PAN结构;
Head输出层:输出层的锚框机制与YOLOv4相同,主要改进的是训练时的损失函数GIOU_Loss,以及预测框筛选的DIOU_nms。
2.2网络架构
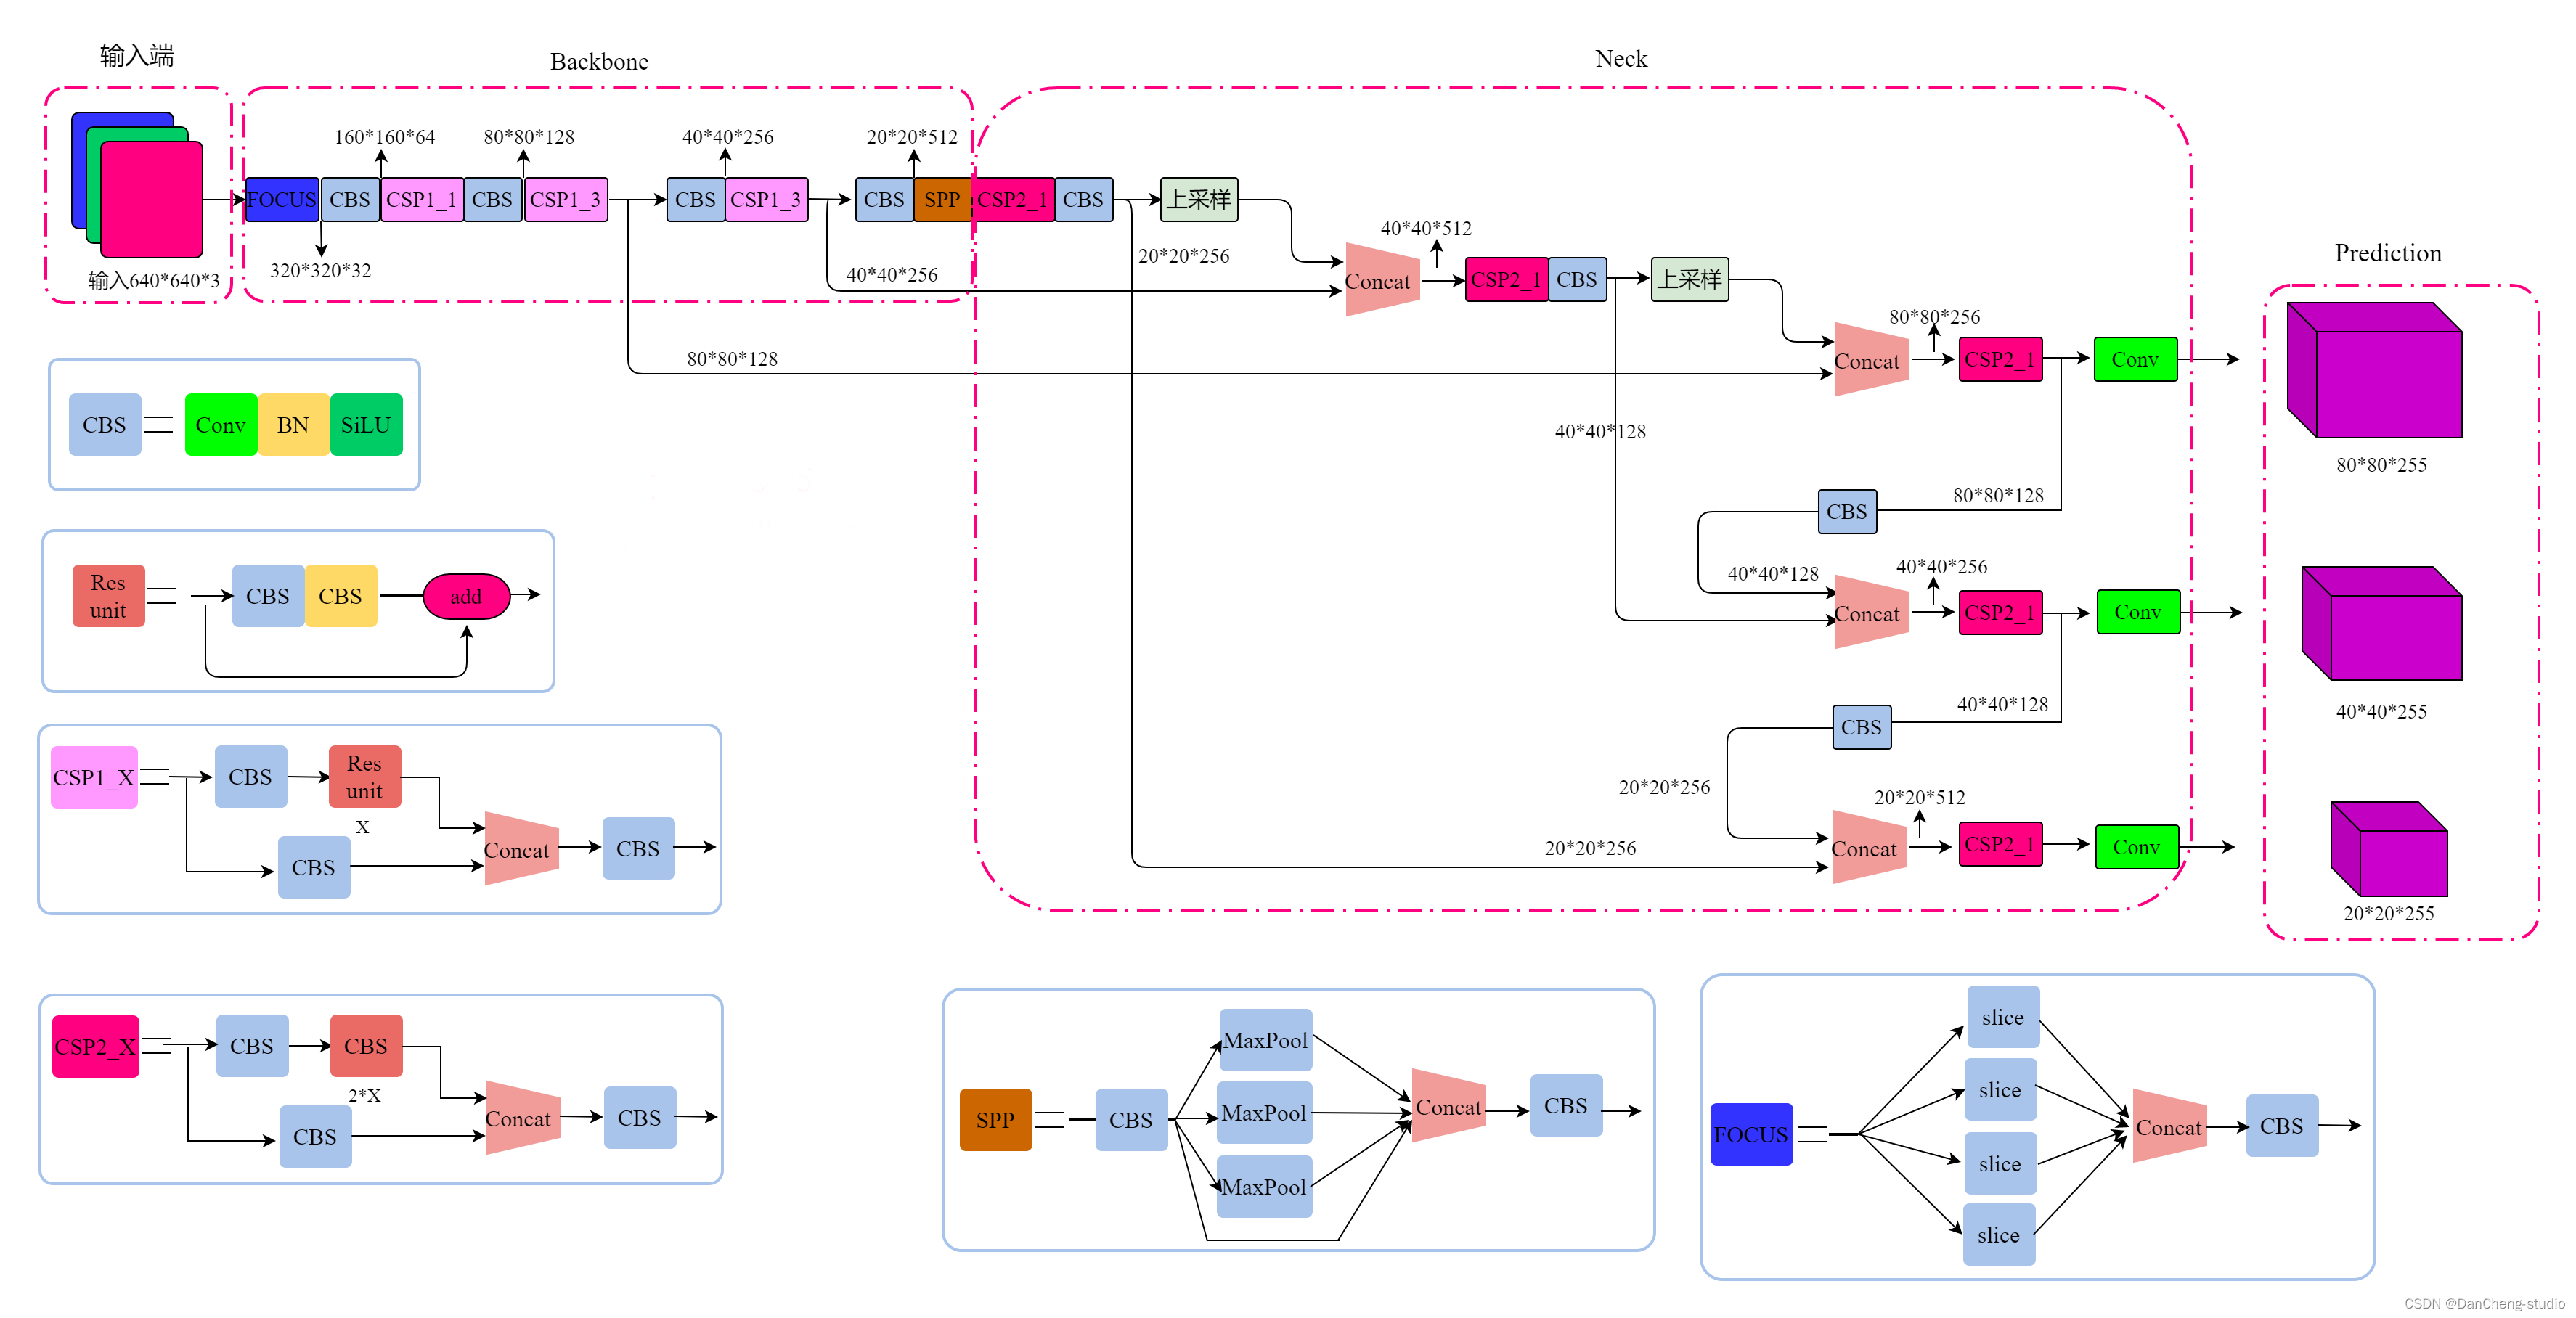
上图展示了YOLOv5目标检测算法的整体框图。对于一个目标检测算法而言,我们通常可以将其划分为4个通用的模块,具体包括:输入端、基准网络、Neck网络与Head输出端,对应于上图中的4个红色模块。YOLOv5算法具有4个版本,具体包括:YOLOv5s、YOLOv5m、YOLOv5l、YOLOv5x四种,本文重点讲解YOLOv5s,其它的版本都在该版本的基础上对网络进行加深与加宽。
- 输入端-输入端表示输入的图片。该网络的输入图像大小为608*608,该阶段通常包含一个图像预处理阶段,即将输入图像缩放到网络的输入大小,并进行归一化等操作。在网络训练阶段,YOLOv5使用Mosaic数据增强操作提升模型的训练速度和网络的精度;并提出了一种自适应锚框计算与自适应图片缩放方法。
- 基准网络-基准网络通常是一些性能优异的分类器种的网络,该模块用来提取一些通用的特征表示。YOLOv5中不仅使用了CSPDarknet53结构,而且使用了Focus结构作为基准网络。
- Neck网络-Neck网络通常位于基准网络和头网络的中间位置,利用它可以进一步提升特征的多样性及鲁棒性。虽然YOLOv5同样用到了SPP模块、FPN+PAN模块,但是实现的细节有些不同。
- Head输出端-Head用来完成目标检测结果的输出。针对不同的检测算法,输出端的分支个数不尽相同,通常包含一个分类分支和一个回归分支。YOLOv4利用GIOU_Loss来代替Smooth L1 Loss函数,从而进一步提升算法的检测精度。
2.3 关键代码
class Detect(nn.Module):stride = None # strides computed during buildonnx_dynamic = False # ONNX export parameterdef __init__(self, nc=80, anchors=(), ch=(), inplace=True): # detection layersuper().__init__()self.nc = nc # number of classesself.no = nc + 5 # number of outputs per anchorself.nl = len(anchors) # number of detection layersself.na = len(anchors[0]) // 2 # number of anchorsself.grid = [torch.zeros(1)] * self.nl # init gridself.anchor_grid = [torch.zeros(1)] * self.nl # init anchor gridself.register_buffer('anchors', torch.tensor(anchors).float().view(self.nl, -1, 2)) # shape(nl,na,2)self.m = nn.ModuleList(nn.Conv2d(x, self.no * self.na, 1) for x in ch) # output convself.inplace = inplace # use in-place ops (e.g. slice assignment)def forward(self, x):z = [] # inference outputfor i in range(self.nl):x[i] = self.m[i](x[i]) # convbs, _, ny, nx = x[i].shape # x(bs,255,20,20) to x(bs,3,20,20,85)x[i] = x[i].view(bs, self.na, self.no, ny, nx).permute(0, 1, 3, 4, 2).contiguous()if not self.training: # inferenceif self.onnx_dynamic or self.grid[i].shape[2:4] != x[i].shape[2:4]:self.grid[i], self.anchor_grid[i] = self._make_grid(nx, ny, i)y = x[i].sigmoid()if self.inplace:y[..., 0:2] = (y[..., 0:2] * 2 - 0.5 + self.grid[i]) * self.stride[i] # xyy[..., 2:4] = (y[..., 2:4] * 2) ** 2 * self.anchor_grid[i] # whelse: # for YOLOv5 on AWS Inferentia https://github.com/ultralytics/yolov5/pull/2953xy = (y[..., 0:2] * 2 - 0.5 + self.grid[i]) * self.stride[i] # xywh = (y[..., 2:4] * 2) ** 2 * self.anchor_grid[i] # why = torch.cat((xy, wh, y[..., 4:]), -1)z.append(y.view(bs, -1, self.no))return x if self.training else (torch.cat(z, 1), x)def _make_grid(self, nx=20, ny=20, i=0):d = self.anchors[i].deviceif check_version(torch.__version__, '1.10.0'): # torch>=1.10.0 meshgrid workaround for torch>=0.7 compatibilityyv, xv = torch.meshgrid([torch.arange(ny).to(d), torch.arange(nx).to(d)], indexing='ij')else:yv, xv = torch.meshgrid([torch.arange(ny).to(d), torch.arange(nx).to(d)])grid = torch.stack((xv, yv), 2).expand((1, self.na, ny, nx, 2)).float()anchor_grid = (self.anchors[i].clone() * self.stride[i]) \.view((1, self.na, 1, 1, 2)).expand((1, self.na, ny, nx, 2)).float()return grid, anchor_gridclass Model(nn.Module):def __init__(self, cfg='yolov5s.yaml', ch=3, nc=None, anchors=None): # model, input channels, number of classessuper().__init__()if isinstance(cfg, dict):self.yaml = cfg # model dictelse: # is *.yamlimport yaml # for torch hubself.yaml_file = Path(cfg).namewith open(cfg, encoding='ascii', errors='ignore') as f:self.yaml = yaml.safe_load(f) # model dict# Define modelch = self.yaml['ch'] = self.yaml.get('ch', ch) # input channelsif nc and nc != self.yaml['nc']:LOGGER.info(f"Overriding model.yaml nc={self.yaml['nc']} with nc={nc}")self.yaml['nc'] = nc # override yaml valueif anchors:LOGGER.info(f'Overriding model.yaml anchors with anchors={anchors}')self.yaml['anchors'] = round(anchors) # override yaml valueself.model, self.save = parse_model(deepcopy(self.yaml), ch=[ch]) # model, savelistself.names = [str(i) for i in range(self.yaml['nc'])] # default namesself.inplace = self.yaml.get('inplace', True)# Build strides, anchorsm = self.model[-1] # Detect()if isinstance(m, Detect):s = 256 # 2x min stridem.inplace = self.inplacem.stride = torch.tensor([s / x.shape[-2] for x in self.forward(torch.zeros(1, ch, s, s))]) # forwardm.anchors /= m.stride.view(-1, 1, 1)check_anchor_order(m)self.stride = m.strideself._initialize_biases() # only run once# Init weights, biasesinitialize_weights(self)self.info()LOGGER.info('')def forward(self, x, augment=False, profile=False, visualize=False):if augment:return self._forward_augment(x) # augmented inference, Nonereturn self._forward_once(x, profile, visualize) # single-scale inference, traindef _forward_augment(self, x):img_size = x.shape[-2:] # height, widths = [1, 0.83, 0.67] # scalesf = [None, 3, None] # flips (2-ud, 3-lr)y = [] # outputsfor si, fi in zip(s, f):xi = scale_img(x.flip(fi) if fi else x, si, gs=int(self.stride.max()))yi = self._forward_once(xi)[0] # forward# cv2.imwrite(f'img_{si}.jpg', 255 * xi[0].cpu().numpy().transpose((1, 2, 0))[:, :, ::-1]) # saveyi = self._descale_pred(yi, fi, si, img_size)y.append(yi)y = self._clip_augmented(y) # clip augmented tailsreturn torch.cat(y, 1), None # augmented inference, traindef _forward_once(self, x, profile=False, visualize=False):y, dt = [], [] # outputsfor m in self.model:if m.f != -1: # if not from previous layerx = y[m.f] if isinstance(m.f, int) else [x if j == -1 else y[j] for j in m.f] # from earlier layersif profile:self._profile_one_layer(m, x, dt)x = m(x) # runy.append(x if m.i in self.save else None) # save outputif visualize:feature_visualization(x, m.type, m.i, save_dir=visualize)return xdef _descale_pred(self, p, flips, scale, img_size):# de-scale predictions following augmented inference (inverse operation)if self.inplace:p[..., :4] /= scale # de-scaleif flips == 2:p[..., 1] = img_size[0] - p[..., 1] # de-flip udelif flips == 3:p[..., 0] = img_size[1] - p[..., 0] # de-flip lrelse:x, y, wh = p[..., 0:1] / scale, p[..., 1:2] / scale, p[..., 2:4] / scale # de-scaleif flips == 2:y = img_size[0] - y # de-flip udelif flips == 3:x = img_size[1] - x # de-flip lrp = torch.cat((x, y, wh, p[..., 4:]), -1)return pdef _clip_augmented(self, y):# Clip YOLOv5 augmented inference tailsnl = self.model[-1].nl # number of detection layers (P3-P5)g = sum(4 ** x for x in range(nl)) # grid pointse = 1 # exclude layer counti = (y[0].shape[1] // g) * sum(4 ** x for x in range(e)) # indicesy[0] = y[0][:, :-i] # largei = (y[-1].shape[1] // g) * sum(4 ** (nl - 1 - x) for x in range(e)) # indicesy[-1] = y[-1][:, i:] # smallreturn ydef _profile_one_layer(self, m, x, dt):c = isinstance(m, Detect) # is final layer, copy input as inplace fixo = thop.profile(m, inputs=(x.copy() if c else x,), verbose=False)[0] / 1E9 * 2 if thop else 0 # FLOPst = time_sync()for _ in range(10):m(x.copy() if c else x)dt.append((time_sync() - t) * 100)if m == self.model[0]:LOGGER.info(f"{'time (ms)':>10s} {'GFLOPs':>10s} {'params':>10s} {'module'}")LOGGER.info(f'{dt[-1]:10.2f} {o:10.2f} {m.np:10.0f} {m.type}')if c:LOGGER.info(f"{sum(dt):10.2f} {'-':>10s} {'-':>10s} Total")def _initialize_biases(self, cf=None): # initialize biases into Detect(), cf is class frequency# https://arxiv.org/abs/1708.02002 section 3.3# cf = torch.bincount(torch.tensor(np.concatenate(dataset.labels, 0)[:, 0]).long(), minlength=nc) + 1.m = self.model[-1] # Detect() modulefor mi, s in zip(m.m, m.stride): # fromb = mi.bias.view(m.na, -1) # conv.bias(255) to (3,85)b.data[:, 4] += math.log(8 / (640 / s) ** 2) # obj (8 objects per 640 image)b.data[:, 5:] += math.log(0.6 / (m.nc - 0.999999)) if cf is None else torch.log(cf / cf.sum()) # clsmi.bias = torch.nn.Parameter(b.view(-1), requires_grad=True)def _print_biases(self):m = self.model[-1] # Detect() modulefor mi in m.m: # fromb = mi.bias.detach().view(m.na, -1).T # conv.bias(255) to (3,85)LOGGER.info(('%6g Conv2d.bias:' + '%10.3g' * 6) % (mi.weight.shape[1], *b[:5].mean(1).tolist(), b[5:].mean()))# def _print_weights(self):# for m in self.model.modules():# if type(m) is Bottleneck:# LOGGER.info('%10.3g' % (m.w.detach().sigmoid() * 2)) # shortcut weightsdef fuse(self): # fuse model Conv2d() + BatchNorm2d() layersLOGGER.info('Fusing layers... ')for m in self.model.modules():if isinstance(m, (Conv, DWConv)) and hasattr(m, 'bn'):m.conv = fuse_conv_and_bn(m.conv, m.bn) # update convdelattr(m, 'bn') # remove batchnormm.forward = m.forward_fuse # update forwardself.info()return selfdef autoshape(self): # add AutoShape moduleLOGGER.info('Adding AutoShape... ')m = AutoShape(self) # wrap modelcopy_attr(m, self, include=('yaml', 'nc', 'hyp', 'names', 'stride'), exclude=()) # copy attributesreturn mdef info(self, verbose=False, img_size=640): # print model informationmodel_info(self, verbose, img_size)def _apply(self, fn):# Apply to(), cpu(), cuda(), half() to model tensors that are not parameters or registered buffersself = super()._apply(fn)m = self.model[-1] # Detect()if isinstance(m, Detect):m.stride = fn(m.stride)m.grid = list(map(fn, m.grid))if isinstance(m.anchor_grid, list):m.anchor_grid = list(map(fn, m.anchor_grid))return selfdef parse_model(d, ch): # model_dict, input_channels(3)LOGGER.info(f"\n{'':>3}{'from':>18}{'n':>3}{'params':>10} {'module':<40}{'arguments':<30}")anchors, nc, gd, gw = d['anchors'], d['nc'], d['depth_multiple'], d['width_multiple']na = (len(anchors[0]) // 2) if isinstance(anchors, list) else anchors # number of anchorsno = na * (nc + 5) # number of outputs = anchors * (classes + 5)layers, save, c2 = [], [], ch[-1] # layers, savelist, ch outfor i, (f, n, m, args) in enumerate(d['backbone'] + d['head']): # from, number, module, argsm = eval(m) if isinstance(m, str) else m # eval stringsfor j, a in enumerate(args):try:args[j] = eval(a) if isinstance(a, str) else a # eval stringsexcept NameError:passn = n_ = max(round(n * gd), 1) if n > 1 else n # depth gainif m in [Conv, GhostConv, Bottleneck, GhostBottleneck, SPP, SPPF, DWConv, MixConv2d, Focus, CrossConv,BottleneckCSP, C3, C3TR, C3SPP, C3Ghost]:c1, c2 = ch[f], args[0]if c2 != no: # if not outputc2 = make_divisible(c2 * gw, 8)args = [c1, c2, *args[1:]]if m in [BottleneckCSP, C3, C3TR, C3Ghost]:args.insert(2, n) # number of repeatsn = 1elif m is nn.BatchNorm2d:args = [ch[f]]elif m is Concat:c2 = sum(ch[x] for x in f)elif m is Detect:args.append([ch[x] for x in f])if isinstance(args[1], int): # number of anchorsargs[1] = [list(range(args[1] * 2))] * len(f)elif m is Contract:c2 = ch[f] * args[0] ** 2elif m is Expand:c2 = ch[f] // args[0] ** 2else:c2 = ch[f]m_ = nn.Sequential(*(m(*args) for _ in range(n))) if n > 1 else m(*args) # modulet = str(m)[8:-2].replace('__main__.', '') # module typenp = sum(x.numel() for x in m_.parameters()) # number paramsm_.i, m_.f, m_.type, m_.np = i, f, t, np # attach index, 'from' index, type, number paramsLOGGER.info(f'{i:>3}{str(f):>18}{n_:>3}{np:10.0f} {t:<40}{str(args):<30}') # printsave.extend(x % i for x in ([f] if isinstance(f, int) else f) if x != -1) # append to savelistlayers.append(m_)if i == 0:ch = []ch.append(c2)return nn.Sequential(*layers), sorted(save)3 数据集处理
中国交通标志检测数据集CCTSDB,由长沙理工大学提供,包括上万张有标注的图片
推荐只使用前4000张照片,因为后面有很多张图片没有标注,需要一张一张的删除,太过于麻烦,所以尽量用前4000张图
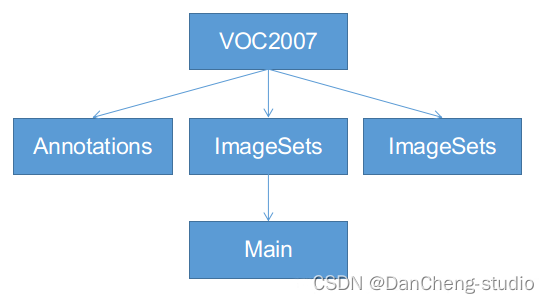
3.1 VOC格式介绍
VOC格式主要包含三个文件夹Annotations,ImageSets,JPEGImages,主要适用于faster-
rcnn等模型的训练,ImageSets下面有一个Main的文件夹,如下图,一定按照这个名字和格式建好文件夹:
-
Annotations:这里是存放你对所有数据图片做的标注,每张照片的标注信息必须是xml格式。
-
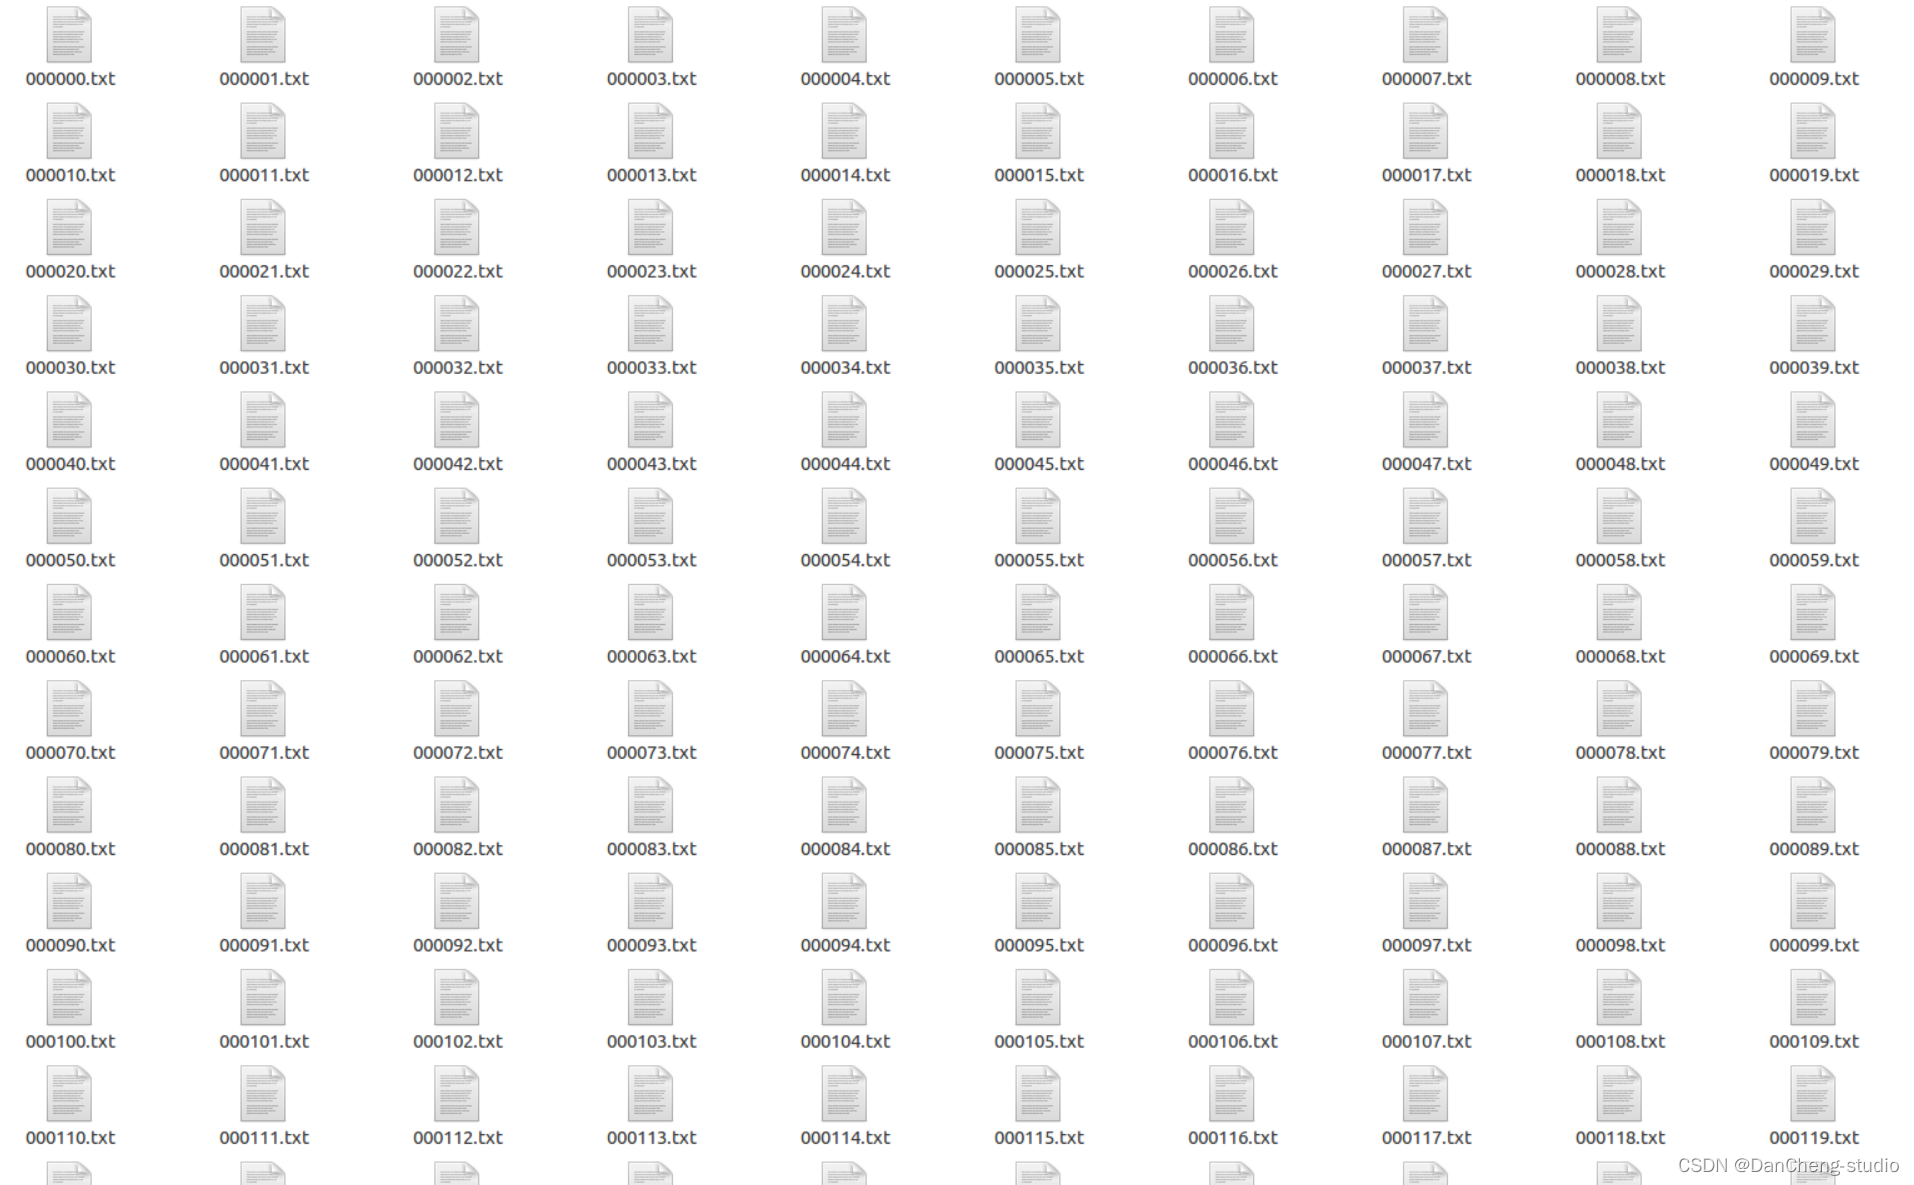
JPEGImages:用来保存你的数据图片,一定要对图片进行编号,一般按照voc数据集格式,采用六位数字编码,如000001.jpg、000002.jpg等。
-
ImageSets:该文件下有一个main文件,main文件下有四个txt文件,分别是train.txt、test.txt、trainval.txt、val.txt,里面都是存放的图片号码。
3.2 将中国交通标志检测数据集CCTSDB数据转换成VOC数据格式
将标注的数据提取出来并且排序,并将里面每一行分割成一个文件
3.3 手动标注数据集
如果为了更深入的学习也可自己标注,但过程相对比较繁琐,麻烦。
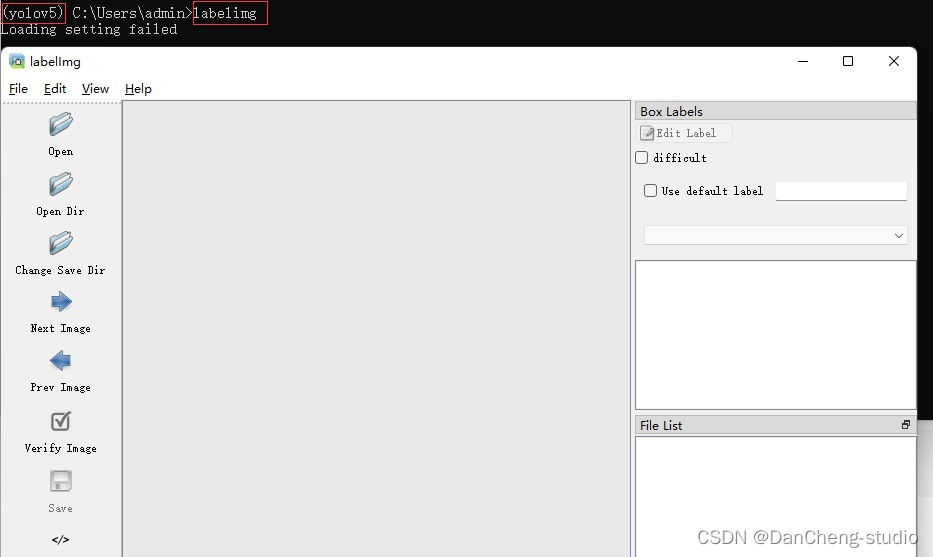
以下简单介绍数据标注的相关方法,数据标注这里推荐的软件是labelimg,通过pip指令即可安装,相关教程可网上搜索
pip install labelimg
4 模型训练
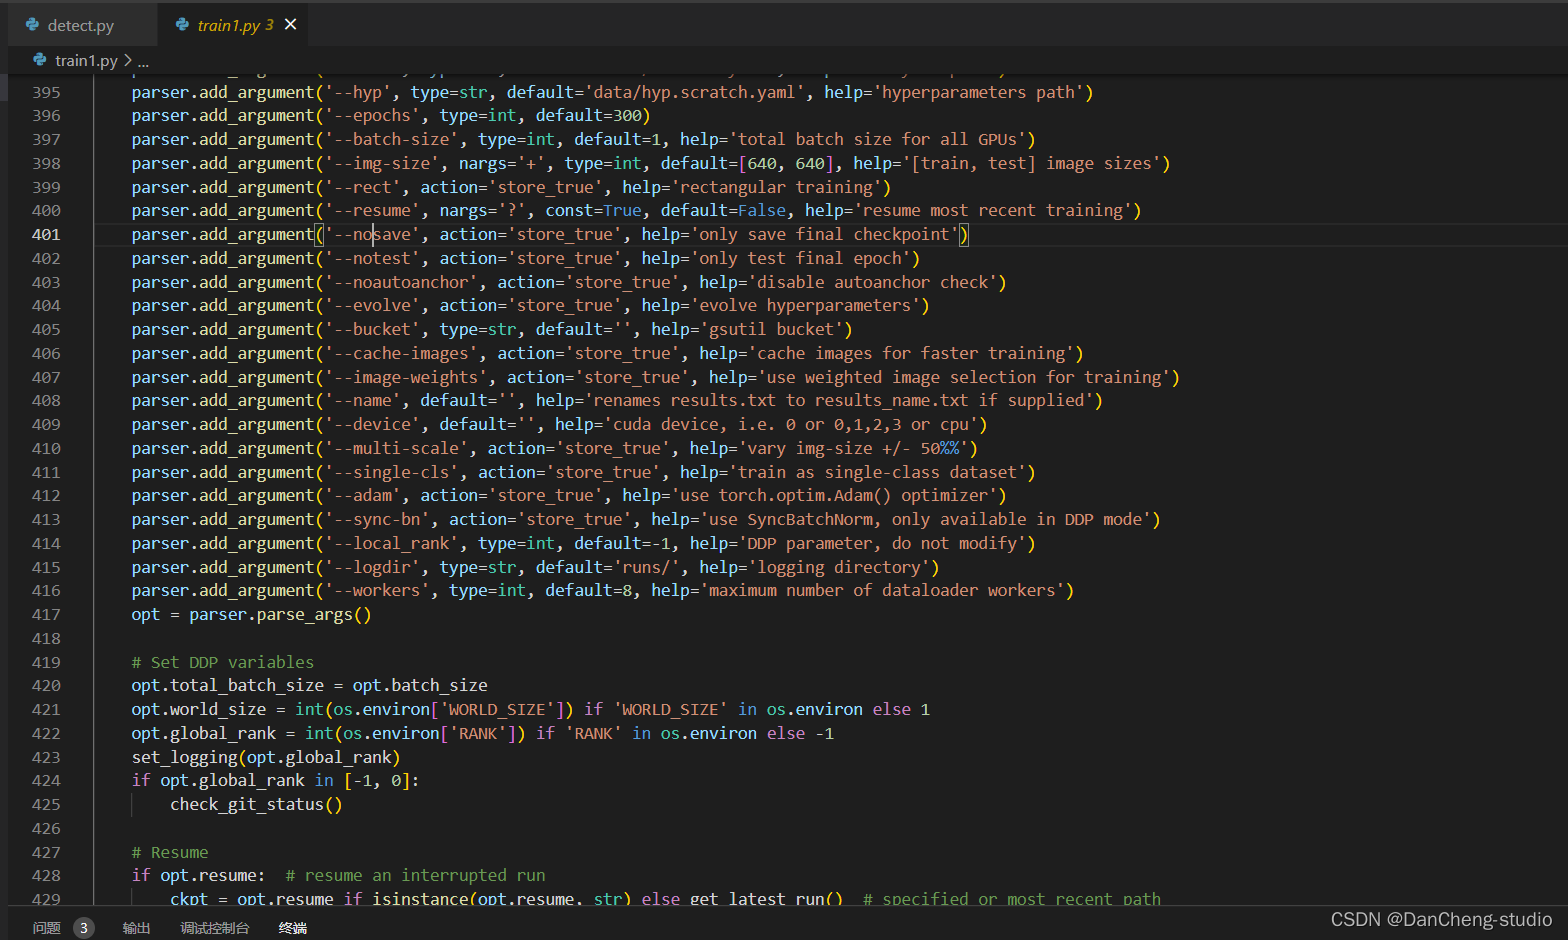
修改train.py中的weights、cfg、data、epochs、batch_size、imgsz、device、workers等参数
训练代码成功执行之后会在命令行中输出下列信息,接下来就是安心等待模型训练结束即可。

5 实现效果
5.1 视频效果
6 最后
🧿 更多资料, 项目分享:
https://gitee.com/dancheng-senior/postgraduate
相关文章:
软著项目推荐 深度学习 opencv python 实现中国交通标志识别
文章目录 0 前言1 yolov5实现中国交通标志检测2.算法原理2.1 算法简介2.2网络架构2.3 关键代码 3 数据集处理3.1 VOC格式介绍3.2 将中国交通标志检测数据集CCTSDB数据转换成VOC数据格式3.3 手动标注数据集 4 模型训练5 实现效果5.1 视频效果 6 最后 0 前言 🔥 优质…...

【Java基础】Java导Excel攻略
💝💝💝欢迎来到我的博客,很高兴能够在这里和您见面!希望您在这里可以感受到一份轻松愉快的氛围,不仅可以获得有趣的内容和知识,也可以畅所欲言、分享您的想法和见解。 推荐:kwan 的首页,持续学…...
maven打包可执行jar含依赖lib
修改pom.xml <build><plugins><plugin><groupId>org.springframework.boot</groupId><artifactId>spring-boot-maven-plugin</artifactId><!-- jdk8可用,其他jdk版本可能需改插件版本 --><version>2.3.7.RE…...
虾皮知虾数据分析软件:优化您的电商经营
在当今竞争激烈的电商市场,了解市场动态、分析竞争对手和产品趋势是成功经营的关键。虾皮知虾数据分析软件是一款强大的工具,为电商卖家提供了全面的数据采集和分析功能。本文将介绍虾皮知虾数据分析软件的特点和功能,以及如何利用它来优化您…...

uniapp开发小程序-如何判断小程序是在手机端还是pc端打开
官方说明 https://developers.weixin.qq.com/miniprogram/dev/devtools/pc-dev.html 小程序如何判断是 PC 平台? 通过 getSystemInfo 官方接口(platform 是 windows) 通过 UA(PC UA 包含 MiniProgramEnv/Windows) …...

7-tcp 三次握手和四次挥手、osi七层协议,哪七层,每层有哪些?tcp和udp的区别?udp用在哪里了?
1 tcp 三次握手和四次挥手 2 osi七层协议,哪七层,每层有哪些 3 tcp和udp的区别?udp用在哪里了? 1 tcp 三次握手和四次挥手 # tcp协议---》处于osi7层协议的传输层,可靠连接,使用三次握手,四次挥…...

DELPHI开发APP回忆录二安卓与pc端路径的选择
路径方法WinAndroidGetHomePathC:\Users\ggggcexx\AppData\Roaming/data/user/0/com.stella.scan/files/GetDocumentsPathC:\Users\ggggcexx\Documents/data/user/0/com.embarcadero.FirstAidExpert_FMX_D11/filesGetSharedDocumentsPathC:\Users\Public\Documents/storage/emu…...

井盖位移传感器怎么监测井盖安全
井盖在城市基础设施建设中扮演着不可或缺的角色,虽然看似并不起眼但确实是城市规划中一个重要的组成部分。在城市规划建设之初都需要首先考虑排水系统的设计,而井盖作为排水系统的一个重要组成部分,一旦出现问题便会造成交通中断或者环境受影…...

从零开始,用Docker-compose打造SkyWalking、Elasticsearch和Spring Cloud的完美融合
🎏:你只管努力,剩下的交给时间 🏠 :小破站 "从零开始,用Docker-compose打造SkyWalking、Elasticsearch和Spring Cloud的完美融合 前言准备工作编写docker-compose.yml文件为什么使用本机ip为什么skywa…...

设计模式——状态模式介绍
状态模式是一种行为设计模式,它允许对象在内部状态改变时改变它的行为。它基于对象的内部状态而改变其行为,看起来好像修改了对象的类。 状态模式的关键组件有三个:上下文(Context)、状态(State)和具体状态(Concrete State)。 下面是一个例…...
,实现无锁优化,自旋锁/乐观锁)
Java 多线程之 CAS(Compare and Set),实现无锁优化,自旋锁/乐观锁
文章目录 一、概述二、JDK 的 Unsafe 类三、ABA 问题 一、概述 CAS(Compare and Swap)是一种并发编程中的原子操作(synchronized 也使用了 CAS),用于实现多线程环境下的同步和数据共享。CAS提供了一种高效的并发控制机…...
python之pyqt专栏1-环境搭建
#python pyqt# python:3.11.6 pycharm:PyCharm Community Edition 2023.2.5 pyqt6 python安装 官网下载:Python Releases for Windows | Python.org pycharm社区版安装 官网地址:Download PyCharm: Python IDE for Professional…...

Spring Cloud LoadBalancer 简单介绍与实战
前言 本文为SpringCloud的学习笔记,如有错误,希望各位高手能指出,主要介绍SpringCloudLoadBalancer的基本概念和实战 文章目录 前言什么是LoadBalancer负载均衡分类服务端负载均衡客户端负载均衡服务端负载均衡和客户端负载均衡的优缺点 常见…...
私域流量解决方案分享
...

Scala---WordCount
一、创建Maven项目导入pom.xml文件 安装Maven仓库管理工具,版本要求是3.2版本以上。新建Maven项目,配置pom.xml。导入必要的包。 二、Spark-Scala版本的WordCount 1.val conf new SparkConf() 2.conf.setMaster("local") 3.conf.setAppNam…...

GTC2023全球流量大会蓄势待发,菊风在7B57展位等你!
第六届 GTC 全球流量大会(以下简称 GTC2023)将于12月5日- 6日,在深圳福田会展中心7&8号馆举办。 据悉,本届大会将是历届以来规模最大、参与人数最多、跨境出海资源最丰富的一次行业盛会。7、8 号馆共 15000 平方米&am…...

喜讯!云起无垠成为国家信息安全漏洞库(CNNVD)技术支撑单位
近日,云起无垠凭借其在漏洞挖掘、漏洞检测以及漏洞修复等领域的卓越表现,荣获“国家信息安全漏洞库(CNNVD)技术支撑单位等级证书(三级)”,正式成为CNNVD技术支撑单位。 中国国家信息安全漏洞库&…...
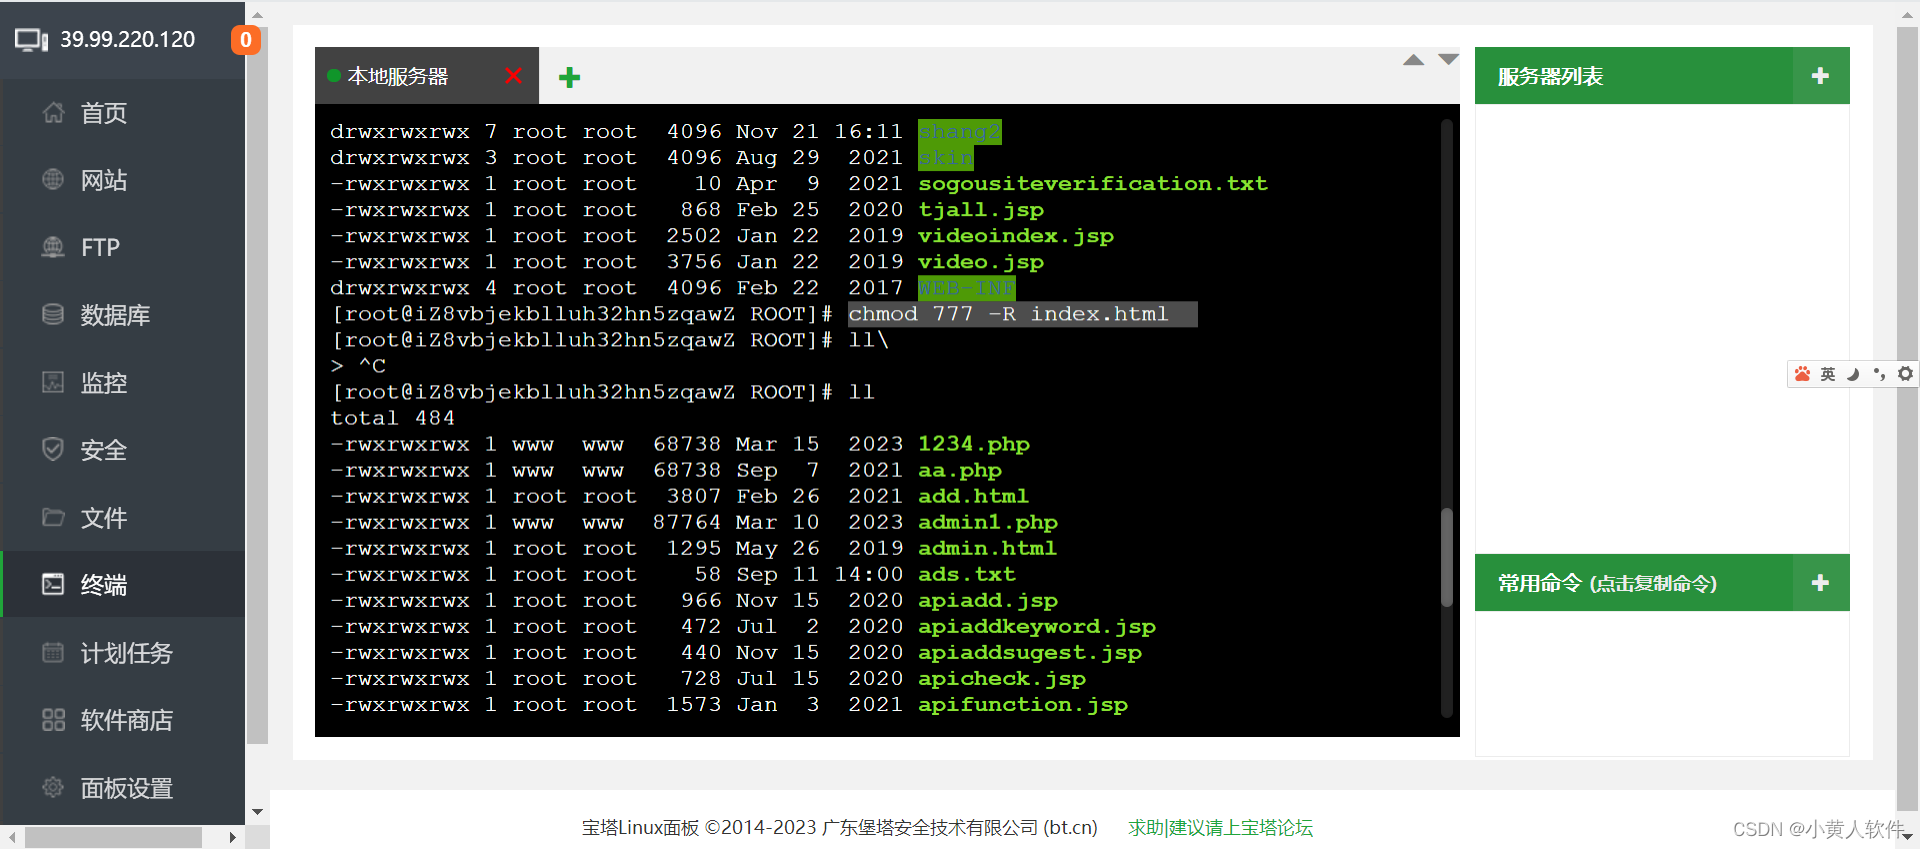
cc linux用root用户执行chmod 777 -R ./提示 Operation not permitted怎么办?
如果你作为 root 用户执行 chmod 777 -R ./ 命令时收到 “Operation not permitted” 错误,可能有几个原因: 不可更改 (Immutable) 文件属性: 文件可能被设置为不可更改。即使是 root 用户也不能修改这些文件的权限。使用 lsattr 命令查看文件…...
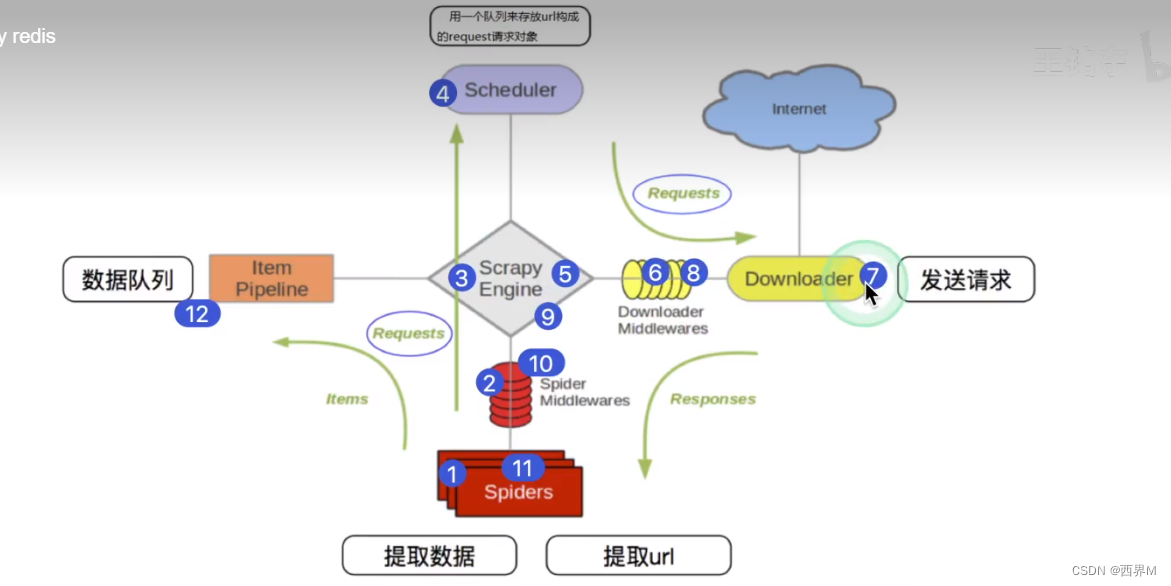
scrapy框架流程
1、Scrapy从Spider子类中提取start_url,然后构造为request请求对象 2、将request请求对象传递给爬虫中间件 3、将request请求对象传递给Scrapy引擎(核心代码) 4、将request请求对象传递给调度器(它负责对多个request安排,好比交…...

802.11 帧的Reason Code 位和Status Code 位
Reason Code 位 当对方不适合加入网络时,工作站会送出 Disassociation(解除连接)或 Deauthentication(解除身份认证)帧作为应答。这些帧当中包含一个长度 16bit 的 Reason Code(原因代码)位&am…...

国密HmacSM3实战:Python三种密钥化加密方案与政务云对接指南
1. 国密HmacSM3与政务云对接的核心挑战 第一次接触政务云项目时,我被HmacSM3这个名词难住了。作为国产密码算法体系中的重要成员,SM3算法在政务、金融等对安全性要求较高的领域已经成为标配。但网上能找到的示例代码大多只演示了基础的SM3哈希计算&#…...

LLM论文研读知识库构建指南:从PEFT、RAG到Agent的工程实践
1. 项目概述:构建一个面向LLM算法工程师的论文研读知识库作为一名在自然语言处理与搜索推荐领域摸爬滚打了十多年的老兵,我深知技术迭代的速度有多快。尤其是大语言模型(LLMs)这波浪潮,几乎每个月都有颠覆性的新论文、…...

微信网页版访问解决方案:wechat-need-web浏览器扩展深度解析
微信网页版访问解决方案:wechat-need-web浏览器扩展深度解析 【免费下载链接】wechat-need-web 让微信网页版可用 / Allow the use of WeChat via webpage access 项目地址: https://gitcode.com/gh_mirrors/we/wechat-need-web 在当前的数字办公环境中&…...
)
深度解析:基于异构计算架构的 AI 视频中台(支持 GB28181、RTSP、Docker 部署与源码交付)
1. 架构演进:从“烟囱式”到“解耦异构” 传统安防系统往往是硬件绑定的。换一个边缘芯片,算法就要重写推理逻辑;换一个协议,接入层就要推倒重来。 本平台采用微服务化与容器化架构,将流媒体转发、算法推理、业务逻辑…...

【重磅喜报】社区项目硬件AI开发工具aily blockly获数百万种子投资
在这个AI与硬件创新交汇的时代,我们怀着无比激动的心情向大家宣布一个重磅好消息:由 Arduino中文社区 发起并主导孵化的开源项目 aily blockly,近日正式获得 宜宾科才集团 和 清智资本 的战略投资!这不仅是对 aily blockly 团队研…...

如何让Windows和Office永远告别激活烦恼?KMS智能激活方案全解析
如何让Windows和Office永远告别激活烦恼?KMS智能激活方案全解析 【免费下载链接】KMS_VL_ALL_AIO Smart Activation Script 项目地址: https://gitcode.com/gh_mirrors/km/KMS_VL_ALL_AIO 还在为电脑屏幕上时不时弹出的"需要激活"通知而焦虑吗&…...

BERT文本嵌入实战:从原理到应用
1. 文本嵌入基础与核心价值文本嵌入(Text Embedding)是现代自然语言处理(NLP)的核心技术之一,它将离散的文本转化为连续的数值向量,使计算机能够理解和处理语义信息。与传统的词袋模型(Bag-of-W…...
)
Windows10运行OpenClaw 安装配置一站式教程(含最新版安装包)
OpenClaw 小龙虾 Windows10 专属一键部署教程|10分钟搞定本地AI数字员工适配系统:Windows10 64位(纯小白友好版) 核心优势:免命令行、免环境配置、解压即装,内置所有运行依赖,全程可视化操作&am…...

如何在Linux系统上轻松读取Microsoft Access数据库:MDB Tools完整指南
如何在Linux系统上轻松读取Microsoft Access数据库:MDB Tools完整指南 【免费下载链接】mdbtools MDB Tools - Read Access databases on *nix 项目地址: https://gitcode.com/gh_mirrors/md/mdbtools 你是否曾经需要在Linux或macOS系统上处理Microsoft Acce…...

从QP到EFSM:为你的RTOS项目找一个更‘接地气’的轻量状态机框架
从QP到EFSM:嵌入式开发者的轻量级状态机迁移实战指南 在嵌入式开发中,状态机是处理复杂业务逻辑的利器。但当我们面对Quantum Platform(QP)这类功能强大却略显"重型"的框架时,很多团队会陷入两难——既向往其严谨的状态管理模式&am…...