构建Helm chart和chart使用管道与函数简介
目录
一.创建helm chart(以nginx为例)
1.通过create去创建模板
2.查看模板下的文件
3.用chart模版安装nginx
二.版本更新和回滚问题
1.使用upgrade -f values.yaml或者命令行--set来设置
2.查看历史版本并回滚
三.helm模板内管道和函数
1.defautl
2.quote
3.indent和nindent
4.upper
5.title
6.toYaml
上一篇文章说到,我们可以通过helm将众多已经初步配置好的yaml文件下载来整合使用,甚至还可以自己定义好需要的安装参数用于下载完成后直接使用而不需要过多更改,现在仍然可以在这些功能上继续推进。创建helm chart模板,现成的yaml文件,自己只需要更改values变量文件即可,如下:
一.创建helm chart(以nginx为例)
1.通过create去创建模板
[root@k8s-master helm]# helm create nginx #创建完成后会在本地创建一个nginx目录
drwxr-xr-x 4 root root 93 Mar 18 19:58 nginx
[root@k8s-master helm]# tree nginx
nginx
├── charts #存放的依赖的子chart
├── Chart.yaml #存放chart基本信息的文件
├── templates #模板,名称都简单翻译一下就懂存的是什么
│ ├── deployment.yaml
│ ├── _helpers.tpl #模板助手
│ ├── hpa.yaml
│ ├── ingress.yaml
│ ├── NOTES.txt #本chart的帮助信息
│ ├── serviceaccount.yaml
│ ├── service.yaml
│ └── tests
│ └── test-connection.yaml
└── values.yaml #存储的是你在的templates中文件需要用到的变量
3 directories, 10 files2.查看模板下的文件
[root@k8s-master helm]# cat nginx/templates/service.yaml
apiVersion: v1
kind: Service
metadata:name: {{ include "nginx.fullname" . }} #这些使用{{}}括起来的变量就是你需要在values.yaml文件中用值替换的变量labels:{{- include "nginx.labels" . | nindent 4 }}
spec:type: {{ .Values.service.type }}ports:- port: {{ .Values.service.port }}targetPort: httpprotocol: TCPname: httpselector:{{- include "nginx.selectorLabels" . | nindent 4 }}
3.用chart模版安装nginx
(1)在values.yaml中定义变量,如下是nginx模版的原始文件
[root@k8s-master nginx]# cat values.yaml
# Default values for nginx.
# This is a YAML-formatted file.
# Declare variables to be passed into your templates.
replicaCount: 1
image:repository: nginx #找到需要的地方,这里是镜像名pullPolicy: IfNotPresent #镜像拉取策略# Overrides the image tag whose default is the chart appVersion.tag: "" #版本信息
imagePullSecrets: []
nameOverride: ""
fullnameOverride: ""
serviceAccount:# Specifies whether a service account should be createdcreate: true# Annotations to add to the service accountannotations: {}# The name of the service account to use.# If not set and create is true, a name is generated using the fullname templatename: ""
podAnnotations: {}
podSecurityContext: {}# fsGroup: 2000
securityContext: {}# capabilities:# drop:# - ALL# readOnlyRootFilesystem: true# runAsNonRoot: true# runAsUser: 1000
service: #service类型和端口type: ClusterIPport: 80
ingress: #ingress的相关配置enabled: falseclassName: ""annotations: {}# kubernetes.io/ingress.class: nginx# kubernetes.io/tls-acme: "true"hosts:- host: chart-example.localpaths:- path: /pathType: ImplementationSpecifictls: []# - secretName: chart-example-tls# hosts:# - chart-example.local
resources: {} #资源要求# We usually recommend not to specify default resources and to leave this as a conscious# choice for the user. This also increases chances charts run on environments with little# resources, such as Minikube. If you do want to specify resources, uncomment the following# lines, adjust them as necessary, and remove the curly braces after 'resources:'.# limits:# cpu: 100m# memory: 128Mi# requests:# cpu: 100m# memory: 128Mi
autoscaling:enabled: falseminReplicas: 1maxReplicas: 100targetCPUUtilizationPercentage: 80# targetMemoryUtilizationPercentage: 80
nodeSelector: {}
tolerations: []
affinity: {}(2)配置后的values.yaml
[root@k8s-master helm]# cat nginx/values.yaml
# Default values for nginx.
# This is a YAML-formatted file.
# Declare variables to be passed into your templates.
replicaCount: 1
image:repository: nginxpullPolicy: IfNotPresent# Overrides the image tag whose default is the chart appVersion.tag: "1.17.3" #版本为1.17.3
imagePullSecrets: []
nameOverride: ""
fullnameOverride: ""
serviceAccount:# Specifies whether a service account should be createdcreate: true# Annotations to add to the service accountannotations: {}# The name of the service account to use.# If not set and create is true, a name is generated using the fullname templatename: ""
podAnnotations: {}
podSecurityContext: {}# fsGroup: 2000
securityContext: {}# capabilities:# drop:# - ALL# readOnlyRootFilesystem: true# runAsNonRoot: true# runAsUser: 1000
service:type: NodePort #NodePort类型port: 80 #80端口
ingress:enabled: falseclassName: ""annotations: {}# kubernetes.io/ingress.class: nginx# kubernetes.io/tls-acme: "true"hosts:- host: chart-example.localpaths:- path: /pathType: ImplementationSpecifictls: []# - secretName: chart-example-tls# hosts:# - chart-example.local
resources: {}# We usually recommend not to specify default resources and to leave this as a conscious# choice for the user. This also increases chances charts run on environments with little# resources, such as Minikube. If you do want to specify resources, uncomment the following# lines, adjust them as necessary, and remove the curly braces after 'resources:'.# limits:# cpu: 100m# memory: 128Mi# requests:# cpu: 100m# memory: 128Mi
autoscaling:enabled: falseminReplicas: 1maxReplicas: 100targetCPUUtilizationPercentage: 80# targetMemoryUtilizationPercentage: 80
nodeSelector: {}
tolerations: []
affinity: {}(3)安装命令
同k8s运行pod差不多,都可以先测试一下但不实际运行helm install --dry-run my-nginx nginx/,卸载将install替换为uninstall即可
[root@k8s-master helm]# helm install my-nginx nginx/
#指定好安装后的名称后要指定这个nginx模版目录,安装完成后还会提示你访问方式
NAME: my-nginx
LAST DEPLOYED: Mon Mar 18 20:27:00 2024
NAMESPACE: default
STATUS: deployed
REVISION: 1
NOTES:
1. Get the application URL by running these commands:export NODE_PORT=$(kubectl get --namespace default -o jsonpath="{.spec.ports[0].nodePort}" services my-nginx)export NODE_IP=$(kubectl get nodes --namespace default -o jsonpath="{.items[0].status.addresses[0].address}")echo http://$NODE_IP:$NODE_PORT[root@k8s-master helm]# kubectl get pods,svc
NAME READY STATUS RESTARTS AGE
pod/my-nginx-9d774fb48-94wd8 1/1 Running 0 3m29s
NAME TYPE CLUSTER-IP EXTERNAL-IP PORT(S) AGE
service/kubernetes ClusterIP 10.96.0.1 <none> 443/TCP 90m
service/my-nginx NodePort 10.97.171.192 <none> 80:30140/TCP 3m29s
[root@k8s-master helm]# curl http://192.168.2.151:30140
<!DOCTYPE html>
<html>
<head>
<title>Welcome to nginx!</title>
<style>body {width: 35em;margin: 0 auto;font-family: Tahoma, Verdana, Arial, sans-serif;}
</style>
</head>
<body>
<h1>Welcome to nginx!</h1>
<p>If you see this page, the nginx web server is successfully installed and
working. Further configuration is required.</p>
<p>For online documentation and support please refer to
<a href="http://nginx.org/">nginx.org</a>.<br/>
Commercial support is available at
<a href="http://nginx.com/">nginx.com</a>.</p>
<p><em>Thank you for using nginx.</em></p>
</body>
</html>二.版本更新和回滚问题
1.使用upgrade -f values.yaml或者命令行--set来设置
[root@k8s-master helm]# kubectl  describe pod my-nginx-9d774fb48-94wd8 | grep ImageImage:          nginx:1.17.5Image ID:       docker.io/library/nginx@sha256:922c815aa4df050d4df476e92daed4231f466acc8ee90e0e774951b0fd7195a4
[root@k8s-master helm]# vim nginx/values.yaml
[root@k8s-master helm]# vim nginx/values.yaml
[root@k8s-master helm]# helm upgrade -f nginx/values.yaml my-nginx nginx/
Release "my-nginx" has been upgraded. Happy Helming!
NAME: my-nginx
LAST DEPLOYED: Mon Mar 18 20:35:40 2024
NAMESPACE: default
STATUS: deployed
REVISION: 2
NOTES:
1. Get the application URL by running these commands:export NODE_PORT=$(kubectl get --namespace default -o jsonpath="{.spec.ports[0].nodePort}" services my-nginx)export NODE_IP=$(kubectl get nodes --namespace default -o jsonpath="{.items[0].status.addresses[0].address}")echo http://$NODE_IP:$NODE_PORT
[root@k8s-master helm]# kubectl  get pods
NAME                        READY   STATUS              RESTARTS   AGE
my-nginx-698cb48f59-v4pbb   0/1     ContainerCreating   0          7s
my-nginx-9d774fb48-94wd8    1/1     Running             0          8m48s
[root@k8s-master helm]# kubectl  get pods
NAME                        READY   STATUS    RESTARTS   AGE
my-nginx-698cb48f59-v4pbb   1/1     Running   0          64s
[root@k8s-master helm]# kubectl  describe pod my-nginx-698cb48f59-v4pbb | grep ImageImage:          nginx:1.17.8Image ID:       docker.io/library/nginx@sha256:380eb808e2a3b0dd954f92c1cae2f845e6558a15037efefcabc5b4e03d666d03
2.查看历史版本并回滚
[root@k8s-master helm]# helm history my-nginx
REVISION UPDATED STATUS CHART APP VERSION DESCRIPTION
1 Mon Mar 18 20:27:00 2024 superseded nginx-0.1.0 1.16.0 Install complete
2 Mon Mar 18 20:35:40 2024 deployed nginx-0.1.0 1.16.0 Upgrade complete
[root@k8s-master helm]# helm rollback my-nginx 1
Rollback was a success! Happy Helming!
[root@k8s-master helm]# kubectl get pods
NAME READY STATUS RESTARTS AGE
my-nginx-9d774fb48-9pv7q 1/1 Running 0 5s
[root@k8s-master helm]# kubectl describe pods my-nginx-9d774fb48-9pv7q | grep ImageImage: nginx:1.17.5Image ID: docker.io/library/nginx@sha256:922c815aa4df050d4df476e92daed4231f466acc8ee90e0e774951b0fd7195a4三.helm模板内管道和函数
1.defautl
也就是和管道符号配合,当你values中的值未指定时,就使用此默认值
以nginx模版的port为例,将其设置为空,但设置了默认值为80,创建过后仍然会暴露80端口
[root@k8s-master helm]# cat nginx/values.yaml | grep portport:
#在deployment文件中引用了此变量的地方设置default
[root@k8s-master helm]# cat nginx/templates/deployment.yaml | grep defaultimage: "{{ .Values.image.repository }}:{{ .Values.image.tag | default .Chart.AppVersion }}"containerPort: {{ .Values.service.port | default 80 }} #这样写#在service文件中引用了此变量的地方设置default
[root@k8s-master helm]# cat nginx/templates/service.yaml | grep default- port: {{ .Values.service.port | default 80 }}
[root@k8s-master helm]# helm install nginx nginx/
[root@k8s-master helm]# kubectl get pods,svc
NAME READY STATUS RESTARTS AGE
pod/nginx-6467995c7d-gt4g5 1/1 Running 0 8s
NAME TYPE CLUSTER-IP EXTERNAL-IP PORT(S) AGE
service/kubernetes ClusterIP 10.96.0.1 <none> 443/TCP 113m
service/nginx NodePort 10.106.164.22 <none> 80:32598/TCP 8s2.quote
这个表示的是为某个变量设置后,无论设定的变量值是什么类型,都将其识别为字符串类型,书写格式如下
{{ quote .Values.service.port }}3.indent和nindent
indent表示在同一行变量值前设定多少个缩进值,nindent表示换行后再在变量值前设置多少个缩进值,书写格式如下
{{ .Values.service.port | indent/nindent 10 }}4.upper
将值都变为大写,格式如下
{{ upper .Values.service.port }}5.title
将首字母设置为大写,格式如下
{{ title .Values.service.port }}6.toYaml
将一整个yaml块都取值取过来,一般还需要陪着缩进一起使用,格式如下
{{ toYaml .Values.service.port | indent/nindent 10 }}相关文章:

构建Helm chart和chart使用管道与函数简介
目录 一.创建helm chart(以nginx为例) 1.通过create去创建模板 2.查看模板下的文件 3.用chart模版安装nginx 二.版本更新和回滚问题 1.使用upgrade -f values.yaml或者命令行--set来设置 2.查看历史版本并回滚 三.helm模板内管道和函数 1.defau…...

深入理解OnCalculate函数的运行机制
文章目录 一、学习 OnCalculate 函数的运行原理的意义二、OnCalculate 函数原型三、OnCalculate 函数在MT4与MT5区别四、OnCalculate 函数的运行原理 一、学习 OnCalculate 函数的运行原理的意义 OnCalculate函数是MQL语言中的一个重要函数,它用于计算技术指标的值。…...

快速从0-1完成聊天室开发——环信ChatroomUIKit功能详解
聊天室是当下泛娱乐社交应用中最经典的玩法,通过调用环信的 IM SDK 接口,可以快速创建聊天室。如果想根据自己业务需求对聊天室应用的 UI界面、弹幕消息、礼物打赏系统等进行自定义设计,最高效的方式则是使用环信的 ChatroomUIKit 。 文档地址…...

nginx实现多个域名和集群
要通过Nginx实现多个域名和集群,你需要配置Nginx作为反向代理服务器,将来自不同域名的请求转发到集群中的相应后端服务器。下面是一个基本的配置示例,你可以根据自己的需求进行修改和扩展。 首先,确保你已经安装了Nginxÿ…...

C. Left and Right Houses
Problem - C - Codeforces 题目分析 <1>0:想被分割至左边; 1:想被分割至右边 <2>使得左右两侧均有一半及其以上的人满意(我*******) <3>答案若有多个,取最接近中间位置的答案 <4…...

缓存与内存:加速你的Python应用
在现代计算中,缓存和内存是提高程序性能的关键组件。在这篇文章中,我们将深入探讨这两个概念,了解它们是如何工作的,以及如何在Python中有效地使用它们来优化你的程序。 缓存与内存:加速你的Python应用 缓存和内存&…...

Go语言之函数、方法、接口
一、函数 函数的基本语法: func 函数名(形参列表)(返回值列表) {执行语句...return 返回值列表 } 1.形参列表:表示函数的输入 2.函数中的语句:表示为了实现某一功能的代码块 3.函数可以有返回…...
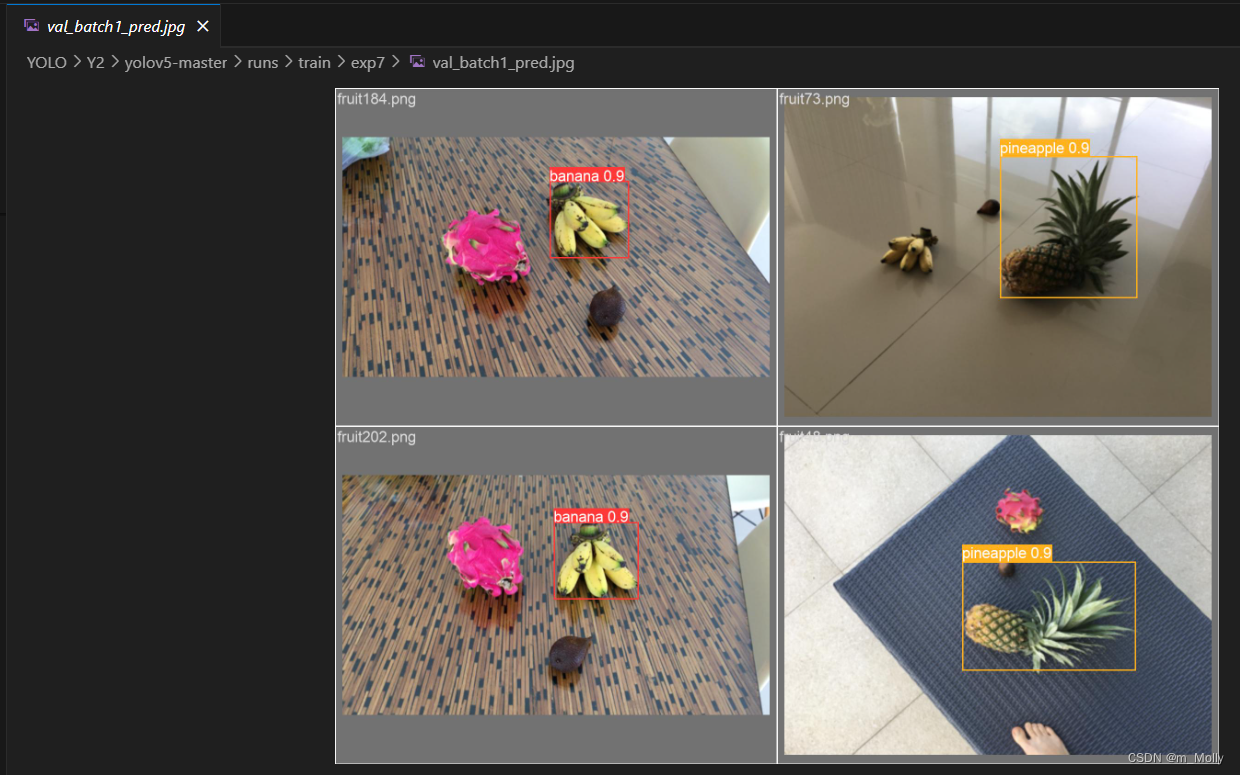
【Week Y2】使用自己的数据集训练YOLO-v5s
Y2-使用自己的数据集训练YOLO-v5s 零、遇到的问题汇总(1)遇到git的import error(2)Error:Dataset not found(3)Error:删除中文后,训练图片路径不存在 一、.xml文件里保存…...
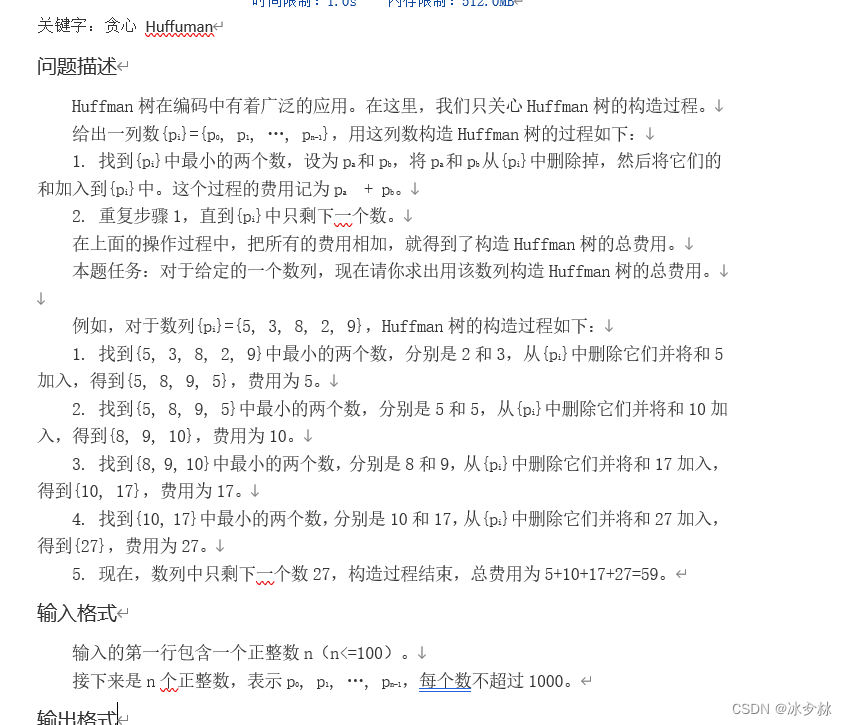
蓝桥杯--基础(哈夫曼)
import java.util.ArrayList; import java.util.Collections; import java.util.List; import java.util.Scanner;public class BASIC28 {//哈夫曼书public static void main(String[] args) {Scanner Scannernew Scanner(System.in);int nScanner.nextInt();List<Integer&…...

【Redis内存数据库】NoSQL的特点和应用场景
前言 Redis作为当今最流行的内存数据库,已经成为服务端加速的必备工具之一。 NoSQL数据库采用了非关系型的数据存储模型,能够更好地处理海量数据和高并发访问。 内存数据库具有更快的读写速度和响应时间,因为内存访问速度比磁盘访问速度快…...

JavaScript基础知识2
求数组的最大值案例 let arr[2,6,1,7,400,55,88,100]let maxarr[0]let minarr[0]for(let i1;i<arr.length;i){max<arr[i]?maxarr[i]:maxmin>arr[i]?minarr[i]:min}console.log(最大值是:${max})console.log(最小值是:${min}) 操作数组 修改…...
Linux之线程同步
目录 一、问题引入 二、实现线程同步的方案——条件变量 1、常用接口: 2、使用示例 一、问题引入 我们再次看看上次讲到的多线程抢票的代码:这次我们让一个线程抢完票之后不去做任何事。 #include <iostream> #include <unistd.h> #inc…...

03 龙芯平台openstack部署搭建-keystone部署
#!/bin/bash #创建keystone数据库并授权,可通过mysql -ukeystone -ploongson验证授权登录 mysql -uroot -e “set password for rootlocalhost password(‘loongson’);” mysql -uroot -ploongson -e ‘CREATE DATABASE keystone;’ #本地登录 mysql -uroot -ploo…...

定义了服务器的端口号和Servlet的上下文路径
server: port: 1224 servlet: context-path: /applet 这个配置定义了服务器的端口号和Servlet的上下文路径。 下面是配置的解释: server.port: 1224:这表示服务器应该监听在1224端口上。server.servlet.context-path: /applet:这表…...

AI论文速读 | UniST:提示赋能通用模型用于城市时空预测
本文是时空领域的统一模型——UniST,无独有偶,时序有个统一模型新工作——UniTS,感兴趣的读者也可以阅读今天发布的另外一条。 论文标题:UniST: A Prompt-Empowered Universal Model for Urban Spatio-Temporal Prediction 作者&…...
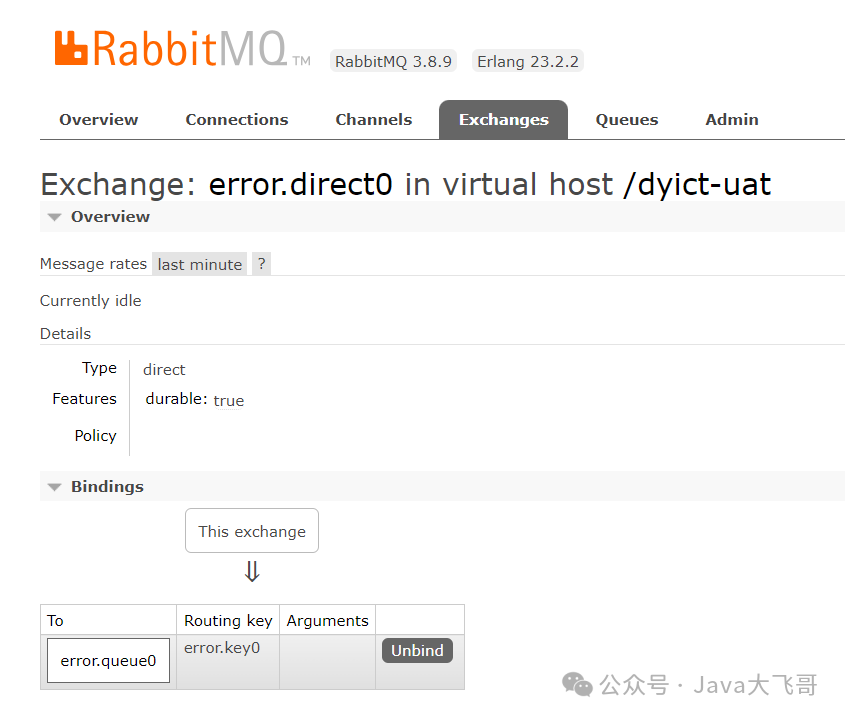
rabbitmq-spring-boot-start配置使用手册
rabbitmq-spring-boot-start配置使用手册 文章目录 1.yaml配置如下2.引入pom依赖如下2.1 引入项目resources下libs中的jar包依赖如下2.2引入maven私服依赖如下 3.启动类配置如下4.项目中测试发送消息如下5.项目中消费消息代码示例6.mq管理后台交换机队列创建及路由绑定关系如下…...
操作系统知识-操作系统作用+进程管理-嵌入式系统设计师备考笔记
0、前言 本专栏为个人备考软考嵌入式系统设计师的复习笔记,未经本人许可,请勿转载,如发现本笔记内容的错误还望各位不吝赐教(笔记内容可能有误怕产生错误引导)。 本章的主要内容见下图: 1、操作系统的作用…...
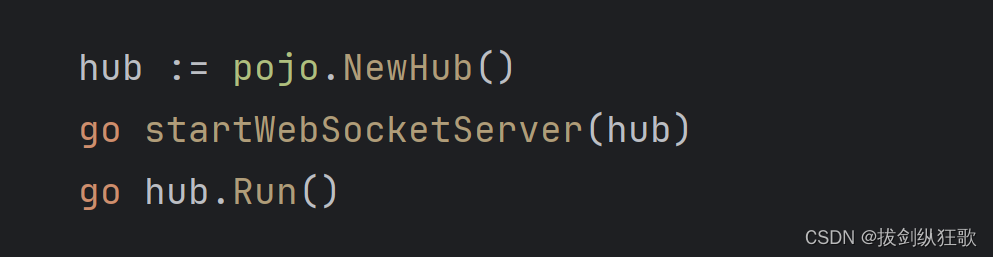
Go语言中的锁与管道的运用
目录 1.前言 2.锁解决方案 3.管道解决方案 4.总结 1.前言 在写H5小游戏的时候,由于需要对多个WebSocket连接进行增、删、查的管理和对已经建立连接的WebSocket通过服务端进行游戏数据交换的需求。于是定义了一个全局的map集合进行连接的管理,让所有…...
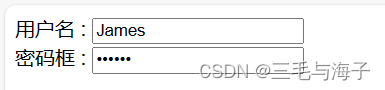
前端 - 基础 表单标签 -- 表单元素( input - type属性) 文本框和密码框
表单元素 : 在表单域中可以定义各种表单元素,这些表单元素就是允许用户在表单中输入或选择 的内容控件。 表单元素的外观也各不一样,有小圆圈,有正方形,也有方框,乱七八糟的,各种各样…...

关于MySQL模糊搜索不区分大小写
在我们日常使用ORM框架进行模糊查询时,会发现,搜索的结果是不区分关键字的英文大小写的,那这是为什么呢? 原因是MySQL的like本就不区分大小写;如果在建表的时候,没有设置好字段区分大小 //包含j和J的都会被…...

AGI能力边界与安全约束
AGI能力边界与安全约束📝 本章学习目标:通过本章学习,你将全面掌握"AGI能力边界与安全约束"这一核心主题,建立系统性认知。一、引言:为什么这个话题如此重要 在人工智能快速发展的今天,AGI能力边…...

为什么BiliTools能成为哔哩哔哩内容管理的最佳选择?3大核心优势解析
为什么BiliTools能成为哔哩哔哩内容管理的最佳选择?3大核心优势解析 【免费下载链接】BiliTools A cross-platform bilibili toolbox. 跨平台哔哩哔哩工具箱,支持下载视频、番剧等等各类资源 项目地址: https://gitcode.com/GitHub_Trending/bilit/Bil…...

Windows下OpenClaw安装指南:Qwen3-14b_int4_awq模型接入与飞书机器人配置
Windows下OpenClaw安装指南:Qwen3-14b_int4_awq模型接入与飞书机器人配置 1. 为什么选择OpenClaw作为个人自动化助手 去年年底,我开始寻找一款能够真正理解自然语言指令的本地自动化工具。当时市面上大多数RPA工具都需要复杂的流程设计,直到…...
)
STM32CubeMX实战:如何用通用定时器精准实现微秒级延时(附DHT11读取示例)
STM32CubeMX实战:通用定时器实现微秒级延时的工程化解决方案 在嵌入式开发中,精确的时序控制往往是项目成功的关键。许多传感器如DHT11温湿度模块、超声波测距模块HC-SR04等,都需要微秒级精度的延时操作。然而,STM32CubeMX默认提…...

2026届必备的十大降AI率助手推荐
Ai论文网站排名(开题报告、文献综述、降aigc率、降重综合对比) TOP1. 千笔AI TOP2. aipasspaper TOP3. 清北论文 TOP4. 豆包 TOP5. kimi TOP6. deepseek 于内容创作里,将 AI 生成率予以降低的关键之处在于把机器输出的规整性还有重复性…...

深度解析notion-enhancer组件化架构:从UI扩展到底层实现的设计模式
深度解析notion-enhancer组件化架构:从UI扩展到底层实现的设计模式 【免费下载链接】notion-enhancer An enhancer/customiser for the all-in-one productivity workspace Notion 项目地址: https://gitcode.com/gh_mirrors/no/notion-enhancer Notion作为现…...

Windows 10/11 安卓应用安装器:APK Installer 完整使用指南
Windows 10/11 安卓应用安装器:APK Installer 完整使用指南 【免费下载链接】APK-Installer An Android Application Installer for Windows 项目地址: https://gitcode.com/GitHub_Trending/ap/APK-Installer 还在为无法在Windows电脑上运行安卓应用而烦恼吗…...
解锁TranslucentTB:4种高效实现Windows任务栏透明化的方法
解锁TranslucentTB:4种高效实现Windows任务栏透明化的方法 【免费下载链接】TranslucentTB A lightweight utility that makes the Windows taskbar translucent/transparent. 项目地址: https://gitcode.com/gh_mirrors/tr/TranslucentTB 任务栏作为Windows…...

3步解锁Windows PDF处理新高度:Poppler预编译包深度解析
3步解锁Windows PDF处理新高度:Poppler预编译包深度解析 【免费下载链接】poppler-windows Download Poppler binaries packaged for Windows with dependencies 项目地址: https://gitcode.com/gh_mirrors/po/poppler-windows 你是否还在为Windows平台上复杂…...

PyTorch 2.8动态计算图深度解析:自定义算子与性能优化技巧
PyTorch 2.8动态计算图深度解析:自定义算子与性能优化技巧 1. 动态计算图的核心魅力 PyTorch的动态计算图一直是其区别于其他深度学习框架的标志性特性。在2.8版本中,这个机制变得更加灵活高效。简单来说,动态计算图就像一张可以随时修改的…...