QT常见Layout布局器使用
布局简介
为什么要布局?通过布局拖动不影响鼠标拖动窗口的效果等优点.QT设计器布局比较固定,不方便后期修改和维护;在Qt里面布局分为四个大类 :
盒子布局:QBoxLayout
网格布局:QGridLayout
表单布局:QFormLayout
抽屉布局:QStackedLayout
分页显示:QTabWidget
分割器:Splitter
QBoxLayout
一般使用它的两个子类QHBoxLayout 和 QVBoxLayout 负责水平和垂直布局
QVBoxLayout 基本使用
mainwindow.cpp(后面例程都在mainwindow.cpp演示):
#include "mainwindow.h"
#include <QApplication>
#include <QPushButton>
#include <QVBoxLayout>
#include <QHBoxLayout>MainWindow::MainWindow(QWidget *parent): QMainWindow(parent)
{QWidget* w=new QWidget;setCentralWidget(w);//注意MainWindow不能直接进行布局QVBoxLayout* vlayout=new QVBoxLayout;QPushButton* b1=new QPushButton("b1");QPushButton* b2=new QPushButton("b2");QPushButton* b3=new QPushButton("b3");vlayout->addWidget(b1);vlayout->addStretch(1);//增加一个伸缩量vlayout->addWidget(b2);vlayout->addStretch(1);//增加一个伸缩量vlayout->addWidget(b3);vlayout->addStretch(2);//增加一个伸缩量centralWidget()->setLayout(vlayout);this->resize(300, 300);
}MainWindow::~MainWindow()
{}
mainwindow.h
#ifndef MAINWINDOW_H
#define MAINWINDOW_H#include <QMainWindow>class MainWindow : public QMainWindow
{Q_OBJECTpublic:MainWindow(QWidget *parent = 0);~MainWindow();
};#endif // MAINWINDOW_H
main.cpp
#include "mainwindow.h"
#include <QApplication>int main(int argc, char *argv[])
{QApplication a(argc, argv);MainWindow w;w.show();return a.exec();
}

QHBoxLayout基本使用
#include "mainwindow.h"
#include <QApplication>
#include <QPushButton>
#include <QVBoxLayout>
#include <QHBoxLayout>MainWindow::MainWindow(QWidget *parent): QMainWindow(parent)
{this->setWindowTitle("水平布局");QWidget* w=new QWidget;setCentralWidget(w);QHBoxLayout* hlayout=new QHBoxLayout;QPushButton* b1=new QPushButton("b1");QPushButton* b2=new QPushButton("b2");QPushButton* b3=new QPushButton("b3");hlayout->addWidget(b1);hlayout->addStretch(1);//增加一个伸缩量hlayout->addWidget(b2);hlayout->addStretch(1);//增加一个伸缩量hlayout->addWidget(b3);hlayout->addStretch(2);//增加一个伸缩量centralWidget()->setLayout(hlayout);this->resize(300, 300);
}
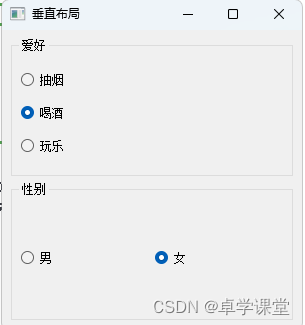
QHBoxLayout和QVBoxLayout综合使用
可以结合QGroupBox容器进行布局
#include "mainwindow.h"
#include <QApplication>
#include <QPushButton>
#include <QVBoxLayout>
#include <QHBoxLayout>
#include <QGroupBox>
#include <QRadioButton>
MainWindow::MainWindow(QWidget *parent): QMainWindow(parent)
{this->setWindowTitle("垂直布局");QWidget* w=new QWidget;setCentralWidget(w);QVBoxLayout* container=new QVBoxLayout;QGroupBox *hobby_box = new QGroupBox("爱好");QVBoxLayout* v_layout=new QVBoxLayout;QRadioButton* btn1 = new QRadioButton("抽烟");QRadioButton* btn2 = new QRadioButton("喝酒");QRadioButton* btn3 = new QRadioButton("玩乐");v_layout->addWidget(btn1);v_layout->addWidget(btn2);v_layout->addWidget(btn3);hobby_box->setLayout(v_layout);QGroupBox* gender_box = new QGroupBox("性别");QHBoxLayout* h_layout = new QHBoxLayout();QRadioButton* btn4 =  new QRadioButton("男");QRadioButton* btn5 = new QRadioButton("女");h_layout->addWidget(btn4);h_layout->addWidget(btn5);gender_box->setLayout(h_layout);container->addWidget(hobby_box);container->addWidget(gender_box);centralWidget()->setLayout(container);this->resize(300, 300);
} 
垂直和水平布局技巧
QGridLayout
QGridLayout基本使用
网格布局,有的人称之为九宫格布局;示例如下:
#include "mainwindow.h"
#include <QApplication>
#include <QPushButton>
#include <QVBoxLayout>
#include <QHBoxLayout>
#include <QGroupBox>
#include <QRadioButton>
#include <QStringList>
#include <QLineEdit>
#include <QGridLayout>MainWindow::MainWindow(QWidget *parent): QMainWindow(parent)
{this->setWindowTitle("网格布局");QWidget* w=new QWidget;setCentralWidget(w);QVBoxLayout* container=new QVBoxLayout;QPushButton* m_buttons[20];const char* btnText[20] ={"7", "8", "9", "+", "(","4", "5", "6", "-", ")","1", "2", "3", "*", "<-","0", ".", "=", "/", "C"};QLineEdit* edit = new QLineEdit();edit->setPlaceholderText("请输入内容");QGridLayout* grid = new QGridLayout();int line_number = 0;int col_number = 0;for(line_number = 0;line_number < 4;line_number++){// 此时line_number是第几行for(col_number = 0;col_number < 5;col_number++){// 此时col_number是第几列m_buttons[line_number*5 + col_number] = new QPushButton();m_buttons[line_number*5 + col_number]->setText(btnText[line_number*5 + col_number]);grid->addWidget(m_buttons[line_number*5 + col_number], line_number, col_number);}}container->addWidget(edit);container->addLayout(grid);centralWidget()->setLayout(container);this->resize(300, 300);
}
网格布局技巧
QFormLayout
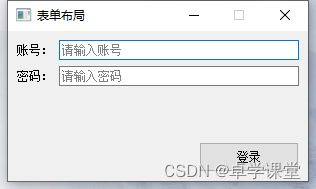
QFormLayout基本使用
表单布局,一般适用于提交数据form表单。比如: 登录,注册类似的场景
#include "mainwindow.h"
#include <QApplication>
#include <QPushButton>
#include <QVBoxLayout>
#include <QHBoxLayout>
#include <QGroupBox>
#include <QRadioButton>
#include <QStringList>
#include <QLineEdit>
#include <QGridLayout>
#include <QFormLayout>
#include<QTextCodec>
#define chineseToQString(pChineseText)  QTextCodec::codecForName("GB2312")->toUnicode(pChineseText)MainWindow::MainWindow(QWidget *parent): QMainWindow(parent)
{this->setWindowTitle(chineseToQString("表单布局"));QWidget* w=new QWidget;setCentralWidget(w);QVBoxLayout* container=new QVBoxLayout;QFormLayout* form_layout = new QFormLayout();QLineEdit* edit1 = new QLineEdit();edit1->setPlaceholderText(chineseToQString("请输入账号"));form_layout->addRow(chineseToQString("账号:"), edit1);QLineEdit* edit2 = new QLineEdit();edit2->setPlaceholderText(chineseToQString("请输入密码"));form_layout->addRow((chineseToQString("密码:")), edit2);QPushButton* login_btn = new QPushButton(chineseToQString("登录"));login_btn->setFixedSize(100, 30);container->addLayout(form_layout);container->addWidget(login_btn,1,Qt::AlignRight);centralWidget()->setLayout(container);this->setFixedSize(300, 150);
}
表单布局技巧
QStackedLayout
QStackedLayout基本使用
抽屉式布局,或叫堆叠布局,提供了多页面切换的布局,一次只能看到一个界面。
#include "mainwindow.h"
#include <QApplication>
#include <QPushButton>
#include <QVBoxLayout>
#include <QHBoxLayout>
#include <QGroupBox>
#include <QRadioButton>
#include <QStringList>
#include <QLineEdit>
#include <QGridLayout>
#include <QFormLayout>
#include <QTextCodec>
#include <QListWidget>
#include <QLabel>
#include <QStackedLayout>
#define chineseToQString(pChineseText)  QTextCodec::codecForName("GB2312")->toUnicode(pChineseText)MainWindow::MainWindow(QWidget *parent): QMainWindow(parent)
{this->setWindowTitle(chineseToQString("抽屉/堆叠布局"));QWidget* w=new QWidget;setCentralWidget(w);QListWidget *listWidget = new QListWidget(); //创建一个列表listWidget->setMinimumWidth(150);listWidget->setFont(QFont("宋体",14));listWidget->addItem("QPushButton");listWidget->addItem("QLabel");listWidget->addItem("QLineEdit");//新建 3 个窗口,分别放置文本框、按钮和单行输入框QWidget *widget1 = new QWidget;widget1->setMinimumSize(400,400);QVBoxLayout* widget1Layout = new QVBoxLayout;QVBoxLayout* widget2Layout = new QVBoxLayout;QVBoxLayout* widget3Layout = new QVBoxLayout;QPushButton *but1 = new QPushButton(chineseToQString("这是一个按钮1"));QPushButton *but2 = new QPushButton(chineseToQString("这是一个按钮2"));widget1Layout->addWidget(but1);widget1Layout->addWidget(but2);widget1->setLayout(widget1Layout);QWidget *widget2 = new QWidget;widget2->setMinimumSize(400,400);QLabel *lab1 = new QLabel(chineseToQString("这是一个文本框1"));QLabel *lab2 = new QLabel(chineseToQString("这是一个文本框2"));widget2Layout->addWidget(lab1);widget2Layout->addWidget(lab2);widget2->setLayout(widget2Layout);QWidget *widget3 = new QWidget;widget3->setMinimumSize(400,400);QLineEdit* edit1 = new QLineEdit(chineseToQString("这是一个单行输入框1"));QLineEdit* edit2 = new QLineEdit(chineseToQString("这是一个单行输入框2"));widget3Layout->addWidget(edit1);widget3Layout->addWidget(edit2);widget3->setLayout(widget3Layout);//创建一个分组布局,将 3 个窗口添加到分组控件中QStackedLayout *stackedLayout = new QStackedLayout;stackedLayout->addWidget(widget1);stackedLayout->addWidget(widget2);stackedLayout->addWidget(widget3);QPushButton* changeBtn = new QPushButton(chineseToQString("点击切换界面"));QVBoxLayout* vLayout = new QVBoxLayout;QHBoxLayout* container=new QHBoxLayout;vLayout->addWidget(listWidget);vLayout->addWidget(changeBtn);container->addLayout(vLayout,1);container->addLayout(stackedLayout,4);centralWidget()->setLayout(container);//连接信号和槽,实现当点击列表中的某一项,切换分组布局管理器显示的控件QObject::connect(listWidget,&QListWidget::currentRowChanged,stackedLayout,&QStackedLayout::setCurrentIndex);connect(changeBtn,&QPushButton::clicked,this,[=](){//也可以通过点击按钮循环切换int nextPage = (stackedLayout->currentIndex() + 1) % stackedLayout->count();stackedLayout->setCurrentIndex(nextPage);});this->setMinimumSize(600, 400);
}

抽屉布局技巧
QTabWidget
提供了便捷的分页显示功能,类似于编辑器中打开不同文件

#include "mainwindow.h"
#include <QApplication>
#include <QPushButton>
#include <QVBoxLayout>
#include <QHBoxLayout>
#include <QGroupBox>
#include <QRadioButton>
#include <QStringList>
#include <QLineEdit>
#include <QGridLayout>
#include <QFormLayout>
#include <QTextCodec>
#include <QListWidget>
#include <QLabel>
#include <QStackedLayout>
#include <QTextEdit>#define chineseToQString(pChineseText)  QTextCodec::codecForName("GB2312")->toUnicode(pChineseText)MainWindow::MainWindow(QWidget *parent): QMainWindow(parent)
{this->setWindowTitle(chineseToQString("QTabWidget"));QWidget* w=new QWidget;setCentralWidget(w);QTextEdit* text1 = new QTextEdit(this);QTextEdit* text2 = new QTextEdit(this);QTextEdit* text3 = new QTextEdit(this);text1->setStyleSheet("background-color: red");text2->setStyleSheet("background-color: blue");text3->setStyleSheet("background-color: green");QTabWidget* tWidget = new QTabWidget(this);tWidget->addTab(text1,"test1.txt");tWidget->addTab(text2,"test2.txt");tWidget->addTab(text3,"test3.txt");tWidget->setTabsClosable(true); //设置可以关闭connect(tWidget,&QTabWidget::tabCloseRequested,this,[=](int index){tWidget->removeTab(index);//点击关闭后关闭此Tab});QHBoxLayout* container=new QHBoxLayout;container->addWidget(tWidget);centralWidget()->setLayout(container);this->setMinimumSize(600, 400);
}
Splitter分割器
splitter允许用户通过拖动子部件之间的边界来控制它们的大小。任何数量的小部件都可以由单个拆分器控制。QSplitter的典型用法是创建几个小部件并使用 insertWidget()或addWidget()添加它们
#include "mainwindow.h"
#include <QApplication>
#include <QPushButton>
#include <QVBoxLayout>
#include <QHBoxLayout>
#include <QGroupBox>
#include <QRadioButton>
#include <QStringList>
#include <QLineEdit>
#include <QGridLayout>
#include <QFormLayout>
#include <QTextCodec>
#include <QListWidget>
#include <QLabel>
#include <QStackedLayout>
#include <QTextEdit>
#include <QSplitter>#define chineseToQString(pChineseText)  QTextCodec::codecForName("GB2312")->toUnicode(pChineseText)MainWindow::MainWindow(QWidget *parent): QMainWindow(parent)
{this->setWindowTitle(chineseToQString("QSplitter"));QWidget* w=new QWidget;setCentralWidget(w);auto text1 = new QTextEdit(this);auto text2 = new QTextEdit(this);QSplitter* splitter = new QSplitter(this);splitter->addWidget(text1);splitter->addWidget(text2);splitter->setOpaqueResize(true);//设置为预览模式:falseQVBoxLayout* container=new QVBoxLayout;container->addWidget(splitter);centralWidget()->setLayout(container);this->setMinimumSize(600, 400);
}鼠标放在中间的间隔上我们便可以左右拖动他们的距离

其它相关技巧
相关文章:
QT常见Layout布局器使用
布局简介 为什么要布局?通过布局拖动不影响鼠标拖动窗口的效果等优点.QT设计器布局比较固定,不方便后期修改和维护;在Qt里面布局分为四个大类 : 盒子布局:QBoxLayout 网格布局:QGridLayout 表单布局&am…...
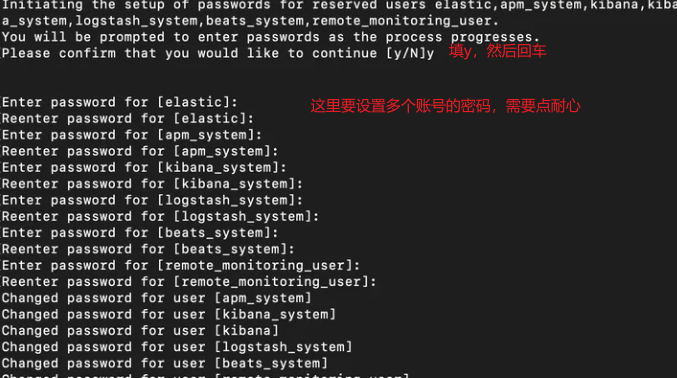
Elasticsearch8 - Docker安装Elasticsearch8.12.2
前言 最近在学习 ES,所以需要在服务器上装一个单节点的 ES 服务器环境:centos 7.9 安装 下载镜像 目前最新版本是 8.12.2 docker pull docker.elastic.co/elasticsearch/elasticsearch:8.12.2创建配置 新增配置文件 elasticsearch.yml http.host…...

还在为不知道怎么学习网络安全而烦恼吗?这篇文带你从入门级开始学习网络安全—认识网络安全
随着网络安全被列为国家安全战略的一部分,这个曾经细分的领域发展提速了不少,除了一些传统安全厂商以外,一些互联网大厂也都纷纷加码了在这一块的投入,随之而来的吸引了越来越多的新鲜血液不断涌入。 不同于Java、C/C等后端开发岗…...
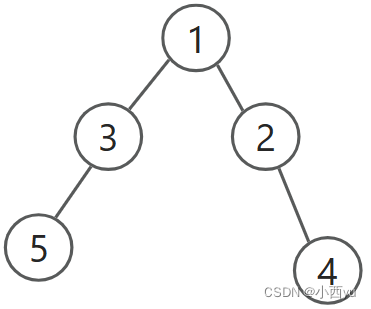
DFS基础——迷宫
迷宫 配套视频讲解 关于dfs和bfs的区别讲解。 对于上图,假设我们要找从1到5的最短路,那么我们用dfs去找,并且按照编号从大到小的顺序去找,首先找到的路径如下, 从节点1出发,我们发现节点2可以走ÿ…...
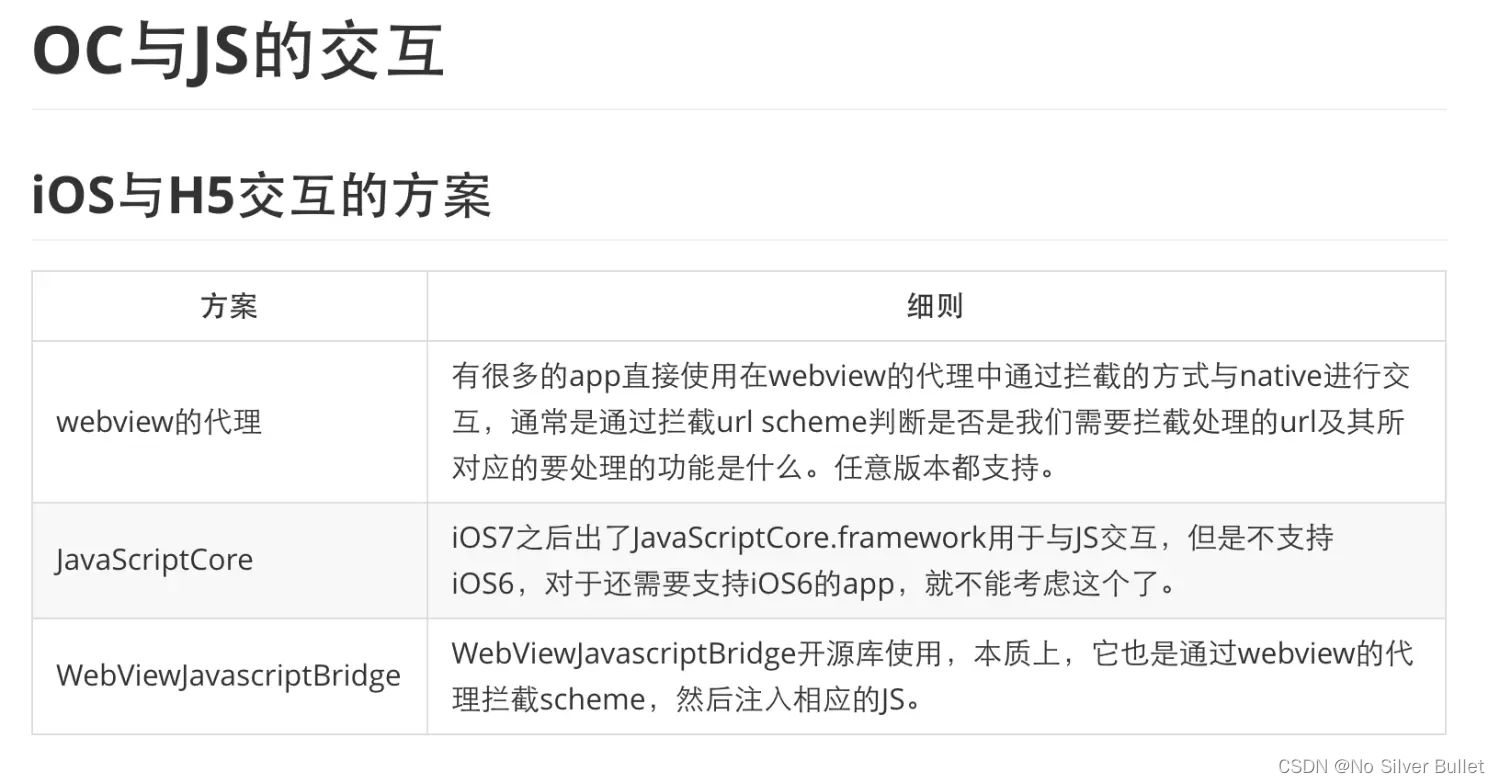
iOS开发进阶(九):OC混合开发嵌套H5应用并互相通信
文章目录 一、前言二、嵌套H5应用并实现双方通信2.1 WKWebView 与JS 原生交互2.1.1 H5页面嵌套2.1.2 常用代理方法2.1.3 OC调用JS方法2.1.4 JS调用OC方法 2.2 JSCore 实现原生与H5交互2.2.1 OC调用H5方法并传参2.2.2 H5给OC传参 2.3 UIWebView的基本用法2.3.1 H5页面嵌套2.3.2 …...

新人应该从哪几个方面掌握大数据测试?
什么是大数据 大数据是指无法在一定时间范围内用传统的计算机技术进行处理的海量数据集。 对于大数据的测试则需要不同的工具、技术、框架来进行处理。 大数据的体量大、多样化和高速处理所涉及的数据生成、存储、检索和分析使得大数据工程师需要掌握极其高的技术功底。 需要你…...

linux debian运行pip报错ssl tsl module in Python is not available
写在前面 ① 在debian 8上升级了Python 3.8.5 ② 升级了openssl 1.1.1 问题描述 在运行pip命令时提示如下错误 pip is configured with locations that require TLS/SSL, however the ssl module in Python is not available.尝试了大神推荐的用如下方法重新编译安装python,发…...

宝塔设置限制ip后,ip改了之后 ,登陆不上了
前言 今天作死,在宝塔面板设置界面,将访问面板的ip地址限制成只有自己电脑的ip才能访问,修改之后直接人傻了,“403 forbidden”。吓得我直接网上一通搜索,还好,解决方法非常简单。 解决方法 打开ssh客户…...

解锁新功能,Dynadot现支持BITPAY平台虚拟货币
Dynadot现已支持虚拟货币付款!借助与BitPay平台的合作,Dynadot为您提供了多种安全的虚拟货币选择。我们深知每位客户都有自己偏好的支付方式,因此我们努力扩大了支付方式范围。如果您对这一新的支付方式感兴趣,在结账时您可以尝试…...

Android下的Touch事件分发详解
文章目录 一、事件传递路径二、触摸事件的三个关键方法2.1 dispatchTouchEvent(MotionEvent ev)2.2 onInterceptTouchEvent(MotionEvent ev)2.3 onTouchEvent(MotionEvent event) 三、ViewGroup中的dispatchTouchEvent实现四、总结 在Android系统中,触摸事件的分发和…...

uniapp的配置文件、入口文件、主组件、页面管理部分
pages.json 配置文件,全局页面路径配置,应用的状态栏、导航条、标题、窗口背景色设置等 main.js 入口文件,主要作用是初始化vue实例、定义全局组件、使用需要的插件如 vuex,注意uniapp无法使用vue-router,路由须在pag…...

B端设计:如何让UI组件库成为助力,而不是阻力。
首发2023-09-24 15:42贝格前端工场 Hi,我是大千UI工场,网上的UI组件库琳琅满目,比如elementUI、antdesign、iview等等,甚至很多前端框架,也出了很多UI组件,如若依、Layui、bootstrap等等,作为U…...
敏捷开发最佳实践:学习与改进维度实践案例之会诊式培养敏捷教练
自组织团队能够定期反思并采取针对性行动来提升人效,但2022年的敏捷调研发现,70%的中国企业在学习和改进方面仍停留在团队级。本节实践案例将分享“会诊式培养敏捷教练”的具体做法,突出了敏捷以人为本的学习和改进,强调了通过人员…...
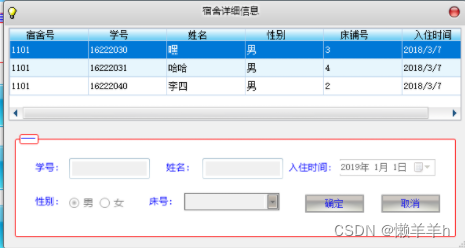
C#宿舍信息管理系统
简介 功能 1.发布公告 2.地理信息与天气信息的弹窗 3.学生信息的增删改查 4.宿舍信息的增删改查 5.管理员信息的增删改查 6.学生对宿舍物品的报修与核实 7.学生提交请假与销假 8.管理员对保修的审批 9.管理员对请假的审批 技术 1.采用C#\Winform开发的C\S系统 2.采用MD5对数据…...

测试环境搭建整套大数据系统(十三:设置开机自启动)
一:编写程序启动命令脚本 vim /root/start.sh二:编写启动脚本 cd /etc/systemd/system vim start.service[Unit] DescriptionStart My Server Afternetwork.target[Service] Typeforking ExecStart/root/start start TimeoutSec0 RemainafterExityes G…...

算法练习第三十二天|122.买卖股票的最佳时机II、55. 跳跃游戏、45.跳跃游戏II
45. 跳跃游戏 II 55. 跳跃游戏 122.买卖股票的最佳时机II 122.买卖股票的最佳时机II class Solution {public int maxProfit(int[] prices) {int result 0;for(int i 1;i<prices.length;i){result Math.max(prices[i] - prices[i-1],0);}return result;} }跳跃游戏 cla…...
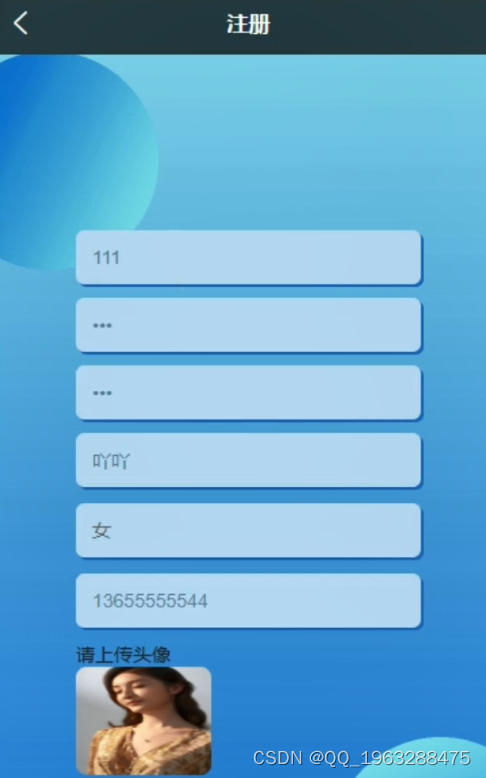
nodejs+vue反诈科普平台的设计与实现pythonflask-django-php
相比于以前的传统手工管理方式,智能化的管理方式可以大幅降低反诈科普平台的运营人员成本,实现了反诈科普平台的标准化、制度化、程序化的管理,有效地防止了反诈科普平台的随意管理,提高了信息的处理速度和精确度,能够…...

SpringBoot3+JPA+MySQL实现多数据源的读写分离(基于EntityManagerFactory)
1、简介 在Spring Boot中配置多个数据源并实现自动切换EntityManager,这里我编写了一个RoutingEntityManagerFactory和AOP(面向切面编程)的方式来实现。 这里我配置了两个数据源:primary和secondary,其中primary主数…...
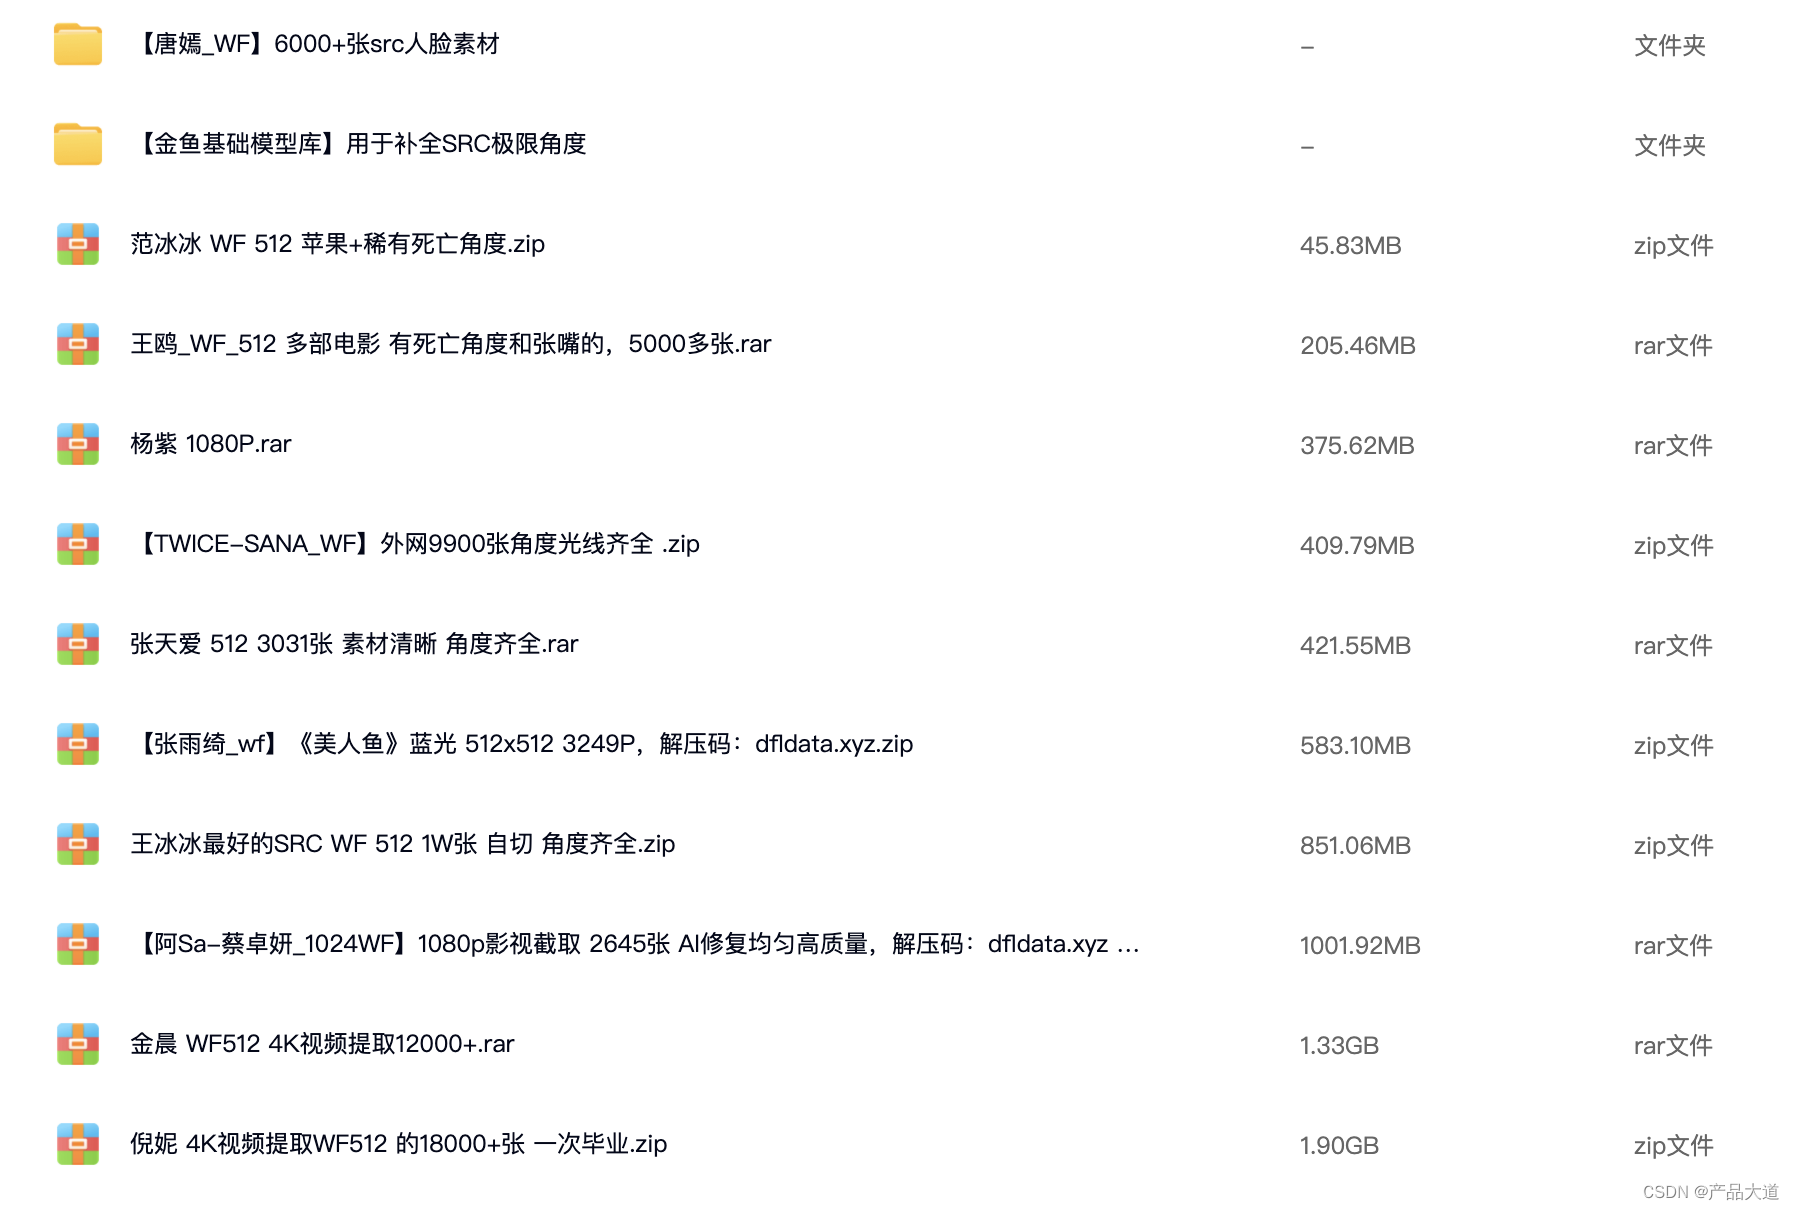
10万+SRC高质量稀有明星人脸素材唐嫣杨紫金晨倪妮蔡卓妍张雨绮合集
素材下载:点击下载 DFL模型训练用,高质量SRC素材合集: 【唐嫣_WF】6000张src人脸素材【金鱼基础模型库】用于补全SRC极限角度范冰冰 WF 512 苹果稀有死亡角度.zip王鸥_WF_512 多部电影 有死亡角度和张嘴的,5000多张.rar杨紫 108…...

目标检测中的mAP计算原理和源码实现
简介 在目标检测任务中,mAP(mean Average Precision,平均精度均值)是一个非常重要的评价指标,用于衡量模型在多个类别上的平均性能。它综合考虑了模型在不同召回率下的精确率,能够全面反映模型在检测任务中…...

保姆级教程:用iSYSTEM winIDEA和iC5000给S32K148烧录程序,附完整配置流程
从零掌握iSYSTEM工具链:S32K148开发板烧录与调试全流程实战第一次接触iSYSTEM的winIDEA和iC5000仿真器时,很多嵌入式开发者都会感到无从下手。不同于常见的开源工具链,这套专业级开发环境在汽车电子和工业控制领域有着广泛应用,尤…...

LLM API安全攻防实战:从提示词注入到自动化测试方案
1. 项目概述:被忽视的LLM API安全前线最近在帮几个团队做上线前的安全审计,发现一个挺有意思的现象:大家对于传统API的鉴权、限流、SQL注入这些常规检查已经形成了肌肉记忆,但一旦涉及到LLM(大语言模型)的A…...
)
从测速到配置:一套完整的cFosSpeed网络加速保姆级教程(适用于小白)
从零开始掌握cFosSpeed:网络加速全流程实战指南对于经常进行在线游戏、视频会议或大文件传输的用户来说,网络延迟和带宽利用率低下往往是影响体验的关键痛点。cFosSpeed作为一款专业的网络流量优化工具,能够显著改善这些问题,但许…...

别再让模型在Unity里‘抽风’了!Blender导出FBX到Unity的7步避坑自查清单
别再让模型在Unity里‘抽风’了!Blender导出FBX到Unity的7步避坑自查清单当你花了三天三夜精心雕琢的Blender模型,导入Unity后却变成了一团旋转错乱、贴图闪烁的"抽象艺术",那种崩溃感每个3D开发者都懂。本文将用实战经验帮你建立一…...

Taurus多执行器对比实战:JMeter/Gatling/Locust统一压测方案
1. 为什么选Taurus做多执行器对比——不是为了炫技,而是为了少踩坑在性能测试领域,我见过太多团队卡在“选型”这一步:刚招来一个会写JMeter脚本的工程师,项目突然要压测WebSocket接口,发现JMeter原生支持弱、插件维护…...
)
双系统Ubuntu磁盘告急?别重装!用GParted无损扩容保姆级教程(附U盘启动盘制作)
双系统Ubuntu磁盘告急?别重装!用GParted无损扩容保姆级教程(附U盘启动盘制作)当你在Windows和Ubuntu双系统环境下工作时,是否遇到过这样的窘境:当初安装时给Ubuntu分配的空间捉襟见肘,而Windows…...

GEO生成引擎优化:当AI成为信息分发的主角,品牌如何抢占对话窗口?
当用户不再"搜索-浏览",而是直接"AI提问-获取答案",传统SEO的逻辑正在被彻底改写。2026年,GEO(Generative Engine Optimization,生成式引擎优化)已经从概念走向规模化落地。本文从技术…...

通过TaotokenCLI工具一键配置开发环境接入参数
🚀 告别海外账号与网络限制!稳定直连全球优质大模型,限时半价接入中。 👉 点击领取海量免费额度 通过Taotoken CLI工具一键配置开发环境接入参数 对于需要接入多个大模型服务的开发者而言,手动配置每个项目的API密钥、…...

解决claude code频繁封号与token不足的taotoken接入方案
🚀 告别海外账号与网络限制!稳定直连全球优质大模型,限时半价接入中。 👉 点击领取海量免费额度 解决Claude Code频繁封号与Token不足的Taotoken接入方案 1. 问题背景:Claude Code用户面临的挑战 对于依赖Claude Cod…...

如何快速无损转换B站m4s视频:完整工具使用指南
如何快速无损转换B站m4s视频:完整工具使用指南 【免费下载链接】m4s-converter 一个跨平台小工具,将bilibili缓存的m4s格式音视频文件合并成mp4 项目地址: https://gitcode.com/gh_mirrors/m4/m4s-converter 你是否曾为B站缓存视频无法在其他设备…...