Kubernetes(K8S)学习(二):K8S常用组件
K8S常用组件
- 一、 Controllers
- 1、ReplicationController(RC)
- 2、ReplicaSet(RS)
- 3、Deployment
- 二、Labels and Selectors
- 三、Namespace(命名空间)
- 1、简介
- 2、测试
- 2.1、创建namespace
- 2.2、创建pod
- 四、Network
- 1、集群内:同一个Pod中的容器通信
- 2、集群内:Pod之间的通信
- 3、集群内:通过Service-Cluster IP通信
- 4、Pod访问外部服务
- 5、外部服务访问集群中的Pod(通过Service-NodePort通信)
- 6、外部服务访问集群中的Pod(通过Service-LoadBalance通信)
一、 Controllers
官网:https://kubernetes.io/docs/concepts/workloads/controllers/
1、ReplicationController(RC)
官网:https://kubernetes.io/docs/concepts/workloads/controllers/replicationcontroller/
1.1、简介
ReplicationController确保任何时期都在运行指定数量的Pod副本。 换句话说,ReplicationController确保一个容器或一组相同的容器始终处于可用状态。
- Pod期待的副本数(replicas)
- 用于筛选目标Pod的Label Selector
- 当Pod的副本数量小于预期数量时,用于创建新Pod的Pod模板(template)
也就是说通过RC实现了集群中Pod的高可用,减少了传统IT环境中手工运维的工作。
常见配置参数:
- (1)kind:表示要新建对象的类型。
- (2)spec.selector:表示需要管理的Pod的label,这里表示包含。
- (3)app: nginx的label的Pod都会被该RC管理。
- (4)spec.replicas:表示受此RC管理的Pod需要运行的副本数。
- (5)spec.template:表示用于定义Pod的模板,比如Pod名称、拥有的label以及Pod中运行的应用等。
通过改变RC里Pod模板中的镜像版本,可以实现Pod的升级功能。
常用命令:
- (1)依据yaml文件配置创建pod
kubectl apply -f yaml文件名- (2)扩/缩容命令
kubectl scale rc nginx --replicas=指定扩/缩容副本数量
1.2、测试
(1)创建nginx_replication.yaml
创建nginx_replication.yaml文件:
[root@m test]# vi nginx_replication.yaml
内容如下(replicas: 3,即创建3个副本):
apiVersion: v1
kind: ReplicationController
metadata:name: nginx
spec:replicas: 3selector:app: nginxtemplate:metadata:name: nginxlabels:app: nginxspec:containers:- name: nginximage: nginxports:- containerPort: 80
(2)根据yaml创建pod
[root@m test]# kubectl apply -f nginx_replication.yaml
(3)查看pod、查看RC
# 查看pod
[root@m test]# kubectl get pods -o wide
NAME          READY   STATUS    RESTARTS   AGE    IP               NODE   NOMINATED NODE   READINESS GATES
nginx-c57tk   1/1     Running   0          109s   192.168.190.69   w1     <none>           <none>
nginx-dhv9m   1/1     Running   0          109s   192.168.190.68   w1     <none>           <none>
nginx-v5cbm   1/1     Running   0          109s   192.168.80.195   w2     <none>           <none>
[root@m test]# #查看RC
[root@m test]# kubectl get rc
NAME    DESIRED   CURRENT   READY   AGE
nginx   3         3         3       2m12s
[root@m test]#
(4)尝试删除一个pod
#(1)删除
[root@m test]# kubectl delete pods nginx-v5cbm
pod "nginx-v5cbm" deleted
[root@m test]##(2)查看pod(发现又自动创建了一个新的)
[root@m test]# kubectl get pods -o wide
NAME          READY   STATUS    RESTARTS   AGE     IP               NODE   NOMINATED NODE   READINESS GATES
nginx-9f4ht   1/1     Running   0          22s     192.168.80.196   w2     <none>           <none>
nginx-c57tk   1/1     Running   0          3m36s   192.168.190.69   w1     <none>           <none>
nginx-dhv9m   1/1     Running   0          3m36s   192.168.190.68   w1     <none>           <none>
[root@m test]#
(5)对pod进行扩/缩容
#(1)使用RC进行扩容(5个副本)
[root@m test]# kubectl scale rc nginx --replicas=5
replicationcontroller/nginx scaled
[root@m test]# #(2)查看pod(发现变成了5个副本,分布再集群节点上)
[root@m test]# kubectl get pods -o wide
NAME          READY   STATUS    RESTARTS   AGE     IP               NODE   NOMINATED NODE   READINESS GATES
nginx-9f4ht   1/1     Running   0          2m57s   192.168.80.196   w2     <none>           <none>
nginx-c57tk   1/1     Running   0          6m11s   192.168.190.69   w1     <none>           <none>
nginx-dhv9m   1/1     Running   0          6m11s   192.168.190.68   w1     <none>           <none>
nginx-j68nb   1/1     Running   0          77s     192.168.80.197   w2     <none>           <none>
nginx-zfz4h   1/1     Running   0          77s     192.168.80.198   w2     <none>           <none>
[root@m test]#
(6)删除测试资源(自行选择)
#(1)使用RC进行扩容(5个副本)
[root@m test]# kubectl delete -f nginx_replication.yaml
replicationcontroller "nginx" deleted
[root@m test]# #(2)查看pod
[root@m test]# kubectl get pods
No resources found in default namespace.
[root@m test]# #(3)删除nginx_replication.yaml(自行选择)
[root@m test]# rm nginx_replication.yaml
rm:是否删除普通文件 "nginx_replication.yaml"?y
[root@m test]#
2、ReplicaSet(RS)
官网:https://kubernetes.io/docs/concepts/workloads/controllers/replicaset/
2.1、简介
ReplicaSet的目的是维护在任何给定时间运行的稳定的副本Pod集。 因此,它通常用于保证指定数量的相同Pod的可用性。
在Kubernetes v1.2时,RC就升级成了另外一个概念:
Replica Set,官方解释为“下一代RC”。ReplicaSet和RC没有本质的区别,kubectl中绝大部分作用于RC的命令同样适用于RS。
RS与RC唯一的区别是:RS支持基于集合的Label Selector(Set-based selector),而RC只支持基于等式的Label Selector(equality-based selector),这使得Replica Set的功能更强。
2.2、测试(见deployment)
一般情况下,我们很少单独使用Replica Set,它主要是被Deployment这个更高的资源对象所使用,从而形成一整套Pod创建、删除、更新的编排机制。当我们使用Deployment时,无须关心它是如何创建和维护Replica Set的,这一切都是自动发生的。同时,无需担心跟其他机制的不兼容问题(比如ReplicaSet不支持rolling-update但Deployment支持)。
apiVersion: extensions/v1beta1
kind: ReplicaSet
metadata:name: frontend
spec:matchLabels: tier: frontendmatchExpressions: - {key:tier,operator: In,values: [frontend]}template:...
说明:ReplicaSet的测试会结合下一节Deployment一起测试,参见下一节测试。
3、Deployment
官网:https://kubernetes.io/docs/concepts/workloads/controllers/deployment/
3.1、简介
Deployment为Pod和ReplicaSet提供了声明式更新(即我们可以随时知道当前Pod“部署”的进度)。
可以在Deployment中描述预期的状态,然后Deployment控制器将实际状态以受控的速率更改为所预期的状态。
创建一个Deployment对象来生成对应的Replica Set,并完成Pod副本的创建过程。我们可以检查Deploymnet的状态来看部署动作是否完成(Pod副本的数量是否达到预期的值)。
3.2、测试
(1)创建nginx_deployment.yaml文件
[root@m test]# vi nginx_deployment.yaml
内容如下(replicas: 3,即创建3个副本):
apiVersion: apps/v1
kind: Deployment
metadata:name: nginx-deploymentlabels:app: nginx
spec:replicas: 3selector:matchLabels:app: nginxtemplate:metadata:labels:app: nginxspec:containers:- name: nginximage: nginx:1.7.9ports:- containerPort: 80
(2)根据yaml文件创建pod
根据nginx_deployment.yaml文件创建pod:
[root@m test]# kubectl apply -f nginx_deployment.yaml
deployment.apps/nginx-deployment created
[root@m test]#
(3)查看pod创建情况
# 查看pod
[root@m test]# kubectl get pods -o wide
NAME                               READY   STATUS    RESTARTS   AGE   IP               NODE   NOMINATED NODE   READINESS GATES
nginx-deployment-6dd86d77d-kdvh2   1/1     Running   0          16m   192.168.80.204   w2     <none>           <none>
nginx-deployment-6dd86d77d-q4l7l   1/1     Running   0          16m   192.168.80.205   w2     <none>           <none>
nginx-deployment-6dd86d77d-s59nl   1/1     Running   0          16m   192.168.190.72   w1     <none>           <none>
[root@m test]# # 查看deployment
[root@m test]# kubectl get deployment
NAME               READY   UP-TO-DATE   AVAILABLE   AGE
nginx-deployment   3/3     3            3           18m
[root@m test]# # 查看RS
[root@m test]# kubectl get rs
NAME                         DESIRED   CURRENT   READY   AGE
nginx-deployment-6dd86d77d   3         3         3       17m
[root@m test]#
查看pod创建情况命令(
可看到异常原因):
[root@m test]# kubectl describe pod
(4)查看nginx的版本
通过查看deployment来查看nginx版本:
# (1)查看nginx版本(通过deployment来查看nginx版本)
[root@m test]# kubectl get deployment -o wide
NAME               READY   UP-TO-DATE   AVAILABLE   AGE   CONTAINERS   IMAGES        SELECTOR
nginx-deployment   3/3     3            3           18m   nginx        nginx:1.7.9   app=nginx
[root@m test]# #(2)更新nginx镜像版本
[root@m test]# kubectl set image deployment nginx-deployment nginx=nginx:1.9.1
deployment.extensions/nginx-deployment image updated
[root@m test]# # (3)再次查看nginx版本
[root@m test]# kubectl get deployment -o wide
NAME               READY   UP-TO-DATE   AVAILABLE   AGE   CONTAINERS   IMAGES        SELECTOR
nginx-deployment   3/3     1            3           41m   nginx        nginx:1.9.1   app=nginx
[root@m test]#
(5)删除测试资源(自行选择)
#(1)删除pod
[root@m test]# kubectl delete -f nginx_deployment.yaml
deployment.apps "nginx-deployment" deleted
[root@m test]# #(2)删除nginx_deployment.yaml文件
[root@m test]# rm nginx_deployment.yaml
rm:是否删除普通文件 "nginx_deployment.yaml"?y
[root@m test]#
二、Labels and Selectors
官网:https://kubernetes.io/docs/concepts/overview/working-with-objects/labels/
Labels就是key/value键值对,可以打在任何资源或对象上。如,在前面的测试的yaml文件中,有很多label,就是给一些资源打上标签的。
例如:
apiVersion: v1
kind: Pod
metadata:name: nginx-podlabels:app: nginx
其中,名称为nginx-pod的pod,有一个label,key为app,value为nginx。
我们还可以将具有同一个label的pod,交给selector管理(如下):
apiVersion: apps/v1
kind: Deployment
metadata: name: nginx-deploymentlabels:app: nginx
spec:replicas: 3selector:             # 匹配具有同一个label属性的pod标签matchLabels:app: nginx         template:             # 定义pod的模板metadata:labels:app: nginx      # 定义当前pod的label属性,app为key,value为nginxspec:containers:- name: nginximage: nginx:1.7.9ports:- containerPort: 80
查看pod的label标签命令:
[root@m test]# kubectl get pods --show-labels
三、Namespace(命名空间)
1、简介
命名空间就是为了隔离不同的资源,比如:Pod、Service、Deployment等。可以在输入命令的时候指定命名空间-n,如果不指定,则使用默认的命名空间:default。
常用命令:
- (1)查看默认(default)命名空间的pod
[root@m test]# kubectl get pods- (2)查看指定命名空间(kube-system)的pod
[root@m test]# kubectl get pods -n kube-system- (3)查看当前命名空间
[root@m test]# kubectl get namespaces
或
[root@m test]# kubectl get ns- (4)查看指定命名空间(myns)下的所有资源对象
[root@m test]# kubectl get all -n myns- (5)查看所有命名空间下的pod
[root@m test]# kubectl get pods --all-namespaces
[root@m test]# kubectl get ns
NAME              STATUS   AGE
default           Active   44h
kube-node-lease   Active   44h
kube-public       Active   44h
kube-system       Active   44h
[root@m test]#
2、测试
2.1、创建namespace
(1)创建myns-namespace.yaml
[root@m test]# vi myns-namespace.yaml
内容:
apiVersion: v1
kind: Namespace
metadata:name: myns
(2)依据yaml配置创建namespace
[root@m test]# kubectl apply -f myns-namespace.yaml
namespace/myns created
[root@m test]#
(3)查看命名空间
[root@m test]# kubectl get ns

2.2、创建pod
(1)创建一个pod(在myns命名空间下创建)
创建nginx-pod.yaml文件:
[root@m test]# vi nginx-pod.yaml
内容:
apiVersion: v1
kind: Pod
metadata:name: nginx-podnamespace: myns
spec:containers:- name: nginx-containerimage: nginxports:- containerPort: 80
(2)依据yaml配置创建pod
注意: 此步骤的前提是
myns命名空间已经被创建成功。
[root@m test]# kubectl apply -f nginx-pod.yaml
pod/nginx-pod created
[root@m test]#
(3)查看myns命名空间下的Pod和资源
# 查看pod(default命名空间下的pod)
[root@m test]# kubectl get pods# 查看pod(myns命名空间下的pod)
[root@m test]# kubectl get pods -n myns
NAME        READY   STATUS    RESTARTS   AGE
nginx-pod   1/1     Running   0          81s
[root@m test]# # 查看所有资源对象(myns命名空间下的)
[root@m test]# kubectl get all -n myns# 查看pod(所有命名空间下的)
[root@m test]# kubectl get pods --all-namespaces
(4)删除测试资源(自行选择)
# (1)删除pod
[root@m test]# kubectl delete -f nginx-pod.yaml
pod "nginx-pod" deleted
[root@m test]# # (2)删除namespace
[root@m test]# kubectl delete -f myns-namespace.yaml
namespace "myns" deleted
[root@m test]# # (3)删除nginx-pod.yaml文件
[root@m test]# rm nginx-pod.yaml
rm:是否删除普通文件 "nginx-pod.yaml"?y
[root@m test]# # (4)删除myns-namespace.yaml文件
[root@m test]# rm myns-namespace.yaml
rm:是否删除普通文件 "myns-namespace.yaml"?y
[root@m test]#

四、Network
接下来,了解下Kubernetes网络通信相关的内容。
K8S最小的操作单位是Pod。
1、集群内:同一个Pod中的容器通信
Kubernetes中,每个Pod分配有一个唯一的IP地址。 Pod中的每个容器都共享网络命名空间,包括IP地址和网络端口,即同一个pod中的容器是共享网络IP地址和端口号的,通信畅通无阻。
思考: 如果通过容器的名称将如何进行通信呢?
答:需要将所有pod中的容器加入到同一个容器的网络中,我们把该容器称作为pod中的
pause container。
2、集群内:Pod之间的通信
我们都知道每个Pod会有独立的IP地址,这个IP地址是被Pod中所有的Container共享的,那么多个Pod之间的通信是通过这个IP地址进行的吗?
我们分析两个维度:
(1)集群中同一台机器中的Pod。
(2)集群中不同机器中的Pod。
2.1、测试准备
准备两个pod,一个nginx,一个busybox。
(1)创建并编辑nginx_pod.yaml文件
[root@m test]# vi nginx_pod.yaml
内容:
apiVersion: v1
kind: Pod
metadata:name: nginx-podlabels:app: nginx
spec:containers:- name: nginx-containerimage: nginxports:- containerPort: 80
(2)创建并编辑busybox_pod.yaml文件
[root@m test]# vi busybox_pod.yaml
内容:
apiVersion: v1
kind: Pod
metadata:name: busyboxlabels:app: busybox
spec:containers:- name: busyboximage: busyboxcommand: ['sh', '-c', 'echo The app is running! && sleep 3600']
(3)创建两个pod,并查看
#(1)依据yaml配置创建nginx_pod
[root@m test]# kubectl apply -f nginx_pod.yaml
pod/nginx-pod created
[root@m test]# #(2)依据yaml配置创建busybox_pod
[root@m test]# kubectl apply -f busybox_pod.yaml
pod/busybox created
[root@m test]# #(3)查看pod
[root@m test]# kubectl get pod -o wide
NAME        READY   STATUS    RESTARTS   AGE   IP               NODE   NOMINATED NODE   READINESS GATES
busybox     1/1     Running   0          38s   192.168.80.208   w2     <none>           <none>
nginx-pod   1/1     Running   0          77s   192.168.190.75   w1     <none>           <none>
[root@m test]#
其中,nginx-pod的IP为192.168.190.75,分布于w1(worker01)节点;busybox-pod的IP为192.168.80.208,分布于w2(worker02)节点。
2.2、测试:同一个集群中同一台机器节点
说明: 在准备环境中,
(1)nginx-pod的IP为192.168.190.75,分布于w1(worker01)节点;
(2)busybox-pod的IP为192.168.80.208,分布于w2(worker02)节点。
(1)在worker01节点,ping本节点IP(ping成功)
[root@w1 ~]# ping 192.168.190.75
(2)在worker01节点,curl本节点IP(curl成功)
[root@w1 ~]# curl 192.168.190.75
<!DOCTYPE html>
<html>
<head>
<title>Welcome to nginx!</title>
<style>body {width: 35em;margin: 0 auto;font-family: Tahoma, Verdana, Arial, sans-serif;}
</style>
</head>
<body>
<h1>Welcome to nginx!</h1>
<p>If you see this page, the nginx web server is successfully installed and
working. Further configuration is required.</p><p>For online documentation and support please refer to
<a href="http://nginx.org/">nginx.org</a>.<br/>
Commercial support is available at
<a href="http://nginx.com/">nginx.com</a>.</p><p><em>Thank you for using nginx.</em></p>
</body>
</html>
[root@w1 ~]#
2.3、测试:同一个集群中不同机器节点
说明: 在准备环境中,
(1)nginx-pod的IP为192.168.190.75,分布于w1(worker01)节点;
(2)busybox-pod的IP为192.168.80.208,分布于w2(worker02)节点。
注意:worker01上的nginx会监听80端口,所以使用curl测试时,master和worker02均能curl测通,但反之不能。
(1)在worker02节点,ping测试worker01节点中nginx-pod的IP(ping成功)
[root@w2 ~]# ping 192.168.190.75
(2)在worker02节点,curl测试worker01节点中nginx-pod的IP(curl成功)
[root@w2 ~]# curl 192.168.190.75
<!DOCTYPE html>
<html>
<head>
<title>Welcome to nginx!</title>
<style>body {width: 35em;margin: 0 auto;font-family: Tahoma, Verdana, Arial, sans-serif;}
</style>
</head>
<body>
<h1>Welcome to nginx!</h1>
<p>If you see this page, the nginx web server is successfully installed and
working. Further configuration is required.</p><p>For online documentation and support please refer to
<a href="http://nginx.org/">nginx.org</a>.<br/>
Commercial support is available at
<a href="http://nginx.com/">nginx.com</a>.</p><p><em>Thank you for using nginx.</em></p>
</body>
</html>
[root@w2 ~]#
(3)在worker01节点,ping测试worker02节点中busybox-pod的IP(ping成功)
[root@w1 ~]# ping 192.168.80.208
(4)在master节点
说明: 在准备环境中,
(1)nginx-pod的IP为192.168.190.75,分布于w1(worker01)节点;
(2)busybox-pod的IP为192.168.80.208,分布于w2(worker02)节点。
① ping测试worker02节点中busybox-pod的IP(ping成功)
[root@m test]# ping 192.168.80.208
② ping测试worker01节点中nginx-pod的IP(ping成功)
[root@m test]# ping 192.168.190.75
③ curl测试worker01节点中nginx-pod的IP(curl成功)
[root@m test]# curl 192.168.190.75
<!DOCTYPE html>
<html>
<head>
<title>Welcome to nginx!</title>
<style>body {width: 35em;margin: 0 auto;font-family: Tahoma, Verdana, Arial, sans-serif;}
</style>
</head>
<body>
<h1>Welcome to nginx!</h1>
<p>If you see this page, the nginx web server is successfully installed and
working. Further configuration is required.</p><p>For online documentation and support please refer to
<a href="http://nginx.org/">nginx.org</a>.<br/>
Commercial support is available at
<a href="http://nginx.com/">nginx.com</a>.</p><p><em>Thank you for using nginx.</em></p>
</body>
</html>
[root@m test]#
2.4、删除测试资源
#(1)删除2个pod
[root@m test]# kubectl delete -f nginx_pod.yaml
pod "nginx-pod" deleted
[root@m test]#
[root@m test]# kubectl delete -f busybox_pod.yaml
pod "busybox" deleted
[root@m test]# #(2)删除2个yaml配置文件
[root@m test]# rm  nginx_pod.yaml
rm:是否删除普通文件 "nginx_pod.yaml"?y
[root@m test]#
[root@m test]# rm busybox_pod.yaml
rm:是否删除普通文件 "busybox_pod.yaml"?y
[root@m test]#
3、集群内:通过Service-Cluster IP通信
Service官网:https://kubernetes.io/docs/concepts/services-networking/service/
对于上述的Pod虽然实现了集群内部互相通信,但是
Pod是不稳定的,比如通过Deployment管理Pod,随时可能对Pod进行扩缩容,这时候Pod的IP地址是变化的。能够有一个固定的IP,使得集群内能够访问。也就是之前在架构描述的时候所提到的,能够把相同或者具有关联的Pod,打上Label,组成Service。而Service有固定的IP,不管Pod怎么创建和销毁,都可以通过Service的IP进行访问。
Service将运行在一组Pod上的应用程序暴露(expose)为网络服务的抽象方法。
使用Kubernetes,您无需修改应用程序即可使用不熟悉的服务发现机制(unfamiliar service discovery mechanism)。 Kubernetes为Pods提供自己的IP地址和一组Pod的单个DNS名称,并且可以在它们之间进行负载平衡。
3.1、测试Service-Cluster IP
(1)创建并编辑whoami-deployment.yaml文件
[root@m ~]# vi whoami-deployment.yaml
内容(创建3个副本、端口:8000):
apiVersion: apps/v1
kind: Deployment
metadata:name: whoami-deploymentlabels:app: whoami
spec:replicas: 3selector:matchLabels:app: whoamitemplate:metadata:labels:app: whoamispec:containers:- name: whoamiimage: jwilder/whoamiports:- containerPort: 8000
(2)创建pod
[root@m test]# kubectl apply -f whoami-deployment.yaml
deployment.apps/whoami-deployment created
[root@m test]#
(3)查看pod、deployment
#(1)查看pod
[root@m test]# kubectl get pod -o wide
NAME                                 READY   STATUS    RESTARTS   AGE   IP               NODE   NOMINATED NODE   READINESS GATES
whoami-deployment-678b64444d-4l9sh   1/1     Running   0          15m   192.168.190.77   w1     <none>           <none>
whoami-deployment-678b64444d-5vb8x   1/1     Running   0          15m   192.168.80.210   w2     <none>           <none>
whoami-deployment-678b64444d-cvqhl   1/1     Running   0          15m   192.168.190.78   w1     <none>           <none>
[root@m test]# #(2)查看deployment
[root@m test]# kubectl get deployment
NAME                READY   UP-TO-DATE   AVAILABLE   AGE
whoami-deployment   3/3     3            3           3m1s
[root@m test]#
(4)在集群内正常访问pod
pod分布信息(端口:
8000)whoami-deployment-678b64444d-4l9sh 192.168.190.77 w1(worker01)
whoami-deployment-678b64444d-5vb8x 192.168.80.210 w2(worker02)
whoami-deployment-678b64444d-cvqhl 192.168.190.78 w1(worker01)
分别在3个节点通过curl访问pod,均可测通:
[root@m test]# curl 192.168.190.77:8000
I am whoami-deployment-678b64444d-4l9sh
[root@m test]# [root@m test]# curl 192.168.80.210:8000
I am whoami-deployment-678b64444d-5vb8x
[root@m test]# [root@m test]# curl 192.168.190.78:8000
I am whoami-deployment-678b64444d-cvqhl
[root@m test]#
(5)创建service并查看
#(1)查看Service(目前只有kubernetes,因为whoami-deployment的service还没有创建呢!)
[root@m test]# kubectl get svc
NAME         TYPE        CLUSTER-IP   EXTERNAL-IP   PORT(S)   AGE
kubernetes   ClusterIP   10.96.0.1    <none>        443/TCP   2d11h
[root@m test]# #(2)暴露Service(即创建Service)
[root@m test]# kubectl expose deployment whoami-deployment
service/whoami-deployment exposed
[root@m test]# #(3)再次查看Service(可以看到whoami-deployment的service已被创建)
[root@m test]# kubectl get svc
NAME                TYPE        CLUSTER-IP      EXTERNAL-IP   PORT(S)    AGE
kubernetes          ClusterIP   10.96.0.1       <none>        443/TCP    2d12h
whoami-deployment   ClusterIP   10.98.239.156   <none>        8000/TCP   13s
[root@m test]#
如上,可以发现有一个Cluster IP类型的service,名称为whoami-deployment,IP为10.98.239.156,端口为8000。
附: 删除service命令
kubectl delete service whoami-deployment
(6)通过Service的Cluster IP访问(10.98.239.156)
可以发现,通信成功,并进行了 负载平衡:
[root@m test]# curl 10.98.239.156:8000
I am whoami-deployment-678b64444d-4l9sh
[root@m test]# curl 10.98.239.156:8000
I am whoami-deployment-678b64444d-cvqhl
[root@m test]# curl 10.98.239.156:8000
I'm whoami-deployment-678b64444d-5vb8x
[root@m test]#
(7)查看service详细信息
查看whoami-deployment的service详情信息,发现有一个Endpoints连接了具体3个Pod(IP):
[root@m test]# kubectl describe svc whoami-deployment
Name:              whoami-deployment
Namespace:         default
Labels:            app=whoami
Annotations:       <none>
Selector:          app=whoami
Type:              ClusterIP
IP Families:       <none>
IP:                10.98.239.156
IPs:               <none>
Port:              <unset>  8000/TCP
TargetPort:        8000/TCP
Endpoints:         192.168.190.77:8000,192.168.190.78:8000,192.168.80.210:8000
Session Affinity:  None
Events:            <none>
[root@m test]#
(8)测试:pod扩容后,使用curl访问
#(1)对whoami-deployment的pod进行扩容成5个副本
[root@m test]# kubectl scale deployment whoami-deployment --replicas=5
deployment.extensions/whoami-deployment scaled
[root@m test]##(2)查看pod详情
[root@m test]# kubectl get pod -o wide
NAME                                 READY   STATUS    RESTARTS   AGE    IP               NODE   NOMINATED NODE   RE
whoami-deployment-678b64444d-4l9sh   1/1     Running   0          50m    192.168.190.77   w1     <none>           <n
whoami-deployment-678b64444d-5vb8x   1/1     Running   0          50m    192.168.80.210   w2     <none>           <n
whoami-deployment-678b64444d-cvqhl   1/1     Running   0          50m    192.168.190.78   w1     <none>           <n
whoami-deployment-678b64444d-q4wfj   1/1     Running   0          2m6s   192.168.190.79   w1     <none>           <n
whoami-deployment-678b64444d-x4tqg   1/1     Running   0          2m6s   192.168.80.211   w2     <none>           <n
[root@m test]# #(3)通过Service的Cluster IP访问(通信成功,并进行了负载平衡)
[root@m test]# curl 10.98.239.156:8000
I am whoami-deployment-678b64444d-cvqhl
[root@m test]# curl 10.98.239.156:8000
I am whoami-deployment-678b64444d-4l9sh
[root@m test]# curl 10.98.239.156:8000
I am whoami-deployment-678b64444d-q4wfj
[root@m test]# curl 10.98.239.156:8000
I am whoami-deployment-678b64444d-5vb8x
[root@m test]# curl 10.98.239.156:8000
I am whoami-deployment-678b64444d-x4tqg
[root@m test]#
(9)再次查看service具体信息
[root@m test]# kubectl describe svc whoami-deployment
Name:              whoami-deployment
Namespace:         default
Labels:            app=whoami
Annotations:       <none>
Selector:          app=whoami
Type:              ClusterIP
IP Families:       <none>
IP:                10.98.239.156
IPs:               <none>
Port:              <unset>  8000/TCP
TargetPort:        8000/TCP
Endpoints:         192.168.190.77:8000,192.168.190.78:8000,192.168.190.79:8000 + 2 more...
Session Affinity:  None
Events:            <none>
[root@m test]#
(10)测试总结
总结: Service存在的意义就是为了解决Pod的不稳定性,而上述探讨的就是关于Service的一种类型Cluster IP,只能供集群内访问。
(11)删除测试资源
#(1)删除pod
[root@m test]# kubectl delete -f whoami-deployment.yaml
deployment.apps "whoami-deployment" deleted
[root@m test]# #(2)删除service(删除whoami-deployment)
[root@m test]# kubectl delete svc whoami-deployment
service "whoami-deployment" deleted
[root@m test]# #(3)删除yaml配置文件
[root@m test]# rm whoami-deployment.yaml
rm:是否删除普通文件 "whoami-deployment.yaml"?y
[root@m test]#
4、Pod访问外部服务
比较简单,没太多好说的内容,直接访问即可。
5、外部服务访问集群中的Pod(通过Service-NodePort通信)
Service-NodePort也是Service的一种类型,可以通过NodePort的方式
说白了,因为外部能够访问到集群的物理机器IP,所以就是在集群中每台物理机器节点上暴露一个相同的端口,如:31689。
5.1、测试Service-NodePort
(1)创建并编辑whoami-deployment.yaml文件
创建whoami-deployment.yaml:
[root@m test]# vi whoami-deployment.yaml
内容:
apiVersion: apps/v1
kind: Deployment
metadata:name: whoami-deploymentlabels:app: whoami
spec:replicas: 3selector:matchLabels:app: whoamitemplate:metadata:labels:app: whoamispec:containers:- name: whoamiimage: jwilder/whoamiports:- containerPort: 8000
(2)创建pod
#(1)创建pod
[root@m test]# kubectl apply -f whoami-deployment.yaml
deployment.apps/whoami-deployment created
[root@m test]# #(2)查看pod
[root@m test]# kubectl get pod -o wide
NAME                                 READY   STATUS    RESTARTS   AGE   IP               NODE   NOMINATED NODE   READINESS GATES
whoami-deployment-678b64444d-dcgxn   1/1     Running   0          37s   192.168.80.212   w2     <none>           <none>
whoami-deployment-678b64444d-f7wxt   1/1     Running   0          37s   192.168.80.213   w2     <none>           <none>
whoami-deployment-678b64444d-nsqgp   1/1     Running   0          37s   192.168.190.80   w1     <none>           <none>
[root@m test]#
(3)创建service并查看
#(1)查看Service(目前只有kubernetes,因为whoami-deployment的service还没有创建呢!)
[root@m test]# kubectl get svc
NAME         TYPE        CLUSTER-IP   EXTERNAL-IP   PORT(S)   AGE
kubernetes   ClusterIP   10.96.0.1    <none>        443/TCP   2d12h
[root@m test]##(2)暴露Service(即创建Service)
[root@m test]# kubectl expose deployment whoami-deployment --type=NodePort
service/whoami-deployment exposed
[root@m test]# #(3)再次查看Service(可以看到whoami-deployment的service已被创建)
[root@m test]# kubectl get svc
NAME                TYPE        CLUSTER-IP      EXTERNAL-IP   PORT(S)          AGE
kubernetes          ClusterIP   10.96.0.1       <none>        443/TCP          2d13h
whoami-deployment   NodePort    10.99.165.184   <none>        8000:31689/TCP   5s
[root@m test]#
附:删除service命令
kubectl delete service whoami-deployment
(4)查看暴露在集群中各节点端口情况
如上,名为whoami-deployment的service,类型: NodePort,IP:10.99.165.184,端口:8000:31689/TCP
查看暴露在集群中各个物理机器节点上的端口情况:
常用端口查询命令:
- (1)lsof -i tcp:端口
- (2)netstat -ntlp | grep 端口
#(1)在master节点,查看端口
[root@m ~]# netstat -ntlp | grep 31689
tcp6       0      0 :::31689                :::*                    LISTEN      2856/kube-proxy
[root@m ~]# #(2)在worker01节点,查看端口
[root@w1 ~]# netstat -ntlp | grep 31689
tcp6       0      0 :::31689                :::*                    LISTEN      2519/kube-proxy
[root@w1 ~]# #(3)在worker02节点,查看端口
[root@w2 ~]# netstat -ntlp | grep 31689
tcp6       0      0 :::31689                :::*                    LISTEN      2461/kube-proxy
[root@w2 ~]#
(5)外部浏览器访问(通过集群各节点物理机IP和暴露的端口)
如上,名为whoami-deployment的service,类型: NodePort,IP:10.99.165.184,端口:8000:31689/TCP
其各物理机IP为:master节点IP:192.168.116.170 暴露的端口:31689
worker01节点IP:192.168.116.171 暴露的端口:31689
worker02节点IP:192.168.116.172 暴露的端口:31689
浏览器访问如下:

(6)测试总结
NodePort能够实现外部访问Pod的需求,唯一的缺点:占用了各个物理主机上的端口。
(7)删除测试资源
#(1)删除pod
[root@m test]# kubectl delete -f whoami-deployment.yaml
deployment.apps "whoami-deployment" deleted
[root@m test]# #(2)删除Service
[root@m test]# kubectl delete service whoami-deployment
service "whoami-deployment" deleted
[root@m test]# #(3)删除yaml配置文件
[root@m test]# rm whoami-deployment.yaml
rm:是否删除普通文件 "whoami-deployment.yaml"?y
[root@m test]#
6、外部服务访问集群中的Pod(通过Service-LoadBalance通信)
测试思路: 在K8S集群中部署tomcat,浏览器想要访问这个tomcat,也就是外部要访问该tomcat,用之前的Service-NodePort的方式是可以的,比如暴露一个32008端口,只需要访问http://192.168.161.170:32008即可。
6.1、测试环境准备
(1)创建并编辑my-tomcat.yaml文件
[root@m test]# vi my-tomcat.yaml
内容:
apiVersion: apps/v1
kind: Deployment
metadata:name: tomcat-deploymentlabels:app: tomcat
spec:replicas: 1selector:matchLabels:app: tomcattemplate:metadata:labels:app: tomcatspec:containers:- name: tomcatimage: tomcatports:- containerPort: 8080
---
apiVersion: v1
kind: Service
metadata:name: tomcat-service
spec:ports:- port: 80   protocol: TCPtargetPort: 8080selector:app: tomcattype: NodePort
(2)创建pod和service
根据my-tomcat.yaml文件,创建pod和service:
[root@m test]# kubectl apply -f my-tomcat.yaml
deployment.apps/tomcat-deployment created
service/tomcat-service created
[root@m test]#
(3)查看pod、deployment、service
#(1)查看pod
[root@m test]# kubectl get pod -o wide
NAME                                 READY   STATUS    RESTARTS   AGE    IP               NODE   NOMINATED NODE   READINESS GATES
tomcat-deployment-6b9d6f8547-56bz6   1/1     Running   0          2m9s   192.168.80.214   w2     <none>           <none>
[root@m test]# #(2)查看deployment
[root@m test]# kubectl get deployment
NAME                READY   UP-TO-DATE   AVAILABLE   AGE
tomcat-deployment   1/1     1            1           2m24s
[root@m test]# #(3)查看service
[root@m test]# kubectl get svc
NAME             TYPE        CLUSTER-IP      EXTERNAL-IP   PORT(S)        AGE
kubernetes       ClusterIP   10.96.0.1       <none>        443/TCP        2d20h
tomcat-service   NodePort    10.101.44.115   <none>        80:31427/TCP   2m32s
[root@m test]#
(4)删除测试资源
以下删除pod的同时,其对应的tomcat-service也会自动删除:
#(1)删除pod和service
[root@m test]# kubectl delete -f my-tomcat.yaml
deployment.apps "tomcat-deployment" deleted
service "tomcat-service" deleted
[root@m test]# # (2)删除yaml配置文件
[root@m test]# rm my-tomcat.yaml
rm:是否删除普通文件 "my-tomcat.yaml"?y
[root@m test]#
Service-NodePort的方式生产环境不推荐使用,那接下来就基于上述需求,使用Ingress实现访问tomcat的需求。
6.2、测试Ingress插件
Ingress插件官网:https://kubernetes.io/docs/concepts/services-networking/ingress/GitHub Ingress Nginx地址:https://github.com/kubernetes/ingress-nginxNginx Ingress Controller地址:https://kubernetes.github.io/ingress-nginx/
(1)Ingress简介
一个API对象,用于管理对集群中服务的外部访问,通常是HTTP。
Ingress可以提供负载平衡,SSL终端和基于名称的虚拟主机。
Ingress公开了从群集外部到群集内服务的HTTP和HTTPS路由 。流量路由由Ingress资源上定义的规则控制。
如下是一个简单的示例,其中Ingress将所有流量发送到一个Service:

可以将Ingress配置为提供服务可外部访问的URL,负载平衡流量,终止SSL / TLS并提供基于名称的虚拟主机。一个入口控制器负责履行入口,通常有一个负载均衡器,虽然它也可以配置您的边缘路由器或额外的前端,以帮助处理流量。
入口不会公开任意端口或协议。将HTTP和HTTPS以外的服务公开到Internet时,通常使用Service.Type = NodePort或 Service.Type = LoadBalancer类型的服务。
(1)创建并编辑mandatory.yaml文件
以Deployment方式创建Pod,该Pod为
Ingress Nginx Controller,要想让外界访问,可以通过Service的NodePort或者HostPort方式,这里选择HostPort,比如指定worker01运行
创建并编辑mandatory.yaml文件:
[root@m test]# vi mandatory.yaml
mandatory.yaml内容:
apiVersion: v1
kind: Namespace
metadata:name: ingress-nginxlabels:app.kubernetes.io/name: ingress-nginxapp.kubernetes.io/part-of: ingress-nginx---kind: ConfigMap
apiVersion: v1
metadata:name: nginx-configurationnamespace: ingress-nginxlabels:app.kubernetes.io/name: ingress-nginxapp.kubernetes.io/part-of: ingress-nginx---
kind: ConfigMap
apiVersion: v1
metadata:name: tcp-servicesnamespace: ingress-nginxlabels:app.kubernetes.io/name: ingress-nginxapp.kubernetes.io/part-of: ingress-nginx---
kind: ConfigMap
apiVersion: v1
metadata:name: udp-servicesnamespace: ingress-nginxlabels:app.kubernetes.io/name: ingress-nginxapp.kubernetes.io/part-of: ingress-nginx---
apiVersion: v1
kind: ServiceAccount
metadata:name: nginx-ingress-serviceaccountnamespace: ingress-nginxlabels:app.kubernetes.io/name: ingress-nginxapp.kubernetes.io/part-of: ingress-nginx---
apiVersion: rbac.authorization.k8s.io/v1beta1
kind: ClusterRole
metadata:name: nginx-ingress-clusterrolelabels:app.kubernetes.io/name: ingress-nginxapp.kubernetes.io/part-of: ingress-nginx
rules:- apiGroups:- ""resources:- configmaps- endpoints- nodes- pods- secretsverbs:- list- watch- apiGroups:- ""resources:- nodesverbs:- get- apiGroups:- ""resources:- servicesverbs:- get- list- watch- apiGroups:- ""resources:- eventsverbs:- create- patch- apiGroups:- "extensions"- "networking.k8s.io"resources:- ingressesverbs:- get- list- watch- apiGroups:- "extensions"- "networking.k8s.io"resources:- ingresses/statusverbs:- update---
apiVersion: rbac.authorization.k8s.io/v1beta1
kind: Role
metadata:name: nginx-ingress-rolenamespace: ingress-nginxlabels:app.kubernetes.io/name: ingress-nginxapp.kubernetes.io/part-of: ingress-nginx
rules:- apiGroups:- ""resources:- configmaps- pods- secrets- namespacesverbs:- get- apiGroups:- ""resources:- configmapsresourceNames:# Defaults to "<election-id>-<ingress-class>"# Here: "<ingress-controller-leader>-<nginx>"# This has to be adapted if you change either parameter# when launching the nginx-ingress-controller.- "ingress-controller-leader-nginx"verbs:- get- update- apiGroups:- ""resources:- configmapsverbs:- create- apiGroups:- ""resources:- endpointsverbs:- get---
apiVersion: rbac.authorization.k8s.io/v1beta1
kind: RoleBinding
metadata:name: nginx-ingress-role-nisa-bindingnamespace: ingress-nginxlabels:app.kubernetes.io/name: ingress-nginxapp.kubernetes.io/part-of: ingress-nginx
roleRef:apiGroup: rbac.authorization.k8s.iokind: Rolename: nginx-ingress-role
subjects:- kind: ServiceAccountname: nginx-ingress-serviceaccountnamespace: ingress-nginx---
apiVersion: rbac.authorization.k8s.io/v1beta1
kind: ClusterRoleBinding
metadata:name: nginx-ingress-clusterrole-nisa-bindinglabels:app.kubernetes.io/name: ingress-nginxapp.kubernetes.io/part-of: ingress-nginx
roleRef:apiGroup: rbac.authorization.k8s.iokind: ClusterRolename: nginx-ingress-clusterrole
subjects:- kind: ServiceAccountname: nginx-ingress-serviceaccountnamespace: ingress-nginx---apiVersion: apps/v1
kind: Deployment
metadata:name: nginx-ingress-controllernamespace: ingress-nginxlabels:app.kubernetes.io/name: ingress-nginxapp.kubernetes.io/part-of: ingress-nginx
spec:replicas: 1selector:matchLabels:app.kubernetes.io/name: ingress-nginxapp.kubernetes.io/part-of: ingress-nginxtemplate:metadata:labels:app.kubernetes.io/name: ingress-nginxapp.kubernetes.io/part-of: ingress-nginxannotations:prometheus.io/port: "10254"prometheus.io/scrape: "true"spec:# wait up to five minutes for the drain of connectionsterminationGracePeriodSeconds: 300serviceAccountName: nginx-ingress-serviceaccounthostNetwork: truenodeSelector:name: ingresskubernetes.io/os: linuxcontainers:- name: nginx-ingress-controllerimage: quay.io/kubernetes-ingress-controller/nginx-ingress-controller:0.26.1args:- /nginx-ingress-controller- --configmap=$(POD_NAMESPACE)/nginx-configuration- --tcp-services-configmap=$(POD_NAMESPACE)/tcp-services- --udp-services-configmap=$(POD_NAMESPACE)/udp-services- --publish-service=$(POD_NAMESPACE)/ingress-nginx- --annotations-prefix=nginx.ingress.kubernetes.iosecurityContext:allowPrivilegeEscalation: truecapabilities:drop:- ALLadd:- NET_BIND_SERVICE# www-data -> 33runAsUser: 33env:- name: POD_NAMEvalueFrom:fieldRef:fieldPath: metadata.name- name: POD_NAMESPACEvalueFrom:fieldRef:fieldPath: metadata.namespaceports:- name: httpcontainerPort: 80- name: httpscontainerPort: 443livenessProbe:failureThreshold: 3httpGet:path: /healthzport: 10254scheme: HTTPinitialDelaySeconds: 10periodSeconds: 10successThreshold: 1timeoutSeconds: 10readinessProbe:failureThreshold: 3httpGet:path: /healthzport: 10254scheme: HTTPperiodSeconds: 10successThreshold: 1timeoutSeconds: 10lifecycle:preStop:exec:command:- /wait-shutdown
---
说明: 在上面的mandatory.yaml中,
- (1)使用HostPort方式运行,需要增加配置(
上面已配置)hostNetwork: true- (2)搜索nodeSelector,并且要确保w1(worker01)节点上的80和443端口没有被占用。
- (3)需要注意,这里镜像拉取需要较长的时间。
(2)给worker01节点打lable
在master节点,给worker01节点打lable,确保nginx-controller运行到w1节点上:
[root@m test]# kubectl label node w1 name=ingress
node/w1 labeled
[root@m test]#
(3)应用mandatory.yaml
[root@m test]# kubectl apply -f mandatory.yaml
namespace/ingress-nginx created
configmap/nginx-configuration created
configmap/tcp-services created
configmap/udp-services created
serviceaccount/nginx-ingress-serviceaccount created
clusterrole.rbac.authorization.k8s.io/nginx-ingress-clusterrole created
role.rbac.authorization.k8s.io/nginx-ingress-role created
rolebinding.rbac.authorization.k8s.io/nginx-ingress-role-nisa-binding created
clusterrolebinding.rbac.authorization.k8s.io/nginx-ingress-clusterrole-nisa-binding created
deployment.apps/nginx-ingress-controller created
[root@m test]#
(4)查看所有资源/pod
说明: 等待全部资源创建完成,需要等待时间很长。
# (1)查看指定命名空间下的pod(确实分配到了worker01节点)
[root@m test]# kubectl get pod -o wide -n ingress-nginx
NAME                                        READY   STATUS    RESTARTS   AGE   IP                NODE   NOMINATED NODE   READINESS GATES
nginx-ingress-controller-7c66dcdd6c-nttzp   1/1     Running   0          37m   192.168.116.171   w1     <none>           <none>
[root@m test]# # (2)查看所有资源或对象
[root@m test]# kubectl get all -n ingress-nginx
NAME                                            READY   STATUS    RESTARTS   AGE
pod/nginx-ingress-controller-7c66dcdd6c-nttzp   1/1     Running   0          36mNAME                                       READY   UP-TO-DATE   AVAILABLE   AGE
deployment.apps/nginx-ingress-controller   1/1     1            1           36mNAME                                                  DESIRED   CURRENT   READY   AGE
replicaset.apps/nginx-ingress-controller-7c66dcdd6c   1         1         1       36m
[root@m test]#
(5)查看worker01节点的80和443端口
在worker01节点,查看80和443端口使用情况(可看到nginx占用):
[root@w1 ~]# lsof -i tcp:80[root@w1 ~]# lsof -i tcp:443
(6)创建并编辑tomcat.yaml
① 创建并编辑tomcat.yaml
[root@m test]# vi tomcat.yaml
内容:
apiVersion: apps/v1
kind: Deployment
metadata:name: tomcat-deploymentlabels:app: tomcat
spec:replicas: 1selector:matchLabels:app: tomcattemplate:metadata:labels:app: tomcatspec:containers:- name: tomcatimage: tomcatports:- containerPort: 8080
---
apiVersion: v1
kind: Service
metadata:name: tomcat-service
spec:ports:- port: 80   protocol: TCPtargetPort: 8080selector:app: tomcat
② 应用tomcat.yaml(创建tomcat的pod、service)
[root@m test]# kubectl apply -f tomcat.yaml
deployment.apps/tomcat-deployment created
service/tomcat-service created
[root@m test]#
③ 查看pod和service
#(1)查看pod
[root@m test]# kubectl get pod -o wide
NAME                                 READY   STATUS    RESTARTS   AGE   IP               NODE   NOMINATED NODE   READINESS GATES
tomcat-deployment-6b9d6f8547-4d4fx   1/1     Running   0          80s   192.168.80.215   w2     <none>           <none>
[root@m test]# #(2)查看service
[root@m test]# kubectl get svc
NAME             TYPE        CLUSTER-IP       EXTERNAL-IP   PORT(S)   AGE
kubernetes       ClusterIP   10.96.0.1        <none>        443/TCP   2d21h
tomcat-service   ClusterIP   10.100.157.237   <none>        80/TCP    87s
[root@m test]# #(3)查看tomcat-service详情(主要看其Endpoints属性)
[root@m test]# kubectl describe svc tomcat-service
Name:              tomcat-service
Namespace:         default
Labels:            <none>
Annotations:       <none>
Selector:          app=tomcat
Type:              ClusterIP
IP Families:       <none>
IP:                10.100.157.237
IPs:               <none>
Port:              <unset>  80/TCP
TargetPort:        8080/TCP
Endpoints:         192.168.80.215:8080
Session Affinity:  None
Events:            <none>
[root@m test]#
(7)创建Ingress,并定义转发规则
① 创建并编辑nginx-ingress.yaml
[root@m test]# vi nginx-ingress.yaml
内容:
#ingress
apiVersion: extensions/v1beta1
kind: Ingress
metadata:name: nginx-ingress
spec:rules:- host: tomcat.jack.comhttp:paths:- path: /backend:serviceName: tomcat-serviceservicePort: 80
② 应用nginx-ingress.yaml(创建ingress)
[root@m test]# kubectl apply -f nginx-ingress.yaml
ingress.extensions/nginx-ingress created
[root@m test]#
③ 查看ingress
#(1)查看ingress
[root@m test]# kubectl get ingress
NAME            HOSTS             ADDRESS   PORTS   AGE
nginx-ingress   tomcat.jack.com             80      27s
[root@m test]# #(2) 查看ingress详情
[root@m test]# kubectl describe ingress nginx-ingress
Name:             nginx-ingress
Namespace:        default
Address:
Default backend:  default-http-backend:80 (<error: endpoints "default-http-backend" not found>)
Rules:Host             Path  Backends----             ----  --------tomcat.jack.com  /   tomcat-service:80 (192.168.80.215:8080)
Annotations:       <none>
Events:Type    Reason  Age   From                      Message----    ------  ----  ----                      -------Normal  CREATE  117s  nginx-ingress-controller  Ingress default/nginx-ingress
[root@m test]#
(8)通过域名访问
① 修改hosts文件,配置域名解析
修改windows系统的hosts文件(C:\Windows\System32\drivers\etc\hosts),添加dns解析:

注: 其中,192.168.116.171为worker01节点IP,其他IP不可以,因为我们在创建时就指定了创建在worker01节点。
②浏览器访问(通过ingress配置的域名访问)
访问URL:http://tomcat.jack.com

(9)Ingress总结
总结:如果以后想要使用Ingress网络,其实只要定义ingress,service和pod即可,前提是要保证nginx ingress controller已经配置好了。
(10)删除测试资源
#(1)删除pod和service等资源
[root@m test]# kubectl delete -f nginx-ingress.yaml
[root@m test]# kubectl delete -f tomcat.yaml
[root@m test]# kubectl delete -f mandatory.yaml#(2)删除yaml配置文件
[root@m test]# rm nginx-ingress.yaml
[root@m test]# rm tomcat.yaml
[root@m test]# rm mandatory.yaml
相关文章:
Kubernetes(K8S)学习(二):K8S常用组件
K8S常用组件 一、 Controllers1、ReplicationController(RC)2、ReplicaSet(RS)3、Deployment 二、Labels and Selectors三、Namespace(命名空间)1、简介2、测试2.1、创建namespace2.2、创建pod 四、Network1、集群内:同一个Pod中的容器通信2、…...

如何使用群晖WebDAV实现固定公网地址同步Zotero文献管理器
文章目录 前言1. Docker 部署 Trfɪk2. 本地访问traefik测试3. Linux 安装cpolar4. 配置Traefik公网访问地址5. 公网远程访问Traefik6. 固定Traefik公网地址 前言 Trfɪk 是一个云原生的新型的 HTTP 反向代理、负载均衡软件,能轻易的部署微服务。它支持多种后端 (D…...
【JavaSE】初识线程,线程与进程的区别
文章目录 ✍线程是什么?✍线程和进程的区别✍线程的创建1.继承 Thread 类2.实现Runnable接口3.匿名内部类4.匿名内部类创建 Runnable ⼦类对象5.lambda 表达式创建 Runnable ⼦类对象 ✍线程是什么? ⼀个线程就是⼀个 “执行流”. 每个线程之间都可以按…...
等级考试三级考试真题2023年9月——持续更新.....)
全国青少年软件编程(Python)等级考试三级考试真题2023年9月——持续更新.....
青少年软件编程(Python)等级考试试卷(三级) 分数:100 题数:38 一、单选题(共25题,共50分) 1.有一组数据存在列表中,things[“桌子”,“椅子”,“茶几”,“沙发”,“西瓜”,“苹果”,“草莓”,“…...
react-navigation:
我的仓库地址:https://gitee.com/ruanjianbianjing/bj-hybrid react-navigation: 学习文档:https://reactnavigation.org 安装核心包: npm install react-navigation/native 安装react-navigation/native本身依赖的相关包: react-nativ…...

nginx负载均衡模式
轮询 (Round Robin) 用法:这是Nginx默认的负载均衡策略。每个请求会按顺序分配给upstream中的后端服务器,即按照配置的服务器列表顺序依次分配。 upstream backend {server backend1.example.com;server backend2.example.com;server backend3.example.…...
手写简易操作系统(十七)--编写键盘驱动
前情提要 上一节我们实现了锁与信号量,这一节我们就可以实现键盘驱动了,访问键盘输入的数据也属于临界区资源,所以需要锁的存在。 一、键盘简介 之前的 ps/2 键盘使用的是中断驱动的,在当时,按下键盘就会触发中断&a…...

springboot中基于RestTemplate 类 实现调用第三方API接口【POST版本】
https://blog.csdn.net/Drug_/article/details/135111675 这一篇的升级版 还是先配置文件 package com.init.config;import org.apache.http.conn.ssl.NoopHostnameVerifier; import org.apache.http.conn.ssl.SSLConnectionSocketFactory; import org.apache.http.impl.clie…...

编程器固件修改教程
首发csdn,转载请说明出处,保留一切权益。 关于编程器固件 所谓编程器固件是用编程器读取嵌入式设备的FLASH存储数据生成的文件,类似于直接用工具复制整个硬盘 编程器固件与普通固件的差异 编程器固件是用特定的结构(按顺序、大小)将一些文件系…...
)
Python从原Excel表中抽出数据存入同一文件的新的Sheet(附源码)
python读取excel数据。Python在从原Excel表中抽出数据并存储到同一文件的新的Sheet中的功能,充分展示了其在数据处理和自动化操作方面的强大能力。这一功能不仅简化了数据迁移的过程,还提高了数据处理的效率,为数据分析和管理工作带来了极大的…...

计算机网络实验六:路由信息协议RIP
目录 6 实验六:路由信息协议RIP 6.1 实验目的 6.2 实验步骤 6.2.1 构建网络拓扑、配置各网络设备 6.2.2 网络功能验证测试 6.3 实验总结 6 实验六:路由信息协议RIP 6.1 实验目的 (1)学习RIP协议的工作原理和特点 (2)学习如何选择最短路径路由。 (3)进一步掌握…...
MySQL数据库备份策略与实践详解
目录 引言 一、MySQL数据库备份的重要性 (一)数据丢失的原因 (二)数据丢失的后果 二、MySQL备份类型 (一)根据数据库状态 (二)根据数据的完整性 (三)…...

String类相关oj练习
前言: 此处练习对应博客文章:公主,王子,请点击 1.第一次只出现一次的字符 做题首先看清要求和提示: 给定一个字符串 s ,找到 它的第一个不重复的字符,并返回它的索引 。如果不…...
【Linux】进程实践项目 —— 自主shell编写
送给大家一句话: 不管前方的路有多苦,只要走的方向正确,不管多么崎岖不平,都比站在原地更接近幸福。 —— 宫崎骏《千与千寻》 自主shell命令编写 1 前言2 项目实现2.1 创建命令行2.2 获取命令2.3 分割命令2.4 运行命令 3 源代码…...

基于SpringBoot和Vue的学生笔记共享平台的设计与实现
今天要和大家聊的是一款基于SpringBoot和Vue的学生笔记共享平台的设计与实现 !!! 有需要的小伙伴可以通过文章末尾名片咨询我哦!!! 💕💕作者:李同学 💕&…...
C++心决之命名空间、重载函数和引用
目录 1. C关键字(C98) 2. 命名空间 2.1 命名空间定义 2.2 命名空间使用 3. C输入&输出 4. 缺省参数 4.1 缺省参数概念 4.2 缺省参数分类 5. 函数重载 5.1 函数重载概念 5.2 C支持函数重载的原理--名字修饰(name Mangling) 6. 引用 6.1 引用概念 6.2 引用特性…...

higress使用了解
higress使用了解 了解下 http-echo、httpbin 镜像使用 未按文档实际搭建,但大致是这样 官方文档:https://higress.io/zh-cn/docs/overview/what-is-higress 了解:利用sealos快速安装kubernetes集群:https://note.youdao.com/s…...
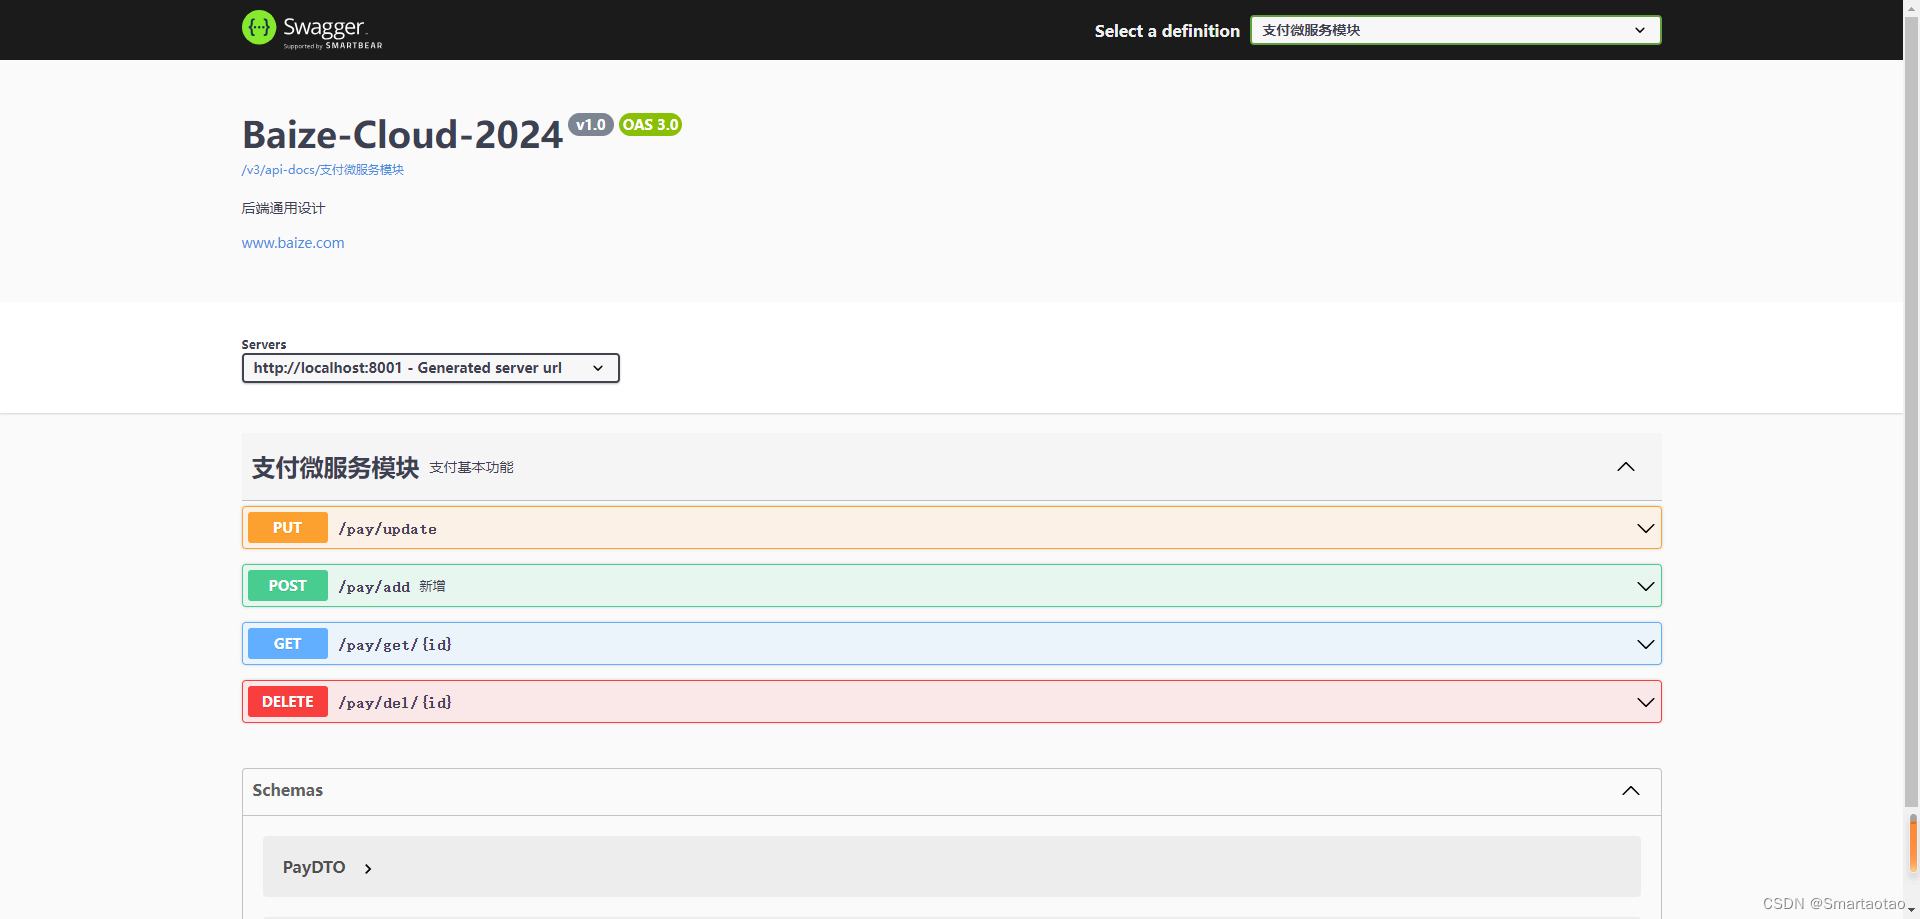
Swagger3探索之游龙入海
引言 后端开发中常用的接口调用工具一般使用Postman、ApiPost工具,但后期需要与前端联调,要补充接口文档花费大量时间,此时Swagger3应运而生,大大提高沟通交流的效率。 引用依赖 <!-- Swagger3 调用方式 http://ip:port/swa…...
javaWeb项目-学生考勤管理系统功能介绍
项目关键技术 开发工具:IDEA 、Eclipse 编程语言: Java 数据库: MySQL5.7 框架:ssm、Springboot 前端:Vue、ElementUI 关键技术:springboot、SSM、vue、MYSQL、MAVEN 数据库工具:Navicat、SQLyog 1、JAVA技术 JavaSc…...
云备份项目认识、环境搭建以及所使用的库的介绍
一、云备份认识 将本地计算机一个受监管的文件夹的文件上传到服务器中,有服务器组织,客户端可以通过网页将文件查看并且下载下来,下载过程支持断点续传功能,并且服务器会对上传的文件进行热点管理,长时间没人访问的文…...

别再只查列表了!Flowable 7.x 待办任务‘状态’字段的实战设计与前端动态渲染
Flowable 7.x 待办任务状态引擎设计与前端动态交互实战 在当今企业级应用开发中,工作流引擎已成为复杂业务流程管理的核心基础设施。作为Activiti的下一代产品,Flowable 7.x在任务状态管理和前后端协同方面提供了更强大的能力。本文将深入探讨如何基于Fl…...

Benchmark.js 配置选项终极指南:如何优化你的 JavaScript 性能测试环境
Benchmark.js 配置选项终极指南:如何优化你的 JavaScript 性能测试环境 【免费下载链接】benchmark.js A benchmarking library. As used on jsPerf.com. 项目地址: https://gitcode.com/gh_mirrors/be/benchmark.js Benchmark.js 是一款专业的 JavaScript 性…...

对比学习演进笔记:从Memory Bank到MoCo的负样本队列设计
1. 对比学习的核心思想与演进背景 对比学习(Contrastive Learning)作为自监督学习的重要分支,其核心思想可以用一句话概括:让相似样本的特征表示尽可能接近,不相似样本的特征表示尽可能远离。这种思想最早可以追溯到20…...

如何高效解决网页视频下载难题:VideoDownloadHelper智能解析工具全解析
如何高效解决网页视频下载难题:VideoDownloadHelper智能解析工具全解析 【免费下载链接】VideoDownloadHelper Chrome Extension to Help Download Video for Some Video Sites. 项目地址: https://gitcode.com/gh_mirrors/vi/VideoDownloadHelper 在数字化内…...

YOLOv8鹰眼目标检测问题解决:常见部署错误与使用技巧汇总
YOLOv8鹰眼目标检测问题解决:常见部署错误与使用技巧汇总 1. 引言:为什么选择YOLOv8鹰眼目标检测 YOLOv8作为当前计算机视觉领域最先进的目标检测模型之一,以其卓越的实时性和准确性赢得了广泛认可。鹰眼目标检测镜像基于Ultralytics官方YO…...

2026职业红利:AI智能体运营岗位培训如何助你实现高薪跨越?
导读: 2026年,职场竞争的底层逻辑已悄然改变。当传统运营还在为写一段文案、剪一个视频熬夜时,掌握了 AI 智能体技术的“新运营人”已经通过自动化工作流,实现了 10 倍速的产出。目前,市场对AI智能体运营经理、AI内容策…...

AI浪潮冲击下,前端该何去何从
🌊 初级前端工程师:向“深水区”扎根技能树与学习路径定位:面向初级前端开发工程师,聚焦底层原理、工程化思维与可验证的实战输出,构建 AI 时代不可替代的技术护城河。📐 核心原则(避坑指南&…...

基于STM32的智能药箱系统开发实战:从硬件搭建到云端互联
1. 为什么需要智能药箱 记得去年我奶奶因为忘记吃药导致血压飙升住院,当时我就在想,如果能有个自动提醒吃药的装置该多好。后来发现这个问题其实困扰着很多家庭——据统计,65岁以上老年人中,有超过60%存在漏服、错服药物的情况。这…...

工业软件全景图:从核心分类到行业深度应用指南
深入理解现代制造业的核心驱动力一、 工业之魂:现代制造业的核心引擎在智能制造与工业4.0的浪潮下,工业软件已不再仅仅是辅助工具,而是被公认为“工业之魂”。它将复杂的工业知识、逻辑和经验代码化,嵌入到硬件设备和业务流程中&a…...

金蝶k3软件常用基础SQL数据表
金蝶软件常用基础SQL数据表SQL数据库 1、系统表 t_tabledescription2、字段表 t_fielddescription3、基础资料表(版本:10.3) t_item 其中fitemclassid值表示1-客户;2-部门;3-职员;4-商品;5-仓位…...