Vue3做出B站【bilibili】 Vue3+TypeScript+ant-design-vue【快速入门一篇文章精通系列(一)前端项目案例】
本项目分为二部分
1、后台管理系统(用户管理,角色管理,视频管理等)
2、客户端(登录注册、发布视频)


Vue3做出B站【bilibili】 Vue3+TypeScript+ant-design-vue【快速入门一篇文章精通系列(一)前端项目案例】
- 一、前言
- 二、项目创建基本页面搭建
- (一)创建Vue3 + TypeScript项目
- 1、新建Vue3 项目
- 2、用WebStorm打开项目
- 1)打开项目以后执行 `npm install`
- 2)安装TypeScript
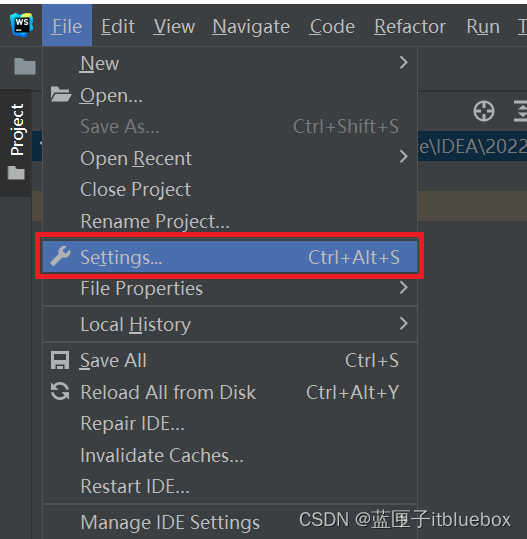
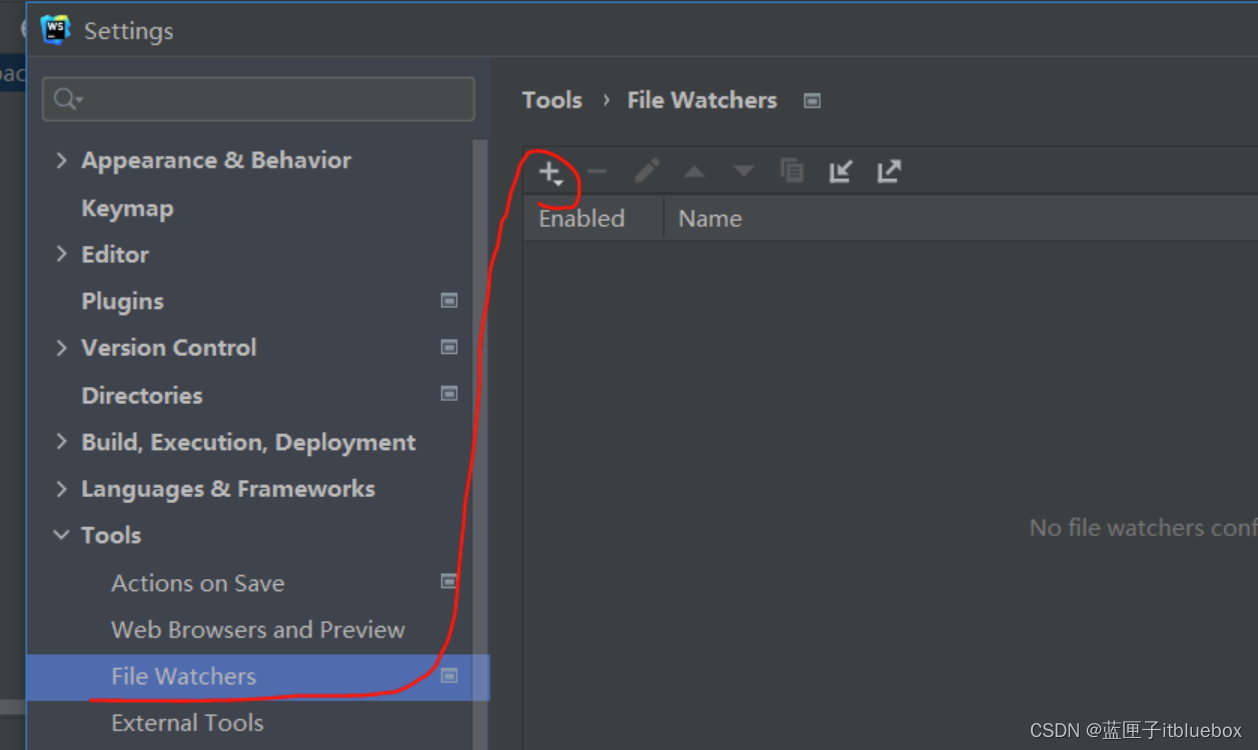
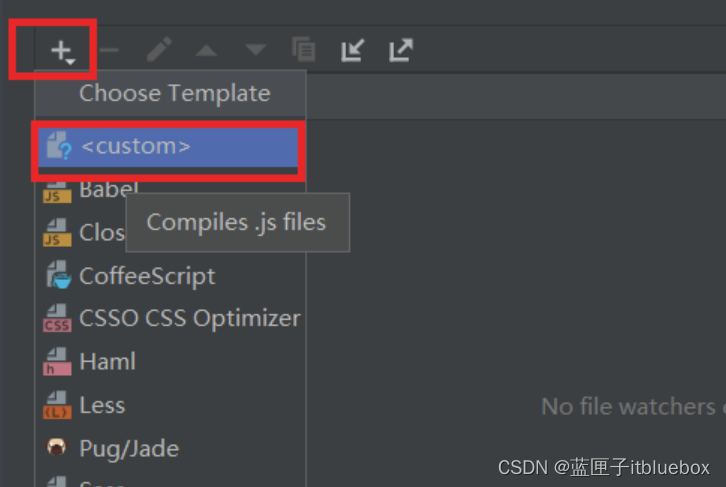
- 3)设置一下WebStorm配置
- 3、配置项目
- 1)安装依赖
- 2)路由配置
- 3)pinia配置
- 4)vite.config.ts配置
- 5)按需引入ant-design-vue
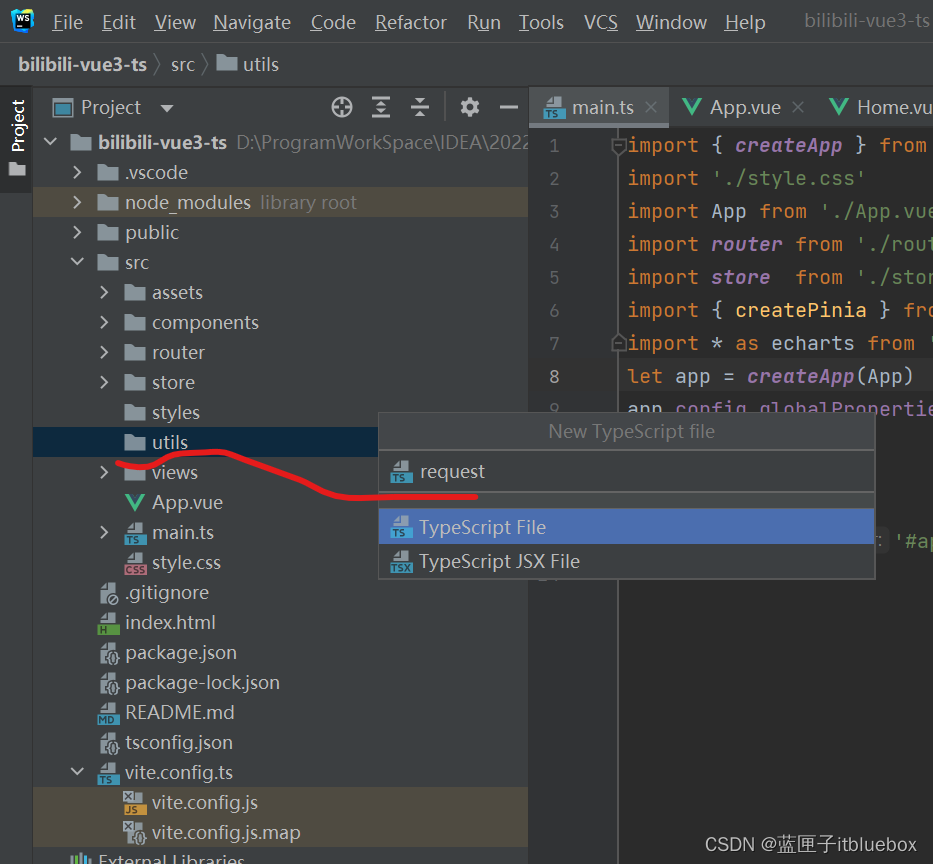
- 6)安装axios
- 4、设置页面路由
- (二)实现登录页面
- 1、设置登陆页面
- 2、设置登录请求
- 3、创建mock.ts
- 4、显示验证码
- 5、在store当中的store.ts设置SET_TOKEN
- 6、实现登录请求相关内容
- 7、完善登录
- (1)在main.ts当中引入antd的全局样式
- (2)完善request.ts当中响应的内容
- 三、后台管理界面开发
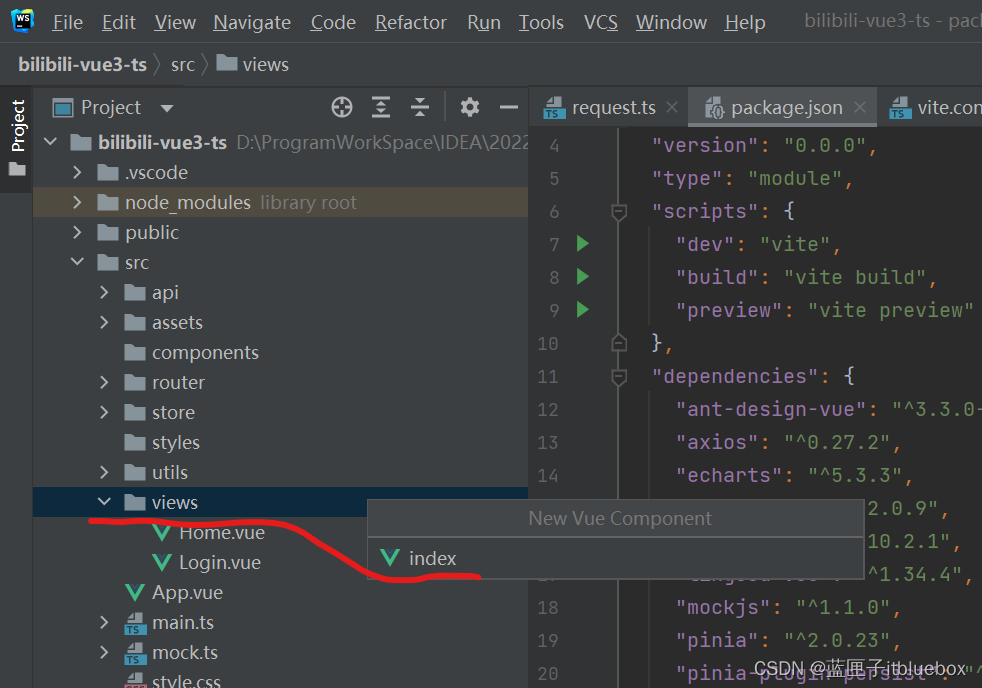
- (一)创建index页面
- 1、新建index页面
- 2、设置路由
- 3、完善菜单页面内容
- 4、Vue代码抽取
- (1)抽取菜单
- (2)index
- 5、设置子路由
- 6、编写导航栏路由
- 1)创建需要路由跳转的页面
- 2)设置页面路由
- (二)用户登录信息展示
- 1、完善用户接口
- 2、设置mock.js
- 3、设置个人中心的路由
- 4、设置退出登录
- (三)动态菜单开发
- 1、修改一下路由规则
- 2、设置动态菜单的数据
- (1)自定义Icon组件
- (2)SideMenu.vue菜单页面
- (3)创建保存菜单的状态信息的内容
- (4)设置mockjs
- (5)完善SideMenu.vue菜单页面,设置请求并渲染菜单
- 3、设置动态路由加载一次以后无需二次加载
- 4、实现动态导航
- 5、设置侧栏和页面进行动态绑定
- 6、完善Tabs标签页
- (四)菜单管理界面开发
- 1、在Menu当中设置表格样式
- 2、在Menu当中设置新增和编辑
- (五)角色管理
- 1、设置角色信息的增删改查-权限分配
- (六)用户管理
一、前言
在前端方面我们使用的技术栈包括
TypeScript
Vue3
ant Design Vue
axios
echarts
highcharts
mockjs
pinia
vue-router
二、项目创建基本页面搭建
(一)创建Vue3 + TypeScript项目
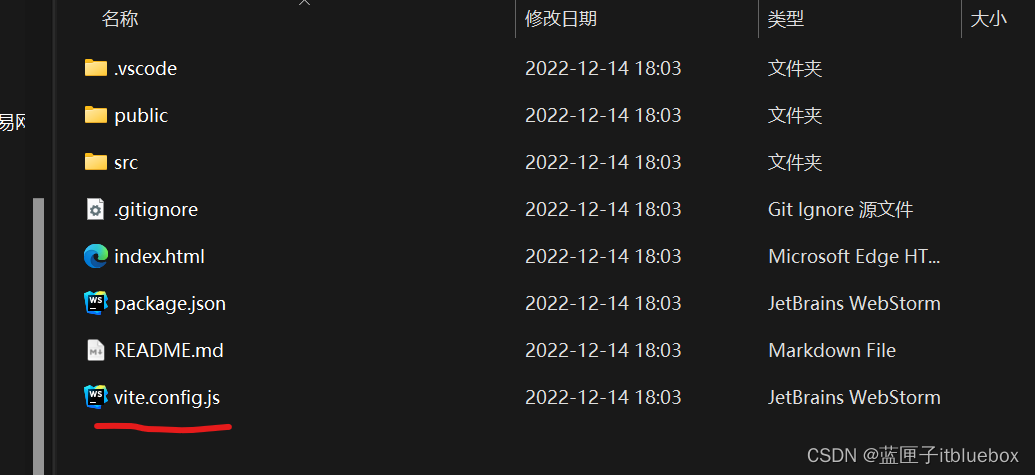
1、新建Vue3 项目
npm create vite@latest bilibili-vue3-ts -- --template vue

将生成的js文件都修改为ts文件
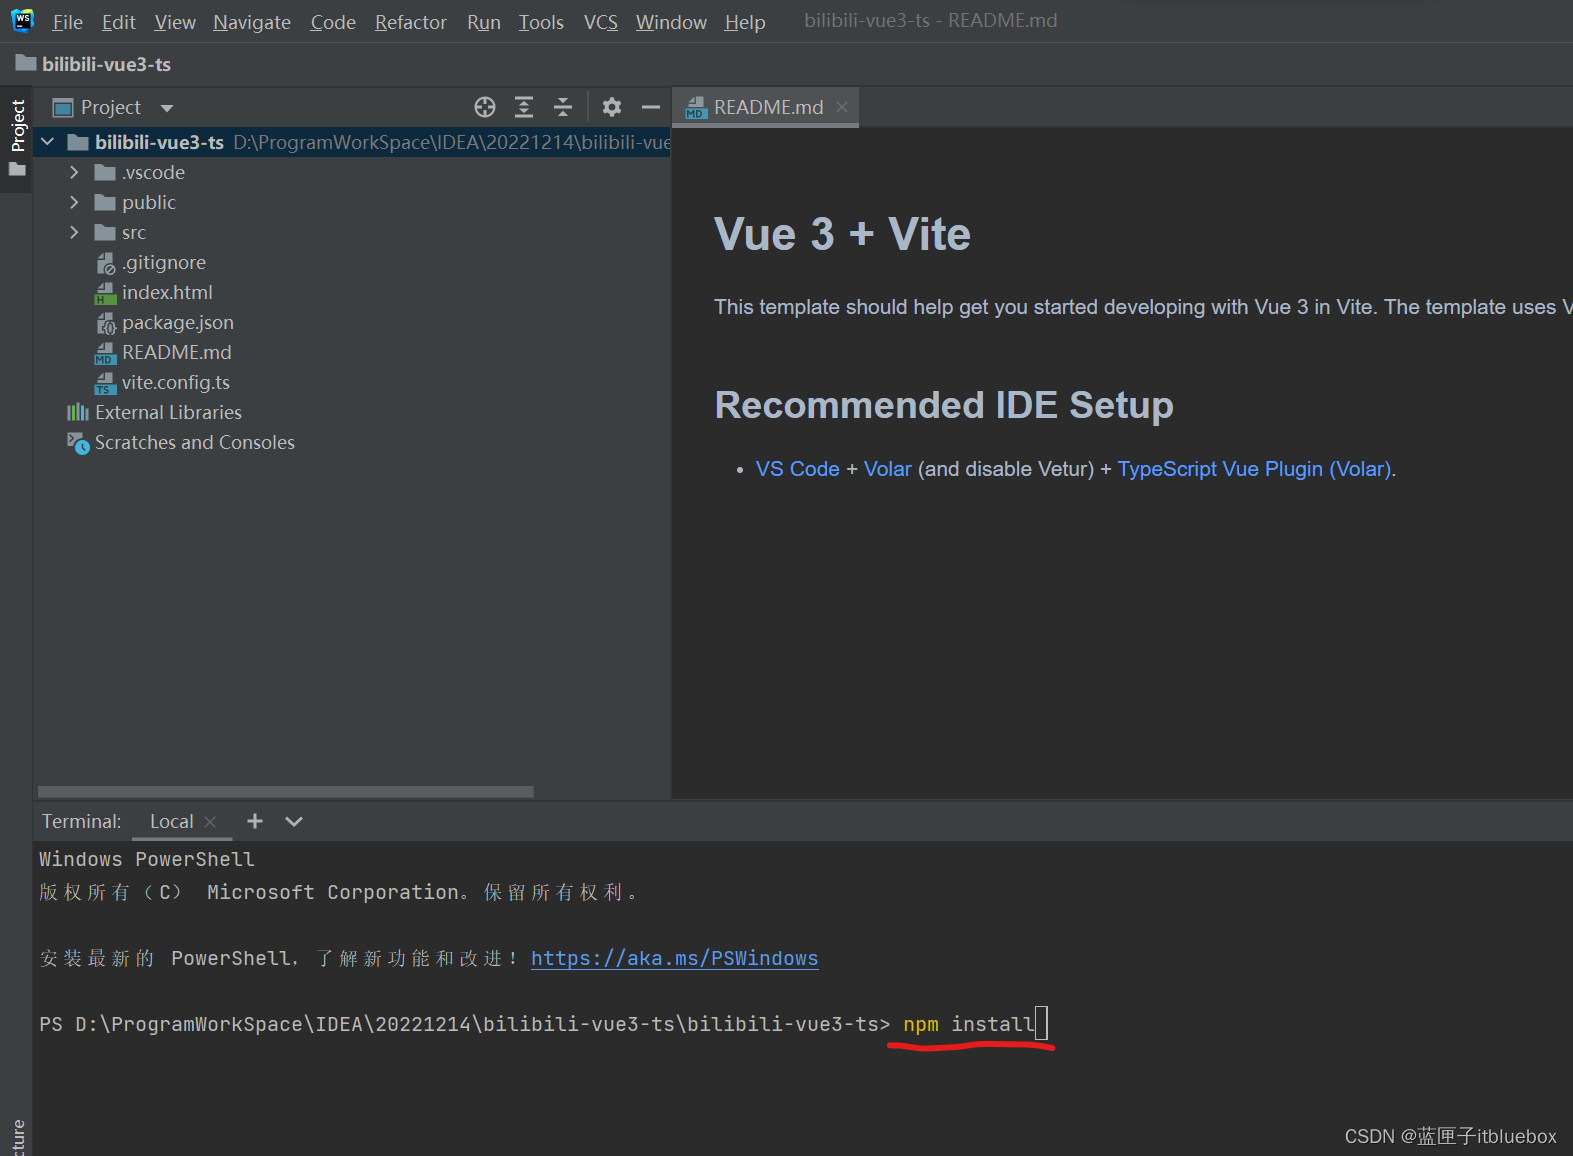
2、用WebStorm打开项目
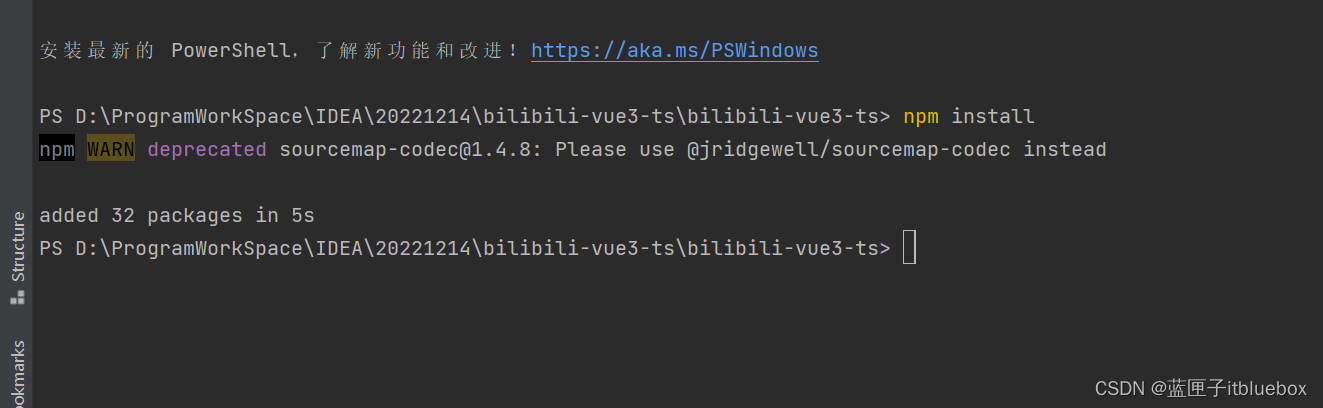
1)打开项目以后执行 npm install
执行成功
2)安装TypeScript
安装TypeScript
npm install -g typescript

安装完成后,在控制台运行如下命令,检查安装是否成功(3.x):
tsc -v

3)设置一下WebStorm配置
设置自动编译

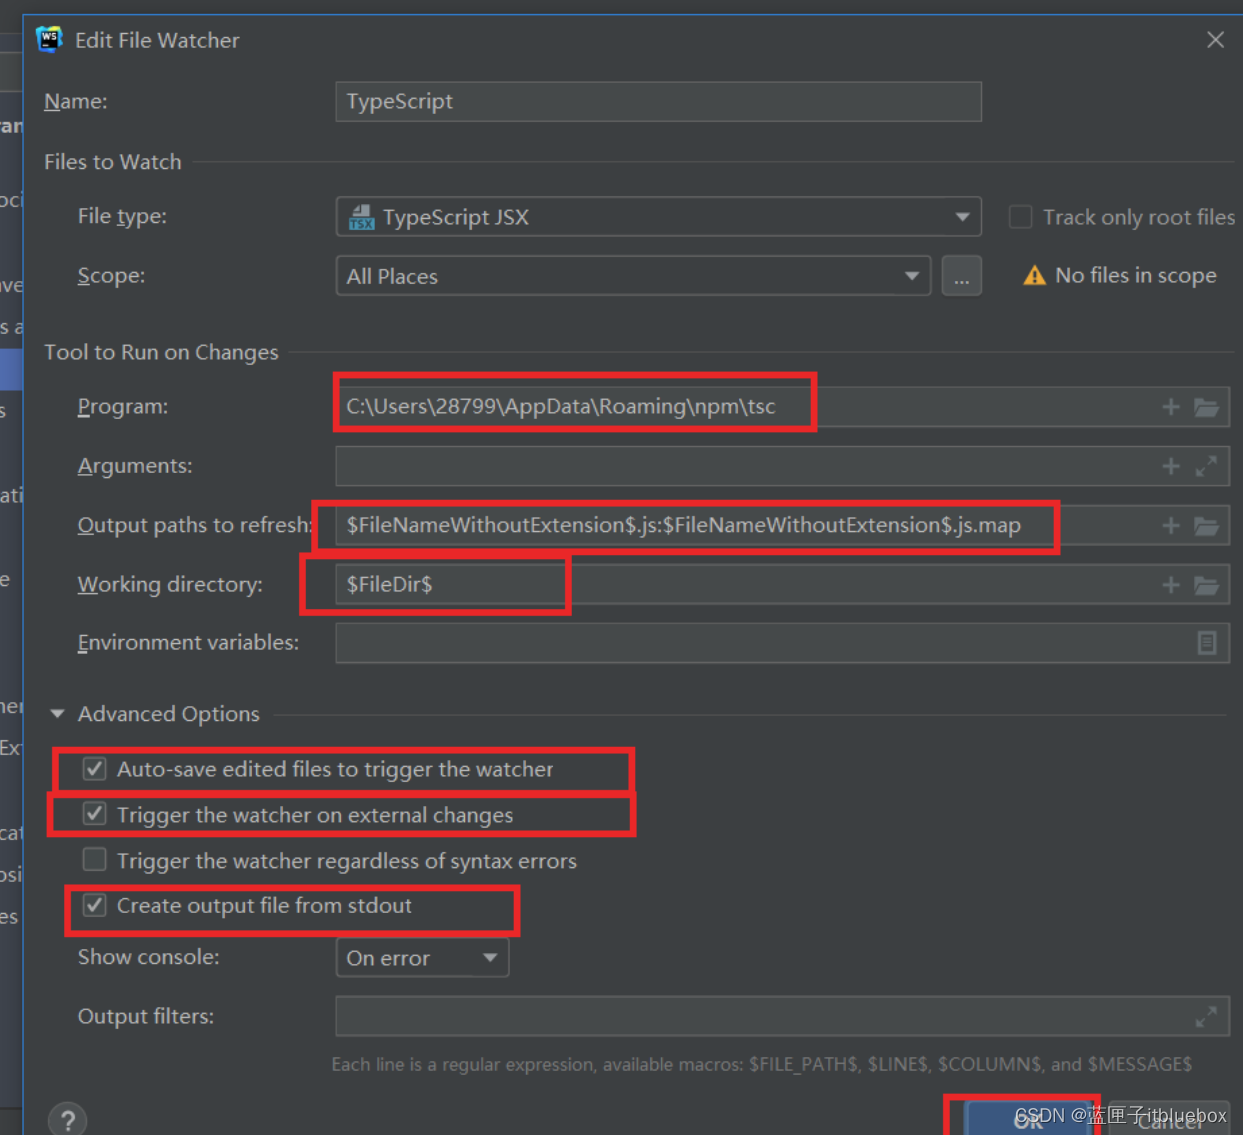
$FileNameWithoutExtension$.js:$FileNameWithoutExtension$.js.map
$FileDir$
3、配置项目
1)安装依赖
作为前端项目我们使用一些场景的依赖
这里我们只需要将以下依赖复制到package.json,重新运行npm install
将package-lock.json文件夹删除
在package.json当中
"dependencies": {"ant-design-vue": "^3.3.0-beta.4","axios": "^0.27.2","echarts": "^5.3.3","echarts-gl": "^2.0.9","highcharts": "^10.2.1","pinia": "^2.0.23","pinia-plugin-persist": "^1.0.0","sass": "^1.54.9","swiper": "^8.4.5","vue": "^3.2.37","vue-router": "^4.1.5","vue3-audio-player": "^1.0.5","vue3-seamless-scroll": "^2.0.1"},"devDependencies": {"less": "^4.1.3","unplugin-auto-import": "^0.11.2","unplugin-vue-components": "^0.22.4","@vitejs/plugin-vue": "^4.0.0","vite": "^4.0.0"}
执行npm install
除了以上安装方式以外,
你也可以自己找到对应依赖的官方网站,
一个一个手动安装
2)路由配置
创建router文件夹
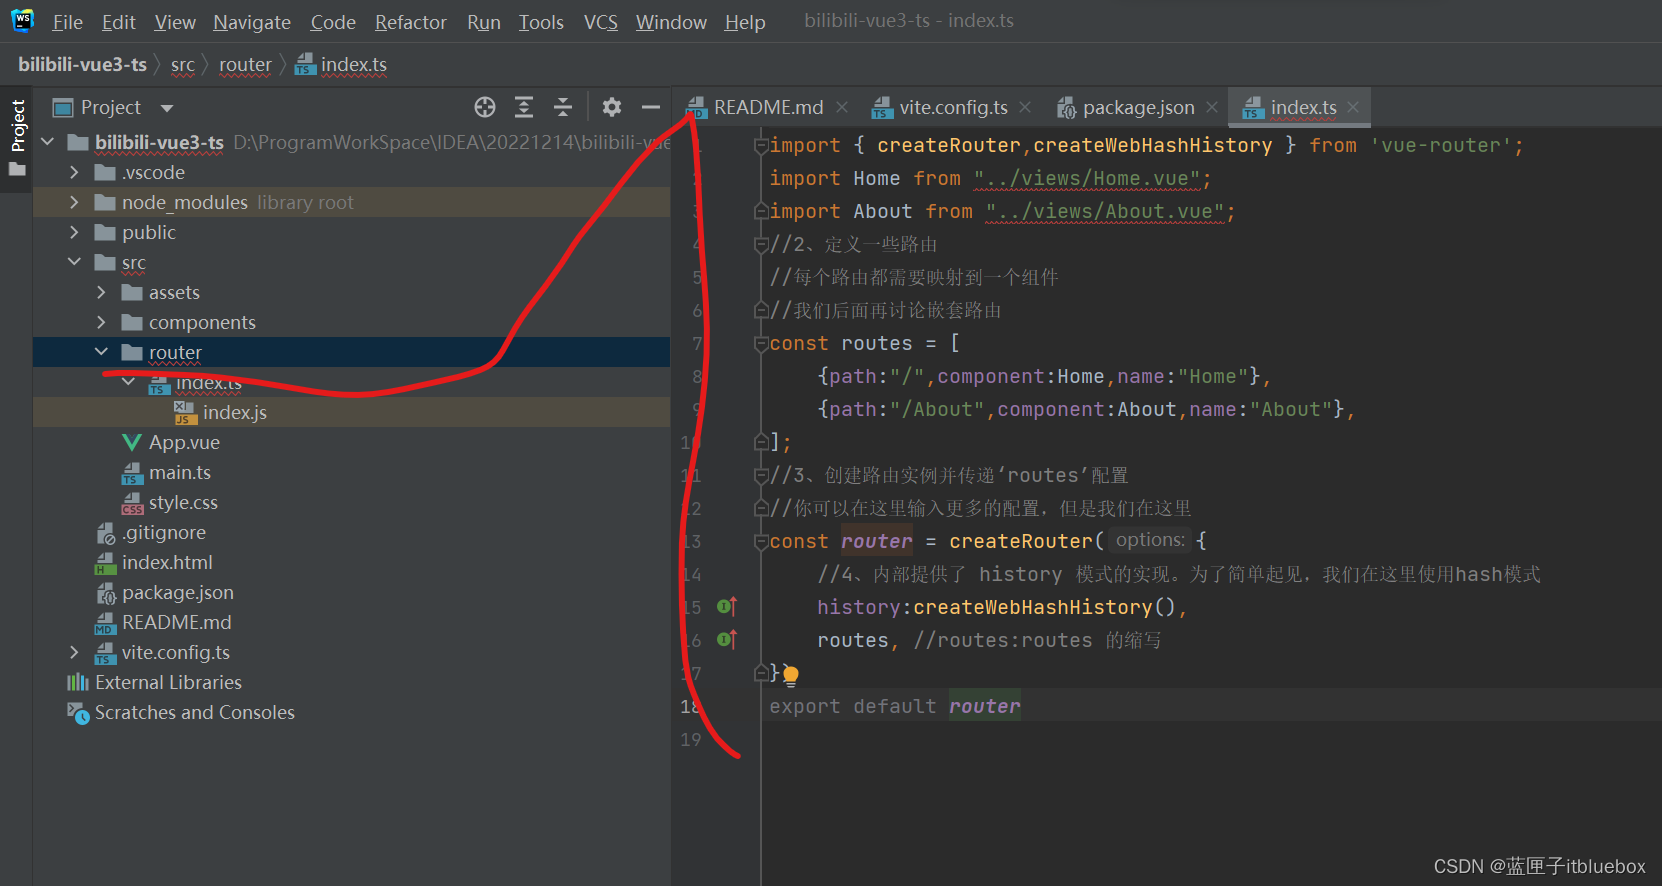
import { createRouter,createWebHashHistory } from 'vue-router';
import Home from "../views/Home.vue";
import About from "../views/About.vue";
//2、定义一些路由
//每个路由都需要映射到一个组件
//我们后面再讨论嵌套路由
const routes = [{path:"/",component:Home,name:"Home"},{path:"/About",component:About,name:"About"},
];
//3、创建路由实例并传递‘routes’配置
//你可以在这里输入更多的配置,但是我们在这里
const router = createRouter({//4、内部提供了 history 模式的实现。为了简单起见,我们在这里使用hash模式history:createWebHashHistory(),routes, //routes:routes 的缩写
})
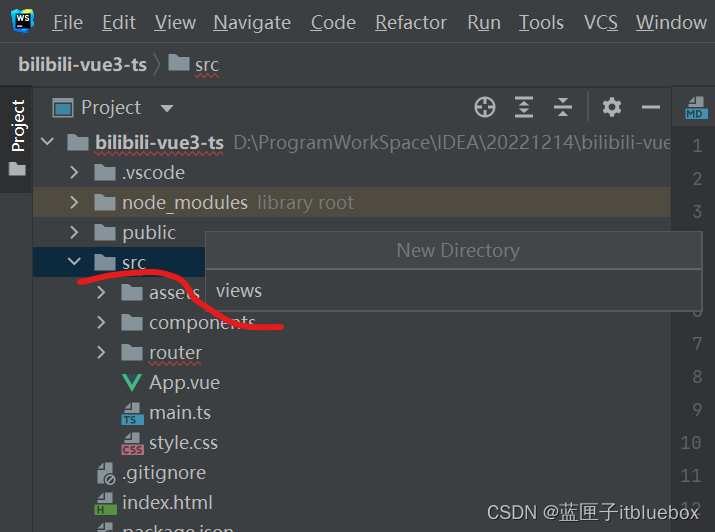
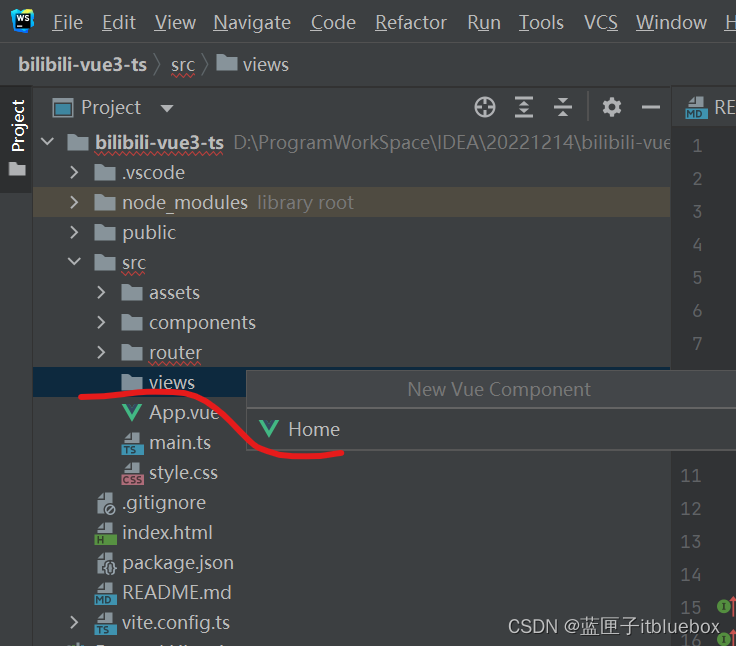
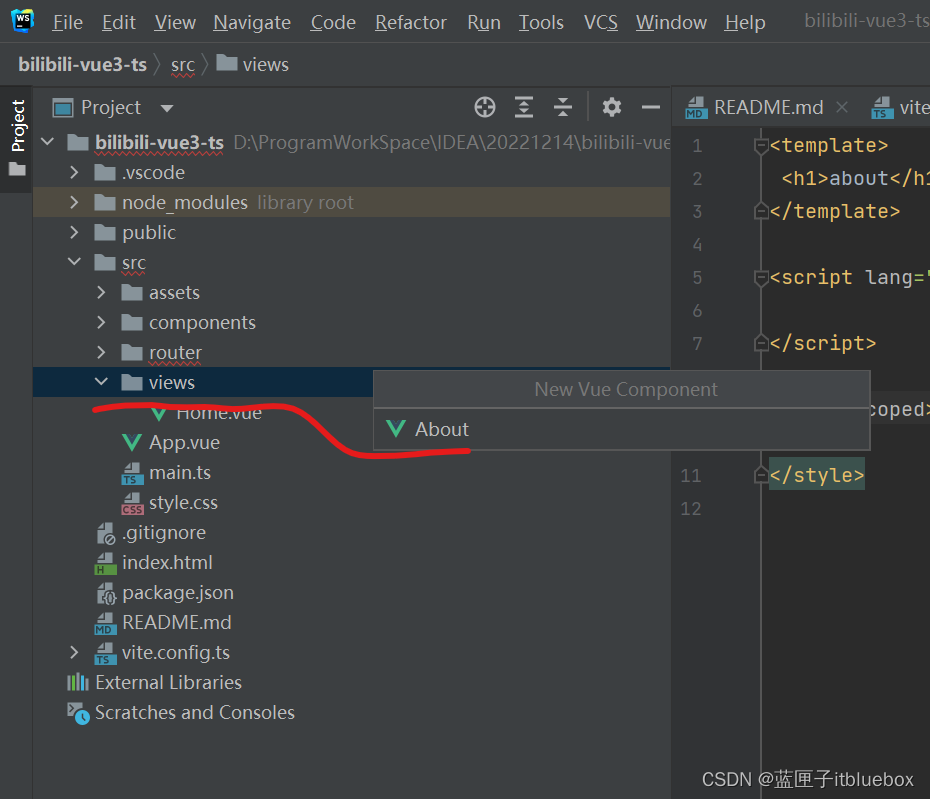
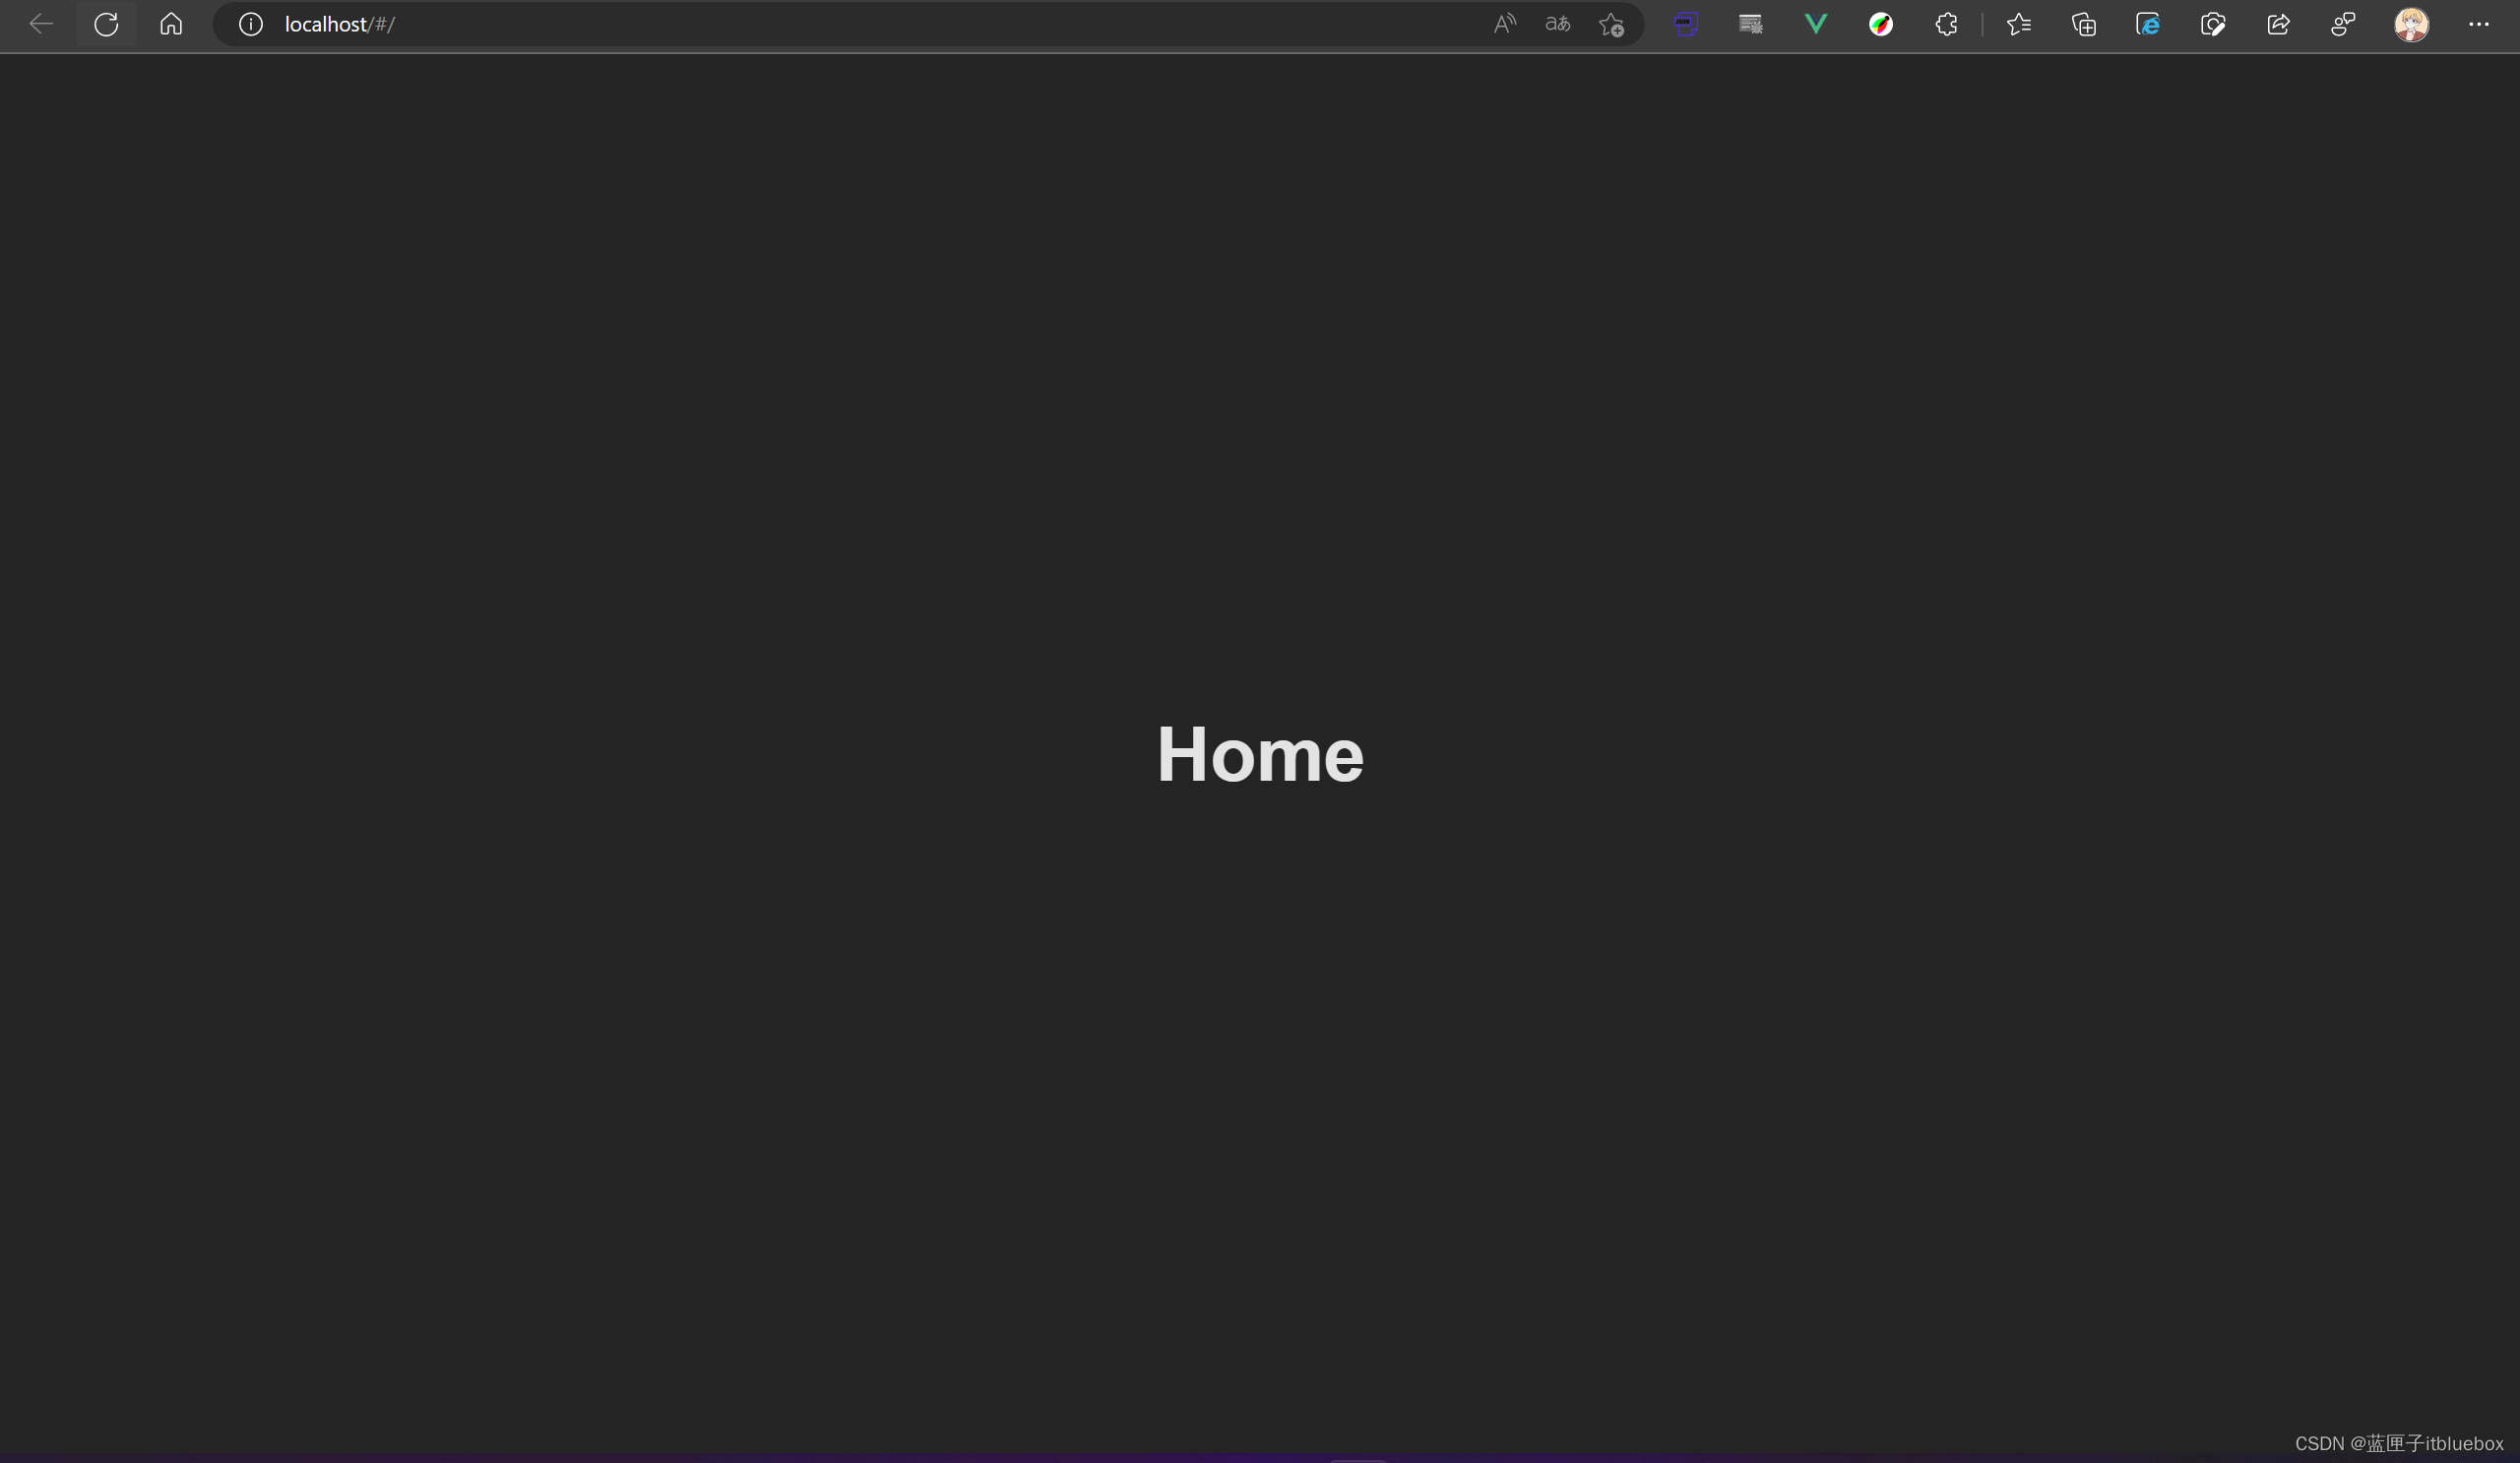
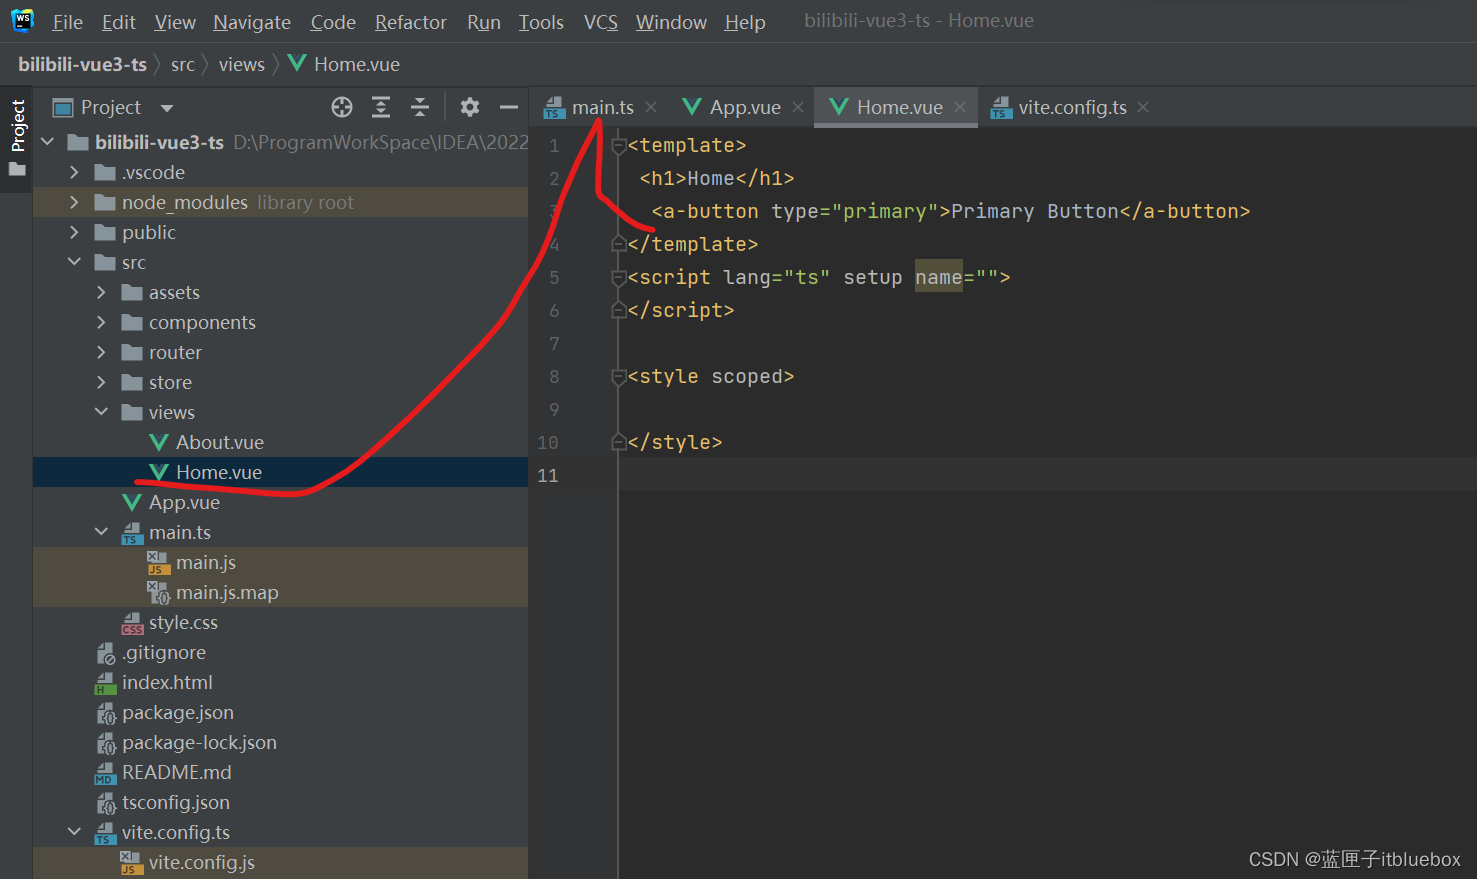
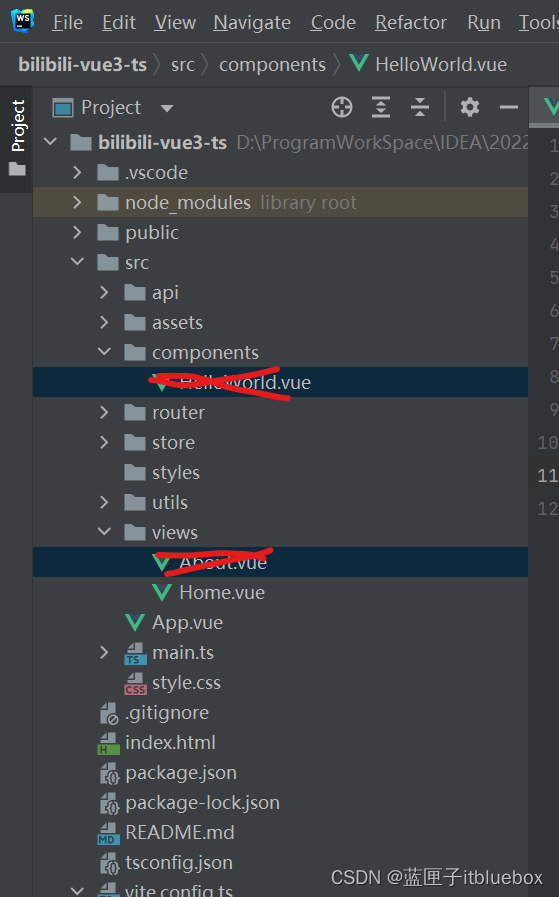
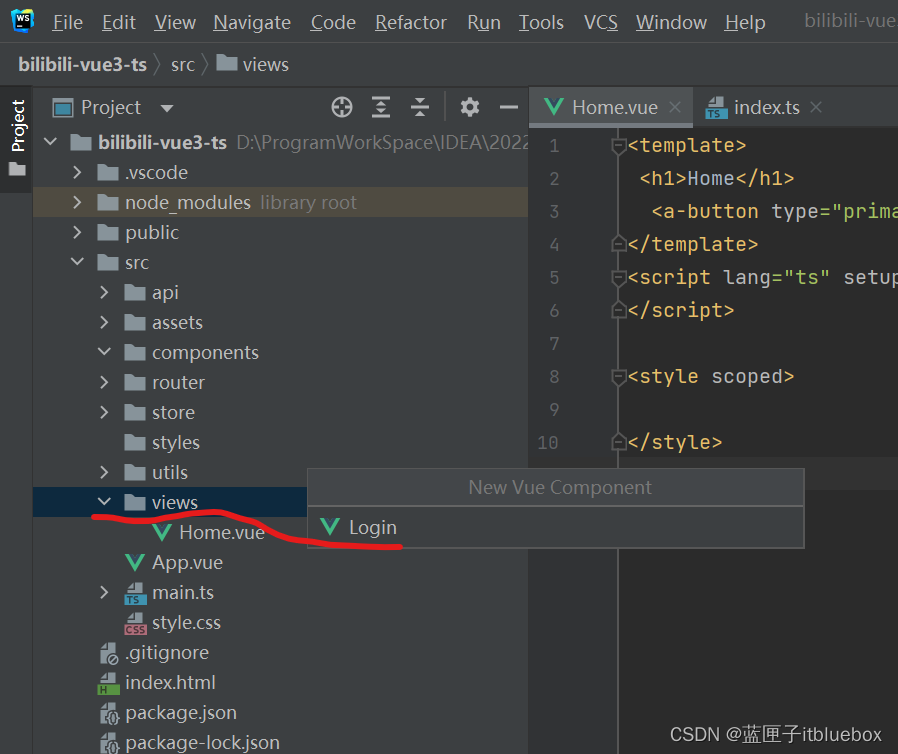
export default router创建Home.vue和About.vue
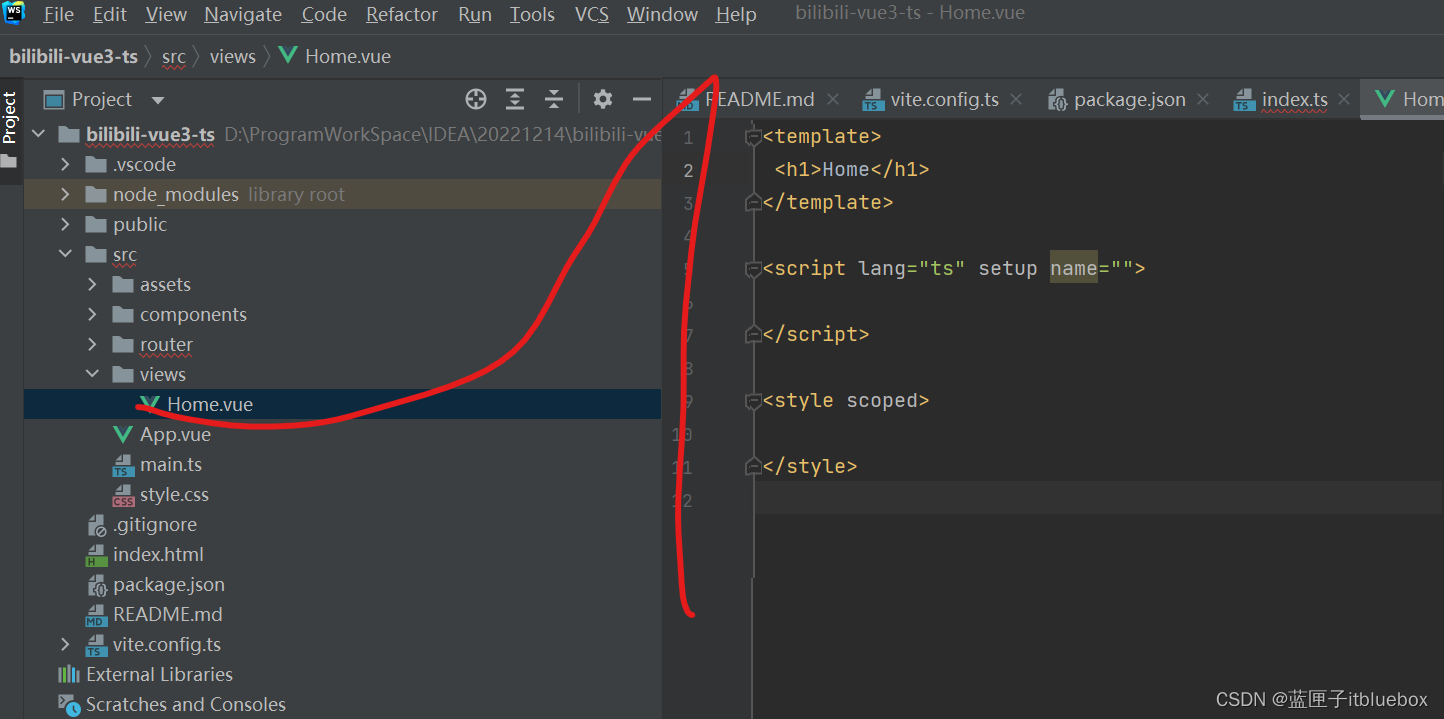
<template><h1>Home</h1>
</template><script lang="ts" setup name=""></script><style scoped></style>
修改App.vue
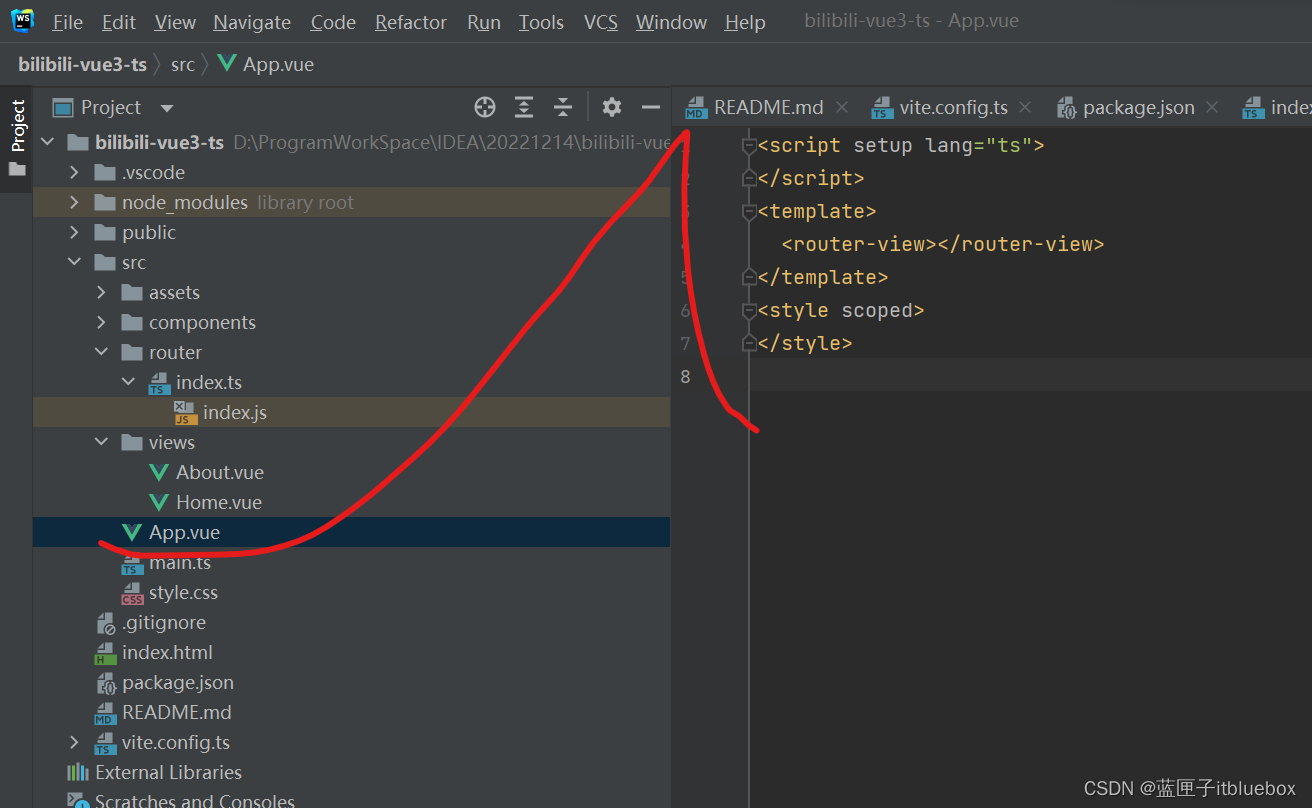
<script setup lang="ts">
</script>
<template><router-view></router-view>
</template>
<style scoped>
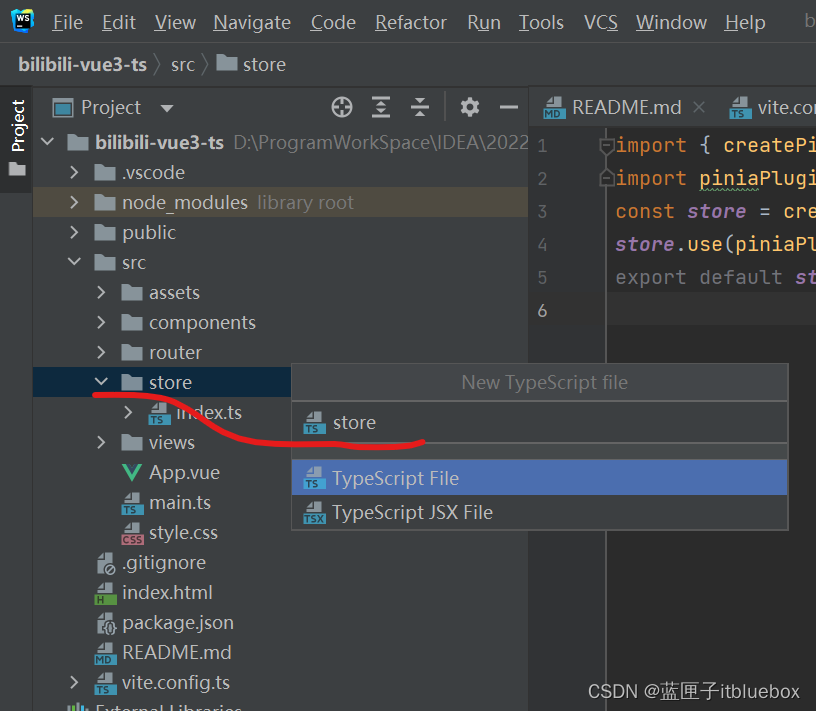
</style>3)pinia配置

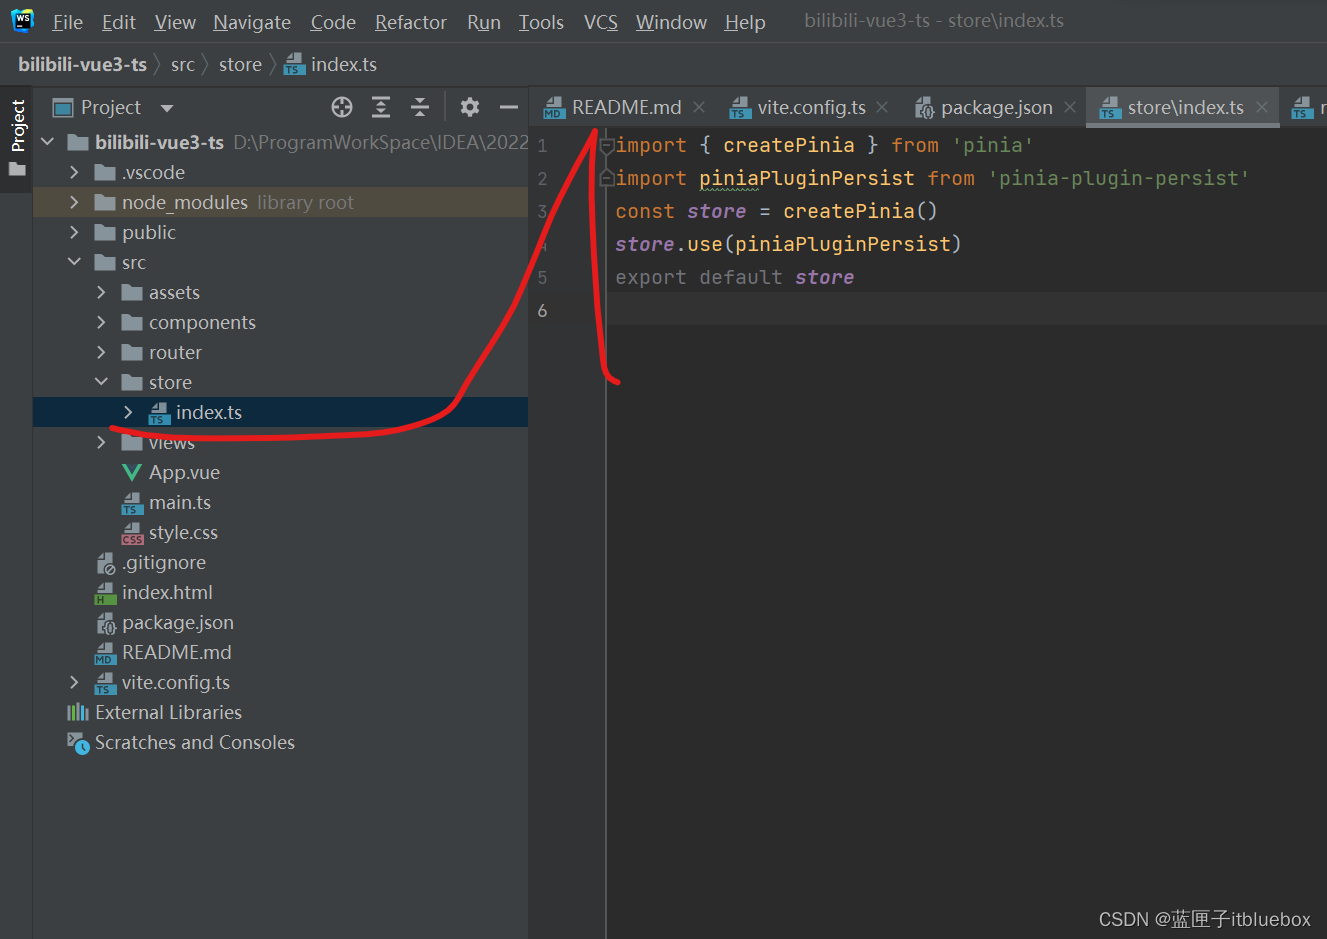
import { createPinia } from 'pinia'
import piniaPluginPersist from 'pinia-plugin-persist'
const store = createPinia()
store.use(piniaPluginPersist)
export default store

import { defineStore } from 'pinia'
export const userStore = defineStore({id: 'user',state: () => {return {title: '',token:''}},getters: {getTitle: (state) => state.title,},actions: {setTitle(title:string) {this.title= title}},// 开启数据缓存// @ts-ignorepersist: { //数据默认存在 sessionStorage 里,并且会以 store 的 id 作为 keyenabled: true}
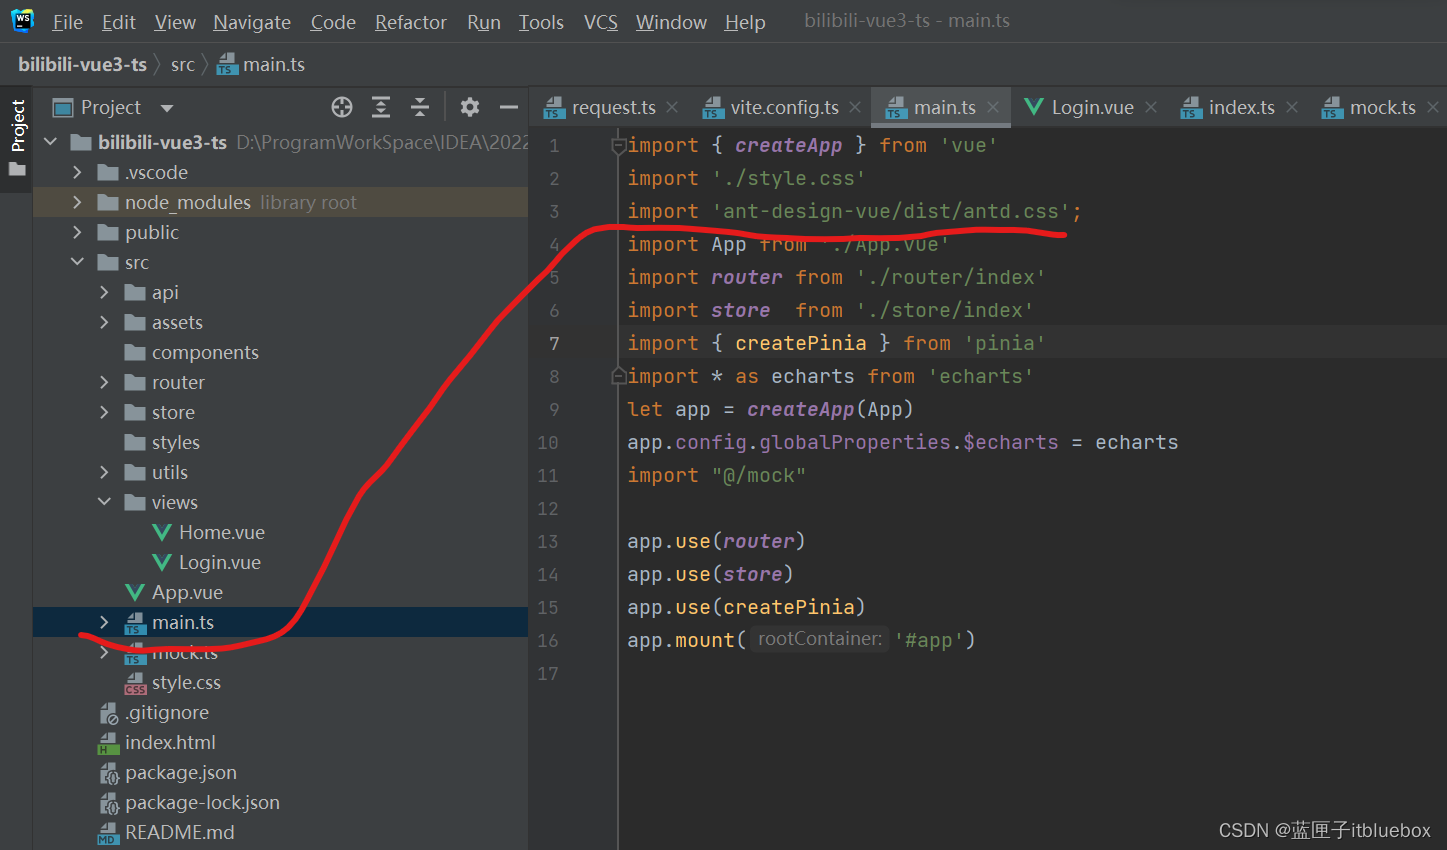
})在main.ts当中引入如上内容
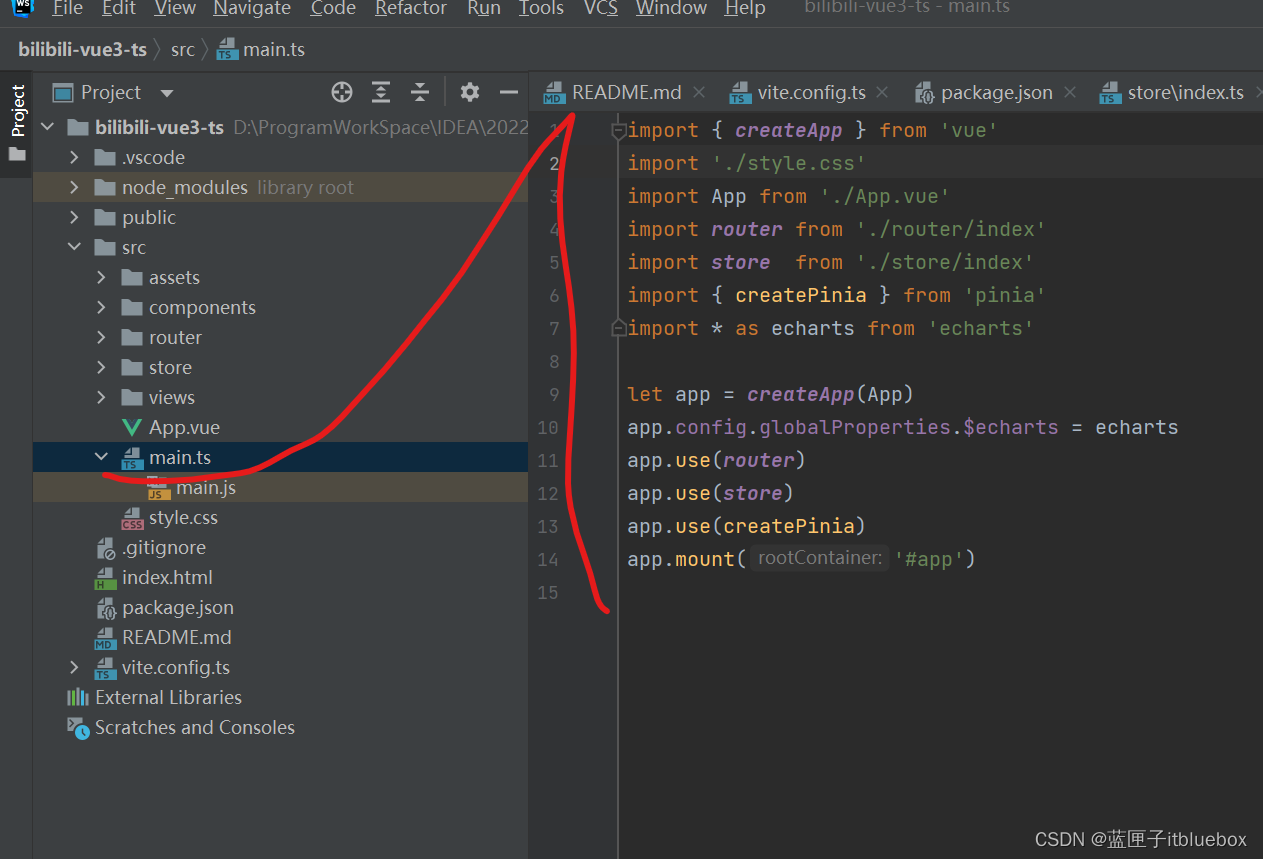
import { createApp } from 'vue'
import './style.css'
import App from './App.vue'
import router from './router/index'
import store  from './store/index'
import { createPinia } from 'pinia'
import * as echarts from 'echarts'let app = createApp(App)
app.config.globalProperties.$echarts = echarts
app.use(router)
app.use(store)
app.use(createPinia)
app.mount('#app')
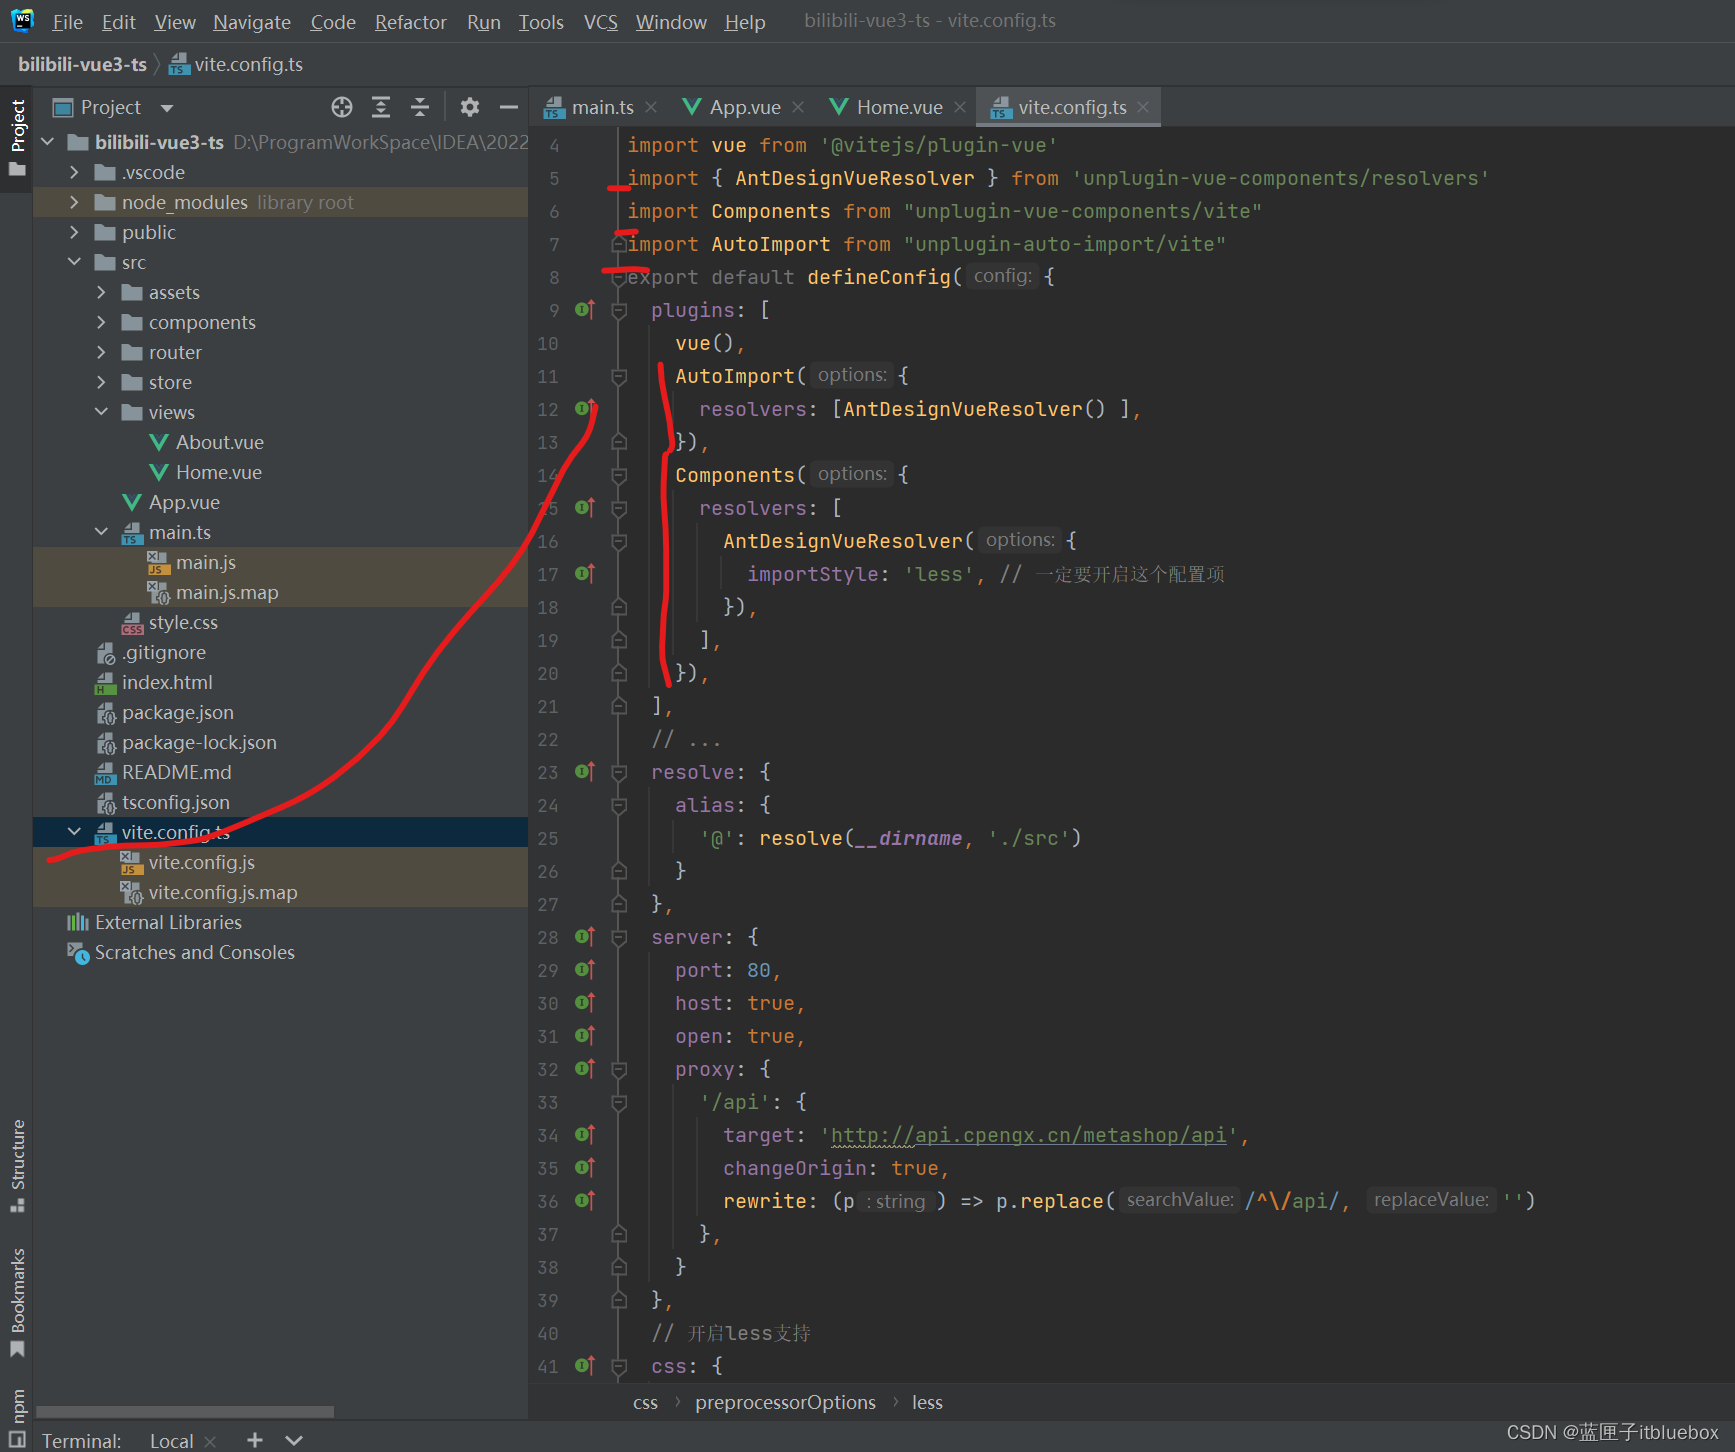
4)vite.config.ts配置
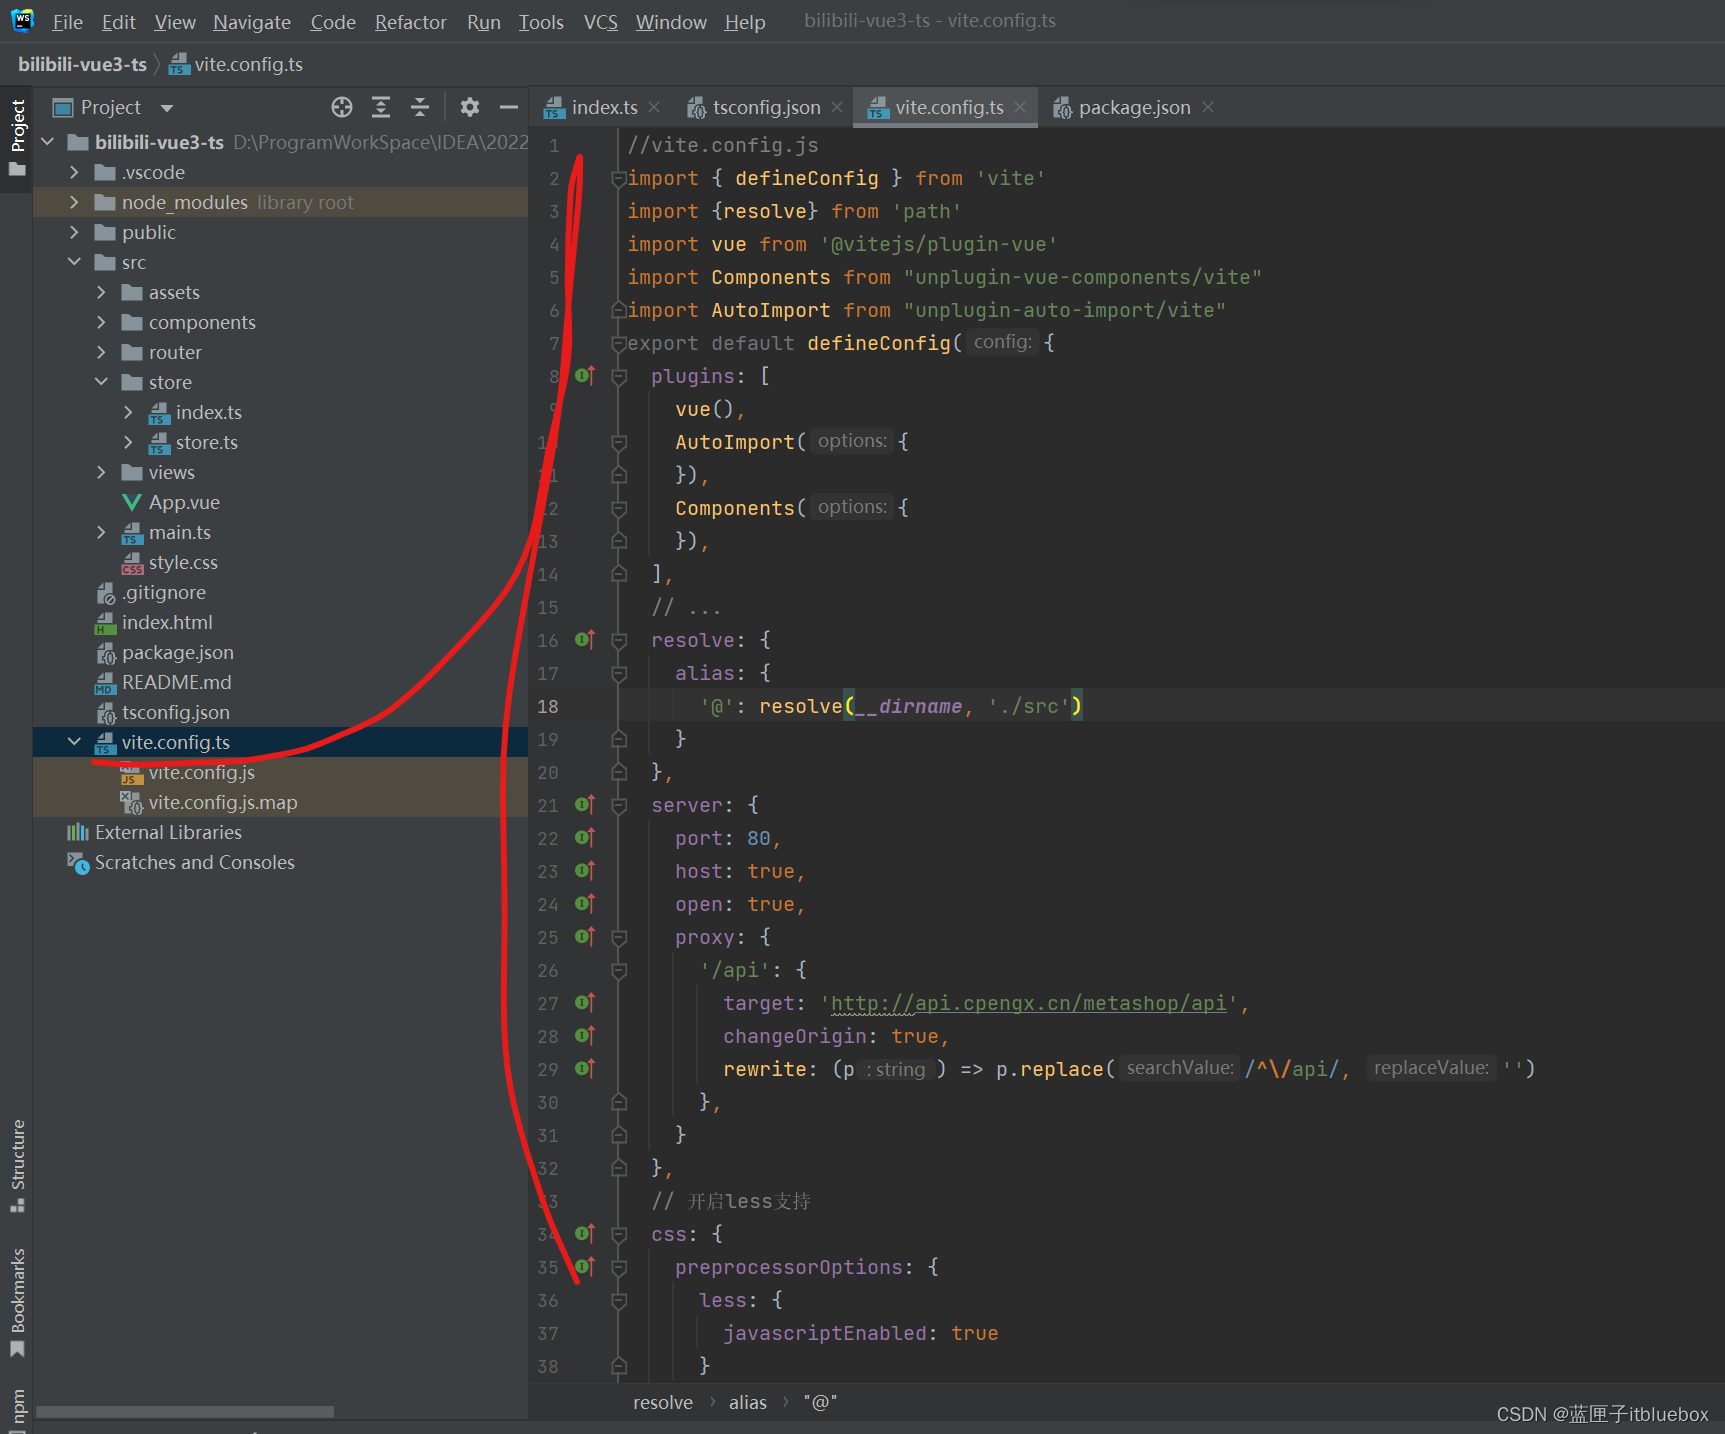
//vite.config.js
import { defineConfig } from 'vite'
import {resolve} from 'path'
import vue from '@vitejs/plugin-vue'
import Components from "unplugin-vue-components/vite"
import AutoImport from "unplugin-auto-import/vite"
export default defineConfig({plugins: [vue(),AutoImport({}),Components({}),],// ...resolve: {alias: {'@': resolve(__dirname, './src')}},server: {port: 80,host: true,open: true,proxy: {'/api': {target: 'http://api.cpengx.cn/metashop/api',changeOrigin: true,rewrite: (p) => p.replace(/^\/api/, '')},}},// 开启less支持css: {preprocessorOptions: {less: {javascriptEnabled: true}}}
})
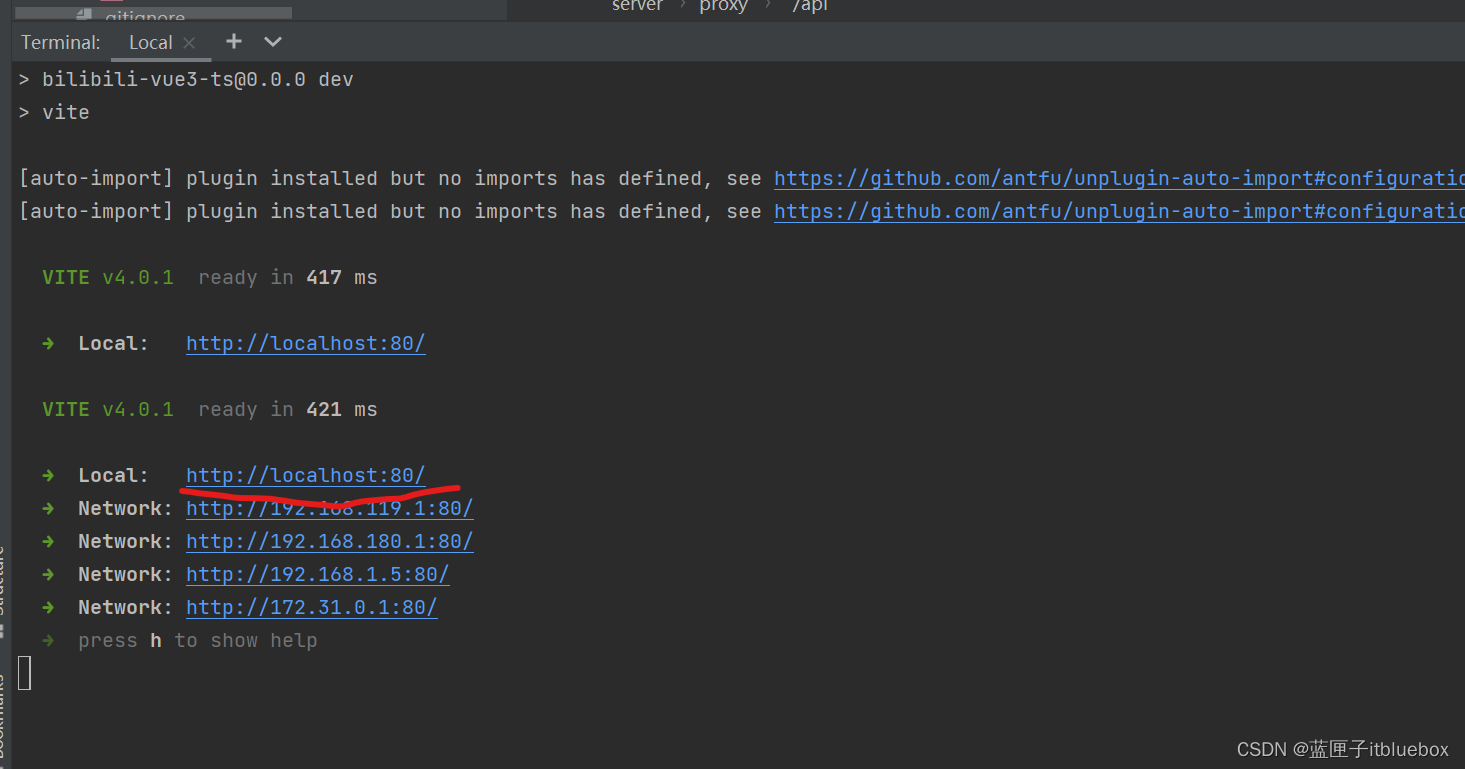
运行测试
npm run dev

5)按需引入ant-design-vue
//vite.config.js
import { defineConfig } from 'vite'
import {resolve} from 'path'
import vue from '@vitejs/plugin-vue'
import { AntDesignVueResolver } from 'unplugin-vue-components/resolvers'
import Components from "unplugin-vue-components/vite"
import AutoImport from "unplugin-auto-import/vite"
export default defineConfig({plugins: [vue(),AutoImport({resolvers: [AntDesignVueResolver() ],}),Components({resolvers: [AntDesignVueResolver({importStyle: 'less', // 一定要开启这个配置项}),],}),],// ...resolve: {alias: {'@': resolve(__dirname, './src')}},server: {port: 80,host: true,open: true,proxy: {'/api': {target: 'http://api.cpengx.cn/metashop/api',changeOrigin: true,rewrite: (p) => p.replace(/^\/api/, '')},}},// 开启less支持css: {preprocessorOptions: {less: {modifyVars: { // 在这里自定义主题色等样式'primary-color': '#fb7299','link-color': '#fb7299','border-radius-base': '2px',},javascriptEnabled: true,}}}
})
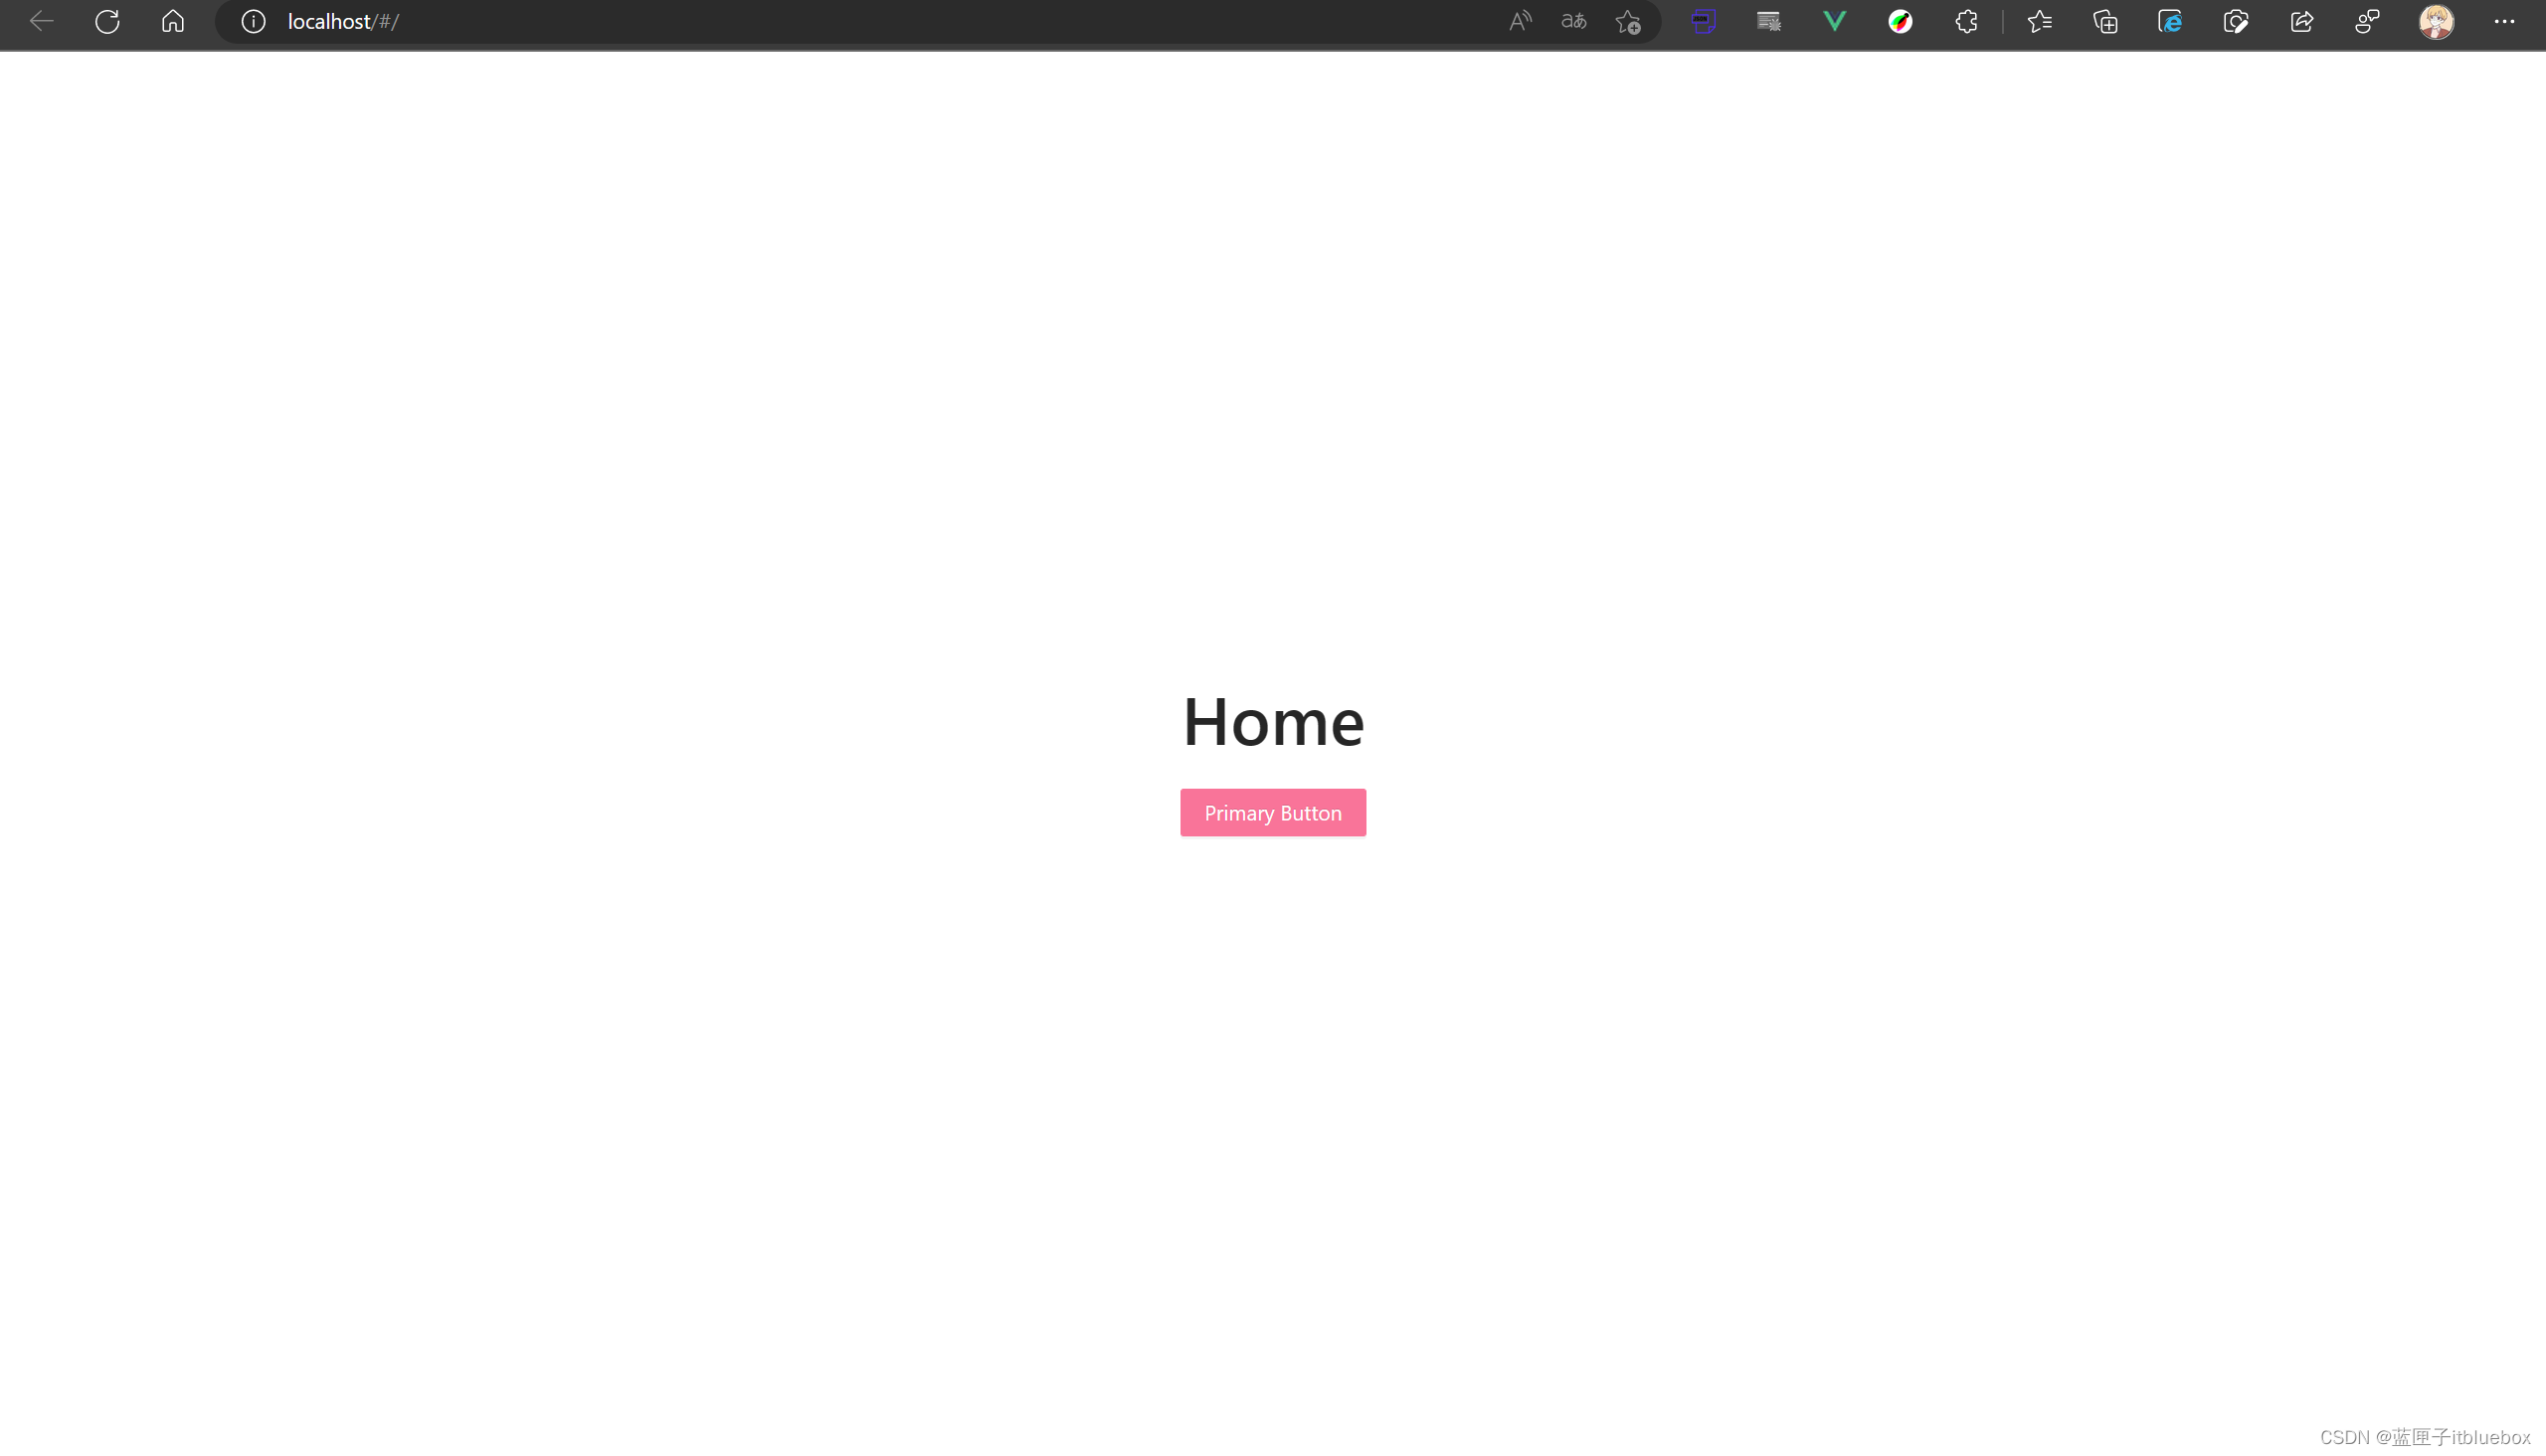
在Home当中放置一个按钮
<template><h1>Home</h1><a-button type="primary">Primary Button</a-button>
</template>
<script lang="ts" setup name="">
</script>
<style scoped>
</style>
重新运行并访问
6)安装axios
安装axios:一个基于promise的HTTP库,类ajax
npm install axios

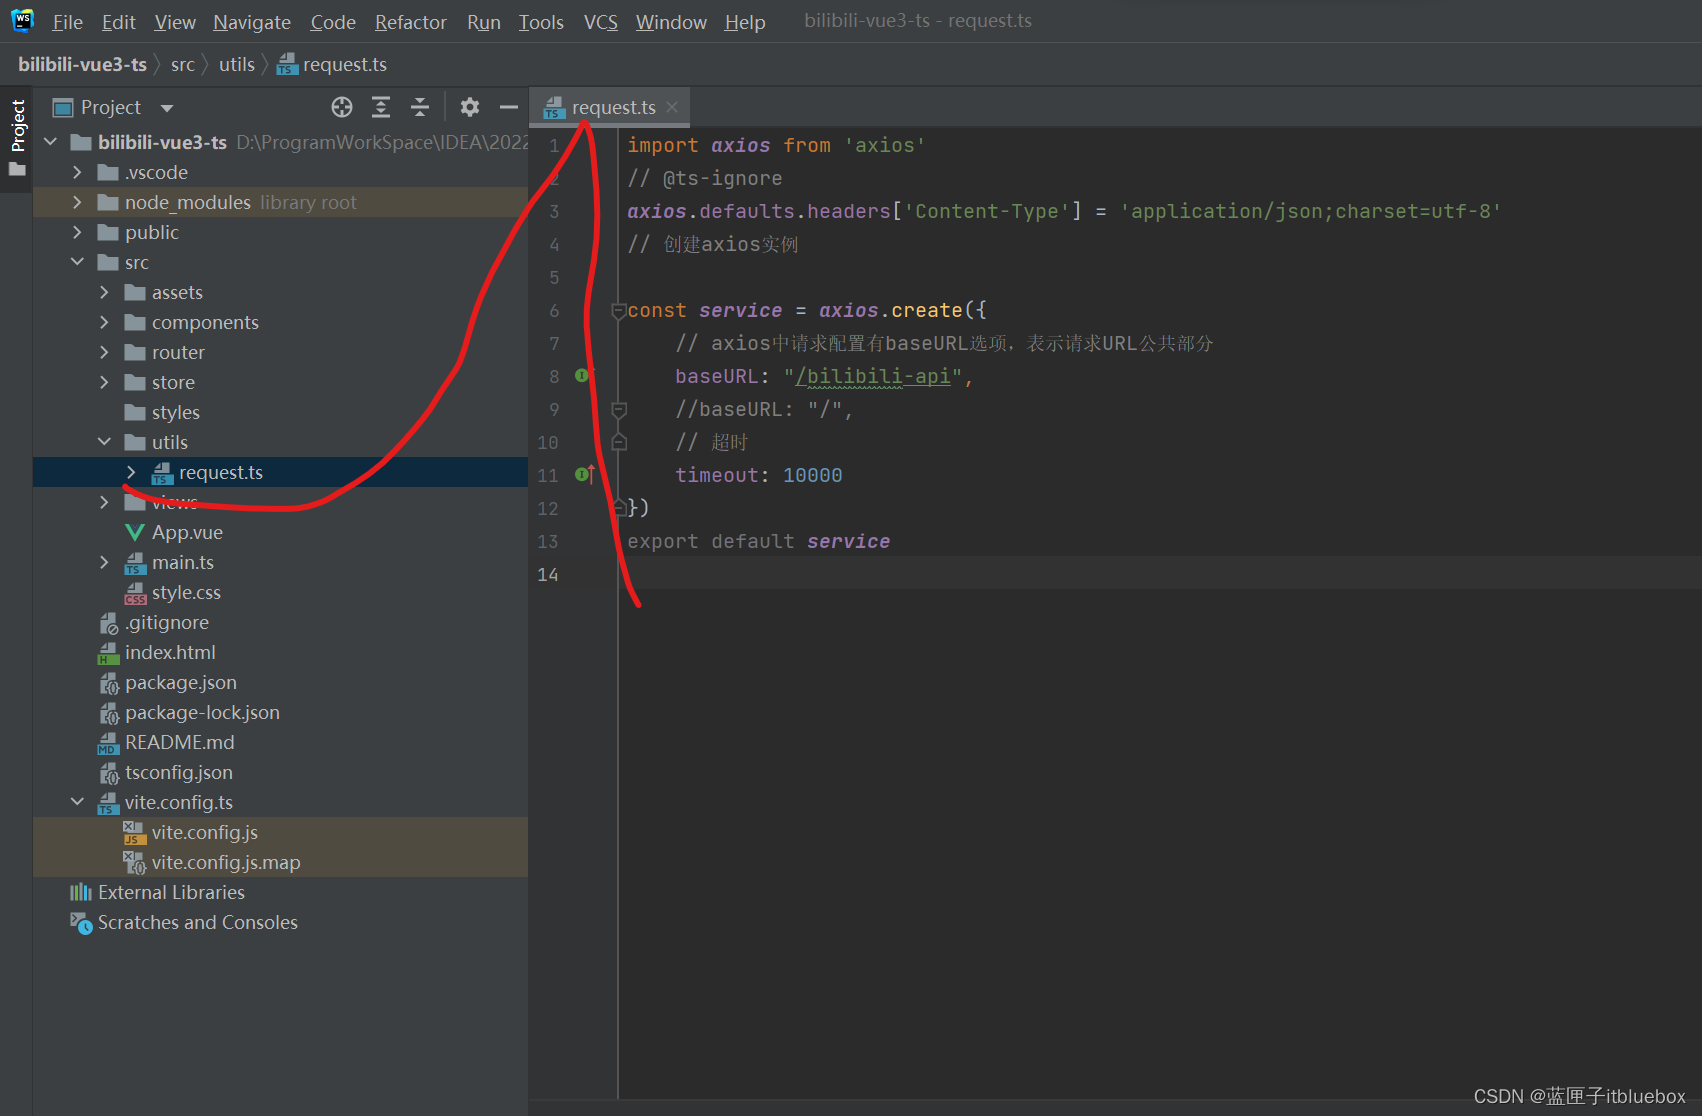
import axios from 'axios'
// @ts-ignore
axios.defaults.headers['Content-Type'] = 'application/json;charset=utf-8'
// 创建axios实例const service = axios.create({// axios中请求配置有baseURL选项,表示请求URL公共部分baseURL: "/bilibili-api",//baseURL: "/",// 超时timeout: 10000
})
export default service
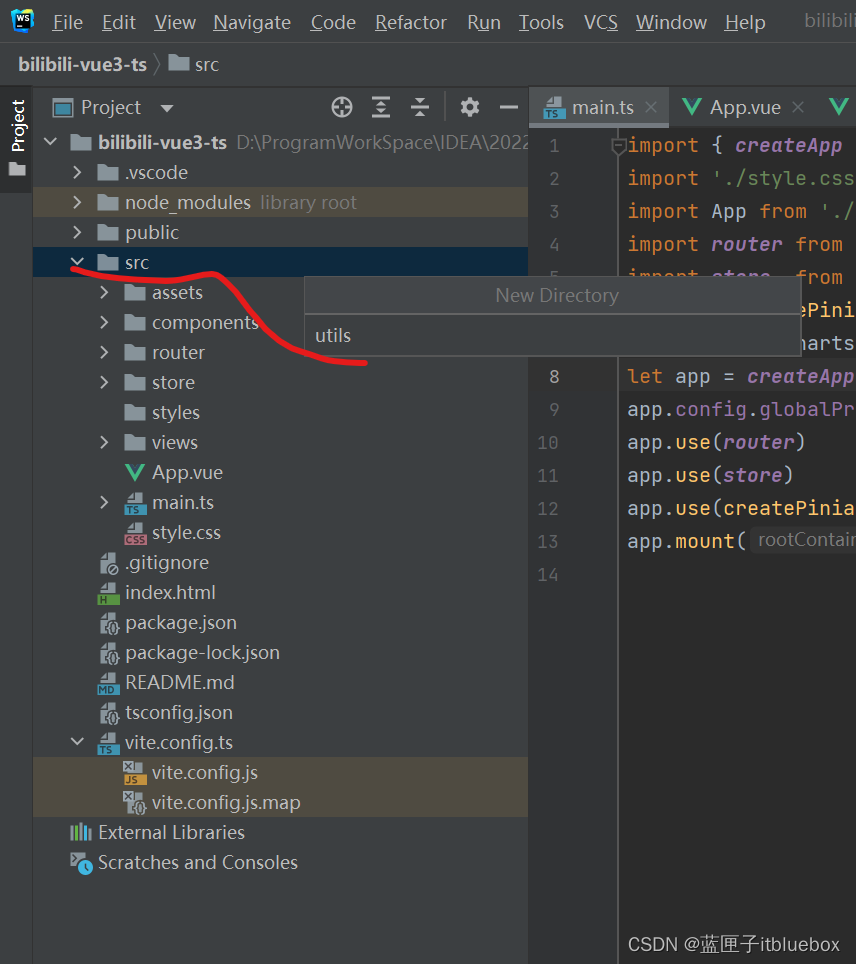
配置请求
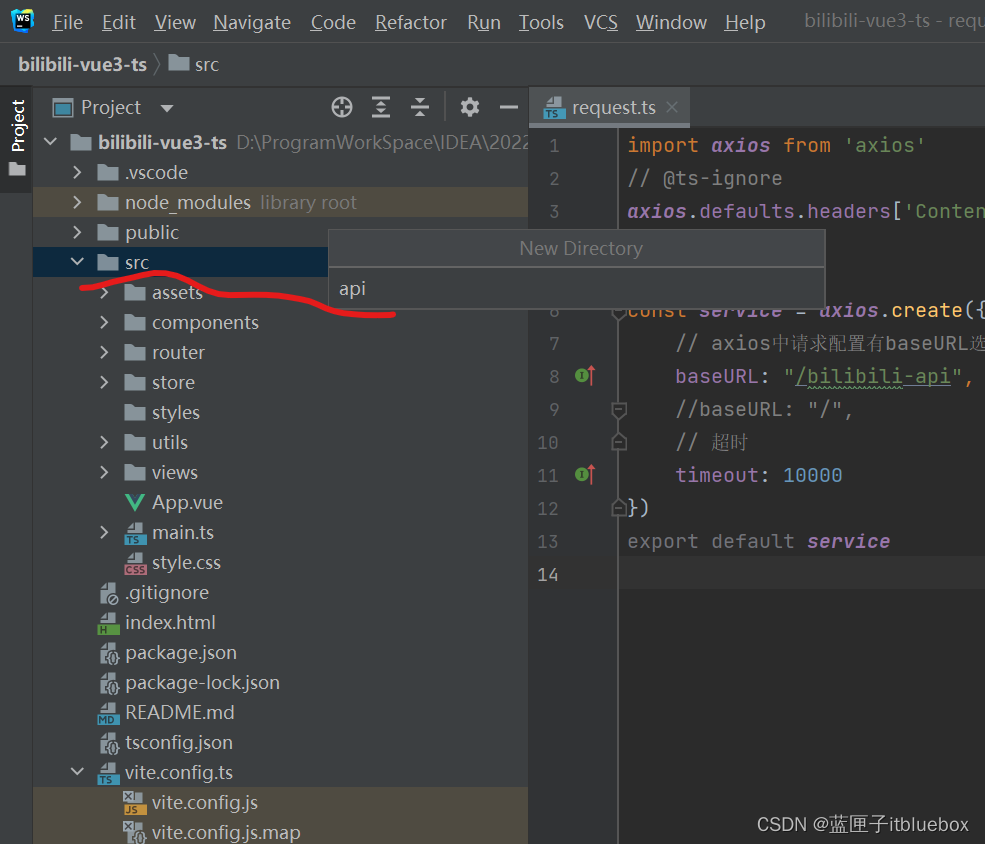
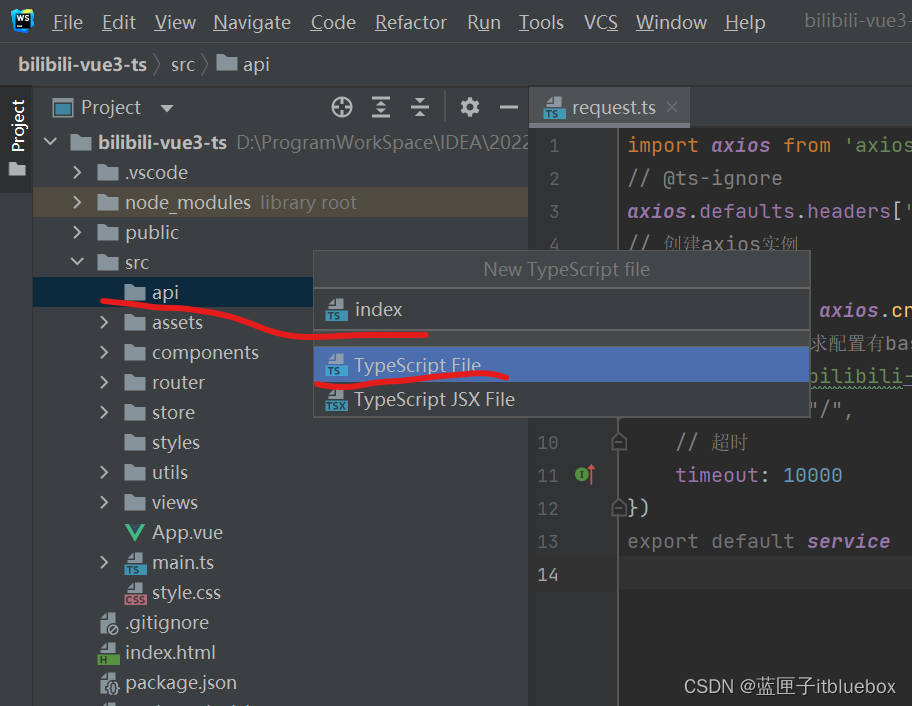
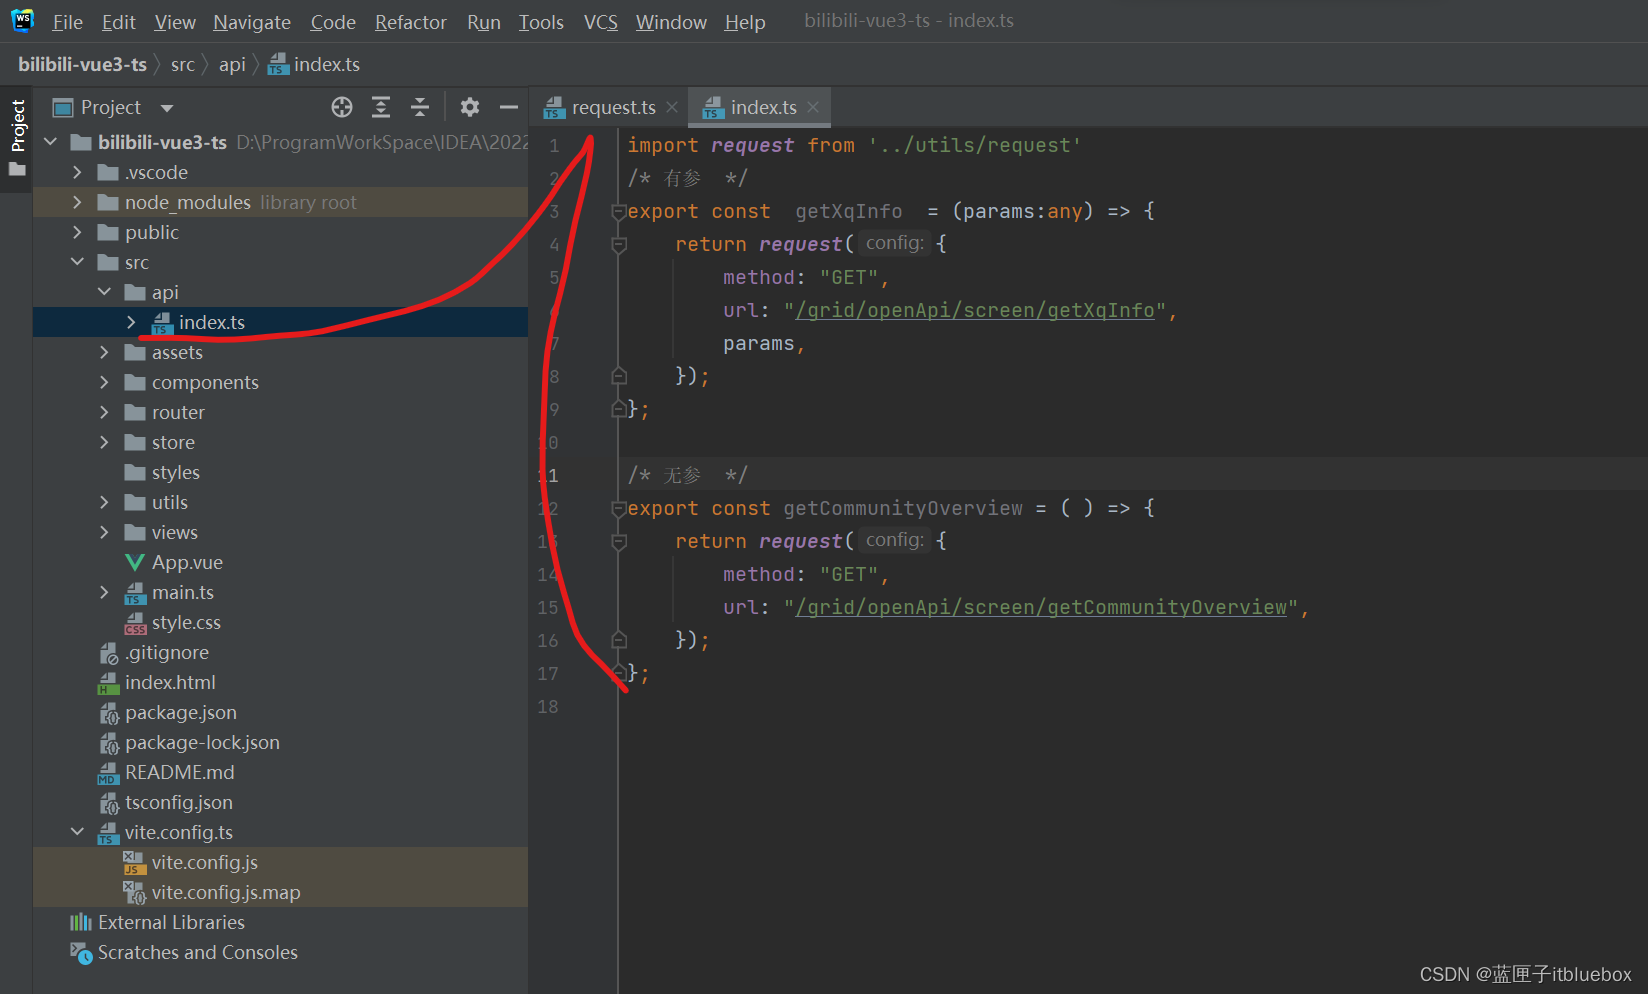
import request from '../utils/request'
/* 有参  */
export const  getXqInfo  = (params:any) => {return request({method: "GET",url: "/grid/openApi/screen/getXqInfo",params,});
};
/* 无参  */
export const getCommunityOverview = ( ) => {return request({method: "GET",url: "/grid/openApi/screen/getCommunityOverview",});
};
4、设置页面路由
删除页面的自动创建好的页面
设置路由
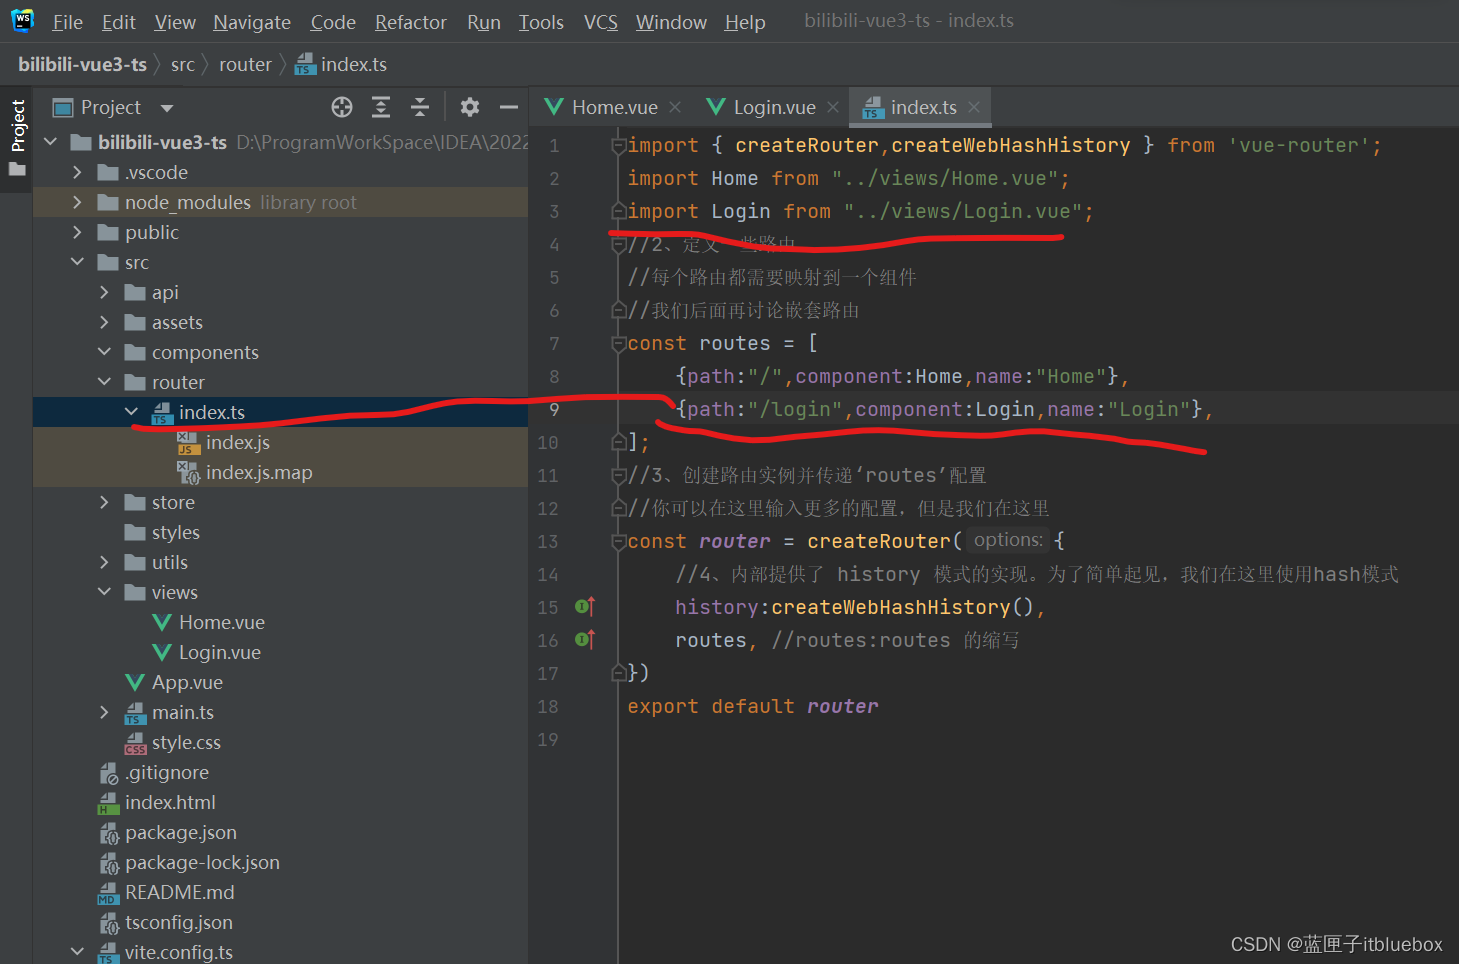
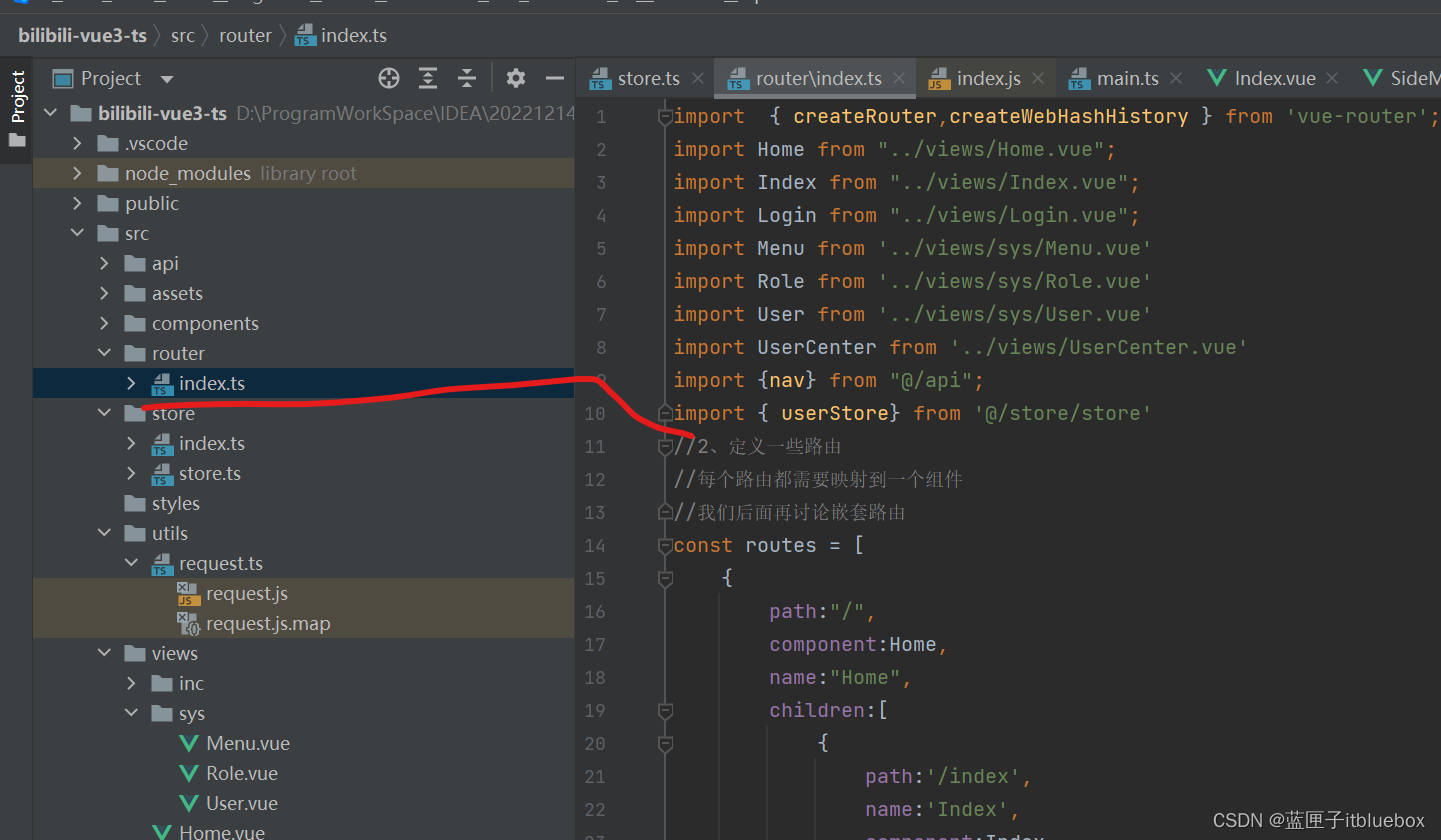
import { createRouter,createWebHashHistory } from 'vue-router';
import Home from "../views/Home.vue";
import Login from "../views/Login.vue";
//2、定义一些路由
//每个路由都需要映射到一个组件
//我们后面再讨论嵌套路由
const routes = [{path:"/",component:Home,name:"Home"},{path:"/login",component:Login,name:"Login"},
];
//3、创建路由实例并传递‘routes’配置
//你可以在这里输入更多的配置,但是我们在这里
const router = createRouter({//4、内部提供了 history 模式的实现。为了简单起见,我们在这里使用hash模式history:createWebHashHistory(),routes, //routes:routes 的缩写
})
export default router
(二)实现登录页面
1、设置登陆页面
我们找到From表单的内容
https://www.antdv.com/components/form-cn
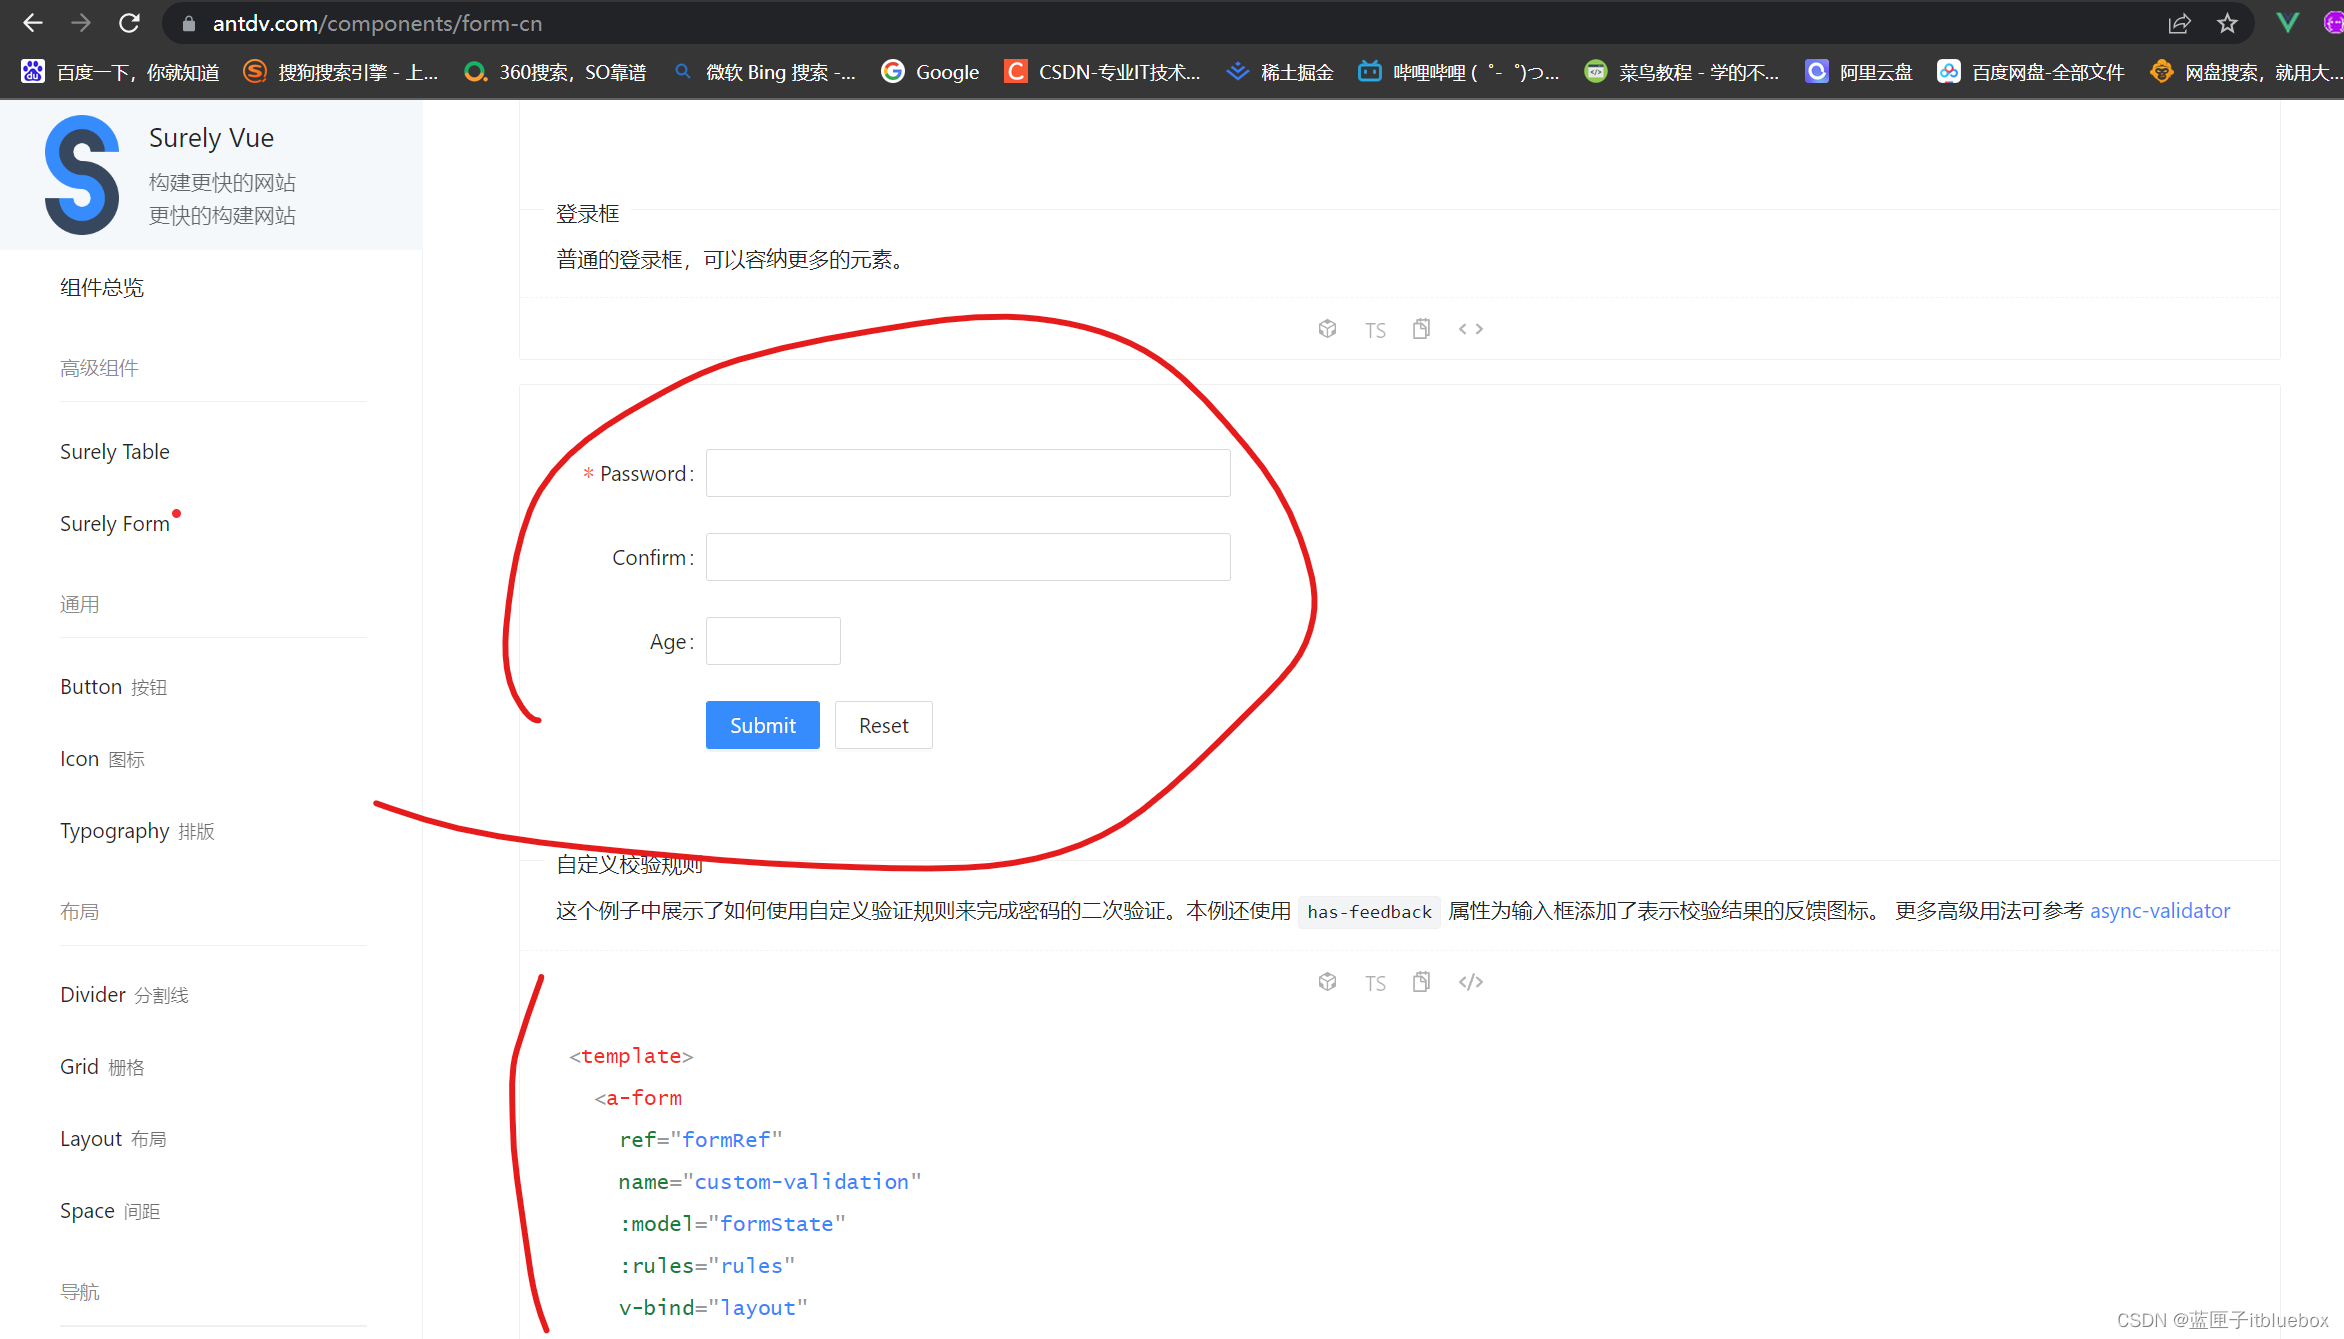
复制上述代码,但是我们并不会直接使用期内容
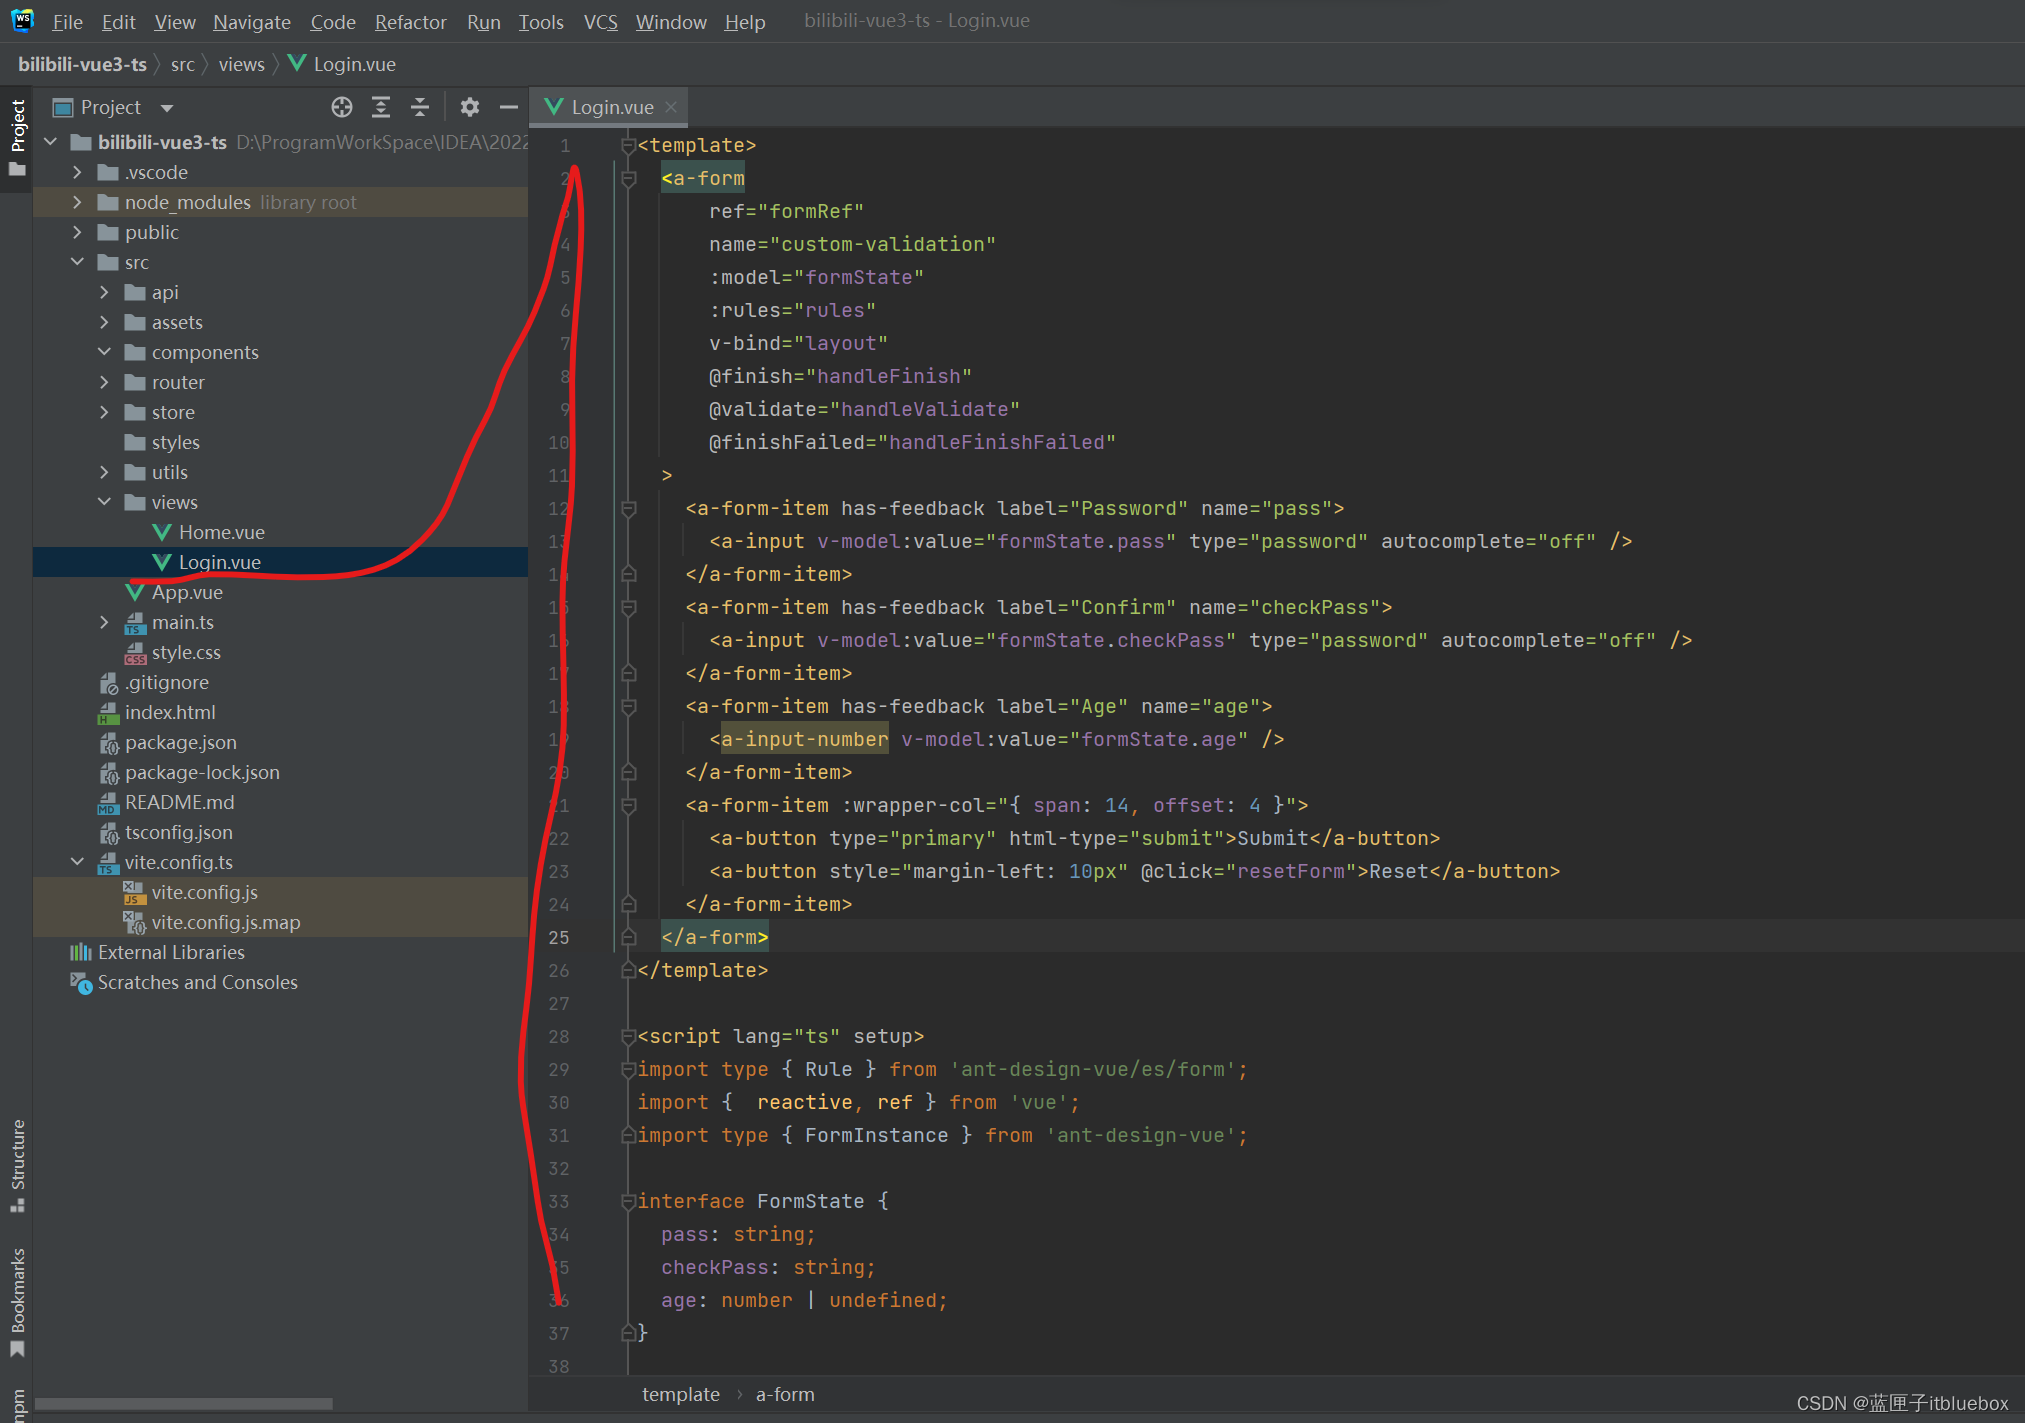
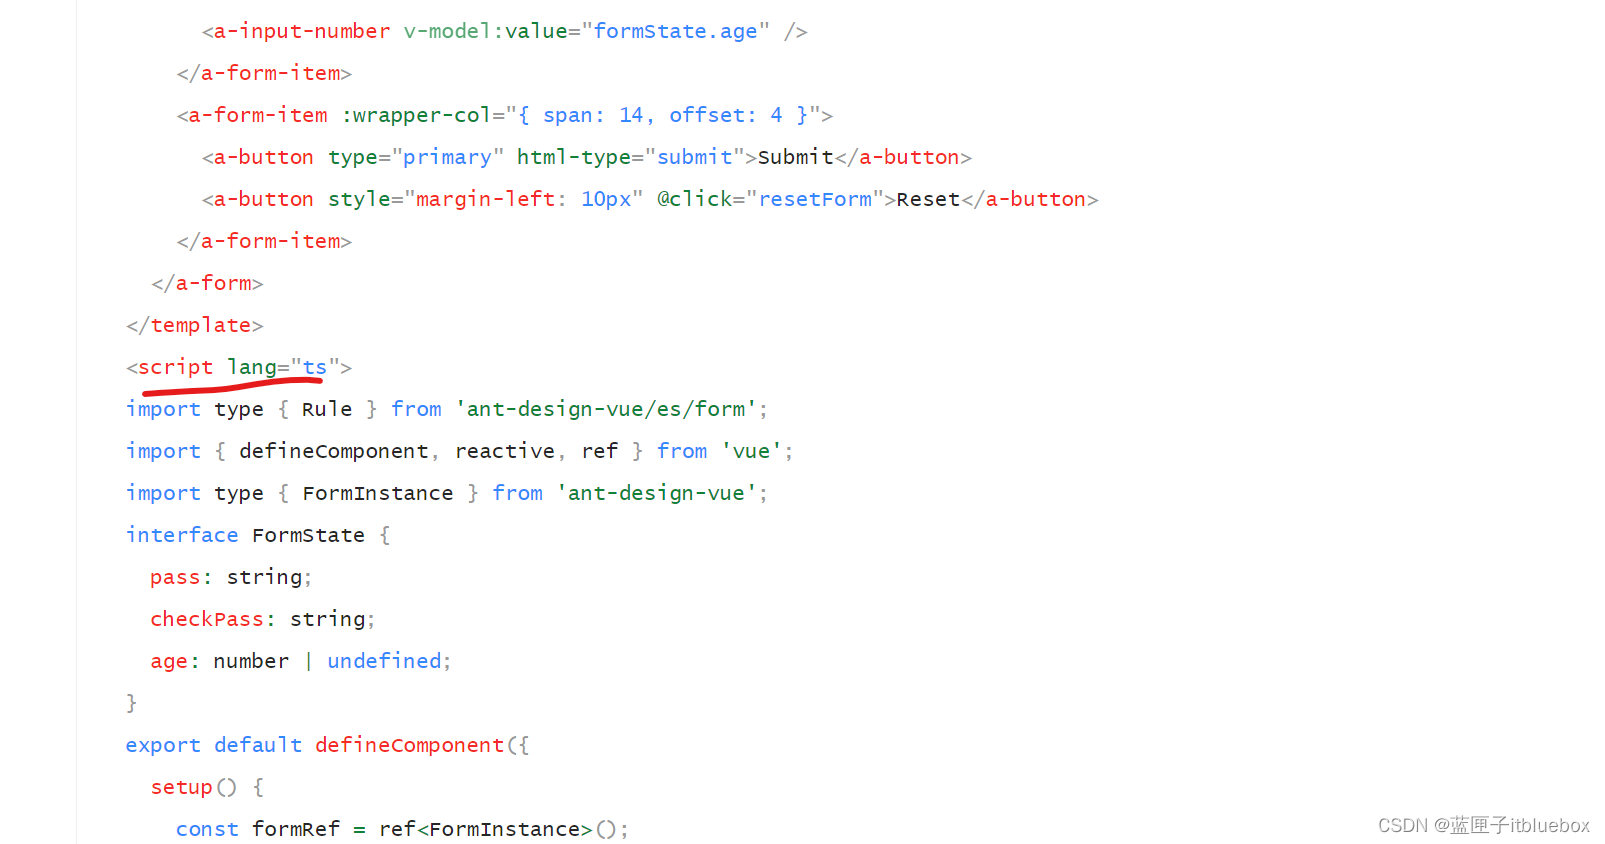
<template><a-formref="formRef"name="custom-validation":model="formState":rules="rules"v-bind="layout"@finish="handleFinish"@validate="handleValidate"@finishFailed="handleFinishFailed"><a-form-item has-feedback label="Password" name="pass"><a-input v-model:value="formState.pass" type="password" autocomplete="off" /></a-form-item><a-form-item has-feedback label="Confirm" name="checkPass"><a-input v-model:value="formState.checkPass" type="password" autocomplete="off" /></a-form-item><a-form-item has-feedback label="Age" name="age"><a-input-number v-model:value="formState.age" /></a-form-item><a-form-item :wrapper-col="{ span: 14, offset: 4 }"><a-button type="primary" html-type="submit">Submit</a-button><a-button style="margin-left: 10px" @click="resetForm">Reset</a-button></a-form-item></a-form>
</template><script lang="ts" setup>
import type { Rule } from 'ant-design-vue/es/form';
import {  reactive, ref } from 'vue';
import type { FormInstance } from 'ant-design-vue';interface FormState {pass: string;checkPass: string;age: number | undefined;
}const formRef = ref<FormInstance>();const formState = reactive<FormState>({pass: '',checkPass: '',age: undefined,
});let checkAge = async (_rule: Rule, value: number) => {if (!value) {return Promise.reject('Please input the age');}if (!Number.isInteger(value)) {return Promise.reject('Please input digits');} else {if (value < 18) {return Promise.reject('Age must be greater than 18');} else {return Promise.resolve();}}
};let validatePass = async (_rule: Rule, value: string) => {if (value === '') {return Promise.reject('Please input the password');} else {if (formState.checkPass !== '') {formRef.value!.validateFields('checkPass');}return Promise.resolve();}
};let validatePass2 = async (_rule: Rule, value: string) => {if (value === '') {return Promise.reject('Please input the password again');} else if (value !== formState.pass) {return Promise.reject("Two inputs don't match!");} else {return Promise.resolve();}
};const rules: Record<string, Rule[]> = {pass: [{ required: true, validator: validatePass, trigger: 'change' }],checkPass: [{ validator: validatePass2, trigger: 'change' }],age: [{ validator: checkAge, trigger: 'change' }],
};const layout = {labelCol: { span: 4 },wrapperCol: { span: 14 },
};const handleFinish = (values: FormState) => {console.log(values, formState);
};const handleFinishFailed = (errors: any) => {console.log(errors);
};const resetForm = () => {formRef.value!.resetFields();
};const handleValidate = (...args: any[]) => {console.log(args);
};
</script>
<style scoped></style>
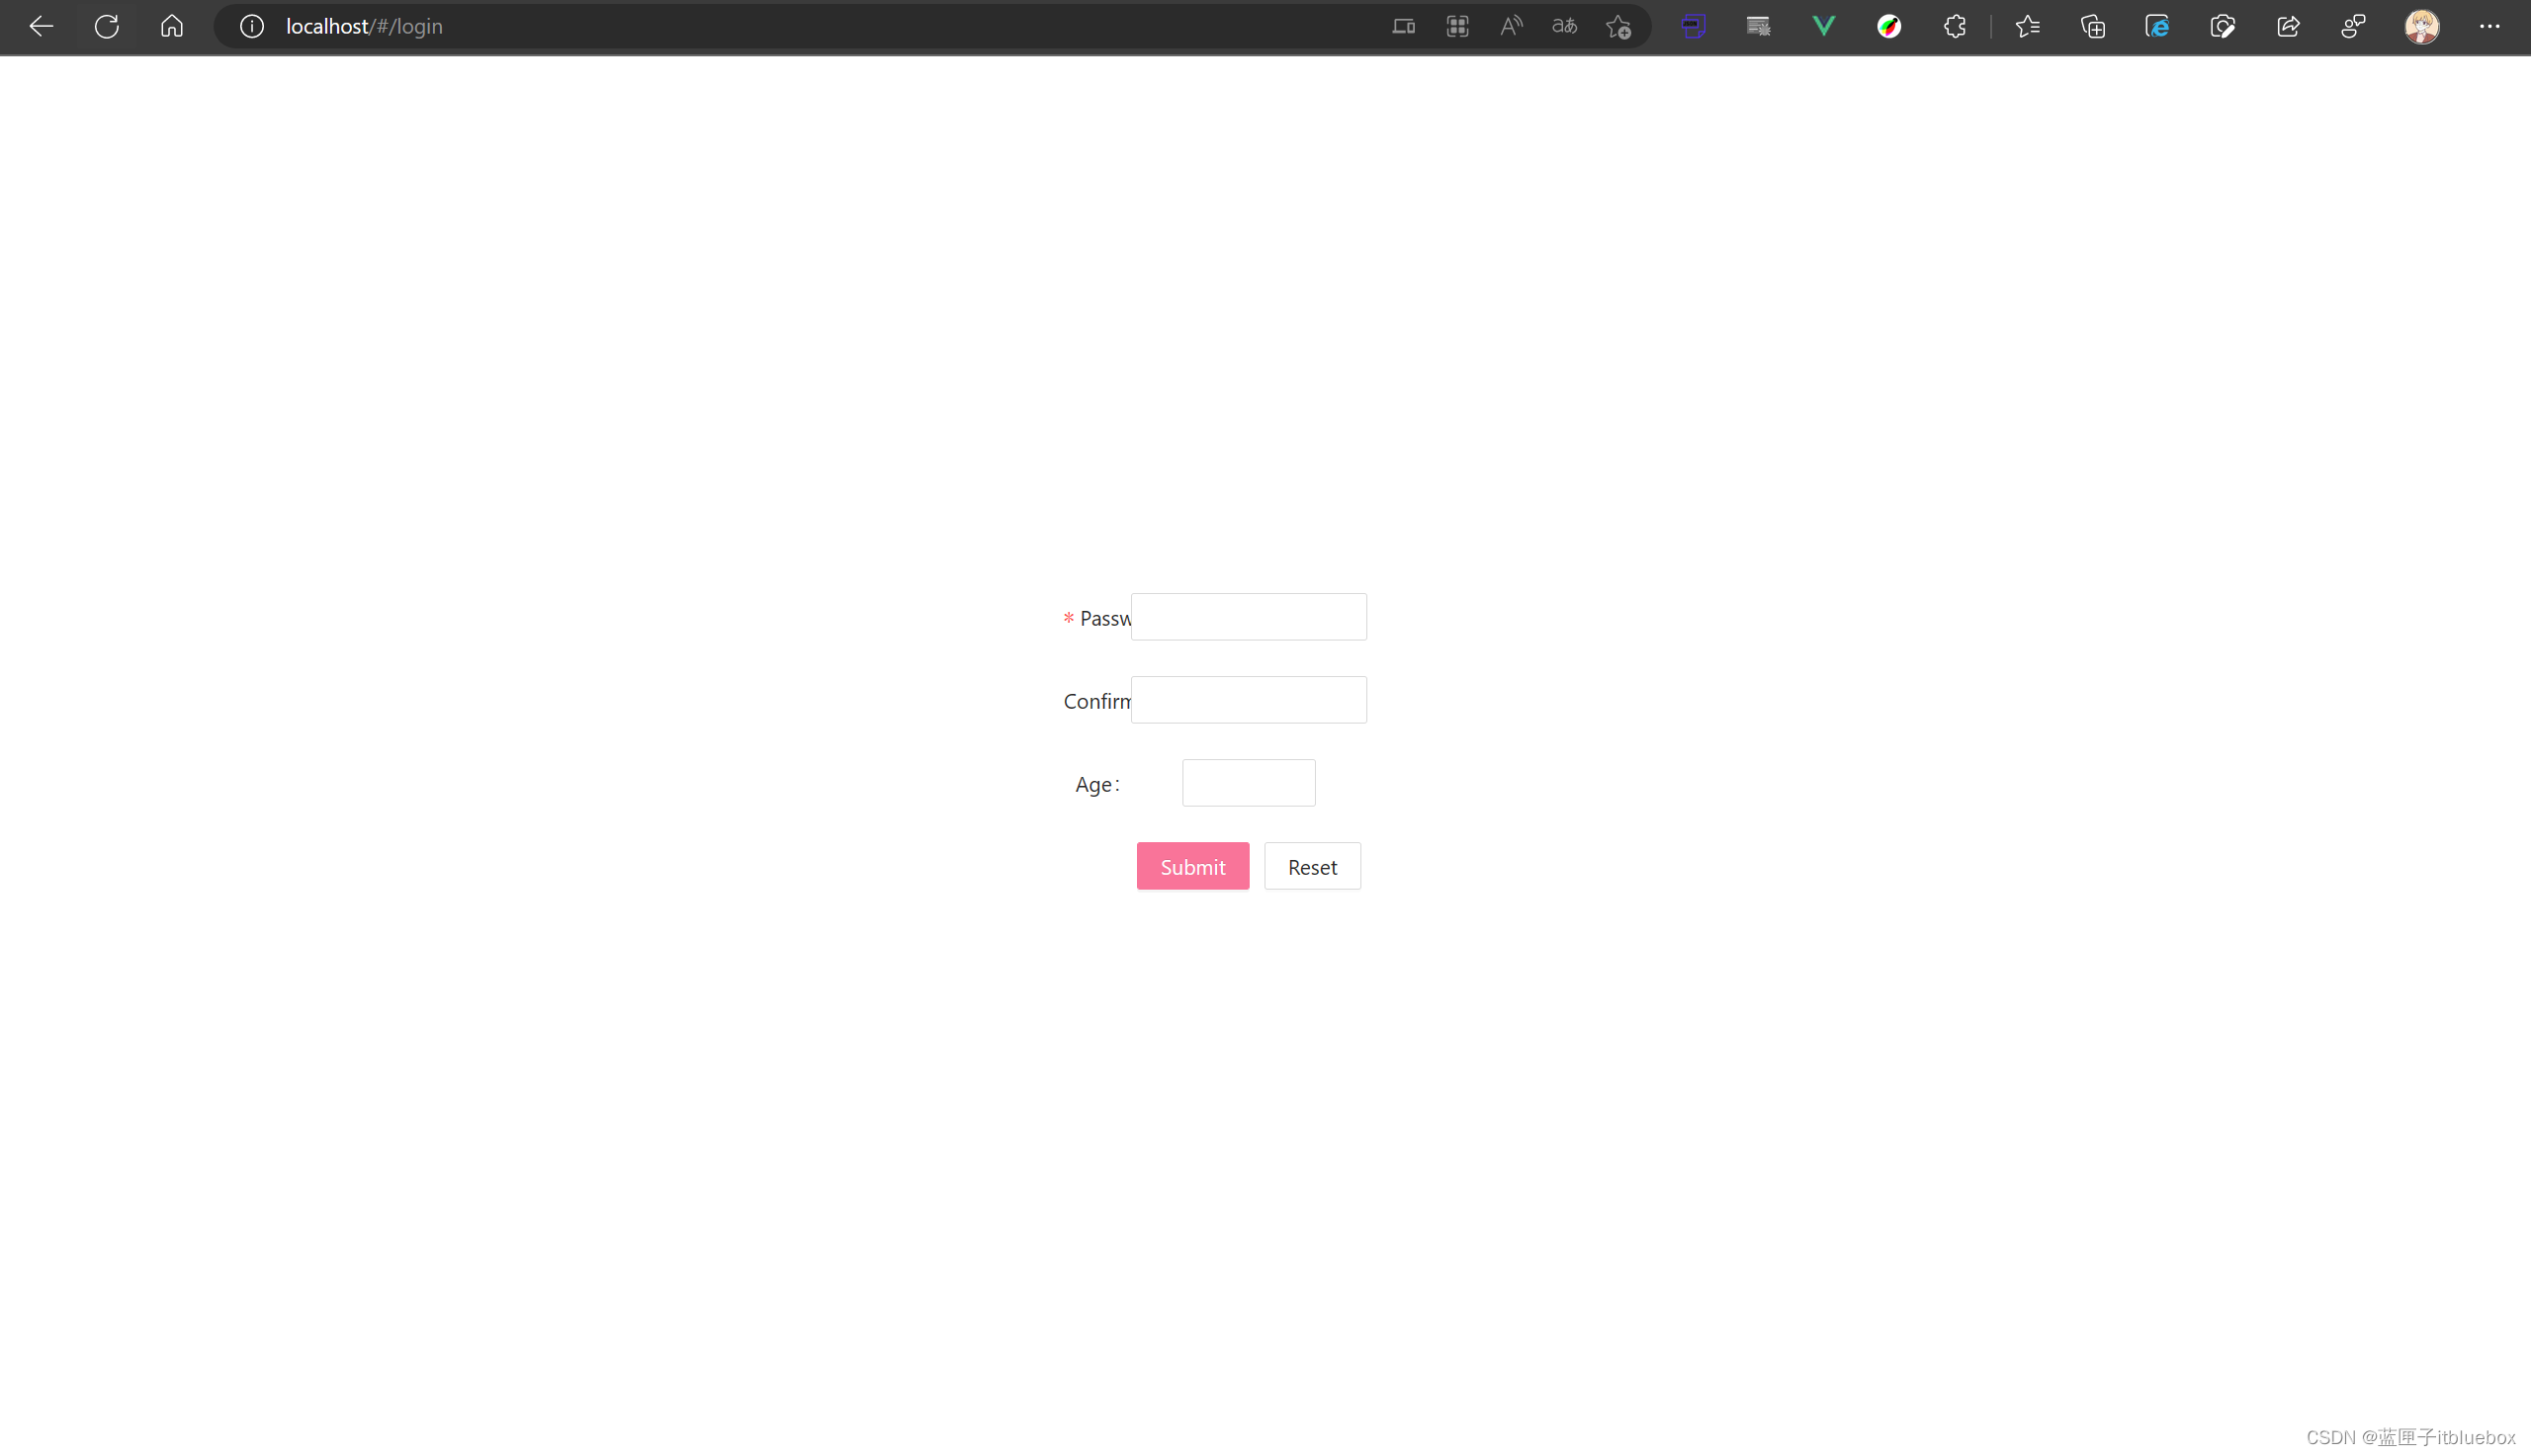
访问页面http://localhost/#/login
删除style.css当中样式

调整一下页面
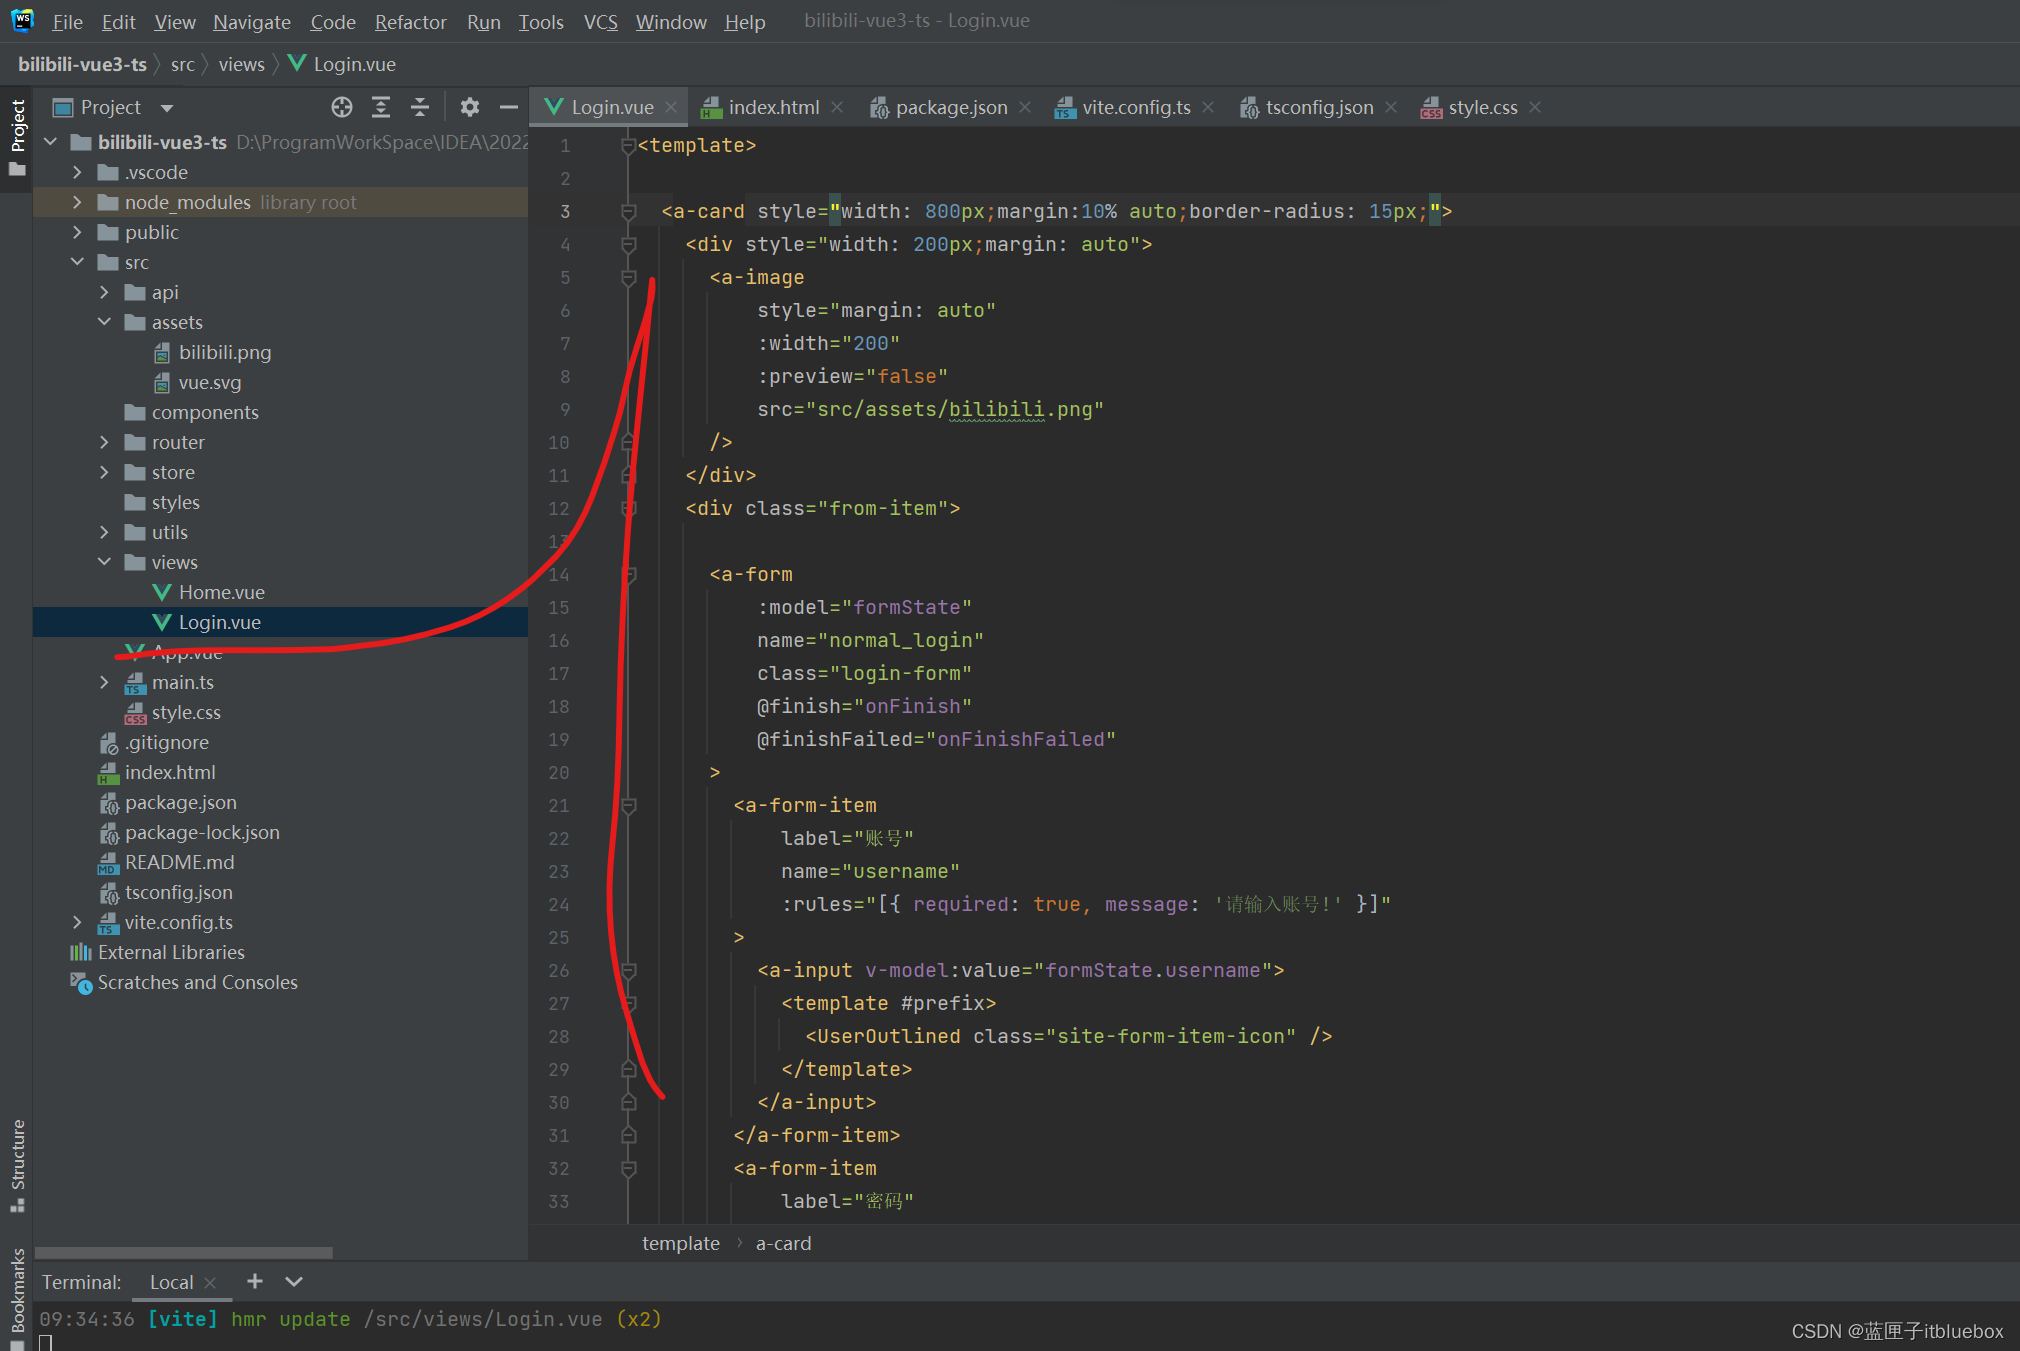
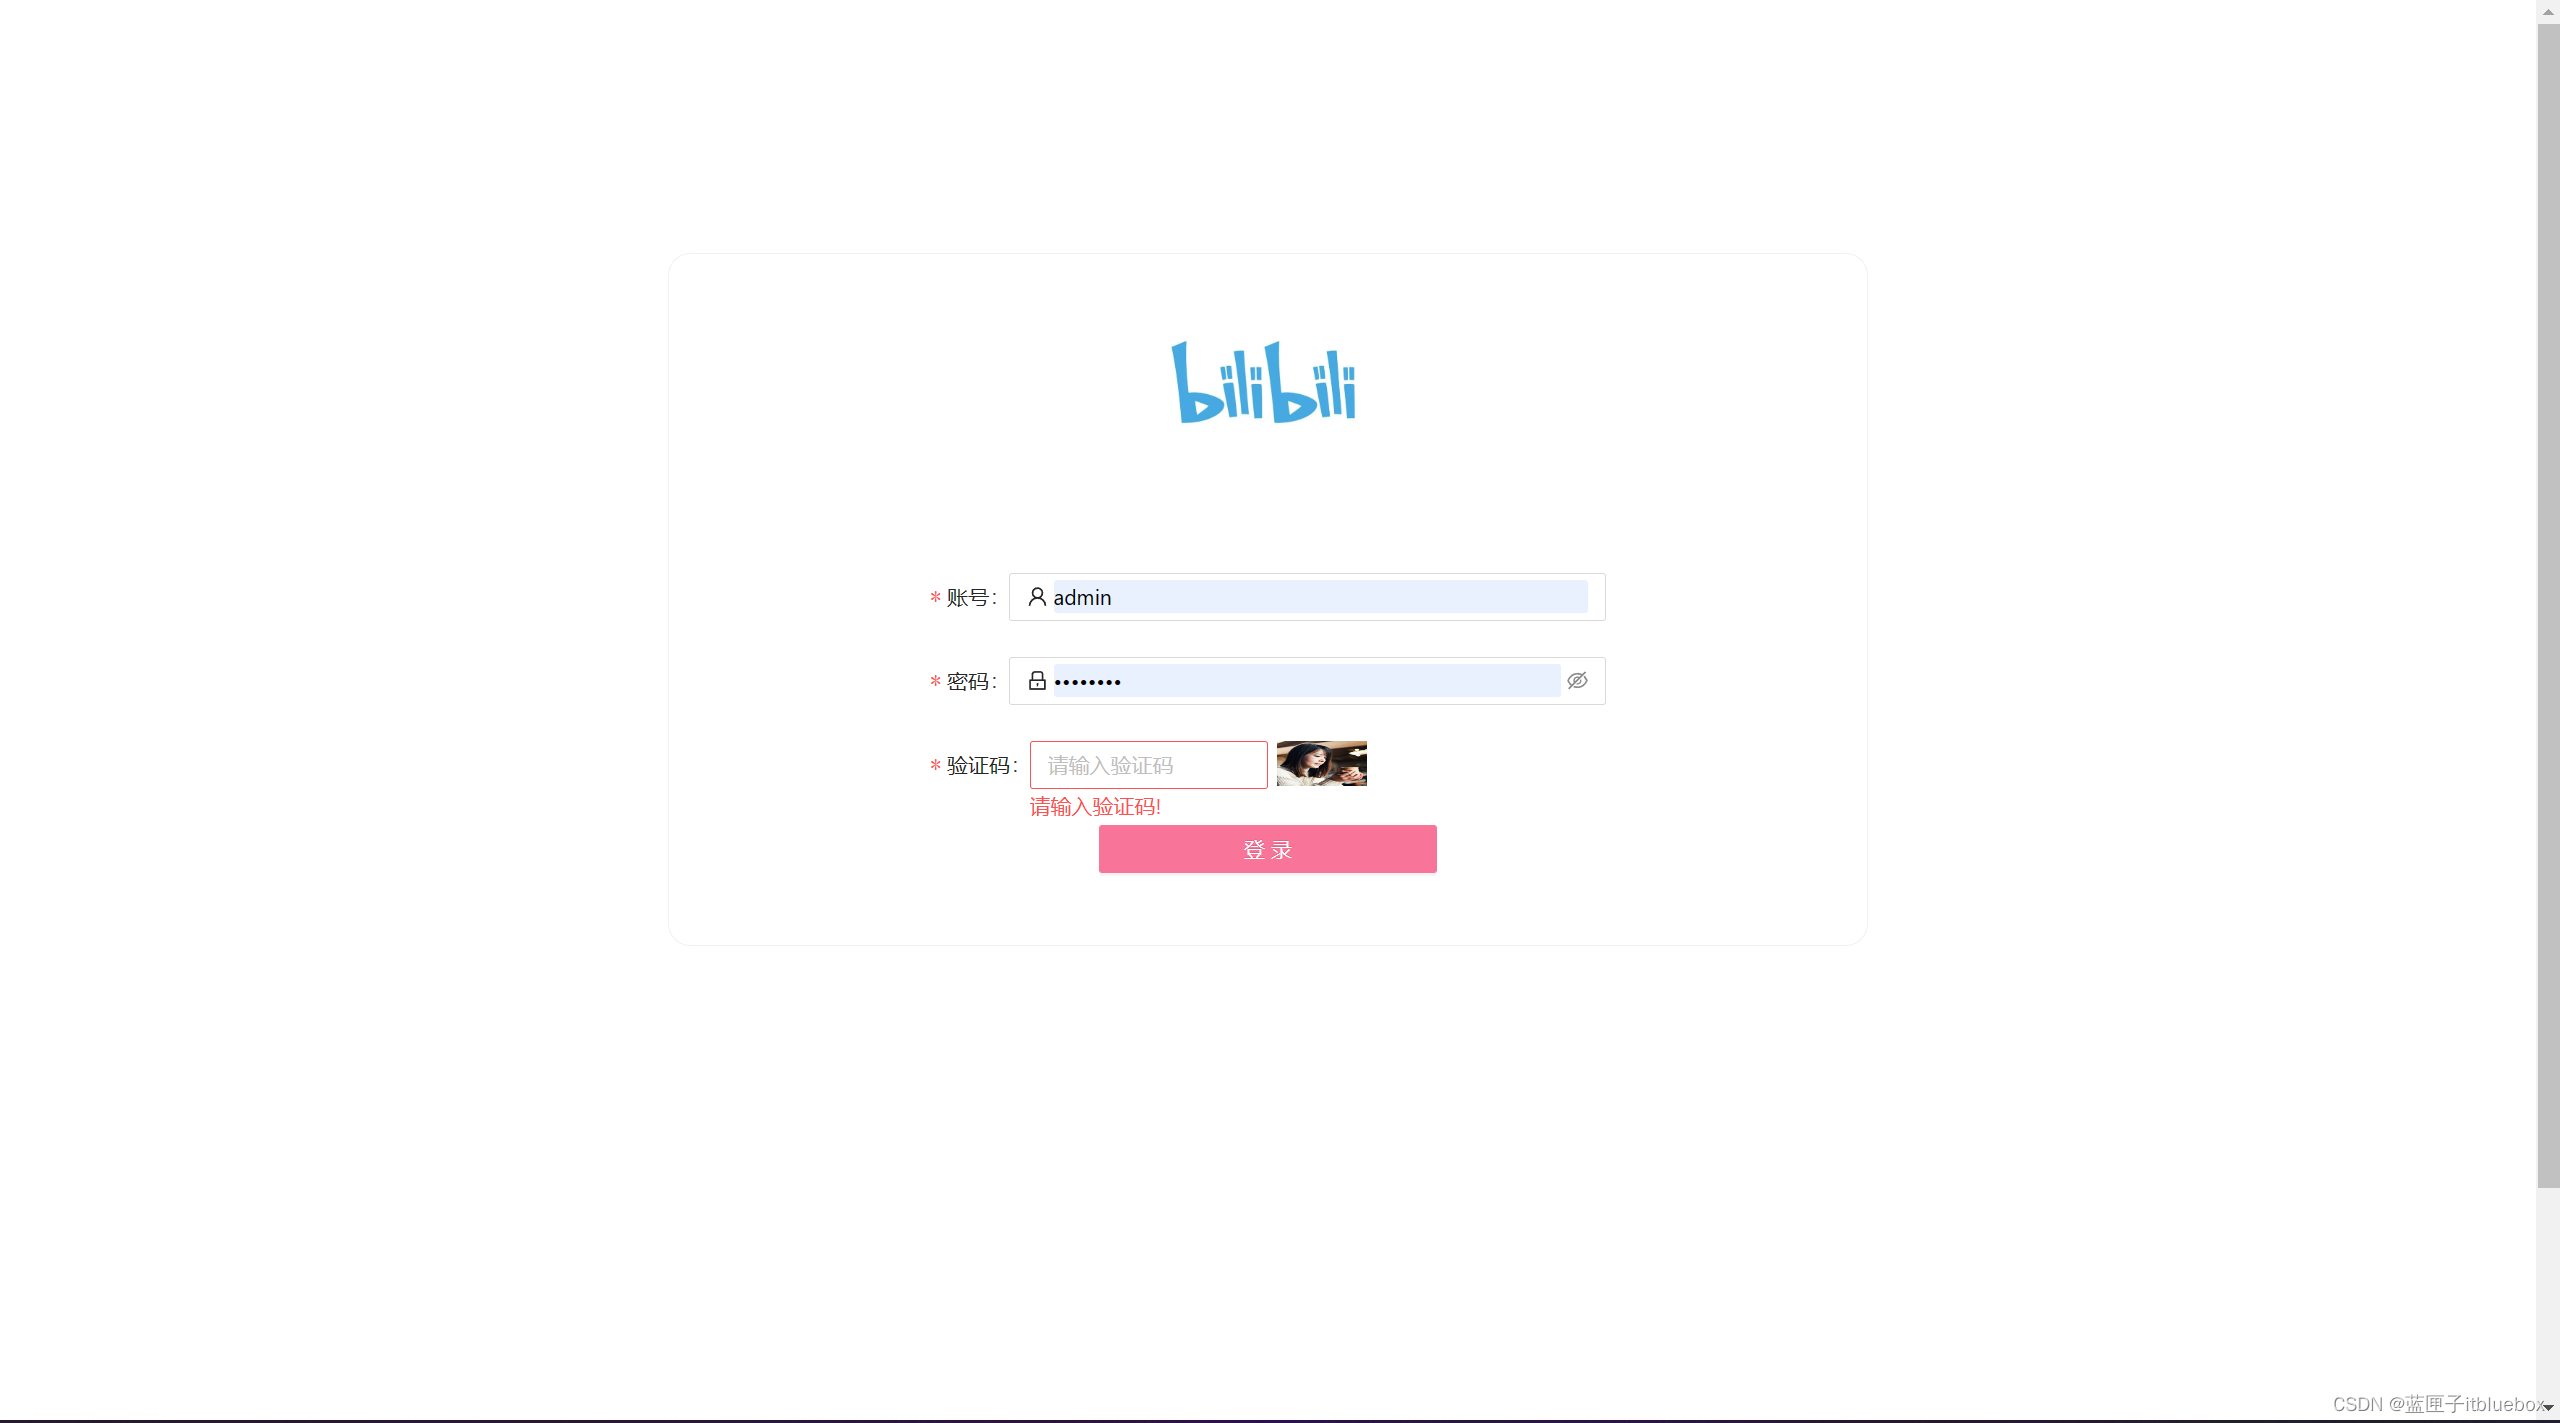
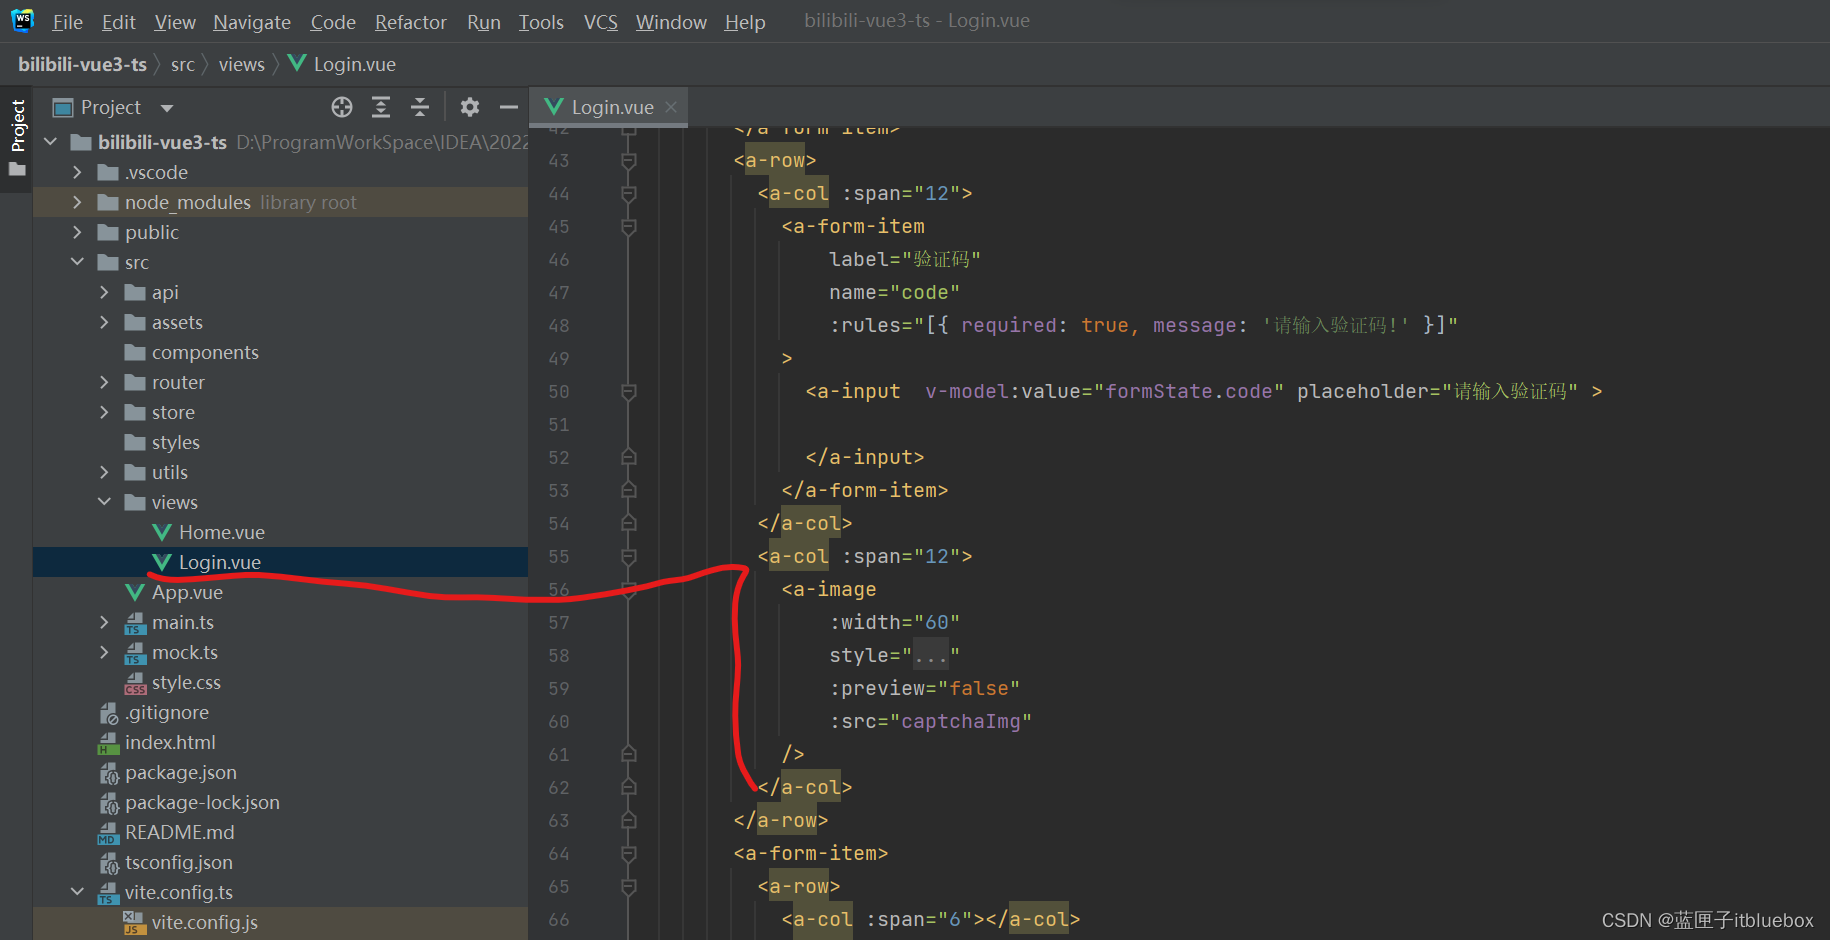
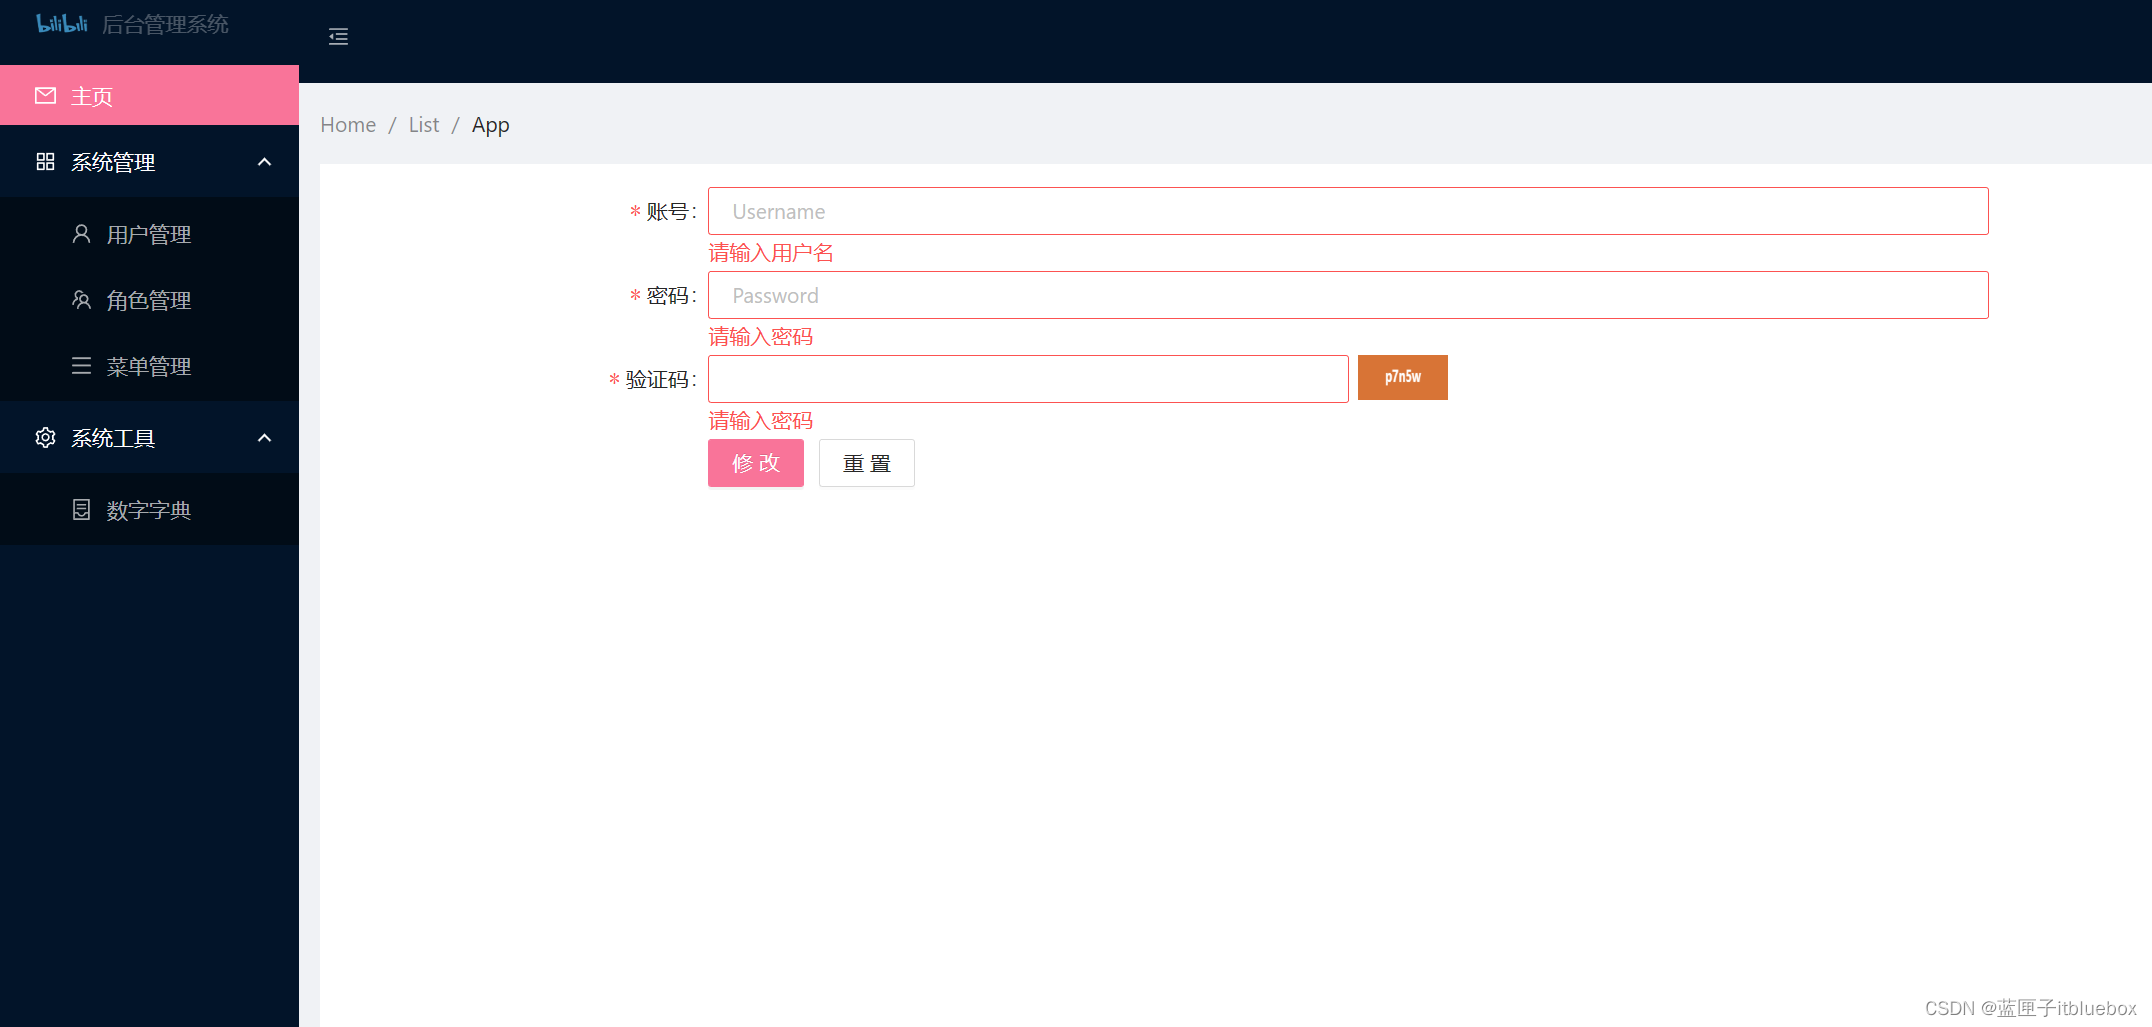
<template><a-card style="width: 800px;margin:10% auto;border-radius: 15px;"><div style="width: 200px;margin: auto"><a-imagestyle="margin: auto":width="200":preview="false"src="src/assets/bilibili.png"/></div><div class="from-item"><a-form:model="formState"name="normal_login"class="login-form"@finish="onFinish"@finishFailed="onFinishFailed"><a-form-itemlabel="账号"name="username":rules="[{ required: true, message: '请输入账号!' }]"><a-input v-model:value="formState.username"><template #prefix><UserOutlined class="site-form-item-icon" /></template></a-input></a-form-item><a-form-itemlabel="密码"name="password":rules="[{ required: true, message: '请输入密码!' }]"><a-input-password v-model:value="formState.password"><template #prefix><LockOutlined class="site-form-item-icon" /></template></a-input-password></a-form-item><a-row><a-col :span="12"><a-form-itemlabel="验证码"name="code":rules="[{ required: true, message: '请输入验证码!' }]"><a-input  v-model:value="formState.code" placeholder="请输入验证码" ></a-input></a-form-item></a-col><a-col :span="12"><a-image:width="60"style="height: 30px;margin-left: 10%":preview="false"src="https://zos.alipayobjects.com/rmsportal/jkjgkEfvpUPVyRjUImniVslZfWPnJuuZ.png"/></a-col></a-row><a-form-item><a-row><a-col :span="6"></a-col><a-col :span="12"><a-button  type="primary" block html-type="submit" class="login-form-button">登录</a-button></a-col><a-col :span="6"></a-col></a-row></a-form-item></a-form></div></a-card>
</template><script lang="ts" setup>
import { defineComponent, reactive, computed } from 'vue';
import { UserOutlined, LockOutlined } from '@ant-design/icons-vue';
interface FormState {username: string;password: string;code: string;
}
const formState = reactive<FormState>({username: '',password: '',code: '',
});
const onFinish = (values: any) => {console.log('Success:', values);
};const onFinishFailed = (errorInfo: any) => {console.log('Failed:', errorInfo);
};
const disabled = computed(() => {return !(formState.username && formState.password);
});
</script><style scoped>
.from-item{padding-top: 10%;margin: auto;width: 60%;
}#components-form-demo-normal-login .login-form {max-width: 300px;
}
#components-form-demo-normal-login .login-form-forgot {float: right;
}
#components-form-demo-normal-login .login-form-button {width: 100%;
}
</style>
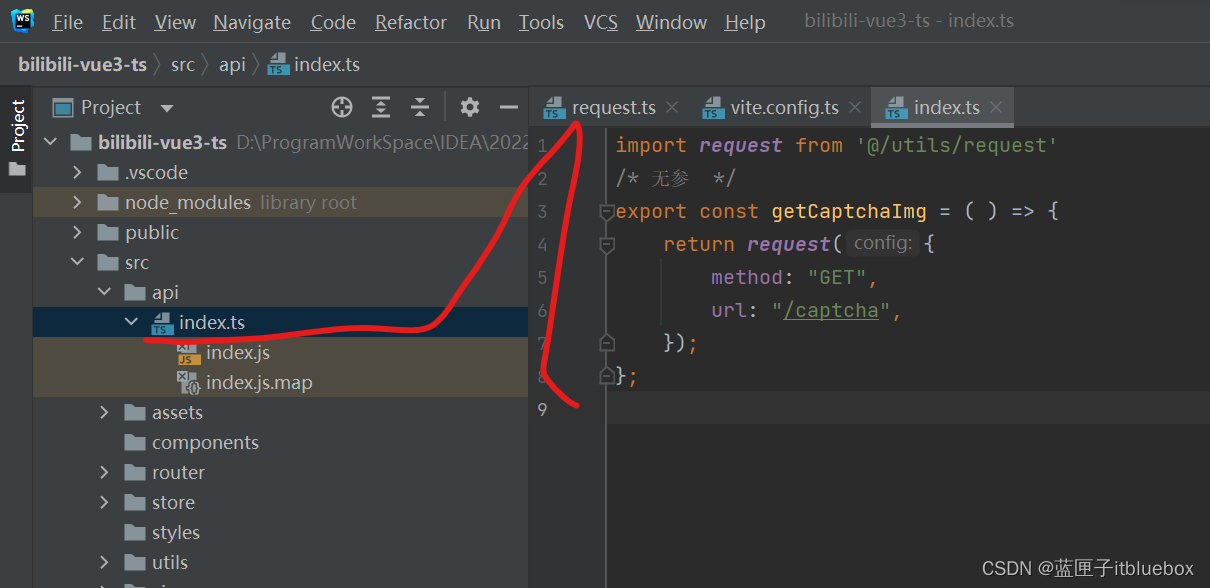
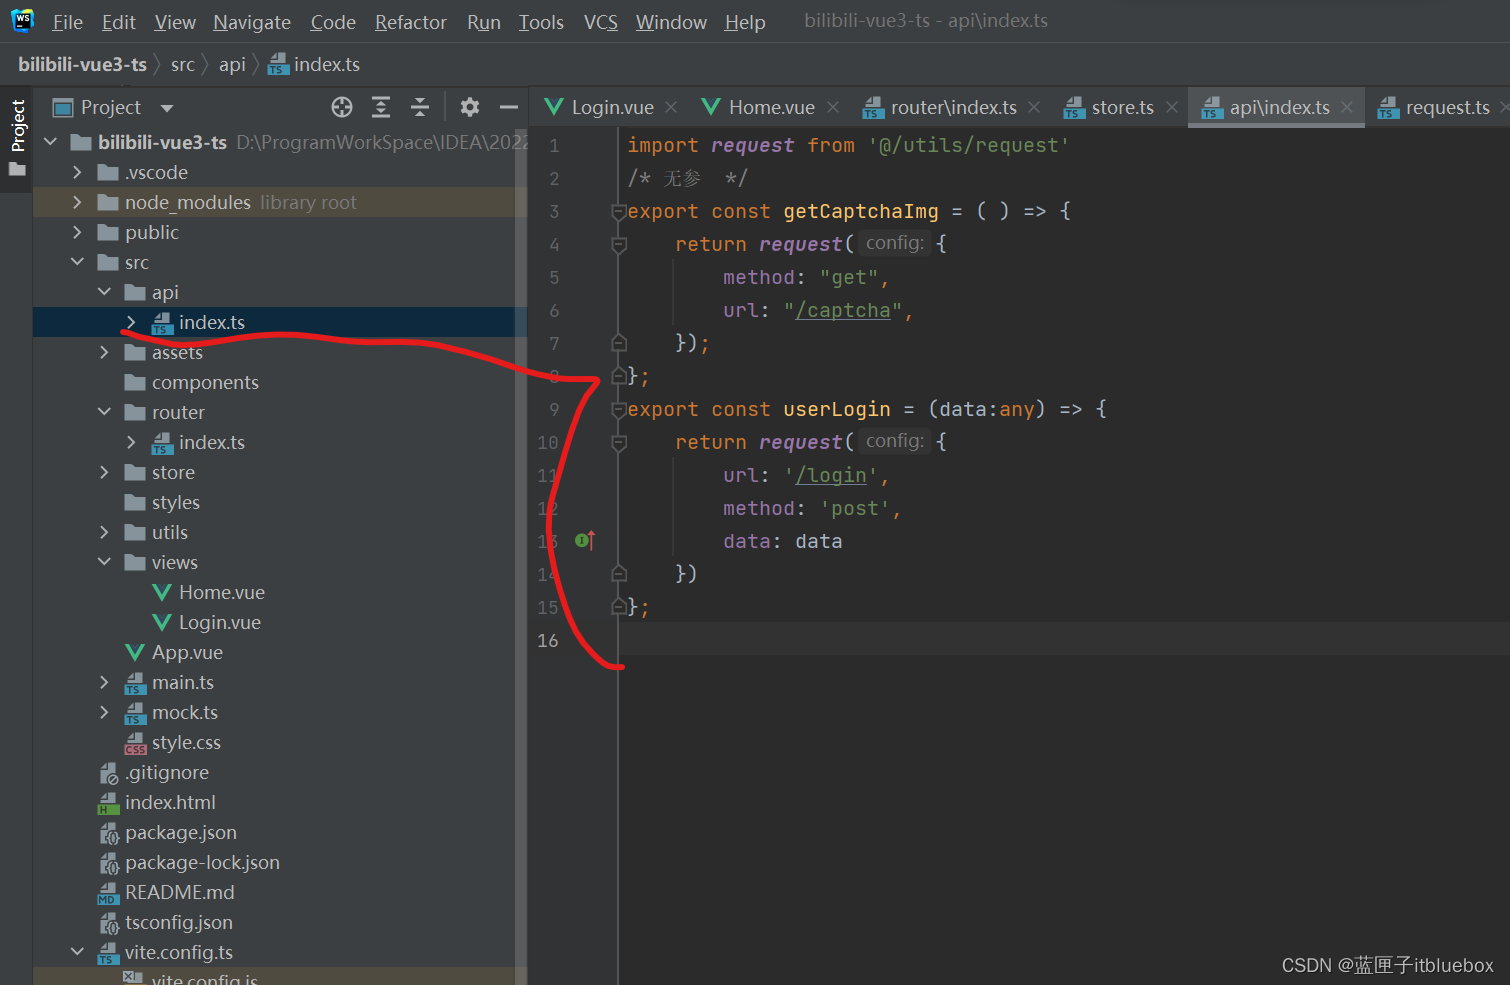
2、设置登录请求
import request from '@/utils/request'
/* 无参  */
export const getCaptchaImg = ( ) => {return request({method: "GET",url: "/captcha",});
};
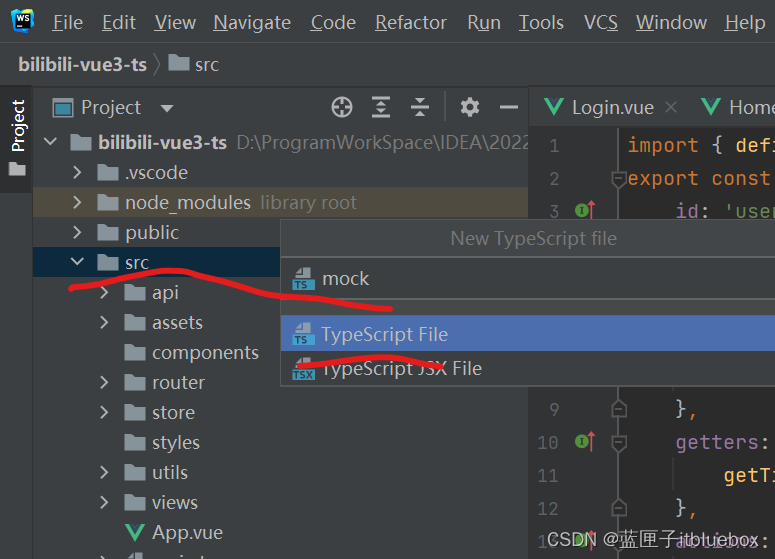
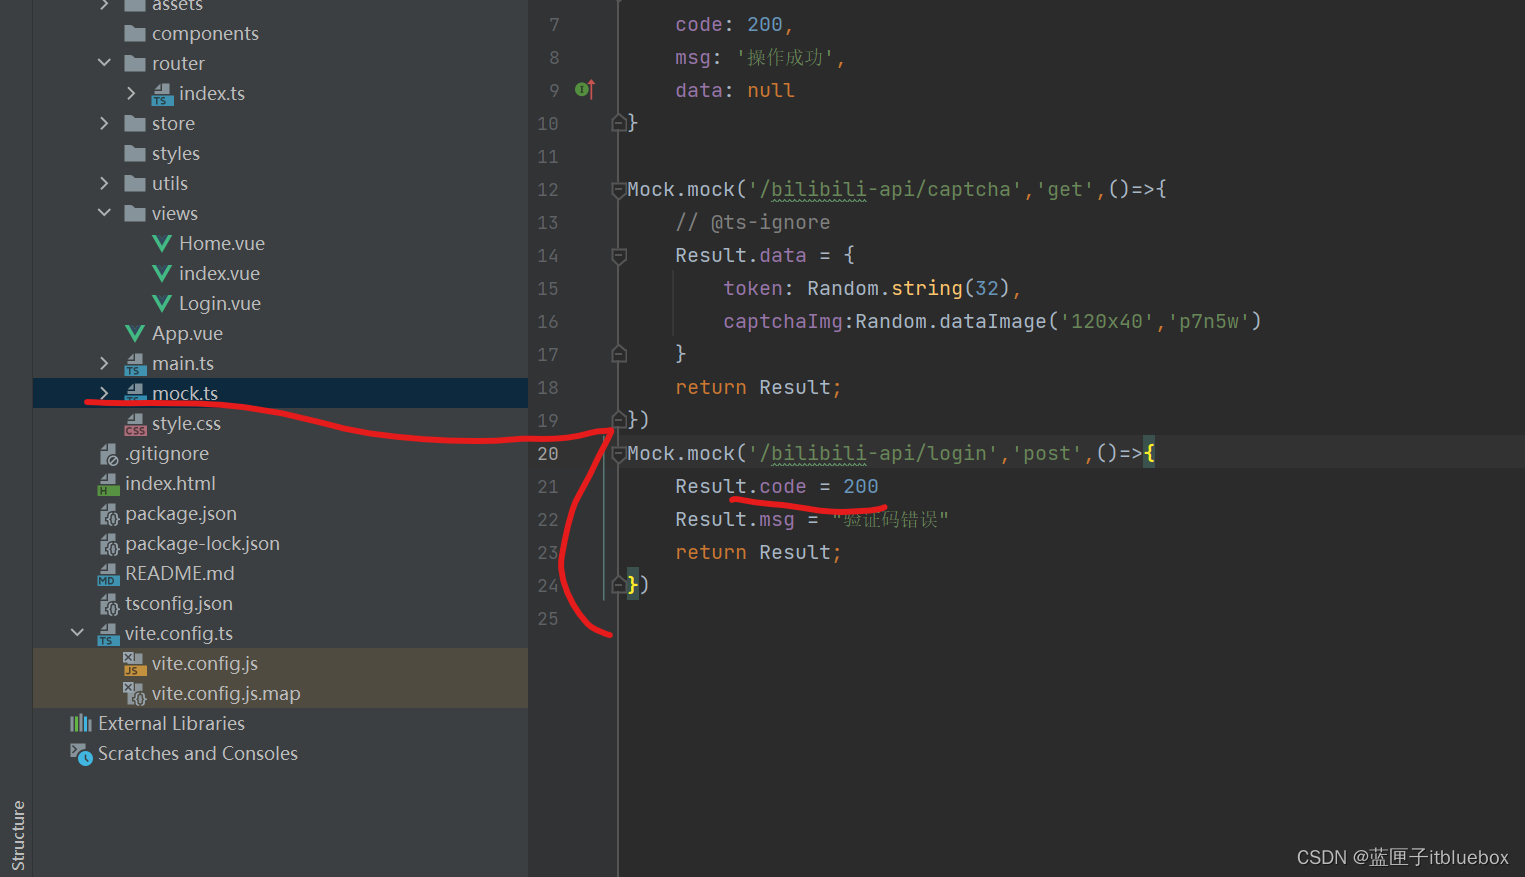
3、创建mock.ts
安装qs
qs:查询参数序列化和解析库
npm install qs
安装mockjs
mockjs:为我们生成随机数据的工具库
npm install mockjs
在main.ts当中引入mock.ts
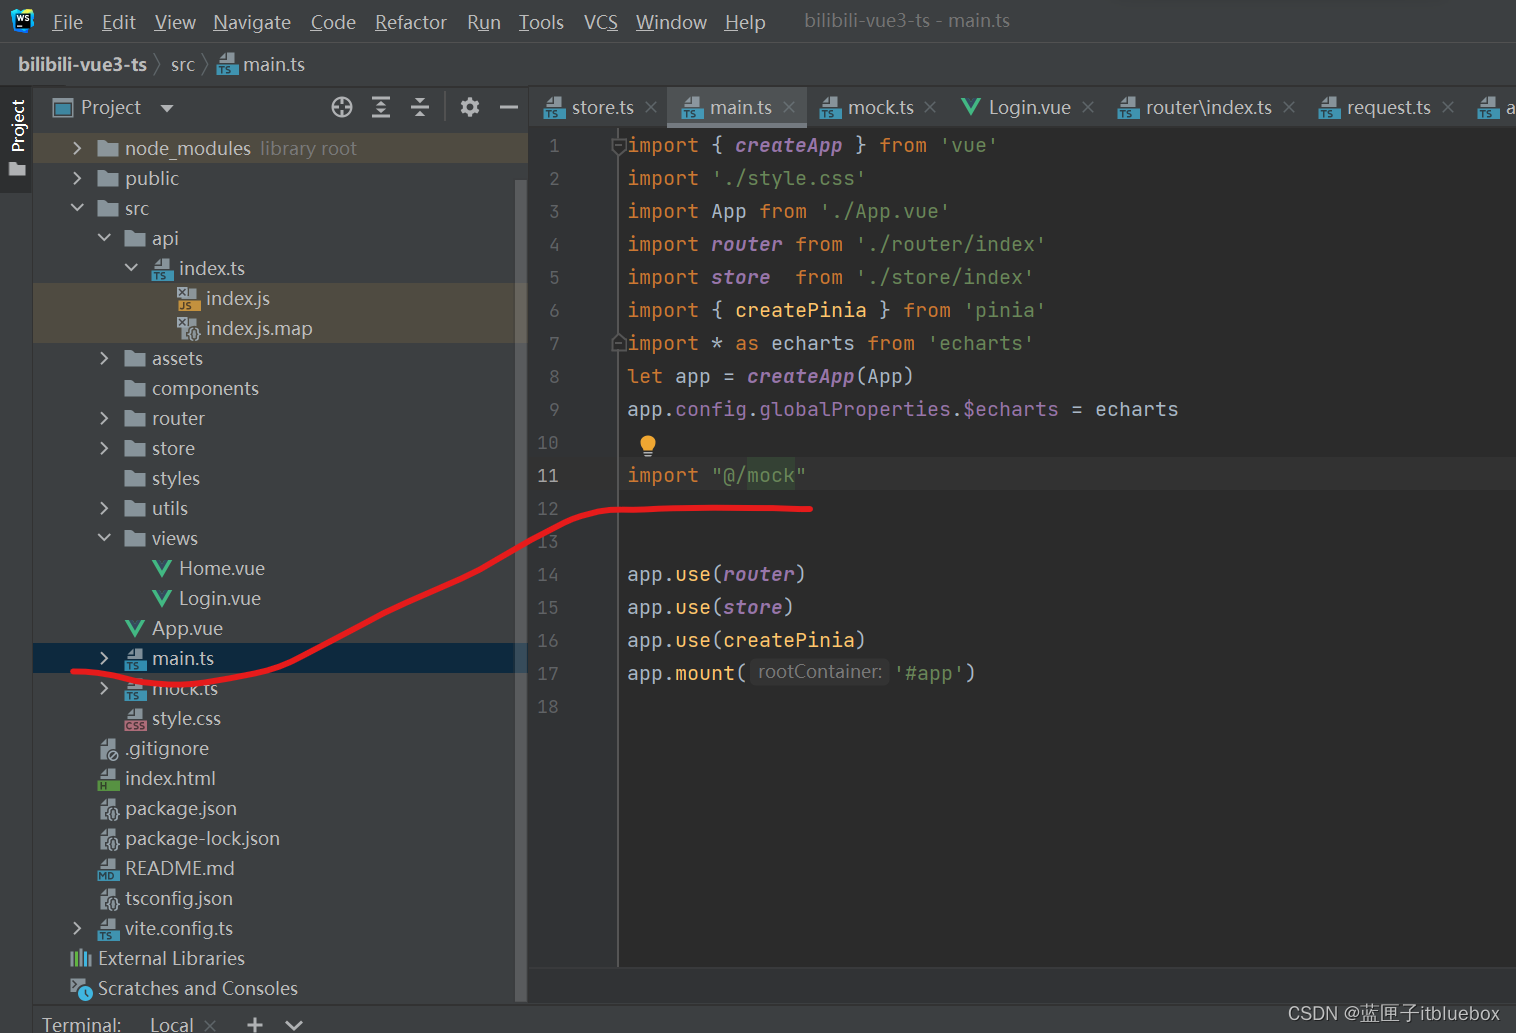
import "@/mock"
完善mock.ts
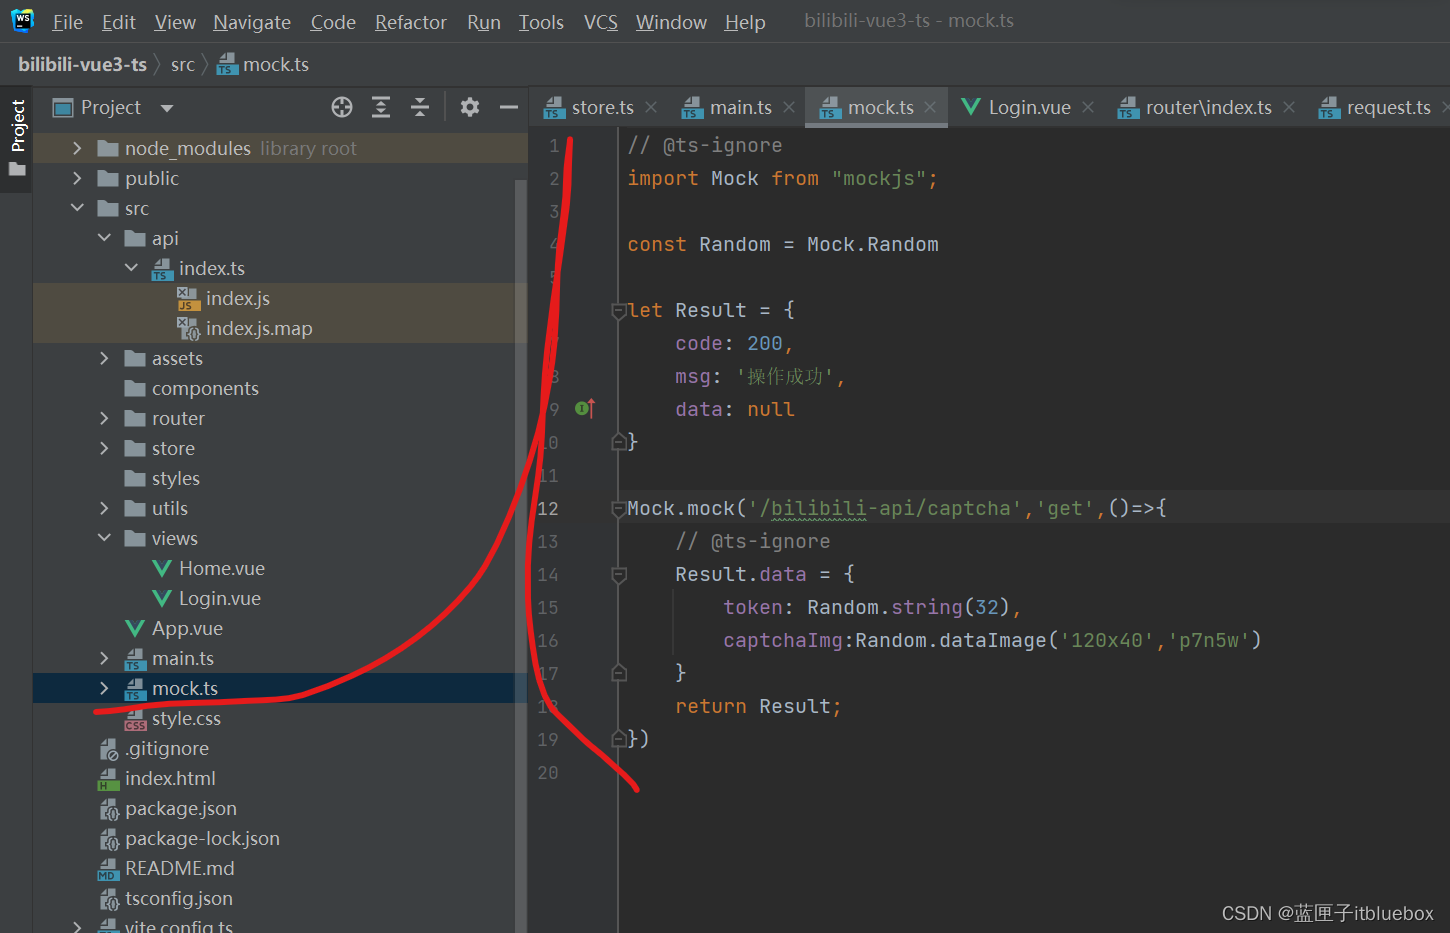
// @ts-ignore
import Mock from "mockjs";const Random = Mock.Randomlet Result = {code: 200,msg: '操作成功',data: null
}Mock.mock('/bilibili-api/captcha','get',()=>{// @ts-ignoreResult.data = {token: Random.string(32),captchaImg:Random.dataImage('120x40','p7n5w')}return Result;
})
4、显示验证码
完善request.ts,设置发起请求的内容

import axios from 'axios'
// @ts-ignore
axios.defaults.headers['Content-Type'] = 'application/json;charset=utf-8'
// 创建axios实例const service = axios.create({// axios中请求配置有baseURL选项,表示请求URL公共部分baseURL: "/bilibili-api",//baseURL: "/",// 超时timeout: 10000
})
export default service完善vite.config.ts,设置发起请求的路径和地址

proxy: {'/bilibili-api': {target: 'http://localhost:8081',changeOrigin: true,rewrite: (p) => p.replace(/^\/bilibili-api/, '')},
}
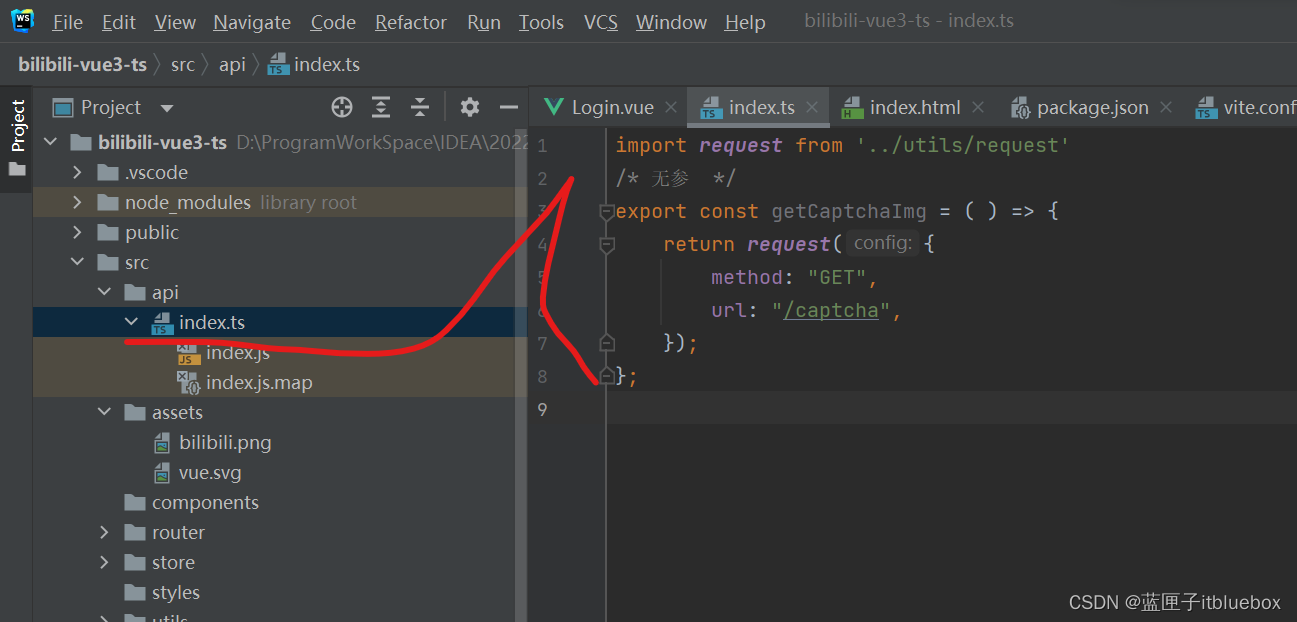
完善src/api/index.ts设置请求
import request from '@/utils/request'
/*无参*/
export const getCaptchaImg = () => {return request({method: "GET",url: "/captcha",});
};
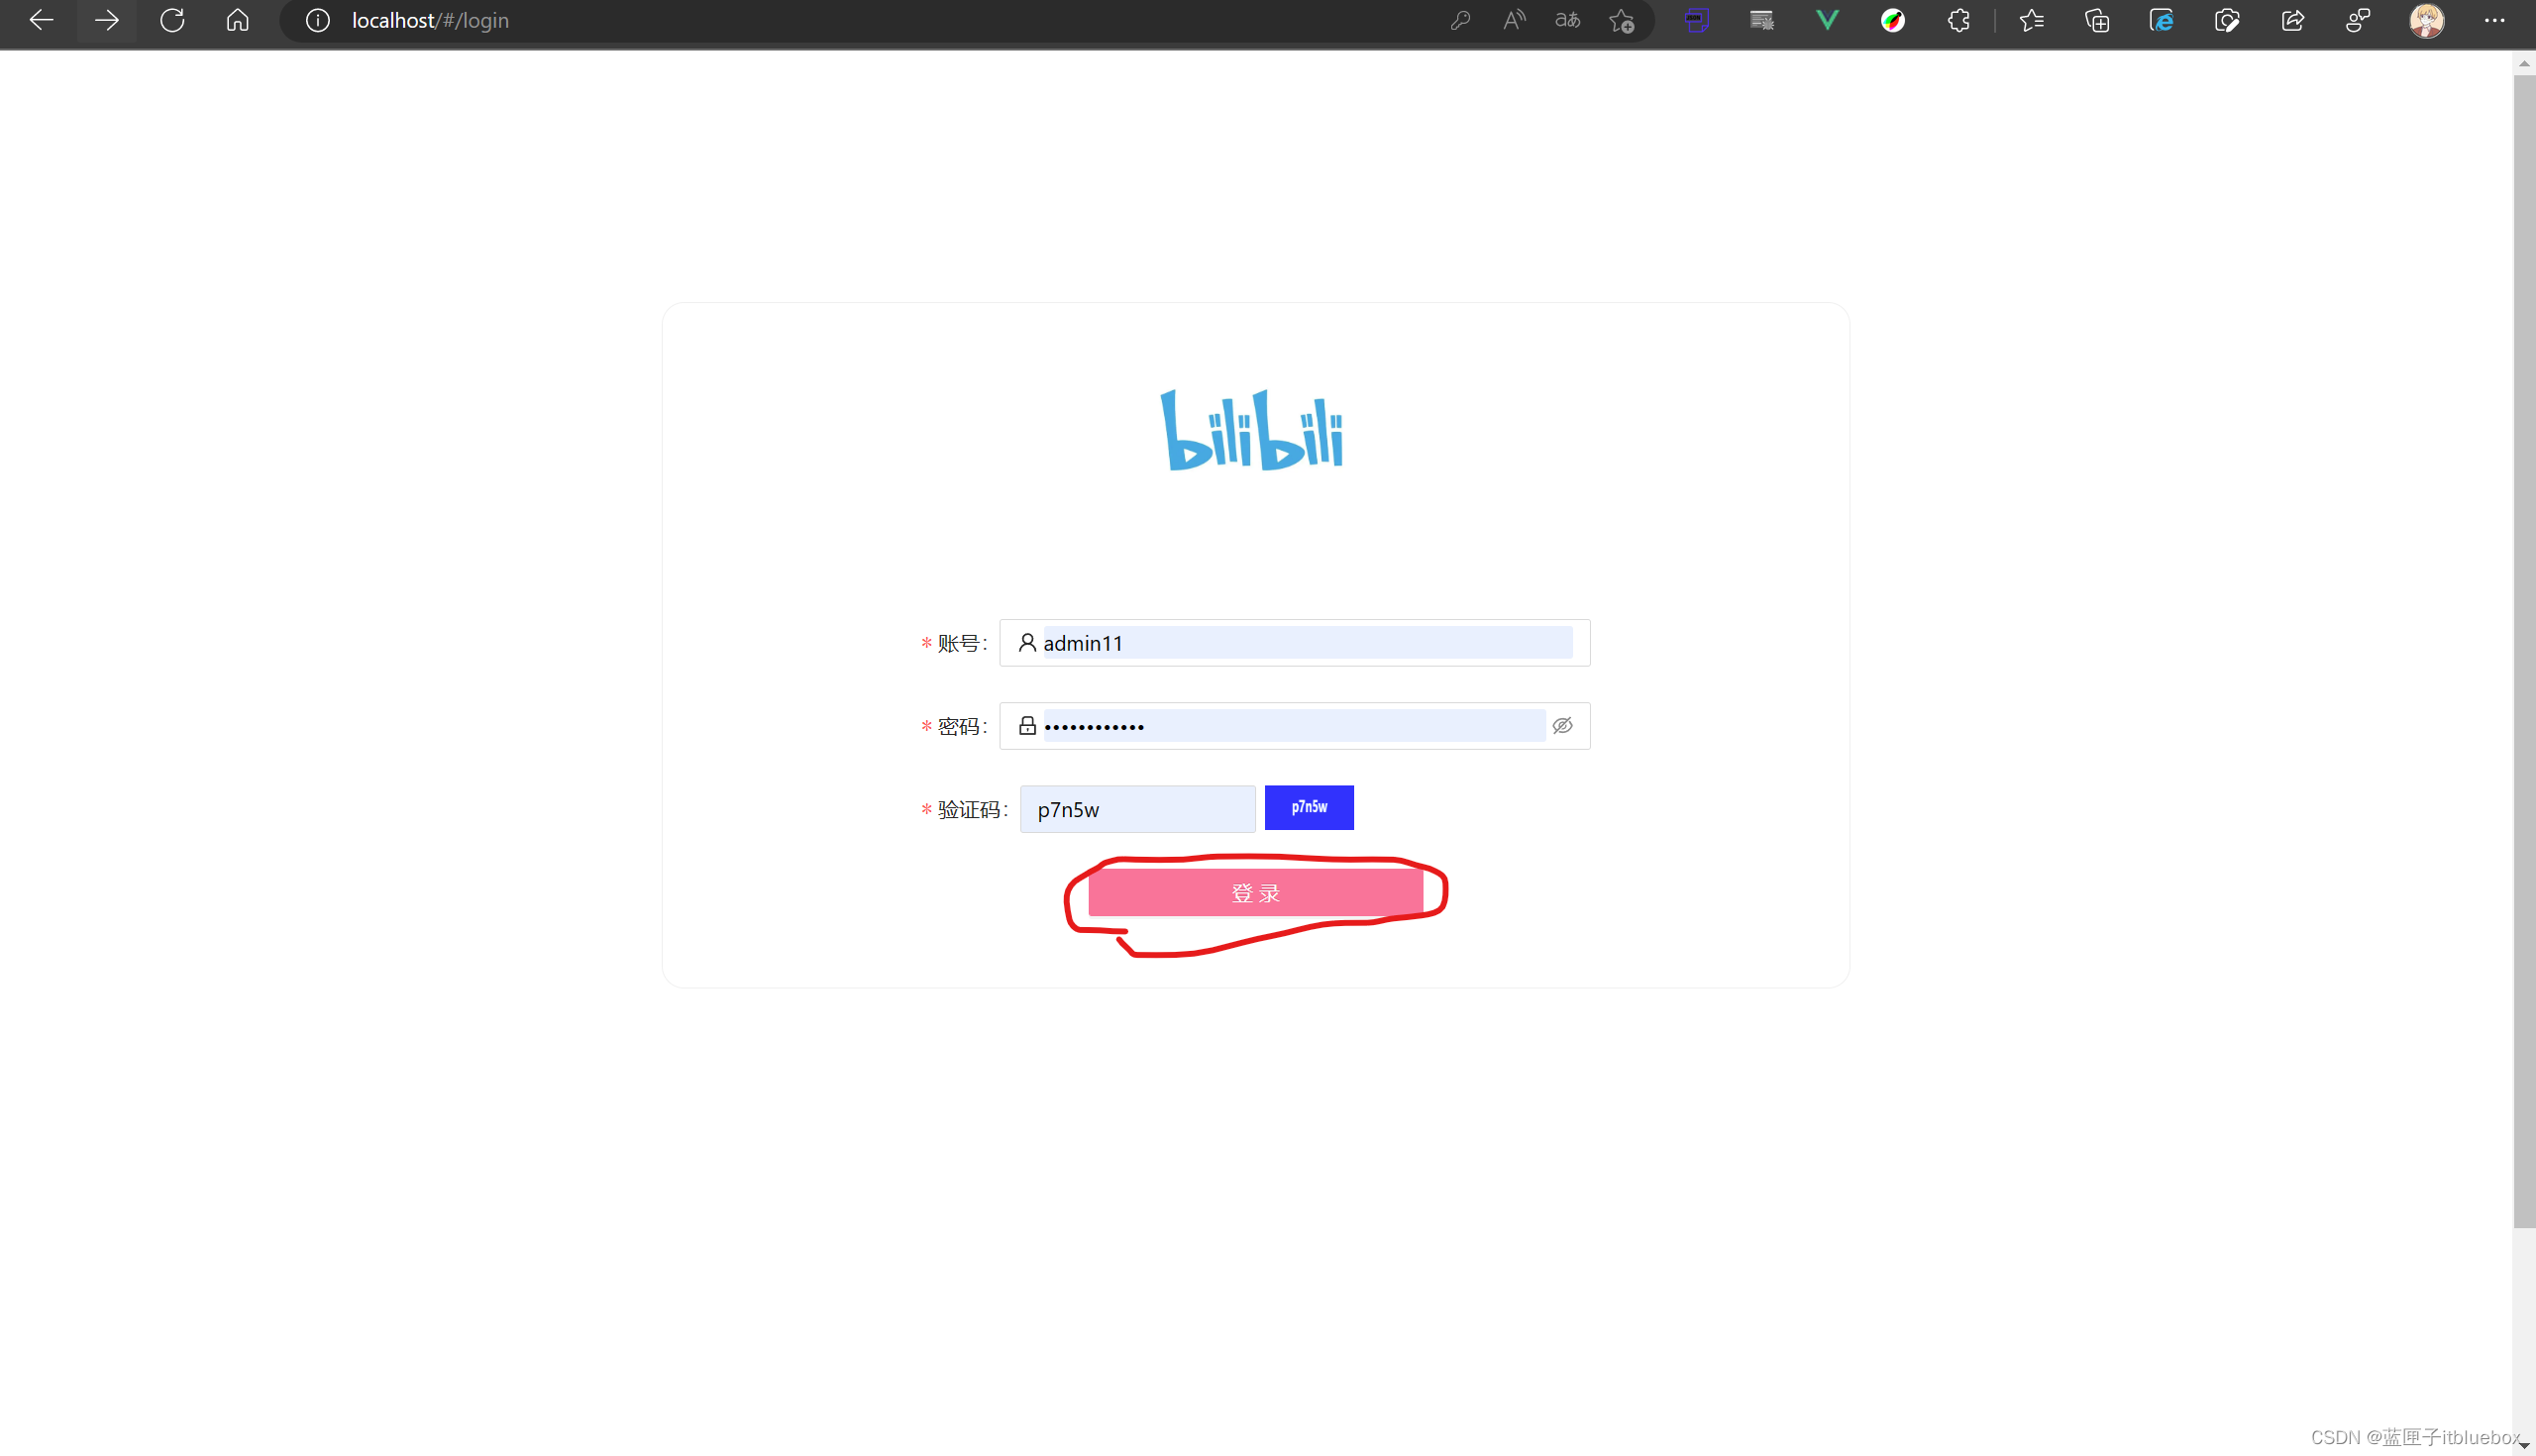
设置登录页面完善请求内容
<a-image:width="60"style="height: 30px;margin-left: 10%":preview="false":src="captchaImg"/>
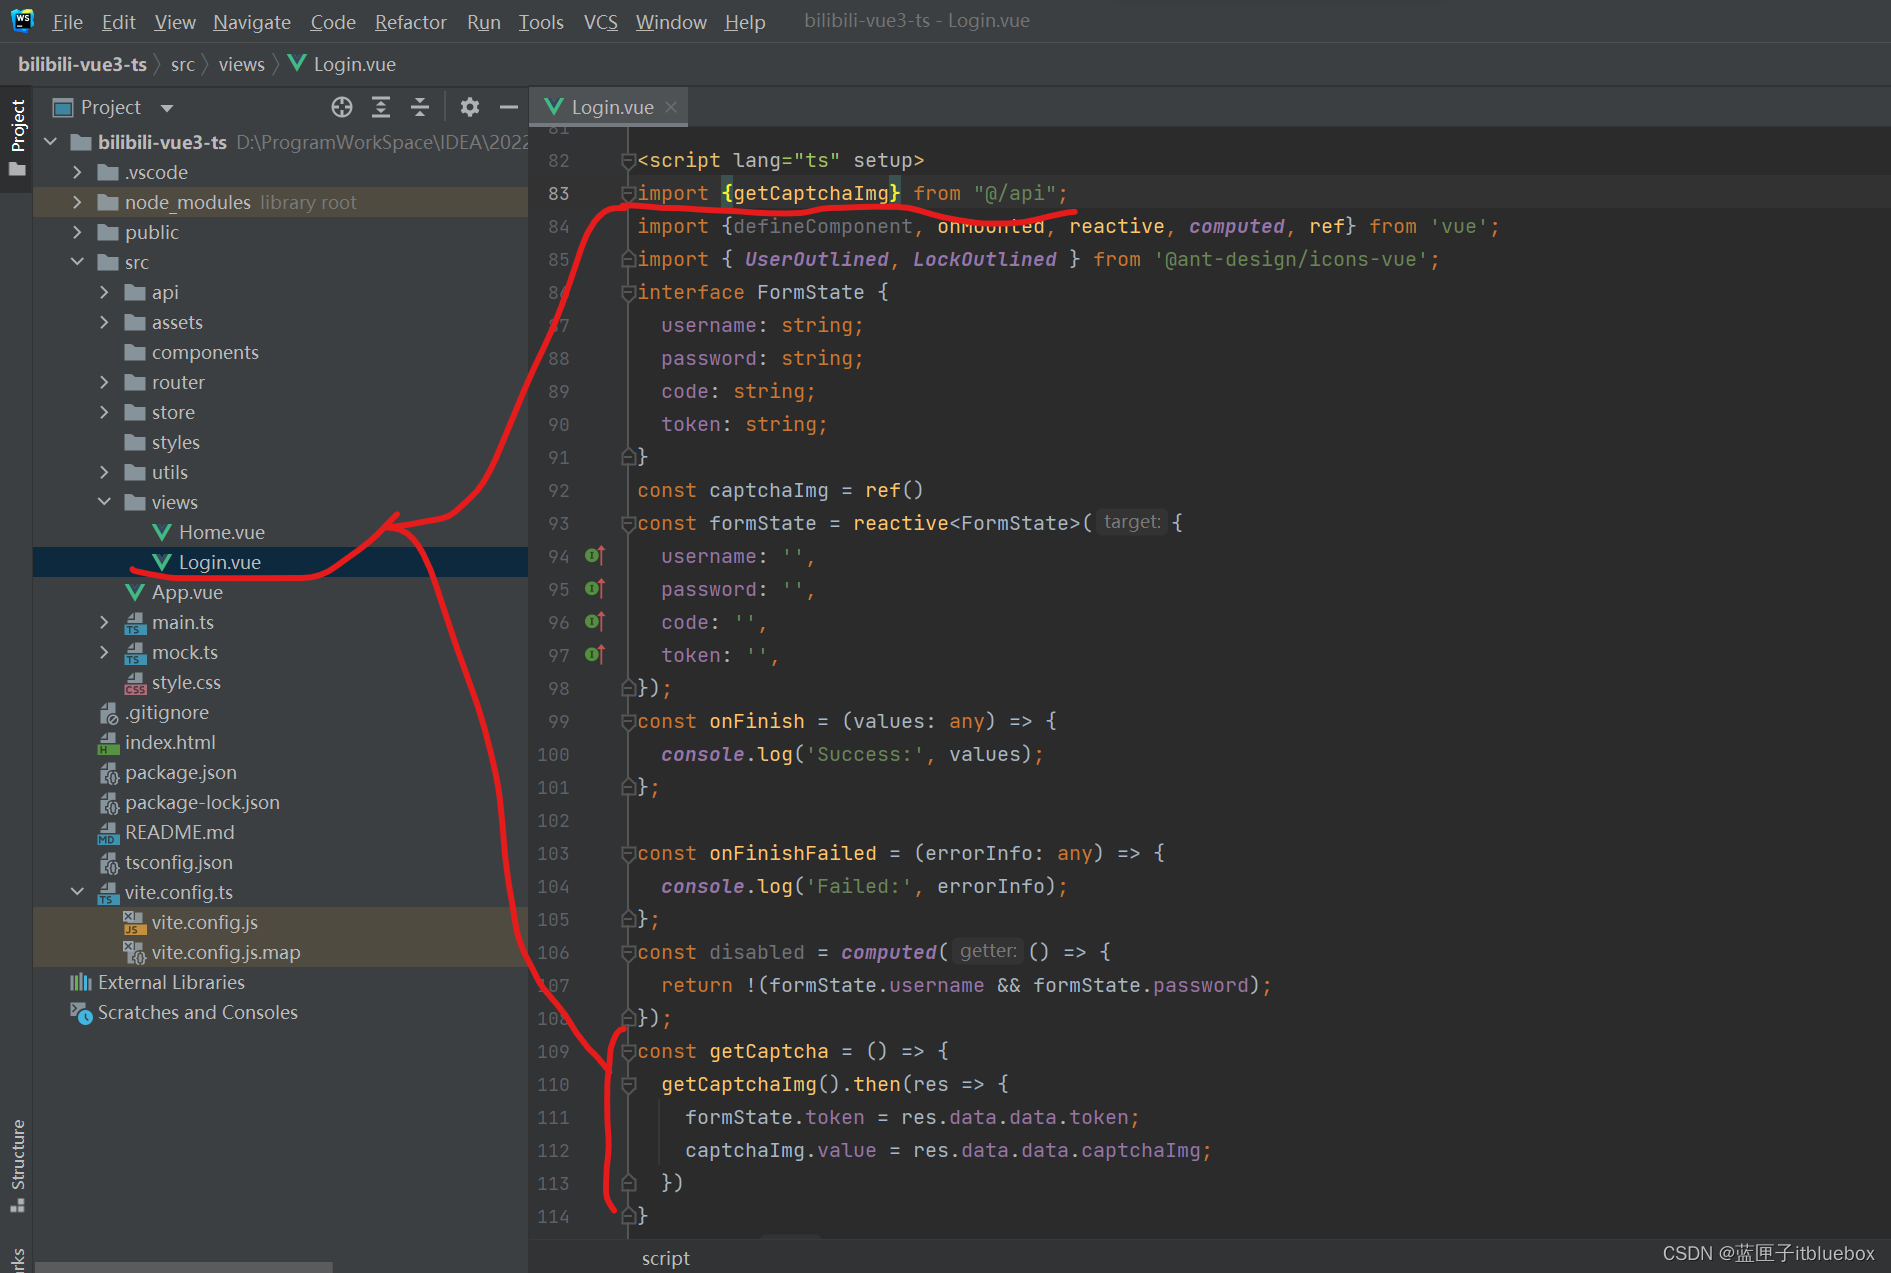
import {getCaptchaImg} from "@/api";
const getCaptcha = () => {getCaptchaImg().then(res => {formState.token = res.data.data.token;captchaImg.value = res.data.data.captchaImg;})
}
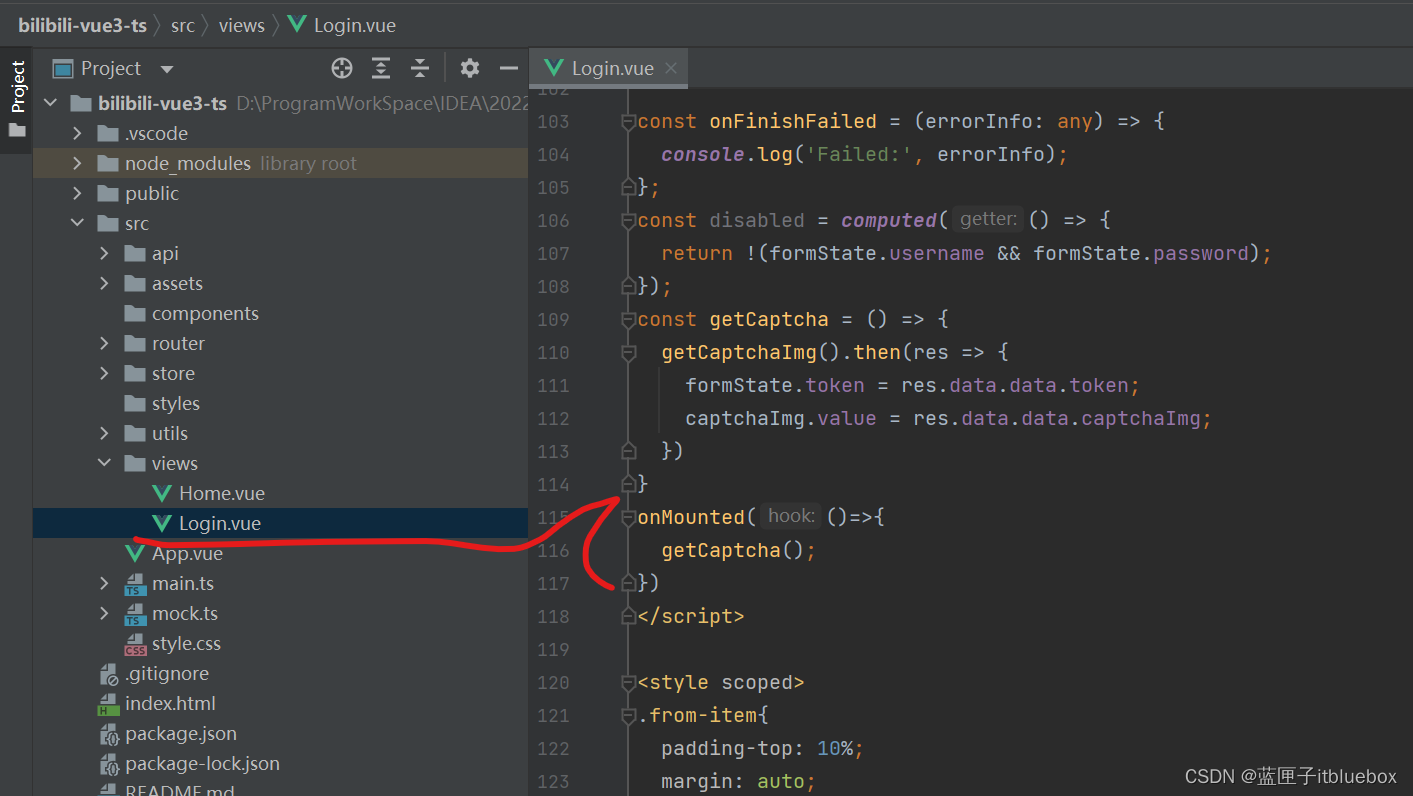
onMounted(()=>{getCaptcha();
})
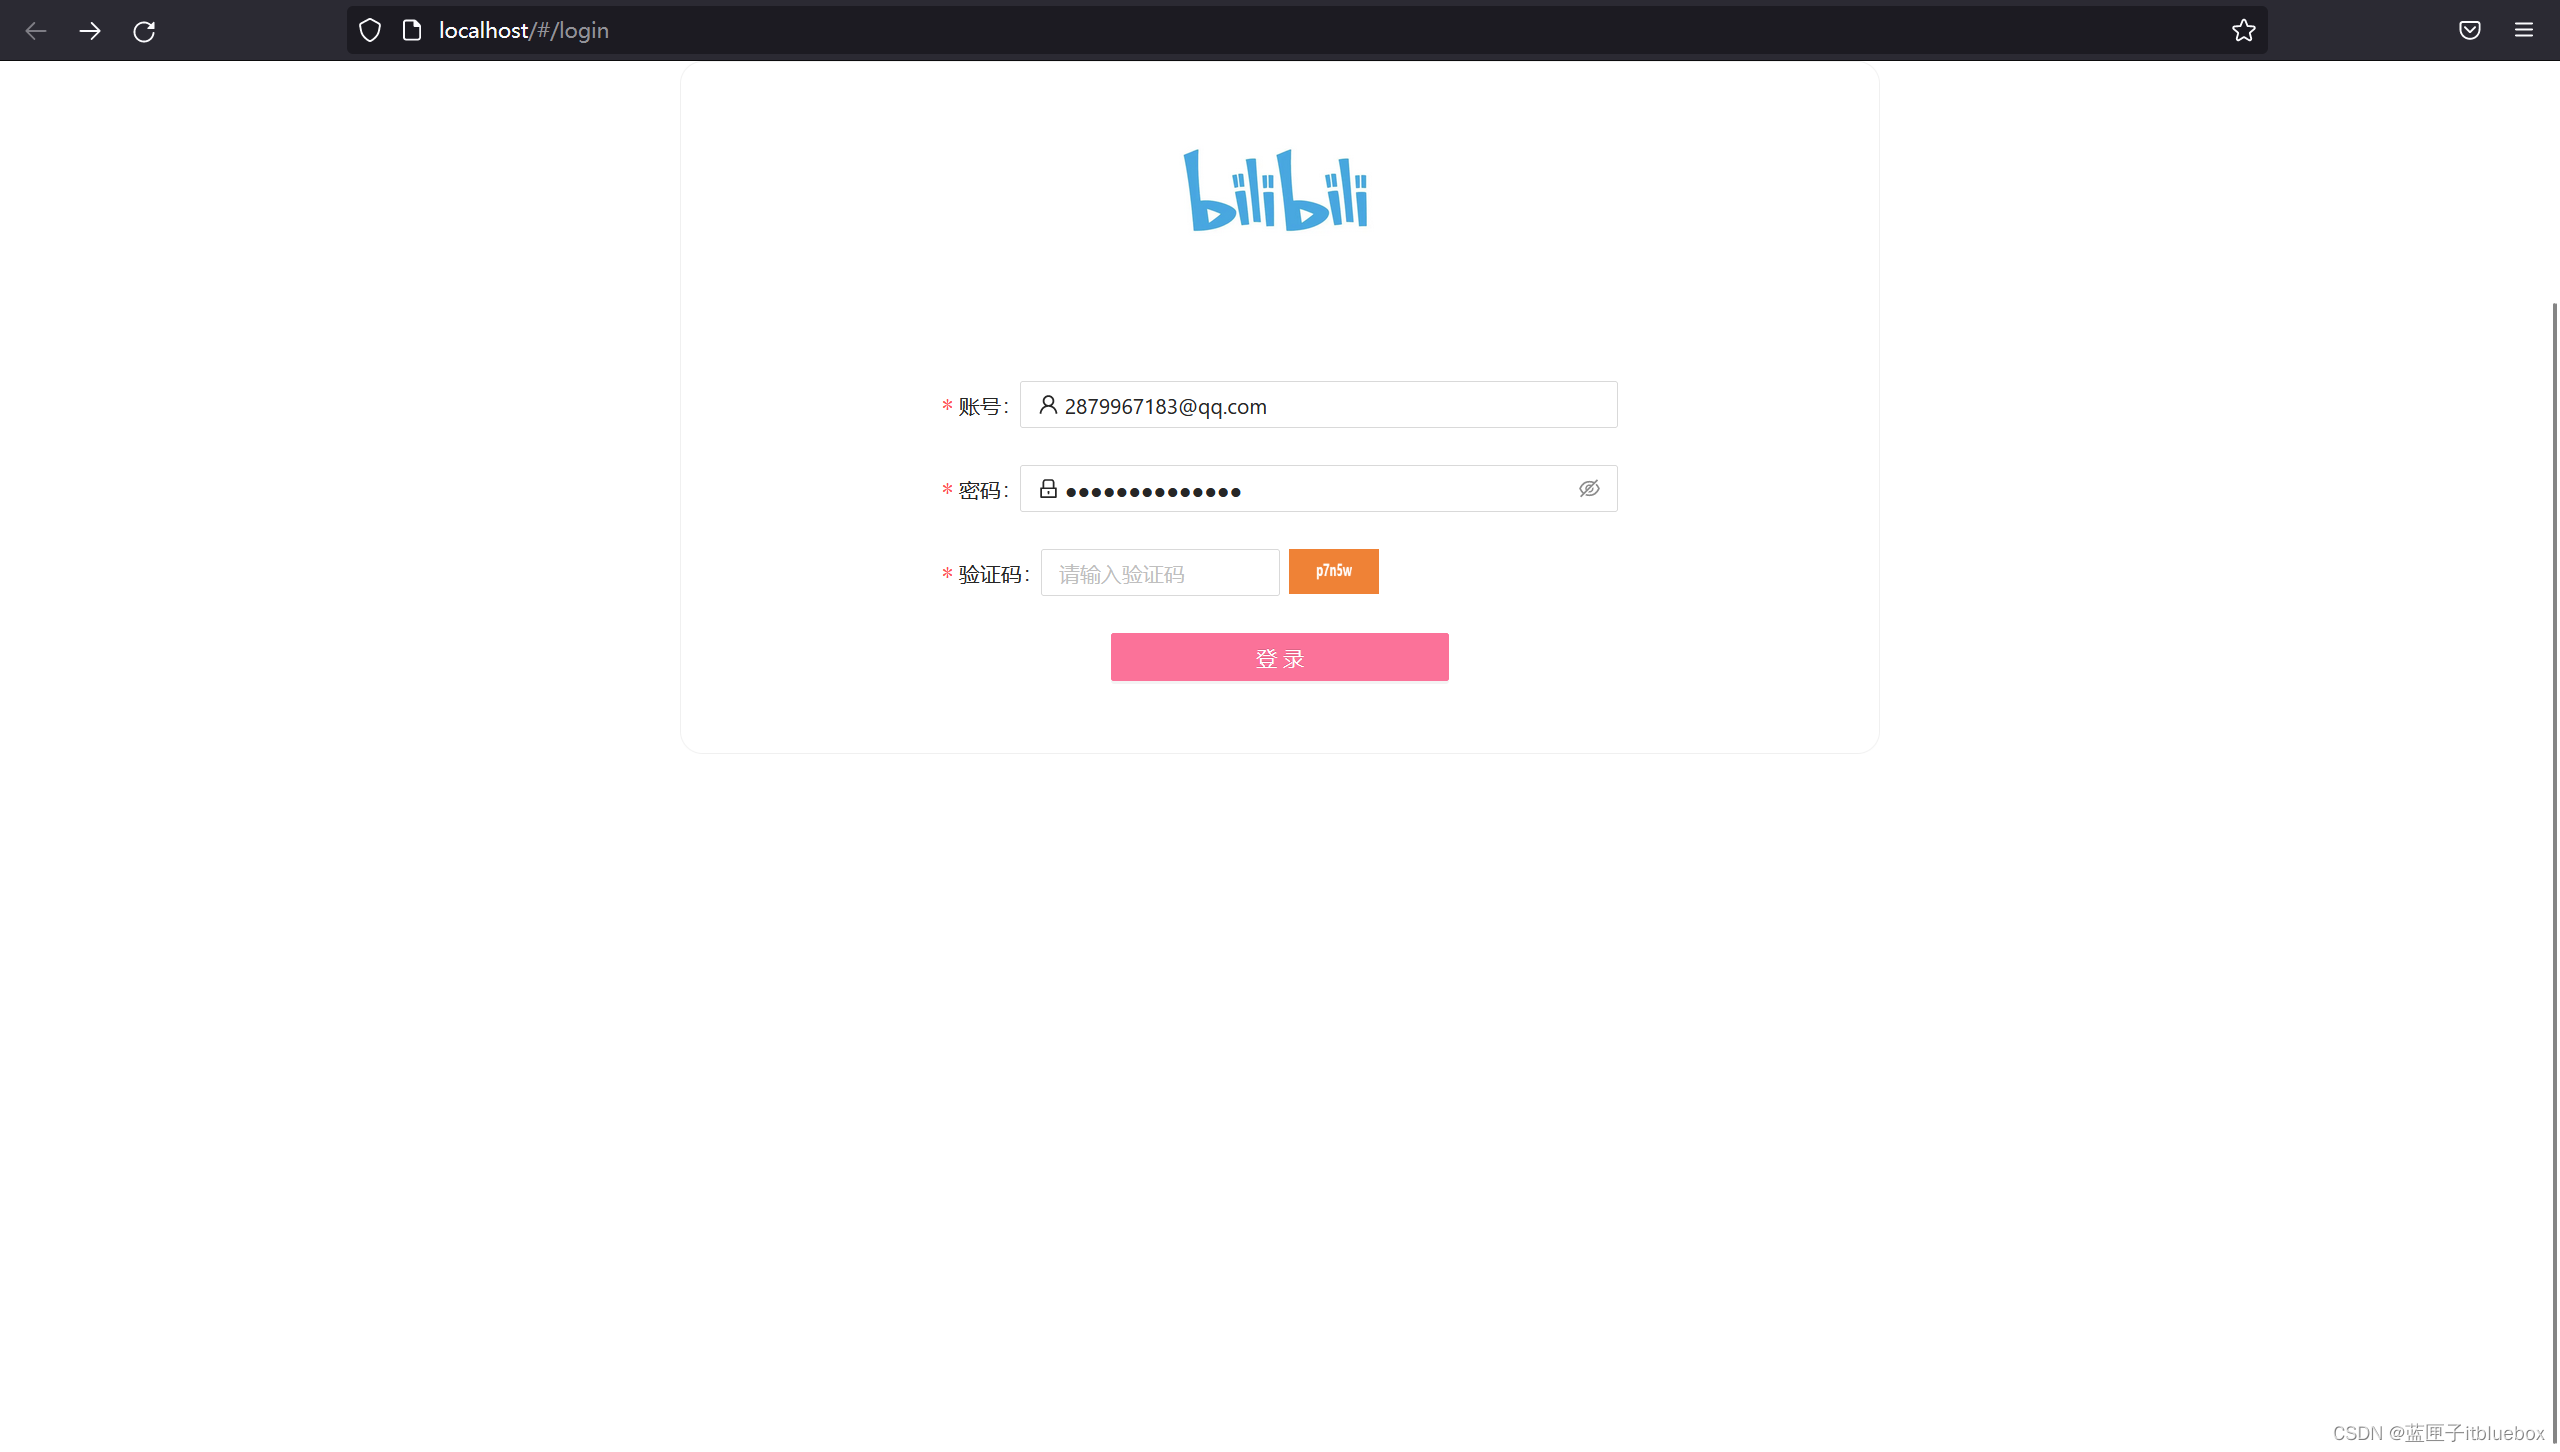
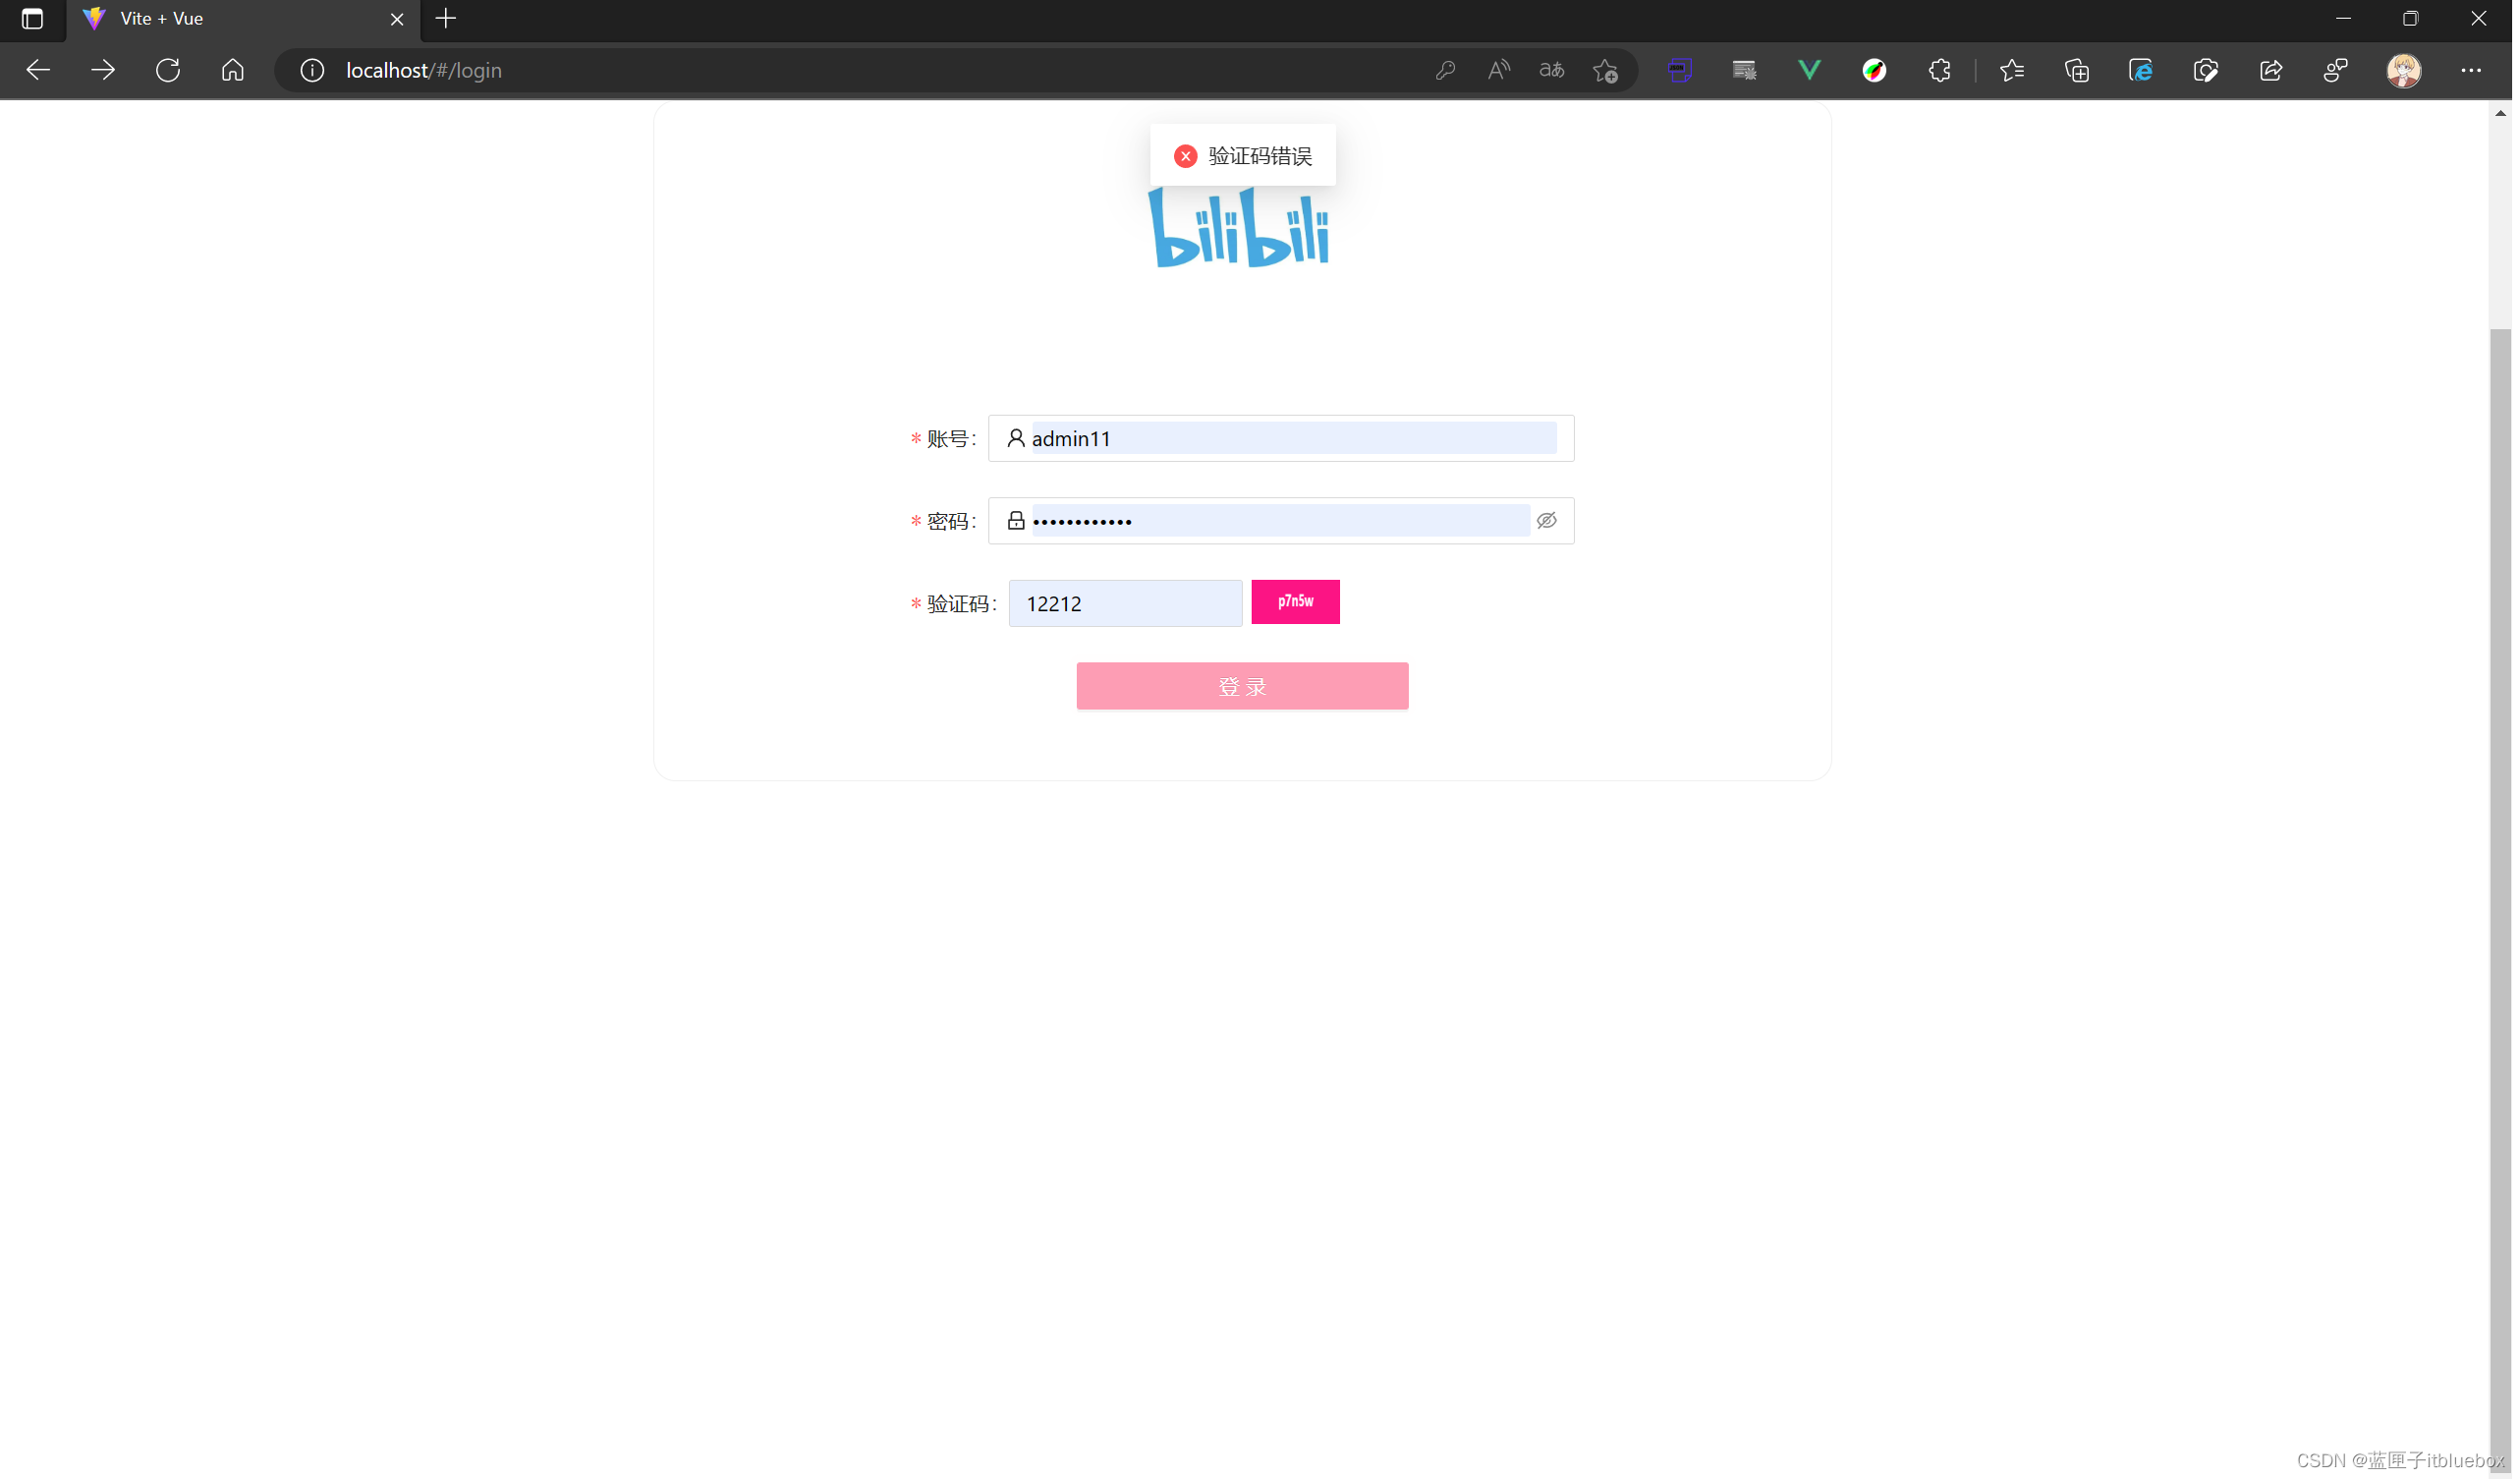
访问http://localhost/#/login
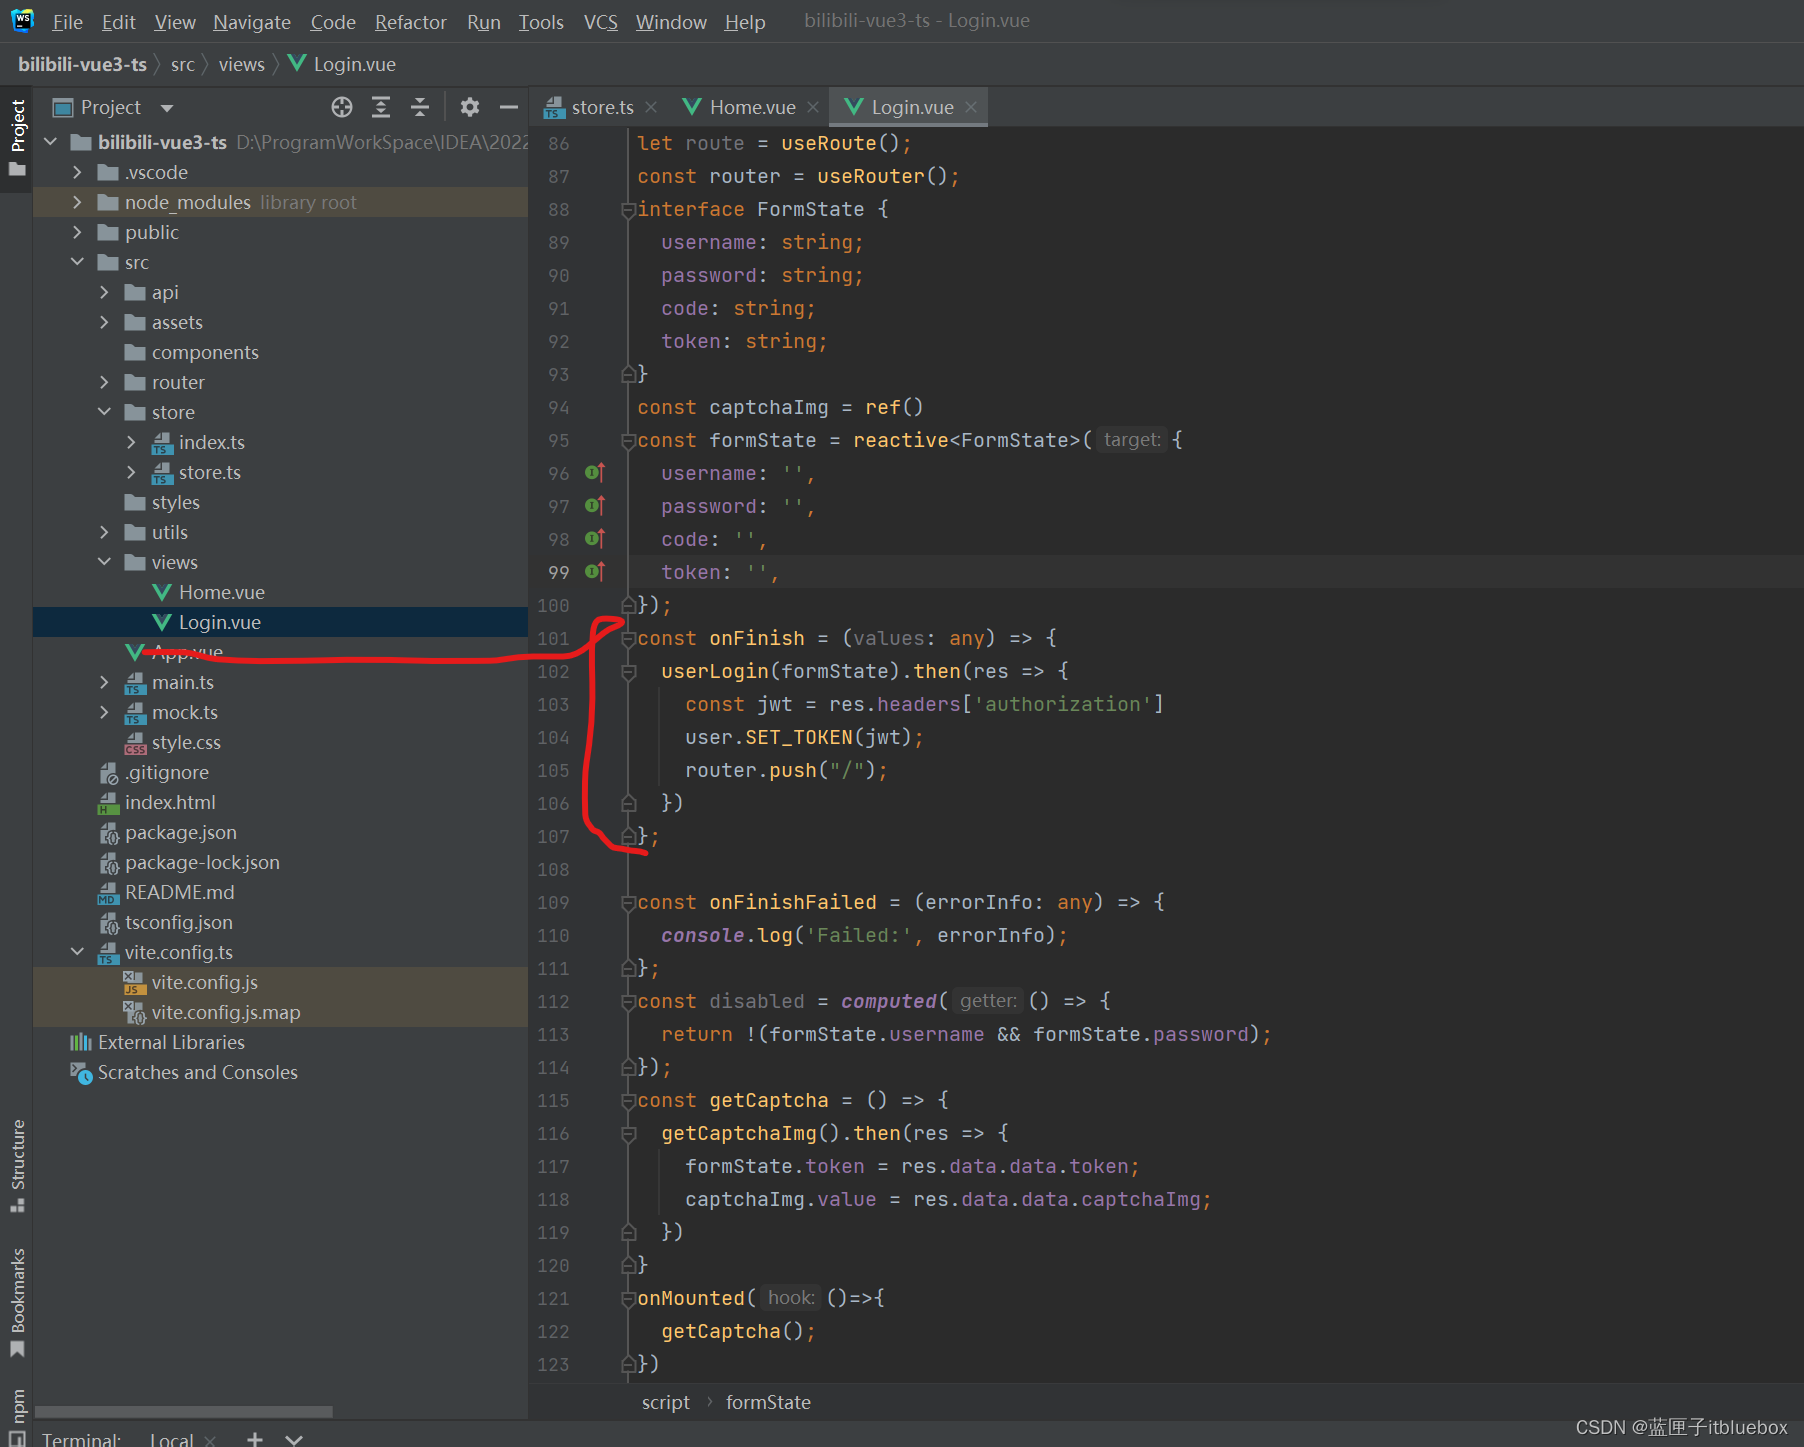
5、在store当中的store.ts设置SET_TOKEN
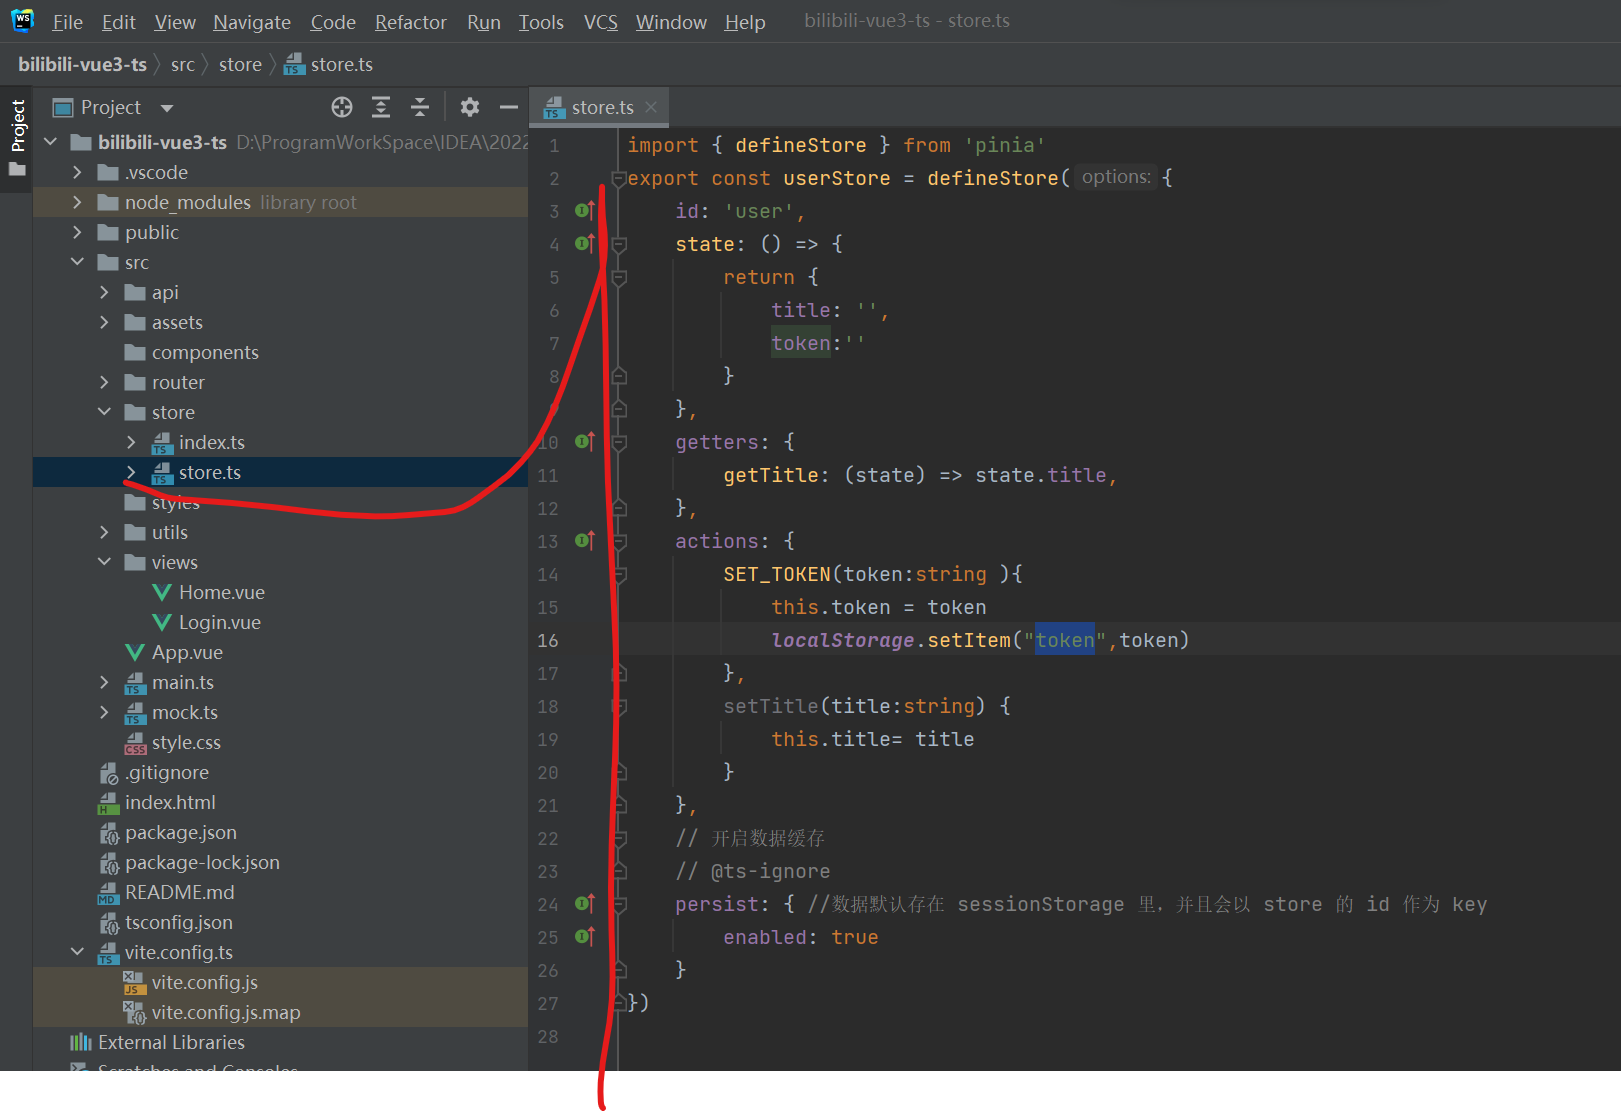
SET_TOKEN(token:string ){this.token = tokenlocalStorage.setItem("token",token)},
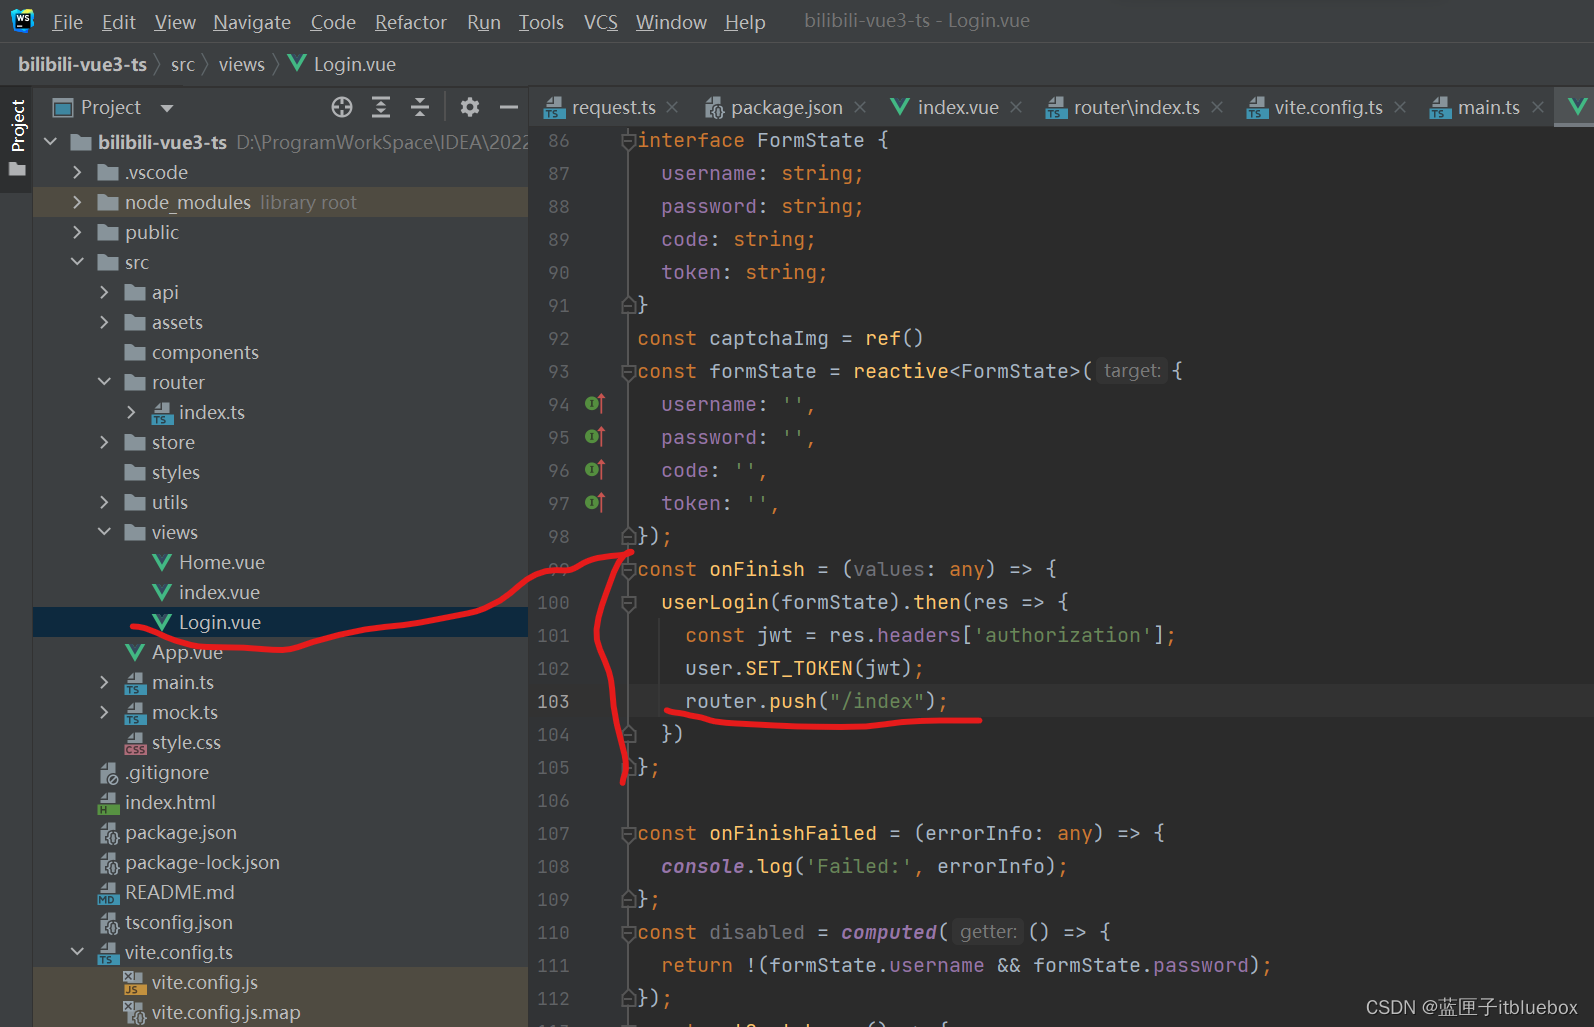
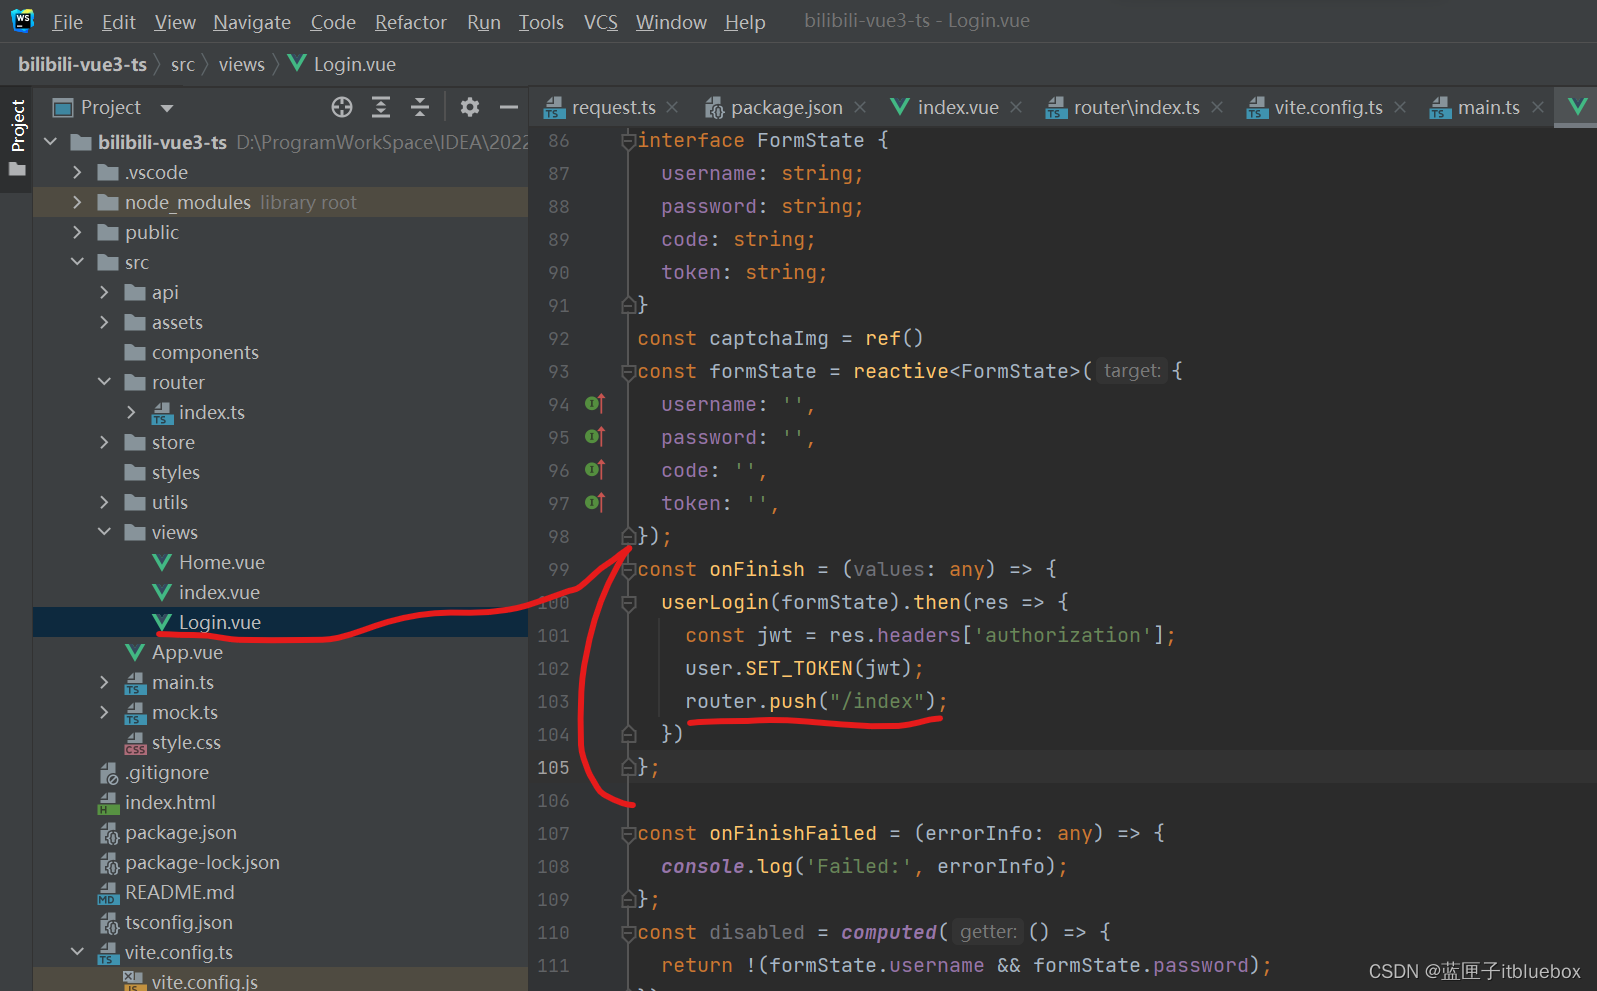
6、实现登录请求相关内容
export const userLogin = (data:any) => {return request({url: '/login',method: 'post',data: data})
};
const router = useRouter();
import { useRouter } from "vue-router";
const user = userStore()const router = useRouter();
const onFinish = (values: any) => {userLogin(formState).then(res => {const jwt = res.headers['authorization']user.SET_TOKEN(jwt);router.push("/");})
};
完善mock.ts
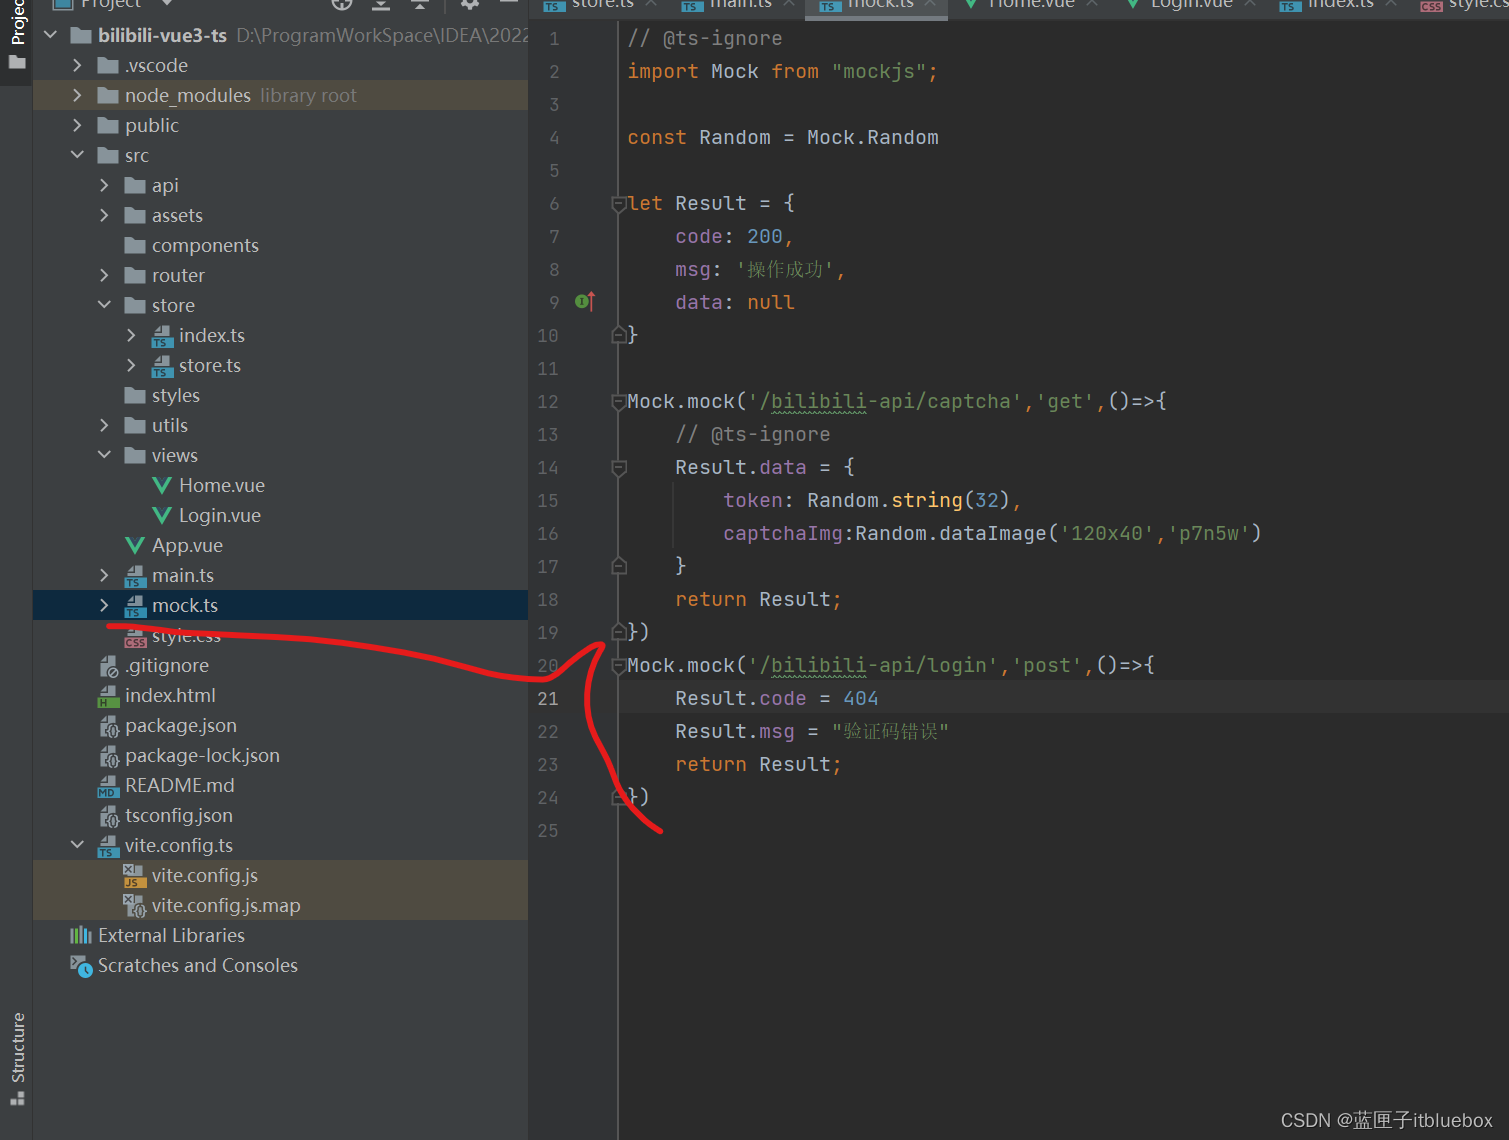
Mock.mock('/bilibili-api/login','post',()=>{Result.code = 404Result.msg = "验证码错误"return Result;
})
7、完善登录
(1)在main.ts当中引入antd的全局样式
import 'ant-design-vue/dist/antd.css';
(2)完善request.ts当中响应的内容
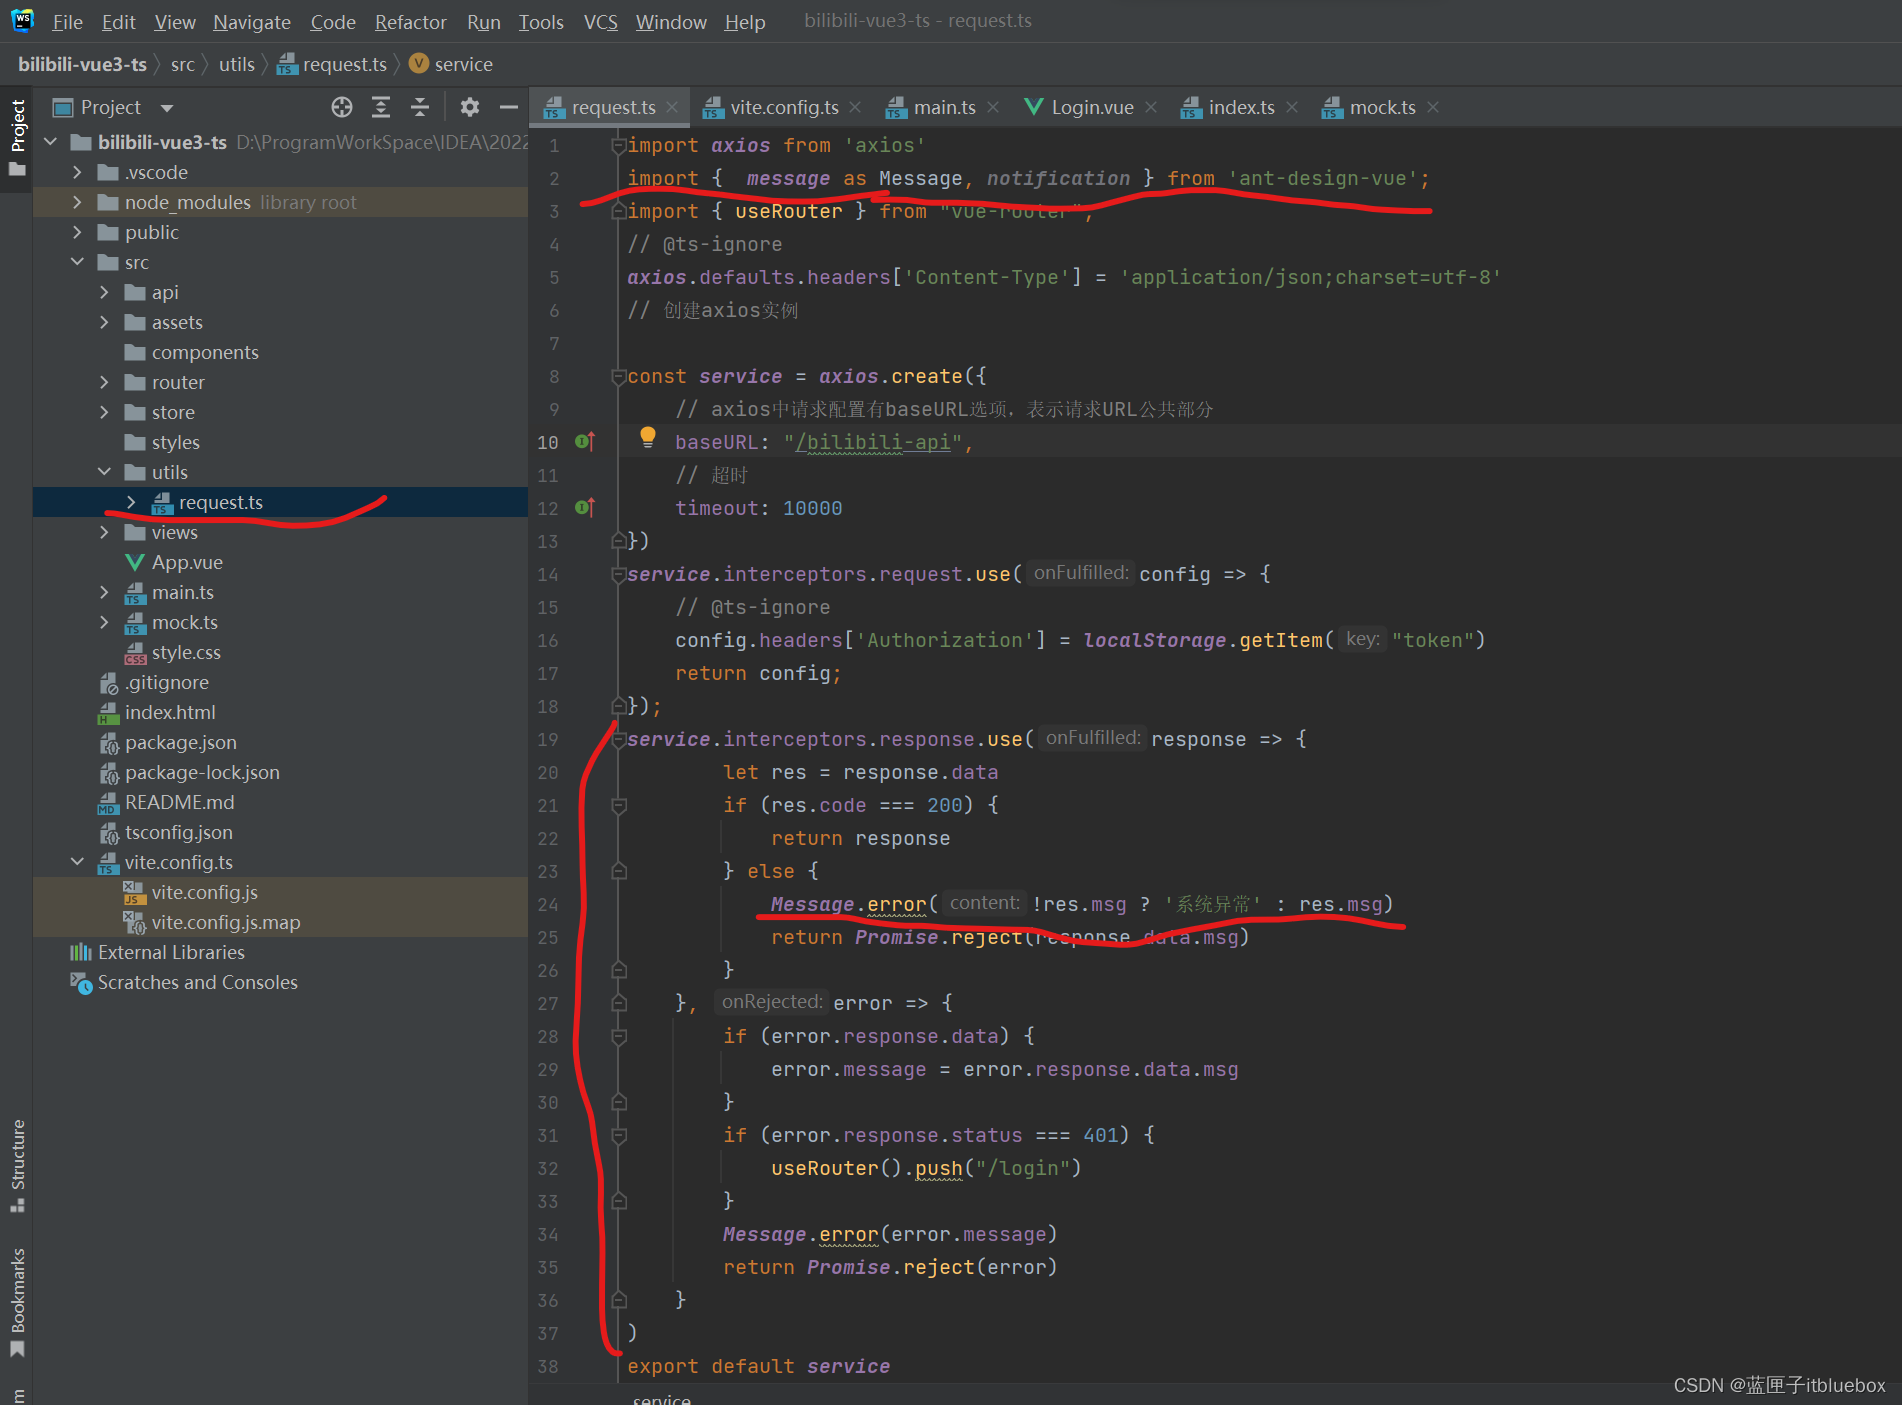
import axios from 'axios'
import {  message as Message, notification } from 'ant-design-vue';
import { useRouter } from "vue-router";
// @ts-ignore
axios.defaults.headers['Content-Type'] = 'application/json;charset=utf-8'
// 创建axios实例const service = axios.create({// axios中请求配置有baseURL选项,表示请求URL公共部分baseURL: "/bilibili-api",// 超时timeout: 10000
})
service.interceptors.request.use(config => {// @ts-ignoreconfig.headers['Authorization'] = localStorage.getItem("token")return config;
});
service.interceptors.response.use(response => {let res = response.dataif (res.code === 200) {return response} else {Message.error(!res.msg ? '系统异常' : res.msg)return Promise.reject(response.data.msg)}}, error => {if (error.response.data) {error.message = error.response.data.msg}if (error.response.status === 401) {useRouter().push("/login")}Message.error(error.message)return Promise.reject(error)}
)
export default service
运行测试
http://localhost/#/login
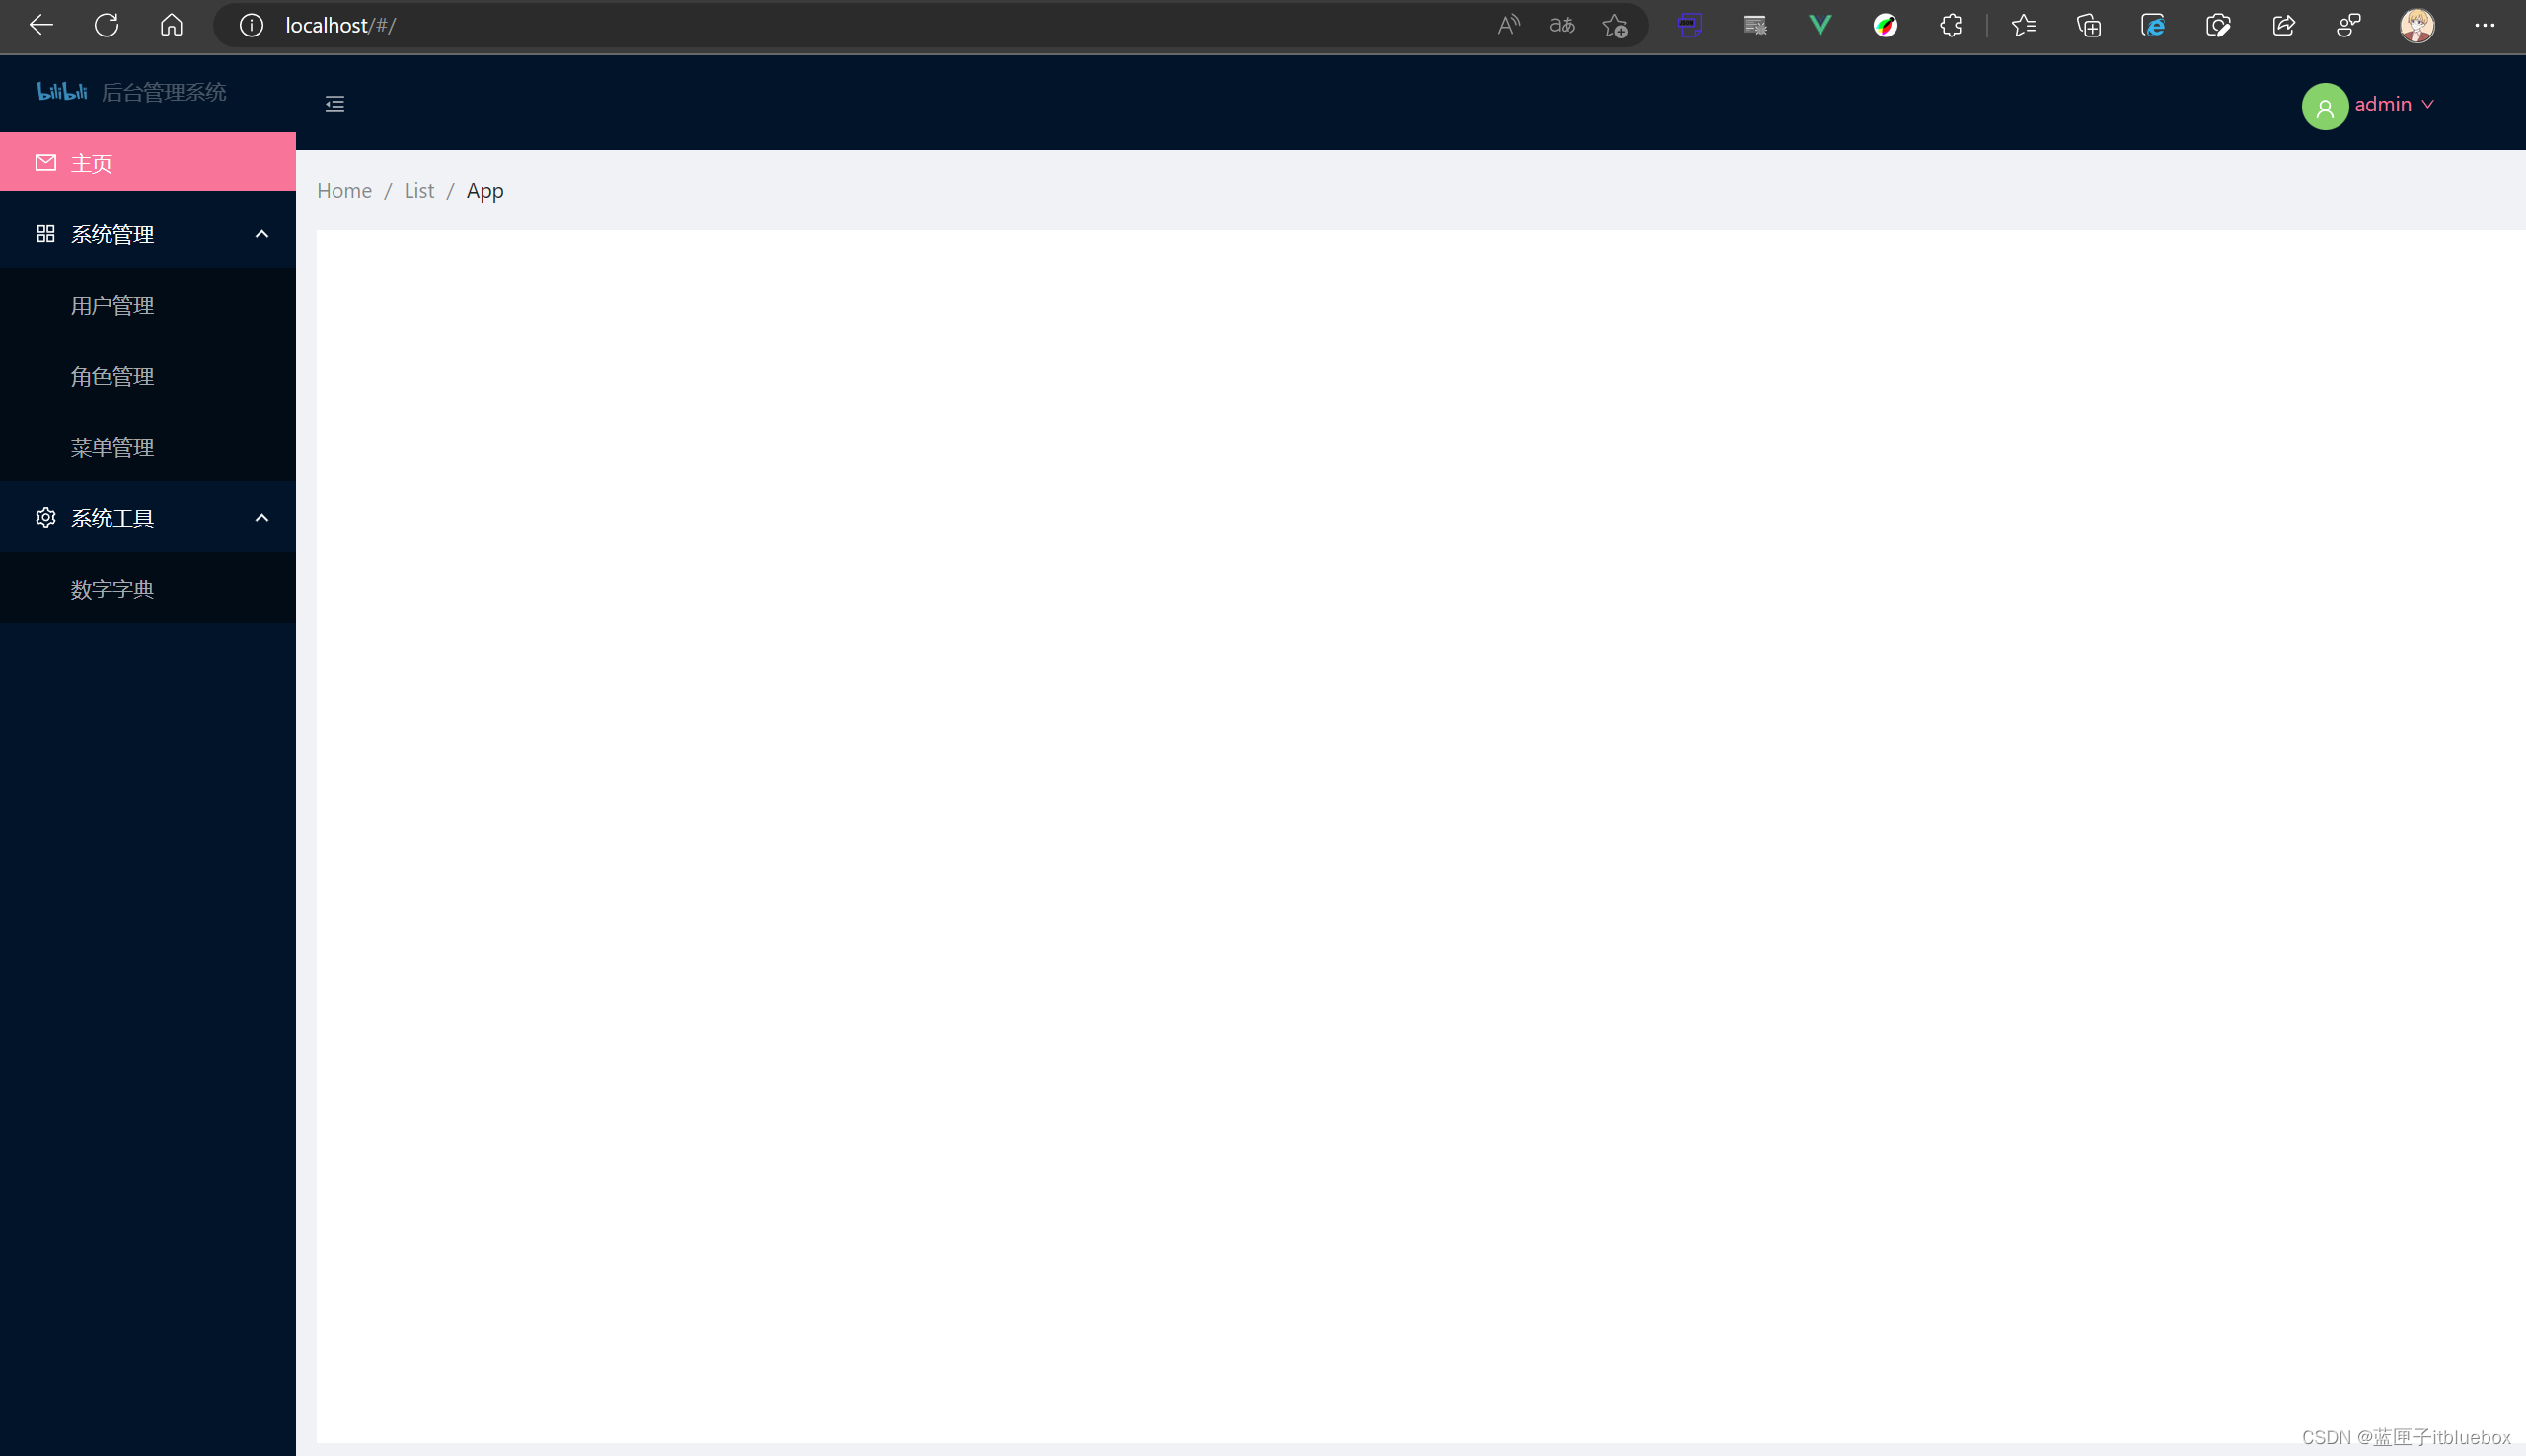
三、后台管理界面开发
(一)创建index页面
一般来说,管理系统的页面我们都是头部是一个简单的信息展示系统名称和登录用户信息,然后中间的左边是菜单导航栏,右边是内容,对应到ant Design Vue的组件中,我们可以找到这个Layout 布局容器用于布局,方便快速搭建页面的基本结构。
而我们采用这个布局:
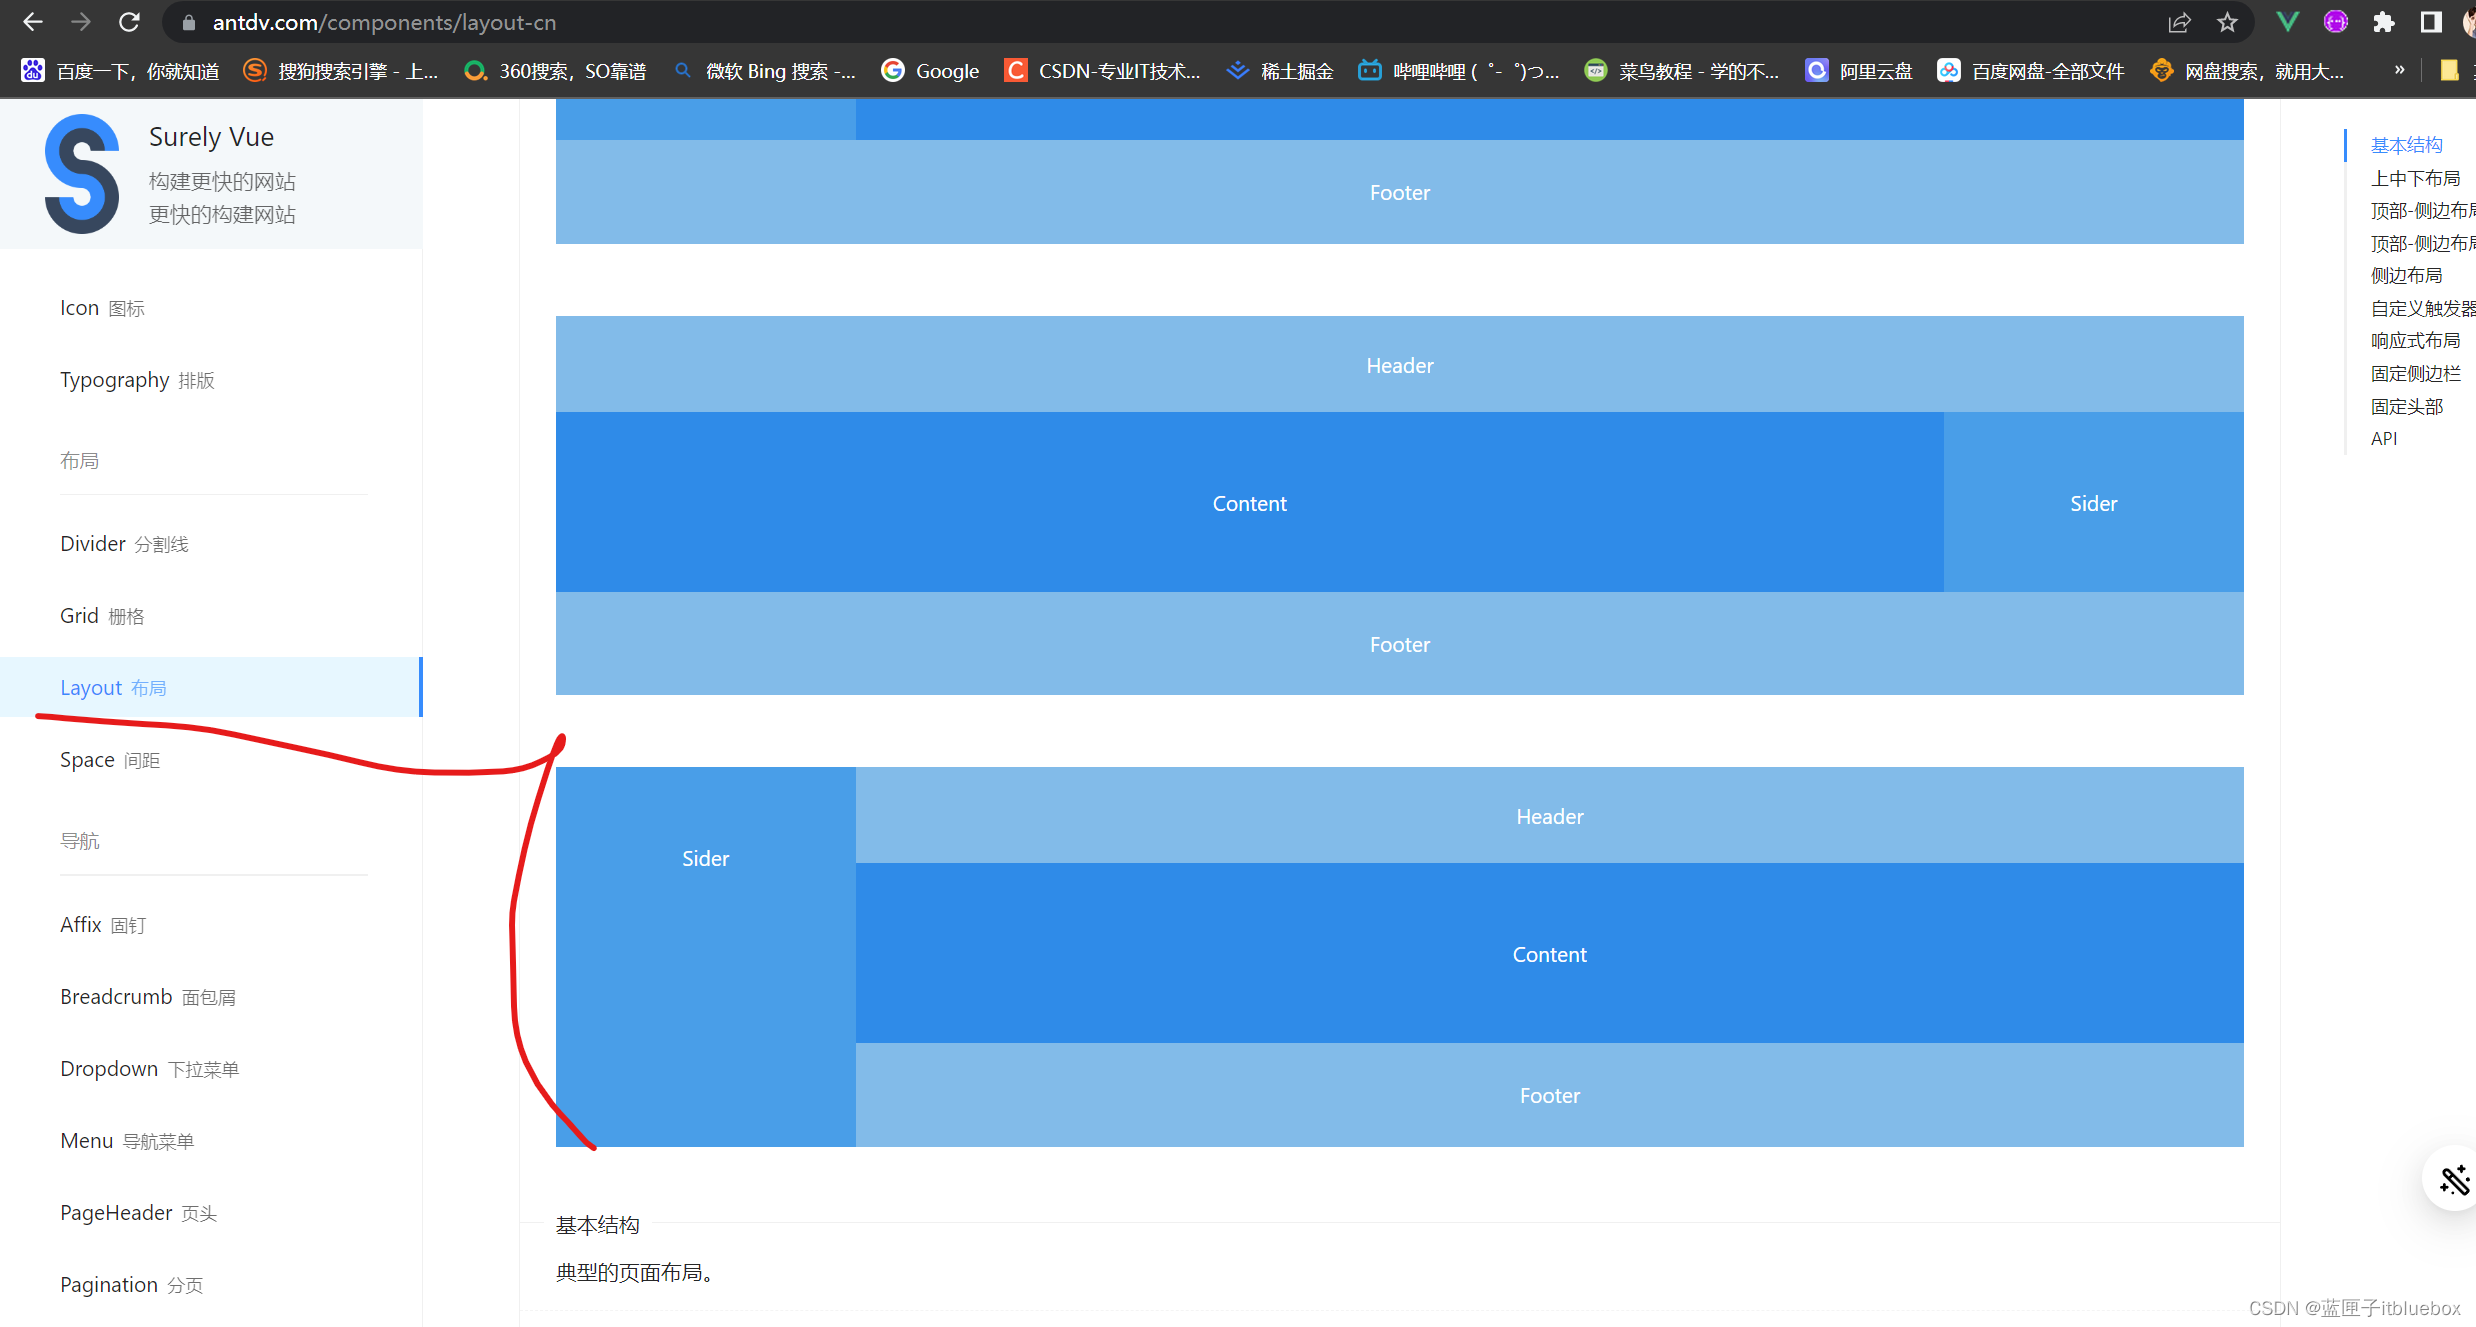
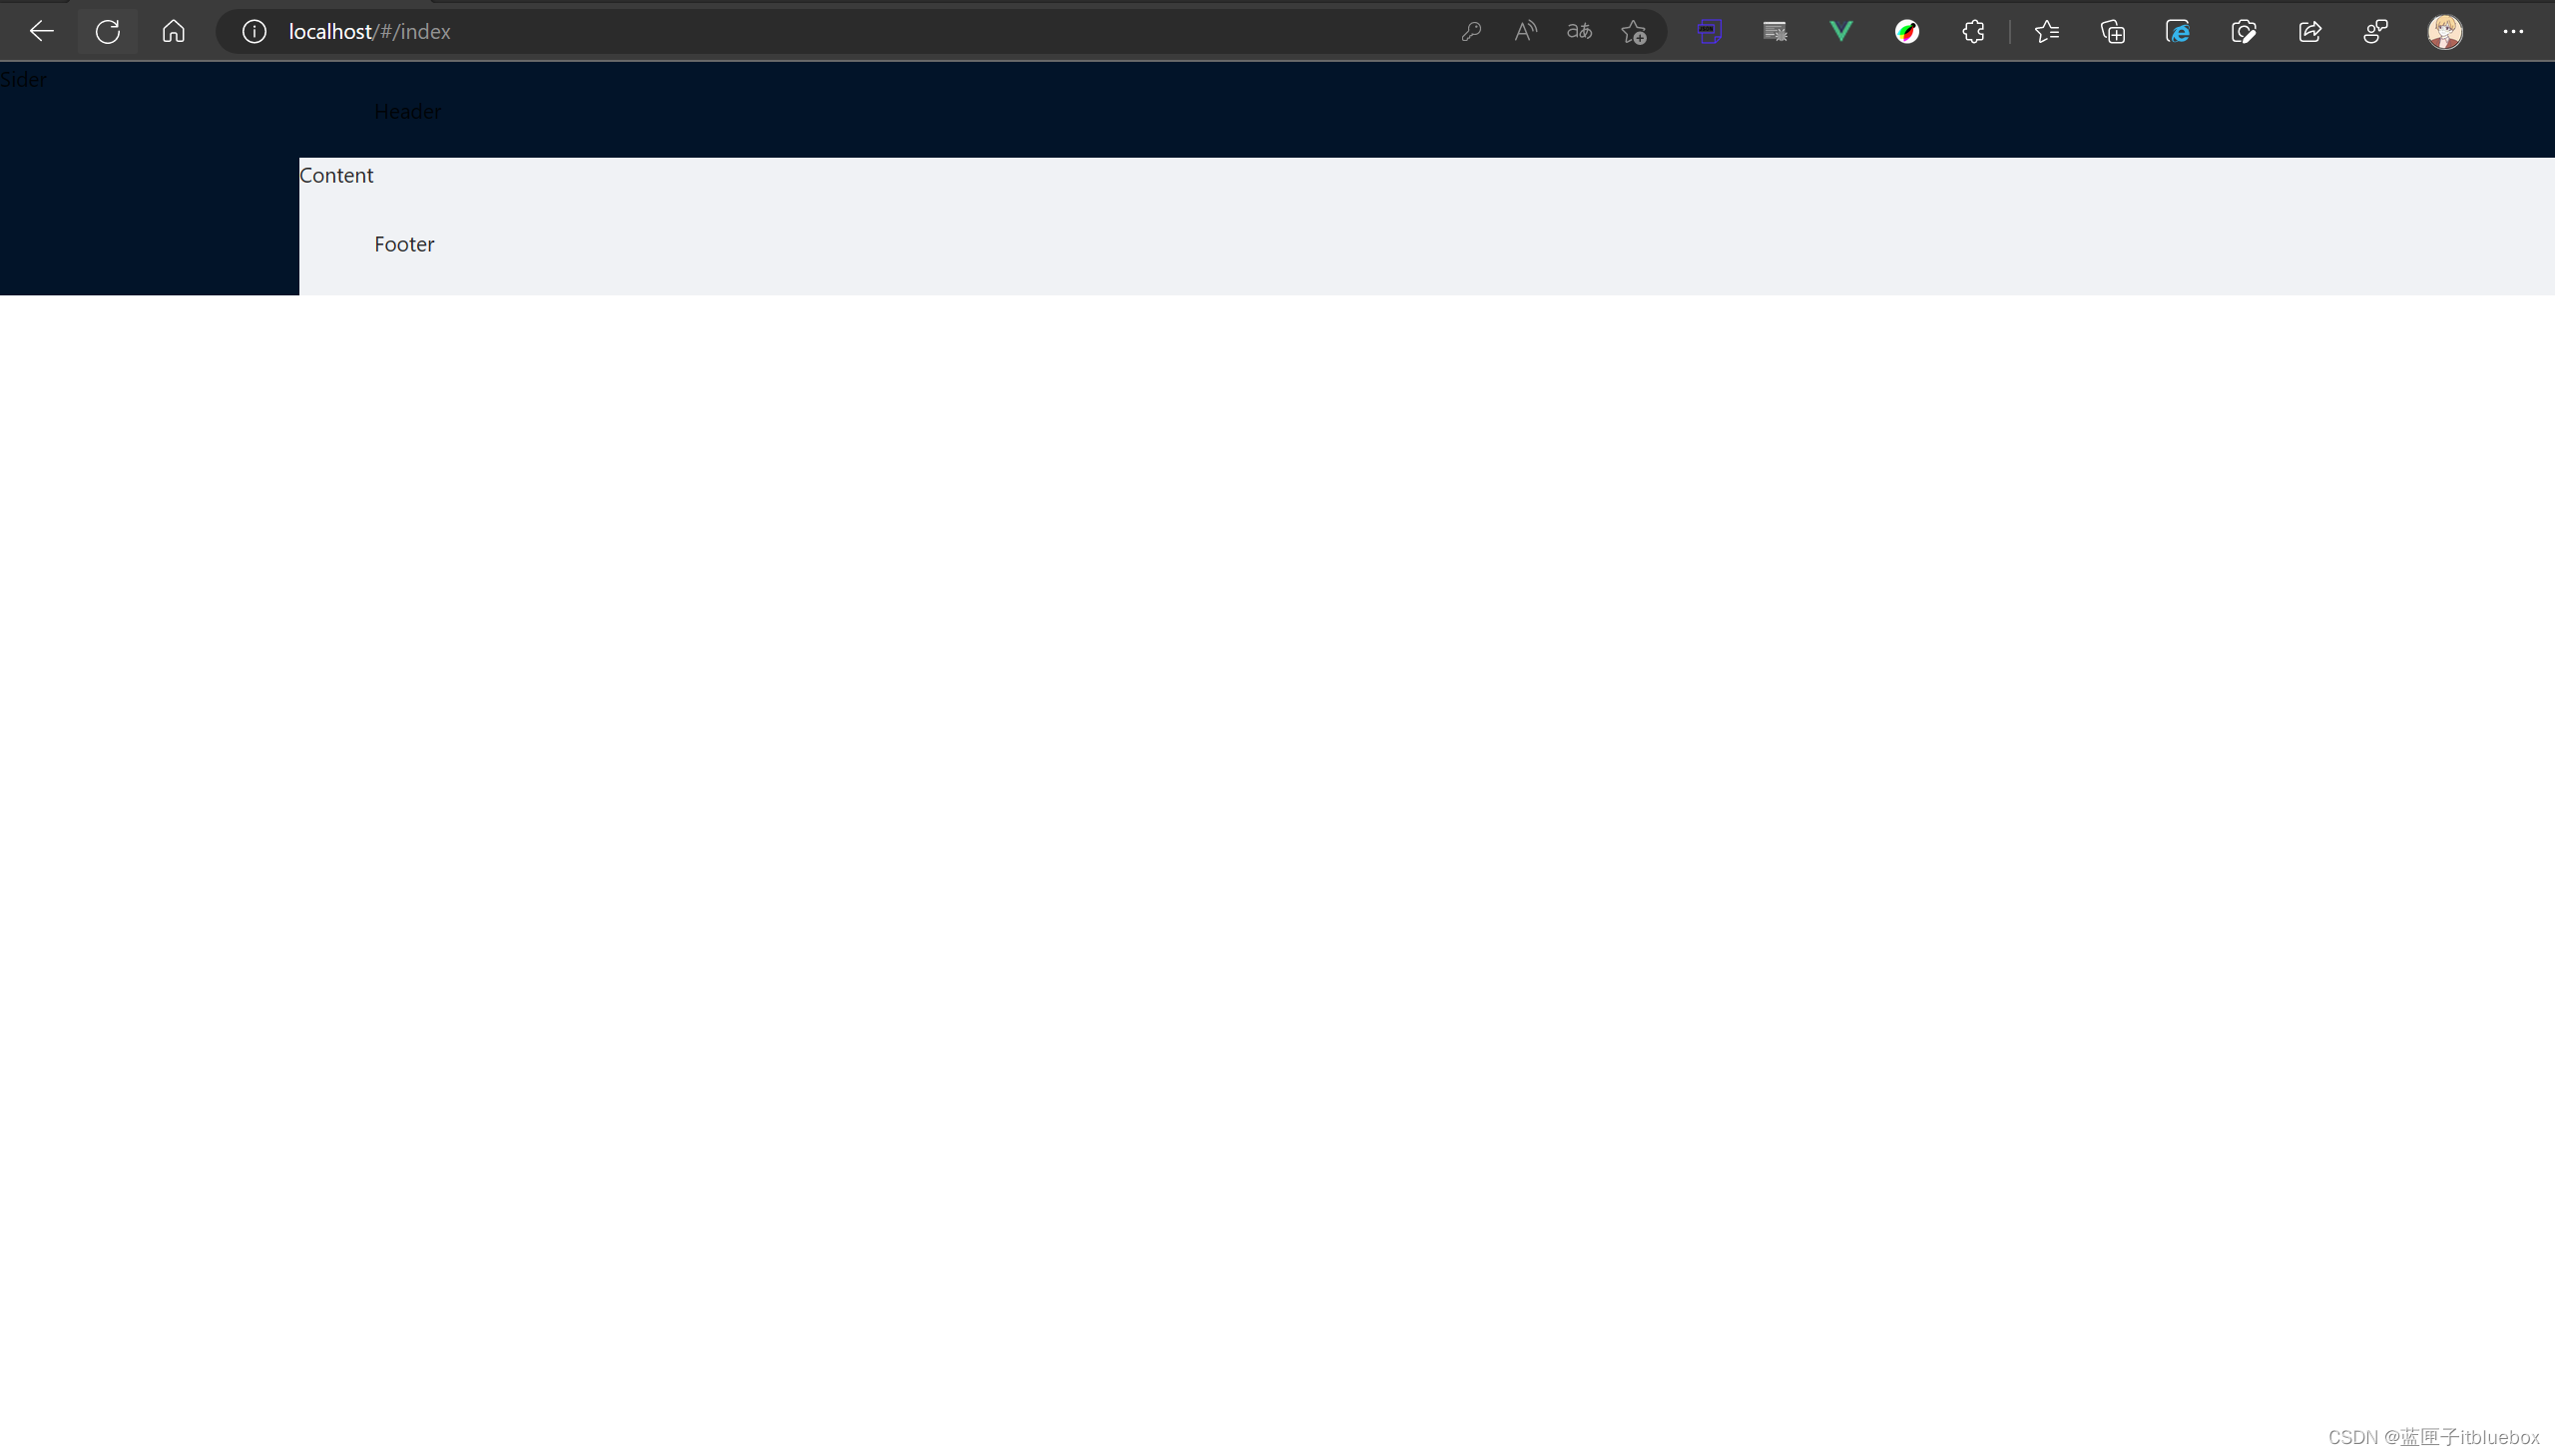
1、新建index页面
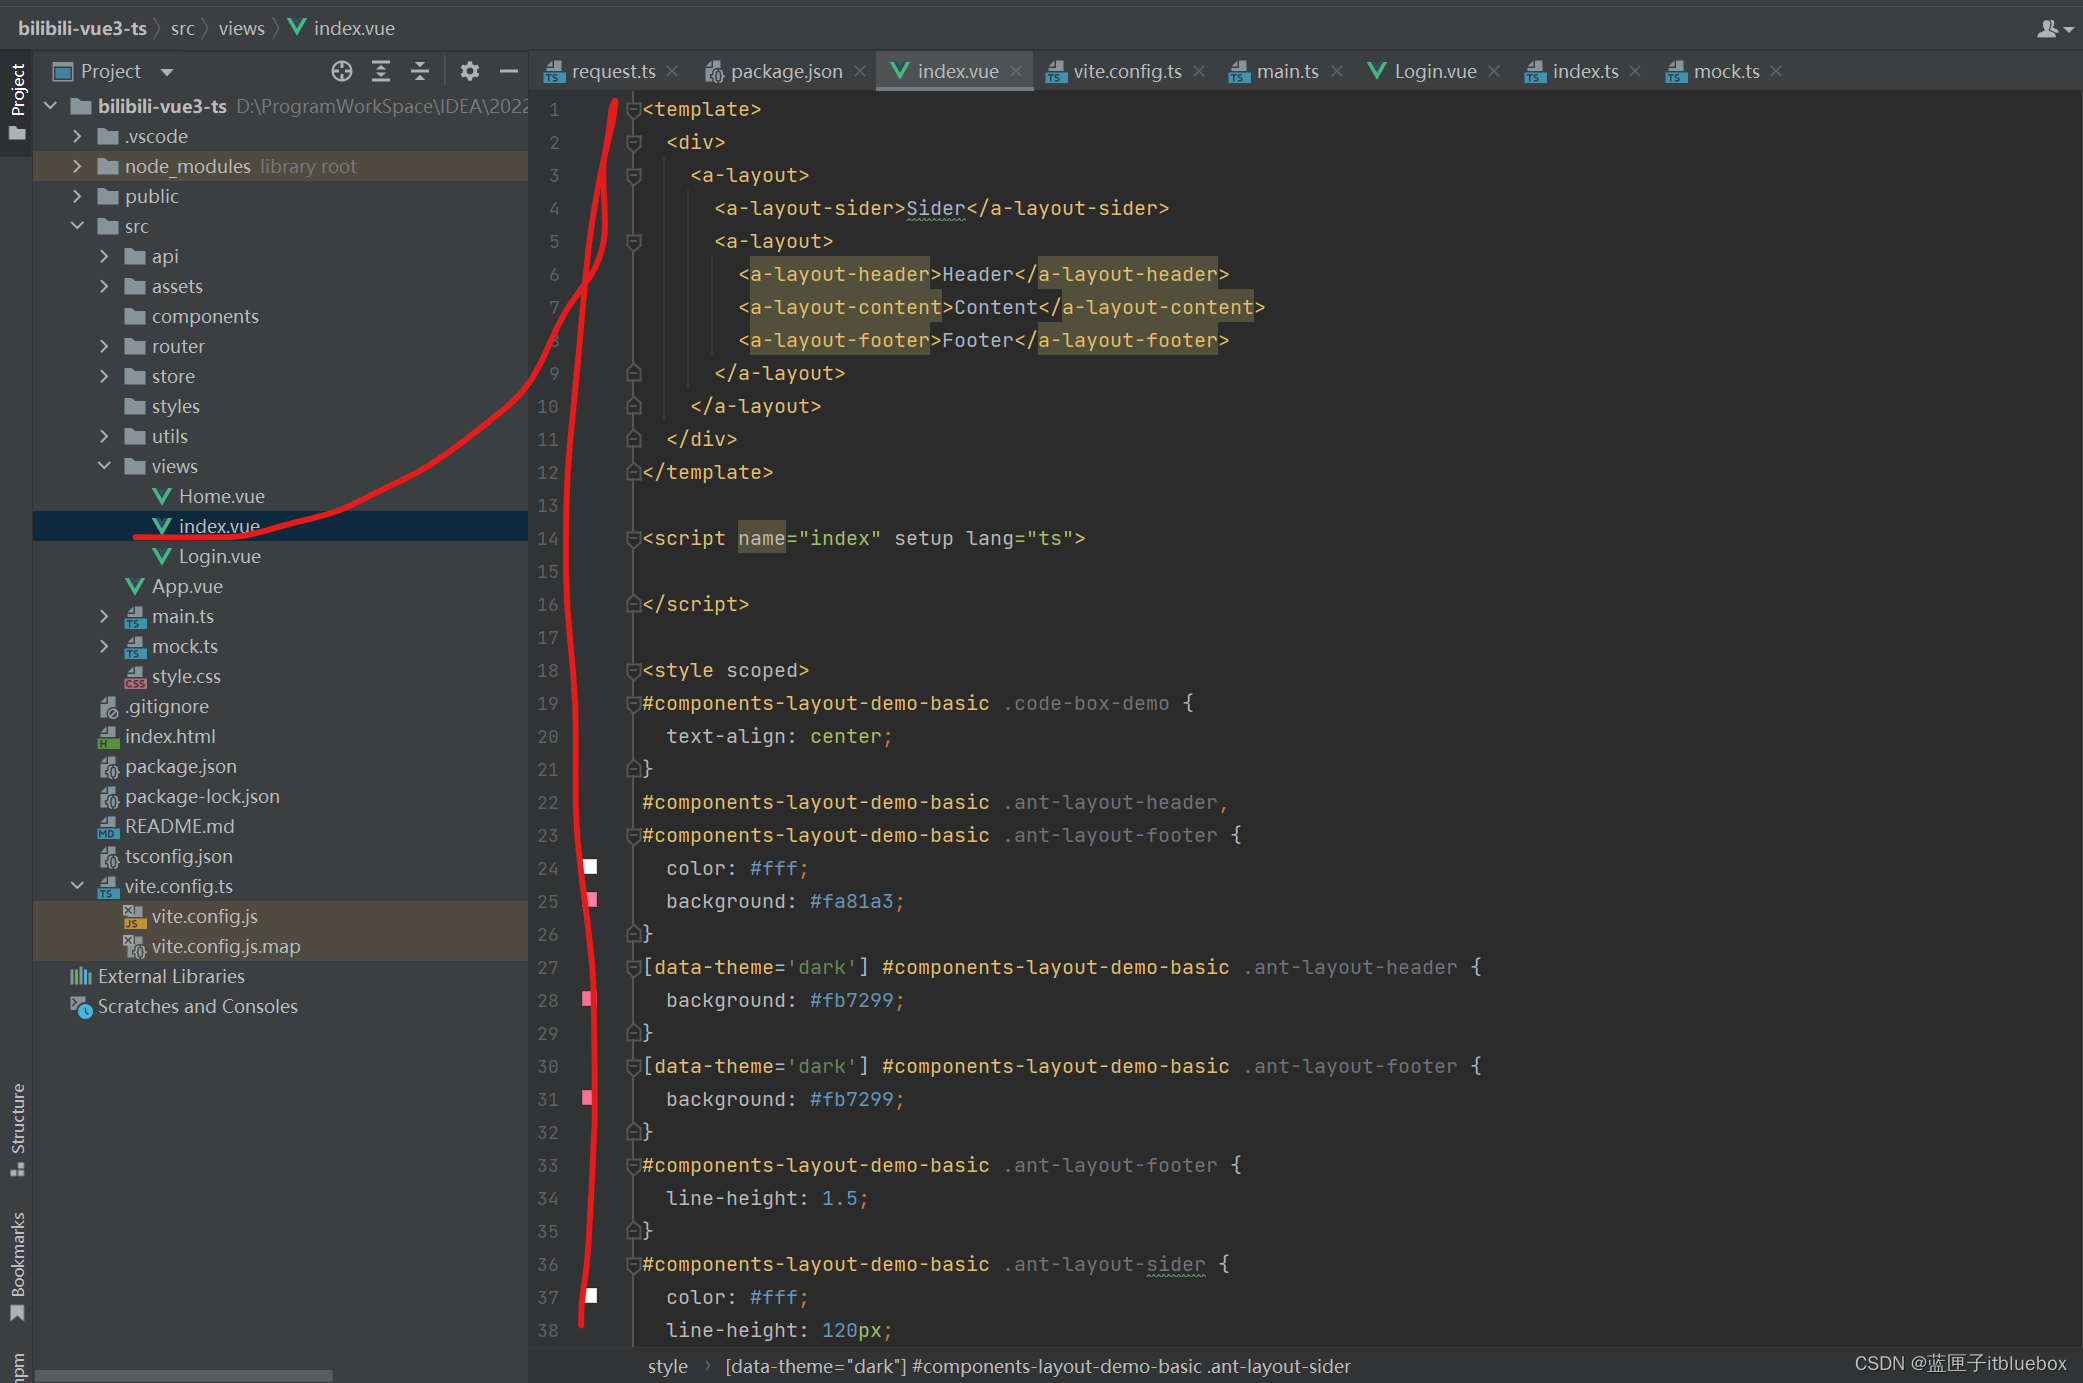
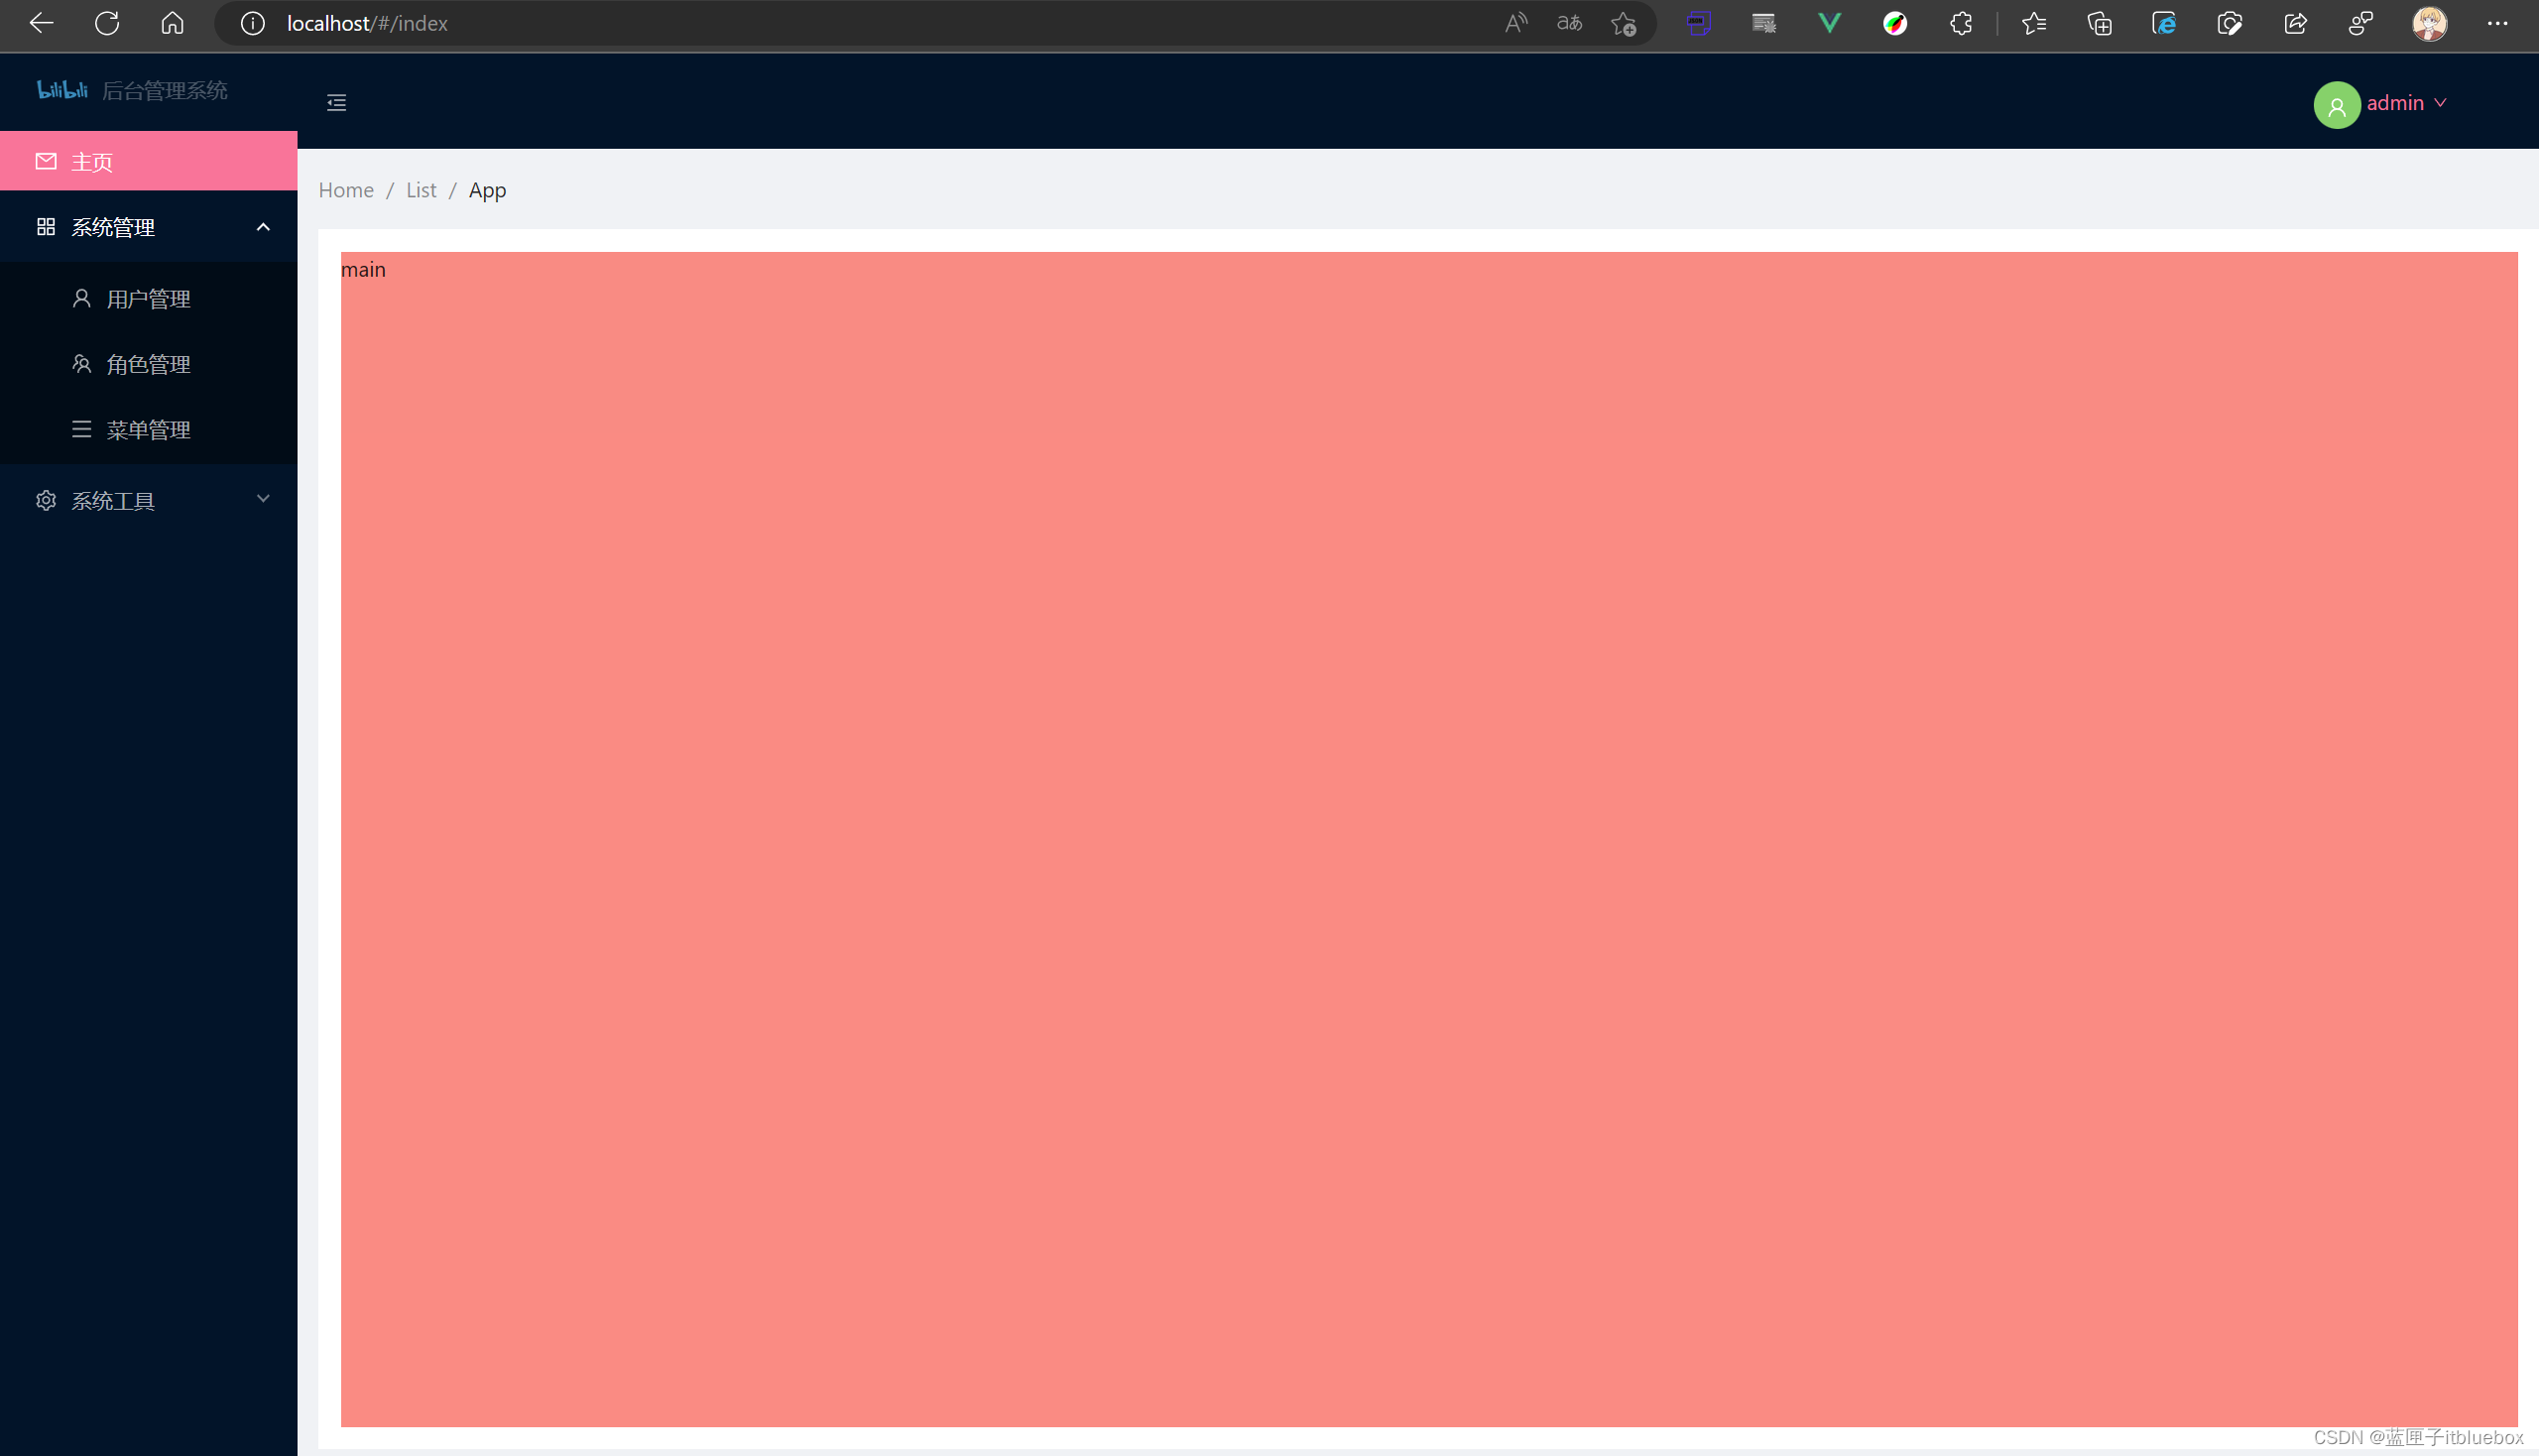
<template><div><a-layout><a-layout-sider>Sider</a-layout-sider><a-layout><a-layout-header>Header</a-layout-header><a-layout-content>Content</a-layout-content><a-layout-footer>Footer</a-layout-footer></a-layout></a-layout></div>
</template>
<script name="index" setup lang="ts">
</script>
<style scoped>
#components-layout-demo-basic .code-box-demo {text-align: center;
}
#components-layout-demo-basic .ant-layout-header,
#components-layout-demo-basic .ant-layout-footer {color: #fff;background: #fa81a3;
}
[data-theme='dark'] #components-layout-demo-basic .ant-layout-header {background: #fb7299;
}
[data-theme='dark'] #components-layout-demo-basic .ant-layout-footer {background: #fb7299;
}
#components-layout-demo-basic .ant-layout-footer {line-height: 1.5;
}
#components-layout-demo-basic .ant-layout-sider {color: #fff;line-height: 120px;background: #fd4c7e;
}
[data-theme='dark'] #components-layout-demo-basic .ant-layout-sider {background: #d9456f;
}
#components-layout-demo-basic .ant-layout-content {min-height: 120px;color: #fff;line-height: 120px;background: #b64665;
}
[data-theme='dark'] #components-layout-demo-basic .ant-layout-content {background: #cc889b;
}
#components-layout-demo-basic > .code-box-demo > .ant-layout + .ant-layout {margin-top: 48px;
}
</style>
2、设置路由
router.push("/index");
设置一下状态码使其跳转成功
3、完善菜单页面内容
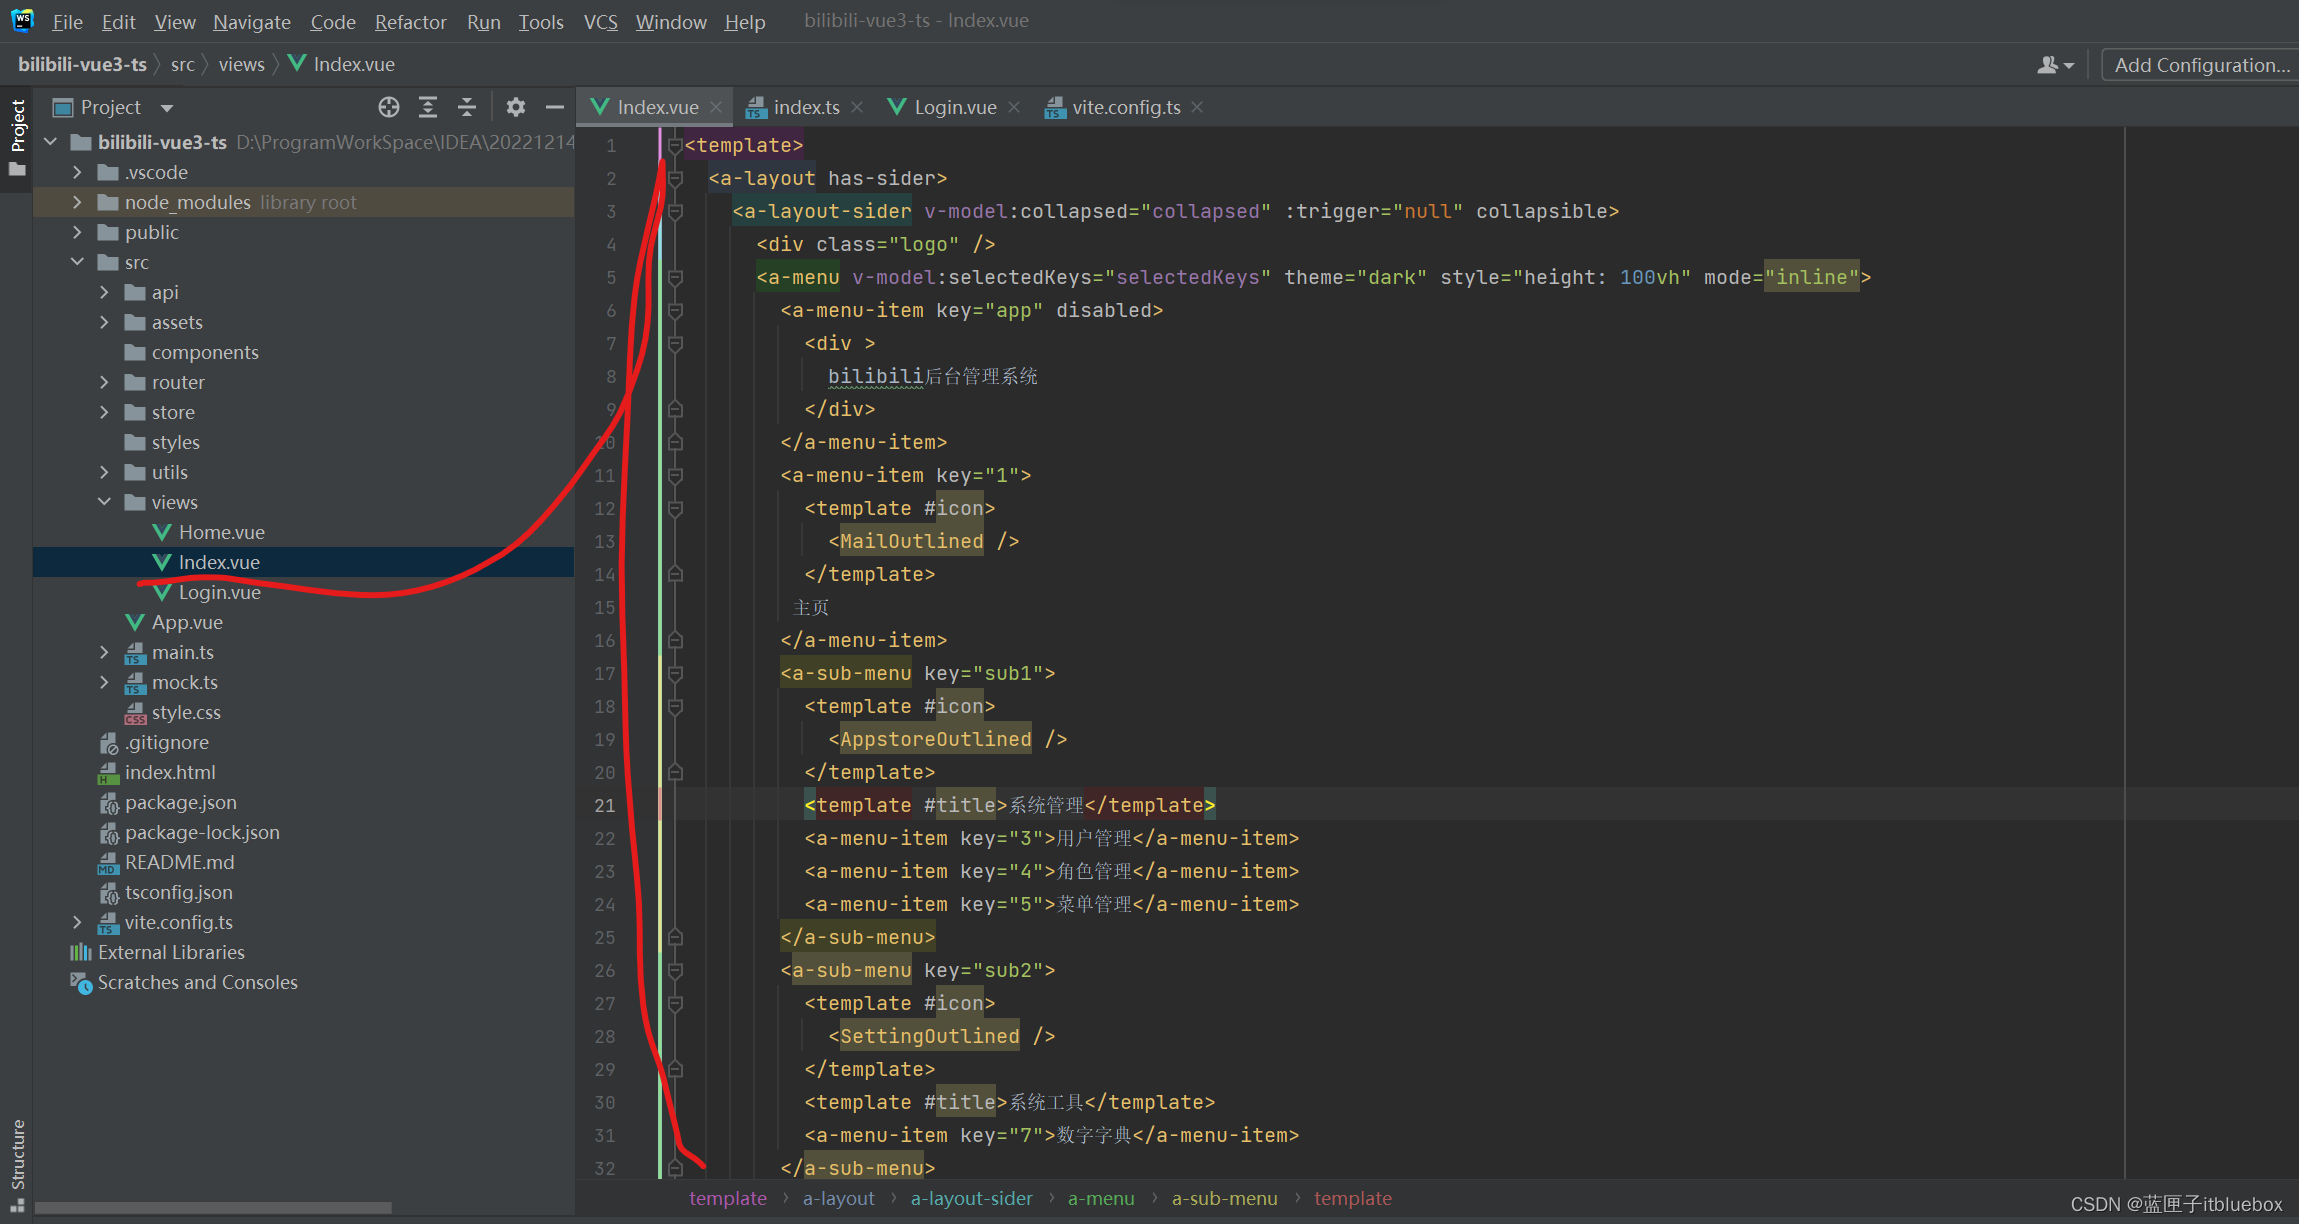
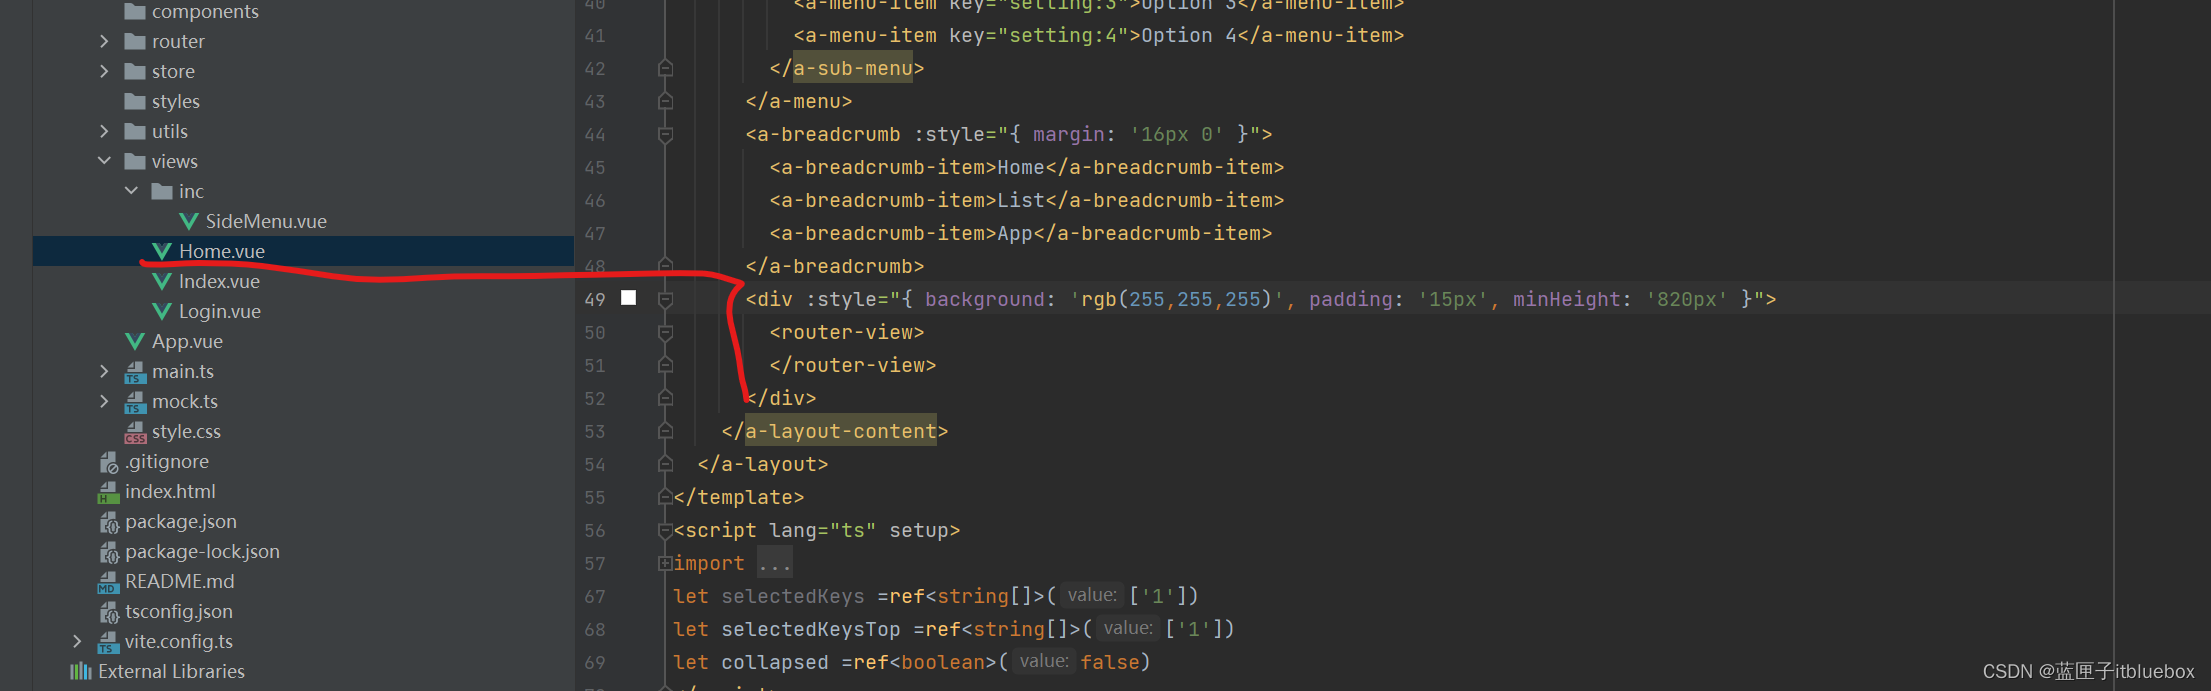
<template><a-layout has-sider><a-layout-sider v-model:collapsed="collapsed" :trigger="null" collapsible><div class="logo" /><a-menu v-model:selectedKeys="selectedKeys" theme="dark" style="height: 100vh" mode="inline"><a-menu-item key="app" disabled><div >bilibili后台管理系统</div></a-menu-item><a-menu-item key="1"><template #icon><MailOutlined /></template>主页</a-menu-item><a-sub-menu key="sub1"><template #icon><AppstoreOutlined /></template><template #title>系统管理</template><a-menu-item key="3">用户管理</a-menu-item><a-menu-item key="4">角色管理</a-menu-item><a-menu-item key="5">菜单管理</a-menu-item></a-sub-menu><a-sub-menu key="sub2"><template #icon><SettingOutlined /></template><template #title>系统工具</template><a-menu-item key="7">数字字典</a-menu-item></a-sub-menu></a-menu></a-layout-sider>、<a-layout-content :style="{  marginTop: '0' }"><a-menuv-model:selectedKeys="selectedKeysTop"theme="dark"mode="horizontal":style="{ lineHeight: '64px',marginLeft:'-15px' }"><a-sub-menu key="sub2" ><template #title><div ><menu-unfold-outlinedv-if="collapsed"class="trigger"@click="() => (collapsed = !collapsed)"/><menu-fold-outlined v-else class="trigger" @click="() => (collapsed = !collapsed)" /></div></template></a-sub-menu><a-sub-menu key="sub1" style="margin-left: 85%" ><template #title><a-avatar style="background-color: #87d068"><template #icon><UserOutlined /></template></a-avatar><a class="ant-dropdown-link" @click.prevent>admin<DownOutlined /></a></template><a-menu-item key="setting:1">Option 1</a-menu-item><a-menu-item key="setting:2">Option 2</a-menu-item><a-menu-item key="setting:3">Option 3</a-menu-item><a-menu-item key="setting:4">Option 4</a-menu-item></a-sub-menu></a-menu><a-breadcrumb :style="{ margin: '16px 0' }"><a-breadcrumb-item>Home</a-breadcrumb-item><a-breadcrumb-item>List</a-breadcrumb-item><a-breadcrumb-item>App</a-breadcrumb-item></a-breadcrumb><div :style="{ background: '#fff', padding: '24px', minHeight: '800px' }">Content</div></a-layout-content></a-layout>
</template>
<script lang="ts" setup>
import {DownOutlined,UserOutlined,VideoCameraOutlined,UploadOutlined,MenuUnfoldOutlined,MenuFoldOutlined,
} from '@ant-design/icons-vue';
import { defineComponent, ref } from 'vue';
let selectedKeys =ref<string[]>(['1'])
let selectedKeysTop =ref<string[]>(['1'])
let collapsed =ref<boolean>(false)
</script>
<style>
#components-layout-demo-custom-trigger .trigger {font-size: 18px;line-height: 64px;padding: 0 24px;cursor: pointer;transition: color 0.3s;
}
#components-layout-demo-custom-trigger .trigger:hover {color: #fb7299;
}
#components-layout-demo-custom-trigger .logo {height: 32px;background: rgba(255, 255, 255, 0.3);margin: 16px;
}
.site-layout .site-layout-background {background: #fff;
}
</style>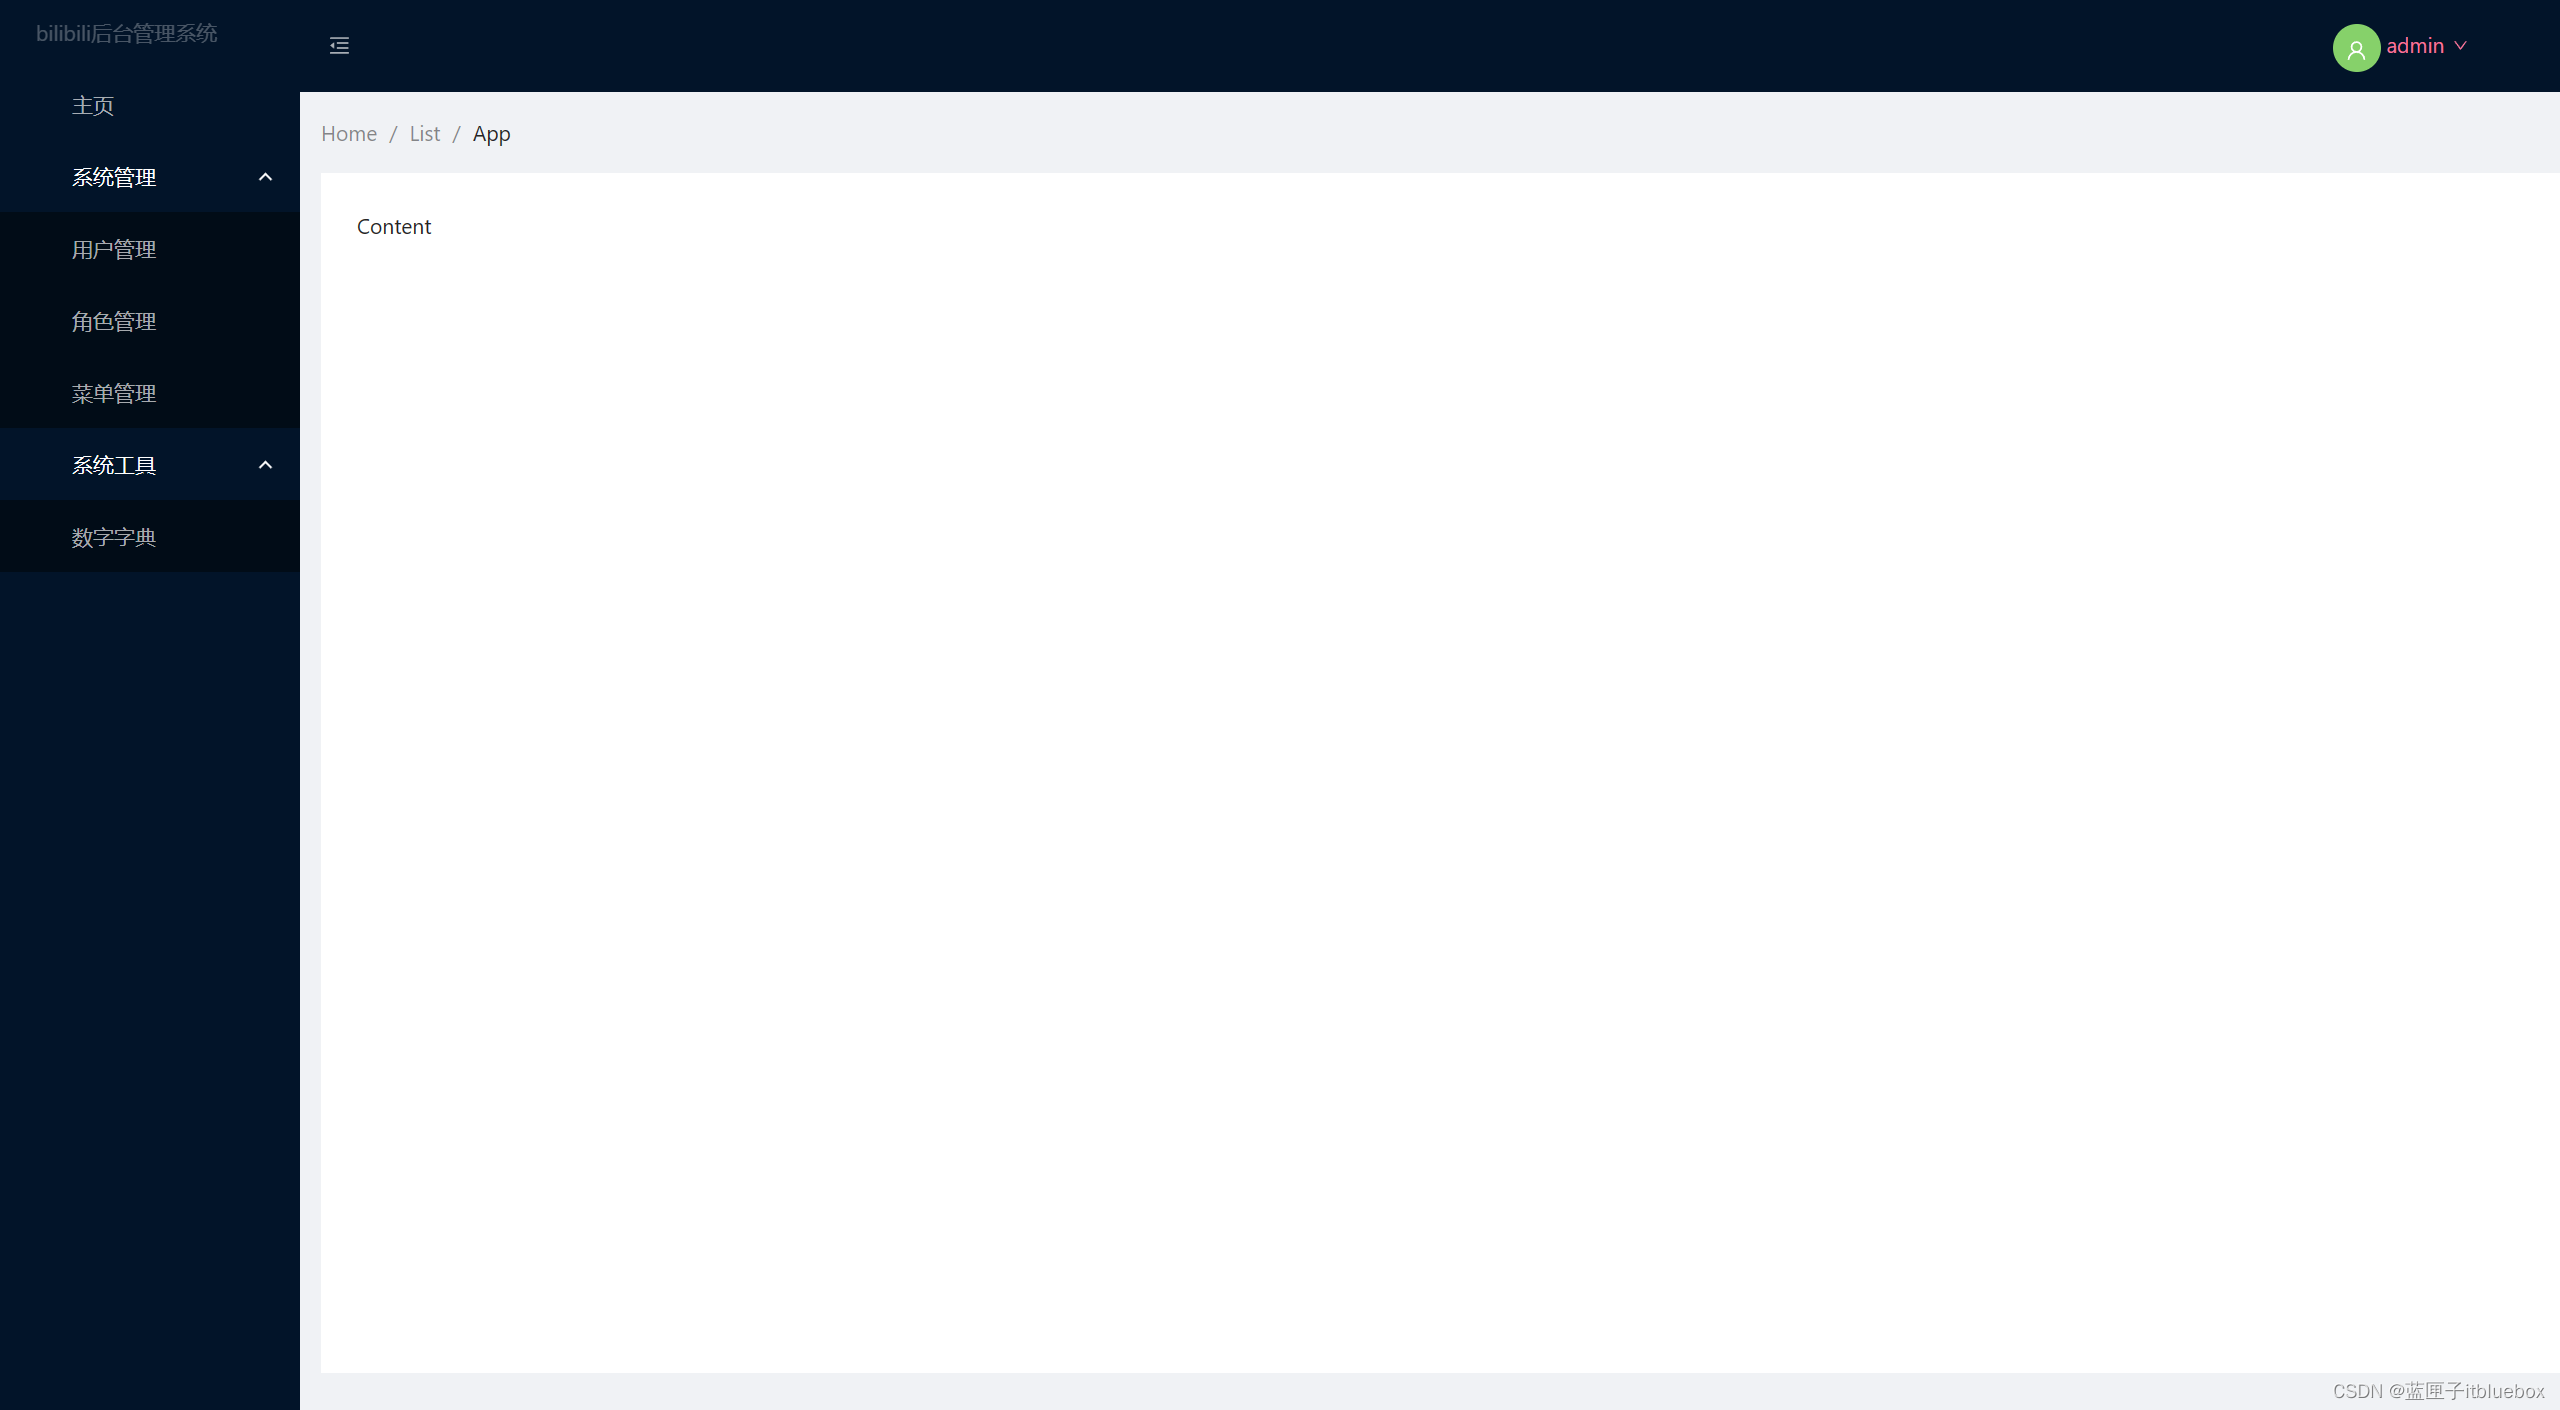
4、Vue代码抽取
(1)抽取菜单
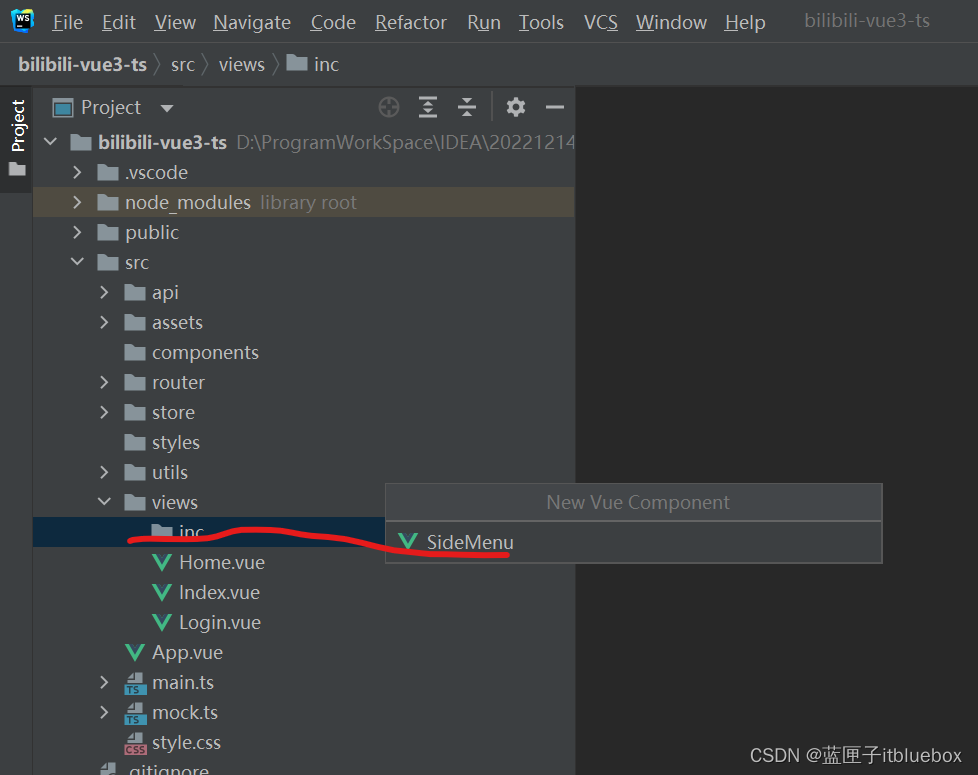
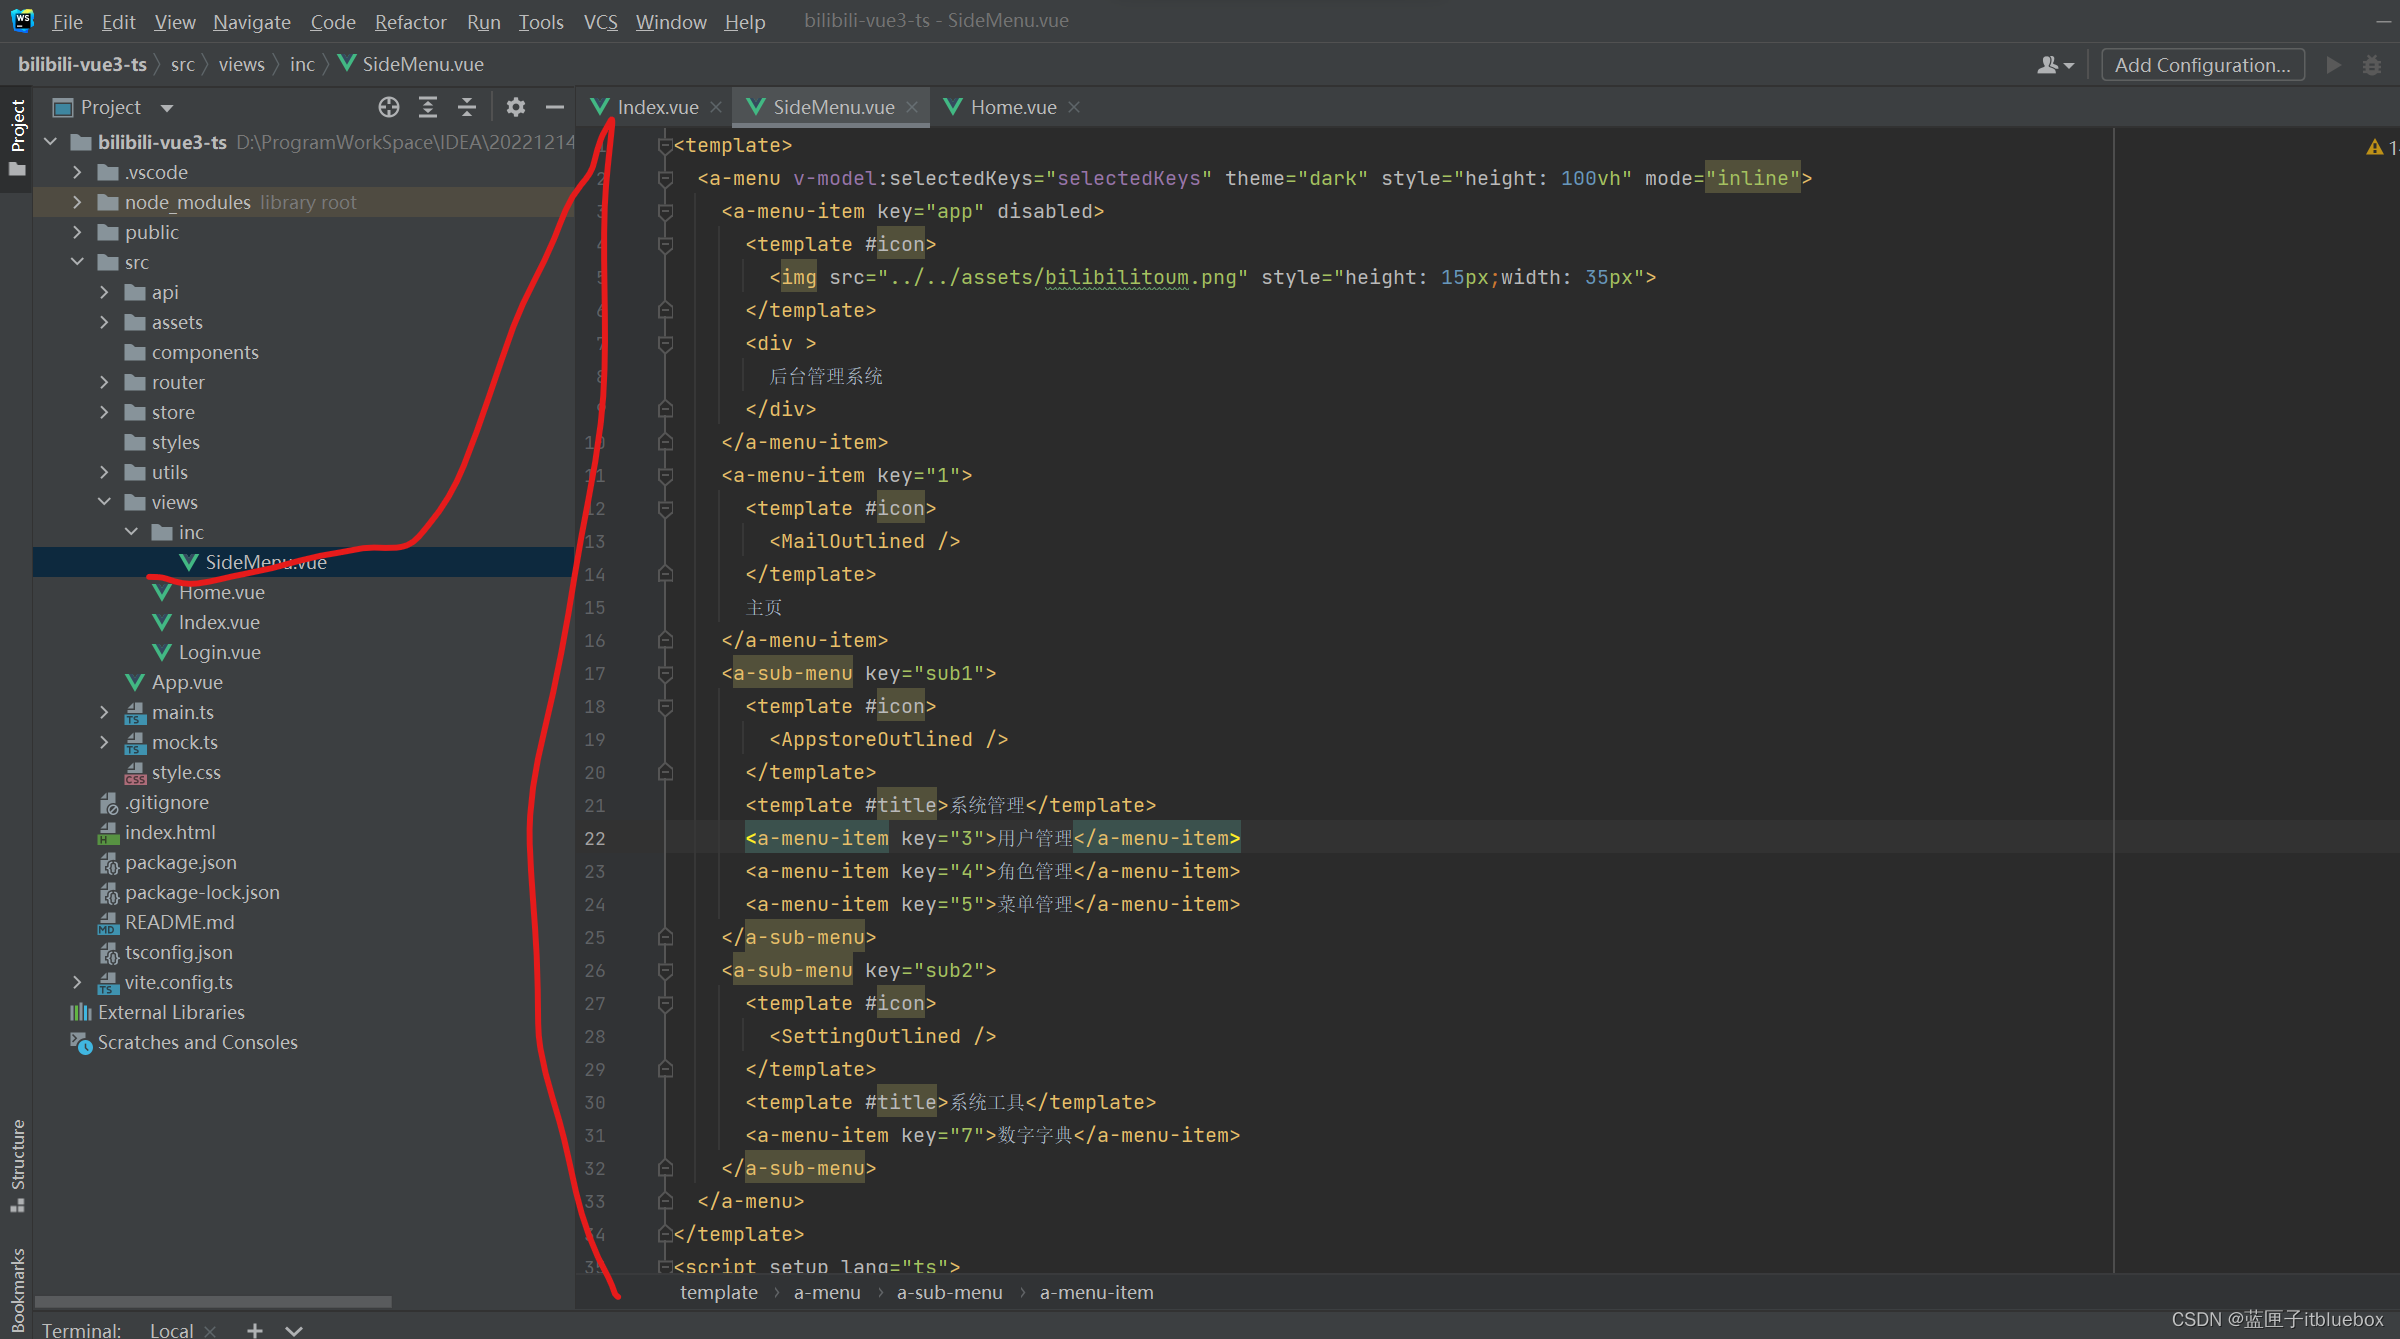
<template><a-menu v-model:selectedKeys="selectedKeys" theme="dark" style="height: 100vh" mode="inline"><a-menu-item key="app" disabled><template #icon><img src="../../assets/bilibilitoum.png" style="height: 15px;width: 35px"></template><div >后台管理系统</div></a-menu-item><a-menu-item key="1"><template #icon><MailOutlined /></template>主页</a-menu-item><a-sub-menu key="sub1"><template #icon><AppstoreOutlined /></template><template #title>系统管理</template><a-menu-item key="3">用户管理</a-menu-item><a-menu-item key="4">角色管理</a-menu-item><a-menu-item key="5">菜单管理</a-menu-item></a-sub-menu><a-sub-menu key="sub2"><template #icon><SettingOutlined /></template><template #title>系统工具</template><a-menu-item key="7">数字字典</a-menu-item></a-sub-menu></a-menu>
</template>
<script setup lang="ts">
import {ref} from "vue";
import {AppstoreOutlined,MailOutlined,SettingOutlined,
} from '@ant-design/icons-vue';
let selectedKeys =ref<string[]>(['1'])
let selectedKeysTop =ref<string[]>(['1'])
let collapsed =ref<boolean>(false)
</script>
<style scoped>
</style>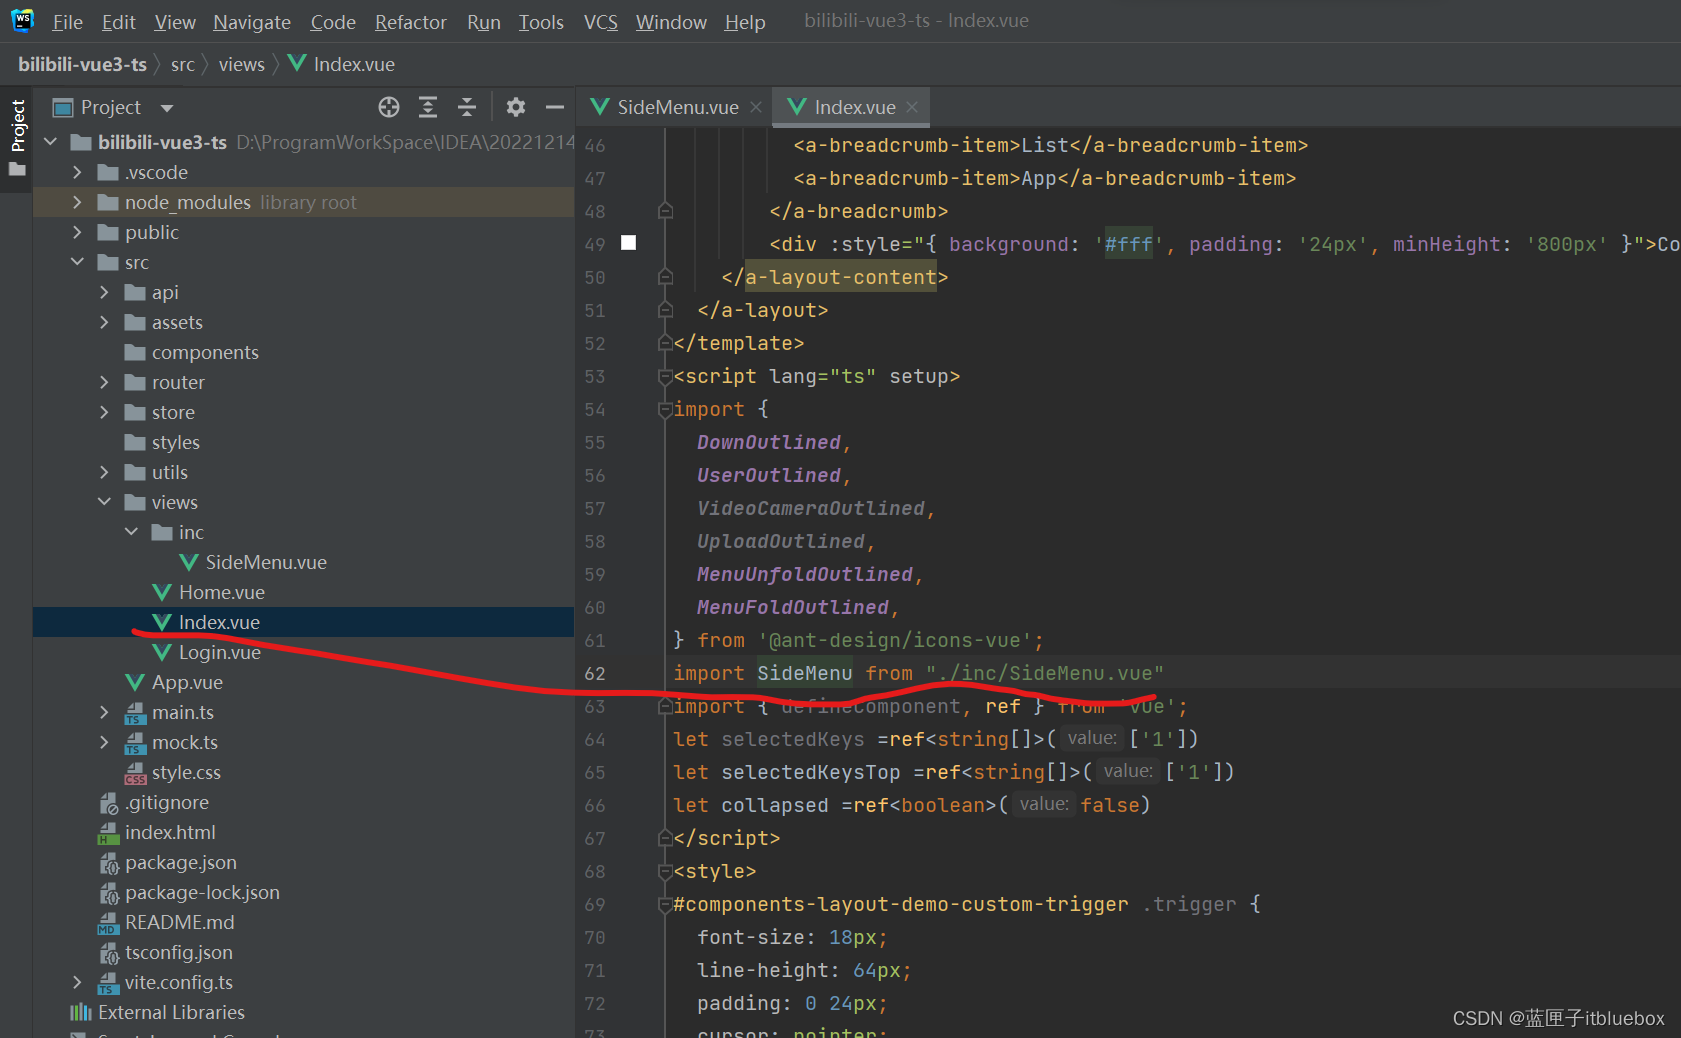
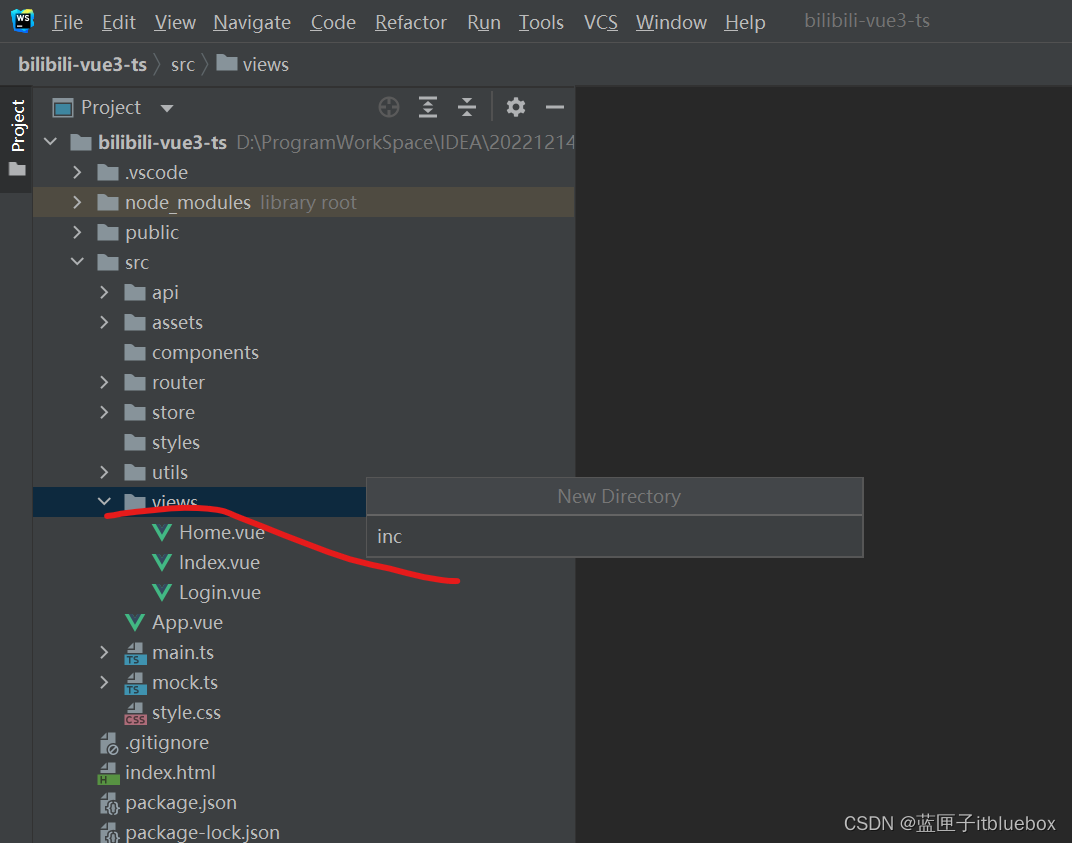
<SideMenu></SideMenu>
import SideMenu from "./inc/SideMenu.vue"
(2)index
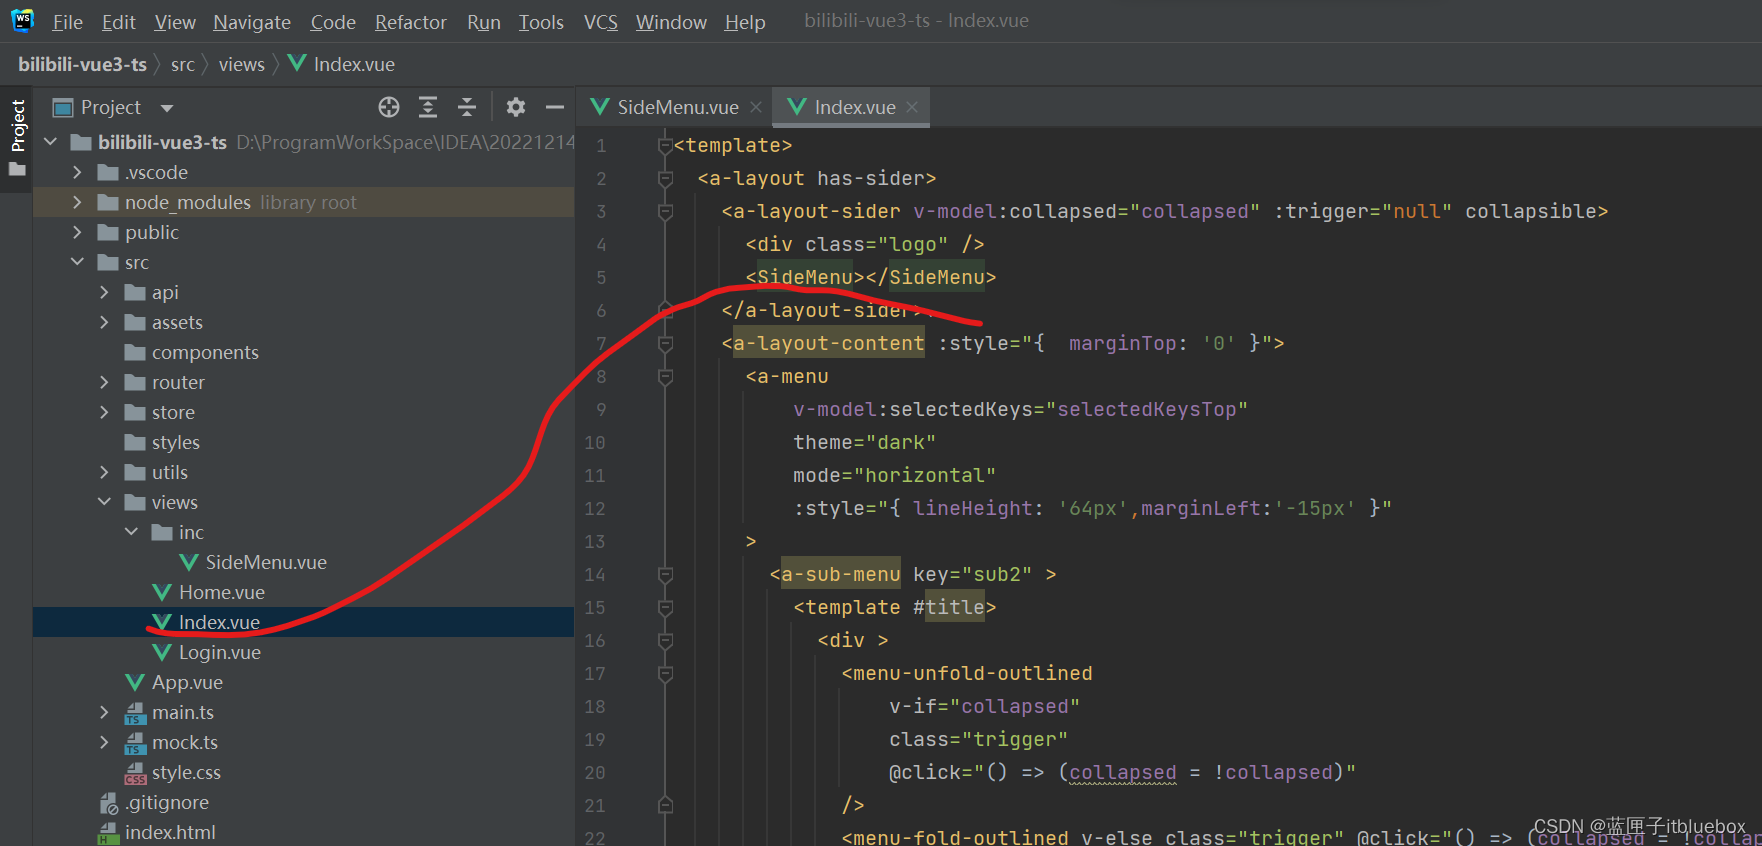
将index.vue的内容全部抽取到Home
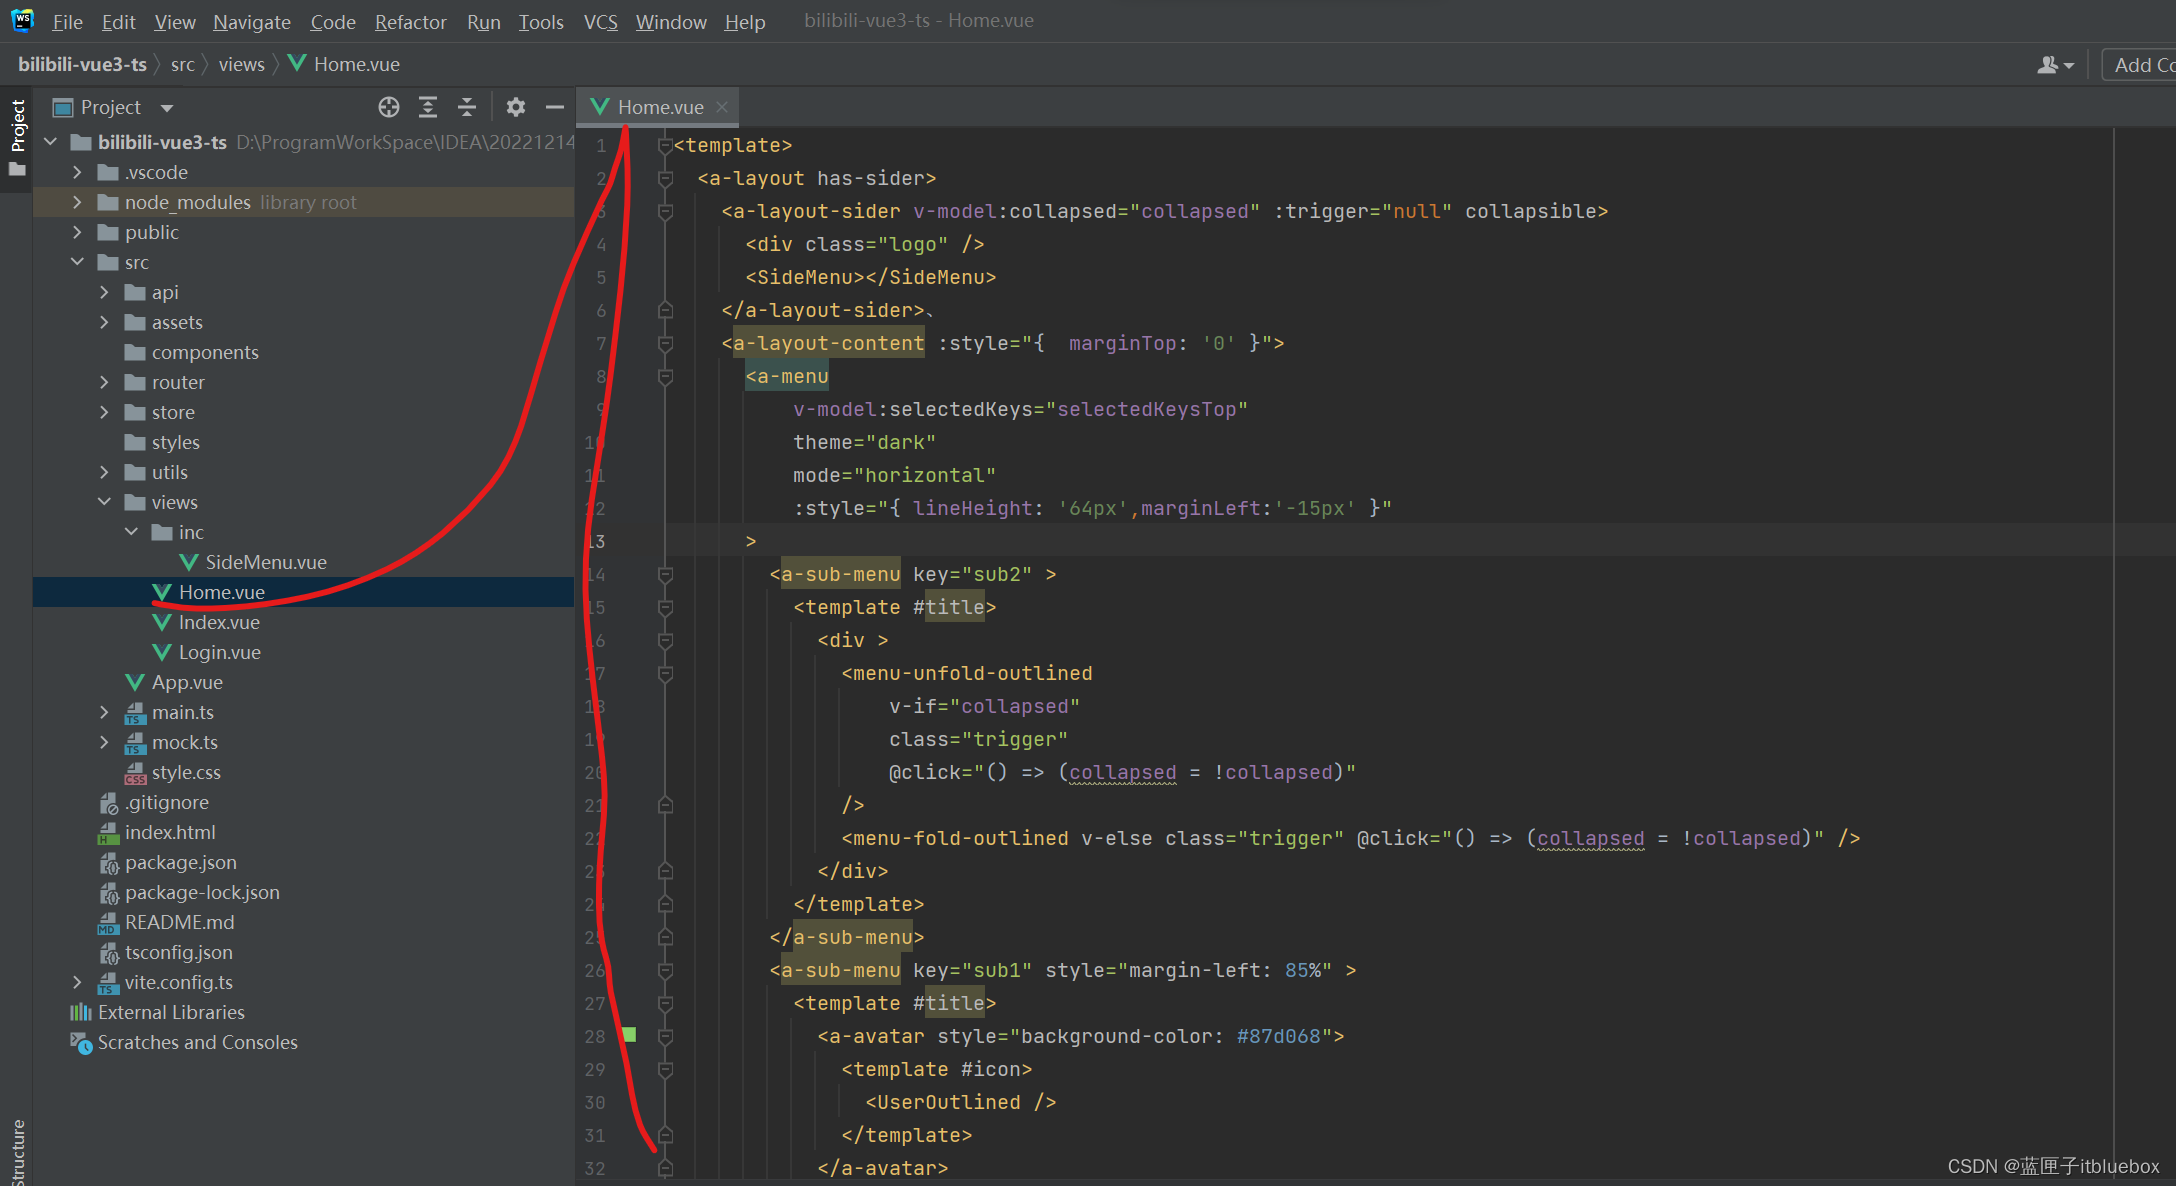
<template><a-layout has-sider><a-layout-sider v-model:collapsed="collapsed" :trigger="null" collapsible><div class="logo" /><SideMenu></SideMenu></a-layout-sider>、<a-layout-content :style="{  marginTop: '0' }"><a-menuv-model:selectedKeys="selectedKeysTop"theme="dark"mode="horizontal":style="{ lineHeight: '64px',marginLeft:'-15px' }"><a-sub-menu key="sub2" ><template #title><div ><menu-unfold-outlinedv-if="collapsed"class="trigger"@click="() => (collapsed = !collapsed)"/><menu-fold-outlined v-else class="trigger" @click="() => (collapsed = !collapsed)" /></div></template></a-sub-menu><a-sub-menu key="sub1" style="margin-left: 85%" ><template #title><a-avatar style="background-color: #87d068"><template #icon><UserOutlined /></template></a-avatar><a class="ant-dropdown-link" @click.prevent>admin<DownOutlined /></a></template><a-menu-item key="setting:1">Option 1</a-menu-item><a-menu-item key="setting:2">Option 2</a-menu-item><a-menu-item key="setting:3">Option 3</a-menu-item><a-menu-item key="setting:4">Option 4</a-menu-item></a-sub-menu></a-menu><a-breadcrumb :style="{ margin: '16px 0' }"><a-breadcrumb-item>Home</a-breadcrumb-item><a-breadcrumb-item>List</a-breadcrumb-item><a-breadcrumb-item>App</a-breadcrumb-item></a-breadcrumb><div :style="{ background: '#fff', padding: '24px', minHeight: '800px' }">Content</div></a-layout-content></a-layout>
</template>
<script lang="ts" setup>
import {DownOutlined,UserOutlined,VideoCameraOutlined,UploadOutlined,MenuUnfoldOutlined,MenuFoldOutlined,
} from '@ant-design/icons-vue';
import SideMenu from "./inc/SideMenu.vue"
import { defineComponent, ref } from 'vue';
let selectedKeys =ref<string[]>(['1'])
let selectedKeysTop =ref<string[]>(['1'])
let collapsed =ref<boolean>(false)
</script>
<style>
#components-layout-demo-custom-trigger .trigger {font-size: 18px;line-height: 64px;padding: 0 24px;cursor: pointer;transition: color 0.3s;
}
#components-layout-demo-custom-trigger .trigger:hover {color: #fb7299;
}
#components-layout-demo-custom-trigger .logo {height: 32px;background: rgba(255, 255, 255, 0.3);margin: 16px;
}
.site-layout .site-layout-background {background: #fff;
}
</style>
5、设置子路由

children:[{path:'/index',name:'Index',component:Index}]
在Home.vue当中设置路由
 <router-view>
</router-view>
访问页面:http://localhost/#/index

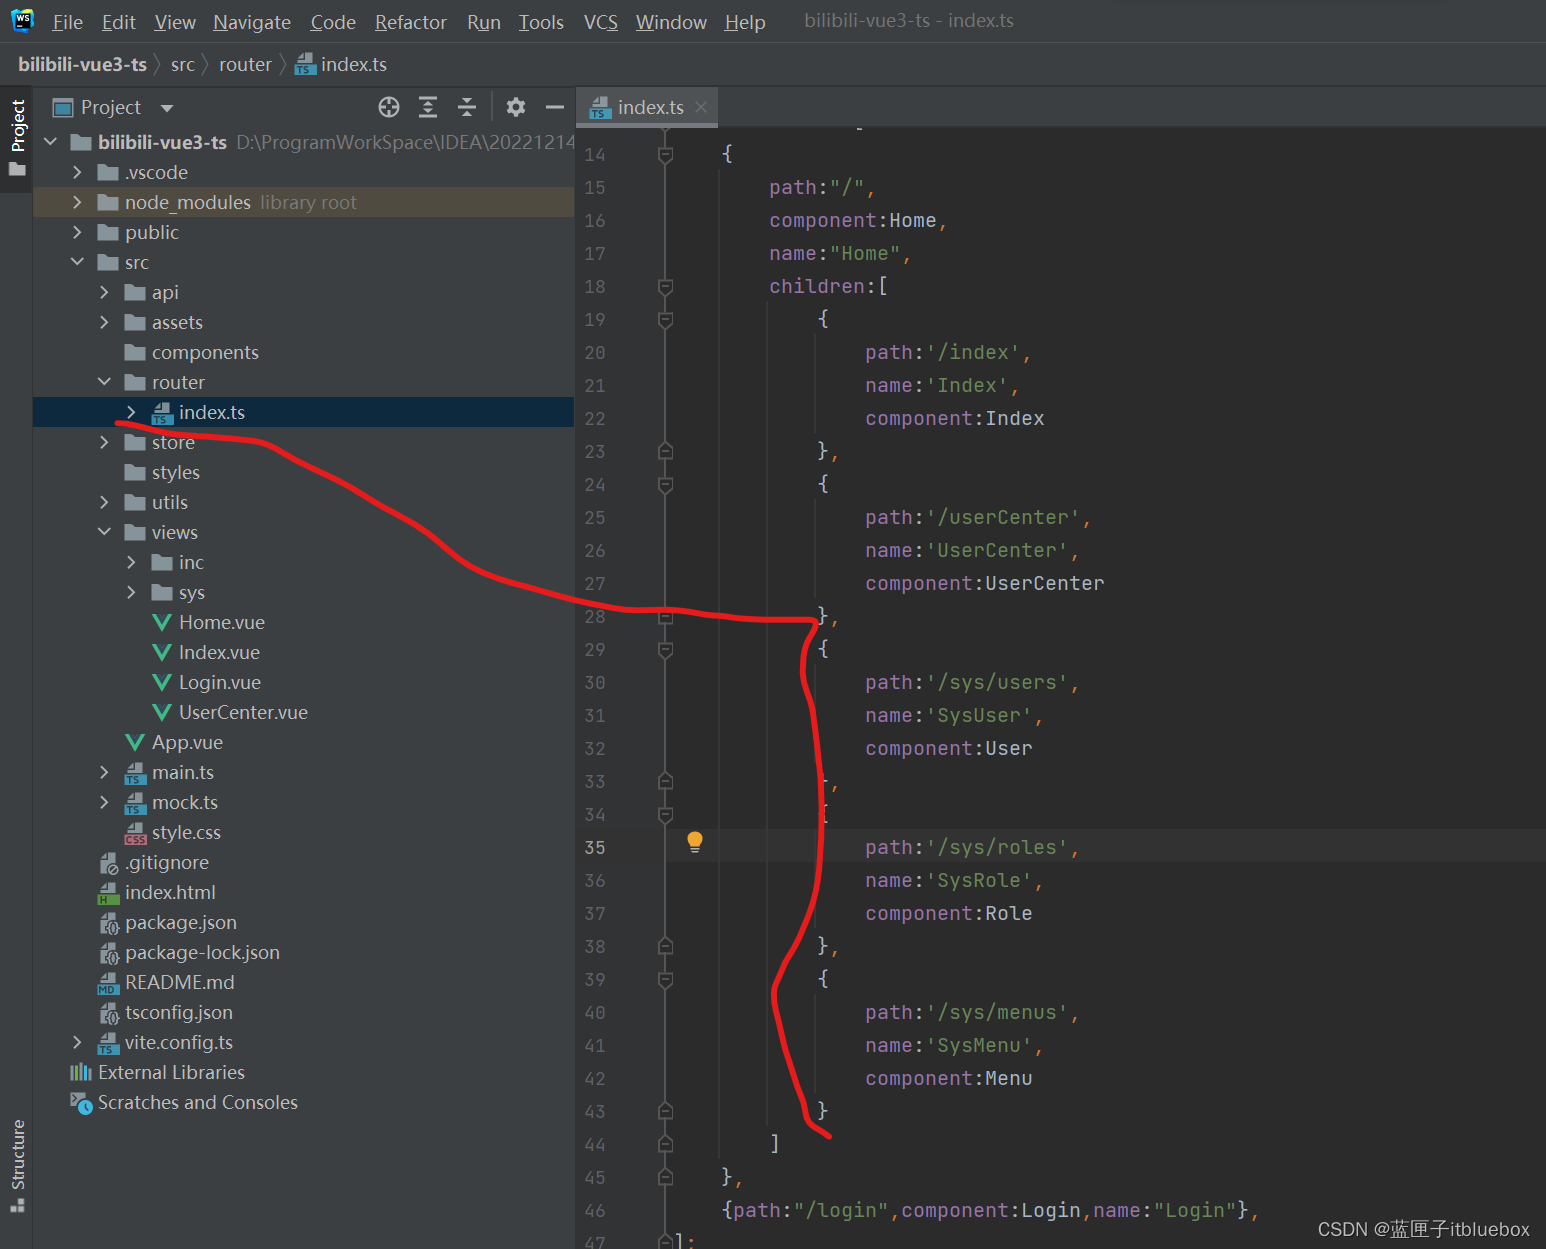
6、编写导航栏路由
1)创建需要路由跳转的页面

防止手残贴上全部代码
import { createRouter,createWebHashHistory } from 'vue-router';
import Home from "../views/Home.vue";
import Index from "../views/Index.vue";
import Login from "../views/Login.vue";
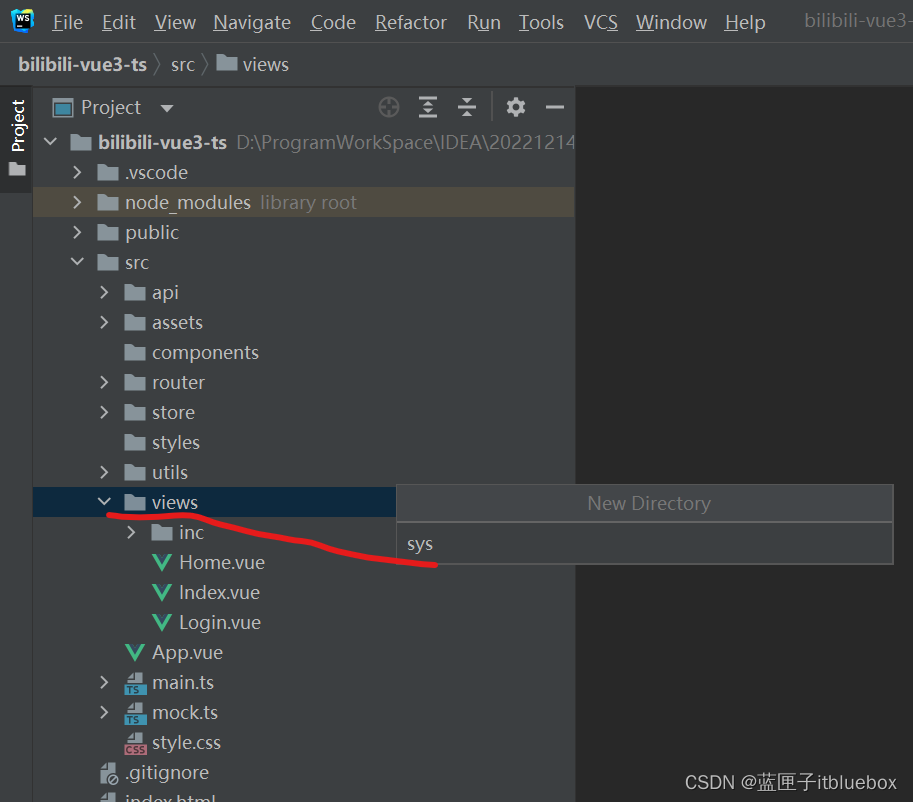
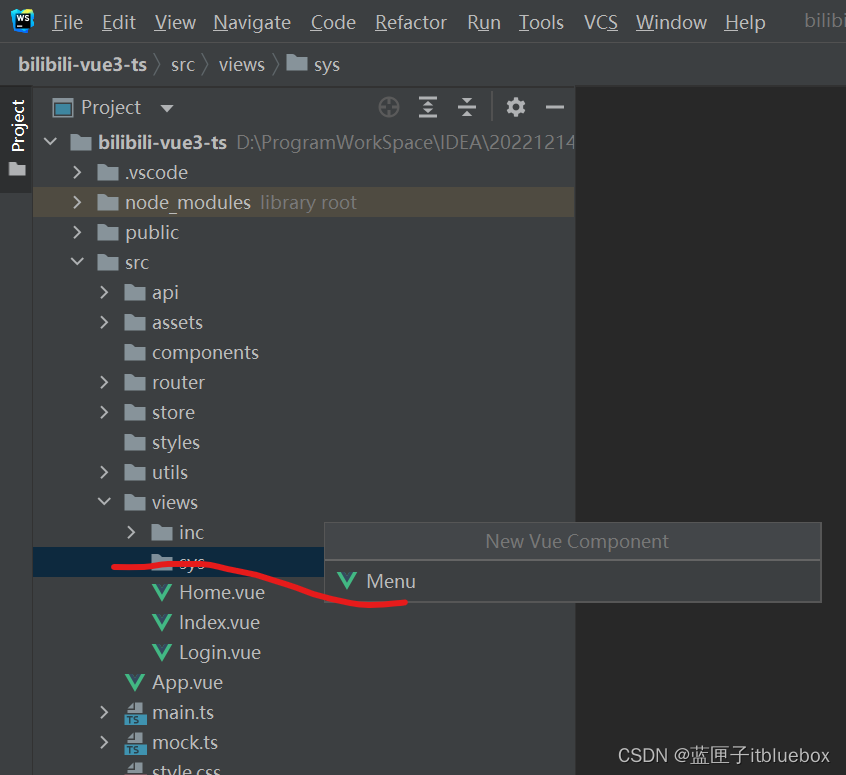
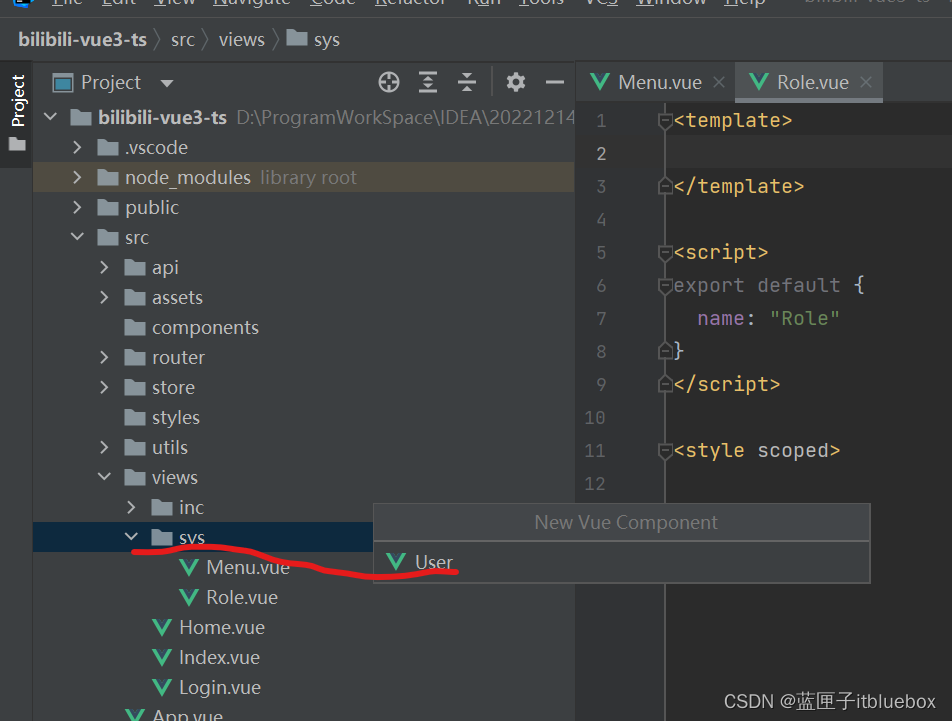
import Menu from '../views/sys/Menu.vue'
import Role from '../views/sys/Role.vue'
import User from '../views/sys/User.vue'
//2、定义一些路由
//每个路由都需要映射到一个组件
//我们后面再讨论嵌套路由
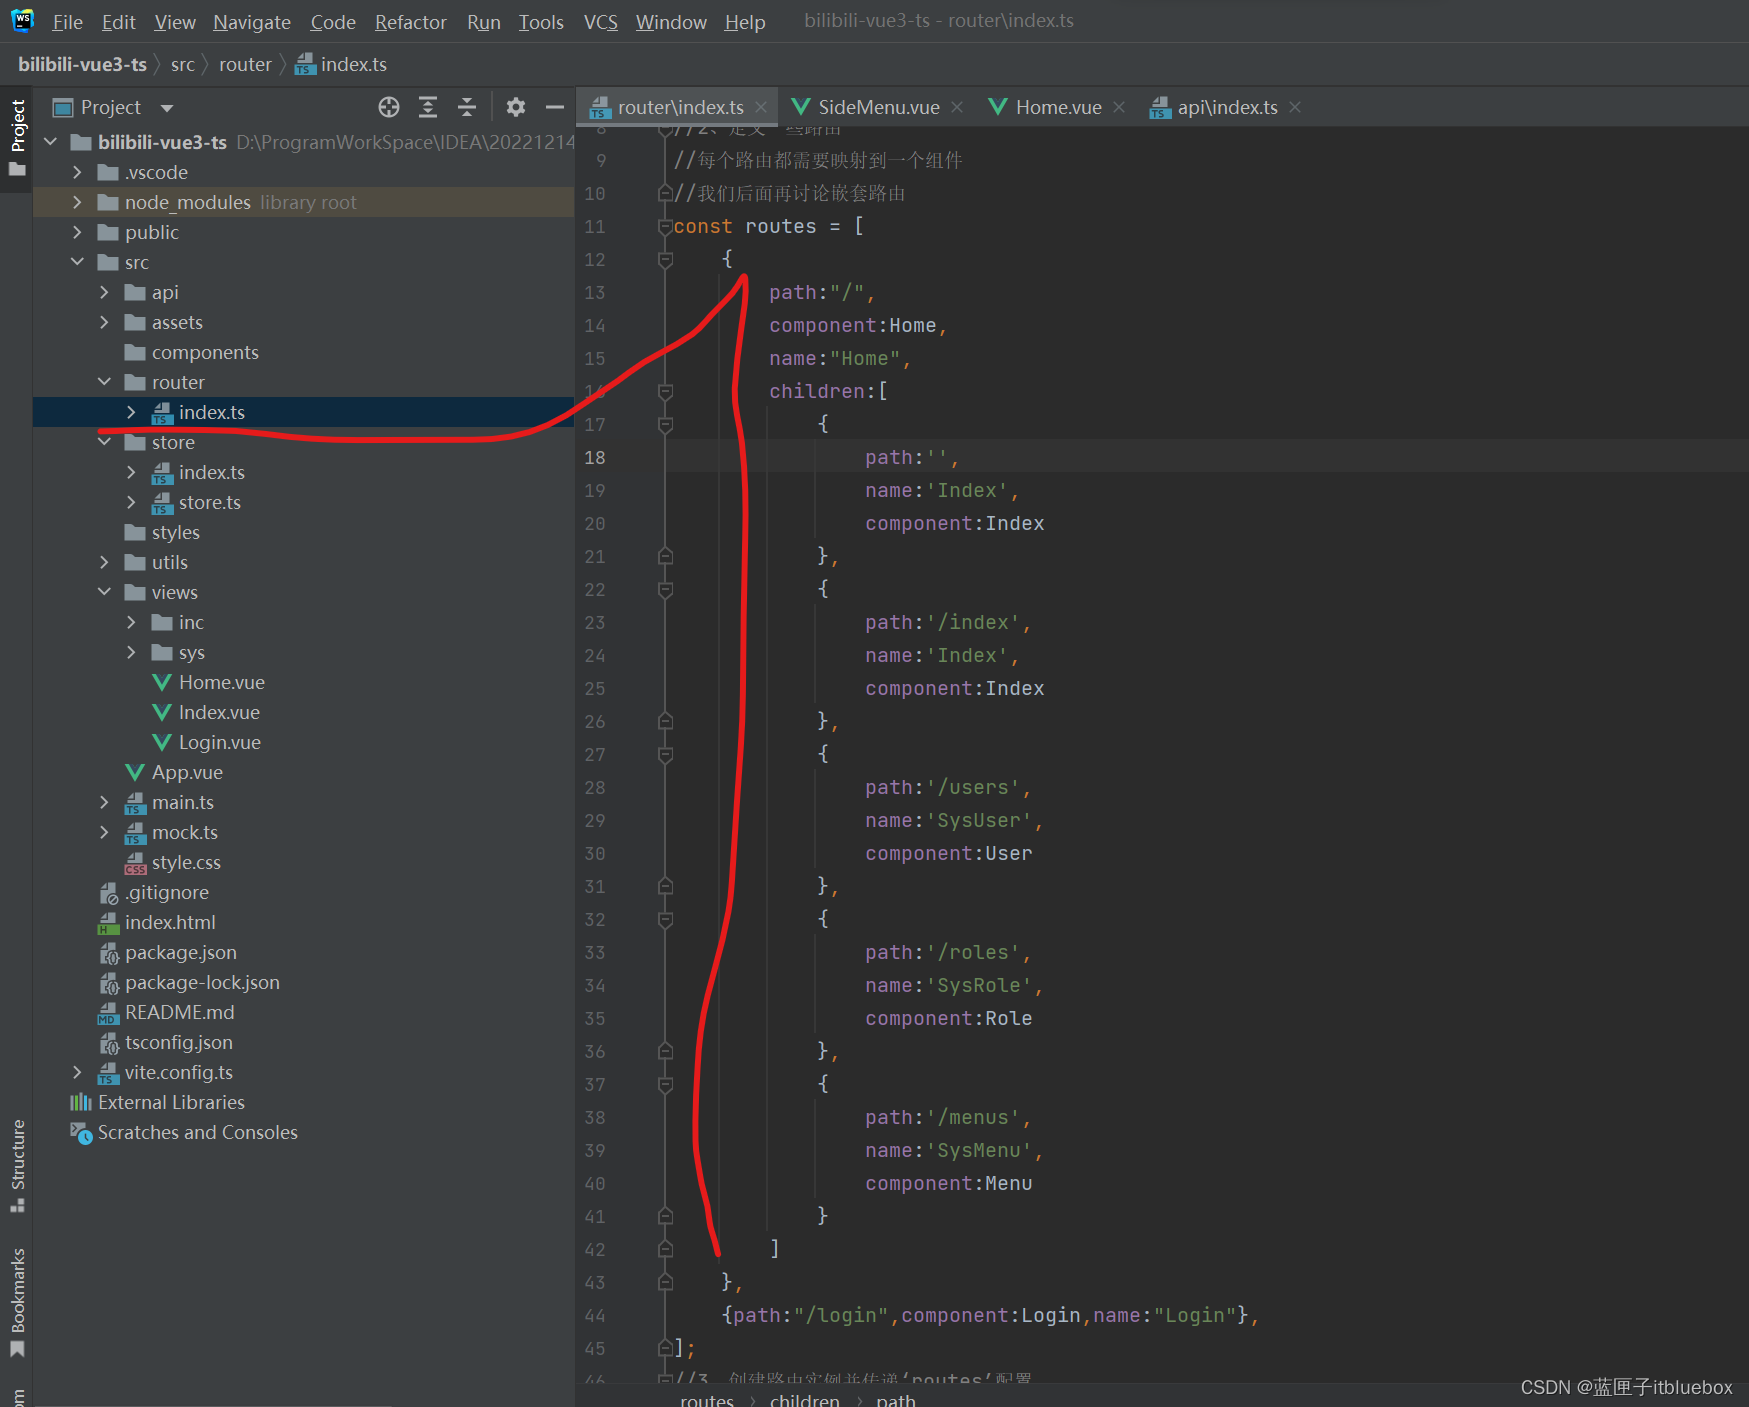
const routes = [{path:"/",component:Home,name:"Home",children:[{path:'',name:'Index',component:Index},{path:'/index',name:'Index',component:Index},{path:'/users',name:'SysUser',component:User},{path:'/roles',name:'SysRole',component:Role},{path:'/menus',name:'SysMenu',component:Menu}]},{path:"/login",component:Login,name:"Login"},
];
//3、创建路由实例并传递‘routes’配置
//你可以在这里输入更多的配置,但是我们在这里
const router = createRouter({//4、内部提供了 history 模式的实现。为了简单起见,我们在这里使用hash模式history:createWebHashHistory(),routes, //routes:routes 的缩写
})
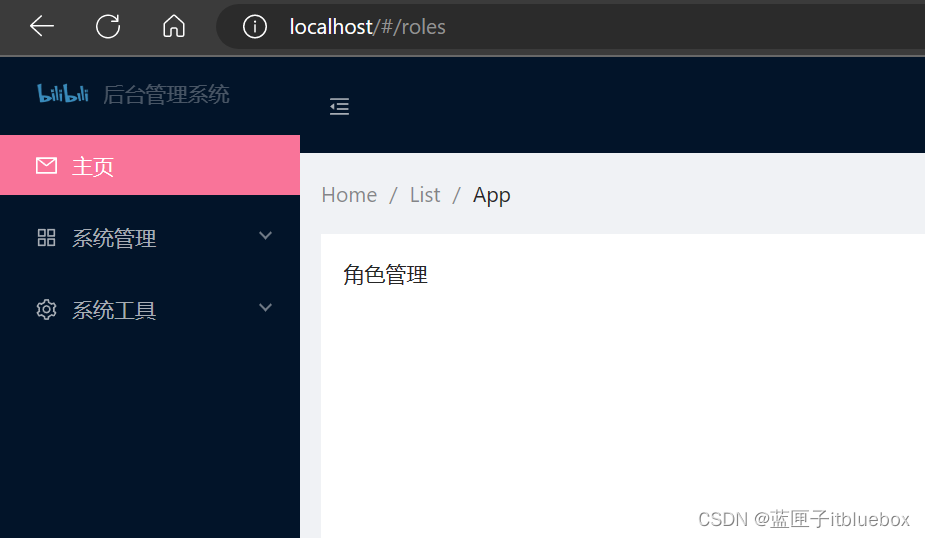
export default router访问:http://localhost/#/roles
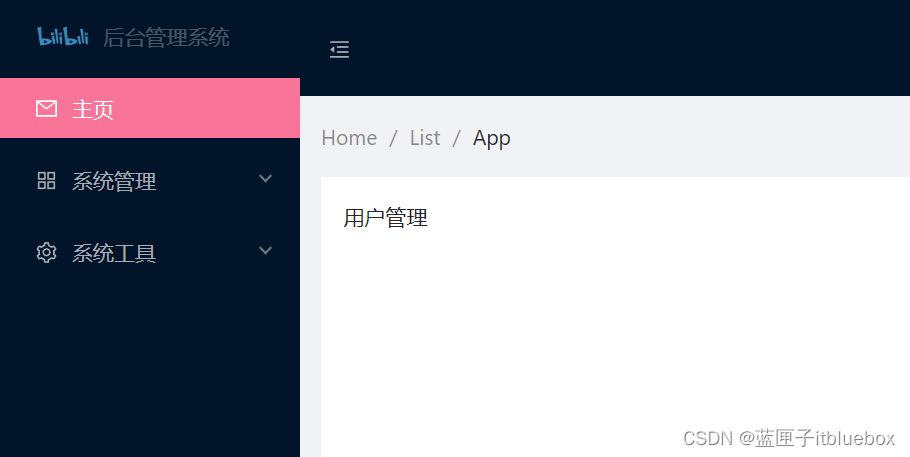
访问: http://localhost/#/users
访问:http://localhost/#/menus
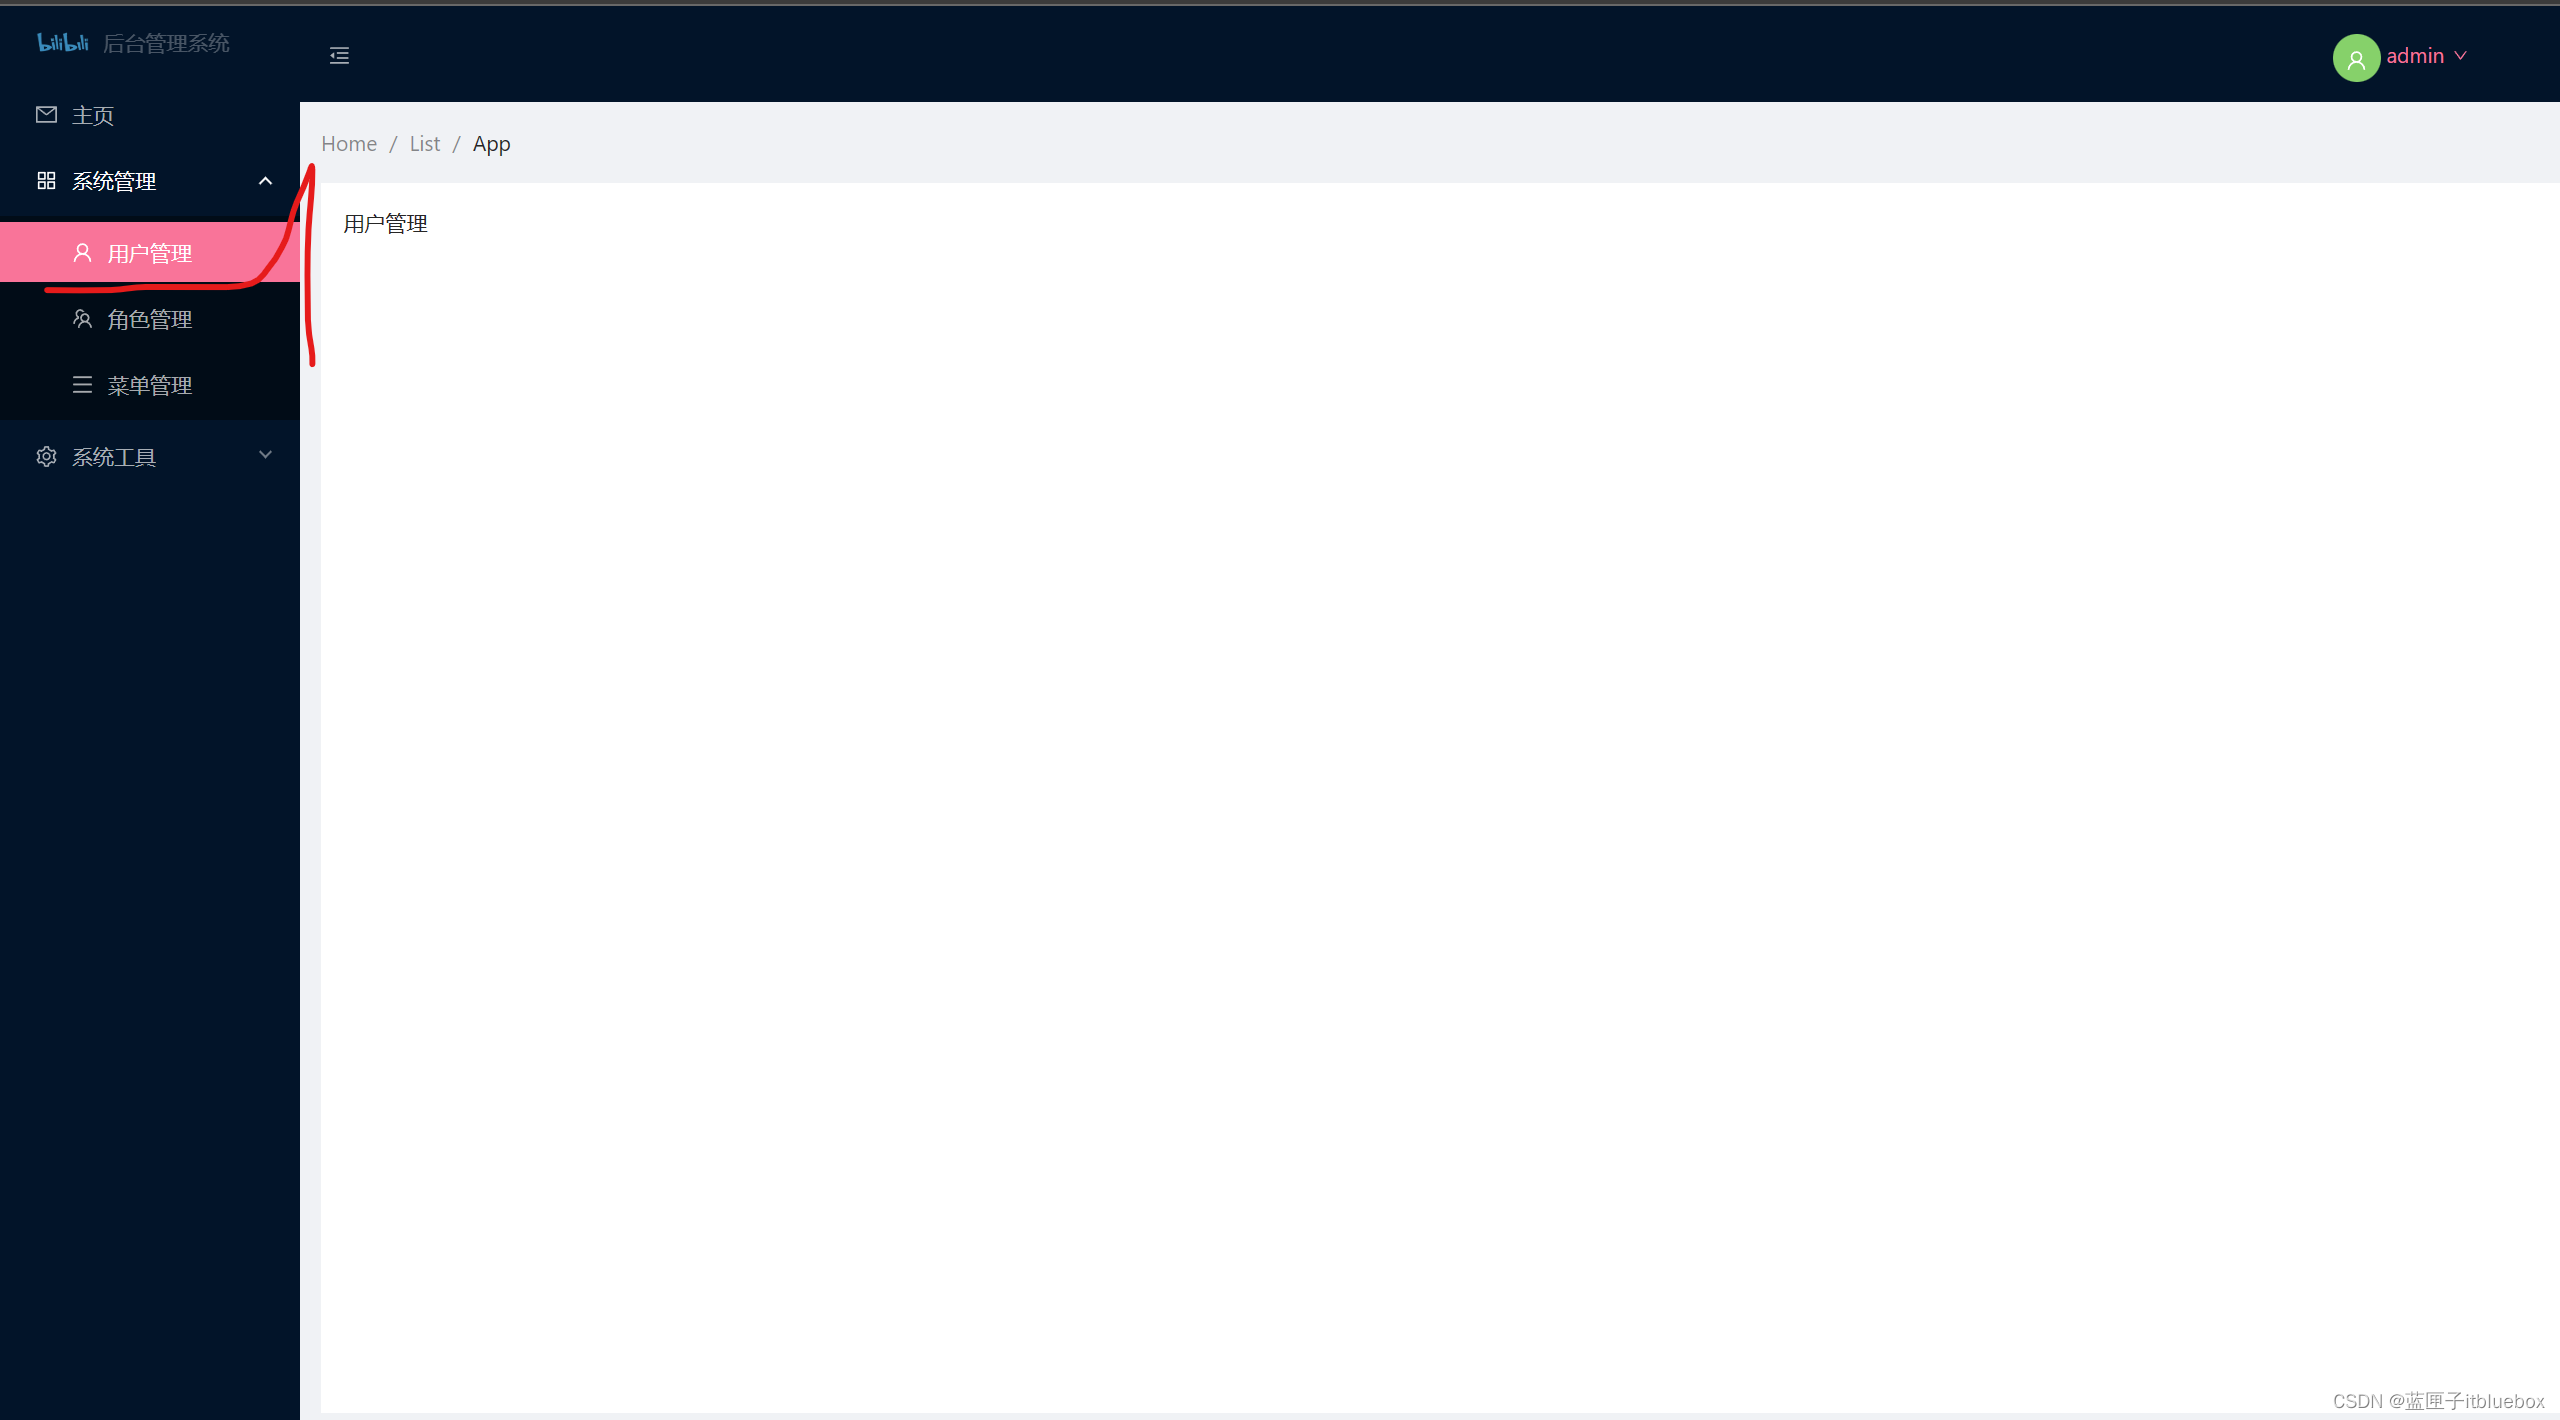
2)设置页面路由
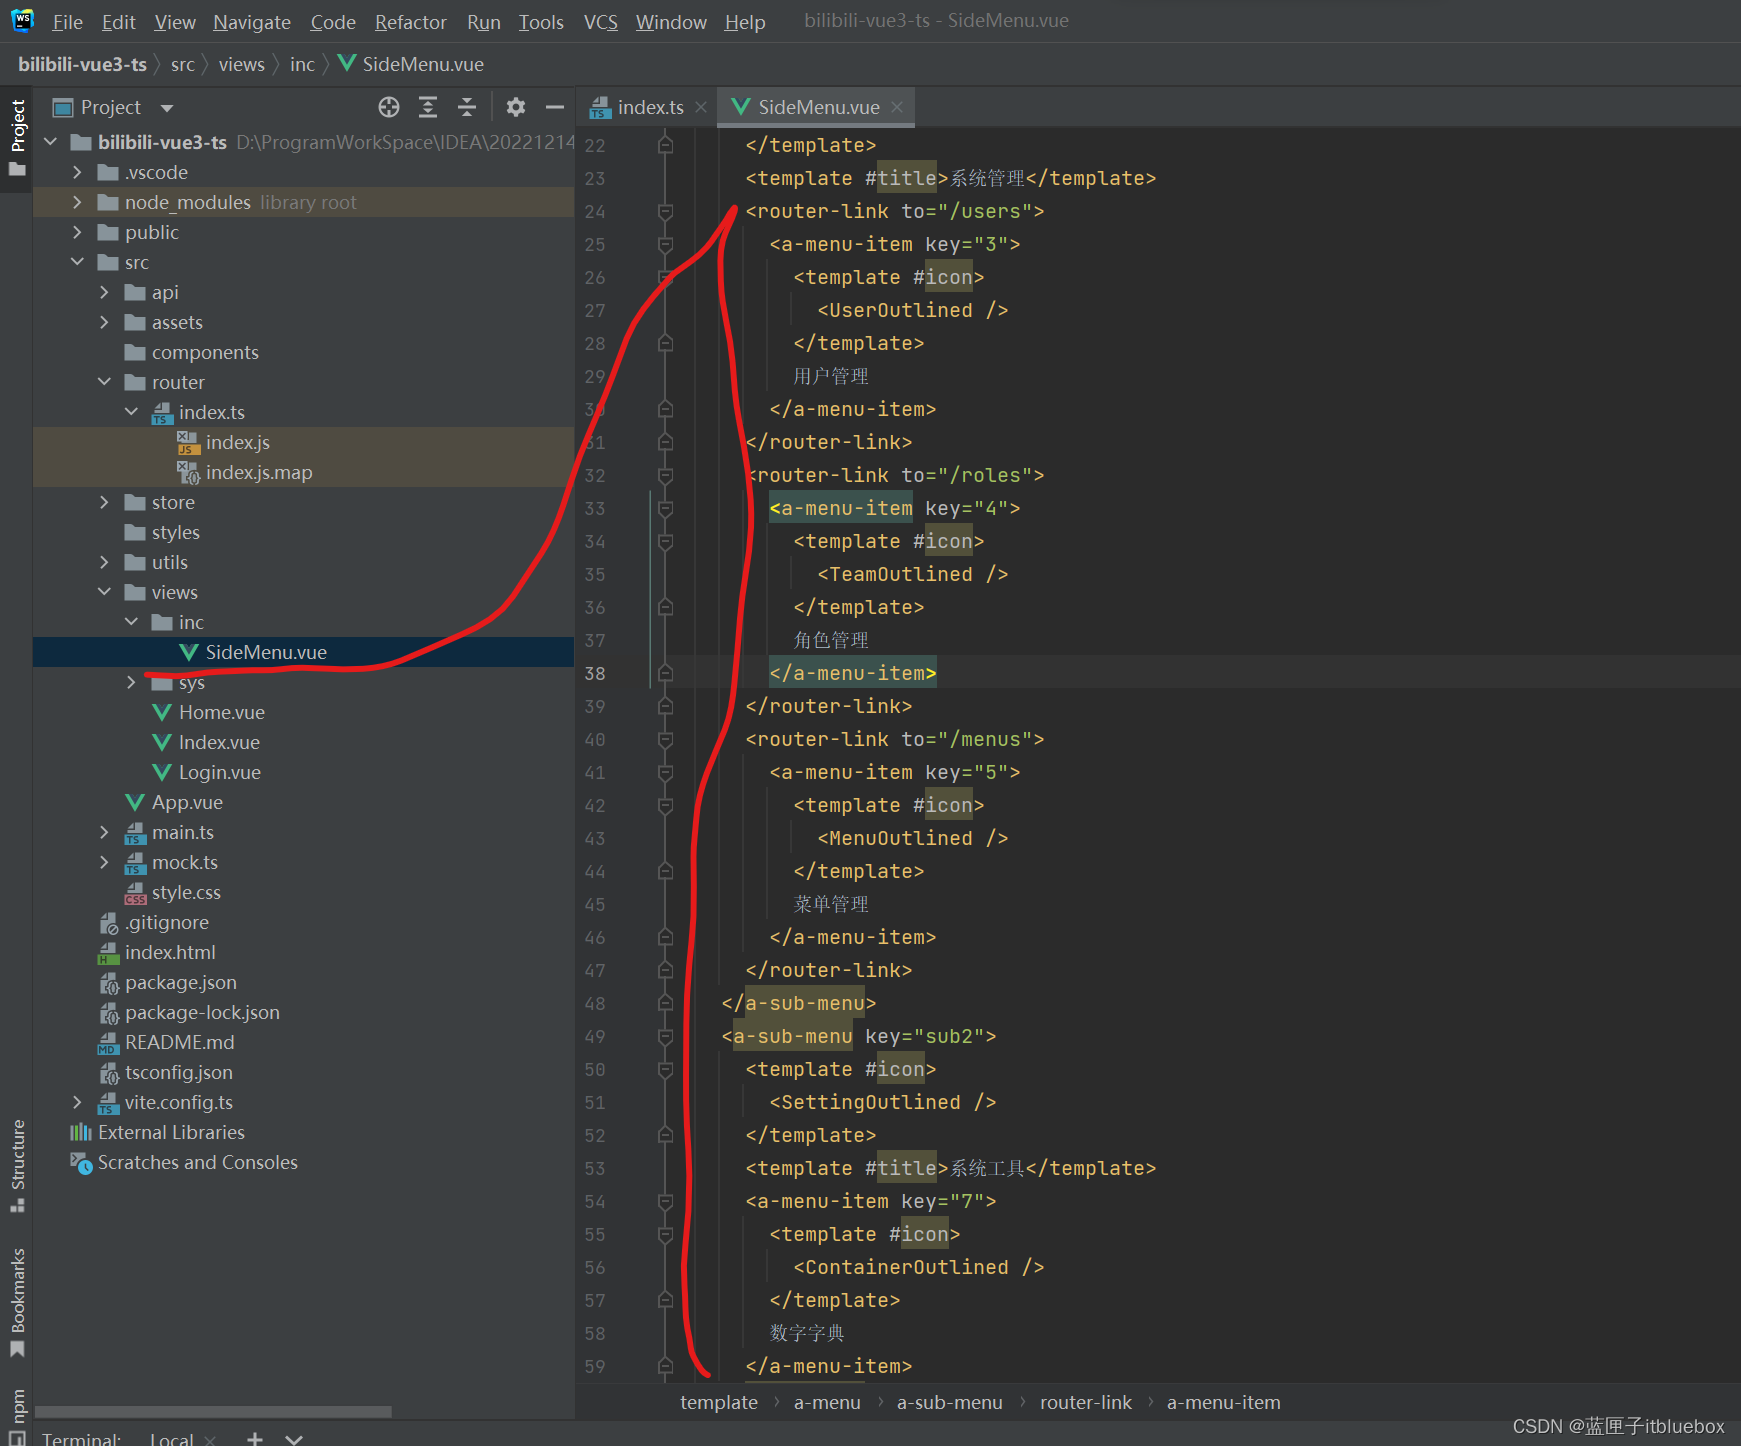
<router-link to="/index"><a-menu-item key="1"><template #icon><MailOutlined /></template>主页</a-menu-item></router-link><a-sub-menu key="sub1"><template #icon><AppstoreOutlined /></template><template #title>系统管理</template><router-link to="/users"><a-menu-item key="3"><template #icon><UserOutlined /></template>用户管理</a-menu-item></router-link><router-link to="/roles"><a-menu-item key="4"><template #icon><TeamOutlined /></template>角色管理</a-menu-item></router-link><router-link to="/menus"><a-menu-item key="5"><template #icon><MenuOutlined /></template>菜单管理</a-menu-item></router-link></a-sub-menu><a-sub-menu key="sub2"><template #icon><SettingOutlined /></template><template #title>系统工具</template><a-menu-item key="7"><template #icon><ContainerOutlined /></template>数字字典</a-menu-item></a-sub-menu>
点击测试
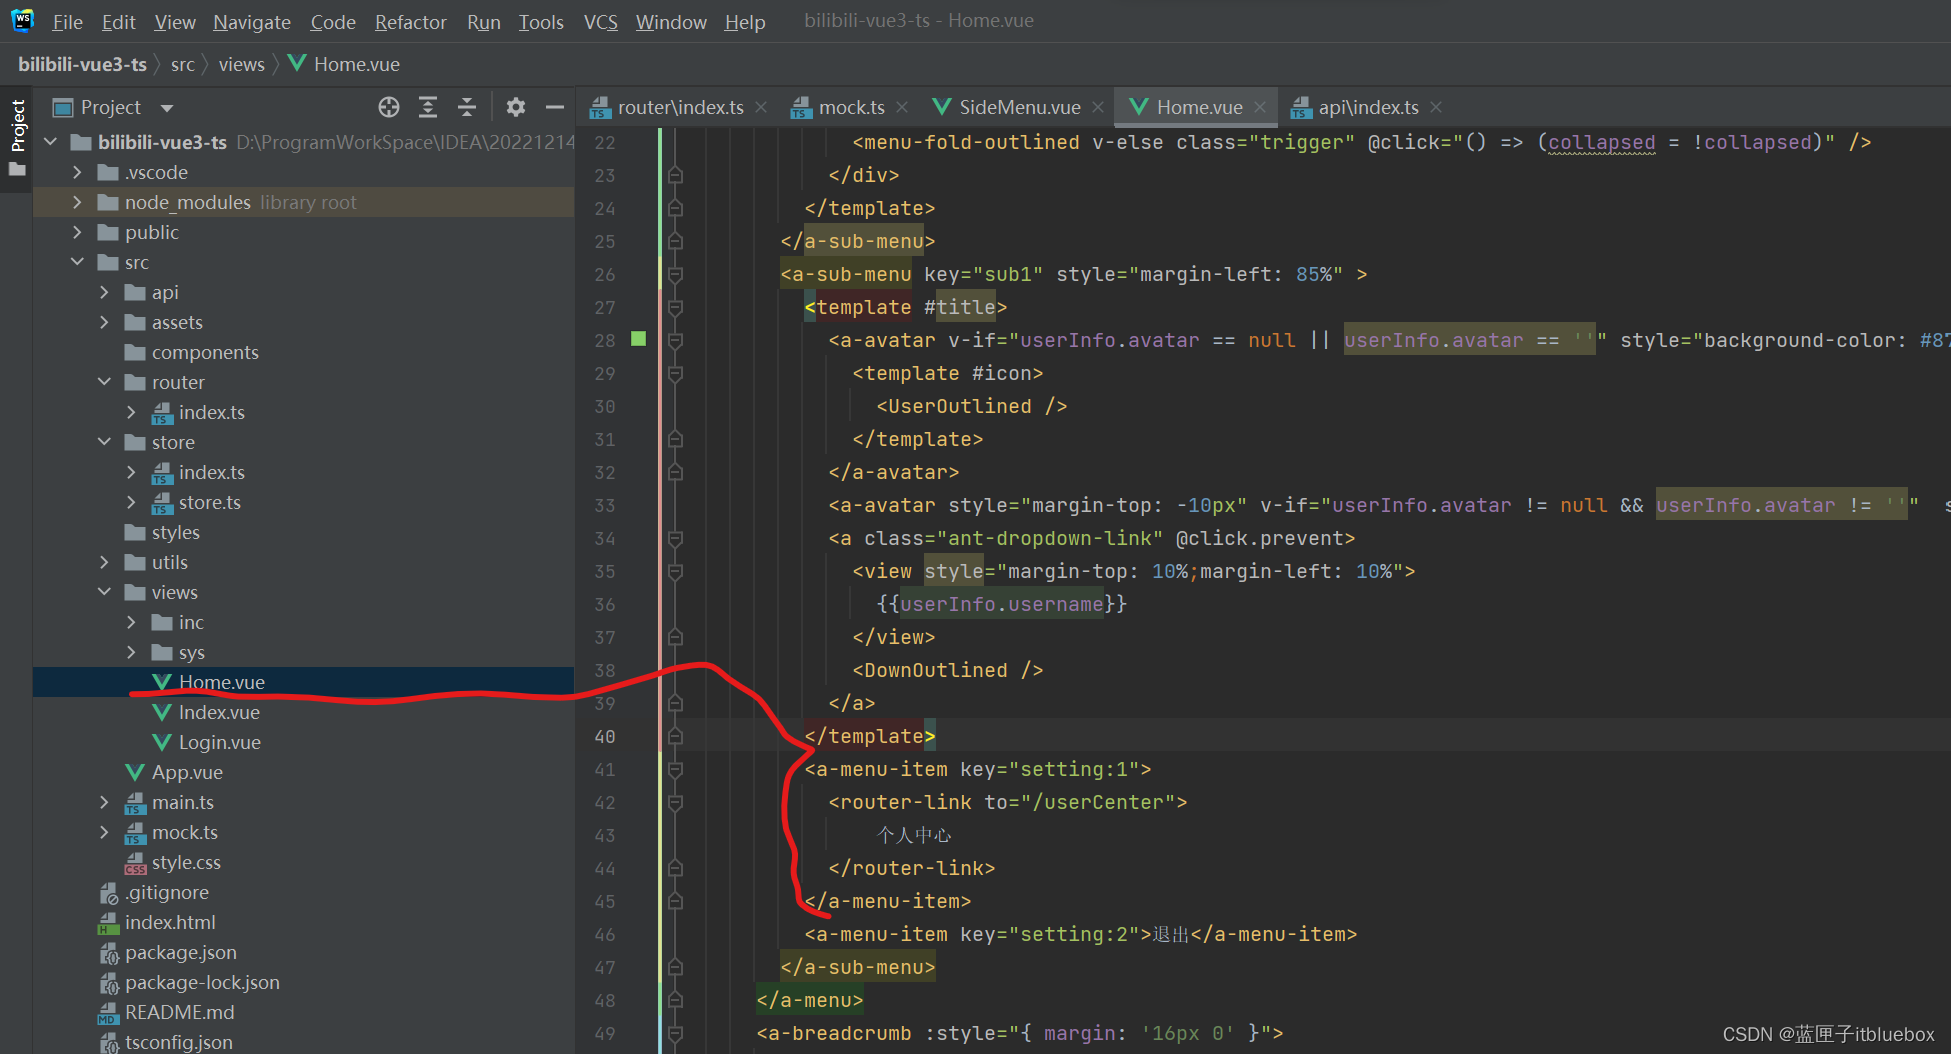
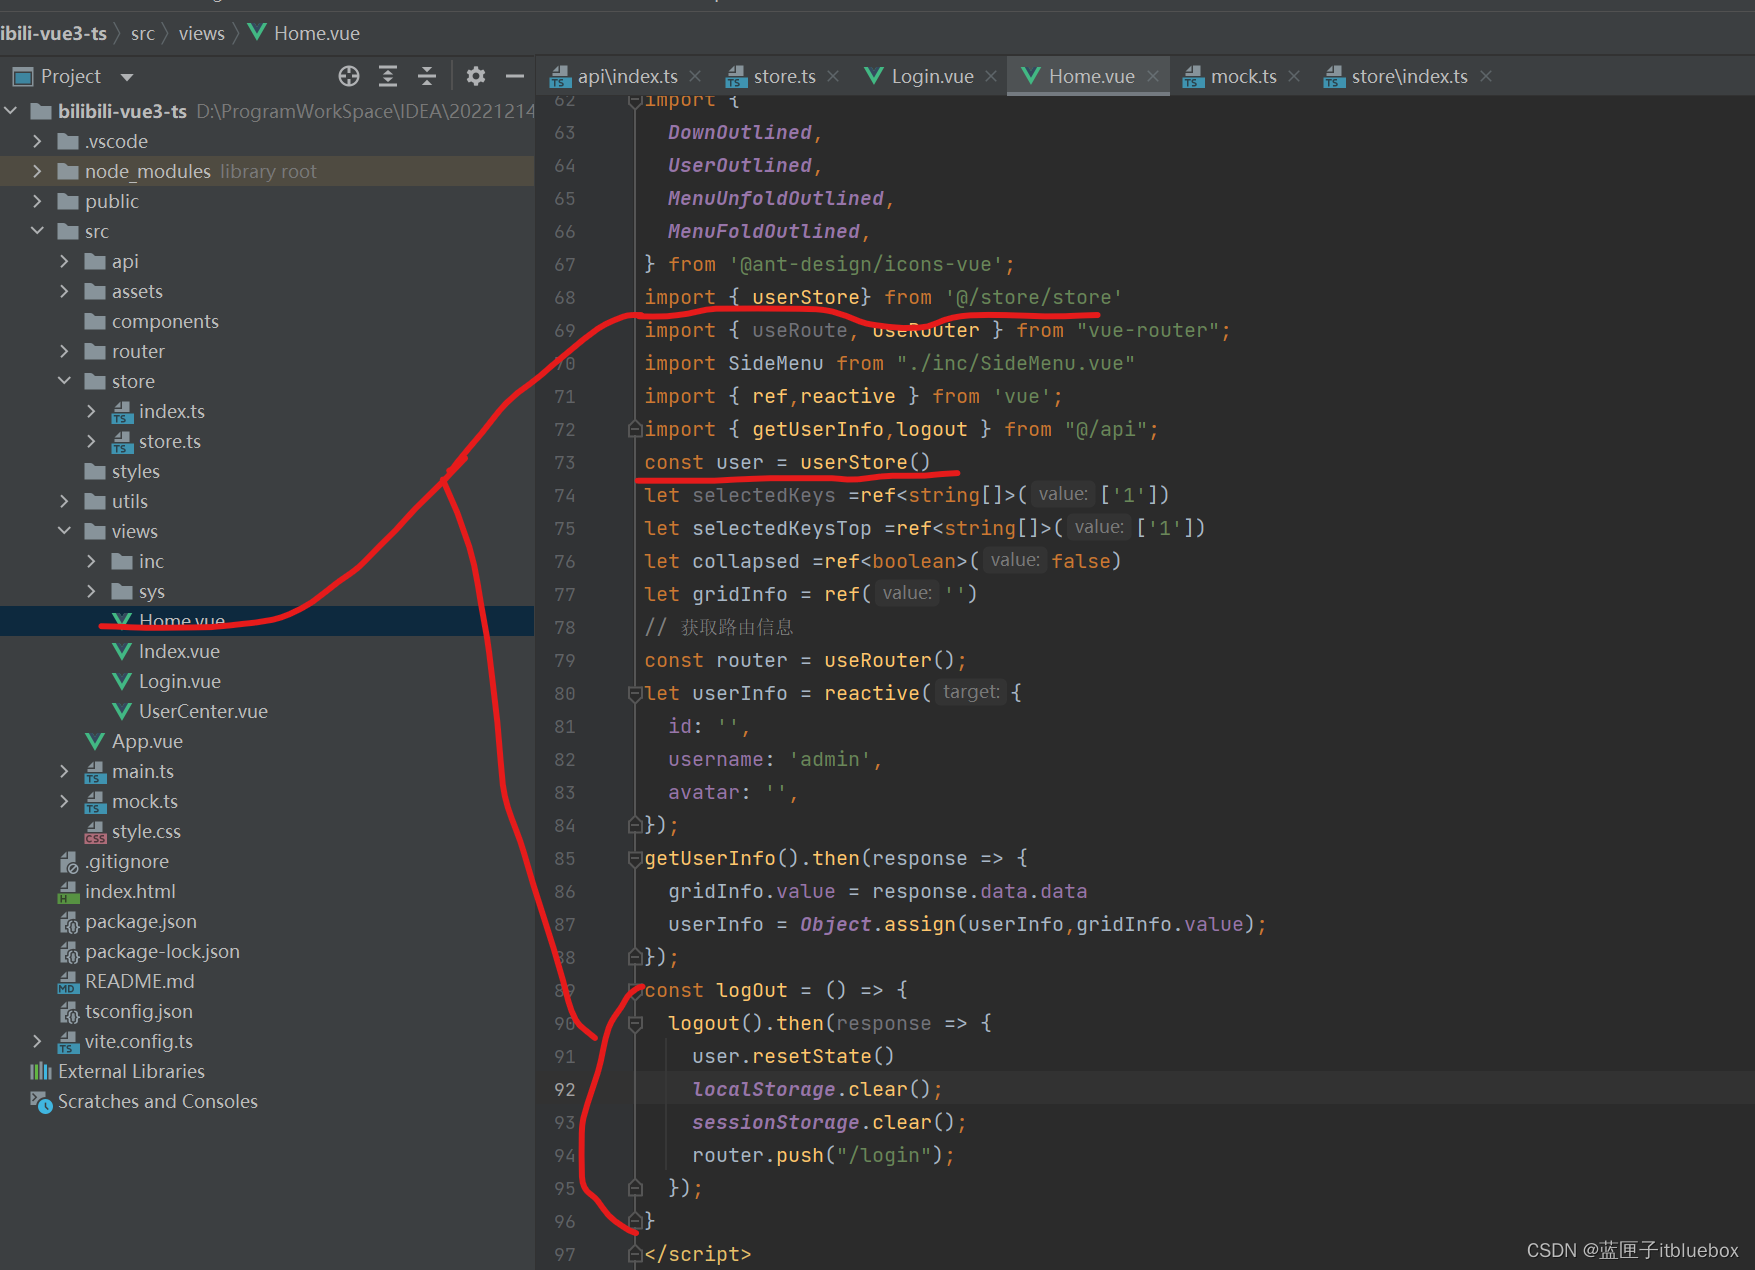
(二)用户登录信息展示
管理界面的右上角的用户信息现在是写死的,
因为我们现在已经登录成功,所以我们可以通过接口去请求获取到当前的用户信息了,
这样我们就可以动态显示用户的信息,这个接口比较简单,然后退出登录的链接也一起完成,
就请求接口同时把浏览器中的缓存删除就退出了哈。
1、完善用户接口
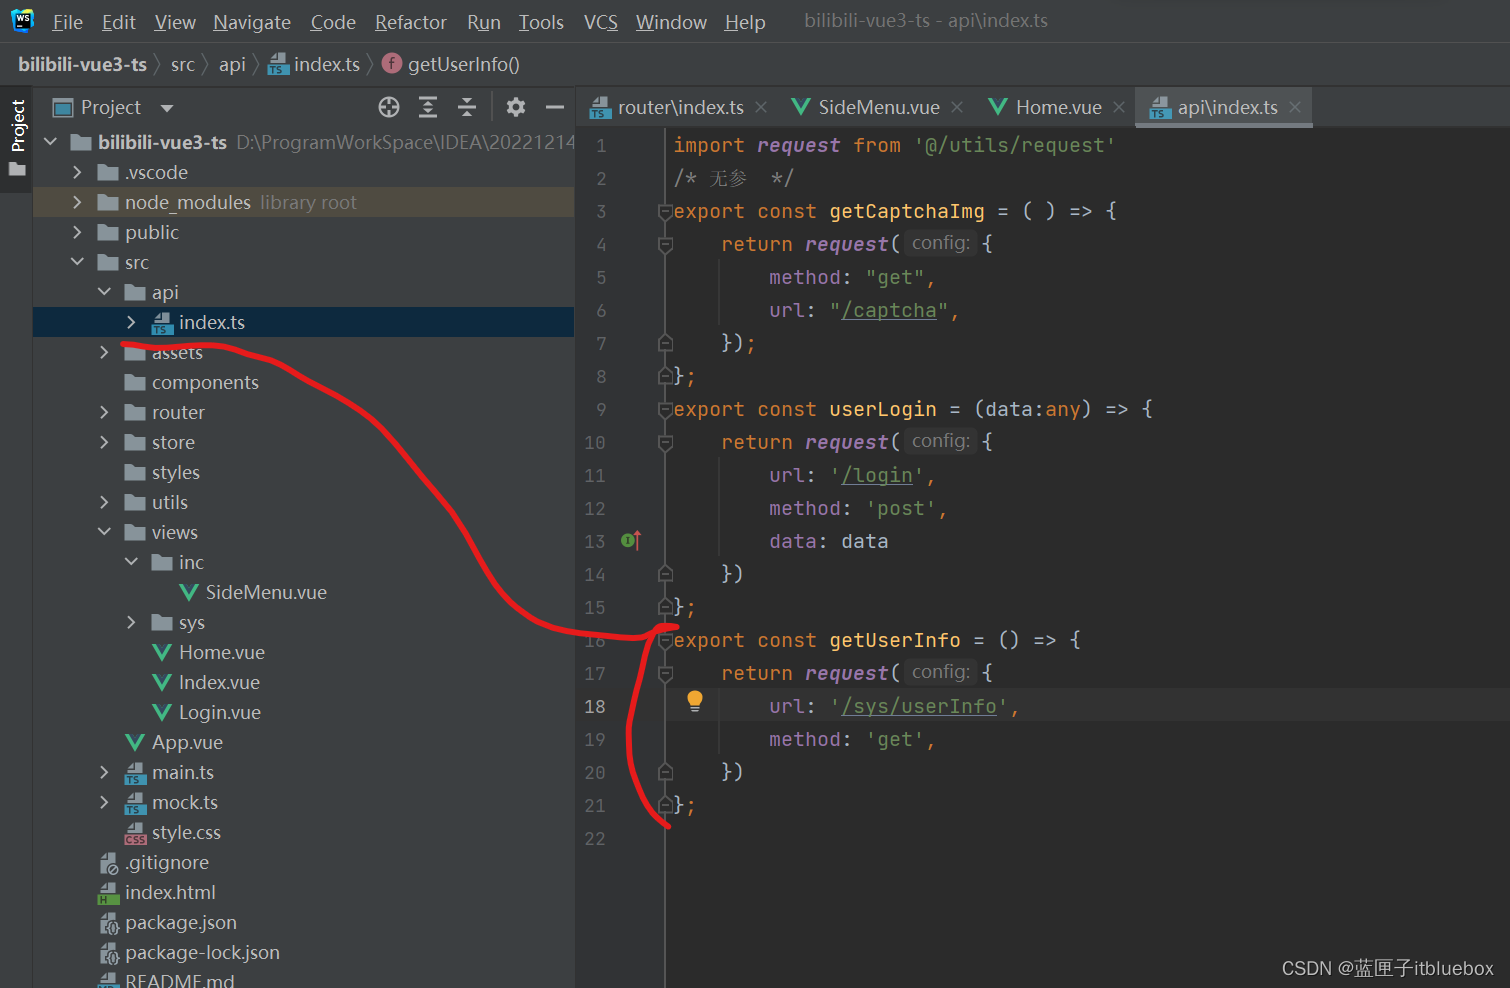
export const getUserInfo = () => {return request({url: '/sys/userInfo',method: 'get',})
};
2、设置mock.js
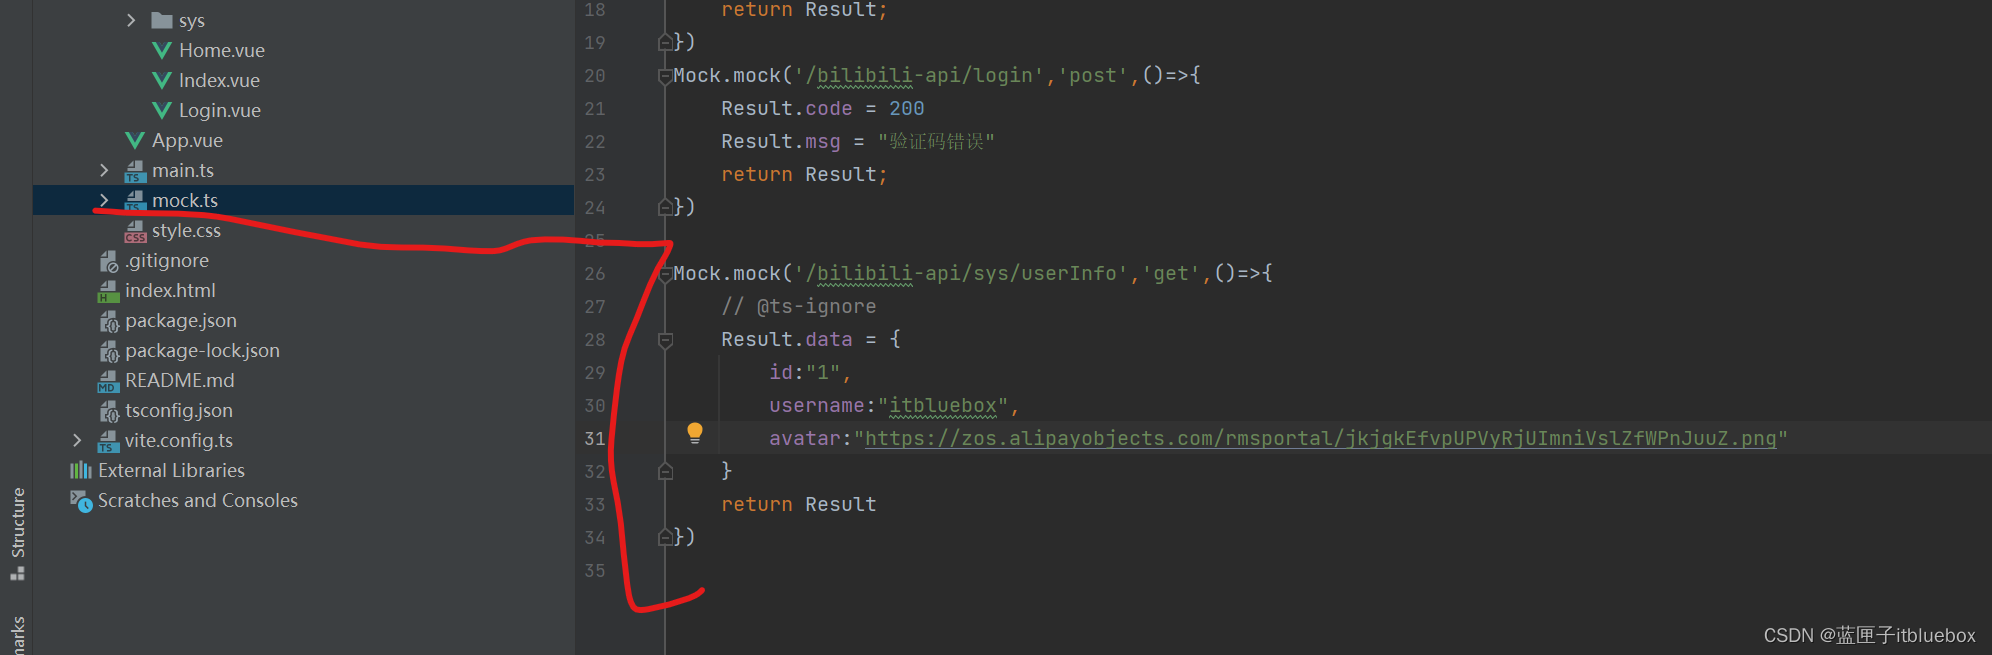
Mock.mock('/bilibili-api/sys/userInfo','get',()=>{// @ts-ignoreResult.data = {id:"1",username:"itbluebox",avatar:"https://zos.alipayobjects.com/rmsportal/jkjgkEfvpUPVyRjUImniVslZfWPnJuuZ.png"}return Result
})
3、设置个人中心的路由
<a-menu-item key="setting:1"><router-link to="/userCenter">个人中心</router-link>
</a-menu-item>
import UserCenter from '../views/UserCenter.vue'
{path:'/userCenter',name:'UserCenter',component:UserCenter
},
创建对应的页面
<template><a-formref="formRef":model="formState":label-col="labelCol":wrapper-col="wrapperCol":rules="rules"><a-form-item ref="user" label="账号" name="user"><a-input v-model:value="formState.user" placeholder="Username"><template #prefix><UserOutlined style="color: rgba(0, 0, 0, 0.25)" /></template></a-input></a-form-item><a-form-item ref="password" label="密码" name="password"><a-input v-model:value="formState.password" type="password" placeholder="Password"><template #prefix><LockOutlined style="color: rgba(0, 0, 0, 0.25)" /></template></a-input></a-form-item><a-form-item ref="code" label="验证码" name="code"><a-row><a-col :span="12"><a-input v-model:value="formState.code" type="textarea" /></a-col><a-col :span="12"><a-image @click="getCaptcha":width="60"style="height: 30px;margin-left: 10%":preview="false":src="captchaImg"/></a-col></a-row></a-form-item><a-form-item :wrapper-col="{ span: 14, offset: 4 }"><a-button type="primary" @click="onSubmit">修改</a-button><a-button style="margin-left: 10px" @click="onReSet">重置</a-button></a-form-item></a-form>
</template><script name="UserCenter" lang="ts" setup>
import { defineComponent, reactive, toRaw, UnwrapRef,ref,onMounted } from 'vue';
import { ValidateErrorEntity } from 'ant-design-vue/es/form/interface';
import {getCaptchaImg} from "@/api";
onMounted(()=>{getCaptcha()
})
const formRef = ref();
let captchaImg = ref('')
let labelCol  = reactive({ span: 4 },
)
let wrapperCol  = reactive({ span: 14  },
)
interface FormState {user: string;password: string | undefined;code:  undefined;
}
const formState: UnwrapRef<FormState> = reactive({user: '',password: undefined,code: undefined,
});
const rules = reactive({user: [{required: true, message: '请输入用户名', trigger: 'blur'},],password: [{required: true, message: '请输入密码', trigger: 'blur'}],code: [{required: true, message: '请输入密码', trigger: 'blur'}],
})
const onSubmit = () => {formRef.value.validate().then(() => {console.log('values', formState, toRaw(formState));}).catch((error: ValidateErrorEntity<FormState>) => {console.log('error', error);});
};
const onReSet = () => {console.log('submit!', toRaw(formState));
};
const getCaptcha = () => {getCaptchaImg().then(res => {captchaImg.value = res.data.data.captchaImg;})
}
</script>
<style scoped>
</style>
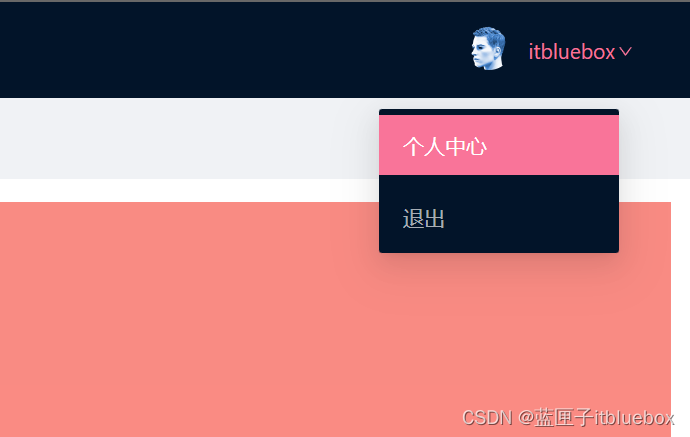
4、设置退出登录
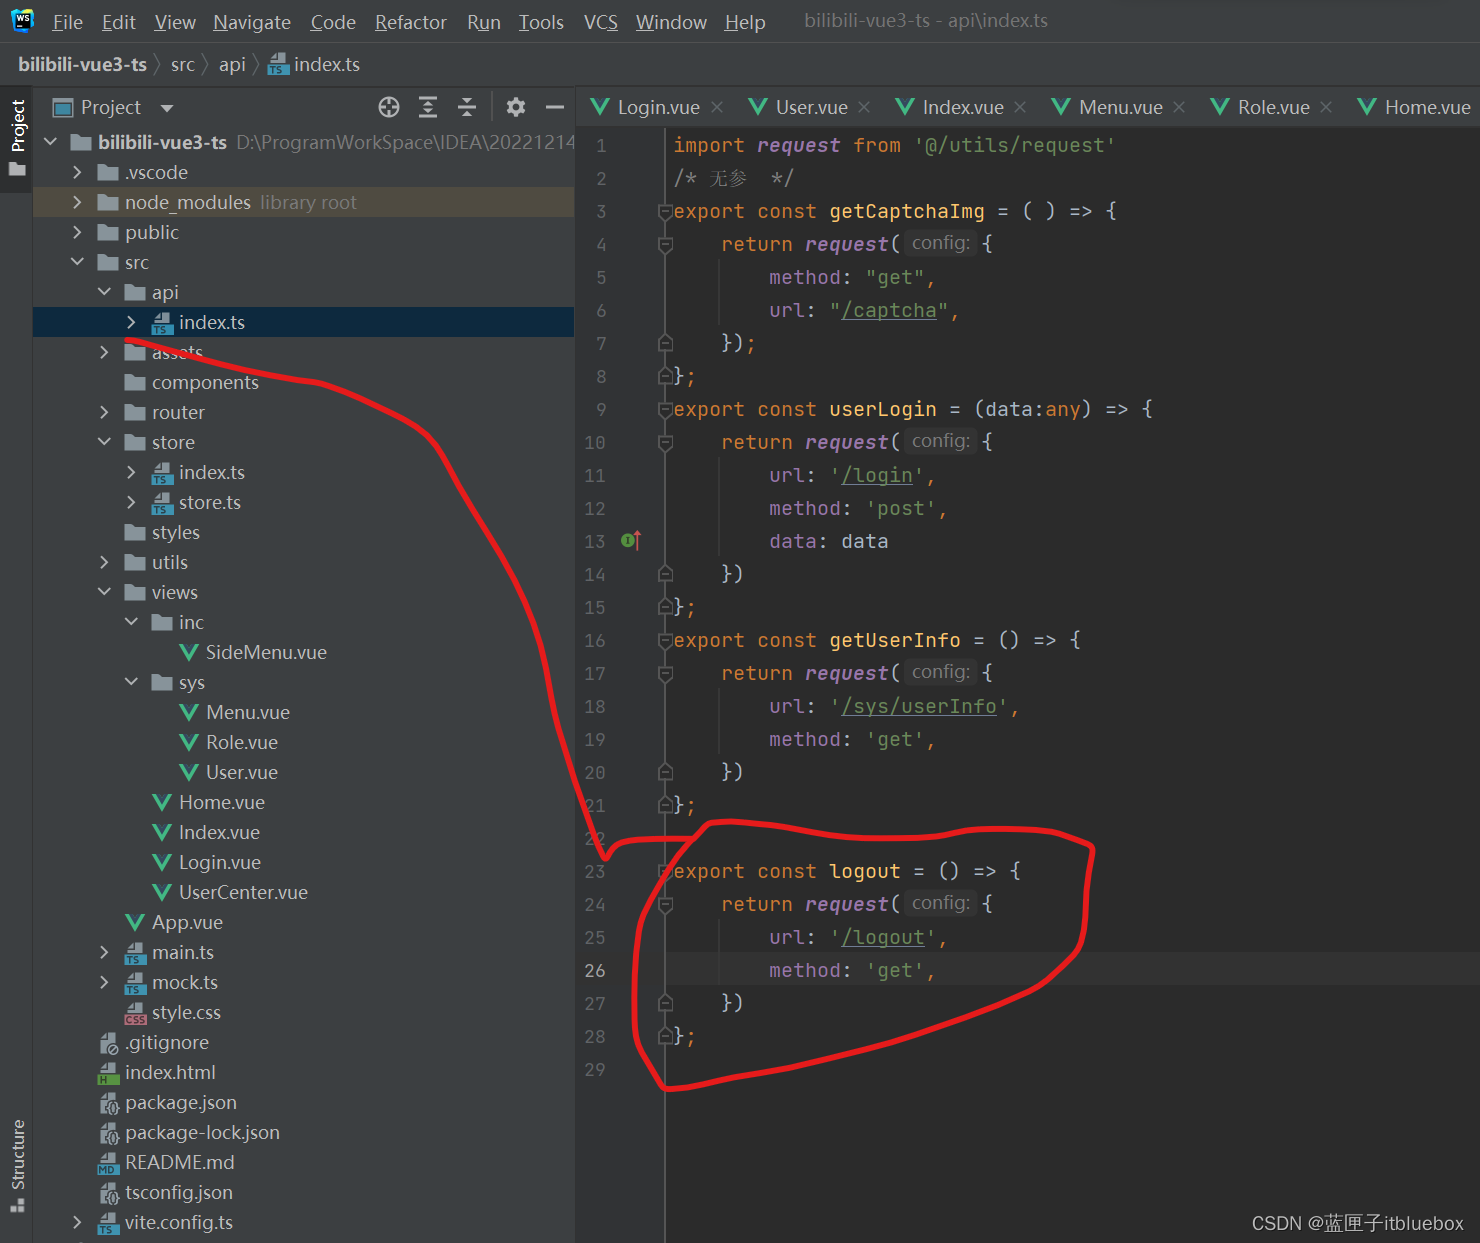
export const logout = () => {return request({url: '/logout',method: 'get',})
};
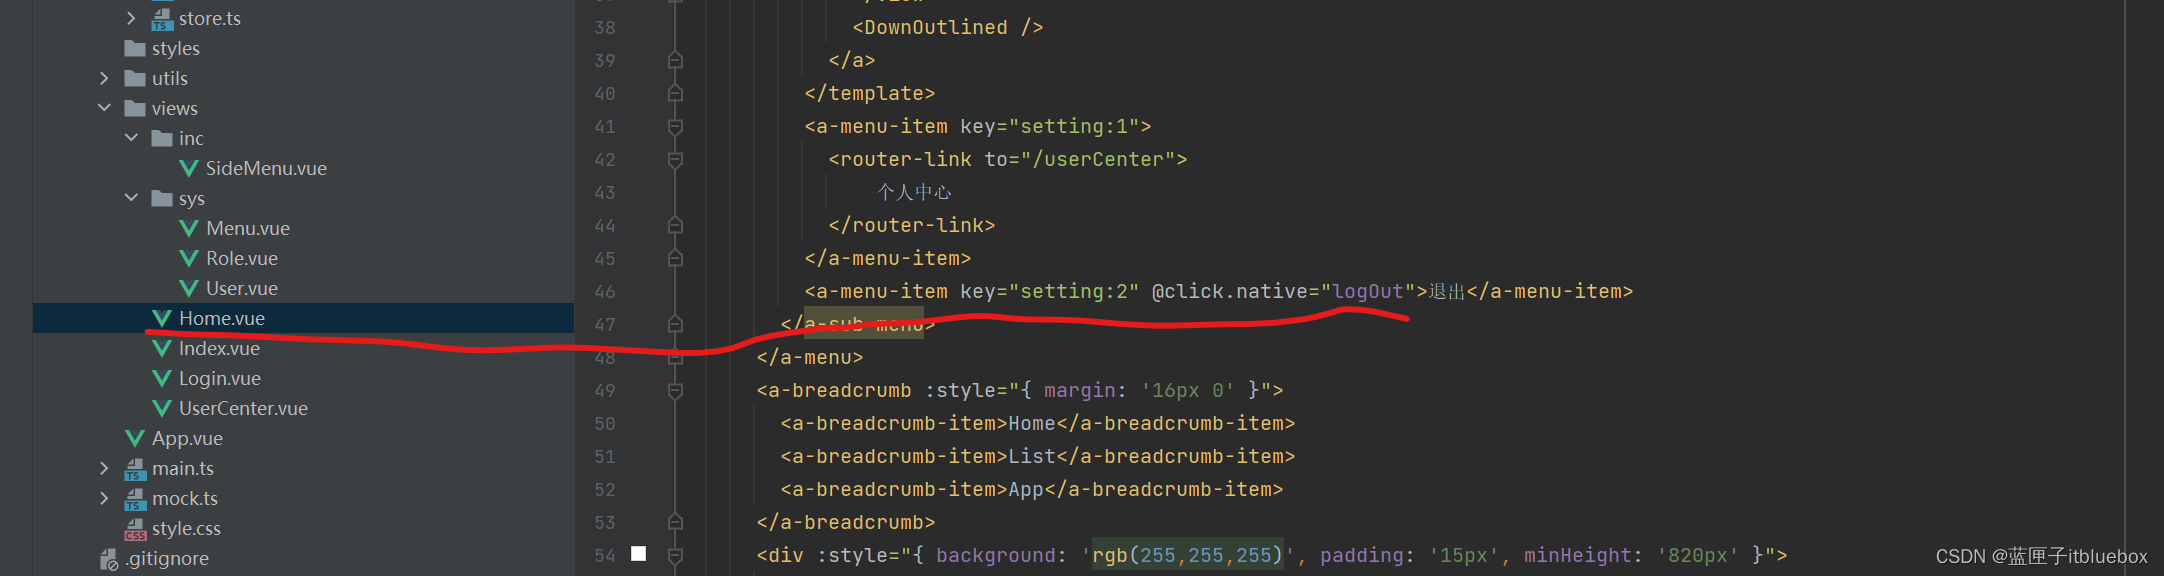
<a-menu-item key="setting:2" @click.native="logOut">退出</a-menu-item>
import { userStore} from '@/store/store'
const user = userStore()
const logOut = () => {logout().then(response => {user.resetState()localStorage.clear();sessionStorage.clear();router.push("/login");});
}
设置Store的状态
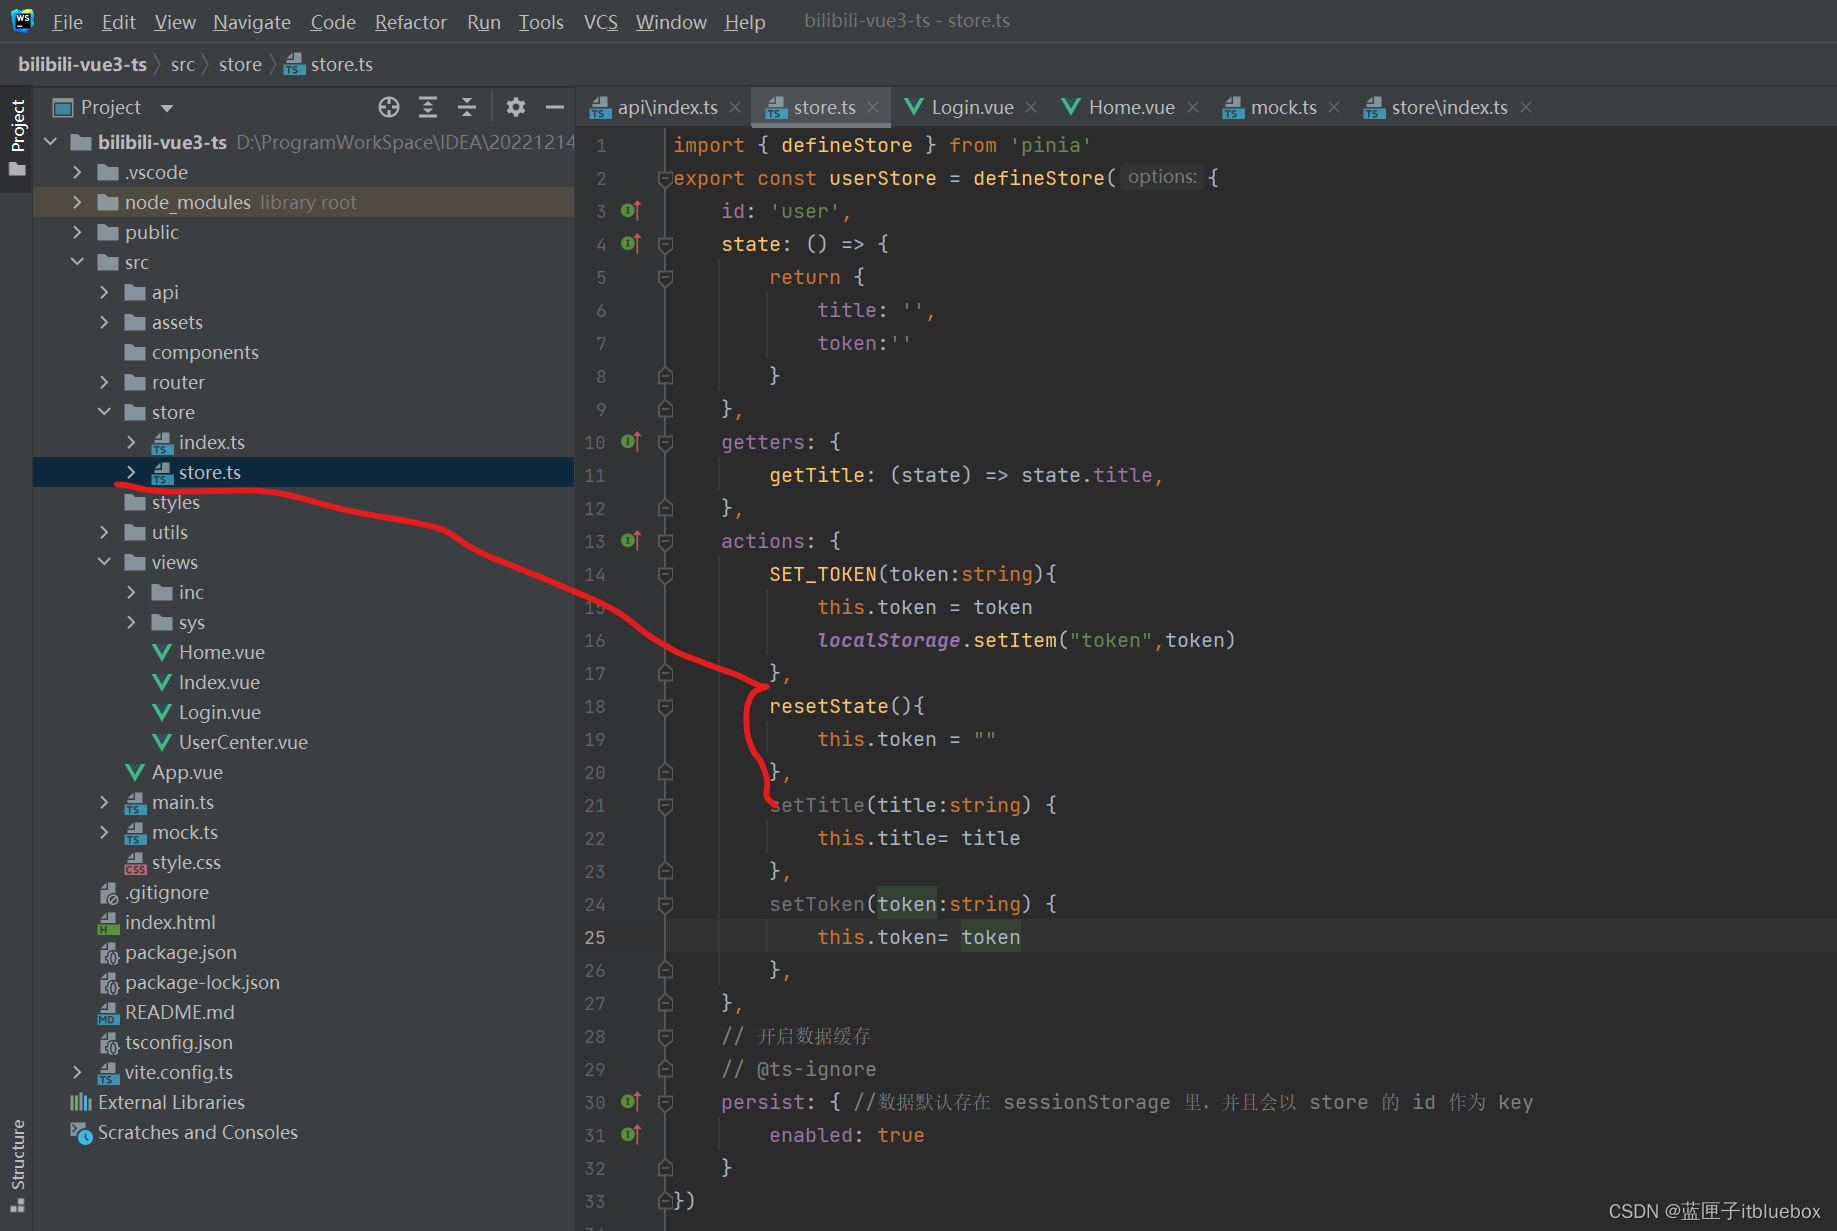
resetState(){this.token = ""},
设置mock
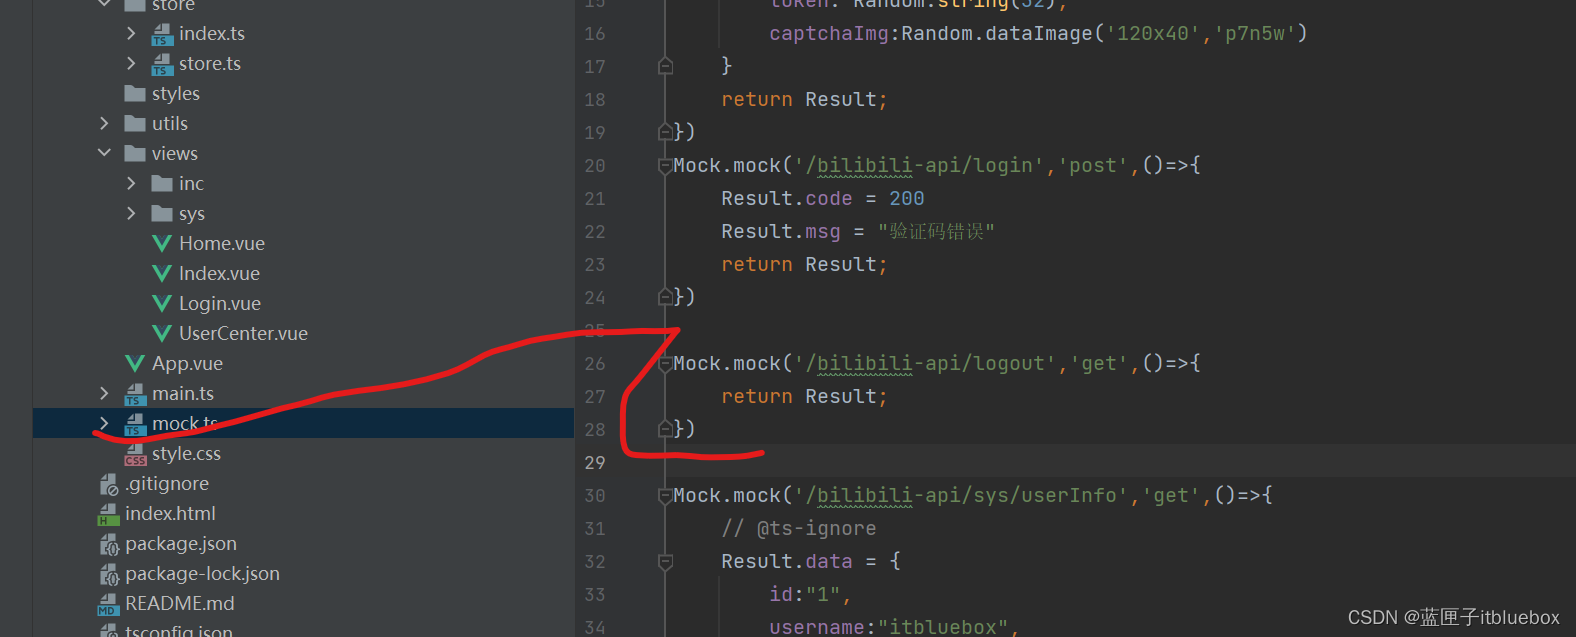
Mock.mock('/bilibili-api/logout','get',()=>{return Result;
})
(三)动态菜单开发
1、修改一下路由规则
{path:'/sys/users',name:'SysUser',component:User},{path:'/sys/roles',name:'SysRole',component:Role},{path:'/sys/menus',name:'SysMenu',component:Menu}
2、设置动态菜单的数据
(1)自定义Icon组件
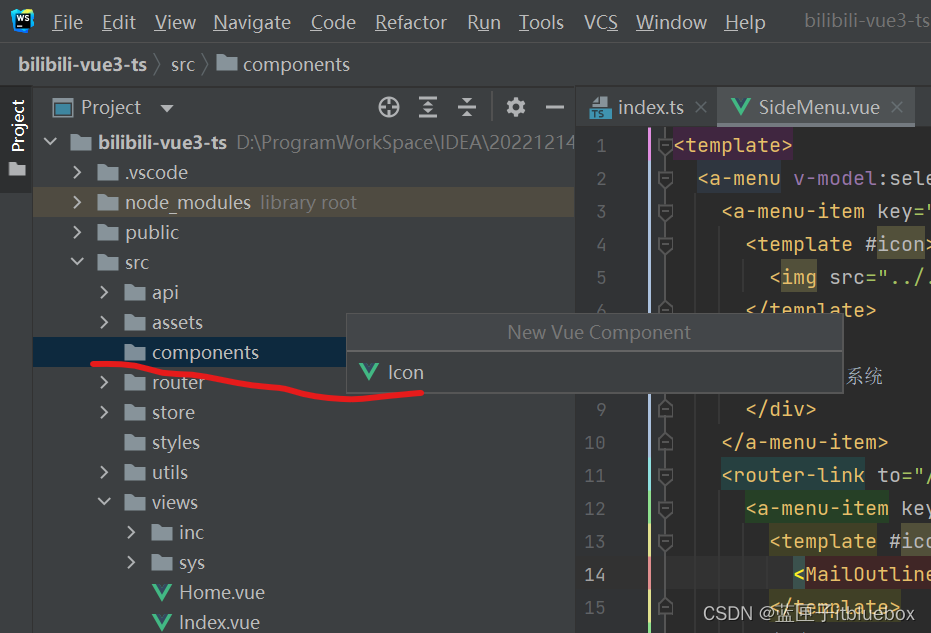
目前先这样。后期会对其进行优化

<template><div><SettingOutlined v-if="iconName == 'setting-outlined'"></SettingOutlined><UserOutlined v-if="iconName == 'user-outlined'"></UserOutlined><MenuOutlined v-if="iconName == 'menu-outlined'"></MenuOutlined><ContainerOutlined v-if="iconName == 'container-outlined'"></ContainerOutlined><UsergroupAddOutlined v-if="iconName == 'user-group-add-outlined'"></UsergroupAddOutlined></div>
</template><script setup lang="ts">
import {ref,reactive} from "vue";
import {UserOutlined,SettingOutlined,MenuOutlined,ContainerOutlined,UsergroupAddOutlined
} from '@ant-design/icons-vue';
const props = defineProps<{iconName: any;
}>();
</script><style scoped></style>
(2)SideMenu.vue菜单页面
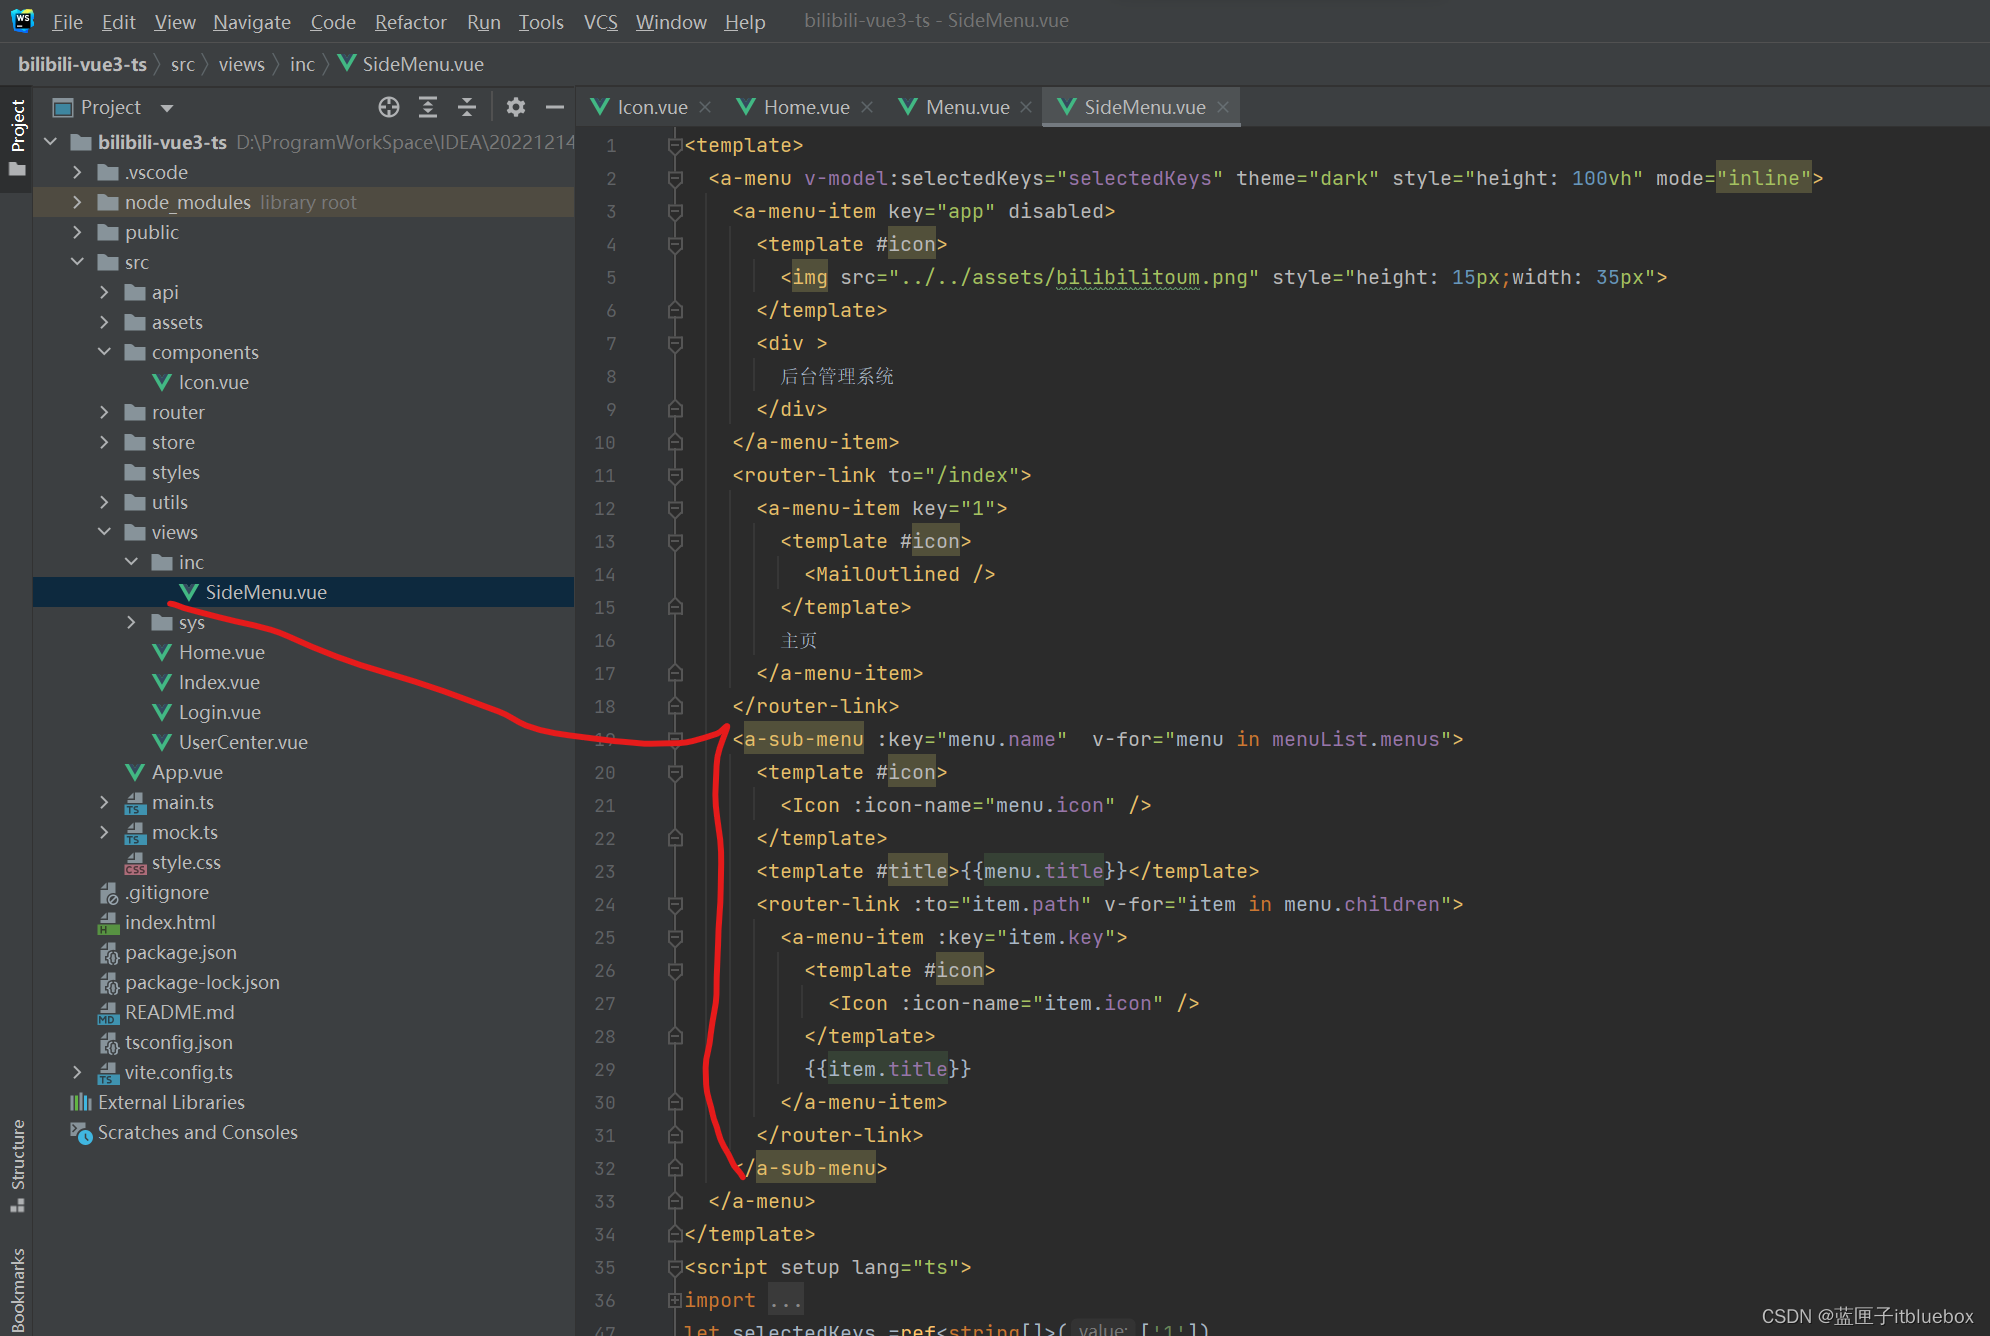
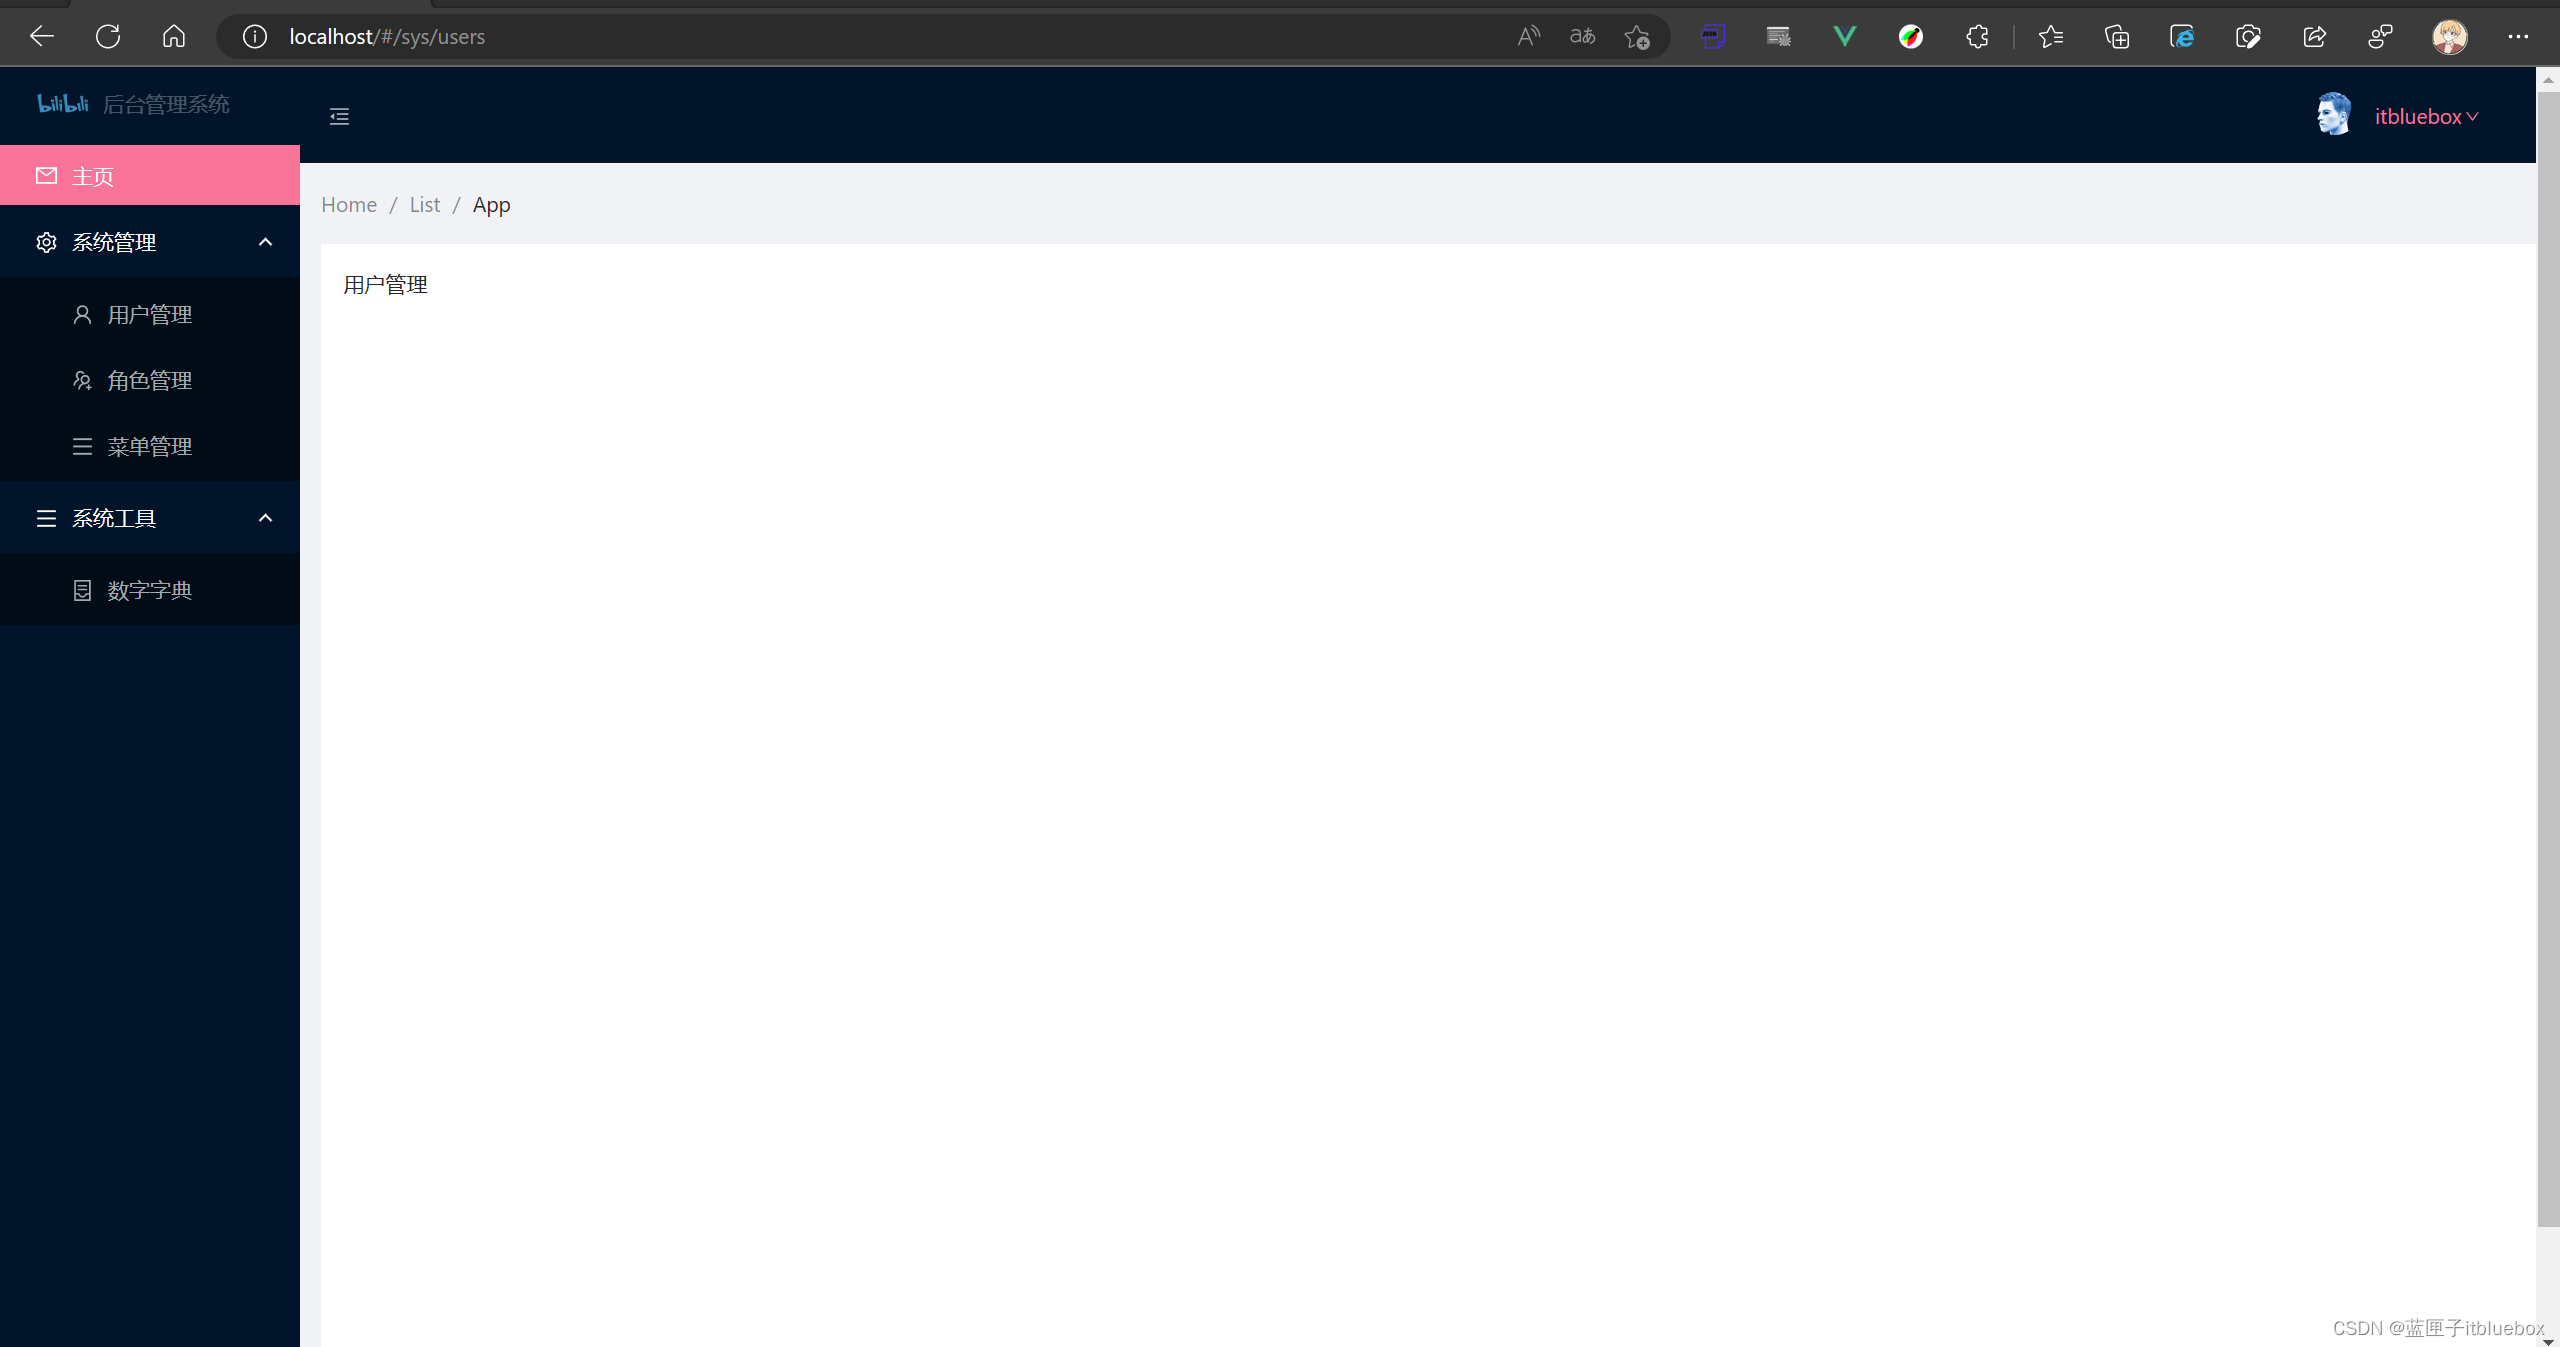
<template><a-menu v-model:selectedKeys="selectedKeys" theme="dark" style="height: 100vh" mode="inline"><a-menu-item key="app" disabled><template #icon><img src="../../assets/bilibilitoum.png" style="height: 15px;width: 35px"></template><div >后台管理系统</div></a-menu-item><router-link to="/index"><a-menu-item key="1"><template #icon><MailOutlined /></template>主页</a-menu-item></router-link><a-sub-menu :key="menu.name" v-for="menu in menuList.menus"><template #icon><Icon :icon-name="menu.icon" /></template><template #title>{{menu.title}}</template><router-link :to="item.path" v-for="item in menu.children"><a-menu-item :key="item.key"><template #icon><Icon :icon-name="item.icon" /></template>{{item.title}}</a-menu-item></router-link></a-sub-menu></a-menu>
</template>
<script setup lang="ts">
import {ref,reactive} from "vue";
import {AppstoreOutlined,MailOutlined,SettingOutlined,TeamOutlined,UserOutlined,MenuOutlined,ContainerOutlined
} from '@ant-design/icons-vue';
import Icon from "@/components/Icon.vue"
let selectedKeys =ref<string[]>(['1'])
let selectedKeysTop =ref<string[]>(['1'])
let collapsed =ref<boolean>(false)
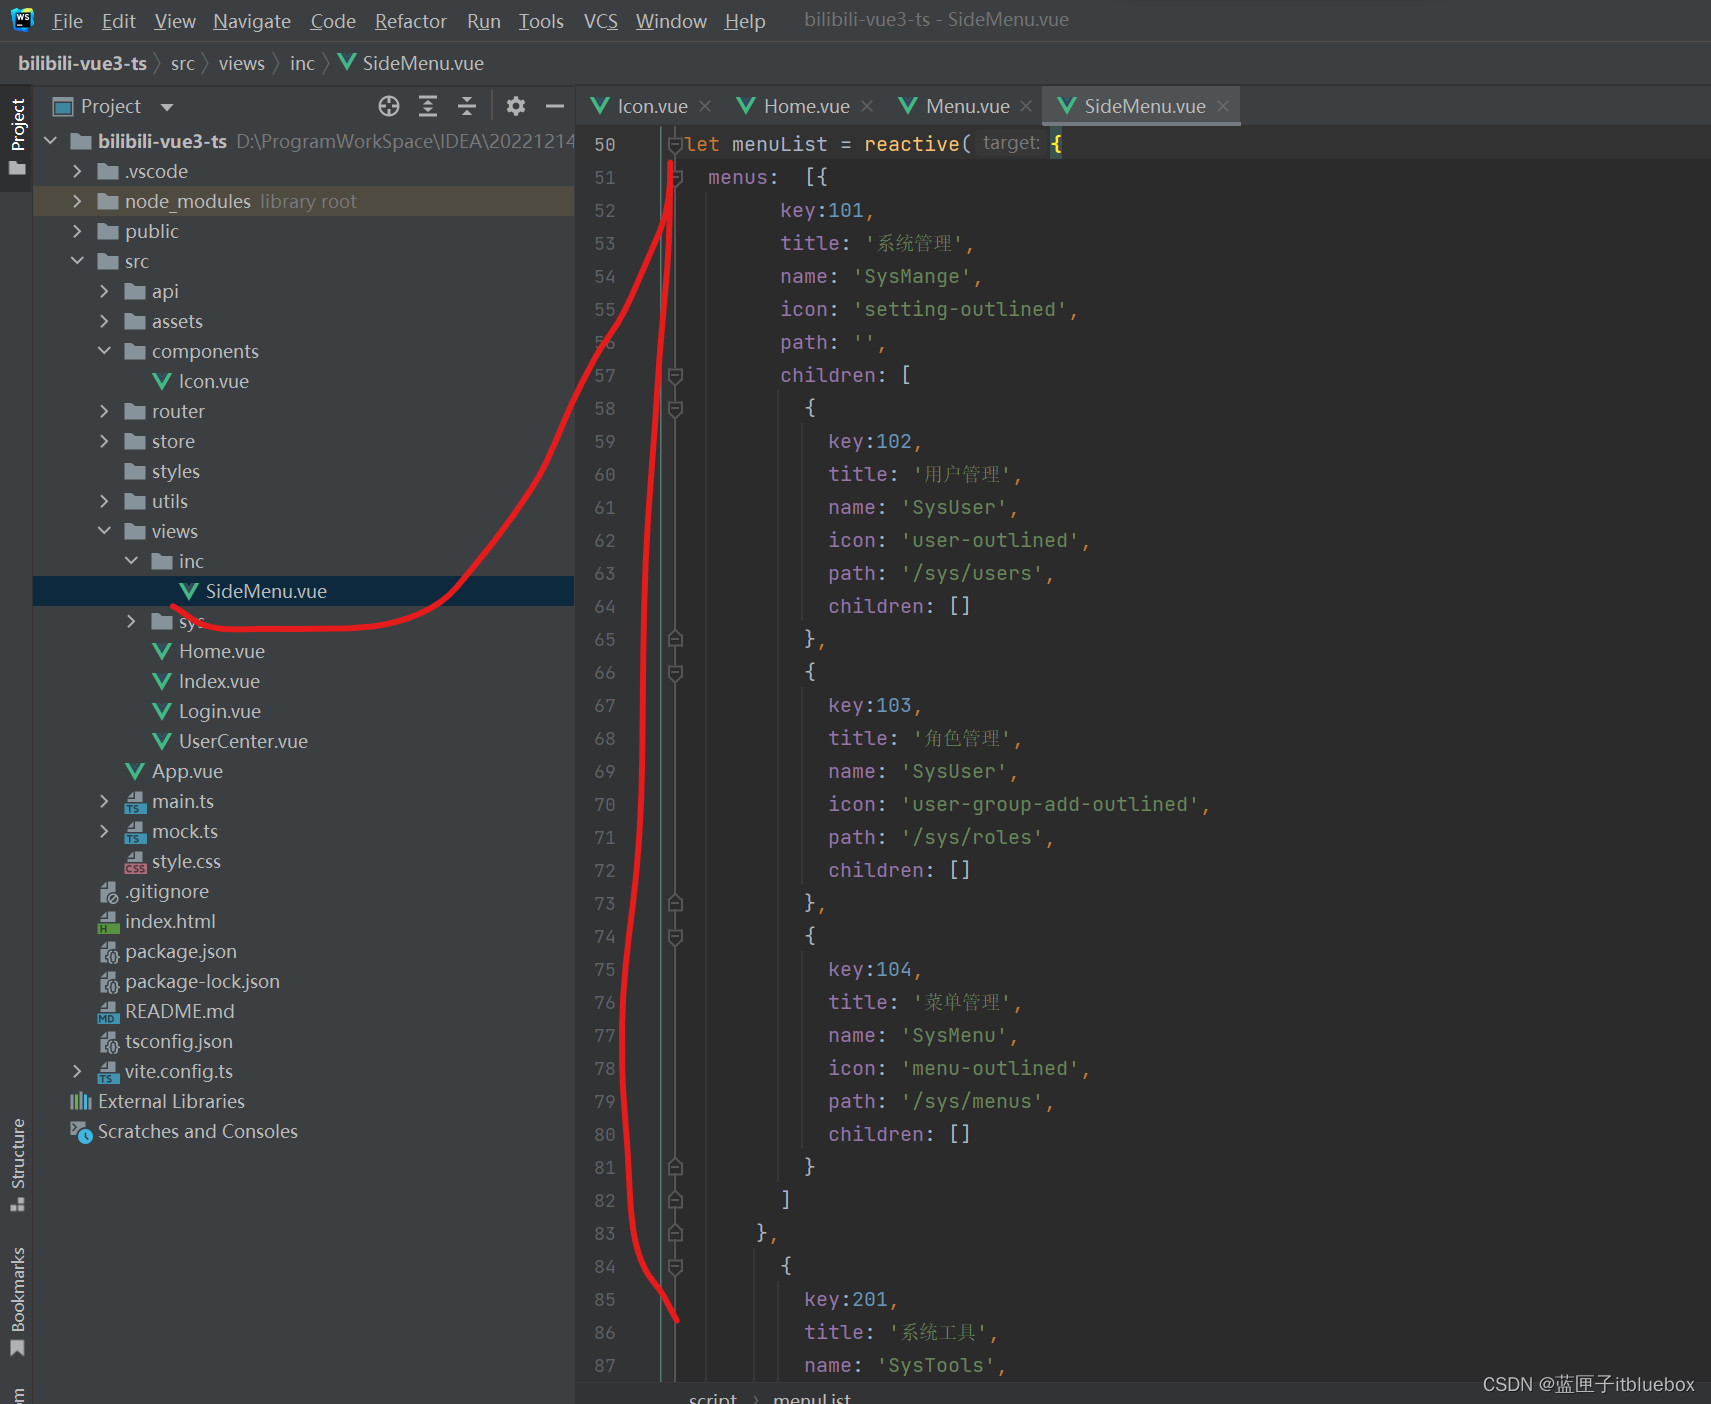
let menuList = reactive({menus: [{key:101,title: '系统管理',name: 'SysMange',icon: 'setting-outlined',path: '',children: [{key:102,title: '用户管理',name: 'SysUser',icon: 'user-outlined',path: '/sys/users',children: []},{key:103,title: '角色管理',name: 'SysUser',icon: 'user-group-add-outlined',path: '/sys/roles',children: []},{key:104,title: '菜单管理',name: 'SysMenu',icon: 'menu-outlined',path: '/sys/menus',children: []}]},{key:201,title: '系统工具',name: 'SysTools',icon: 'menu-outlined',path: '',children: [{title: '数字字典',name: 'SysDict',icon: 'container-outlined',path: '/sys/dicts',children: []}]}]
})
</script>
<style scoped>
</style>刷新并访问页面
(3)创建保存菜单的状态信息的内容
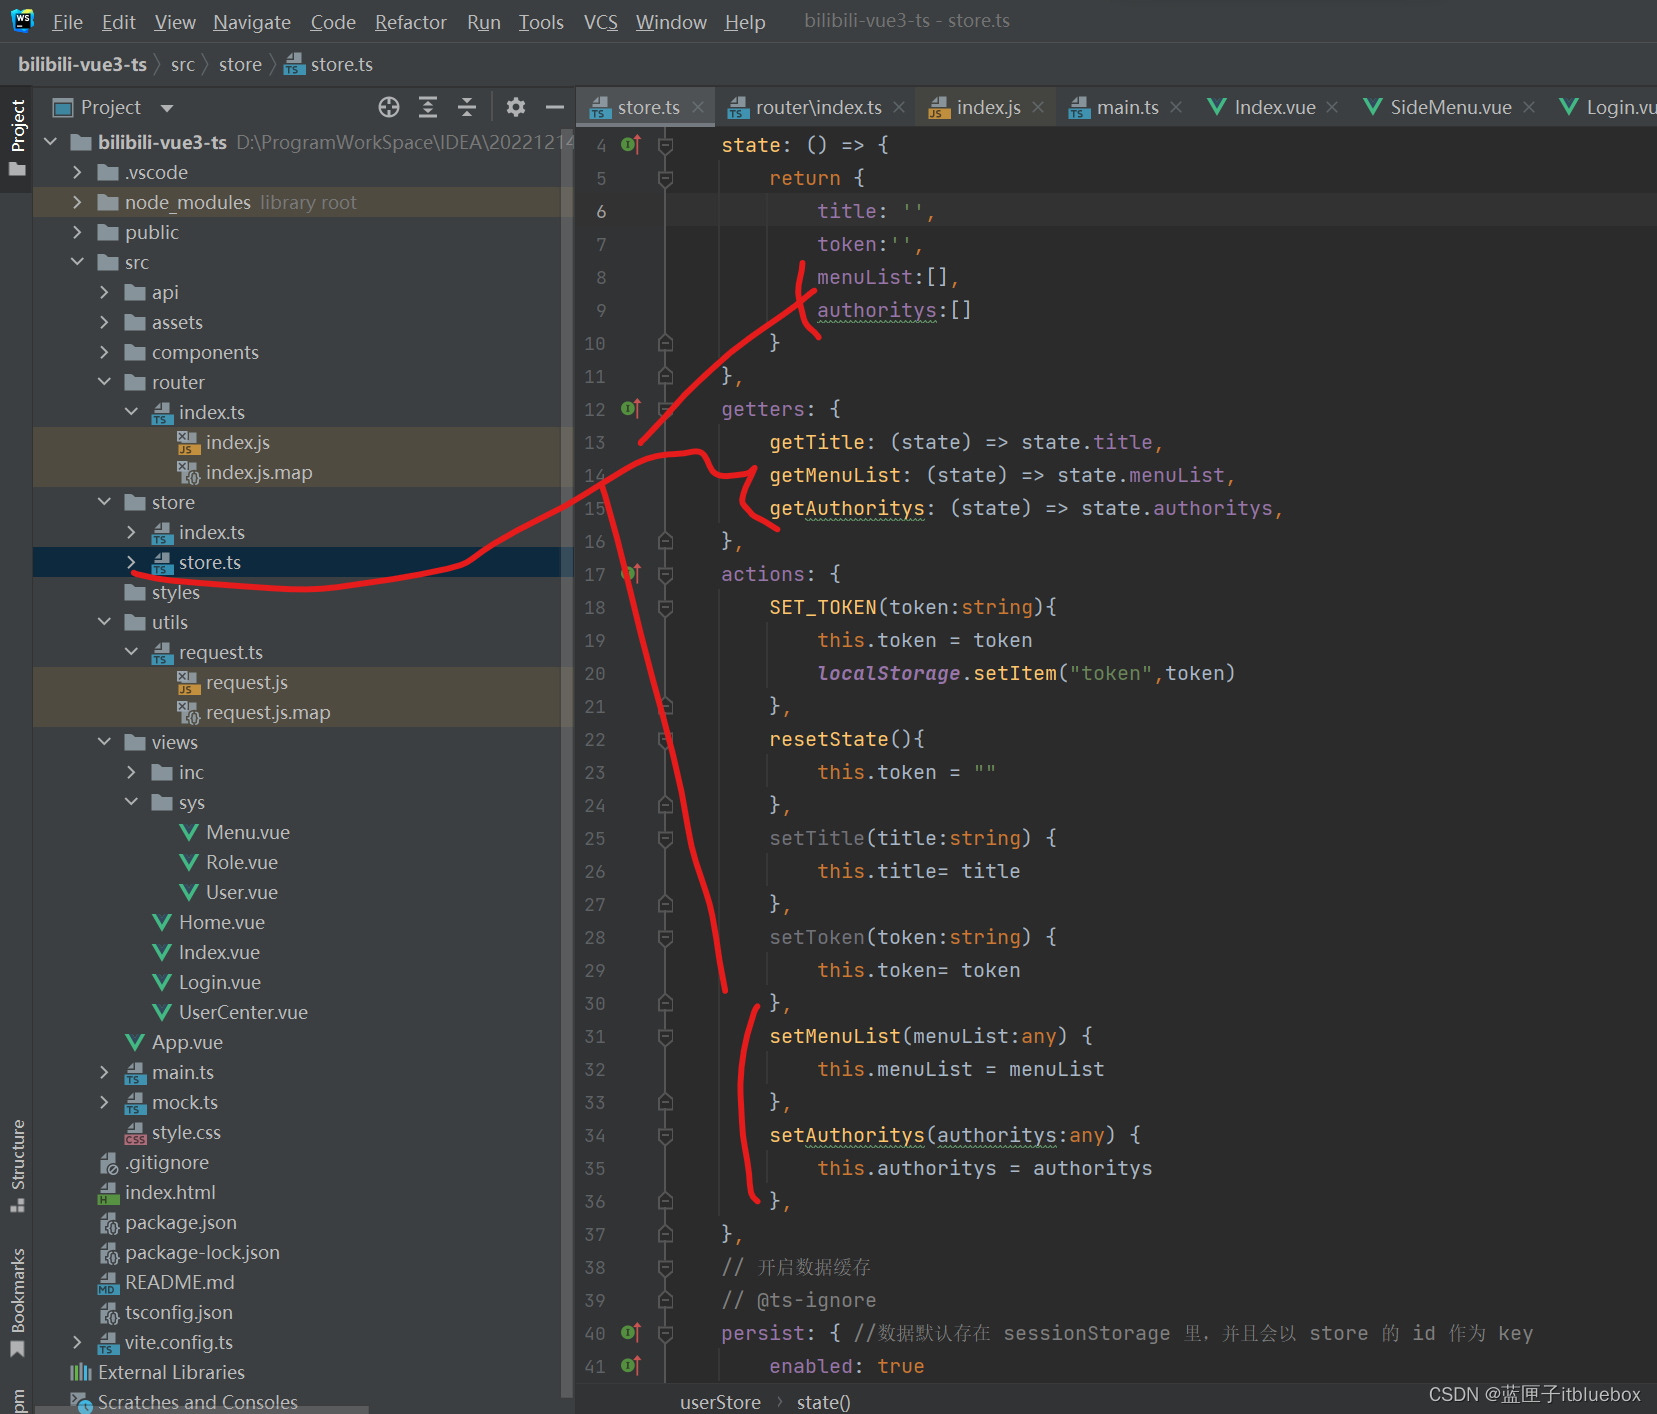
menuList:[],authoritys:[]setMenuList(menuList:any) {this.menuList = menuList},setAuthoritys(authoritys:any) {this.authoritys = authoritys},
发送获取菜单的请求
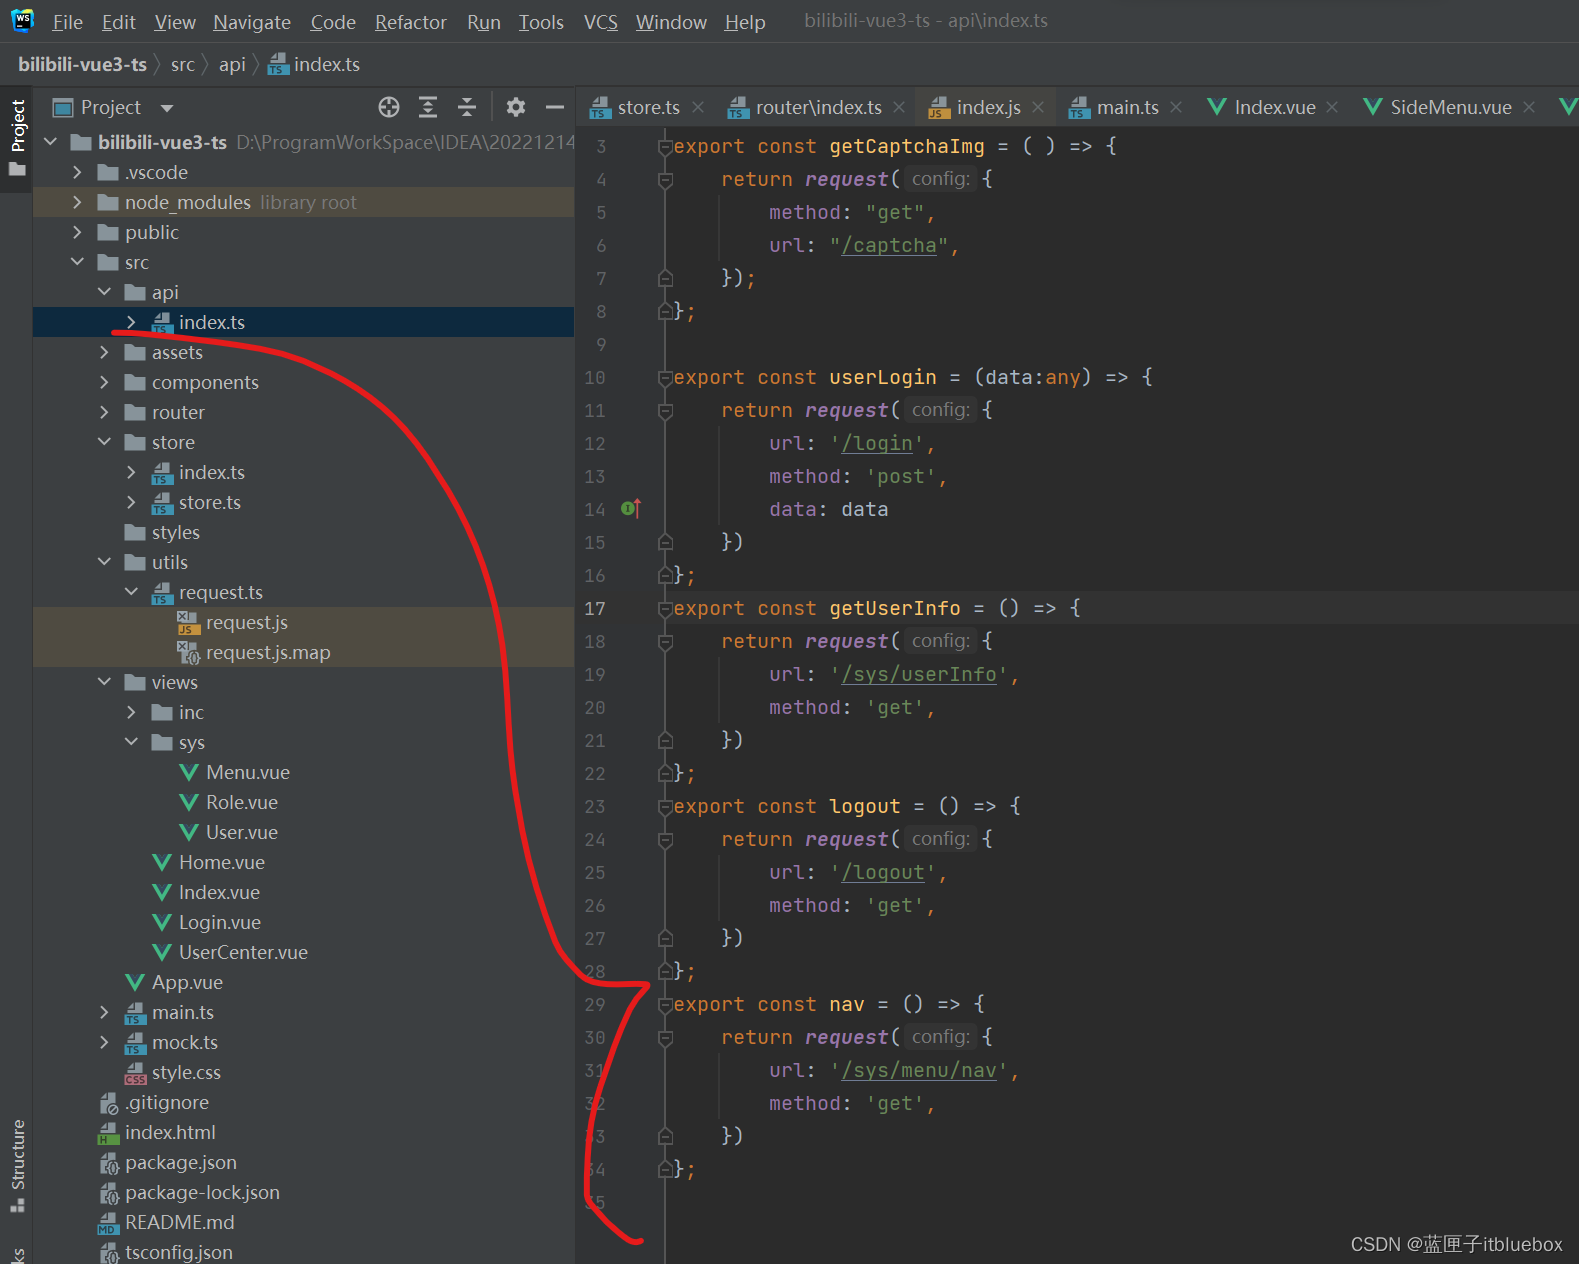
export const nav = () => {return request({url: '/sys/menu/nav',method: 'get',})
};
在路由当中获取拿到menuList,
import {nav} from "@/api";
import { userStore} from '@/store/store'
设置在路由加载前拿到前,拿到菜单的内容并添加到Store

router.beforeEach((to,from,next)=>{nav().then(res => {//拿到menuListuserStore().setMenuList(res.data.data.nav)userStore().setAuthoritys(res.data.data.authoritys)})next()
})
(4)设置mockjs
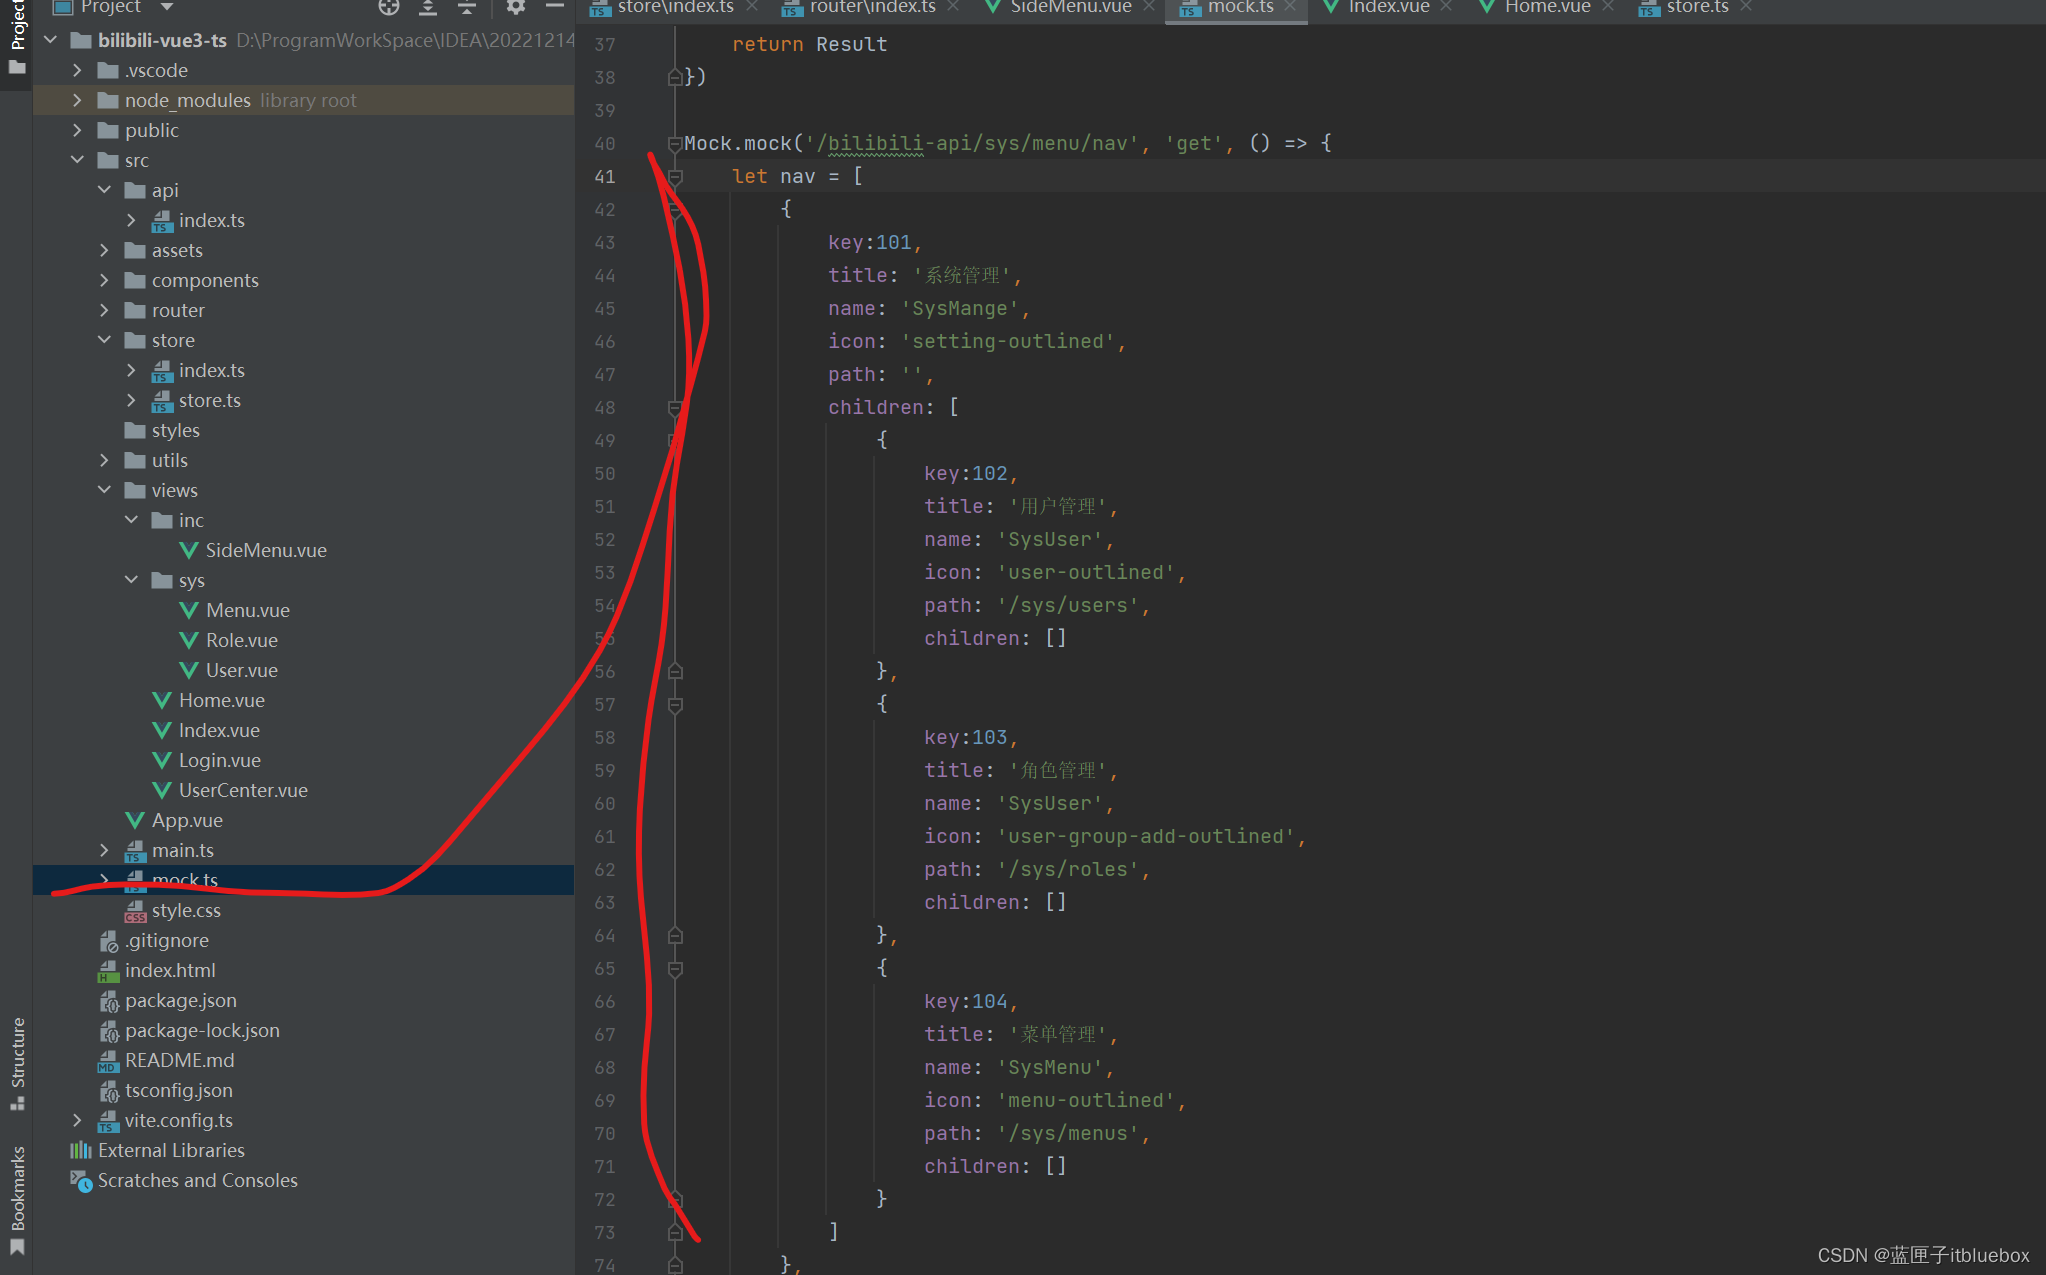
Mock.mock('/bilibili-api/sys/menu/nav', 'get', () => {let nav = [{key:101,title: '系统管理',name: 'SysMange',icon: 'setting-outlined',path: '',children: [{key:102,title: '用户管理',name: 'SysUser',icon: 'user-outlined',path: '/sys/users',children: []},{key:103,title: '角色管理',name: 'SysUser',icon: 'user-group-add-outlined',path: '/sys/roles',children: []},{key:104,title: '菜单管理',name: 'SysMenu',icon: 'menu-outlined',path: '/sys/menus',children: []}]},{key:201,title: '系统工具',name: 'SysTools',icon: 'menu-outlined',path: '',children: [{title: '数字字典',name: 'SysDict',icon: 'container-outlined',path: '/sys/dicts',children: []}]}];// @ts-ignorelet authoritys = [];// @ts-ignoreResult.data = {nav: nav,// @ts-ignoreauthoritys: authoritys}return Result;
})
(5)完善SideMenu.vue菜单页面,设置请求并渲染菜单
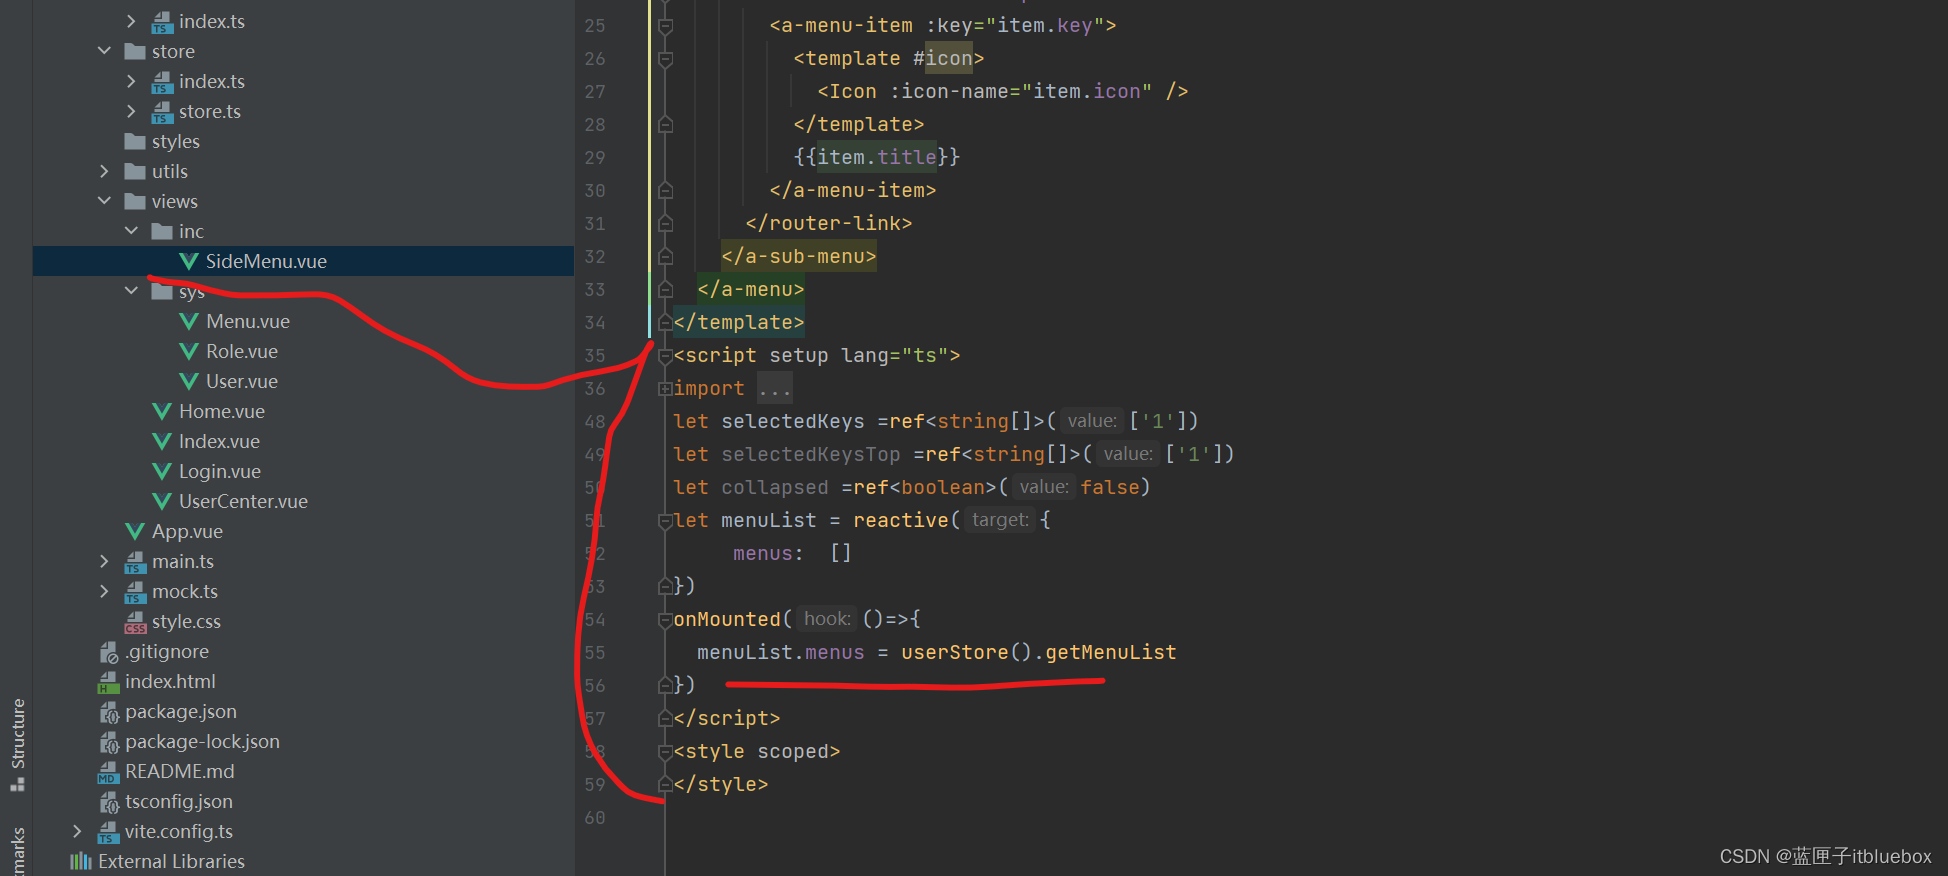
import {ref,reactive,onMounted} from "vue";
import {AppstoreOutlined,MailOutlined,SettingOutlined,TeamOutlined,UserOutlined,MenuOutlined,ContainerOutlined
} from '@ant-design/icons-vue';
import Icon from "@/components/Icon.vue"
import { userStore} from '@/store/store'
let selectedKeys =ref<string[]>(['1'])
let selectedKeysTop =ref<string[]>(['1'])
let collapsed =ref<boolean>(false)
let menuList = reactive({menus:  []
})
onMounted(()=>{menuList.menus = userStore().getMenuList
})
3、设置动态路由加载一次以后无需二次加载
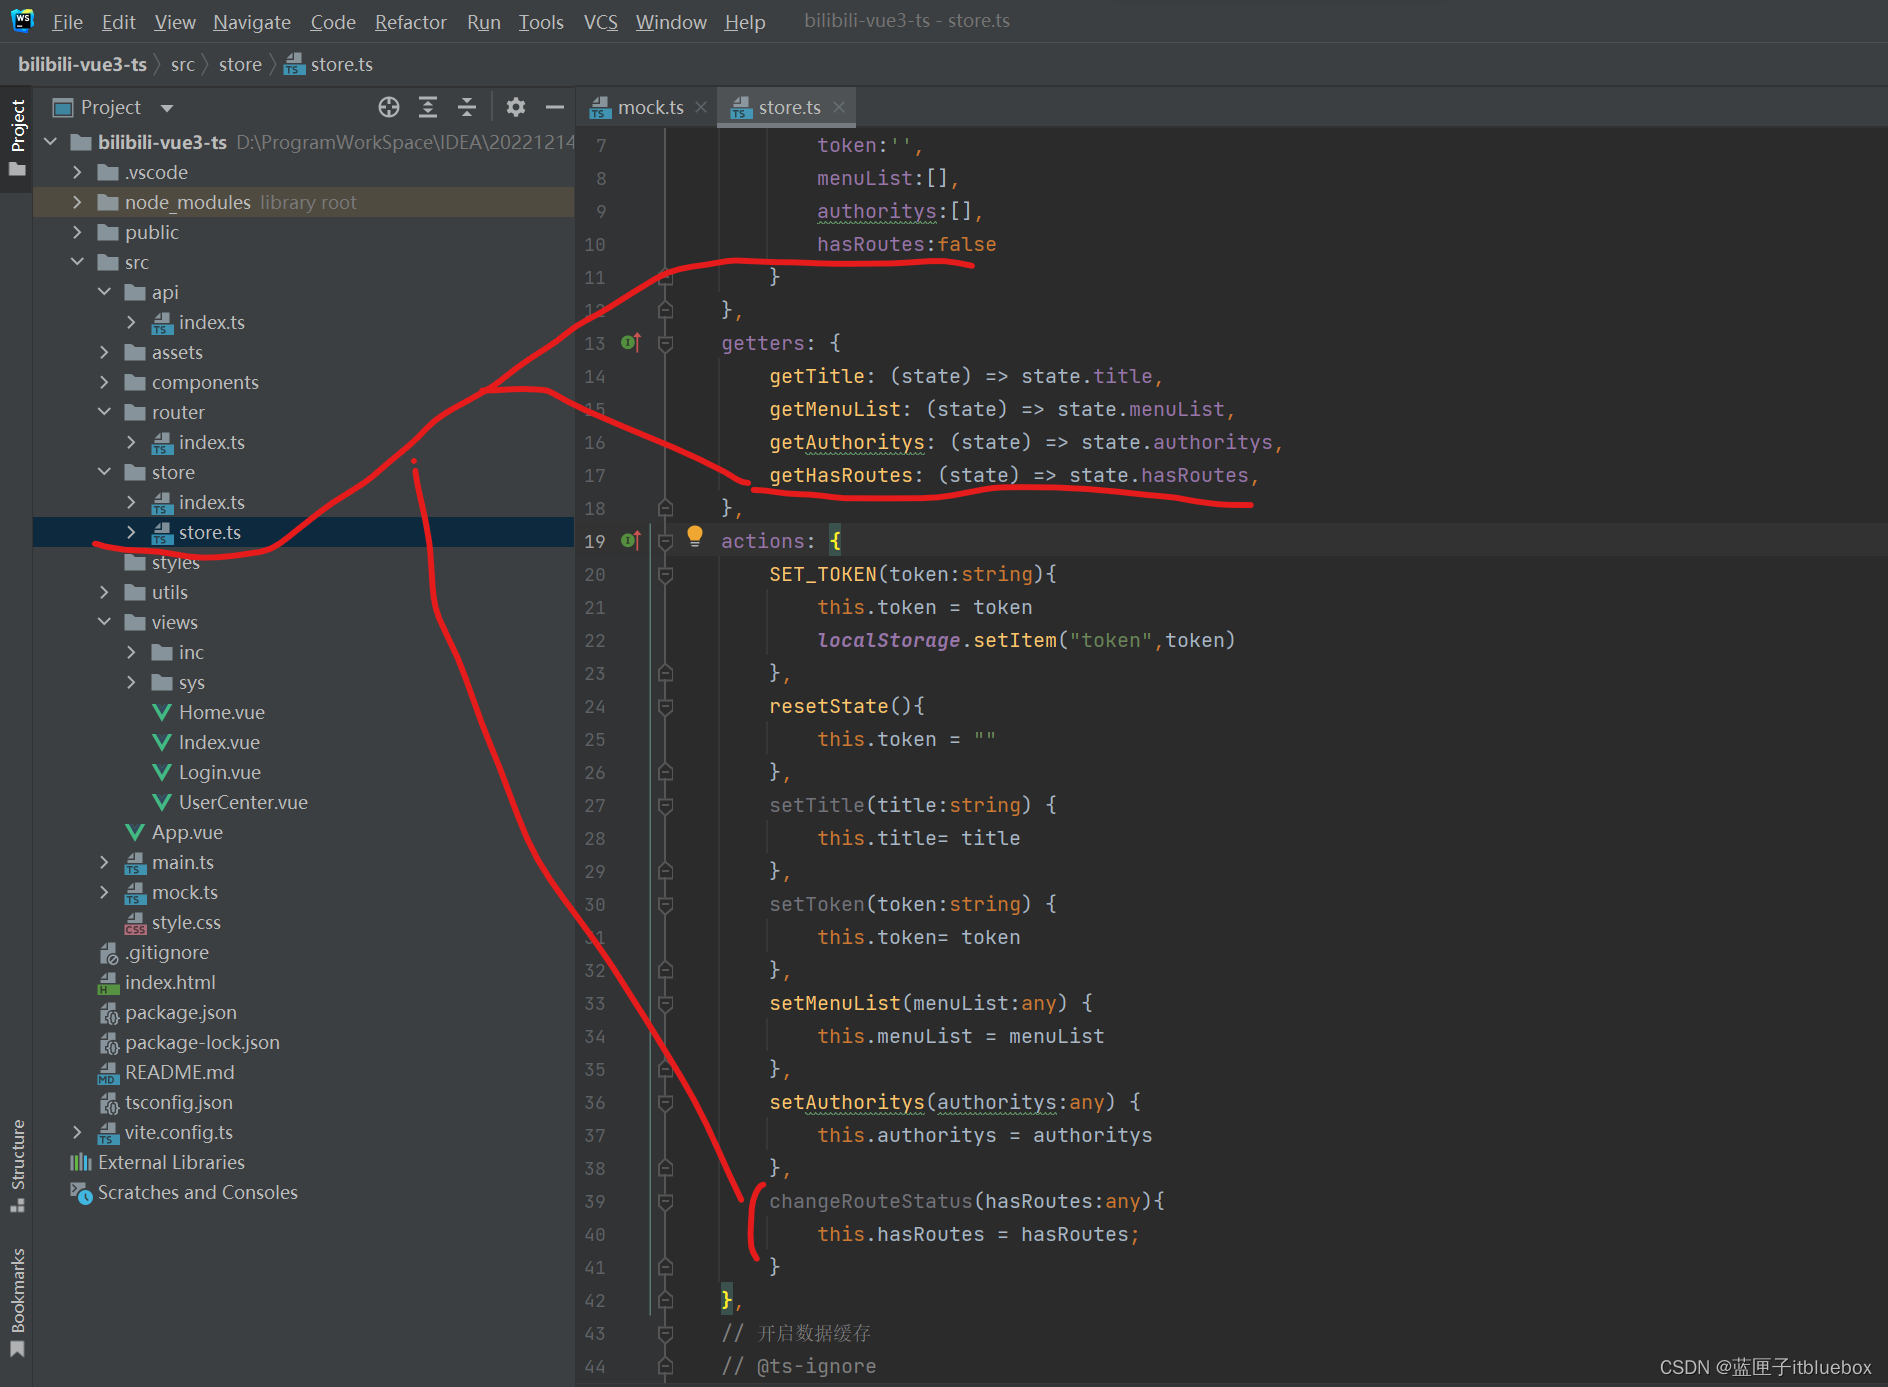
hasRoutes:falsegetHasRoutes: (state) => state.hasRoutes,changeRouteStatus(hasRoutes:any){this.hasRoutes = hasRoutes;
}
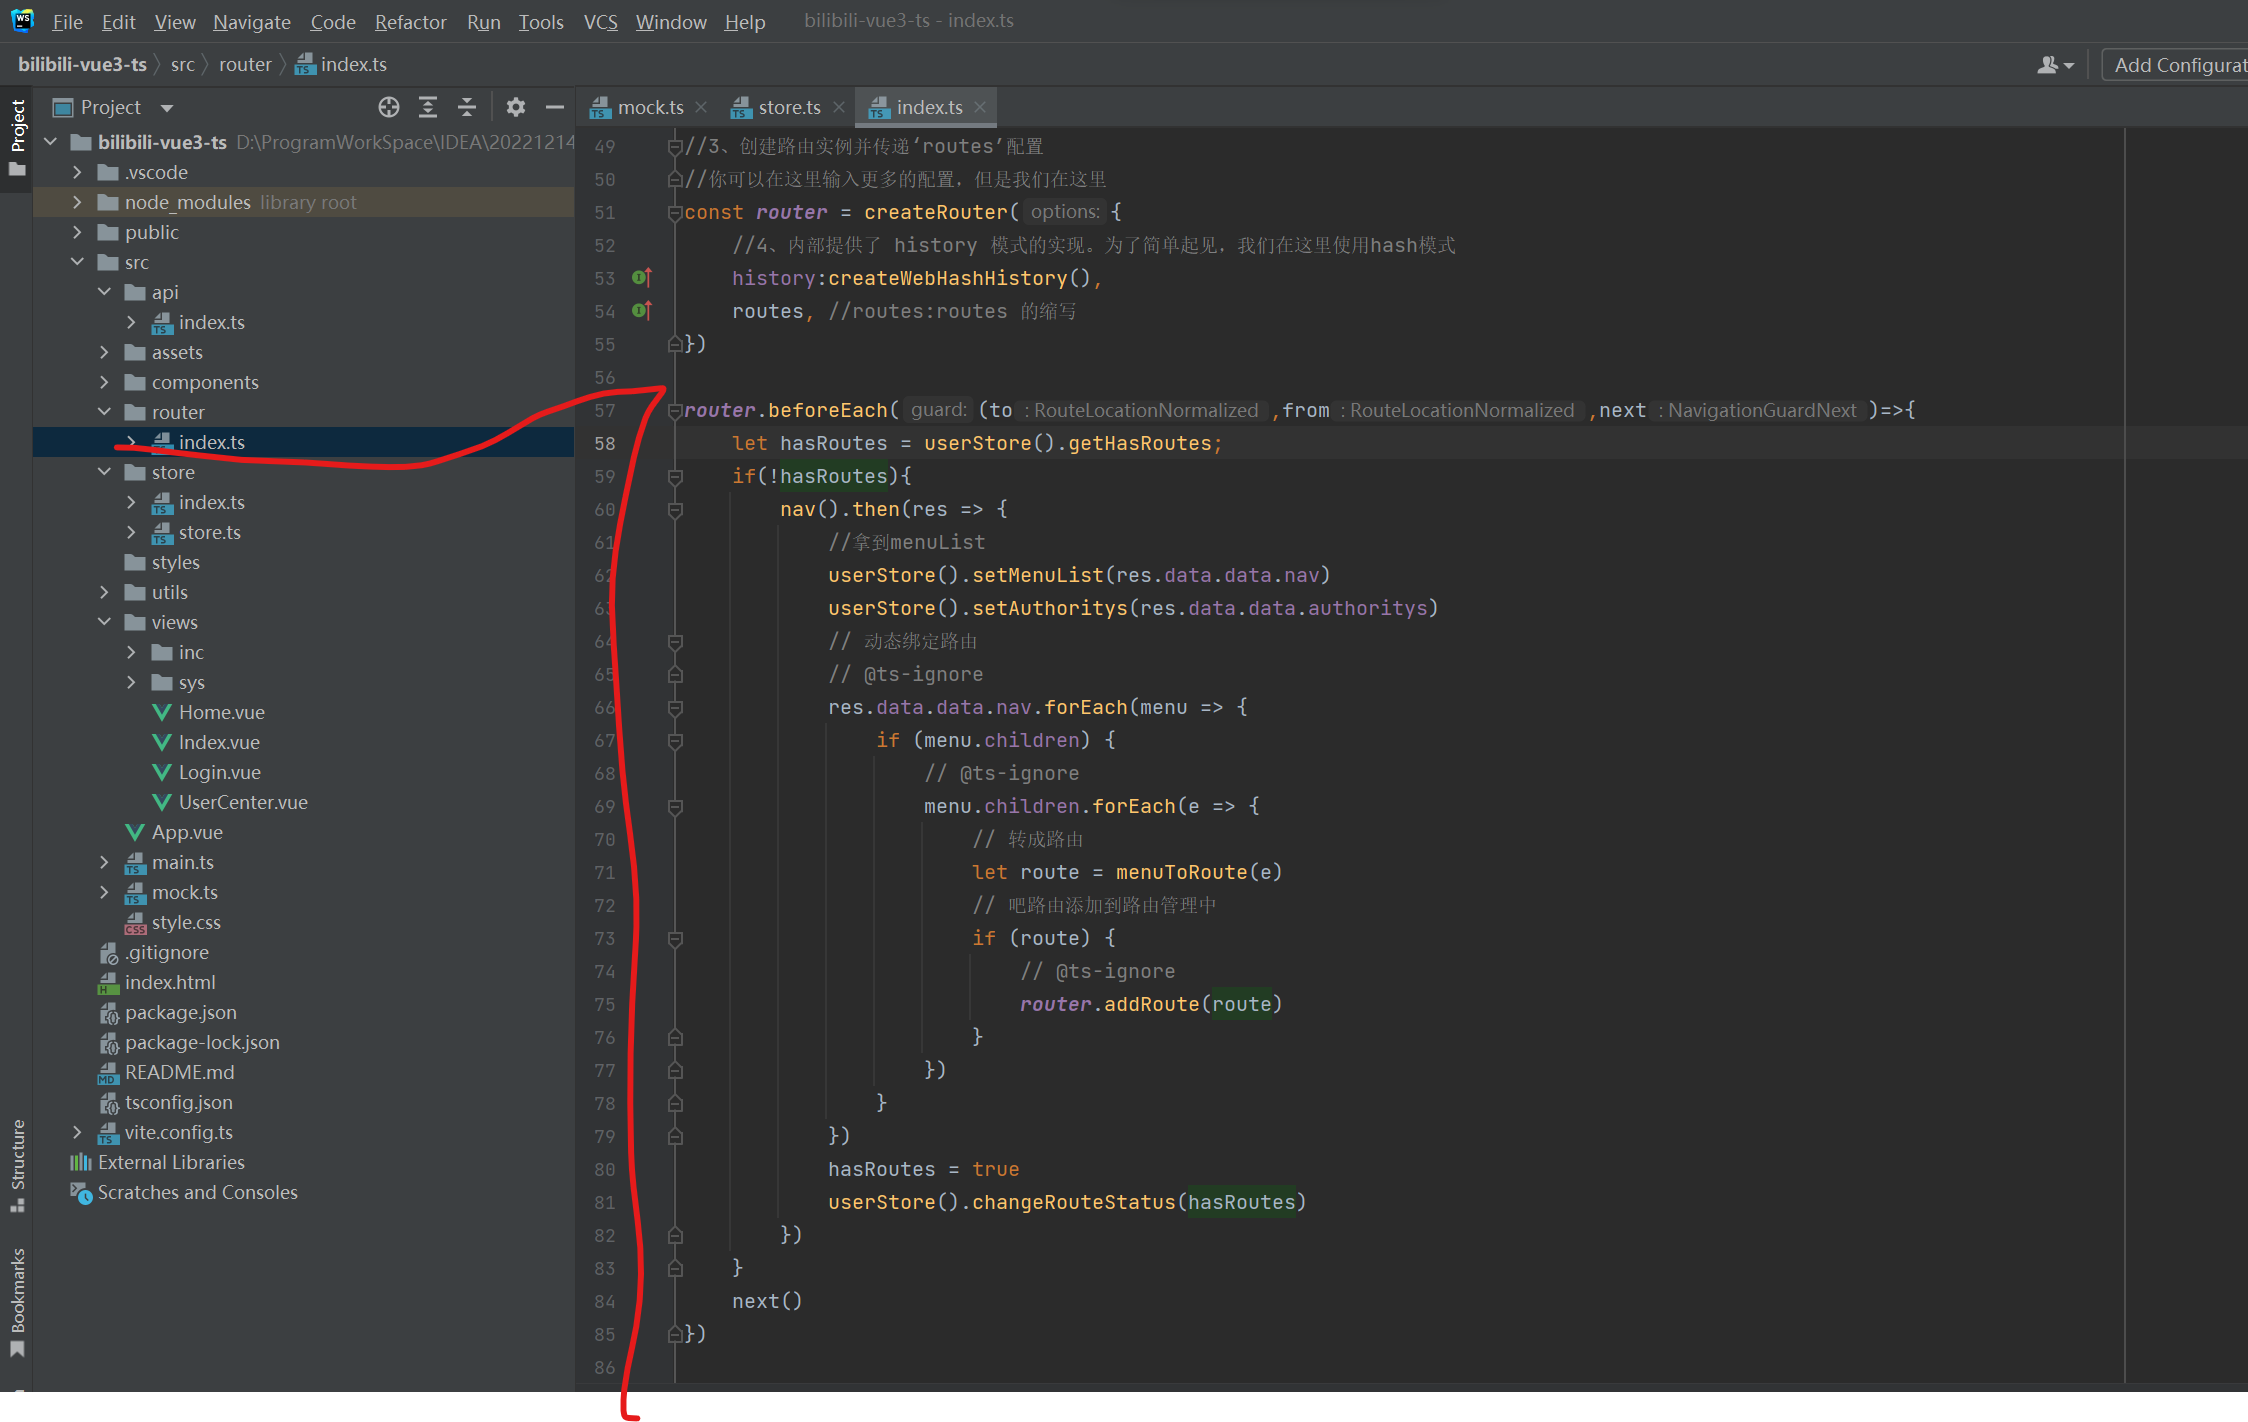
router.beforeEach((to,from,next)=>{let hasRoutes = userStore().getHasRoutes;if(!hasRoutes){nav().then(res => {//拿到menuListuserStore().setMenuList(res.data.data.nav)userStore().setAuthoritys(res.data.data.authoritys)hasRoutes = trueuserStore().changeRouteStatus(hasRoutes)})}next()
})
4、实现动态导航


<template><div><a-tabs v-model:activeKey="activeKey" type="editable-card" @edit="onEdit"><a-tab-pane v-for="pane in panes" :key="pane.key" :tab="pane.title" :closable="pane.closable"></a-tab-pane></a-tabs></div>
</template><script setup lang="ts">
/*
*
* <close-outlined />
* */
import { defineComponent, ref,onMounted } from 'vue'
const panes = ref<{ title: string; content: string; key: string; closable?: boolean }[]>([{ title: 'Tab 1', content: 'Content of Tab 1', key: '1' },{ title: 'Tab 2', content: 'Content of Tab 2', key: '2' },{ title: 'Tab 3', content: 'Content of Tab 3', key: '3', closable: false },
]);
const activeKey = ref(panes.value[0].key);
const newTabIndex = ref(0);
onMounted(()=>{
})
const add = () => {activeKey.value = `newTab${++newTabIndex.value}`;panes.value.length = 1
};
const remove = (targetKey: string) => {let lastIndex = 0;panes.value.forEach((pane, i) => {if (pane.key === targetKey) {lastIndex = i - 1;}});panes.value = panes.value.filter(pane => pane.key !== targetKey);if (panes.value.length && activeKey.value === targetKey) {if (lastIndex >= 0) {activeKey.value = panes.value[lastIndex].key;} else {activeKey.value = panes.value[0].key;}}
};const onEdit = (targetKey: string | MouseEvent, action: string) => {if (action === 'add') {add();} else {remove(targetKey as string);}
};
</script>
<style scoped>
::v-deep .ant-tabs-nav-list .ant-tabs-nav-add span {transform: rotate(-45deg);
}
</style>
查看效果
在Home当中引入该内容

<div style="margin-top: 15px;"><Tabs></Tabs>
</div>
import Tabs from "@/views/inc/Tabs.vue"

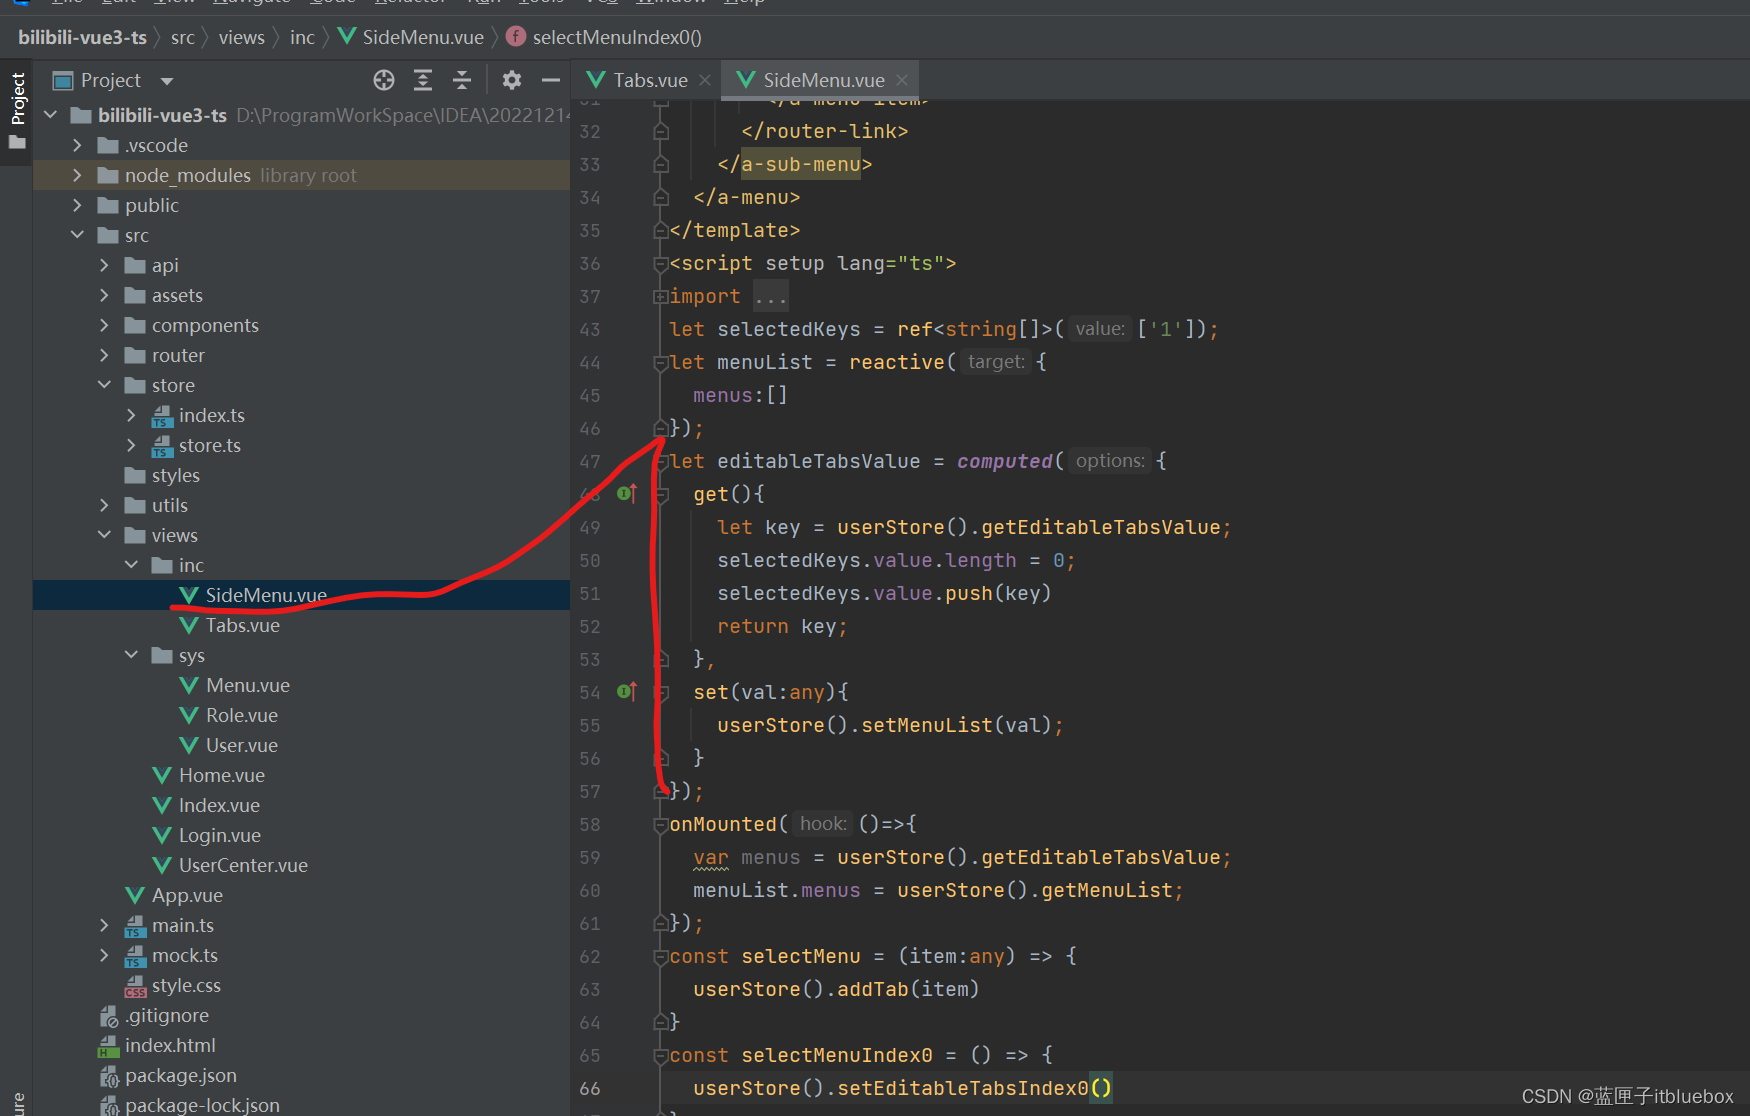
5、设置侧栏和页面进行动态绑定
- 在store.ts当中设置添加tab 的功能

editableTabsValue: 0,editableTabs: [{title: '首页',content: '/index',key: 0,closable: false,}],getEditableTabsValue: (state) => state.editableTabsValue,getEditableTabs: (state) => state.editableTabs,
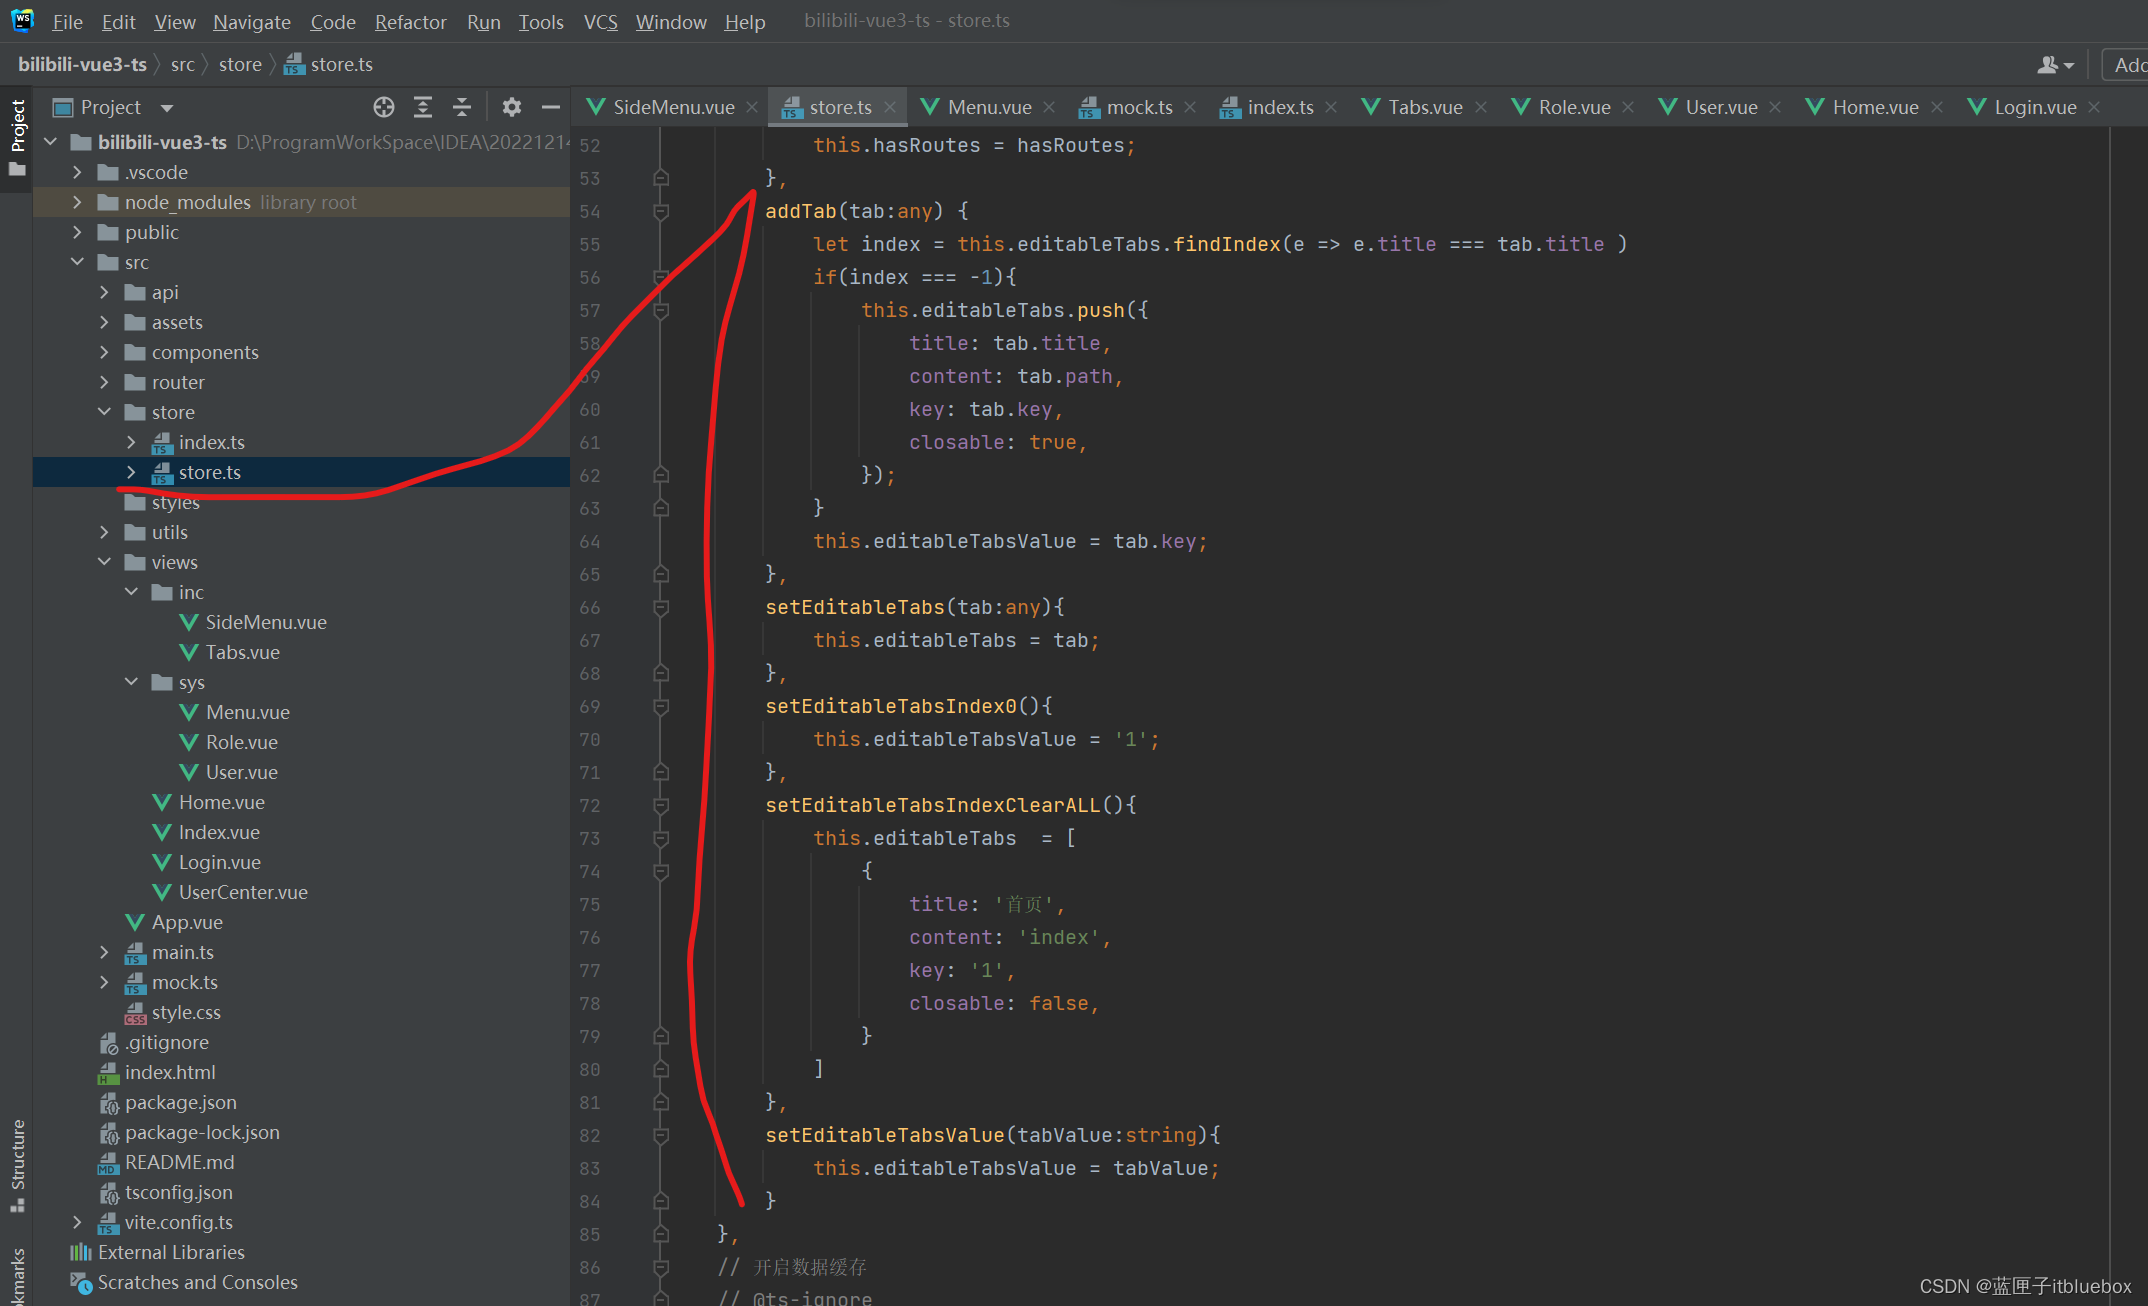
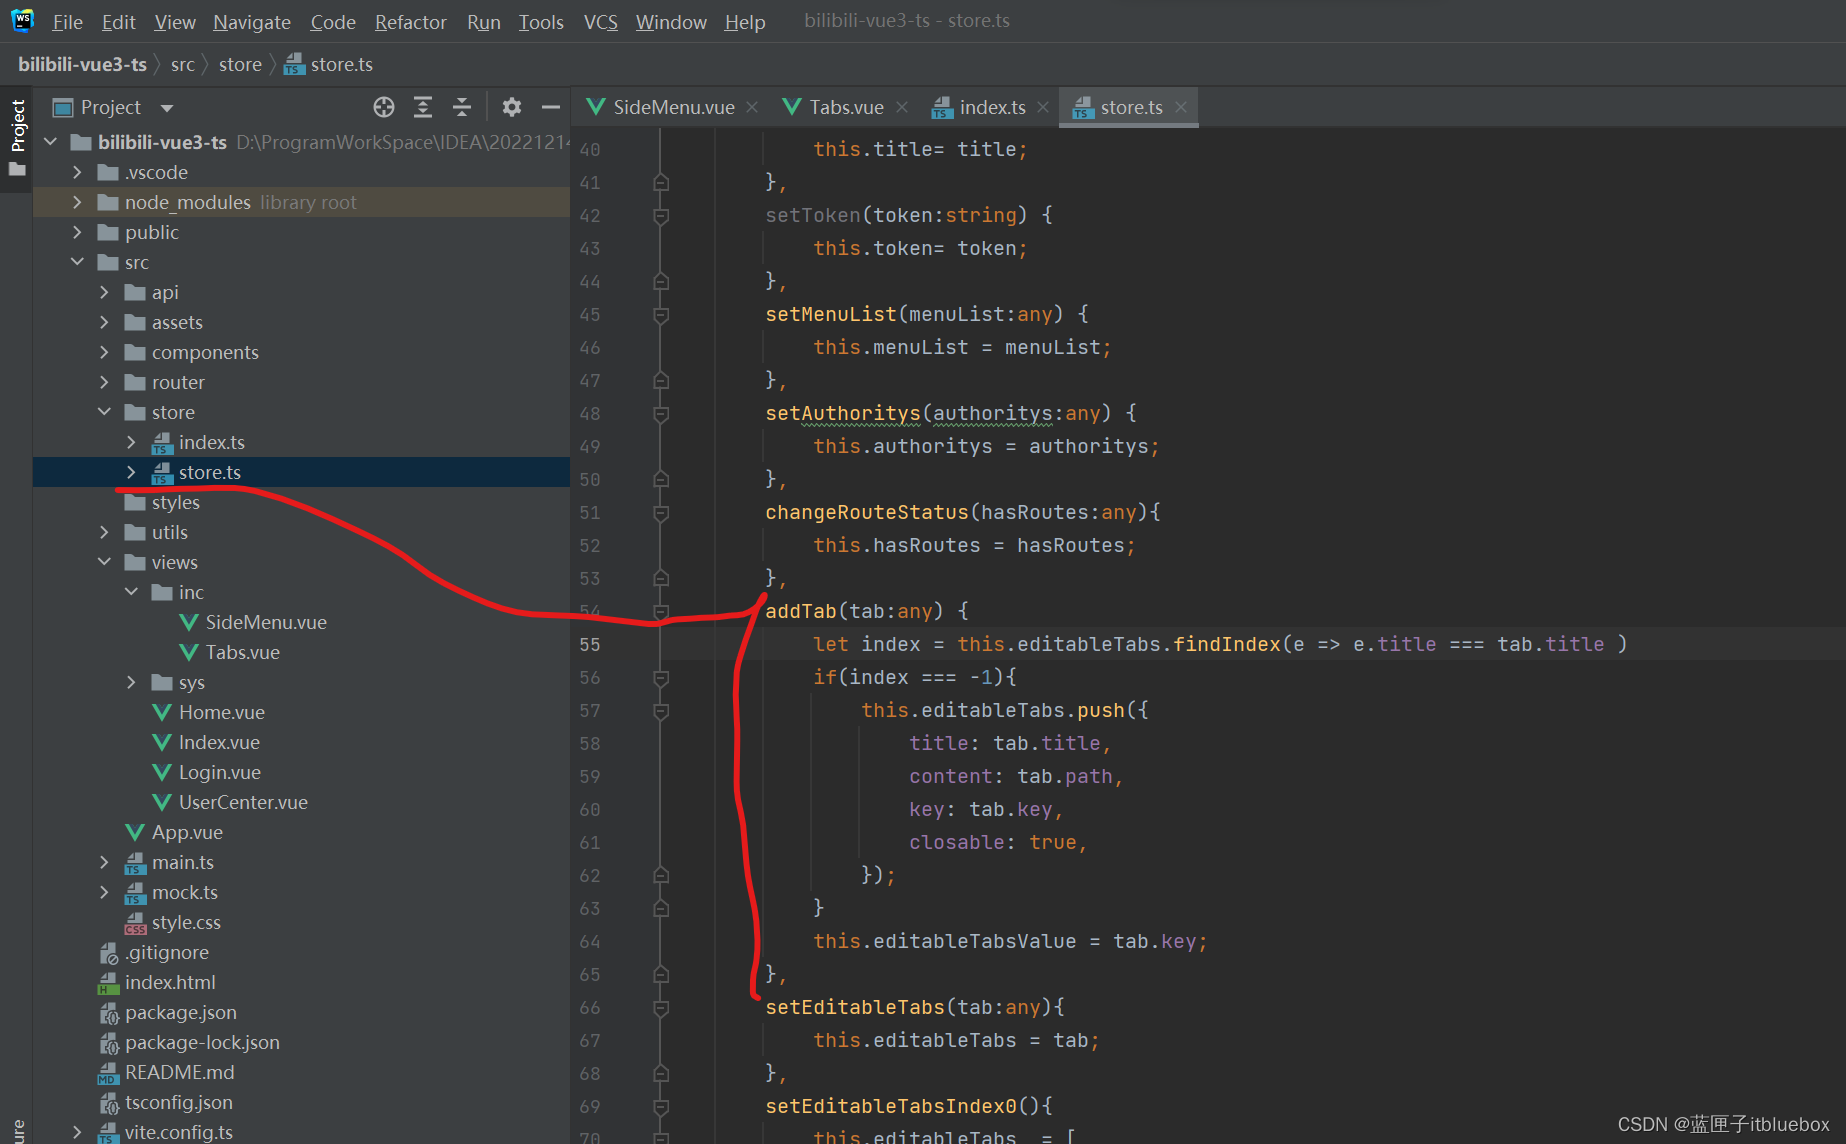
addTab(tab:any) {this.editableTabs.push({title: tab.title,content: tab.path,key: tab.key,closable: true,});},setEditableTabs(tab:any){this.editableTabs = tab;},setEditableTabsIndex0(){this.editableTabsValue = 0;},setEditableTabsIndexClearALL(){this.editableTabs = [{title: '首页',content: '/index',key: 0,closable: false,}]},setEditableTabsValue(tabValue:number){this.editableTabsValue = tabValue;}

 <a-menu-item key="1" @click="selectMenuIndex0"><template #icon><MailOutlined /></template>主页</a-menu-item>
<a-menu-item :key="item.key" @click="selectMenu(item)"><template #icon><Icon :icon-name="item.icon" /></template>{{item.title}}</a-menu-item>
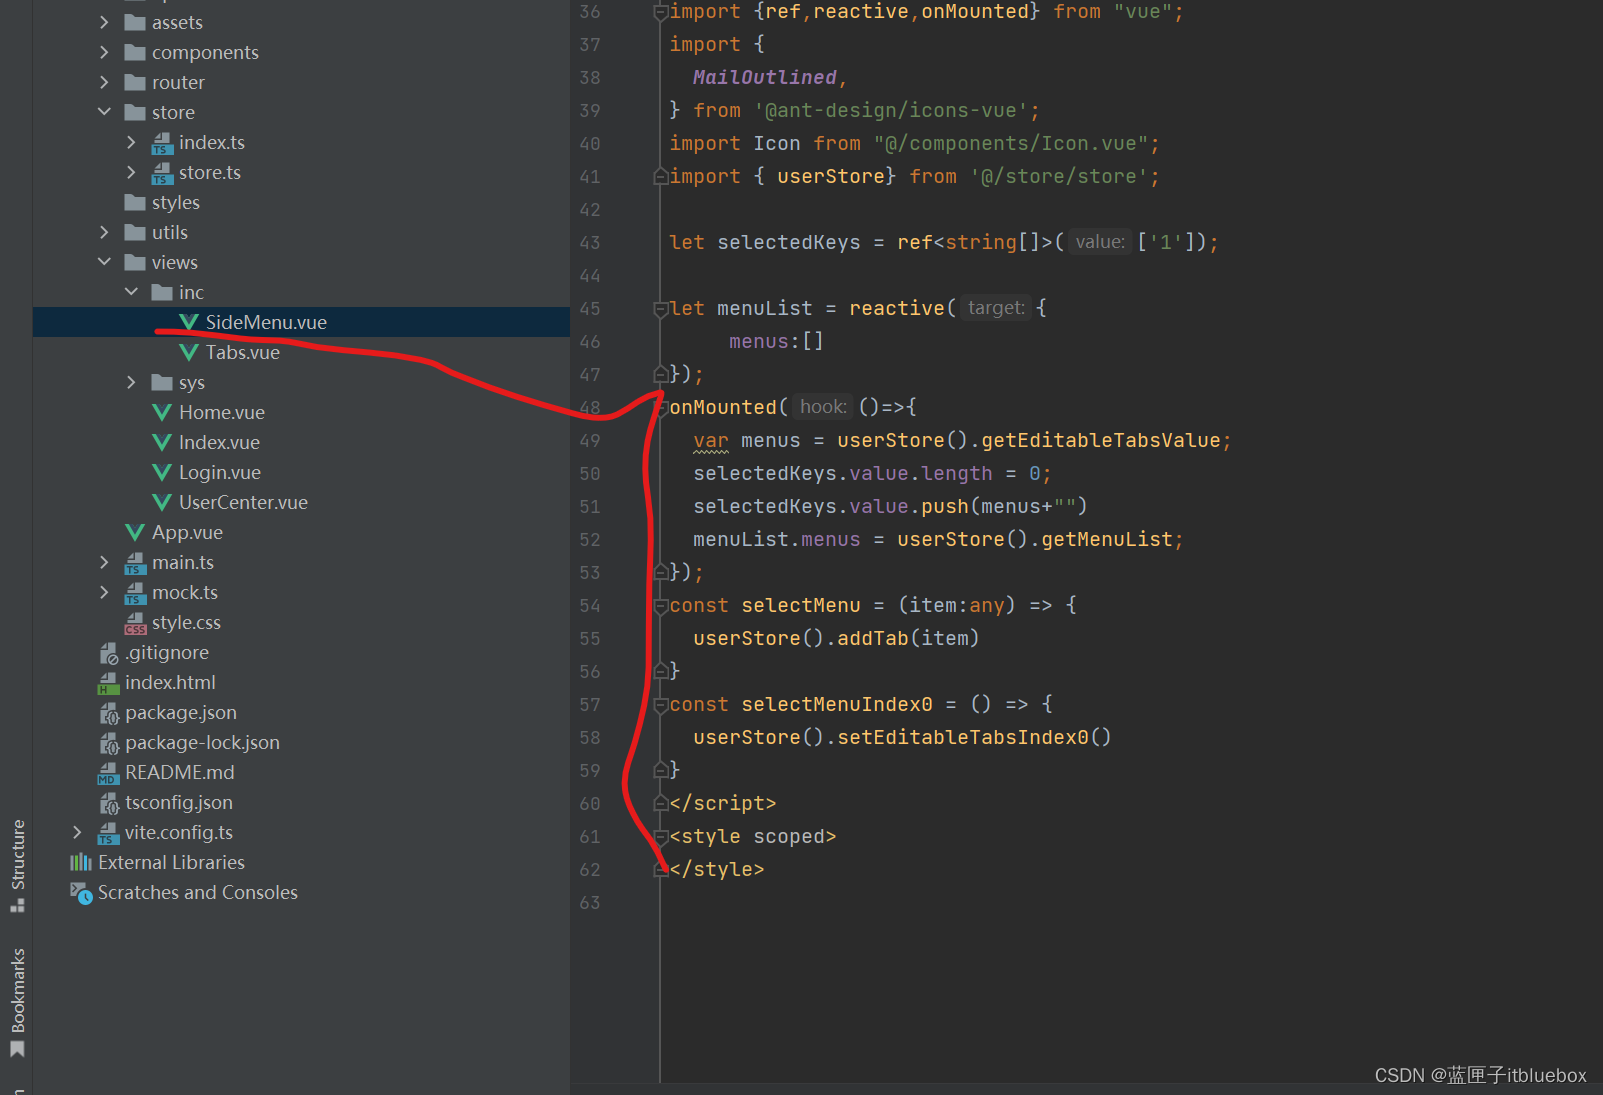
onMounted(()=>{var menus = userStore().getEditableTabsValue;//设置高亮同步selectedKeys.value.length = 0;selectedKeys.value.push(menus+"")menuList.menus = userStore().getMenuList;
});
const selectMenu = (item:any) => {userStore().addTab(item)
}
const selectMenuIndex0 = () => {userStore().setEditableTabsIndex0()
}
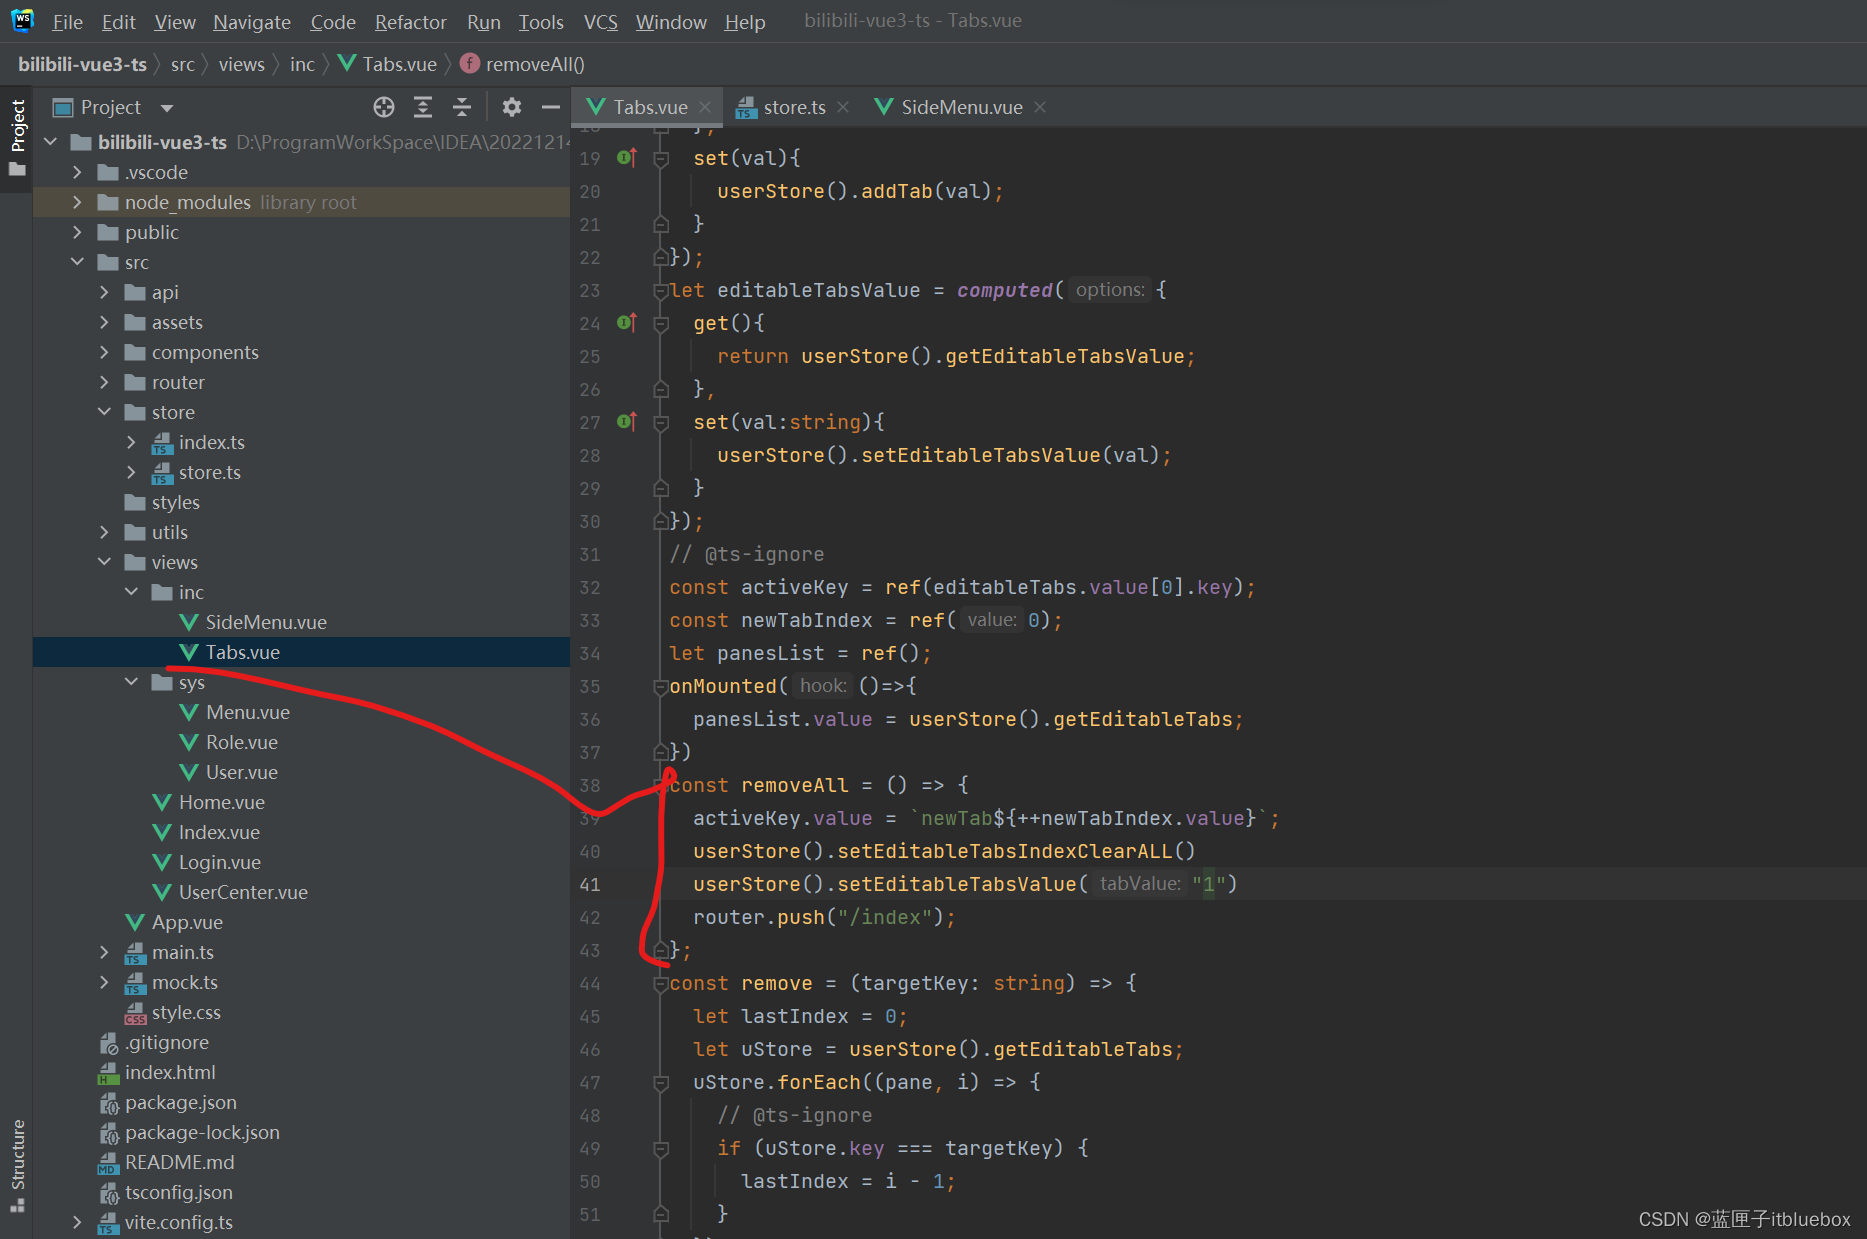
6、完善Tabs标签页
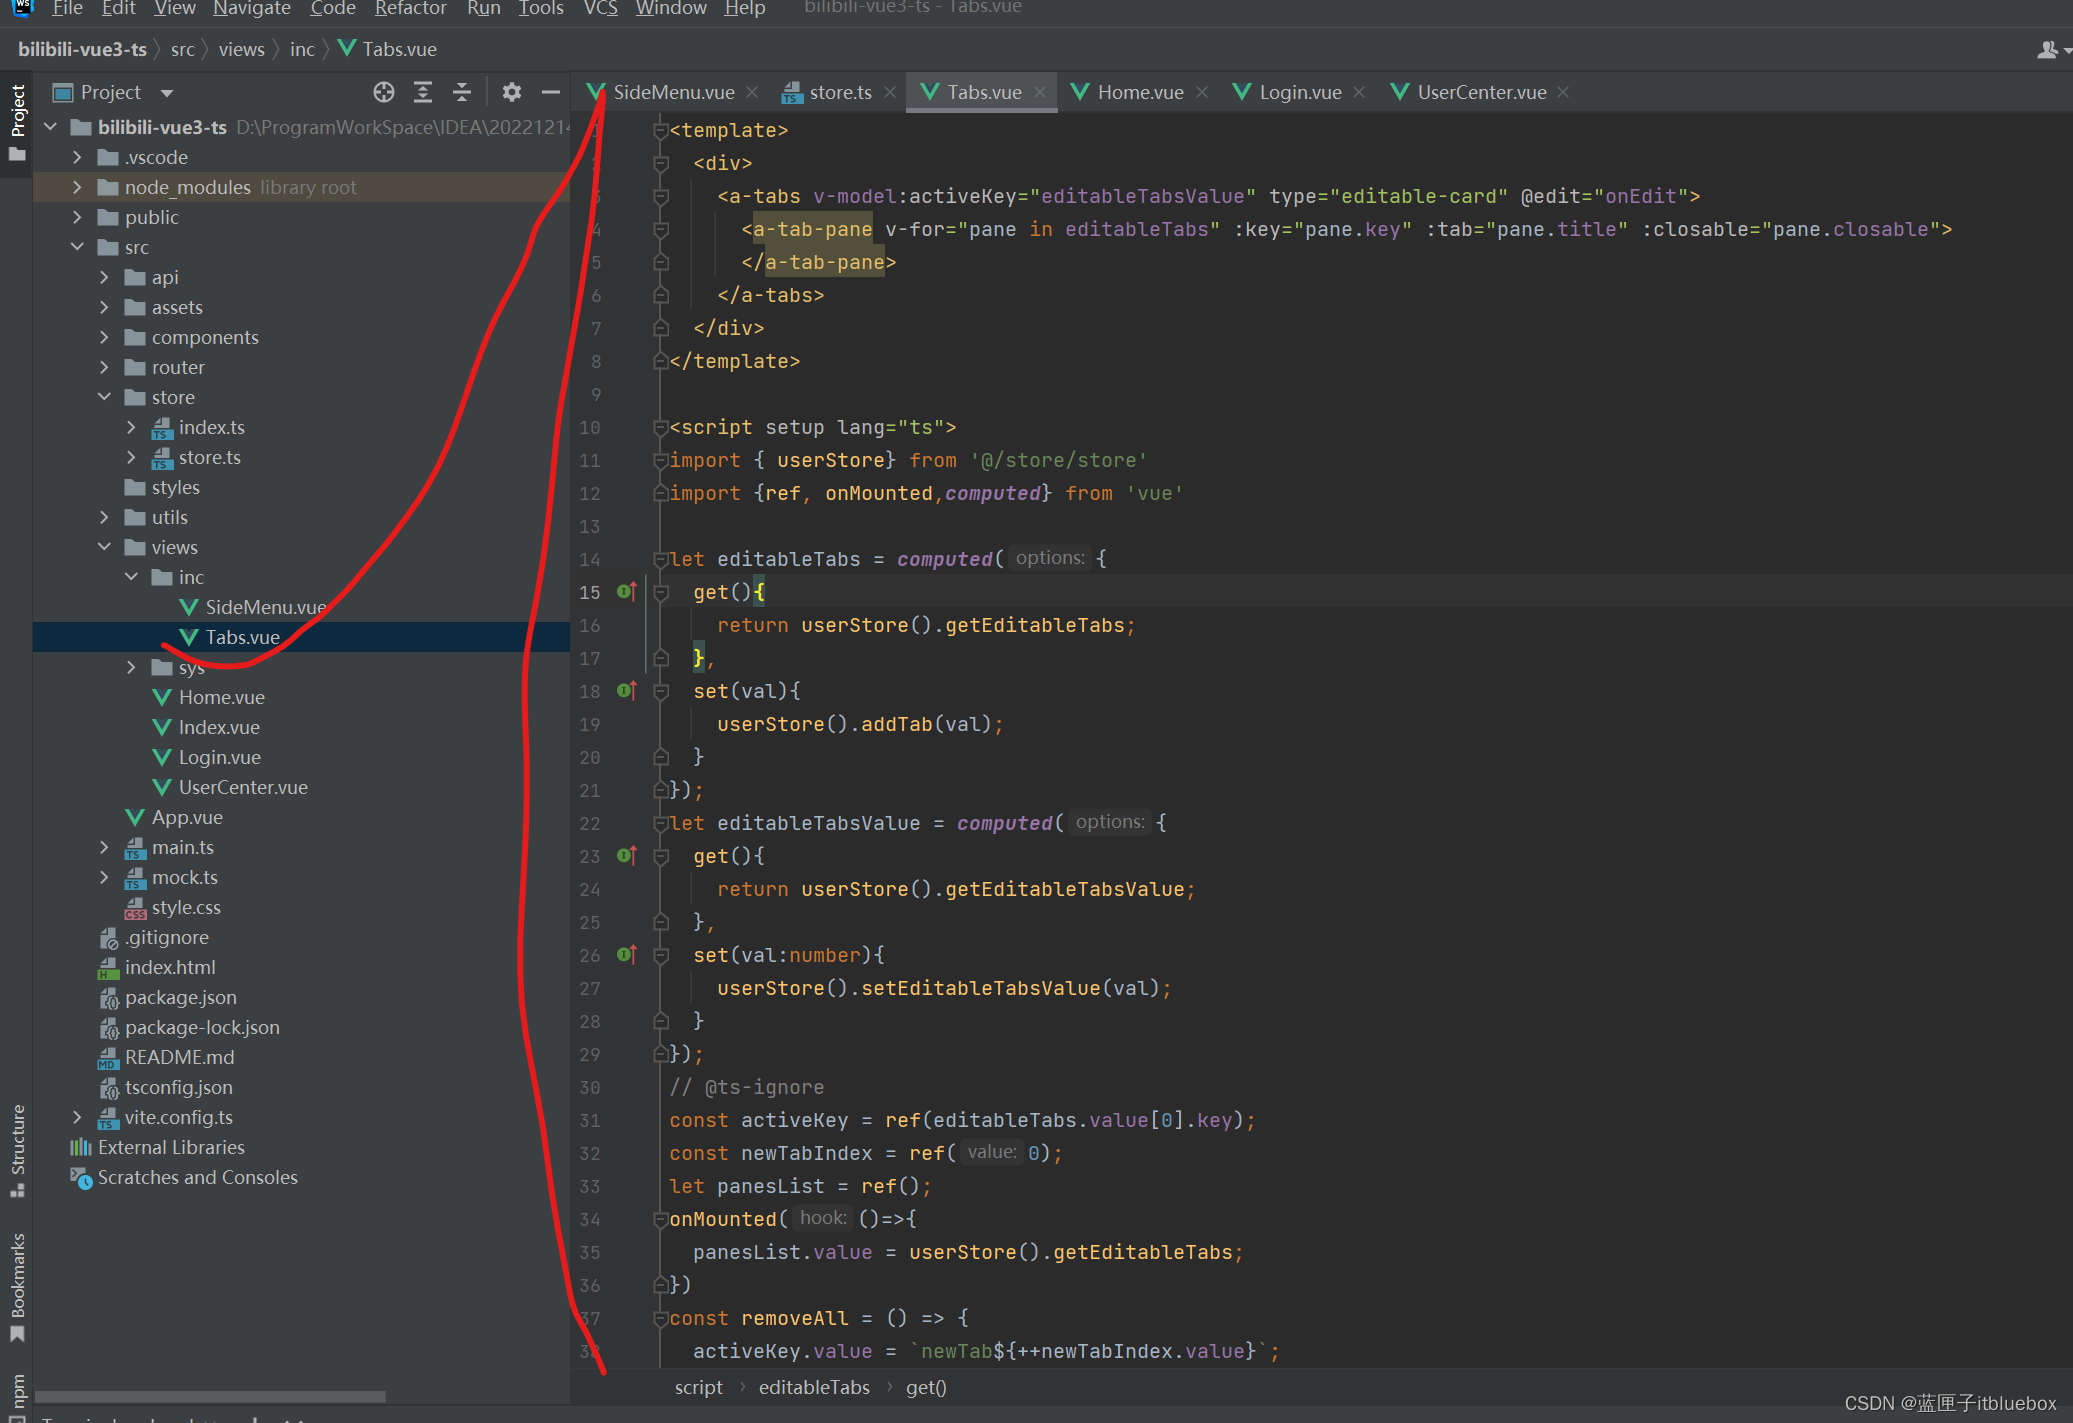
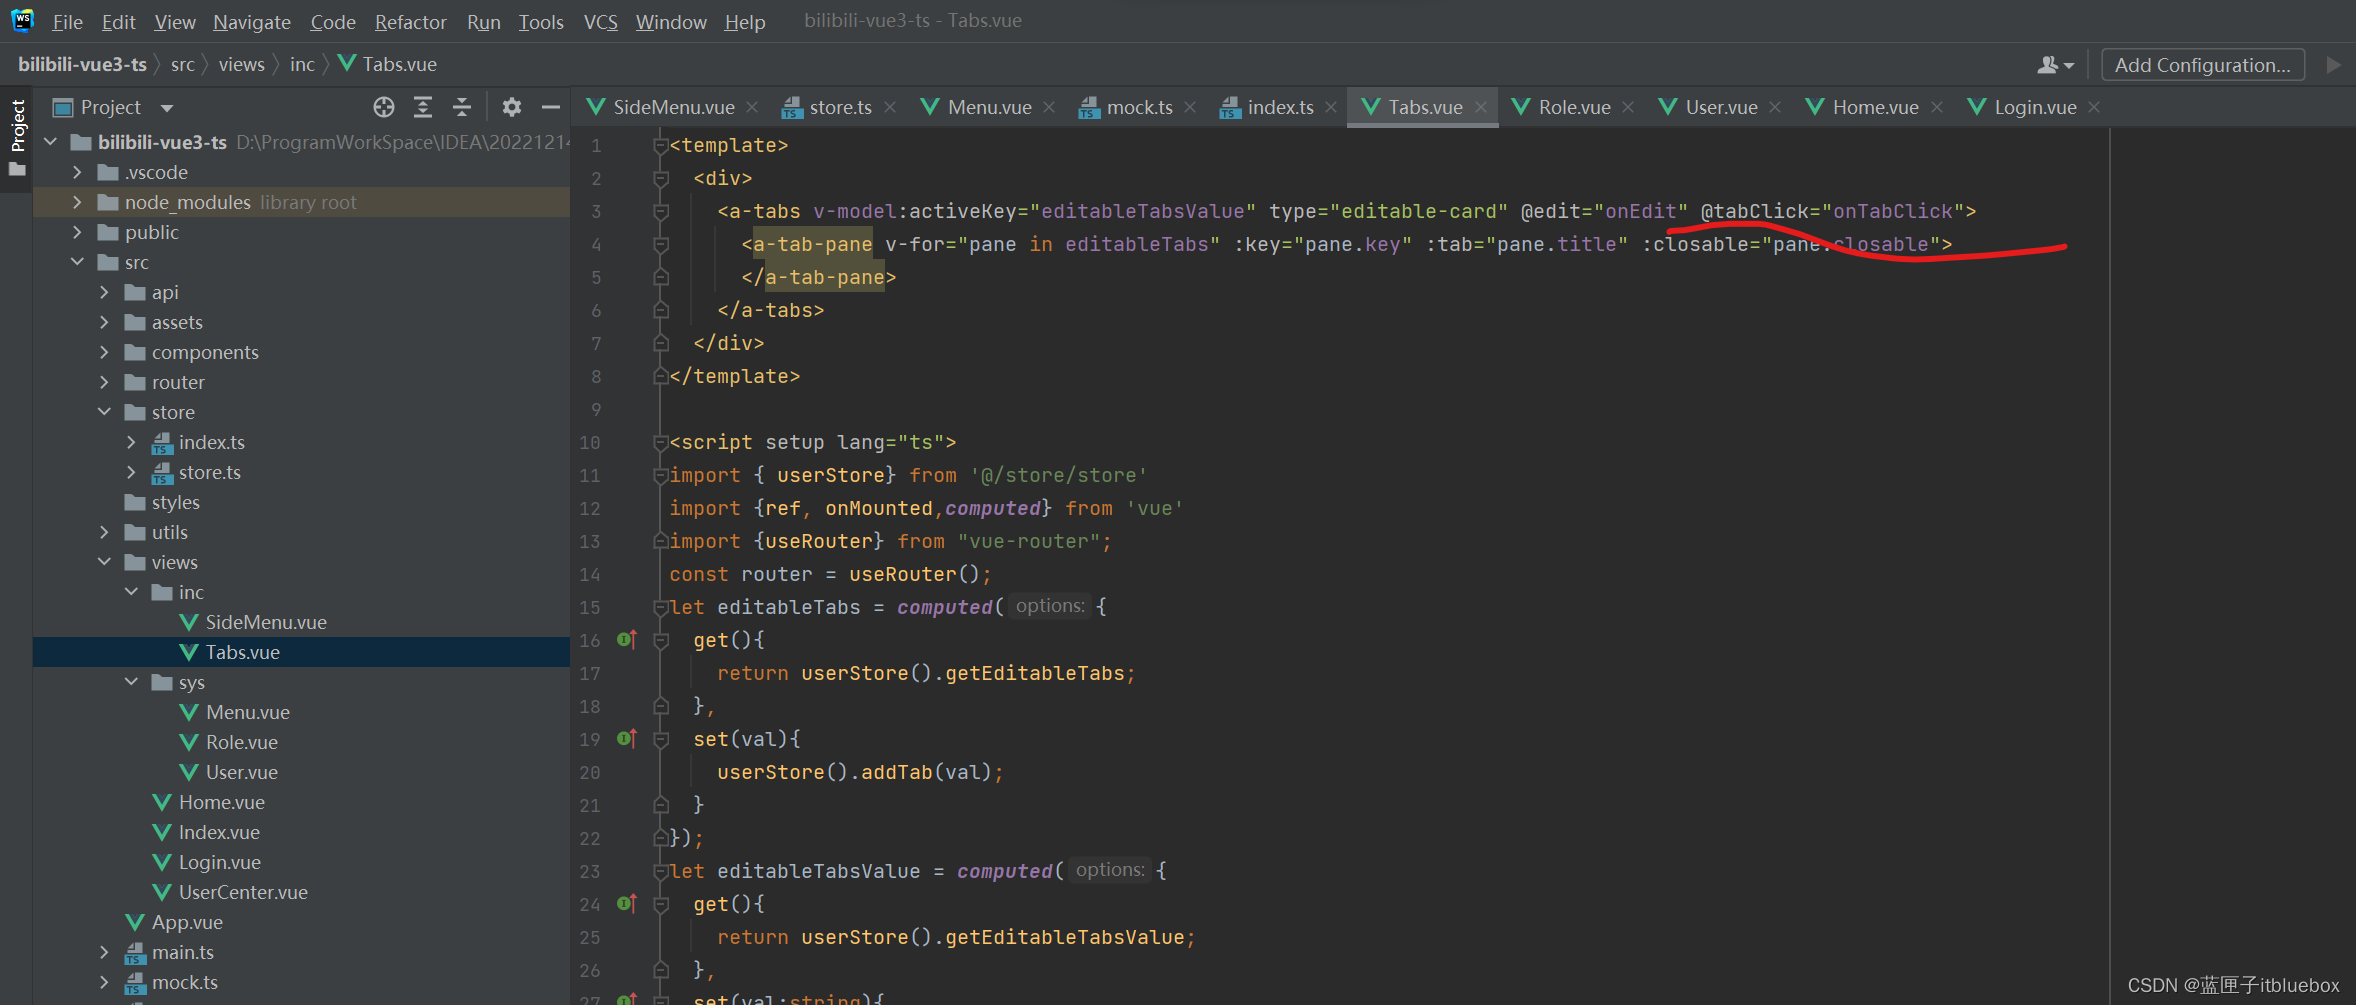
<template><div><a-tabs v-model:activeKey="editableTabsValue" type="editable-card" @edit="onEdit"><a-tab-pane v-for="pane in editableTabs" :key="pane.key" :tab="pane.title" :closable="pane.closable"></a-tab-pane></a-tabs></div>
</template><script setup lang="ts">
import { userStore} from '@/store/store'
import {ref, onMounted,computed} from 'vue'let editableTabs = computed({get(){return userStore().getEditableTabs;},set(val){userStore().addTab(val);}
});
let editableTabsValue = computed({get(){return userStore().getEditableTabsValue;},set(val:number){userStore().setEditableTabsValue(val);}
});
// @ts-ignore
const activeKey = ref(editableTabs.value[0].key);
const newTabIndex = ref(0);
let panesList = ref();
onMounted(()=>{panesList.value = userStore().getEditableTabs;
})
const removeAll = () => {activeKey.value = `newTab${++newTabIndex.value}`;userStore().setEditableTabsIndexClearALL()
};
const remove = (targetKey: string) => {let lastIndex = 0;let uStore = userStore().getEditableTabs;uStore.forEach((pane, i) => {// @ts-ignoreif (uStore.key === targetKey) {lastIndex = i - 1;}});// @ts-ignoreuStore = uStore.filter(pane => pane.key !== targetKey);if (uStore.length && activeKey.value === targetKey) {if (lastIndex >= 0) {// @ts-ignoreactiveKey.value = uStore[lastIndex].key;} else {// @ts-ignoreactiveKey.value = uStore[0].key;}}userStore().setEditableTabs(uStore);
};
const onEdit = (targetKey: string | MouseEvent, action: string) => {if (action === 'add') {removeAll();} else {remove(targetKey as string);}
};
</script>
<style scoped>
::v-deep .ant-tabs-nav-list .ant-tabs-nav-add span {transform: rotate(-45deg);
}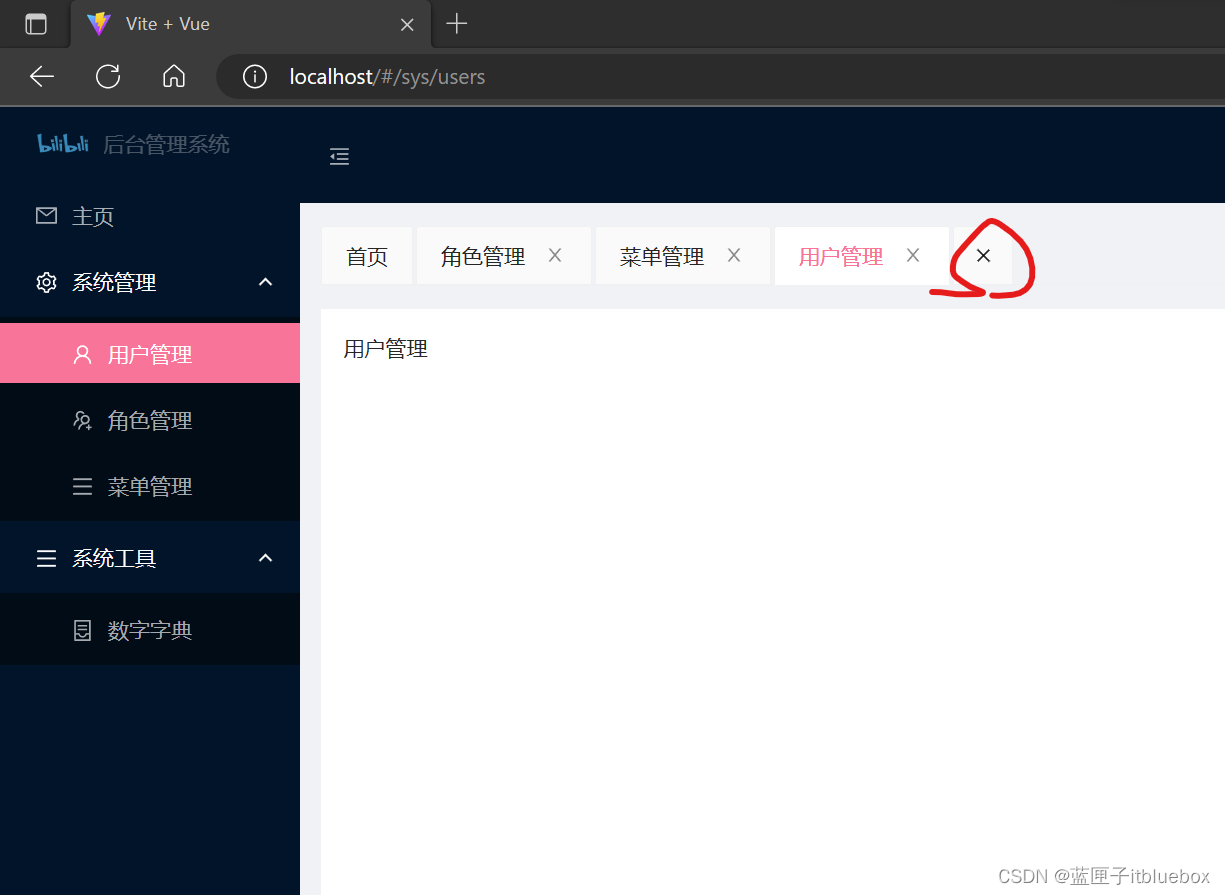
</style>- 我们发现重复点击会重复的添加到上面,现在设置重复点击不会出现重复的信息
addTab(tab:any) {let index = this.editableTabs.findIndex(e => e.title === tab.title )if(index === -1){this.editableTabs.push({title: tab.title,content: tab.path,key: tab.key,closable: true,});}this.editableTabsValue = tab.key;},
多次点击以后不会出现
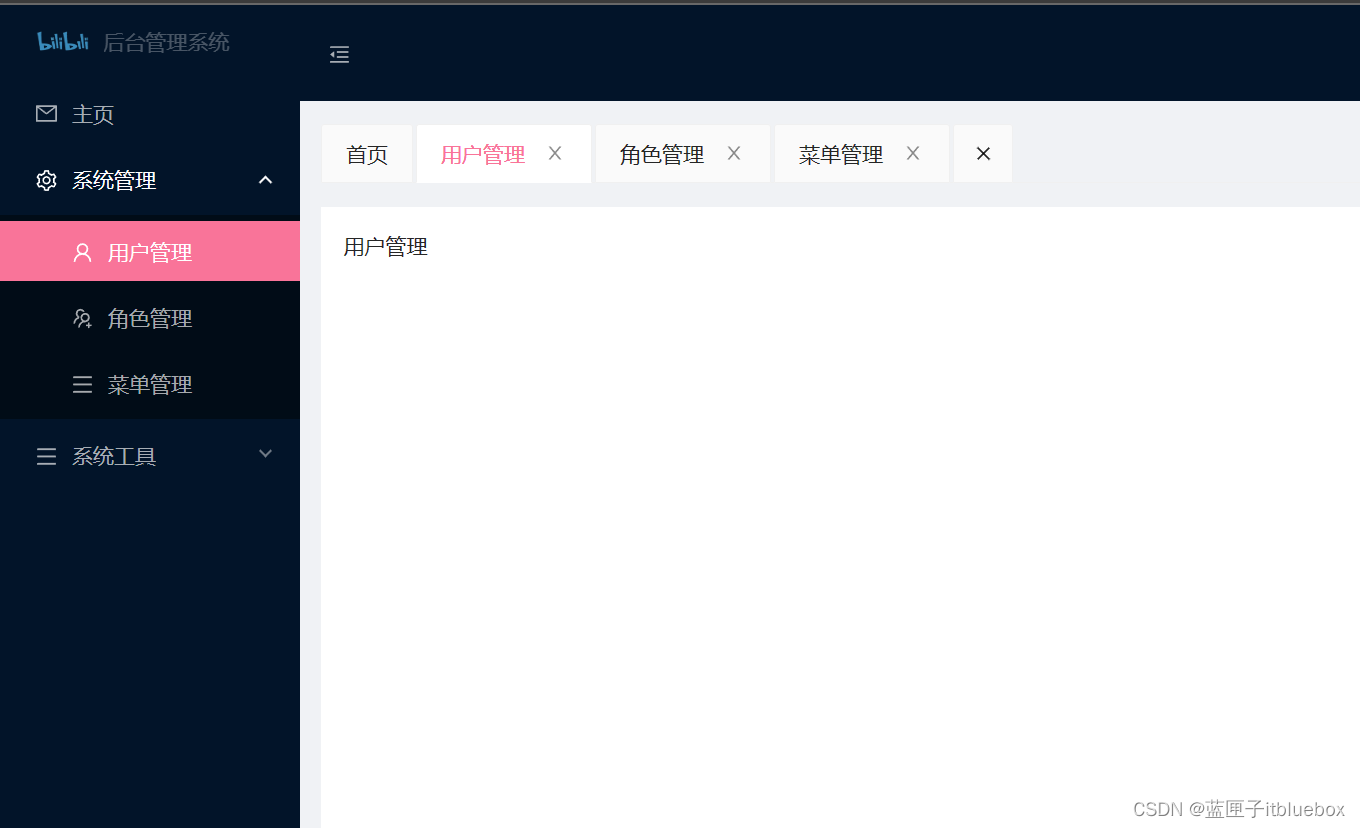
- 设置点击tab进行内容的切换
<a-tabs v-model:activeKey="editableTabsValue" type="editable-card" @edit="onEdit" @tabClick="onTabClick"><a-tab-pane v-for="pane in editableTabs" :key="pane.key" :tab="pane.title" :closable="pane.closable"></a-tab-pane>
</a-tabs>
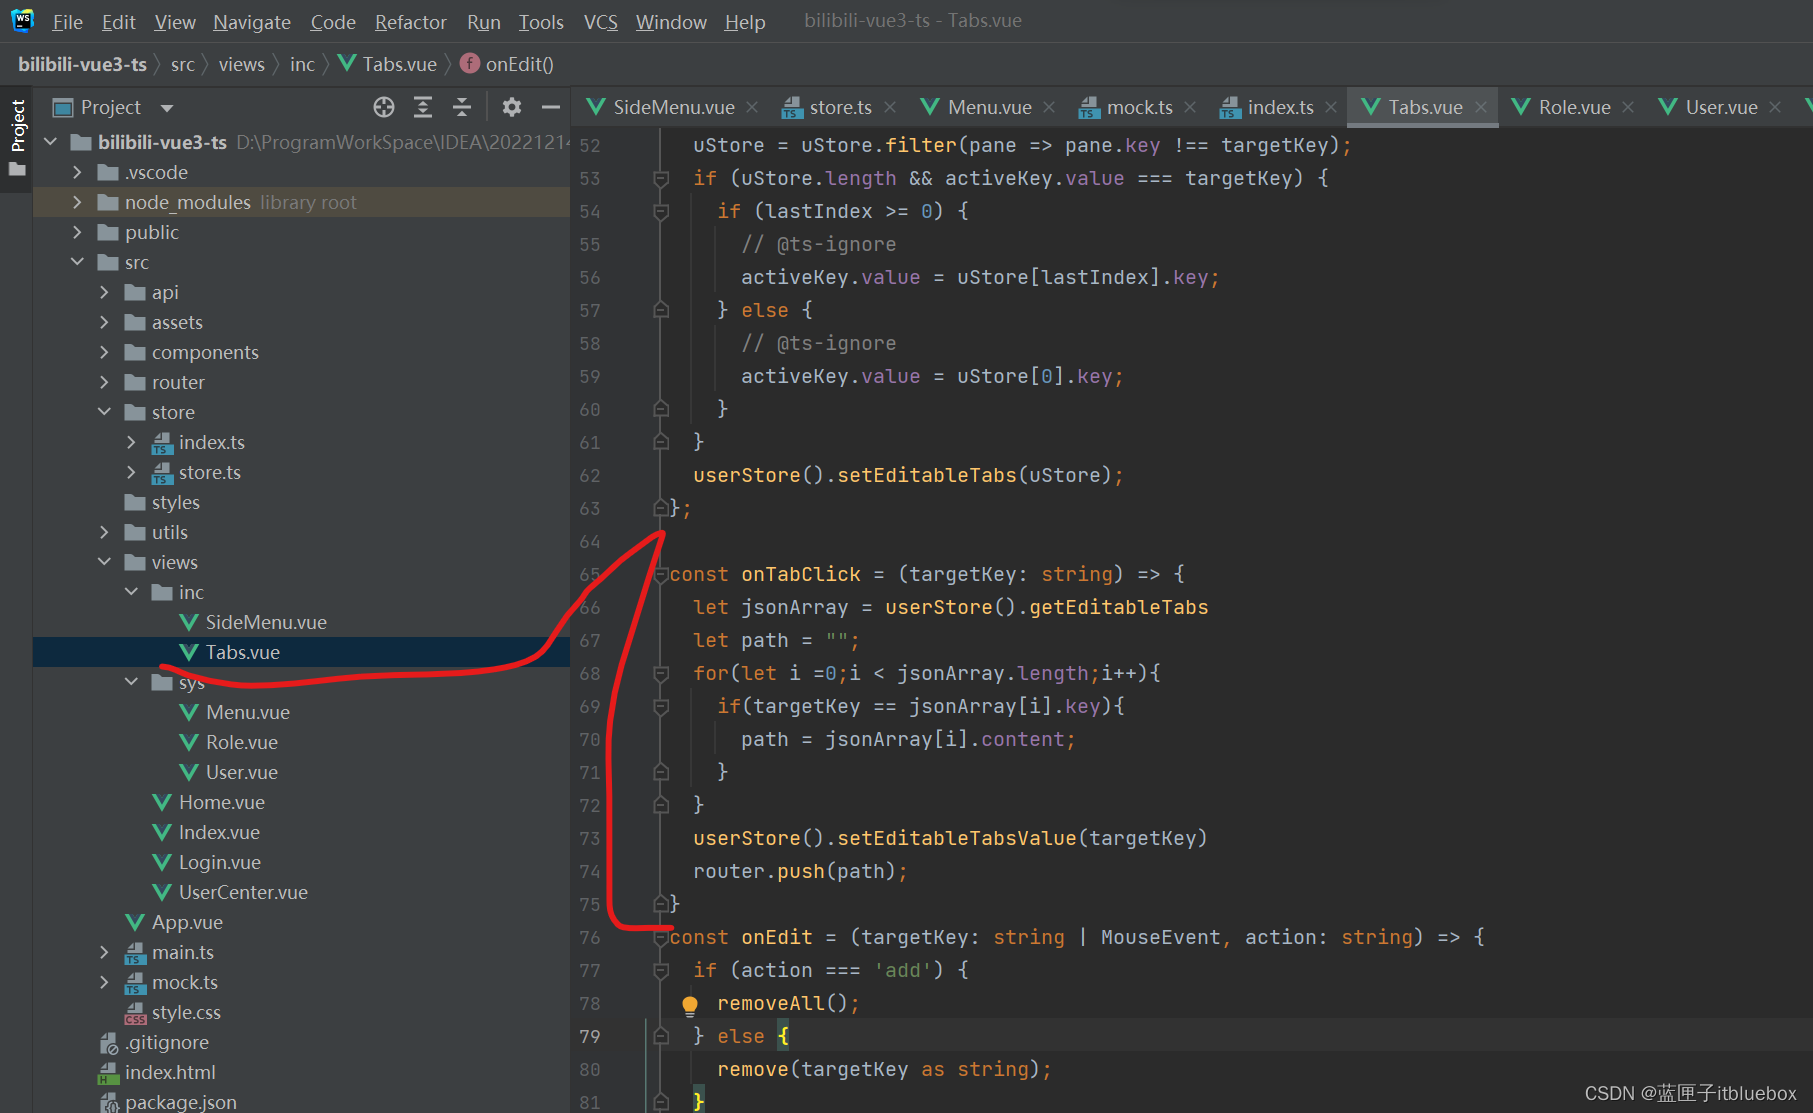
const onTabClick = (targetKey: string) => {let jsonArray = userStore().getEditableTabslet path = "";for(let i =0;i < jsonArray.length;i++){if(targetKey == jsonArray[i].key){path = jsonArray[i].content;}}userStore().setEditableTabsValue(targetKey)router.push(path);
}
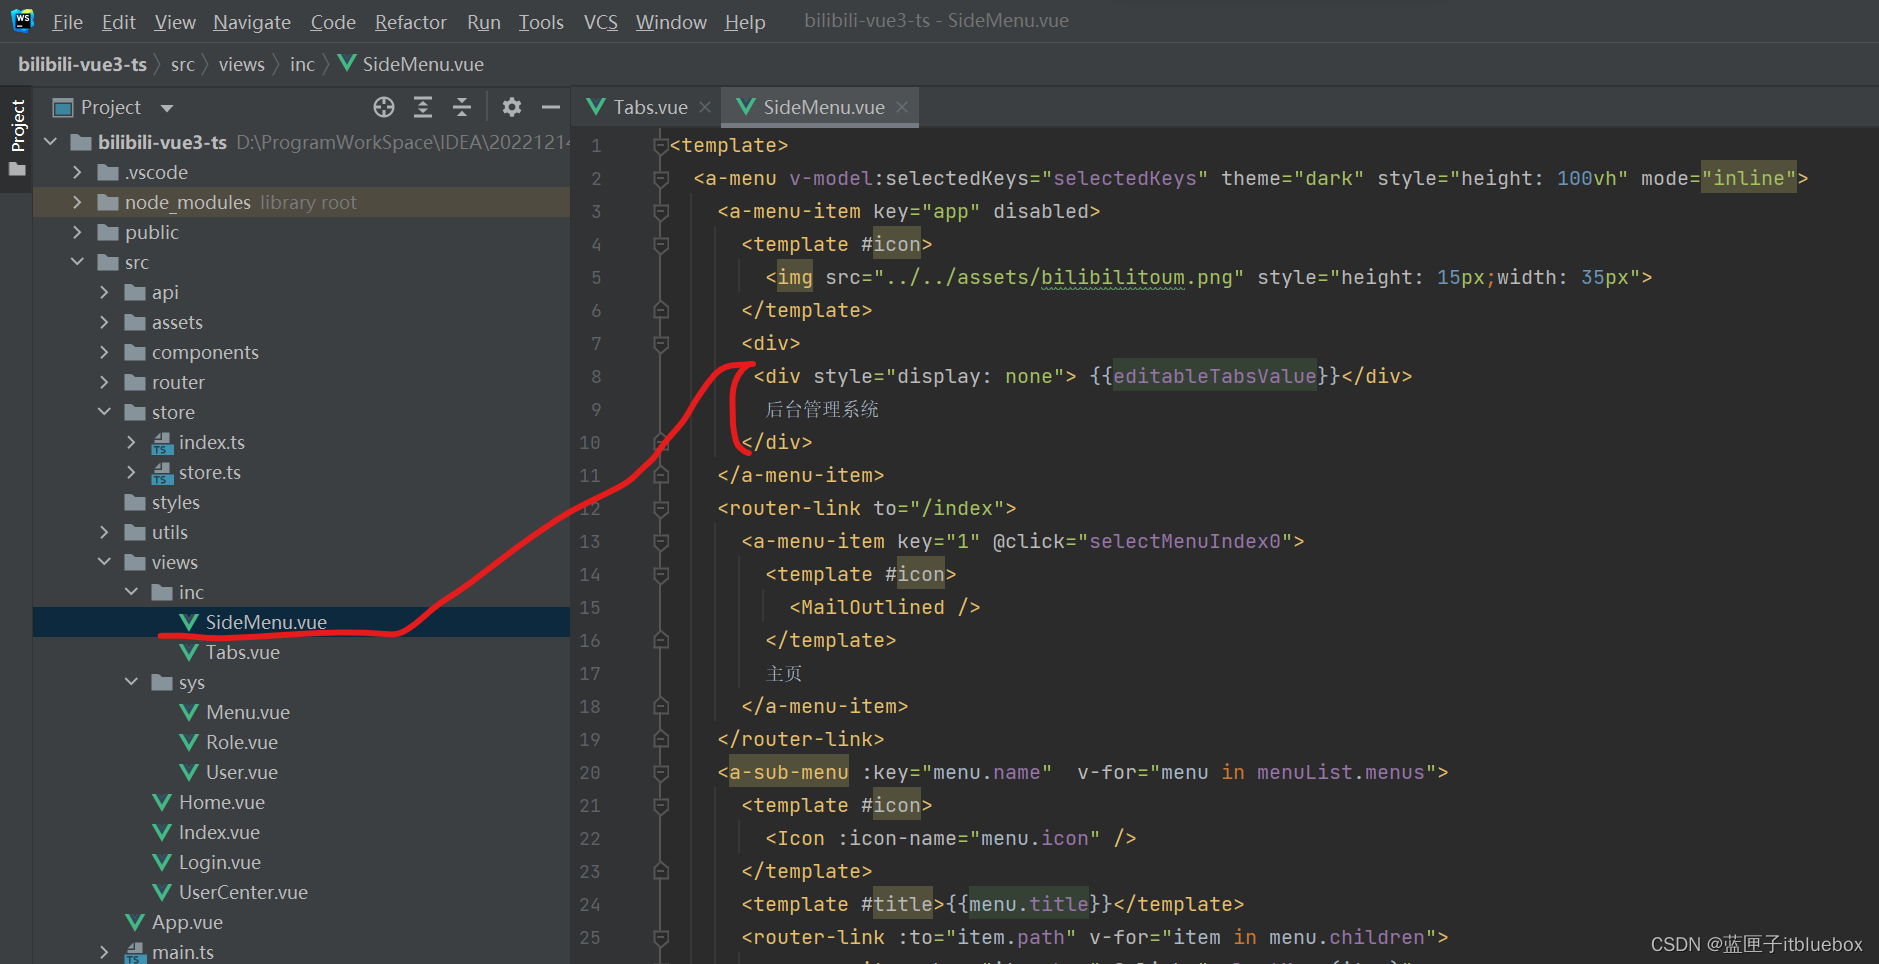
<div style="display: none"> {{editableTabsValue}}</div>后台管理系统</div>
let editableTabsValue = computed({get(){let key = userStore().getEditableTabsValue;selectedKeys.value.length = 0;selectedKeys.value.push(key)return key;},set(val:any){userStore().setMenuList(val);}
});
完善清除功能
const removeAll = () => {activeKey.value = `newTab${++newTabIndex.value}`;userStore().setEditableTabsIndexClearALL()userStore().setEditableTabsValue("1")router.push("/index");
};
设置通过ip路径访问的时候,设置对应tabs和menu
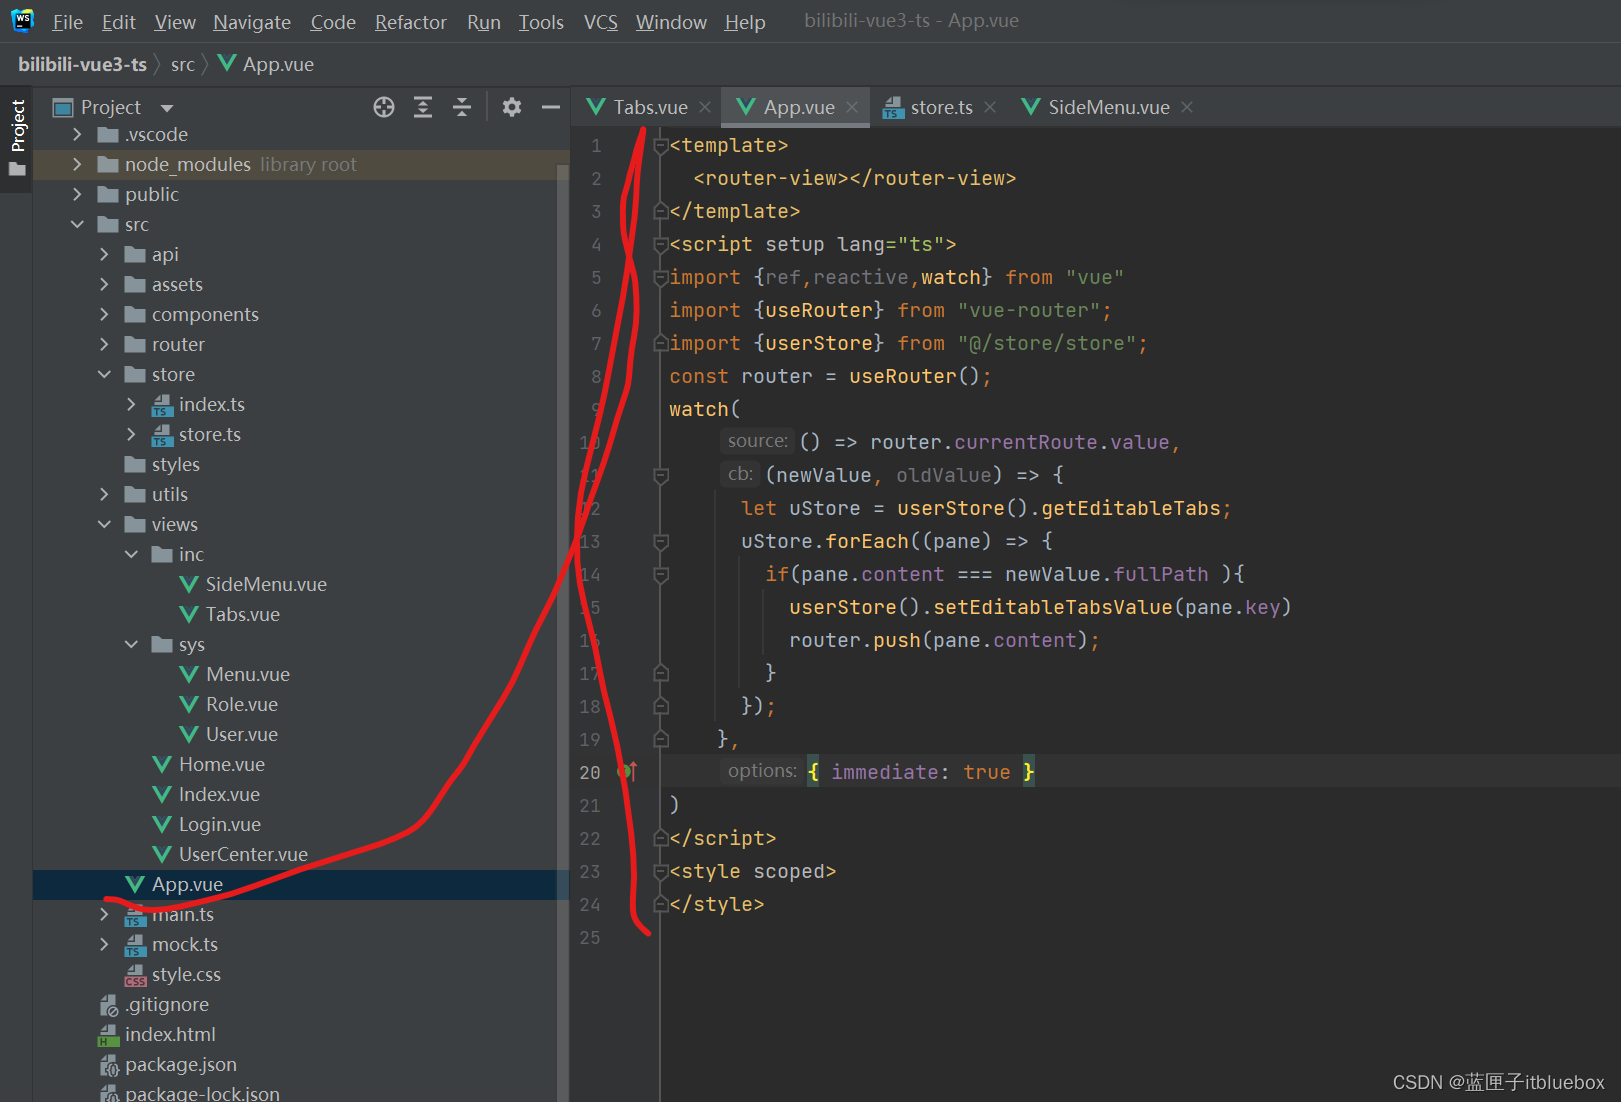
<template><router-view></router-view>
</template>
<script setup lang="ts">
import {ref,reactive,watch} from "vue"
import {useRouter} from "vue-router";
import {userStore} from "@/store/store";
const router = useRouter();
watch(() => router.currentRoute.value,(newValue, oldValue) => {let uStore = userStore().getEditableTabs;uStore.forEach((pane) => {if(pane.content === newValue.fullPath ){userStore().setEditableTabsValue(pane.key)router.push(pane.content);}});},{ immediate: true }
)
</script>
<style scoped>
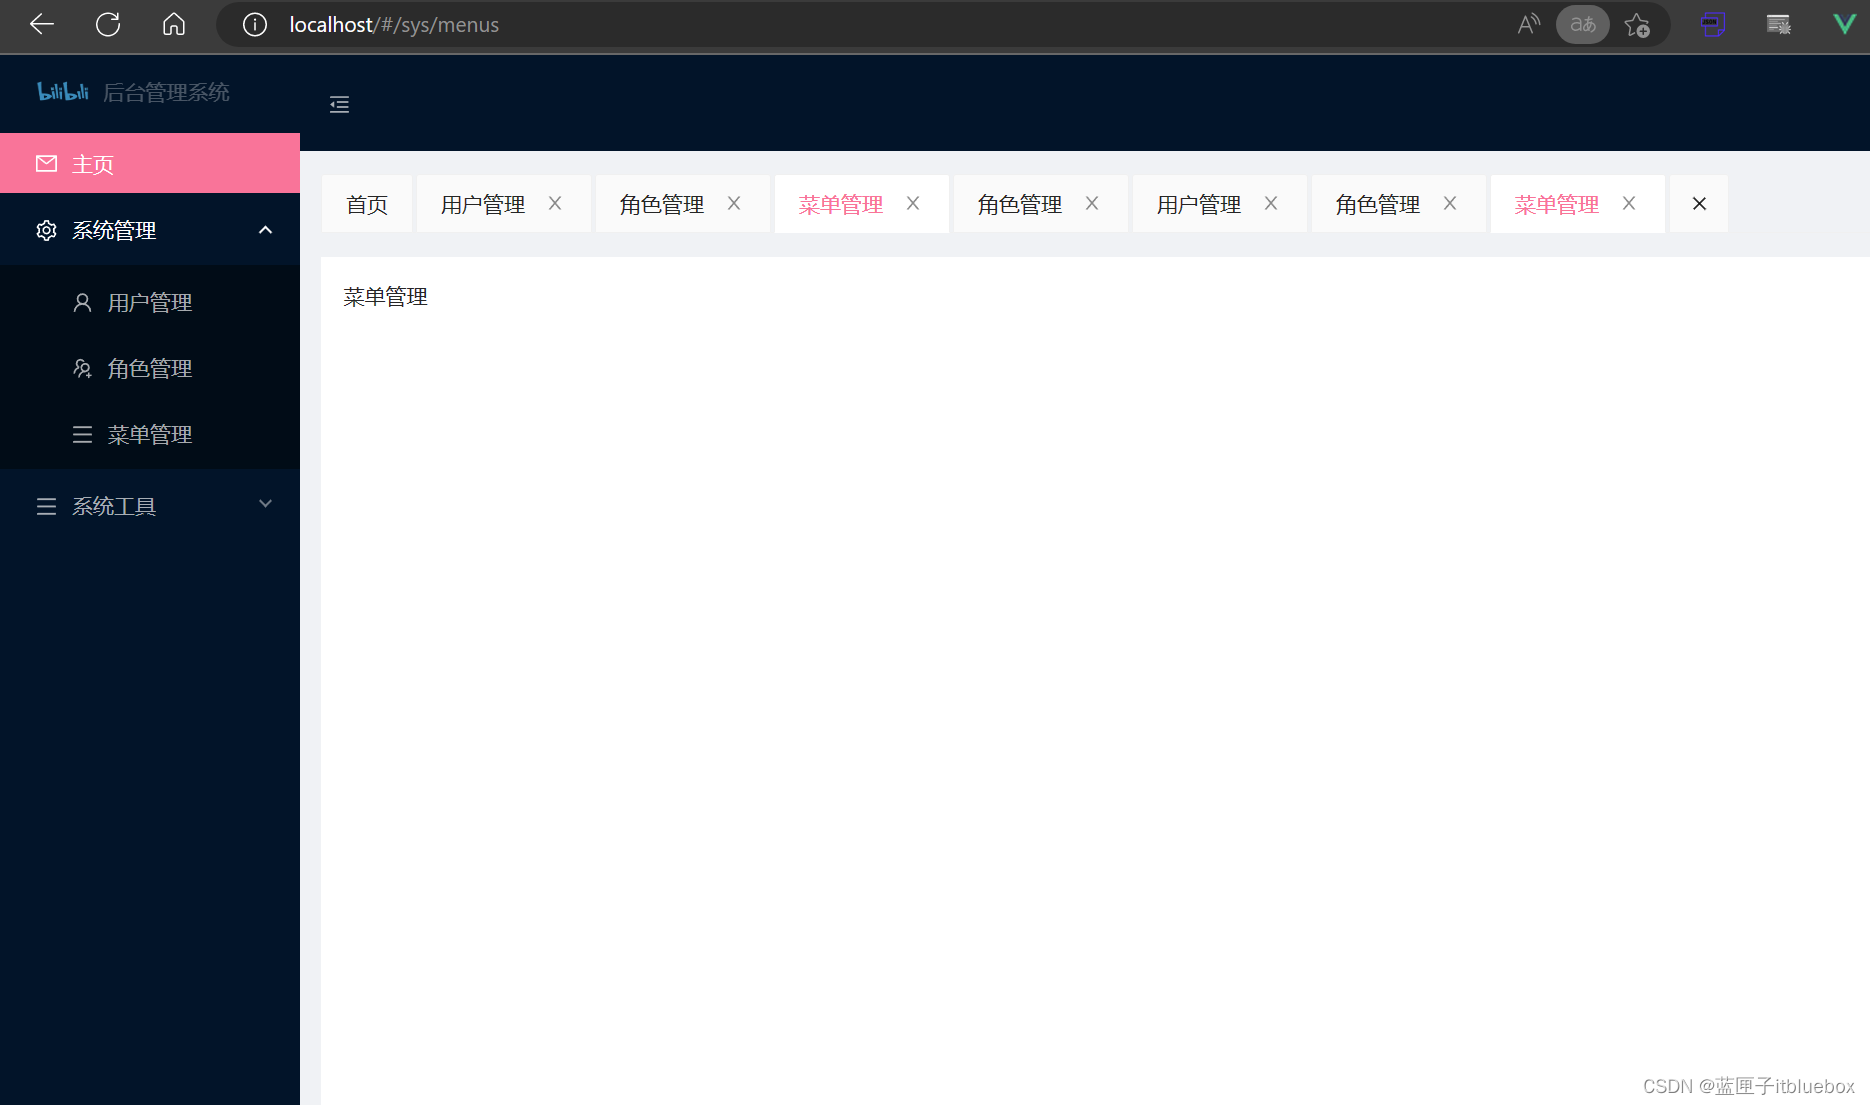
</style>访问:http://localhost/#/sys/menus

设置退出登录后清除tab
<a-menu-item key="setting:2" @click.native="logOut">退出</a-menu-item>
const logOut = () => {logout().then(response => {user.resetState()user.setEditableTabsIndexClearALL()user.setEditableTabsIndex0()localStorage.clear();sessionStorage.clear();router.push("/login");});
}
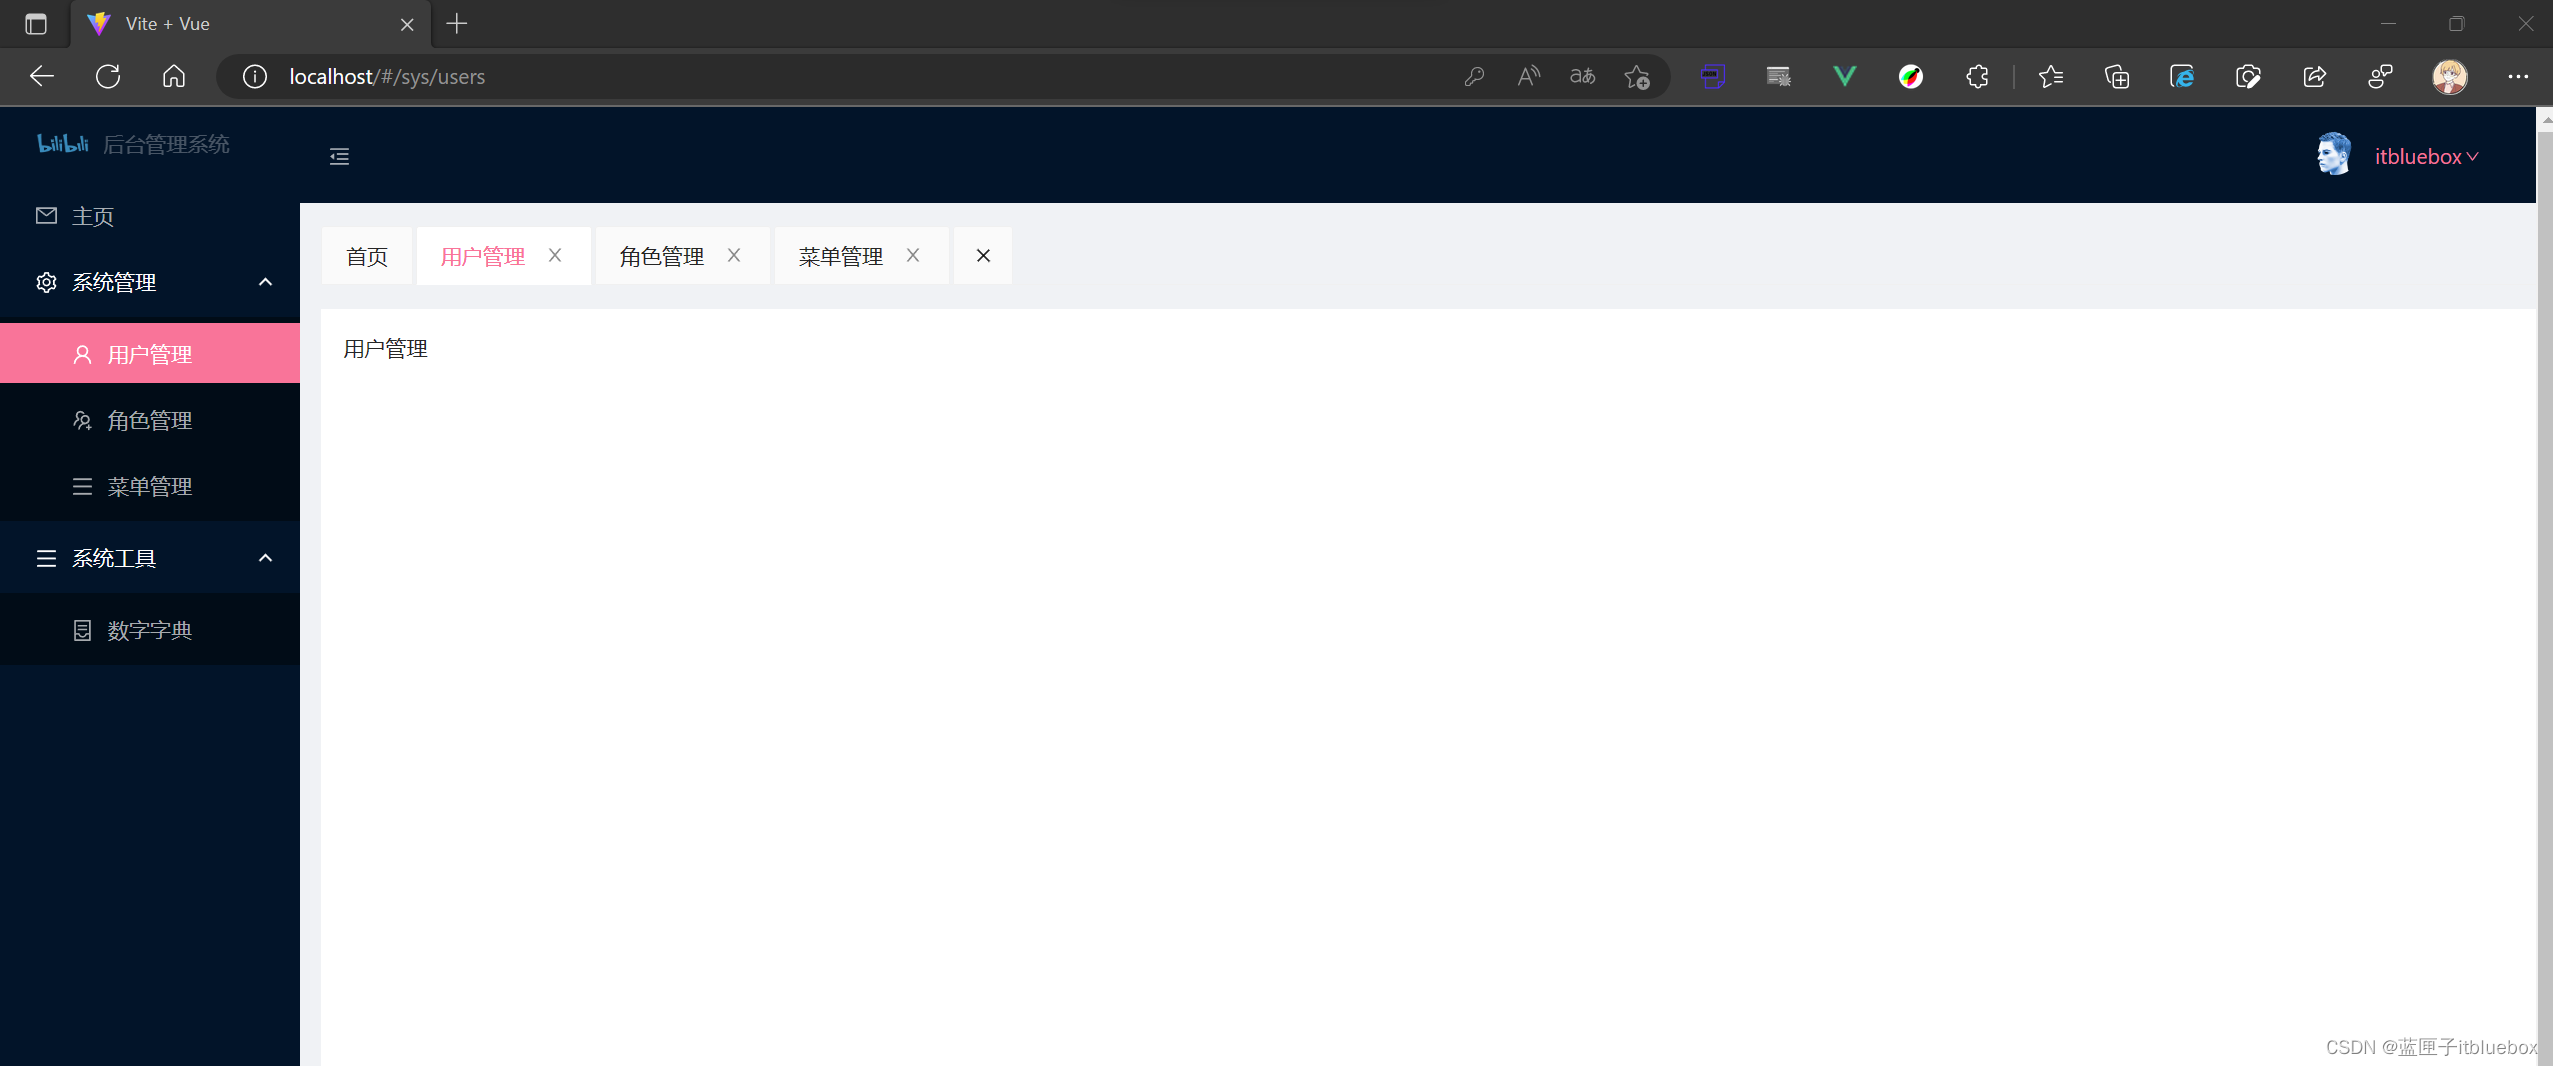
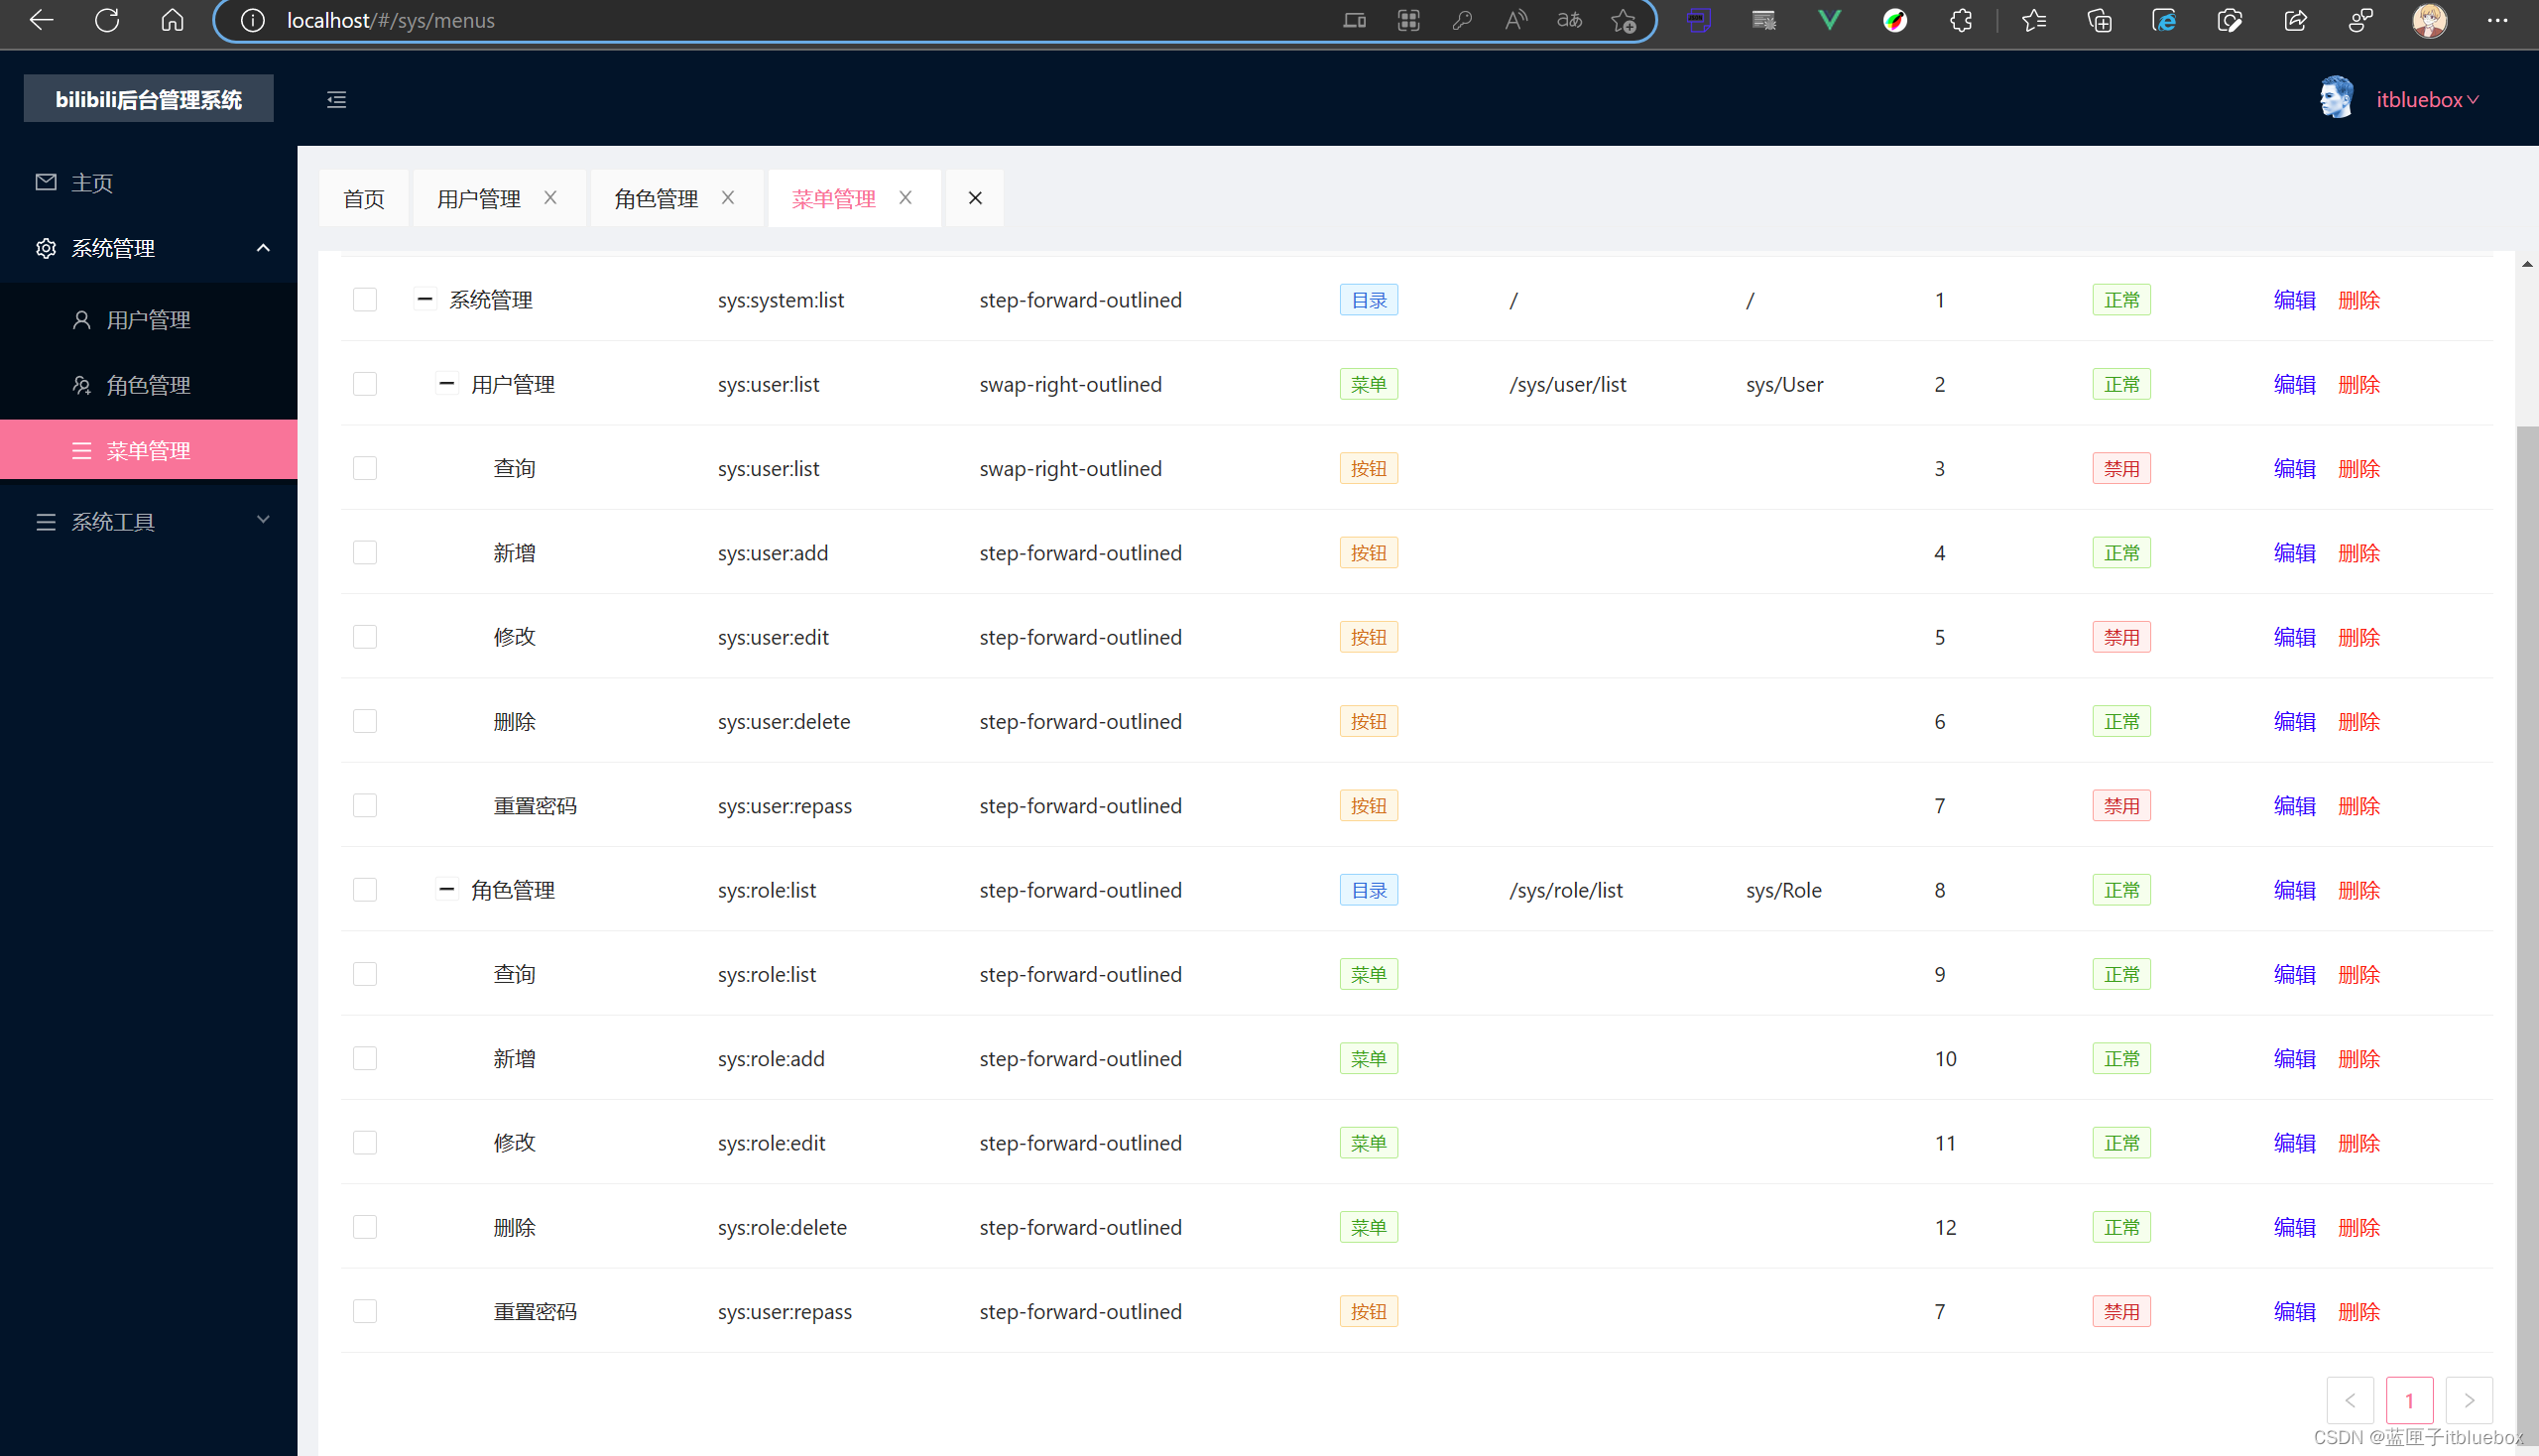
(四)菜单管理界面开发
1、在Menu当中设置表格样式
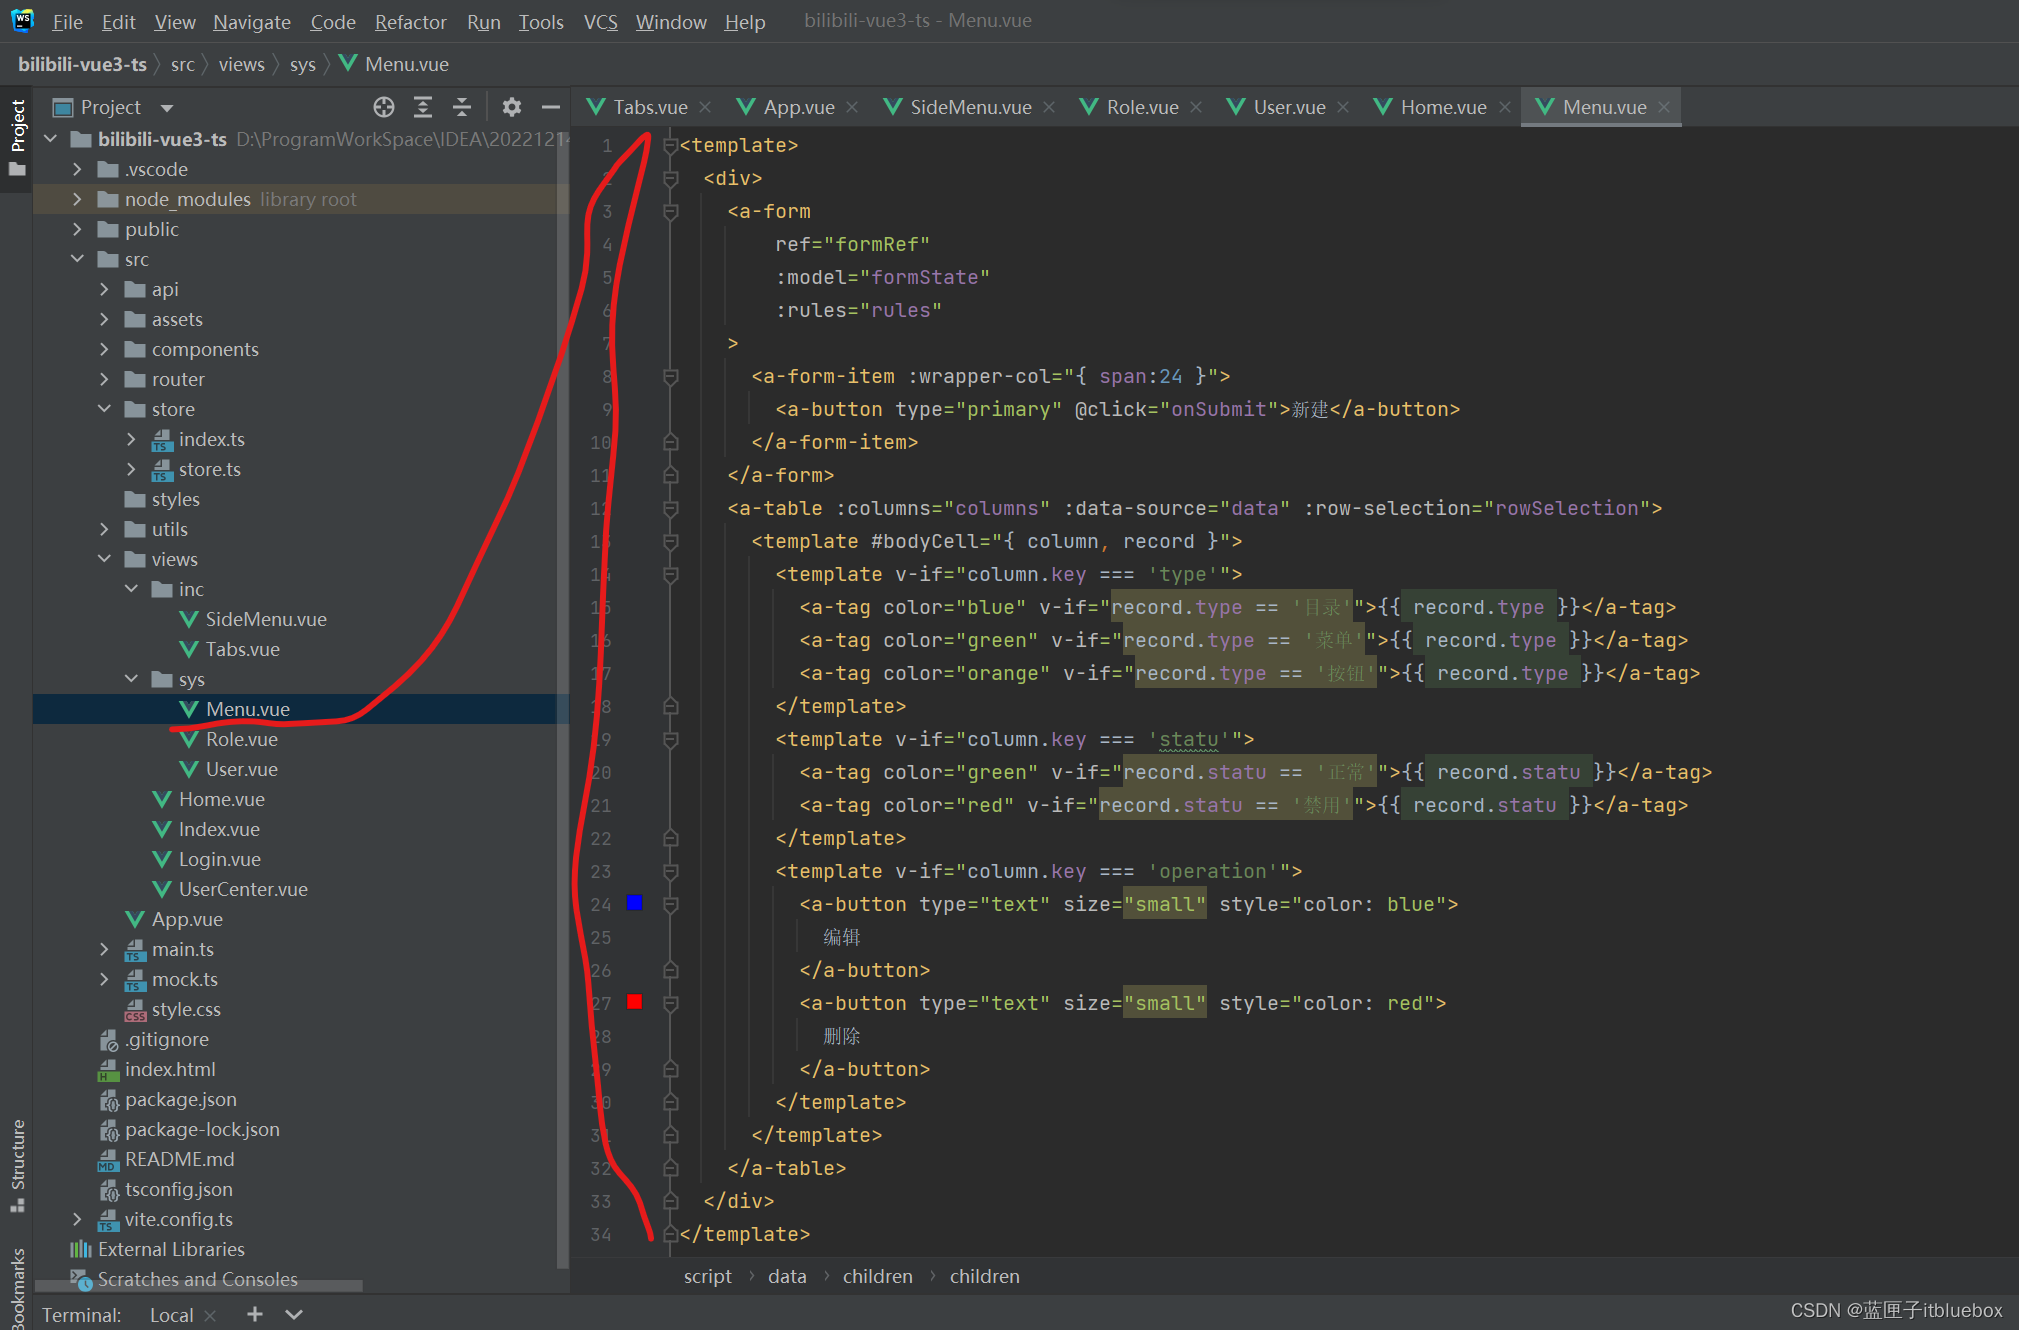
<template><div><a-formref="formRef":model="formState":rules="rules"><a-form-item :wrapper-col="{ span:24 }"><a-button type="primary" @click="onSubmit">新建</a-button></a-form-item></a-form><a-table :columns="columns" :data-source="data" :row-selection="rowSelection"><template #bodyCell="{ column, record }"><template v-if="column.key === 'type'"><a-tag color="blue" v-if="record.type == '目录'">{{ record.type }}</a-tag><a-tag color="green" v-if="record.type == '菜单'">{{ record.type }}</a-tag><a-tag color="orange" v-if="record.type == '按钮'">{{ record.type }}</a-tag></template><template v-if="column.key === 'statu'"><a-tag color="green" v-if="record.statu == '正常'">{{ record.statu }}</a-tag><a-tag color="red" v-if="record.statu == '禁用'">{{ record.statu }}</a-tag></template><template v-if="column.key === 'operation'"><a-button type="text" size="small" style="color: blue">编辑</a-button><a-button type="text" size="small" style="color: red">删除</a-button></template></template></a-table></div>
</template><script name="menu" lang="ts" setup>
import { defineComponent,ref,reactive,toRaw } from 'vue';
import { SearchOutlined } from '@ant-design/icons-vue';
const formRef = ref();
const formState = reactive({name: undefined,sub: { name: undefined },
});
const rules = {parentId: {required: true,message: '请选择上级菜单',},name: {required: true,message: '请输入您的姓名',},perms: {required: true,message: '请输入权限编码',},type: {required: true,message: '请选择类型',},orderNum: {required: true,message: '请填入排序号',},statu: {required: true,message: '请选择状态',},
};
const onSubmit = () => {formRef.value.validate().then(() => {console.log('values', formState, toRaw(formState));}).catch(error => {console.log('error', error);});
};
const resetForm = () => {formRef.value.resetFields();
};
const columns = [{title: '名称',dataIndex: 'name',key: 'name',},{title: '权限编码',dataIndex: 'code',key: 'code',},{title: '图标',dataIndex: 'icon',key: 'icon',},{title: '类型',dataIndex: 'type',key: 'type',},{title: '菜单path',dataIndex: 'path',key: 'path',},{title: '菜单组件',dataIndex: 'component',key: 'component',},{title: '排序号',dataIndex: 'sort',key: 'sort',},{title: '状态',dataIndex: 'statu',key: 'statu',},{title: '操作',dataIndex: 'operation',key: 'operation',},
];interface DataItem {key: number;name: string;code: string;sort: string;icon:string;statu:string;type: string;path: string;component: string;operation: string;children?: DataItem[];
}const data: DataItem[] = [{key: 1,name: '系统管理',code: 'sys:system:list',type: "目录",path: "/",component: "/",sort: '1',icon: 'step-forward-outlined',statu: '正常',operation: '操作',children: [{key: 12,name: '用户管理',code: 'sys:user:list',type: "菜单",path: "/sys/user/list",component: "sys/User",sort: '2',icon: 'swap-right-outlined',statu: '正常',operation: '操作',children: [{key: 121,name: '查询',code: 'sys:user:list',type: "按钮",path: "",component: "",sort: '3',icon: 'swap-right-outlined',statu: '禁用',operation: '操作',},{key: 121,name: '新增',code: 'sys:user:add',type: "按钮",path: "",component: "",sort: '4',icon: 'step-forward-outlined',statu: '正常',operation: '操作',},{key: 121,name: '修改',code: 'sys:user:edit',type: "按钮",path: "",component: "",sort: '5',icon: 'step-forward-outlined',statu: '禁用',operation: '操作',},{key: 121,name: '删除',code: 'sys:user:delete',type: "按钮",path: "",component: "",sort: '6',icon: 'step-forward-outlined',statu: '正常',operation: '操作',},{key: 121,name: '重置密码',code: 'sys:user:repass',type: "按钮",path: "",component: "",sort: '7',icon: 'step-forward-outlined',statu: '禁用',operation: '操作',},],},{key: 122,name: '角色管理',code: 'sys:role:list',type: "目录",path: "/sys/role/list",component: "sys/Role",sort: '8',icon: 'step-forward-outlined',statu: '正常',operation: '操作',children: [{key: 1212,name: '查询',code: 'sys:role:list',type: "菜单",path: "",component: "",sort: '9',icon: 'step-forward-outlined',statu: '正常',operation: '操作',},{key: 1213,name: '新增',code: 'sys:role:add',type: "菜单",path: "",component: "",sort: '10',icon: 'step-forward-outlined',statu: '正常',operation: '操作',},{key: 1214,name: '修改',code: 'sys:role:edit',type: "菜单",path: "",component: "",sort: '11',icon: 'step-forward-outlined',statu: '正常',operation: '操作',},{key: 1215,name: '删除',code: 'sys:role:delete',type: "菜单",path: "",component: "",sort: '12',icon: 'step-forward-outlined',statu: '正常',operation: '操作',},{key: 121,name: '重置密码',code: 'sys:user:repass',type: "按钮",path: "",component: "",sort: '7',icon: 'step-forward-outlined',statu: '禁用',operation: '操作',},],},],},
];const rowSelection = {onChange: (selectedRowKeys: (string | number)[], selectedRows: DataItem[]) => {console.log(`selectedRowKeys: ${selectedRowKeys}`, 'selectedRows: ', selectedRows);},onSelect: (record: DataItem, selected: boolean, selectedRows: DataItem[]) => {console.log(record, selected, selectedRows);},onSelectAll: (selected: boolean, selectedRows: DataItem[], changeRows: DataItem[]) => {console.log(selected, selectedRows, changeRows);},
};</script><style scoped></style>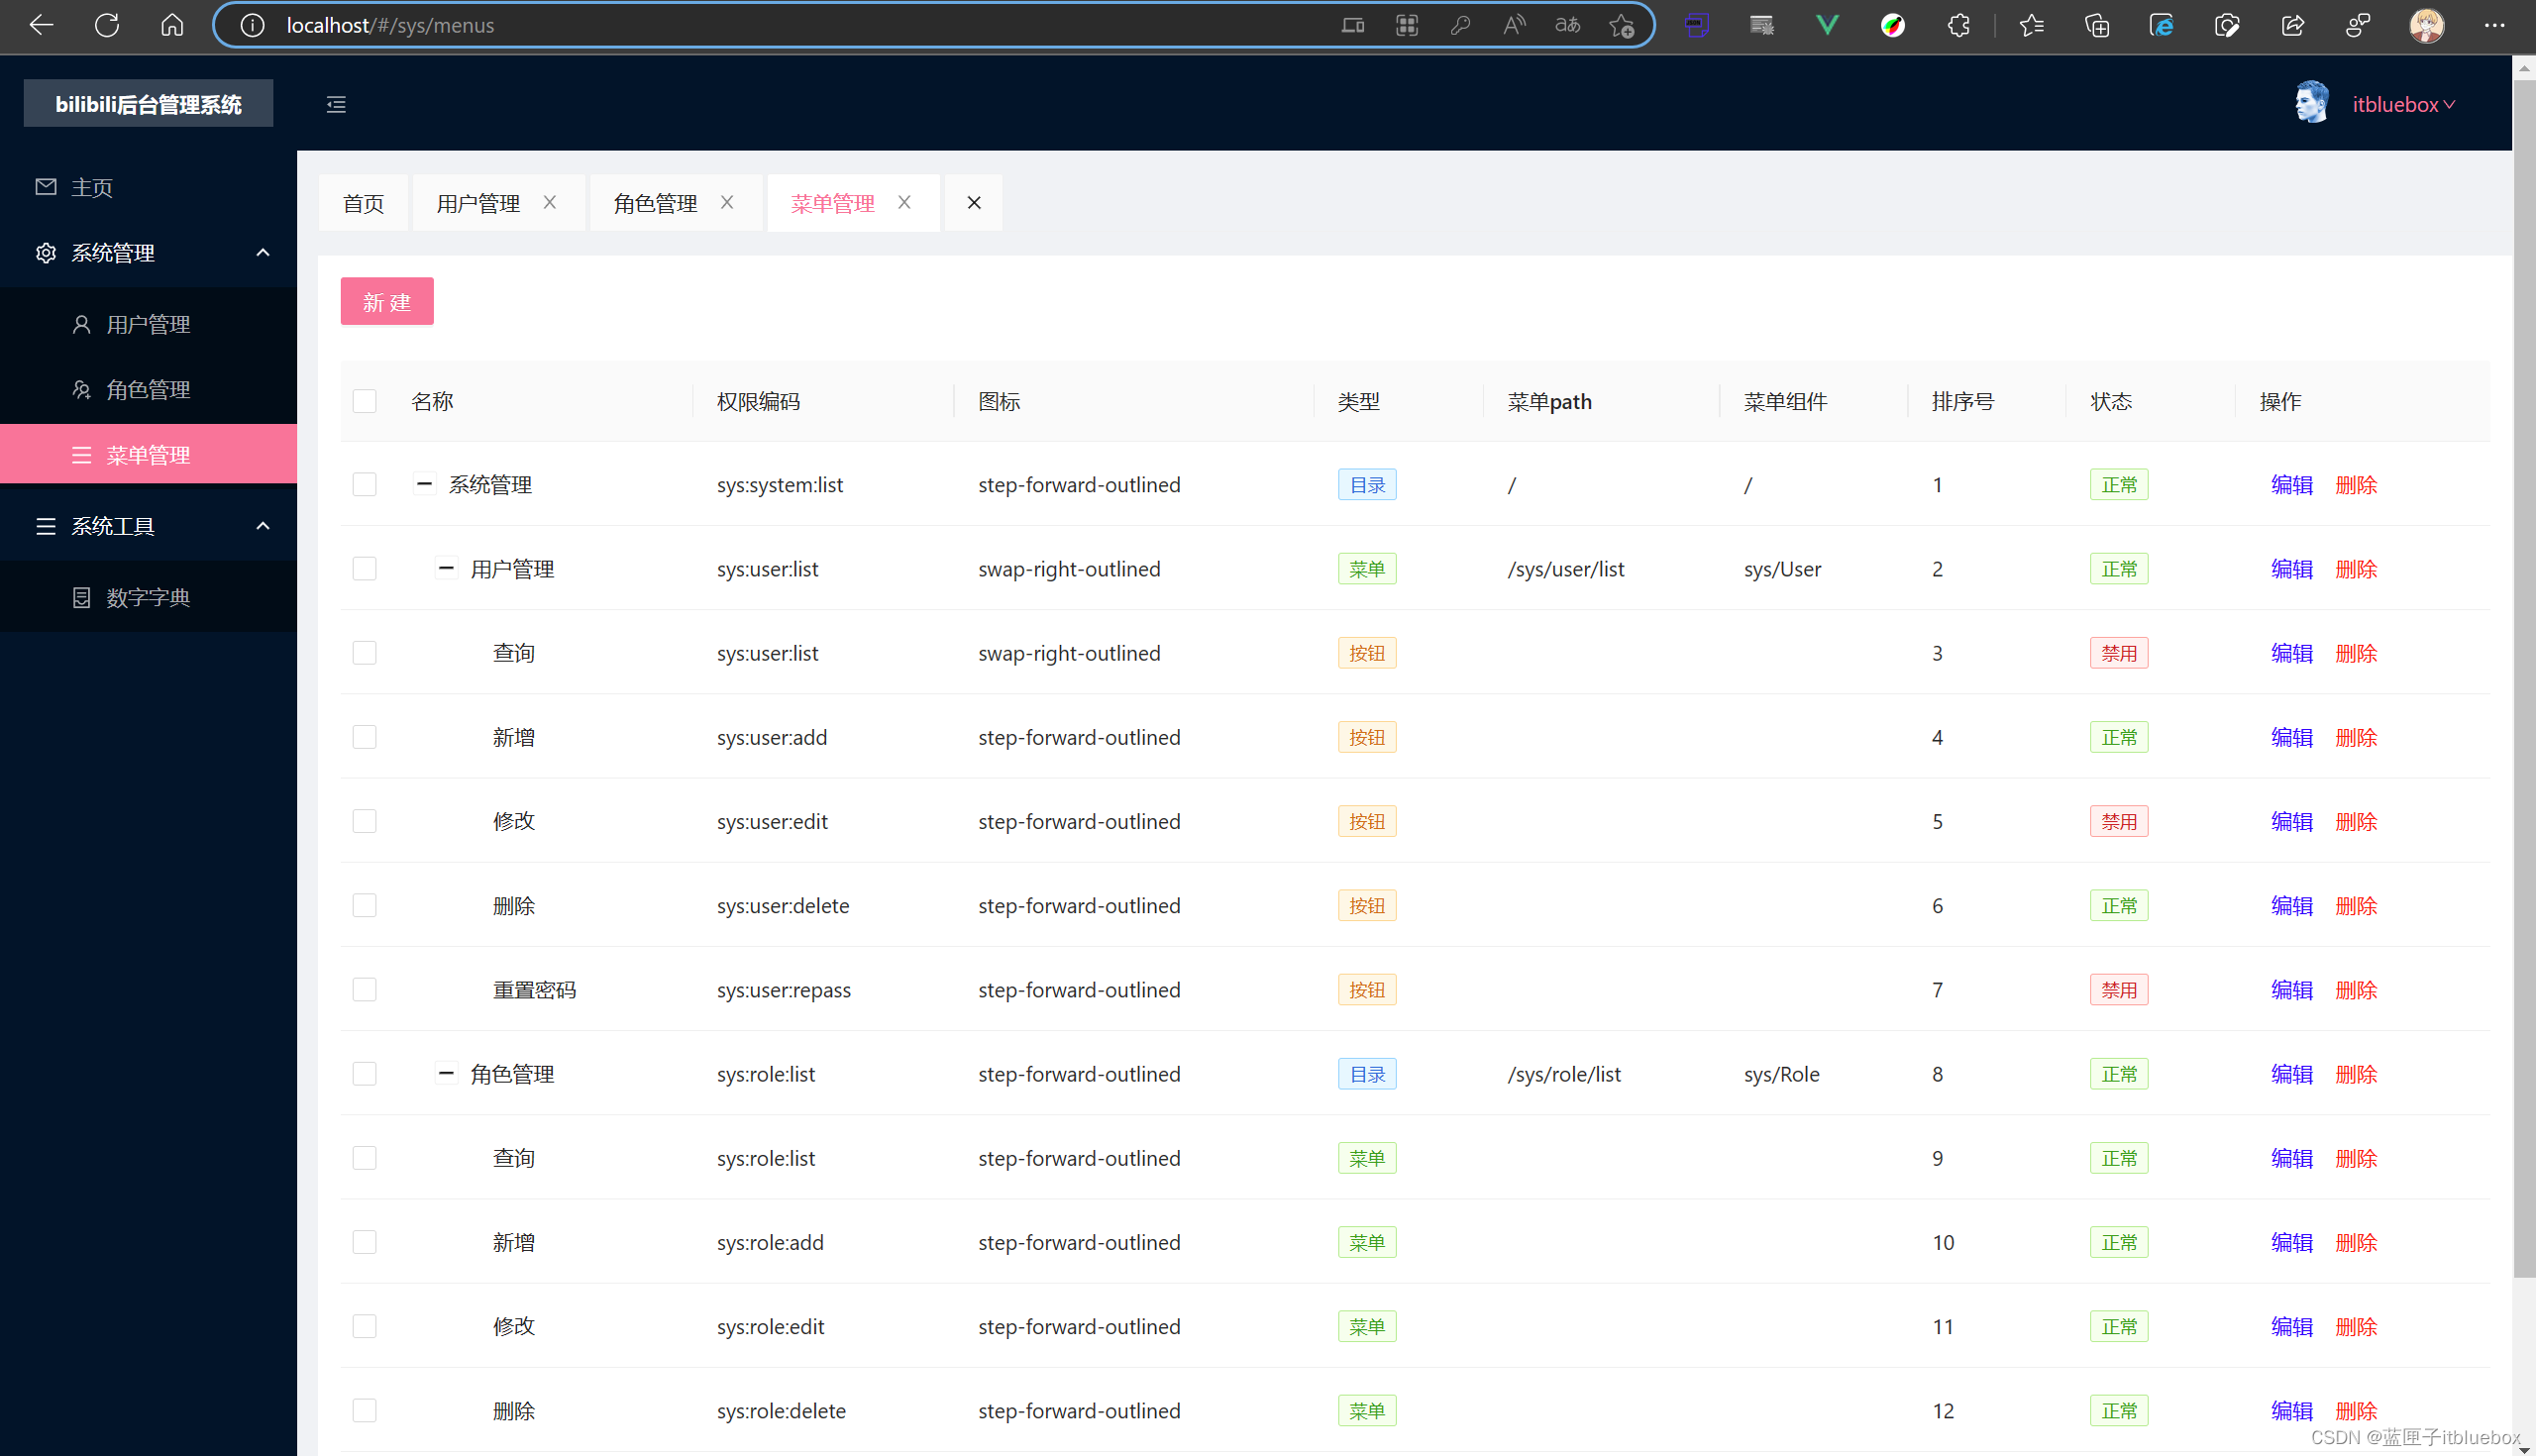
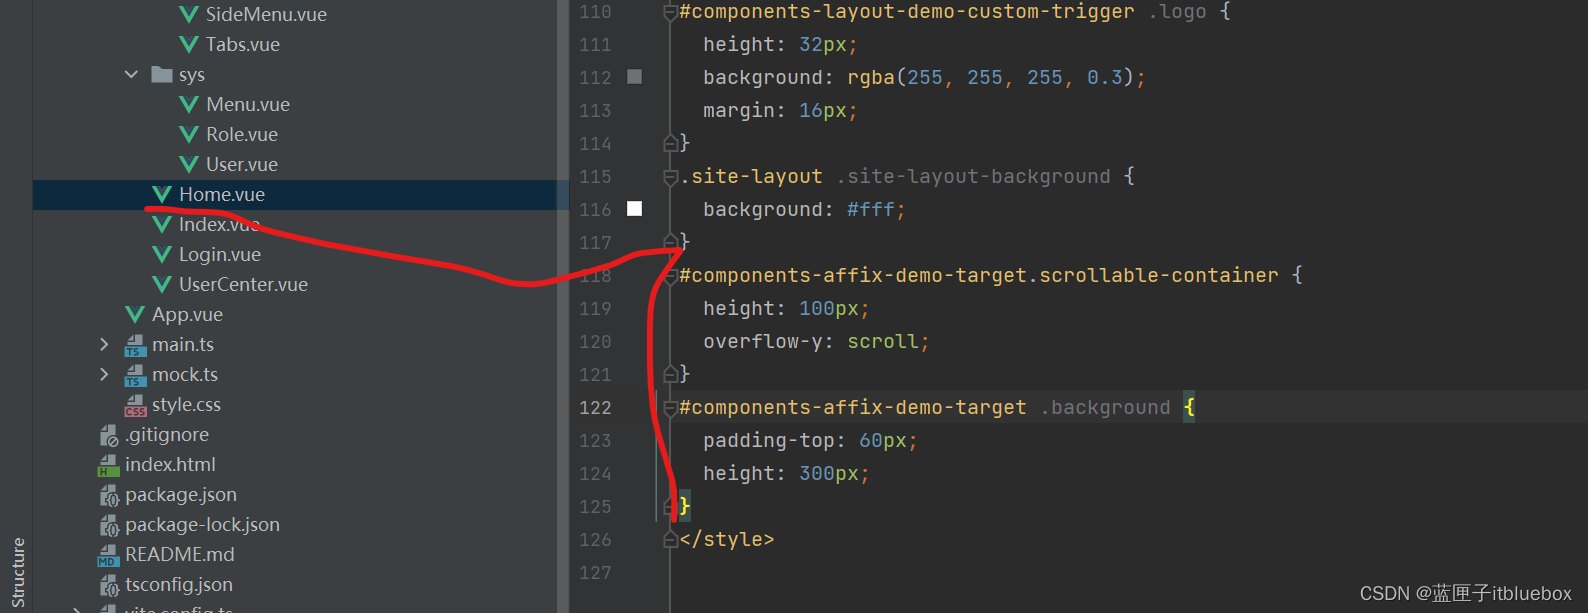
上面当面数据超出页面的时候页面跟着滚动这样不太好我们优化一下,设置侧边栏和头部不懂,设置内容区域滚动
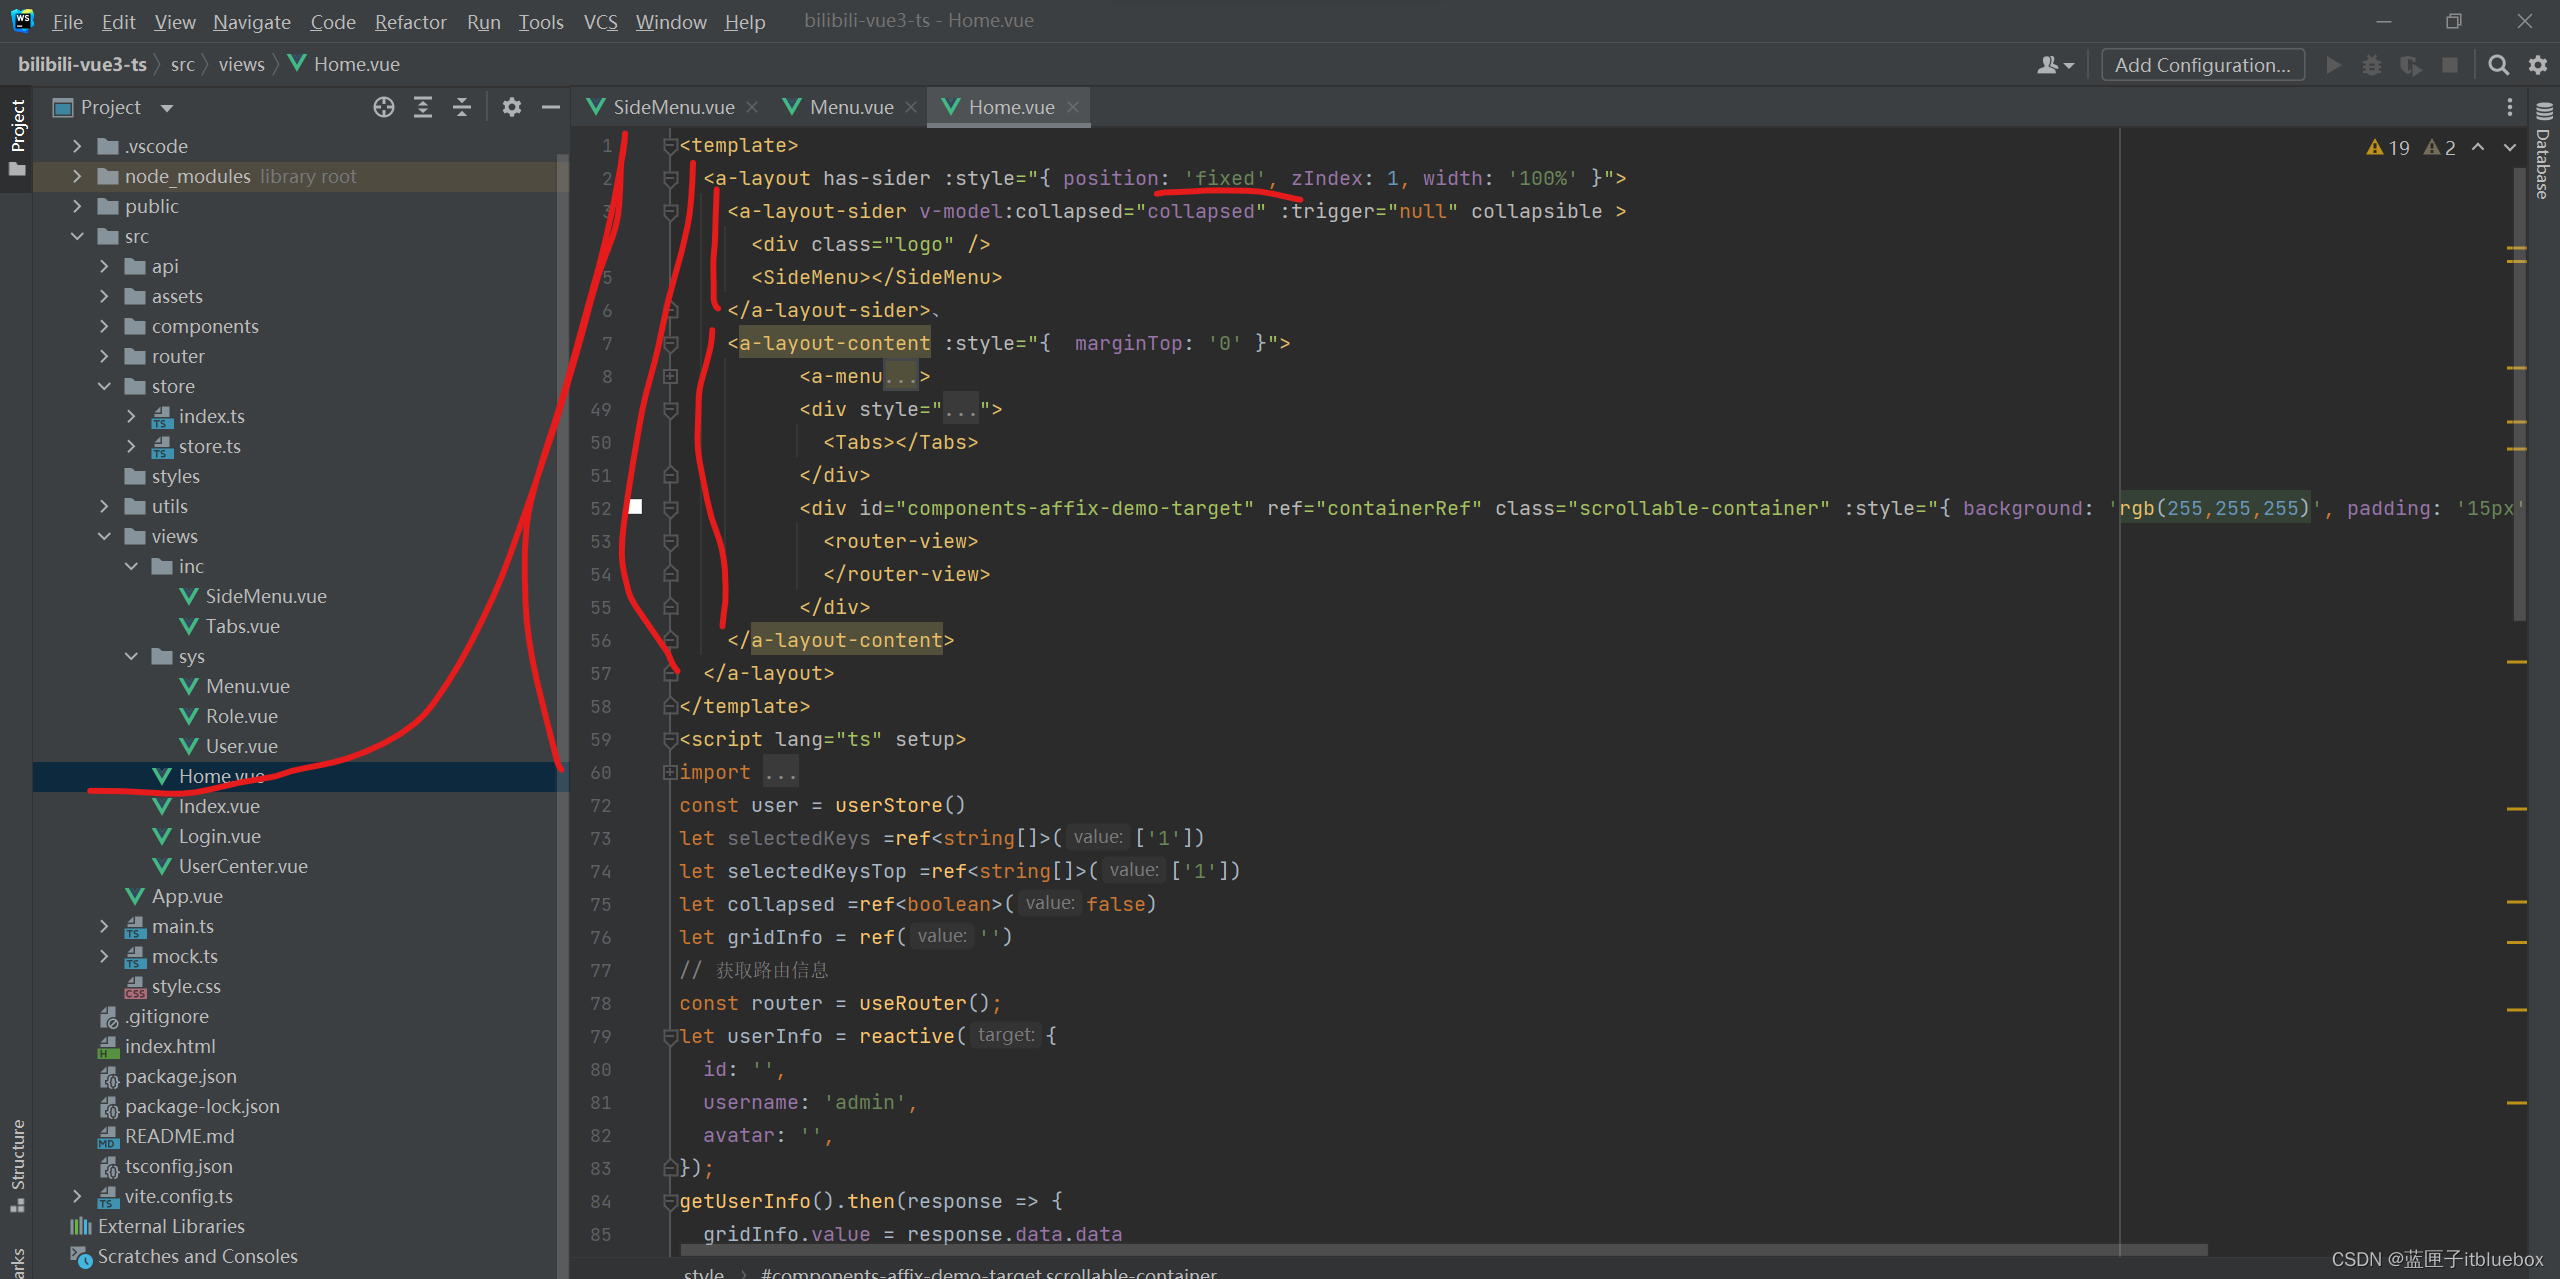
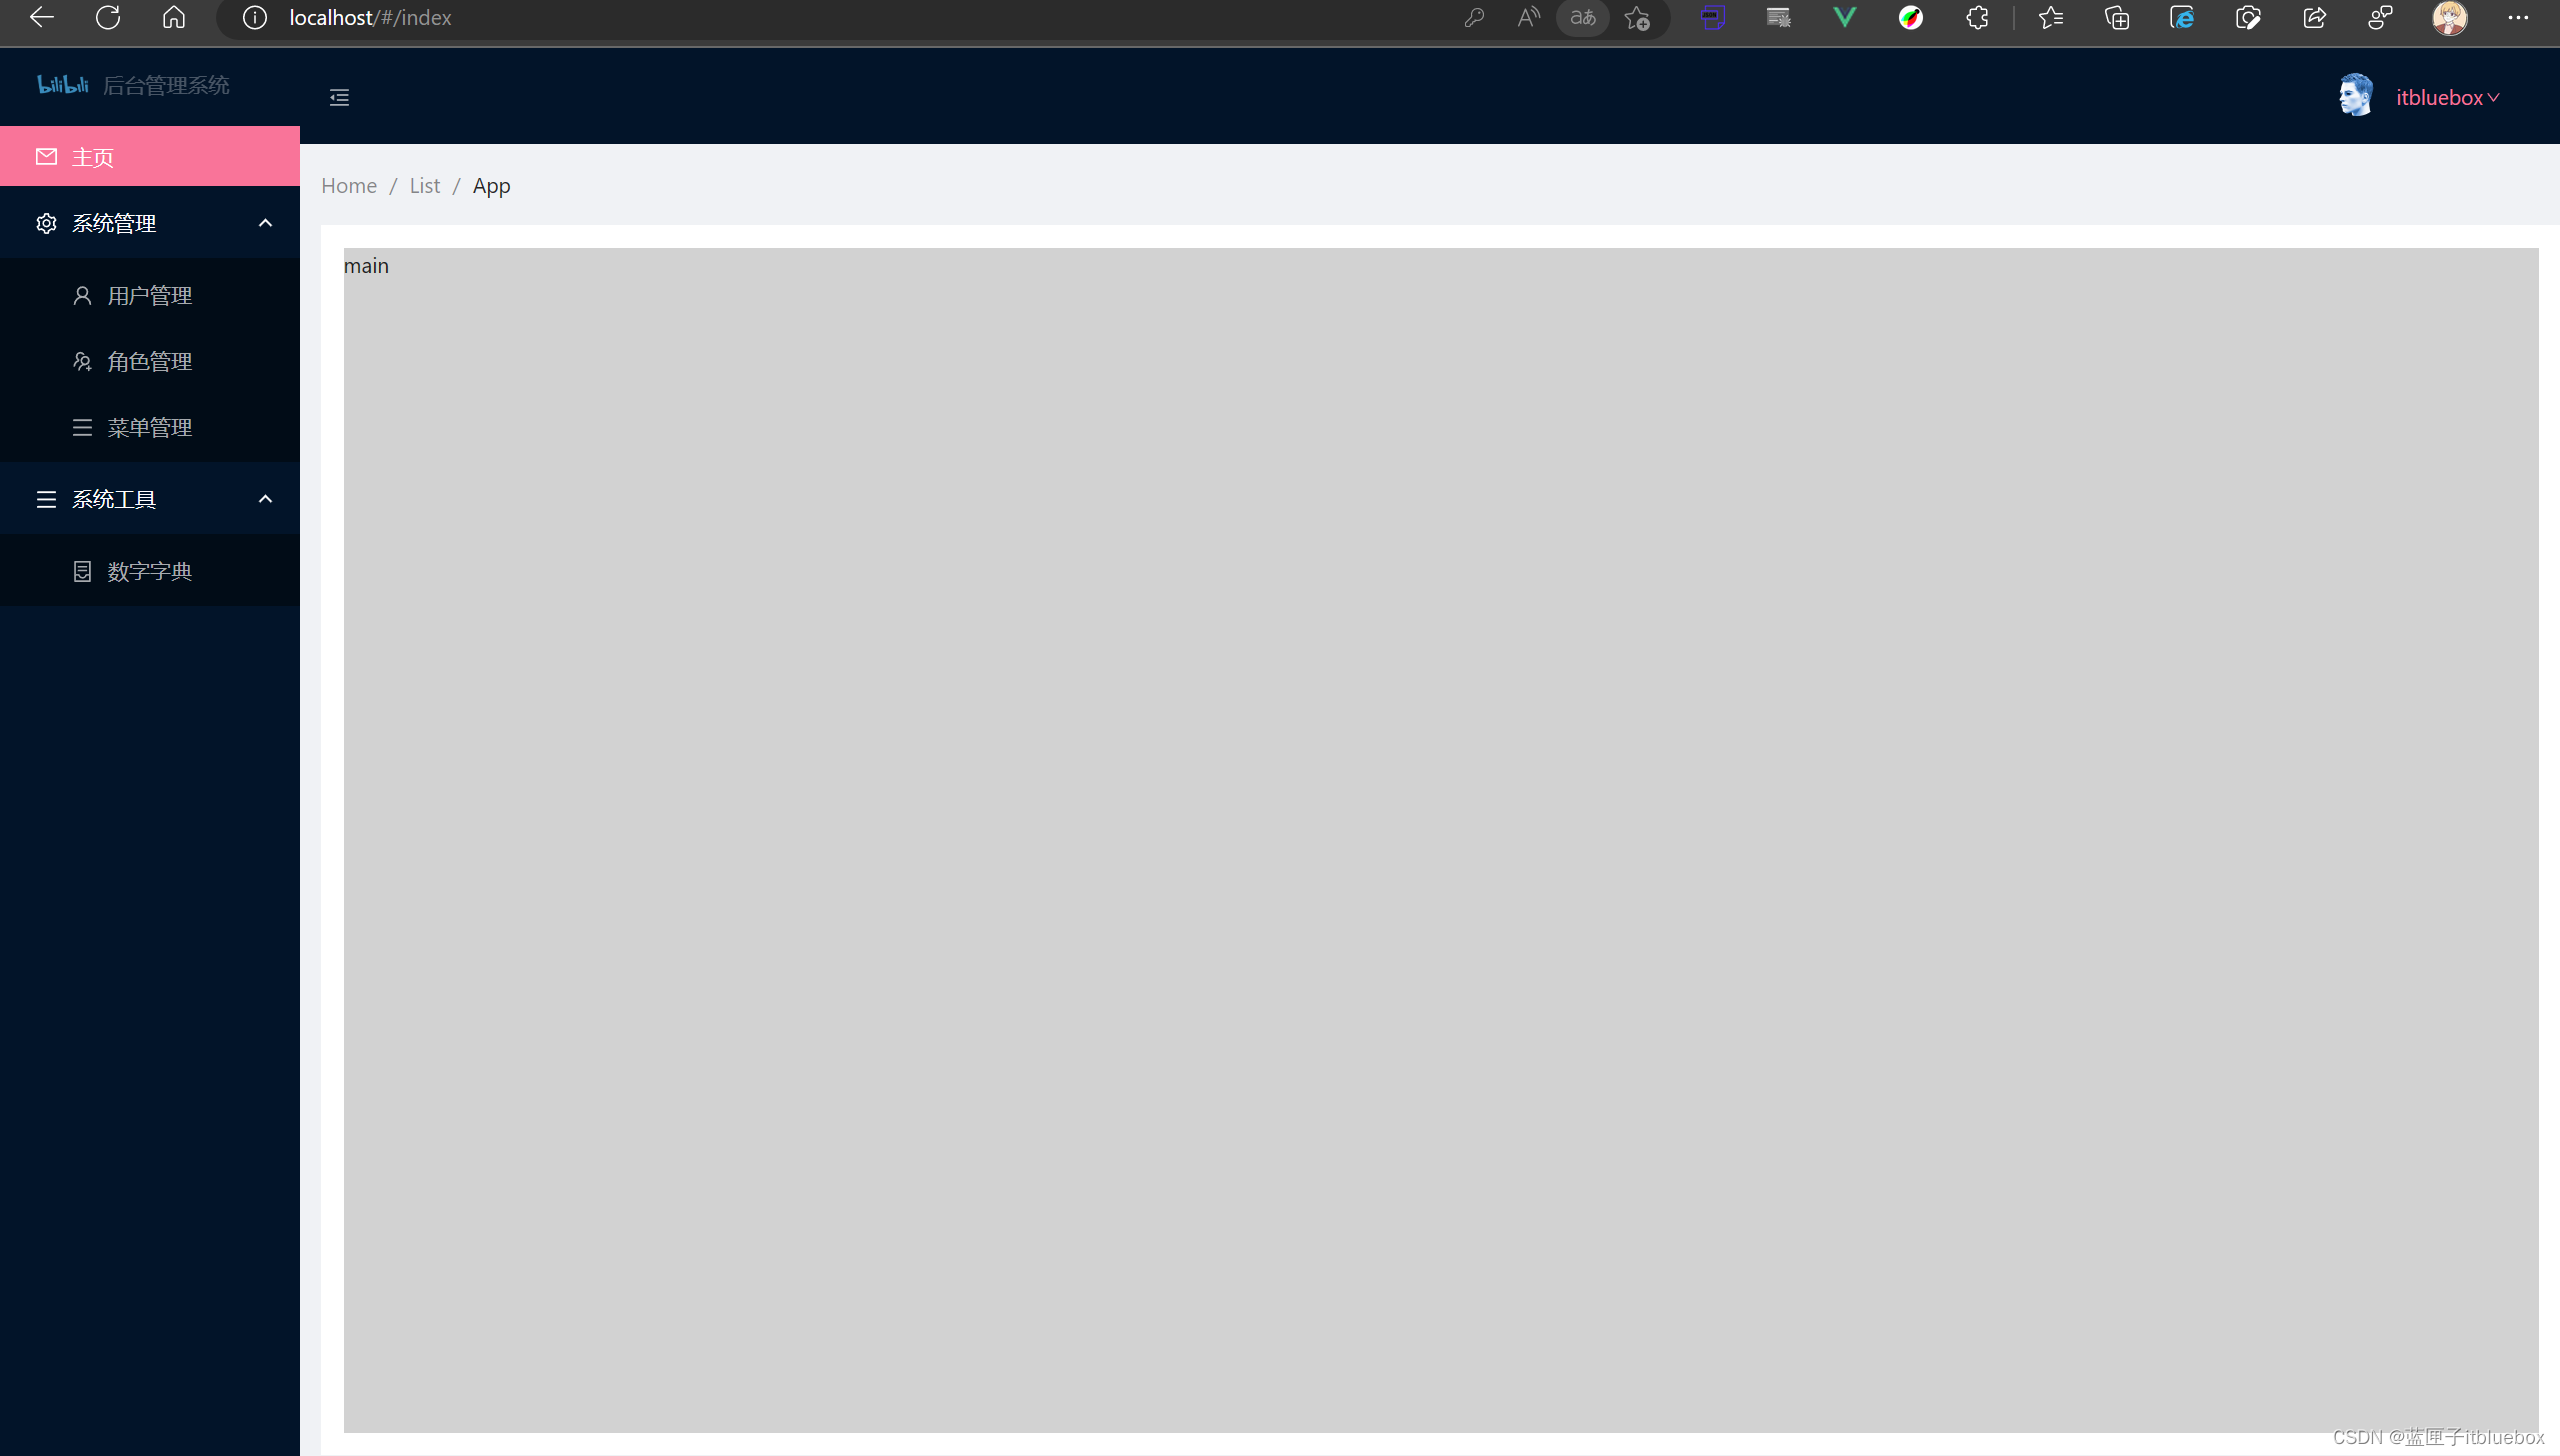
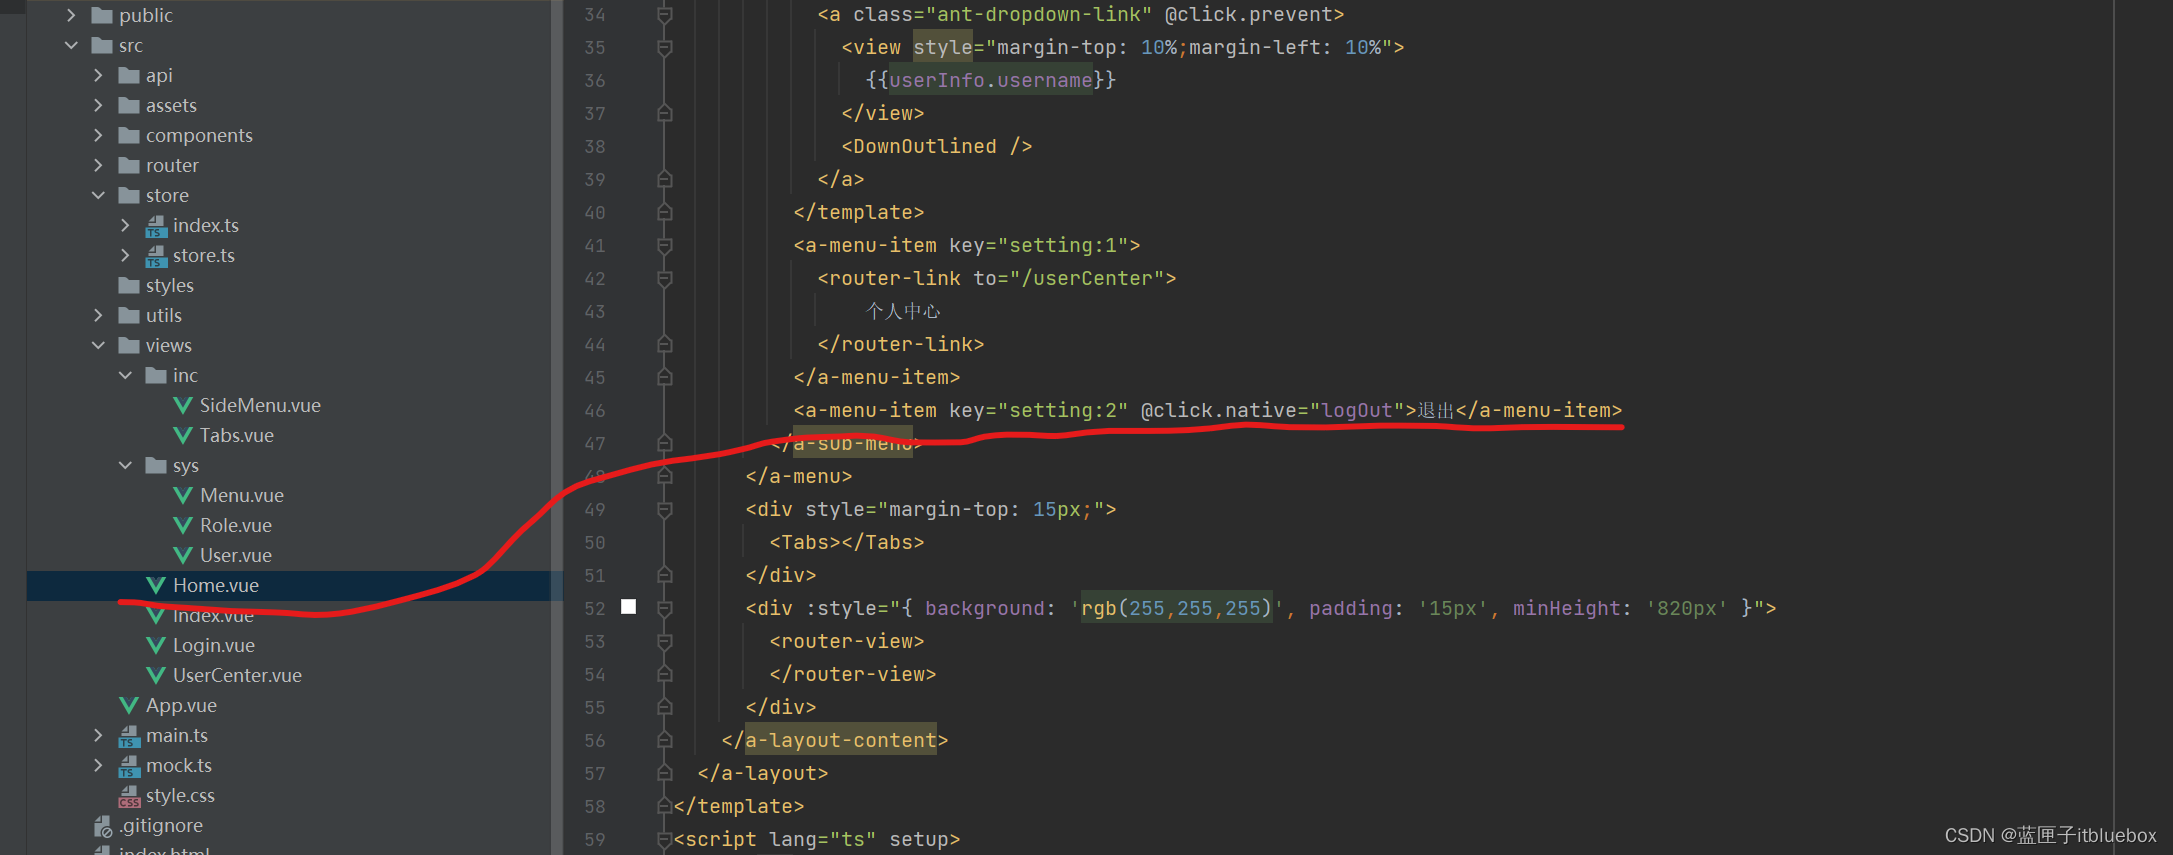
<template><a-layout has-sider :style="{ position: 'fixed', zIndex: 1, width: '100%' }"><a-layout-sider v-model:collapsed="collapsed" :trigger="null" collapsible ><div class="logo" /><SideMenu></SideMenu></a-layout-sider>、<a-layout-content :style="{ marginTop: '0' }"><a-menuv-model:selectedKeys="selectedKeysTop"theme="dark"mode="horizontal":style="{ lineHeight: '64px',marginLeft:'-15px' }"><a-sub-menu key="sub2" ><template #title><div ><menu-unfold-outlinedv-if="collapsed"class="trigger"@click="() => (collapsed = !collapsed)"/><menu-fold-outlined v-else class="trigger" @click="() => (collapsed = !collapsed)" /></div></template></a-sub-menu><a-sub-menu key="sub1" style="margin-left: 85%" ><template #title><a-avatar v-if="userInfo.avatar == null || userInfo.avatar == ''" style="background-color: #87d068"><template #icon><UserOutlined /></template></a-avatar><a-avatar style="margin-top: -10px" v-if="userInfo.avatar != null && userInfo.avatar != ''" src="https://zos.alipayobjects.com/rmsportal/ODTLcjxAfvqbxHnVXCYX.png" /><a class="ant-dropdown-link" @click.prevent><view style="margin-top: 10%;margin-left: 10%">{{userInfo.username}}</view><DownOutlined /></a></template><a-menu-item key="setting:1"><router-link to="/userCenter">个人中心</router-link></a-menu-item><a-menu-item key="setting:2" @click.native="logOut">退出</a-menu-item></a-sub-menu></a-menu><div style="margin-top: 15px;"><Tabs></Tabs></div><div id="components-affix-demo-target" ref="containerRef" class="scrollable-container" :style="{ background: 'rgb(255,255,255)', padding: '15px', minHeight: '820px' }"><router-view></router-view></div></a-layout-content></a-layout>
</template>
<script lang="ts" setup>
import {DownOutlined,UserOutlined,MenuUnfoldOutlined,MenuFoldOutlined,
} from '@ant-design/icons-vue';
import { userStore} from '@/store/store'
import { useRoute, useRouter } from "vue-router";
import SideMenu from "@/views/inc/SideMenu.vue"
import Tabs from "@/views/inc/Tabs.vue"
import { ref,reactive } from 'vue';
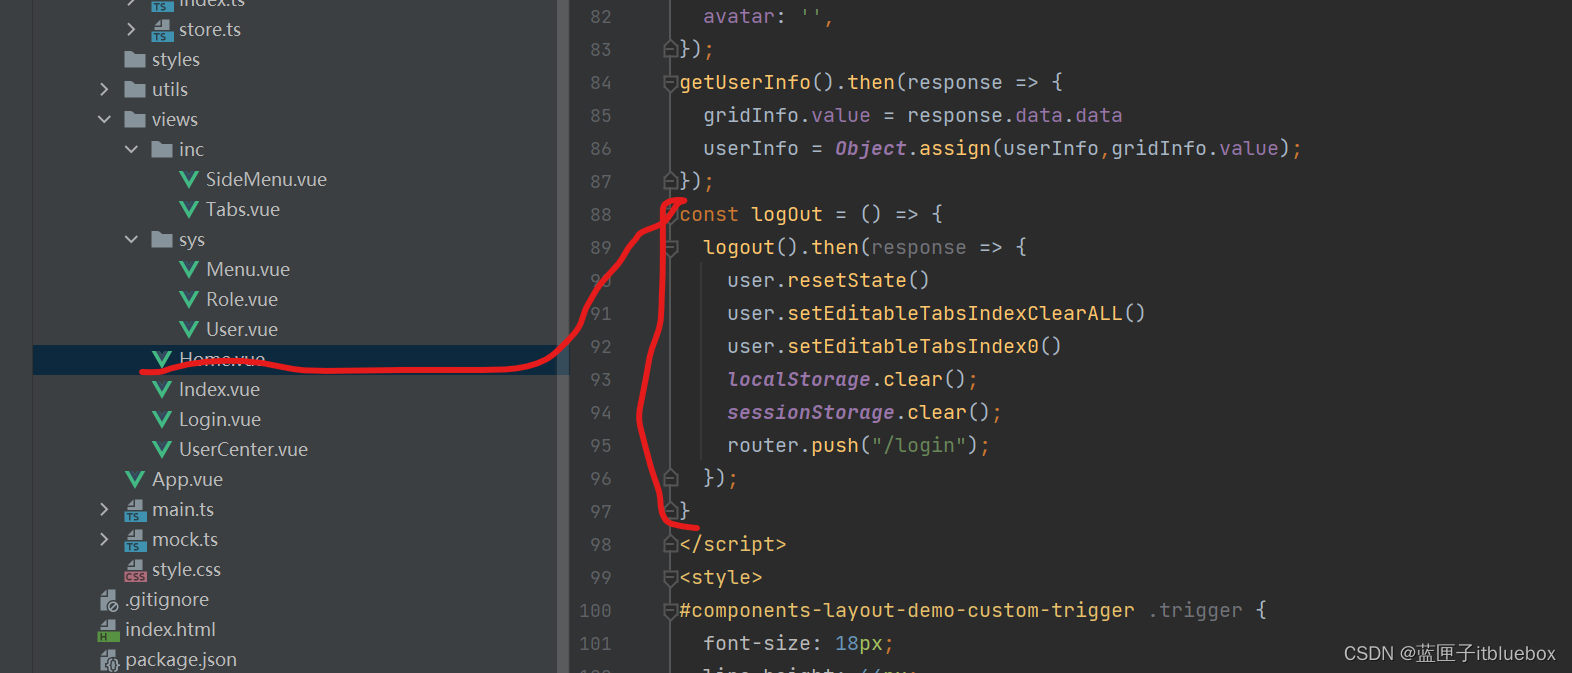
import { getUserInfo,logout } from "@/api";
const user = userStore()
let selectedKeys =ref<string[]>(['1'])
let selectedKeysTop =ref<string[]>(['1'])
let collapsed =ref<boolean>(false)
let gridInfo = ref('')
// 获取路由信息
const router = useRouter();
let userInfo = reactive({id: '',username: 'admin',avatar: '',
});
getUserInfo().then(response => {gridInfo.value = response.data.datauserInfo = Object.assign(userInfo,gridInfo.value);
});
const logOut = () => {logout().then(response => {user.resetState()user.setEditableTabsIndexClearALL()user.setEditableTabsIndex0()localStorage.clear();sessionStorage.clear();router.push("/login");});
}
</script>
<style>
#components-layout-demo-custom-trigger .trigger {font-size: 18px;line-height: 64px;padding: 0 24px;cursor: pointer;transition: color 0.3s;
}
#components-layout-demo-custom-trigger .trigger:hover {color: #fb7299;
}
#components-layout-demo-custom-trigger .logo {height: 32px;background: rgba(255, 255, 255, 0.3);margin: 16px;
}
.site-layout .site-layout-background {background: #fff;
}
#components-affix-demo-target.scrollable-container {height: 100px;overflow-y: scroll;
}
#components-affix-demo-target .background {padding-top: 60px;height: 300px;
}
</style>内容滚动头部底部不滚
2、在Menu当中设置新增和编辑
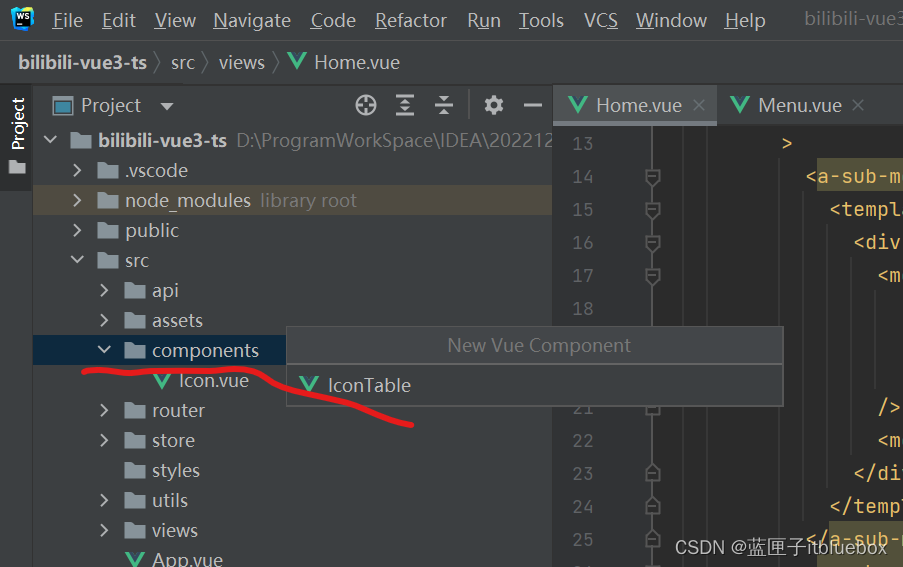
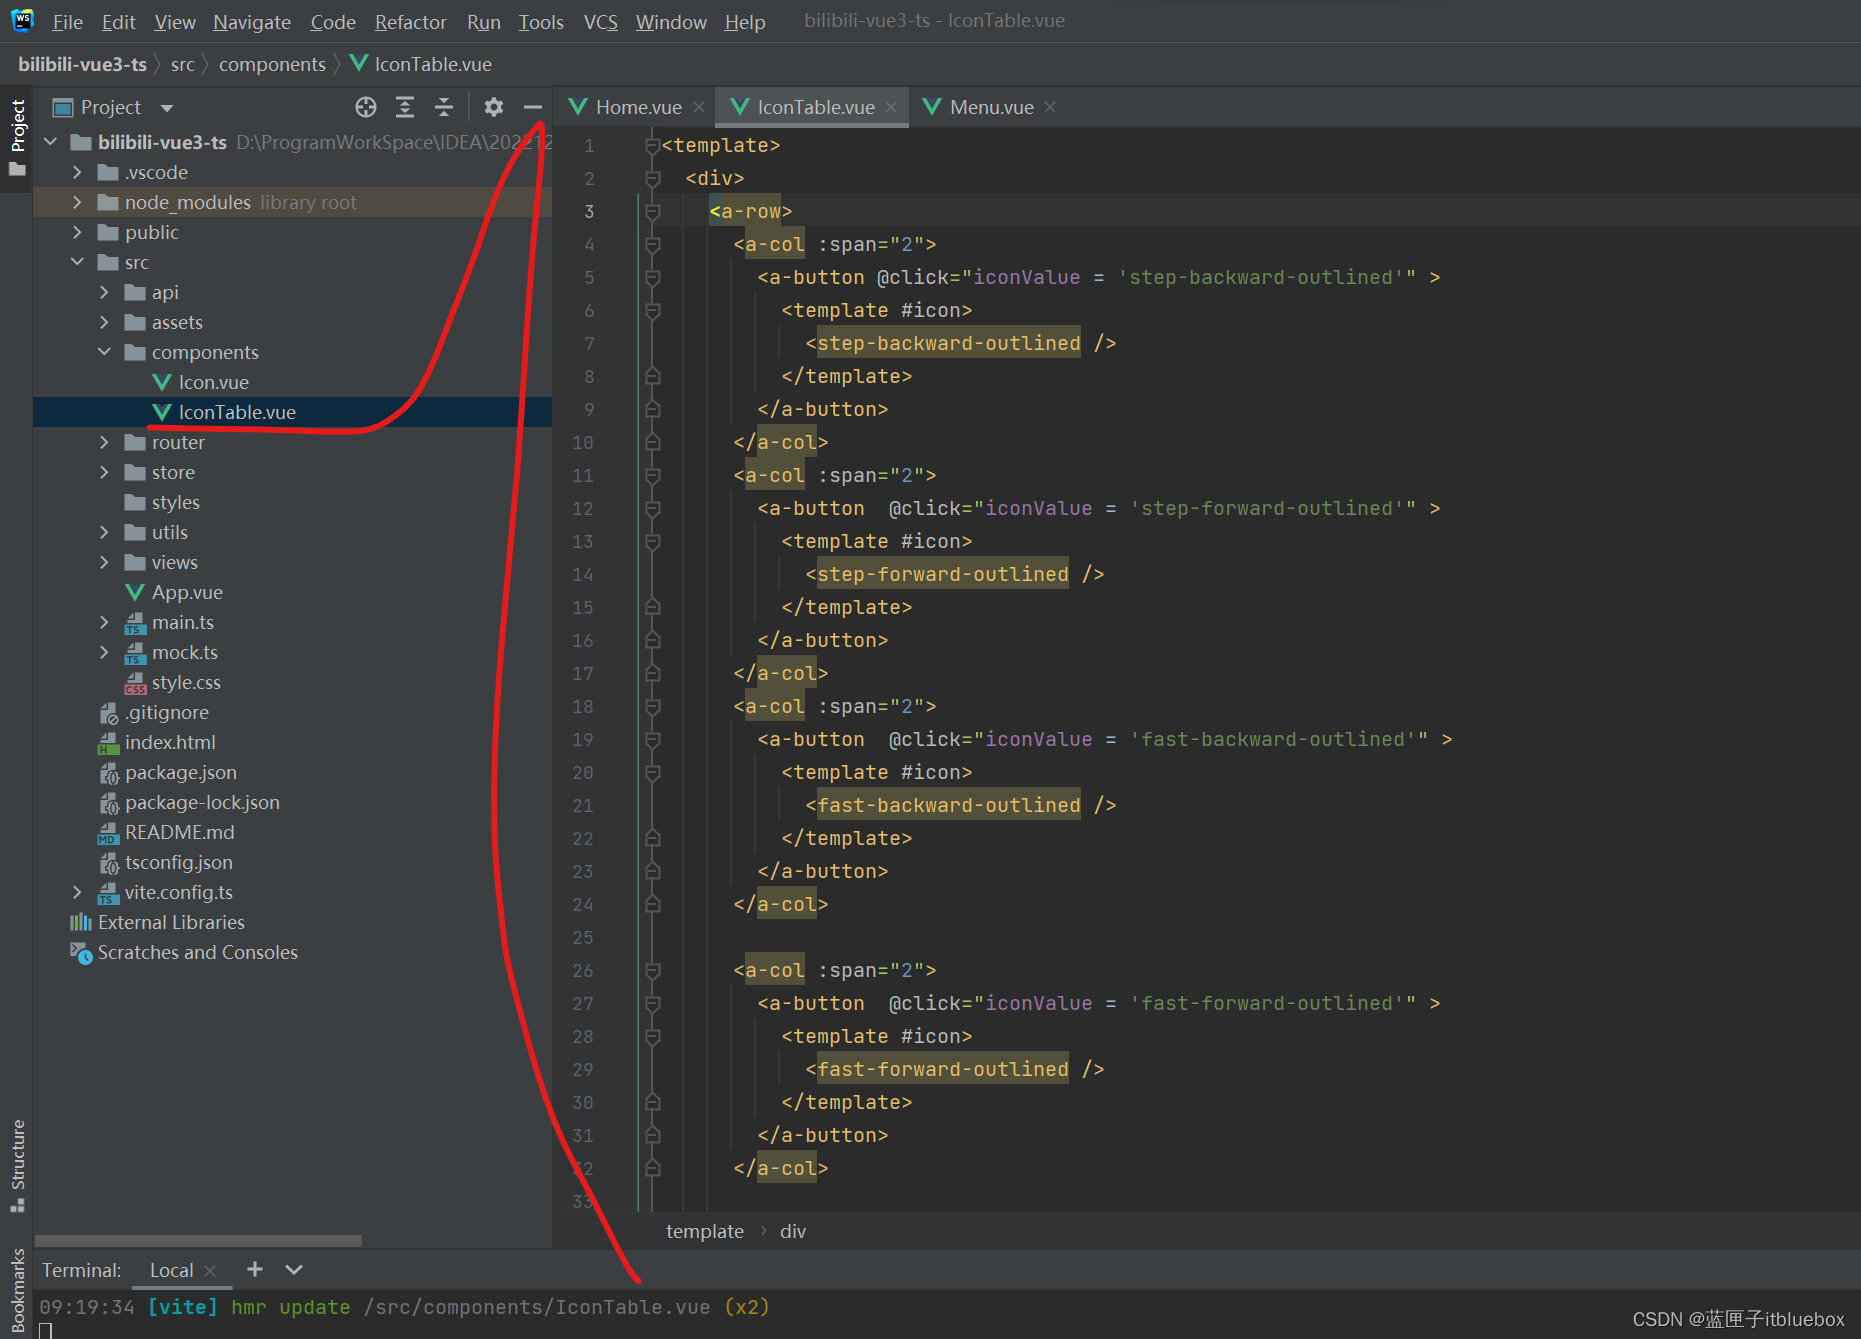
<template><div><a-row><a-col :span="2"><a-button @click="iconValue = 'step-backward-outlined'" ><template #icon><step-backward-outlined /></template></a-button></a-col><a-col :span="2"><a-button  @click="iconValue = 'step-forward-outlined'" ><template #icon><step-forward-outlined /></template></a-button></a-col><a-col :span="2"><a-button  @click="iconValue = 'fast-backward-outlined'" ><template #icon><fast-backward-outlined /></template></a-button></a-col><a-col :span="2"><a-button  @click="iconValue = 'fast-forward-outlined'" ><template #icon><fast-forward-outlined /></template></a-button></a-col><a-col :span="2"><a-button   @click="iconValue = 'shrink-outlined'" ><template #icon><shrink-outlined /></template></a-button></a-col><a-col :span="2"><a-button   @click="iconValue = 'arrows-alt-outlined'" ><template #icon><arrows-alt-outlined /></template></a-button></a-col><a-col :span="2"><a-button   @click="iconValue = 'down-outlined'" ><template #icon><down-outlined /></template></a-button></a-col><a-col :span="2"><a-button  @click="iconValue = 'up-outlined'" ><template #icon><up-outlined /></template></a-button></a-col><a-col :span="2"><a-button  @click="iconValue = 'left-outlined'" ><template #icon><left-outlined /></template></a-button></a-col><a-col :span="2"><a-button   @click="iconValue = 'right-outlined'" ><template #icon><right-outlined /></template></a-button></a-col><a-col :span="2"><a-button  @click="iconValue = 'caret-up-outlined'" ><template #icon><caret-up-outlined /></template></a-button></a-col><a-col :span="2"><a-button  @click="iconValue = 'caret-down-outlined'" ><template #icon><caret-down-outlined /></template></a-button></a-col><a-col :span="2"><a-button  @click="iconValue = 'caret-left-outlined'" ><template #icon><caret-left-outlined /></template></a-button></a-col><a-col :span="2"><a-button  @click="iconValue = 'caret-right-outlined'" ><template #icon><caret-right-outlined /></template></a-button></a-col><a-col :span="2"><a-button  @click="iconValue = 'up-circle-outlined'" ><template #icon><up-circle-outlined /></template></a-button></a-col><a-col :span="2"><a-button   @click="iconValue = 'down-circle-outlined'" ><template #icon><down-circle-outlined /></template></a-button></a-col><a-col :span="2"><a-button  @click="iconValue = 'down-circle-outlined'" ><template #icon><down-circle-outlined /></template></a-button></a-col><a-col :span="2"><a-button  @click="iconValue = 'left-circle-outlined'" ><template #icon><left-circle-outlined /></template></a-button></a-col><a-col :span="2"><a-button  @click="iconValue = 'right-circle-outlined'" ><template #icon><right-circle-outlined /></template></a-button></a-col><a-col :span="2"><a-button  @click="iconValue = 'right-circle-outlined'" ><template #icon><right-circle-outlined /></template></a-button></a-col><a-col :span="2"><a-button  @click="iconValue = 'double-left-outlined'" ><template #icon><double-left-outlined /></template></a-button></a-col><a-col :span="2"><a-button  @click="iconValue = 'vertical-left-outlined'" ><template #icon><vertical-left-outlined /></template></a-button></a-col><a-col :span="2"><a-button  @click="iconValue = 'vertical-right-outlined'" ><template #icon><vertical-right-outlined /></template></a-button></a-col><a-col :span="2"><a-button  @click="iconValue = 'vertical-align-top-outlined'" ><template #icon><vertical-align-top-outlined /></template></a-button></a-col><a-col :span="2"><a-button  @click="iconValue = 'vertical-align-middle-outlined'" ><template #icon><vertical-align-middle-outlined /></template></a-button></a-col><a-col :span="2"><a-button  @click="iconValue = 'vertical-align-middle-outlined'" ><template #icon><vertical-align-middle-outlined /></template></a-button></a-col><a-col :span="2"><a-button  @click="iconValue = 'vertical-align-bottom-outlined'" ><template #icon><vertical-align-bottom-outlined /></template></a-button></a-col><a-col :span="2"><a-button  @click="iconValue = 'forward-outlined'" ><template #icon><forward-outlined /></template></a-button></a-col><a-col :span="2"><a-button  @click="iconValue = 'backward-outlined'" ><template #icon><backward-outlined /></template></a-button></a-col><a-col :span="2"><a-button   @click="iconValue = 'rollback-outlined'" ><template #icon><rollback-outlined /></template></a-button></a-col><a-col :span="2"><a-button  @click="iconValue = 'enter-outlined'" ><template #icon><enter-outlined /></template></a-button></a-col><a-col :span="2"><a-button   @click="iconValue = 'retweet-outlined'" ><template #icon><retweet-outlined /></template></a-button></a-col><a-col :span="2"><a-button  @click="iconValue = 'step-backward-outlined'" ><template #icon><menu-fold-outlined /></template></a-button></a-col><a-col :span="2"><a-button  @click="iconValue = 'menu-unfold-outlined'" ><template #icon><menu-unfold-outlined /></template></a-button></a-col><a-col :span="2"><a-button  @click="iconValue = 'align-center-outlined'" ><template #icon><align-center-outlined /></template></a-button></a-col><a-col :span="2"><a-button  @click="iconValue = 'align-left-outlined'" ><template #icon><align-left-outlined /></template></a-button></a-col><a-col :span="2"><a-button  @click="iconValue = 'ordered-list-outlined'" ><template #icon><ordered-list-outlined /></template></a-button></a-col><a-col :span="2"><a-button  @click="iconValue = 'unordered-list-outlined'" ><template #icon><unordered-list-outlined /></template></a-button></a-col><a-col :span="2"><a-button  @click="iconValue = 'appstore-outlined'" ><template #icon><appstore-outlined /></template></a-button></a-col><a-col :span="2"><a-button  @click="iconValue = 'bars-outlined'" ><template #icon><bars-outlined /></template></a-button></a-col><a-col :span="2"><a-button  @click="iconValue = 'vertical-align-top-outlined'" ><template #icon><vertical-align-top-outlined /></template></a-button></a-col><a-col :span="2"><a-button  @click="iconValue = 'bulb-outlined'" ><template #icon><bulb-outlined /></template></a-button></a-col><a-col :span="2"><a-button  @click="iconValue = 'console-sql-outlined'" ><template #icon><console-sql-outlined /></template></a-button></a-col><a-col :span="2"><a-button  @click="iconValue = 'desktop-outlined'" ><template #icon><desktop-outlined /></template></a-button></a-col><a-col :span="2"><a-button   @click="iconValue = 'vertical-align-top-outlined'" ><template #icon><vertical-align-top-outlined /></template></a-button></a-col><a-col :span="2"><a-button   @click="iconValue = 'vertical-align-top-outlined'" ><template #icon><vertical-align-top-outlined /></template></a-button></a-col><a-col :span="2"><a-button  @click="iconValue = 'exception-outline'" ><template #icon><exception-outlined /></template></a-button></a-col><a-col :span="2"><a-button   @click="iconValue = 'file-word-outlined'" ><template #icon><file-word-outlined /></template></a-button></a-col><a-col :span="2"><a-button  @click="iconValue = 'file-markdown-outlined'" ><template #icon><file-markdown-outlined /></template></a-button></a-col><a-col :span="2"><a-button   @click="iconValue = 'file-search-outlined'" ><template #icon><file-search-outlined /></template></a-button></a-col><a-col :span="2"><a-button   @click="iconValue = 'file-protect-outlined'" ><template #icon><file-protect-outlined /></template></a-button></a-col><a-col :span="2"><a-button  @click="iconValue = 'hdd-outlined'" ><template #icon><hdd-outlined /></template></a-button></a-col><a-col :span="2"><a-button   @click="iconValue = 'insert-row-left-outlined'" ><template #icon><insert-row-left-outlined /></template></a-button></a-col><a-col :span="2"><a-button   @click="iconValue = 'merge-cells-outlined'" ><template #icon><merge-cells-outlined /></template></a-button></a-col><a-col :span="2"><a-button  @click="iconValue = 'printer-outlined'" ><template #icon><printer-outlined /></template></a-button></a-col><a-col :span="2"><a-button  @click="iconValue = 'reconciliation-outlined'" ><template #icon><reconciliation-outlined /></template></a-button></a-col><a-col :span="2"><a-button  @click="iconValue = 'shop-outlined'" ><template #icon><shop-outlined /></template></a-button></a-col><a-col :span="2"><a-button   @click="iconValue = 'split-cells-outlined'" ><template #icon><split-cells-outlined /></template></a-button></a-col><a-col :span="2"><a-button  @click="iconValue = 'usergroup-add-outlined'" ><template #icon><usergroup-add-outlined /></template></a-button></a-col><a-col :span="2"><a-button  @click="iconValue = 'woman-outlined'" ><template #icon><woman-outlined /></template></a-button></a-col></a-row></div>
</template><script setup lang="ts">
import {ref,defineExpose} from "vue";
let iconValue = ref('')
const props = defineProps<{iconName: any;
}>();const change = () => {console.log(iconValue.value)
}defineExpose({change,iconValue
})
</script><style scoped></style>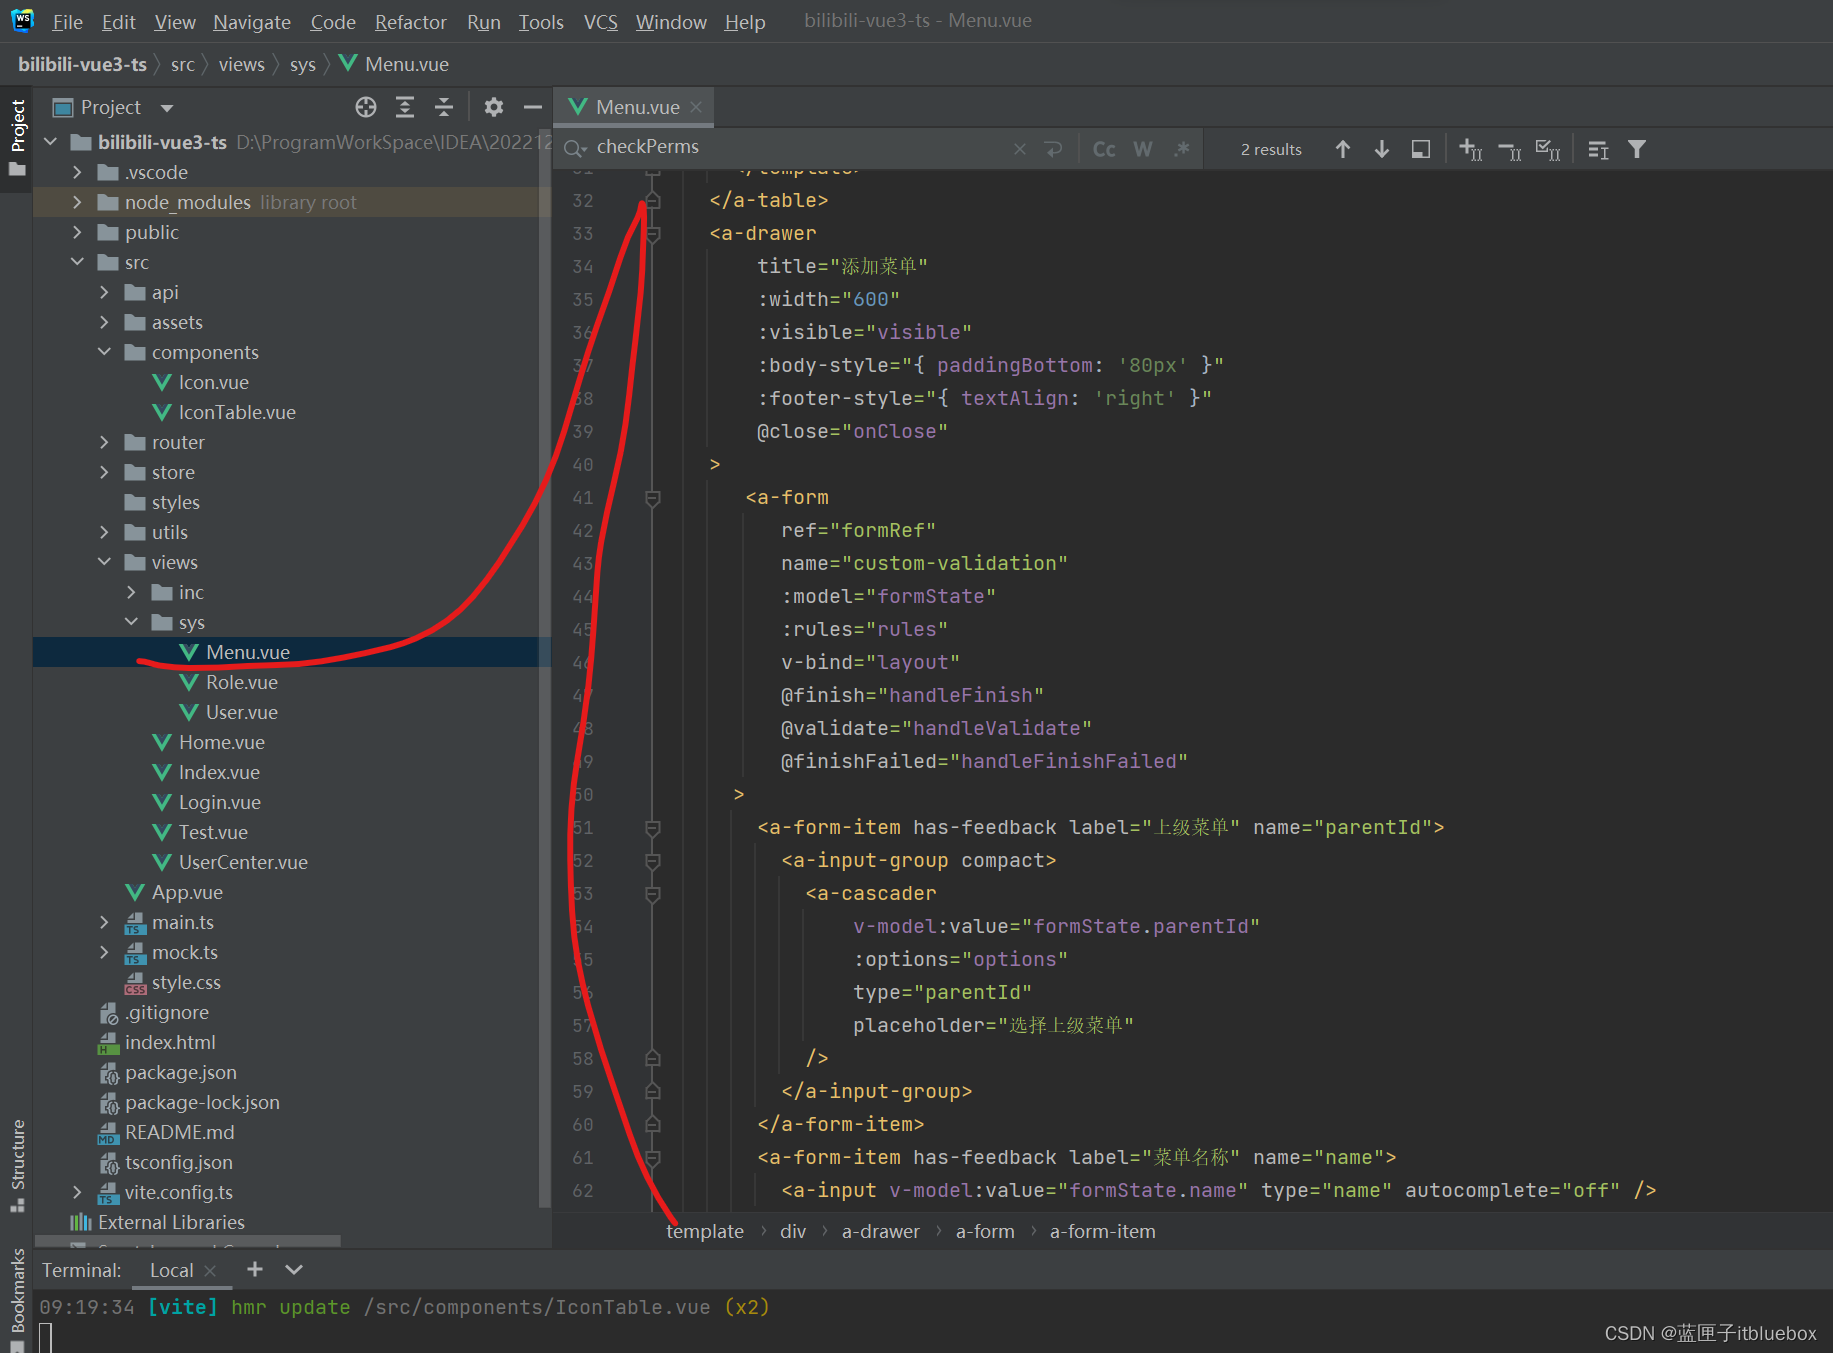
<template><div><a-formref="formRef":model="formState":rules="rules"><a-form-item :wrapper-col="{ span:24 }"><a-button type="primary" @click="showDrawer">新建</a-button></a-form-item></a-form><a-table :columns="columns" :data-source="data" :row-selection="rowSelection"><template #bodyCell="{ column, record }"><template v-if="column.key === 'type'"><a-tag color="blue" v-if="record.type == '目录'">{{ record.type }}</a-tag><a-tag color="green" v-if="record.type == '菜单'">{{ record.type }}</a-tag><a-tag color="orange" v-if="record.type == '按钮'">{{ record.type }}</a-tag></template><template v-if="column.key === 'statu'"><a-tag color="green" v-if="record.statu == '正常'">{{ record.statu }}</a-tag><a-tag color="red" v-if="record.statu == '禁用'">{{ record.statu }}</a-tag></template><template v-if="column.key === 'operation'"><a-button type="text" size="small" style="color: blue">编辑</a-button><a-button type="text" size="small" style="color: red">删除</a-button></template></template></a-table><a-drawertitle="添加菜单":width="600":visible="visible":body-style="{ paddingBottom: '80px' }":footer-style="{ textAlign: 'right' }"@close="onClose"><a-formref="formRef"name="custom-validation":model="formState":rules="rules"v-bind="layout"@finish="handleFinish"@validate="handleValidate"@finishFailed="handleFinishFailed"><a-form-item has-feedback label="上级菜单" name="parentId"><a-input-group compact><a-cascaderv-model:value="formState.parentId":options="options"type="parentId"placeholder="选择上级菜单"/></a-input-group></a-form-item><a-form-item has-feedback label="菜单名称" name="name"><a-input v-model:value="formState.name" type="name" autocomplete="off" /></a-form-item><a-form-item has-feedback label="权限编码" name="perms"><a-input v-model:value="formState.perms" type="perms" autocomplete="off" /></a-form-item><a-form-item has-feedback label="图标" name="icon"><a-input  v-model:value="formState.icon" @click="showModal" type="icon" autocomplete="off" /></a-form-item><a-form-item has-feedback label="菜单URL" name="path"><a-input v-model:value="formState.path" type="path" autocomplete="off" /></a-form-item><a-form-item has-feedback label="菜单组件" name="component"><a-input v-model:value="formState.component" type="component" autocomplete="off" /></a-form-item><a-form-item has-feedback label="类型" name="type" ><a-checkbox-group v-model:value="formState.type"><a-checkbox value="1" name="type">目录</a-checkbox><a-checkbox value="2" name="type">菜单</a-checkbox><a-checkbox value="3" name="type">按钮</a-checkbox></a-checkbox-group></a-form-item><a-form-item has-feedback label="状态" name="statu"><a-checkbox-group v-model:value="formState.statu"><a-checkbox value="1" name="type">禁用</a-checkbox><a-checkbox value="2" name="type">正常</a-checkbox></a-checkbox-group></a-form-item><a-form-item has-feedback label="排序" name="orderNum"><a-input-number v-model:value="formState.orderNum" /></a-form-item><a-form-item :wrapper-col="{ span: 20, offset: 4 }"><a-button type="primary" html-type="submit">提交</a-button><a-button style="margin-left: 10px" @click="resetForm">重置</a-button></a-form-item></a-form></a-drawer><a-modal v-model:visible="visibleIcon" title="选择图标" @ok="handleOk"><IconTable ref="myIcons"></IconTable></a-modal></div>
</template><script name="menu" lang="ts" setup>
import { defineComponent,ref,reactive,toRaw } from 'vue';
import { SearchOutlined } from '@ant-design/icons-vue';
import type { DrawerProps } from 'ant-design-vue';
import type { Rule } from 'ant-design-vue/es/form';
import type { FormInstance } from 'ant-design-vue';import IconTable from  '@/components/IconTable.vue'
//获取绑定的ref
const myIcons = ref();
const formRef = ref<FormInstance>();
const placement = ref<DrawerProps['placement']>('right');
const visible = ref<boolean>(false);
const value18 = ref<string[]>([]);
interface FormState {parentId: string;name: string;perms: string;icon: string;path: string;component: string;type: string;statu: number | undefined;orderNum: number | undefined;
}
const formState = reactive<FormState>({parentId:  '',name: '',perms:  '',icon: '',path:  '',component:  '',type: '',statu: 0,orderNum:  0,
});
const options = [{value: '主页',label: '主页',},{value: '系统管理',label: '系统管理',children: [{value: '用户管理',label: '用户管理'},{value: '角色管理',label: '角色管理'},{value: '菜单管理',label: '菜单管理'},],},{value: '系统工具',label: '系统工具',children: [{value: '数据字典',label: '数据字典',},],},
]let checkName= async (_rule: Rule, value: string) => {if (!value) {return Promise.reject('请输入菜单名称');}
};let checkPath= async (_rule: Rule, value: string) => {if (!value) {return Promise.reject('请输入路径');}
};let checkParentId= async (_rule: Rule, value: string) => {if (!value) {return Promise.reject('请选择父目录');}
};let checkPerms= async (_rule: Rule, value: string) => {if (!value) {return Promise.reject('请输入权限编码');}
};let checkIcon= async (_rule: Rule, value: string) => {if (!value) {return Promise.reject('请选择图标');}
};let checkComponent= async (_rule: Rule, value: string) => {if (!value) {return Promise.reject('请输入组件');}
};let checkType= async (_rule: Rule, value: string) => {if (!value) {return Promise.reject('请选择类型');}
};let checkStatu= async (_rule: Rule, value: string) => {if (!value) {return Promise.reject('请选择状态');}
};let checkOrderNum= async (_rule: Rule, value: string) => {if (!value) {return Promise.reject('请输入排序');}
};let checkAge = async (_rule: Rule, value: number) => {if (!value) {return Promise.reject('Please input the age');}if (!Number.isInteger(value)) {return Promise.reject('Please input digits');} else {if (value < 18) {return Promise.reject('Age must be greater than 18');} else {return Promise.resolve();}}
};let validatePass = async (_rule: Rule, value: string) => {if (value === '') {return Promise.reject('Please input the password');} else {// @ts-ignoreif (formState.checkPass !== '') {// @ts-ignoreformRef.value.validateFields('checkPass');}return Promise.resolve();}
};
let validatePass2 = async (_rule: Rule, value: string) => {if (value === '') {return Promise.reject('Please input the password again');// @ts-ignore} else if (value !== formState.pass) {return Promise.reject("Two inputs don't match!");} else {return Promise.resolve();}
};
const rules: Record<string, Rule[]> = {pass: [{ required: true, validator: validatePass, trigger: 'change' }],checkPass: [{ validator: validatePass2, trigger: 'change' }],age: [{ validator: checkAge, trigger: 'change' }],parentId: [{ validator: checkParentId, trigger: 'change' }],name: [{ validator: checkName, trigger: 'change' }],perms: [{ validator: checkPerms, trigger: 'change' }],icon: [{ validator: checkIcon, trigger: 'change' }],path: [{ validator: checkPath, trigger: 'change' }],component: [{ validator: checkComponent, trigger: 'change' }],type: [{ validator: checkType, trigger: 'change' }],statu: [{ validator: checkStatu, trigger: 'change' }],orderNum: [{ validator: checkOrderNum, trigger: 'change' }],
};
const layout = {labelCol: { span: 4 },wrapperCol: { span: 14 },
};
const handleFinish = (values: FormState) => {console.log(values, formState);
};
const handleFinishFailed = (errors: any) => {console.log(errors);
};
const resetForm = () => {// @ts-ignoreformRef.value.resetFields();
};
const handleValidate = (...args: any[]) => {console.log(args);
};const showDrawer = () => {visible.value = true;
};
const onClose = () => {visible.value = false;
};
const visibleIcon = ref<boolean>(false);const showModal = () => {visibleIcon.value = true;
};const handleOk = (e: MouseEvent) => {console.log(e);visibleIcon.value = false;myIcons.value.change()//这里也可以通过ref获取到子组件暴露出来想要父组件获取到的值formState.icon = myIcons.value.iconValue
};
const columns = [{title: '名称',dataIndex: 'name',key: 'name',},{title: '权限编码',dataIndex: 'code',key: 'code',},{title: '图标',dataIndex: 'icon',key: 'icon',},{title: '类型',dataIndex: 'type',key: 'type',},{title: '菜单path',dataIndex: 'path',key: 'path',},{title: '菜单组件',dataIndex: 'component',key: 'component',},{title: '排序号',dataIndex: 'sort',key: 'sort',},{title: '状态',dataIndex: 'statu',key: 'statu',},{title: '操作',dataIndex: 'operation',key: 'operation',},
];interface DataItem {key: number;name: string;code: string;sort: string;icon:string;statu:string;type: string;path: string;component: string;operation: string;children?: DataItem[];
}const data: DataItem[] = [{key: 1,name: '系统管理',code: 'sys:system:list',type: "目录",path: "/",component: "/",sort: '1',icon: 'step-forward-outlined',statu: '正常',operation: '操作',children: [{key: 12,name: '用户管理',code: 'sys:user:list',type: "菜单",path: "/sys/user/list",component: "sys/User",sort: '2',icon: 'swap-right-outlined',statu: '正常',operation: '操作',children: [{key: 121,name: '查询',code: 'sys:user:list',type: "按钮",path: "",component: "",sort: '3',icon: 'swap-right-outlined',statu: '禁用',operation: '操作',},{key: 121,name: '新增',code: 'sys:user:add',type: "按钮",path: "",component: "",sort: '4',icon: 'step-forward-outlined',statu: '正常',operation: '操作',},{key: 121,name: '修改',code: 'sys:user:edit',type: "按钮",path: "",component: "",sort: '5',icon: 'step-forward-outlined',statu: '禁用',operation: '操作',},{key: 121,name: '删除',code: 'sys:user:delete',type: "按钮",path: "",component: "",sort: '6',icon: 'step-forward-outlined',statu: '正常',operation: '操作',},{key: 121,name: '重置密码',code: 'sys:user:repass',type: "按钮",path: "",component: "",sort: '7',icon: 'step-forward-outlined',statu: '禁用',operation: '操作',},],},{key: 122,name: '角色管理',code: 'sys:role:list',type: "目录",path: "/sys/role/list",component: "sys/Role",sort: '8',icon: 'step-forward-outlined',statu: '正常',operation: '操作',children: [{key: 1212,name: '查询',code: 'sys:role:list',type: "菜单",path: "",component: "",sort: '9',icon: 'step-forward-outlined',statu: '正常',operation: '操作',},{key: 1213,name: '新增',code: 'sys:role:add',type: "菜单",path: "",component: "",sort: '10',icon: 'step-forward-outlined',statu: '正常',operation: '操作',},{key: 1214,name: '修改',code: 'sys:role:edit',type: "菜单",path: "",component: "",sort: '11',icon: 'step-forward-outlined',statu: '正常',operation: '操作',},{key: 1215,name: '删除',code: 'sys:role:delete',type: "菜单",path: "",component: "",sort: '12',icon: 'step-forward-outlined',statu: '正常',operation: '操作',},{key: 121,name: '重置密码',code: 'sys:user:repass',type: "按钮",path: "",component: "",sort: '13',icon: 'step-forward-outlined',statu: '禁用',operation: '操作',},],},],},
];const rowSelection = {onChange: (selectedRowKeys: (string | number)[], selectedRows: DataItem[]) => {console.log(`selectedRowKeys: ${selectedRowKeys}`, 'selectedRows: ', selectedRows);},onSelect: (record: DataItem, selected: boolean, selectedRows: DataItem[]) => {console.log(record, selected, selectedRows);},onSelectAll: (selected: boolean, selectedRows: DataItem[], changeRows: DataItem[]) => {console.log(selected, selectedRows, changeRows);},
};</script><style scoped></style>

(五)角色管理
1、设置角色信息的增删改查-权限分配

<template><div><a-formref="formRef":model="formState":rules="rules"><a-form-item :wrapper-col="{ span:24 }"><a-button type="primary" @click="showDrawer">新建</a-button></a-form-item></a-form><a-table :columns="columns" :data-source="data" :row-selection="rowSelection"><template #bodyCell="{ column, record }"><template v-if="column.key === 'type'"><a-tag color="blue" v-if="record.type == '目录'">{{ record.type }}</a-tag><a-tag color="green" v-if="record.type == '菜单'">{{ record.type }}</a-tag><a-tag color="orange" v-if="record.type == '按钮'">{{ record.type }}</a-tag></template><template v-if="column.key === 'statu'"><a-tag color="green" v-if="record.statu == '正常'">{{ record.statu }}</a-tag><a-tag color="red" v-if="record.statu == '禁用'">{{ record.statu }}</a-tag></template><template v-if="column.key === 'operation'"><a-button type="text" size="small" style="color: blue">编辑</a-button><a-button type="text" size="small" style="color: red">删除</a-button></template></template></a-table><a-drawertitle="添加菜单":width="600":visible="visible":body-style="{ paddingBottom: '80px' }":footer-style="{ textAlign: 'right' }"@close="onClose"><a-formref="formRef"name="custom-validation":model="formState":rules="rules"v-bind="layout"@finish="handleFinish"@validate="handleValidate"@finishFailed="handleFinishFailed"><a-form-item has-feedback label="上级菜单" name="parentId"><a-input-group compact><a-cascaderv-model:value="formState.parentId":options="options"type="parentId"placeholder="选择上级菜单"/></a-input-group></a-form-item><a-form-item has-feedback label="菜单名称" name="name"><a-input v-model:value="formState.name" type="name" autocomplete="off" /></a-form-item><a-form-item has-feedback label="权限编码" name="perms"><a-input v-model:value="formState.perms" type="perms" autocomplete="off" /></a-form-item><a-form-item has-feedback label="图标" name="icon"><a-input  v-model:value="formState.icon" @click="showModal" type="icon" autocomplete="off" /></a-form-item><a-form-item has-feedback label="菜单URL" name="path"><a-input v-model:value="formState.path" type="path" autocomplete="off" /></a-form-item><a-form-item has-feedback label="菜单组件" name="component"><a-input v-model:value="formState.component" type="component" autocomplete="off" /></a-form-item><a-form-item has-feedback label="类型" name="type" ><a-checkbox-group v-model:value="formState.type"><a-checkbox value="1" name="type">目录</a-checkbox><a-checkbox value="2" name="type">菜单</a-checkbox><a-checkbox value="3" name="type">按钮</a-checkbox></a-checkbox-group></a-form-item><a-form-item has-feedback label="状态" name="statu"><a-checkbox-group v-model:value="formState.statu"><a-checkbox value="1" name="type">禁用</a-checkbox><a-checkbox value="2" name="type">正常</a-checkbox></a-checkbox-group></a-form-item><a-form-item has-feedback label="排序" name="orderNum"><a-input-number v-model:value="formState.orderNum" /></a-form-item><a-form-item :wrapper-col="{ span: 20, offset: 4 }"><a-button type="primary" html-type="submit">提交</a-button><a-button style="margin-left: 10px" @click="resetForm">重置</a-button></a-form-item></a-form></a-drawer><a-modal v-model:visible="visibleIcon" title="选择图标" @ok="handleOk" okText="确认" cancelText="取消"><IconTable ref="myIcons"></IconTable></a-modal></div>
</template><script name="menu" lang="ts" setup>
import { defineComponent,ref,reactive,toRaw } from 'vue';
import { SearchOutlined } from '@ant-design/icons-vue';
import type { DrawerProps } from 'ant-design-vue';
import type { Rule } from 'ant-design-vue/es/form';
import type { FormInstance } from 'ant-design-vue';import IconTable from  '@/components/IconTable.vue'
//获取绑定的ref
const myIcons = ref();
const formRef = ref<FormInstance>();
const placement = ref<DrawerProps['placement']>('right');
const visible = ref<boolean>(false);
const value18 = ref<string[]>([]);
interface FormState {parentId: string;name: string;perms: string;icon: string;path: string;component: string;type: string;statu: number | undefined;orderNum: number | undefined;
}
const formState = reactive<FormState>({parentId:  '',name: '',perms:  '',icon: '',path:  '',component:  '',type: '',statu: 0,orderNum:  0,
});const options = [{value: '主页',label: '主页',},{value: '系统管理',label: '系统管理',children: [{value: '用户管理',label: '用户管理'},{value: '角色管理',label: '角色管理'},{value: '菜单管理',label: '菜单管理'},],},{value: '系统工具',label: '系统工具',children: [{value: '数据字典',label: '数据字典',},],},
]let checkName= async (_rule: Rule, value: string) => {if (!value) {return Promise.reject('请输入菜单名称');}
};let checkPath= async (_rule: Rule, value: string) => {if (!value) {return Promise.reject('请输入路径');}
};let checkParentId= async (_rule: Rule, value: string) => {if (!value) {return Promise.reject('请选择父目录');}
};let checkPerms= async (_rule: Rule, value: string) => {if (!value) {return Promise.reject('请输入权限编码');}
};let checkIcon= async (_rule: Rule, value: string) => {if (!value) {return Promise.reject('请选择图标');}
};let checkComponent= async (_rule: Rule, value: string) => {if (!value) {return Promise.reject('请输入组件');}
};let checkType= async (_rule: Rule, value: string) => {if (!value) {return Promise.reject('请选择类型');}
};let checkStatu= async (_rule: Rule, value: string) => {if (!value) {return Promise.reject('请选择状态');}
};let checkOrderNum= async (_rule: Rule, value: string) => {if (!value) {return Promise.reject('请输入排序');}
};let checkAge = async (_rule: Rule, value: number) => {if (!value) {return Promise.reject('Please input the age');}if (!Number.isInteger(value)) {return Promise.reject('Please input digits');} else {if (value < 18) {return Promise.reject('Age must be greater than 18');} else {return Promise.resolve();}}
};let validatePass = async (_rule: Rule, value: string) => {if (value === '') {return Promise.reject('Please input the password');} else {// @ts-ignoreif (formState.checkPass !== '') {// @ts-ignoreformRef.value.validateFields('checkPass');}return Promise.resolve();}
};
let validatePass2 = async (_rule: Rule, value: string) => {if (value === '') {return Promise.reject('Please input the password again');// @ts-ignore} else if (value !== formState.pass) {return Promise.reject("Two inputs don't match!");} else {return Promise.resolve();}
};
const rules: Record<string, Rule[]> = {pass: [{ required: true, validator: validatePass, trigger: 'change' }],checkPass: [{ validator: validatePass2, trigger: 'change' }],age: [{ validator: checkAge, trigger: 'change' }],parentId: [{ validator: checkParentId, trigger: 'change' }],name: [{ validator: checkName, trigger: 'change' }],perms: [{ validator: checkPerms, trigger: 'change' }],icon: [{ validator: checkIcon, trigger: 'change' }],path: [{ validator: checkPath, trigger: 'change' }],component: [{ validator: checkComponent, trigger: 'change' }],type: [{ validator: checkType, trigger: 'change' }],statu: [{ validator: checkStatu, trigger: 'change' }],orderNum: [{ validator: checkOrderNum, trigger: 'change' }],
};
const layout = {labelCol: { span: 4 },wrapperCol: { span: 20 },
};
const handleFinish = (values: FormState) => {console.log(values, formState);
};
const handleFinishFailed = (errors: any) => {console.log(errors);
};
const resetForm = () => {// @ts-ignoreformRef.value.resetFields();
};
const handleValidate = (...args: any[]) => {console.log(args);
};const showDrawer = () => {visible.value = true;
};
const onClose = () => {visible.value = false;
};
const visibleIcon = ref<boolean>(false);const showModal = () => {visibleIcon.value = true;
};const handleOk = (e: MouseEvent) => {console.log(e);visibleIcon.value = false;myIcons.value.change()//这里也可以通过ref获取到子组件暴露出来想要父组件获取到的值formState.icon = myIcons.value.iconValue
};
const columns = [{title: '名称',dataIndex: 'name',key: 'name',},{title: '权限编码',dataIndex: 'code',key: 'code',},{title: '图标',dataIndex: 'icon',key: 'icon',},{title: '类型',dataIndex: 'type',key: 'type',},{title: '菜单path',dataIndex: 'path',key: 'path',},{title: '菜单组件',dataIndex: 'component',key: 'component',},{title: '排序号',dataIndex: 'sort',key: 'sort',},{title: '状态',dataIndex: 'statu',key: 'statu',},{title: '操作',dataIndex: 'operation',key: 'operation',},
];interface DataItem {key: number;name: string;code: string;sort: string;icon:string;statu:string;type: string;path: string;component: string;operation: string;children?: DataItem[];
}const data: DataItem[] = [{key: 1,name: '系统管理',code: 'sys:system:list',type: "目录",path: "/",component: "/",sort: '1',icon: 'step-forward-outlined',statu: '正常',operation: '操作',children: [{key: 12,name: '用户管理',code: 'sys:user:list',type: "菜单",path: "/sys/user/list",component: "sys/User",sort: '2',icon: 'swap-right-outlined',statu: '正常',operation: '操作',children: [{key: 121,name: '查询',code: 'sys:user:list',type: "按钮",path: "",component: "",sort: '3',icon: 'swap-right-outlined',statu: '禁用',operation: '操作',},{key: 121,name: '新增',code: 'sys:user:add',type: "按钮",path: "",component: "",sort: '4',icon: 'step-forward-outlined',statu: '正常',operation: '操作',},{key: 121,name: '修改',code: 'sys:user:edit',type: "按钮",path: "",component: "",sort: '5',icon: 'step-forward-outlined',statu: '禁用',operation: '操作',},{key: 121,name: '删除',code: 'sys:user:delete',type: "按钮",path: "",component: "",sort: '6',icon: 'step-forward-outlined',statu: '正常',operation: '操作',},{key: 121,name: '重置密码',code: 'sys:user:repass',type: "按钮",path: "",component: "",sort: '7',icon: 'step-forward-outlined',statu: '禁用',operation: '操作',},],},{key: 122,name: '角色管理',code: 'sys:role:list',type: "目录",path: "/sys/role/list",component: "sys/Role",sort: '8',icon: 'step-forward-outlined',statu: '正常',operation: '操作',children: [{key: 1212,name: '查询',code: 'sys:role:list',type: "菜单",path: "",component: "",sort: '9',icon: 'step-forward-outlined',statu: '正常',operation: '操作',},{key: 1213,name: '新增',code: 'sys:role:add',type: "菜单",path: "",component: "",sort: '10',icon: 'step-forward-outlined',statu: '正常',operation: '操作',},{key: 1214,name: '修改',code: 'sys:role:edit',type: "菜单",path: "",component: "",sort: '11',icon: 'step-forward-outlined',statu: '正常',operation: '操作',},{key: 1215,name: '删除',code: 'sys:role:delete',type: "菜单",path: "",component: "",sort: '12',icon: 'step-forward-outlined',statu: '正常',operation: '操作',},{key: 121,name: '重置密码',code: 'sys:user:repass',type: "按钮",path: "",component: "",sort: '13',icon: 'step-forward-outlined',statu: '禁用',operation: '操作',},],},],},
];const rowSelection = {onChange: (selectedRowKeys: (string | number)[], selectedRows: DataItem[]) => {console.log(`selectedRowKeys: ${selectedRowKeys}`, 'selectedRows: ', selectedRows);},onSelect: (record: DataItem, selected: boolean, selectedRows: DataItem[]) => {console.log(record, selected, selectedRows);},onSelectAll: (selected: boolean, selectedRows: DataItem[], changeRows: DataItem[]) => {console.log(selected, selectedRows, changeRows);},
};
</script><style scoped></style>
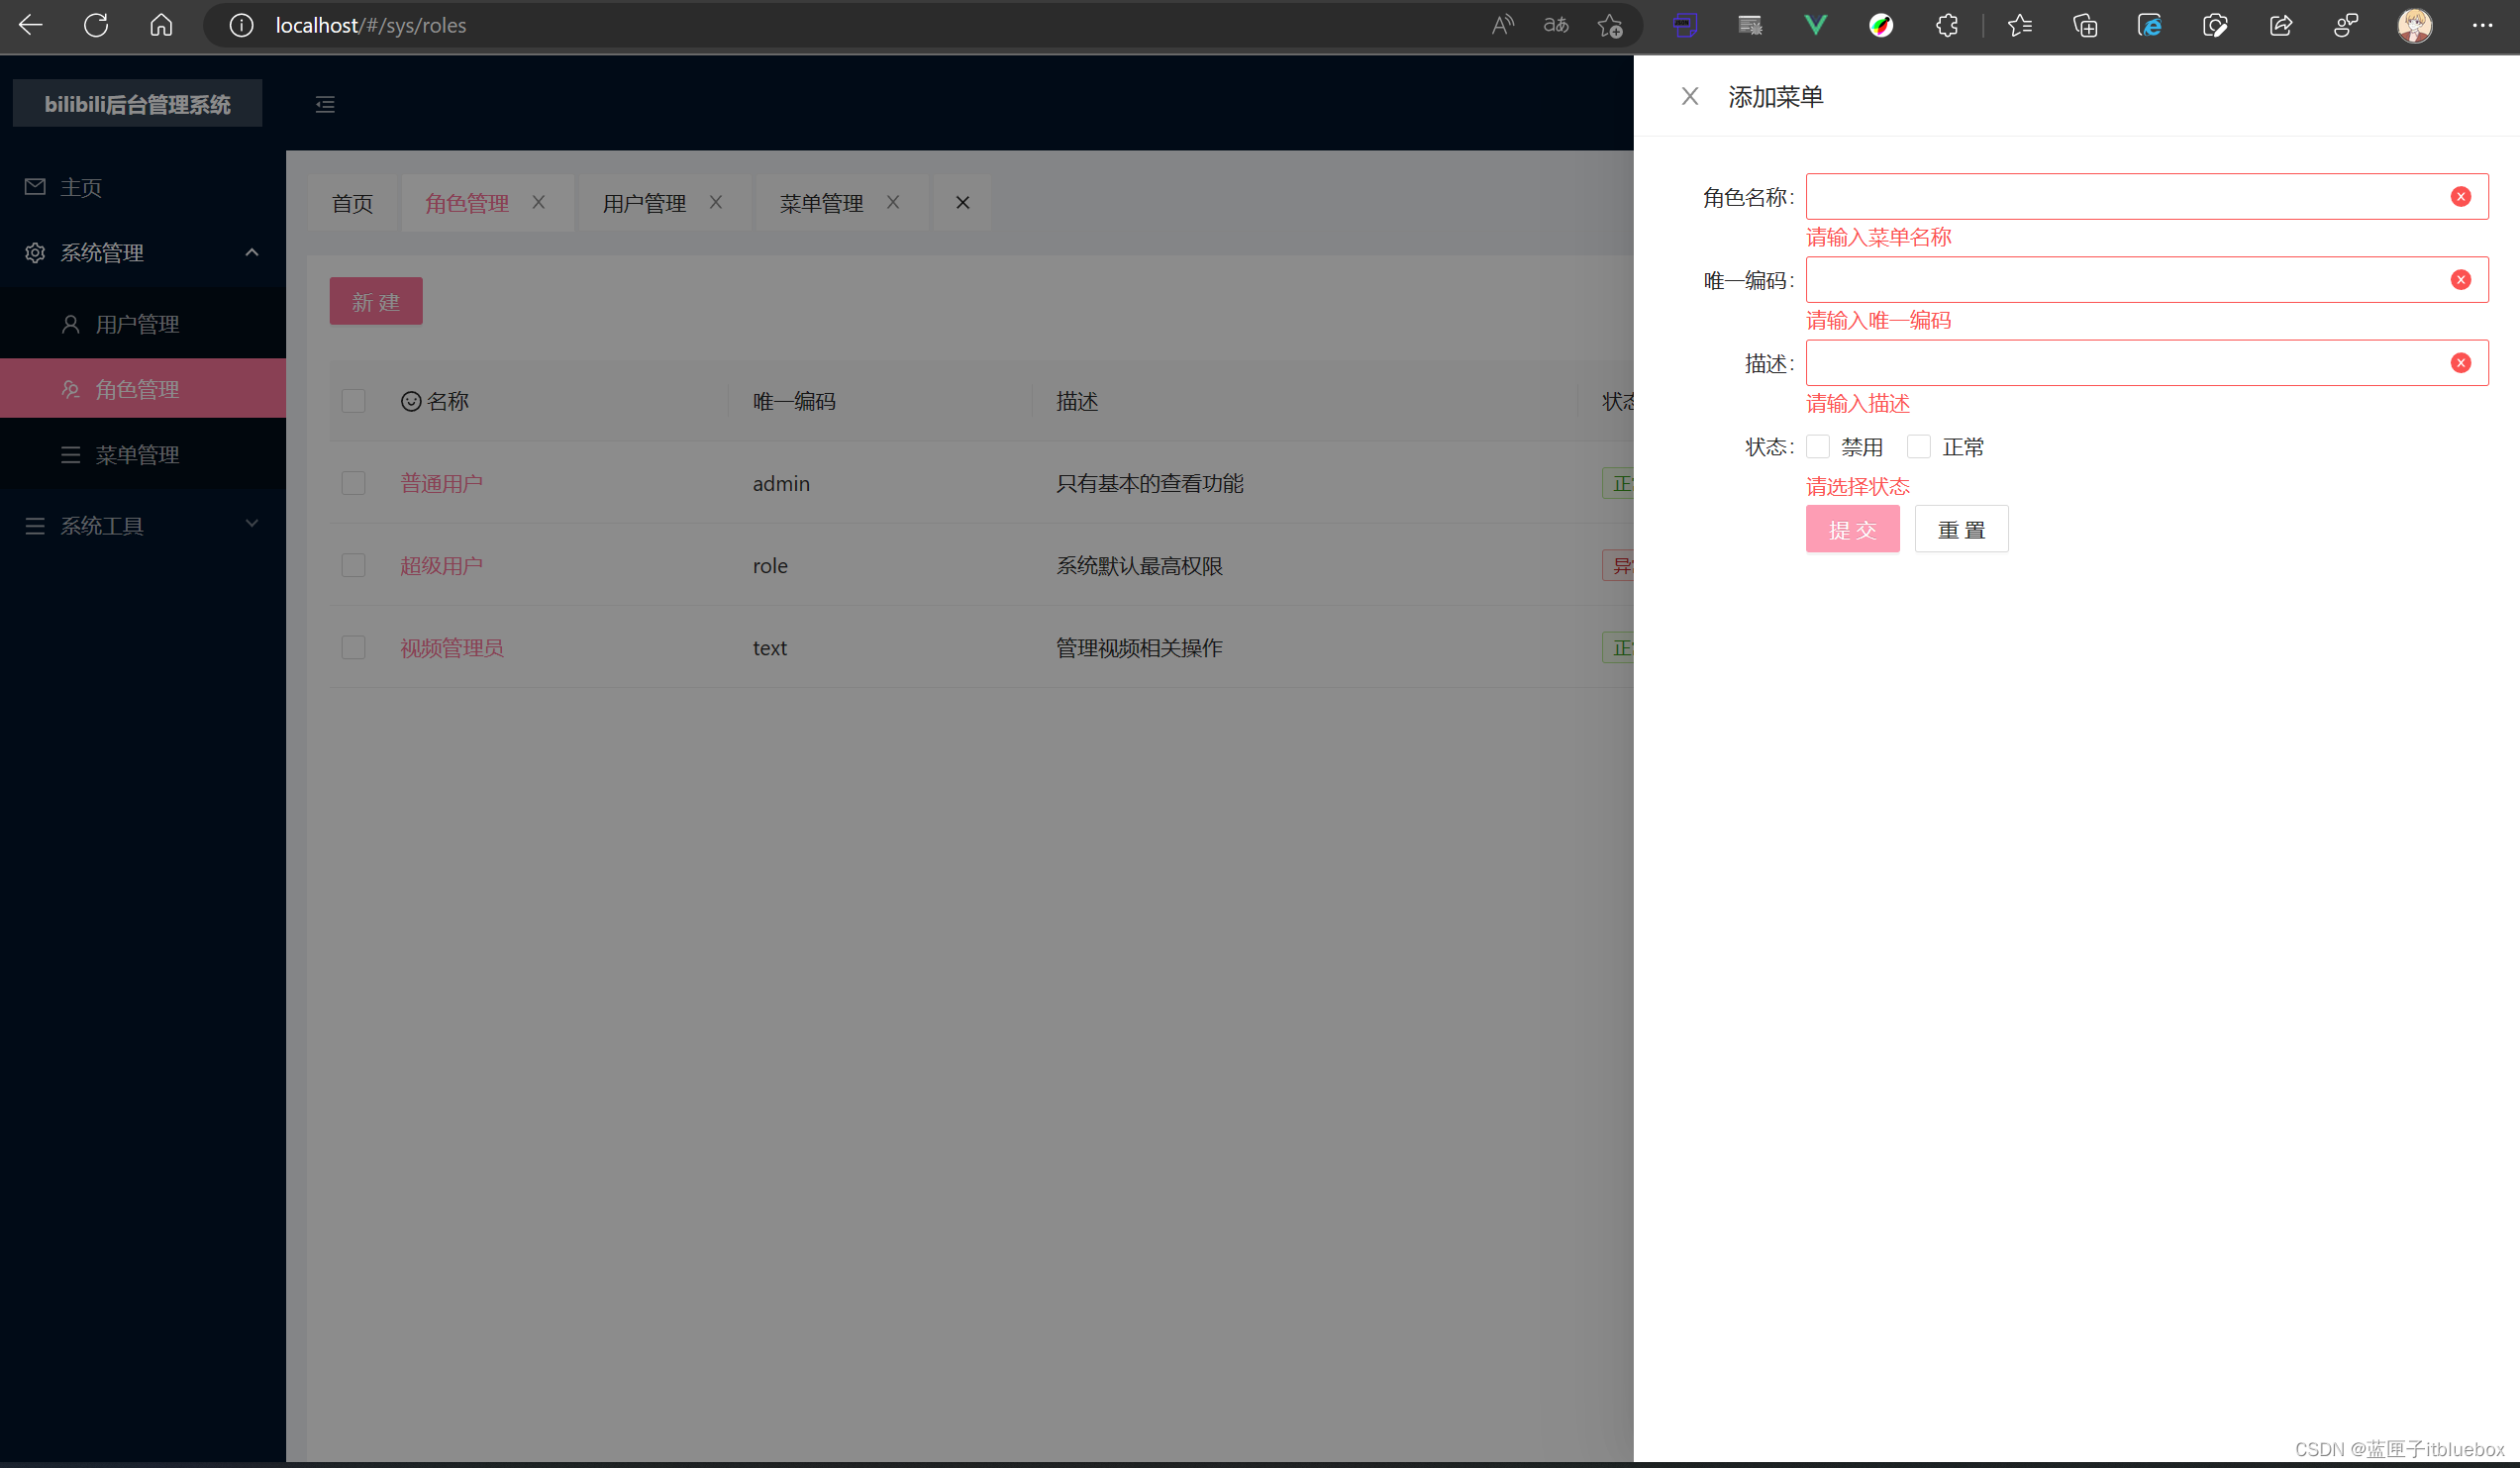
(六)用户管理
用户的增删改查以及对应的权限
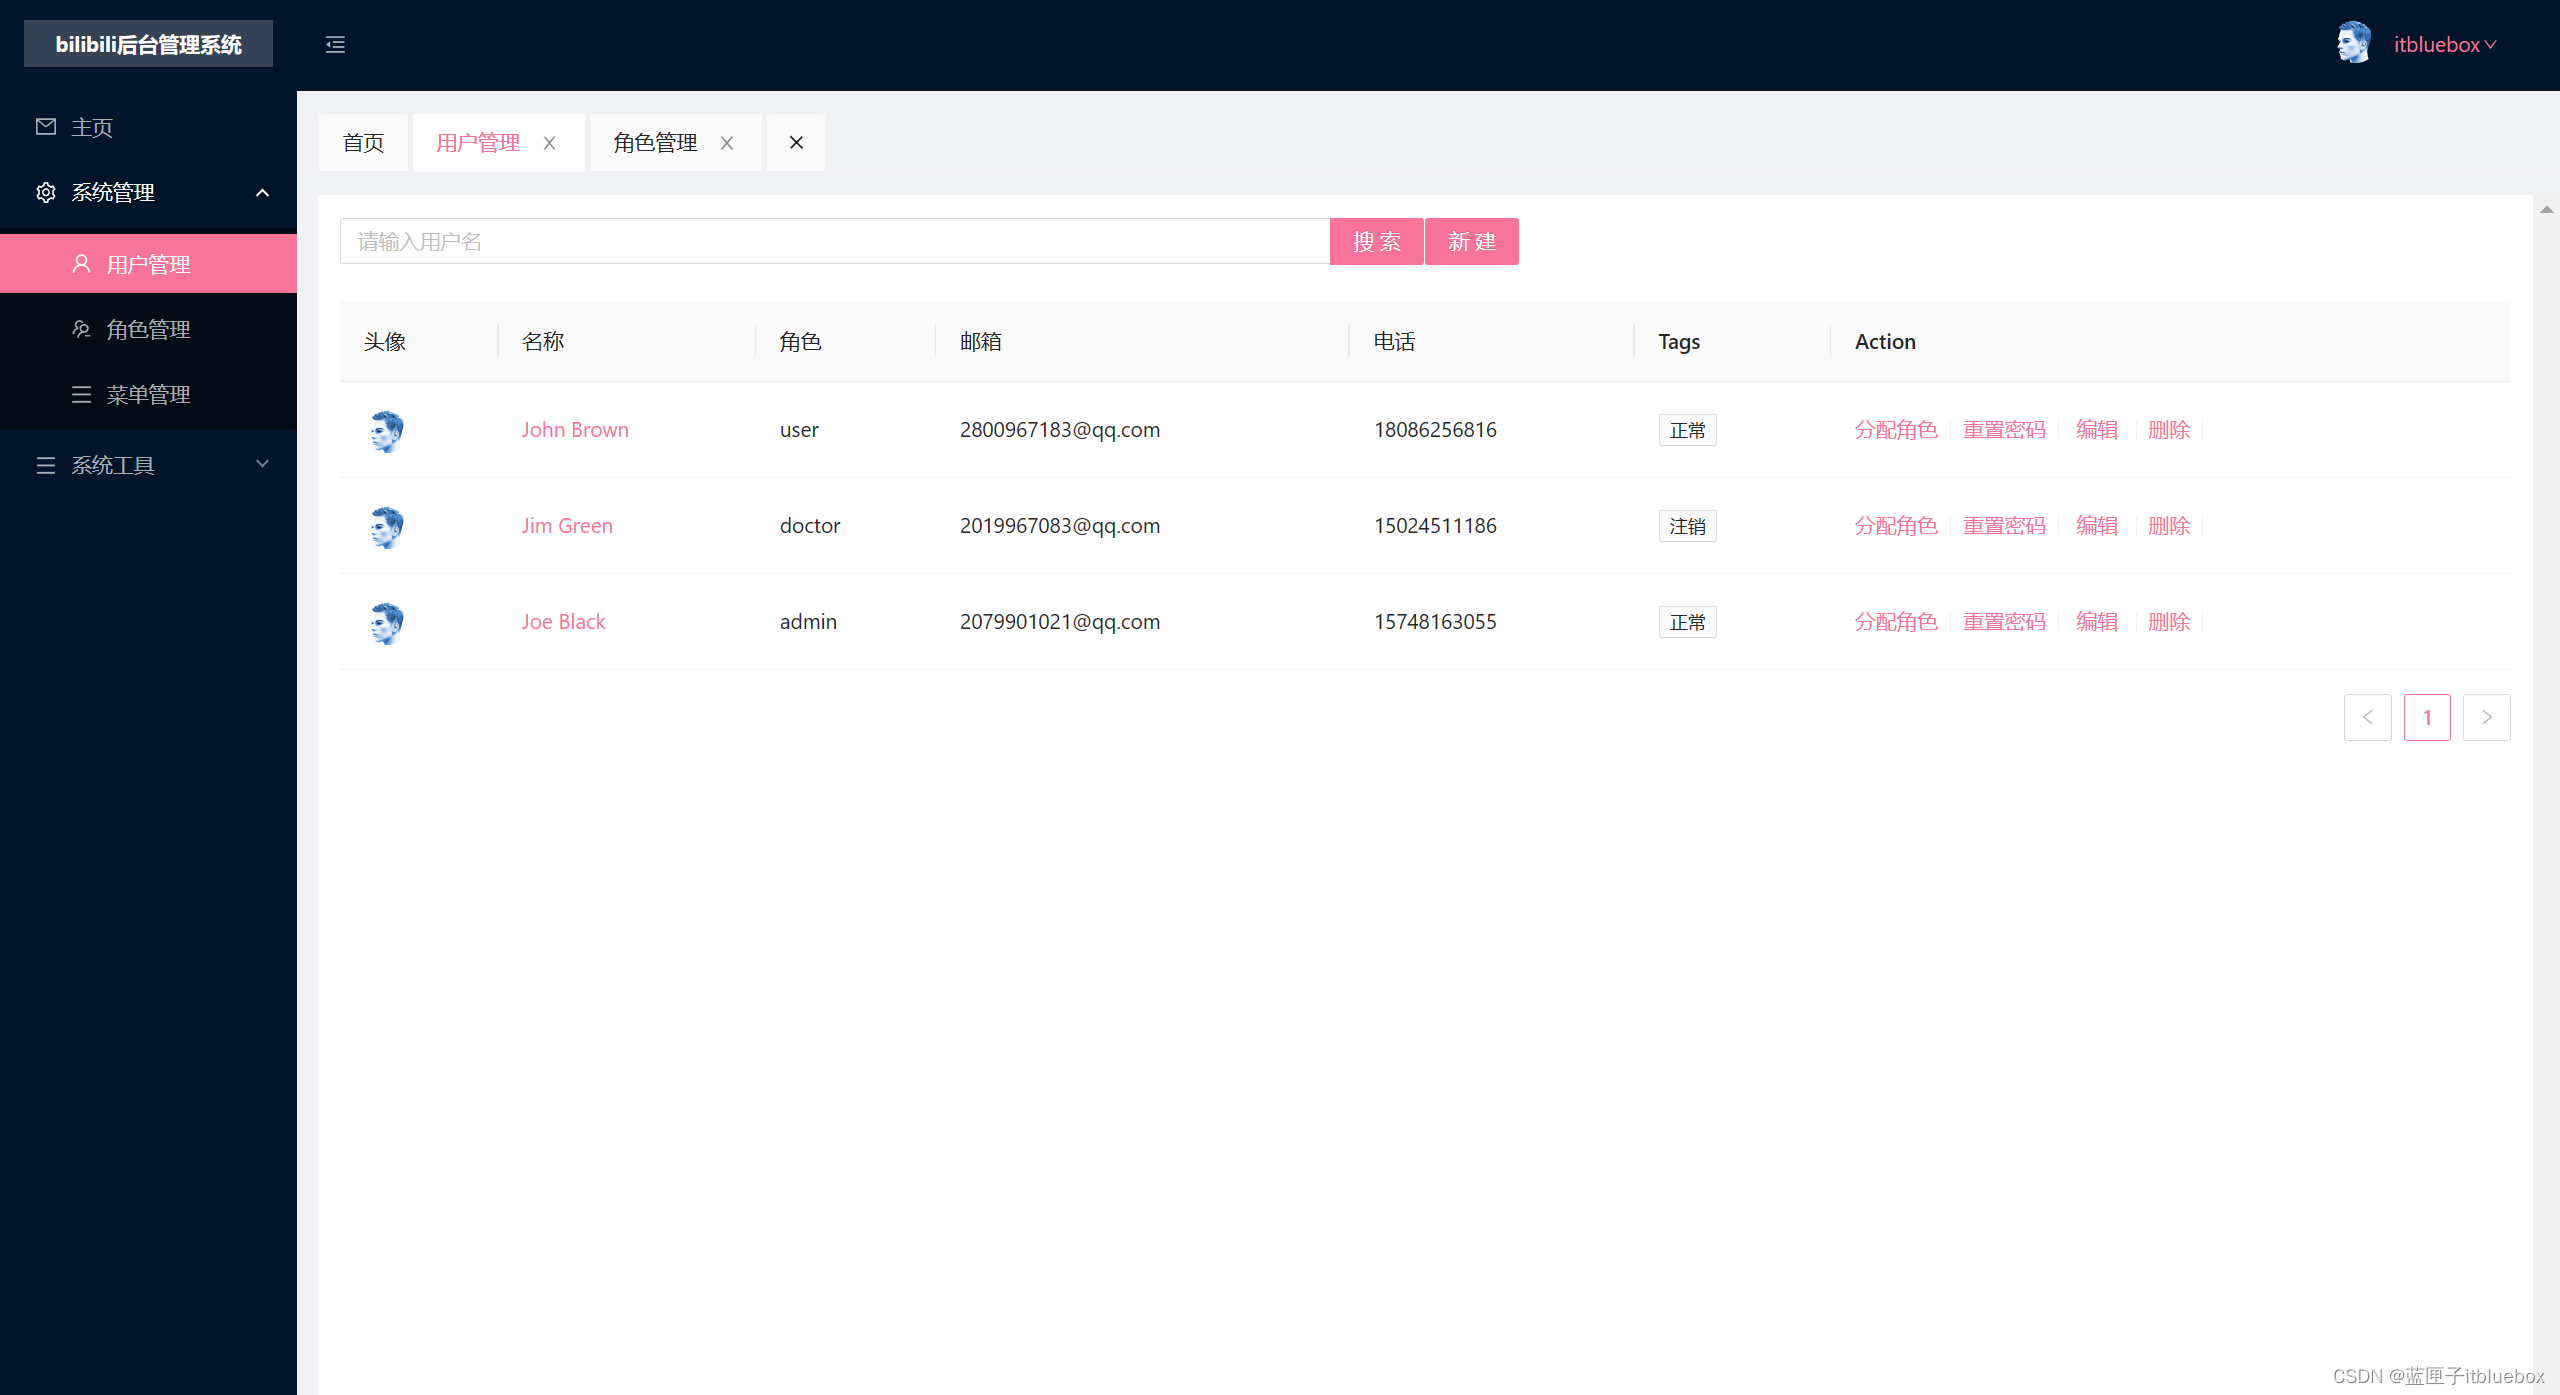
<template><div><a-formref="formRef":model="formState":rules="rules"><a-row><a-col :span="12"><a-form-item><a-input-searchv-model:value="searchValue"placeholder="请输入用户名"enter-button="搜索"@search="onSearch"/></a-form-item></a-col><a-col :span="12"><a-form-item :wrapper-col="{ span:6 }"><a-button type="primary" @click="showDrawer">新建</a-button></a-form-item></a-col></a-row></a-form><a-table :columns="columns" :data-source="data"><template #avatar="{ text }"><a-avatar :src="text" /></template><template #name="{ text }"><a>{{ text }}</a></template><template #customTitle><span><smile-outlined />Name</span></template><template #tags="{ text: tags }"><span><a-tagv-for="tag in tags":key="tag">{{ tag.toUpperCase() }}</a-tag></span></template><template #action="{ record }"><span><a>分配角色</a><a-divider type="vertical" /><a>重置密码</a><a-divider type="vertical" /><a @click="edit(record)" class="ant-dropdown-link">编辑</a><a-divider type="vertical" /><a>删除</a><a-divider type="vertical" /></span></template></a-table><a-drawertitle="添加用户":width="600":visible="visible"@close="handleClose"><a-formref="formRef"name="custom-validation":model="formState":rules="rulesFrom"v-bind="layout"@finish="handleFinish"@validate="handleValidate"@finishFailed="handleFinishFailed"><a-form-item has-feedback label="菜单名称" name="name"><a-input v-model:value="formState.name" type="name" autocomplete="off" /></a-form-item><a-form-item has-feedback label="头像" name="avatar"><a-uploadv-model:file-list="formState.avatar"name="avatar"list-type="picture-card"class="avatar-uploader":show-upload-list="false"action="https://www.mocky.io/v2/5cc8019d300000980a055e76":before-upload="beforeUpload"@change="handleChange"><img v-if="imageUrl" :src="imageUrl" alt="avatar" /><div v-else><loading-outlined v-if="loading"></loading-outlined><plus-outlined v-else></plus-outlined><div class="ant-upload-text">Upload</div></div></a-upload></a-form-item><a-form-item has-feedback label="权限编码" name="code"><a-input v-model:value="formState.code" type="code" autocomplete="off" /></a-form-item><a-form-item has-feedback label="电话" name="phone"><a-input v-model:value="formState.phone" type="phone" autocomplete="off" /></a-form-item><a-form-item has-feedback label="性别" name="sex"><a-select v-model:value="formState.sex" placeholder="请选择性别"><a-select-option value="1">男</a-select-option><a-select-option value="2">女</a-select-option></a-select></a-form-item><a-form-item has-feedback label="状态" name="statu"><a-select v-model:value="formState.statu" placeholder="请选择状态"><a-select-option value="1">正常</a-select-option><a-select-option value="2">停止</a-select-option><a-select-option value="3">注销</a-select-option></a-select></a-form-item><a-form-item :wrapper-col="{ span: 20, offset: 4 }"><a-button type="primary" html-type="submit">提交</a-button><a-button style="margin-left: 10px" @click="resetForm">重置</a-button></a-form-item></a-form></a-drawer></div>
</template><script name="user" lang="ts" setup>
import {ref,reactive } from "vue";
import { SmileOutlined, DownOutlined } from '@ant-design/icons-vue';
import { PlusOutlined, LoadingOutlined } from '@ant-design/icons-vue';
import { message } from 'ant-design-vue';
import {Rule} from "ant-design-vue/es/form";
import {FormInstance} from "ant-design-vue";
const formRef = ref<FormInstance>();
const visible = ref<boolean>(false);
const fileList = ref([]);
const loading = ref<boolean>(false);
const imageUrl = ref<string>('');interface FormState {name: string;avatar: string[];code: string;email: string;phone: string;sex: string;statu: string;
}
const formState = reactive<FormState>({name: '',avatar:  [],code:  '',email: '',phone:  '',sex:  '',statu:  '',
});
const layout = {labelCol: { span: 4 },wrapperCol: { span: 20 },
};
let checkName= async (_rule: Rule, value: string) => {if (!value) {return Promise.reject('请输入姓名');}
};
let checkEmail= async (_rule: Rule, value: string) => {if (!value) {return Promise.reject('请输入邮箱');}
};
let checkPhone= async (_rule: Rule, value: string) => {if (!value) {return Promise.reject('请输入电话');}
};
let checkSex= async (_rule: Rule, value: string) => {if (!value) {return Promise.reject('请输入菜单名称');}
};
let checkStatu= async (_rule: Rule, value: string) => {if (!value) {return Promise.reject('请选择状态');}
};
let checkCode= async (_rule: Rule, value: string) => {if (!value) {return Promise.reject('请输入权限编码');}
};
let checkAvatar= async (_rule: Rule, value: string) => {if (!value) {return Promise.reject('请选择头像');}
};
const rulesFrom: Record<string, Rule[]> = {name: [{ validator: checkName, trigger: 'change' }],avatar: [{ validator: checkAvatar, trigger: 'change' }],code: [{ validator: checkCode, trigger: 'change' }],email: [{ validator: checkEmail, trigger: 'change' }],phone: [{ validator: checkPhone, trigger: 'change' }],sex: [{ validator: checkSex, trigger: 'change' }],statu: [{ validator: checkStatu, trigger: 'change' }],
};
const onFinish = (values: any) => {console.log('Success:', values);
};
let searchValue = ref("")
const columns = [{title: '头像',dataIndex: 'avatar',key: 'avatar',slots: {title: 'customTitle',customRender: 'avatar'},},{title: '名称',dataIndex: 'name',key: 'name',slots: {title: 'customTitle',customRender: 'name'},},{title: '角色',dataIndex: 'code',key: 'code',},{title: '邮箱',dataIndex: 'email',key: 'email',},{title: '电话',dataIndex: 'phone',key: 'phone',},{title: 'Tags',key: 'tags',dataIndex: 'tags',slots: {customRender: 'tags'},},{title: 'Action',key: 'action',slots: {customRender: 'action'},},
];
const data = [{key: '1',avatar: 'https://zos.alipayobjects.com/rmsportal/ODTLcjxAfvqbxHnVXCYX.png',name: 'John Brown',code: 'user',email: '2800967183@qq.com',phone: '18086256816',tags: ['正常'],},{key: '2',avatar: 'https://zos.alipayobjects.com/rmsportal/ODTLcjxAfvqbxHnVXCYX.png',name: 'Jim Green',code: 'doctor',email: '2019967083@qq.com',phone: '15024511186',tags: ['注销'],},{key: '3',avatar: 'https://zos.alipayobjects.com/rmsportal/ODTLcjxAfvqbxHnVXCYX.png',name: 'Joe Black',code: 'admin',email: '2079901021@qq.com',phone: '15748163055',tags: ['正常'],},
];
const onSearch = () => {}let checkRemark= async (_rule: Rule, value: string) => {if (!value) {return Promise.reject('请输入描述');}
};const rules: Record<string, Rule[]> = {name: [{ validator: checkName, trigger: 'change' }],code: [{ validator: checkCode, trigger: 'change' }],remark: [{ validator: checkRemark, trigger: 'change' }],statu: [{ validator: checkStatu, trigger: 'change' }],
};const showDrawer = (id:number) => {console.log(id)visible.value = true;
};
const handleClose = () => {visible.value = false;
};
const handleFinish = (values: FormState) => {console.log(values, formState);
};
const handleFinishFailed = (errors: any) => {console.log(errors);
};
const resetForm = () => {// @ts-ignoreformRef.value.resetFields();
};
const handleValidate = (...args: any[]) => {console.log(args);
};
interface FileItem {uid: string;name?: string;status?: string;response?: string;url?: string;type?: string;size: number;originFileObj: any;
}
interface FileInfo {file: FileItem;fileList: FileItem[];
}
function getBase64(img: Blob, callback: (base64Url: string) => void) {const reader = new FileReader();reader.addEventListener('load', () => callback(reader.result as string));reader.readAsDataURL(img);
}
const handleChange = (info: FileInfo) => {if (info.file.status === 'uploading') {loading.value = true;return;}if (info.file.status === 'done') {// Get this url from response in real world.getBase64(info.file.originFileObj, (base64Url: string) => {imageUrl.value = base64Url;loading.value = false;});}if (info.file.status === 'error') {loading.value = false;message.error('upload error');}
};const beforeUpload = (file: FileItem) => {const isJpgOrPng = file.type === 'image/jpeg' || file.type === 'image/png';if (!isJpgOrPng) {message.error('You can only upload JPG file!');}const isLt2M = file.size / 1024 / 1024 < 2;if (!isLt2M) {message.error('Image must smaller than 2MB!');}return isJpgOrPng && isLt2M;
};
const edit = (e:any) => {resetForm();console.log(e)formState.avatar = [e.avatar];formState.code = e.code;formState.email = e.email;formState.name = e.name;formState.phone = e.phone;formState.sex = e.sex;formState.statu = e.tags[0];visible.value = true;
}</script><style scoped></style>
相关文章:
Vue3做出B站【bilibili】 Vue3+TypeScript+ant-design-vue【快速入门一篇文章精通系列(一)前端项目案例】
本项目分为二部分 1、后台管理系统(用户管理,角色管理,视频管理等) 2、客户端(登录注册、发布视频) Vue3做出B站【bilibili】 Vue3TypeScriptant-design-vue【快速入门一篇文章精通系列(一&…...

2.3操作系统-进程管理:死锁、死锁的产生条件、死锁资源数计算
2.3操作系统-进程管理:死锁、死锁的产生条件、死锁资源数计算死锁死锁的产生条件死锁资源数计算死锁 进程管理是操作系统的核心,如果设计不当,就会出现死锁的问题。如果一个进程在等待意见不可能发生的事,进程就会死锁。而如果一…...

人物百科怎么建?个人百度百科创建的注意事项
百科词条根据百科类型可分为人物词条、品牌词条以及企业词条等等,对于不同类型的词条,在创建时有着不同的规则要求。 相对于品牌词条和企业词条,人物词条是相对有难度的一类,因为品牌有注册商标,企业有营业执照,都是比较容易佐证的…...
ArrayList与LinkedList的区别 以及 链表理解
list接口中ArrayList、LinkedList都不是线程安全,Vector是线程安全 1、数据结构不同 ArrayList是Array(动态数组)的数据结构,LinkedList是Link(链表)双向链表的数据结构。 2、空间灵活性 ArrayList最好指定初始容量 LinkedList是比ArrayList灵活的&a…...
电脑蓝屏怎么办?这5个技巧你必须学会
案例:电脑蓝屏是什么原因?怎么样可以解决? “救命!!!电脑是怎么了?开机直接蓝屏,是哪里坏了吗?前几天电脑还是好的,今早一打开就是蓝屏,可能是之…...
大数据 | (三)centos7图形界面无法执行yum命令
大家好,今天是三八女神节了! 你知道吗?世界上第一位电脑程序设计师是名女性,Ada Lovelace (1815-1852)。 她是一位英国数学家兼作家,第一位主张计算机不只可以用来算数的人,也发表了第一段分析机用的演算…...
历史上被发现的第一个真正的Bug - Grace Hopper
写在前面:博主是一只经过实战开发历练后投身培训事业的“小山猪”,昵称取自动画片《狮子王》中的“彭彭”,总是以乐观、积极的心态对待周边的事物。本人的技术路线从Java全栈工程师一路奔向大数据开发、数据挖掘领域,如今终有小成…...

KiCad 编译
KiCad 编译 因为最新项目需要,所以看了一下KiCad的编译,这里介绍的是64位电脑的编译,32位小伙伴请绕道官网看教程呦。 您可以在KiCad内查看基本的编译教程。 我这里也是参考的官网编译教程进行的编译,接下来让我们一起看看吧。…...

HTML 简介
文章目录HTML 简介实例解析什么是HTML?HTML 标签HTML 元素Web 浏览器HTML 网页结构HTML版本<!DOCTYPE> 声明通用声明HTML5HTML 4.01XHTML 1.0中文编码HTML 简介 HTML 实例 <!DOCTYPE html> <html><head><meta charset"utf-8"><ti…...
)
2023浙江省赛“信息安全管理与评估“--数字取证调查--网络数据包分析解析(高职组)
2022全国职业技能大赛“信息安全管理与评估”(高职组)任务书 2022全国职业技能大赛“信息安全管理与评估”任务书第一阶段竞赛项目试题第二阶段竞赛项目试题任务 2: 网络数据包分析第三阶段竞赛项目试题2022全国职业技能大赛“信息安全管理与评估”任务书 第一阶段竞赛项目…...
【Redis应用】查询缓存相关问题解决(二)
🚗Redis应用学习第二站~ 🚩起始站:【Redis应用】基于Redis实现共享session登录(一) 🚩本文已收录至专栏:Redis技术学习 👍希望您能有所收获,底部附有完整思维导图 一.概述 本篇我们会一起来学习…...
【SpringCloud】SpringCloud教程之Nacos实战(三集群配置)
目录前言一.Nacos集群逻辑图二.Nacos集群搭建1.搭建数据库,初始化数据库表结构2.下载Nacos3.配置Nacos3.启动Nacos4.配置启动nginx5.测试是否成功6.设置服务的nacos地址7.新增一个配置,查看数据看是否进行持久化了前言 在我前面两篇讲的都是单个nacos&a…...

什么是激励能力?HR人才测评
什么是激励能力?激励能力主要是针对管理型岗位而言的,尤其是团队型管理,既要督导团队成员,更需要掌握激励下属的方法和技巧。在HR人才测评系统中,对于管理型岗位的人才测评指标,通常也会包含激励能力&#…...
【刷题笔记】之滑动窗口(长度最小的子数组、水果成篮、最小的覆盖子串)
滑动窗口模板//滑动窗口模板:注意使用滑动窗口方法,使用一个 for(while) 循环中的变量是用来控制终止位置的//最小滑窗:给定数组 nums,定义滑动窗口的左右边界 i、j,求满足某个条件的滑窗的最小长度 for(j 0; j < …...

【JavaScript速成之路】JavaScript函数
📃个人主页:「小杨」的csdn博客 🔥系列专栏:【JavaScript速成之路】 🐳希望大家多多支持🥰一起进步呀! 文章目录前言1,函数基础1.1,函数概念1.2,函数使用1.3&…...
萤火虫算法优化SVM变压器故障分类预测,fa-svm分类预测,libsvm参数优化
目录 支持向量机SVM的详细原理 SVM的定义 SVM理论 Libsvm工具箱详解 简介 参数说明 易错及常见问题 SVM应用实例,基于fa-svm分类预测 代码 结果分析 展望 支持向量机SVM的详细原理 SVM的定义 支持向量机(support vector machines, SVM)是一种二分类模型,它的基本模型是…...
JavaScript DOM API的使用
文章目录一. 什么是DOM二. 最常用的DOM API1. 选中页面元素2. 操作元素的属性2.1 事件概念2.2 获取/修改元素内容计数器2.4 获取/修改元素属性点击图片切换2.5 获取/修改表单元素属性表单计数器全选/取消全选按钮2.6 获取修改样式属性点击文字放大实现夜间/日间模式的切换3. 操…...
Vue组件库出现$listeners is readonly等错误的原因及预防方法
本文主要是面向写组件库的人士,而不是组件库的使用人士。 出现原因 根本原因是因为组件库的package.json中 dependencies包含了vue包,然后导致最后打包出来的组件库也包含vue包 然后和引用这个组件库的项目中的vue发生冲突。 举个例子,pro…...

lsusb
用法: lsusb -hUsage: lsusb [options]... List USB devices -v, --verbose Increase verbosity (show descriptors) -s [[bus]:][devnum] Show only devices with specified device and/or bus numbers (in decimal) -d vendor:[product] …...

Allegro如何在PCB中添加层面操作指导
Allegro如何在PCB中添加层面操作指导 在用Allegro做PCB设计的时候,根据需要,会在PCB中额外添加一些额外的层面,如下图 如何添加,具体操作如下 点击Setup点击Subclasses...

HTML 语义化
目录 HTML 语义化HTML5 新特性HTML 语义化的好处语义化标签的使用场景最佳实践 HTML 语义化 HTML5 新特性 标准答案: 语义化标签: <header>:页头<nav>:导航<main>:主要内容<article>&#x…...
springboot 百货中心供应链管理系统小程序
一、前言 随着我国经济迅速发展,人们对手机的需求越来越大,各种手机软件也都在被广泛应用,但是对于手机进行数据信息管理,对于手机的各种软件也是备受用户的喜爱,百货中心供应链管理系统被用户普遍使用,为方…...
Lombok 的 @Data 注解失效,未生成 getter/setter 方法引发的HTTP 406 错误
HTTP 状态码 406 (Not Acceptable) 和 500 (Internal Server Error) 是两类完全不同的错误,它们的含义、原因和解决方法都有显著区别。以下是详细对比: 1. HTTP 406 (Not Acceptable) 含义: 客户端请求的内容类型与服务器支持的内容类型不匹…...

【OSG学习笔记】Day 18: 碰撞检测与物理交互
物理引擎(Physics Engine) 物理引擎 是一种通过计算机模拟物理规律(如力学、碰撞、重力、流体动力学等)的软件工具或库。 它的核心目标是在虚拟环境中逼真地模拟物体的运动和交互,广泛应用于 游戏开发、动画制作、虚…...
Xshell远程连接Kali(默认 | 私钥)Note版
前言:xshell远程连接,私钥连接和常规默认连接 任务一 开启ssh服务 service ssh status //查看ssh服务状态 service ssh start //开启ssh服务 update-rc.d ssh enable //开启自启动ssh服务 任务二 修改配置文件 vi /etc/ssh/ssh_config //第一…...

DockerHub与私有镜像仓库在容器化中的应用与管理
哈喽,大家好,我是左手python! Docker Hub的应用与管理 Docker Hub的基本概念与使用方法 Docker Hub是Docker官方提供的一个公共镜像仓库,用户可以在其中找到各种操作系统、软件和应用的镜像。开发者可以通过Docker Hub轻松获取所…...

Swift 协议扩展精进之路:解决 CoreData 托管实体子类的类型不匹配问题(下)
概述 在 Swift 开发语言中,各位秃头小码农们可以充分利用语法本身所带来的便利去劈荆斩棘。我们还可以恣意利用泛型、协议关联类型和协议扩展来进一步简化和优化我们复杂的代码需求。 不过,在涉及到多个子类派生于基类进行多态模拟的场景下,…...
【JVM】- 内存结构
引言 JVM:Java Virtual Machine 定义:Java虚拟机,Java二进制字节码的运行环境好处: 一次编写,到处运行自动内存管理,垃圾回收的功能数组下标越界检查(会抛异常,不会覆盖到其他代码…...
【Zephyr 系列 10】实战项目:打造一个蓝牙传感器终端 + 网关系统(完整架构与全栈实现)
🧠关键词:Zephyr、BLE、终端、网关、广播、连接、传感器、数据采集、低功耗、系统集成 📌目标读者:希望基于 Zephyr 构建 BLE 系统架构、实现终端与网关协作、具备产品交付能力的开发者 📊篇幅字数:约 5200 字 ✨ 项目总览 在物联网实际项目中,**“终端 + 网关”**是…...

Java面试专项一-准备篇
一、企业简历筛选规则 一般企业的简历筛选流程:首先由HR先筛选一部分简历后,在将简历给到对应的项目负责人后再进行下一步的操作。 HR如何筛选简历 例如:Boss直聘(招聘方平台) 直接按照条件进行筛选 例如:…...