Linux 36.3 + JetPack v6.0@jetson-inference之图像分类
Linux 36.3 + JetPack v6.0@jetson-inference之图像分类
- 1. 源由
- 2. imagenet
- 2.1 命令选项
- 2.2 下载模型
- 2.3 操作示例
- 2.3.1 单张照片
- 2.3.2 视频
- 3. 代码
- 3.1 Python
- 3.2 C++
- 4. 参考资料
- 5. 补充
- 5.1 第一次运行模型本地适应初始化
- 5.2 samba软连接
1. 源由
从应用角度来说,图像分类是计算机视觉里面最基本的一个操作。
2. imagenet
imageNet对象接受输入图像并输出每个类别的概率。GoogleNet和ResNet-18模型在构建过程中自动下载,这些模型已在包含1000个物体的ImageNet ILSVRC数据集上进行了训练。
2.1 命令选项
$ imagenet --help
usage: imagenet [--help] [--network=NETWORK] ...input_URI [output_URI]Classify a video/image stream using an image recognition DNN.
See below for additional arguments that may not be shown above.optional arguments:--help            show this help message and exit--network=NETWORK pre-trained model to load (see below for options)--topK=N         show the topK number of class predictions (default: 1)
positional arguments:input_URI       resource URI of input stream  (see videoSource below)output_URI      resource URI of output stream (see videoOutput below)imageNet arguments:--network=NETWORK    pre-trained model to load, one of the following:* alexnet* googlenet (default)* googlenet-12* resnet-18* resnet-50* resnet-101* resnet-152* vgg-16* vgg-19* inception-v4--model=MODEL        path to custom model to load (caffemodel, uff, or onnx)--prototxt=PROTOTXT  path to custom prototxt to load (for .caffemodel only)--labels=LABELS      path to text file containing the labels for each class--input-blob=INPUT   name of the input layer (default is 'data')--output-blob=OUTPUT name of the output layer (default is 'prob')--threshold=CONF     minimum confidence threshold for classification (default is 0.01)--smoothing=WEIGHT   weight between [0,1] or number of frames (disabled by default)--profile            enable layer profiling in TensorRTvideoSource arguments:input                resource URI of the input stream, for example:* /dev/video0               (V4L2 camera #0)* csi://0                   (MIPI CSI camera #0)* rtp://@:1234              (RTP stream)* rtsp://user:pass@ip:1234  (RTSP stream)* webrtc://@:1234/my_stream (WebRTC stream)* file://my_image.jpg       (image file)* file://my_video.mp4       (video file)* file://my_directory/      (directory of images)--input-width=WIDTH    explicitly request a width of the stream (optional)--input-height=HEIGHT  explicitly request a height of the stream (optional)--input-rate=RATE      explicitly request a framerate of the stream (optional)--input-save=FILE      path to video file for saving the input stream to disk--input-codec=CODEC    RTP requires the codec to be set, one of these:* h264, h265* vp8, vp9* mpeg2, mpeg4* mjpeg--input-decoder=TYPE   the decoder engine to use, one of these:* cpu* omx  (aarch64/JetPack4 only)* v4l2 (aarch64/JetPack5 only)--input-flip=FLIP      flip method to apply to input:* none (default)* counterclockwise* rotate-180* clockwise* horizontal* vertical* upper-right-diagonal* upper-left-diagonal--input-loop=LOOP      for file-based inputs, the number of loops to run:* -1 = loop forever*  0 = don't loop (default)* >0 = set number of loopsvideoOutput arguments:output               resource URI of the output stream, for example:* file://my_image.jpg       (image file)* file://my_video.mp4       (video file)* file://my_directory/      (directory of images)* rtp://<remote-ip>:1234    (RTP stream)* rtsp://@:8554/my_stream   (RTSP stream)* webrtc://@:1234/my_stream (WebRTC stream)* display://0               (OpenGL window)--output-codec=CODEC   desired codec for compressed output streams:* h264 (default), h265* vp8, vp9* mpeg2, mpeg4* mjpeg--output-encoder=TYPE  the encoder engine to use, one of these:* cpu* omx  (aarch64/JetPack4 only)* v4l2 (aarch64/JetPack5 only)--output-save=FILE     path to a video file for saving the compressed streamto disk, in addition to the primary output above--bitrate=BITRATE      desired target VBR bitrate for compressed streams,in bits per second. The default is 4000000 (4 Mbps)--headless             don't create a default OpenGL GUI windowlogging arguments:--log-file=FILE        output destination file (default is stdout)--log-level=LEVEL      message output threshold, one of the following:* silent* error* warning* success* info* verbose (default)* debug--verbose              enable verbose logging (same as --log-level=verbose)--debug                enable debug logging   (same as --log-level=debug)
注:关于照片、视频等基本操作,详见: 《Linux 36.3 + JetPack v6.0@jetson-inference之视频操作》
2.2 下载模型
两种方式:
- 创建imageNet对象时,初始化会自动下载
- 通过手动将模型文件放置到
data/networks/目录下
国内,由于“墙”的存在,对于我们这种处于起飞阶段的菜鸟来说就是“障碍”。有条件的朋友可以参考《apt-get通过代理更新系统》进行设置网络。
不过,NVIDIA还是很热心的帮助我们做了“Work around”,所有的模型都已经预先存放在中国大陆能访问的位置:Github - model-mirror-190618
--network=NETWORK pre-trained model to load, one of the following:* alexnet* googlenet (default)* googlenet-12* resnet-18* resnet-50* resnet-101* resnet-152* vgg-16* vgg-19* inception-v4--model=MODEL path to custom model to load (caffemodel, uff, or onnx)
根据以上Model方面信息,该命令支持:
- alexnet
- googlenet (default)
- googlenet-12
- resnet-18
- resnet-50
- resnet-101
- resnet-152
- vgg-16
- vgg-19
- inception-v4
- 支持定制模型(需要用到通用的模型文件caffemodel, uff, or onnx)
作为示例,就下载一个googlenet (default)模型
$ mkdir model-mirror-190618
$ cd model-mirror-190618
$ wget https://github.com/dusty-nv/jetson-inference/releases/download/model-mirror-190618/GoogleNet.tar.gz
$ mkdir -p ../data/networks/Googlenet
$ tar -zxvf GoogleNet.tar.gz -C ../data/networks/Googlenet
$ cd ..
注:这个模型文件下载要注意,将解压缩文件放置到Googlenet目录下。
2.3 操作示例
它加载图像(或多张图像),使用TensorRT和imageNet类进行推理,然后叠加分类结果并保存输出图像。该项目附带了供您使用的示例图像,这些图像位于images/目录下。
- What’s wrong with imagenet, continous printf?
$ cd build/aarch64/bin/
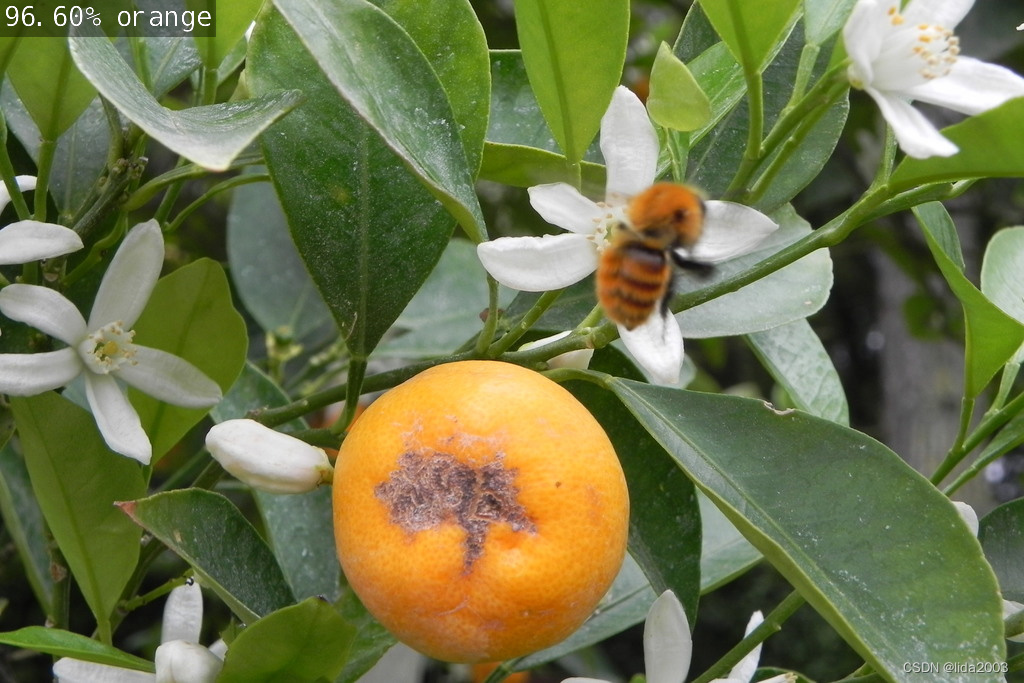
2.3.1 单张照片
# C++
$ ./imagenet images/orange_0.jpg images/test/output_imagenet_cpp.jpg
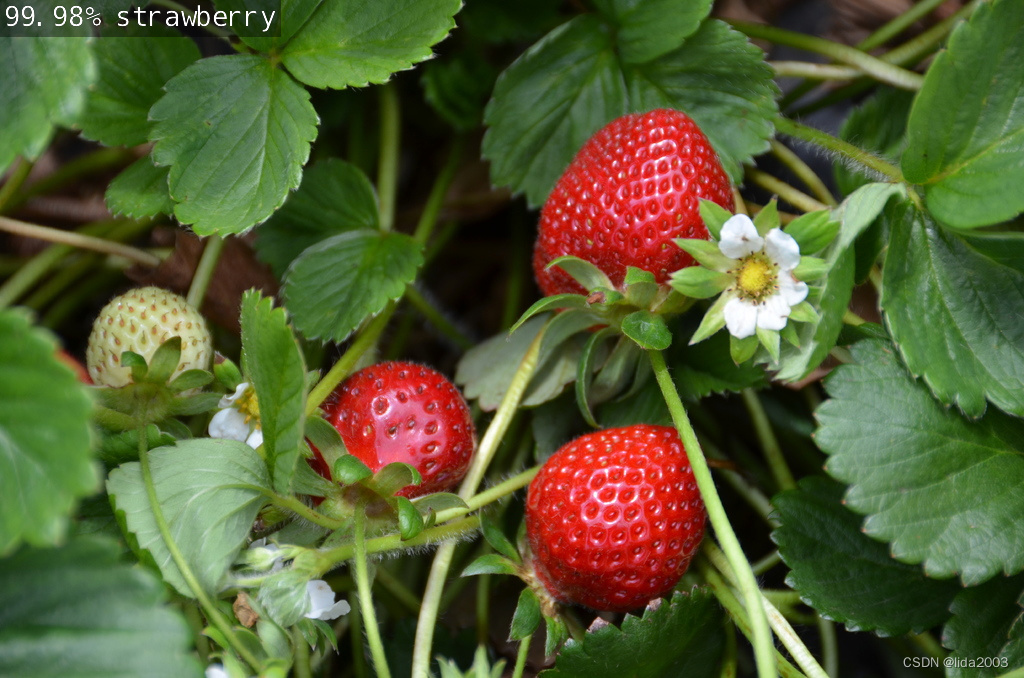
# Python
$ ./imagenet.py images/strawberry_0.jpg images/test/output_imagenet_python.jpg
2.3.2 视频
# Download test video (thanks to jell.yfish.us)
$ wget https://nvidia.box.com/shared/static/tlswont1jnyu3ix2tbf7utaekpzcx4rc.mkv -O jellyfish.mkv
# C++
$ ./imagenet --network=resnet-18 ../../../jellyfish.mkv images/test/output_imagenet_jellyfish_cpp.mkv
# Python
$ ./imagenet.py --network=resnet-18 ../../../jellyfish.mkv images/test/output_imagenet_jellyfish_python.mkv
这里视频就放一份了,理论上将既然有概率性的问题求解方式,不同时间运算的结果可能会有差异。但是基于这个模型,计算机没有记忆,所以理论上是同一个概率。
那么问题来了,照片的CPP和Python两次运算概率确是是不一样的。这是什么原因呢?
output_imagenet_jellyfish_cpp
3. 代码
3.1 Python
Import statements
├── sys
├── argparse
├── jetson_inference
│   └── imageNet
└── jetson_utils├── videoSource├── videoOutput├── cudaFont└── LogCommand line parsing
├── Create ArgumentParser
│   ├── description
│   ├── formatter_class
│   └── epilog
├── Add arguments
│   ├── input
│   ├── output
│   ├── --network
│   └── --topK
└── Parse arguments├── try│   └── args = parser.parse_known_args()[0]└── except├── print("")├── parser.print_help()└── sys.exit(0)Load the recognition network
└── net = imageNet(args.network, sys.argv)Optional hard-coded model loading (commented out)
└── net = imageNet(model="model/resnet18.onnx", labels="model/labels.txt", input_blob="input_0", output_blob="output_0")Create video sources & outputs
├── input = videoSource(args.input, argv=sys.argv)
├── output = videoOutput(args.output, argv=sys.argv)
└── font = cudaFont()Process frames until EOS or user exits
└── while True├── Capture the next image│   ├── img = input.Capture()│   └── if img is None│       └── continue├── Classify the image and get the topK predictions│   └── predictions = net.Classify(img, topK=args.topK)├── Draw predicted class labels│   └── for n, (classID, confidence) in enumerate(predictions)│       ├── classLabel = net.GetClassLabel(classID)│       ├── confidence *= 100.0│       ├── print(f"imagenet:  {confidence:05.2f}% class #{classID} ({classLabel})")│       └── font.OverlayText(img, text=f"{confidence:05.2f}% {classLabel}", │                            x=5, y=5 + n * (font.GetSize() + 5),│                            color=font.White, background=font.Gray40)├── Render the image│   └── output.Render(img)├── Update the title bar│   └── output.SetStatus("{:s} | Network {:.0f} FPS".format(net.GetNetworkName(), net.GetNetworkFPS()))├── Print out performance info│   └── net.PrintProfilerTimes()└── Exit on input/output EOS└── if not input.IsStreaming() or not output.IsStreaming()└── break
3.2 C++
#include statements
├── "videoSource.h"
├── "videoOutput.h"
├── "cudaFont.h"
├── "imageNet.h"
└── <signal.h>Global variables
└── bool signal_recieved = false;Function definitions
├── void sig_handler(int signo)
│   └── if (signo == SIGINT)
│       ├── LogVerbose("received SIGINT\n");
│       └── signal_recieved = true;
└── int usage()├── printf("usage: imagenet [--help] [--network=NETWORK] ...\n");├── printf("                input_URI [output_URI]\n\n");├── printf("Classify a video/image stream using an image recognition DNN.\n");├── printf("See below for additional arguments that may not be shown above.\n\n");├── printf("optional arguments:\n");├── printf("  --help            show this help message and exit\n");├── printf("  --network=NETWORK pre-trained model to load (see below for options)\n");├── printf("  --topK=N          show the topK number of class predictions (default: 1)\n");├── printf("positional arguments:\n");├── printf("    input_URI       resource URI of input stream  (see videoSource below)\n");├── printf("    output_URI      resource URI of output stream (see videoOutput below)\n\n");├── printf("%s", imageNet::Usage());├── printf("%s", videoSource::Usage());├── printf("%s", videoOutput::Usage());└── printf("%s", Log::Usage());main function
├── Parse command line
│   ├── commandLine cmdLine(argc, argv);
│   └── if (cmdLine.GetFlag("help"))
│       └── return usage();
├── Attach signal handler
│   └── if (signal(SIGINT, sig_handler) == SIG_ERR)
│       └── LogError("can't catch SIGINT\n");
├── Create input stream
│   ├── videoSource* input = videoSource::Create(cmdLine, ARG_POSITION(0));
│   └── if (!input)
│       ├── LogError("imagenet:  failed to create input stream\n");
│       └── return 1;
├── Create output stream
│   ├── videoOutput* output = videoOutput::Create(cmdLine, ARG_POSITION(1));
│   └── if (!output)
│       ├── LogError("imagenet:  failed to create output stream\n");
│       └── return 1;
├── Create font for image overlay
│   ├── cudaFont* font = cudaFont::Create();
│   └── if (!font)
│       ├── LogError("imagenet:  failed to load font for overlay\n");
│       └── return 1;
├── Create recognition network
│   ├── imageNet* net = imageNet::Create(cmdLine);
│   └── if (!net)
│       ├── LogError("imagenet:  failed to initialize imageNet\n");
│       └── return 1;
│   ├── const int topK = cmdLine.GetInt("topK", 1);  // default top result
├── Processing loop
│   └── while (!signal_recieved)
│       ├── uchar3* image = NULL;
│       ├── int status = 0;
│       ├── if (!input->Capture(&image, &status))
│       │   └── if (status == videoSource::TIMEOUT)
│       │       └── continue;
│       │   └── break; // EOS
│       ├── imageNet::Classifications classifications; // classID, confidence
│       ├── if (net->Classify(image, input->GetWidth(), input->GetHeight(), classifications, topK) < 0)
│       │   └── continue;
│       ├── for (uint32_t n=0; n < classifications.size(); n++)
│       │   ├── const uint32_t classID = classifications[n].first;
│       │   ├── const char* classLabel = net->GetClassLabel(classID);
│       │   ├── const float confidence = classifications[n].second * 100.0f;
│       │   ├── LogVerbose("imagenet:  %2.5f%% class #%i (%s)\n", confidence, classID, classLabel);
│       │   ├── char str[256];
│       │   ├── sprintf(str, "%05.2f%% %s", confidence, classLabel);
│       │   └── font->OverlayText(image, input->GetWidth(), input->GetHeight(),
│       │       str, 5, 5 + n * (font->GetSize() + 5),
│       │       make_float4(255,255,255,255), make_float4(0,0,0,100));
│       ├── if (output != NULL)
│       │   ├── output->Render(image, input->GetWidth(), input->GetHeight());
│       │   ├── char str[256];
│       │   ├── sprintf(str, "TensorRT %i.%i.%i | %s | Network %.0f FPS", NV_TENSORRT_MAJOR, NV_TENSORRT_MINOR, NV_TENSORRT_PATCH, net->GetNetworkName(), net->GetNetworkFPS());
│       │   └── output->SetStatus(str);
│       │   └── if (!output->IsStreaming())
│       │       └── break;
│       └── net->PrintProfilerTimes();
├── Destroy resources
│   ├── LogVerbose("imagenet:  shutting down...\n");
│   ├── SAFE_DELETE(input);
│   ├── SAFE_DELETE(output);
│   ├── SAFE_DELETE(net);
└── LogVerbose("imagenet:  shutdown complete.\n");return 0;
4. 参考资料
【1】jetson-inference - Classifying Images with ImageNet
5. 补充
5.1 第一次运行模型本地适应初始化
第一次运行神经网络,虽然模型是预训练的,但是本地部署还是有个初始化过程,好像是建立一些cache的过程,具体有待进一步研究。
注:有知道为什么是这样,也请评论区告诉我,谢谢!
- imagenet can’t work as readme says, see attached log #1858
- could not find engine cache … MonoDepth-FCN-Mobilenet/monodepth_fcn_mobilenet.onnx.1.1.8602.GPU.FP16.engine ? #1855
- What’s wrong with imagenet/detectnet, continous printf?
5.2 samba软连接
注:share请替换为samba共享目录,比如:home
- ubuntu22.04 配置
[global]
allow insecure wide links = yes[share]
follow symlinks = yes
wide links = yes
- 之前的版本
[global]
unix extensions = no[share]
follow symlinks = yes
wide links = yes
相关文章:
Linux 36.3 + JetPack v6.0@jetson-inference之图像分类
Linux 36.3 JetPack v6.0jetson-inference之图像分类 1. 源由2. imagenet2.1 命令选项2.2 下载模型2.3 操作示例2.3.1 单张照片2.3.2 视频 3. 代码3.1 Python3.2 C 4. 参考资料5. 补充5.1 第一次运行模型本地适应初始化5.2 samba软连接 1. 源由 从应用角度来说,图…...
重庆公司记账代理,打造专业财务管理解决方案的领先企业
重庆公司记账代理,作为专业的财务管理服务提供商,我们的目标是为公司的经营管理和决策提供科学、准确的财务数据支持,我们通过长期的专业经验和对市场的深入理解,为您提供一站式的记账服务和财务咨询。 专业团队 我们拥有一支由经…...

transformers 阅读:Llama 模型
正文 学习一下 transformers 库中,Llama 模型的代码,学习过程中写下这篇笔记,一来加深印象,二来可以多次回顾。 笔者小白,里面错误之处请不吝指出。 层归一化 LlamaRMSNorm transformers 中对于 LlamaRMSNorm 类的…...

python绘制piper三线图
piper三线图 Piper三线图是一种常用于水化学分析的图表,它能够帮助我们理解和比较水样的化学成分。该图表由三个部分组成:两个三角形和一个菱形。两个三角形分别用于显示阳离子和阴离子的相对比例,而菱形部分则综合显示了这些离子比例在水样…...

咖啡机器人如何精准控制液位流量
在如今快节奏的生活中,精确控制液位流量的需求愈发迫切,特别是在咖啡机器人等精密设备中。为了满足这一需求,工程师们不断研发出各种先进的技术,以确保液体流量的精准控制。其中,霍尔式流量计和光电式流量计就是两种常…...

Go go-redis应用
go-redis 是 Go 语言的一个流行的 Redis 客户端库,它提供了丰富的功能来与 Redis 数据库进行交互。 1、简单应用 package mainimport ("context""fmt""log""github.com/redis/go-redis/v9" )func main() {ctx : context…...

从混乱到有序:PDM系统如何优化物料编码
在现代制造业中,物料管理是企业运营的核心。物料编码作为物料管理的基础,对于确保物料的准确性、唯一性和高效性至关重要。随着产品种类的不断增加和产品变型的多样化,传统的物料编码管理方式已经不能满足企业的需求。本文将探讨产品数据管理…...

npm发布自己的插件包
要发布自己的插件包到npm,可以按照以下步骤进行操作: 1.创建一个新项目 首先确保你已经安装了Node.js和npm。然后,在你的项目目录中初始化一个新的npm项目:npm init命令会引导你创建一个package.json文件,其中包含你插件包的基本…...

Pygame:新手指南与入门教程
在游戏开发领域,pygame 是一个广受欢迎的 Python 库,它提供了开发二维游戏的丰富工具和方法。这个库让开发者可以较少地关注底层图形处理细节,更多地专注于游戏逻辑和玩法的实现。本文将详细介绍 pygame,包括其安装过程、基本概念、主要功能和一个简单游戏的开发流程。 一…...

动态IP与静态IP的优缺点
在网络连接中,使用动态和静态 IP 地址取决于连接的性质和要求。静态 IP 地址通常更适合企业相关服务,而动态 IP 地址更适合家庭网络。让我们来看看动态 IP 与静态 IP 的优缺点。 1.静态IP的优点: 更好的 DNS 支持:静态 IP 地址在…...

上海市计算机学会竞赛平台2024年1月月赛丙组最大的和
题目描述 给定两个序列 𝑎1,𝑎2,…,𝑎𝑛a1,a2,…,an 与 𝑏1,𝑏2,…,𝑏𝑛b1,b2,…,bn,请从这两个序列中分别各找一个数,要求这两个数的差不超过给…...

C++三大特性之继承,详细介绍
阿尼亚全程陪伴大家学习~ 前言 每个程序员在开发新系统时,都希望能够利用已有的软件资源,以缩短开发周期,提高开发效率。 为了提高软件的可重用性(reusability),C提供了类的继承机制。 1.继承的概念 继承: 指在现有…...

Python推导式详解
引言 推导式(Comprehensions)是Python中一种简洁且强大的语法结构,可以用来生成列表、字典和集合。推导式使得代码更加简洁、易读,同时也更具Pythonic风格。今天我将将详细介绍列表推导式、字典推导式和集合推导式…...

stm32中如何实现EXTI线 0 ~ 15与对应IO口的配置呢?
STM32的EXTI控制器支持19 个外部中断/ 事件请求。每个中断设有状态位,每个中断/ 事件都有独立的触发和屏蔽设置。 STM32的19个外部中断对应着19路中断线,分别是EXTI_Line0-EXTI_Line18: 线0~15:对应外部 IO口的输入中断。 线16&…...

Python 短文本匹配,短文本语义相似度,基于大模型的短文本匹配,基于LLMs的短文本语义相似度识别,短文本语义扩充和匹配
1.任务描述 之前在做疾病相似度匹配的时候,堪称史诗级难题,虽然最后加上规则以及一些nlp模型,取得了差强人意的效果,但是短文本的语义相似度匹配一直属于比较难以攻克的难题 2.思路 随着近年大模型的飞速发展,就之前…...

提升接口性能方式汇总
1,sql 2,缓存,尤其面向用户,如app数据。可用redis咖啡,二级缓存。 充分利用redis,redis数据类型很多,平时场景中结合实际情况,找一下对应的redis实现方案 比如Zset可以排序&#…...

C++中的常见语法糖汇总
C中的语法糖是指使代码更简洁、可读性更高的语言特性和简化的语法。以下是一些常见的C语法糖: 1. 自动类型推导(auto) 使用 auto 关键字可以让编译器自动推导变量的类型,简化变量的声明。 auto x 10; // 编译器推导 x…...

TensorFlow Playground神经网络演示工具使用方法详解
在现代机器学习领域,神经网络无疑是一个重要的研究方向。然而,对于许多初学者来说,神经网络的概念和实际操作可能显得相当复杂。幸运的是,TensorFlow Playground 提供了一个交互式的在线工具,使得我们可以直观地理解和实验神经网络的基本原理。在这篇博客中,我们将详细介…...
【git】subtree 简单教程
git subtree使用案例 😄生命不息,写作不止 🔥 继续踏上学习之路,学之分享笔记 👊 总有一天我也能像各位大佬一样 🏆 博客首页 怒放吧德德 To记录领地 🌝分享学习心得,欢迎指正&am…...

C语言基础:字符串函数使用与剖析
strtok(分割字符串) char * strtok ( char * str, const char * sep ); sep参数是个字符串,定义了用作分隔符的字符集合 第一个参数指定一个字符串,它包含了0个或者多个由sep字符串中一个或者多个分隔符分割的标 记。strtok函数找…...

从零到一:MicroPython 环境搭建与首个硬件交互项目实战
1. 初识MicroPython:为什么选择它? 第一次接触MicroPython时,我正为一个智能家居项目寻找合适的开发方案。当时被它"Python on hardware"的理念吸引——毕竟谁能拒绝用熟悉的Python语法直接控制硬件呢?MicroPython本质上…...

Alibaba DASD-4B Thinking 对话工具在网络安全领域的应用:智能威胁分析与响应
Alibaba DASD-4B Thinking 对话工具在网络安全领域的应用:智能威胁分析与响应 每天,安全运维团队的工程师们都要面对海量的安全告警。防火墙日志、入侵检测系统的报警、终端防护软件的提示……这些信息像潮水一样涌来。传统的处理方式,往往依…...

别再手动点灯了!用Simulink串口实时控制STM32,5分钟搞定双向通信
基于Simulink与STM32的实时双向通信实战指南 在嵌入式系统开发中,快速原型验证是提升效率的关键环节。传统开发模式下,工程师需要花费大量时间编写底层通信协议、调试硬件接口,而真正核心的控制算法验证反而被边缘化。本文将介绍一种高效开发…...

如何快速实现Tale博客系统国际化:多语言博客搭建完整指南
如何快速实现Tale博客系统国际化:多语言博客搭建完整指南 【免费下载链接】tale 🦄 Best beautiful java blog, worth a try 项目地址: https://gitcode.com/gh_mirrors/ta/tale Tale博客系统是一款优雅的Java博客程序,提供了强大的内…...

避开这5个坑!用MediaRecorder+Vue3实现高兼容性语音输入
Vue3MediaRecorder实战:5个关键技巧打造高兼容语音输入方案 在移动优先的时代,语音输入已成为提升用户体验的重要交互方式。但当你兴奋地在Vue3项目中集成MediaRecorder API时,可能会遇到iOS设备上的静默失败、Android机型上的格式兼容性问题…...

安卓应用按钮样式问题及解决方案
在开发安卓应用的过程中,我们常常会遇到一些看似简单但实际上隐藏着复杂问题的样式问题。今天我们来探讨一个在更换设备后按钮样式发生变化的问题。 问题描述 一位开发者在Android Studio中开发了一个食谱应用。当他从一台手机切换到另一台手机运行应用时,发现所有的按钮都…...

Qwen3-14B企业知识图谱构建:从私有文档抽取实体关系实践
Qwen3-14B企业知识图谱构建:从私有文档抽取实体关系实践 1. 企业知识图谱构建概述 在当今企业数字化转型浪潮中,知识图谱作为结构化知识表示的重要方式,正成为企业知识管理的核心基础设施。传统知识图谱构建需要大量人工标注和规则设计&…...

预制指标、宽表、SQL、本体ABC:真正决定长期成本的,是一次变更会波及多少层
企业做智能问数,最常见的比较题是:预制指标、宽表、人工 SQL、本体ABC,到底哪条路线维护成本更低?如果只给一个笼统答案,往往容易失真。因为真正决定长期成本的,不是“今天开发快不快”,也不是“…...

告别云端:在百元ESP32-S3上实现离线婴儿哭声识别,隐私与实时性我全都要
边缘智能革命:用ESP32-S3打造零隐私风险的婴儿监护终端 当科技与育儿需求碰撞,我们面临一个核心矛盾:如何在不牺牲隐私的前提下实现智能化监护?传统方案依赖云端处理,却让敏感数据暴露在传输与存储环节。本文将揭示一种…...

Clawdbot整合Qwen3:32B效果体验:长文档理解与精准问答演示
Clawdbot整合Qwen3:32B效果体验:长文档理解与精准问答演示 1. 从痛点出发:为什么你需要这个工具 如果你经常需要处理技术文档、合同、论文或者产品手册,一定遇到过这样的困扰:面对一份几十页甚至上百页的PDF文件,想要…...