python:faces swap
# encoding: utf-8
# 版权所有 2024 ©涂聚文有限公司
# 许可信息查看: 两个头像图片之间换脸
# 描述: https://stackoverflow.com/questions/902761/saving-a-numpy-array-as-an-image?answertab=votes
# Author    : geovindu,Geovin Du 涂聚文.
# IDE       : PyCharm 2023.1 python 311
# Datetime  : 2024/6/13 10:25
# User      : geovindu
# Product   : PyCharm
# Project   : EssentialAlgorithms
# File      : imageFaceSwapFun.py
# explain   : 学习
import cv2
import numpy as np
import dlib
from PIL import Image as imclass FaceSwaFun(object):"""换脸类"""def __init__(self,SOURCEPATH,DESTPATH):"""实例化:param SOURCEPATH: 需要用脸的图片:param DESTPATH: 用脸目标图片"""self.SOURCE_PATH=SOURCEPATHself.DEST_PATH=DESTPATHdef index_from_array(self,numpyarray):""":param numpyarray::return:"""index = Nonefor n in numpyarray[0]:index = nbreakreturn indexdef getImage(self)-> tuple:""":return: 返回 (图片的数组,保存的文件名)"""frontal_face_detector = dlib.get_frontal_face_detector()frontal_face_predictor = dlib.shape_predictor("dataset/shape_predictor_68_face_landmarks.dat")source_image = cv2.imread(self.SOURCE_PATH)source_image_grayscale = cv2.cvtColor(source_image, cv2.COLOR_BGR2GRAY)#destination_image = cv2.imread(self.DEST_PATH)destination_image_grayscale = cv2.cvtColor(destination_image, cv2.COLOR_BGR2GRAY)source_image_canvas = np.zeros_like(source_image_grayscale)height, width, no_of_channels = destination_image.shapedestination_image_canvas = np.zeros((height, width, no_of_channels), np.uint8)source_faces = frontal_face_detector(source_image_grayscale)# Obtaining source face landmark points, convex hull, creating mask and also getting delaunay triangle face landmark indices for every facefor source_face in source_faces:source_face_landmarks = frontal_face_predictor(source_image_grayscale, source_face)source_face_landmark_points = []for landmark_no in range(68):x_point = source_face_landmarks.part(landmark_no).xy_point = source_face_landmarks.part(landmark_no).ysource_face_landmark_points.append((x_point, y_point))source_face_landmark_points_array = np.array(source_face_landmark_points, np.int32)source_face_convexhull = cv2.convexHull(source_face_landmark_points_array)cv2.fillConvexPoly(source_image_canvas, source_face_convexhull, 255)source_face_image = cv2.bitwise_and(source_image, source_image, mask=source_image_canvas)# DELAUNAY TRIANGULATIONbounding_rectangle = cv2.boundingRect(source_face_convexhull)subdivisions = cv2.Subdiv2D(bounding_rectangle)subdivisions.insert(source_face_landmark_points)triangles_vector = subdivisions.getTriangleList()triangles_array = np.array(triangles_vector, dtype=np.int32)triangle_landmark_points_list = []source_face_image_copy = source_face_image.copy()for triangle in triangles_array:index_point_1 = (triangle[0], triangle[1])index_point_2 = (triangle[2], triangle[3])index_point_3 = (triangle[4], triangle[5])index_1 = np.where((source_face_landmark_points_array == index_point_1).all(axis=1))index_1 = self.index_from_array(index_1)index_2 = np.where((source_face_landmark_points_array == index_point_2).all(axis=1))index_2 = self.index_from_array(index_2)index_3 = np.where((source_face_landmark_points_array == index_point_3).all(axis=1))index_3 = self.index_from_array(index_3)triangle = [index_1, index_2, index_3]triangle_landmark_points_list.append(triangle)destination_faces = frontal_face_detector(destination_image_grayscale)# Obtaining destination face landmark points and also convex hull for every facefor destination_face in destination_faces:destination_face_landmarks = frontal_face_predictor(destination_image_grayscale, destination_face)destination_face_landmark_points = []for landmark_no in range(68):x_point = destination_face_landmarks.part(landmark_no).xy_point = destination_face_landmarks.part(landmark_no).ydestination_face_landmark_points.append((x_point, y_point))destination_face_landmark_points_array = np.array(destination_face_landmark_points, np.int32)destination_face_convexhull = cv2.convexHull(destination_face_landmark_points_array)# Iterating through all source delaunay triangle and superimposing source triangles in empty destination canvas after warping to same size as destination triangles' shapefor i, triangle_index_points in enumerate(triangle_landmark_points_list):# Cropping source triangle's bounding rectanglesource_triangle_point_1 = source_face_landmark_points[triangle_index_points[0]]source_triangle_point_2 = source_face_landmark_points[triangle_index_points[1]]source_triangle_point_3 = source_face_landmark_points[triangle_index_points[2]]source_triangle = np.array([source_triangle_point_1, source_triangle_point_2, source_triangle_point_3],np.int32)source_rectangle = cv2.boundingRect(source_triangle)(x, y, w, h) = source_rectanglecropped_source_rectangle = source_image[y:y + h, x:x + w]source_triangle_points = np.array([[source_triangle_point_1[0] - x, source_triangle_point_1[1] - y],[source_triangle_point_2[0] - x, source_triangle_point_2[1] - y],[source_triangle_point_3[0] - x, source_triangle_point_3[1] - y]],np.int32)# Create a mask using cropped destination triangle's bounding rectangle(for same landmark points as used for source triangle)destination_triangle_point_1 = destination_face_landmark_points[triangle_index_points[0]]destination_triangle_point_2 = destination_face_landmark_points[triangle_index_points[1]]destination_triangle_point_3 = destination_face_landmark_points[triangle_index_points[2]]destination_triangle = np.array([destination_triangle_point_1, destination_triangle_point_2, destination_triangle_point_3], np.int32)destination_rectangle = cv2.boundingRect(destination_triangle)(x, y, w, h) = destination_rectanglecropped_destination_rectangle_mask = np.zeros((h, w), np.uint8)destination_triangle_points = np.array([[destination_triangle_point_1[0] - x, destination_triangle_point_1[1] - y],[destination_triangle_point_2[0] - x, destination_triangle_point_2[1] - y],[destination_triangle_point_3[0] - x, destination_triangle_point_3[1] - y]],np.int32)cv2.fillConvexPoly(cropped_destination_rectangle_mask, destination_triangle_points, 255)# Warp source triangle to match shape of destination triangle and put it over destination triangle masksource_triangle_points = np.float32(source_triangle_points)destination_triangle_points = np.float32(destination_triangle_points)matrix = cv2.getAffineTransform(source_triangle_points, destination_triangle_points)warped_rectangle = cv2.warpAffine(cropped_source_rectangle, matrix, (w, h))warped_triangle = cv2.bitwise_and(warped_rectangle, warped_rectangle,mask=cropped_destination_rectangle_mask)# Reconstructing destination face in empty canvas of destination image# removing white lines in triangle using maskingnew_dest_face_canvas_area = destination_image_canvas[y:y + h, x:x + w]new_dest_face_canvas_area_gray = cv2.cvtColor(new_dest_face_canvas_area, cv2.COLOR_BGR2GRAY)_, mask_created_triangle = cv2.threshold(new_dest_face_canvas_area_gray, 1, 255, cv2.THRESH_BINARY_INV)warped_triangle = cv2.bitwise_and(warped_triangle, warped_triangle, mask=mask_created_triangle)new_dest_face_canvas_area = cv2.add(new_dest_face_canvas_area, warped_triangle)destination_image_canvas[y:y + h, x:x + w] = new_dest_face_canvas_area# Put reconstructed face on the destination imagefinal_destination_canvas = np.zeros_like(destination_image_grayscale)final_destination_face_mask = cv2.fillConvexPoly(final_destination_canvas, destination_face_convexhull, 255)final_destination_canvas = cv2.bitwise_not(final_destination_face_mask)destination_face_masked = cv2.bitwise_and(destination_image, destination_image, mask=final_destination_canvas)destination_with_face = cv2.add(destination_face_masked, destination_image_canvas)# Seamless cloning to make attachment blend with surrounding pixels# we have to find center point of reconstructed convex hull to pass into seamlessClone()(x, y, w, h) = cv2.boundingRect(destination_face_convexhull)destination_face_center_point = (int((x + x + w) / 2), int((y + y + h) / 2))seamless_cloned_face = cv2.seamlessClone(destination_with_face, destination_image, final_destination_face_mask,destination_face_center_point, cv2.NORMAL_CLONE)data = im.fromarray(seamless_cloned_face)# saving the final output# as a PNG filefile='geovindu.png'data.save(file)#cv2.imshow("Destination image with source face 2", seamless_cloned_face)#cv2.waitKey(0)#cv2.destroyAllWindows()print(type(seamless_cloned_face))return (seamless_cloned_face,file)'''1.import cv2cv2.imwrite("geovindu.jpg", seamless_cloned_face)2.from PIL import Imageim = Image.fromarray(seamless_cloned_face)im.save("geovindu.jpg")3.import scipy.miscscipy.misc.imsave('geovindu.jpg', seamless_cloned_face)4.import scipy.miscscipy.misc.toimage(seamless_cloned_face, cmin=0.0, cmax=...).save('geovindu.jpg')5.import matplotlibmatplotlib.image.imsave('geovindu.png', seamless_cloned_face)'''
調用:
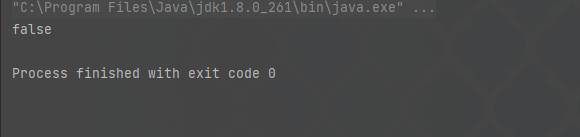
# 调用du= BLL.imageFaceSwapFun.FaceSwaFun("media/images/modi.jpg","media/images/viplav.jpeg")#du.SOURCE_PATH="media/images/modi.jpg"# du.DEST_PATH="media/images/viplav.jpeg"geovindu=du.getImage()print(geovindu)cv2.imwrite("geovindu20.png", geovindu[0])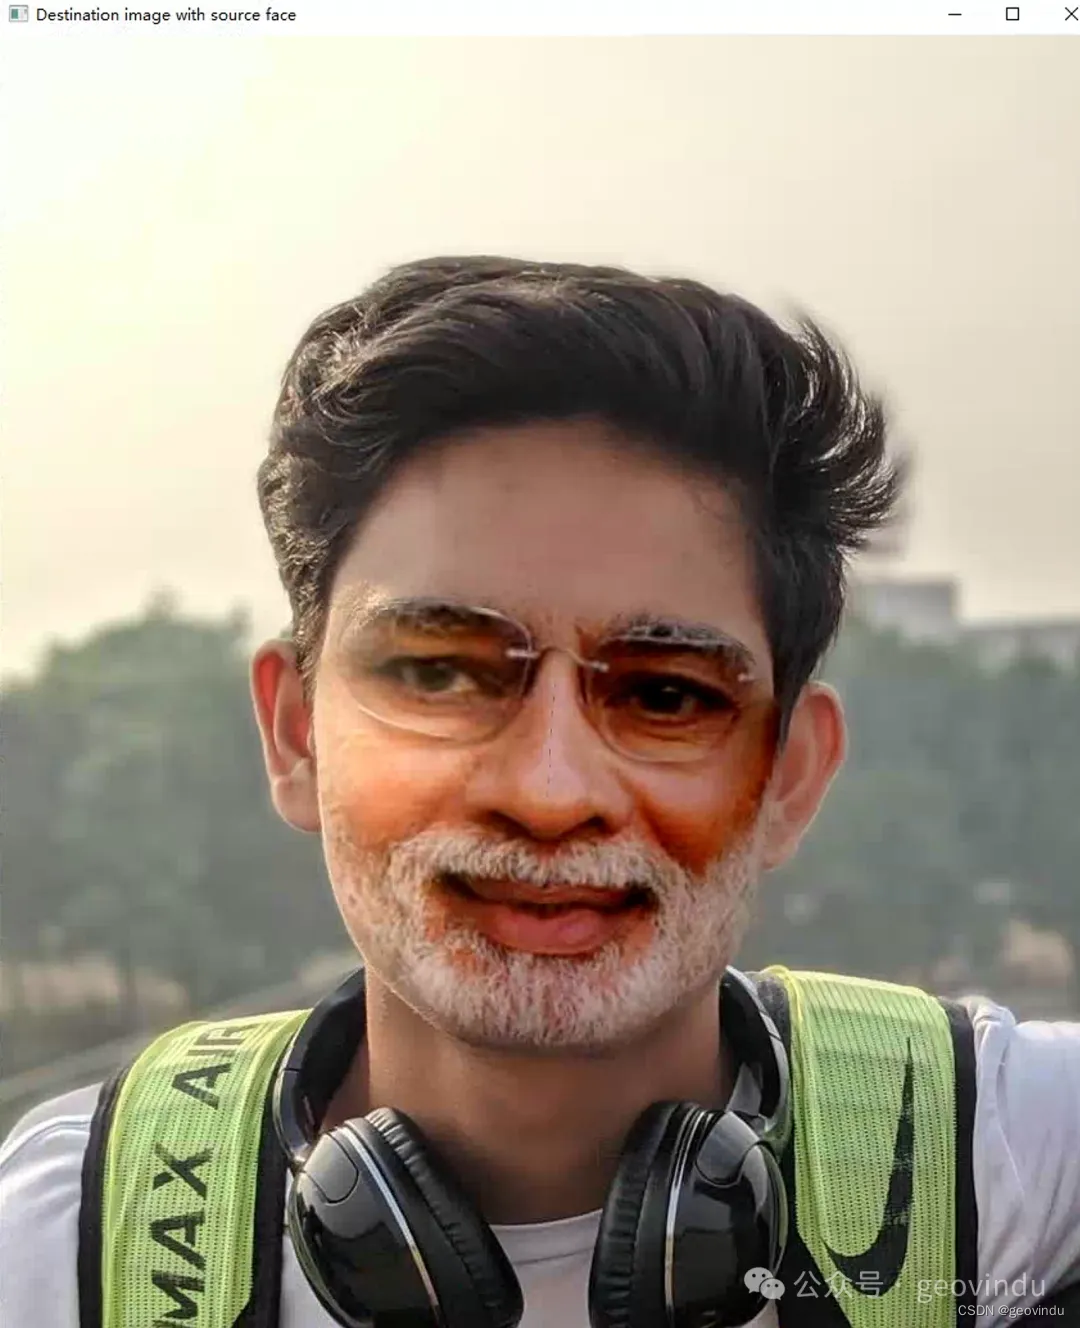
相关文章:
python:faces swap
# encoding: utf-8 # 版权所有 2024 ©涂聚文有限公司 # 许可信息查看: 两个头像图片之间换脸 # 描述: https://stackoverflow.com/questions/902761/saving-a-numpy-array-as-an-image?answertabvotes # Author : geovindu,Geovin Du 涂聚文. #…...
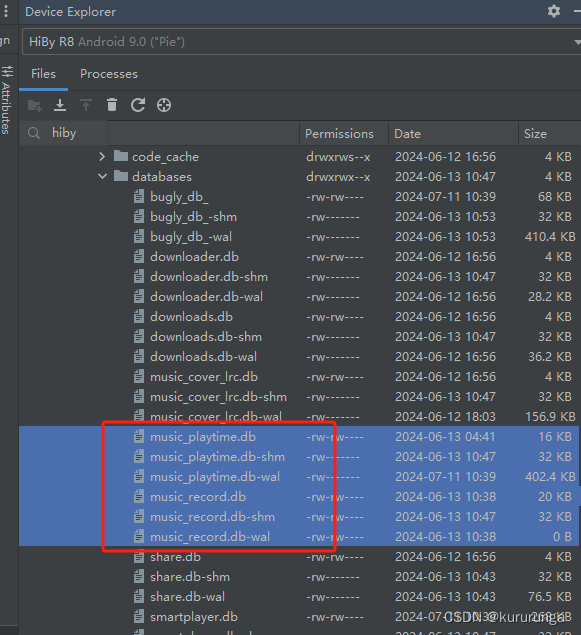
Android开发之音乐播放器添加排行需求
Music统计功能需求 1.记录歌曲名称与次数(歌曲播放结束算一次),根据播放次数制作一个排行列表;(开始说要记录歌手,后面debug发现这个字段没有,暂时不记录) 2.记录播放歌曲的时长,时间累加;&…...
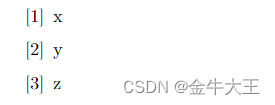
latex 方括号编号
最近在做简历,需要列出发表的论文。 论文编号一般是采用[1]这种样式,但是找了几个简历模板里头没有直接包含这种编号样式。 我只好求助网络。 在CSDN上找了一圈,这篇博客给了一个思路:在\begin{enumerate}后面添加对应的样式即…...

Vue CLI 4与项目构建实战指南
title: Vue CLI 4与项目构建实战指南 date: 2024/6/9 updated: 2024/6/9 excerpt: 这篇文章介绍了如何使用Vue CLI优化项目构建配置,提高开发效率,涉及配置管理、项目部署策略、插件系统定制以及Webpack和TypeScript的深度集成技巧。 categories: 前端…...

深入解析Web通信 HTTP、HTTPS 和 WebSocket
在现代Web开发中,了解和掌握HTTP、HTTPS以及WebSocket协议是非常重要的。这些协议是实现Web应用程序之间通信的基石。本文将详细介绍这三种协议,包括它们的基本概念、工作原理、优缺点以及适用场景。通过深入解析它们的特点和应用,帮助读者更好地理解和使用这些协议。 一、…...
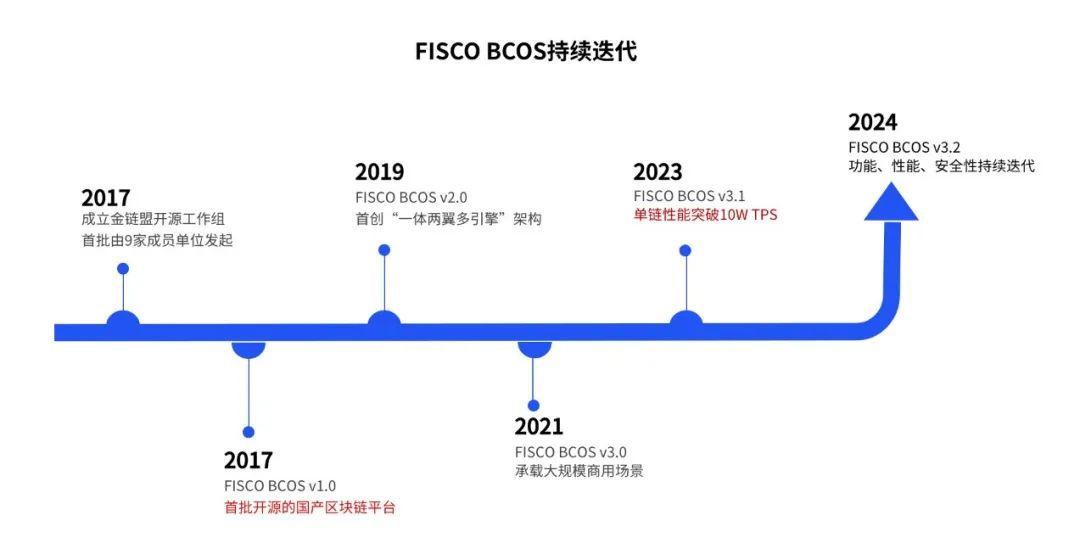
FISCO BCOS x GitLink,为国产开源技术生态注入新活力
作为中国领先的区块链底层平台之一,FISCO BCOS 自成立以来始终致力于推动国产开源区块链技术的应用和普及。近期,FISCO BCOS 将开源代码托管到CCF官方代码托管平台 GitLink (确实开源),为国产开源技术生态注入新活力。…...
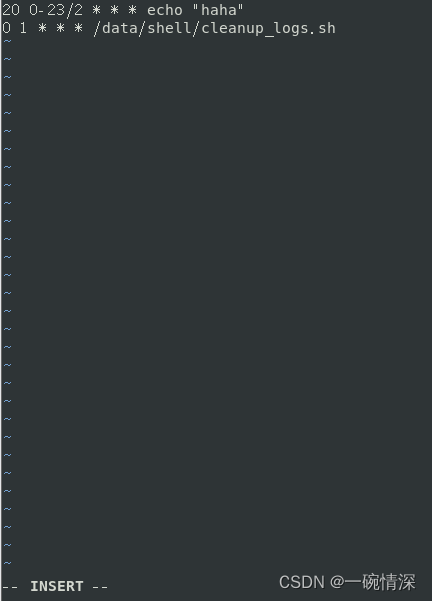
Linux crontabs定时执行任务
文章目录 前言一、安装二、服务1. 启动crond服务2. 关闭crond服务3. 重启crond服务4. 设置crond开机启动5. 禁用crond开机启动6. 查看crond是否开机启动7. 重新载入配置8. 查看crond运行状态 三、使用1. 查看当前用户的crontab2. 编辑用户的crontab3. 删除用户的crontab的内容 …...
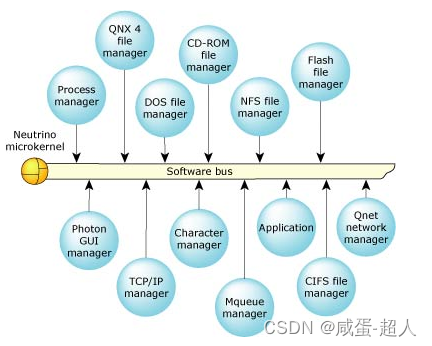
QNX简述
文章目录 前言1. QNX简介1.1 什么是QNX1.2 QNX的应用场景1.3 QNX的优点1.4 QNX的发展史1.5 QNX的商业模式 2. QNX的技术特点3. QNX和其它操作系统的比较3.1 QNX VS LINUX3.2 QNX VS FreeRTOS3.3 QNX VS 鸿蒙操作系统 4. 我的疑问4.1 微内核看起来又稳定又容易调试,为…...

[Llama3] ReAct Prompt 测试实验
ReAct 是一种 LLM 提示和结果处理方法,结合了推理、行动计划和知识源整合,使 LLM 超越其语言模型,并在预测中使用来自现实世界的信息。 ReAct 是推理和行动的结合。 介绍 ReAct 的论文表明它比思维链提示更好。与后者不同的是,Re…...
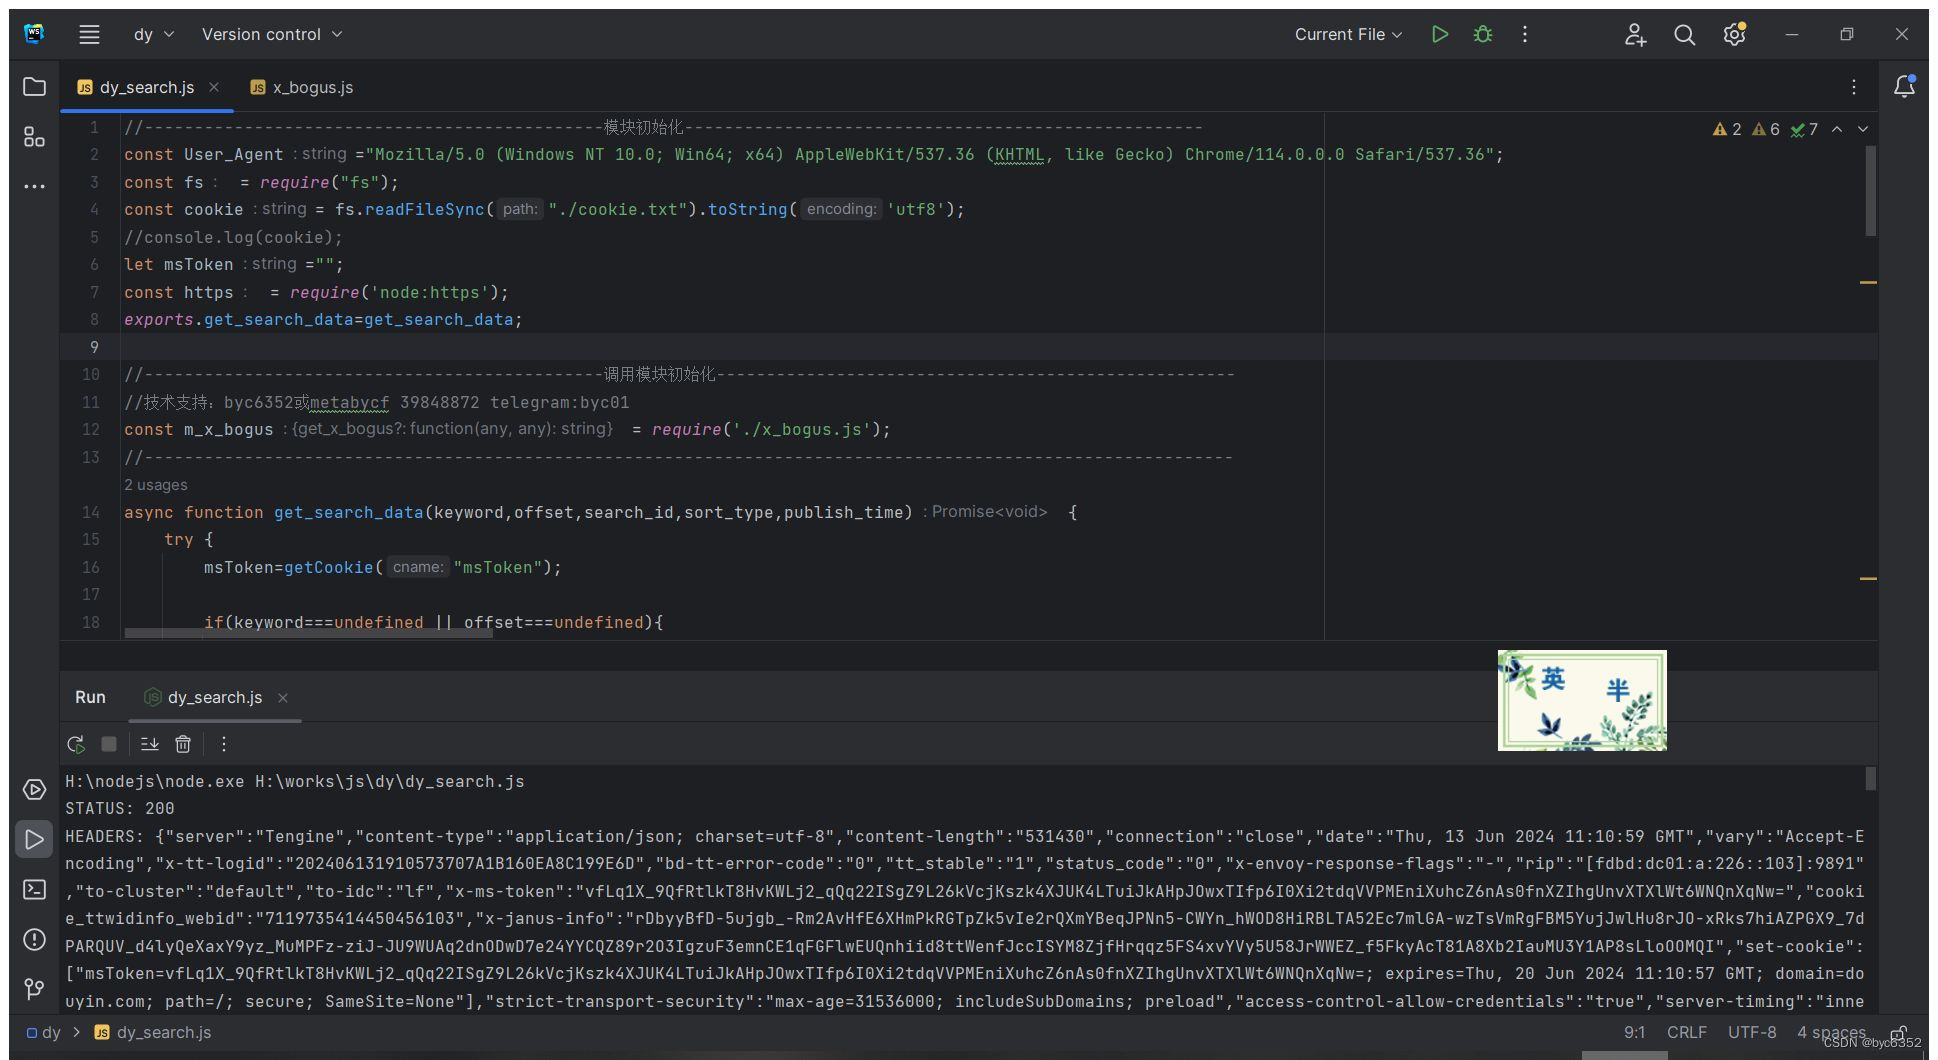
nodejs 某音douyin网页端搜索接口及x_bogus、a_bogus(包含完整源码)(2024-06-13)
前言 x_bogus或a_bogus算法大概是对数据、ua、时间戳、浏览器的几个指纹进行计算,拿到一个110位大数组,然后转字符,在头部再添加十二位随机字符,再进行魔改的base64加密。 问:抖音的x_bogus、a_bogus值有什么用&#x…...
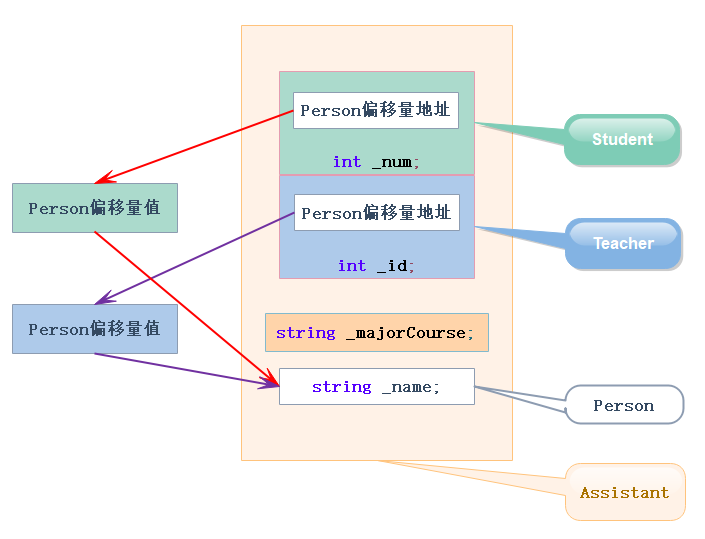
继承深度剖析
前言 从继承开始就开始C进阶了, 这一块需要好好学习,这块知识很重要, 坑有点多,所以是面试笔试的常客。 基本概念 继承(inheritance)机制是面向对象程序设计使代码可以复用的最重要的手段, 它允许程序员在保持原有…...

使用 Vue 和 Ant Design 实现抽屉效果的模块折叠功能
功能描述: 有两个模块,点击上面模块的收起按钮时,上面的模块可以折叠,下面的模块随之扩展 代码实现: 我们在 Vue 组件中定义两个模块的布局和状态管理: const scrollTableY ref(560); // 表格初始高度…...

Springboot整合SpringCache+redis简化缓存开发
使用步骤: 1.引入依赖 <dependency><groupId>org.springframework.boot</groupId><artifactId>spring-boot-starter-cache</artifactId> </dependency><dependency><groupId>org.springframework.boot</groupI…...

关于EOF标识符
EOF的概念 EOF是C语言中表示文件结束的标志符号,通常被定义为-1,它用于指示已到达文件的末尾或输入流的末尾。 EOF的使用 在输入操作中,EOF常常用于判断是否到达了文件末尾或输入流末尾,以便终止读取操作。例如,在使…...
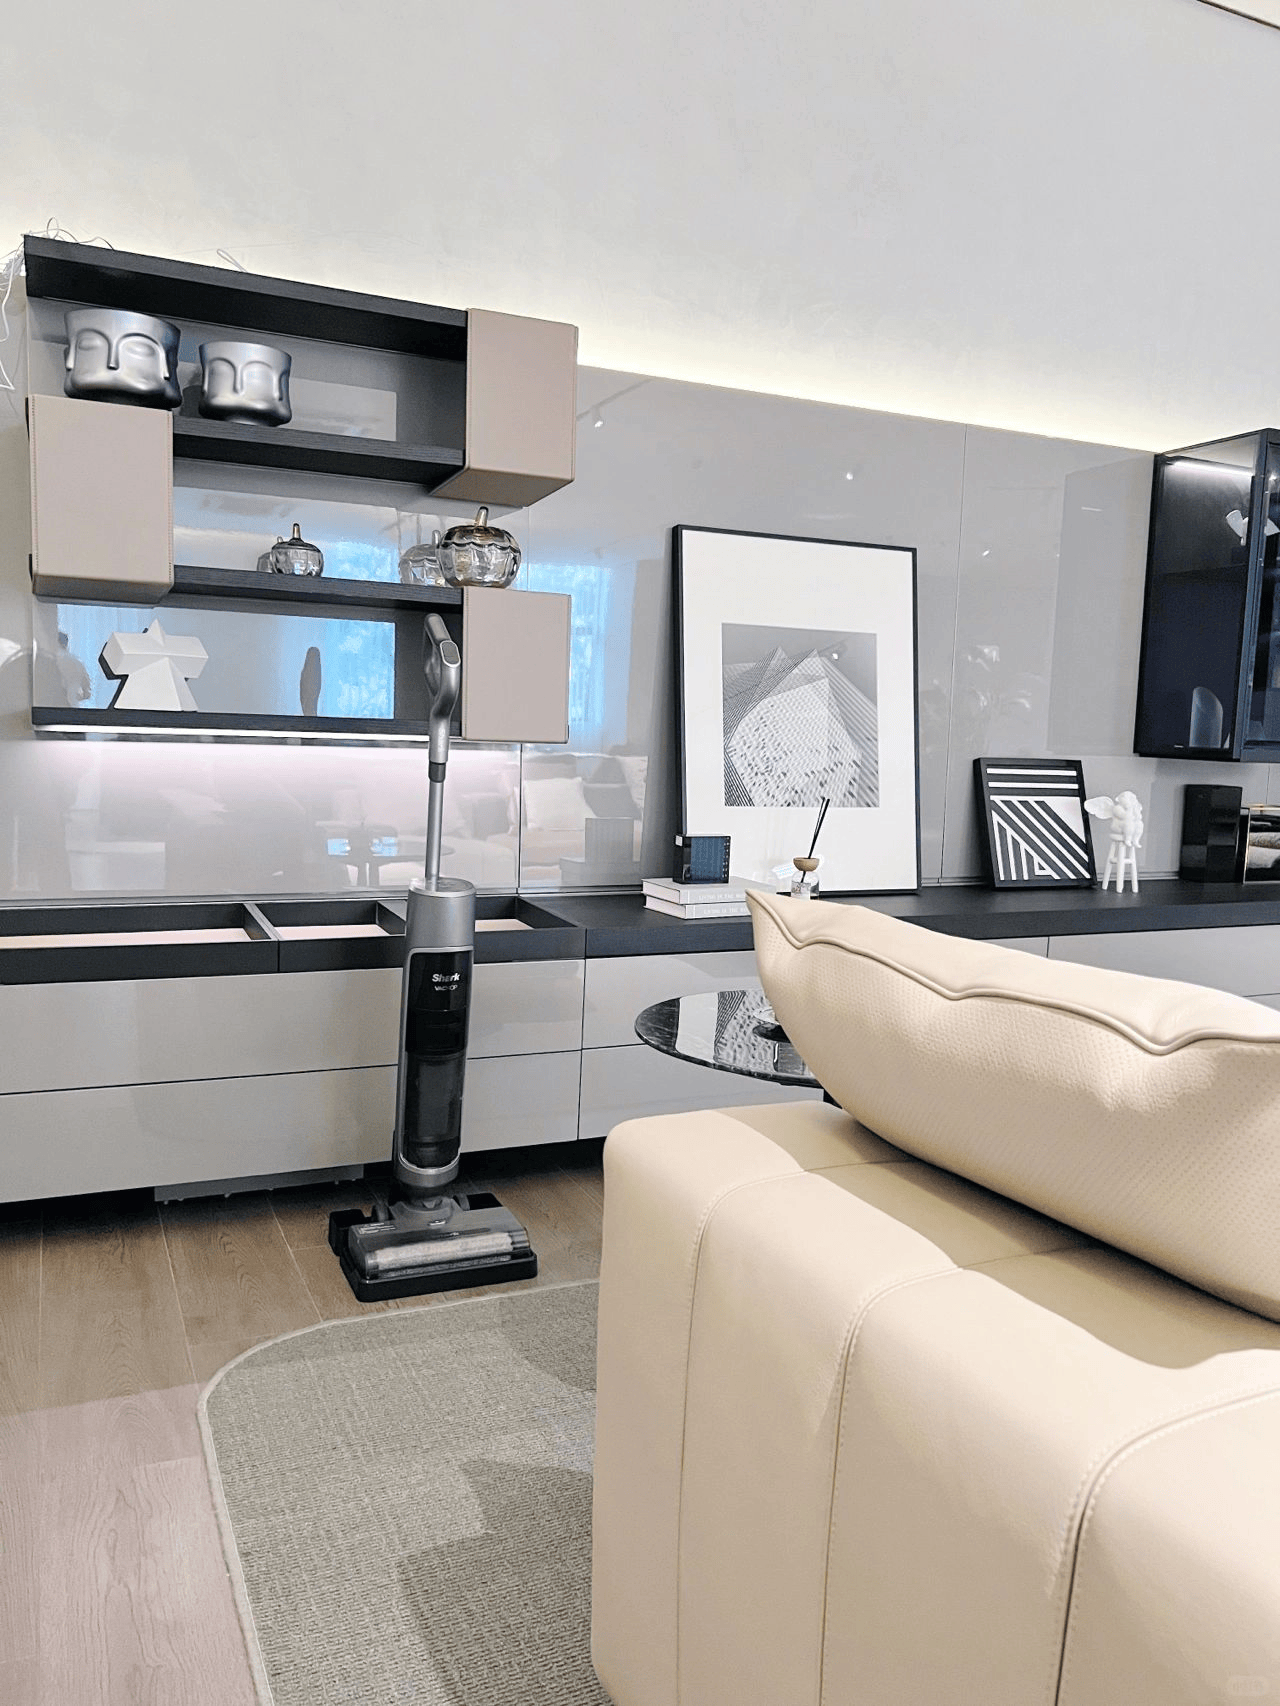
家用洗地机排行榜前十名:2024十大王牌机型精准种草
最近很多人都在问我洗地机相关的问题,不愧是改善家庭生活品质的“三神器”之一。洗地机依靠其清洁力和清洁效率吸引了越来越多的平时需要做家务人群的兴趣,为了解答大家关于洗地机的各种疑问,我把市面上目前非常火爆的洗地机型号和参数都进行…...

【Chrome插件】如何在Chrome插件开发中处理复杂数据结构的存储
最近俺在接触 Chrome 插件开发,需要把一个数据存放到浏览器的存储中。这个数据结构有点复杂,它包含一个 Map 和一个数组。我使用 chrome.storage.local API来存储这个数据,然后在另一个地方获取数据。保存数据的代码并没有报错,但…...
:使用 MySQL 检索数据)
MySQL 保姆级教程(二):使用 MySQL 检索数据
使用 MySQL 3.2 选择数据库 使用数据库: 输入: USE 数据库名;输出: Database changed分析: 不返回任何结果,显示某种形式的通知 例如: 使用 crashcourse 数据库 use crashcourse; 3.3 了解数据库和表 列出所有的数据库: 输入: SHOW DATABASES;输出: --------…...
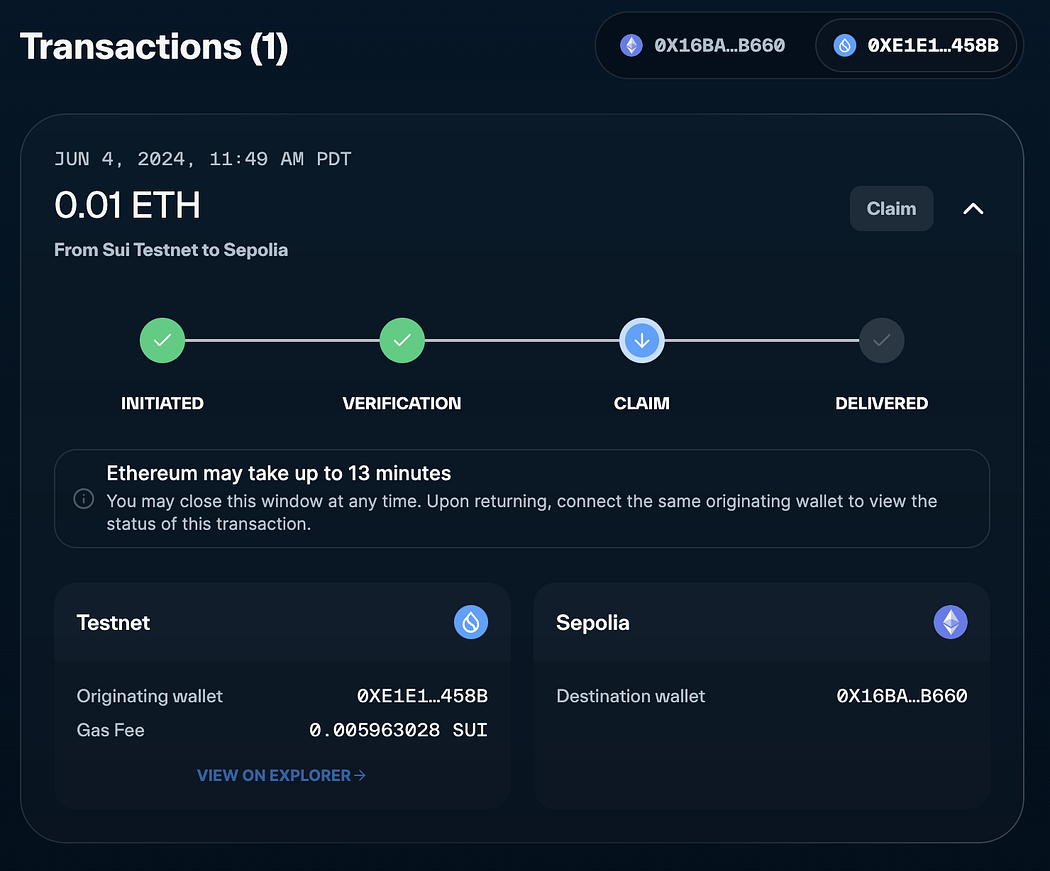
Sui Bridge在测试网上线并推出10万SUI激励计划
是一种为Sui设计的原生桥接协议,专门用于在Sui与其他网络之间桥接资产和数据。今天,Sui Bridge宣布在测试网上线。作为一种原生协议,Sui Bridge能够在Ethereum和Sui之间轻松且安全地转移ETH、wBTC、USDC和USDT,使其成为Sui基础设施…...
Spring系统学习 - Bean的作用域
bean作用域介绍 Spring框架提供了不同的作用域来管理Bean的生命周期和可见性,这对于控制不同类型的组件和处理并发请求尤其重要。 singleton(默认): 每个Spring IoC容器只有一个bean实例。当容器创建bean后,它会被缓存…...
贪吃蛇双人模式设计(2)
敲上瘾-CSDN博客控制台程序设置_c语言控制程序窗口大小-CSDN博客贪吃蛇小游戏_贪吃蛇小游戏csdn-CSDN博客 一、功能实现: 玩家1使用↓ → ← ↑按键来操作蛇的方向,使用右Shift键加速,右Ctrl键减速玩家2使用W A S D按键来操作蛇的方向&am…...

Claude API开发实战:从模型选型到工具调用,一站式资源与代码详解
1. 项目概述与核心价值最近在折腾AI应用开发的朋友,估计没少为Claude API的调用和管理头疼。官方文档虽然详尽,但当你需要快速查找某个特定端点、对比不同模型参数,或者只是想找个现成的代码片段时,那种在多个页面间跳转、反复搜索…...

从网易招聘看技术人择校与城市选择:一线城市VS武汉,哪里机会更多?
技术人择校与城市选择指南:数据驱动的职业发展决策 站在高考志愿填报或考研择校的十字路口,每个怀揣技术梦想的年轻人都面临着一个关键抉择:是追逐一线城市的产业聚集效应,还是选择武汉这类高校密集但名企较少的城市?这…...

美国通信业去监管趋势下的技术生态变革与产业应对策略
1. 从“去监管”信号看美国通信业格局重塑 2017年初,当阿吉特派伊(Ajit Pai)正式接任美国联邦通信委员会(FCC)主席时,他的一项早期举措——为广播公司和有线电视运营商削减文书工作规定——几乎在所有人的预…...

Go-ldap-admin权限系统解析:基于Casbin的RBAC实现完整指南
Go-ldap-admin权限系统解析:基于Casbin的RBAC实现完整指南 【免费下载链接】go-ldap-admin 🌉 基于GoVue实现的openLDAP后台管理项目 项目地址: https://gitcode.com/gh_mirrors/go/go-ldap-admin Go-ldap-admin作为一款基于GoVue实现的现代化Ope…...

Buzz音频转录工具故障快速定位:5大紧急级别终极排查指南 [特殊字符]
Buzz音频转录工具故障快速定位:5大紧急级别终极排查指南 🚨 【免费下载链接】buzz Buzz transcribes and translates audio offline on your personal computer. Powered by OpenAIs Whisper. 项目地址: https://gitcode.com/GitHub_Trending/buz/buzz…...

DocX入门指南:如何在不安装Word的情况下快速创建第一个Word文档
DocX入门指南:如何在不安装Word的情况下快速创建第一个Word文档 【免费下载链接】DocX Fast and easy to use .NET library that creates or modifies Microsoft Word files without installing Word. 项目地址: https://gitcode.com/gh_mirrors/doc/DocX Do…...

oh-my-iflow:基于多智能体协作的自动化命令行开发工作流
1. 项目概述:当命令行遇上多智能体工作流如果你和我一样,每天有大量时间泡在终端里,那你肯定对命令行工具的效率又爱又恨。爱的是它直接、强大,恨的是很多复杂任务依然需要我们手动串联多个命令,或者在不同工具间来回切…...

AI编程助手文档自动化:dev-docs-skill实现PRD、API与CHANGELOG高效管理
1. 项目概述:一个为AI编程助手“赋能”的文档自动化工具 如果你和我一样,是个在多个项目间穿梭、既要写代码又要维护文档的开发者,那你一定对“文档债”深恶痛绝。代码写完了,功能上线了,但更新API文档、记录变更日志、…...

PHP批量导出数据,CSV格式文件 - 支持几十万行数据无压力
目录 一、前言 二、解决方案 三、示例 一、前言 之前做数据批量导出一直都是用的PHPExcel插件,一个是由于现在PHPExcel已经不再维护了,一个是如果导出大批量数据,导出的表格就会提示数据损坏、文件不完整之类的提示,就是打不开…...

统一AI编程助手配置:使用agent-anatomy提升开发效率与一致性
1. 项目概述:一个配置文件夹,统一所有AI编程助手如果你和我一样,日常开发中会同时使用Claude Code、Cursor、GitHub Copilot等多个AI编程助手,那你一定也经历过同样的烦恼:每个助手都需要自己独立的配置文件。今天要介…...