云原生之容器编排实践-OpenEuler23.09在线安装Kubernetes与KubeSphere
背景
前几篇文章中介绍了如何将 ruoyi-cloud 项目部署到 Kubernetes 集群中,包括网关服务、认证服务和系统服务并且对全部服务采用 YAML 文件的方式来进行部署,这虽然有助于理解 K8S 组织管理资源的风格与底层机制,但是对于团队中不太熟悉命令行操作的成员不太友好,这不,现在我们借助由青云开源的容器平台, KubeSphere 来进行可视化的服务部署。 KubeSphere 是在 Kubernetes 之上构建的面向云原生应用的分布式操作系统,完全开源,支持多云与多集群管理,提供全栈的 IT 自动化运维能力;
接下来使用 KubeKey 完成 Kubernetes 与 KubeSphere 的一键安装。另外,由于 CentOS7 在2024年即将停服,实际部署不建议采用;本次的部署环境采用 OpenEuler 社区创新版 23.09 。
Note:如果是生产环境部署,建议使用更稳定的 LTS 版本的操作系统,eg: OpenEuler 22.03 SP3 。
虚机资源
共用到了三台虚机,1台作为 Master 节点,2台 Worker 节点。
| 主机名 | IP | 说明 |
|---|---|---|
| k1 | 192.168.44.162 | 主节点 |
| k2 | 192.168.44.163 | 工作节点 |
| k3 | 192.168.44.164 | 工作节点 |
即将安装的 KubeSphere 和 Kubernetes 版本信息如下:
- KubeSphere版本:v3.3.2(我们指定了版本:./kk create config --with-kubesphere v3.3.2)
- Kubernetes版本:v1.23.10(kubectl get node)
[root@k1 ~]# kubectl get node
NAME   STATUS   ROLES                  AGE    VERSION
k1     Ready    control-plane, master   3h2m   v1.23.10
k2     Ready    worker                 3h2m   v1.23.10
k3     Ready    worker                 3h2m   v1.23.10
系统环境
[root@k1 ~]# uname -a
Linux k1 6.4.0-10.1.0.20.oe2309.x86_64 #1 SMP PREEMPT_DYNAMIC Mon Sep 25 19:01:14 CST 2023 x86_64 x86_64 x86_64 GNU/Linux
[root@k1 ~]# cat /proc/version
Linux version 6.4.0-10.1.0.20.oe2309.x86_64 (root@dc-64g.compass-ci) (gcc_old (GCC) 12.3.1 (openEuler 12.3.1-16.oe2309), GNU ld (GNU Binutils) 2.40) #1 SMP PREEMPT_DYNAMIC Mon Sep 25 19:01:14 CST 2023
下载安装操作系统:https://www.openeuler.org/zh/download/?version=openEuler%2023.09
我这里使用的 OpenEuler 操作系统,采用最小化安装,没有自带压缩/解压缩的软件,先安装下: yum install -y tar ,马上要用到。
下载安装KubeKey
KubeKey 是一个用于部署 Kubernetes 集群的开源轻量级工具。它提供了一种灵活、快速、便捷的方式来仅安装 Kubernetes/K3s ,或同时安装 Kubernetes/K3s 和 KubeSphere ,以及其他云原生插件。除此之外,它也是扩展和升级集群的有效工具。
# 下载安装KubeKey
[root@euler ~]# curl -sfL https://get-kk.kubesphere.io | VERSION=v3.0.7 sh -Downloading kubekey v3.0.7 from https://kubernetes.pek3b.qingstor.com/kubekey/releases/download/v3.0.7/kubekey-v3.0.7-linux-amd64.tar.gz ...Kubekey v3.0.7 Download Complete!# 查看帮助文档
[root@euler ~]# ./kk -h
Deploy a Kubernetes or KubeSphere cluster efficiently, flexibly and easily. There are three scenarios to use KubeKey.
1. Install Kubernetes only
2. Install Kubernetes and KubeSphere together in one command
3. Install Kubernetes first, then deploy KubeSphere on it using https://github.com/kubesphere/ks-installerUsage:kk [command]Available Commands:add         Add nodes to kubernetes clusteralpha       Commands for features in alphaartifact    Manage a KubeKey offline installation packagecerts       cluster certscompletion  Generate shell completion scriptscreate      Create a cluster or a cluster configuration filedelete      Delete node or clusterhelp        Help about any commandinit        Initializes the installation environmentplugin      Provides utilities for interacting with pluginsupgrade     Upgrade your cluster smoothly to a newer version with this commandversion     print the client version informationFlags:-h, --help   help for kkUse "kk [command] --help" for more information about a command.
配置准备工作
# 设置三台虚机的主机名
[root@k1 ~]# hostnamectl set-hostname k1
[root@k2 ~]# hostnamectl set-hostname k2
[root@k3 ~]# hostnamectl set-hostname k3# 创建配置文件
[root@k1 ~]# ./kk create config --with-kubesphere v3.3.2
Generate KubeKey config file successfully# 修改配置文件,符合自己的需求
[root@k1 ~]# vi config-sample.yaml
# 修改了主机信息,控制平面与ETCD的安装节点、工作节点信息
spec:hosts:- {name: k1, address: 192.168.44.162, internalAddress: 192.168.44.162, user: root, password: "CloudNative"}- {name: k2, address: 192.168.44.163, internalAddress: 192.168.44.163, user: root, password: "CloudNative"}- {name: k3, address: 192.168.44.164, internalAddress: 192.168.44.164, user: root, password: "CloudNative"}roleGroups:etcd:- k1control-plane:- k1worker:- k2- k3
安装K8S集群与KubeSphere
[root@k1 ~]# ./kk create cluster -f config-sample.yaml_   __      _          _   __
| | / /     | |        | | / /
| |/ / _   _| |__   ___| |/ /  ___ _   _
|    \| | | | '_ \ / _ \    \ / _ \ | | |
| |\  \ |_| | |_) |  __/ |\  \  __/ |_| |
\_| \_/\__, _|_.__/ \___\_| \_/\___|\__, |__/ ||___/10:51:08 CST [GreetingsModule] Greetings
10:51:09 CST message: [k3]
Greetings, KubeKey!
10:51:09 CST message: [k1]
Greetings, KubeKey!
10:51:09 CST message: [k2]
Greetings, KubeKey!
10:51:09 CST success: [k3]
10:51:09 CST success: [k1]
10:51:09 CST success: [k2]
10:51:09 CST [NodePreCheckModule] A pre-check on nodes
10:51:15 CST success: [k1]
10:51:15 CST success: [k3]
10:51:15 CST success: [k2]
10:51:15 CST [ConfirmModule] Display confirmation form
+------+------+------+---------+----------+-------+-------+---------+-----------+--------+--------+------------+------------+-------------+------------------+--------------+
| name | sudo | curl | openssl | ebtables | socat | ipset | ipvsadm | conntrack | chrony | docker | containerd | nfs client | ceph client | glusterfs client | time         |
+------+------+------+---------+----------+-------+-------+---------+-----------+--------+--------+------------+------------+-------------+------------------+--------------+
| k1   | y    | y    | y       | y        |       | y     |         |           |        |        |            |            |             |                  | CST 10:51:15 |
| k2   | y    | y    | y       | y        |       | y     |         |           |        |        |            |            |             |                  | CST 10:51:14 |
| k3   | y    | y    | y       | y        |       | y     |         |           |        |        |            |            |             |                  | CST 10:51:15 |
+------+------+------+---------+----------+-------+-------+---------+-----------+--------+--------+------------+------------+-------------+------------------+--------------+
10:51:15 CST [ERRO] k1: conntrack is required.
10:51:15 CST [ERRO] k1: socat is required.
10:51:15 CST [ERRO] k2: conntrack is required.
10:51:15 CST [ERRO] k2: socat is required.
10:51:15 CST [ERRO] k3: conntrack is required.
10:51:15 CST [ERRO] k3: socat is required.This is a simple check of your environment.
Before installation, ensure that your machines meet all requirements specified at
https://github.com/kubesphere/kubekey#requirements-and-recommendations
上面的安装过程报错:操作系统缺失 conntrack 与 socat 依赖,那就安装吧。。
# 三台虚机都安装
[root@k1 ~]# yum install -y conntrack socat# 重新执行安装操作
[root@k1 ~]# ./kk create cluster -f config-sample.yaml_   __      _          _   __
| | / /     | |        | | / /
| |/ / _   _| |__   ___| |/ /  ___ _   _
|    \| | | | '_ \ / _ \    \ / _ \ | | |
| |\  \ |_| | |_) |  __/ |\  \  __/ |_| |
\_| \_/\__, _|_.__/ \___\_| \_/\___|\__, |__/ ||___/11:17:17 CST [GreetingsModule] Greetings
11:17:17 CST message: [k3]
Greetings, KubeKey!
11:17:18 CST message: [k1]
Greetings, KubeKey!
11:17:18 CST message: [k2]
Greetings, KubeKey!
11:17:18 CST success: [k3]
11:17:18 CST success: [k1]
11:17:18 CST success: [k2]
11:17:18 CST [NodePreCheckModule] A pre-check on nodes
11:17:24 CST success: [k3]
11:17:24 CST success: [k2]
11:17:24 CST success: [k1]
11:17:24 CST [ConfirmModule] Display confirmation form
+------+------+------+---------+----------+-------+-------+---------+-----------+--------+--------+------------+------------+-------------+------------------+--------------+
| name | sudo | curl | openssl | ebtables | socat | ipset | ipvsadm | conntrack | chrony | docker | containerd | nfs client | ceph client | glusterfs client | time         |
+------+------+------+---------+----------+-------+-------+---------+-----------+--------+--------+------------+------------+-------------+------------------+--------------+
| k1   | y    | y    | y       | y        | y     | y     |         | y         |        |        | v1.4.9     |            |             |                  | CST 11:17:24 |
| k2   | y    | y    | y       | y        | y     | y     |         | y         |        |        |            |            |             |                  | CST 11:17:24 |
| k3   | y    | y    | y       | y        | y     | y     |         | y         |        |        |            |            |             |                  | CST 11:17:24 |
+------+------+------+---------+----------+-------+-------+---------+-----------+--------+--------+------------+------------+-------------+------------------+--------------+This is a simple check of your environment.
Before installation, ensure that your machines meet all requirements specified at
https://github.com/kubesphere/kubekey#requirements-and-recommendationsContinue this installation? [yes/no]: yes
11:17:39 CST success: [LocalHost]
11:17:39 CST [NodeBinariesModule] Download installation binaries
11:17:39 CST message: [localhost]
downloading amd64 kubeadm v1.23.10 ...
11:17:40 CST message: [localhost]
kubeadm is existed
11:17:40 CST message: [localhost]
downloading amd64 kubelet v1.23.10 ...
11:17:41 CST message: [localhost]
kubelet is existed
11:17:41 CST message: [localhost]
downloading amd64 kubectl v1.23.10 ...
11:17:41 CST message: [localhost]
kubectl is existed
11:17:41 CST message: [localhost]
downloading amd64 helm v3.9.0 ...
11:17:41 CST message: [localhost]
helm is existed
11:17:41 CST message: [localhost]
downloading amd64 kubecni v0.9.1 ...
11:17:42 CST message: [localhost]
kubecni is existed
11:17:42 CST message: [localhost]
downloading amd64 crictl v1.24.0 ...
11:17:42 CST message: [localhost]
crictl is existed
11:17:42 CST message: [localhost]
downloading amd64 etcd v3.4.13 ...
11:17:42 CST message: [localhost]
etcd is existed
11:17:42 CST message: [localhost]
downloading amd64 docker 20.10.8 ...
11:17:42 CST message: [localhost]
docker is existed
11:17:42 CST success: [LocalHost]
11:17:42 CST [ConfigureOSModule] Get OS release
11:17:43 CST success: [k3]
11:17:43 CST success: [k1]
11:17:43 CST success: [k2]
11:17:43 CST [ConfigureOSModule] Prepare to init OS
11:17:51 CST success: [k3]
11:17:51 CST success: [k2]
11:17:51 CST success: [k1]
11:17:51 CST [ConfigureOSModule] Generate init os script
11:17:54 CST success: [k1]
11:17:54 CST success: [k3]
11:17:54 CST success: [k2]
11:17:54 CST [ConfigureOSModule] Exec init os script
11:17:55 CST stdout: [k3]
Permissive
kernel.sysrq = 0
net.ipv4.ip_forward = 1
net.ipv4.conf.all.send_redirects = 0
net.ipv4.conf.default.send_redirects = 0
net.ipv4.conf.all.accept_source_route = 0
net.ipv4.conf.default.accept_source_route = 0
net.ipv4.conf.all.accept_redirects = 0
net.ipv4.conf.default.accept_redirects = 0
net.ipv4.conf.all.secure_redirects = 0
net.ipv4.conf.default.secure_redirects = 0
net.ipv4.icmp_echo_ignore_broadcasts = 1
net.ipv4.icmp_ignore_bogus_error_responses = 1
net.ipv4.conf.all.rp_filter = 1
net.ipv4.conf.default.rp_filter = 1
net.ipv4.tcp_syncookies = 1
kernel.dmesg_restrict = 1
net.ipv6.conf.all.accept_redirects = 0
net.ipv6.conf.default.accept_redirects = 0
net.bridge.bridge-nf-call-arptables = 1
net.bridge.bridge-nf-call-ip6tables = 1
net.bridge.bridge-nf-call-iptables = 1
net.ipv4.ip_local_reserved_ports = 30000-32767
vm.max_map_count = 262144
vm.swappiness = 1
fs.inotify.max_user_instances = 524288
kernel.pid_max = 65535
11:17:55 CST stdout: [k2]
Permissive
kernel.sysrq = 0
net.ipv4.ip_forward = 1
net.ipv4.conf.all.send_redirects = 0
net.ipv4.conf.default.send_redirects = 0
net.ipv4.conf.all.accept_source_route = 0
net.ipv4.conf.default.accept_source_route = 0
net.ipv4.conf.all.accept_redirects = 0
net.ipv4.conf.default.accept_redirects = 0
net.ipv4.conf.all.secure_redirects = 0
net.ipv4.conf.default.secure_redirects = 0
net.ipv4.icmp_echo_ignore_broadcasts = 1
net.ipv4.icmp_ignore_bogus_error_responses = 1
net.ipv4.conf.all.rp_filter = 1
net.ipv4.conf.default.rp_filter = 1
net.ipv4.tcp_syncookies = 1
kernel.dmesg_restrict = 1
net.ipv6.conf.all.accept_redirects = 0
net.ipv6.conf.default.accept_redirects = 0
net.bridge.bridge-nf-call-arptables = 1
net.bridge.bridge-nf-call-ip6tables = 1
net.bridge.bridge-nf-call-iptables = 1
net.ipv4.ip_local_reserved_ports = 30000-32767
vm.max_map_count = 262144
vm.swappiness = 1
fs.inotify.max_user_instances = 524288
kernel.pid_max = 65535
11:17:55 CST stdout: [k1]
Permissive
kernel.sysrq = 0
net.ipv4.ip_forward = 1
net.ipv4.conf.all.send_redirects = 0
net.ipv4.conf.default.send_redirects = 0
net.ipv4.conf.all.accept_source_route = 0
net.ipv4.conf.default.accept_source_route = 0
net.ipv4.conf.all.accept_redirects = 0
net.ipv4.conf.default.accept_redirects = 0
net.ipv4.conf.all.secure_redirects = 0
net.ipv4.conf.default.secure_redirects = 0
net.ipv4.icmp_echo_ignore_broadcasts = 1
net.ipv4.icmp_ignore_bogus_error_responses = 1
net.ipv4.conf.all.rp_filter = 1
net.ipv4.conf.default.rp_filter = 1
net.ipv4.tcp_syncookies = 1
kernel.dmesg_restrict = 1
net.ipv6.conf.all.accept_redirects = 0
net.ipv6.conf.default.accept_redirects = 0
net.bridge.bridge-nf-call-arptables = 1
net.bridge.bridge-nf-call-ip6tables = 1
net.bridge.bridge-nf-call-iptables = 1
net.ipv4.ip_local_reserved_ports = 30000-32767
vm.max_map_count = 262144
vm.swappiness = 1
fs.inotify.max_user_instances = 524288
kernel.pid_max = 65535
11:17:55 CST success: [k3]
11:17:55 CST success: [k2]
11:17:55 CST success: [k1]
11:17:55 CST [ConfigureOSModule] configure the ntp server for each node
11:17:55 CST skipped: [k3]
11:17:55 CST skipped: [k2]
11:17:55 CST skipped: [k1]
11:17:55 CST [KubernetesStatusModule] Get kubernetes cluster status
11:17:56 CST success: [k1]
11:17:56 CST [InstallContainerModule] Sync docker binaries
11:18:06 CST success: [k1]
11:18:06 CST success: [k3]
11:18:06 CST success: [k2]
11:18:06 CST [InstallContainerModule] Generate docker service
11:18:09 CST success: [k1]
11:18:09 CST success: [k2]
11:18:09 CST success: [k3]
11:18:09 CST [InstallContainerModule] Generate docker config
11:18:11 CST success: [k1]
11:18:11 CST success: [k3]
11:18:11 CST success: [k2]
11:18:11 CST [InstallContainerModule] Enable docker
11:18:15 CST success: [k1]
11:18:15 CST success: [k2]
11:18:15 CST success: [k3]
11:18:15 CST [InstallContainerModule] Add auths to container runtime
11:18:15 CST skipped: [k1]
11:18:15 CST skipped: [k2]
11:18:15 CST skipped: [k3]
11:18:15 CST [PullModule] Start to pull images on all nodes
11:18:15 CST message: [k1]
downloading image: kubesphere/pause:3.6
11:18:15 CST message: [k3]
downloading image: kubesphere/pause:3.6
11:18:15 CST message: [k2]
downloading image: kubesphere/pause:3.6
11:18:25 CST message: [k3]
downloading image: kubesphere/kube-proxy:v1.23.10
11:18:25 CST message: [k2]
downloading image: kubesphere/kube-proxy:v1.23.10
11:18:26 CST message: [k1]
downloading image: kubesphere/kube-apiserver:v1.23.10
11:19:25 CST message: [k2]
downloading image: coredns/coredns:1.8.6
11:19:38 CST message: [k1]
downloading image: kubesphere/kube-controller-manager:v1.23.10
11:19:40 CST message: [k2]
downloading image: kubesphere/k8s-dns-node-cache:1.15.12
11:19:54 CST message: [k3]
downloading image: coredns/coredns:1.8.6
11:20:06 CST message: [k1]
downloading image: kubesphere/kube-scheduler:v1.23.10
11:20:07 CST message: [k2]
downloading image: calico/kube-controllers:v3.23.2
11:20:12 CST message: [k3]
downloading image: kubesphere/k8s-dns-node-cache:1.15.12
11:20:21 CST message: [k1]
downloading image: kubesphere/kube-proxy:v1.23.10
11:20:42 CST message: [k1]
downloading image: coredns/coredns:1.8.6
11:20:46 CST message: [k2]
downloading image: calico/cni:v3.23.2
11:20:49 CST message: [k3]
downloading image: calico/kube-controllers:v3.23.2
11:20:58 CST message: [k1]
downloading image: kubesphere/k8s-dns-node-cache:1.15.12
11:21:18 CST message: [k3]
downloading image: calico/cni:v3.23.2
11:21:25 CST message: [k1]
downloading image: calico/kube-controllers:v3.23.2
11:21:50 CST message: [k2]
downloading image: calico/node:v3.23.2
11:21:57 CST message: [k1]
downloading image: calico/cni:v3.23.2
11:22:36 CST message: [k3]
downloading image: calico/node:v3.23.2
11:23:01 CST message: [k1]
downloading image: calico/node:v3.23.2
11:23:04 CST message: [k2]
downloading image: calico/pod2daemon-flexvol:v3.23.2
11:23:45 CST message: [k3]
downloading image: calico/pod2daemon-flexvol:v3.23.2
11:24:21 CST message: [k1]
downloading image: calico/pod2daemon-flexvol:v3.23.2
11:24:40 CST success: [k2]
11:24:40 CST success: [k3]
11:24:40 CST success: [k1]
11:24:40 CST [ETCDPreCheckModule] Get etcd status
11:24:41 CST success: [k1]
11:24:41 CST [CertsModule] Fetch etcd certs
11:24:41 CST success: [k1]
11:24:41 CST [CertsModule] Generate etcd Certs
[certs] Generating "ca" certificate and key
[certs] admin-k1 serving cert is signed for DNS names [etcd etcd.kube-system etcd.kube-system.svc etcd.kube-system.svc.cluster.local k1 k2 k3 lb.kubesphere.local localhost] and IPs [127.0.0.1 ::1 192.168.44.162 192.168.44.163 192.168.44.164]
[certs] member-k1 serving cert is signed for DNS names [etcd etcd.kube-system etcd.kube-system.svc etcd.kube-system.svc.cluster.local k1 k2 k3 lb.kubesphere.local localhost] and IPs [127.0.0.1 ::1 192.168.44.162 192.168.44.163 192.168.44.164]
[certs] node-k1 serving cert is signed for DNS names [etcd etcd.kube-system etcd.kube-system.svc etcd.kube-system.svc.cluster.local k1 k2 k3 lb.kubesphere.local localhost] and IPs [127.0.0.1 ::1 192.168.44.162 192.168.44.163 192.168.44.164]
11:24:41 CST success: [LocalHost]
11:24:41 CST [CertsModule] Synchronize certs file
11:24:51 CST success: [k1]
11:24:51 CST [CertsModule] Synchronize certs file to master
11:24:51 CST skipped: [k1]
11:24:51 CST [InstallETCDBinaryModule] Install etcd using binary
11:24:53 CST success: [k1]
11:24:53 CST [InstallETCDBinaryModule] Generate etcd service
11:24:54 CST success: [k1]
11:24:54 CST [InstallETCDBinaryModule] Generate access address
11:24:54 CST success: [k1]
11:24:54 CST [ETCDConfigureModule] Health check on exist etcd
11:24:54 CST skipped: [k1]
11:24:54 CST [ETCDConfigureModule] Generate etcd.env config on new etcd
11:24:56 CST success: [k1]
11:24:56 CST [ETCDConfigureModule] Refresh etcd.env config on all etcd
11:24:57 CST success: [k1]
11:24:57 CST [ETCDConfigureModule] Restart etcd
11:24:58 CST stdout: [k1]
Created symlink /etc/systemd/system/multi-user.target.wants/etcd.service → /etc/systemd/system/etcd.service.
11:24:58 CST success: [k1]
11:24:58 CST [ETCDConfigureModule] Health check on all etcd
11:24:59 CST success: [k1]
11:24:59 CST [ETCDConfigureModule] Refresh etcd.env config to exist mode on all etcd
11:25:00 CST success: [k1]
11:25:00 CST [ETCDConfigureModule] Health check on all etcd
11:25:00 CST success: [k1]
11:25:00 CST [ETCDBackupModule] Backup etcd data regularly
11:25:02 CST success: [k1]
11:25:02 CST [ETCDBackupModule] Generate backup ETCD service
11:25:03 CST success: [k1]
11:25:03 CST [ETCDBackupModule] Generate backup ETCD timer
11:25:04 CST success: [k1]
11:25:04 CST [ETCDBackupModule] Enable backup etcd service
11:25:05 CST success: [k1]
11:25:05 CST [InstallKubeBinariesModule] Synchronize kubernetes binaries
11:25:52 CST success: [k1]
11:25:52 CST success: [k3]
11:25:52 CST success: [k2]
11:25:52 CST [InstallKubeBinariesModule] Synchronize kubelet
11:25:52 CST success: [k1]
11:25:52 CST success: [k3]
11:25:52 CST success: [k2]
11:25:52 CST [InstallKubeBinariesModule] Generate kubelet service
11:25:54 CST success: [k2]
11:25:54 CST success: [k3]
11:25:54 CST success: [k1]
11:25:54 CST [InstallKubeBinariesModule] Enable kubelet service
11:25:56 CST success: [k1]
11:25:56 CST success: [k2]
11:25:56 CST success: [k3]
11:25:56 CST [InstallKubeBinariesModule] Generate kubelet env
11:25:58 CST success: [k1]
11:25:58 CST success: [k3]
11:25:58 CST success: [k2]
11:25:58 CST [InitKubernetesModule] Generate kubeadm config
11:26:00 CST success: [k1]
11:26:00 CST [InitKubernetesModule] Init cluster using kubeadm
11:26:13 CST stdout: [k1]
W0129 11:26:00.970957   33502 utils.go:69] The recommended value for "clusterDNS" in "KubeletConfiguration" is: [10.233.0.10]; the provided value is: [169.254.25.10]
[init] Using Kubernetes version: v1.23.10
[preflight] Running pre-flight checks
[preflight] Pulling images required for setting up a Kubernetes cluster
[preflight] This might take a minute or two, depending on the speed of your internet connection
[preflight] You can also perform this action in beforehand using 'kubeadm config images pull'
[certs] Using certificateDir folder "/etc/kubernetes/pki"
[certs] Generating "ca" certificate and key
[certs] Generating "apiserver" certificate and key
[certs] apiserver serving cert is signed for DNS names [k1 k1.cluster.local k2 k2.cluster.local k3 k3.cluster.local kubernetes kubernetes.default kubernetes.default.svc kubernetes.default.svc.cluster.local lb.kubesphere.local localhost] and IPs [10.233.0.1 192.168.44.162 127.0.0.1 192.168.44.163 192.168.44.164]
[certs] Generating "apiserver-kubelet-client" certificate and key
[certs] Generating "front-proxy-ca" certificate and key
[certs] Generating "front-proxy-client" certificate and key
[certs] External etcd mode: Skipping etcd/ca certificate authority generation
[certs] External etcd mode: Skipping etcd/server certificate generation
[certs] External etcd mode: Skipping etcd/peer certificate generation
[certs] External etcd mode: Skipping etcd/healthcheck-client certificate generation
[certs] External etcd mode: Skipping apiserver-etcd-client certificate generation
[certs] Generating "sa" key and public key
[kubeconfig] Using kubeconfig folder "/etc/kubernetes"
[kubeconfig] Writing "admin.conf" kubeconfig file
[kubeconfig] Writing "kubelet.conf" kubeconfig file
[kubeconfig] Writing "controller-manager.conf" kubeconfig file
[kubeconfig] Writing "scheduler.conf" kubeconfig file
[kubelet-start] Writing kubelet environment file with flags to file "/var/lib/kubelet/kubeadm-flags.env"
[kubelet-start] Writing kubelet configuration to file "/var/lib/kubelet/config.yaml"
[kubelet-start] Starting the kubelet
[control-plane] Using manifest folder "/etc/kubernetes/manifests"
[control-plane] Creating static Pod manifest for "kube-apiserver"
[control-plane] Creating static Pod manifest for "kube-controller-manager"
[control-plane] Creating static Pod manifest for "kube-scheduler"
[wait-control-plane] Waiting for the kubelet to boot up the control plane as static Pods from directory "/etc/kubernetes/manifests". This can take up to 4m0s
[apiclient] All control plane components are healthy after 9.004023 seconds
[upload-config] Storing the configuration used in ConfigMap "kubeadm-config" in the "kube-system" Namespace
[kubelet] Creating a ConfigMap "kubelet-config-1.23" in namespace kube-system with the configuration for the kubelets in the cluster
NOTE: The "kubelet-config-1.23" naming of the kubelet ConfigMap is deprecated. Once the UnversionedKubeletConfigMap feature gate graduates to Beta the default name will become just "kubelet-config". Kubeadm upgrade will handle this transition transparently.
[upload-certs] Skipping phase. Please see --upload-certs
[mark-control-plane] Marking the node k1 as control-plane by adding the labels: [node-role.kubernetes.io/master(deprecated) node-role.kubernetes.io/control-plane node.kubernetes.io/exclude-from-external-load-balancers]
[mark-control-plane] Marking the node k1 as control-plane by adding the taints [node-role.kubernetes.io/master: NoSchedule]
[bootstrap-token] Using token: 27cbyk.yln96f9a3mdrupaa
[bootstrap-token] Configuring bootstrap tokens, cluster-info ConfigMap, RBAC Roles
[bootstrap-token] configured RBAC rules to allow Node Bootstrap tokens to get nodes
[bootstrap-token] configured RBAC rules to allow Node Bootstrap tokens to post CSRs in order for nodes to get long term certificate credentials
[bootstrap-token] configured RBAC rules to allow the csrapprover controller automatically approve CSRs from a Node Bootstrap Token
[bootstrap-token] configured RBAC rules to allow certificate rotation for all node client certificates in the cluster
[bootstrap-token] Creating the "cluster-info" ConfigMap in the "kube-public" namespace
[kubelet-finalize] Updating "/etc/kubernetes/kubelet.conf" to point to a rotatable kubelet client certificate and key
[addons] Applied essential addon: CoreDNS
[addons] Applied essential addon: kube-proxyYour Kubernetes control-plane has initialized successfully!To start using your cluster, you need to run the following as a regular user:mkdir -p $HOME/.kubesudo cp -i /etc/kubernetes/admin.conf $HOME/.kube/configsudo chown $(id -u):$(id -g) $HOME/.kube/configAlternatively, if you are the root user, you can run:export KUBECONFIG=/etc/kubernetes/admin.confYou should now deploy a pod network to the cluster.
Run "kubectl apply -f [podnetwork].yaml" with one of the options listed at:https://kubernetes.io/docs/concepts/cluster-administration/addons/You can now join any number of control-plane nodes by copying certificate authorities
and service account keys on each node and then running the following as root:kubeadm join lb.kubesphere.local:6443 --token 27cbyk.yln96f9a3mdrupaa \--discovery-token-ca-cert-hash sha256:694e4c50f1efbea5b14425c4d2face12c19ded118cbfc7a930c44d713f740c4f \--control-plane Then you can join any number of worker nodes by running the following on each as root:kubeadm join lb.kubesphere.local:6443 --token 27cbyk.yln96f9a3mdrupaa \--discovery-token-ca-cert-hash sha256:694e4c50f1efbea5b14425c4d2face12c19ded118cbfc7a930c44d713f740c4f11:26:13 CST success: [k1]
11:26:13 CST [InitKubernetesModule] Copy admin.conf to ~/.kube/config
11:26:15 CST success: [k1]
11:26:15 CST [InitKubernetesModule] Remove master taint
11:26:15 CST skipped: [k1]
11:26:15 CST [InitKubernetesModule] Add worker label
11:26:15 CST skipped: [k1]
11:26:15 CST [ClusterDNSModule] Generate coredns service
11:26:17 CST success: [k1]
11:26:17 CST [ClusterDNSModule] Override coredns service
11:26:18 CST stdout: [k1]
service "kube-dns" deleted
11:26:21 CST stdout: [k1]
service/coredns created
Warning: resource clusterroles/system:coredns is missing the kubectl.kubernetes.io/last-applied-configuration annotation which is required by kubectl apply. kubectl apply should only be used on resources created declaratively by either kubectl create --save-config or kubectl apply. The missing annotation will be patched automatically.
clusterrole.rbac.authorization.k8s.io/system:coredns configured
11:26:21 CST success: [k1]
11:26:21 CST [ClusterDNSModule] Generate nodelocaldns
11:26:23 CST success: [k1]
11:26:23 CST [ClusterDNSModule] Deploy nodelocaldns
11:26:23 CST stdout: [k1]
serviceaccount/nodelocaldns created
daemonset.apps/nodelocaldns created
11:26:23 CST success: [k1]
11:26:23 CST [ClusterDNSModule] Generate nodelocaldns configmap
11:26:25 CST success: [k1]
11:26:25 CST [ClusterDNSModule] Apply nodelocaldns configmap
11:26:26 CST stdout: [k1]
configmap/nodelocaldns created
11:26:26 CST success: [k1]
11:26:26 CST [KubernetesStatusModule] Get kubernetes cluster status
11:26:27 CST stdout: [k1]
v1.23.10
11:26:27 CST stdout: [k1]
k1    v1.23.10   [map[address:192.168.44.162 type: InternalIP] map[address:k1 type: Hostname]]
11:26:32 CST stdout: [k1]
I0129 11:26:30.356155   42023 version.go:255] remote version is much newer: v1.29.1; falling back to: stable-1.23
[upload-certs] Storing the certificates in Secret "kubeadm-certs" in the "kube-system" Namespace
[upload-certs] Using certificate key:
1e0ba137d117b90238a6ac1c63d6da2483d5fecb6668f14ccd9d4995cdece40a
11:26:33 CST stdout: [k1]
secret/kubeadm-certs patched
11:26:33 CST stdout: [k1]
secret/kubeadm-certs patched
11:26:33 CST stdout: [k1]
secret/kubeadm-certs patched
11:26:34 CST stdout: [k1]
g49jkt.ajjqolknkk5sku1v
11:26:34 CST success: [k1]
11:26:34 CST [JoinNodesModule] Generate kubeadm config
11:26:39 CST skipped: [k1]
11:26:39 CST success: [k3]
11:26:39 CST success: [k2]
11:26:39 CST [JoinNodesModule] Join control-plane node
11:26:39 CST skipped: [k1]
11:26:39 CST [JoinNodesModule] Join worker node
11:26:47 CST stdout: [k3]
[preflight] Running pre-flight checks
[preflight] Reading configuration from the cluster...
[preflight] FYI: You can look at this config file with 'kubectl -n kube-system get cm kubeadm-config -o yaml'
W0129 11:26:40.419569   25214 utils.go:69] The recommended value for "clusterDNS" in "KubeletConfiguration" is: [10.233.0.10]; the provided value is: [169.254.25.10]
[kubelet-start] Writing kubelet configuration to file "/var/lib/kubelet/config.yaml"
[kubelet-start] Writing kubelet environment file with flags to file "/var/lib/kubelet/kubeadm-flags.env"
[kubelet-start] Starting the kubelet
[kubelet-start] Waiting for the kubelet to perform the TLS Bootstrap...This node has joined the cluster:
* Certificate signing request was sent to apiserver and a response was received.
* The Kubelet was informed of the new secure connection details.Run 'kubectl get nodes' on the control-plane to see this node join the cluster.
11:26:47 CST stdout: [k2]
[preflight] Running pre-flight checks
[preflight] Reading configuration from the cluster...
[preflight] FYI: You can look at this config file with 'kubectl -n kube-system get cm kubeadm-config -o yaml'
W0129 11:26:40.228777   25530 utils.go:69] The recommended value for "clusterDNS" in "KubeletConfiguration" is: [10.233.0.10]; the provided value is: [169.254.25.10]
[kubelet-start] Writing kubelet configuration to file "/var/lib/kubelet/config.yaml"
[kubelet-start] Writing kubelet environment file with flags to file "/var/lib/kubelet/kubeadm-flags.env"
[kubelet-start] Starting the kubelet
[kubelet-start] Waiting for the kubelet to perform the TLS Bootstrap...This node has joined the cluster:
* Certificate signing request was sent to apiserver and a response was received.
* The Kubelet was informed of the new secure connection details.Run 'kubectl get nodes' on the control-plane to see this node join the cluster.
11:26:47 CST success: [k3]
11:26:47 CST success: [k2]
11:26:47 CST [JoinNodesModule] Copy admin.conf to ~/.kube/config
11:26:47 CST skipped: [k1]
11:26:47 CST [JoinNodesModule] Remove master taint
11:26:47 CST skipped: [k1]
11:26:47 CST [JoinNodesModule] Add worker label to master
11:26:47 CST skipped: [k1]
11:26:47 CST [JoinNodesModule] Synchronize kube config to worker
11:26:50 CST success: [k2]
11:26:50 CST success: [k3]
11:26:50 CST [JoinNodesModule] Add worker label to worker
11:26:51 CST stdout: [k3]
node/k3 labeled
11:26:51 CST stdout: [k2]
node/k2 labeled
11:26:51 CST success: [k3]
11:26:51 CST success: [k2]
11:26:51 CST [DeployNetworkPluginModule] Generate calico
11:26:53 CST success: [k1]
11:26:53 CST [DeployNetworkPluginModule] Deploy calico
11:26:54 CST stdout: [k1]
configmap/calico-config created
customresourcedefinition.apiextensions.k8s.io/bgpconfigurations.crd.projectcalico.org created
customresourcedefinition.apiextensions.k8s.io/bgppeers.crd.projectcalico.org created
customresourcedefinition.apiextensions.k8s.io/blockaffinities.crd.projectcalico.org created
customresourcedefinition.apiextensions.k8s.io/caliconodestatuses.crd.projectcalico.org created
customresourcedefinition.apiextensions.k8s.io/clusterinformations.crd.projectcalico.org created
customresourcedefinition.apiextensions.k8s.io/felixconfigurations.crd.projectcalico.org created
customresourcedefinition.apiextensions.k8s.io/globalnetworkpolicies.crd.projectcalico.org created
customresourcedefinition.apiextensions.k8s.io/globalnetworksets.crd.projectcalico.org created
customresourcedefinition.apiextensions.k8s.io/hostendpoints.crd.projectcalico.org created
customresourcedefinition.apiextensions.k8s.io/ipamblocks.crd.projectcalico.org created
customresourcedefinition.apiextensions.k8s.io/ipamconfigs.crd.projectcalico.org created
customresourcedefinition.apiextensions.k8s.io/ipamhandles.crd.projectcalico.org created
customresourcedefinition.apiextensions.k8s.io/ippools.crd.projectcalico.org created
customresourcedefinition.apiextensions.k8s.io/ipreservations.crd.projectcalico.org created
customresourcedefinition.apiextensions.k8s.io/kubecontrollersconfigurations.crd.projectcalico.org created
customresourcedefinition.apiextensions.k8s.io/networkpolicies.crd.projectcalico.org created
customresourcedefinition.apiextensions.k8s.io/networksets.crd.projectcalico.org created
clusterrole.rbac.authorization.k8s.io/calico-kube-controllers created
clusterrolebinding.rbac.authorization.k8s.io/calico-kube-controllers created
clusterrole.rbac.authorization.k8s.io/calico-node created
clusterrolebinding.rbac.authorization.k8s.io/calico-node created
daemonset.apps/calico-node created
serviceaccount/calico-node created
deployment.apps/calico-kube-controllers created
serviceaccount/calico-kube-controllers created
poddisruptionbudget.policy/calico-kube-controllers created
11:26:54 CST success: [k1]
11:26:54 CST [ConfigureKubernetesModule] Configure kubernetes
11:26:54 CST success: [k3]
11:26:54 CST success: [k1]
11:26:54 CST success: [k2]
11:26:54 CST [ChownModule] Chown user $HOME/.kube dir
11:26:56 CST success: [k2]
11:26:56 CST success: [k3]
11:26:56 CST success: [k1]
11:26:56 CST [AutoRenewCertsModule] Generate k8s certs renew script
11:27:00 CST success: [k1]
11:27:00 CST [AutoRenewCertsModule] Generate k8s certs renew service
11:27:03 CST success: [k1]
11:27:03 CST [AutoRenewCertsModule] Generate k8s certs renew timer
11:27:09 CST success: [k1]
11:27:09 CST [AutoRenewCertsModule] Enable k8s certs renew service
11:27:11 CST success: [k1]
11:27:11 CST [SaveKubeConfigModule] Save kube config as a configmap
11:27:11 CST success: [LocalHost]
11:27:11 CST [AddonsModule] Install addons
11:27:11 CST success: [LocalHost]
11:27:11 CST [DeployStorageClassModule] Generate OpenEBS manifest
11:27:16 CST success: [k1]
11:27:16 CST [DeployStorageClassModule] Deploy OpenEBS as cluster default StorageClass
11:27:19 CST success: [k1]
11:27:19 CST [DeployKubeSphereModule] Generate KubeSphere ks-installer crd manifests
11:27:22 CST success: [k1]
11:27:22 CST [DeployKubeSphereModule] Apply ks-installer
11:27:22 CST stdout: [k1]
namespace/kubesphere-system created
serviceaccount/ks-installer created
customresourcedefinition.apiextensions.k8s.io/clusterconfigurations.installer.kubesphere.io created
clusterrole.rbac.authorization.k8s.io/ks-installer created
clusterrolebinding.rbac.authorization.k8s.io/ks-installer created
deployment.apps/ks-installer created
11:27:22 CST success: [k1]
11:27:22 CST [DeployKubeSphereModule] Add config to ks-installer manifests
11:27:23 CST success: [k1]
11:27:23 CST [DeployKubeSphereModule] Create the kubesphere namespace
11:27:25 CST success: [k1]
11:27:25 CST [DeployKubeSphereModule] Setup ks-installer config
11:27:26 CST stdout: [k1]
secret/kube-etcd-client-certs created
11:27:28 CST success: [k1]
11:27:28 CST [DeployKubeSphereModule] Apply ks-installer
11:27:29 CST stdout: [k1]
namespace/kubesphere-system unchanged
serviceaccount/ks-installer unchanged
customresourcedefinition.apiextensions.k8s.io/clusterconfigurations.installer.kubesphere.io unchanged
clusterrole.rbac.authorization.k8s.io/ks-installer unchanged
clusterrolebinding.rbac.authorization.k8s.io/ks-installer unchanged
deployment.apps/ks-installer unchanged
clusterconfiguration.installer.kubesphere.io/ks-installer created
11:27:29 CST success: [k1]
########################################################              Welcome to KubeSphere!           ########################################################Console: http://192.168.44.162:30880
Account: admin
Password: P@88w0rd
NOTES:1. After you log into the console, please check themonitoring status of service components in"Cluster Management". If any service is notready, please wait patiently until all components are up and running.2. Please change the default password after login.#####################################################
https://kubesphere.io             2024-01-29 11:40:43
#####################################################
11:40:47 CST success: [k1]
11:40:47 CST Pipeline[CreateClusterPipeline] execute successfully
Installation is complete.Please check the result using the command:kubectl logs -n kubesphere-system $(kubectl get pod -n kubesphere-system -l 'app in (ks-install, ks-installer)' -o jsonpath='{.items[0].metadata.name}') -f
这个过程取决于网络和硬件配置,我花了大概十几分钟,当看到以下内容时,表示 K8S 集群和 KubeSphere 安装成功。
########################################################              Welcome to KubeSphere!           ########################################################Console: http://192.168.44.162:30880
Account: admin
Password: P@88w0rd
NOTES:1. After you log into the console, please check themonitoring status of service components in"Cluster Management". If any service is notready, please wait patiently until all components are up and running.2. Please change the default password after login.#####################################################
https://kubesphere.io             2024-01-29 11:40:43
#####################################################
11:40:47 CST success: [k1]
11:40:47 CST Pipeline[CreateClusterPipeline] execute successfully
Installation is complete.
验证集群
# 查看启动了哪些pod
[root@k1 ~]# kubectl get pod -A
NAMESPACE                      NAME                                               READY   STATUS    RESTARTS   AGE
kube-system                    calico-kube-controllers-84897d7cdf-grnr9           1/1     Running   0          43m
kube-system                    calico-node-8b6c7                                  1/1     Running   0          43m
kube-system                    calico-node-llb8n                                  1/1     Running   0          43m
kube-system                    calico-node-pmz75                                  1/1     Running   0          43m
kube-system                    coredns-b7c47bcdc-2cz5g                            1/1     Running   0          43m
kube-system                    coredns-b7c47bcdc-v7lnx                            1/1     Running   0          43m
kube-system                    kube-apiserver-k1                                  1/1     Running   0          44m
kube-system                    kube-controller-manager-k1                         1/1     Running   0          44m
kube-system                    kube-proxy-n7p95                                   1/1     Running   0          43m
kube-system                    kube-proxy-n9dgz                                   1/1     Running   0          43m
kube-system                    kube-proxy-p2hkx                                   1/1     Running   0          43m
kube-system                    kube-scheduler-k1                                  1/1     Running   0          44m
kube-system                    nodelocaldns-7qpwq                                 1/1     Running   0          43m
kube-system                    nodelocaldns-qq8q5                                 1/1     Running   0          43m
kube-system                    nodelocaldns-sg52g                                 1/1     Running   0          43m
kube-system                    openebs-localpv-provisioner-858c4bc894-9hsgs       1/1     Running   0          42m
kube-system                    snapshot-controller-0                              1/1     Running   0          40m
kubesphere-controls-system     default-http-backend-696d6bf54f-2l6sf              1/1     Running   0          37m
kubesphere-controls-system     kubectl-admin-b49cf5585-zm5vh                      1/1     Running   0          30m
kubesphere-monitoring-system   alertmanager-main-0                                2/2     Running   0          33m
kubesphere-monitoring-system   alertmanager-main-1                                2/2     Running   0          33m
kubesphere-monitoring-system   alertmanager-main-2                                2/2     Running   0          33m
kubesphere-monitoring-system   kube-state-metrics-6c4bdb8d9c-jv9mr                3/3     Running   0          34m
kubesphere-monitoring-system   node-exporter-8zqk2                                2/2     Running   0          34m
kubesphere-monitoring-system   node-exporter-lhlgj                                2/2     Running   0          34m
kubesphere-monitoring-system   node-exporter-t65lm                                2/2     Running   0          34m
kubesphere-monitoring-system   notification-manager-deployment-7dd45b5b7d-llc8p   2/2     Running   0          30m
kubesphere-monitoring-system   notification-manager-deployment-7dd45b5b7d-mhfvl   2/2     Running   0          30m
kubesphere-monitoring-system   notification-manager-operator-8598775b-d68jj       2/2     Running   0          33m
kubesphere-monitoring-system   prometheus-k8s-0                                   2/2     Running   0          33m
kubesphere-monitoring-system   prometheus-k8s-1                                   2/2     Running   0          33m
kubesphere-monitoring-system   prometheus-operator-57c78bd7fb-kj2qg               2/2     Running   0          34m
kubesphere-system              ks-apiserver-b7ddc4f5c-mx7tk                       1/1     Running   0          37m
kubesphere-system              ks-console-7c48dd4c9f-ndhtl                        1/1     Running   0          37m
kubesphere-system              ks-controller-manager-854ff655d4-mjjld             1/1     Running   0          37m
kubesphere-system              ks-installer-6644975f87-5vxjx                      1/1     Running   0          42m# 查看所有节点状态
[root@k1 ~]# kubectl get node
NAME   STATUS   ROLES                  AGE    VERSION
k1     Ready    control-plane, master   3h2m   v1.23.10
k2     Ready    worker                 3h2m   v1.23.10
k3     Ready    worker                 3h2m   v1.23.10
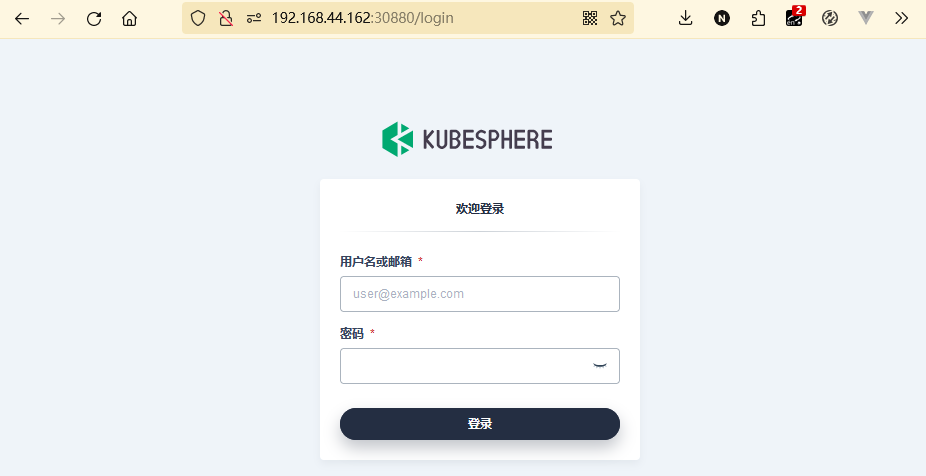
由于 KubeSphere 暴露的服务端口,我们可以在浏览器中直接访问验证:
Console: http://192.168.44.162:30880
Account: admin
Password: P@88w0rd
- KubeSphere登录界面
 * KubeSphere平台信息
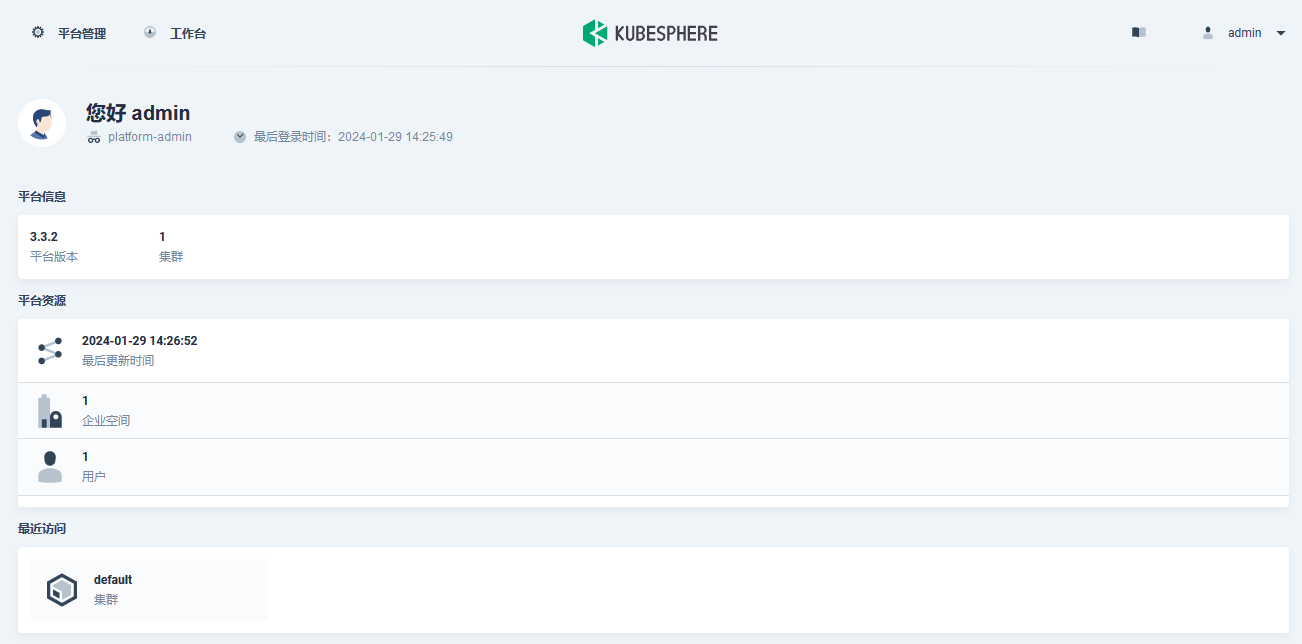
- KubeSphere资源概览

- Kubernetes集群状态

- Kubernetes集群就绪

可能遇到的问题
Failed to connect to storage.googleapis.com port 443 after 2006 ms: Connection refused
在执行 ./kk create cluster -f config-sample.yaml 时,遇到上述报错信息,同时,提示我们通过 export KKZONE=cn 切换为国内源,解决网络问题。
小总结
本文介绍了如何使用 KubeSphere 官方提供的 KubeKey 工具快速搭建一个 Kubernetes 集群。 KubeSphere 提供了运维友好的向导式操作界面,帮助企业快速构建一个强大和功能丰富的容器云平台。
KubeSphere 为用户屏蔽了基础设施底层复杂的技术细节,帮助企业在各类基础设施之上无缝地部署、更新、迁移和管理现有的容器化应用。通过这种方式, KubeSphere 使开发人员能够专注于应用程序开发,使运维团队能够通过企业级可观测性功能和故障排除机制、统一监控和日志查询、存储和网络管理,以及易用的 CI/CD 流水线等来加快 DevOps 自动化工作流程和交付流程等。
If you have any questions or any bugs are found, please feel free to contact me.
Your comments and suggestions are welcome!
相关文章:
云原生之容器编排实践-OpenEuler23.09在线安装Kubernetes与KubeSphere
背景 前几篇文章中介绍了如何将 ruoyi-cloud 项目部署到 Kubernetes 集群中,包括网关服务、认证服务和系统服务并且对全部服务采用 YAML 文件的方式来进行部署,这虽然有助于理解 K8S 组织管理资源的风格与底层机制,但是对于团队中不太熟悉命…...

Ubuntu 截图shutter,图像编辑 gimp,录屏kazam
1.截图: Shutter 安装shutter命令: sudo add-apt-repository ppa:shutter/ppasudo apt-get updatesudo apt-get install shutter 2.图片编辑:Gimp, Kolourpaint, Pinta gimp全名为:GNU Image Manipulation Program,…...

WSO2 products 文件上传漏洞(CVE-2022-29464)
前言 CVE-2022-29464 是一个影响多个 WSO2 产品的严重远程代码执行(RCE)漏洞。这些产品包括 WSO2 API Manager、WSO2 Identity Server 和 WSO2 Enterprise Integrator 等。由于用户输入验证不当,该漏洞允许未经身份验证的攻击者在服务器上上…...
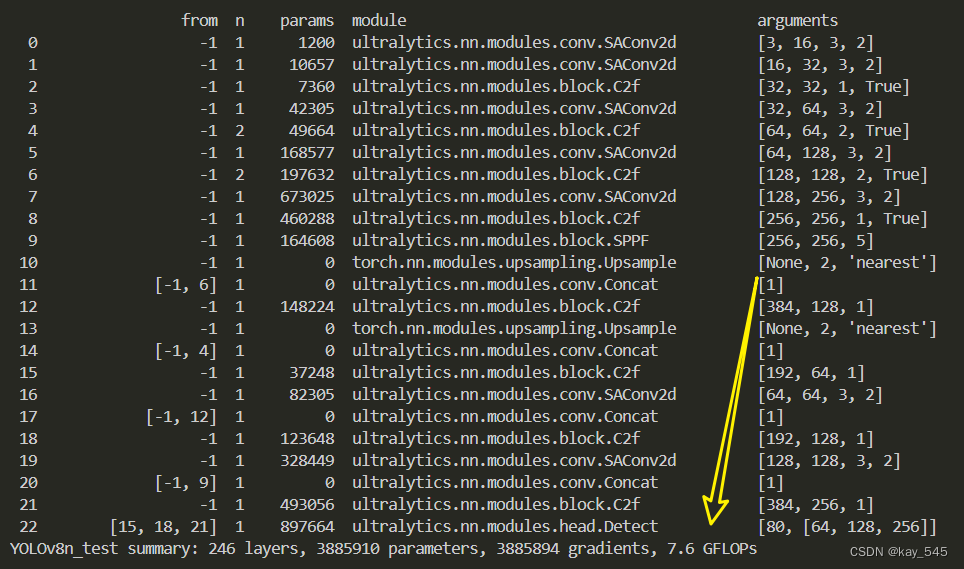
YOLOv8改进 | 卷积模块 | SAConv可切换空洞卷积
秋招面试专栏推荐 :深度学习算法工程师面试问题总结【百面算法工程师】——点击即可跳转 💡💡💡本专栏所有程序均经过测试,可成功执行💡💡💡 专栏目录 :《YOLOv8改进有效…...

使用Python下载并合并HLS视频片段
下载和合并视频片段的实用方法 在日常工作中,我们经常会遇到需要从网上下载视频并将其合并成一个完整视频的需求。本文将介绍如何使用 Python 下载多个视频片段,并使用 ffmpeg 将这些片段合并成一个完整的视频文件。以下是具体步骤和代码实现。 完整代…...

常见的九种二极管
常见的九种二极管 文章目录 常见的九种二极管1、普通二极管2、光电二极管(LED)3、变容二级管4、发光二极管5、恒流二极管6、快恢复二极管(FRD)7、肖特基二极管8、瞬态电压抑制二极管(TVS)9、齐纳二极管(稳压࿰…...
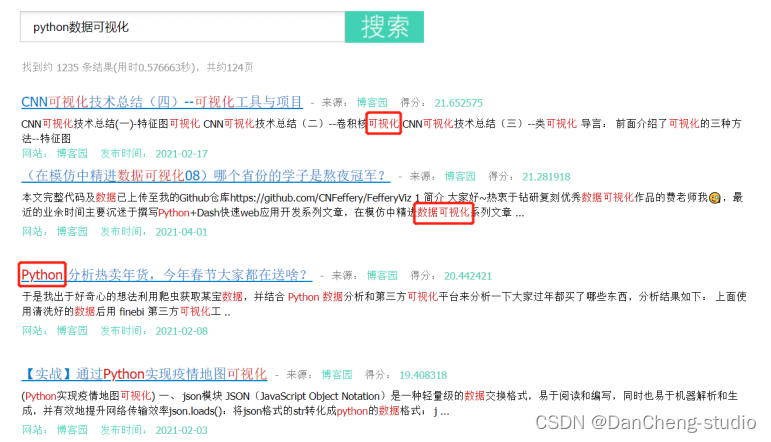
竞赛选题 python的搜索引擎系统设计与实现
0 前言 🔥 优质竞赛项目系列,今天要分享的是 🚩 python的搜索引擎系统设计与实现 🥇学长这里给一个题目综合评分(每项满分5分) 难度系数:3分工作量:5分创新点:3分 该项目较为新颖ÿ…...

大模型技术方向夏令营1期-对话分角色要素提取挑战赛
#AI夏令营 #Datawhale #夏令营 一、 baseline 跑通 Baseline 本身挑战性有限,关键是熟悉 LLM-centric 相关任务 coding 层面的流程方法,比如: 大模型 API(这里为科大讯飞 Spark)调用token消耗的理解如何调用大模型实现针对给定…...
类和对象(封装、继承、多态、友元)
c面相对象的三大特性为:封装、继承、多态 c 认为万事万物都皆为对象,对象上有其属性和行为 一、类和对象(封装) (一)封装的意义 封装是c面相对象的三大特性之一 封装的意义: 将属性和行为…...

关于Yolov8我踩过的那些坑
按照报错频次梳理: 致命反斜杠‘\’ 调用模型时,我喜欢‘copy relative location’,然后win系统默认反斜杠! 就导致路径读取错误!各种报错!! debug到崩溃然后发现是斜杠的问题,本吗喽…...
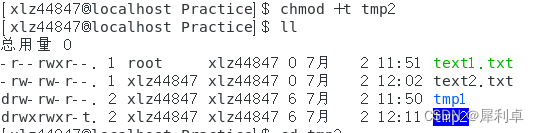
Linux——shell原理和文件权限
1.shell原理 在我们使用云服务器时,需要通过shell进行使用,而shell则是一种外壳程序。 我们提到过,大部分的指令实际上就是文件,当用户需要执行某种功能时,由于用户不擅长和操作系统直接交互(操作复杂&…...

网络工程师需要熟悉Docker吗?我觉得不需要精通,但是得懂基础
你好,这里是网络技术联盟站,我是瑞哥。 Docker,这个字眼大家不陌生吧,不过作为网络工程师可能平时接触不到,如果在看文章的是运维人员,那么70%以上的运维人员都会跟Docker打交道。即使网工用不到ÿ…...

c++初级-2-引用
文章目录 引用一、引用的定义二、引用做函数参数三、引用作为返回对象四、引用的本质五、常量引用 引用 即给一个变量起别名。 一、引用的定义 int a 10;//引用int& b a;cout << "a " << a << endl;cout << "b " <&l…...
如何清理电脑内存?让电脑运行如飞!
电脑内存(RAM)的清理对于维持系统的流畅运行至关重要。随着使用时间的增加,系统内存会被各种应用程序和后台进程占用,导致系统响应变慢,甚至出现卡顿现象。通过有效地清理内存,可以提升电脑的性能ÿ…...
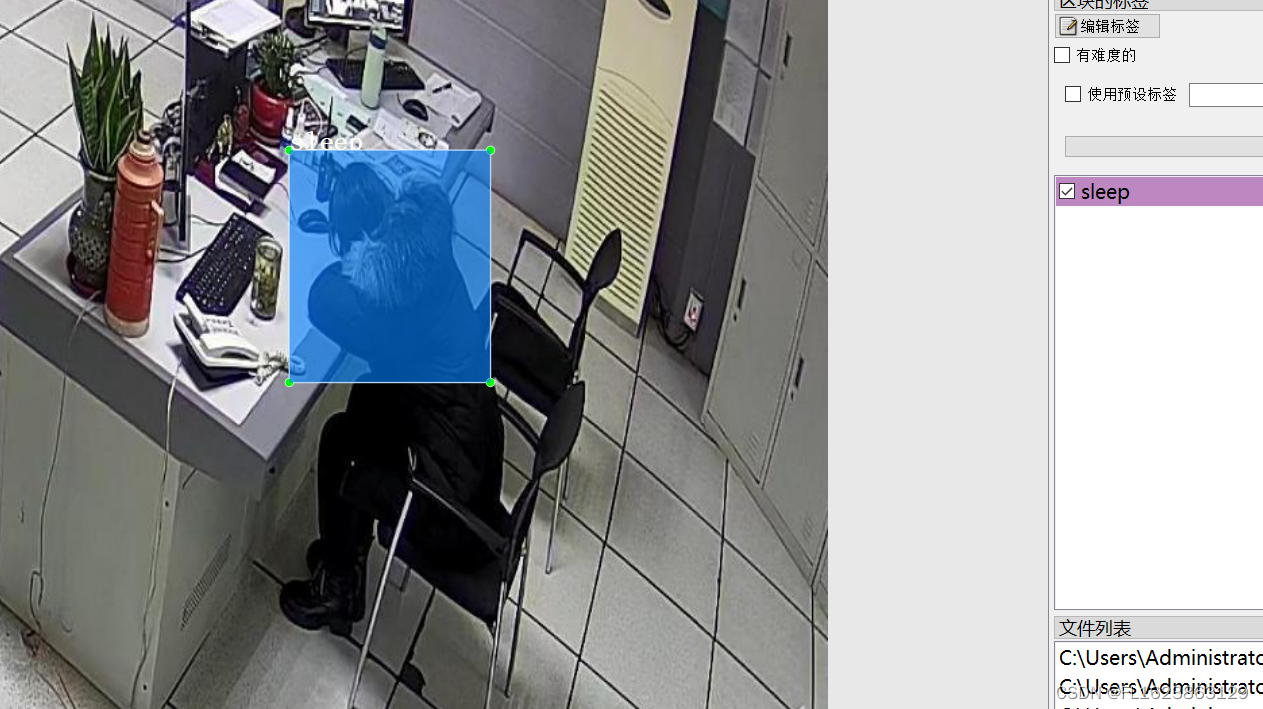
[数据集][目标检测]人员状态跑睡抽烟打电话跌倒检测数据集4943张5类别
数据集格式:Pascal VOC格式YOLO格式(不包含分割路径的txt文件,仅仅包含jpg图片以及对应的VOC格式xml文件和yolo格式txt文件) 图片数量(jpg文件个数):4943 标注数量(xml文件个数):4943 标注数量(txt文件个数):4943 标注…...

Java8 - Stream API 处理集合数据
Java 8的Stream API提供了一种功能强大的方式来处理集合数据,以函数式和声明式的方式进行操作。Stream API允许您对元素集合执行操作,如过滤、映射和归约,以简洁高效的方式进行处理。 下面是Java 8 Stream API的一些关键特性和概念ÿ…...

漫步5G-A City,一份独属于上海的浪漫
作家亨利詹姆斯曾写道,“城市漫步,让我接触到了这个世界上最好的东西”。 用漫无目的地行走,来体验和观察一座城市,上海凭借丰富多元的文化特质,成为citywalk这种浪漫生活方式的流行地。 无论你是漫步在美术馆、画廊林…...

SpringBoot 如何处理跨域请求?你说的出几种方法?
引言:在现代的Web开发中,跨域请求(Cross-Origin Resource Sharing,CORS)是一个常见的挑战。随着前后端分离架构的流行,前端应用通常运行在一个与后端 API 不同的域名或端口上,这就导致了浏览器的…...
OV SSL证书年度成本概览:为企业安全护航的经济之选
在当今数字化时代,企业网站不仅是品牌展示的窗口,更是与客户沟通的桥梁。然而,随着网络威胁的不断升级,保护网站安全成为了企业不可忽视的任务。SSL证书,特别是OV SSL证书,因其对企业身份的严格验证&#x…...

歌尔气压计SPA06-003在无人机的创新应用
随着科技的不断进步,各类智能设备的功能日益强大,其中气压计作为一种能够测量大气压力的传感器,已被广泛应用于多种领域。歌尔气压计以其高精度、低功耗的特点,在无人机和智能手表上的应用尤为突出,为这两个领域的产品…...

Godot PCK解包原理与专业逆向实践指南
1. 这不是“解压软件”,而是Godot游戏逆向工程的第一把手术刀你刚下载了一款用Godot引擎开发的独立游戏,想研究它的UI动效逻辑,或者复刻一段粒子特效,又或者只是单纯好奇——那个让你反复通关三次的像素风过场动画,图层…...

Buzz音频转录完全指南:3大核心功能+5个实战场景,快速掌握本地语音转文字技术
Buzz音频转录完全指南:3大核心功能5个实战场景,快速掌握本地语音转文字技术 【免费下载链接】buzz Buzz transcribes and translates audio offline on your personal computer. Powered by OpenAIs Whisper. 项目地址: https://gitcode.com/GitHub_Tr…...

Hirschmann RS20-0800M4M4SDAE工业以太网交换机
Hirschmann RS20-0800M4M4SDAE 工业以太网交换机产品特点:端口配置:共8个端口,含6个RJ45电口和2个ST光纤接口。端口速率:所有端口均为100Mbps快速以太网。光纤类型:2个光纤端口为多模、ST接头。管理类型:二…...
)
UOS系统下WPS卸载不干净?手把手教你用命令行精准清理(附dpkg/apt组合拳)
UOS系统下WPS卸载不干净?手把手教你用命令行精准清理 在UOS系统日常使用中,WPS Office作为常用办公软件,有时因版本更新或功能调整需要彻底卸载。但不少用户发现,通过图形界面或简单命令卸载后,系统中仍残留配置文件、…...

AI时代程序员职业发展与个人创业可行性研究报告
一、行业宏观变革(2026核心趋势数据佐证) 1.1 开发范式已彻底重构(行业不可逆拐点) 2026年正式进入AI Agent智能体开发时代,传统CRUD编码价值持续崩塌。 核心权威数据: Gartner预测:2026年75%企…...

Gofile批量下载自动化工具:5步实现高效文件管理解决方案
Gofile批量下载自动化工具:5步实现高效文件管理解决方案 【免费下载链接】gofile-downloader Download files from https://gofile.io 项目地址: https://gitcode.com/gh_mirrors/go/gofile-downloader 在当今数字化工作环境中,技术团队经常需要从…...

WarcraftHelper:魔兽争霸III现代兼容性问题的终极解决方案指南
WarcraftHelper:魔兽争霸III现代兼容性问题的终极解决方案指南 【免费下载链接】WarcraftHelper Warcraft III Helper , support 1.20e, 1.24e, 1.26a, 1.27a, 1.27b 项目地址: https://gitcode.com/gh_mirrors/wa/WarcraftHelper 魔兽争霸III作为经典即时战…...

翻译 GDB 官方文档
翻译 GDB 官方文档项目地址官方文档地址下载源码包编译html运行翻译程序项目地址 https://github.com/shootercheng/gdb-translate.git 项目结构 $ tree -L 1 . ├── cmd ├── go.mod ├── input ├── internal ├── LICENSE ├── output ├── README.md ├─…...

如何快速批量下载高质量歌词:ZonyLrcToolsX跨平台终极解决方案
如何快速批量下载高质量歌词:ZonyLrcToolsX跨平台终极解决方案 【免费下载链接】ZonyLrcToolsX ZonyLrcToolsX 是一个能够方便地下载歌词的小软件。 项目地址: https://gitcode.com/gh_mirrors/zo/ZonyLrcToolsX 还在为本地音乐库缺少歌词而烦恼吗࿱…...

深度解析网络设备权限管理工具:中兴光猫工厂模式与Telnet服务完整指南
深度解析网络设备权限管理工具:中兴光猫工厂模式与Telnet服务完整指南 【免费下载链接】zteOnu A tool that can open ZTE onu device factory mode 项目地址: https://gitcode.com/gh_mirrors/zt/zteOnu 在当今网络设备管理领域,获取设备完整控制…...