存储课程学习笔记2_借助内核插入一个文件系统,用文件夹下测试文件系统(mount文件系统到目录下是入口)
裸盘是如何能达到我们日常操作目录那样,按目录依次访问文件等,实际上就是基于裸盘上,用文件系统进行控制。
0:总结。
0:mount是入口,一个裸盘先赋予文件系统,然后mount后才可以用。
1:内核提供了插入文件系统的方法,register_filesystem函数和对应的struct file_system_type 结构体。
2:插入内核模块的demo,基于插入内核模块,实现插入一个新的文件系统。
3:基于文件系统,实现对应的指令,mount是入口(mount_nodev和mount_bdev两种mount的区别),才有其他后续接口:关注struct super_block , struct inode_operations,struct file_operations。
1:首先要了解文件系统,以及挂载。
新增一个裸盘后,首先需要给裸盘赋予文件系统,然后就可以挂载后使用了。
#可以看到 sdb设备是新增的空闲设备 10G  虚拟机上的scsi设备
ubuntu@ubuntu:~/start_test$ lsblk
...
sdb                         8:16   0   10G  0 disk
sr0                        11:0    1  1.8G  0 rom  #首先裸盘是没有文件系统的  可以给它加载文件系统
root@ubuntu:/home/ubuntu/start_test# mkfs.ext4 /dev/sdb
mke2fs 1.46.5 (30-Dec-2021)
Creating filesystem with 2621440 4k blocks and 655360 inodes
Filesystem UUID: 96099ecd-4c7c-4006-b843-7faf4ceb07c4
Superblock backups stored on blocks: 32768, 98304, 163840, 229376, 294912, 819200, 884736, 1605632Allocating group tables: done
Writing inode tables: done
Creating journal (16384 blocks): done
Writing superblocks and filesystem accounting information: done #对该磁盘进行挂载 挂载后可通过挂载目录对磁盘进行访问
root@ubuntu:/home/ubuntu/start_test# mkdir mnt
root@ubuntu:/home/ubuntu/start_test# mount -t ext4 /dev/sdb /home/ubuntu/start_test/mnt/#可以看到 已经挂载成功
root@ubuntu:/home/ubuntu/start_test/mnt# ls
lost+found
root@ubuntu:/home/ubuntu/start_test# df -h
...
/dev/sdb                           9.8G   28K  9.3G   1% /home/ubuntu/start_test/mnt#可以借助目录对磁盘进行访问了。
root@ubuntu:/home/ubuntu/start_test/mnt# mkdir 1
root@ubuntu:/home/ubuntu/start_test/mnt# umount /dev/sdb
umount: /home/ubuntu/start_test/mnt: target is busy.
root@ubuntu:/home/ubuntu/start_test/mnt# cd ../
root@ubuntu:/home/ubuntu/start_test# umount /dev/sdb
2:插入内核模块demo
本节目的是借助内核提供的文件系统接口,插入一个文件系统内核模块。
2.1 插入一个内核模块,观察日志。
#include <linux/init.h>
#include <linux/module.h>
#include <linux/kernel.h> //printkstatic int __init hello_init(void) {printk(KERN_INFO "Hello, World!\n");return 0;
}static void __exit hello_exit(void) {printk(KERN_INFO "Goodbye, World!\n");
}module_init(hello_init);
module_exit(hello_exit);MODULE_LICENSE("GPL");
MODULE_AUTHOR("hello World test");
MODULE_DESCRIPTION("A simple example kernel module");
2.2 借助make对其进行编译,生成ko文件。
obj-m += hello_module.o
KERNELDIR ?= /lib/modules/$(shell uname -r)/build
all:make -C $(KERNELDIR) M=$(PWD) modules
clean:make -C $(KERNELDIR) M=$(PWD) clean
2.3 编译该模块,加入内核和移出内核,观察日志。
#插入内核模块 移除内核模块
root@ubuntu:/home/ubuntu/storage/module_test# insmod hello_module.ko
root@ubuntu:/home/ubuntu/storage/module_test# rmmod hello_module.ko
#使用dmesg查看系统日志  (-x这里打印前面的级别)
root@ubuntu:/etc# dmesg -x |tail
kern  :info  : [526406.354334] Hello, World!
kern  :err   : [526413.567482] Goodbye, World!#带系统时间进行显示   可以了解dmesg相关指令参数
root@ubuntu:/etc# dmesg -x -T|tail
kern  :info  : [Fri May 17 04:53:13 2024] Hello, World!
kern  :err   : [Fri May 17 04:53:20 2024] Goodbye, World!
3:注册文件系统(通过内核模块,给特定目录加入文件系统)
借助mount -t 文件系统 (插入文件系统内核模块后,借助mount指令实现挂载,可以测试文件系统)
内核提供了两种挂载的方式。
mount_nodev 更适合用于创建虚拟文件系统, 如创建的一个文件夹。
mount_bdev需要的是绑定对应的块设备(如硬盘,硬盘上的 ext4、xfs 等常见文件系统。)
3.1 注册文件系统,确定mount的入口正确( 通过struct file_system_type结构体,register_filesystem 注册文件系统)
主要了解register_filesystem 函数接口以及struct file_system_type结构体 中相关函数,以及操作对应函数入口。
这里仅仅观察执行mount时,能否正常日志记录。
3.1.1 代码demo,借助makefiel编译
//这里如果mount时没有实现该功能 测试后,会导致模块无法卸载
#include <linux/init.h>
#include <linux/module.h>#include <linux/fs.h>  //内核下:usr/src/linux-headers-5.15.0-107/include/linux///挂载虚拟文件时用  对应file_system_type中name
// mount -t filesys_test nodev ./mnt/
// mount_nodev();//挂载设备文件时用
// mount -t filesys_test /dev/nvme ./mnt/
// mount_bdev();
//借助mount -t 指令实现挂载时触发
struct dentry *filesys_mount(struct file_system_type *fstype, int flags,const char *dev_name, void *data) {
{printk("filesys mount ...\n");return NULL;  //这里如果只是NULL 导致该模块无法卸载
}          void filesys_kill_superblock (struct super_block *)
{printk("filesys des ... \n");
}//定义对应的文件系统结构体  对应内核模块的linux/fs.h
//文件系统看看 linux/fs.h  文件下的相关内容
struct file_system_type file_sys_st  = {.owner = THIS_MODULE,.name = "filesys_test",// .fs_flags =  //看一下默认多少// .init_fs_context = 必要的初始化相关函数// .parameters  未定义相关文件系统参数.mount =  filesys_mount, 			//挂载时对应执行的函数指针.kill_sb = filesys_kill_superblock	//销毁超级块时触发
};//一定要注意类型对应  参数有个void  function declaration isn’t a prototype [-Werror=strict-prototypes
static int __init filesys_init(void)
{//注册文件系统int ret = register_filesystem(&file_sys_st);if(ret){printk("init module: register filesys error. [%d]. \n", ret);return ret;}printk("init module: register filesys success. [%d]. \n", ret);return ret;
}static void __exit filesys_exit(void)
{//对应上文模块初始化unregister_filesystem(&file_sys_st);printk("destory module: unregister filesys.\n");
}module_init(filesys_init);
module_exit(filesys_exit);
MODULE_LICENSE("GPL");
–需要了解一下fs.h中结构体和相关函数
struct file_system_type {const char *name;int fs_flags; 					//文件系统标志位#define FS_REQUIRES_DEV		1     //该文件系统需要一个实际设备作为其挂载点。#define FS_BINARY_MOUNTDATA	2#define FS_HAS_SUBTYPE		4#define FS_USERNS_MOUNT		8			// Can be mounted by userns root #define FS_DISALLOW_NOTIFY_PERM	16		// Disable fanotify permission events #define FS_ALLOW_IDMAP         32      	// FS has been updated to handle vfs idmappings. #define FS_THP_SUPPORT		8192		// Remove once all fs converted #define FS_RENAME_DOES_D_MOVE	32768	// FS will handle d_move() during rename() internally. int (*init_fs_context)(struct fs_context *);    //挂载前的动作const struct fs_parameter_spec *parameters;    //文件系统参数的结构体struct dentry *(*mount) (struct file_system_type *, int,  const char *, void *);          // 挂载函数指针void (*kill_sb) (struct super_block *);   // 销毁超级块函数指针struct module *owner;         		// 所属模块指针(可选)struct file_system_type * next;		// 链表下一个元素指针(可选)struct hlist_head fs_supers;struct lock_class_key s_lock_key;struct lock_class_key s_umount_key;struct lock_class_key s_vfs_rename_key;struct lock_class_key s_writers_key[SB_FREEZE_LEVELS];struct lock_class_key i_lock_key;struct lock_class_key i_mutex_key;struct lock_class_key invalidate_lock_key;struct lock_class_key i_mutex_dir_key;
};extern int register_filesystem(struct file_system_type *);
extern int unregister_filesystem(struct file_system_type *);
3.1.2 对应执行和测试(导致该内核模块无法卸载)
root@ubuntu:/home/ubuntu/storage/filesys# insmod filesys.ko
root@ubuntu:/home/ubuntu/storage/filesys# mount -t filesys_test nodev ./mnt/
Killed
# 发现mount后 该内核模块无法移除,对应的dmesg中有相关错误日志
root@ubuntu:/home/ubuntu/storage/filesys# rmmod filesys.ko
rmmod: ERROR: Module filesys is in use
root@ubuntu:/home/ubuntu/storage/filesys# lsmod|grep file
filesys                16384  1root@ubuntu:/# dmesg
[537582.603611] init module: register filesys success. [0].
[537589.942759] filesys mount ...
[537589.943232] BUG: kernel NULL pointer dereference, address: 0000000000000068
[537589.943612] #PF: supervisor read access in kernel mode
[537589.943997] #PF: error_code(0x0000) - not-present page
[537589.944405] PGD 0 P4D 0
[537589.944774] Oops: 0000 [#1] SMP NOPTI
3.2 实现文件系统对应mount模块,使该模块正常(mount_nodev和mount_bdev差别)
3.2.1 必要代码模块
//个人理解:mount是文件系统挂载的第一步,比如把这个目录当做根目录,基于该目录下去创建文件系统,使支持相关文件/文件夹操作,(禁止外部原文件系统访问)。
//mount时 需要初始化相关的超级块 需要对根目录节点进行处理以及相关初始化
const struct inode_operations filesys_inode_ops =
{};const struct file_operations filesys_file_ops =
{};//回调函数 对参数做初始化
//struct super_block 超级块 存储了文件系统磁盘大小,系统类型,inode表等
static int filesys_super_block(struct super_block * sb, void *data, int flag)
{struct inode *root_inode;printk("filesys mount super_block ...\n");//创建根目录节点 root_inode = new_inode(sb); //创建一个inode节点,从sb中分配//初始化第一个inode的节点信息// void inode_init_owner(struct user_namespace *mnt_userns, struct inode *inode,// 	      const struct inode *dir, umode_t mode);// init_user_ns 命名空间  &nop_mnt_idmapinode_init_owner(&init_user_ns, root_inode, NULL, S_IFDIR); //S_IFDIR表示目录类型 sys/stat.h中root_inode->i_sb = sb;root_inode->i_op = &filesys_inode_ops;  //inode操作相关函数root_inode->i_fop = &filesys_file_ops;  //文件操作相关函数//fs.h中封装的函数root_inode->i_atime = root_inode->i_mtime = root_inode->i_ctime = current_time(root_inode);//根目录对应的结构体指针 //d_make_root函数用于在mount一个文件系统的时候,为文件系统的root inode创建对应的dentry。//dentry 是表示目录项的数据结构  该目录需要的必要信息sb->s_root = d_make_root(root_inode);return 0;
}//挂载虚拟文件时用  对应file_system_type中name
// mount -t filesys_test nodev ./mnt/
// mount_nodev();//挂载设备文件时用
// mount -t filesys_test /dev/nvme ./mnt/
// mount_bdev();
//借助mount -t 指令实现挂载时触发
struct dentry *filesys_mount(struct file_system_type *fstype, int flags,const char *dev_name, void *data)
{struct dentry* re; //为了解决告警放最前面printk("filesys mount ...\n");//mount时实际上需要关注目标文件夹的一些特性  不同的文件类型不同的接口re =  mount_nodev(fstype, flags, data, filesys_super_block);return re;  //这里如果只是NULL 导致该模块无法卸载
}          void filesys_kill_superblock(struct super_block * sb)
{printk("filesys des ... \n");//这里卸载需要需求清理kill_litter_super(sb); // 调用默认的卸载函数return;
}
3.2.2 执行结果,能正常umount以及移除内核模块(暂时该目录下创建删除等各种指令依然无法使用):
root@ubuntu:/home/ubuntu/storage/filesys# insmod filesys.ko
root@ubuntu:/home/ubuntu/storage/filesys# mount -t filesys_test nodev ./mnt/
root@ubuntu:/home/ubuntu/storage/filesys# umount ./mnt/
root@ubuntu:/home/ubuntu/storage/filesys# rmmod filesys.ko root@ubuntu:/home/ubuntu/storage/filesys# dmesg --clear
root@ubuntu:/home/ubuntu/storage/filesys# dmesg
root@ubuntu:/home/ubuntu/storage/filesys# dmesg
[ 2065.265739] init module: register filesys success. [0].
[ 2071.640164] filesys mount ...
[ 2071.640215] filesys mount super_block ...
[ 2079.303963] filesys des ...
[ 2082.553245] destory module: unregister filesys.
3.3 基于mount已经实现,实现其他基本指令(ls,cd,mkdir等)
构造对应的结构体 struct inode_operations 和struct file_operations 实现内部接口。
3.3.1 代码demo, 相关inode_operations 对应的接口
#include <linux/init.h>
#include <linux/module.h>
#include <linux/slab.h>
#include <linux/fs.h>  //内核下:usr/src/linux-headers-5.15.0-107/include/linux///考虑已有的结构体和必要内容结构体 文件夹信息和文件内容如何存储和识别
//超级块==》inode首节点根目录==》inode节点目录/文件识别必要信息
#define MAX_FILE_NUM 1024
#define MAX_FILENAME_LEN 64typedef struct file_context_st{char *buffer;  //文件内容的存储 需要研究文件数据块的存储逻辑 小文件 大文件,,,int buf_len;char filename[MAX_FILENAME_LEN];
}FILE_CONTEXT_ST;//inode节点中i_ino唯一标识 可以与文件或者目录结构做对应关系
//inode中可以指向该文件的写入内容地址
FILE_CONTEXT_ST g_file[MAX_FILE_NUM] = {0};int get_one_file_idx(void) {int i = 0;for (i = 0;i < MAX_FILE_NUM;i ++) {if (g_file[i].buffer == NULL && g_file[i].buf_len == 0) {return i;}}return MAX_FILE_NUM;
}int filesys_inode_create(struct user_namespace *uns, struct inode *dir,struct dentry *dentry,umode_t mode, bool excl);
struct dentry *filesys_inode_lookup (struct inode *inode,struct dentry *dentry, unsigned int flags);
int filesys_inode_mkdir(struct user_namespace *uns, struct inode *dir, struct dentry *dentry, umode_t mode);
int filesys_inode_rmdir(struct inode *inode, struct dentry *dentry);
int filesys_inode_unlink(struct inode *inode, struct dentry *dentry);int filesys_file_open (struct inode *inode, struct file *filp);
int filesys_file_release(struct inode *inode, struct file *filp);
ssize_t filesys_file_read(struct file *filp, char __user *buffer, size_t length, loff_t *offset);
ssize_t filesys_file_write(struct file *filp, const char __user *buffer, size_t length, loff_t *offset);
int filesys_file_iterate (struct file *filp, struct dir_context *ctx);const struct inode_operations filesys_inode_ops =
{//创建文件 查看文件  移除文件  返回文件信息  查看属性  链接指令等.create = filesys_inode_create,.lookup = filesys_inode_lookup,.mkdir = filesys_inode_mkdir,.rmdir = filesys_inode_rmdir,.unlink = filesys_inode_unlink,
};const struct file_operations filesys_file_ops =
{.open = filesys_file_open,.release = filesys_file_release,.read = filesys_file_read,.write = filesys_file_write,.iterate = filesys_file_iterate,
};//这里创建文件 需要考虑文件名和文件内容 文件夹的创建对应mkdir
//需要考虑逐层创建文件和文件夹的结构 struct dentry
int filesys_inode_create(struct user_namespace *uns, struct inode *dir,struct dentry *dentry,umode_t mode, bool excl)
{//编译时有校验  初始化放在前面struct inode *inode;struct super_block *sb = dir->i_sb;int idx = 0;//从参数中获取到文件名 printk("filename: %s\n", dentry->d_name.name);//实际上就是创建一个节点,保存必要的信息 inode = new_inode(sb);  //这里要考虑父节点  同级节点 inode->i_sb = sb;inode->i_op = &filesys_inode_ops; //这里文件节点 应该对相关操作做限制吧?inode->i_fop = &filesys_file_ops;//这里涉及文件名  以及文件预留内存等必要信息  idx = get_one_file_idx();if(idx >= MAX_FILE_NUM){return -EINVAL;}g_file[idx].buffer = kmalloc(1024, GFP_KERNEL);g_file[idx].buf_len = 0;strncpy(g_file[idx].filename, dentry->d_name.name, MAX_FILENAME_LEN);inode->i_ino = idx; //唯一标识 可以找到关联内容inode->i_private = &g_file[idx]; //私有空间 存储必要信息  指针//使用传递参数对inode做必要的初始化inode_init_owner(uns, inode, dir, mode);//创建dentry结构 做相关指向关联 加入目录的功能d_add(dentry, inode); //return 0;
}struct dentry *filesys_inode_lookup (struct inode *inode,struct dentry *dentry, unsigned int flags) {printk("filesys_inode_lookup\n");return NULL;}//mkdir 文件夹的创建
int filesys_inode_mkdir(struct user_namespace *uns, struct inode *dir, struct dentry *dentry, umode_t mode) {printk("filesys_inode_mkdir\n");return 0;
}// rmdir dir
int filesys_inode_rmdir(struct inode *inode, struct dentry *dentry) {printk("filesys_inode_rmdir\n");return 0;
}// rm file
int filesys_inode_unlink(struct inode *inode, struct dentry *dentry) {printk("filesys_inode_unlink\n");return 0;
}	//ls 调用 open iterate release
//touch 调用 inode_lookup open release
int filesys_file_open (struct inode *inode, struct file *filp)
{printk("filesys_file_open\n");return 0;
}int filesys_file_release(struct inode *inode, struct file *filp)
{printk("filesys_file_release\n");return 0;
}ssize_t filesys_file_read(struct file *filp, char __user *buffer, size_t length, loff_t *offset)
{size_t len = length > 1024 ? 1024 : length;FILE_CONTEXT_ST *blk = filp->f_path.dentry->d_inode->i_private;char *ptr = blk->buffer;int buflen = blk->buf_len;if (*offset >= buflen) {return 0;}printk("filesys_file_read len: %ld, offset: %lld\n", len, *offset);if (!ptr)return -EINVAL;ptr += *offset;if (copy_to_user(buffer, ptr, len)) {return -EFAULT;}*offset += len;return len;
}ssize_t filesys_file_write(struct file *filp, const char __user *buffer, size_t length, loff_t *offset)
{size_t len = length > 1024 ? 1024 : length;FILE_CONTEXT_ST *blk = filp->f_path.dentry->d_inode->i_private;char *ptr = blk->buffer;printk("filesys_file_write\n");if (!ptr)return -EINVAL;ptr += *offset;if (copy_from_user(ptr, buffer, len)) {return -EFAULT;}blk->buf_len = len;filp->f_inode->i_size = blk->buf_len;*offset += len;return len;
}int filesys_file_iterate (struct file *filp, struct dir_context *ctx)
{int count = get_one_file_idx();int i = 0;printk("filesys_file_iterate--> count: %d, pos: %lld\n", count, ctx->pos);if(ctx->pos > count) return 0;//在目录中添加.和..if (!dir_emit_dots(filp, ctx)) {return 0;}//遍历将一个文件或子目录的信息添加到目录中的函数for (i = 0;i < count;i ++) {dir_emit(ctx, g_file[i].filename, strlen(g_file[i].filename), i, DT_UNKNOWN);ctx->pos ++;}return 0;
}
3.3.2 运行结果测试:
只是测试框架以及方向,其他基本指令待实现。
mount -t filesys_test nodev ./mnt/ 中filesys_test 这里是代码中注册的文件系统名。
root@ubuntu:/home/ubuntu/storage/filesys# insmod filesys.ko
root@ubuntu:/home/ubuntu/storage/filesys# mount -t filesys_test nodev ./mnt/
root@ubuntu:/home/ubuntu/storage/filesys# touch ./mnt/1.txt
root@ubuntu:/home/ubuntu/storage/filesys# echo "123456" >./mnt/1.txt
root@ubuntu:/home/ubuntu/storage/filesys# cat ./mnt/1.txt
123456
root@ubuntu:/home/ubuntu/storage/filesys# umount ./mnt/
root@ubuntu:/home/ubuntu/storage/filesys# rmmod filesys.ko
root@ubuntu:/home/ubuntu/storage/filesys# dmesg
[ 3456.748025] init module: register filesys success. [0].
[ 3464.294293] filesys mount ...
[ 3464.294353] filesys mount super_block ...
[ 3474.675258] filesys_inode_lookup
[ 3474.675264] filename: 1.txt
[ 3474.675272] filesys_file_open
[ 3474.675280] filesys_file_release
[ 3487.604103] filesys_file_open
[ 3487.604123] filesys_file_write
[ 3487.604125] filesys_file_write
[ 3487.604126] filesys_file_write
[ 3487.604128] filesys_file_release
[ 3492.519216] filesys_file_open
[ 3492.519237] filesys_file_read len: 1024, offset: 0
[ 3492.519306] filesys_file_release
[ 3498.087984] filesys des ...
...
[ 3501.761647] destory module: unregister filesys.
相关文章:
)
存储课程学习笔记2_借助内核插入一个文件系统,用文件夹下测试文件系统(mount文件系统到目录下是入口)
裸盘是如何能达到我们日常操作目录那样,按目录依次访问文件等,实际上就是基于裸盘上,用文件系统进行控制。 0:总结。 0:mount是入口,一个裸盘先赋予文件系统,然后mount后才可以用。 1…...

chunk-vendors.js 文件过大导致页面加载缓慢解决方案
1、路由懒加载 在 Webpack 中,我们可以使用动态 import语法来定义代码分块点 (split point): import(./Foo.vue) // 返回 Promise如果您使用的是 Babel,你将需要添加 syntax-dynamic-import 插件,才能使 Babel 可以正确地解析语…...
【Postgresql】地理空间数据的存储与查询,查询效率优化策略,数据类型与查询速度的影响
注:使用postgresql数据库会用到PostGIS 扩展。 一、安装PostGIS 扩展 在 PostgreSQL 中遇到错误 “type geography does not exist” 通常意味着你的 PostgreSQL 数据库还没有安装 PostGIS 扩展,或者 PostGIS 扩展没有被正确地安装在你的数据库中。geo…...

设计模式应用
单例模式 RunTime类是单例模式的体现,getRunTime()方法会返回一个唯一的实例。确保程序中只有一个唯一的RunTime类对象建造者模式 StringBuilder和StringBuffer是建造者模式的体现工厂模式 Calender类中Calender.getInstance()方法 DriverManager.getConnection()方…...

Android开机启动流程
Android开机启动流程 systemReady启动"added application" frameworks/base/services/java/com/android/server/SystemServer.java mainnew SystemServer().run();startBootstrapServicesmActivityManagerService ActivityManagerService.Lifecycle.startService(…...

数据结构基本知识
一、什么是数据结构 1.1、组织存储数据 ---------》内存(存储) 1.2、研究目的 如何存储数据(变量,数组....)程序数据结构算法 1.3、常见保存数据的方法 数组:保存自己的数据指针:是间接访问已经存在的…...
浙大数据结构:02-线性结构4 Pop Sequence
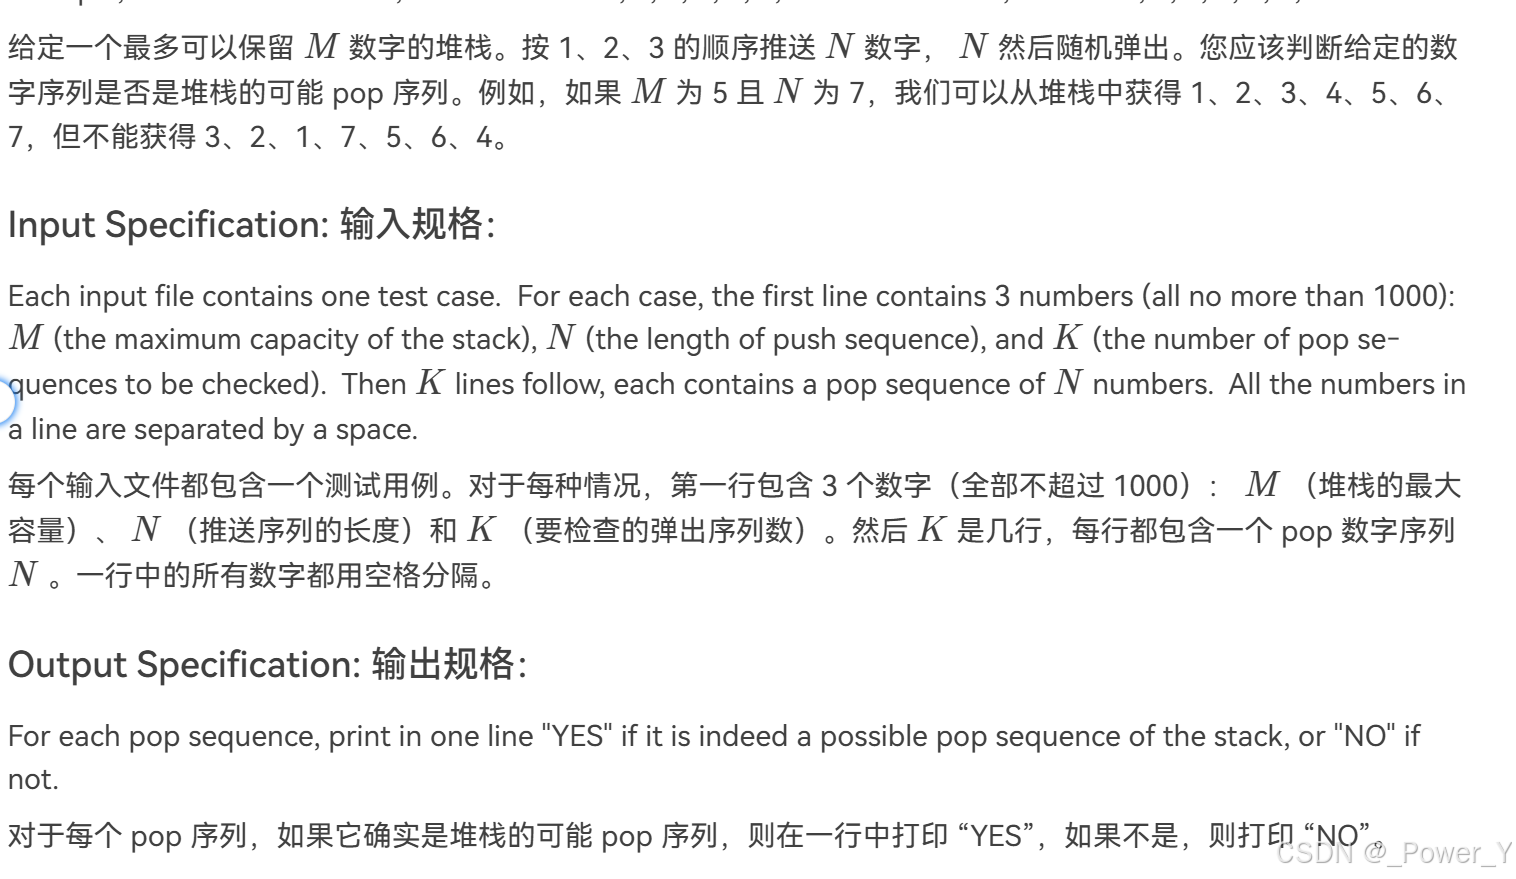
这道题我们采用数组来模拟堆栈和队列。 简单说一下大致思路,我们用栈来存1234.....,队列来存输入的一组数据,栈与队列进行匹配,相同就pop 机翻 1、条件准备 stk是栈,que是队列。 tt指向的是栈中下标,fr…...

java开发,记录一些注解和架构 pojo、entity、respository
最近接了一个项目,说是项目其实也不算是项目,因为是把这个项目赛到其他项目中的。 熟悉一些这个项目的功能,梳理了一下,在代码开发中主要关心pojo、entity、respository、controller、service。 在这里主要记录前3个的流程与作用…...
MatLab基础学习01
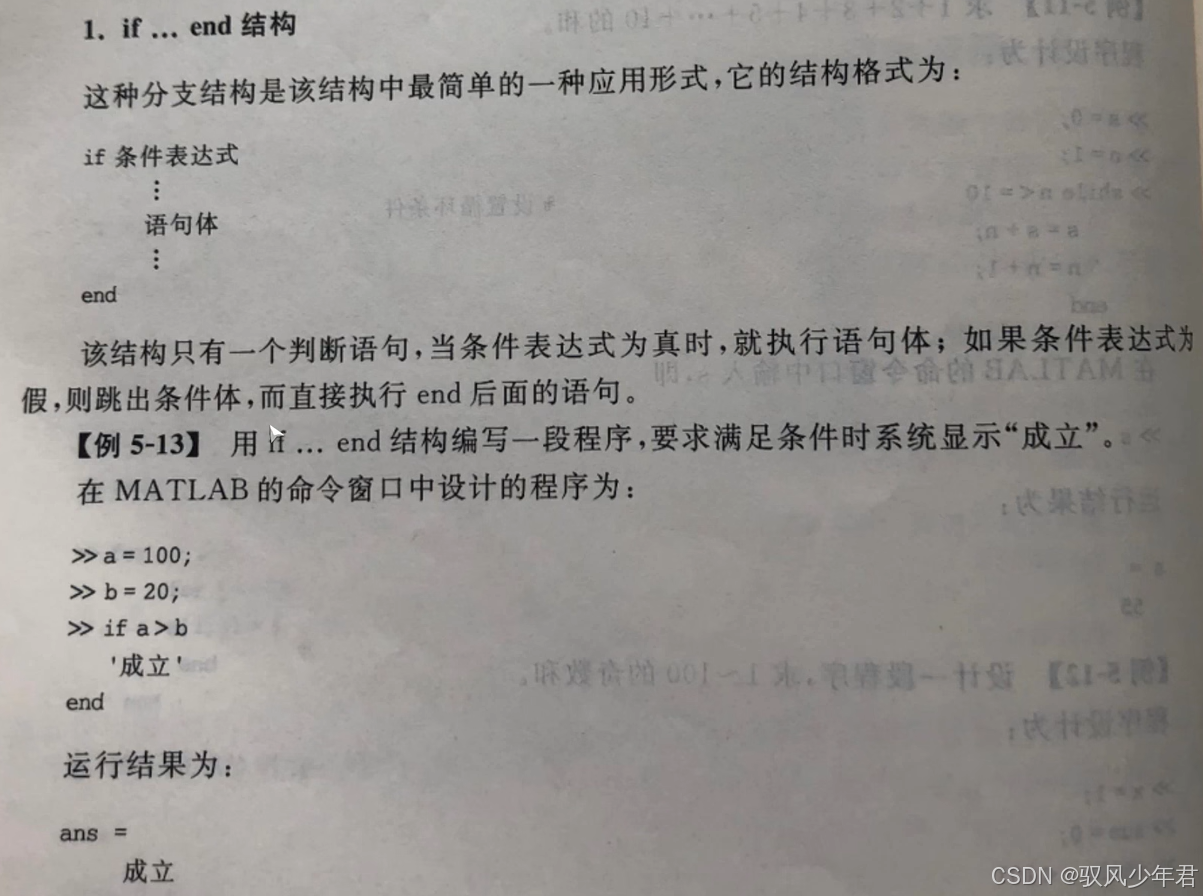
MatLab基础学习01 1.基础入门2.MatLab的数据类型2.1数字2.2字符串2.3矩阵2.4.元胞数组2.5结构体 3.MatLab的矩阵的操作3.1矩阵定义与构造3.2矩阵的下标取值 4.MatLab的逻辑流程4. For循环结构4.2 While循环,当条件成立的时候进行循环4.3 IF end 1.基础入门 matlba必…...
第 5 章多视图几何
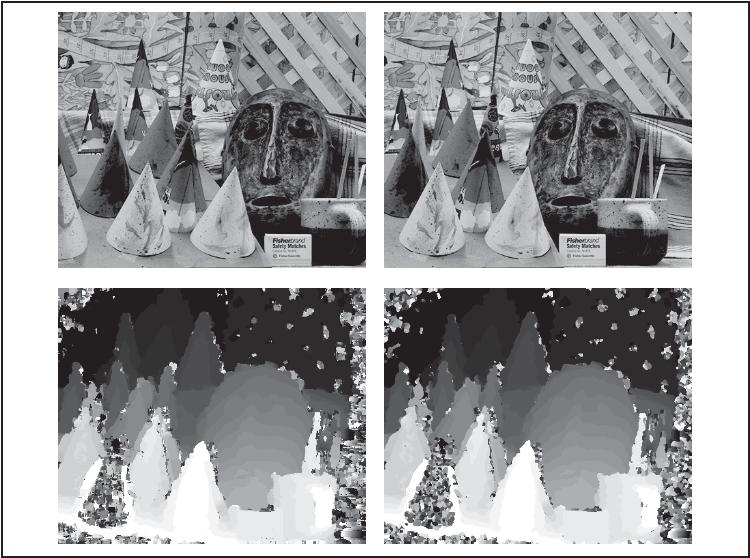
本章讲解如何处理多个视图,以及如何利用多个视图的几何关系来恢复照相机位置信息和三维结构。通过在不同视点拍摄的图像,我们可以利用特征匹配来计算出三维场景点以及照相机位置。本章会介绍一些基本的方法,展示一个三维重建的完整例子&#…...

IOS 开发者账号注册流程
注册步骤 准备资料 营业执照 法人信息(电话、身份证信息) 注册邮箱(公司邮箱) 开发者信息(电话、身份证信息、邮箱)1. 注册AppleID 注册地址: https://appleid.apple.com/account 填写表单信…...

netty之NioEventLoop和NioEventLoopGroup
类结构图 NioEventLoopGroup #mermaid-svg-5g1iVjr5oyhqXK92 {font-family:"trebuchet ms",verdana,arial,sans-serif;font-size:16px;fill:#333;}#mermaid-svg-5g1iVjr5oyhqXK92 .error-icon{fill:#552222;}#mermaid-svg-5g1iVjr5oyhqXK92 .error-text{fill:#55222…...

睿考网:中级经济师考试题型有哪些?
中级经济师考试时间在每年的11月份,2024年考试时间定于11月16-17日,考试科目为《经济基础知识》与《专业知识与实务》两科。 《专业知识与实务》有10个专业,分别是工商管理、知识产权、农业经济、财政税收、金融、保险、运输经济、人力资源管…...

kubernetes集群部署Confluence 7.2.0+mysql 5.7(自测有效)
背景介绍: Confluence是一个专业的企业知识管理与协同软件。使用简单,但它强大的编辑和站点管理特征能够帮助团队成员之间共享信息、文档协作、集体讨论,信息推送。 这里介绍的使用的是Confluence 7.2.0版本的。 一、在kubernetes集群部署 1…...

Vmware ubuntu22.04 虚拟机 连接Windows主机虚拟串口
1. Windows虚拟串口配置 虚拟串口下载:虚拟串口 VSPD 的使用_vspd使用教程-CSDN博客 虚拟串口使用:使用虚拟串口在一台电脑上模拟串口通讯_pc怎么模拟一主多从串口-CSDN博客 2. ubuntu虚拟串口配置 Vmware ubuntu22.04 虚拟机 连接windows主机虚拟串口…...

Postgresql碎片整理
创建pgstattuple 扩展 CREATE EXTENSION pgstattuple 获取表的元组(行)信息,包括空闲空间的比例和行的平均宽度 SELECT * FROM pgstattuple(表名); 查看表和索引大小 SELECT pg_relation_size(表名), pg_relation_size(索引名称); 清理碎片方…...

【最新华为OD机试E卷-支持在线评测】字母组合(200分)多语言题解-(Python/C/JavaScript/Java/Cpp)
🍭 大家好这里是春秋招笔试突围 ,一枚热爱算法的程序员 💻 ACM金牌🏅️团队 | 大厂实习经历 | 多年算法竞赛经历 ✨ 本系列打算持续跟新华为OD-E/D卷的多语言AC题解 🧩 大部分包含 Python / C / Javascript / Java / Cpp 多语言代码 👏 感谢大家的订阅➕ 和 喜欢�…...

力扣493.翻转对
class Solution {public static int MAXN 50001;public static int[] help new int[MAXN];public static void main(String[] args) {}public static int reversePairs(int[] arr) {return counts(arr, 0, arr.length - 1);}//统计l …… r上反转对的数量,同时计算…...

潜望长焦+快充:vivo X200系列,小尺寸手机的大突破
在智能手机市场日益激烈的竞争中,厂商们不断推陈出新,以满足消费者多样化的需求。vivo作为中国知名的智能手机品牌,一直以其创新的设计和强大的功能赢得市场的认可。 近日,vivo X200系列的即将发布引起了广泛关注,特别…...
)
Stable Diffusion训练LoRA模型参数详细说明(阿里巴巴堆友AI)
工具:线上模型训练堆友AI 一、训练参数 批量大小 (Batch Size) 作用:每次训练中使用的样本数量。参考值:可以从 8 到 64,取决于显存大小。 训练轮数 (Epochs) 作用:完整遍历训练数据的次数。参考值:通…...
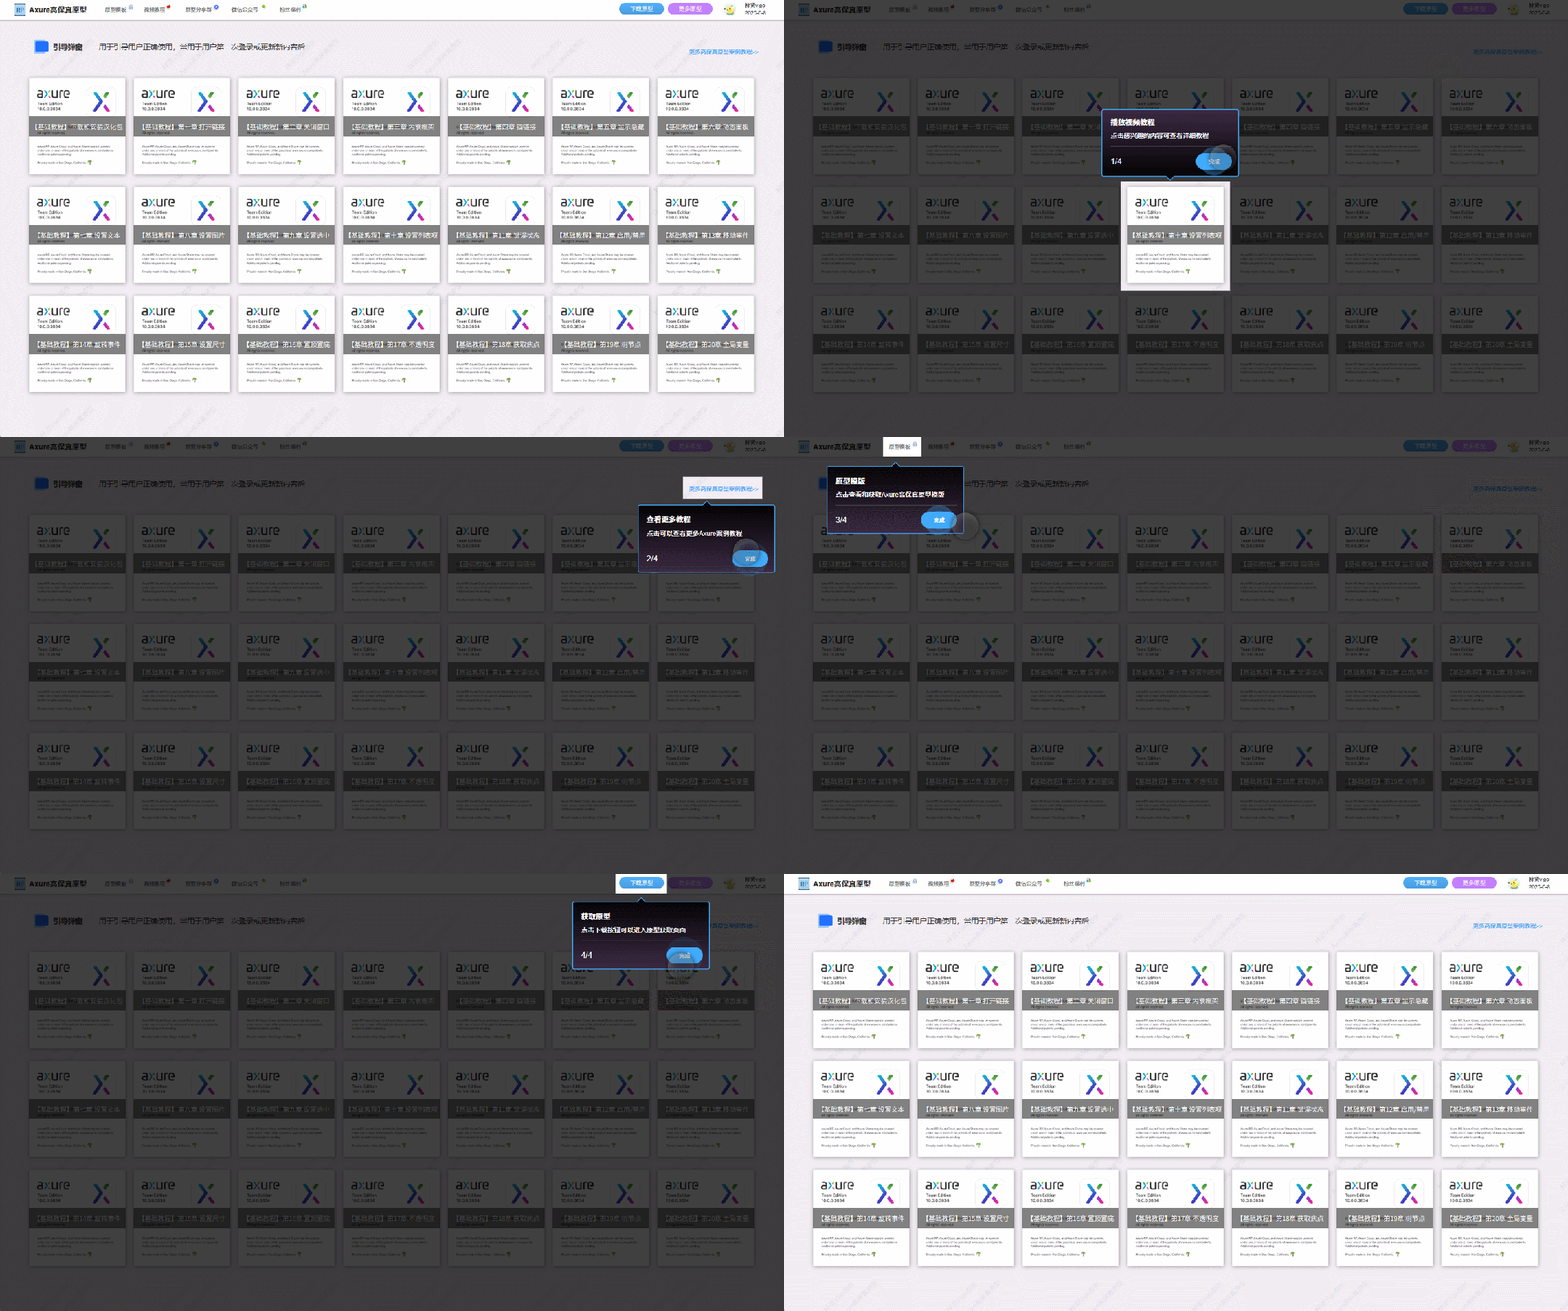
【Axure高保真原型】引导弹窗
今天和大家中分享引导弹窗的原型模板,载入页面后,会显示引导弹窗,适用于引导用户使用页面,点击完成后,会显示下一个引导弹窗,直至最后一个引导弹窗完成后进入首页。具体效果可以点击下方视频观看或打开下方…...
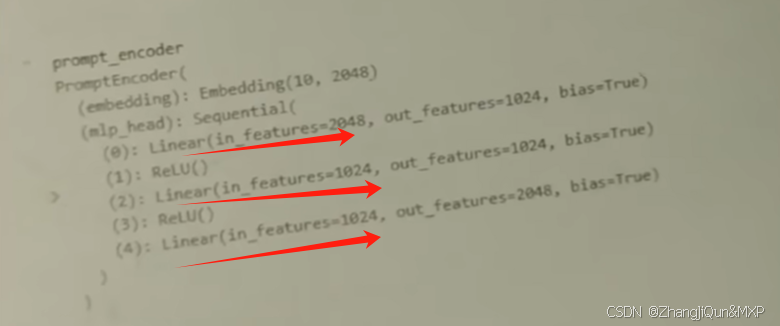
Prompt Tuning、P-Tuning、Prefix Tuning的区别
一、Prompt Tuning、P-Tuning、Prefix Tuning的区别 1. Prompt Tuning(提示调优) 核心思想:固定预训练模型参数,仅学习额外的连续提示向量(通常是嵌入层的一部分)。实现方式:在输入文本前添加可训练的连续向量(软提示),模型只更新这些提示参数。优势:参数量少(仅提…...

边缘计算医疗风险自查APP开发方案
核心目标:在便携设备(智能手表/家用检测仪)部署轻量化疾病预测模型,实现低延迟、隐私安全的实时健康风险评估。 一、技术架构设计 #mermaid-svg-iuNaeeLK2YoFKfao {font-family:"trebuchet ms",verdana,arial,sans-serif;font-size:16px;fill:#333;}#mermaid-svg…...
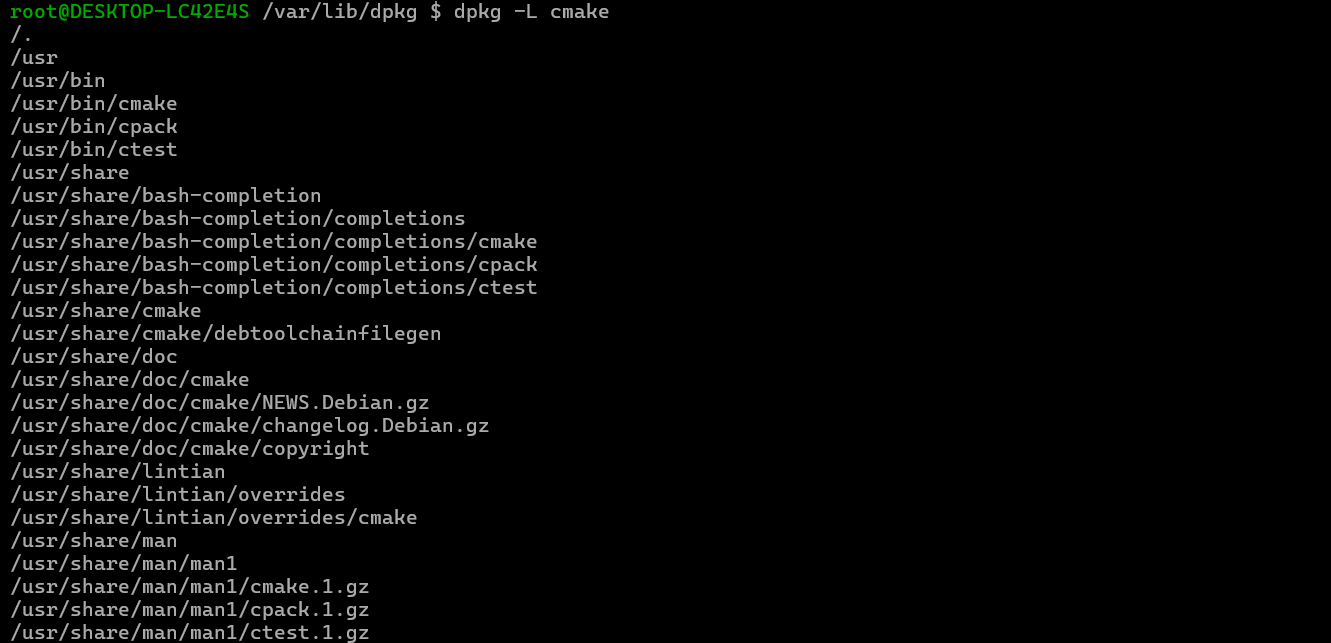
Debian系统简介
目录 Debian系统介绍 Debian版本介绍 Debian软件源介绍 软件包管理工具dpkg dpkg核心指令详解 安装软件包 卸载软件包 查询软件包状态 验证软件包完整性 手动处理依赖关系 dpkg vs apt Debian系统介绍 Debian 和 Ubuntu 都是基于 Debian内核 的 Linux 发行版ÿ…...

Spring Boot+Neo4j知识图谱实战:3步搭建智能关系网络!
一、引言 在数据驱动的背景下,知识图谱凭借其高效的信息组织能力,正逐步成为各行业应用的关键技术。本文聚焦 Spring Boot与Neo4j图数据库的技术结合,探讨知识图谱开发的实现细节,帮助读者掌握该技术栈在实际项目中的落地方法。 …...

docker 部署发现spring.profiles.active 问题
报错: org.springframework.boot.context.config.InvalidConfigDataPropertyException: Property spring.profiles.active imported from location class path resource [application-test.yml] is invalid in a profile specific resource [origin: class path re…...
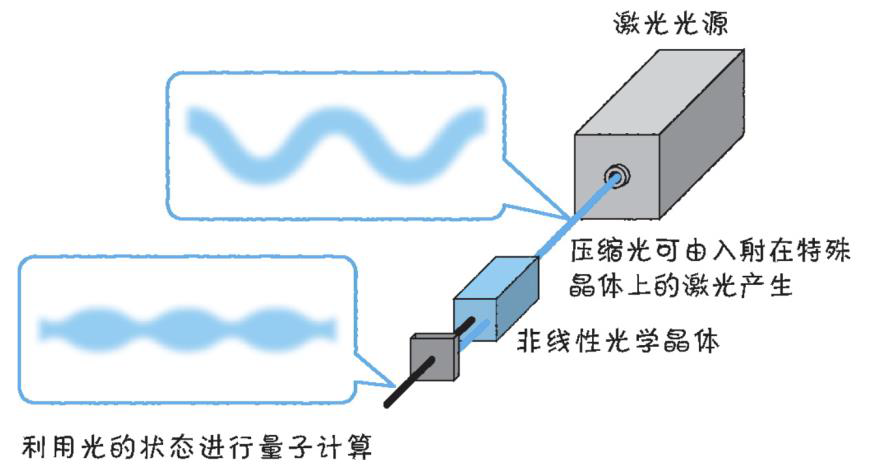
以光量子为例,详解量子获取方式
光量子技术获取量子比特可在室温下进行。该方式有望通过与名为硅光子学(silicon photonics)的光波导(optical waveguide)芯片制造技术和光纤等光通信技术相结合来实现量子计算机。量子力学中,光既是波又是粒子。光子本…...

AGain DB和倍数增益的关系
我在设置一款索尼CMOS芯片时,Again增益0db变化为6DB,画面的变化只有2倍DN的增益,比如10变为20。 这与dB和线性增益的关系以及传感器处理流程有关。以下是具体原因分析: 1. dB与线性增益的换算关系 6dB对应的理论线性增益应为&…...

Webpack性能优化:构建速度与体积优化策略
一、构建速度优化 1、升级Webpack和Node.js 优化效果:Webpack 4比Webpack 3构建时间降低60%-98%。原因: V8引擎优化(for of替代forEach、Map/Set替代Object)。默认使用更快的md4哈希算法。AST直接从Loa…...
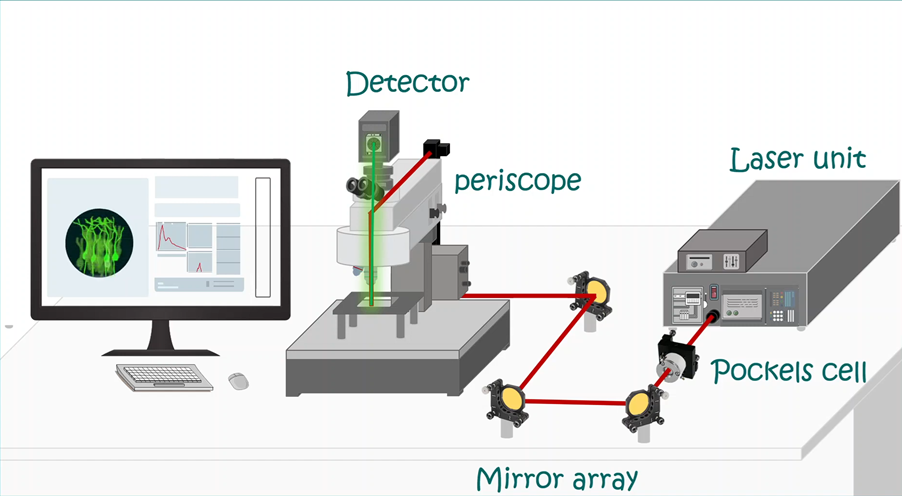
LabVIEW双光子成像系统技术
双光子成像技术的核心特性 双光子成像通过双低能量光子协同激发机制,展现出显著的技术优势: 深层组织穿透能力:适用于活体组织深度成像 高分辨率观测性能:满足微观结构的精细研究需求 低光毒性特点:减少对样本的损伤…...
