Spring Boot - 数据库集成04 - 集成Redis
Spring boot集成Redis
文章目录
- Spring boot集成Redis
- 一:redis基本集成
- 1:RedisTemplate + Jedis
- 1.1:RedisTemplate
- 1.2:实现案例
- 1.2.1:依赖引入和属性配置
- 1.2.2:redisConfig配置
- 1.2.3:基础使用
- 2:RedisTemplate+Lettuce
- 2.1:什么是Lettuce
- 2.2:为何能干掉Jedis成为默认
- 2.3:Lettuce的基本的API方式
- 2.4:实现案例
- 2.5:数据类封装
- 二:集成redisson
- 1:单机可重入锁
- 2:红锁(Red Lock)
- 2.1:环境准备
- 2.2:配置编写
- 2.3:使用测试
- 3:读写锁
- 3.1:读锁lock.readLock()
- 3.2:写锁lock.writeLock()
- 4:Semaphore和countDownLatch
- 4.1:Semaphore
- 4.2:闭锁CountDownLatch
一:redis基本集成
首先对redis来说,所有的key(键)都是字符串。
我们在谈基础数据结构时,讨论的是存储值的数据类型,主要包括常见的5种数据类型,分别是:String、List、Set、Zset、Hash。

| 结构类型 | 结构存储的值 | 结构的读写能力 |
|---|---|---|
| String | 可以是字符串、整数或浮点数 | 对整个字符串或字符串的一部分进行操作;对整数或浮点数进行自增或自减操作; |
| List | 一个链表,链表上的每个节点都包含一个字符串 | 对链表的两端进行push和pop操作,读取单个或多个元素;根据值查找或删除元素; |
| Hash | 包含键值对的无序散列表 | 包含方法有添加、获取、删除单个元素 |
| Set | 包含字符串的无序集合 | 字符串的集合,包含基础的方法有看是否存在添加、获取、删除; 还包含计算交集、并集、差集等 |
| Zset | 和散列一样,用于存储键值对 | 字符串成员与浮点数分数之间的有序映射; 元素的排列顺序由分数的大小决定; 包含方法有添加、获取、删除单个元素以及根据分值范围或成员来获取元素 |
1:RedisTemplate + Jedis
Jedis是Redis的Java客户端,在SpringBoot 1.x版本中也是默认的客户端。
在SpringBoot 2.x版本中默认客户端是Luttuce。
1.1:RedisTemplate
Spring 通过模板方式(RedisTemplate)提供了对Redis的数据查询和操作功能。
什么是模板方法模式
模板方法模式(Template pattern): 在一个方法中定义一个算法的骨架, 而将一些步骤延迟到子类中.
模板方法使得子类可以在不改变算法结构的情况下, 重新定义算法中的某些步骤。

RedisTemplate对于Redis5种基础类型的操作
redisTemplate.opsForValue(); // 操作字符串
redisTemplate.opsForHash(); // 操作hash
redisTemplate.opsForList(); // 操作list
redisTemplate.opsForSet(); // 操作set
redisTemplate.opsForZSet(); // 操作zset
对HyperLogLogs(基数统计)类型的操作
redisTemplate.opsForHyperLogLog();
对geospatial (地理位置)类型的操作
redisTemplate.opsForGeo();
对于BitMap的操作,也是在opsForValue()方法返回类型ValueOperations中
Boolean setBit(K key, long offset, boolean value);
Boolean getBit(K key, long offset);
对于Stream的操作
redisTemplate.opsForStream();
1.2:实现案例
本例子主要基于SpringBoot2+ 使用Jedis客户端,通过RedisTemplate模板方式访问Redis数据。
其他实体类结构请看(集成Jpa)
1.2.1:依赖引入和属性配置
<dependency><groupId>org.springframework.boot</groupId><artifactId>spring-boot-starter-data-redis</artifactId><!-- 暂时先排除lettuce-core,使用jedis --><!-- jedis是spring-boot 1.x的默认,lettuce是spring-boot 2.x的默认 --><exclusions><exclusion><artifactId>lettuce-core</artifactId><groupId>io.lettuce</groupId></exclusion></exclusions>
</dependency><!-- 格外使用jedis -->
<dependency><groupId>redis.clients</groupId><artifactId>jedis</artifactId>
</dependency><!-- commons-pools,连接池 -->
<dependency><groupId>org.apache.commons</groupId><artifactId>commons-pool2</artifactId><version>2.9.0</version>
</dependency>
spring:# swagger配置mvc:path match:# 由于 springfox 3.0.x 版本 和 Spring Boot 2.6.x 版本有冲突,所以还需要先解决这个 bugmatching-strategy: ANT_PATH_MATCHER# 数据源配置datasource:url: jdbc:mysql://127.0.0.1:3306/mytest?useUnicode=true&characterEncoding=utf-8&useSSL=false&serverTimezone=Asia/Shanghaidriver-class-name: com.mysql.cj.jdbc.Driver # 8.0 +username: rootpassword: bnm314159# JPA 配置jpa:generate-ddl: false # 是否自动创建数据库表show-sql: true # 是否打印生成的 sqlproperties:hibernate:dialect: org.hibernate.dialect.MySQL8Dialect # 数据库方言 mysql8format_sql: true # 是否格式化 sqluse_new_id_generator_mappings: true # 是否使用新的 id 生成器# redis 配置redis:database: 0 # redis数据库索引(默认为0)host: 127.0.0.1 # redis服务器地址port: 6379 # redis服务器连接端口jedis:pool:min-idle: 0 # 连接池中的最小空闲连接max-active: 8 # 连接池最大连接数(使用负值表示没有限制)max-idle: 8 # 连接池中的最大空闲连接max-wait: -1ms # 连接池最大阻塞等待时间(使用负值表示没有限制)connect-timeout: 30000ms # 连接超时时间(毫秒)timeout: 30000ms # 读取超时时间(毫秒)
1.2.2:redisConfig配置
package com.cui.jpa_demo.config;import org.springframework.context.annotation.Bean;
import org.springframework.context.annotation.Configuration;
import org.springframework.data.redis.connection.RedisConnectionFactory;
import org.springframework.data.redis.core.RedisTemplate;
import org.springframework.data.redis.serializer.GenericJackson2JsonRedisSerializer;
import org.springframework.data.redis.serializer.StringRedisSerializer;/*** @author cui haida* 2025/1/25*/
@Configuration
public class RedisConfig {/*** 配置RedisTemplate以支持键值对存储* 该方法在Spring框架中定义了一个Bean,用于创建和配置RedisTemplate实例* RedisTemplate用于与Redis数据库进行交互,支持数据的存储和检索** @param factory RedisConnectionFactory实例,用于连接Redis服务器* @return 配置好的RedisTemplate实例,用于执行键值对操作*/@Beanpublic RedisTemplate<String, Object> redisTemplate(RedisConnectionFactory factory) {// 创建RedisTemplate实例,并指定键和值的类型RedisTemplate<String, Object> template = new RedisTemplate<>();// 设置连接工厂,用于建立与Redis服务器的连接template.setConnectionFactory(factory);// 配置键的序列化方式为StringRedisSerializer// 这是为了确保键以字符串形式存储和检索template.setKeySerializer(new StringRedisSerializer());// 配置哈希键的序列化方式为StringRedisSerializer// 这适用于哈希表中的键值对操作template.setHashKeySerializer(new StringRedisSerializer());// 配置值的序列化方式为GenericJackson2JsonRedisSerializer// 使用Jackson库将对象序列化为JSON格式存储template.setValueSerializer(new GenericJackson2JsonRedisSerializer());// 配置哈希表值的序列化方式为GenericJackson2JsonRedisSerializer// 同样使用Jackson库将对象序列化为JSON格式存储template.setHashValueSerializer(new GenericJackson2JsonRedisSerializer());// 初始化RedisTemplate,确保所有必需的属性都已设置template.afterPropertiesSet();// 返回配置好的RedisTemplate实例return template;}
}
1.2.3:基础使用
package com.cui.jpa_demo.controller;import com.cui.jpa_demo.entity.bean.UserQueryBean;
import com.cui.jpa_demo.entity.model.User;
import com.cui.jpa_demo.entity.response.ResponseResult;
import com.cui.jpa_demo.service.IUserService;
import org.springframework.data.domain.Page;
import org.springframework.data.domain.PageRequest;
import org.springframework.data.redis.core.RedisTemplate;
import org.springframework.web.bind.annotation.*;import javax.annotation.Resource;
import java.time.LocalDateTime;/*** @author cui haida* 2025/1/23*/
@RestController
@RequestMapping("/user")
public class UserController {private final IUserService userService;@Resourceprivate RedisTemplate<String, User> redisTemplate;public UserController(IUserService userService) {this.userService = userService;}@PostMapping("add")public ResponseResult<User> add(User user) {if (user.getId()==null || !userService.exists(user.getId())) {user.setCreateTime(LocalDateTime.now());user.setUpdateTime(LocalDateTime.now());userService.save(user);} else {user.setUpdateTime(LocalDateTime.now());userService.update(user);}return ResponseResult.success(userService.find(user.getId()));}/*** @return user list*/@GetMapping("edit/{userId}")public ResponseResult<User> edit(@PathVariable("userId") Long userId) {return ResponseResult.success(userService.find(userId));}/*** @return user list*/@GetMapping("list")public ResponseResult<Page<User>> list(@RequestParam int pageSize, @RequestParam int pageNumber) {return ResponseResult.success(userService.findPage(UserQueryBean.builder().build(), PageRequest.of(pageNumber, pageSize)));}@PostMapping("/redis/add")public ResponseResult<User> addIntoRedis(User user) {redisTemplate.opsForValue().set(String.valueOf(user.getId()), user);return ResponseResult.success(redisTemplate.opsForValue().get(String.valueOf(user.getId())));}@GetMapping("/redis/get/{userId}")public ResponseResult<User> getFromRedis(@PathVariable("userId") Long userId) {return ResponseResult.success(redisTemplate.opsForValue().get(String.valueOf(userId)));}
}
2:RedisTemplate+Lettuce
2.1:什么是Lettuce
Lettuce 是一个可伸缩线程安全的 Redis 客户端。多个线程可以共享同一个 RedisConnection。
它利用优秀 netty NIO 框架来高效地管理多个连接。
Lettuce的特性:
- 支持 同步、异步、响应式 的方式
- 支持 Redis Sentinel
- 支持 Redis Cluster
- 支持 SSL 和 Unix Domain Socket 连接
- 支持 Streaming API
- 支持 CDI 和 Spring 的集成
- 支持 Command Interfaces
- 兼容 Java 8+ 以上版本
2.2:为何能干掉Jedis成为默认
除了上述特性的支持性之外,最为重要的是Lettuce中使用了Netty框架,使其具备线程共享和异步的支持性。
线程共享
Jedis 是直连模式,在多个线程间共享一个 Jedis 实例时是线程不安全的
如果想要在多线程环境下使用 Jedis,需要使用连接池,每个线程都去拿自己的 Jedis 实例,当连接数量增多时,物理连接成本就较高了。
Lettuce 是基于 netty 的,连接实例可以在多个线程间共享,所以,一个多线程的应用可以使用一个连接实例,而不用担心并发线程的数量。
异步和反应式
Lettuce 从一开始就按照非阻塞式 IO 进行设计,是一个纯异步客户端,对异步和反应式 API 的支持都很全面。
即使是同步命令,底层的通信过程仍然是异步模型,只是通过阻塞调用线程来模拟出同步效果而已。

2.3:Lettuce的基本的API方式
依赖POM包
<dependency><groupId>io.lettuce</groupId><artifactId>lettuce-core</artifactId><version>x.y.z.BUILD-SNAPSHOT</version>
</dependency>
基础用法
// 声明redis-client
RedisClient client = RedisClient.create("redis://localhost");
// 创建连接
StatefulRedisConnection<String, String> connection = client.connect();
// 同步命令
RedisStringCommands sync = connection.sync();
// 执行get方法
String value = sync.get("key");
异步方式
StatefulRedisConnection<String, String> connection = client.connect();
// 异步命令
RedisStringAsyncCommands<String, String> async = connection.async();
// 异步set & get
RedisFuture<String> set = async.set("key", "value")
RedisFuture<String> get = async.get("key")async.awaitAll(set, get) == trueset.get() == "OK"
get.get() == "value"
- 响应式
StatefulRedisConnection<String, String> connection = client.connect();
RedisStringReactiveCommands<String, String> reactive = connection.reactive();
Mono<String> set = reactive.set("key", "value");
Mono<String> get = reactive.get("key");
// 订阅
set.subscribe();get.block() == "value"
2.4:实现案例
依赖和配置
<dependency><groupId>org.springframework.boot</groupId><artifactId>spring-boot-starter-data-redis</artifactId>
</dependency><!-- 一定要加入这个,否则连接池用不了 -->
<dependency><groupId>org.apache.commons</groupId><artifactId>commons-pool2</artifactId>
</dependency>
配置
  # redis 配置redis:host: 127.0.0.1 # 地址port: 6379 # 端口database: 0 # redis 数据库索引# 如果是集群模式,需要配置如下
#    cluster:
#      nodes:
#        - 127.0.0.1:7000
#        - 127.0.0.1:7001
#        - 127.0.0.1:7002lettuce:pool:max-wait: -1 # 最大连接等待时间, 默认 -1 表示没有限制max-active: 8 # 最大连接数, 默认8max-idle: 8 # 最大空闲连接数, 默认8min-idle: 0 # 最小空闲连接数, 默认0
#    password: 123456 # 密码
#    timeout: 10000ms # 超时时间
#    ssl: false # 是否启用 SSL
#    sentinel:
#      master: mymaster # 主节点名称
#      nodes: 127.0.0.1:26379,127.0.0.1:26380,127.0.0.1:26381 # 哨兵节点
序列化配置
redis的序列化也是我们在使用RedisTemplate的过程中需要注意的事情。
如果没有特殊设置redis的序列化方式,那么它其实使用的是默认的序列化方式【JdkSerializationRedisSerializer】。
这种序列化最大的问题就是存入对象后,我们很难直观看到存储的内容,很不方便我们排查问题
RedisTemplate这个类的泛型是<String,Object>, 也就是他是支持写入Object对象的,那么这个对象采取什么方式序列化存入内存中就是它的序列化方式。
Redis本身提供了以下几种序列化的方式:
- GenericToStringSerializer: 可以将任何对象泛化为字符串并序列化
- Jackson2JsonRedisSerializer: 跟JacksonJsonRedisSerializer实际上是一样的 <---- 我们要换成这个
- JacksonJsonRedisSerializer: 序列化object对象为json字符串
- JdkSerializationRedisSerializer: 序列化java对象【默认的】
- StringRedisSerializer: 简单的字符串序列化 JSON 方式序列化成字符串,存储到 Redis 中 。我们查看的时候比较直观
package com.study.study_demo_of_spring_boot.redis_study.config;import com.fasterxml.jackson.annotation.JsonAutoDetect;
import com.fasterxml.jackson.annotation.JsonTypeInfo;
import com.fasterxml.jackson.annotation.PropertyAccessor;
import com.fasterxml.jackson.databind.ObjectMapper;
import com.fasterxml.jackson.databind.jsontype.impl.LaissezFaireSubTypeValidator;
import org.springframework.context.annotation.Bean;
import org.springframework.context.annotation.Configuration;
import org.springframework.data.redis.connection.RedisConnectionFactory;
import org.springframework.data.redis.core.RedisTemplate;
import org.springframework.data.redis.serializer.Jackson2JsonRedisSerializer;
import org.springframework.data.redis.serializer.StringRedisSerializer;/*** <p>* 功能描述:redis 序列化配置类* </p>** @author cui haida* @date 2024/04/13/19:52*/
@Configuration
public class RedisConfig {/*** 创建并配置RedisTemplate,用于操作Redis数据库。** @param factory Redis连接工厂,用于创建Redis连接。* @return 配置好的RedisTemplate对象,可以用于执行Redis操作。*/@Bean(name = "redisTemplate")public RedisTemplate<String, Object> getRedisTemplate(RedisConnectionFactory factory) {RedisTemplate<String, Object> redisTemplate = new RedisTemplate<>();redisTemplate.setConnectionFactory(factory);// 配置Key的序列化方式为StringRedisSerializerStringRedisSerializer stringRedisSerializer = new StringRedisSerializer();redisTemplate.setKeySerializer(stringRedisSerializer);// 配置Value的序列化方式为Jackson2JsonRedisSerializerJackson2JsonRedisSerializer<Object> jackson2JsonRedisSerializer = new Jackson2JsonRedisSerializer<>(Object.class);ObjectMapper objectMapper = new ObjectMapper();objectMapper.setVisibility(PropertyAccessor.ALL, JsonAutoDetect.Visibility.ANY);objectMapper.activateDefaultTyping(LaissezFaireSubTypeValidator.instance, ObjectMapper.DefaultTyping.NON_FINAL, JsonTypeInfo.As.PROPERTY);jackson2JsonRedisSerializer.setObjectMapper(objectMapper);redisTemplate.setValueSerializer(jackson2JsonRedisSerializer);// 配置Hash的Key和Value的序列化方式redisTemplate.setHashKeySerializer(stringRedisSerializer);redisTemplate.setHashValueSerializer(jackson2JsonRedisSerializer);// 初始化RedisTemplateredisTemplate.afterPropertiesSet();return redisTemplate;}
}
业务类调用
import io.swagger.annotations.ApiOperation;
import org.springframework.data.redis.core.RedisTemplate;
import org.springframework.web.bind.annotation.*;
import tech.pdai.springboot.redis.lettuce.entity.User;
import tech.pdai.springboot.redis.lettuce.entity.response.ResponseResult;import javax.annotation.Resource;@RestController
@RequestMapping("/user")
public class UserController {// 注意:这里@Autowired是报错的,因为@Autowired按照类名注入的@Resourceprivate RedisTemplate<String, User> redisTemplate;/*** @param user user param* @return user*/@ApiOperation("Add")@PostMapping("add")public ResponseResult<User> add(User user) {redisTemplate.opsForValue().set(String.valueOf(user.getId()), user);return ResponseResult.success(redisTemplate.opsForValue().get(String.valueOf(user.getId())));}/*** @return user list*/@ApiOperation("Find")@GetMapping("find/{userId}")public ResponseResult<User> edit(@PathVariable("userId") String userId) {return ResponseResult.success(redisTemplate.opsForValue().get(userId));}
}
2.5:数据类封装
RedisTemplate中的操作和方法众多,为了程序保持方法使用的一致性,屏蔽一些无关的方法以及对使用的方法进一步封装。
import org.springframework.data.redis.core.RedisCallback;import java.util.Collection;
import java.util.Set;/*** 可能只关注这些方法*/
public interface IRedisService<T> {void set(String key, T value);void set(String key, T value, long time);T get(String key);void delete(String key);void delete(Collection<String> keys);boolean expire(String key, long time);Long getExpire(String key);boolean hasKey(String key);Long increment(String key, long delta);Long decrement(String key, long delta);void addSet(String key, T value);Set<T> getSet(String key);void deleteSet(String key, T value);T execute(RedisCallback<T> redisCallback);
}
RedisService的实现类
import org.springframework.data.redis.core.RedisCallback;
import org.springframework.data.redis.core.RedisTemplate;
import org.springframework.stereotype.Service;
import tech.pdai.springboot.redis.lettuce.enclosure.service.IRedisService;import javax.annotation.Resource;
import java.util.Collection;
import java.util.Set;
import java.util.concurrent.TimeUnit;@Service
public class RedisServiceImpl<T> implements IRedisService<T> {@Resourceprivate RedisTemplate<String, T> redisTemplate;@Overridepublic void set(String key, T value, long time) {redisTemplate.opsForValue().set(key, value, time, TimeUnit.SECONDS);}@Overridepublic void set(String key, T value) {redisTemplate.opsForValue().set(key, value);}@Overridepublic T get(String key) {return redisTemplate.opsForValue().get(key);}@Overridepublic void delete(String key) {redisTemplate.delete(key);}@Overridepublic void delete(Collection<String> keys) {redisTemplate.delete(keys);}@Overridepublic boolean expire(String key, long time) {return redisTemplate.expire(key, time, TimeUnit.SECONDS);}@Overridepublic Long getExpire(String key) {return redisTemplate.getExpire(key, TimeUnit.SECONDS);}@Overridepublic boolean hasKey(String key) {return redisTemplate.hasKey(key);}@Overridepublic Long increment(String key, long delta) {return redisTemplate.opsForValue().increment(key, delta);}@Overridepublic Long decrement(String key, long delta) {return redisTemplate.opsForValue().increment(key, -delta);}@Overridepublic void addSet(String key, T value) {redisTemplate.opsForSet().add(key, value);}@Overridepublic Set<T> getSet(String key) {return redisTemplate.opsForSet().members(key);}@Overridepublic void deleteSet(String key, T value) {redisTemplate.opsForSet().remove(key, value);}@Overridepublic T execute(RedisCallback<T> redisCallback) {return redisTemplate.execute(redisCallback);}
}
RedisService的调用
@RestController
@RequestMapping("/user")
public class UserController {@Autowiredprivate IRedisService<User> redisService;//...
}
二:集成redisson
1:单机可重入锁
redisson-spring-boot-starter依赖于与最新版本的spring-boot兼容的redisson-spring数据模块。
| redisson-spring-data module name | spring boot version |
|---|---|
| redisson-spring-data-16 | 1.3.y |
| redisson-spring-data-17 | 1.4.y |
| redisson-spring-data-18 | 1.5.y |
| redisson-spring-data-2x | 2.x.y |
| redisson-spring-data-3x | 3.x.y |
<!-- redisson -->
<dependency><groupId>org.redisson</groupId><artifactId>redisson-spring-boot-starter</artifactId><version>3.16.2</version>
</dependency>
package com.study.study_demo_of_spring_boot.redis_study.config;import lombok.Data;
import org.redisson.Redisson;
import org.redisson.api.RedissonClient;
import org.redisson.config.Config;
import org.springframework.boot.context.properties.ConfigurationProperties;
import org.springframework.context.annotation.Bean;
import org.springframework.context.annotation.Configuration;import java.io.IOException;/*** <p>* 功能描述:redis client 配置* </p>** @author cui haida* @date 2024/04/14/7:24*/
@Configuration
@ConfigurationProperties(prefix = "spring.redis")
@Data
public class MyRedissonConfig {private String host;private int port;@Bean(destroyMethod = "shutdown")RedissonClient redisson() throws IOException {Config config = new Config();config.useSingleServer().setAddress("redis://" + host + ":" + port);return Redisson.create(config);}
}
加锁解锁测试
package com.study.study_demo_of_spring_boot.redis_study.use;import com.study.study_demo_of_spring_boot.redis_study.config.MyRedissonConfig;
import com.study.study_demo_of_spring_boot.redis_study.util.RedisUtil;
import org.junit.Test;
import org.junit.runner.RunWith;
import org.redisson.api.RLock;
import org.redisson.api.RedissonClient;
import org.springframework.beans.factory.annotation.Autowired;
import org.springframework.boot.test.context.SpringBootTest;
import org.springframework.test.context.junit4.SpringRunner;import java.util.concurrent.TimeUnit;/*** <p>* 功能描述:redis test* </p>** @author cui haida* @date 2024/04/14/7:28*/
@RunWith(SpringRunner.class)
@SpringBootTest
public class UseTest {@Autowiredprivate RedisUtil redisUtil;@Autowiredprivate RedissonClient redissonClient;@Testpublic void redisNormalTest() {redisUtil.set("name", "张三");}@Testpublic void redissonTest() {RLock lock = redissonClient.getLock("global_lock_key");try {System.out.println(lock);// 加锁30mslock.lock(30, TimeUnit.MILLISECONDS);if (lock.isLocked()) {System.out.println("获取到了");} else {System.out.println("未获取到");}} catch (Exception e) {e.printStackTrace();} finally {if (lock.isHeldByCurrentThread()) {lock.unlock();System.out.println("解锁成功");}}}
}
lock.lock()即没有指定锁的过期时间,就是用30s,即看门狗的默认时间,只要占锁成功,就会启动一个定时任务,每隔10秒就会自动续期到30秒。lock.lock(10, TimeUnit.xxx),默认锁的过期时间就是我们指定的时间。
2:红锁(Red Lock)
红锁其实就是对多个redission节点同时加锁
2.1:环境准备
用docker启动三个redis实例,模拟redLock
docker run -itd  # -d 后台启动, -it shell交互--name redlock-1  # 这个容器的名称-p 6380:6379 # 端口映射 redis的6379 <-> 容器的6380映射redis:7.0.8 # 镜像名称,如果没有下载对应的redis镜像,将会先进行拉取--requirepass 123456 # redis密码123456
docker run -itd --name redlock-2 -p 6381:6379 redis:7.0.8 --requirepass 123456
docker run -itd --name redlock-3 -p 6382:6379 redis:7.0.8 --requirepass 123456

2.2:配置编写
package com.study.study_demo_of_spring_boot.redis_study.config;import lombok.Data;
import org.redisson.Redisson;
import org.redisson.api.RedissonClient;
import org.redisson.config.Config;
import org.springframework.boot.context.properties.ConfigurationProperties;
import org.springframework.context.annotation.Bean;
import org.springframework.context.annotation.Configuration;import java.io.IOException;/*** <p>* 功能描述:redis client 配置* </p>** @author cui haida* @date 2024/04/14/7:24*/
@Configuration
@ConfigurationProperties(prefix = "spring.redis")
@Data
public class MyRedissonConfig {private String host;private int port;@Bean(name = "normalRedisson", destroyMethod = "shutdown")RedissonClient redisson() {Config config = new Config();config.useSingleServer().setAddress("redis://" + host + ":" + port);return Redisson.create(config);}@Bean(name = "redLock1")RedissonClient redissonClient1(){Config config = new Config();config.useSingleServer().setAddress("redis://ip:6380").setDatabase(0).setPassword("123456");return Redisson.create(config);}@Bean(name = "redLock2")RedissonClient redissonClient2(){Config config = new Config();config.useSingleServer().setAddress("redis://ip:6381").setDatabase(0).setPassword("123456");return Redisson.create(config);}@Bean(name = "redLock3")RedissonClient redissonClient3(){Config config = new Config();config.useSingleServer().setAddress("redis://ip:6382").setDatabase(0).setPassword("123456");return Redisson.create(config);}
}
2.3:使用测试
package com.study.study_demo_of_spring_boot.redis_study.use;import com.study.study_demo_of_spring_boot.redis_study.config.MyRedissonConfig;
import com.study.study_demo_of_spring_boot.redis_study.util.RedisUtil;
import org.junit.Test;
import org.junit.runner.RunWith;
import org.redisson.RedissonRedLock;
import org.redisson.api.RLock;
import org.redisson.api.RedissonClient;
import org.springframework.beans.factory.annotation.Autowired;
import org.springframework.beans.factory.annotation.Qualifier;
import org.springframework.boot.test.context.SpringBootTest;
import org.springframework.test.context.junit4.SpringRunner;import java.util.concurrent.TimeUnit;/*** <p>* 功能描述:* </p>** @author cui haida* @date 2024/04/14/7:28*/
@RunWith(SpringRunner.class)
@SpringBootTest
public class UseTest {@Autowired@Qualifier("redLock1")private RedissonClient redLock1;@Autowired@Qualifier("redLock2")private RedissonClient redLock2;@Autowired@Qualifier("redLock3")private RedissonClient redLock3;@Testpublic void redLockTest() {RLock lock1 = redLock1.getLock("global_lock_key");RLock lock2 = redLock2.getLock("global_lock_key");RLock lock3 = redLock3.getLock("global_lock_key");// 三个构成red lockRedissonRedLock redLock = new RedissonRedLock(lock1, lock2, lock3);//定义获取锁标志位,默认是获取失败boolean isLockBoolean = false;try {// 等待获取锁的最长时间。如果在等待时间内无法获取锁,并且没有其他锁释放,则返回 false。如果 waitTime < 0,则无限期等待,直到获得锁定。int waitTime = 1;// 就是redis key的过期时间,锁的持有时间,可以使用 ttl  查看过期时间。int leaseTime = 20;// 如果在持有时间结束前锁未被释放,则锁将自动过期,没有进行key续期,并且其他线程可以获得此锁。如果 leaseTime = 0,则锁将永久存在,直到被显式释放。isLockBoolean = redLock.tryLock(waitTime, leaseTime, TimeUnit.SECONDS);System.out.printf("线程:"+Thread.currentThread().getId()+",是否拿到锁:" +isLockBoolean +"\n");if (isLockBoolean) {System.out.println("线程:"+Thread.currentThread().getId() + ",加锁成功,进入业务操作");try {//业务逻辑,40s模拟,超过了key的过期时间TimeUnit.SECONDS.sleep(40);} catch (InterruptedException e) {e.printStackTrace();}}} catch (Exception e) {System.err.printf("线程:"+Thread.currentThread().getId()+"发生异常,加锁失败");e.printStackTrace();} finally {// 无论如何,最后都要解锁redLock.unlock();}System.out.println(isLockBoolean);}
}
3:读写锁
基于Redis的Redisson分布式可重入读写锁RReadWriteLock
Java对象实现了java.util.concurrent.locks.ReadWriteLock接口。其中读锁和写锁都继承了RLock接口。
分布式可重入读写锁允许同时有多个读锁和一个写锁处于加锁状态。
3.1:读锁lock.readLock()
@GetMapping("/read")
public String readValue() {// 声明一个可重入读写锁RReadWriteLock lock = redissonClient.getReadWriteLock("rw-lock");String s = "";//加读锁RLock rLock = lock.readLock();rLock.lock();try {System.out.println("读锁加锁成功"+Thread.currentThread().getId());                                           // 拿到values = redisTemplate.opsForValue().get("writeValue");Thread.sleep(30000);} catch (Exception e) {e.printStackTrace();} finally {// 解锁rLock.unlock();System.out.println("读锁释放"+Thread.currentThread().getId());}return  s;
}
3.2:写锁lock.writeLock()
@GetMapping("/write")
public String writeValue(){// 获取一把锁RReadWriteLock lock = redissonClient.getReadWriteLock("rw-lock");String s = "";// 加写锁RLock rLock = lock.writeLock();try {//1、改数据加写锁,读数据加读锁rLock.lock();System.out.println("写锁加锁成功..."+Thread.currentThread().getId());s = UUID.randomUUID().toString();Thread.sleep(30000);// 写入redis中redisTemplate.opsForValue().set("writeValue",s);} catch (Exception e) {e.printStackTrace();} finally {rLock.unlock();System.out.println("写锁释放"+Thread.currentThread().getId());}return  s;
}
- 先加写锁,后加读锁,此时并不会立刻给数据加读锁,而是需要等待写锁释放后,才能加读锁
- 先加读锁,再加写锁:有读锁,写锁需要等待
- 先加读锁,再加读锁:并发读锁相当于无锁模式,会同时加锁成功
只要有写锁的存在,都必须等待,写锁是一个排他锁,只能有一个写锁存在,读锁是一个共享锁,可以有多个读锁同时存在
源码在这里:https://blog.csdn.net/meser88/article/details/116591953
4:Semaphore和countDownLatch
4.1:Semaphore
基本使用
基于Redis的Redisson的分布式信号量(Semaphore)
Java对象RSemaphore采用了与java.util.concurrent.Semaphore相似的接口和用法
Semaphore是信号量,可以设置许可的个数,表示同时允许多个线程使用这个信号量(acquire()获取许可)
- 如果没有许可可用就线程阻塞,并且通过AQS进行排队
- 可以使用
release()释放许可,当某一个线程释放了某一个许可之后,将会从AQS中依次唤醒,直到没有空闲许可。
@Test
public void semaphoreTest() throws InterruptedException {RSemaphore semaphore = redissonClient.getSemaphore("semaphore");// 同时最多允许3个线程获取锁semaphore.trySetPermits(3);for(int i = 0; i < 10; i++) {new Thread(() -> {try {System.out.println(new Date() + ":线程[" + Thread.currentThread().getName() + "]尝试获取Semaphore锁");semaphore.acquire();System.out.println(new Date() + ":线程[" + Thread.currentThread().getName() + "]成功获取到了Semaphore锁,开始工作");Thread.sleep(3000);semaphore.release();System.out.println(new Date() + ":线程[" + Thread.currentThread().getName() + "]释放Semaphore锁");} catch (Exception e) {e.printStackTrace();}}).start();}Thread.sleep(5000);
}
源码分析 - trySetPermits
@Override
public boolean trySetPermits(int permits) {return get(trySetPermitsAsync(permits));
}@Override
public RFuture<Boolean> trySetPermitsAsync(int permits) {RFuture<Boolean> future = commandExecutor.evalWriteAsync(getRawName(), LongCodec.INSTANCE, RedisCommands.EVAL_BOOLEAN,"local value = redis.call('get', KEYS[1]); " +"if (value == false or value == 0) then "+ "redis.call('set', KEYS[1], ARGV[1]); "+ "redis.call('publish', KEYS[2], ARGV[1]); "+ "return 1;"+ "end;"+ "return 0;",Arrays.asList(getRawName(), getChannelName()), permits);// other....完成的时候打日志
}
- get semaphore,获取到一个当前的值
- 第一次数据为0, 然后使用set semaphore 3,将这个信号量同时能够允许获取锁的客户端的数量设置为3
- 然后发布一些消息,返回1
源码分析 -> acquire
@Override
public void acquire(int permits) throws InterruptedException {// try - acquire ?if (tryAcquire(permits)) {return;}RFuture<RedissonLockEntry> future = subscribe();commandExecutor.syncSubscriptionInterrupted(future);try {while (true) {if (tryAcquire(permits)) {return;}future.getNow().getLatch().acquire();}} finally {unsubscribe(future);}// get(acquireAsync(permits));
}@Override
public boolean tryAcquire(int permits) {return get(tryAcquireAsync(permits));
}@Override
public RFuture<Boolean> tryAcquireAsync(int permits) {if (permits < 0) {throw new IllegalArgumentException("Permits amount can't be negative");}if (permits == 0) {return RedissonPromise.newSucceededFuture(true);}return commandExecutor.evalWriteAsync(getRawName(), LongCodec.INSTANCE, RedisCommands.EVAL_BOOLEAN,"local value = redis.call('get', KEYS[1]); " +"if (value ~= false and tonumber(value) >= tonumber(ARGV[1])) then " +"local val = redis.call('decrby', KEYS[1], ARGV[1]); " +"return 1; " +"end; " +"return 0;",Collections.<Object>singletonList(getRawName()), permits);
}
- get semaphore,获取到一个当前的值,比如说是3,3 > 1
- decrby semaphore 1,将信号量允许获取锁的客户端的数量递减1,变成2
- decrby semaphore 1
- decrby semaphore 1
- 执行3次加锁后,semaphore值为0
此时如果再来进行加锁则直接返回0,然后进入死循环去获取锁
源码分析 -> release
@Override
public RFuture<Void> releaseAsync(int permits) {if (permits < 0) {throw new IllegalArgumentException("Permits amount can't be negative");}if (permits == 0) {return RedissonPromise.newSucceededFuture(null);}RFuture<Void> future = commandExecutor.evalWriteAsync(getRawName(), StringCodec.INSTANCE, RedisCommands.EVAL_VOID,"local value = redis.call('incrby', KEYS[1], ARGV[1]); " +"redis.call('publish', KEYS[2], value); ",Arrays.asList(getRawName(), getChannelName()), permits);if (log.isDebugEnabled()) {future.onComplete((o, e) -> {if (e == null) {log.debug("released, permits: {}, name: {}", permits, getName());}});}return future;
}
- incrby semaphore 1,每次一个客户端释放掉这个锁的话,就会将信号量的值累加1,信号量的值就不是0了
4.2:闭锁CountDownLatch
基于Redisson的Redisson分布式闭锁(CountDownLatch)
Java对象RCountDownLatch采用了与java.util.concurrent.CountDownLatch相似的接口和用法。
countDownLatch是计数器,可以设置一个数字,一个线程如果调用countDownLatch的await()将会发生阻塞
其他的线程可以调用countDown()对数字进行减一,数字成为0之后,阻塞的线程就会被唤醒。
底层原理就是,调用了await()的方法会利用AQS进行排队。一旦数字成为0。AQS中的内容将会被依次唤醒。
@Test
public void countDownLatchTest() throws InterruptedException {RCountDownLatch latch = redissonClient.getCountDownLatch("anyCountDownLatch");latch.trySetCount(3);System.out.println(new Date() + ":线程[" + Thread.currentThread().getName() + "]设置了必须有3个线程执行countDown,进入等待中。。。");for(int i = 0; i < 3; i++) {new Thread(() -> {try {System.out.println(new Date() + ":线程[" + Thread.currentThread().getName() + "]在做一些操作,请耐心等待。。。。。。");Thread.sleep(3000);RCountDownLatch localLatch = redissonClient.getCountDownLatch("anyCountDownLatch");localLatch.countDown();System.out.println(new Date() + ":线程[" + Thread.currentThread().getName() + "]执行countDown操作");} catch (Exception e) {e.printStackTrace();}}).start();}// 一等多模型,主线程阻塞等子线程执行完毕,将countdown -> 0,主线程才能往下走latch.await();System.out.println(new Date() + ":线程[" + Thread.currentThread().getName() + "]收到通知,有3个线程都执行了countDown操作,可以继续往下走");
}
先分析
trySetCount()方法逻辑:
@Override
public RFuture<Boolean> trySetCountAsync(long count) {return commandExecutor.evalWriteAsync(getName(), LongCodec.INSTANCE, RedisCommands.EVAL_BOOLEAN,"if redis.call('exists', KEYS[1]) == 0 then "+ "redis.call('set', KEYS[1], ARGV[2]); "+ "redis.call('publish', KEYS[2], ARGV[1]); "+ "return 1 "+ "else "+ "return 0 "+ "end",Arrays.<Object>asList(getName(), getChannelName()), newCountMessage, count);
}
exists anyCountDownLatch,第一次肯定是不存在的set redisson_countdownlatch__channel__anyCountDownLatch 3- 返回1
接着分析
latch.await()方法
@Override
public void await() throws InterruptedException {if (getCount() == 0) {return;}RFuture<RedissonCountDownLatchEntry> future = subscribe();try {commandExecutor.syncSubscriptionInterrupted(future);while (getCount() > 0) {// waiting for open statefuture.getNow().getLatch().await();}} finally {unsubscribe(future);}
}
这个方法其实就是陷入一个while true死循环,不断的get anyCountDownLatch的值
如果这个值还是大于0那么就继续死循环,否则的话呢,就退出这个死循环
最后分析
localLatch.countDown()方法
@Override
public RFuture<Void> countDownAsync() {return commandExecutor.evalWriteAsync(getName(), LongCodec.INSTANCE, RedisCommands.EVAL_BOOLEAN,"local v = redis.call('decr', KEYS[1]);" +"if v <= 0 then redis.call('del', KEYS[1]) end;" +"if v == 0 then redis.call('publish', KEYS[2], ARGV[1]) end;",Arrays.<Object>asList(getName(), getChannelName()), zeroCountMessage);
}
decr anyCountDownLatch,就是每次一个客户端执行countDown操作,其实就是将这个cocuntDownLatch的值递减1
相关文章:

Spring Boot - 数据库集成04 - 集成Redis
Spring boot集成Redis 文章目录 Spring boot集成Redis一:redis基本集成1:RedisTemplate Jedis1.1:RedisTemplate1.2:实现案例1.2.1:依赖引入和属性配置1.2.2:redisConfig配置1.2.3:基础使用 2&…...

C++红黑树详解
文章目录 红黑树概念规则为什么最长路径不超过最短路径的二倍?红黑树的时间复杂度红黑树的结构插入叔叔节点情况的讨论只变色(叔叔存在且为红)抽象的情况变色单旋(叔叔不存在或叔叔存在且为黑)变色双旋(叔叔不存在或叔叔存在且为黑…...

与机器学习相关的概率论重要概念的介绍和说明
概率论一些重要概念的介绍和说明 1、 试验 (1)试验是指在特定条件下,对某种方法、技术、设备或产品(即,事物)进行测试或验证的过程。 (2)易混淆的概念是,实验。实验&…...

60.await与sleep的原理分析 C#例子 WPF例子
在异步任务中使用Thread.Sleep会阻塞当前线程,因其是同步操作,暂停线程执行而不释放资源。这与异步编程旨在避免线程阻塞的目的相冲突。尽管异步方法可能包含其他await调用,Thread.Sleep仍会立即阻塞线程,妨碍其处理其他任务或响应…...

数据库连接池是如何工作的?
连接池是一种用于管理和复用连接(如数据库连接或网络连接)的技术,广泛应用于数据库操作和网络请求中,以提高应用程序的性能和资源利用率。以下是连接池的工作原理和机制的详细解释: 连接池的工作原理 1. 初始化阶段 在应用程序启动时,连接池会根据配置参数预先创建一定…...

2025年01月26日Github流行趋势
项目名称:onlook 项目地址url:https://github.com/onlook-dev/onlook项目语言:TypeScript历史star数:4871今日star数:207项目维护者:Kitenite, drfarrell, iNerdStack, abhiroopc84, apps/dependabot项目简…...

C语言的灵魂——指针(1)
指针是C语言的灵魂,有了指针C语言才能完成一些复杂的程序;没了指针就相当于C语言最精髓的部分被去掉了,可见指针是多么重要。废话不多讲我们直接开始。 指针 一,内存和地址二,编址三,指针变量和地址1&#…...

vue2和vue3指令
Vue 2 和 Vue 3 的指令系统非常相似,但 Vue 3 在指令方面进行了优化和扩展。以下是 Vue 2 和 Vue 3 中指令的对比: 1. 通用指令 这些指令在 Vue 2 和 Vue 3 中都可以使用,功能一致: 指令说明v-bind绑定 HTML 属性或组件 propsv-…...

【超详细】ELK实现日志采集(日志文件、springboot服务项目)进行实时日志采集上报
本文章介绍,Logstash进行自动采集服务器日志文件,并手把手教你如何在springboot项目中配置logstash进行日志自动上报与日志自定义格式输出给logstash。kibana如何进行配置索引模式,可以在kibana中看到采集到的日志 日志流程 logfile-> l…...

微信阅读网站小程序的设计与实现(LW+源码+讲解)
专注于大学生项目实战开发,讲解,毕业答疑辅导,欢迎高校老师/同行前辈交流合作✌。 技术范围:SpringBoot、Vue、SSM、HLMT、小程序、Jsp、PHP、Nodejs、Python、爬虫、数据可视化、安卓app、大数据、物联网、机器学习等设计与开发。 主要内容:…...

通过配置核查,CentOS操作系统当前无多余的、过期的账户;但CentOS操作系统存在共享账户r***t
通过配置核查,CentOS操作系统当前无多余的、过期的账户;但CentOS操作系统存在共享 核查CentOS操作系统中的用户账户,可以使用以下命令: 查看当前活跃用户: awk -F: /\$1\$/{print $1} /etc/shadow 查看多余账户(非活跃账户&…...

Vue 3 30天精进之旅:Day 05 - 事件处理
引言 在前几天的学习中,我们探讨了Vue实例、计算属性和侦听器。这些概念为我们搭建了Vue应用的基础。今天,我们将专注于事件处理,这是交互式Web应用的核心部分。通过学习如何在Vue中处理事件,你将能够更好地与用户进行交互&#…...

.NET Core跨域
CORS 跨域通讯的问题。解决方案:JSONP、前端代理后端请求、CORS等。CORS原理:在服务器的响应报文头中通过access-control-allow-origin告诉浏览器允许跨域访问的域名。在Program.cs的“var appbuilder.Build()”这句代码之前注册 string[] urls new[] …...

笔试-二维数组2
应用 现有M(1<M<10)个端口组,每个端口组是长度为N(1<N<100),元素均为整数。如果这些端口组间存在2个及以上的元素相同,则认为端口组可以关联合并;若可以关联合并,请用二位数组表示输出结果。其中…...

vue中使用jquery 实现table 拖动改变尺寸
使用 CDN , 降低打包文件的大小在index.html中 <script src"https://.../cdns/jquery-1.12.4.min.js"></script>在 Vue 中使用 jQuery 一旦你引入 jQuery,你可以在 Vue 实例中使用它。有两种主要方式: 1. 使用全局变量 $ jQue…...

使用ensp进行ppp协议综合实验
实验拓扑 实验划分 AR1的Serial3/0/0接口:192.168.1.1/24; AR2的Serial3/0/0接口:192.168.1.2/24; AR2的Serial3/0/1和4/0/0的聚合接口:192.168.2.2/24; AR3的Serial3/0/0和3/0/1的聚合接口:192…...

什么是AGI
AGI(Artificial General Intelligence,人工通用智能)是指具备与人类相当或超越人类水平的通用智能的人工智能系统。与当前主流的**狭义人工智能(Narrow AI)**不同,AGI 能够像人类一样灵活地处理各种任务&am…...

RabbitMQ模块新增消息转换器
文章目录 1.目录结构2.代码1.pom.xml 排除logging2.RabbitMQConfig.java3.RabbitMQAutoConfiguration.java 1.目录结构 2.代码 1.pom.xml 排除logging <?xml version"1.0" encoding"UTF-8"?> <project xmlns"http://maven.apache.org/PO…...
)
验证二叉搜索树(力扣98)
根据二叉搜索树的特性,我们使用中序遍历,保证节点按从小到大的顺序遍历。既然要验证,就是看在中序遍历的条件下,各个节点的大小关系是否符合二叉搜索树的特性。双指针法和适合解决这个问题,一个指针指向当前节点&#…...

vue3 vue2区别
Vue 3 和 Vue 2 之间存在多个方面的区别,以下是一些主要的差异点: 1. 性能改进 Vue 3:在性能上有显著提升,包括更小的包体积、更快的渲染速度和更好的内存管理。Vue 2:性能相对较低,尤其是在大型应用中。…...

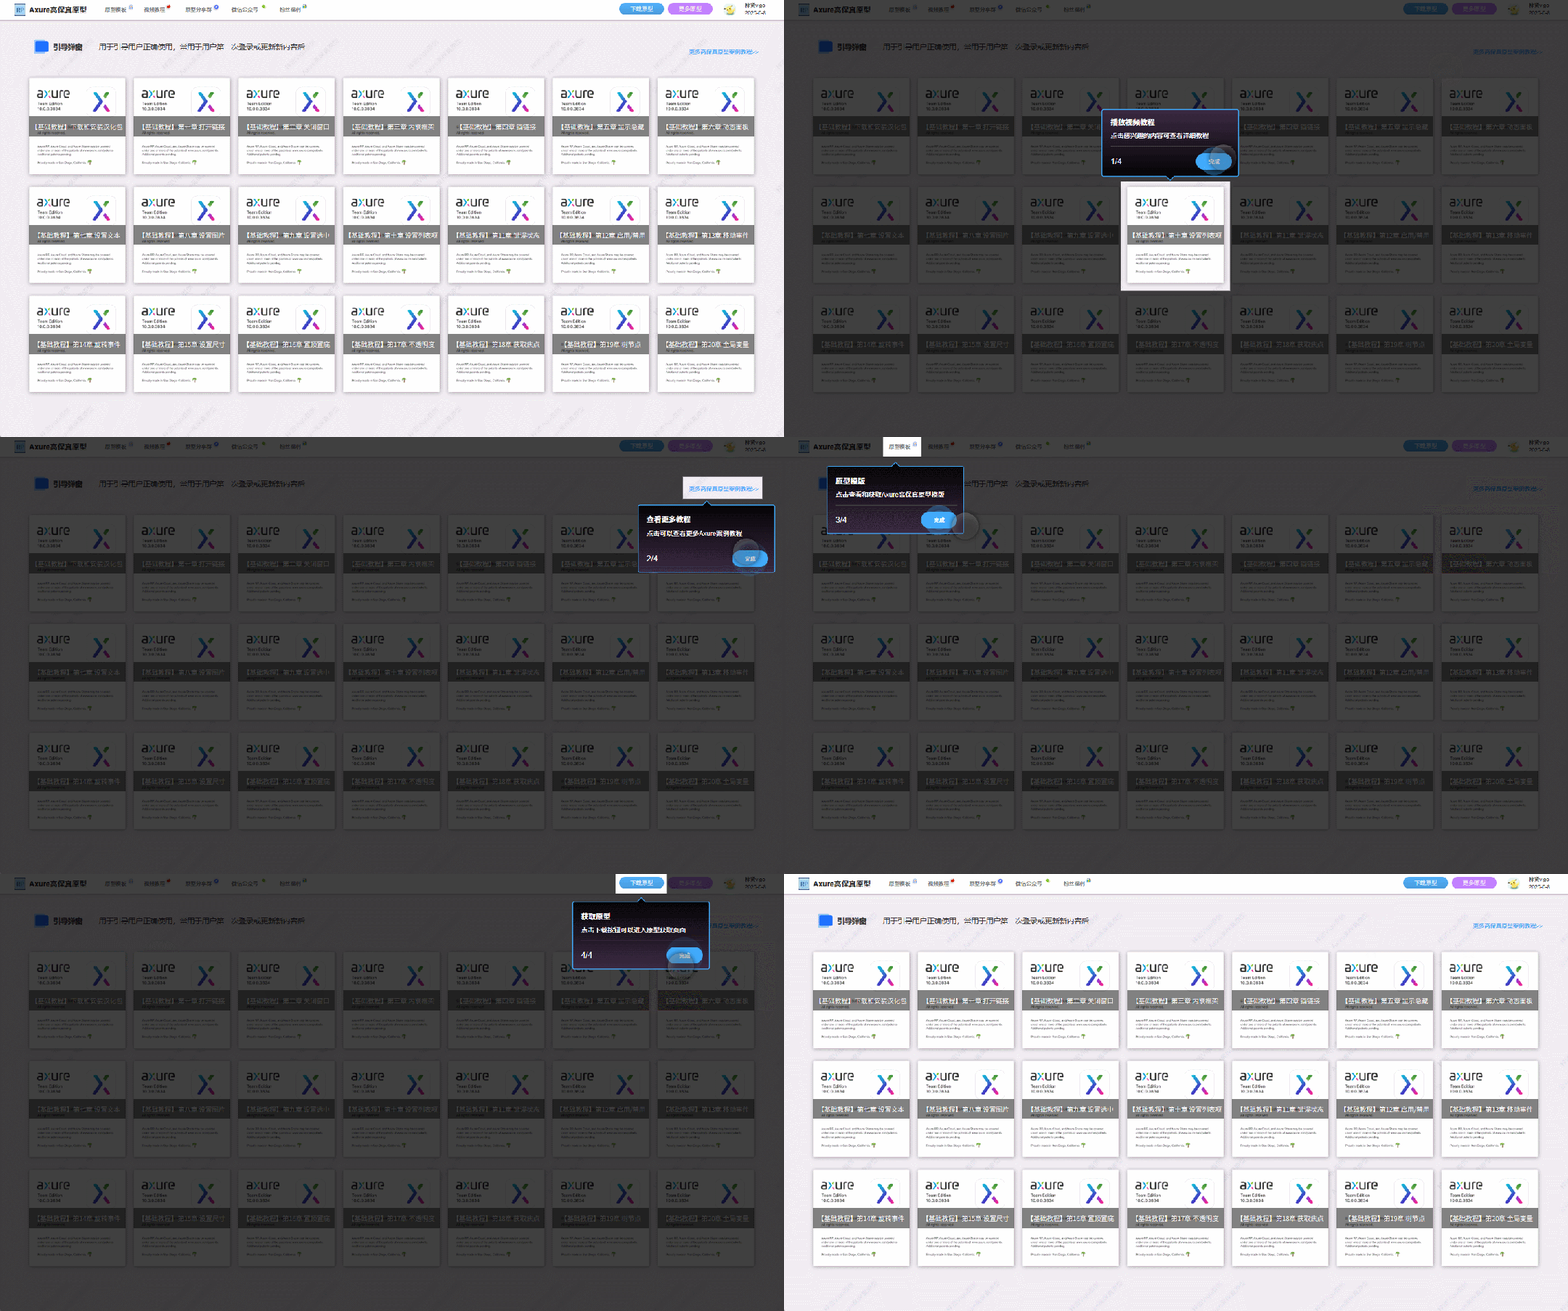
【Axure高保真原型】引导弹窗
今天和大家中分享引导弹窗的原型模板,载入页面后,会显示引导弹窗,适用于引导用户使用页面,点击完成后,会显示下一个引导弹窗,直至最后一个引导弹窗完成后进入首页。具体效果可以点击下方视频观看或打开下方…...
)
Java 语言特性(面试系列1)
一、面向对象编程 1. 封装(Encapsulation) 定义:将数据(属性)和操作数据的方法绑定在一起,通过访问控制符(private、protected、public)隐藏内部实现细节。示例: public …...

逻辑回归:给不确定性划界的分类大师
想象你是一名医生。面对患者的检查报告(肿瘤大小、血液指标),你需要做出一个**决定性判断**:恶性还是良性?这种“非黑即白”的抉择,正是**逻辑回归(Logistic Regression)** 的战场&a…...

JavaScript 中的 ES|QL:利用 Apache Arrow 工具
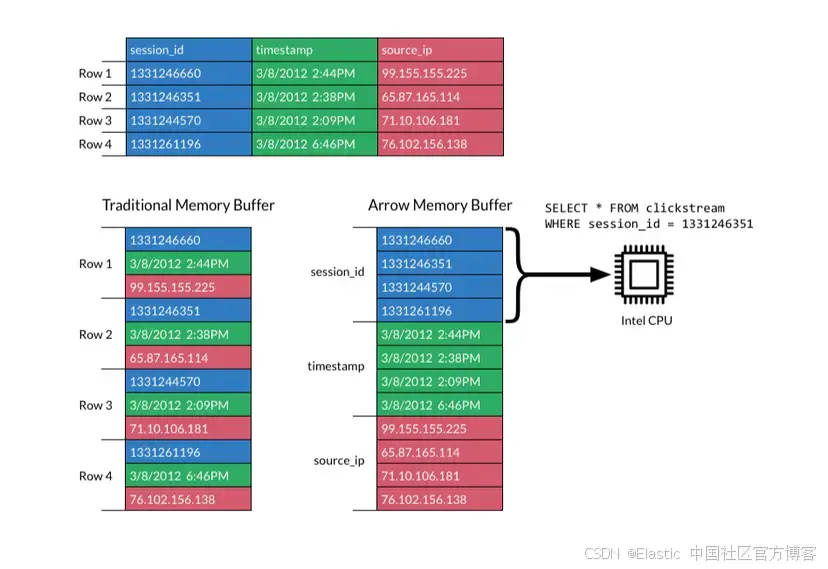
作者:来自 Elastic Jeffrey Rengifo 学习如何将 ES|QL 与 JavaScript 的 Apache Arrow 客户端工具一起使用。 想获得 Elastic 认证吗?了解下一期 Elasticsearch Engineer 培训的时间吧! Elasticsearch 拥有众多新功能,助你为自己…...

Cesium1.95中高性能加载1500个点
一、基本方式: 图标使用.png比.svg性能要好 <template><div id"cesiumContainer"></div><div class"toolbar"><button id"resetButton">重新生成点</button><span id"countDisplay&qu…...

JVM垃圾回收机制全解析
Java虚拟机(JVM)中的垃圾收集器(Garbage Collector,简称GC)是用于自动管理内存的机制。它负责识别和清除不再被程序使用的对象,从而释放内存空间,避免内存泄漏和内存溢出等问题。垃圾收集器在Ja…...

工程地质软件市场:发展现状、趋势与策略建议
一、引言 在工程建设领域,准确把握地质条件是确保项目顺利推进和安全运营的关键。工程地质软件作为处理、分析、模拟和展示工程地质数据的重要工具,正发挥着日益重要的作用。它凭借强大的数据处理能力、三维建模功能、空间分析工具和可视化展示手段&…...

Java多线程实现之Callable接口深度解析
Java多线程实现之Callable接口深度解析 一、Callable接口概述1.1 接口定义1.2 与Runnable接口的对比1.3 Future接口与FutureTask类 二、Callable接口的基本使用方法2.1 传统方式实现Callable接口2.2 使用Lambda表达式简化Callable实现2.3 使用FutureTask类执行Callable任务 三、…...

C# 类和继承(抽象类)
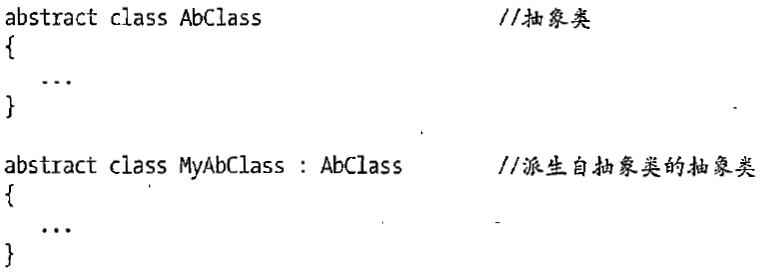
抽象类 抽象类是指设计为被继承的类。抽象类只能被用作其他类的基类。 不能创建抽象类的实例。抽象类使用abstract修饰符声明。 抽象类可以包含抽象成员或普通的非抽象成员。抽象类的成员可以是抽象成员和普通带 实现的成员的任意组合。抽象类自己可以派生自另一个抽象类。例…...

佰力博科技与您探讨热释电测量的几种方法
热释电的测量主要涉及热释电系数的测定,这是表征热释电材料性能的重要参数。热释电系数的测量方法主要包括静态法、动态法和积分电荷法。其中,积分电荷法最为常用,其原理是通过测量在电容器上积累的热释电电荷,从而确定热释电系数…...
