Flutter_学习记录_Tab的简单Demo~真的很简单
1. Tab的简单使用了解
要实现tab(选项卡或者标签视图)需要用到三个组件:
- TabBar
- TabBarView
- TabController
这一块,我也不知道怎么整理了,直接提供代码吧:
import 'package:flutter/material.dart';void main() {runApp(MyApp());
}class MyApp extends StatelessWidget {const MyApp({super.key});Widget build(BuildContext context) {return MaterialApp(debugShowCheckedModeBanner: true,home: Home(),theme: ThemeData(appBarTheme: AppBarTheme(backgroundColor: Colors.yellow, // 设置导航栏颜色为蓝色)),);}
}class Home extends StatelessWidget {const Home({super.key});Widget build(BuildContext context) {return DefaultTabController(length: 3, child: Scaffold(appBar: AppBar(leading: IconButton(onPressed: () => debugPrint("navigation button is pressed."), icon: Icon(Icons.menu),tooltip: "Navigation",),actions: [IconButton(onPressed: () => debugPrint("navigation button is pressed."), icon: Icon(Icons.search),tooltip: "search",)],title: Text("App Demo"),elevation: 0.0,bottom: TabBar(unselectedLabelColor: Colors.black38,indicatorColor: Colors.black54,indicatorSize: TabBarIndicatorSize.label,indicatorWeight: 1.0,tabs: [Tab(icon: Icon(Icons.local_florist)),Tab(icon: Icon(Icons.change_history)),Tab(icon: Icon(Icons.directions_bike)),]),),body: TabBarView(children: [Icon(Icons.local_florist, size: 128.0, color: Colors.black12),Icon(Icons.change_history, size: 128.0, color: Colors.black12),Icon(Icons.directions_bike, size: 128.0, color: Colors.black12),]),));}
}
效果图如下:

2. Drawer 侧边栏简单使用
在手势在屏幕进行左滑手势时,可以通过设置drawer属性,来实现侧边栏显示的效果。
侧边栏代码的实现如下(为了避免代码太长,新建一个实现Drawer视图的文件):
import 'package:flutter/material.dart';class DrawerDemo extends StatelessWidget {const DrawerDemo({super.key});Widget build(BuildContext context) {return Drawer(child: ListView(padding: EdgeInsets.zero,children: [// DrawerHeader(// decoration: BoxDecoration(// color: Colors.greenAccent// ),// child: Text("Header".toUpperCase()),// ),UserAccountsDrawerHeader(accountName: Text("zhuzhu", style: TextStyle(fontWeight: FontWeight.bold, color: Colors.black)), accountEmail: Text("zhuzhu@com.net", style: TextStyle(color: Colors.black),),currentAccountPicture: CircleAvatar(backgroundImage: NetworkImage("https://img1.baidu.com/it/u=1368815763,3761060632&fm=253&fmt=auto&app=138&f=JPEG?w=760&h=434"),),decoration: BoxDecoration(image: DecorationImage(image: NetworkImage("https://i-blog.csdnimg.cn/blog_migrate/41635df939e6dd13c6d5e2af785d358b.jpeg"),fit: BoxFit.cover,colorFilter: ColorFilter.mode(Colors.yellow.withAlpha(150), BlendMode.srcOver))),),ListTile(title: Text("Message", textAlign: TextAlign.right),trailing: Icon(Icons.message, color: Colors.black12, size: 22.0),onTap: () => Navigator.pop(context), // 关闭抽屉),ListTile(title: Text("Favorite", textAlign: TextAlign.right),trailing: Icon(Icons.favorite, color: Colors.black12, size: 22.0),onTap: () => Navigator.pop(context), // 关闭抽屉),ListTile(title: Text("Settings", textAlign: TextAlign.right),trailing: Icon(Icons.settings, color: Colors.black12, size: 22.0),onTap: () => Navigator.pop(context), // 关闭抽屉),],),);}
}
然后将DrawerDemo 添加到drawer属性里,代码如下:
import 'package:flutter/material.dart';
import 'Demo/Drawer_demo.dart'; // 导入DrawerDemo所在的文件void main() {runApp(MyApp());
}class MyApp extends StatelessWidget {const MyApp({super.key});Widget build(BuildContext context) {return MaterialApp(debugShowCheckedModeBanner: true,home: Home(),theme: ThemeData(appBarTheme: AppBarTheme(backgroundColor: Colors.yellow, // 设置导航栏颜色为蓝色)),);}
}class Home extends StatelessWidget {const Home({super.key});Widget build(BuildContext context) {return DefaultTabController(length: 3, child: Scaffold(appBar: AppBar(leading: IconButton(onPressed: () => debugPrint("navigation button is pressed."), icon: Icon(Icons.menu),tooltip: "Navigation",),actions: [IconButton(onPressed: () => debugPrint("navigation button is pressed."), icon: Icon(Icons.search),tooltip: "search",)],title: Text("App Demo"),elevation: 0.0,bottom: TabBar(unselectedLabelColor: Colors.black38,indicatorColor: Colors.black54,indicatorSize: TabBarIndicatorSize.label,indicatorWeight: 1.0,tabs: [Tab(icon: Icon(Icons.local_florist)),Tab(icon: Icon(Icons.change_history)),Tab(icon: Icon(Icons.directions_bike)),]),),body: TabBarView(children: [Icon(Icons.local_florist, size: 128.0, color: Colors.black12),Icon(Icons.change_history, size: 128.0, color: Colors.black12),Icon(Icons.directions_bike, size: 128.0, color: Colors.black12),]),// 添加侧边栏, 用扫动的手势来显示这个侧边栏drawer: DrawerDemo()));}
}
效果如下:

3. 底部导航栏的添加
底部导航栏的添加,可以通过属性bottomNavigationBar来设置,实现它需要用到这两个组件:
- BottomNavigationBar
- BottomNavigationBarItem
之前页面都是静态页面,创建的类也都是继承于StatelessWidget,但是点击tabbar需要根据点击改变状态,所以,就需要用新的组件StatefulWidget。这一次就先只记录怎么使用,后面有时间把这个控件的说明再补充上。
根据前面的代码,抽取出一些代码,并创建以下三个类:
- ExploreDemo
import 'package:flutter/material.dart';
import 'ListView_demo.dart';
import 'Drawer_demo.dart';class ExploreDemo extends StatelessWidget {Widget build(BuildContext context) {return DefaultTabController(length: 3, child: Scaffold(appBar: AppBar(leading: IconButton(onPressed: () => debugPrint("navigation button is pressed."), icon: Icon(Icons.menu),tooltip: "Navigation",),actions: [IconButton(onPressed: () => debugPrint("navigation button is pressed."), icon: Icon(Icons.search),tooltip: "search",)],title: Text("App Demo"),elevation: 0.0,bottom: TabBar(unselectedLabelColor: Colors.black38,indicatorColor: Colors.black54,indicatorSize: TabBarIndicatorSize.label,indicatorWeight: 1.0,tabs: [Tab(icon: Icon(Icons.local_florist)),Tab(icon: Icon(Icons.change_history)),Tab(icon: Icon(Icons.directions_bike)),]),),body: TabBarView(children: [ListViewDemo(),Icon(Icons.change_history, size: 128.0, color: Colors.black12),Icon(Icons.directions_bike, size: 128.0, color: Colors.black12),]),// 添加侧边栏, 用扫动的手势来显示这个侧边栏drawer: DrawerDemo()));}
}
- HistoryDemo
import 'package:flutter/material.dart';class HistoryDemo extends StatelessWidget {Widget build(BuildContext context) {return Scaffold(appBar: AppBar(title: Text("历史记录")),body: Container(child: Center(child: Text("历史记录"),),));}
}
- MyviewDemo
import 'package:flutter/material.dart';class MyviewDemo extends StatelessWidget {Widget build(BuildContext context) {return Scaffold(appBar: AppBar(title: Text("个人主页")),body: Container(child: Center(child: Text("个人主页"),),));}
}
基础工作做好后,在main.dart 文件中,实现如下代码:
import 'package:flutter/material.dart';
import 'Demo/Explore_demo.dart';
import 'Demo/History_demo.dart';
import 'Demo/MyView_demo.dart';void main() {runApp(MyApp());
}class MyApp extends StatelessWidget {const MyApp({super.key});Widget build(BuildContext context) {return MaterialApp(debugShowCheckedModeBanner: true,home: Home(),theme: ThemeData(appBarTheme: AppBarTheme(backgroundColor: Colors.yellow, // 设置导航栏颜色为蓝色)),);}
}class Home extends StatefulWidget {const Home({super.key});State<StatefulWidget> createState() {return _HomeState();}
}class _HomeState extends State<Home> {int _currentPageIndex = 0;// 提前创建3个视图,当点击tabbar的时候,调用setState的index来去对应的页面final List<Widget> pageLists = [ExploreDemo(),HistoryDemo(),MyviewDemo()];void _onTapHandler (int index) {// 更新状态setState(() {_currentPageIndex = index;});}Widget build(BuildContext context) {return Scaffold(// 根据_currentPageIndex展示视图body: pageLists[_currentPageIndex],// 设置底部tabbarbottomNavigationBar: BottomNavigationBar(currentIndex: _currentPageIndex,onTap: _onTapHandler,type: BottomNavigationBarType.fixed,fixedColor: Colors.black,items: [BottomNavigationBarItem(icon: Icon(Icons.explore),label: "explore"),BottomNavigationBarItem(icon: Icon(Icons.history),label: "history"),BottomNavigationBarItem(icon: Icon(Icons.person),label: "My"),]));}
}
效果图如下:

相关文章:

Flutter_学习记录_Tab的简单Demo~真的很简单
1. Tab的简单使用了解 要实现tab(选项卡或者标签视图)需要用到三个组件: TabBarTabBarViewTabController 这一块,我也不知道怎么整理了,直接提供代码吧: import package:flutter/material.dart;void main() {runApp(MyApp());…...
CSS核心
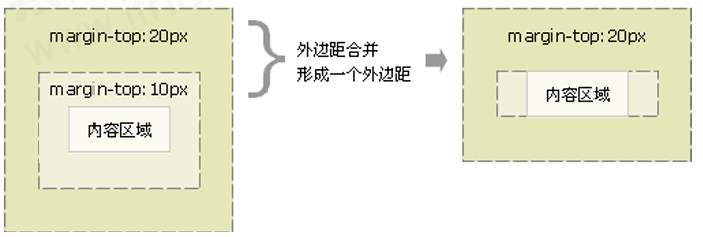
CSS的引入方式 内部样式表是在 html 页面内部写一个 style 标签,在标签内部编写 CSS 代码控制整个 HTML 页面的样式。<style> 标签理论上可以放在 HTML 文档的任何地方,但一般会放在文档的 <head> 标签中。 <style> div { color: r…...
)
Deepseek本地部署(ollama+open-webui)
ollama 首先是安装ollama,这个非常简单 https://ollama.com/ 下载安装即可 open-webui 这个是为了提供一个ui,毕竟我们也不想在cmd和模型交互,很不方便。 第一,需要安装python3.11,必须是3.11(其他版…...
PaddleSeg 从配置文件和模型 URL 自动化运行预测任务
git clone https://github.com/PaddlePaddle/PaddleSeg.git# 在ipynb里面运行 cd PaddleSegimport sys sys.path.append(/home/aistudio/work/PaddleSeg)import os# 配置文件夹路径 folder_path "/home/aistudio/work/PaddleSeg/configs"# 遍历文件夹,寻…...

数据结构 队列
目录 前言 一,队列的基本知识 二,用数组实现队列 三,用链表实现队列 总结 前言 接下来我们将学习队列的知识,这会让我们了解队列的基本概念和基本的功能 一,队列的基本知识 (Queue) 我们先来研究队列的ADT,…...

Cocoa和Cocoa Touch是什么语言写成的?什么是Cocoa?编程语言中什么是框架?为什么苹果公司Cocoa类库有不少NS前缀?Swift编程语言?
Cocoa和Cocoa Touch是什么语言写成的? 二者主要都是用Objective-C语言编写而成的。 什么是Cocoa? Cocoa是苹果操作系统macOS和iOS上的应用程序开发框架集合,核心语言是Objective-C编程语言,在移动平台被称为Cocoa Touch,Cocoa包含多个子框架…...

登录管理——认证方案(JWT、拦截器、ThreadLocal、短信验证)
两种常见的认证方案 基于Session认证 登录状态信息保存在服务器内存中,若访问量增加,单台节点压力会较大集群环境下需要解决集群中的各种服务器登录状态共享问题 解决方案:将登录状态保存的Redis中,从Redis中查找登录状态 基于…...

Java实现LFU缓存策略实战
LFU算法原理在Java中示例实现集成Caffeine的W-TinyLFU策略缓存实战总结LFU与LRU稍有不同,LFU是根据数据被访问的频率来决定去留。尽管它考虑了数据的近期使用,但它不会区分数据的首次访问和后续访问,淘汰那些访问次数最少的数据。 这种缓存策略主要用来处理以下场景: 数据…...

物业系统改革引领行业智能化管理与提升服务质量的新征程
内容概要 在当今迅速变化的社会中,物业系统改革正在悄然推动行业的智能化管理进程。物业管理作为一个古老而传统的领域,面临着诸多挑战,包括效率低下、业主需求难以满足等。数字化转型为这一现象注入了新活力,帮助物业公司通过先…...

QT+mysql+python 效果:
# This Python file uses the following encoding: utf-8 import sysfrom PySide6.QtWidgets import QApplication, QWidget,QMessageBox from PySide6.QtGui import QStandardItemModel, QStandardItem # 导入需要的类# Important: # 你需要通过以下指令把 form.ui转为ui…...
:利用图神经网络进行图分类)
动手学图神经网络(4):利用图神经网络进行图分类
利用图神经网络进行图分类:从理论到实践 引言 在之前的学习中,大家了解了如何使用图神经网络(GNNs)进行节点分类。本次教程将深入探讨如何运用 GNNs 解决图分类问题。图分类是指在给定一个图数据集的情况下,根据图的一些结构属性对整个图进行分类,而不是对图中的节点进…...

【Block总结】PConv,部分卷积|即插即用
论文信息 标题: Run, Don’t Walk: Chasing Higher FLOPS for Faster Neural Networks 论文链接: https://arxiv.org/pdf/2303.03667 GitHub链接: https://github.com/JierunChen/FasterNet 创新点 该论文的核心创新在于提出了一种新的运算符——部分卷积(PCo…...

接口使用实例(1)
大家好,今天我们来看看接口的一些实例,关于如何定义和实现接口,相信通过这些例子,我们能有一些清晰的认知。 先定义一个学生类: 再给定一个学生数组,对这个对象数组中的元素进行排序(按分数排&…...

动态规划DP 最长上升子序列模型 总览
最长上升子序列模型 1. 最长上升子序列 1.1 怪盗基德的滑翔伞 1.1.1 登山 1.1.2 合唱队形 1.2 友好城市 1.3 最长上升子序列和 1.4 导弹拦截...

网络工程师 (7)进程管理
一、进程相关的概念 (一)定义 进程(Process)是计算机中的程序关于某数据集合上的一次运行活动,是系统进行资源分配和调度的基本单位,也是操作系统结构的基础。进程是程序的一次执行实例,具有动…...

登录授权流程
发起一个网络请求需要:1.请求地址 2.请求方式 3.请求参数 在检查中找到request method,在postman中设置同样的请求方式将登录的url接口复制到postman中(json类型数据)在payload中选择view parsed,将其填入Body-raw中 …...

Flutter_学习记录_导航和其他
Flutter 的导航页面跳转,是通过组件Navigator 和 组件MaterialPageRoute来实现的,Navigator提供了很多个方法,但是目前,我只记录我学习过程中接触到的方法: Navigator.push(), 跳转下一个页面Navigator.pop(), 返回上一…...

二叉树-堆(补充)
二叉树-堆 1.二叉树的基本特性2.堆2.1.堆的基本概念2.2.堆的实现2.2.1.基本结构2.2.2.堆的初始化2.2.3.堆的销毁2.2.4.堆的插入2.2.5.取出堆顶的数据2.2.6.堆的删除2.2.7.堆的判空2.2.8.堆的数据个数2.2.9.交换2.2.10.打印堆数据2.2.11.堆的创建2.2.12.堆排序2.2.13.完整代码 3…...

Big Bird:适用于更长序列的Transformer模型
摘要 基于Transformer的模型,如BERT,已成为自然语言处理(NLP)中最成功的深度学习模型之一。然而,它们的一个核心限制是由于其全注意力机制,对序列长度的二次依赖(主要是在内存方面)…...

doris:MySQL Load
Doris 兼容 MySQL 协议,可以使用 MySQL 标准的 LOAD DATA 语法导入本地文件。MySQL Load 是一种同步导入方式,执行导入后即返回导入结果。可以通过 LOAD DATA 语句的返回结果判断导入是否成功。一般来说,可以使用 MySQL Load 导入 10GB 以下的…...
《从零掌握MIPI CSI-2: 协议精解与FPGA摄像头开发实战》-- CSI-2 协议详细解析 (一)
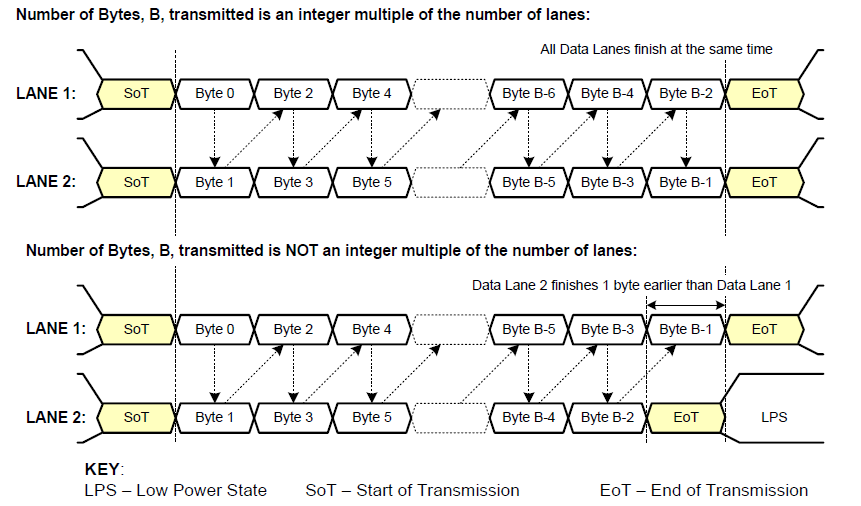
CSI-2 协议详细解析 (一) 1. CSI-2层定义(CSI-2 Layer Definitions) 分层结构 :CSI-2协议分为6层: 物理层(PHY Layer) : 定义电气特性、时钟机制和传输介质(导线&#…...
2.Vue编写一个app
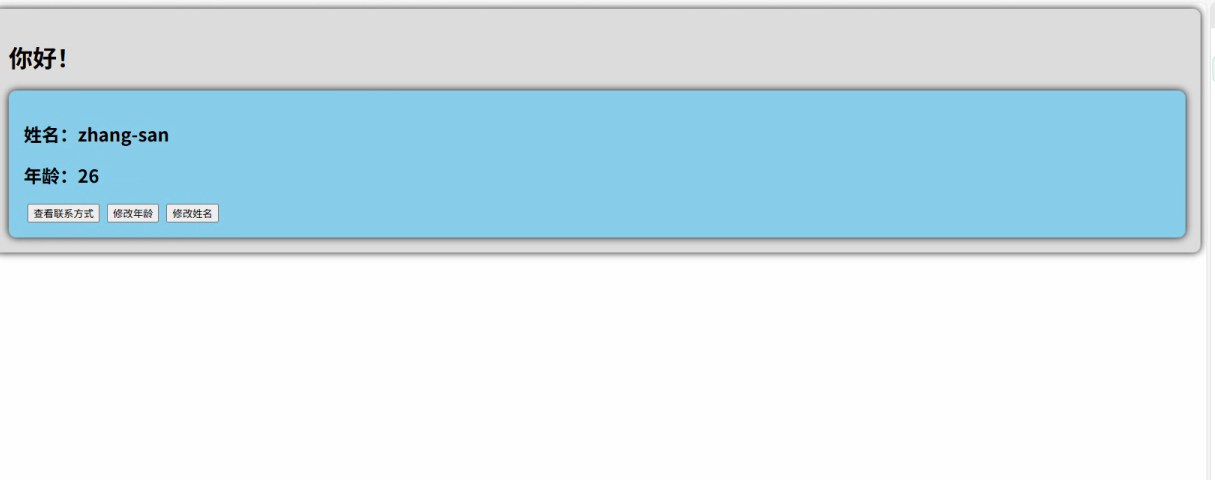
1.src中重要的组成 1.1main.ts // 引入createApp用于创建应用 import { createApp } from "vue"; // 引用App根组件 import App from ./App.vue;createApp(App).mount(#app)1.2 App.vue 其中要写三种标签 <template> <!--html--> </template>…...

Robots.txt 文件
什么是robots.txt? robots.txt 是一个位于网站根目录下的文本文件(如:https://example.com/robots.txt),它用于指导网络爬虫(如搜索引擎的蜘蛛程序)如何抓取该网站的内容。这个文件遵循 Robots…...
)
【HarmonyOS 5 开发速记】如何获取用户信息(头像/昵称/手机号)
1.获取 authorizationCode: 2.利用 authorizationCode 获取 accessToken:文档中心 3.获取手机:文档中心 4.获取昵称头像:文档中心 首先创建 request 若要获取手机号,scope必填 phone,permissions 必填 …...

docker 部署发现spring.profiles.active 问题
报错: org.springframework.boot.context.config.InvalidConfigDataPropertyException: Property spring.profiles.active imported from location class path resource [application-test.yml] is invalid in a profile specific resource [origin: class path re…...
关键领域软件测试的突围之路:如何破解安全与效率的平衡难题
在数字化浪潮席卷全球的今天,软件系统已成为国家关键领域的核心战斗力。不同于普通商业软件,这些承载着国家安全使命的软件系统面临着前所未有的质量挑战——如何在确保绝对安全的前提下,实现高效测试与快速迭代?这一命题正考验着…...

Xen Server服务器释放磁盘空间
disk.sh #!/bin/bashcd /run/sr-mount/e54f0646-ae11-0457-b64f-eba4673b824c # 全部虚拟机物理磁盘文件存储 a$(ls -l | awk {print $NF} | cut -d. -f1) # 使用中的虚拟机物理磁盘文件 b$(xe vm-disk-list --multiple | grep uuid | awk {print $NF})printf "%s\n"…...

LangChain知识库管理后端接口:数据库操作详解—— 构建本地知识库系统的基础《二》
这段 Python 代码是一个完整的 知识库数据库操作模块,用于对本地知识库系统中的知识库进行增删改查(CRUD)操作。它基于 SQLAlchemy ORM 框架 和一个自定义的装饰器 with_session 实现数据库会话管理。 📘 一、整体功能概述 该模块…...
混合(Blending))
C++.OpenGL (20/64)混合(Blending)
混合(Blending) 透明效果核心原理 #mermaid-svg-SWG0UzVfJms7Sm3e {font-family:"trebuchet ms",verdana,arial,sans-serif;font-size:16px;fill:#333;}#mermaid-svg-SWG0UzVfJms7Sm3e .error-icon{fill:#552222;}#mermaid-svg-SWG0UzVfJms7Sm3e .error-text{fill…...
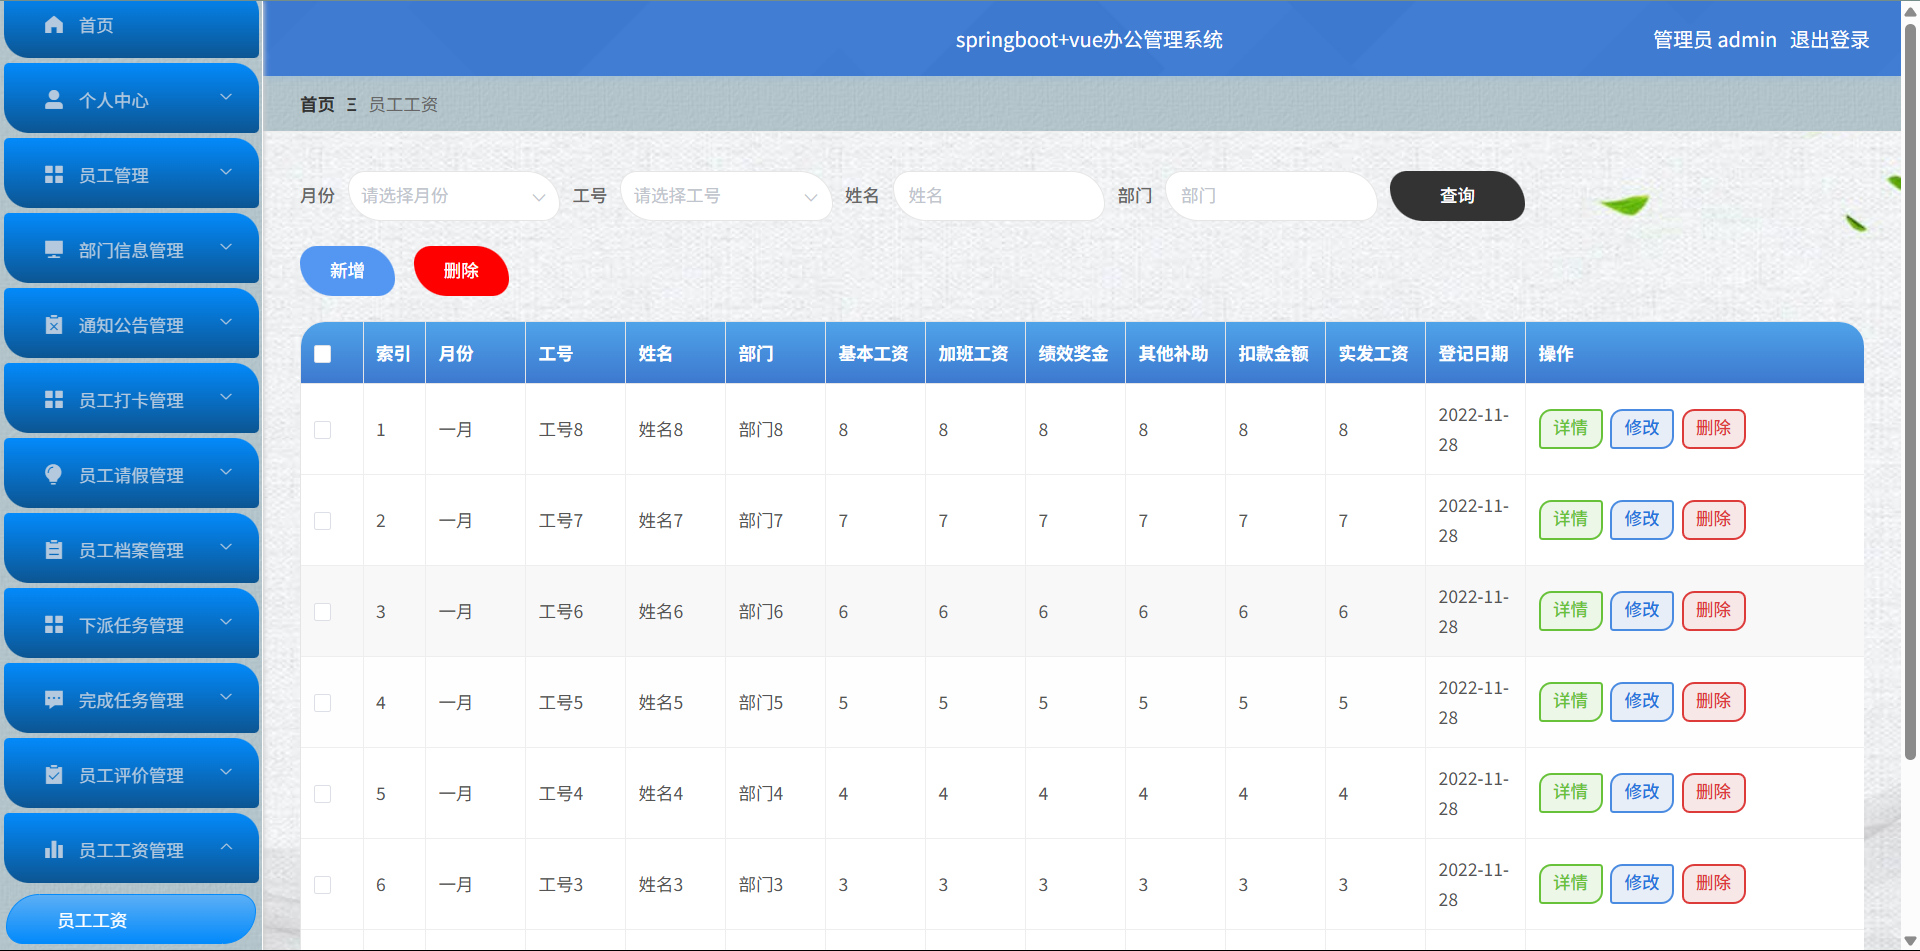
基于Springboot+Vue的办公管理系统
角色: 管理员、员工 技术: 后端: SpringBoot, Vue2, MySQL, Mybatis-Plus 前端: Vue2, Element-UI, Axios, Echarts, Vue-Router 核心功能: 该办公管理系统是一个综合性的企业内部管理平台,旨在提升企业运营效率和员工管理水…...
