Linux | RHEL / CentOS 中 YUM history / downgrade 命令回滚操作
注:英文引文,机翻未校。
在 RHEL/CentOS 系统上使用 YUM history 命令回滚升级操作
作者: 2daygeek
译者: LCTT DarkSun
为服务器打补丁是 Linux 系统管理员的一项重要任务,为的是让系统更加稳定,性能更加优化。厂商经常会发布一些安全/高危的补丁包,相关软件需要升级以防范潜在的安全风险。
Yum (Yellowdog Update Modified) 是 CentOS 和 RedHat 系统上用的 RPM 包管理工具,yum history 命令允许系统管理员将系统回滚到上一个状态,但由于某些限制,回滚不是在所有情况下都能成功,有时 yum 命令可能什么都不做,有时可能会删掉一些其他的包。
我建议你在升级之前还是要做一个完整的系统备份,而 yum history 并不能用来替代系统备份的。系统备份能让你将系统还原到任意时候的节点状态。
某些情况下,安装的应用程序在升级了补丁之后不能正常工作或者出现一些错误(可能是由于库不兼容或者软件包升级导致的),那该怎么办呢?
与应用开发团队沟通,并找出导致库和软件包的问题所在,然后使用 yum history 命令进行回滚。
回滚 / 降级注意事项:
- 它不支持回滚 selinux,selinux-policy-*,kernel,glibc (以及依赖 glibc 的包,比如 gcc)。
- 不建议将系统降级到更低的版本(比如 CentOS 6.9 降到 CentOS 6.8),这会导致系统处于不稳定的状态
让我们先来看看系统上有哪些包可以升级,然后挑选出一些包来做实验。
# yum update
Loaded plugins: fastestmirror, security
Setting up Update Process
Loading mirror speeds from cached hostfile
epel/metalink | 12 kB 00:00* epel: mirror.csclub.uwaterloo.ca
base | 3.7 kB 00:00
dockerrepo | 2.9 kB 00:00
draios | 2.9 kB 00:00
draios/primary_db | 13 kB 00:00
epel | 4.3 kB 00:00
epel/primary_db | 5.9 MB 00:00
extras | 3.4 kB 00:00
updates | 3.4 kB 00:00
updates/primary_db | 2.5 MB 00:00
Resolving Dependencies
--> Running transaction check
---> Package git.x86_64 0:1.7.1-8.el6 will be updated
---> Package git.x86_64 0:1.7.1-9.el6_9 will be an update
---> Package httpd.x86_64 0:2.2.15-60.el6.centos.4 will be updated
---> Package httpd.x86_64 0:2.2.15-60.el6.centos.5 will be an update
---> Package httpd-tools.x86_64 0:2.2.15-60.el6.centos.4 will be updated
---> Package httpd-tools.x86_64 0:2.2.15-60.el6.centos.5 will be an update
---> Package perl-Git.noarch 0:1.7.1-8.el6 will be updated
---> Package perl-Git.noarch 0:1.7.1-9.el6_9 will be an update
--> Finished Dependency Resolution
Dependencies Resolved
=================================================================================================Package Arch Version Repository Size
=================================================================================================
Updating:git x86_64 1.7.1-9.el6_9 updates 4.6 Mhttpd x86_64 2.2.15-60.el6.centos.5 updates 836 khttpd-tools x86_64 2.2.15-60.el6.centos.5 updates 80 kperl-Git noarch 1.7.1-9.el6_9 updates 29 k
Transaction Summary
=================================================================================================
Upgrade 4 Package(s)
Total download size: 5.5 M
Is this ok [y/N]: n
你会发现 git 包可以被升级,那我们就用它来实验吧。运行下面命令获得软件包的版本信息(当前安装的版本和可以升级的版本)。
# yum list git
Loaded plugins: fastestmirror, security
Setting up Update Process
Loading mirror speeds from cached hostfile* epel: mirror.csclub.uwaterloo.ca
Installed Packages
git.x86_64 1.7.1-8.el6 @base
Available Packages
git.x86_64 1.7.1-9.el6_9 updates
运行下面命令来将 git 从 1.7.1-8 升级到 1.7.1-9。
# yum update git
Loaded plugins: fastestmirror, presto
Setting up Update Process
Loading mirror speeds from cached hostfile* base: repos.lax.quadranet.com* epel: fedora.mirrors.pair.com* extras: mirrors.seas.harvard.edu* updates: mirror.sesp.northwestern.edu
Resolving Dependencies
--> Running transaction check
---> Package git.x86_64 0:1.7.1-8.el6 will be updated
--> Processing Dependency: git = 1.7.1-8.el6 for package: perl-Git-1.7.1-8.el6.noarch
---> Package git.x86_64 0:1.7.1-9.el6_9 will be an update
--> Running transaction check
---> Package perl-Git.noarch 0:1.7.1-8.el6 will be updated
---> Package perl-Git.noarch 0:1.7.1-9.el6_9 will be an update
--> Finished Dependency Resolution
Dependencies Resolved
=================================================================================================Package Arch Version Repository Size
=================================================================================================
Updating:git x86_64 1.7.1-9.el6_9 updates 4.6 M
Updating for dependencies:perl-Git noarch 1.7.1-9.el6_9 updates 29 k
Transaction Summary
=================================================================================================
Upgrade 2 Package(s)
Total download size: 4.6 M
Is this ok [y/N]: y
Downloading Packages:
Setting up and reading Presto delta metadata
Processing delta metadata
Package(s) data still to download: 4.6 M
(1/2): git-1.7.1-9.el6_9.x86_64.rpm | 4.6 MB 00:00
(2/2): perl-Git-1.7.1-9.el6_9.noarch.rpm | 29 kB 00:00
-------------------------------------------------------------------------------------------------
Total 5.8 MB/s | 4.6 MB 00:00
Running rpm_check_debug
Running Transaction Test
Transaction Test Succeeded
Running TransactionUpdating : perl-Git-1.7.1-9.el6_9.noarch 1/4Updating : git-1.7.1-9.el6_9.x86_64 2/4Cleanup : perl-Git-1.7.1-8.el6.noarch 3/4Cleanup : git-1.7.1-8.el6.x86_64 4/4Verifying : git-1.7.1-9.el6_9.x86_64 1/4Verifying : perl-Git-1.7.1-9.el6_9.noarch 2/4Verifying : git-1.7.1-8.el6.x86_64 3/4Verifying : perl-Git-1.7.1-8.el6.noarch 4/4
Updated:git.x86_64 0:1.7.1-9.el6_9
Dependency Updated:perl-Git.noarch 0:1.7.1-9.el6_9
Complete!
验证升级后的 git 版本.
# yum list git
Installed Packages
git.x86_64 1.7.1-9.el6_9 @updates
或
# rpm -q git
git-1.7.1-9.el6_9.x86_64
现在我们成功升级这个软件包,可以对它进行回滚了。步骤如下。
使用 YUM history 命令回滚升级操作
首先,使用下面命令获取 yum 操作的 id。下面的输出很清晰地列出了所有需要的信息,例如操作 id、谁做的这个操作(用户名)、操作日期和时间、操作的动作(安装还是升级)、操作影响的包数量。
首先,使用下面命令获取 yum 操作的 id。下面的输出很清晰地列出了所有需要的信息,例如操作 id、谁做的这个操作(用户名)、操作日期和时间、操作的动作(安装还是升级)、操作影响的包数量。
# yum history
或
# yum history list all
Loaded plugins: fastestmirror, presto
ID | Login user | Date and time | Action(s) | Altered
-------------------------------------------------------------------------------13 | root | 2017-08-18 13:30 | Update | 212 | root | 2017-08-10 07:46 | Install | 111 | root | 2017-07-28 17:10 | E, I, U | 28 EE10 | root | 2017-04-21 09:16 | E, I, U | 162 EE9 | root | 2017-02-09 17:09 | E, I, U | 20 EE8 | root | 2017-02-02 10:45 | Install | 17 | root | 2016-12-15 06:48 | Update | 16 | root | 2016-12-15 06:43 | Install | 15 | root | 2016-12-02 10:28 | E, I, U | 23 EE4 | root | 2016-10-28 05:37 | E, I, U | 13 EE3 | root | 2016-10-18 12:53 | Install | 12 | root | 2016-09-30 10:28 | E, I, U | 31 EE1 | root | 2016-07-26 11:40 | E, I, U | 160 EE
上面命令显示有两个包受到了影响,因为 git 还升级了它的依赖包 perl-Git。 运行下面命令来查看关于操作的详细信息。
# yum history info 13
Loaded plugins: fastestmirror, presto
Transaction ID : 13
Begin time : Fri Aug 18 13:30:52 2017
Begin rpmdb : 420:f5c5f9184f44cf317de64d3a35199e894ad71188
End time : 13:30:54 2017 (2 seconds)
End rpmdb : 420:d04a95c25d4526ef87598f0dcaec66d3f99b98d4
User : root
Return-Code : Success
Command Line : update git
Transaction performed with:Installed rpm-4.8.0-55.el6.x86_64 @baseInstalled yum-3.2.29-81.el6.centos.noarch @baseInstalled yum-plugin-fastestmirror-1.1.30-40.el6.noarch @baseInstalled yum-presto-0.6.2-1.el6.noarch @anaconda-CentOS-201207061011.x86_64/6.3
Packages Altered:Updated git-1.7.1-8.el6.x86_64 @baseUpdate 1.7.1-9.el6_9.x86_64 @updatesUpdated perl-Git-1.7.1-8.el6.noarch @baseUpdate 1.7.1-9.el6_9.noarch @updates
history info
运行下面命令来回滚 git 包到上一个版本。
# yum history undo 13
Loaded plugins: fastestmirror, presto
Undoing transaction 53, from Fri Aug 18 13:30:52 2017Updated git-1.7.1-8.el6.x86_64 @baseUpdate 1.7.1-9.el6_9.x86_64 @updatesUpdated perl-Git-1.7.1-8.el6.noarch @baseUpdate 1.7.1-9.el6_9.noarch @updates
Loading mirror speeds from cached hostfile* base: repos.lax.quadranet.com* epel: fedora.mirrors.pair.com* extras: repo1.dal.innoscale.net* updates: mirror.vtti.vt.edu
Resolving Dependencies
--> Running transaction check
---> Package git.x86_64 0:1.7.1-8.el6 will be a downgrade
---> Package git.x86_64 0:1.7.1-9.el6_9 will be erased
---> Package perl-Git.noarch 0:1.7.1-8.el6 will be a downgrade
---> Package perl-Git.noarch 0:1.7.1-9.el6_9 will be erased
--> Finished Dependency Resolution
Dependencies Resolved
=================================================================================================Package Arch Version Repository Size
=================================================================================================
Downgrading:git x86_64 1.7.1-8.el6 base 4.6 Mperl-Git noarch 1.7.1-8.el6 base 29 k
Transaction Summary
=================================================================================================
Downgrade 2 Package(s)
Total download size: 4.6 M
Is this ok [y/N]: y
Downloading Packages:
Setting up and reading Presto delta metadata
Processing delta metadata
Package(s) data still to download: 4.6 M
(1/2): git-1.7.1-8.el6.x86_64.rpm | 4.6 MB 00:00
(2/2): perl-Git-1.7.1-8.el6.noarch.rpm | 29 kB 00:00
-------------------------------------------------------------------------------------------------
Total 3.4 MB/s | 4.6 MB 00:01
Running rpm_check_debug
Running Transaction Test
Transaction Test Succeeded
Running TransactionInstalling : perl-Git-1.7.1-8.el6.noarch 1/4Installing : git-1.7.1-8.el6.x86_64 2/4Cleanup : perl-Git-1.7.1-9.el6_9.noarch 3/4Cleanup : git-1.7.1-9.el6_9.x86_64 4/4Verifying : git-1.7.1-8.el6.x86_64 1/4Verifying : perl-Git-1.7.1-8.el6.noarch 2/4Verifying : git-1.7.1-9.el6_9.x86_64 3/4Verifying : perl-Git-1.7.1-9.el6_9.noarch 4/4
Removed:git.x86_64 0:1.7.1-9.el6_9 perl-Git.noarch 0:1.7.1-9.el6_9
Installed:git.x86_64 0:1.7.1-8.el6 perl-Git.noarch 0:1.7.1-8.el6
Complete!
回滚后,使用下面命令来检查降级包的版本。
# yum list git
或
# rpm -q git
git-1.7.1-8.el6.x86_64
使用YUM downgrade 命令回滚升级
此外,我们也可以使用 YUM downgrade 命令回滚升级。
# yum downgrade git-1.7.1-8.el6 perl-Git-1.7.1-8.el6
Loaded plugins: search-disabled-repos, security, ulninfo
Setting up Downgrade Process
Resolving Dependencies
--> Running transaction check
---> Package git.x86_64 0:1.7.1-8.el6 will be a downgrade
---> Package git.x86_64 0:1.7.1-9.el6_9 will be erased
---> Package perl-Git.noarch 0:1.7.1-8.el6 will be a downgrade
---> Package perl-Git.noarch 0:1.7.1-9.el6_9 will be erased
--> Finished Dependency Resolution
Dependencies Resolved
=================================================================================================Package Arch Version Repository Size
=================================================================================================
Downgrading:git x86_64 1.7.1-8.el6 base 4.6 Mperl-Git noarch 1.7.1-8.el6 base 29 k
Transaction Summary
=================================================================================================
Downgrade 2 Package(s)
Total download size: 4.6 M
Is this ok [y/N]: y
Downloading Packages:
(1/2): git-1.7.1-8.el6.x86_64.rpm | 4.6 MB 00:00
(2/2): perl-Git-1.7.1-8.el6.noarch.rpm | 28 kB 00:00
-------------------------------------------------------------------------------------------------
Total 3.7 MB/s | 4.6 MB 00:01
Running rpm_check_debug
Running Transaction Test
Transaction Test Succeeded
Running TransactionInstalling : perl-Git-1.7.1-8.el6.noarch 1/4Installing : git-1.7.1-8.el6.x86_64 2/4Cleanup : perl-Git-1.7.1-9.el6_9.noarch 3/4Cleanup : git-1.7.1-9.el6_9.x86_64 4/4Verifying : git-1.7.1-8.el6.x86_64 1/4Verifying : perl-Git-1.7.1-8.el6.noarch 2/4Verifying : git-1.7.1-9.el6_9.x86_64 3/4Verifying : perl-Git-1.7.1-9.el6_9.noarch 4/4
Removed:git.x86_64 0:1.7.1-9.el6_9 perl-Git.noarch 0:1.7.1-9.el6_9
Installed:git.x86_64 0:1.7.1-8.el6 perl-Git.noarch 0:1.7.1-8.el6
Complete!
注意: 你也需要降级依赖包,否则它会删掉当前版本的依赖包而不是对依赖包做降级,因为 downgrade 命令无法处理依赖关系。
至于 Fedora 用户
命令是一样的,只需要将包管理器名称从 yum 改成 dnf 就行了。
# dnf list git
# dnf history
# dnf history info
# dnf history undo
# dnf list git
# dnf downgrade git-1.7.1-8.el6 perl-Git-1.7.1-8.el6
How to display Date and Time in history command
如何在历史记录命令中显示日期和时间
January 20, 2020
We all are familiar with the history command. It stores all the commands executed by bash in the terminal into the .bash_history file, which helps us recheck the previously executed commands for further investigation.
我们都熟悉 history 命令。它将 bash 在终端执行的所有命令存储到 .bash_history 文件中,这将有助于我们重新检查用户之前执行的命令以进行进一步调查。
By default, the history command shows only the commands executed by users and does not print the date and time, although it logs the time when the command was run.
默认情况下,history 命令仅显示用户执行的命令,不会打印日期和时间,但会记录命令运行的时间。
Whenever you run the history command, it looks for an environment variable called HISTTIMEFORMAT, which tells it how to format the date and time with the history command.
每当你运行 history 命令时,它会寻找一个名为 HISTTIMEFORMAT 的环境变量,该变量用于指定如何在 history 命令中格式化日期和时间。
If the value is null or not set, it will show default results, like most systems do (without date and time).
如果该值为空或未设置,则会显示默认结果,就像大多数系统一样(不显示日期和时间)。
HISTTIMEFORMAT takes values from strftime (strftime – convert date and time to a string). When you have date and time in the history command output, it might help you track issues more easily.
HISTTIMEFORMAT 从 strftime(strftime — 将日期和时间转换为字符串)中获取值。当 history 命令的输出中包含日期和时间时,它可以帮助你更轻松地跟踪问题。
-
%T: Replaced by the time (%H:%M:%S).
%T:替换为时间(%H:%M:%S)。 -
%F: Equivalent to %Y-%m-%d (the ISO 8601:2000 standard date format).
%F:相当于 %Y-%m-%d(ISO 8601:2000 标准日期格式)。
See below for the default history command output.
请参阅下面的默认 history 命令输出。
# history1 yum install -y mysql-server mysql-client2 service mysqld start3 sysdig proc.name=sshd4 sysdig -c topprocs_net5 sysdig proc.name=sshd6 sysdig proc.name=sshd | more7 sysdig fd.name=/var/log/auth.log | more8 sysdig fd.name=/var/log/mysqld.log9 sysdig -cl10 sysdig -i httplog11 sysdig -i proc_exec_time12 sysdig -i topprocs_cpu13 sysdig -c topprocs_cpu14 sysdig -c tracers_2_statsd15 sysdig -c topfiles_bytes16 sysdig -c topprocs_cpu17 sysdig -c topprocs_cpu "fd.name contains sshd"18 sysdig -c topprocs_cpu "proc.name contains sshd"19 csysdig20 sysdig -c topprocs_cpu21 rpm --import https://s3.amazonaws.com/download.draios.com/DRAIOS-GPG-KEY.public22 curl -s -o /etc/yum.repos.d/draios.repo http://download.draios.com/stable/rpm/draios.repo23 yum install -y epel-release24 yum update25 yum makecache26 yum -y install kernel-devel-$(uname -r)27 yum -y install sysdig28 sysdig29 yum install httpd mysql30 service httpd start
We can set this environment variable in three ways based on our requirements.
我们可以根据需求以三种方式设置这个环境变量。
-
Temporarily for the current user
临时对当前用户生效 -
Permanently for the current user or another user
永久对当前用户或其他用户生效 -
Permanently for all users
永久对所有用户生效
Note: Don’t forget to add a space before the last single quote, otherwise the output will be messy.
注意:不要忘记在最后一个单引号之前添加空格,否则输出会很混乱。
Method 1: Temporarily for the Current User
方法 1:临时对当前用户生效
Run the following command to set the HISTTIMEFORMAT variable temporarily for the current user. This setting will be lost after a reboot.
执行以下命令,将 HISTTIMEFORMAT 变量临时设置为当前用户。重启后该设置将失效。
# export HISTTIMEFORMAT='%F %T '
Method 2: Permanently for the Current User
方法 2:永久对当前用户生效
Append the following HISTTIMEFORMAT variable to the .bashrc or .bash_profile file to make it permanent for the current user.
将以下 HISTTIMEFORMAT 变量追加到 .bashrc 或 .bash_profile 文件中,使其对当前用户永久生效。
# echo 'HISTTIMEFORMAT="%F %T "' >> ~/.bashrc
or
# echo 'HISTTIMEFORMAT="%F %T "' >> ~/.bash_profile
Run the following command to apply the changes made to the file.
运行以下命令以使文件中的更改生效。
# source ~/.bashrc
or
# source ~/.bash_profile
Method 3: Permanently for All Users
方法 3:永久对所有用户生效
Append the following HISTTIMEFORMAT variable to the /etc/profile file to make it permanent for all users.
将以下 HISTTIMEFORMAT 变量追加到 /etc/profile 文件中,使其对所有用户永久生效。
# echo 'HISTTIMEFORMAT="%F %T "' >> /etc/profile
Run the following command to apply the changes made to the file.
运行以下命令以使文件中的更改生效。
# source /etc/profile
See the sample output below.
请参阅以下示例输出。
# history1 2017-08-16 15:30:15 yum install -y mysql-server mysql-client2 2017-08-16 15:30:15 service mysqld start3 2017-08-16 15:30:15 sysdig proc.name=sshd4 2017-08-16 15:30:15 sysdig -c topprocs_net5 2017-08-16 15:30:15 sysdig proc.name=sshd6 2017-08-16 15:30:15 sysdig proc.name=sshd | more7 2017-08-16 15:30:15 sysdig fd.name=/var/log/auth.log | more8 2017-08-16 15:30:15 sysdig fd.name=/var/log/mysqld.log9 2017-08-16 15:30:15 sysdig -cl10 2017-08-16 15:30:15 sysdig -i httplog11 2017-08-16 15:30:15 sysdig -i proc_exec_time12 2017-08-16 15:30:15 sysdig -i topprocs_cpu13 2017-08-16 15:30:15 sysdig -c topprocs_cpu14 2017-08-16 15:30:15 sysdig -c tracers_2_statsd15 2017-08-16 15:30:15 sysdig -c topfiles_bytes16 2017-08-16 15:30:15 sysdig -c topprocs_cpu17 2017-08-16 15:30:15 sysdig -c topprocs_cpu "fd.name contains sshd"18 2017-08-16 15:30:15 sysdig -c topprocs_cpu "proc.name contains sshd"19 2017-08-16 15:30:15 csysdig20 2017-08-16 15:30:15 sysdig -c topprocs_cpu21 2017-08-16 15:30:15 rpm --import https://s3.amazonaws.com/download.draios.com/DRAIOS-GPG-KEY.public22 2017-08-16 15:30:15 curl -s -o /etc/yum.repos.d/draios.repo http://download.draios.com/stable/rpm/draios.repo23 2017-08-16 15:30:15 yum install -y epel-release24 2017-08-16 15:30:15 yum update25 2017-08-16 15:30:15 yum makecache26 2017-08-16 15:30:15 yum -y install kernel-devel-$(uname -r)27 2017-08-16 15:30:15 yum -y install sysdig28 2017-08-16 15:30:15 sysdig29 2017-08-16 15:30:15 yum install httpd mysql30 2017-08-16 15:30:15 service httpd start
via:
-
How To Use YUM History Command To Rollback An Updates In RHEL/CentOS Systems | 2DayGeek
https://www.2daygeek.com/rollback-fallback-updates-downgrade-packages-centos-rhel-fedora/作者:2daygeek 译者:lujun9972 校对:wxy 本文由 LCTT 原创编译,Linux中国. 荣誉推出 | 2018-01-18 08:47
-
How To Display Date And Time In History Command
https://www.2daygeek.com/display-date-time-linux-bash-history-command/
相关文章:

Linux | RHEL / CentOS 中 YUM history / downgrade 命令回滚操作
注:英文引文,机翻未校。 在 RHEL/CentOS 系统上使用 YUM history 命令回滚升级操作 作者: 2daygeek 译者: LCTT DarkSun 为服务器打补丁是 Linux 系统管理员的一项重要任务,为的是让系统更加稳定,性能更加…...

BGP状态和机制
BGP邻居优化 为了增加稳定性,通常建议实验回环口来建立邻居。更新源:建立邻居和邻居所学习到的路由的下一跳。多跳:EBGP邻居建立默认选哟直连,因为TTL=1,如果非直连,必须修改TTL。命令备注peer 2.2.2.2 connect-interface lo1配置更新源peer 2.2.2.2 ebgp-max-hop 2配置T…...

温湿度监控设备融入智慧物联网
当医院的温湿度监控设备融入智慧物联网,将会带来许多新的体验,可以帮助医院温湿度监控设备智能化管理,实现设备之间的互联互通,方便医院对温湿度数据进行统一管理和分析。 添加智慧物联网技术,实现对医院温湿度的实时…...

smolagents学习笔记系列(五)Tools-in-depth-guide
这篇文章锁定官网教程中的 Tools-in-depth-guide 章节,主要介绍了如何详细构造自己的Tools,在之前的博文 smolagents学习笔记系列(二)Agents - Guided tour 中我初步介绍了下如何将一个函数或一个类声明成 smolagents 的工具&…...

前端面试真题 2025最新版
文章目录 写在前文CSS怪异盒模型JS闭包闭包的形成闭包注意点 CSS选择器及优先级优先级 说说flex布局及相关属性Flex 容器相关属性:Flex 项目相关属性 响应式布局如何实现是否用过tailwindcss,有哪些好处好处缺点 说说对象的 prototype属性及原型说说 pro…...
面试八股文--数据库基础知识总结(1)
1、数据库的定义 数据库(DataBase,DB)简单来说就是数据的集合数据库管理系统(Database Management System,DBMS)是一种操纵和管理数据库的大型软件,通常用于建立、使用和维护数据库。数据库系统…...

10. docker nginx官方镜像使用方法
本文介绍docker nginx官方镜像使用方法,因为第一次用,在加上对docker也不是很熟,中间踩了一些坑,为了避免下一次用又踩坑,因此记录如下,也希望能够帮到其它小伙伴。 官方镜像页面:https://hub.d…...

[Web 安全] PHP 反序列化漏洞 —— PHP 反序列化漏洞演示案例
关注这个专栏的其他相关笔记:[Web 安全] 反序列化漏洞 - 学习笔记-CSDN博客 PHP 反序列化漏洞产生原因 PHP 反序列化漏洞产生的原因就是因为在反序列化过程中,unserialize() 接收的值可控。 0x01:环境搭建 这里笔者是使用 PhpStudy 搭建的环…...

es-head(es库-谷歌浏览器插件)
1.下载es-head插件压缩包,并解压缩 2.谷歌浏览器添加插件 3.使用...

第二十:【路由的props配置】
作用:让路由组件更方便的收到参数(可以将路由参数作为props传给组件) {name:xiang,path:detail/:id/:title/:content,component:Detail, 第一种方法:// props的对象写法,作用:把对象中的每一组key-valu…...

Vue 2全屏滚动动画实战:结合fullpage-vue与animate.css打造炫酷H5页面
引言 在移动端H5开发中,全屏滚动效果因其沉浸式体验而广受欢迎。如何快速实现带有动态加载动画的全屏滚动页面?本文将手把手教你使用 Vue 2、全屏滚动插件 fullpage-vue 和动画库 animate.css 3.5.1,打造一个高效且视觉冲击力强的H5页面。通…...

AF3 DataPipeline类process_pdb 方法解读
DataPipeline 类中的 process_pdb 方法用于从 PDB 文件中生成特定蛋白质链的特征,作为 AlphaFold3 预测的输入。它的流程与 process_mmcif 类似,但输入来源是 PDB 文件而非 MmcifObject。 源代码: def process_pdb(self,pdb_path: str,alignment_dir: str,is_distillation:…...

抓包工具 wireshark
1.什么是抓包工具 抓包工具是什么?-CSDN博客 2.wireshark的安装 【抓包工具】win 10 / win 11:WireShark 下载、安装、使用_windows抓包工具-CSDN博客 3.wireshark的基础操作 Wireshark零基础使用教程(超详细) - 元宇宙-Meta…...

OpenBMC:BmcWeb app获取socket
OpenBMC:BmcWeb app.run-CSDN博客 app对象在run函数中调用了setupSocket() static std::vector<Acceptor> setupSocket() {std::vector<Acceptor> acceptors;char** names = nullptr;int listenFdCount = sd_listen_fds_with_names(0, &names);BMCWEB_LOG_DE…...

《深度学习实战》第2集-补充:卷积神经网络(CNN)与图像分类 实战代码解析和改进
以下是对《深度学习实战》第2集中 CIFAR-10 数据集 使用卷积神经网络进行图像分类实战 代码的详细分析,并增加数据探索环节,同时对数据探索、模型训练和评估的过程进行具体说明。所有代码都附上了运行结果配图,方便对比。 《深度学习实战》第…...

nodejs:express + js-mdict 作为后端,vue 3 + vite 作为前端,在线查询英汉词典
向 doubao.com/chat/ 提问: node.js js-mdict 作为后端,vue 3 vite 作为前端,编写在线查询英汉词典 后端部分(express js-mdict ) 1. 项目结构 首先,创建一个项目目录,结构如下࿱…...

《深度剖析Linux 系统 Shell 核心用法与原理_666》
1. 管道符的用法 查找当前目录下所有txt文件并统计行数 # 使用管道符将ls命令的结果传递给wc命令进行行数统计 ls *.txt | wc -l 在/etc目录下查找包含"network"的文件并统计数量 # 使用find命令查找文件,并通过grep查找包含特定字符串的文件…...
:更精准的风险调整收益指标(中英双语))
索提诺比率(Sortino Ratio):更精准的风险调整收益指标(中英双语)
索提诺比率(Sortino Ratio):更精准的风险调整收益指标 📉📊 📌 什么是索提诺比率? 在投资分析中,我们通常使用 夏普比率(Sharpe Ratio) 来衡量风险调整后的…...

minio作为K8S后端存储
docker部署minio mkdir -p /minio/datadocker run -d \-p 9000:9000 \-p 9001:9001 \--name minio \-v /minio/data:/data \-e "MINIO_ROOT_USERjbk" \-e "MINIO_ROOT_PASSWORDjbjbjb123" \quay.io/minio/minio server /data --console-address ":90…...

一周学会Flask3 Python Web开发-Jinja2模板访问对象
锋哥原创的Flask3 Python Web开发 Flask3视频教程: 2025版 Flask3 Python web开发 视频教程(无废话版) 玩命更新中~_哔哩哔哩_bilibili 如果渲染模板传的是对象,如果如何来访问呢? 我们看下下面示例: 定义一个Student类 cla…...
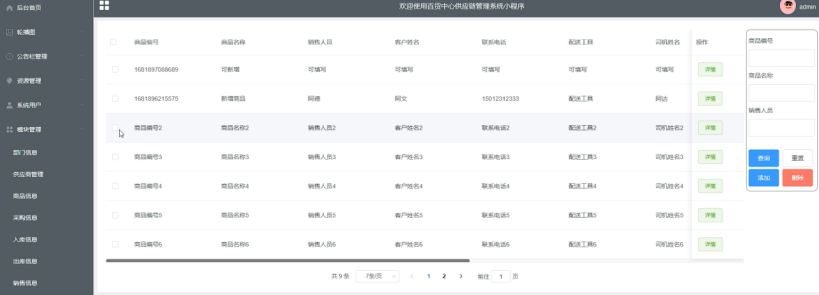
springboot 百货中心供应链管理系统小程序
一、前言 随着我国经济迅速发展,人们对手机的需求越来越大,各种手机软件也都在被广泛应用,但是对于手机进行数据信息管理,对于手机的各种软件也是备受用户的喜爱,百货中心供应链管理系统被用户普遍使用,为方…...
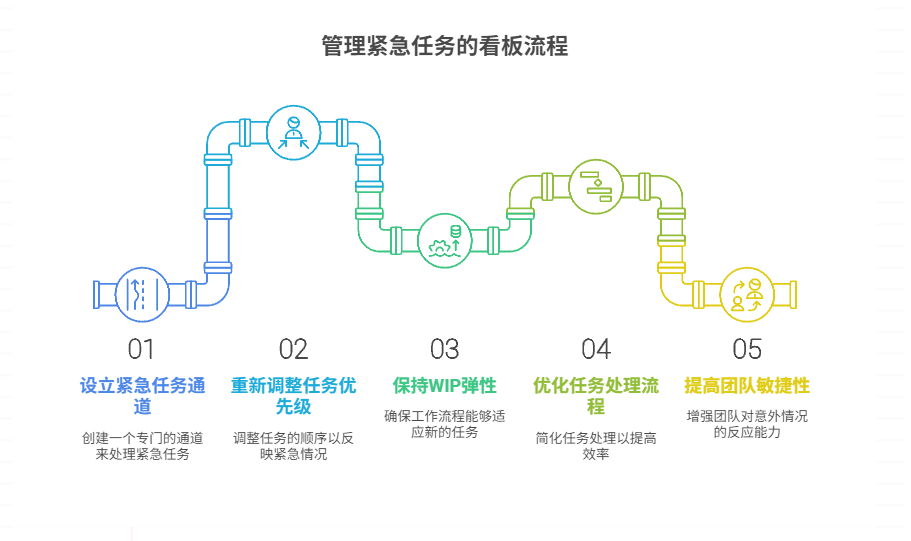
如何在看板中有效管理突发紧急任务
在看板中有效管理突发紧急任务需要:设立专门的紧急任务通道、重新调整任务优先级、保持适度的WIP(Work-in-Progress)弹性、优化任务处理流程、提高团队应对突发情况的敏捷性。其中,设立专门的紧急任务通道尤为重要,这能…...
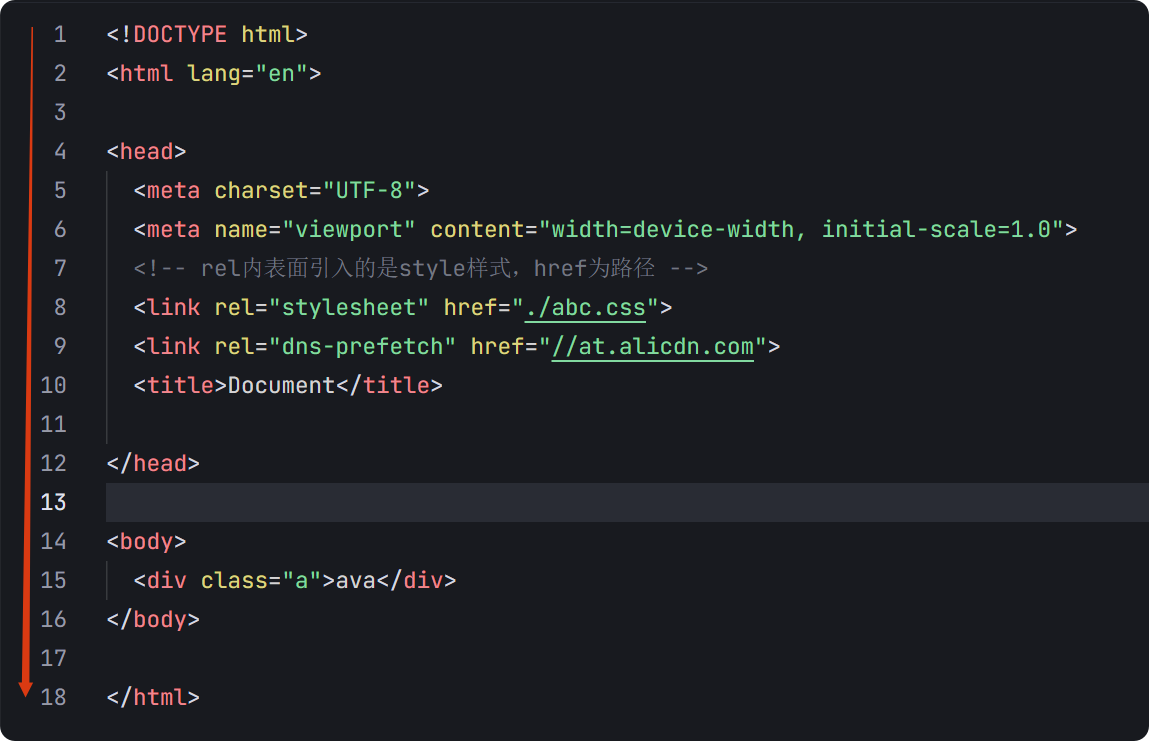
04-初识css
一、css样式引入 1.1.内部样式 <div style"width: 100px;"></div>1.2.外部样式 1.2.1.外部样式1 <style>.aa {width: 100px;} </style> <div class"aa"></div>1.2.2.外部样式2 <!-- rel内表面引入的是style样…...
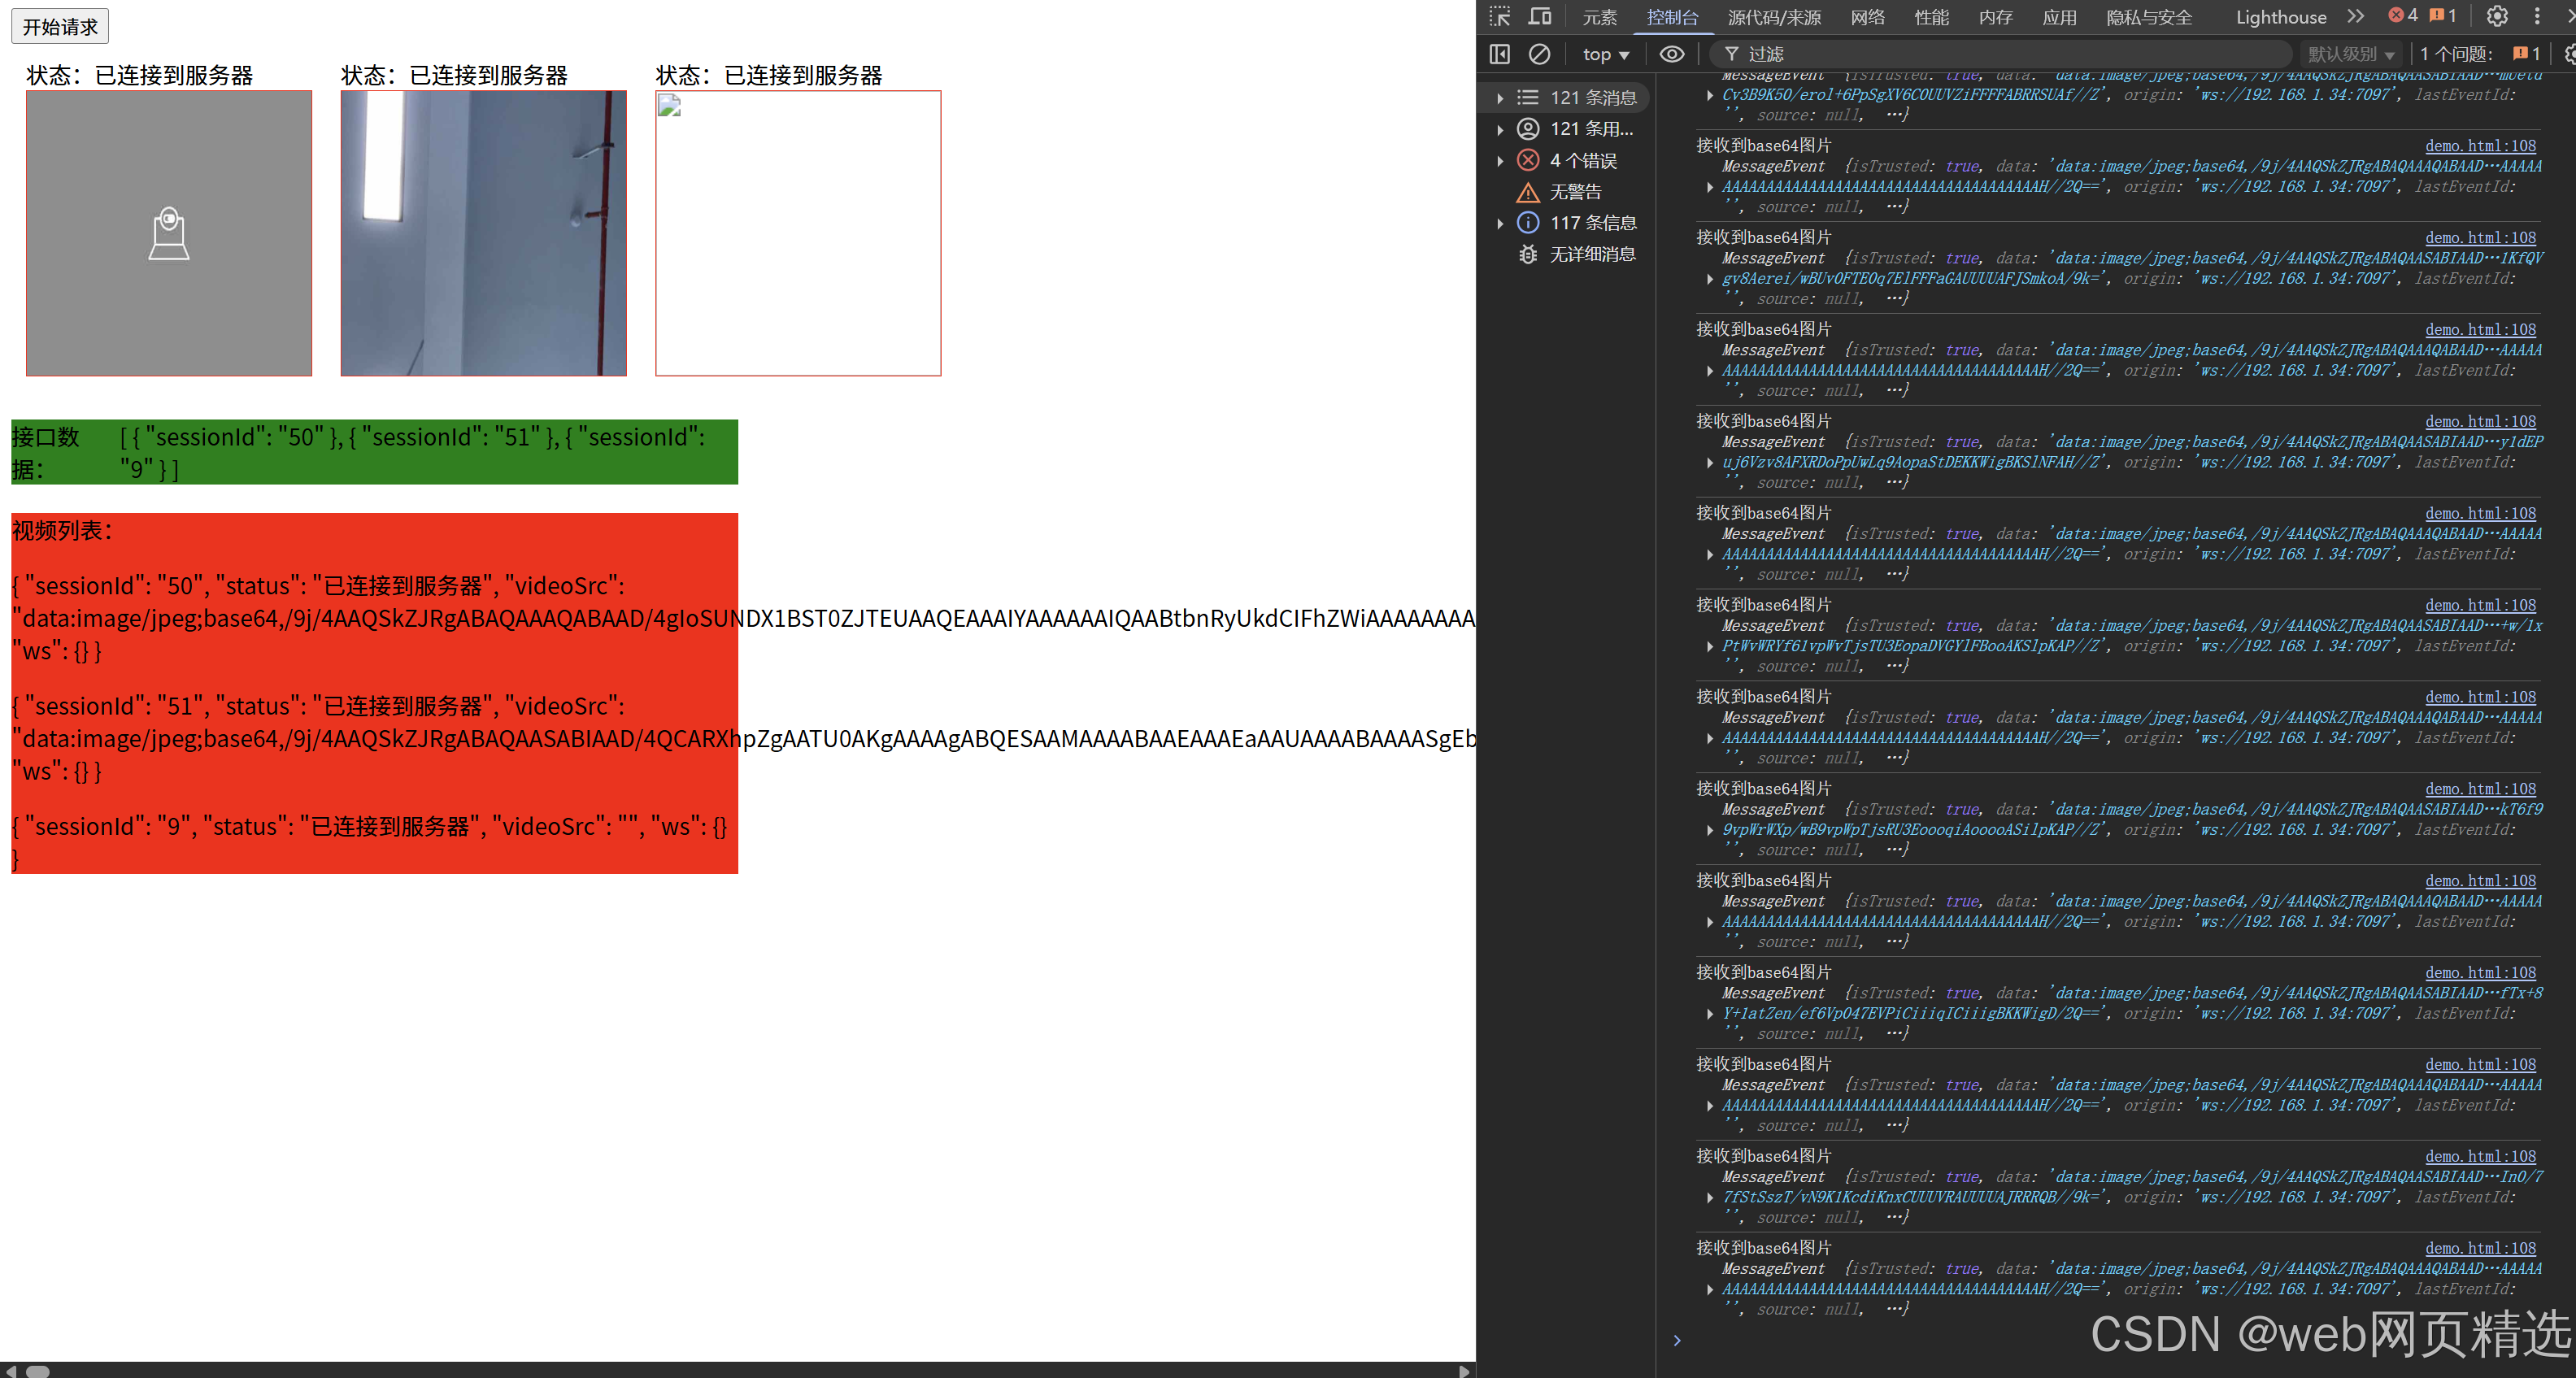
uniapp微信小程序视频实时流+pc端预览方案
方案类型技术实现是否免费优点缺点适用场景延迟范围开发复杂度WebSocket图片帧定时拍照Base64传输✅ 完全免费无需服务器 纯前端实现高延迟高流量 帧率极低个人demo测试 超低频监控500ms-2s⭐⭐RTMP推流TRTC/即构SDK推流❌ 付费方案 (部分有免费额度&#x…...

IP如何挑?2025年海外专线IP如何购买?
你花了时间和预算买了IP,结果IP质量不佳,项目效率低下不说,还可能带来莫名的网络问题,是不是太闹心了?尤其是在面对海外专线IP时,到底怎么才能买到适合自己的呢?所以,挑IP绝对是个技…...

JavaScript 数据类型详解
JavaScript 数据类型详解 JavaScript 数据类型分为 原始类型(Primitive) 和 对象类型(Object) 两大类,共 8 种(ES11): 一、原始类型(7种) 1. undefined 定…...

人工智能--安全大模型训练计划:基于Fine-tuning + LLM Agent
安全大模型训练计划:基于Fine-tuning LLM Agent 1. 构建高质量安全数据集 目标:为安全大模型创建高质量、去偏、符合伦理的训练数据集,涵盖安全相关任务(如有害内容检测、隐私保护、道德推理等)。 1.1 数据收集 描…...

什么是VR全景技术
VR全景技术,全称为虚拟现实全景技术,是通过计算机图像模拟生成三维空间中的虚拟世界,使用户能够在该虚拟世界中进行全方位、无死角的观察和交互的技术。VR全景技术模拟人在真实空间中的视觉体验,结合图文、3D、音视频等多媒体元素…...
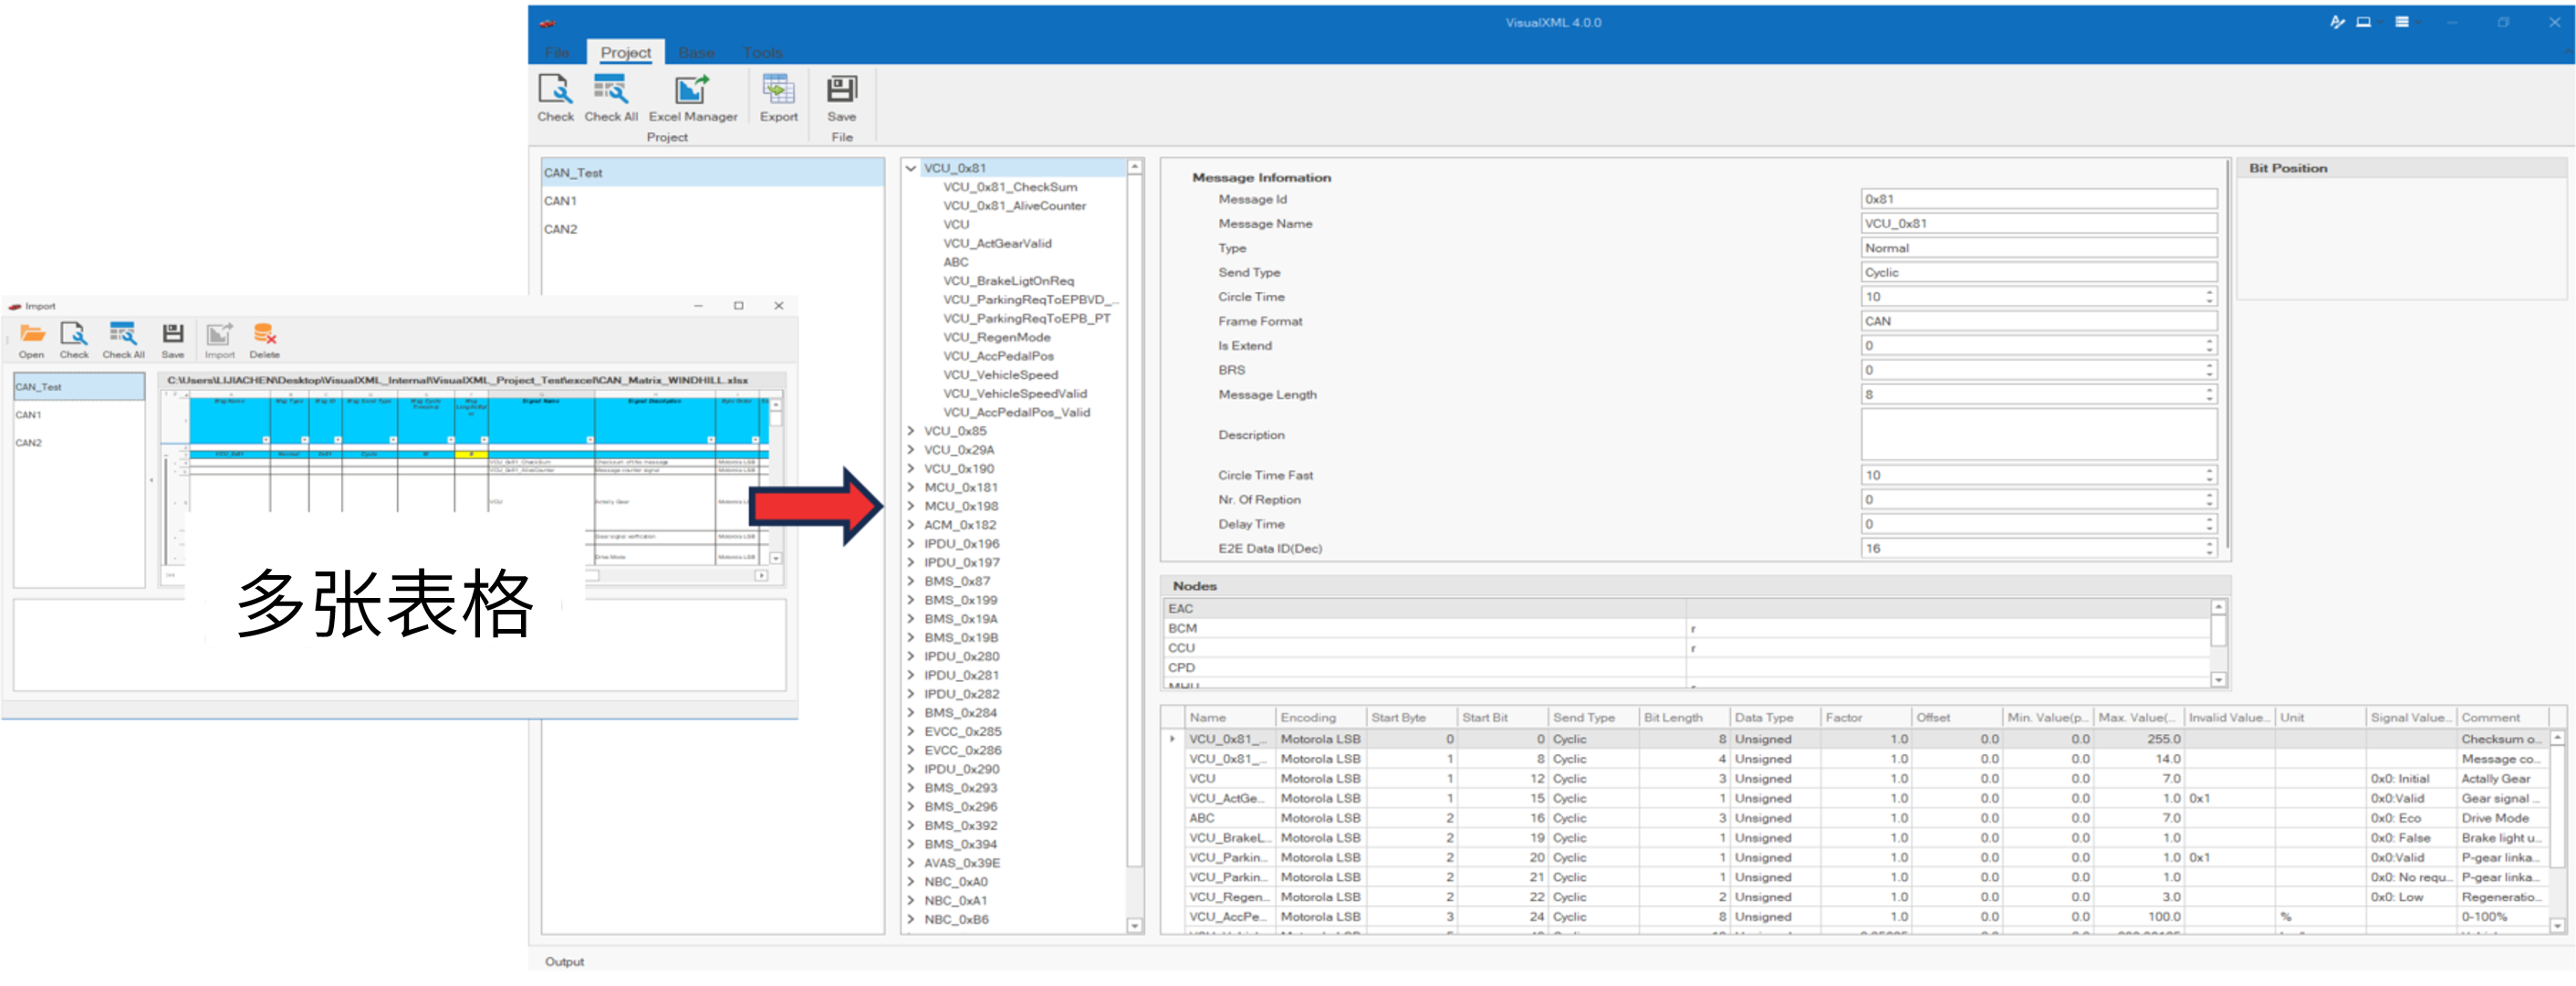
VisualXML全新升级 | 新增数据库编辑功能
VisualXML是一个功能强大的网络总线设计工具,专注于简化汽车电子系统中复杂的网络数据设计操作。它支持多种主流总线网络格式的数据编辑(如DBC、LDF、ARXML、HEX等),并能够基于Excel表格的方式生成和转换多种数据库文件。由此&…...

Java中HashMap底层原理深度解析:从数据结构到红黑树优化
一、HashMap概述与核心特性 HashMap作为Java集合框架中最常用的数据结构之一,是基于哈希表的Map接口非同步实现。它允许使用null键和null值(但只能有一个null键),并且不保证映射顺序的恒久不变。与Hashtable相比,Hash…...
