《Terraform 101 从入门到实践》 Terraform在公有云Azure上的应用
《Terraform 101 从入门到实践》这本小册在南瓜慢说官方网站和GitHub两个地方同步更新,书中的示例代码也是放在GitHub上,方便大家参考查看。
简介
Azure是微软的公有云,它提供了一些免费的资源,具体可以查看: https://azure.microsoft.com/en-us/free/
本章将介绍如何通过Terraform来使用Azure的云资源。
注册Azure账号
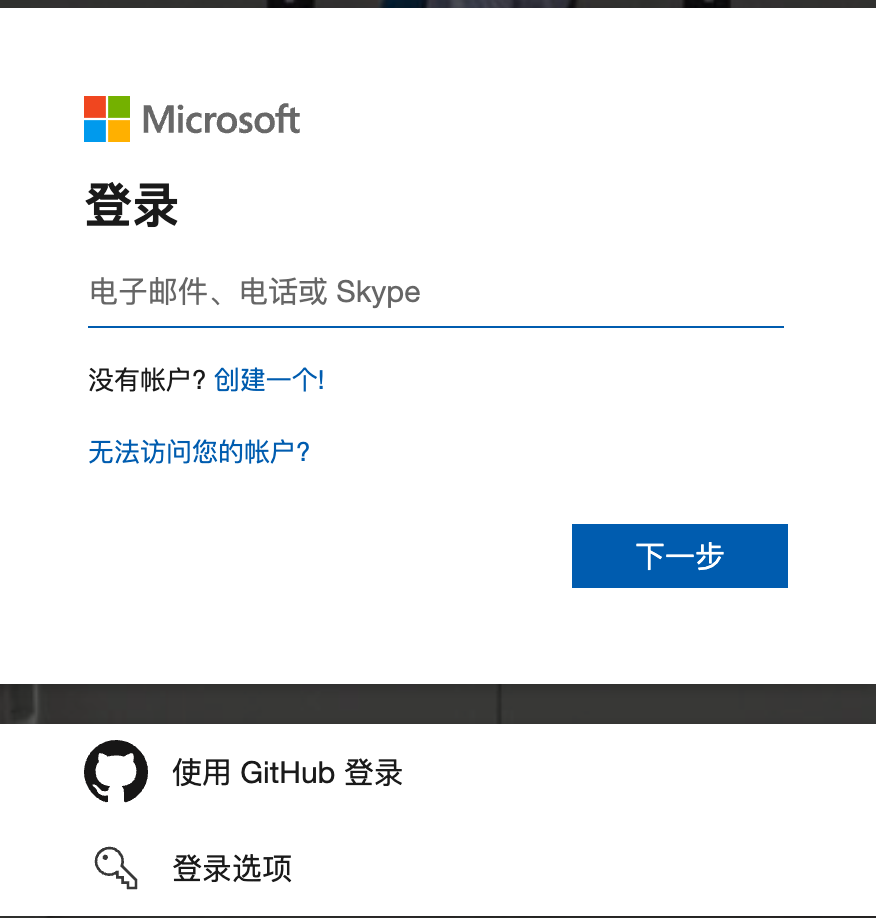
首先要注册一个Azure账号,我选择用GitHub账号登陆,免得又记多一个密码。
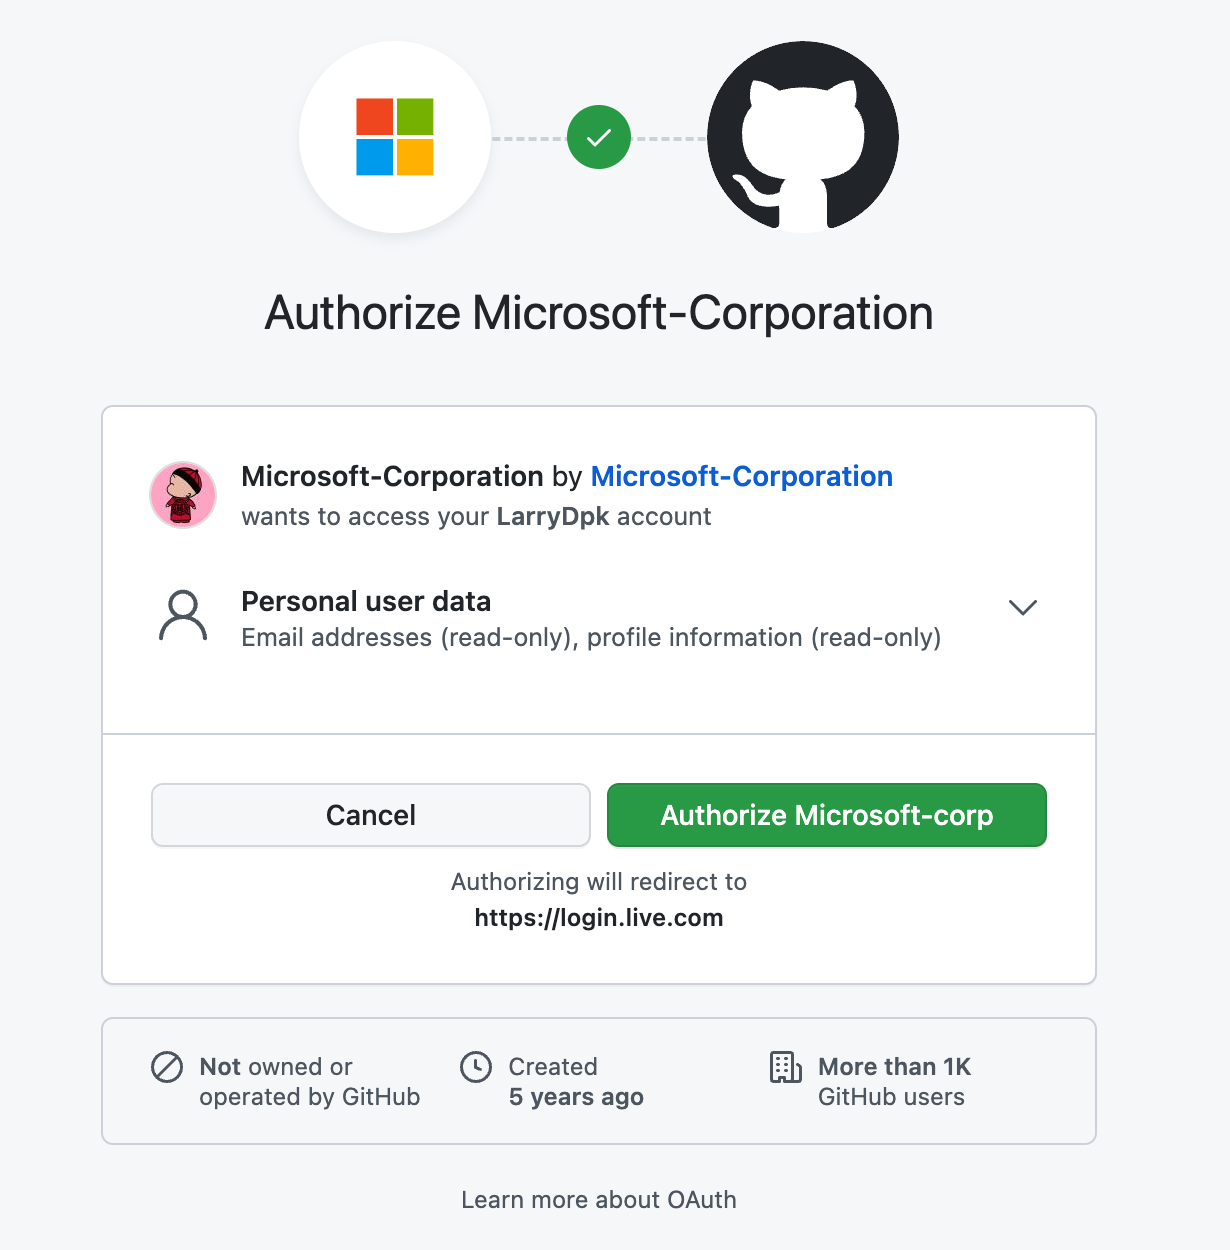
跳到GitHub,同意即可:
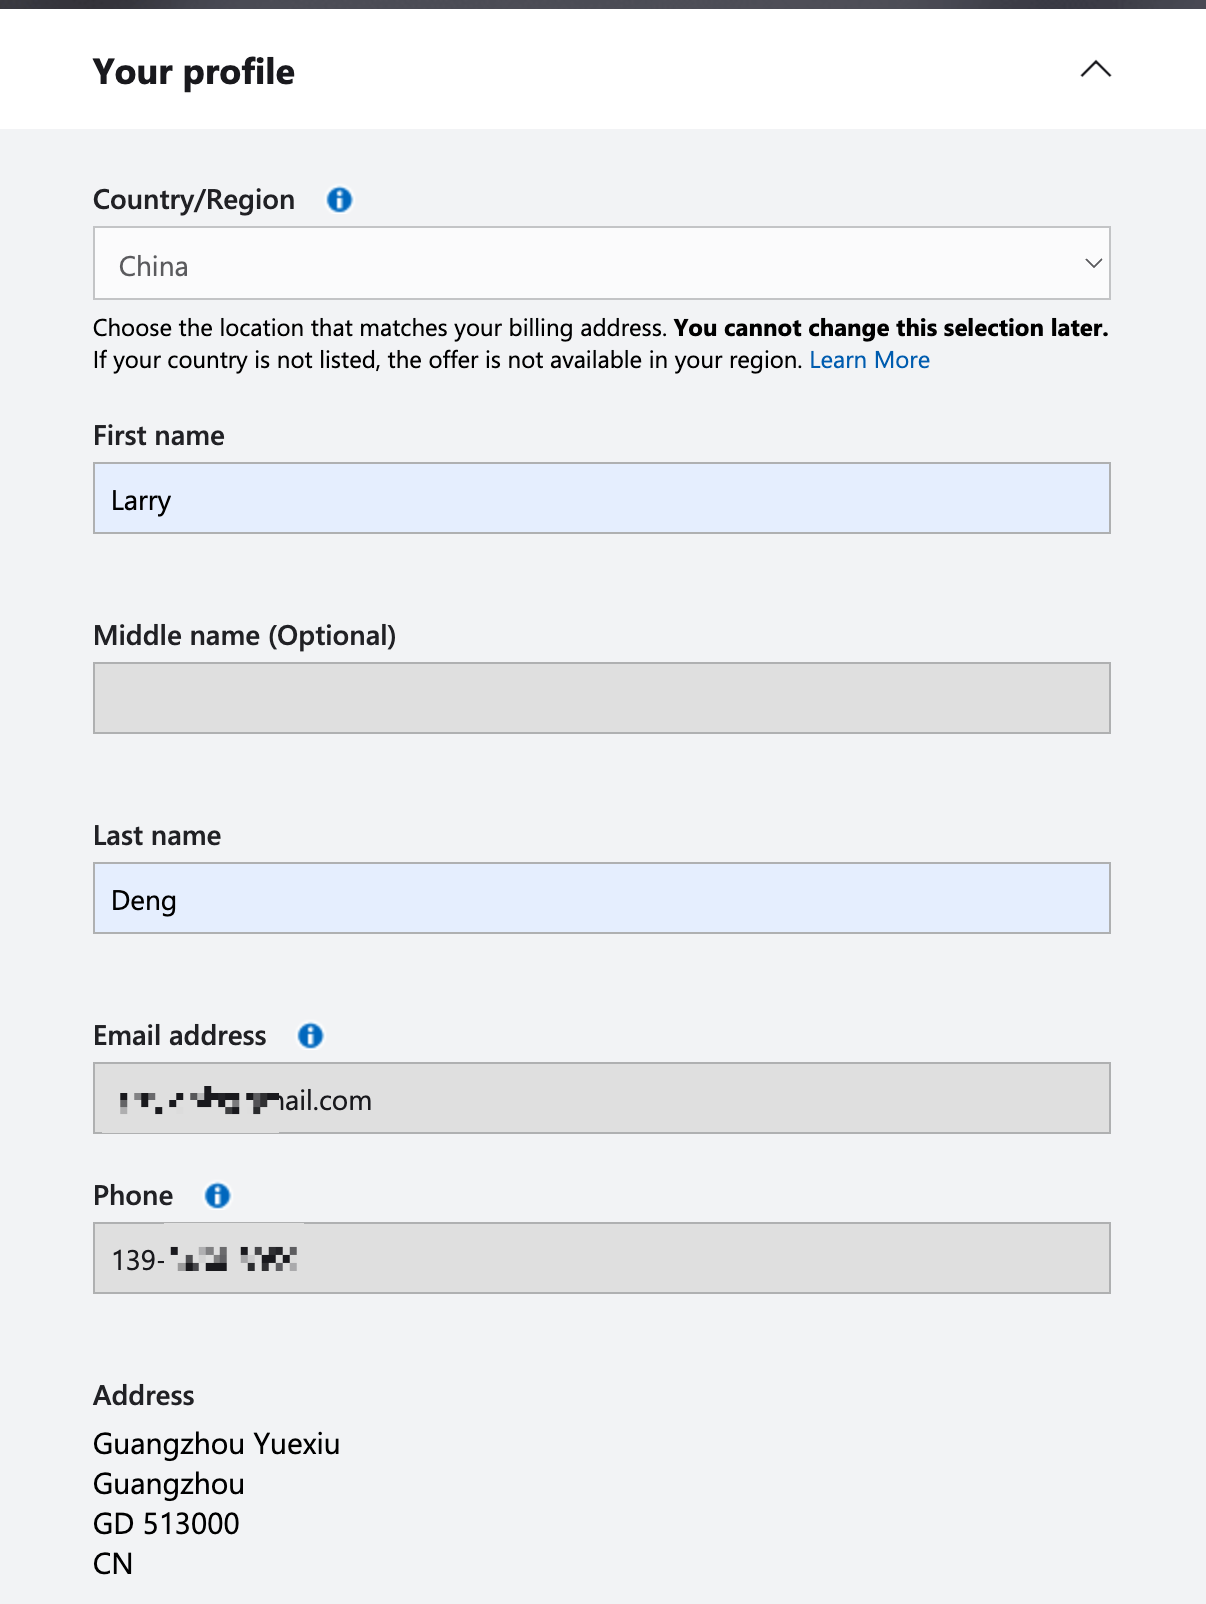
创建账号时,有一些信息要填,特别是邮箱和手机号比较关键:
同时还需要一张Visa或Master卡,我是有一张Visa的卡,填好后会有一个0元的扣费,不要担心。下面Cardholder Name我填的中文名字,注册成功了。

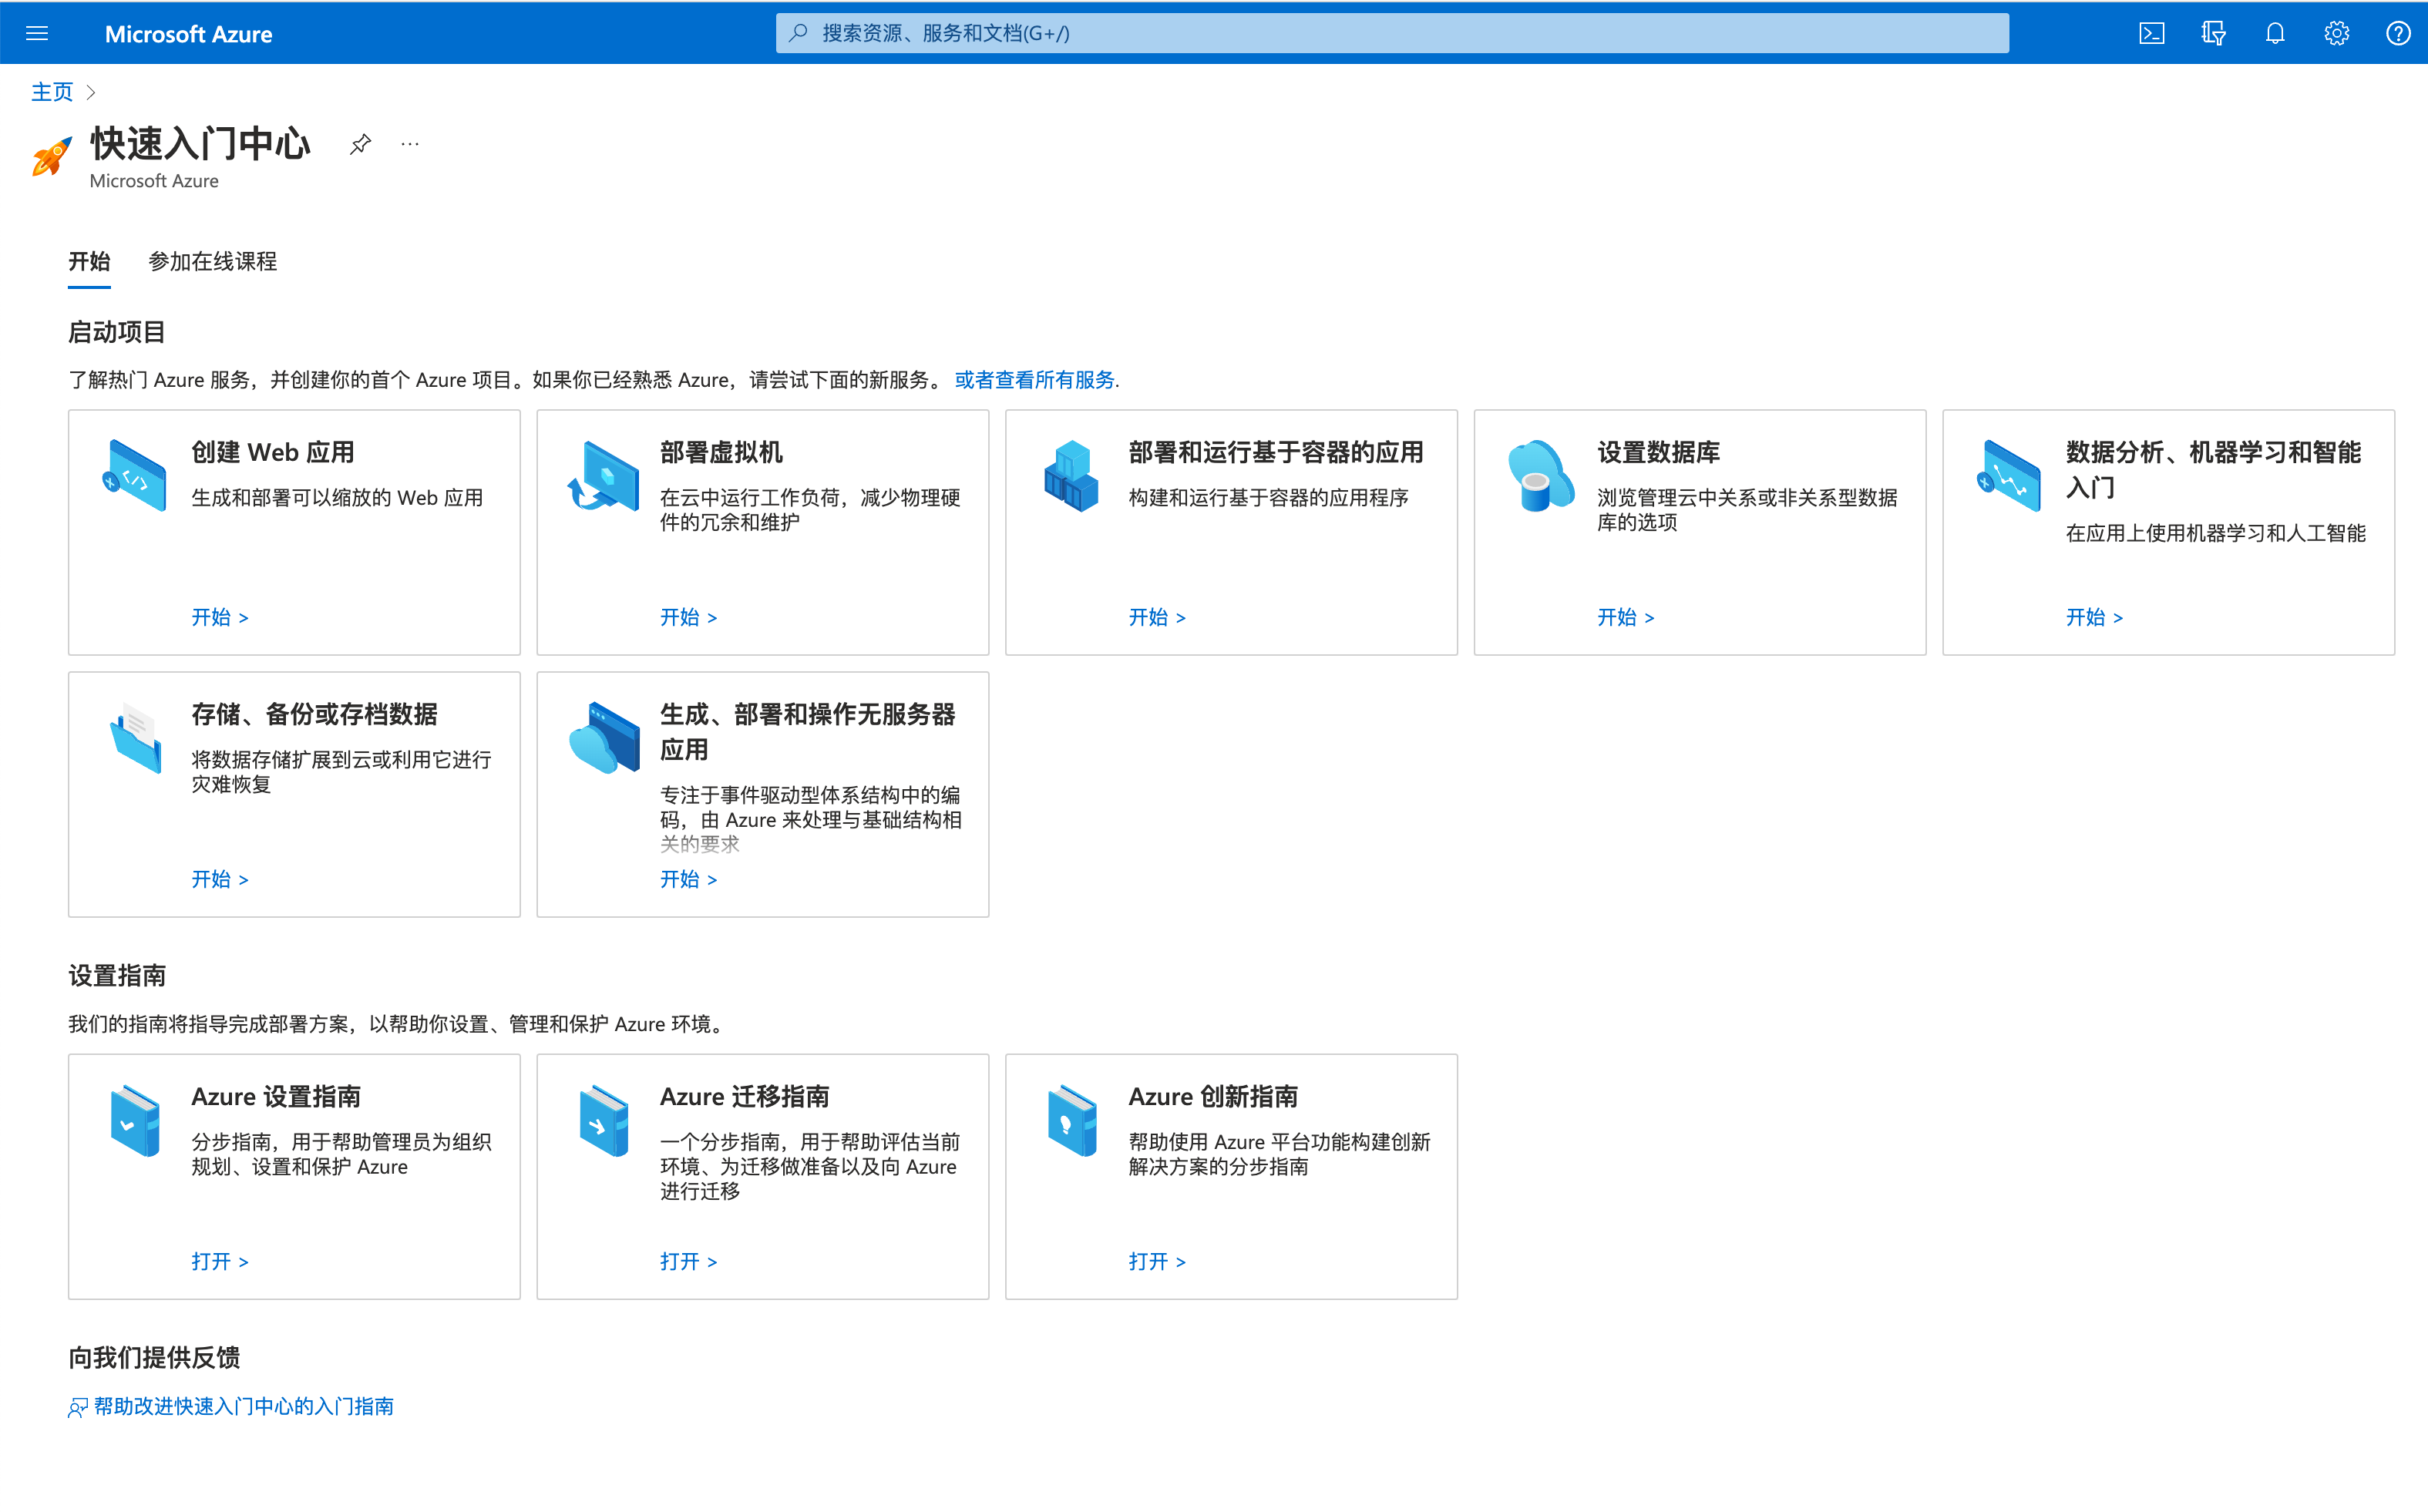
0元扣费成功后,表示卡是正常的,就可以成功注册了,注册后就可以到Portal查看了。
手动部署虚拟机
为了体验一下Azure,我们先手动创建一个虚拟机,操作入口如下:

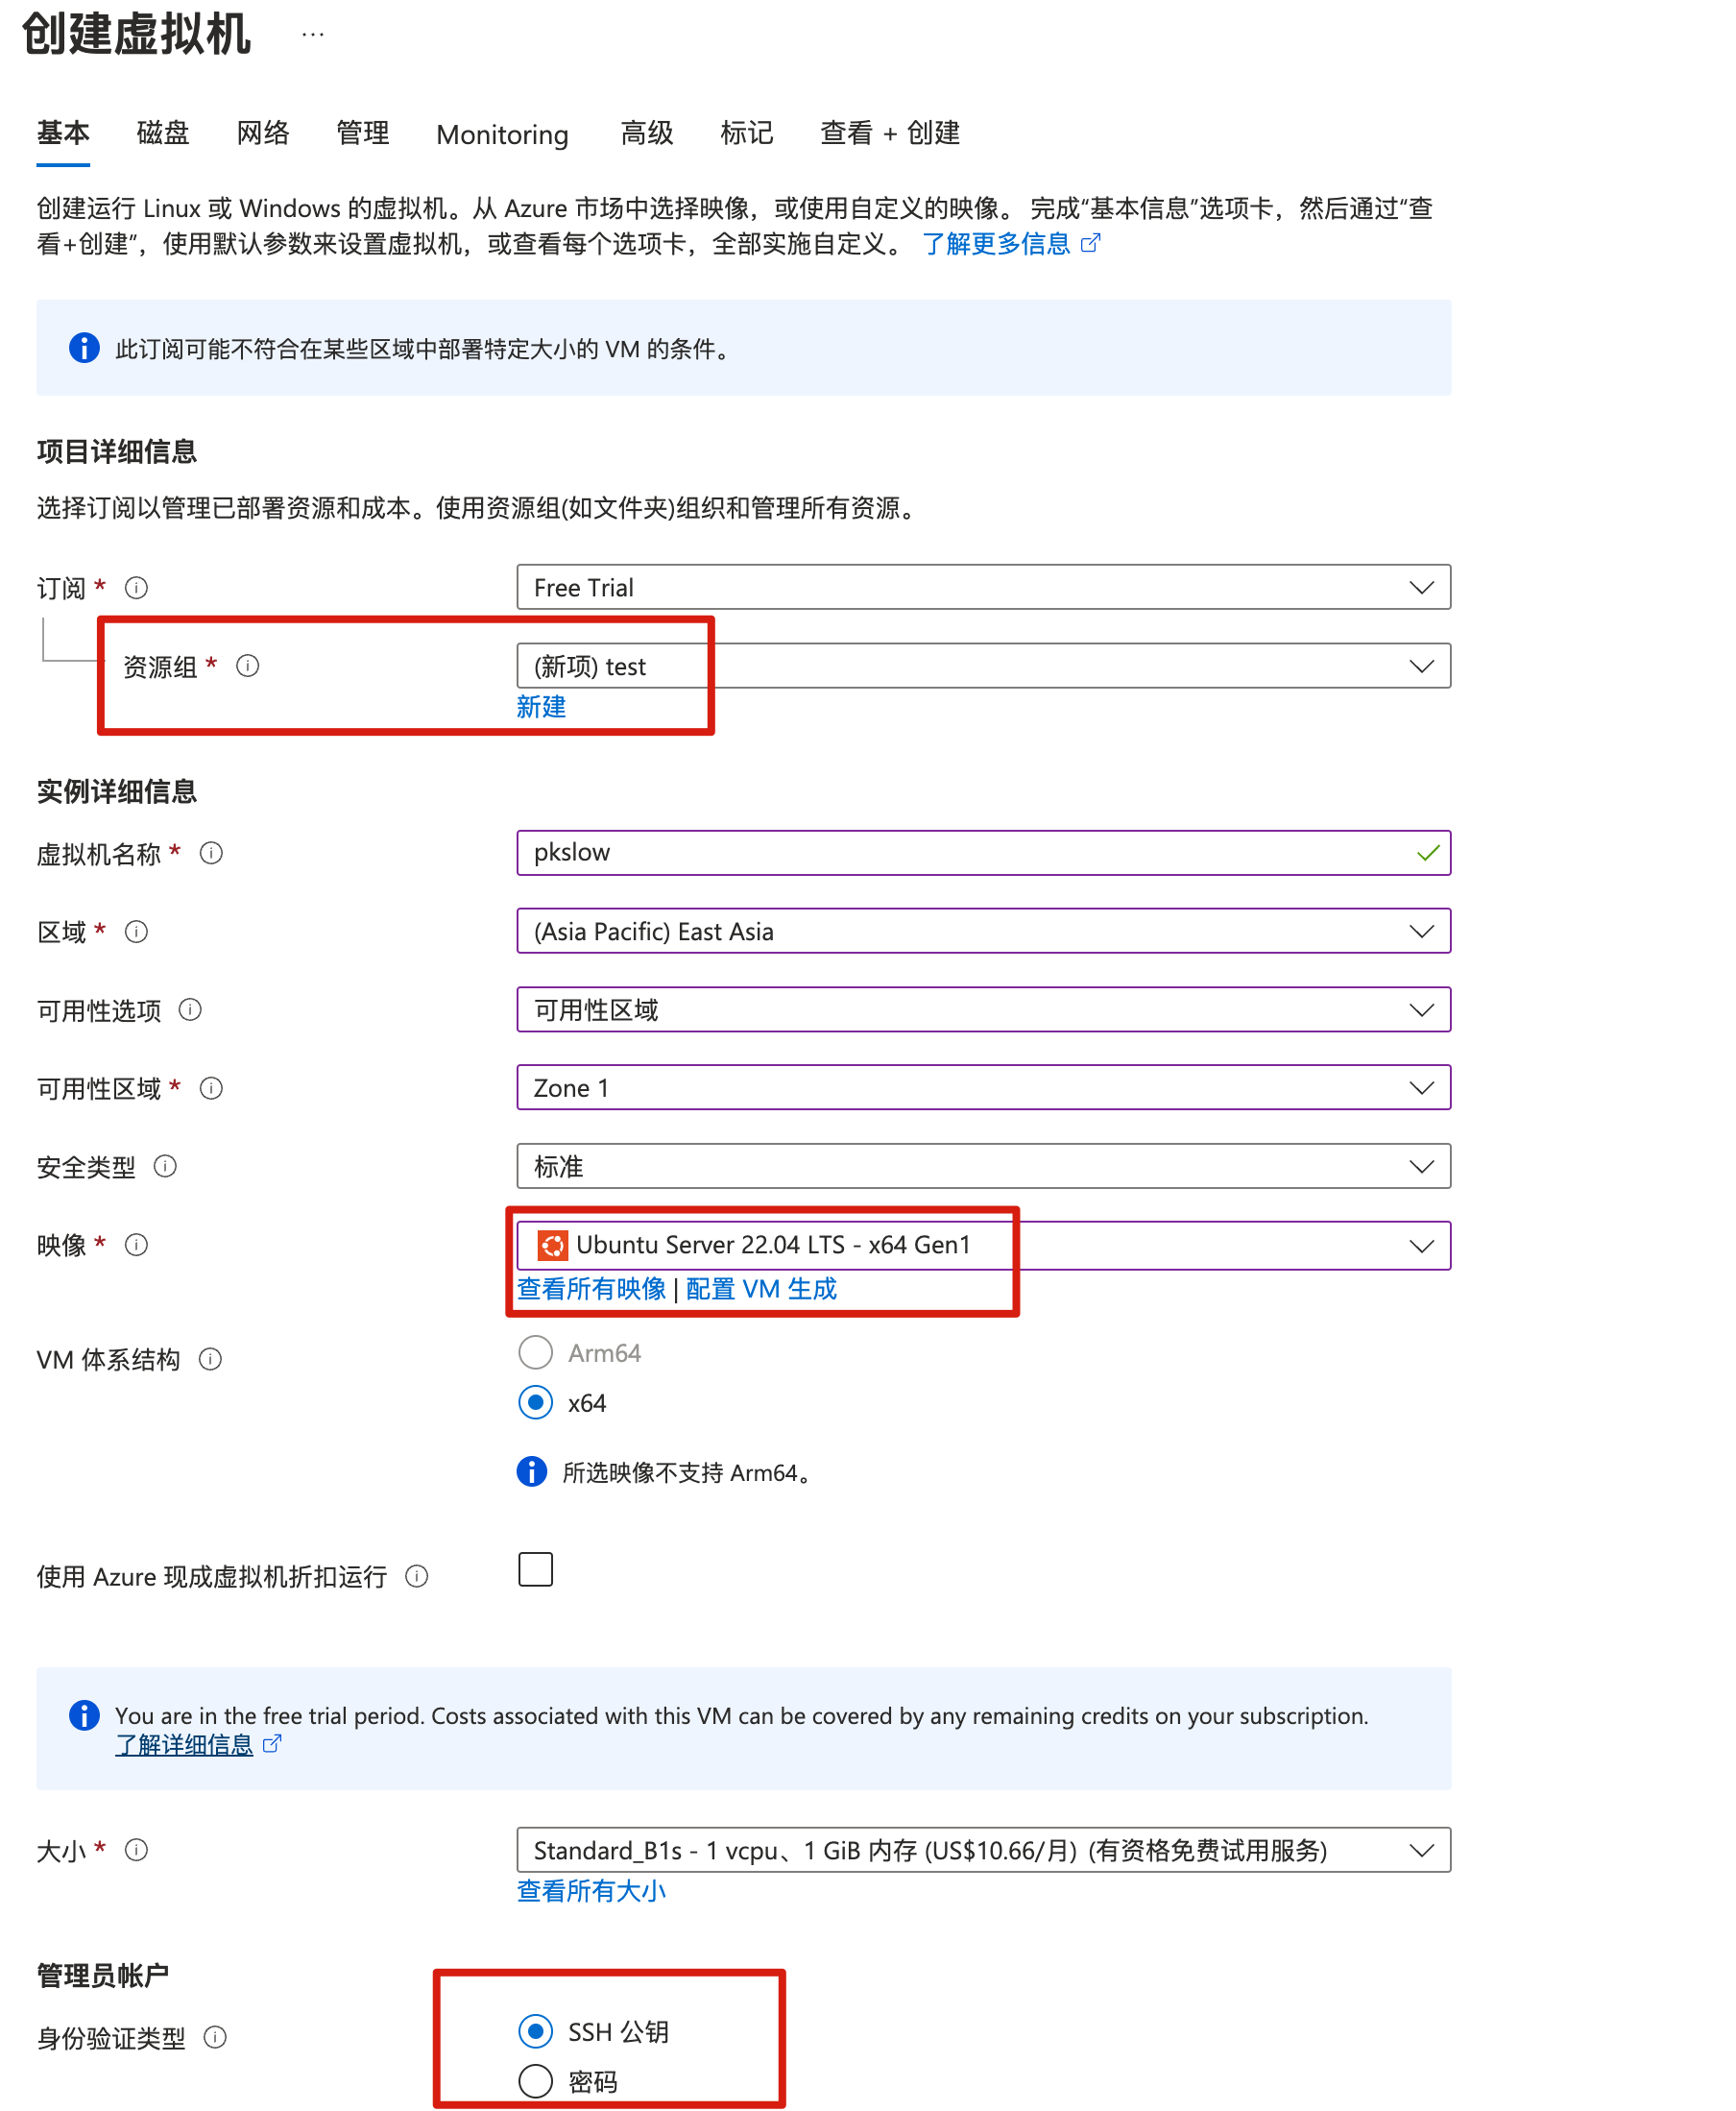
需要填写一些配置信息,如主机名、区域、镜像、网络端口等,按需要我打开了22/80/443端口。
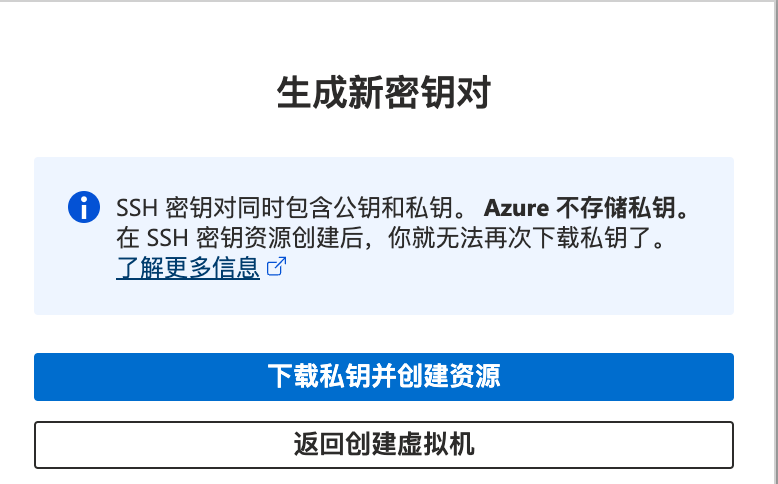
完成配置后,点击创建,提示要下载密钥对,必须要在创建的时候下载:
创建完资源后,可以在虚拟机列表查看:

根据用户名和公网IP,我们可以ssh连接到服务器。需要给密钥文件修改权限,太大是不行的,会报错。
$ chmod 400 ~/Downloads/pksow-azure.pem然后通过下面命令连接:
$ ssh azureuser@20.2.85.137 -i ~/Downloads/pksow-azure.pem
Welcome to Ubuntu 22.04.1 LTS (GNU/Linux 5.15.0-1030-azure x86_64)* Documentation:  https://help.ubuntu.com* Management:     https://landscape.canonical.com* Support:        https://ubuntu.com/advantageSystem load:  0.01513671875     Processes:             109Usage of /:   4.9% of 28.89GB   Users logged in:       0Memory usage: 31%               IPv4 address for eth0: 10.0.0.4Swap usage:   0%0 updates can be applied immediately.The programs included with the Ubuntu system are free software;
the exact distribution terms for each program are described in the
individual files in /usr/share/doc/*/copyright.Ubuntu comes with ABSOLUTELY NO WARRANTY, to the extent permitted by
applicable law.To run a command as administrator (user "root"), use "sudo <command>".
See "man sudo_root" for details.azureuser@pkslow:~$ freetotal        used        free      shared  buff/cache   available
Mem:          928460      261816      288932        4140      377712      533872
Swap:              0           0           0
azureuser@pkslow:~$ df -h
Filesystem      Size  Used Avail Use% Mounted on
/dev/root        29G  1.5G   28G   5% /
tmpfs           454M     0  454M   0% /dev/shm
tmpfs           182M  1.1M  181M   1% /run
tmpfs           5.0M     0  5.0M   0% /run/lock
/dev/sda15      105M  5.3M  100M   5% /boot/efi
/dev/sdb1       3.9G   28K  3.7G   1% /mnt
tmpfs            91M  4.0K   91M   1% /run/user/1000
通过azure-cli创建虚拟机
安装azure-cli
我的电脑是MacOS,安装如下:
$ brew update-reset$ brew install azure-cli$ which az
/usr/local/bin/az$ az version
{"azure-cli": "2.44.1","azure-cli-core": "2.44.1","azure-cli-telemetry": "1.0.8","extensions": {}
}
其它系统请参考: https://learn.microsoft.com/en-us/cli/azure/install-azure-cli
权限
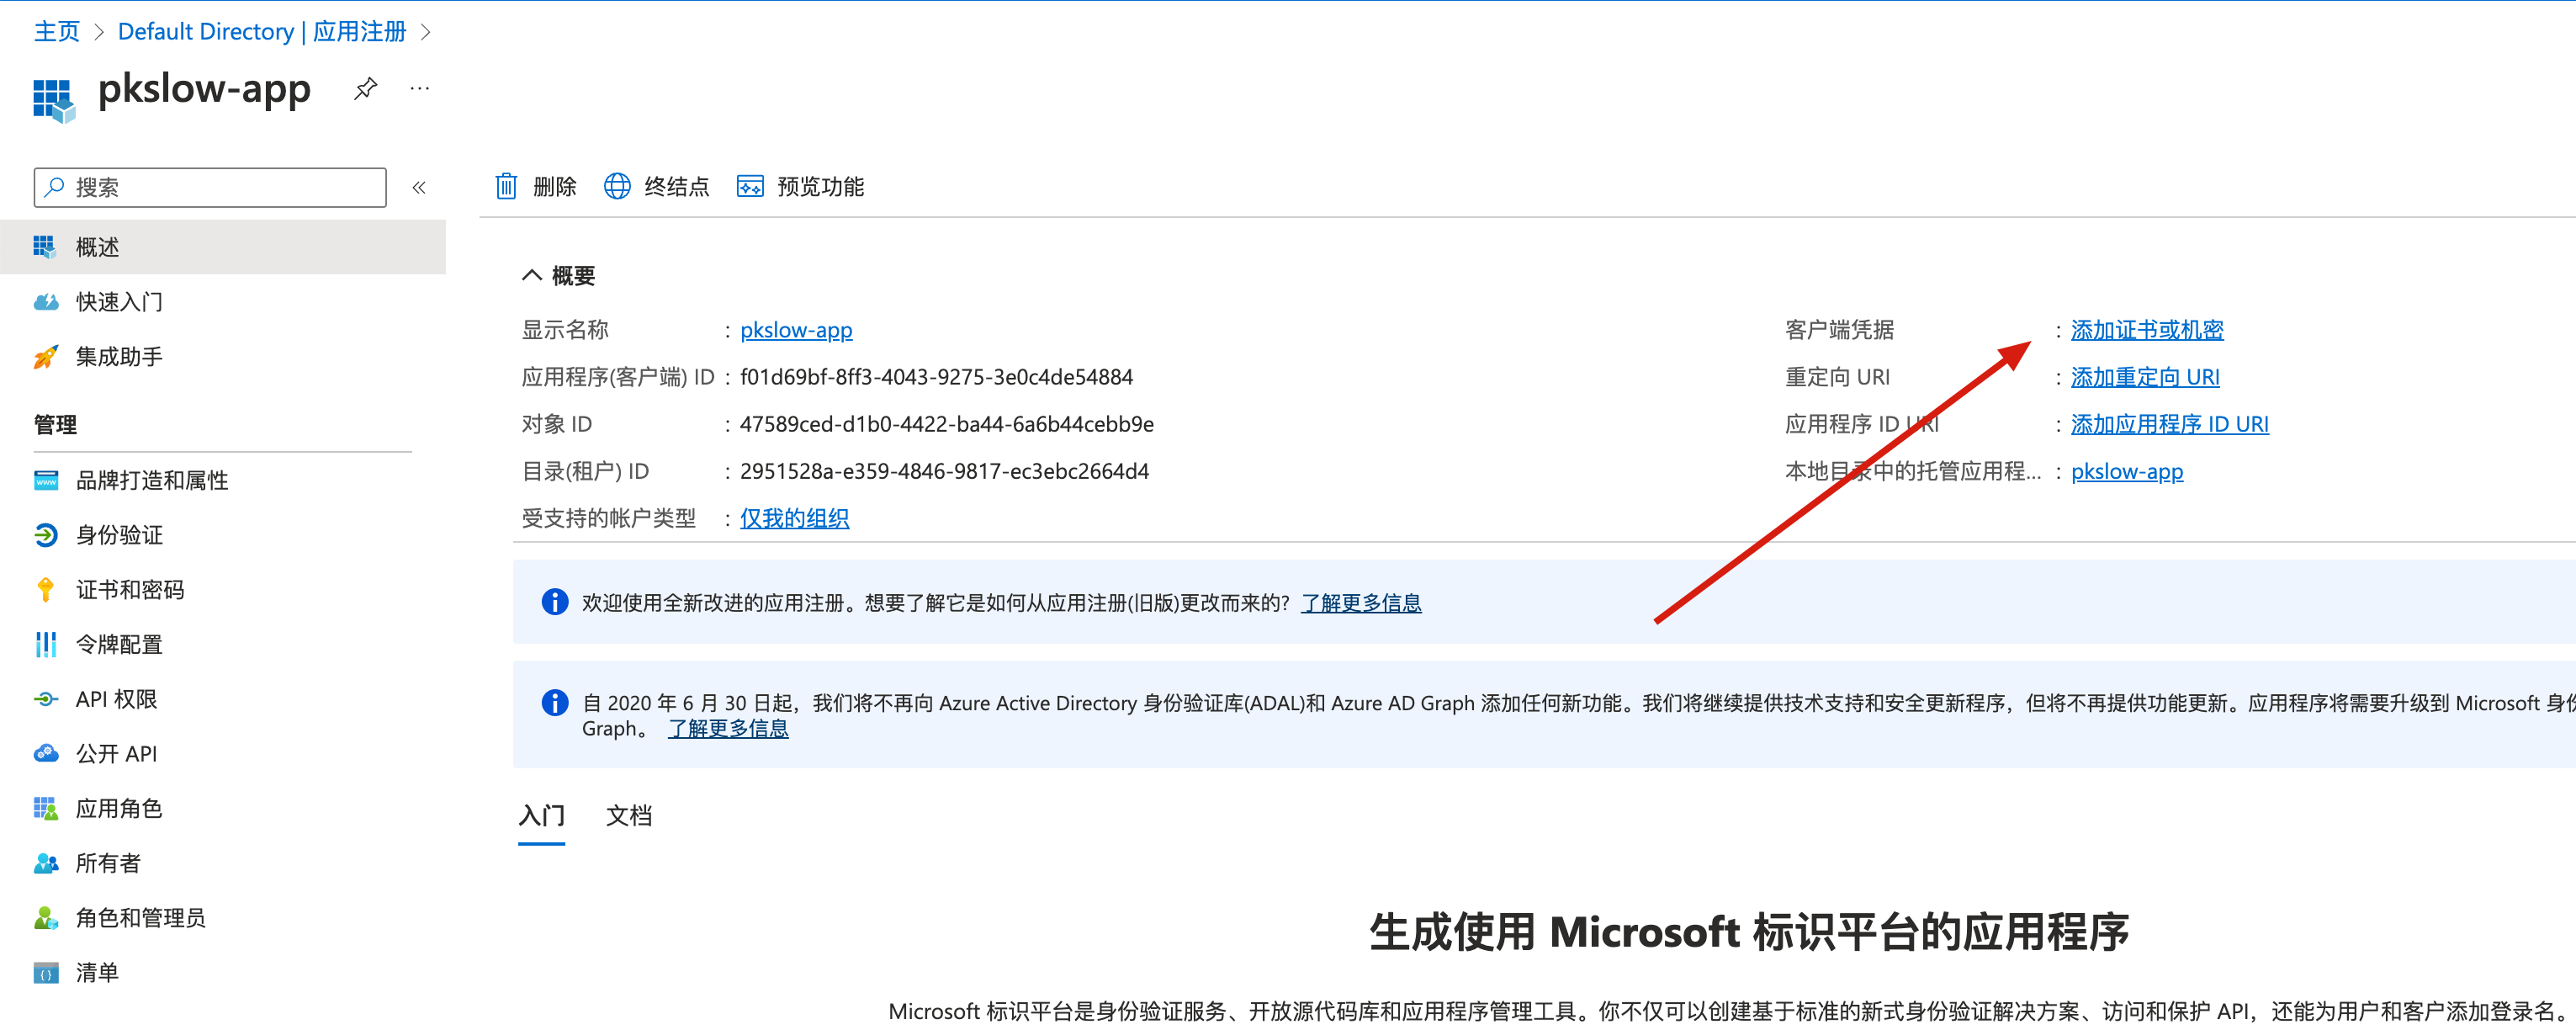
通过命令行操作Azure的资源,必然是需要权限的,我们可以通过密码,还可以通过Service Principal等方式来登陆。我们主要使用Service Principal的方式来授权。因此我们先在Portal上创建。
在左侧菜单选择Azure Active Directory,选择应用注册,点击新注册:

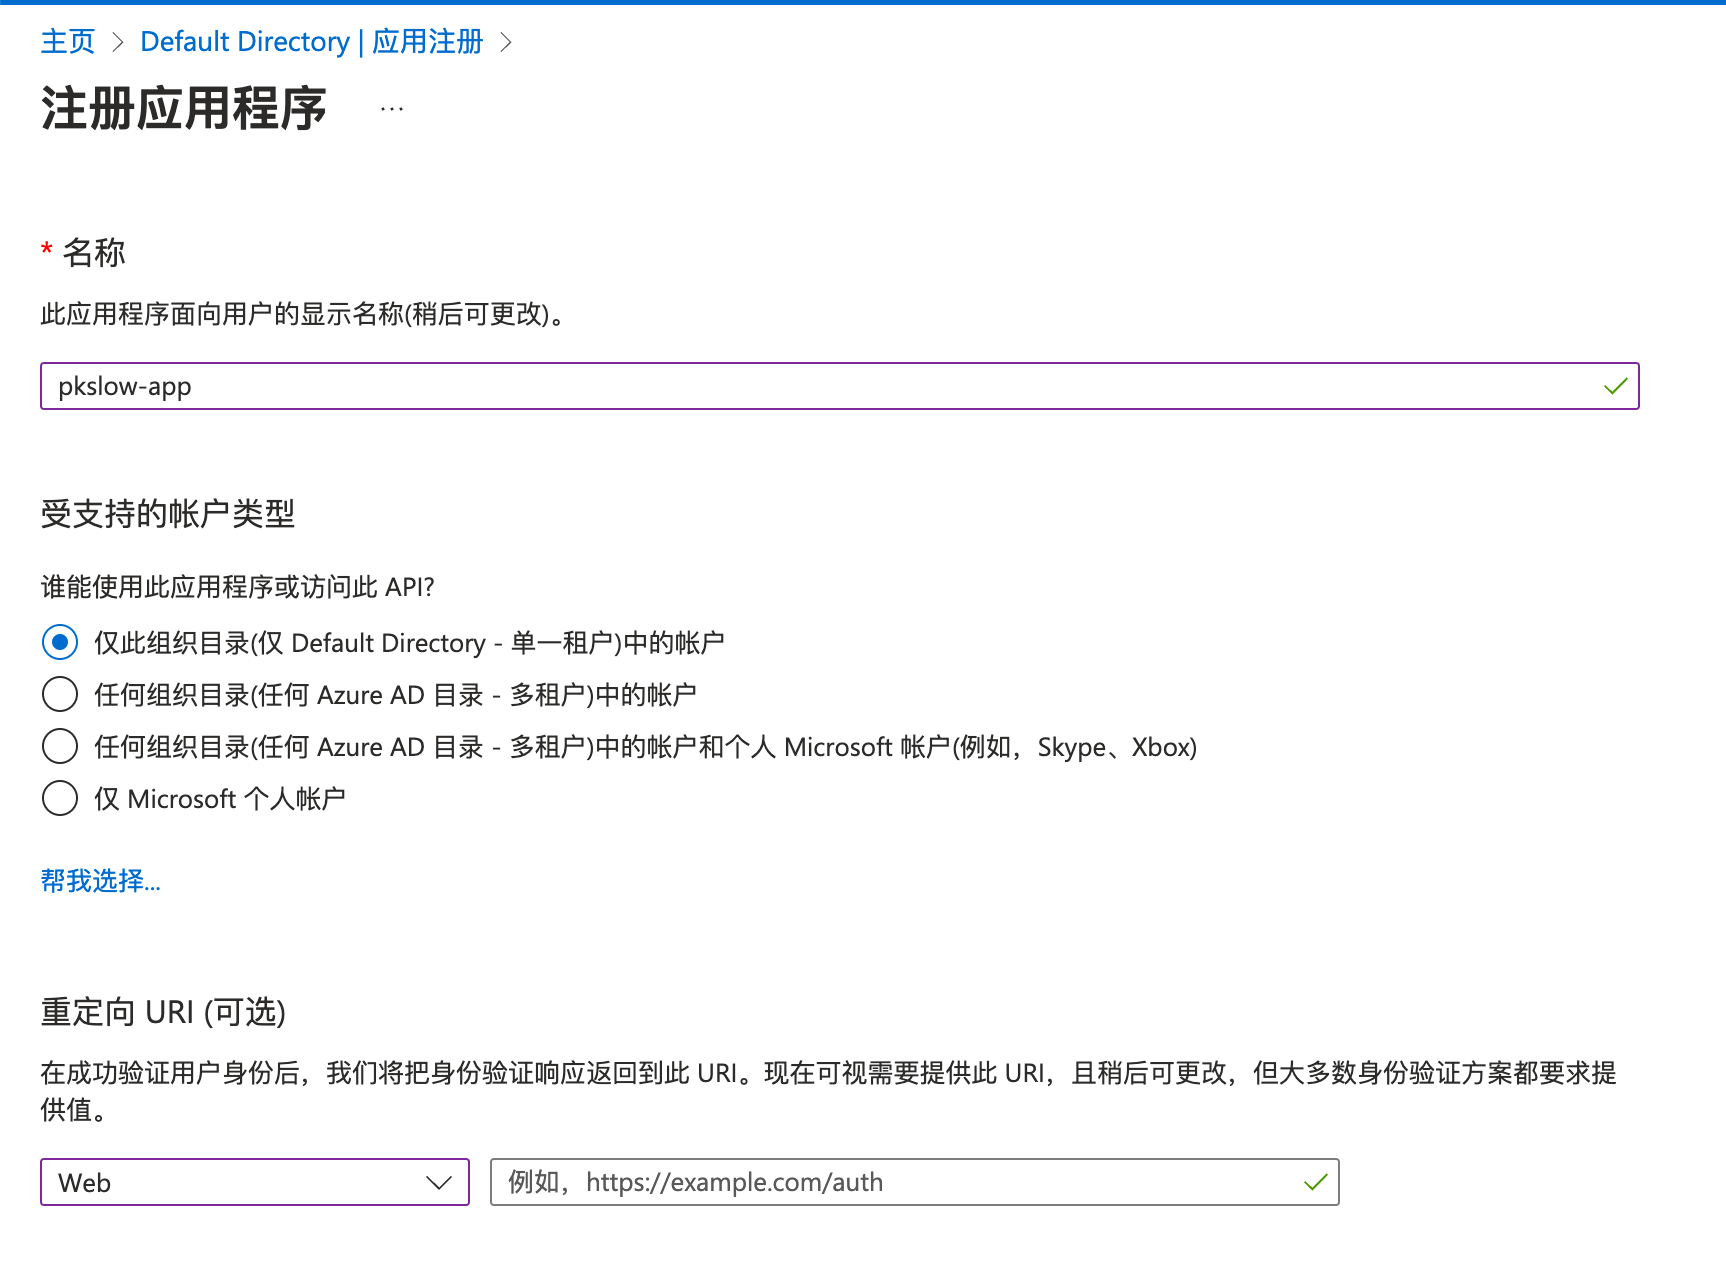
注册应用程序:
添加密码:
设置说明和时长:

创建完后要马上记下密码,后面无法再获取密码值:

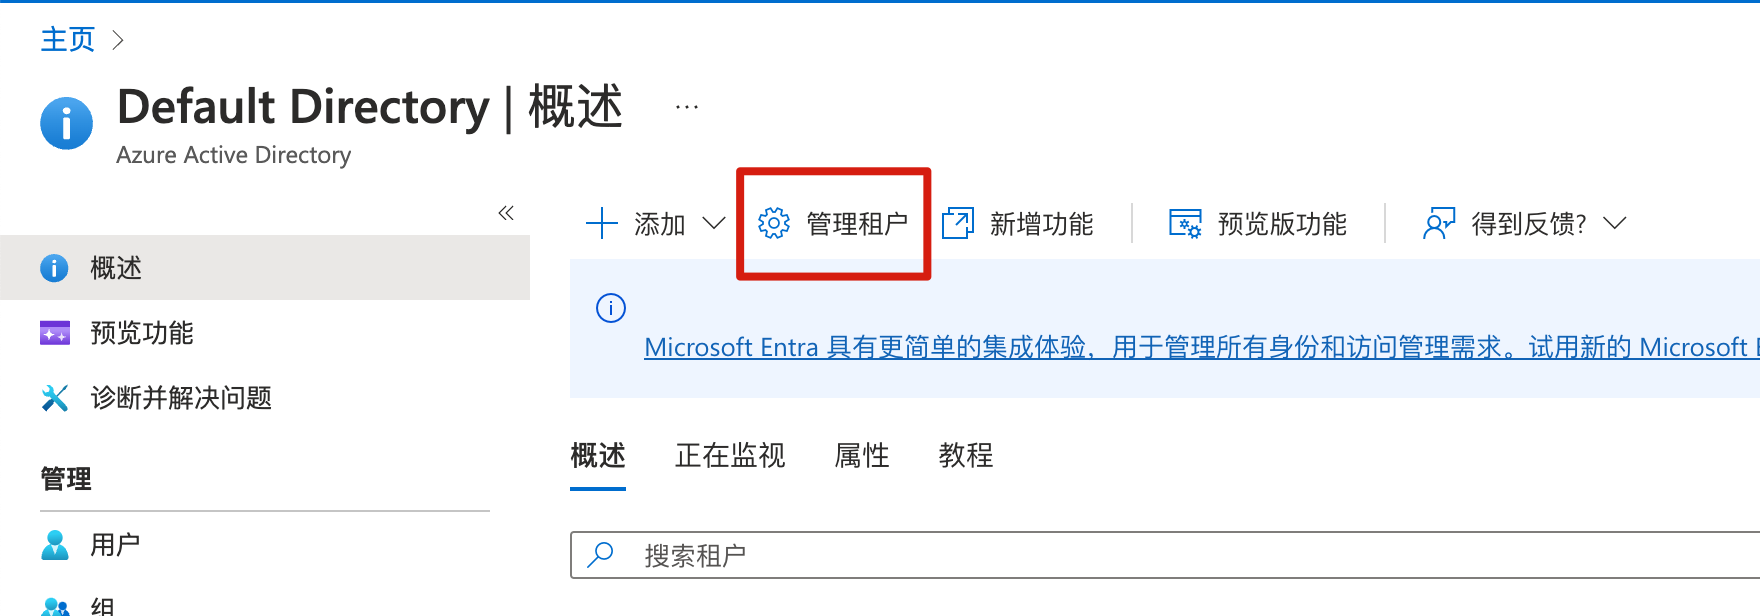
查看租户
需要查看租户ID,或创建租户:
分配角色
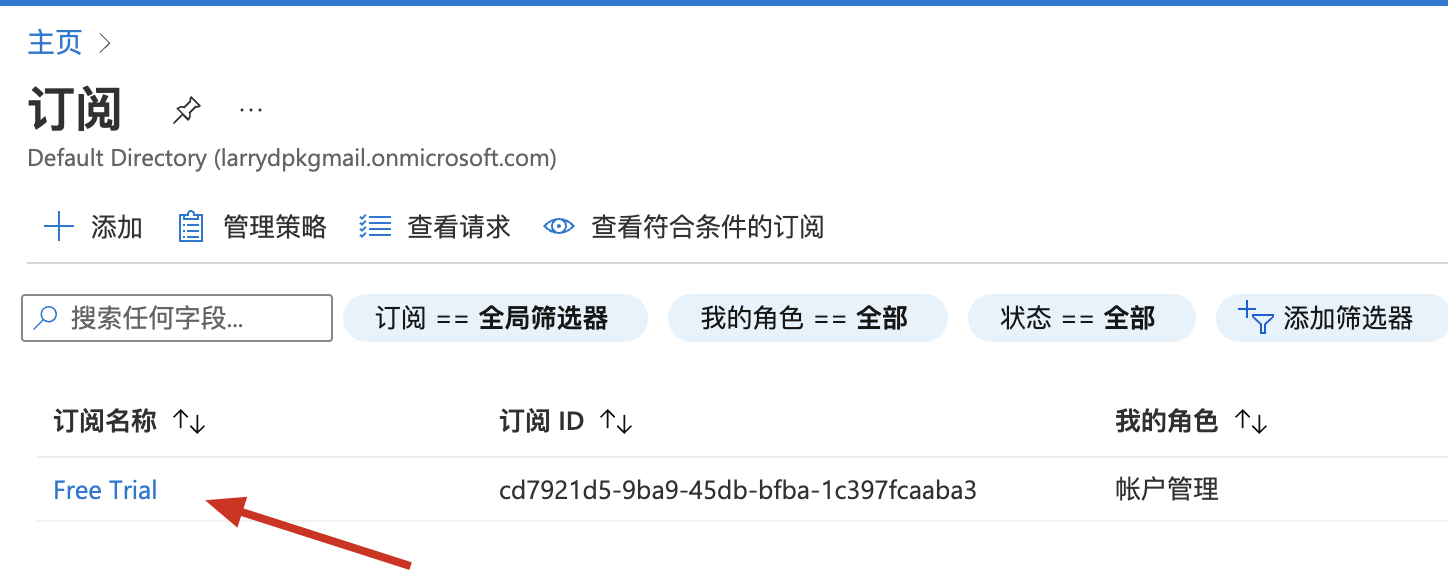
到订阅管理界面: Subscriptions page in Azure portal,查看订阅列表:
点进去后,可以管理访问控制:
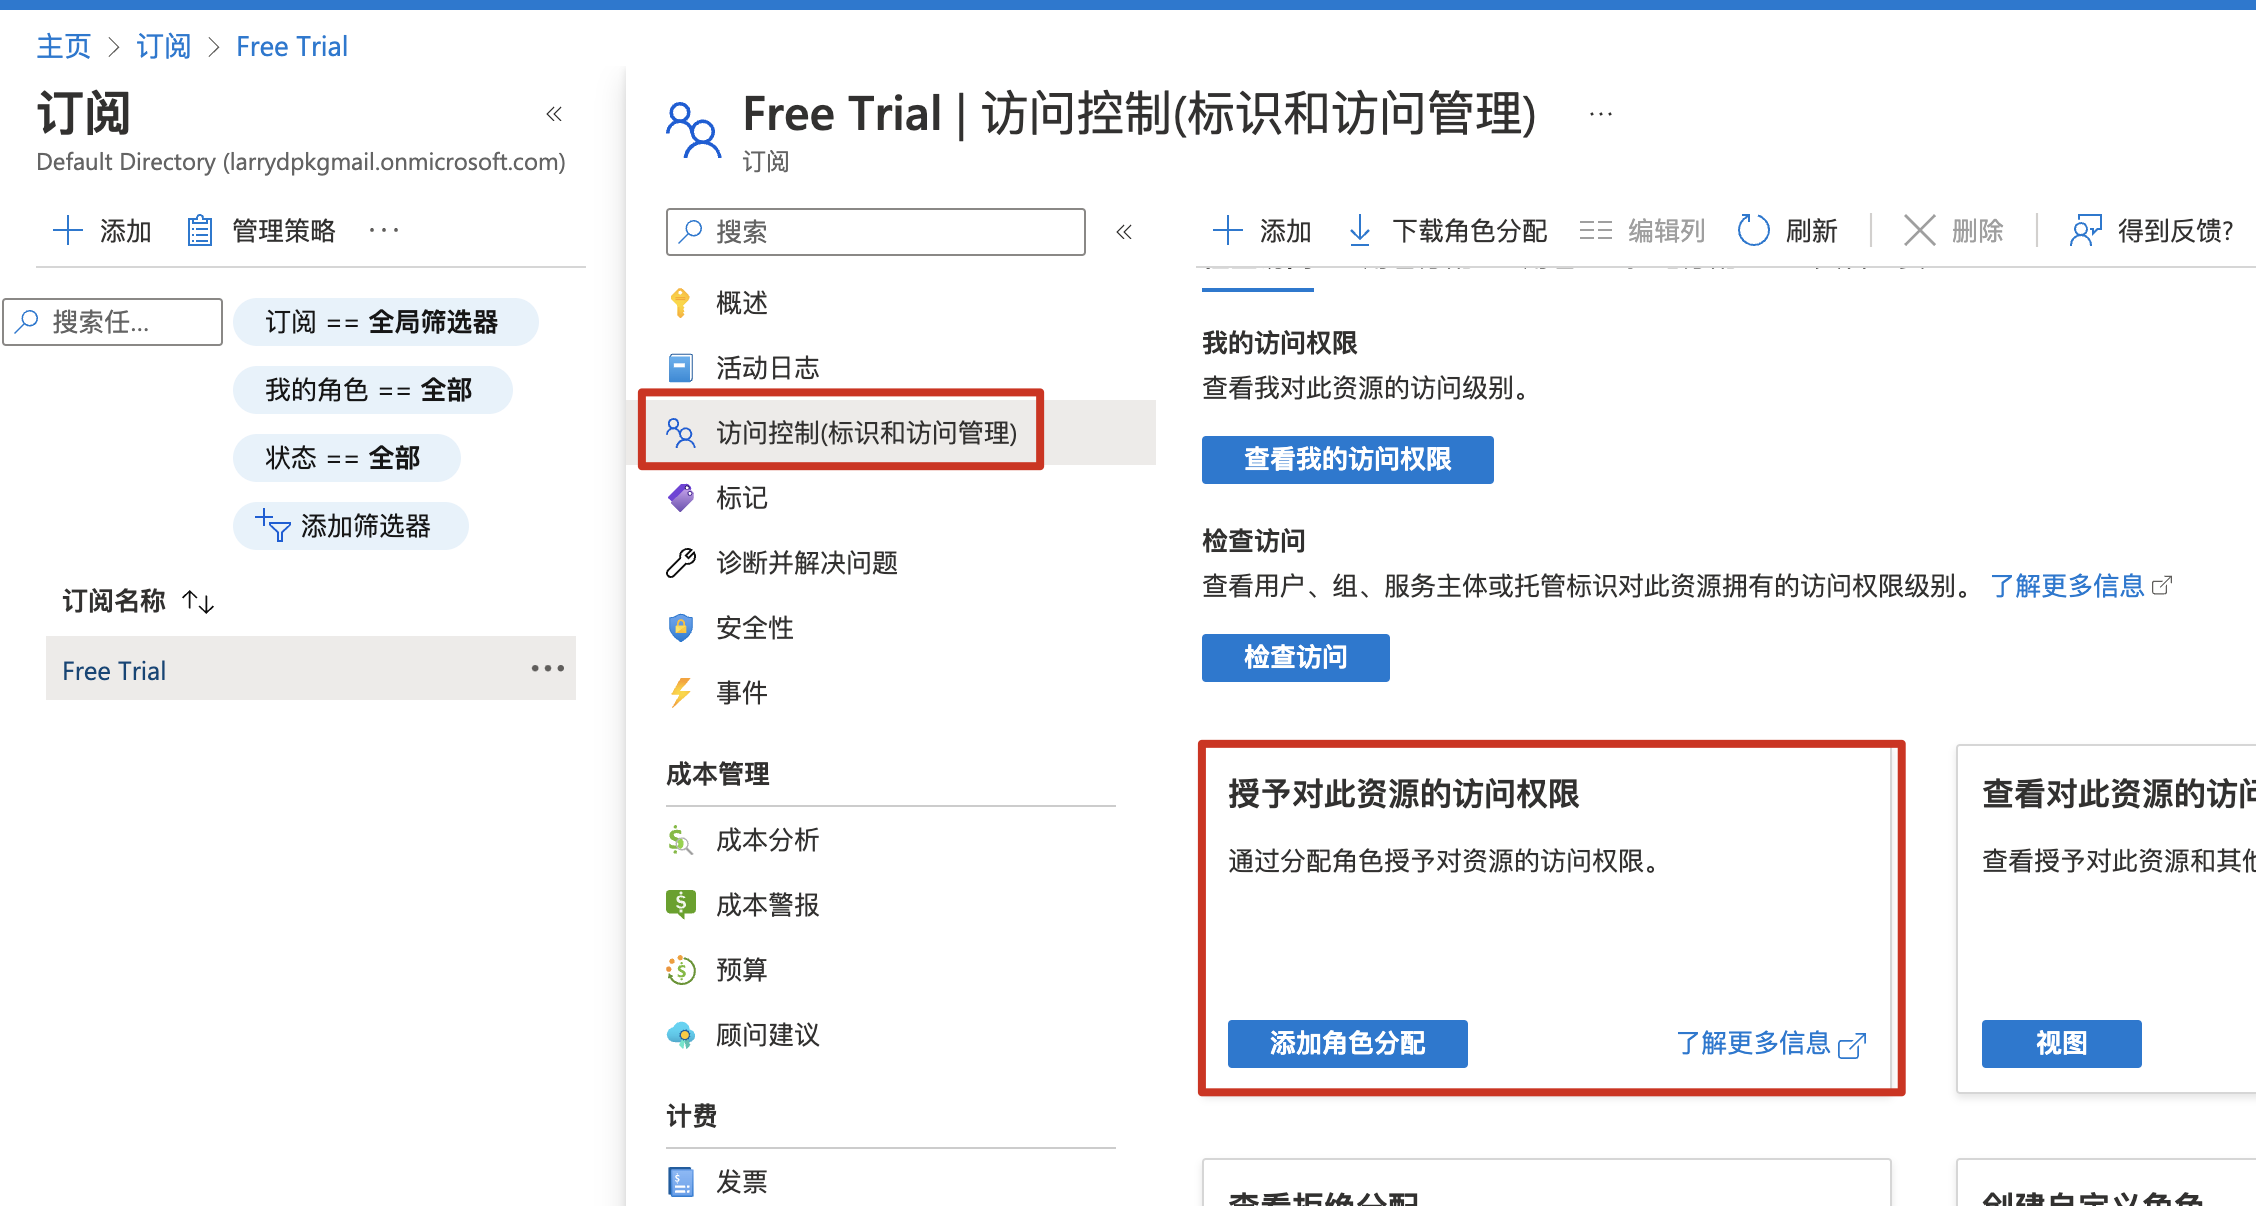
把之前创建的Service Principal加进来,分配特定角色:
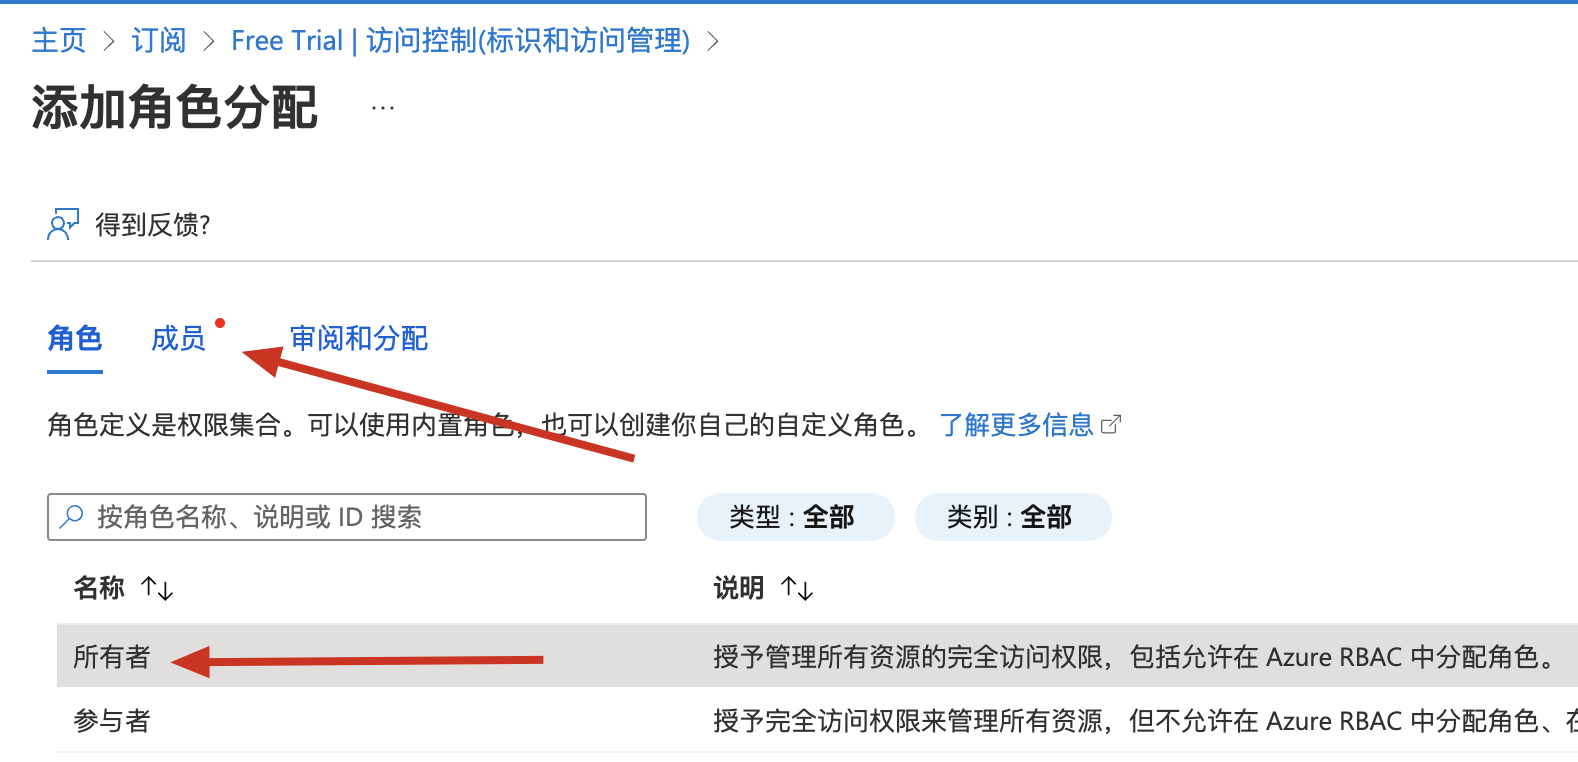
选择对应的Service Principal:

命令行登陆
完成以上操作后,就可以通过命令行来登陆Azure了:
$ az login --service-principal -u f01d69bf-8ff3-4043-9275-3e0c4de54884 -p B0N8Q~PQu6hTJkBTS5xxxxxxxx******** --tenant 2951528a-e359-4846-9817-ec3ebc2664d4
[{"cloudName": "AzureCloud","homeTenantId": "2951528a-e359-4846-9817-ec3ebc2664d4","id": "cd7921d5-9ba9-45db-bfba-1c397fcaaba3","isDefault": true,"managedByTenants": [],"name": "Free Trial","state": "Enabled","tenantId": "2951528a-e359-4846-9817-ec3ebc2664d4","user": {"name": "f01d69bf-8ff3-4043-9275-3e0c4de54884","type": "servicePrincipal"}}
]-u是注册应用的ID;
-p就是之前要记下的密码;
--tenant就是租户ID;
查询之前创建的VM,成功:
$ az vm list -g test --output table
Name    ResourceGroup    Location    Zones
------  ---------------  ----------  -------
pkslow  test             eastasia    1
创建vm
通过命令行创建vm如下:
$ az vm create --resource-group 'test' --name 'pkslow2' --image 'canonical:0001-com-ubuntu-server-jammy:22_04-lts:22.04.202301100' --admin-username 'larry' --admin-password 'Pa!!!ss123' --location 'eastasia'{"fqdns": "","id": "/subscriptions/cd7921d5-9ba9-45db-bfba-1c397fcaaba3/resourceGroups/test/providers/Microsoft.Compute/virtualMachines/pkslow2","location": "eastasia","macAddress": "60-45-BD-57-30-C1","powerState": "VM running","privateIpAddress": "10.0.0.5","publicIpAddress": "20.187.85.53","resourceGroup": "test","zones": ""
}
查询后成功创建,已经有2台虚拟机在运行:
$ az vm list -g test --output table
Name     ResourceGroup    Location    Zones
-------  ---------------  ----------  -------
pkslow   test             eastasia    1
pkslow2  test             eastasia
用Terraform创建vm
权限环境变量设置
当我们使用Terraform来操作Azure时,同样也是需要权限的,配置以下环境变量即可。这些值在前面的内容已经讲过了。
export ARM_SUBSCRIPTION_ID="<azure_subscription_id>"
export ARM_TENANT_ID="<azure_subscription_tenant_id>"
export ARM_CLIENT_ID="<service_principal_appid>"
export ARM_CLIENT_SECRET="<service_principal_password>"
插件和版本
配置Terraform和插件的版本:
terraform {required_version = ">= 1.1.3"required_providers {azurerm = {source = "hashicorp/azurerm"version = "3.38.0"}}
}
创建vm
通过azurerm_virtual_machine来创建VM资源:
provider "azurerm" {features {}
}variable "prefix" {default = "pkslow-azure"
}resource "azurerm_resource_group" "example" {name     = "${var.prefix}-resources"location = "West Europe"
}resource "azurerm_virtual_network" "main" {name                = "${var.prefix}-network"address_space       = ["10.0.0.0/16"]location            = azurerm_resource_group.example.locationresource_group_name = azurerm_resource_group.example.name
}resource "azurerm_subnet" "internal" {name                 = "internal"resource_group_name  = azurerm_resource_group.example.namevirtual_network_name = azurerm_virtual_network.main.nameaddress_prefixes     = ["10.0.2.0/24"]
}resource "azurerm_network_interface" "main" {name                = "${var.prefix}-nic"location            = azurerm_resource_group.example.locationresource_group_name = azurerm_resource_group.example.nameip_configuration {name                          = "testconfiguration1"subnet_id                     = azurerm_subnet.internal.idprivate_ip_address_allocation = "Dynamic"}
}resource "azurerm_virtual_machine" "main" {name                  = "${var.prefix}-vm"location              = azurerm_resource_group.example.locationresource_group_name   = azurerm_resource_group.example.namenetwork_interface_ids = [azurerm_network_interface.main.id]vm_size               = "Standard_DS1_v2"# Uncomment this line to delete the OS disk automatically when deleting the VM# delete_os_disk_on_termination = true# Uncomment this line to delete the data disks automatically when deleting the VM# delete_data_disks_on_termination = truestorage_image_reference {publisher = "Canonical"offer     = "0001-com-ubuntu-server-jammy"sku       = "22_04-lts"version   = "22.04.202301100"}storage_os_disk {name              = "myosdisk1"caching           = "ReadWrite"create_option     = "FromImage"managed_disk_type = "Standard_LRS"}os_profile {computer_name  = "hostname"admin_username = "larry"admin_password = "Password1234!"}os_profile_linux_config {disable_password_authentication = false}tags = {environment = "staging"}
}
然后我们执行初始化,会下载Azure的Terraform插件:
$ terraform initInitializing the backend...Initializing provider plugins...
- Finding hashicorp/azurerm versions matching "3.38.0"...
- Installing hashicorp/azurerm v3.38.0...
- Installed hashicorp/azurerm v3.38.0 (signed by HashiCorp)Terraform has created a lock file .terraform.lock.hcl to record the provider
selections it made above. Include this file in your version control repository
so that Terraform can guarantee to make the same selections by default when
you run "terraform init" in the future.Terraform has been successfully initialized!You may now begin working with Terraform. Try running "terraform plan" to see
any changes that are required for your infrastructure. All Terraform commands
should now work.If you ever set or change modules or backend configuration for Terraform,
rerun this command to reinitialize your working directory. If you forget, other
commands will detect it and remind you to do so if necessary.
查看plan,看看会生成什么资源:
$ terraform planTerraform used the selected providers to generate the following execution plan. Resource actions are indicated with the following symbols:+ createTerraform will perform the following actions:# azurerm_network_interface.main will be created+ resource "azurerm_network_interface" "main" {+ applied_dns_servers = (known after apply)+ dns_servers = (known after apply)+ enable_accelerated_networking = false+ enable_ip_forwarding = false+ id = (known after apply)+ internal_dns_name_label = (known after apply)+ internal_domain_name_suffix = (known after apply)+ location = "westeurope"+ mac_address = (known after apply)+ name = "pkslow-azure-nic"+ private_ip_address = (known after apply)+ private_ip_addresses = (known after apply)+ resource_group_name = "pkslow-azure-resources"+ virtual_machine_id = (known after apply)+ ip_configuration {+ gateway_load_balancer_frontend_ip_configuration_id = (known after apply)+ name = "testconfiguration1"+ primary = (known after apply)+ private_ip_address = (known after apply)+ private_ip_address_allocation = "Dynamic"+ private_ip_address_version = "IPv4"+ subnet_id = (known after apply)}}# azurerm_resource_group.example will be created+ resource "azurerm_resource_group" "example" {+ id = (known after apply)+ location = "westeurope"+ name = "pkslow-azure-resources"}# azurerm_subnet.internal will be created+ resource "azurerm_subnet" "internal" {+ address_prefixes = [+ "10.0.2.0/24",]+ enforce_private_link_endpoint_network_policies = (known after apply)+ enforce_private_link_service_network_policies = (known after apply)+ id = (known after apply)+ name = "internal"+ private_endpoint_network_policies_enabled = (known after apply)+ private_link_service_network_policies_enabled = (known after apply)+ resource_group_name = "pkslow-azure-resources"+ virtual_network_name = "pkslow-azure-network"}# azurerm_virtual_machine.main will be created+ resource "azurerm_virtual_machine" "main" {+ availability_set_id = (known after apply)+ delete_data_disks_on_termination = false+ delete_os_disk_on_termination = false+ id = (known after apply)+ license_type = (known after apply)+ location = "westeurope"+ name = "pkslow-azure-vm"+ network_interface_ids = (known after apply)+ resource_group_name = "pkslow-azure-resources"+ tags = {+ "environment" = "staging"}+ vm_size = "Standard_DS1_v2"+ identity {+ identity_ids = (known after apply)+ principal_id = (known after apply)+ type = (known after apply)}+ os_profile {+ admin_password = (sensitive value)+ admin_username = "larry"+ computer_name = "hostname"+ custom_data = (known after apply)}+ os_profile_linux_config {+ disable_password_authentication = false}+ storage_data_disk {+ caching = (known after apply)+ create_option = (known after apply)+ disk_size_gb = (known after apply)+ lun = (known after apply)+ managed_disk_id = (known after apply)+ managed_disk_type = (known after apply)+ name = (known after apply)+ vhd_uri = (known after apply)+ write_accelerator_enabled = (known after apply)}+ storage_image_reference {+ offer = "0001-com-ubuntu-server-jammy"+ publisher = "Canonical"+ sku = "22_04-lts"+ version = "22.04.202301100"}+ storage_os_disk {+ caching = "ReadWrite"+ create_option = "FromImage"+ disk_size_gb = (known after apply)+ managed_disk_id = (known after apply)+ managed_disk_type = "Standard_LRS"+ name = "myosdisk1"+ os_type = (known after apply)+ write_accelerator_enabled = false}}# azurerm_virtual_network.main will be created+ resource "azurerm_virtual_network" "main" {+ address_space = [+ "10.0.0.0/16",]+ dns_servers = (known after apply)+ guid = (known after apply)+ id = (known after apply)+ location = "westeurope"+ name = "pkslow-azure-network"+ resource_group_name = "pkslow-azure-resources"+ subnet = (known after apply)}Plan: 5 to add, 0 to change, 0 to destroy.─────────────────────────────────────────────────────────────────────────────────────────────────────────────────────────────────────────────────────────────────────────────────Note: You didn't use the -out option to save this plan, so Terraform can't guarantee to take exactly these actions if you run "terraform apply" now.直接apply,创建对应的资源:
$ terraform applyTerraform used the selected providers to generate the following execution plan. Resource actions are indicated with the following symbols:+ createTerraform will perform the following actions:# azurerm_network_interface.main will be created+ resource "azurerm_network_interface" "main" {+ applied_dns_servers           = (known after apply)+ dns_servers                   = (known after apply)+ enable_accelerated_networking = false+ enable_ip_forwarding          = false+ id                            = (known after apply)+ internal_dns_name_label       = (known after apply)+ internal_domain_name_suffix   = (known after apply)+ location                      = "westeurope"+ mac_address                   = (known after apply)+ name                          = "pkslow-azure-nic"+ private_ip_address            = (known after apply)+ private_ip_addresses          = (known after apply)+ resource_group_name           = "pkslow-azure-resources"+ virtual_machine_id            = (known after apply)+ ip_configuration {+ gateway_load_balancer_frontend_ip_configuration_id = (known after apply)+ name                                               = "testconfiguration1"+ primary                                            = (known after apply)+ private_ip_address                                 = (known after apply)+ private_ip_address_allocation                      = "Dynamic"+ private_ip_address_version                         = "IPv4"+ subnet_id                                          = (known after apply)}}# azurerm_resource_group.example will be created+ resource "azurerm_resource_group" "example" {+ id       = (known after apply)+ location = "westeurope"+ name     = "pkslow-azure-resources"}# azurerm_subnet.internal will be created+ resource "azurerm_subnet" "internal" {+ address_prefixes                               = [+ "10.0.2.0/24",]+ enforce_private_link_endpoint_network_policies = (known after apply)+ enforce_private_link_service_network_policies  = (known after apply)+ id                                             = (known after apply)+ name                                           = "internal"+ private_endpoint_network_policies_enabled      = (known after apply)+ private_link_service_network_policies_enabled  = (known after apply)+ resource_group_name                            = "pkslow-azure-resources"+ virtual_network_name                           = "pkslow-azure-network"}# azurerm_virtual_machine.main will be created+ resource "azurerm_virtual_machine" "main" {+ availability_set_id              = (known after apply)+ delete_data_disks_on_termination = false+ delete_os_disk_on_termination    = false+ id                               = (known after apply)+ license_type                     = (known after apply)+ location                         = "westeurope"+ name                             = "pkslow-azure-vm"+ network_interface_ids            = (known after apply)+ resource_group_name              = "pkslow-azure-resources"+ tags                             = {+ "environment" = "staging"}+ vm_size                          = "Standard_DS1_v2"+ identity {+ identity_ids = (known after apply)+ principal_id = (known after apply)+ type         = (known after apply)}+ os_profile {+ admin_password = (sensitive value)+ admin_username = "larry"+ computer_name  = "hostname"+ custom_data    = (known after apply)}+ os_profile_linux_config {+ disable_password_authentication = false}+ storage_data_disk {+ caching                   = (known after apply)+ create_option             = (known after apply)+ disk_size_gb              = (known after apply)+ lun                       = (known after apply)+ managed_disk_id           = (known after apply)+ managed_disk_type         = (known after apply)+ name                      = (known after apply)+ vhd_uri                   = (known after apply)+ write_accelerator_enabled = (known after apply)}+ storage_image_reference {+ offer     = "0001-com-ubuntu-server-jammy"+ publisher = "Canonical"+ sku       = "22_04-lts"+ version   = "22.04.202301100"}+ storage_os_disk {+ caching                   = "ReadWrite"+ create_option             = "FromImage"+ disk_size_gb              = (known after apply)+ managed_disk_id           = (known after apply)+ managed_disk_type         = "Standard_LRS"+ name                      = "myosdisk1"+ os_type                   = (known after apply)+ write_accelerator_enabled = false}}# azurerm_virtual_network.main will be created+ resource "azurerm_virtual_network" "main" {+ address_space       = [+ "10.0.0.0/16",]+ dns_servers         = (known after apply)+ guid                = (known after apply)+ id                  = (known after apply)+ location            = "westeurope"+ name                = "pkslow-azure-network"+ resource_group_name = "pkslow-azure-resources"+ subnet              = (known after apply)}Plan: 5 to add, 0 to change, 0 to destroy.Do you want to perform these actions?Terraform will perform the actions described above.Only 'yes' will be accepted to approve.Enter a value: yesazurerm_resource_group.example: Creating...
azurerm_resource_group.example: Creation complete after 9s [id=/subscriptions/cd7921d5-9ba9-45db-bfba-1c397fcaaba3/resourceGroups/pkslow-azure-resources]
azurerm_virtual_network.main: Creating...
azurerm_virtual_network.main: Still creating... [10s elapsed]
azurerm_virtual_network.main: Creation complete after 17s [id=/subscriptions/cd7921d5-9ba9-45db-bfba-1c397fcaaba3/resourceGroups/pkslow-azure-resources/providers/Microsoft.Network/virtualNetworks/pkslow-azure-network]
azurerm_subnet.internal: Creating...
azurerm_subnet.internal: Still creating... [10s elapsed]
azurerm_subnet.internal: Creation complete after 11s [id=/subscriptions/cd7921d5-9ba9-45db-bfba-1c397fcaaba3/resourceGroups/pkslow-azure-resources/providers/Microsoft.Network/virtualNetworks/pkslow-azure-network/subnets/internal]
azurerm_network_interface.main: Creating...
azurerm_network_interface.main: Still creating... [10s elapsed]
azurerm_network_interface.main: Creation complete after 10s [id=/subscriptions/cd7921d5-9ba9-45db-bfba-1c397fcaaba3/resourceGroups/pkslow-azure-resources/providers/Microsoft.Network/networkInterfaces/pkslow-azure-nic]
azurerm_virtual_machine.main: Creating...
azurerm_virtual_machine.main: Still creating... [10s elapsed]
azurerm_virtual_machine.main: Still creating... [20s elapsed]
azurerm_virtual_machine.main: Still creating... [30s elapsed]
azurerm_virtual_machine.main: Still creating... [40s elapsed]
azurerm_virtual_machine.main: Still creating... [50s elapsed]
azurerm_virtual_machine.main: Still creating... [1m0s elapsed]
azurerm_virtual_machine.main: Creation complete after 1m0s [id=/subscriptions/cd7921d5-9ba9-45db-bfba-1c397fcaaba3/resourceGroups/pkslow-azure-resources/providers/Microsoft.Compute/virtualMachines/pkslow-azure-vm]Apply complete! Resources: 5 added, 0 changed, 0 destroyed.查看所有资源,选择资源组pkslow-azure-resources下面的,已经成功创建:

使用完成后,通过下面命令删除:
terraform destroy部署Azure Kubernetes集群
通过Auzre CLI部署
创建资源组
Azure资源组是用于部署和管理Azure资源的逻辑组。创建资源时,系统会提示你指定一个位置。该位置主要用于:
(1)资源组元数据的存储位置;
(2)在创建资源期间未指定另一个区域时,资源在Azure中的运行位置。
我们通过以下命令来创建资源组:
$ az group create --name pkslow-aks --location eastasia
{"id": "/subscriptions/cd7921d5-9ba9-45db-bfba-1c397fcaaba3/resourceGroups/pkslow-aks","location": "eastasia","managedBy": null,"name": "pkslow-aks","properties": {"provisioningState": "Succeeded"},"tags": null,"type": "Microsoft.Resources/resourceGroups"
}
创建AKS
通过下面的命令创建AKS:
az aks create -g pkslow-aks -n pkslow --enable-managed-identity --node-count 1 --enable-addons monitoring --enable-msi-auth-for-monitoring --generate-ssh-keys创建完成后会输出很大的Json日志,我们直接来查看一下是否正确生成:
$ az aks list --output table
Name    Location    ResourceGroup    KubernetesVersion    CurrentKubernetesVersion    ProvisioningState    Fqdn
------  ----------  ---------------  -------------------  --------------------------  -------------------  --------------------------------------------------------
pkslow  eastasia    pkslow-aks       1.24.6               1.24.6                      Succeeded            pkslow-pkslow-aks-cd7921-725c7247.hcp.eastasia.azmk8s.io
连接到AKS
需要有kubectl命令,没有的就安装一下:
az aks install-cli连接集群需要认证,要获取一下验证配置:
$ az aks get-credentials --resource-group pkslow-aks --name pkslow
Merged "pkslow" as current context in /Users/larry/.kube/config
成功后就可以连接并操作了:
$ kubectl get node
NAME                                STATUS   ROLES   AGE     VERSION
aks-nodepool1-29201873-vmss000000   Ready    agent   8m45s   v1.24.6$ kubectl get ns
NAME              STATUS   AGE
default           Active   9m33s
kube-node-lease   Active   9m35s
kube-public       Active   9m35s
kube-system       Active   9m35s$ kubectl get pod -n kube-system
NAME                                  READY   STATUS    RESTARTS   AGE
ama-logs-lhlkb                        3/3     Running   0          9m8s
ama-logs-rs-6cf9546595-rdmh9          2/2     Running   0          9m26s
azure-ip-masq-agent-nppvd             1/1     Running   0          9m8s
cloud-node-manager-bd4c2              1/1     Running   0          9m8s
coredns-59b6bf8b4f-lrzpp              1/1     Running   0          9m26s
coredns-59b6bf8b4f-zbbkm              1/1     Running   0          7m56s
coredns-autoscaler-5655d66f64-5946c   1/1     Running   0          9m26s
csi-azuredisk-node-9rpvd              3/3     Running   0          9m8s
csi-azurefile-node-hvxhc              3/3     Running   0          9m8s
konnectivity-agent-95ff8bbd-fwkds     1/1     Running   0          9m26s
konnectivity-agent-95ff8bbd-qg9vx     1/1     Running   0          9m26s
kube-proxy-c5crz                      1/1     Running   0          9m8s
metrics-server-7dd74d8758-ms8h9       2/2     Running   0          7m50s
metrics-server-7dd74d8758-nxq9t       2/2     Running   0          7m50s
部署测试应用
为了方便,我们直接使用官网的示例来测试一下。创建文件azure-vote.yaml,内容如下:
apiVersion: apps/v1
kind: Deployment
metadata:name: azure-vote-back
spec:replicas: 1selector:matchLabels:app: azure-vote-backtemplate:metadata:labels:app: azure-vote-backspec:nodeSelector:"kubernetes.io/os": linuxcontainers:- name: azure-vote-backimage: mcr.microsoft.com/oss/bitnami/redis:6.0.8env:- name: ALLOW_EMPTY_PASSWORDvalue: "yes"resources:requests:cpu: 100mmemory: 128Milimits:cpu: 250mmemory: 256Miports:- containerPort: 6379name: redis
---
apiVersion: v1
kind: Service
metadata:name: azure-vote-back
spec:ports:- port: 6379selector:app: azure-vote-back
---
apiVersion: apps/v1
kind: Deployment
metadata:name: azure-vote-front
spec:replicas: 1selector:matchLabels:app: azure-vote-fronttemplate:metadata:labels:app: azure-vote-frontspec:nodeSelector:"kubernetes.io/os": linuxcontainers:- name: azure-vote-frontimage: mcr.microsoft.com/azuredocs/azure-vote-front:v1resources:requests:cpu: 100mmemory: 128Milimits:cpu: 250mmemory: 256Miports:- containerPort: 80env:- name: REDISvalue: "azure-vote-back"
---
apiVersion: v1
kind: Service
metadata:name: azure-vote-front
spec:type: LoadBalancerports:- port: 80selector:app: azure-vote-front
然后执行以下命令:
$ kubectl apply -f azure-vote.yaml
deployment.apps/azure-vote-back created
service/azure-vote-back created
deployment.apps/azure-vote-front created
service/azure-vote-front created
成功后查看对应资源:
$ kubectl get svc
NAME               TYPE           CLUSTER-IP     EXTERNAL-IP    PORT(S)        AGE
azure-vote-back    ClusterIP      10.0.156.161   <none>         6379/TCP       112s
azure-vote-front   LoadBalancer   10.0.29.217    20.239.124.1   80:30289/TCP   112s
kubernetes         ClusterIP      10.0.0.1       <none>         443/TCP        21m$ kubectl get deployment
NAME               READY   UP-TO-DATE   AVAILABLE   AGE
azure-vote-back    1/1     1            1           2m1s
azure-vote-front   1/1     1            1           2m1s$ kubectl get pod
NAME                                READY   STATUS    RESTARTS   AGE
azure-vote-back-7cd69cc96f-gqm7r    1/1     Running   0          2m7s
azure-vote-front-7c95676c68-jtkqz   1/1     Running   0          2m7s
已经成功创建。
看front那有external IP,通过它直接在浏览器访问如下:
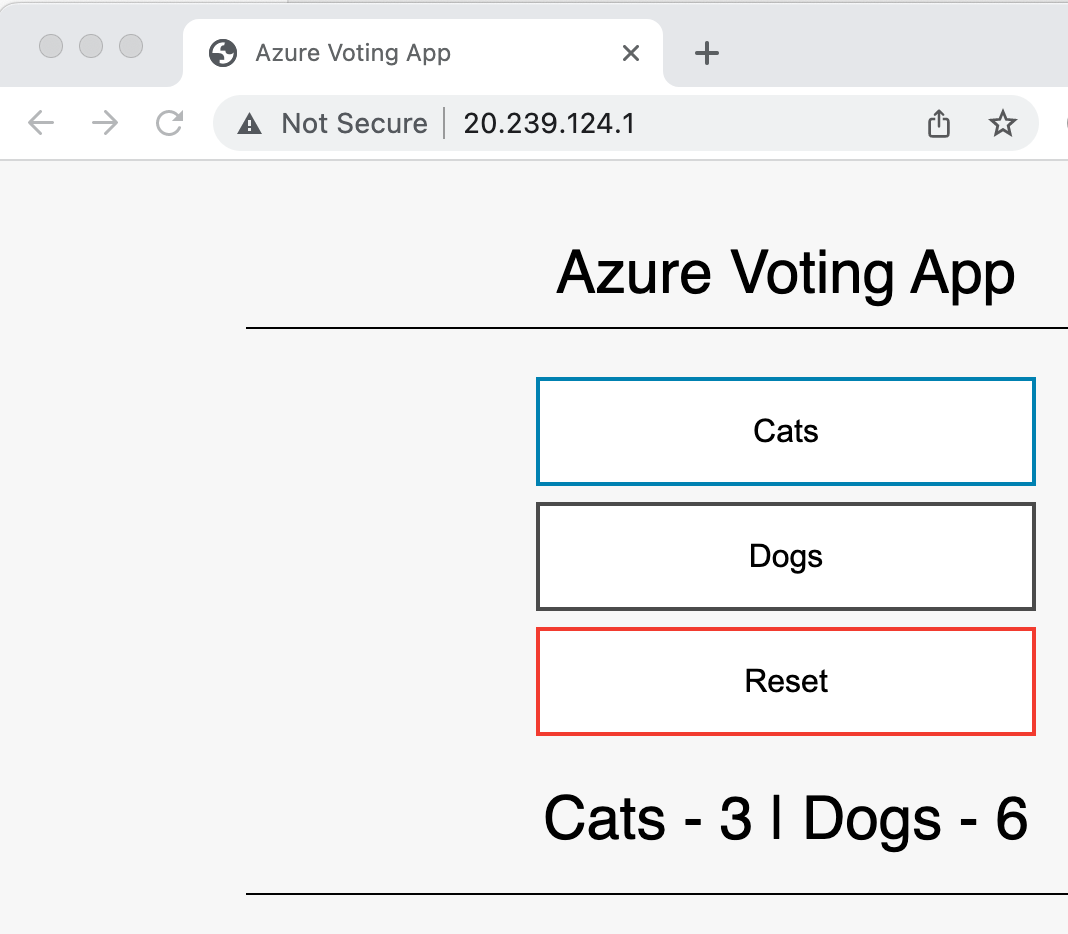
应用已经成功部署并访问了。
删除资源组
如果完成测试,不再使用,可以整个资源组一起删除:
az group delete --name pkslow-aks --yes --no-wait通过Terraform部署
配置插件和版本
terraform {required_version = ">= 1.1.3"required_providers {azurerm = {source = "hashicorp/azurerm"version = "3.38.0"}random = {source  = "hashicorp/random"version = "= 3.1.0"}}
}
变量设置
给Terraform设置一些要用到的变量:
variable "agent_count" {default = 1
}# The following two variable declarations are placeholder references.
# Set the values for these variable in terraform.tfvars
variable "aks_service_principal_app_id" {default = ""
}variable "aks_service_principal_client_secret" {default = ""
}variable "cluster_name" {default = "pkslow-k8s"
}variable "dns_prefix" {default = "pkslow"
}# Refer to https://azure.microsoft.com/global-infrastructure/services/?products=monitor for available Log Analytics regions.
variable "log_analytics_workspace_location" {default = "eastus"
}variable "log_analytics_workspace_name" {default = "testLogAnalyticsWorkspaceName"
}# Refer to https://azure.microsoft.com/pricing/details/monitor/ for Log Analytics pricing
variable "log_analytics_workspace_sku" {default = "PerGB2018"
}variable "resource_group_location" {default     = "eastus"description = "Location of the resource group."
}variable "resource_group_name_prefix" {default     = "rg"description = "Prefix of the resource group name that's combined with a random ID so name is unique in your Azure subscription."
}variable "ssh_public_key" {default = "~/.ssh/id_rsa.pub"
}agent_count应该设置合理,这里设成1是因为我的账号是免费的,有限制。
输出结果
当Terraform执行完,会有一些结果,我们可以把一些值输出以便使用:
output "client_certificate" {value     = azurerm_kubernetes_cluster.k8s.kube_config[0].client_certificatesensitive = true
}output "client_key" {value     = azurerm_kubernetes_cluster.k8s.kube_config[0].client_keysensitive = true
}output "cluster_ca_certificate" {value     = azurerm_kubernetes_cluster.k8s.kube_config[0].cluster_ca_certificatesensitive = true
}output "cluster_password" {value     = azurerm_kubernetes_cluster.k8s.kube_config[0].passwordsensitive = true
}output "cluster_username" {value     = azurerm_kubernetes_cluster.k8s.kube_config[0].usernamesensitive = true
}output "host" {value     = azurerm_kubernetes_cluster.k8s.kube_config[0].hostsensitive = true
}output "kube_config" {value     = azurerm_kubernetes_cluster.k8s.kube_config_rawsensitive = true
}output "resource_group_name" {value = azurerm_resource_group.rg.name
}
main.tf创建AKS
通过azurerm_kubernetes_cluster创建AKS:
provider "azurerm" {features {}
}# Generate random resource group name
resource "random_pet" "rg_name" {prefix = var.resource_group_name_prefix
}resource "azurerm_resource_group" "rg" {location = var.resource_group_locationname     = random_pet.rg_name.id
}resource "random_id" "log_analytics_workspace_name_suffix" {byte_length = 8
}resource "azurerm_log_analytics_workspace" "test" {location            = var.log_analytics_workspace_location# The WorkSpace name has to be unique across the whole of azure;# not just the current subscription/tenant.name                = "${var.log_analytics_workspace_name}-${random_id.log_analytics_workspace_name_suffix.dec}"resource_group_name = azurerm_resource_group.rg.namesku                 = var.log_analytics_workspace_sku
}resource "azurerm_log_analytics_solution" "test" {location              = azurerm_log_analytics_workspace.test.locationresource_group_name   = azurerm_resource_group.rg.namesolution_name         = "ContainerInsights"workspace_name        = azurerm_log_analytics_workspace.test.nameworkspace_resource_id = azurerm_log_analytics_workspace.test.idplan {product   = "OMSGallery/ContainerInsights"publisher = "Microsoft"}
}resource "azurerm_kubernetes_cluster" "k8s" {location            = azurerm_resource_group.rg.locationname                = var.cluster_nameresource_group_name = azurerm_resource_group.rg.namedns_prefix          = var.dns_prefixtags                = {Environment = "Development"}default_node_pool {name       = "agentpool"vm_size    = "Standard_D2_v2"node_count = var.agent_count}linux_profile {admin_username = "ubuntu"ssh_key {key_data = file(var.ssh_public_key)}}network_profile {network_plugin    = "kubenet"load_balancer_sku = "standard"}service_principal {client_id     = var.aks_service_principal_app_idclient_secret = var.aks_service_principal_client_secret}
}
执行
准备好文件后,先初始化,下载插件:
$ terraform initInitializing the backend...Initializing provider plugins...
- Finding hashicorp/random versions matching "3.1.0"...
- Finding hashicorp/azurerm versions matching "3.38.0"...
- Installing hashicorp/random v3.1.0...
- Installed hashicorp/random v3.1.0 (unauthenticated)
- Installing hashicorp/azurerm v3.38.0...
- Installed hashicorp/azurerm v3.38.0 (signed by HashiCorp)Terraform has created a lock file .terraform.lock.hcl to record the provider
selections it made above. Include this file in your version control repository
so that Terraform can guarantee to make the same selections by default when
you run "terraform init" in the future.Terraform has been successfully initialized!You may now begin working with Terraform. Try running "terraform plan" to see
any changes that are required for your infrastructure. All Terraform commands
should now work.If you ever set or change modules or backend configuration for Terraform,
rerun this command to reinitialize your working directory. If you forget, other
commands will detect it and remind you to do so if necessary.
查看Terraform计划,知道将要生成多少资源:
$ terraform plan -out main.tfplan -var="aks_service_principal_app_id=$ARM_CLIENT_ID" -var="aks_service_principal_client_secret=$ARM_CLIENT_SECRET"没有问题则执行变更:
$ terraform apply main.tfplan
Outputs:client_certificate = <sensitive>
client_key = <sensitive>
cluster_ca_certificate = <sensitive>
cluster_password = <sensitive>
cluster_username = <sensitive>
host = <sensitive>
kube_config = <sensitive>
resource_group_name = "rg-harmless-tomcat"
连接AKS
把kube_config输出,然后设置环境变量就可以通过kubectl连接了:
$ echo "$(terraform output kube_config)" > ./azurek8s$ export KUBECONFIG=./azurek8s$ kubectl get nodes
NAME                                STATUS   ROLES   AGE     VERSION
aks-agentpool-45159290-vmss000000   Ready    agent   9m20s   v1.24.6
如果有问题,可以查看azurek8s文件是否正常。
创建PostgreSQL
通过Azure CLI创建Single Server
创建资源组和数据库
先创建资源组:
az group create --name pkslow-sql --location eastasia --tag create-postgresql-server-and-firewall-rule然后创建数据库:
$ az postgres server create \
> --name pkslow-pg \
> --resource-group pkslow-sql \
> --location eastasia \
> --admin-user pguser \
> --admin-password 'Pa$$word' \
> --sku-name GP_Gen5_2Checking the existence of the resource group 'pkslow-sql'...
Resource group 'pkslow-sql' exists ? : True
Creating postgres Server 'pkslow-pg' in group 'pkslow-sql'...
Your server 'pkslow-pg' is using sku 'GP_Gen5_2' (Paid Tier). Please refer to https://aka.ms/postgres-pricing  for pricing details
Make a note of your password. If you forget, you would have to reset your password with 'az postgres server update -n pkslow-pg -g pkslow-sql -p <new-password>'.
{"additionalProperties": {},"administratorLogin": "pguser","byokEnforcement": "Disabled","connectionString": "postgres://pguser%40pkslow-pg:Pa$$word@pkslow-pg.postgres.database.azure.com/postgres?sslmode=require","earliestRestoreDate": "2023-01-15T03:24:18.440000+00:00","fullyQualifiedDomainName": "pkslow-pg.postgres.database.azure.com","id": "/subscriptions/cd7921d5-9ba9-45db-bfba-1c397fcaaba3/resourceGroups/pkslow-sql/providers/Microsoft.DBforPostgreSQL/servers/pkslow-pg","identity": null,"infrastructureEncryption": "Disabled","location": "eastasia","masterServerId": "","minimalTlsVersion": "TLSEnforcementDisabled","name": "pkslow-pg","password": "Pa$$word","privateEndpointConnections": [],"publicNetworkAccess": "Enabled","replicaCapacity": 5,"replicationRole": "None","resourceGroup": "pkslow-sql","sku": {"additionalProperties": {},"capacity": 2,"family": "Gen5","name": "GP_Gen5_2","size": null,"tier": "GeneralPurpose"},"sslEnforcement": "Enabled","storageProfile": {"additionalProperties": {},"backupRetentionDays": 7,"geoRedundantBackup": "Disabled","storageAutogrow": "Enabled","storageMb": 5120},"tags": null,"type": "Microsoft.DBforPostgreSQL/servers","userVisibleState": "Ready","version": "11"
}
创建成功后,会打印很多有用的信息,如连接信息。
也可以在以后查看:
az postgres server show --resource-group pkslow-sql --name pkslow-pg禁用SSL
创建完成后还可以更新一些配置,如我们禁用SSL:
az postgres server update --resource-group pkslow-sql --name pkslow-pg --ssl-enforcement Disabled生产环境不要禁用SSL。
添加防火墙
需要把客户端IP添加到Firewall,不然会连接失败。
az postgres server firewall-rule create \
--resource-group pkslow-sql \
--server pkslow-pg \
--name AllowIps \
--start-ip-address '0.0.0.0' \
--end-ip-address '255.255.255.255'
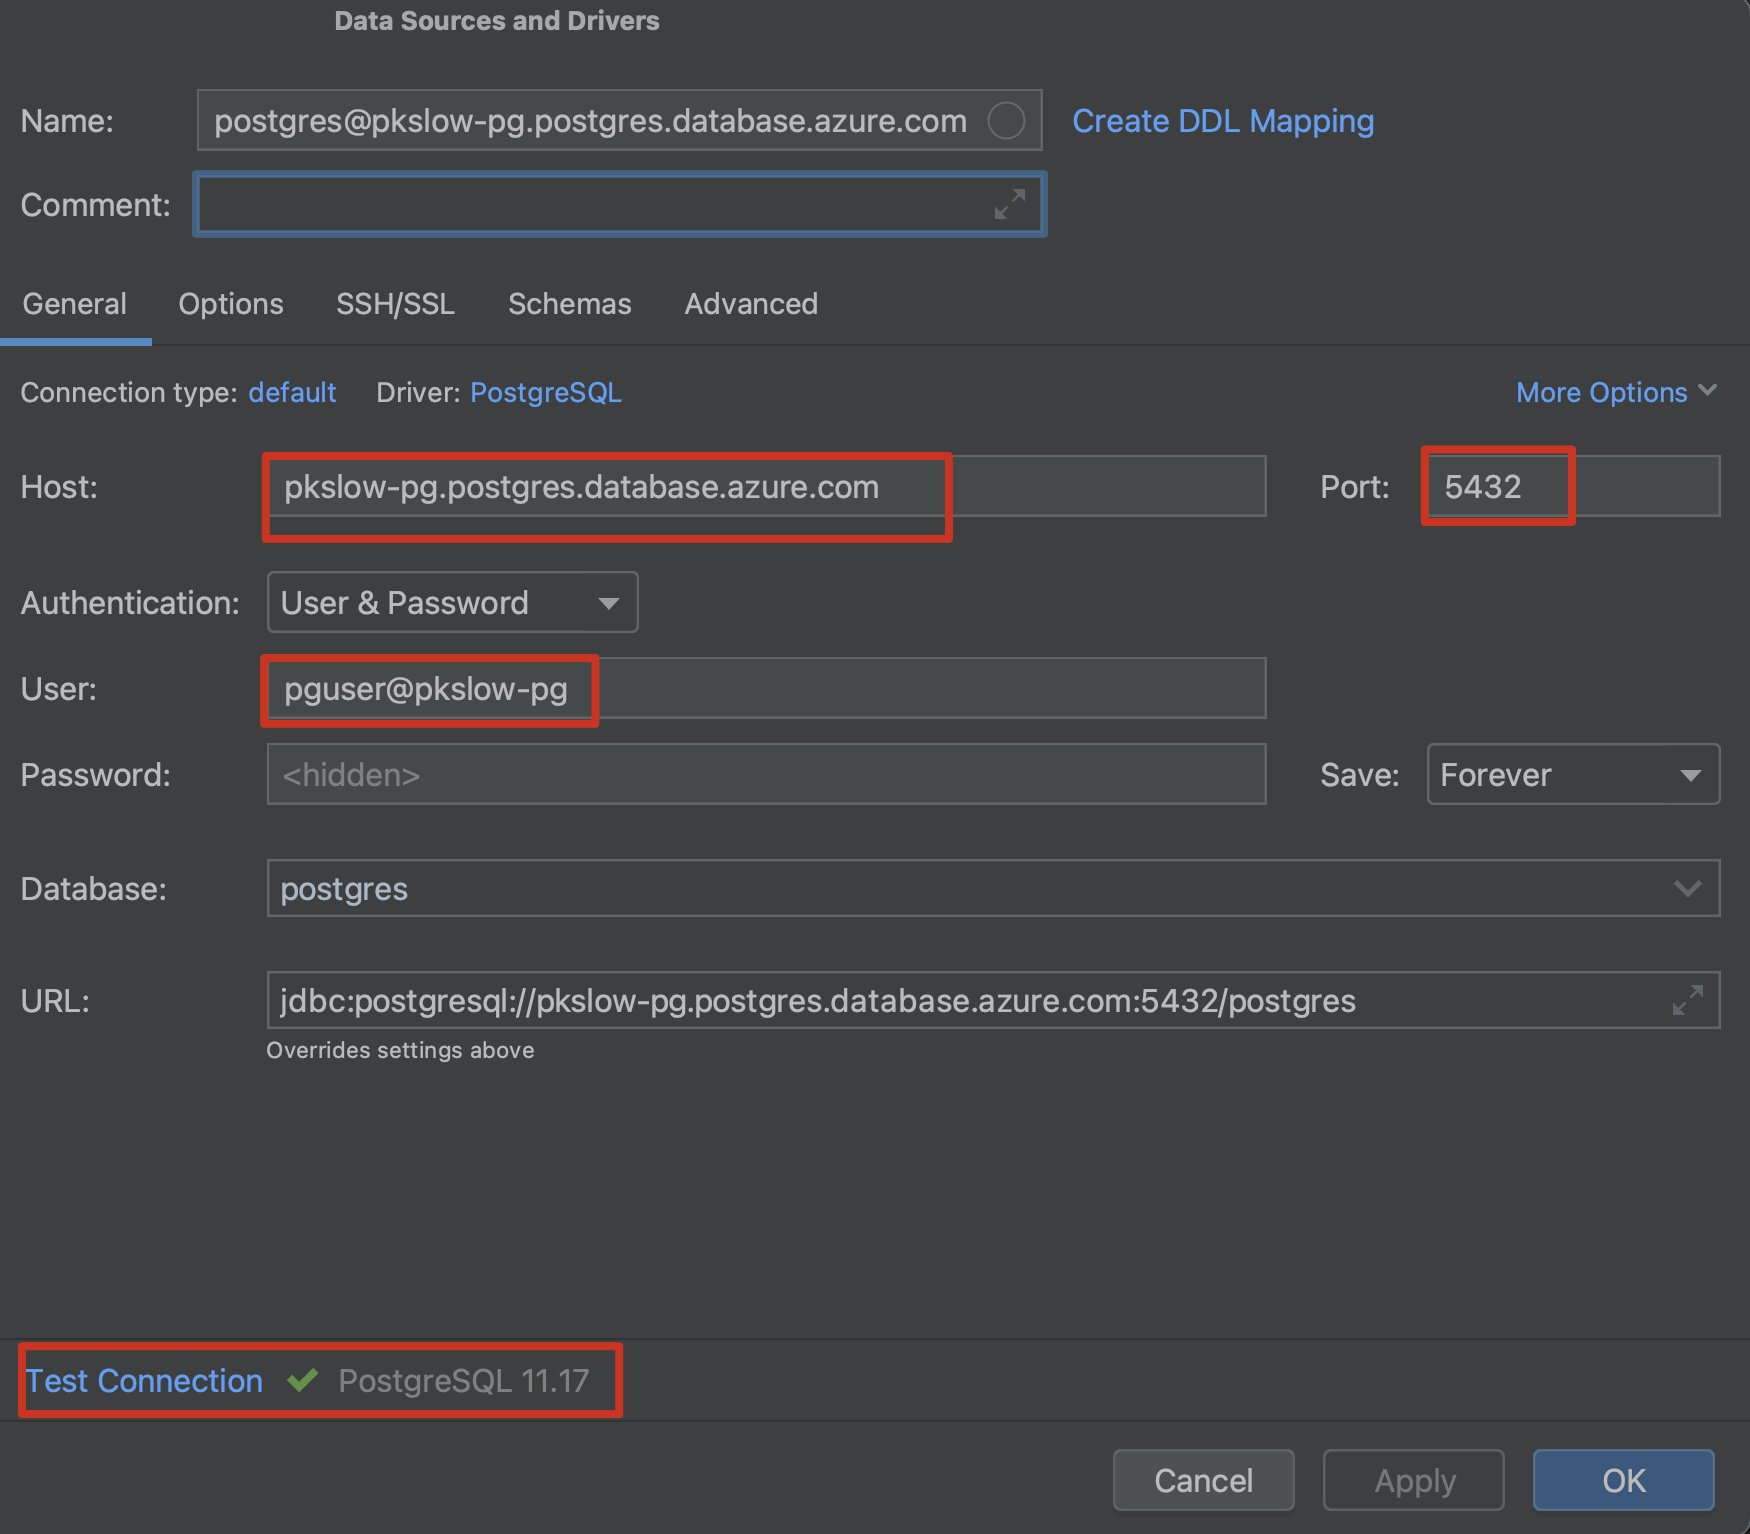
测试连接
配置连接如下,注意用户名不只是pguser:
删除资源
如果不需要再使用,就删除资源:
az group delete --name pkslow-sql通过Terraform创建Flexible Server
插件与版本
terraform {required_version = ">= 1.1.3"required_providers {azurerm = {source = "hashicorp/azurerm"version = "3.38.0"}}
}provider "azurerm" {features {}
}
变量设置
variable "name_prefix" {default     = "pkslow-pg-fs"description = "Prefix of the resource name."
}variable "location" {default     = "eastus"description = "Location of the resource."
}
main.tf创建
resource "random_pet" "rg-name" {prefix = var.name_prefix
}resource "azurerm_resource_group" "default" {name     = random_pet.rg-name.idlocation = var.location
}resource "azurerm_virtual_network" "default" {name                = "${var.name_prefix}-vnet"location            = azurerm_resource_group.default.locationresource_group_name = azurerm_resource_group.default.nameaddress_space       = ["10.0.0.0/16"]
}resource "azurerm_network_security_group" "default" {name                = "${var.name_prefix}-nsg"location            = azurerm_resource_group.default.locationresource_group_name = azurerm_resource_group.default.namesecurity_rule {name                       = "test123"priority                   = 100direction                  = "Inbound"access                     = "Allow"protocol                   = "Tcp"source_port_range          = "*"destination_port_range     = "*"source_address_prefix      = "*"destination_address_prefix = "*"}
}resource "azurerm_subnet" "default" {name                 = "${var.name_prefix}-subnet"virtual_network_name = azurerm_virtual_network.default.nameresource_group_name  = azurerm_resource_group.default.nameaddress_prefixes     = ["10.0.2.0/24"]service_endpoints    = ["Microsoft.Storage"]delegation {name = "fs"service_delegation {name = "Microsoft.DBforPostgreSQL/flexibleServers"actions = ["Microsoft.Network/virtualNetworks/subnets/join/action",]}}
}resource "azurerm_subnet_network_security_group_association" "default" {subnet_id                 = azurerm_subnet.default.idnetwork_security_group_id = azurerm_network_security_group.default.id
}resource "azurerm_private_dns_zone" "default" {name                = "${var.name_prefix}-pdz.postgres.database.azure.com"resource_group_name = azurerm_resource_group.default.namedepends_on = [azurerm_subnet_network_security_group_association.default]
}resource "azurerm_private_dns_zone_virtual_network_link" "default" {name                  = "${var.name_prefix}-pdzvnetlink.com"private_dns_zone_name = azurerm_private_dns_zone.default.namevirtual_network_id    = azurerm_virtual_network.default.idresource_group_name   = azurerm_resource_group.default.name
}resource "azurerm_postgresql_flexible_server" "default" {name                   = "${var.name_prefix}-server"resource_group_name    = azurerm_resource_group.default.namelocation               = azurerm_resource_group.default.locationversion                = "13"delegated_subnet_id    = azurerm_subnet.default.idprivate_dns_zone_id    = azurerm_private_dns_zone.default.idadministrator_login    = "pguser"administrator_password = "QAZwsx123"zone                   = "1"storage_mb             = 32768sku_name               = "GP_Standard_D2s_v3"backup_retention_days  = 7depends_on = [azurerm_private_dns_zone_virtual_network_link.default]
}
准备文件:pg-fs-db.tf
resource "azurerm_postgresql_flexible_server_database" "default" {name      = "${var.name_prefix}-db"server_id = azurerm_postgresql_flexible_server.default.idcollation = "en_US.UTF8"charset   = "UTF8"
}
输出结果
output "resource_group_name" {value = azurerm_resource_group.default.name
}output "azurerm_postgresql_flexible_server" {value = azurerm_postgresql_flexible_server.default.name
}output "postgresql_flexible_server_database_name" {value = azurerm_postgresql_flexible_server_database.default.name
}
执行
准备好hcl文件后,执行如下:
$ terraform init$ terraform plan -out main.tfplan$ terraform apply main.tfplan
Apply complete! Resources: 10 added, 0 changed, 0 destroyed.Outputs:
azurerm_postgresql_flexible_server = "pkslow-pg-fs-server"
postgresql_flexible_server_database_name = "pkslow-pg-fs-db"
resource_group_name = "pkslow-pg-fs-delicate-honeybee"
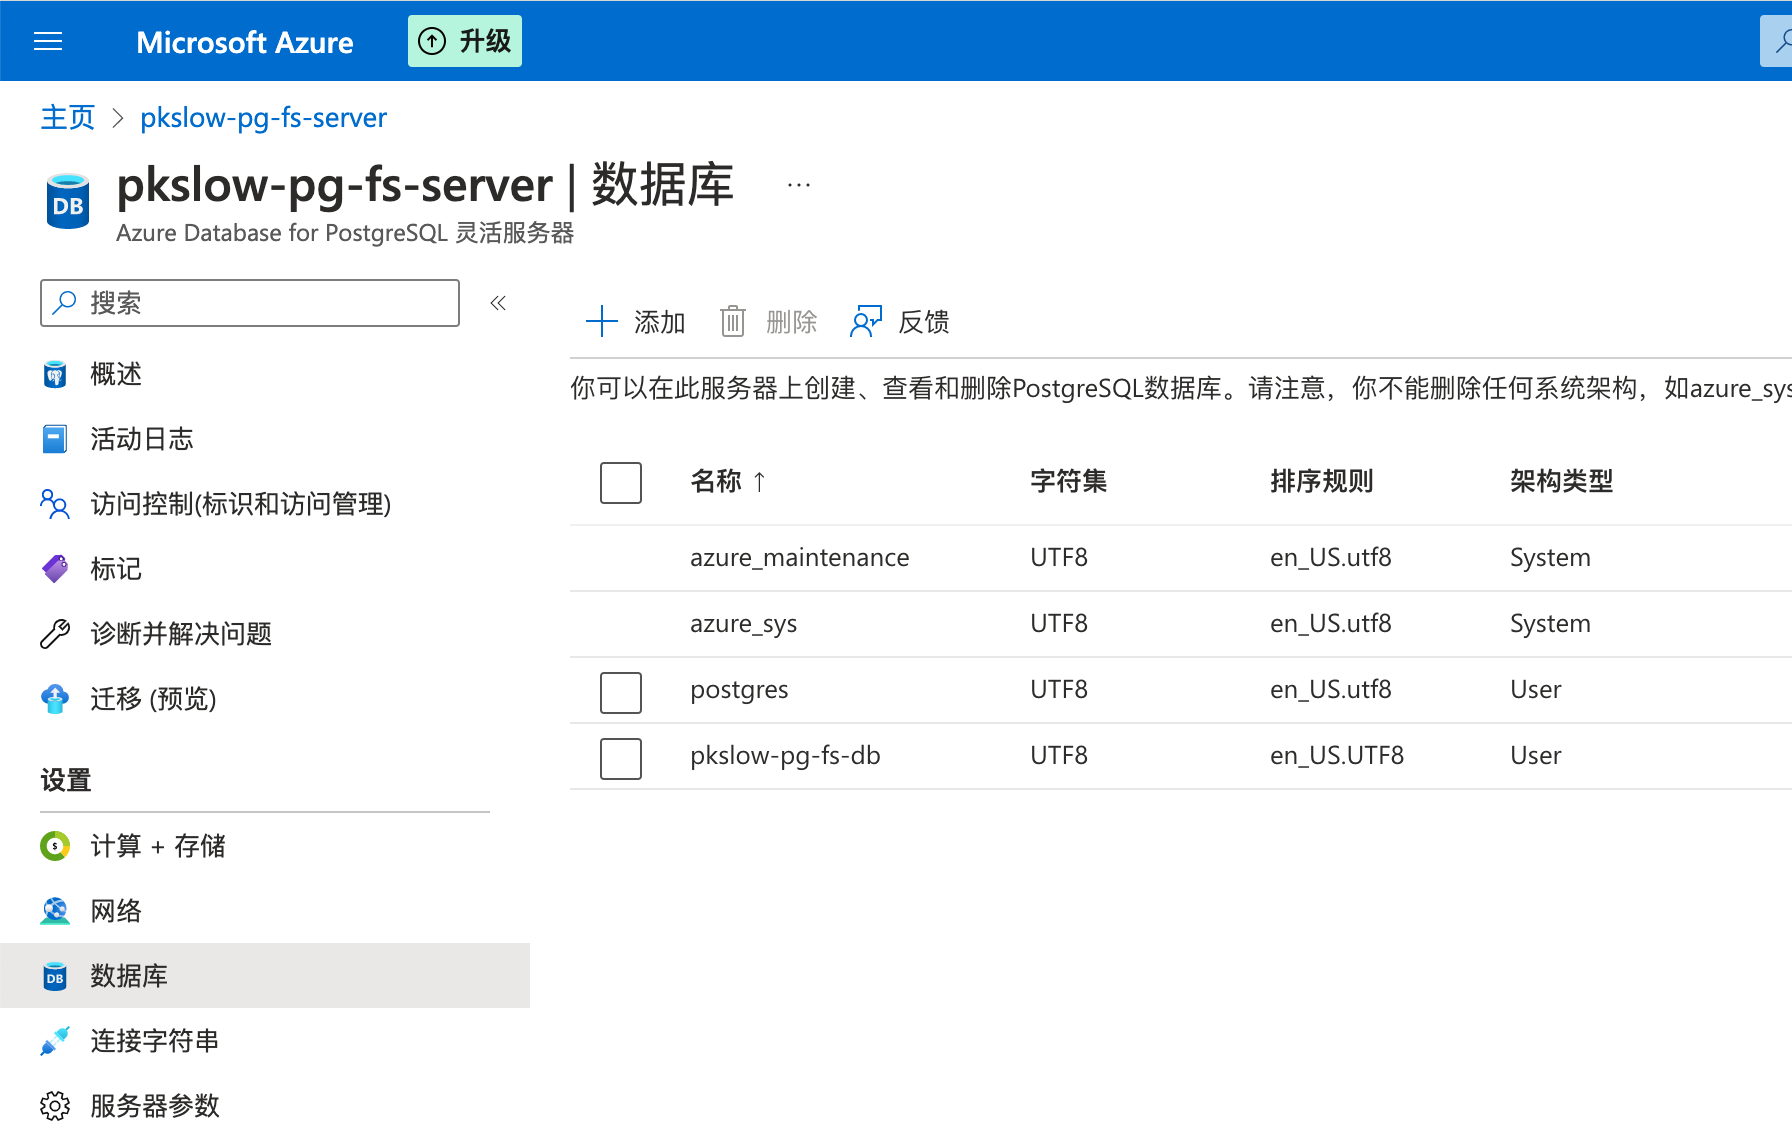
创建成功后,可以查看:
$ az postgres flexible-server list --output table
Name                 Resource Group                  Location    Version    Storage Size(GiB)    Tier            SKU              State    HA State    Availability zone
-------------------  ------------------------------  ----------  ---------  -------------------  --------------  ---------------  -------  ----------  -------------------
pkslow-pg-fs-server  pkslow-pg-fs-delicate-honeybee  East US     13         32                   GeneralPurpose  Standard_D2s_v3  Ready    NotEnabled  1
当然,在Portal上看也是可以的:
删除
不需要了可以执行删除:
terraform destroy在Azure云存储上管理Terraform状态
默认Terraform的状态是保存在本地的,为了安全和协作,在生产环境中一般要保存在云上。
创建Azure Storage
我们创建Storage来存储Terraform状态。按下面一步步执行即可:
RESOURCE_GROUP_NAME=pkslow-tstate-rg
STORAGE_ACCOUNT_NAME=pkslowtfstate
CONTAINER_NAME=tfstate# Create resource group
az group create --name $RESOURCE_GROUP_NAME --location "West Europe"# Create storage account
az storage account create --resource-group $RESOURCE_GROUP_NAME --name $STORAGE_ACCOUNT_NAME --sku Standard_LRS --encryption-services blob# Get storage account key
ACCOUNT_KEY=$(az storage account keys list --resource-group $RESOURCE_GROUP_NAME --account-name $STORAGE_ACCOUNT_NAME --query [0].value -o tsv)# Create blob container
az storage container create --name $CONTAINER_NAME --account-name $STORAGE_ACCOUNT_NAME --account-key $ACCOUNT_KEYecho "storage_account_name: $STORAGE_ACCOUNT_NAME"
echo "container_name: $CONTAINER_NAME"
echo "access_key: $ACCOUNT_KEY"
Terraform backend
创建完Storage后,我们需要在Terraform中配置使用:
terraform {required_version = ">= 1.1.3"required_providers {azurerm = {source  = "hashicorp/azurerm"version = "3.38.0"}local = {source  = "hashicorp/local"version = "= 2.1.0"}}backend "azurerm" {resource_group_name  = "pkslow-tstate-rg"storage_account_name = "pkslowtfstate"container_name       = "tfstate"key                  = "pkslow.tfstate"}
}provider "azurerm" {features {}
}resource "local_file" "test-file" {content  = "https://www.pkslow.com"filename = "${path.root}/terraform-guides-by-pkslow.txt"
}
主要代码是这块:
backend "azurerm" {
resource_group_name  = "pkslow-tstate-rg"
storage_account_name = "pkslowtfstate"
container_name       = "tfstate"
key                  = "pkslow.tfstate"
}
这里前三个变量的值都是前面创建Storage的时候指定的。
执行Terraform
初始化:
$ terraform initInitializing the backend...Initializing provider plugins...
- Finding hashicorp/local versions matching "2.1.0"...
- Finding hashicorp/azurerm versions matching "3.38.0"...
- Installing hashicorp/local v2.1.0...
- Installed hashicorp/local v2.1.0 (unauthenticated)
- Installing hashicorp/azurerm v3.38.0...
- Installed hashicorp/azurerm v3.38.0 (signed by HashiCorp)Terraform has created a lock file .terraform.lock.hcl to record the provider
selections it made above. Include this file in your version control repository
so that Terraform can guarantee to make the same selections by default when
you run "terraform init" in the future.Terraform has been successfully initialized!You may now begin working with Terraform. Try running "terraform plan" to see
any changes that are required for your infrastructure. All Terraform commands
should now work.If you ever set or change modules or backend configuration for Terraform,
rerun this command to reinitialize your working directory. If you forget, other
commands will detect it and remind you to do so if necessary.
看日志就会初始化backend。
执行apply:
$ terraform apply -auto-approve
Acquiring state lock. This may take a few moments...Terraform used the selected providers to generate the following execution plan. Resource actions are indicated with the following symbols:+ createTerraform will perform the following actions:# local_file.test-file will be created+ resource "local_file" "test-file" {+ content              = "https://www.pkslow.com"+ directory_permission = "0777"+ file_permission      = "0777"+ filename             = "./terraform-guides-by-pkslow.txt"+ id                   = (known after apply)}Plan: 1 to add, 0 to change, 0 to destroy.
local_file.test-file: Creating...
local_file.test-file: Creation complete after 0s [id=6db7ad1bbf57df0c859cd5fc62ff5408515b5fc1]
Releasing state lock. This may take a few moments...Apply complete! Resources: 1 added, 0 changed, 0 destroyed.
然后我们去查看Azure Storage,就可以发现已经生成一个Terraform状态文件:
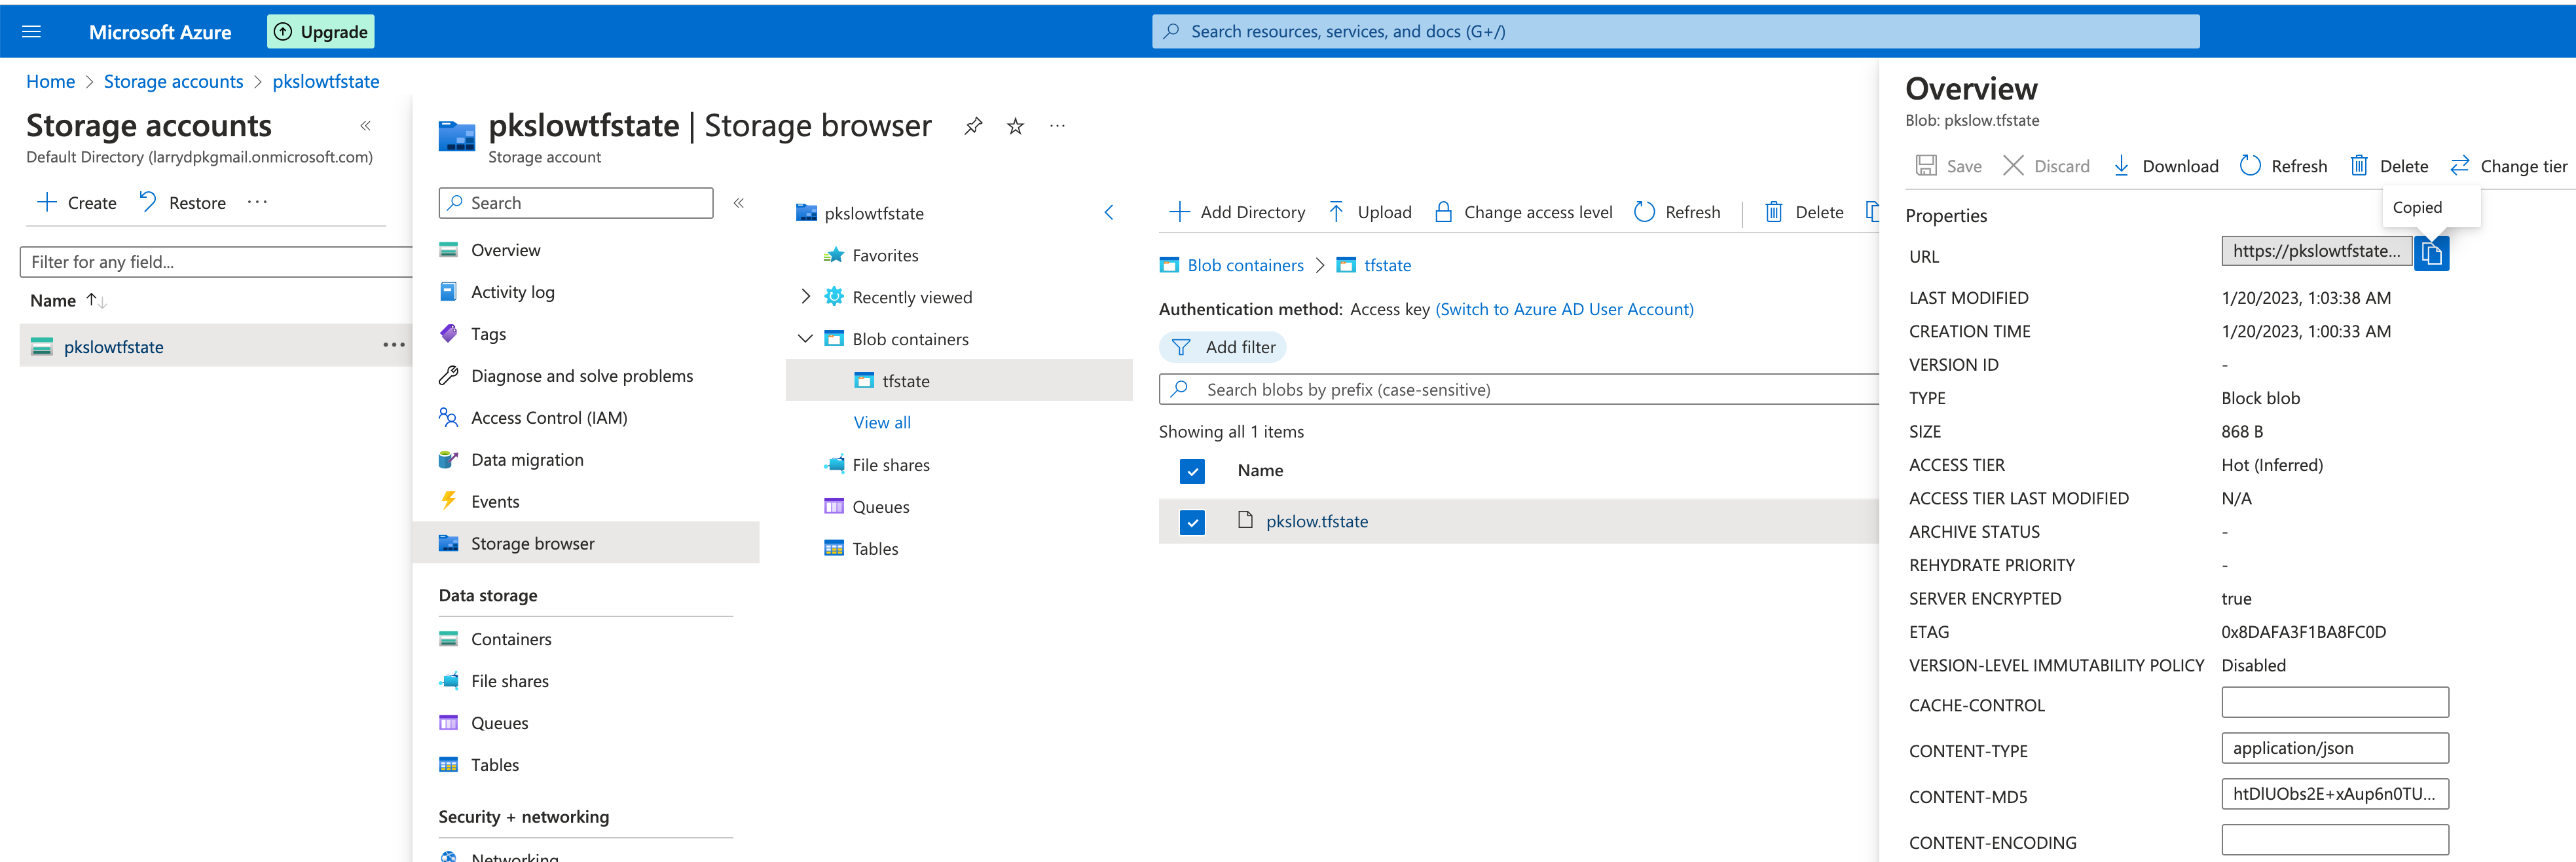
如果不再使用,记得删除资源。
相关文章:

《Terraform 101 从入门到实践》 Terraform在公有云Azure上的应用
《Terraform 101 从入门到实践》这本小册在南瓜慢说官方网站和GitHub两个地方同步更新,书中的示例代码也是放在GitHub上,方便大家参考查看。 简介 Azure是微软的公有云,它提供了一些免费的资源,具体可以查看: https:/…...

别具一格,原创唯美浪漫情人节表白专辑,(复制就可用)(html5,css3,svg)表白爱心代码(3)
别具一格,原创唯美浪漫情人节表白专辑, (复制就可用)(html5,css3,svg)表白爱心代码(3) 目录 款式三:心形实时显示认识多长时间桃花飞舞(猫咪)款 1、拷贝完整源代码 2、拷贝完整js代码 3、修改时间 4、…...

Linux 删除修改日期大于某一天的文件
在服务器运维过程中,我们往往会产生大量的日志文件. 如果日志文件命名能看出日志产生的时间,这些文件是很好删除的. 但有时,我们可能有成千上万的没有命名规律日志文件 下面的方法可以根据日志最后修改时间 批量删除这些文件 先给出完整命令: find /mydir -mtime 10 -name &…...

【算法题】1845. 座位预约管理系统
插: 前些天发现了一个巨牛的人工智能学习网站,通俗易懂,风趣幽默,忍不住分享一下给大家。点击跳转到网站。 坚持不懈,越努力越幸运,大家一起学习鸭~~~ 题目: 请你设计一个管理 n 个座位预约的系…...

【专业认知】保研北大金融 / 入职腾讯产品经理
2023.02.11 一. 朱博文学长分享——关于大学生活的一点思考 1. 自我介绍 大数据18级 经济学双学位 保研至北大金融硕士 “多思考、多感受、兼听则明” 2. 大学生活 2.1 为什么要上大学 1:追求美好生活的需要 “美好”难以量化,因为每个人对生活…...
OpenHarmony使用Socket实现一个UDP客户端详解
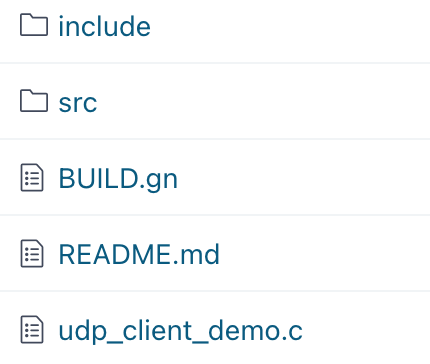
一、前言 我们在这里介绍Socket的使用,是为了后面的一篇文章实现设备配网做铺垫。 二、示例详解 点击获取BearPi-HM_Nano源码 ,以D3_iot_udp_client为例: 示例本身很简单,只需要修改 udp_client_demo.c 的2处代码,就能测试了: //连接WIFI,参数1是:WIFI名称,参数2是:…...
使用VUE自定义组件封装部门选择功能
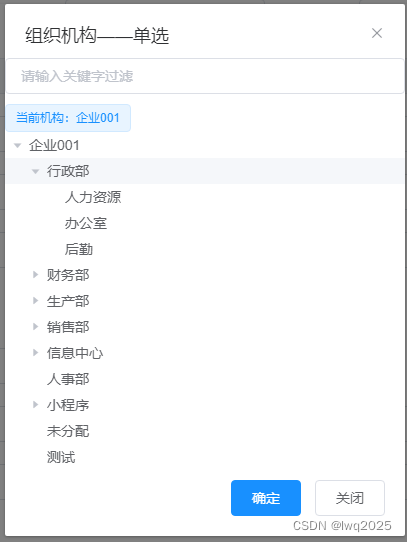
背景 照惯例,先交待下背景,从真实需求出发,讲述实现效果、设计思路和实现方式。 软件系统中,会有一些常见常用的选择功能,如部门选择、人员选择等,用于填报表单,使用频率很高。直接使用一方面会…...
C语言基础应用(一)数据类型
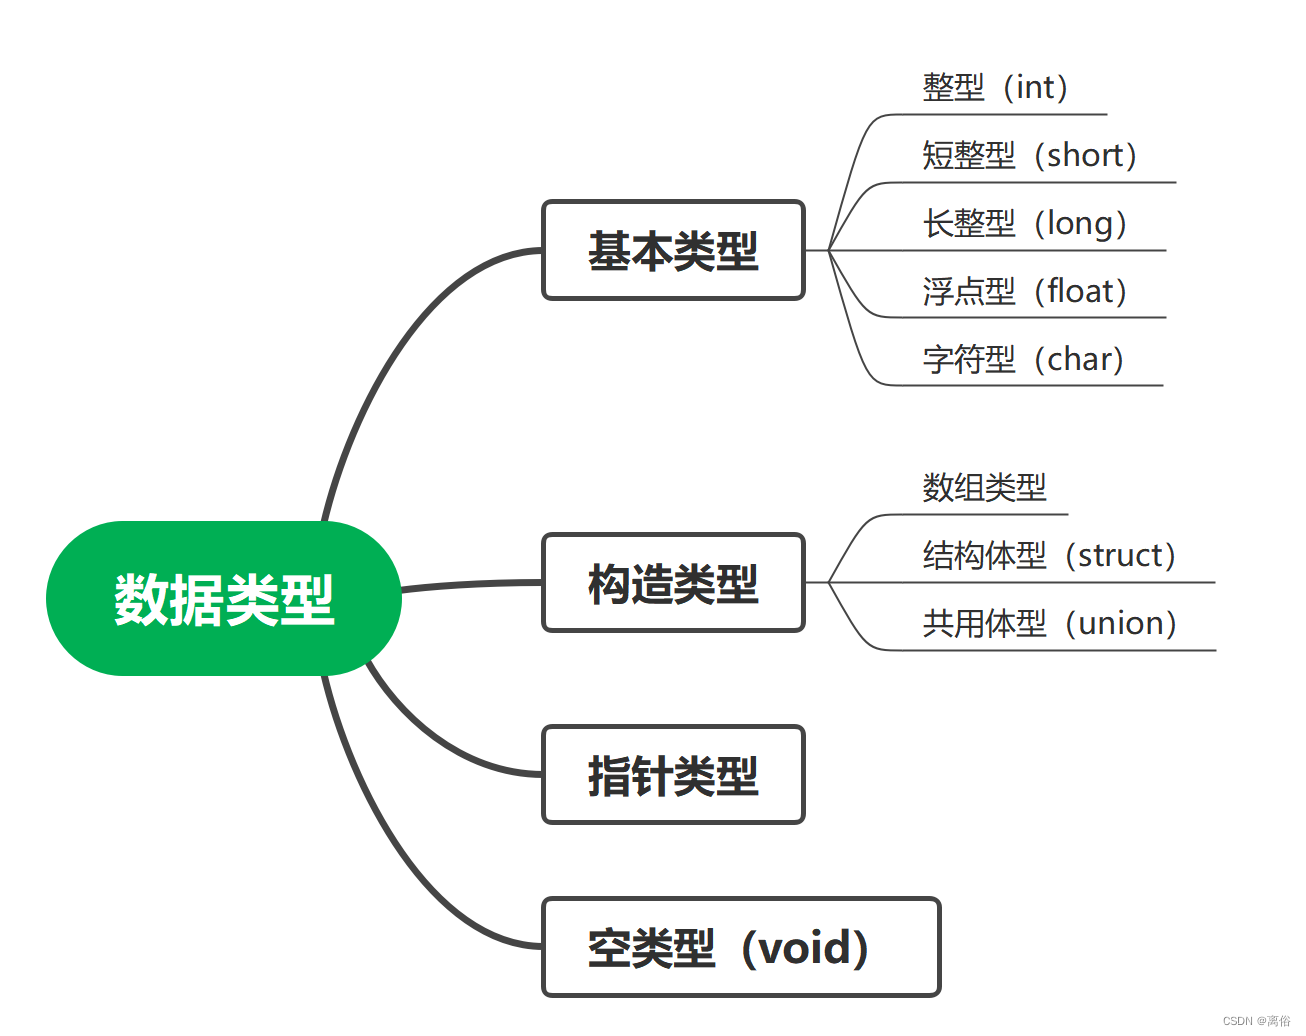
一、数据类型 1、数据类型的分类 2、常量 常量是固定值,在程序执行期间不会改变。这些固定的值,又叫做字面量。 2.1 常量举例 // 整型常量 举例 /*718 十进制0213 八进制0x4b 十六进制30u 无符号整数30l 长整型30ul 无符号长整型*/ // 浮点常量…...

算法笔记(三)—— 桶排序及排序总结
堆 逻辑上是一棵完全二叉树(依次遍满或者全满)。 数组可以转为完全二叉树,完全二叉树某结点左孩子(2*i1),右孩子(i*22),父结点((i-1/)2),根节点的父还是自己。 如何将数组转化为堆(大根堆&…...
Linux入门篇(一)
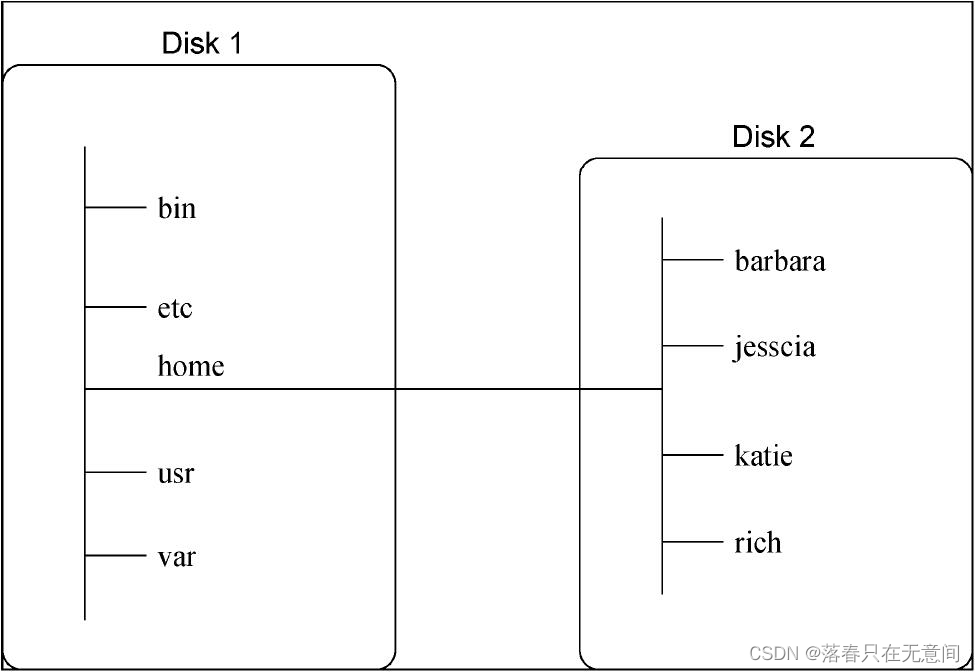
Linux前言Linux初探Linux内核GNU实用工具shellLinux发行版bash shell 基础Linux文件系统Linux文件操作命令前言 在阅读诸如docker之类的书的时候,经常碰到Linux的知识。同时,大部分的盲区也是在Linux方面。因此就想稍微了解一下这个广为人使用的操作系统…...

HTTPSHandler SSL Error
我在服务器ubuntu中,尝试使用pip3,但是出现下面的报错 ImportError: cannot import name HTTPSHandler 通过查询资料,发现报错的原因是,该pip3.5中没有安装好openssl. 我尝试在python3.5中使用import ssl, 确实是会显示下面的报错…...

基于Android的高校食堂餐厅配送系统
需求信息: 商家客户端: 1:登录注册:用户可以通过自己的信息进行账号的注册 2:发布菜单:发布自己经营的美食信息 3:用户订单:查看用户的购买订单 4:订单配送:对…...

Java设计模式-02工厂模式
为什么需要工厂模式,其作用什么?如何实现,代码演示解析优缺点。Q1:为什么需要工厂模式?工厂模式的作用(优点)是什么? 解耦。把对象的创建和使用的过程分开。就是Class A 想调用 Class B ,那么A只是调用B的…...

AXI-Lite 学习笔记
AXI-Lite 学习笔记 参考 FPGA:AXI_Lite总线基础2-1]、第二节 AXI总线介绍、ZYNQ PL与PS交互专题_哔哩哔哩_bilibili AXI-Lite总线系列1 - 基础知识_哔哩哔哩_bilibili AXI4 介绍 AXI4 是ARM公司提出的一种片内总线,描述了主从设备之间的数据传输方式。主…...
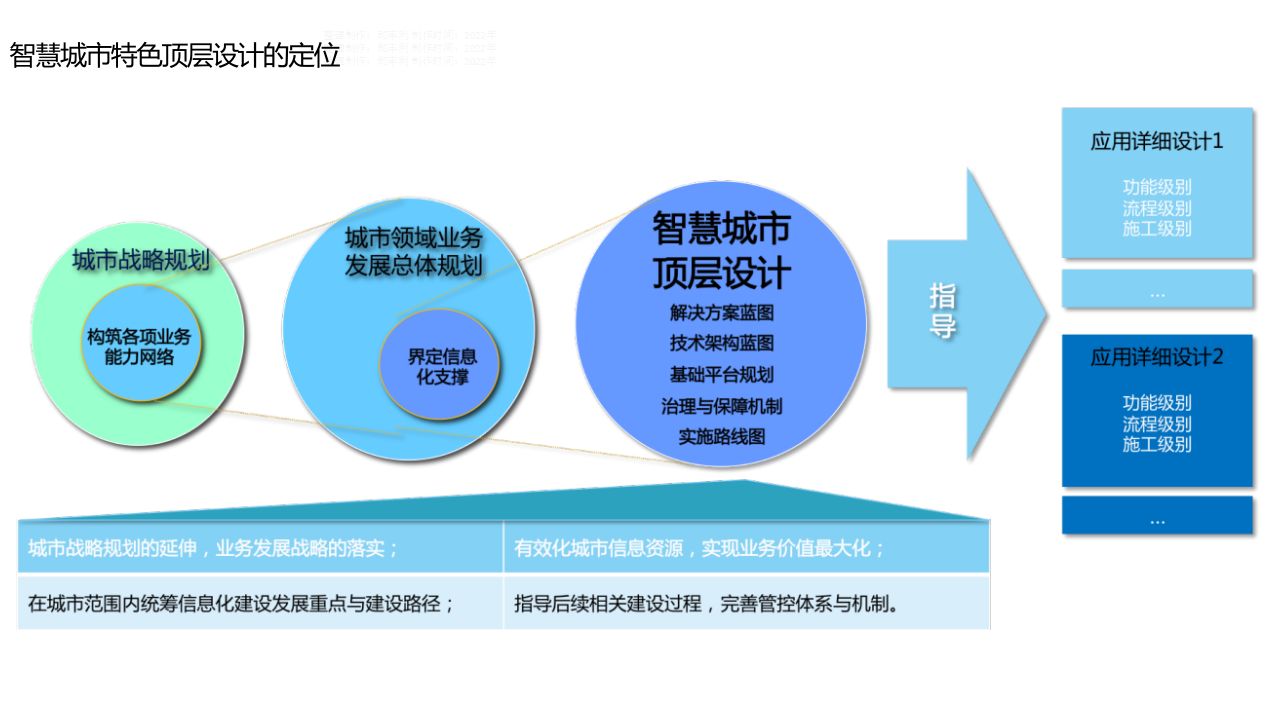
77页智慧城市顶层设计方案
【版权声明】本资料来源网络,知识分享,仅供个人学习,请勿商用。【侵删致歉】如有侵权请联系小编,将在收到信息后第一时间删除!完整资料领取见文末,部分资料内容:篇幅有限,无法完全展…...
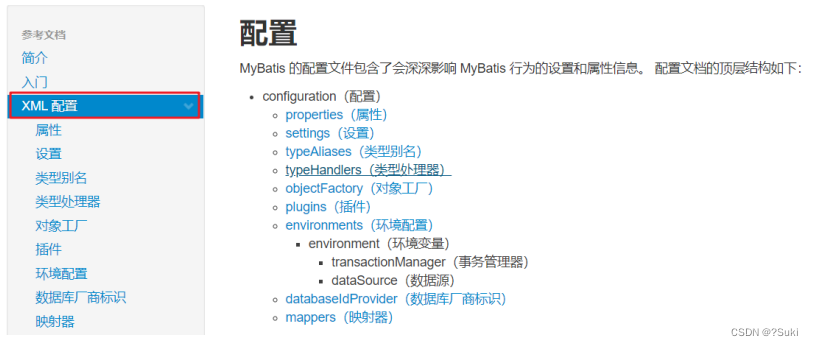
JavaWeb--MavenMybatis基础
JavaWeb--Maven&Mybatis基础1 Maven1.1 Maven简介1.1.1 Maven模型1.1.2 仓库1.2 Maven基本使用1.2.1 Maven 常用命令1.2.2 Maven 生命周期1.3 IDEA使用Maven1.3.1 IDEA配置Maven环境1.3.2 Maven 坐标详解1.3.3 IDEA 创建 Maven项目1.3.4 IDEA 导入 Maven项目1.4 依赖管理1.…...

博客系统--测试用例编写
目录一,整体概览1.1,登录页面测试用例1.2,注册页面测试用例1.3,发布博客功能测试1.4,删除博客功能测试二,具体设计2.1,注册页面测试--等价类法2.2,删除博客功能测试--判定表法一&…...
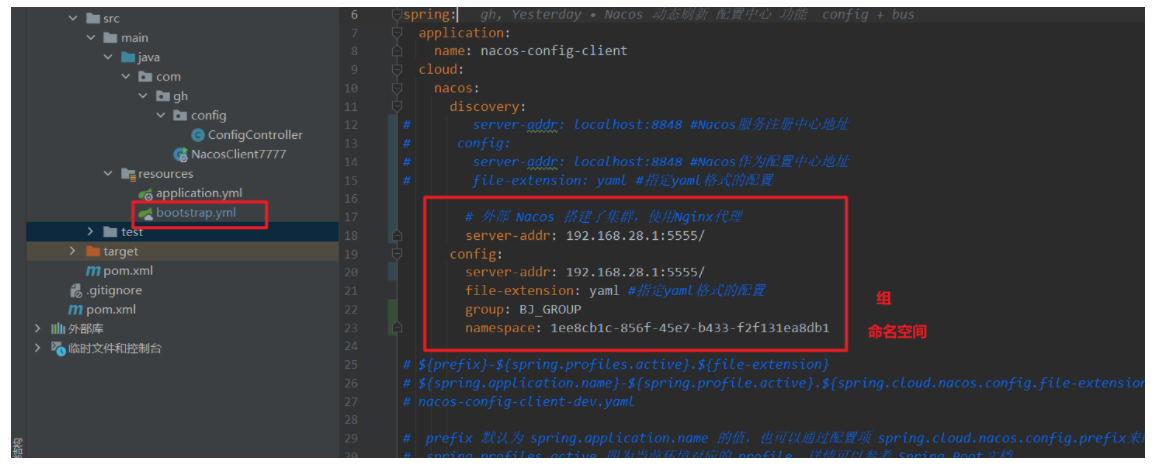
SpringCloud Alibaba
文章目录🚏 第十七章 SpringCloud Alibaba入门简介🚬 一、为什么使用Alibaba🚭 1、spring netflix进入维护模式🚭 Spring cloud alibaba🚬 二、如何使用?🚬 三、版本对应🚏 第十八章…...

地平线slam算法岗位 面试分享
本专栏分享 计算机小伙伴秋招春招找工作的面试经验和面试的详情知识点 专栏首页:秋招算法类面经分享 主要分享计算机算法类在面试互联网公司时候一些真实的经验 小伙伴自我介绍: 写在前面,南京某炮专,研二上阶段,简历写了两个竞赛和一个项目,一个机器人相关的二等奖,一个…...
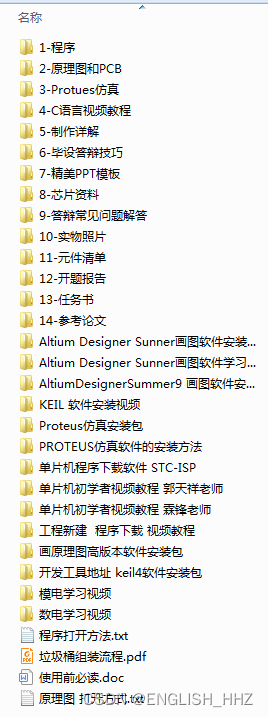
32、基于51单片机红外智能垃圾桶系统设计
摘要 随着现代化进程的日益推进,科技越来越发达,人们的生活水平也提高了,城市化程度越来越高,与此同时也带了许多问题,生活垃圾越来越多垃圾设施却不够完善。无论是在公共场合还是家庭厨房的垃圾大都是没有盖或者有盖…...

java调用dll出现unsatisfiedLinkError以及JNA和JNI的区别
UnsatisfiedLinkError 在对接硬件设备中,我们会遇到使用 java 调用 dll文件 的情况,此时大概率出现UnsatisfiedLinkError链接错误,原因可能有如下几种 类名错误包名错误方法名参数错误使用 JNI 协议调用,结果 dll 未实现 JNI 协…...

1688商品列表API与其他数据源的对接思路
将1688商品列表API与其他数据源对接时,需结合业务场景设计数据流转链路,重点关注数据格式兼容性、接口调用频率控制及数据一致性维护。以下是具体对接思路及关键技术点: 一、核心对接场景与目标 商品数据同步 场景:将1688商品信息…...
Python Ovito统计金刚石结构数量
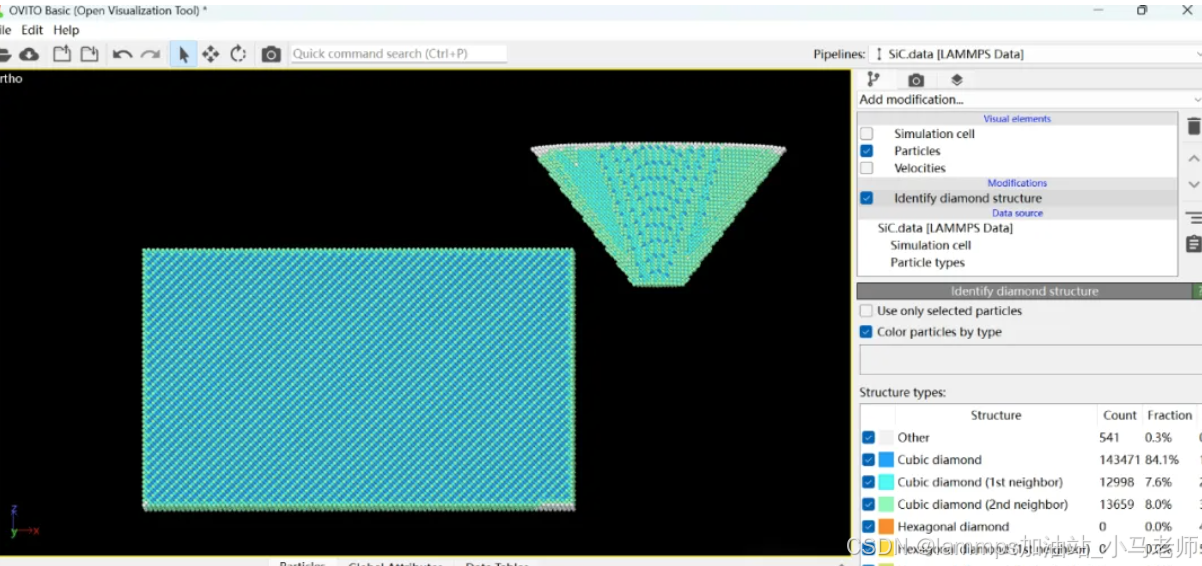
大家好,我是小马老师。 本文介绍python ovito方法统计金刚石结构的方法。 Ovito Identify diamond structure命令可以识别和统计金刚石结构,但是无法直接输出结构的变化情况。 本文使用python调用ovito包的方法,可以持续统计各步的金刚石结构,具体代码如下: from ovito…...
【p2p、分布式,区块链笔记 MESH】Bluetooth蓝牙通信 BLE Mesh协议的拓扑结构 定向转发机制
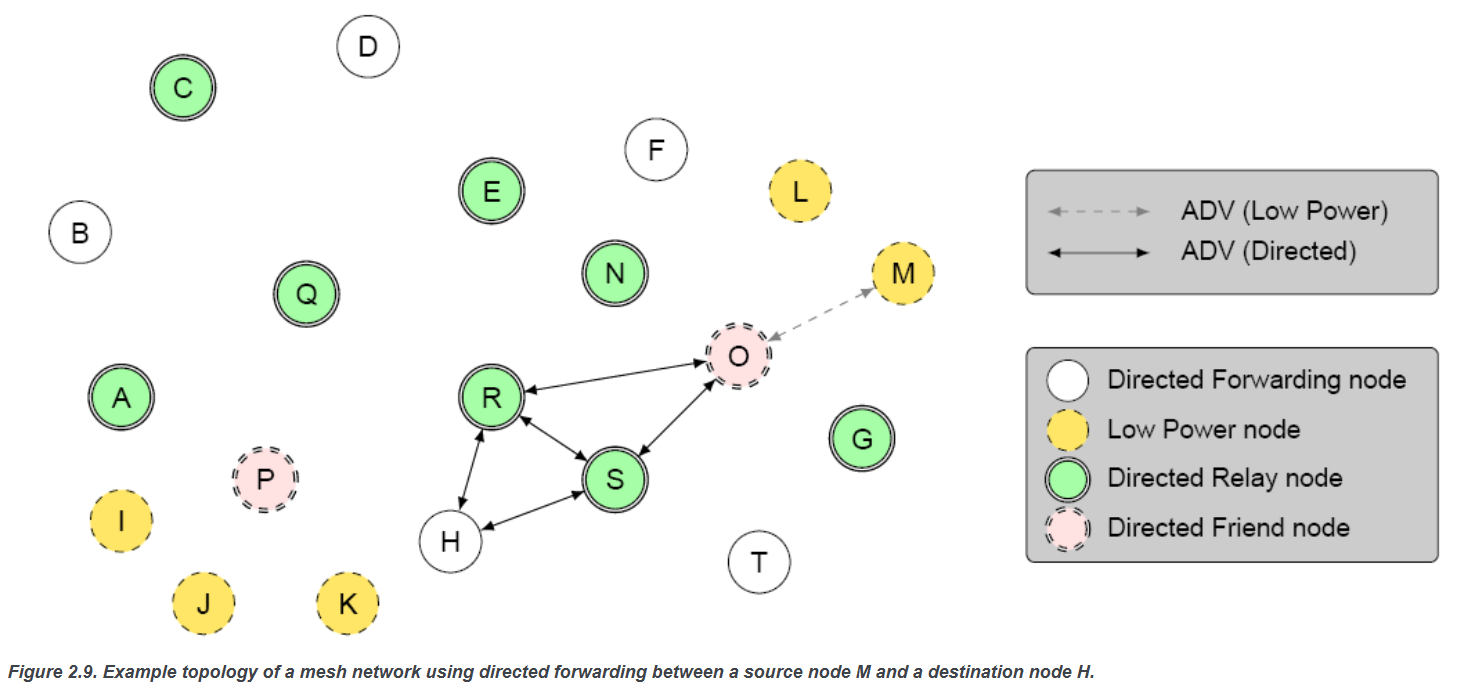
目录 节点的功能承载层(GATT/Adv)局限性: 拓扑关系定向转发机制定向转发意义 CG 节点的功能 节点的功能由节点支持的特性和功能决定。所有节点都能够发送和接收网格消息。节点还可以选择支持一个或多个附加功能,如 Configuration …...

从零开始了解数据采集(二十八)——制造业数字孪生
近年来,我国的工业领域正经历一场前所未有的数字化变革,从“双碳目标”到工业互联网平台的推广,国家政策和市场需求共同推动了制造业的升级。在这场变革中,数字孪生技术成为备受关注的关键工具,它不仅让企业“看见”设…...
Mac flutter环境搭建
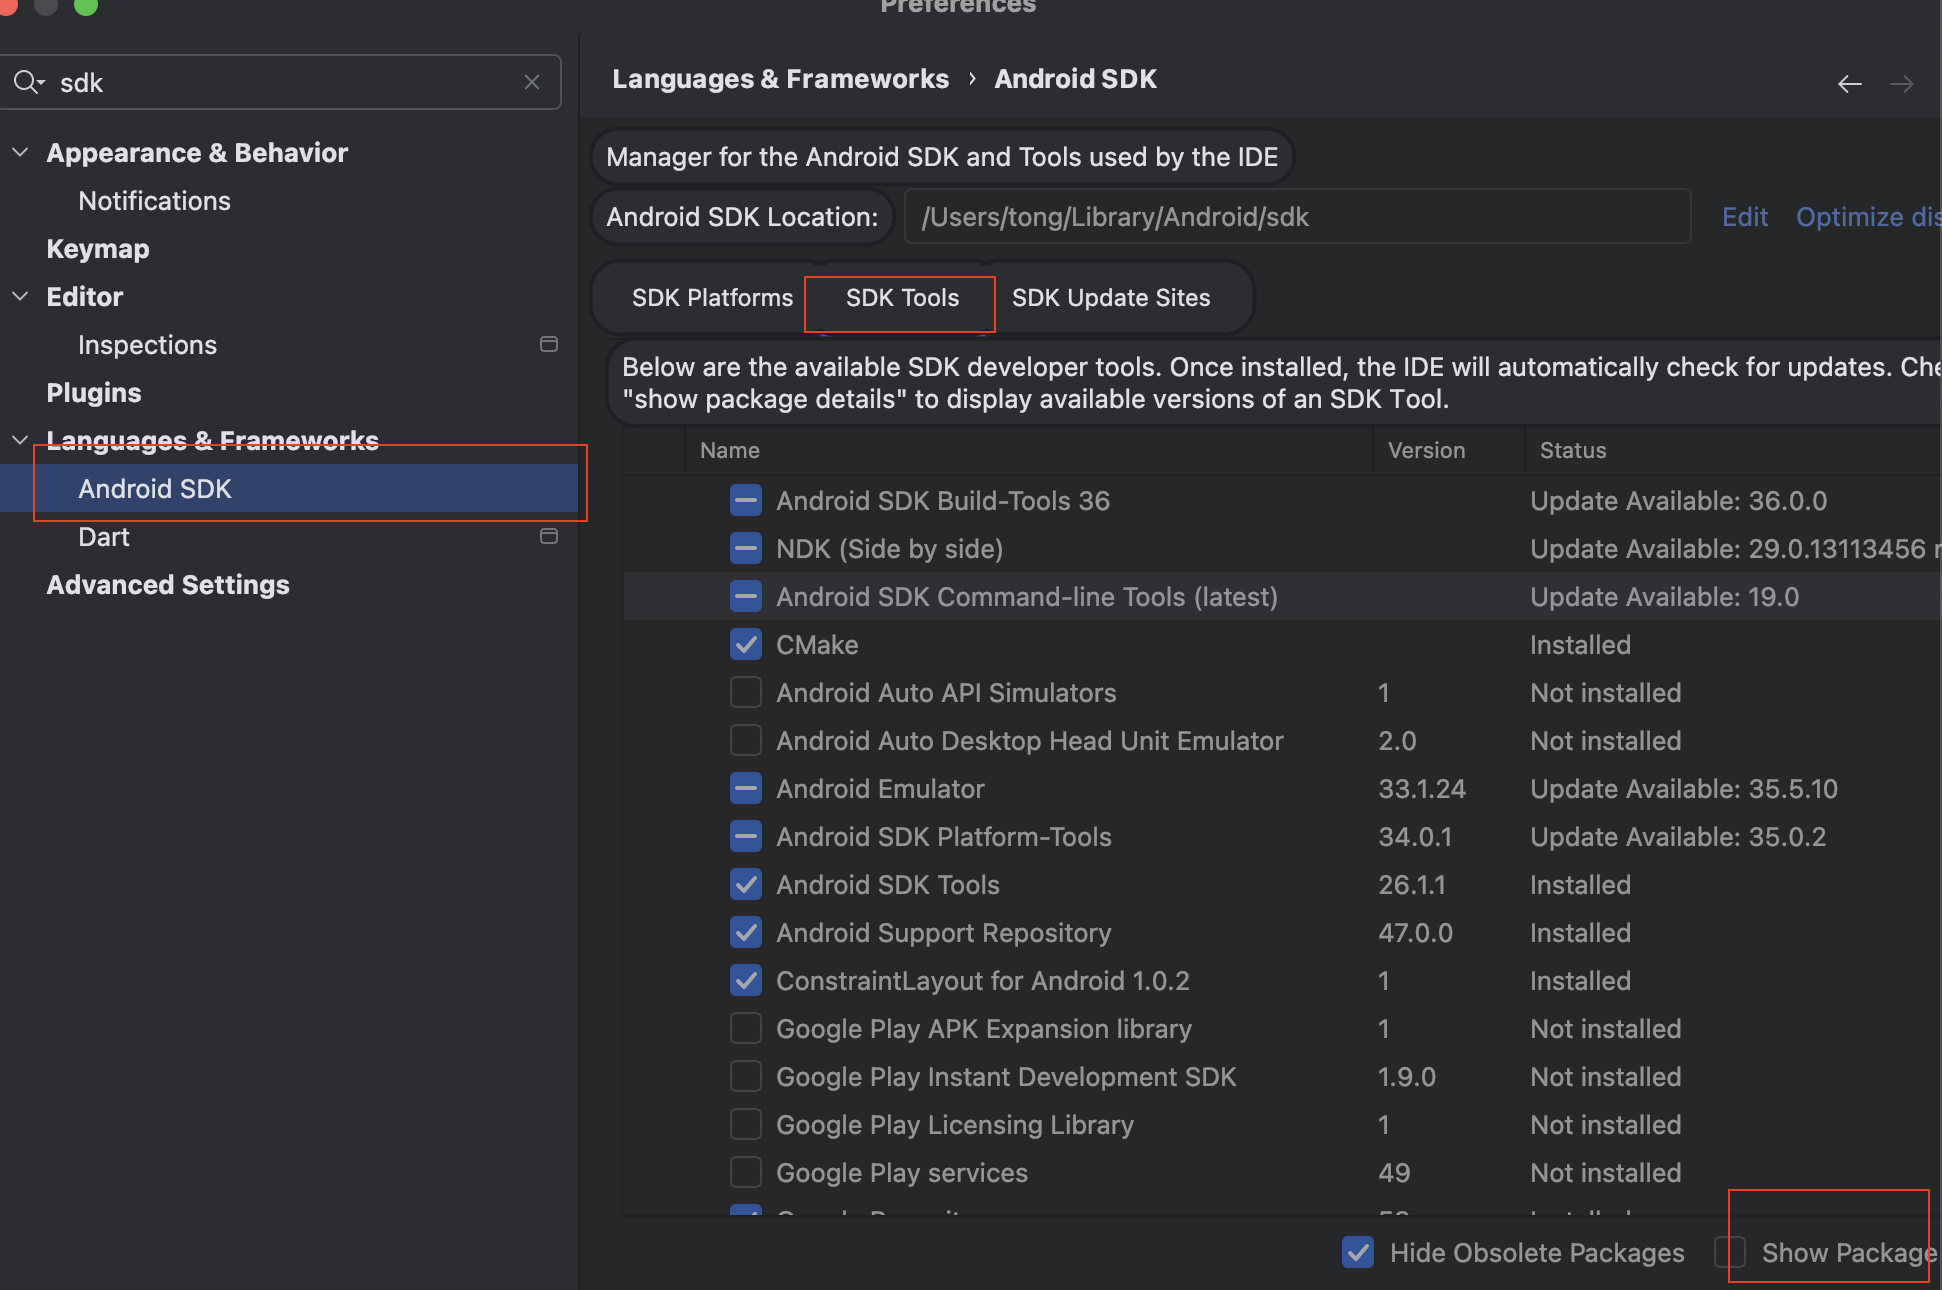
一、下载flutter sdk 制作 Android 应用 | Flutter 中文文档 - Flutter 中文开发者网站 - Flutter 1、查看mac电脑处理器选择sdk 2、解压 unzip ~/Downloads/flutter_macos_arm64_3.32.2-stable.zip \ -d ~/development/ 3、添加环境变量 命令行打开配置环境变量文件 ope…...

用 FFmpeg 实现 RTMP 推流直播
RTMP(Real-Time Messaging Protocol) 是直播行业中常用的传输协议。 一般来说,直播服务商会给你: ✅ 一个 RTMP 推流地址(你推视频上去) ✅ 一个 HLS 或 FLV 拉流地址(观众观看用)…...

Linux系统:进程间通信-匿名与命名管道
本节重点 匿名管道的概念与原理匿名管道的创建命名管道的概念与原理命名管道的创建两者的差异与联系命名管道实现EchoServer 一、管道 管道(Pipe)是一种进程间通信(IPC, Inter-Process Communication)机制,用于在不…...

Java求职者面试指南:Spring、Spring Boot、Spring MVC与MyBatis技术点解析
Java求职者面试指南:Spring、Spring Boot、Spring MVC与MyBatis技术点解析 第一轮:基础概念问题 请解释Spring框架的核心容器是什么?它的作用是什么? 程序员JY回答:Spring框架的核心容器是IoC容器(控制反转…...

HarmonyOS-ArkUI 自定义弹窗
自定义弹窗 自定义弹窗是界面开发中最为常用的一种弹窗写法。在自定义弹窗中, 布局样式完全由您决定,非常灵活。通常会被封装成工具类,以使得APP中所有弹窗具备相同的设计风格。 自定义弹窗具备的能力有 打开弹窗自定义布局,以…...
