OpenCV DNN模块推理YOLOv5 ONNX模型方法
文章目录
- 概述
- 1. 环境部署
- `YOLOv5`算法`ONNX`模型获取
- `opencv-python`模块安装
- 2.关键代码
- 2.1 模型加载
- 2.2 图片数据预处理
- 2.3 模型推理
- 2.4 推理结果后处理
- 2.4.1 NMS
- 2.4.2 score_threshold过滤
- 2.4.3 bbox坐标转换与还原
- 3. 示例代码(可运行)
- 3.1 未封装
- 3.2 封装成类调用
概述
本文档主要描述python平台,使用opencv-python深度神经网络模块dnn,推理YOLOv5模型的方法。
文档主要包含以下内容:
opencv-python模块的安装YOLOv5模型格式的说明ONNX格式模型的加载- 图片数据的预处理
- 模型推理
- 推理结果后处理,包括
NMS,cxcywh坐标转换为xyxy坐标等 - 关键方法的调用与参数说明
- 完整的示例代码
1. 环境部署
YOLOv5算法ONNX模型获取
可通过官方链接下载YOLOv5的官方预训练模型,模型格式为pt.下载链接
YOLOv5官方项目提供了pt格式模型转换为ONNX格式模型的脚本,项目链接
模型导出指令:
python export --weights yolov5s.pt --include onnx
注:导出文件执行指令所需环境安装配置参考官方项目
README文档即可,不在赘述。
opencv-python模块安装
-
创建虚拟环境并激活
conda create -n opencv python=3.8 -y conda activate opencv -
pip安装opencv-python模块pip install opencv-python注: 通过
pip安装opencv-python模块时,默认安装仅支持CPU推理,如需支持GPU推理,需从源码编译安装,具体安装方法较复杂,这里不在赘述。
2.关键代码
2.1 模型加载
opencv-python模块提供了readNetFromONNX方法,用于加载ONNX格式模型。
import cv2
cv2.dnn.readNetFromONNX(model_path)
2.2 图片数据预处理
数据预处理步骤包括resize,归一化,颜色通道转换,NCWH维度转换等。
resize之前,有一个非常常用的trick来处理非方形的图片,即计算图形的最长边,以此最长边为基础,创建一个正方形,并将原图形放置到左上角,剩余部分用黑色填充,这样做的好处是,不会改变原图形的长宽比,同时也不会改变原图形的内容。
 # image preprocessing, the trick is to make the frame to be a square but not twist the image
row, col, _ = frame.shape  # get the row and column of the origin frame array
_max = max(row, col)  # get the max value of row and column
input_image = np.zeros((_max, _max, 3), dtype=np.uint8)  # create a new array with the max value
input_image[:row, :col, :] = frame  # paste the original frame  to make the input_image to be a square
完成图片的填充后,继续执行resize,归一化,颜色通道转换等操作。
blob = cv2.dnn.blobFromImage(image, scalefactor=1 / 255.0, size=(640,640), swapRB=True, crop=False)
image: 输入图片数据,numpy.ndarray格式,shape为(H,W,C),Channel顺序为BGR。scalefactor: 图片数据归一化系数,一般为1/255.0。size: 图片resize尺寸,以模型的输入要求为准,这里是(640,640)。swapRB: 是否交换颜色通道,即转换BGR为RGBTrue表示交换,False表示不交换,由于opencv读取图片数据的颜色通道顺序为BGR,而YOLOv5模型的输入要求为RGB,所以这里需要交换颜色通道。crop: 是否裁剪图片,False表示不裁剪。
blobFromImage函数返回四维Mat对象(NCHW dimensions order),数据的shape为(1,3,640,640)
2.3 模型推理
-
设置推理Backend和Target
model.setPreferableBackend(cv2.dnn.DNN_BACKEND_OPENCV)
model.setPreferableTarget(cv2.dnn.DNN_TARGET_CPU)
模型加载完成后,需要设置推理时的设备,一般情况下,推理设备为
CPU,设置方法如下:model.setPreferableBackend(cv2.dnn.DNN_BACKEND_OPENCV) model.setPreferableTarget(cv2.dnn.DNN_TARGET_CPU)当然,若此时环境中的
opencv-python模块支持GPU推理,也可以设置为GPU推理,设置方法如下:model.setPreferableBackend(cv2.dnn.DNN_BACKEND_CUDA) model.setPreferableTarget(cv2.dnn.DNN_TARGET_CUDA)注: 判断
opencv-python模块是否支持GPU推理的方法如下:cv2.cuda.getCudaEnabledDeviceCount(),返回值大于0表示支持GPU推理,否则表示不支持。 -
设置模型输入数据
model.setInput(blob)blob为上一步数据预处理得到的数据。 -
调用模型前向传播
forward方法outputs = model.forward()outputs为模型推理的输出,输出格式为(1,25200,5+nc),25200为模型输出的网格数量,5+nc为每个网格预测的5+nc个值,5为x,y,w,h,conf,nc为类别数量。
2.4 推理结果后处理
由于推理结果存在大量重叠的bbox,需要进行NMS处理,后续根据每个bbox的置信度和用户设定的置信度阈值进行过滤,最终得到最终的bbox,和对应的类别、置信度。
2.4.1 NMS
opencv-python模块提供了NMSBoxes方法,用于进行NMS处理。
cv2.dnn.NMSBoxes(bboxes, scores, score_threshold, nms_threshold, eta=None, top_k=None)
bboxes:bbox列表,shape为(N,4),N为bbox数量,4为bbox的x,y,w,h。scores:bbox对应的置信度列表,shape为(N,1),N为bbox数量。score_threshold: 置信度阈值,小于该阈值的bbox将被过滤。nms_threshold:NMS阈值
NMSBoxes函数返回值为bbox索引列表,shape为(M,),M为bbox数量.
2.4.2 score_threshold过滤
根据NMS处理后的bbox索引列表,过滤置信度小于score_threshold的bbox。
2.4.3 bbox坐标转换与还原
YOLOv5模型输出的bbox坐标为cxcywh格式,需要转换为xyxy格式,此外,由于之前对图片进行了resize操作,所以需要将bbox坐标还原到原始图片的尺寸。
转换方法如下:
# 获取原始图片的尺寸(填充后)
image_width, image_height, _ = input_image.shape
# 计算缩放比
x_factor = image_width / INPUT_WIDTH  #  640
y_factor = image_height / INPUT_HEIGHT #  640 # 将cxcywh坐标转换为xyxy坐标
x1 = int((x - w / 2) * x_factor)
y1 = int((y - h / 2) * y_factor)
w = int(w * x_factor)
h = int(h * y_factor)
x2 = x1 + w
y2 = y1 + h
x1,y1,x2,y2即为bbox的xyxy坐标。
3. 示例代码(可运行)
源代码一共有两份,其中一份是函数的拼接与调用,比较方便调试,另一份是封装成类,方便集成到其他项目中。
3.1 未封装
"""
running the onnx model inference with opencv dnn module"""
from typing import Listimport cv2
import numpy as np
import time
from pathlib import Pathdef build_model(model_path: str) -> cv2.dnn_Net:"""build the model with opencv dnn moduleArgs:model_path: the path of the model, the model should be in onnx formatReturns:the model object"""# check if the model file existsif not Path(model_path).exists():raise FileNotFoundError(f"model file {model_path} not found")model = cv2.dnn.readNetFromONNX(model_path)# check if the opencv-python in your environment supports cudacuda_available = cv2.cuda.getCudaEnabledDeviceCount() > 0if cuda_available:  # if cuda is available, use cudamodel.setPreferableBackend(cv2.dnn.DNN_BACKEND_CUDA)model.setPreferableTarget(cv2.dnn.DNN_TARGET_CUDA)else:  # if cuda is not available, use cpumodel.setPreferableBackend(cv2.dnn.DNN_BACKEND_OPENCV)model.setPreferableTarget(cv2.dnn.DNN_TARGET_CPU)return modeldef inference(image: np.ndarray, model: cv2.dnn_Net) -> np.ndarray:"""inference the model with the input imageArgs:image: the input image in numpy array format, the shape should be (height, width, channel),the color channels should be in GBR order, like the original opencv image formatmodel: the model objectReturns:the output data of the model, the shape should be (1, 25200, nc+5), nc is the number of classes"""# image preprocessing, include resize, normalization, channel swap like BGR to RGB, and convert to blob format# get a 4-dimensional Mat with NCHW dimensions order.blob = cv2.dnn.blobFromImage(image, 1 / 255.0, (INPUT_WIDTH, INPUT_HEIGHT), swapRB=True, crop=False)# the alternative way to get the blob# rgb = cv2.cvtColor(image, cv2.COLOR_BGR2RGB)# input_image = cv2.resize(src=rgb, dsize=(INPUT_WIDTH, INPUT_HEIGHT))# blob_img = np.float32(input_image) / 255.0# input_x = blob_img.transpose((2, 0, 1))# blob = np.expand_dims(input_x, 0)if cv2.cuda.getCudaEnabledDeviceCount() > 0:model.setPreferableBackend(cv2.dnn.DNN_BACKEND_CUDA)model.setPreferableTarget(cv2.dnn.DNN_TARGET_CUDA)else:model.setPreferableBackend(cv2.dnn.DNN_BACKEND_OPENCV)model.setPreferableTarget(cv2.dnn.DNN_TARGET_CPU)# set the input datamodel.setInput(blob)start = time.perf_counter()# inferenceouts = model.forward()end = time.perf_counter()print("inference time: ", end - start)# the shape of the output data is (1, 25200, nc+5), nc is the number of classesreturn outsdef xywh_to_xyxy(bbox_xywh, image_width, image_height):"""Convert bounding box coordinates from (center_x, center_y, width, height) to (x_min, y_min, x_max, y_max) format.Parameters:bbox_xywh (list or tuple): Bounding box coordinates in (center_x, center_y, width, height) format.image_width (int): Width of the image.image_height (int): Height of the image.Returns:tuple: Bounding box coordinates in (x_min, y_min, x_max, y_max) format."""center_x, center_y, width, height = bbox_xywhx_min = max(0, int(center_x - width / 2))y_min = max(0, int(center_y - height / 2))x_max = min(image_width - 1, int(center_x + width / 2))y_max = min(image_height - 1, int(center_y + height / 2))return x_min, y_min, x_max, y_maxdef wrap_detection(input_image: np.ndarray,output_data: np.ndarray,labels: List[str],confidence_threshold: float = 0.6
) -> (List[int], List[float], List[List[int]]):# the shape of the output_data is (25200,5+nc),# the first 5 elements are [x, y, w, h, confidence], the rest are prediction scores of each classimage_width, image_height, _ = input_image.shapex_factor = image_width / INPUT_WIDTHy_factor = image_height / INPUT_HEIGHT# transform the output_data[:, 0:4] from (x, y, w, h) to (x_min, y_min, x_max, y_max)indices = cv2.dnn.NMSBoxes(output_data[:, 0:4].tolist(), output_data[:, 4].tolist(), 0.6, 0.4)raw_boxes = output_data[:, 0:4][indices]raw_confidences = output_data[:, 4][indices]raw_class_prediction_probabilities = output_data[:, 5:][indices]criteria = raw_confidences > confidence_thresholdraw_class_prediction_probabilities = raw_class_prediction_probabilities[criteria]raw_boxes = raw_boxes[criteria]raw_confidences = raw_confidences[criteria]bounding_boxes, confidences, class_ids = [], [], []for class_prediction_probability, box, confidence in zip(raw_class_prediction_probabilities, raw_boxes,raw_confidences):## find the least and most probable classes' indices and their probabilities# min_val, max_val, min_loc, mac_loc = cv2.minMaxLoc(class_prediction_probability)most_probable_class_index = np.argmax(class_prediction_probability)label = labels[most_probable_class_index]confidence = float(confidence)# bounding_boxes.append(box)# confidences.append(confidence)# class_ids.append(most_probable_class_index)x, y, w, h = boxleft = int((x - 0.5 * w) * x_factor)top = int((y - 0.5 * h) * y_factor)width = int(w * x_factor)height = int(h * y_factor)bounding_box = [left, top, width, height]bounding_boxes.append(bounding_box)confidences.append(confidence)class_ids.append(most_probable_class_index)return class_ids, confidences, bounding_boxescoco_class_names = ["person", "bicycle", "car", "motorcycle", "airplane", "bus", "train", "truck", "boat","traffic light", "fire hydrant", "stop sign", "parking meter", "bench", "bird", "cat","dog", "horse", "sheep", "cow", "elephant", "bear", "zebra", "giraffe", "backpack","umbrella", "handbag", "tie", "suitcase", "frisbee", "skis", "snowboard", "sports ball","kite", "baseball bat", "baseball glove", "skateboard", "surfboard", "tennis racket","bottle", "wine glass", "cup", "fork", "knife", "spoon", "bowl", "banana", "apple","sandwich", "orange", "broccoli", "carrot", "hot dog", "pizza", "donut", "cake", "chair","couch", "potted plant", "bed", "dining table", "toilet", "tv", "laptop", "mouse","remote", "keyboard", "cell phone", "microwave", "oven", "toaster", "sink","refrigerator", "book", "clock", "vase", "scissors", "teddy bear", "hair drier","toothbrush"]
# generate different colors for coco classes
colors = np.random.uniform(0, 255, size=(len(coco_class_names), 3))INPUT_WIDTH = 640
INPUT_HEIGHT = 640
CONFIDENCE_THRESHOLD = 0.7
NMS_THRESHOLD = 0.45def video_detector(video_src):cap = cv2.VideoCapture(video_src)# 3. inference and show the result in a loopwhile cap.isOpened():success, frame = cap.read()start = time.perf_counter()if not success:break# image preprocessing, the trick is to make the frame to be a square but not twist the imagerow, col, _ = frame.shape  # get the row and column of the origin frame array_max = max(row, col)  # get the max value of row and columninput_image = np.zeros((_max, _max, 3), dtype=np.uint8)  # create a new array with the max valueinput_image[:row, :col, :] = frame  # paste the original frame  to make the input_image to be a square# inferenceoutput_data = inference(input_image, net)  # the shape of output_data is (1, 25200, 85)# 4. wrap the detection resultclass_ids, confidences, boxes = wrap_detection(input_image, output_data[0], coco_class_names)# 5. draw the detection result on the framefor (class_id, confidence, box) in zip(class_ids, confidences, boxes):color = colors[int(class_id) % len(colors)]label = coco_class_names[int(class_id)]xmin, ymin, width, height = boxcv2.rectangle(frame, (xmin, ymin), (xmin + width, ymin + height), color, 2)# cv2.rectangle(frame, box, color, 2)# cv2.rectangle(frame, [box[0], box[1], box[2], box[3]], color, thickness=2)# cv2.rectangle(frame, (box[0], box[1] - 20), (box[0] + 100, box[1]), color, -1)cv2.putText(frame, str(label), (box[0], box[1] - 5), cv2.FONT_HERSHEY_SIMPLEX, 1, (0, 0, 0), 2)finish = time.perf_counter()FPS = round(1.0 / (finish - start), 2)cv2.putText(frame, str(FPS), (10, 50), cv2.FONT_HERSHEY_SIMPLEX, 1, (0, 0, 0), 2)# 6. show the framecv2.imshow("frame", frame)# 7. press 'q' to exitif cv2.waitKey(1) == ord('q'):break# 8. release the capture and destroy all windowscap.release()cv2.destroyAllWindows()if __name__ == '__main__':# there are 4 steps to use opencv dnn module to inference onnx model exported by yolov5 and show the result# 1. load the modelmodel_path = Path("weights/yolov5s.onnx")net = build_model(str(model_path))# 2. load the video capture# video_source = 0video_source = 'rtsp://admin:aoto12345@192.168.8.204:554/h264/ch1/main/av_stream'video_detector(video_source)exit(0)
3.2 封装成类调用
from typing import Listimport onnx
from torchvision import transformsfrom torchvision.ops import nms,box_convert
import cv2
import time
import numpy as np
import onnxruntime as ort
import torchINPUT_WIDTH = 640
INPUT_HEIGHT = 640def wrap_detection(input_image: np.ndarray,output_data: np.ndarray,labels: List[str],confidence_threshold: float = 0.6
) -> (List[int], List[float], List[List[int]]):# the shape of the output_data is (25200,5+nc),# the first 5 elements are [x, y, w, h, confidence], the rest are prediction scores of each classimage_width, image_height, _ = input_image.shapex_factor = image_width / INPUT_WIDTHy_factor = image_height / INPUT_HEIGHT# transform the output_data[:, 0:4] from (x, y, w, h) to (x_min, y_min, x_max, y_max)# output_data[:, 0:4] = np.apply_along_axis(xywh_to_xyxy, 1, output_data[:, 0:4], image_width, image_height)nms_start = time.perf_counter()indices = cv2.dnn.NMSBoxes(output_data[:, 0:4].tolist(), output_data[:, 4].tolist(), 0.6, 0.4)nms_finish = time.perf_counter()print(f"nms time: {nms_finish - nms_start}")# print(indices)raw_boxes = output_data[:, 0:4][indices]raw_confidences = output_data[:, 4][indices]raw_class_prediction_probabilities = output_data[:, 5:][indices]criteria = raw_confidences > confidence_thresholdraw_class_prediction_probabilities = raw_class_prediction_probabilities[criteria]raw_boxes = raw_boxes[criteria]raw_confidences = raw_confidences[criteria]bounding_boxes, confidences, class_ids = [], [], []for class_prediction_probability, box, confidence in zip(raw_class_prediction_probabilities, raw_boxes,raw_confidences):## find the least and most probable classes' indices and their probabilities# min_val, max_val, min_loc, mac_loc = cv2.minMaxLoc(class_prediction_probability)most_probable_class_index = np.argmax(class_prediction_probability)label = labels[most_probable_class_index]confidence = float(confidence)# bounding_boxes.append(box)# confidences.append(confidence)# class_ids.append(most_probable_class_index)x, y, w, h = boxleft = int((x - 0.5 * w) * x_factor)top = int((y - 0.5 * h) * y_factor)width = int(w * x_factor)height = int(h * y_factor)bounding_box = [left, top, width, height]bounding_boxes.append(bounding_box)confidences.append(confidence)class_ids.append(most_probable_class_index)return class_ids, confidences, bounding_boxescoco_class_names = ["person", "bicycle", "car", "motorcycle", "airplane", "bus", "train", "truck", "boat","traffic light", "fire hydrant", "stop sign", "parking meter", "bench", "bird", "cat","dog", "horse", "sheep", "cow", "elephant", "bear", "zebra", "giraffe", "backpack","umbrella", "handbag", "tie", "suitcase", "frisbee", "skis", "snowboard", "sports ball","kite", "baseball bat", "baseball glove", "skateboard", "surfboard", "tennis racket","bottle", "wine glass", "cup", "fork", "knife", "spoon", "bowl", "banana", "apple","sandwich", "orange", "broccoli", "carrot", "hot dog", "pizza", "donut", "cake", "chair","couch", "potted plant", "bed", "dining table", "toilet", "tv", "laptop", "mouse","remote", "keyboard", "cell phone", "microwave", "oven", "toaster", "sink","refrigerator", "book", "clock", "vase", "scissors", "teddy bear", "hair drier","toothbrush"]colors = np.random.uniform(0, 255, size=(len(coco_class_names), 3))
if __name__ == '__main__':# Load the modelmodel_path = "weights/yolov5s.onnx"onnx_model = onnx.load(model_path)onnx.checker.check_model(onnx_model)session = ort.InferenceSession(model_path, providers=['CUDAExecutionProvider',"CPUExecutionProvider"])capture = cv2.VideoCapture(0)trans = transforms.Compose([transforms.Resize((640, 640)),transforms.ToTensor()])from PIL import Imagewhile capture.isOpened():success, frame = capture.read()start = time.perf_counter()if not success:breakrows, cols, channels = frame.shape# Preprocessingmax_size = max(rows, cols)input_image = np.zeros((max_size, max_size, 3), dtype=np.uint8)input_image[:rows, :cols, :] = frameinput_image = cv2.cvtColor(input_image, cv2.COLOR_BGR2RGB)inputs = trans(Image.fromarray(input_image))inputs = inputs.unsqueeze(0)print(inputs.shape)# inputs.to('cuda')ort_inputs = {session.get_inputs()[0].name: inputs.numpy()}ort_outs = session.run(None, ort_inputs)out_prob = ort_outs[0][0]print(out_prob.shape)scores = out_prob[:, 4] # Confidence scores are in the 5th column (0-indexed)class_ids = out_prob[:, 5:].argmax(axis=1)  # Class labels are from the 6th column onwardsbounding_boxes_xywh = out_prob[:, :4]  # Bounding boxes in cxcywh format# Filter out boxes based on confidence thresholdconfidence_threshold = 0.7mask = scores >= confidence_thresholdclass_ids = class_ids[mask]bounding_boxes_xywh = bounding_boxes_xywh[mask]scores = scores[mask]bounding_boxes_xywh = torch.tensor(bounding_boxes_xywh, dtype=torch.float32)# Convert bounding boxes from xywh to xyxy formatbounding_boxes_xyxy = box_convert(bounding_boxes_xywh, in_fmt='cxcywh', out_fmt='xyxy')# Perform Non-Maximum Suppression to filter candidate boxesscores = torch.tensor(scores, dtype=torch.float32)bounding_boxes_xyxy.to('cuda')scores.to('cuda')nms_start = time.perf_counter()keep_indices = nms(bounding_boxes_xyxy, scores, 0.4)nms_end = time.perf_counter()print(f"NMS took {nms_end - nms_start} seconds")class_ids = class_ids[keep_indices]confidences = scores[keep_indices]bounding_boxes = bounding_boxes_xyxy[keep_indices]# class_ids, confidences, bounding_boxes = wrap_detection(input_image, out_prob[0], coco_class_names, 0.6)# breakfor i in range(len(keep_indices)):try:class_id = class_ids[i]except IndexError as e:print(e)print(class_ids,i, len(keep_indices))breakconfidence = confidences[i]box = bounding_boxes[i]color = colors[int(class_id) % len(colors)]label = coco_class_names[int(class_id)]# cv2.rectangle(frame, box, color, 2)print(type(box), box[0], box[1], box[2], box[3], box)xmin, ymin, xmax, ymax = int(box[0]), int(box[1]), int(box[2]), int(box[3])cv2.rectangle(frame, (xmin, ymin), (xmax, ymax), color, 2)# cv2.rectangle(frame, box, color, 2)# cv2.rectangle(frame, [box[0], box[1], box[2], box[3]], color, thickness=2)cv2.rectangle(frame, (xmin, ymin - 20), (xmin + 100, ymin), color, -1)cv2.putText(frame, str(label), (xmin, ymin - 5), cv2.FONT_HERSHEY_SIMPLEX, 1, (0, 0, 0), 2)finish = time.perf_counter()FPS = round(1.0 / (finish - start), 2)cv2.putText(frame, f"FPS: {str(FPS)}", (10, 50), cv2.FONT_HERSHEY_SIMPLEX, 1, (0, 0, 0), 2)# 6. show the framecv2.imshow("frame", frame)# 7. press 'q' to exitif cv2.waitKey(1) == ord('q'):break# 8. release the capture and destroy all windowscapture.release()cv2.destroyAllWindows()exit(0)
相关文章:

OpenCV DNN模块推理YOLOv5 ONNX模型方法
文章目录 概述1. 环境部署YOLOv5算法ONNX模型获取opencv-python模块安装 2.关键代码2.1 模型加载2.2 图片数据预处理2.3 模型推理2.4 推理结果后处理2.4.1 NMS2.4.2 score_threshold过滤2.4.3 bbox坐标转换与还原 3. 示例代码(可运行)3.1 未封装3.2 封装成类调用 概述 本文档主…...
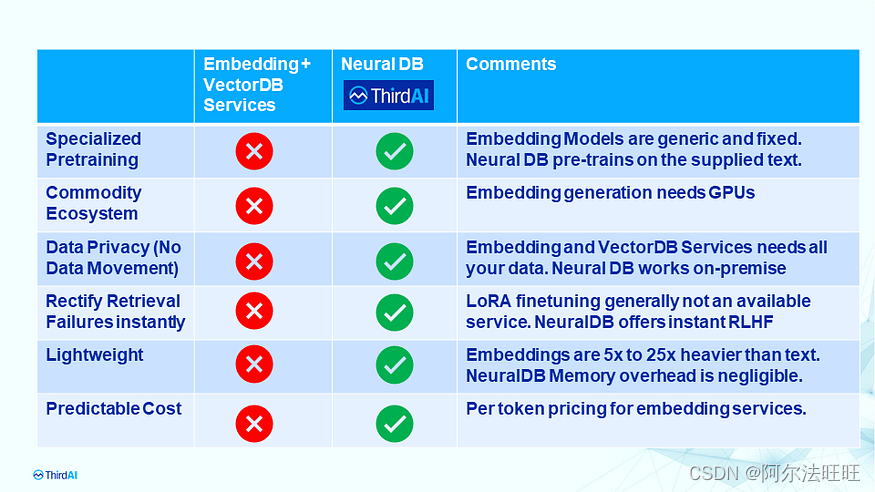
ThirdAI 的私有和可个性化神经数据库:增强检索增强生成(第 3/3 部分)
这是我们关于使用检索增强生成构建 AI 代理的系列的最后一章 (3/3)。在第 1/3 部分中,我们讨论了断开连接的嵌入和基于矢量的检索管道的局限性。在第 2/3 部分中,我们介绍了神经数据库,它消除了存储和操作繁重且昂贵的…...

C# 解决TCP Server 关不掉客户端连接的问题
问题描述 拷贝了一段 TCP Server的应用代码,第一次运行正常,但是关闭软件或者实现disconnectclose后都无法关闭端口连接。 关闭之后,另外一个客户端还在正常与PC连接。 TCP Server 重新运行,无法接收到客户端的连接。 复现环境…...
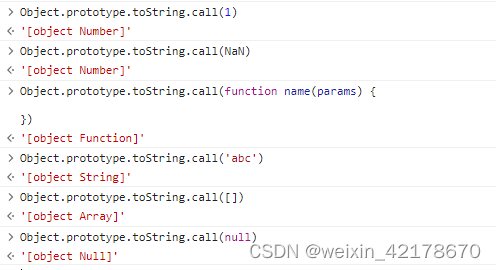
JS判断类型的方法和对应的局限性(typeof、instanceof和Object.prototype.toString.call()的用法)
JS判断类型的方法和对应的局限性(typeof、instanceof和Object.prototype.toString.call()的用法) 一、typeof 返回: 该方法返回小写字符串表示检测数据属于什么类型,例如: 检测函数返回function 可判断的数据类型:…...

mongostat跟踪Mongodb运行的状态
版本控制 从 MongoDB 4.4 开始,mongostat 现在与 MongoDB 服务器分开发布,并使用自己的版本控制,初始版本为100.0.0. 之前, mongostat 与 MongoDB Server 一起发布并使用匹配的版本控制。 兼容性 mongostat 版本100.7.3支持以下…...
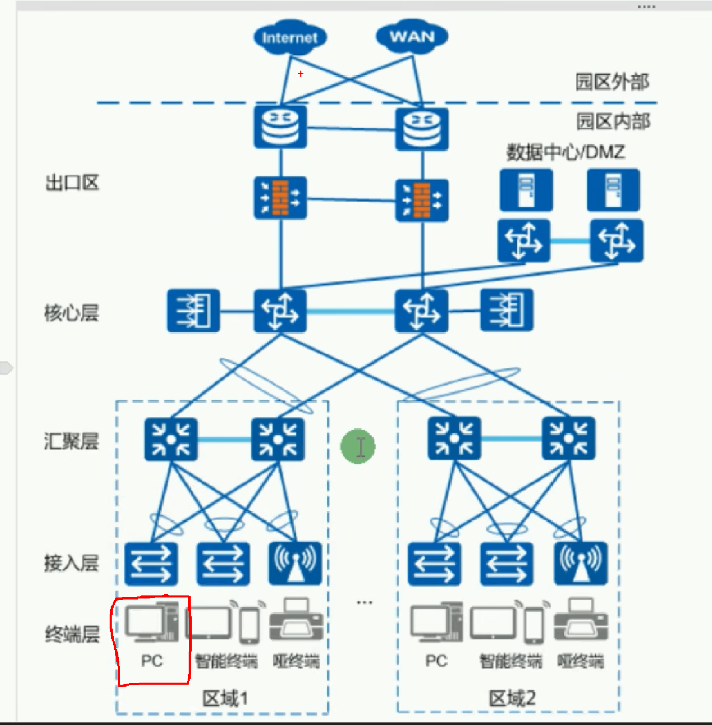
华为数通HCIA-数通网络基础
基础概念 通信:两个实体之间进行信息交流 数据通信:网络设备之间进行的通信 计算机网络:实现网络设备之间进行数据通信的媒介 园区网络(企业网络)/私网/内网:用于实现园区内部互通,并且需要部…...
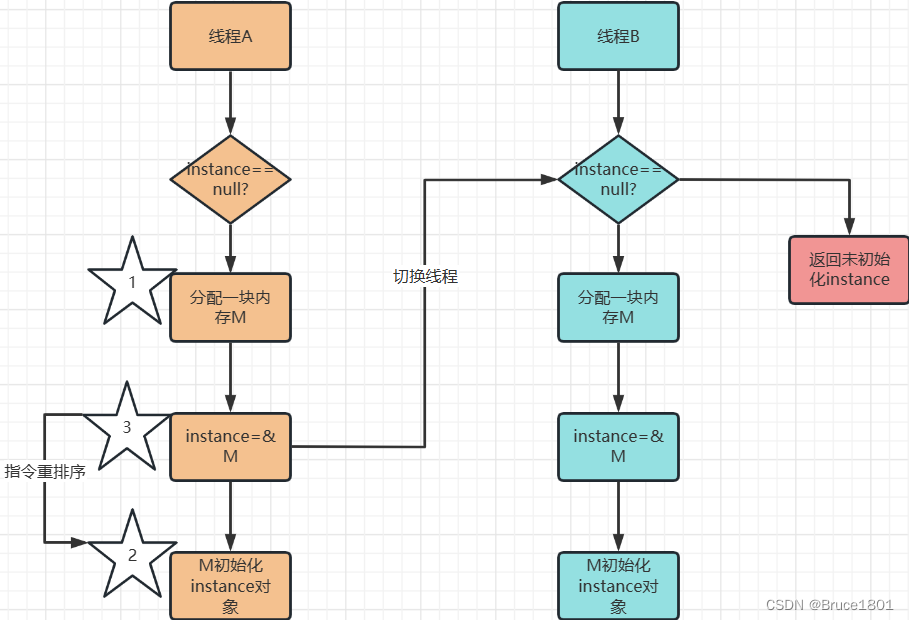
【设计模式】详解单例设计模式(包含并发、JVM)
文章目录 1、背景2、单例模式3、代码实现1、第一种实现(饿汉式)为什么属性都是static的?2、第二种实现(懒汉式,线程不安全)3、第三种实现(懒汉式,线程安全)4、第四种实现…...
监控和可观察性在 DevOps 中的作用!
在不断发展的DevOps世界中,深入了解系统行为、诊断问题和提高整体性能的能力是首要任务之一。监控和可观察性是促进这一过程的两个关键概念,为系统的健康状况和性能提供有价值的可见性。虽然这些术语经常互换使用,但它们代表了理解和管理复杂…...
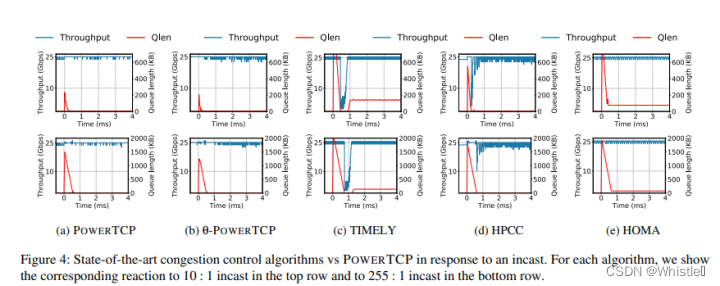
论文分享:PowerTCP: Pushing the Performance Limits of Datacenter Networks
1 原论文的题目(中英文)、题目中包含了哪些关键词?这些关键词的相关知识分别是什么? 题目:PowerTCP: Pushing the Performance Limits of Datacenter Networks PowerTCP:逼近数据中心的网络性能极限 2 论…...
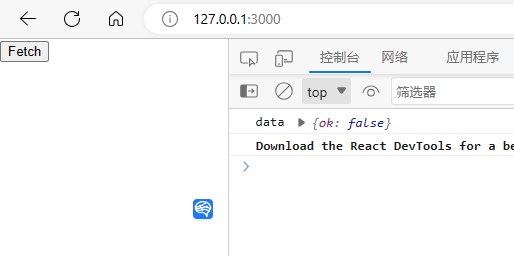
浏览器的同源策略 - 跨域问题
1.什么是跨域 跨域问题的实质是浏览器的同源策略造成的。浏览器同源策略是浏览器为 JavaScript 施加的限制。简单点说就是非同源会出现如下等限制: 无法访问其他源下的网页的 Cookies,Storage等;无法访问其他源下的DOM对象和 JS 对象;无法使…...
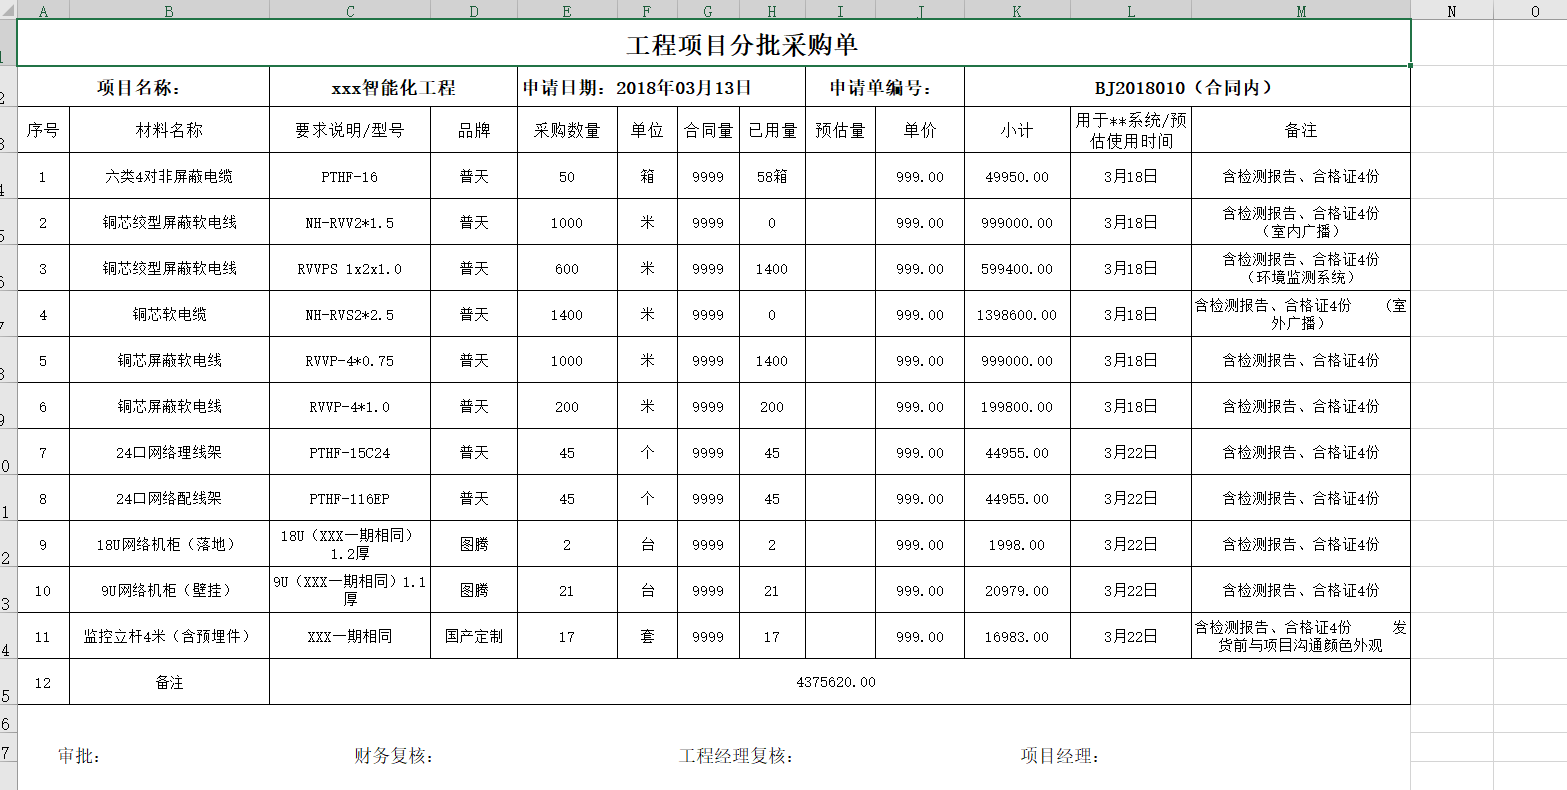
go 查询采购单设备事项[小示例]V2-两种模式{严格,包含模式}
第一版: https://mp.csdn.net/mp_blog/creation/editor/131979385 第二版: 优化内容: 检索数据的两种方式: 1.严格模式--找寻名称是一模一样的内容,在上一个版本实现了 2.包含模式,也就是我输入检索关…...

c++11 标准模板(STL)(std::basic_filebuf)(八)
定义于头文件 <fstream> template< class CharT, class Traits std::char_traits<CharT> > class basic_filebuf : public std::basic_streambuf<CharT, Traits> std::basic_filebuf 是关联字符序列为文件的 std::basic_streambuf 。输入序…...

行为型模式之解释器模式
解释器模式(Interpreter Pattern) 解释器模式(Interpreter Pattern)是一种行为设计模式,它用于对语言的文法进行解释和解析,以实现特定的操作。 在解释器模式中,存在以下几个角色: 抽…...
阿里云域名备案
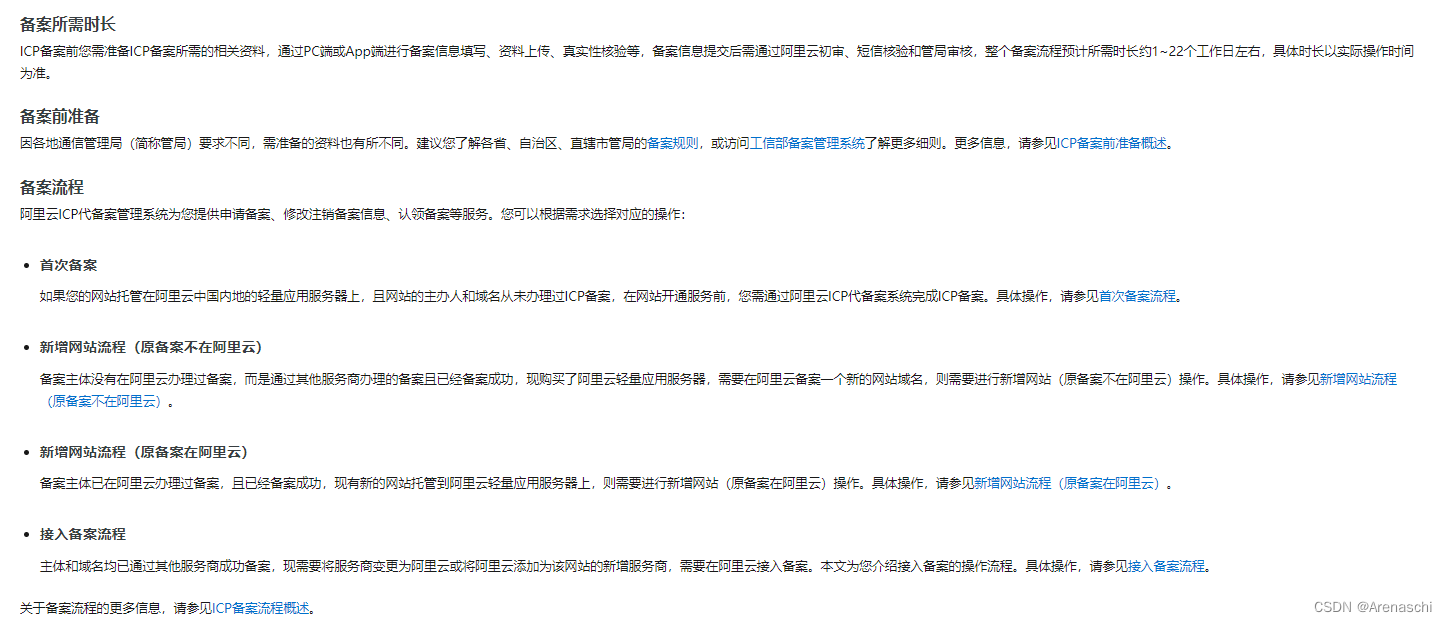
最好的爱情,不是因为我们彼此需要在一起,而是因为我们彼此想要在一起。 阿里云的域名如何备案,域名备案和ICP备案一样吗?? 截至我所掌握的知识(2021年9月),阿里云的域名备案和ICP备案…...

Clion开发Stm32之温湿度传感器(DS18B20)驱动编写和测试
前言 涵盖之前文章: Clion开发STM32之HAL库GPIO宏定义封装(最新版)Clion开发stm32之微妙延迟(采用nop指令实现)Clion开发STM32之日志模块(参考RT-Thread) DSP18B20驱动文件 头文件 /*******************************************************************************Copy…...
文档管理NAS储存安全吗?
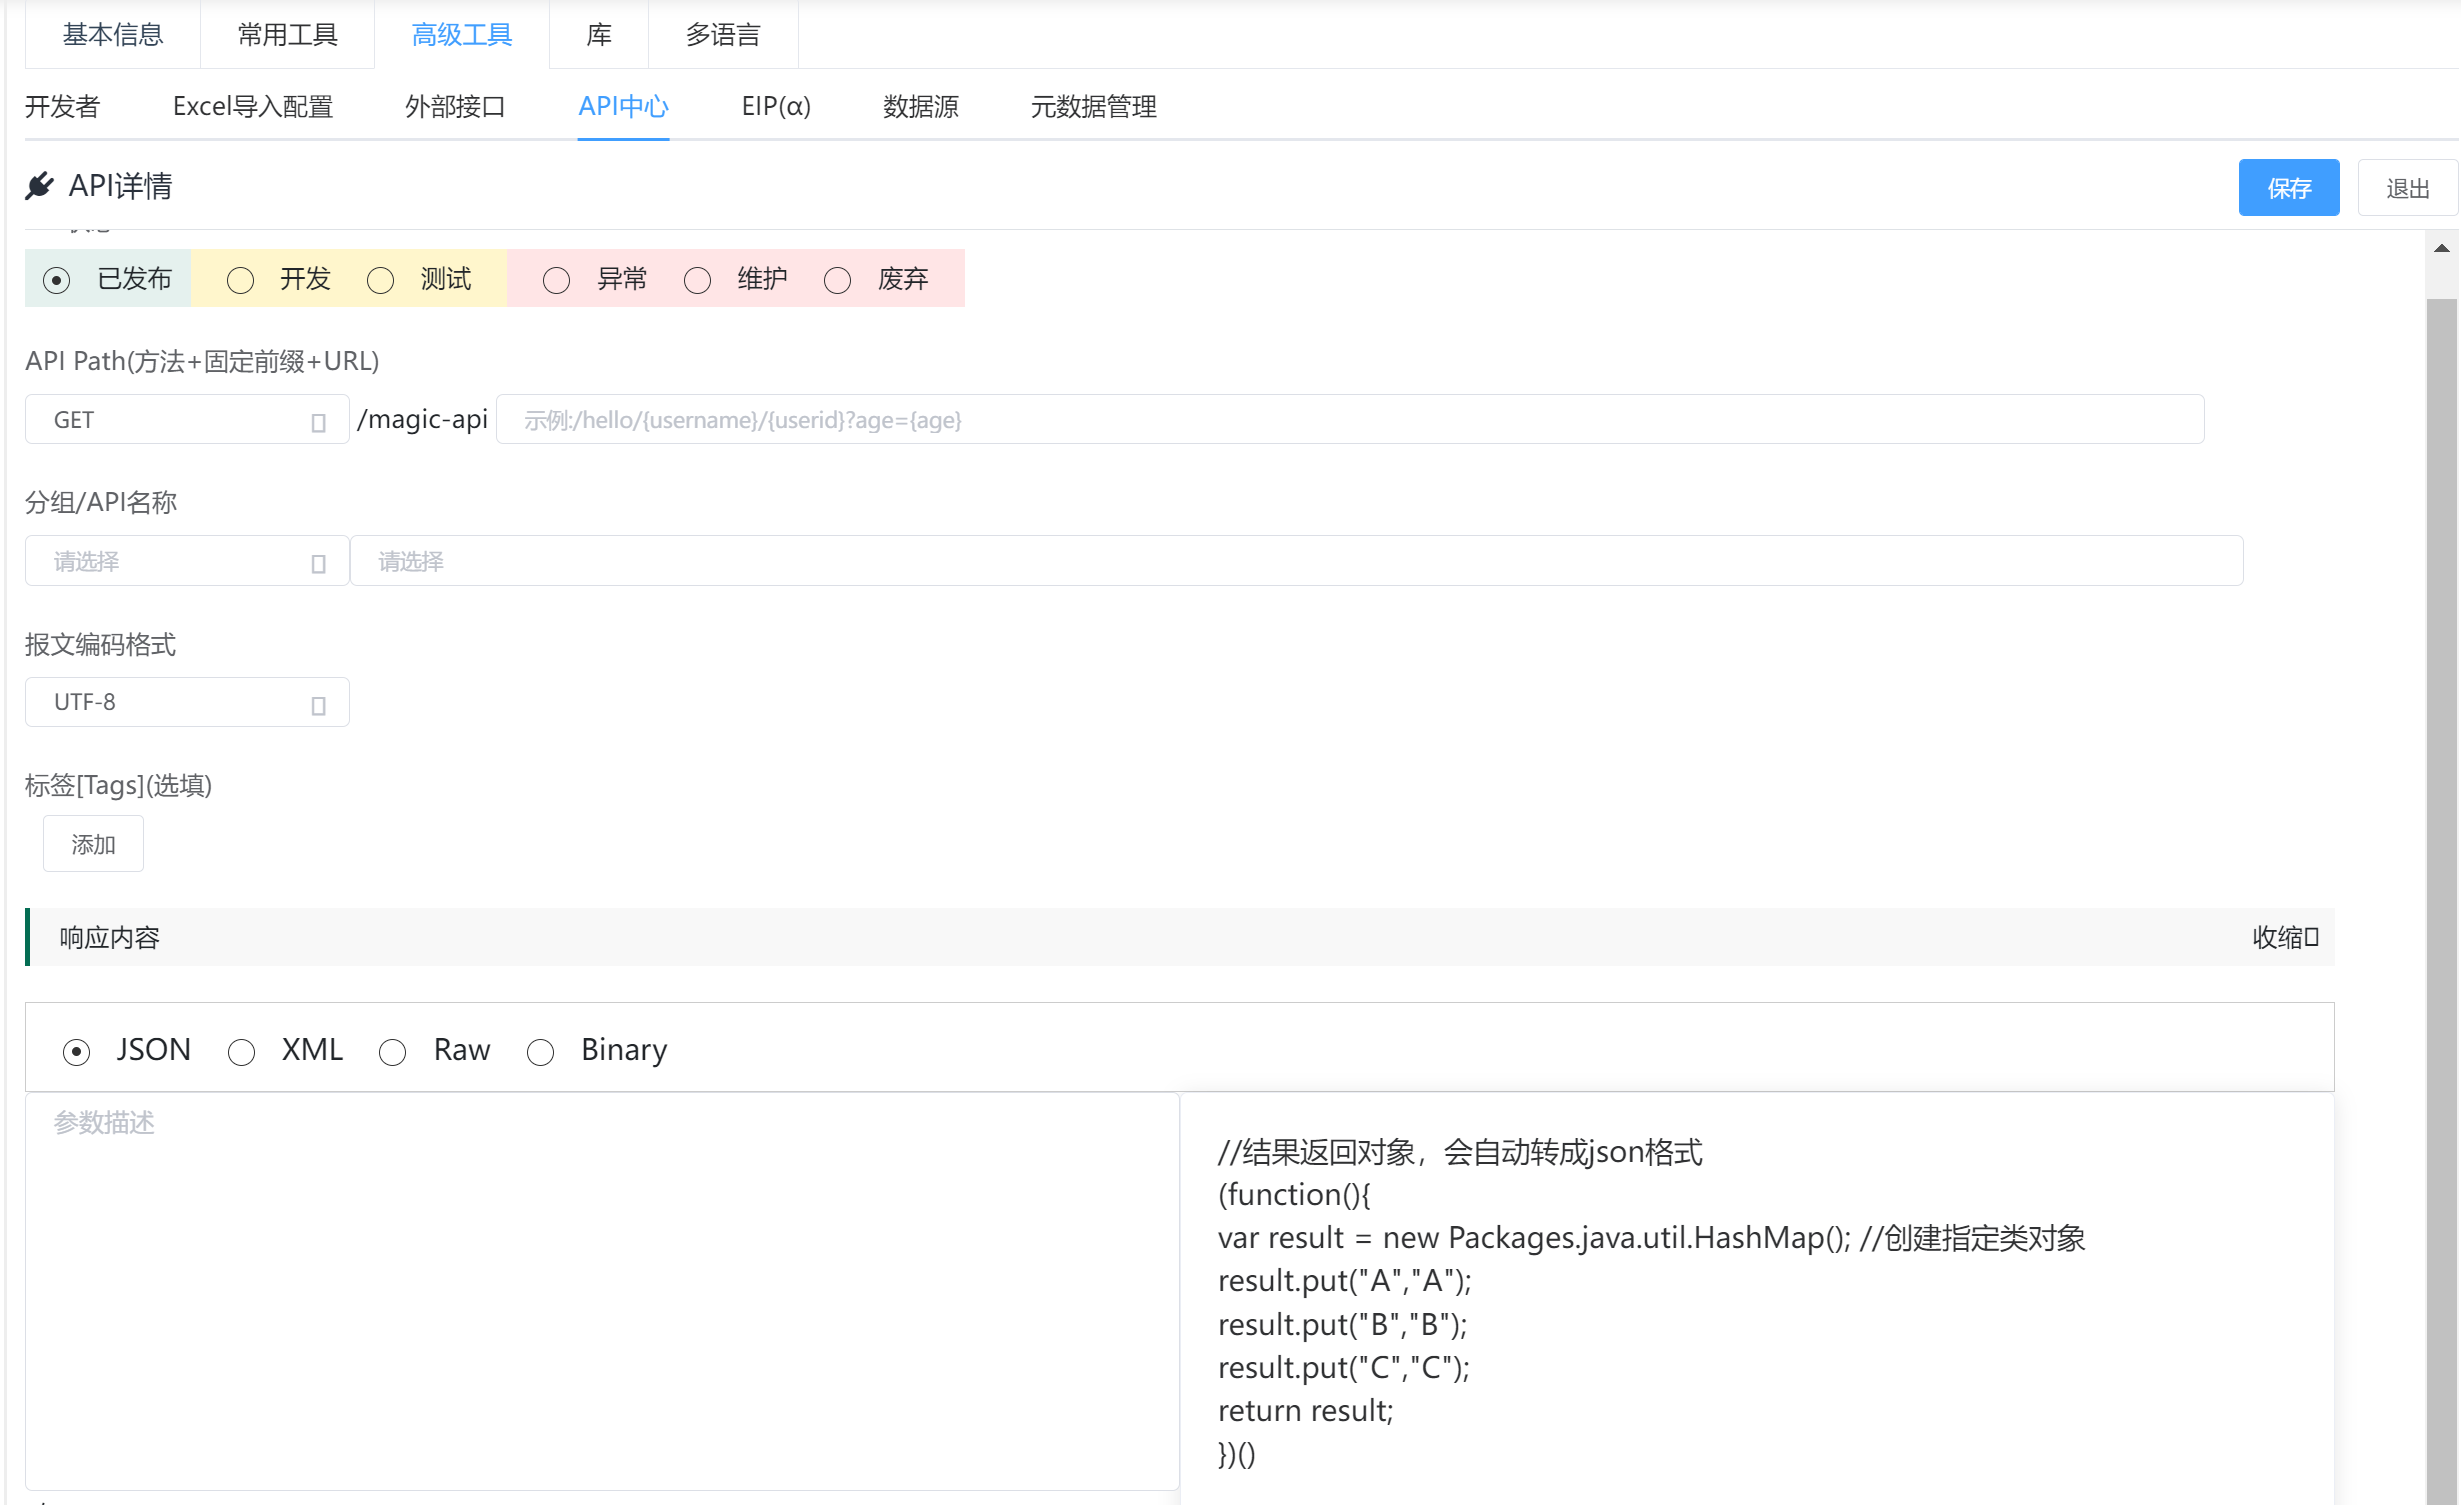
关键词:私有化、知识管理系统、文档管理、群晖NAS、协同编辑 随着企业不断发展扩大,企业的知识文档也逐渐增多,很多企业方便管理及考虑数据安全问题会将文件数据储存至NAS。 但将企业文档数据放在NAS上就足够安全的吗? 天翎文档管…...

用windeployqt.exe打包Qt代码
首先找到我们编译Qt代码的对应Qt版本的dll目录,该目录下有windeployqt.exe: D:\DevTools\Qt\5.9\msvc2017_64\bin 在这个目录下打开cmd程序。 然后把要打包的exe放到一个单独的目录下,比如: 然后在cmd中调用: winde…...
【Python机器学习】实验04(2) 机器学习应用实践--手动调参
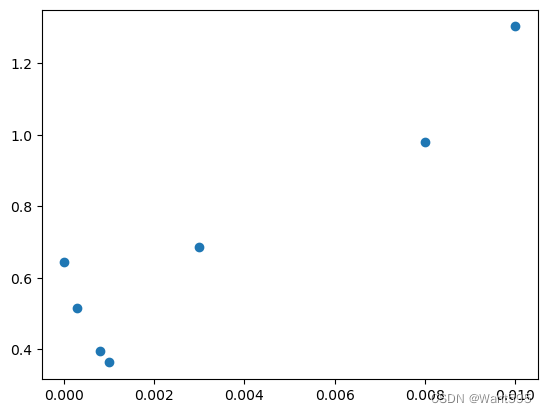
文章目录 机器学习应用实践1.1 准备数据此处进行的调整为:要所有数据进行拆分 1.2 定义假设函数Sigmoid 函数 1.3 定义代价函数1.4 定义梯度下降算法gradient descent(梯度下降) 此处进行的调整为:采用train_x, train_y进行训练 1.5 绘制决策边界1.6 计算…...
【爬虫案例】用Python爬取iPhone14的电商平台评论
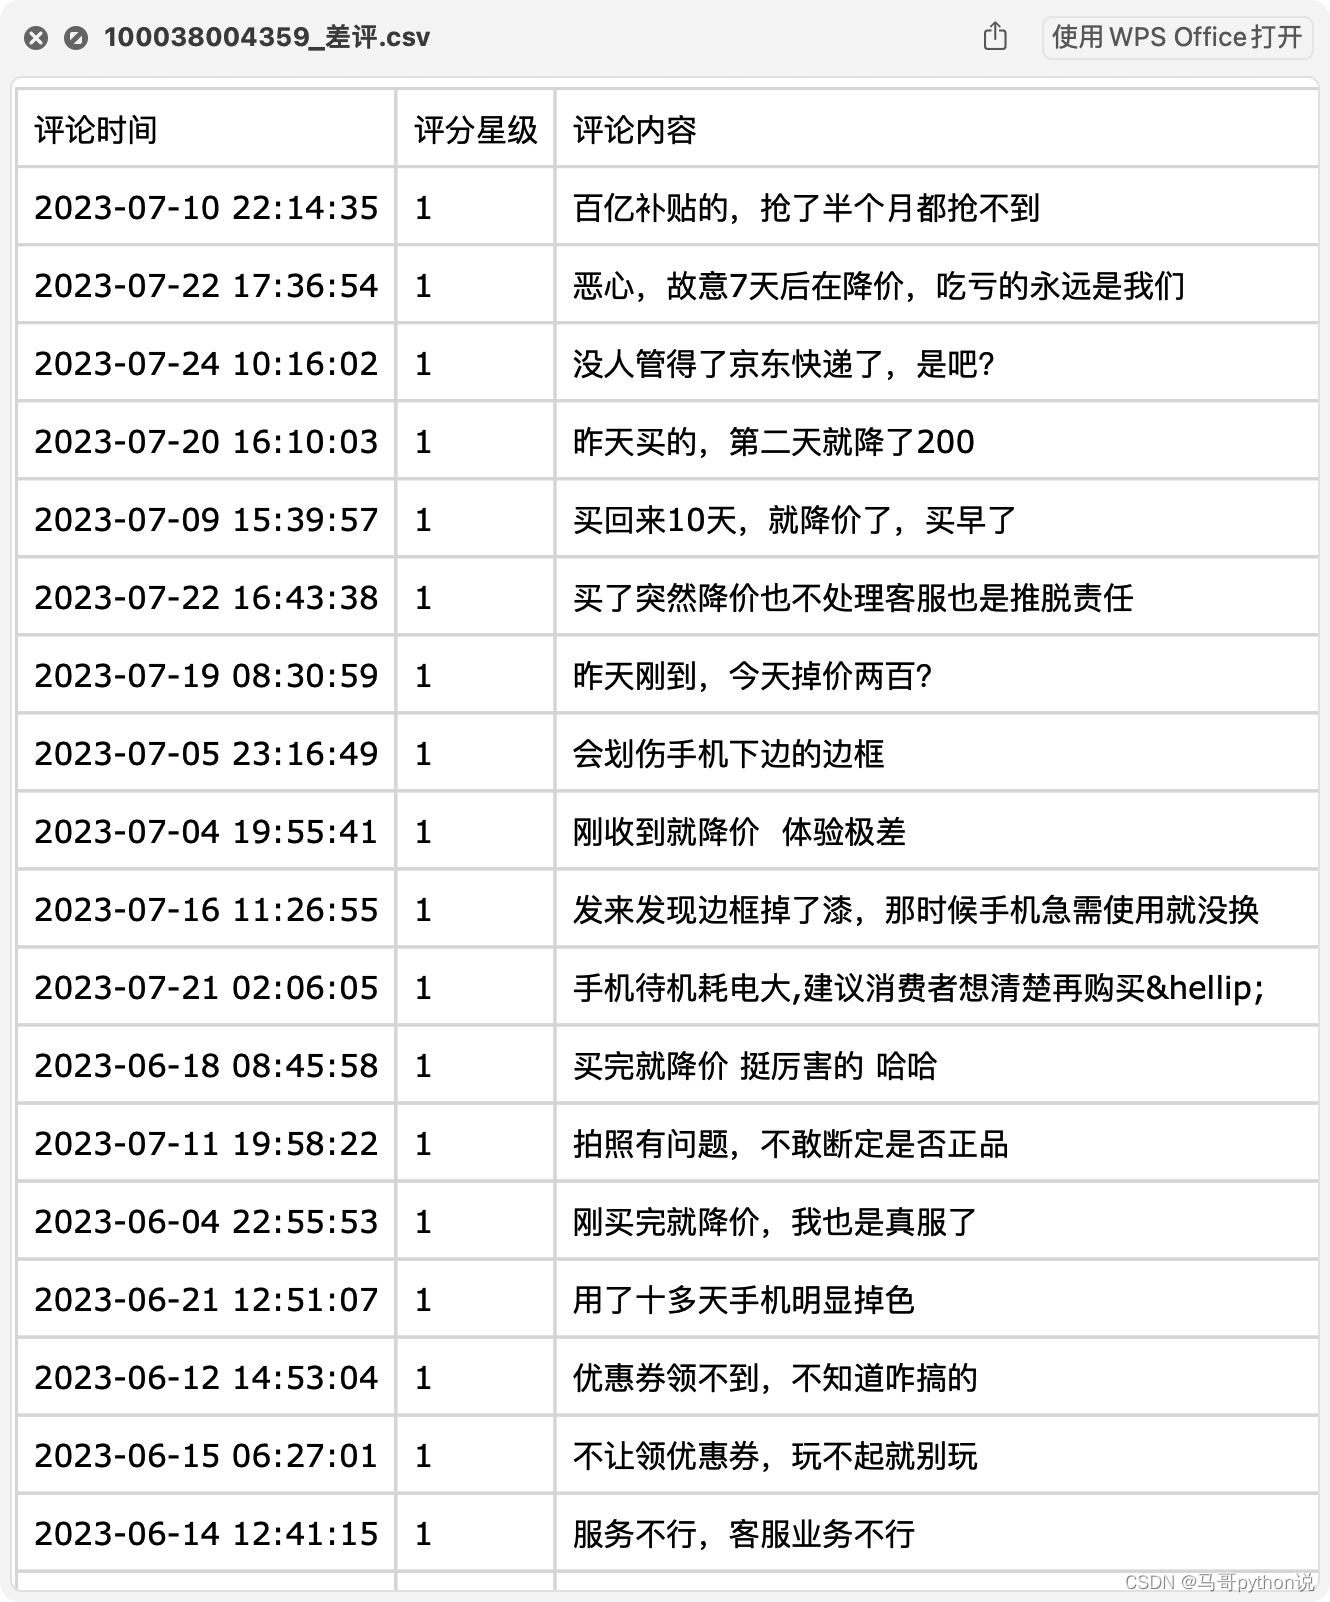
用python爬取某电商网站的iPhone14评论数据, 爬取目标: 核心代码如下: 爬取到的5分好评: 爬取到的3分中评: 爬取到的1分差评: 所以说,用python开发爬虫真的很方面! 您好&…...

01)docker学习 centos7离线安装docker
docker学习 centos7离线安装docker 在实操前可以先看下docker教程,https://www.runoob.com/docker/docker-tutorial.html , 不过教程上都是在线安装方式,很方便,离线安装肯定比如在线麻烦点。 一、什么是Docker 在学习docker时,在网上看到一篇博文讲得很好,自己总结一下…...

超短脉冲激光自聚焦效应
前言与目录 强激光引起自聚焦效应机理 超短脉冲激光在脆性材料内部加工时引起的自聚焦效应,这是一种非线性光学现象,主要涉及光学克尔效应和材料的非线性光学特性。 自聚焦效应可以产生局部的强光场,对材料产生非线性响应,可能…...

CTF show Web 红包题第六弹
提示 1.不是SQL注入 2.需要找关键源码 思路 进入页面发现是一个登录框,很难让人不联想到SQL注入,但提示都说了不是SQL注入,所以就不往这方面想了 先查看一下网页源码,发现一段JavaScript代码,有一个关键类ctfs…...
工业安全零事故的智能守护者:一体化AI智能安防平台
前言: 通过AI视觉技术,为船厂提供全面的安全监控解决方案,涵盖交通违规检测、起重机轨道安全、非法入侵检测、盗窃防范、安全规范执行监控等多个方面,能够实现对应负责人反馈机制,并最终实现数据的统计报表。提升船厂…...
从WWDC看苹果产品发展的规律
WWDC 是苹果公司一年一度面向全球开发者的盛会,其主题演讲展现了苹果在产品设计、技术路线、用户体验和生态系统构建上的核心理念与演进脉络。我们借助 ChatGPT Deep Research 工具,对过去十年 WWDC 主题演讲内容进行了系统化分析,形成了这份…...

解锁数据库简洁之道:FastAPI与SQLModel实战指南
在构建现代Web应用程序时,与数据库的交互无疑是核心环节。虽然传统的数据库操作方式(如直接编写SQL语句与psycopg2交互)赋予了我们精细的控制权,但在面对日益复杂的业务逻辑和快速迭代的需求时,这种方式的开发效率和可…...
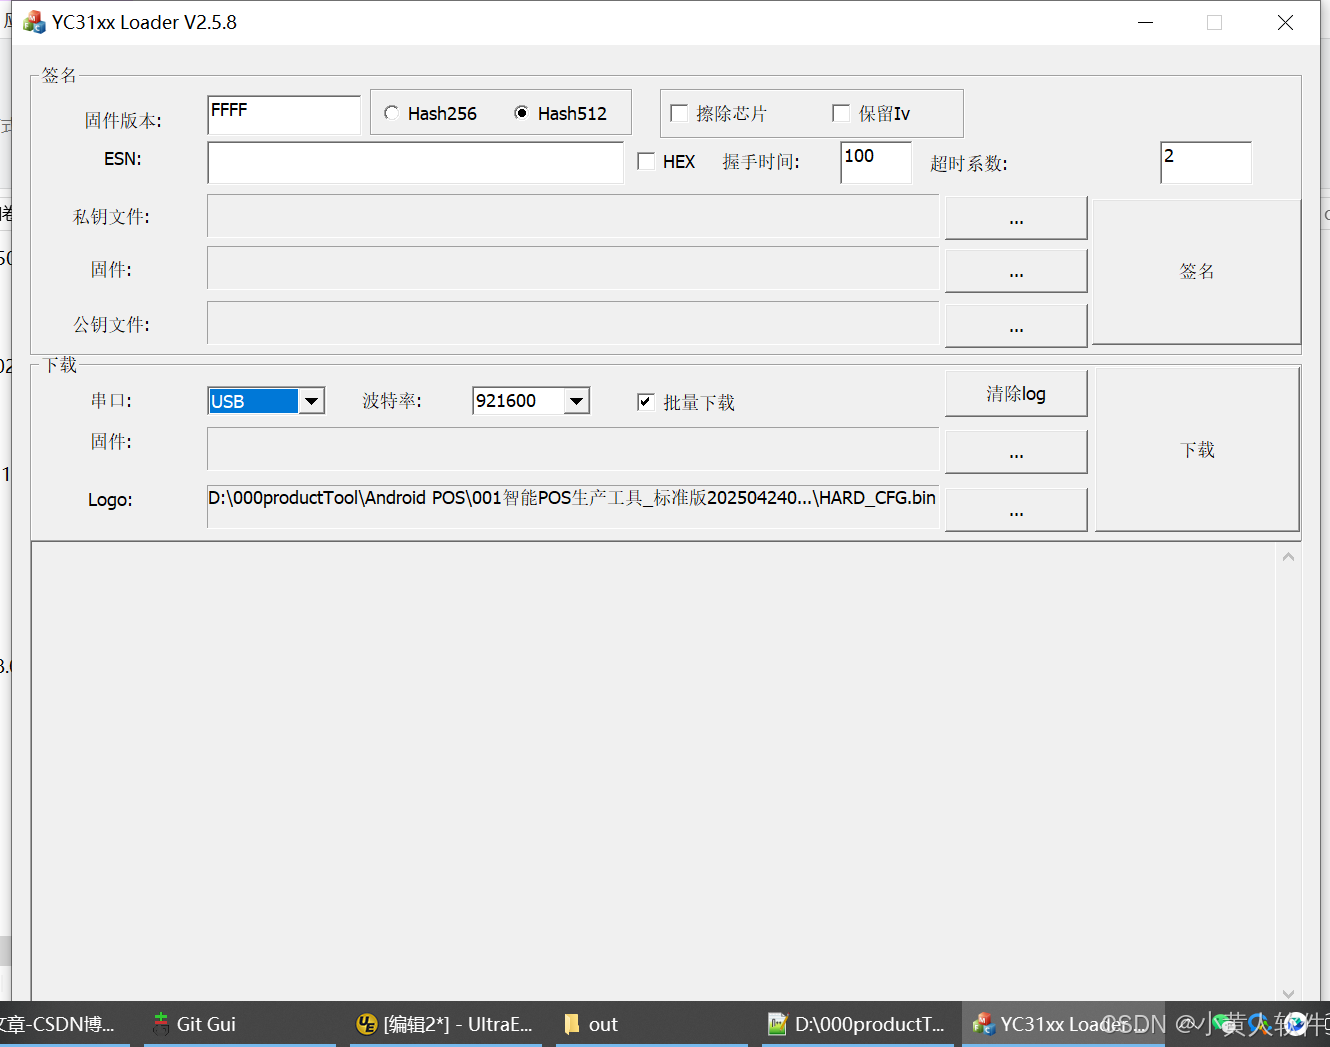
C++ Visual Studio 2017厂商给的源码没有.sln文件 易兆微芯片下载工具加开机动画下载。
1.先用Visual Studio 2017打开Yichip YC31xx loader.vcxproj,再用Visual Studio 2022打开。再保侟就有.sln文件了。 易兆微芯片下载工具加开机动画下载 ExtraDownloadFile1Info.\logo.bin|0|0|10D2000|0 MFC应用兼容CMD 在BOOL CYichipYC31xxloaderDlg::OnIni…...

鸿蒙DevEco Studio HarmonyOS 5跑酷小游戏实现指南
1. 项目概述 本跑酷小游戏基于鸿蒙HarmonyOS 5开发,使用DevEco Studio作为开发工具,采用Java语言实现,包含角色控制、障碍物生成和分数计算系统。 2. 项目结构 /src/main/java/com/example/runner/├── MainAbilitySlice.java // 主界…...

Java毕业设计:WML信息查询与后端信息发布系统开发
JAVAWML信息查询与后端信息发布系统实现 一、系统概述 本系统基于Java和WML(无线标记语言)技术开发,实现了移动设备上的信息查询与后端信息发布功能。系统采用B/S架构,服务器端使用Java Servlet处理请求,数据库采用MySQL存储信息࿰…...

【笔记】WSL 中 Rust 安装与测试完整记录
#工作记录 WSL 中 Rust 安装与测试完整记录 1. 运行环境 系统:Ubuntu 24.04 LTS (WSL2)架构:x86_64 (GNU/Linux)Rust 版本:rustc 1.87.0 (2025-05-09)Cargo 版本:cargo 1.87.0 (2025-05-06) 2. 安装 Rust 2.1 使用 Rust 官方安…...

JS手写代码篇----使用Promise封装AJAX请求
15、使用Promise封装AJAX请求 promise就有reject和resolve了,就不必写成功和失败的回调函数了 const BASEURL ./手写ajax/test.jsonfunction promiseAjax() {return new Promise((resolve, reject) > {const xhr new XMLHttpRequest();xhr.open("get&quo…...
