NNI 适配 TensorRT10教程
引言
本文涉及两个框架及其版本分别为
- NNI (Neural Network Intelligence) :3.0
- TensorRT:10.9.0.34
NNI 在文档 Speed Up Quantized Model with TensorRT里描述了如何使用 TensorRT 为NNI量化的模型实现加速,但是从NNI 的源代码https://github.com/microsoft/nni/blob/master/nni/compression/quantization_speedup/integrated_tensorrt.py 来看:
- https://github.com/microsoft/nni/blob/767ed7f22e1e588ce76cbbecb6c6a4a76a309805/nni/compression/quantization_speedup/integrated_tensorrt.py#L14
TRT8 = 8
- https://github.com/microsoft/nni/blob/767ed7f22e1e588ce76cbbecb6c6a4a76a309805/nni/compression/quantization_speedup/integrated_tensorrt.py#L292
assert trt_version >= TRT8, "Version of TensorRT is too old, please \update TensorRT to version >= 8.0"
来看,实际上 NNI只支持 TensorRT 8 的API,但是TensorRT后续已经更新到10了,并且NNI 已经不再更新,因此有必要实现NNI 适配 TensorRT10。
本文将参考:
- API Migration Guide
- 个人实践经验
完成适配过程。
适配过程
修改 integrated_tensorrt.py 文件
integrated_tensorrt.py 位于https://github.com/microsoft/nni/blob/master/nni/compression/quantization_speedup/integrated_tensorrt.py
- L291
assert trt_version >= TRT8, "Version of TensorRT is too old, please \update TensorRT to version >= 8.0"
修改为
trt_version = int(trt.__version__.split('.')[0])
assert trt_version >= TRT8, "Version of TensorRT is too old, please \update TensorRT to version >= 8.0"
- L231-L232
builder.max_batch_size = input_shape[0]
trt_config.max_workspace_size = common.GiB(8)
修改为
# builder.max_batch_size = input_shape[0]
# trt_config.max_workspace_size = common.GiB(8)
trt_config.set_memory_pool_limit(trt.MemoryPoolType.WORKSPACE, 8 << 30)
L255
engine = builder.build_engine(network, trt_config)
修改为
# engine = builder.build_engine(network, trt_config)
engine_data = builder.build_serialized_network(network, trt_config)
if not engine_data:raise RuntimeError("Failed to build serialized engine.")runtime = trt.Runtime(TRT_LOGGER)
engine = runtime.deserialize_cuda_engine(engine_data)
- L354
engine_input_shape = self.engine.get_tensor_shape(self.engine.get_tensor_name(0))
修改为
# engine_input_shape = self.engine.get_binding_shape(0)
engine_input_shape = self.engine.get_tensor_shape(self.engine.get_tensor_name(0))
- L365
trt_outputs = common.do_inference_v2(self.context, bindings=self.bindings, inputs=self.inputs,outputs=self.outputs, stream=self.stream)
修改为
trt_outputs = common.do_inference_v2(self.engine, self.context, self.bindings, inputs=self.inputs,outputs=self.outputs, stream=self.stream)
修改 trt_pycuda.py
trt_pycuda.py 位于https://github.com/microsoft/nni/blob/master/nni/compression/quantization_speedup/trt_pycuda.py
- L77
for binding in engine:size = trt.volume(engine.get_binding_shape(binding)) # * engine.max_batch_size, batch size already indtype = trt.nptype(engine.get_binding_dtype(binding))
修改为
# ref to https://docs.nvidia.com/deeplearning/tensorrt/migration-guide/index.html
# modify the code to support to compatibility with TensorRT 10.0
"""
for binding in engine: size = trt.volume(engine.get_binding_shape(binding)) * engine.max_batch_sizedtype = trt.nptype(engine.get_binding_dtype(binding))
"""
for i in range(engine.num_io_tensors):tensor_name = engine.get_tensor_name(i)size = trt.volume(engine.get_tensor_shape(tensor_name))dtype = trt.nptype(engine.get_tensor_dtype(tensor_name))
L93
if engine.get_tensor_mode(tensor_name) == trt.TensorIOMode.INPUT:
修改为
# if engine.binding_is_input(binding):
if engine.get_tensor_mode(tensor_name) == trt.TensorIOMode.INPUT:
- L102
def do_inference_v2(context, bindings, inputs, outputs, stream):
修改为
def do_inference_v2(engine, context, bindings, inputs, outputs, stream):# Ref to https://docs.nvidia.com/deeplearning/tensorrt/migration-guide/index.html to # Setup tensor addressfor i in range(engine.num_io_tensors):context.set_tensor_address(engine.get_tensor_name(i), bindings[i])
- L110
context.execute_async_v2(bindings=bindings, stream_handle=stream.handle)
修改为
# context.execute_async_v2(bindings=bindings, stream_handle=stream.handle)
context.execute_async_v3(stream_handle=stream.handle)
实验
我们试着在NNI上对ResNet18 进行量化,然后使用TensorRT 进行加速验证
实验准备
- 实验平台信息
This Benchmark is running on the following Hardware:
CPU Information:
CPU Brand: Intel(R) Xeon(R) Silver 4210R CPU @ 2.40GHz
CPU Architecture: X86_64
CPU Count: 40GPU Information:
GPU Device: Tesla T4
GPU Count: 1
CUDA Version: 12.1
GPU Memory Usage:Allocated: 0.00MBCached: 0.00MB
This Benchmark is running on the following Software:
PyTorch Version: 2.4.1+cu121
ONNX Version: 1.17.0
ONNXRuntime Version: 1.19.2
TensorRT Version: 10.9.0.34
- 代码
import torch
import torch.nn.functional as F
import torch.nn as nn
import torchvision.models as modelsmodel = models.resnet18(pretrained=True)
BATCH_SIZE = 32
NUM_CLASSES = 1000INPUT_SHAPE = (BATCH_SIZE, 3, 32, 32)
OUTPUT_SHAPE = (BATCH_SIZE, NUM_CLASSES)dummy_input = torch.randn(BATCH_SIZE, 3, 32, 32)
cnn_model_onnx_save_path = "resnet18_pytorch.onnx"torch.onnx.export(model,dummy_input,  # 例如 shape=(1,3,224,224)cnn_model_onnx_save_path,input_names=["input"],output_names=["output"],dynamic_axes={"input": {0: "batch_size"}, "output": {0: "batch_size"}},opset_version=11,
)import pycuda.autoinit
import pycuda.driver as cuda
import tensorrt as trt
import numpy as np
import torch.onnx
import torchvision.models as models
from torchvision.models import ResNet18_Weights
import torch
import time
import onnx
import onnxruntime as ort
import cpuinfo
import matplotlib.pyplot as pltdef build_engine(onnx_path, input_shape):logger = trt.Logger(trt.Logger.WARNING)builder = trt.Builder(logger)network = builder.create_network(1 << int(trt.NetworkDefinitionCreationFlag.EXPLICIT_BATCH))parser = trt.OnnxParser(network, logger)with open(onnx_path, "rb") as f:if not parser.parse(f.read()):for i in range(parser.num_errors):print(parser.get_error(i))raise RuntimeError("Failed to parse ONNX.")config = builder.create_builder_config()config.set_memory_pool_limit(trt.MemoryPoolType.WORKSPACE, 1 << 30)  # 1GB# 固定输入大小为 (1, 3, 224, 224)profile = builder.create_optimization_profile()input_tensor = network.get_input(0)profile.set_shape(input_tensor.name, input_shape, input_shape, input_shape)config.add_optimization_profile(profile)engine_data = builder.build_serialized_network(network, config)if not engine_data:raise RuntimeError("Failed to build serialized engine.")runtime = trt.Runtime(logger)engine = runtime.deserialize_cuda_engine(engine_data)return engine# PyTorch inference
def pytorch_inference(model, dummy_input, num_runs=100):model.eval()# model.half()# dummy_input = dummy_input.half()with torch.no_grad():# Warmupfor _ in range(10):_ = model(dummy_input)# Benchmarktorch.cuda.synchronize()start = time.time()for _ in range(num_runs):_ = model(dummy_input)torch.cuda.synchronize()end = time.time()return (end - start) / num_runs# ONNX inference
def onnx_inference(onnx_path,dummy_input,num_runs=100,providers=["CUDAExecutionProvider", "CPUExecutionProvider"],
):session = ort.InferenceSession(onnx_path, providers=providers)print(f"[ONNX Inference]: Using providers: {session.get_providers()} Args: {providers}")# Warmupfor _ in range(10):_ = session.run(None, {"input": dummy_input})# Benchmarkstart = time.time()for _ in range(num_runs):_ = session.run(None, {"input": dummy_input})end = time.time()return (end - start) / num_runs# TensorRT inference
def tensorrt_inference(engine, d_input, dummy_input, num_runs=100):context = engine.create_execution_context()stream = cuda.Stream()# Allocate host and device memory for outputoutput_shape = (BATCH_SIZE, 1000)  # Based on ResNet18 output shapeh_output = cuda.pagelocked_empty(output_shape, dtype=np.float32)d_output = cuda.mem_alloc(h_output.nbytes)# Create bindings# bindings = [int(d_input), int(d_output)]# Ref to https://forums.developer.nvidia.com/t/how-to-correctly-set-up-bindings-for-execute-async-v3/289924 to fix bugs about bindingscontext.set_tensor_address(engine.get_tensor_name(0), int(d_input))context.set_tensor_address(engine.get_tensor_name(1), int(d_output))# Warmupfor _ in range(10):cuda.memcpy_htod_async(d_input, dummy_input, stream)context.execute_async_v3(stream_handle=stream.handle)stream.synchronize()# Benchmarkstart = time.time()for _ in range(num_runs):cuda.memcpy_htod_async(d_input, dummy_input, stream)context.execute_async_v3(stream.handle)stream.synchronize()end = time.time()avg_time = (end - start) / num_runsreturn avg_timedef quantized_tensorrt_inference(engine, dummy_tensor, num_runs=100):total_time = 0# Warmupfor _ in range(10):output, time_span = engine.inference(dummy_tensor)# Benchmarkfor _ in range(num_runs):output, time_span = engine.inference(dummy_tensor)total_time += time_spanavg_time = total_time / num_runsreturn avg_time# Run benchmarks
# CPU Information
cpu_info = cpuinfo.get_cpu_info()
print("This Benchmark is running on the following Hardware:")
print("CPU Information:")
print(f"CPU Brand: {cpu_info['brand_raw']}")
print(f"CPU Architecture: {cpu_info['arch']}")
print(f"CPU Count: {cpu_info['count']}")# GPU Information
print("\nGPU Information:")
if torch.cuda.is_available():print(f"GPU Device: {torch.cuda.get_device_name(0)}")print(f"GPU Count: {torch.cuda.device_count()}")print(f"CUDA Version: {torch.version.cuda}")print(f"GPU Memory Usage:")print(f"  Allocated: {torch.cuda.memory_allocated(0)/1024**2:.2f}MB")print(f"  Cached: {torch.cuda.memory_reserved(0)/1024**2:.2f}MB")
else:print("No GPU available")print("This Benchmark is running on the following Software:")
print(f"PyTorch Version: {torch.__version__}")
print(f"ONNX Version: {onnx.__version__}")
print(f"ONNXRuntime Version: {ort.__version__}")
print(f"TensorRT Version: {trt.__version__}")# 1. 构建引擎
engine = build_engine(cnn_model_onnx_save_path, INPUT_SHAPE)input_nbytes = int(np.prod(INPUT_SHAPE) * np.float32().nbytes)
d_input = cuda.mem_alloc(input_nbytes)# 假设输出维度为1000
output_nbytes = int(np.prod(OUTPUT_SHAPE) * np.float32().nbytes)
d_output = cuda.mem_alloc(output_nbytes)
bindings = [int(d_input), int(d_output)]dummy_input = np.random.rand(*INPUT_SHAPE).astype(np.float32)
# dummy_input_pytorch = torch.tensor(dummy_input).cuda()tensorrt_time = tensorrt_inference(engine, d_input, dummy_input)onnx_cpu_time = onnx_inference(cnn_model_onnx_save_path, dummy_input, providers=["CPUExecutionProvider"]
)
onnx_gpu_time = onnx_inference(cnn_model_onnx_save_path, dummy_input, providers=["CUDAExecutionProvider"]
)
onnx_tensorrt_time = onnx_inference(cnn_model_onnx_save_path,dummy_input,providers=["TensorrtExecutionProvider"],
)
dummy_input_pytorch = torch.tensor(dummy_input)
pytorch_cpu_time = pytorch_inference(model.cpu(), dummy_input_pytorch.cpu())
pytorch_gpu_time = pytorch_inference(model.cuda(), dummy_input_pytorch.cuda())from tquant.quantization.quantizer import QuantizationManager
from tquant.quantization.utils import create_optimizer
from torchvision.datasets import CIFAR10
from torchvision import transformsconfig_list = [{"op_types": ["Conv2d", "Linear"],"target_names": ["weight"],"quant_dtype": "int8","quant_scheme": "affine","granularity": "default",},
]device = "cuda" if torch.cuda.is_available() else "cpu"
ptq_manager = QuantizationManager('ptq', model, config_list, device)
transform = transforms.Compose([transforms.ToTensor(), transforms.Normalize((0.1307,), (0.3081,))]
)
calibration_loader = torch.utils.data.DataLoader(dataset=CIFAR10(root="./data", train=True, download=True, transform=transform),batch_size=BATCH_SIZE,shuffle=True,
)optimizer = create_optimizer(model, optimizer_name="SGD", lr=0.001)
scheduler = Nonequantized_model, calibration_config = ptq_manager.quantize(calibration_loader, optimizer, scheduler
)
print(calibration_config)calib_data = Nonefor image, target in calibration_loader:calib_data = image.numpy()breakfrom nni.compression.quantization_speedup.calibrator import Calibrator# TensorRT processes the calibration data in the batch size of 64
calib = Calibrator(calib_data,"data/cache/calib_cache_file.cache", # Replace with your own cache file path(absolute path)batch_size=BATCH_SIZE,
)from nni.compression.quantization_speedup import ModelSpeedupTensorRTquant_engine = ModelSpeedupTensorRT(model, input_shape=INPUT_SHAPE, config=calibration_config
)
quant_engine.compress_with_calibrator(calib)quantize_tensorrt_inference_time = quantized_tensorrt_inference(quant_engine, dummy_input_pytorch
)times = [pytorch_cpu_time * 1000,onnx_cpu_time * 1000,pytorch_gpu_time * 1000,onnx_gpu_time * 1000,onnx_tensorrt_time * 1000,tensorrt_time * 1000,quantize_tensorrt_inference_time * 1000,
]
labels = ["PyTorch CPU","ONNX CPU","PyTorch GPU","ONNX GPU","ONNX TensorRT","TensorRT","TensorRT(Quantized)",
]plt.figure(figsize=(15, 10))
plt.bar(labels, times)
plt.title("Inference Time Comparison")
plt.ylabel("Time (ms)")
plt.grid(True, alpha=0.3)for i, v in enumerate(times):plt.text(i, v + 0.1, f"{v:.2f}ms", ha="center")
plt.show()import numpy as np
import seaborn as sns# Create a 5x5 matrix where each cell is time_row / time_col
n = len(times)
comparison_matrix = np.zeros((n, n))
for i in range(n):for j in range(n):comparison_matrix[i][j] = times[i] / times[j]# Create heatmap
plt.figure(figsize=(15, 10))
sns.heatmap(comparison_matrix,annot=True,fmt=".2f",xticklabels=labels,yticklabels=labels,cmap="YlOrRd",
)
plt.title("Speed Comparison Matrix (row/column)")
plt.xlabel("Framework (denominator)")
plt.ylabel("Framework (numerator)")
plt.xticks(rotation=45)
plt.tight_layout()
plt.show()
实验结果
- 时间对比图

- 加速热力图

可以看到,量化后的ResNet18 模型,其推理时间相比它的浮点模型在PyTorch CPU,ONNX CPU,PyTorch GPU,ONNX GPU,ONNX TensorRT,TensorRT等平台上的推理速度都有比较大或者一定程度的提升!
结语
至此,我们完成NNI 适配 TensorRT10的过程
相关文章:
NNI 适配 TensorRT10教程
引言 本文涉及两个框架及其版本分别为 NNI (Neural Network Intelligence) :3.0TensorRT:10.9.0.34 NNI 在文档 Speed Up Quantized Model with TensorRT里描述了如何使用 TensorRT 为NNI量化的模型实现加速,但是从NNI 的源代码https://gi…...

Docker, Docker 镜像是什么,怎么创建, Docker有什么用
Docker, Docker 镜像是什么,怎么创建, Docker有什么用 Docker 镜像的概念 Docker 镜像可以理解为一个只读的模板,它包含了运行应用程序所需的所有文件、依赖项、环境变量和配置信息等。就像制作蛋糕的模具,利用这个模具可以制作出多个相同的蛋糕(这里的蛋糕就好比 Dock…...

多路径 TCP 调度的另一面
参考前面的文章 一个原教旨的多路径 TCP 和 MP-BBR 公平性推演,一直都破而不立,不能光说怎样不好,还得说说现状情况下,该如何是好。 如果 receiver 乱序重排的能力有限(拜 TCP 所赐),如果非要在多路径上传输 TCP&…...

vcpkg安装指定版本的库
一.vcpkg安装 使用git将vcpkg源码克隆到本地制定目录(D:\vcpkg),并初始化 git clone https://github.com/microsoft/vcpkg.git cd vcpkg ./bootstrap-vcpkg.sh # Linux/macOS .\bootstrap-vcpkg.bat # Windows 如下图: 二.安…...

【工具变量】上市公司供应链稳定性数据两个维度(2013-2023年)
供应链稳定性是指供应链在面对各种内外部因素的冲击和不确定性时,能够保持持续、顺畅运作的能力,而供应链稳定性指数是用于评估企业在其供应链管理中保持稳定性的一个重要指标。本分享数据参考钟涛(2022)、董浩和闫晴(…...
Redis场景问题2:缓存击穿
Redis 缓存击穿是指在缓存系统中,大量请求(高并发访问)同时访问一个不存在于缓存中(一般是因为缓存过期或者数据未被加载到缓存)但在数据库中存在的热点数据,从而导致这些请求直接穿透缓存层,涌…...

RocketMQ - 从消息可靠传输谈高可用
先稍微介绍下RocketMQ架构。 主从架构 Broker 集群:每个 Broker 分为 Master 和 Slave 角色,Master 负责读写,Slave 作为热备。 同步复制(SYNC_MASTER):消息写入 Master 后,需等待 Slave 同步完…...

ES拼音分词自动补全实现
#测试拼音分词 POST /_analyze { "text":"如家酒店真不错", "analyzer": "pinyin" } #这里把拼音的首字母放到这里,也说明了这句话没有被分词,而是作为一个整体出现的 #还把每一个字都形成了一个拼音&#…...

golang 日志log与logrus
目录 一、Go 标准库 log 详解 1. 功能特点 2. 常用函数 3. 示例代码 4. 优势和局限 二、第三方库 logrus 详解 1. 功能特点 2. 核心功能 3. 示例代码 4. 优势和扩展性 三、总结 1. 何时选择 log? 2. 何时选择 logrus? 3. 对比总结 一、Go 标…...

EFISH-SBC-RK3576 + 5G模组:无线工业相机与分布式AI质检
在智能制造与仓储物流场景中,传统有线工业相机存在部署成本高、灵活性差等痛点。eFish-SBC-RK3576 通过 5G无线传输 分布式NPU协同,实现跨产线、跨工厂的AI质检系统,检测效率提升300%,布线复杂度降低90%。 1. 系统架构…...

C/C++ 基础 - 回调函数
目录 前言 回调函数预备知识 函数指针 什么是函数指针 函数指针的语法 如何用函数指针调用函数 函数指针作为函数的参数 函数指针作为函数返回类型 函数指针数组 回调函数 什么是回调函数 为什么要用回调函数 怎么使用回调函数 总结 前言 在写项目的时候&#x…...
【 <二> 丹方改良:Spring 时代的 JavaWeb】之 Spring Boot 中的消息队列:使用 RabbitMQ 实现异步处
<前文回顾> 点击此处查看 合集 https://blog.csdn.net/foyodesigner/category_12907601.html?fromshareblogcolumn&sharetypeblogcolumn&sharerId12907601&sharereferPC&sharesourceFoyoDesigner&sharefromfrom_link <今日更新> 一、开篇整…...

高项第十六章——项目采购管理
什么是采购管理?项目采购管理包括从项目团队外部采购或获取所需产品、服务或成果的各个过程。 项目采购管理包括编制和管理协议所需的管理和控制过程。 16_1 管理基础 什么是协议?协议是用于明确项目初步意向的任何文件或沟通结果,协议的范…...

宽带的带宽
宽带的带宽是指在一定时间内通过网络连接传输数据的能力,通常用**比特率(bit/s,即每秒传输的比特数)**来表示,比如100Mbps(兆比特每秒)。带宽越大,理论上网络传输数据的速度越快&…...
DeepSeek分析仿写选题应该怎么做?
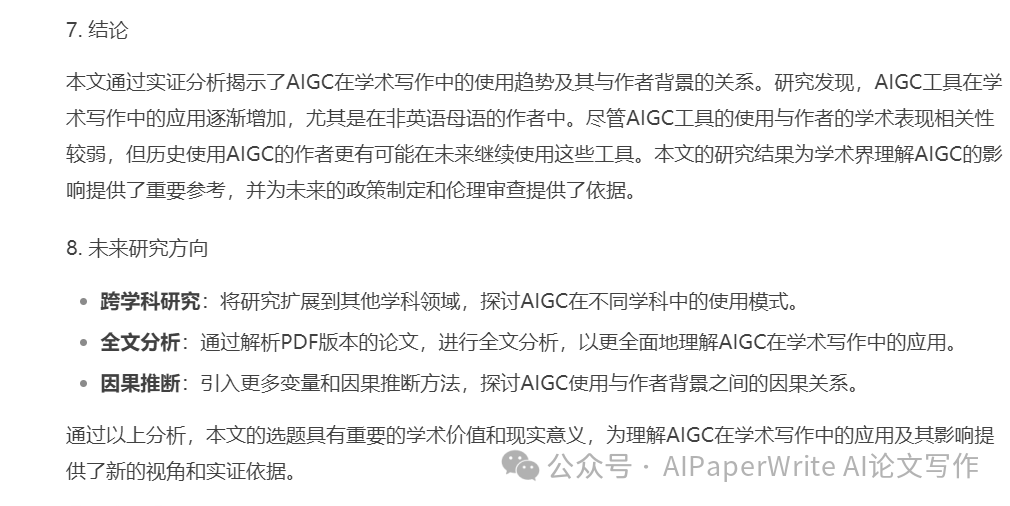
目录 选题分析:AIGC在学术写作中的应用及其与作者背景的关系 1. 选题背景与意义 2. 研究问题 3. 研究方法 4. 主要发现 5. 研究贡献 6. 研究局限与未来方向 7. 结论 8. 未来研究方向 大家好这里是AIWritePaper官方账号,官网👉AIWrit…...

19840 Dijkstra求最短路2
19840 Dijkstra求最短路2 相较于1,数据增强了,要用堆来优化,也就是优先队列。 ⭐️难度:中等 🌟考点:Dijkstra、最短路问题 📖 📚 import java.util.*;public class Main {static…...

docker-compose部署prometheus+grafana+node_exporter
目录 docker-compose文件 配置文件 文件层级关系,docker-compose和配置文件位于同级目录 node_exporter页面json文件 涉及离线包 一.docker-compose文件 [rootsulibao prometheus]# cat docker-compose.yml version: 3services:prometheus:image: registry.c…...

Oracle数据库数据编程SQL<递归函数详解>
递归函数是一种在函数体内直接或间接调用自身的函数。这种函数通过将复杂问题分解为更小的相同问题来解决特定类型的编程任务。 目录 一、递归函数基本概念 1. 递归定义 2. 递归工作原理 二、递归函数示例 1. 经典阶乘函数 2. 斐波那契数列 3. 计算数字位数 三、递归查…...

Redis-08.Redis常用命令-有序集合操作命令
一.有序集合操作命令 ZADD key score 1 member1 [score2 member2]: zadd zset 10.0 a 10.5 b ZRANGE key start stop [WITHSCORES]: zrange zset 0 -1 为何顺序为a,c,b? 因为 zrange zset 0 -1 withscores zrange key start …...

LLaMA-Factory使用实战
LLaMA-Factory使用实战 项目介绍 项目地址:https://github.com/hiyouga/LLaMA-Factory 中文文档:安装 - LLaMA Factory 快速开始文档:https://zhuanlan.zhihu.com/p/695287607(推荐参考) 远程服务器通过本地代理加…...

读一本书,骑行万里路:与维乐 Angel Rise+骑行看世界
最近读到了一本名为《自行车改变的世界:女性骑行的历史》的书,才发现原来女性的骑行自由来得并不轻易,激励着每一位女性勇敢地踏上骑行之路。而我一直在使用的维乐坐垫品牌,除了产品专业之外,也一直都非常关注女性骑行…...

【大模型】SpringBoot整合LangChain4j实现RAG检索实战详解
目录 一、前言 二、LangChain4j 介绍 2.1 什么是LangChain4j 2.2 LangChain4j 主要特点 2.3 Langchain4j 核心组件 三、RAG介绍 3.1 什么是RAG 3.2 RAG工作流程 3.2.1 补充说明 3.3 Embedding模型 3.3.1 RAG实际使用步骤 3.3.2 什么是Embedding 3.3.3 Embedding 技…...

流动的梦境:GPT-4o 的自回归图像生成深度解析
每周跟踪AI热点新闻动向和震撼发展 想要探索生成式人工智能的前沿进展吗?订阅我们的简报,深入解析最新的技术突破、实际应用案例和未来的趋势。与全球数同行一同,从行业内部的深度分析和实用指南中受益。不要错过这个机会,成为AI领…...

北大人工智能研究院朱松纯:“中国的AI叙事” 存在认知偏差
3月29日,在2025中关村论坛通用人工智能论坛上,北京通用人工智能学院院长,北京大学人工智能研究院、智能学院院长朱松纯表示,目前,行业对AI的讨论几乎被大模型能力所占据,而基础学科、原始创新与智能本质的研…...

习题1.26
解释题,说简单也简单,难在如何表达清楚。 首先解释下代码的变化 (defn expmod[base exp m](cond ( exp 0) 1(even? exp) (mod (square (expmod base (/ exp 2) m)) m):else (mod (* base (expmod base (- exp 1) m)) m)))(defn expmod[base exp m](co…...

FPGA调试笔记
XILINX SSTL属性电平报错 错误如下: [DRC BIVRU-1] Bank IO standard Vref utilization: Bank 33 contains ports that use a reference voltage. In order to use such standards in a bank that is not configured to use INTERNAL_VREF, the banks VREF pin mu…...

基于Java(SSM)+Mysql实现移动大厅业务办理(增删改查)
基于 SSM 框架的移动业务大厅 数据库需要自行创建! 一、 整体基本实现情况 对本学期的 Java 作业 1 的 SOSO 移动大厅进行改进, 基于 SSM、JSP、Maven、Tomcat、MySQL 等实现。 二、 实现详情 1、 工程结构图 2、 工程结构各部分实现 (…...

音视频 ColorSpace色彩空间详解
前言 基于前篇介绍YUV格式,本文继续介绍另一个重要概念颜色空间,又叫色彩空间;主要用于在音视频开发中的色彩空间转换。 色彩空间Color Space 色彩空间由色彩模型和色域共同定义。当色彩模型与特定的描述相关联以后,就称为色彩空间。 色彩模型Color Model 色彩模型Col…...

【字符设备驱动开发–IMX6ULL】(一)简介
【字符设备驱动开发–IMX6ULL】(一)简介 一、Linux驱动与裸机开发区别 1.裸机驱动开发回顾 1、底层,跟寄存器打交道,有些MCU提供了库。 spi.c:主机驱动(换成任何一个设备之后只需要调用此文件里面的…...

45 55跳跃游戏解题记录
先是55跳跃游戏,暴力解法会怎样?会超出时间限制,而且有很多细节要注意: func canJump(nums []int) bool {// 处理空数组情况,当nums只剩一个元素时,nums[i:]导致越界。if len(nums) 0 {return false}// 如…...