Qt使用QGraphicsView绘制线路图————附带详细实现代码
文章目录
- 0 效果
- 1 核心
- 1.1 简单示例
- 1.1.1 解读
- 1.2 创建用户交互
- 1.2.1 完整示例
- 1.3 创建图形元
- 1.3.1 绘制直线
- 1.3.2 绘制贝塞尔曲线
- 1.3.3 绘制图片
- 1.4 移动的小车
- 2 使用自定义视图类
- 参考
0 效果
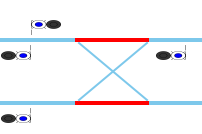
视图中包含线路、道岔、信号灯、火车。
下图为站点信号灯:

下图为区间信号灯:

下视频为火车过站和区间时,信号灯的改变:

下图为信号灯的修改:

下图为道岔的修改:
- 道岔开:
- 道岔关:

1 核心
Qt的Graphics View 框架中,核心就是场景(QGraphicsScene)、视图(QGraphicsView)、图形项(QGraphicsItem)。
引入的头文件为:
#include <QGraphicsScene>
#include <QGraphicsView>
#include <QGraphicsRectItem>
1.1 简单示例
//创建场景QGraphicsScene* m_qgraphicsScene = new QGraphicsScene;//创建视图QGraphicsView m_graphicsView(m_qgraphicsScene);QGraphicsLineItem* routeLine1 = new QGraphicsLineItem;routeLine1->setPos(QPointF(182, 295));routeLine1->setLine(0,0, 1896-183, 0);routeLine1->setPen(QPen(QColor(125, 200, 235), 4));//添加到场景中m_qgraphicsScene->addItem(routeLine1);m_graphicsView->setGeometry(0, 0, 1910, 580);//实现显示窗口大小m_graphicsView->setGraphicsSceneSceneRect(0, 0, 1920, 580);//设置场景大小m_graphicsView.show();
注意:
1,如果场景的实际大小(宽、高)大于显示窗口大小,就会出现滑动条;否则,就不会出现。
2,可以使用m_graphicsView->setRenderHints(QPainter::Antialiasing | QPainter::SmoothPixmapTransform);来进行线段的抗锯齿化;
1.1.1 解读
- 1, 创建场景
场景是不可见的,是一个抽象的管理图形项的容器,可向场景中添加图形项,获取场景中的某个图形项等;
QGraphicsScene* m_qgraphicsScene = new QGraphicsScene;
- 2 创建视图类
该类提供绘图的视图(View)组件,用于显示场景中的内容,处理用户的交互操作(如鼠标、键盘事件);
QGraphicsView* m_graphicsView(m_qgraphicsScene);
- 3 创建图形项目
QGraphicsLineItem* routeLine1 = new QGraphicsLineItem;routeLine1->setPos(QPointF(182, 295));routeLine1->setLine(0,0, 1896-183, 0);routeLine1->setPen(QPen(QColor(125, 200, 235), 4));//添加到场景中m_qgraphicsScene->addItem(routeLine1);//显示视图 m_graphicsView.show();
1.2 创建用户交互
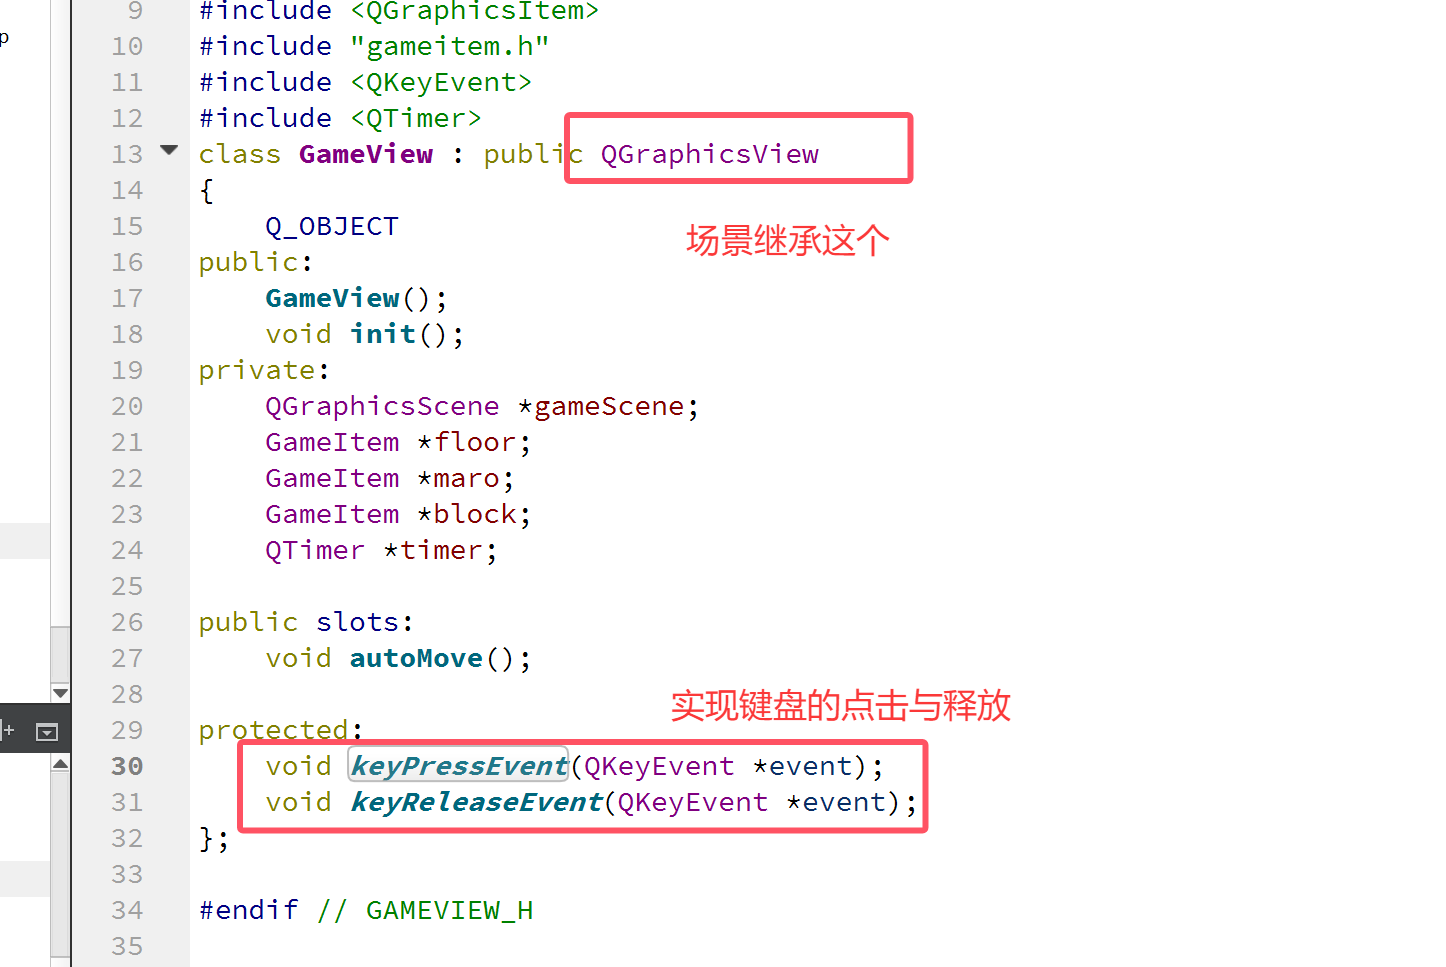
继承QGraphicsView重写鼠标和键盘事件,代码中使用图标元素的坐标位置来唯一确定图形项:
示例如下:
声明:
protected:/*** @brief mousePressEvent:鼠标点击事件* @param event*/void mousePressEvent(QMouseEvent *event) override;/*** @brief mouseMoveEvent:鼠标移动事件* @param event*/void mouseMoveEvent(QMouseEvent *event) override;
实现:
//鼠标点击事件
void GraphicsView::mousePressEvent(QMouseEvent *event)
{// 处理鼠标点击事件QPointF pos = mapToScene(event->pos());//转换为场景中的位置QGraphicsItem *item = scene()->itemAt(pos, QTransform());if (item){qDebug()<<"获得图元坐标:"<<item->pos();if(item->type() == 6){//直线}else if(item->type() == 7){//图片for(QMap<LampInformation, int>::Iterator iter = g_lampTypeHash.begin();iter != g_lampTypeHash.end();iter++){//qDebug()<<"判断坐标是否相同";if(iter.key().m_pos == item->pos()){//qDebug()<<"相同";emit changeLampColor2MainInterface(LampInformation(iter.key().m_lampType, iter.key().m_pos, TrainStationInformationNow::ChangdeStationLocated));}}}}else{qDebug() << "Clicked on background";}
}
//鼠标移动事件
void GraphicsView::mouseMoveEvent(QMouseEvent *event)
{// setMouseTracking(true);//QGraphicsView坐标QPoint viewPoint = event->pos();//QGraphicsScene坐标QPointF  scenePoint = mapToScene(viewPoint);QGraphicsItem *item = scene()->itemAt(scenePoint, QTransform());if (item){//qDebug()<<"移动获得图标项目:";if(item->type() == 6){}else if(item->type() == 7){viewport()->setCursor(Qt::PointingHandCursor);}}else{//qDebug() << "没有移动到图标位置";viewport()->setCursor(Qt::ArrowCursor);}
}
1.2.1 完整示例
头文件:
class GraphicsView : public QGraphicsView
{Q_OBJECTpublic:GraphicsView(QWidget *parent = nullptr);//场景QGraphicsScene *m_scene;protected:void mousePressEvent(QMouseEvent *event) override;void mouseMoveEvent(QMouseEvent *event) override;    //鼠标移动事件public:QGraphicsScene* getGraphicsScene();void setGraphicsSceneSceneRect(qreal x, qreal y, qreal w, qreal h);
}
cpp文件:
GraphicsView::GraphicsView(QWidget *parent): QGraphicsView(parent)
{// 创建场景m_scene = new QGraphicsScene(this);//m_scene->setSceneRect(0,0, 1630 , 390 );setScene(m_scene);setMouseTracking(true);// 添加图形项// QGraphicsRectItem *rectItem = new QGraphicsRectItem(0,0, 100, 100);// scene->addItem(rectItem);
}//鼠标点击事件
void GraphicsView::mousePressEvent(QMouseEvent *event)
{// 处理鼠标点击事件QPointF pos = mapToScene(event->pos());//转换为场景中的位置QGraphicsItem *item = scene()->itemAt(pos, QTransform());if (item){qDebug()<<"获得图元坐标:"<<item->pos();if(item->type() == 6){}else if(item->type() == 7){}}else{qDebug() << "Clicked on background";}
}
//鼠标
void GraphicsView::mouseMoveEvent(QMouseEvent *event)
{// setMouseTracking(true);//QGraphicsView坐标QPoint viewPoint = event->pos();//QGraphicsScene坐标QPointF  scenePoint = mapToScene(viewPoint);QGraphicsItem *item = scene()->itemAt(scenePoint, QTransform());if (item){qDebug()<<"移动获得图标项目:"<<item->pos();// viewport()->setCursor(Qt::PointingHandCursor);if(item->type() == 6){}else if(item->type() == 7){viewport()->setCursor(Qt::PointingHandCursor);}}else{//qDebug() << "没有移动到图标位置";viewport()->setCursor(Qt::ArrowCursor);}
}QGraphicsScene *GraphicsView::getGraphicsScene()
{return m_scene;
}void GraphicsView::setGraphicsSceneSceneRect(qreal x, qreal y, qreal w, qreal h)
{m_scene->setSceneRect(x, y, w , h);
}
1.3 创建图形元
1.3.1 绘制直线
QGraphicsLineItem* routeLine1 = new QGraphicsLineItem;routeLine1->setPos(QPointF(182, 295));routeLine1->setLine(0,0, 1896-183, 0);routeLine1->setPen(QPen(QColor(125, 200, 235), 4));qgraphicsScene->addItem(routeLine1);
1.3.2 绘制贝塞尔曲线
QPainterPath path;path.moveTo(0, 300);path.cubicTo(0, 300, 16, 266, 32, 266);QGraphicsPathItem* routeLine = new QGraphicsPathItem(path);routeLine->setPen(routeLineItemPassPen);qgraphicsScene->addItem(routeLine);
曲线的计算方法:

1.3.3 绘制图片
QGraphicsPixmapItem* lamp1 = new QGraphicsPixmapItem;lamp1->setPos(QPointF(1054, 46));icoPix.load(":/Image/lampMode4Red.png");lamp1->setPixmap(icoPix.scaled(50, 15, Qt::IgnoreAspectRatio, Qt::SmoothTransformation));qgraphicsScene->addItem(lamp1);
1.4 移动的小车
小车使用的是之前博文写的类,这里仅显示对应的头文件,详细内容请查看对应的博文。
#include <QToolButton>
#include <QTimer>class VehicleToolButton : public QToolButton
{Q_OBJECTpublic:/*** @brief 使用默认图片* @param parent*/VehicleToolButton(QWidget *parent = nullptr);/*** @brief VehicleToolButton* @param image:按钮的图标的文件路径* @param size:按钮大小* @param parent*/VehicleToolButton(QString imagePath, QSize size,QWidget *parent = nullptr);~VehicleToolButton();public:/*** @brief 得到速度* @return*/qreal getSpeed();/*** @brief 强制设置显示位置* @param x* @param y*/void setCurCoordinate(int x,int y);/*** @brief 设置现在所处位置* @param x* @param y*/void setCurrentPosition(int x, int y);/*** @brief 改变速度* @param _speed*/void setSpeed(qreal _speed);/*** @brief 设置行进参数* @param _v_point* @param _distance* @param _speed*/void setData(QVector<QPoint> _v_point, qreal _distance, qreal _speed);/*** @brief 设置刷新时间* @param refreshTime*/void setRefreshTime(int refreshTime);/*** @brief 设置图标图片* @param image*/void setImage(QImage image);/*** @brief 设置图标大小* @param size*/void setSize(QSize size);private:/*** @brief 计算从起点到终点方向距离distance的坐标点* @param distance* @param start* @param end* @return*/QPoint getPoswithLinedistance(qreal distance,QPoint start,QPoint end);/*** @brief 按水平轴或者垂直线作镜像翻转,bIsHorizon为true按水平轴,false按垂直方向* @param image* @param bIsHorizon* @return*/QImage filp(const QImage& image,bool bIsHorizon);/*** @brief 根据弧度值(角度值)起点(x1,y1)和终点(x2,y2)确定图片旋转的角度* @param x1* @param y1* @param x2* @param y2*/void setImageRote(int x1,int y1,int x2,int y2);/*** @brief 将图片按顺时针方向旋转一定的角度,fAngle为角度值* @param image* @param fAngle* @return*/QImage rotateImage(const QImage& image,qreal fAngle);/*** @brief 根据弧度值(角度值)r_x,r_y确定图片旋转的角度* @param r_x* @param r_y*/void setImageRote(qreal r_x,qreal r_y);/*** @brief //根据车速和运动轨迹计算time时间之后位置,timer事件调用move()函数移动到该位置,* @param time* @param x* @param y*/void getCurrentPos(qreal time,int& x,int& y);public slots:/*** @brief 刷新图片*/void updatedisplay();/*** @brief 开始定时器* @param _msec*/void startTimer(int _msec);private:QImage m_image;//按钮图标QSize m_pixSize;//按钮大小//车辆行进数据结构QVector<QPoint> m_pointVector;												//行驶路径点集合(图上位置)QVector<qreal> m_linedistanceVector;											//行驶路径段在图上的线段长度qreal m_distance;															//行驶路径总长度(单位m)qreal m_linedistance;														//行驶路径在图上的总长度int	   m_curposindex;														//当前所在点的下标qreal  m_curlinedistance;													//当前所在线段上距离qreal  m_curlinetotledistance;											//当前行驶完成的路径长度总和int	   m_curposx;															//当前在图上的点X坐标int    m_curposy;															//当前在图上的点Y坐标//1km/h ----->0.27777777778m/sqreal m_speed = 0.0;															//当前车速 m/s//设置刷新时间(毫秒)int m_refreshTime = 10;//计时器QTimer m_timer;signals:/*** @brief 停止移动*/void stopVehicleMove();
};
2 使用自定义视图类
1,创建视图类指针:
GraphicsView* m_graphicsView;
2,调用方法绘图:
drawGraphicsViewRailwayStation(m_graphicsView);
void MainInterface::drawGraphicsViewRailwayStation(GraphicsView* graphicsView)
{//清除之前的场景元素graphicsView->getGraphicsScene()->clear();//1,创建场景: 场景是不可见的,是一个抽象的管理图形项的容器,可向场景中添加图形项,获取场景中的某个图形项等QGraphicsScene* qgraphicsScene = graphicsView->getGraphicsScene();//3,图形项类(QGraphicsItem)://该类提供了一些基本的图形元件,也可在此基础上自定义图形项,它支持各种事件的响应,如鼠标事件、键盘事件、拖放事件等,以实现图形的交互功能/*------画线路------*/// QPen routeLineItemPassPen(QColor(125, 200, 235), 4);QPen turnoutLinePassPen(QColor(125, 200, 235), 2);QPen routeLineItemPassPen(QColor(125, 200, 235), 4);QPen turnoutLineBlockedPen(Qt::red, 2);QPen routeLineItemBlockedPen(Qt::red, 4);//主干线QGraphicsLineItem* routeLine1 = new QGraphicsLineItem;routeLine1->setPos(QPointF(182, 295));routeLine1->setLine(0,0, 1896-183, 0);routeLine1->setPen(QPen(QColor(125, 200, 235), 4));qgraphicsScene->addItem(routeLine1);QGraphicsLineItem* routeLine2 = new QGraphicsLineItem;routeLine2->setPos(QPointF(4, 358));routeLine2->setLine(0,0, 1896-4, 0);routeLine2->setPen(routeLineItemPassPen);qgraphicsScene->addItem(routeLine2);QGraphicsLineItem* routeLine3 = new QGraphicsLineItem;routeLine3->setPos(QPointF(850, 166));routeLine3->setLine(0,0, 1280 - 850, 0);routeLine3->setPen(routeLineItemPassPen);qgraphicsScene->addItem(routeLine3);//道岔QGraphicsLineItem* turnoutLine1 = new QGraphicsLineItem;turnoutLine1->setPos(QPointF(965, 100));turnoutLine1->setLine(0,0, 1054 - 963, 36 - 103 + 5);turnoutLine1->setPen(turnoutLineBlockedPen);qgraphicsScene->addItem(turnoutLine1);QGraphicsLineItem* turnoutLine2 = new QGraphicsLineItem;turnoutLine2->setPos(QPointF(1274, 36));turnoutLine2->setLine(0,0, 1323 - 1274, 103 - 36 - 3);turnoutLine2->setPen(turnoutLineBlockedPen);qgraphicsScene->addItem(turnoutLine2);QGraphicsLineItem* routeLine5_2 = new QGraphicsLineItem;routeLine5_2->setPos(QPointF(1275, 103));routeLine5_2->setLine(0,0, 1323 - 1275, 0);routeLine5_2->setPen(routeLineItemPassPen);qgraphicsScene->addItem(routeLine5_2);g_turnoutTypeStatusHash[QPair(1274, 36)] = false;g_turnoutRelevanceInformationHash.insert(QPair(1274, 36), TurnoutRelevanceInformation({turnoutLine2}, {routeLine5_2}));QGraphicsLineItem* turnoutLine3 = new QGraphicsLineItem;turnoutLine3->setPos(QPointF(882, 163));turnoutLine3->setLine(0,0, 963 - 882, 103 - 163 + 3);turnoutLine3->setPen(turnoutLineBlockedPen);qgraphicsScene->addItem(turnoutLine3);QGraphicsLineItem* turnoutLine4 = new QGraphicsLineItem;turnoutLine4->setPos(QPointF(1380, 103));turnoutLine4->setLine(0,0, 1460 - 1380, 231 - 103 - 3);turnoutLine4->setPen(turnoutLineBlockedPen);qgraphicsScene->addItem(turnoutLine4);QGraphicsLineItem* routeLine9_4 = new QGraphicsLineItem;routeLine9_4->setPos(QPointF(1380, 231));routeLine9_4->setLine(0,0, 1456 - 1380, 0);routeLine9_4->setPen(routeLineItemPassPen);qgraphicsScene->addItem(routeLine9_4);g_turnoutTypeStatusHash[QPair(1380, 103)] = false;g_turnoutRelevanceInformationHash.insert(QPair(1380, 103), TurnoutRelevanceInformation({turnoutLine4}, {routeLine9_4}));//画灯//QPointF使用qreal(通常是double)来表示坐标,这意味着它可以表示浮点数坐标。而QPoint使用int来表示坐标,只能表示整数坐标QPixmap icoPix;//类型:3、4灯QGraphicsPixmapItem* lamp1 = new QGraphicsPixmapItem;lamp1->setPos(QPointF(1054, 46));icoPix.load(":/Image/lampMode4Red.png");lamp1->setPixmap(icoPix.scaled(50, 15, Qt::IgnoreAspectRatio, Qt::SmoothTransformation));qgraphicsScene->addItem(lamp1);g_lampTypeHash[LampInformation(LampTypeEnum::LampFourType, QPointF(1054, 46), TrainStationInformationNow::StationLocated)] = LampColorTypeEnum::RedLampColorType;m_lampGraphicsPixmapHash[QPair(1054, 46)] = lamp1;QGraphicsPixmapItem* lamp2 = new QGraphicsPixmapItem;lamp2->setPos(QPointF(1210, 12));icoPix.load(":/Image/lampMode3Red.png");lamp2->setPixmap(icoPix.scaled(50, 15, Qt::IgnoreAspectRatio, Qt::SmoothTransformation));qgraphicsScene->addItem(lamp2);g_lampTypeHash[LampInformation(LampTypeEnum::LampThreeType, QPointF(1210, 12), TrainStationInformationNow::StationLocated)] = LampColorTypeEnum::RedLampColorType;m_lampGraphicsPixmapHash[QPair(1210, 12)] = lamp2;}
注意:
1,如果要进行场景切换,则使用graphicsView->getGraphicsScene()->clear();进行场景的清除,而不是removeItem函数;
参考
QGraphicsView架构学习总结
Qt之QGraphicsView入门篇
QT之QGraphicsScene详细介绍
Qt工作笔记-QGraphics框架场景中图元的移除与析构
QPainter、QPen、QBrush,绘图、填充、渐变等使用方法
QGraphicsScene设置SceneRect
相关文章:
Qt使用QGraphicsView绘制线路图————附带详细实现代码
文章目录 0 效果1 核心1.1 简单示例1.1.1 解读 1.2 创建用户交互1.2.1 完整示例 1.3 创建图形元1.3.1 绘制直线1.3.2 绘制贝塞尔曲线1.3.3 绘制图片 1.4 移动的小车 2 使用自定义视图类参考 0 效果 视图中包含线路、道岔、信号灯、火车。 下图为站点信号灯: 下图…...

【系统性偏见:AI照出的文明暗伤与生存悖论】
系统性偏见:AI照出的文明暗伤与生存悖论 第一层:偏见如何从数据中“遗传” 当某科技公司用十年招聘数据训练AI筛选简历时,系统悄然学会:提到"女性工程师协会"的简历,获得面试的概率自动下降37%——这相当于…...

【Linux】调试器——gdb使用
目录 一、预备知识 二、常用指令 三、调试技巧 (一)监视变量的变化指令 watch (二)更改指定变量的值 set var 正文 一、预备知识 程序的发布形式有两种,debug和release模式,Linux gcc/g出来的二进制…...

【数据分享】2000—2024年我国乡镇的逐年归一化植被指数(NDVI)数据(年最大值/Shp/Excel格式)
之前我们分享过2000-2024年我国逐年的归一化植被指数(NDVI)栅格数据,该逐年数据是取的当年月归一化植被指数(NDVI)的年最大值!另外,我们基于此年度栅格数据按照行政区划取平均值,得到…...
Shell 不神秘:拆解 Linux 命令行的逻辑与效率
初始shell shell的概述 什么是shell 本质 shell本质是脚本文件:完成批处理。 比如 有一个文件 中十个文件,这十个文件中每个文件又有是个子文件,由人来处理,很麻烦,但如果写一个脚本文件,让脚本来替我…...

win 远程 ubuntu 服务器 安装图形界面
远程结果:无法使用docker环境使用此方法 注意要写IP和:数字 在 ubuntu 服务器上安装如下: # 安装 sudo apt-get install tightvncserver # 卸载 sudo apt purge tightvncserver sudo apt autoremove#安装缺失的字体包: sudo apt update s…...

大模型高质量rag构建:A Cheat Sheet and Some Recipes For Building Advanced RAG
原文:A Cheat Sheet and Some Recipes For Building Advanced RAG — LlamaIndex - Build Knowledge Assistants over your Enterprise DataLlamaIndex is a simple, flexible framework for building knowledge assistants using LLMs connected to your enterpris…...
【Qt】游戏场景和图元
一:图元 advance函数: 在 Qt 框架里,QGraphicsItem 是用于在 QGraphicsScene 中绘制图形项的基类。advance(int phase) 是 QGraphicsItem 类的一个虚函数,其主要用途是让图形项在场景的动画或更新过程里完成特定的逻辑操作。 p…...

C++位运算精要:高效解题的利器
引言 在算法竞赛和底层开发中,位运算(Bit Manipulation)因其极高的执行效率而广受青睐。它能在O(1)时间复杂度内完成某些复杂操作,大幅优化程序性能。本文系统梳理C位运算的核心技巧,涵盖基础操作、经典应用、优化策略…...

几种常见的.NET单元测试模拟框架介绍
目录 1. Moq 2. NSubstitute 3. AutoFixture 4. FakeItEasy 总结对比 单元测试模拟框架是一种在软件开发中用于辅助单元测试的工具。 它的主要作用是创建模拟对象来替代真实对象进行测试。在单元测试中,被测试的代码可能依赖于其他组件或服务,如数…...

开源的CMS建站系统可以随便用吗?有什么需要注意的?
开源CMS建站系统虽然具有许多优点,但并非完全“随便用”。无论选哪个CMS系统,大家在使用的时候,可以尽可能地多注意以下几点: 1、版权问题 了解开源许可证:不同的开源CMS系统采用不同的开源许可证,如GPL、…...
初始ARM
ARM最基础的组成单元。 最小系统:能系统能够正常工作的最少器件构成的系统 。 一、CPU基础定义 1. 核心定位 计算机三大核心部件: CPU(运算与控制)内部存储器(数据存储)输入/输出设备(数据交互…...

vue配置.eslintrc、.prettierrc详解
一、eslint简介 ESLint 是一个用于识别和报告 JavaScript 代码中潜在问题的静态代码分析工具。它可以帮助开发人员和团队维护一致的代码风格,减少错误,并确保代码质量。以下是 ESLint 的一些关键特点和功能: 1.静态代码分析:ESLi…...

DataPlatter:利用最少成本数据提升机器人操控的泛化能力
25年3月来自中科院计算所的论文“DataPlatter: Boosting Robotic Manipulation Generalization with Minimal Costly Data”。 视觉-语言-动作 (VLA) 模型在具身人工智能中的应用日益广泛,这加剧对多样化操作演示的需求。然而,数据收集的高成本往往导致…...

诠视科技MR眼镜如何安装apk应用
诠视科技MR眼镜如何安装apk应用 1、使用adb工具安装1.1 adb工具下载1.2 解压adb文件1.3 使用adb安装apk1.4 常用adb命令 2、拷贝到文件夹安装 1、使用adb工具安装 1.1 adb工具下载 点击下面的链接开始下载adb工具,下载结束以后解压文件。 下载链接: https://down…...

3.31Python有关文件操作
1.复制文件 import os from shutil ipmort copy,copytreepath os.path.join(os.getcwd(),test1.txt) target_path os.path.join(os.getcwd(),test1copy)copy(path,target_path) copytree(path,target_path) 注意:test1.txt 和 test1copy 文件夹/包 都点存在 …...

搭建前端环境和后端环境
搭建前端环境 ①、安装vscode,并安装相应的插件工具 ②、安装node.js,可以选择当前版本,或者其他版本 ③、创建工作区 创建一个空文件夹,然后通过vscode工具打开,保存为后缀名为.code-workspace ④、从gitee…...

Polhemus FastScan 单摄像头3D激光扫描器
FastSCAN Cobra是Polhemus公司研制的手持激光扫描仪。与以前的产品比较,它节省了30%的费用,体积也减小了一半 ,但仍然保留了所有功能,使用和携带都更加方便。作为超小的手持激光扫描仪,FastSCAN Cobra对扫描三维物体具…...

召唤数学精灵
1.召唤数学精灵 - 蓝桥云课 问题描述 数学家们发现了两种用于召唤强大的数学精灵的仪式,这两种仪式分别被称为累加法仪式 A(n) 和累乘法仪式 B(n)。 累加法仪式 A(n) 是将从1到 n 的所有数字进行累加求和,即: A(n)12⋯n 累乘法仪式 B(n) …...

《算法:递归+记忆化搜索》
递归记忆化搜索 此文章为简单讲义,详情请移步至主播的主页算法合集: 樱茶喵的个人主页 🔴递归 一.什么是递归? 函数自己调用自己。 二.为什么要用递归? 优点: 代码简洁,可读性好 可用于某些…...

框架修改思路
一、组件引入基本样式 面包屑(使用element plus的标签页) <!-- 标签页区域 --><el-tabs v-model"activeTab" type"card" closable tab-remove"removeTab" class"top-tabs"><el-tab-pane :key&q…...
:ls)
每天学一个 Linux 命令(8):ls
大家好,欢迎来到《每天掌握一个Linux命令》系列。在这个系列中,我们将逐步学习并熟练掌握Linux命令,今天,我们要学习的命令是ls。 01 什么是ls命令 在Linux系统中,ls命令是“list”的缩写,其英文全称为“list directory contents”,即“列出目录内容”。该命令非常实用…...
2025图像处理和深度学习国际学术会议(IPDL 2025)
重要信息 官网:www.IPDL.xyz 时间:2025年4月11-13日 地点:中国-成都 简介 随着深度学习和图像处理技术的迅速发展,相关技术的应用逐渐渗透到各个行业,如医疗影像分析、自动驾驶、安防监控和智能制造等。这些应用的…...

Flutter 环境搭建、常用指令、开发细节
一、环境搭建 Flutter 插件和包管理平台:pub.devFlutter 环境安装,官方中文文档,按着官方的来就够了,没啥难度。安卓模拟器可以使用 Android Studio 自带的也可以第三方的,例如:Genymotion。配置环境变量&…...

使用uni-app框架 写电商商城前端h5静态网站模板项目-手机端-前端项目练习
以前用vue2 分享过一个电商商城前端静态网站项目-电脑端,需要的小伙伴还是很多的,最近又花了几天更新了一个 手机端的 电商商城h5项目,今天也分享一下实现方案。 对于以前写的 电商商城前端静态网站模板-电脑端,有兴趣的小伙伴 可…...

远心镜头原理
文章目录 原理特点分类应用领域 参考:B站优致谱视觉 原理 远心镜头的工作原理基于其特殊的光学设计,旨在解决普通镜头存在的视差问题。它通过将镜头的光轴与成像面垂直,并使主光线平行于光轴,从而确保在一定的物距范围内…...

centos7修复漏洞CVE-2023-38408
漏洞描述: CVE-2023-38408 是 OpenSSH 组件中的一个远程代码执行(RCE)漏洞,影响 OpenSSH 代理(ssh-agent)的安全性。该漏洞被发现于 2023 年 7 月,并被标记为 高危(CVSS 评分 7.3&a…...

Scikit-learn使用指南
1. Scikit-learn 简介 定义: Scikit-learn(简称 sklearn)是基于 Python 的开源机器学习库,提供了一系列算法和工具,用于数据挖掘、数据预处理、分类、回归、聚类、模型评估等任务。特点: 基于 NumPy、SciP…...

React AJAX:深入理解与高效实践
React AJAX:深入理解与高效实践 引言 随着Web应用的日益复杂,前端开发对数据的处理需求也越来越高。React作为目前最流行的前端框架之一,其与AJAX的结合使得数据的异步获取和处理变得更为高效和便捷。本文将深入探讨React与AJAX的关系&…...

uniapp微信小程序封装navbar组件
一、 最终效果 二、实现了功能 1、nav左侧返回icon支持自定义点击返回事件(默认返回上一步) 2、nav左侧支持既显示返回又显示返回首页icon 3、nav左侧只显示返回icon 4、nav左侧只显示返回首页icon 5、nav左侧自定义left插槽 6、nav中间支持title命名 7…...