PCL PolygonMesh 与 TextureMesh 源码阅读与简单测试
Title: PCL PolygonMesh 与 TextureMesh 源码阅读与简单测试
文章目录
- I . PolygonMesh
- 1. PolygonMesh 结构体
- 2. Vertices 结构体与点云索引
- 3. 测试 PolygonMesh
- II. TextureMesh
- 1. TextureMesh 结构体
- 2. TexMaterial 结构体
- 3. 纹理坐标与纹理坐标索引
- 4. 测试 TextureMesh
以下简单记录以备忘.
I . PolygonMesh
1. PolygonMesh 结构体
先要建立没有纹理的 PolygonMesh, 一般都为三角形网格. ([pcl]/common/include/pcl/PolygonMesh.h)
#pragma once#include <algorithm>
#include <vector>
#include <ostream>// Include the correct Header path here
#include <pcl/PCLHeader.h>
#include <pcl/PCLPointCloud2.h>
#include <pcl/Vertices.h>namespace pcl
{struct PolygonMesh{PolygonMesh () = default;::pcl::PCLHeader  header;::pcl::PCLPointCloud2 cloud;std::vector< ::pcl::Vertices>  polygons;/* ... ... */} // namespace pcl
只要设置好 cloud 和 polygons 就可以. header 和 ros 中的 std_msgs/Header.msg 一致.
cloud 的类型是 ::pcl::PCLPointCloud2, 这种格式和 ros 中的 sensor_msgs/PointCloud2 Message 一致.
我们给点云输入数据时还是习惯于使用直观易懂的 pcl::PointCloud<pcl::PointXYZ>. 可以通过 fromPCLPointCloud2 和 toPCLPointCloud2 来进行两者的转换.
polygons 存储的是一个一个的多边形网格的单元面元. 如果创建三角形网格, polygons vector 中的元素就是一个一个 ::pcl::Vertices 三角形面片.
2. Vertices 结构体与点云索引
看一下 ::pcl::Vertices 结构体定义能够比较清晰的理解. ([pcl]/common/include/pcl/Vertices.h)
#pragma once#include <pcl/memory.h>
#include <pcl/pcl_macros.h>
#include <pcl/types.h>#include <ostream>namespace pcl
{/** \brief Describes a set of vertices in a polygon mesh, by basically* storing an array of indices.*/struct Vertices{Vertices () = default;Indices vertices;public:using Ptr = shared_ptr<Vertices>;using ConstPtr = shared_ptr<const Vertices>;}; // struct Vertices/* ... ... */} // namespace pcl
而这个 Indices 是单元面元各个顶点 (点云 cloud 中的点 point) 在点云 cloud 中点的索引指标 (0 开始排序), 就是点云 cloud 中各个点输入时的顺序指标.
#pragma once/*** \file pcl/types.h** \brief Defines basic non-point types used by PCL* \ingroup common*/#include <pcl/pcl_config.h>
#include <pcl/pcl_macros.h>
#include <vector>#include <cstdint>#include <Eigen/Core>namespace pcl
{namespace detail {/*** \brief int_type::type refers to an integral type that satisfies template parameters* \tparam Bits number of bits in the integral type* \tparam Signed signed or unsigned nature of the type*/template <std::size_t Bits, bool Signed = true>struct int_type { using type = void; };/*** \brief helper type to use for `int_type::type`* \see int_type*/template <std::size_t Bits, bool Signed = true>using int_type_t = typename int_type<Bits, Signed>::type;template <>struct int_type<8, true> { using type = std::int8_t; };template <>struct int_type<8, false> { using type = std::uint8_t; };template <>struct int_type<16, true> { using type = std::int16_t; };template <>struct int_type<16, false> { using type = std::uint16_t; };template <>struct int_type<32, true> { using type = std::int32_t; };template <>struct int_type<32, false> { using type = std::uint32_t; };template <>struct int_type<64, true> { using type = std::int64_t; };template <>struct int_type<64, false> { using type = std::uint64_t; };/*** \brief number of bits in PCL's index type** Please use PCL_INDEX_SIZE when building PCL to choose a size best suited for your needs.* PCL 1.12 will come with default 32** PCL 1.11 has a default size = sizeof(int)*/constexpr std::uint8_t index_type_size = PCL_INDEX_SIZE;/*** \brief signed/unsigned nature of PCL's index type* Please use PCL_INDEX_SIGNED when building PCL to choose a type best suited for your needs.* Default: signed*/constexpr bool index_type_signed = PCL_INDEX_SIGNED;
}  // namespace detail/*** \brief Type used for an index in PCL** Default index_t = int for PCL 1.11, std::int32_t for PCL >= 1.12*/using index_t = detail::int_type_t<detail::index_type_size, detail::index_type_signed>;static_assert(!std::is_void<index_t>::value, "`index_t` can't have type `void`");/*** \brief Type used for an unsigned index in PCL** Unsigned index that mirrors the type of the index_t*/using uindex_t = detail::int_type_t<detail::index_type_size, false>;static_assert(!std::is_signed<uindex_t>::value, "`uindex_t` must be unsigned");/*** \brief Type used for indices in PCL* \todo Remove with C++20*/template <typename Allocator = std::allocator<index_t>>using IndicesAllocator = std::vector<index_t, Allocator>;/*** \brief Type used for indices in PCL*/using Indices = IndicesAllocator<>;/*** \brief Type used for aligned vector of Eigen objects in PCL*/template <typename T>using AlignedVector = std::vector<T, Eigen::aligned_allocator<T>>;
}  // namespace pcl
3. 测试 PolygonMesh
#include <pcl/PolygonMesh.h>
#include <pcl/point_cloud.h>
#include <pcl/point_types.h>
#include <pcl/conversions.h>
#include <pcl/io/ply_io.h>
#include <chrono>
#include <iostream>void generatePolygonMesh()
{pcl::PolygonMesh simple_polygon_mesh;// headersimple_polygon_mesh.header.frame_id = "odom";simple_polygon_mesh.header.seq = 0;// 获取当前时间点auto now = std::chrono::system_clock::now();// 计算从纪元开始的微秒数auto duration = now.time_since_epoch();auto microseconds = std::chrono::duration_cast<std::chrono::microseconds>(duration).count();// The value represents microseconds since 1970-01-01 00:00:00 (the UNIX epoch)simple_polygon_mesh.header.stamp = microseconds;// cloudpcl::PointCloud<pcl::PointXYZ> raw_point_cloud;raw_point_cloud.push_back(pcl::PointXYZ(0.0, 1.0, 0.0)); // #0raw_point_cloud.push_back(pcl::PointXYZ(0.0, 0.0, 0.0)); // #1raw_point_cloud.push_back(pcl::PointXYZ(1.0, 0.0, 0.0)); // #2raw_point_cloud.push_back(pcl::PointXYZ(1.0, 1.0, -0.5)); // #3pcl::toPCLPointCloud2(raw_point_cloud, simple_polygon_mesh.cloud);// polygonsstd::vector< ::pcl::Vertices>  triangle_polygons;pcl::Vertices triangle_face_1;triangle_face_1.vertices.push_back(0);triangle_face_1.vertices.push_back(1);triangle_face_1.vertices.push_back(2);triangle_polygons.push_back(triangle_face_1);pcl::Vertices triangle_face_2;triangle_face_2.vertices.push_back(0);triangle_face_2.vertices.push_back(2);triangle_face_2.vertices.push_back(3);triangle_polygons.push_back(triangle_face_2);simple_polygon_mesh.polygons = triangle_polygons;std::cout << "========= simple_polygon_mesh ===========\n" << simple_polygon_mesh << std::endl;pcl::io::savePLYFile("output_mesh.ply", simple_polygon_mesh);
}int main()
{generatePolygonMesh();
}
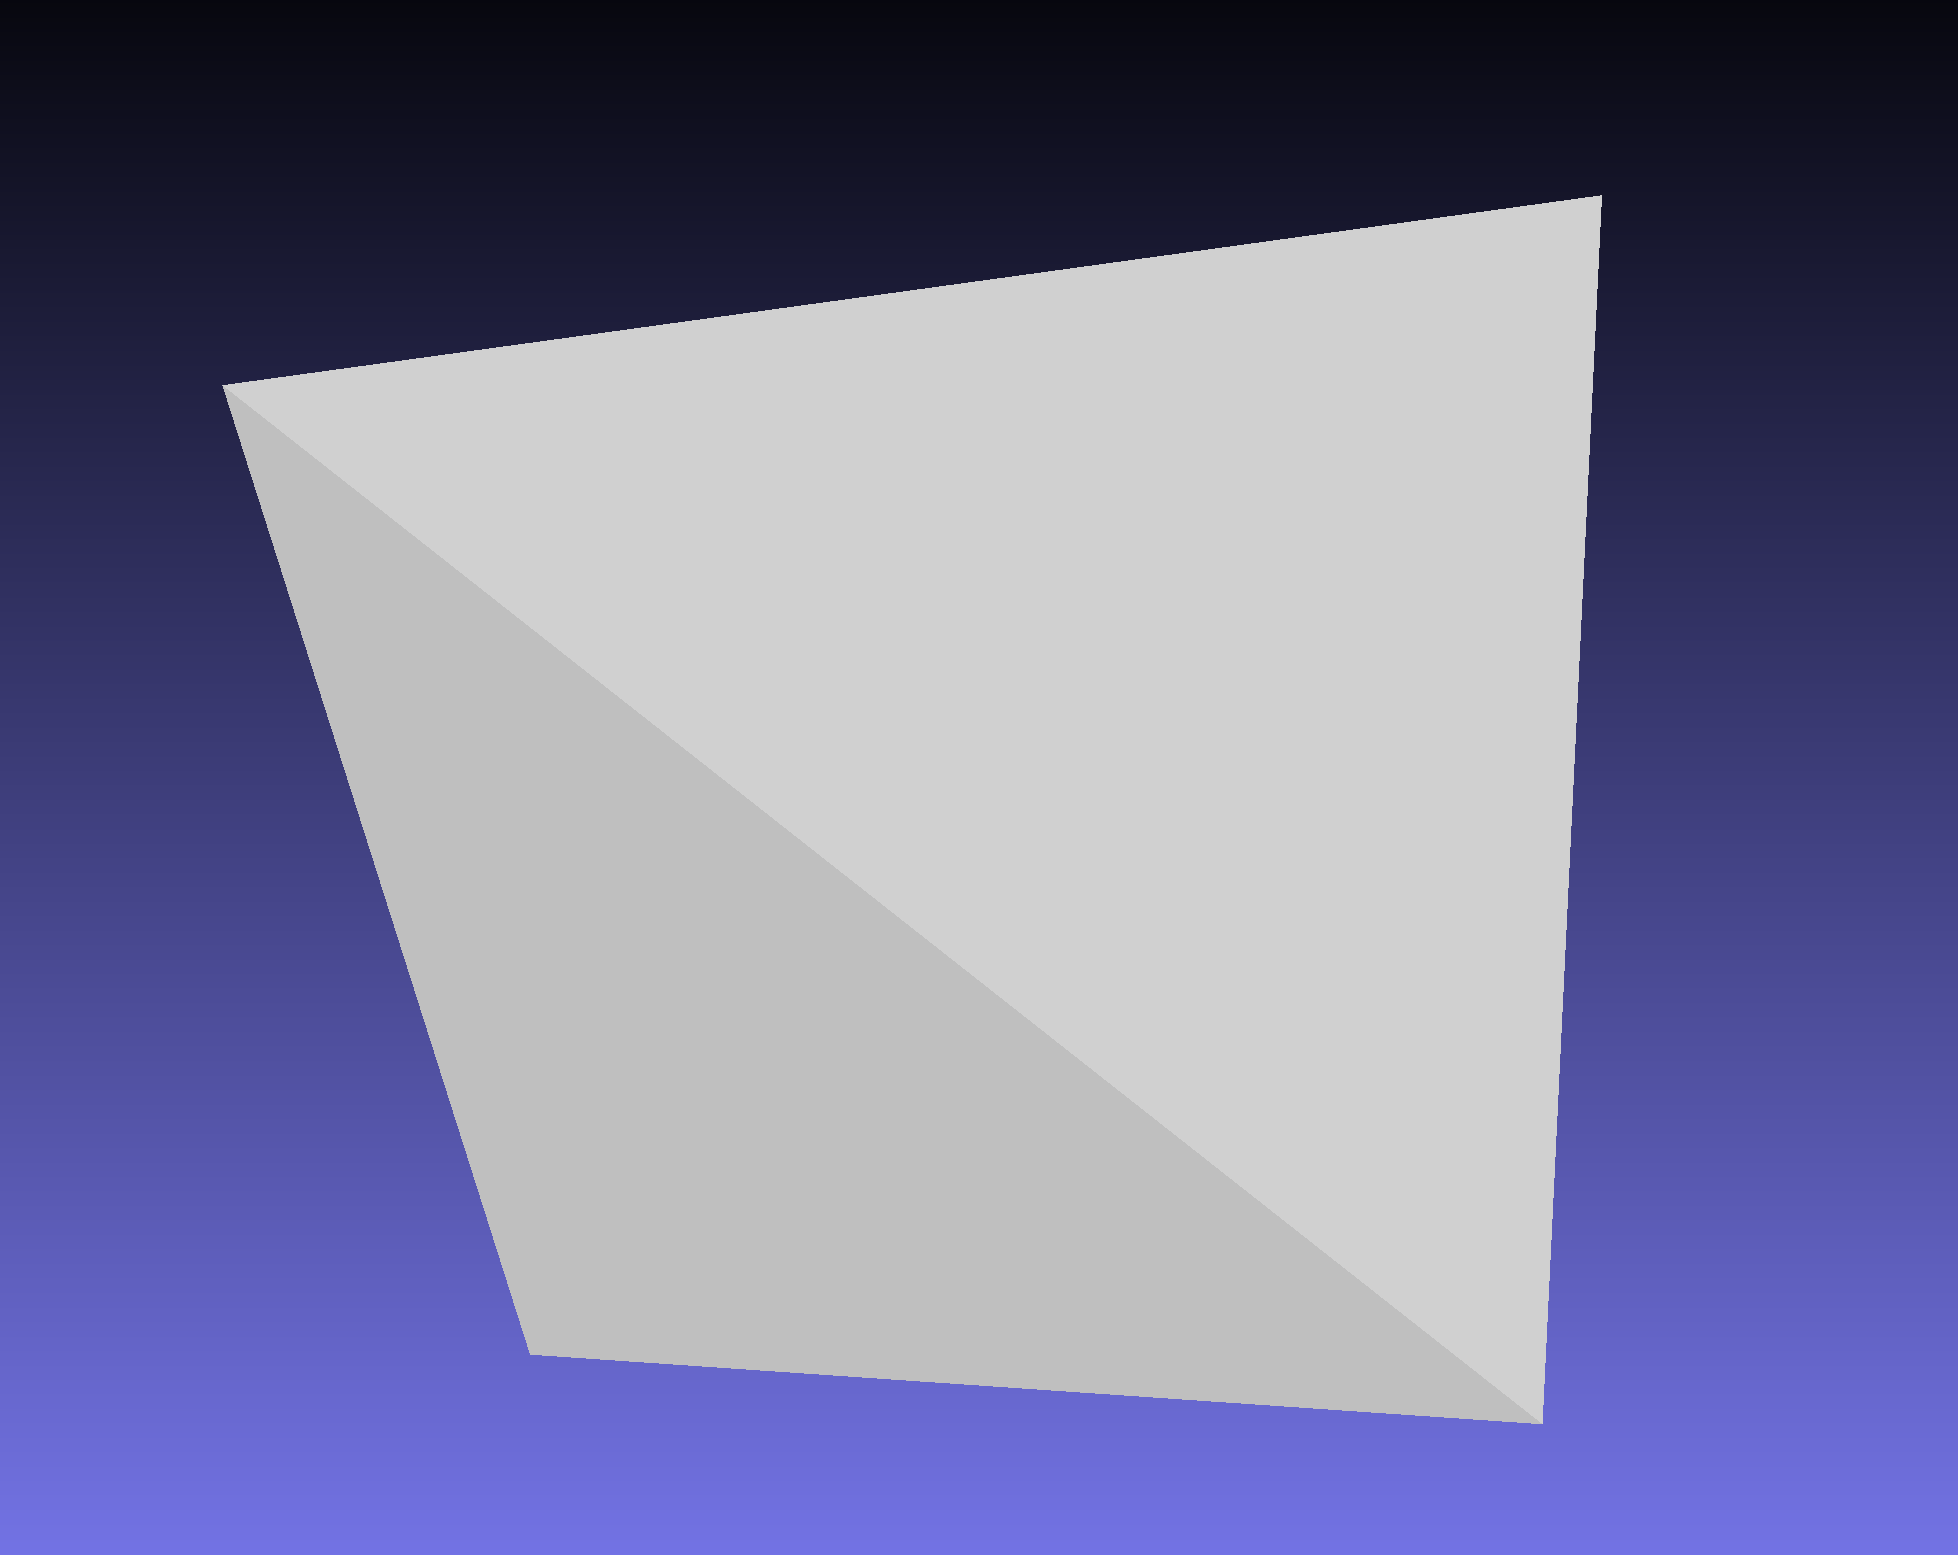
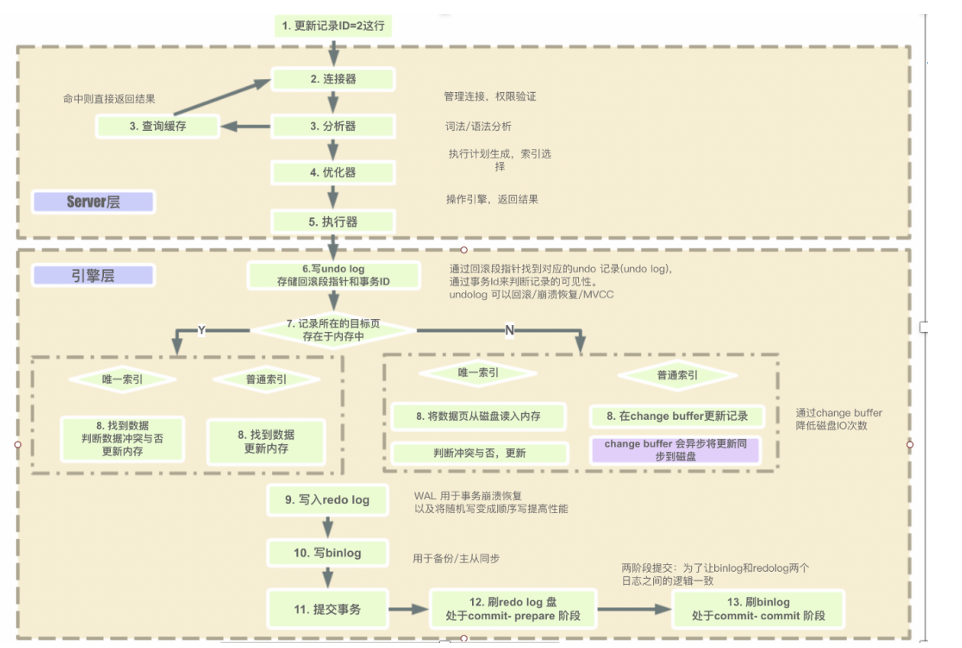
生成的三角形网格
II. TextureMesh
1. TextureMesh 结构体
TextureMesh 在 PolygonMesh 基础上多了纹理部分, 以及纹理(像素)和网格(几何)之间的映射关系. 先看一下 TextureMesh 结构体的定义.
结构体内所有元素 tex_polygons、tex_materials 等都套了 2 层 std::vector, 这是因为每一个网格可以拥有不同的多个纹理.
#pragma once#include <Eigen/Core>
#include <string>
#include <pcl/PCLPointCloud2.h>
#include <pcl/Vertices.h>namespace pcl
{/** \author Khai Tran */struct TexMaterial{struct RGB{float r = 0;float g = 0;float b = 0;}; //RGB/** \brief Texture name. */std::string tex_name;/** \brief Texture file. */std::string tex_file;/** \brief Defines the ambient color of the material to be (r,g,b). */RGB         tex_Ka;/** \brief Defines the diffuse color of the material to be (r,g,b). */RGB         tex_Kd;/** \brief Defines the specular color of the material to be (r,g,b). This color shows up in highlights. */RGB         tex_Ks;/** \brief Defines the transparency of the material to be alpha. */float       tex_d;/** \brief Defines the shininess of the material to be s. */float       tex_Ns;/** \brief Denotes the illumination model used by the material.** illum = 1 indicates a flat material with no specular highlights, so the value of Ks is not used.* illum = 2 denotes the presence of specular highlights, and so a specification for Ks is required.*/int         tex_illum;}; // TexMaterial/** \author Khai Tran */struct TextureMesh{pcl::PCLPointCloud2  cloud;pcl::PCLHeader  header;/** \brief polygon which is mapped with specific texture defined in TexMaterial */std::vector<std::vector<pcl::Vertices> >    tex_polygons;/** \brief UV coordinates */std::vector<std::vector<Eigen::Vector2f, Eigen::aligned_allocator<Eigen::Vector2f> > > tex_coordinates;/** \brief define texture material */std::vector<pcl::TexMaterial>               tex_materials;/** \brief Specifies which texture coordinates from tex_coordinates each polygon/face uses.* The vectors must have the same sizes as in tex_polygons, but the pcl::Vertices* may be empty for those polygons/faces that do not use coordinates.*/std::vector<std::vector<pcl::Vertices> >    tex_coord_indices;public:using Ptr = shared_ptr<pcl::TextureMesh>;using ConstPtr = shared_ptr<const pcl::TextureMesh>;}; // struct TextureMeshusing TextureMeshPtr = TextureMesh::Ptr;using TextureMeshConstPtr = TextureMesh::ConstPtr;
} // namespace pcl
2. TexMaterial 结构体
tex_name: 材质的名称, 用于在模型中引用此材质.
tex_file: 纹理图像文件的路径, 通常为.png、.jpg 等格式.
tex_Ka: 环境光颜色, 控制材质在全局光照下的基础颜色.
tex_Kd: 漫反射颜色, 控制材质在光线照射下的基本颜色 (最主要的颜色成分).
tex_Ks: 镜面反射颜色, 控制材质高光的颜色 (通常与金属性相关).
tex_d: 透明度值, 范围 0.0 (完全透明) 到 1.0 (完全不透明).
tex_Ns: 光泽度值, 范围 0~1000+, 值越大高光越集中 (例如, 塑料≈300, 金属≈800).
tex_illum: 光照模型编号, 控制材质的渲染方式. 设为1 表示一个没有镜面高光的平面材质,所以不使用镜面反射颜色(Ks)的值. 设为 2 表示存在镜面高光,因此需要指定镜面反射颜色 (Ks).
material.tex_name = “my_texture”; // 千万不要命名为 “texture”!
会引发 “error C1105: cannot call a non-function”.
避免使用以下保留名称作为变量名: texture、position、normal、color、matrix、view、projection
3. 纹理坐标与纹理坐标索引
纹理坐标 UV coordinates 可看做是归一化的像素坐标, 纹理坐标索引就是 UV 坐标的标号. 通过为每个 PolygonMesh 的顶点 Vertex 指定一个像素的 UV 坐标索引, 而由顶点定义的面元内部区域中的任意点就可以通过线性插值计算得到对应的 UV 坐标. 这样就实现了图像纹理坐标到三维模型表面坐标之间的映射, 进而就能在三维网格表面贴图和渲染了.
需要说明利用 OpenCV 加载的图像坐标的原点在左上角, 这不同于 OpenGL 的原点左下角设置. 而渲染引擎一般使用 OpenGL (pcl 库中也是如此), 所以对 UV 坐标中的 V 坐标需要翻转一下.
std::vector<                 // 第一层向量:材质组(Material Groups)std::vector<               // 第二层向量:每个材质组中的所有UV坐标Eigen::Vector2f,         // UV坐标点(U,V),使用Eigen库的二维向量Eigen::aligned_allocator<Eigen::Vector2f>  // 内存对齐分配器(确保SSE优化)>
> tex_coordinates;
看似很严格定义的 std::vector<std::vector<pcl::Vertices> > tex_coord_indices, 在 libpcl-dev 1.14.0 还没有起作用. UV 索引和 PolygonMesh 各个顶点索引之间就是顺序对应, 即 tex_polygons[i][j] 对应 tex_coordinates[i][j].
std::vector<                // 第一层向量:材质组(Material Groups)std::vector<              // 第二层向量:每个材质组中的多边形(Polygons)pcl::Vertices           // 每个多边形的顶点对应的 UV 坐标索引>
> tex_coord_indices;
4. 测试 TextureMesh
#include <pcl/PolygonMesh.h>
#include <pcl/point_cloud.h>
#include <pcl/point_types.h>
#include <pcl/conversions.h>
#include <pcl/io/ply_io.h>
#include <pcl/io/obj_io.h>
#include <pcl/TextureMesh.h>
#include <pcl/visualization/pcl_visualizer.h>
#include <iostream>
#include <opencv2/opencv.hpp>
#include <opencv2/core.hpp>
#include <opencv2/imgcodecs.hpp>
#include <opencv2/highgui.hpp>
#include <filesystem>void visualizeTexturedMesh(const pcl::TextureMesh& tex_mesh)
{pcl::visualization::PCLVisualizer::Ptr viewer(new pcl::visualization::PCLVisualizer("3D Mesh Viewer"));// 添加网格到可视化器if (!viewer->addTextureMesh(tex_mesh, "ploygon_mesh")) {std::cerr << "Failed to add texture mesh!" << std::endl;return;}// 设置显示参数viewer->setBackgroundColor(0.4, 0.698, 1.0);viewer->setSize(1280, 720);                     // 窗口尺寸viewer->addCoordinateSystem(0.1, "axis", 0);viewer->addText("Texture Mesh Viewer\nPress Q to exit", 10, 10, 20, 1.0, 1.0, 1.0, "help");while (!viewer->wasStopped()) {viewer->spinOnce(100);  // 更新频率100ms}
}pcl::TextureMesh generateTextureMesh()
{pcl::TextureMesh simple_texture_mesh;// 1 导入多边形网格(点云+网格), 并设置纹理网格的点云和网格pcl::PolygonMesh polyon_mesh;pcl::io::loadPLYFile("./output_mesh.ply", polyon_mesh);simple_texture_mesh.cloud = polyon_mesh.cloud;simple_texture_mesh.header = polyon_mesh.header;simple_texture_mesh.tex_polygons.push_back(polyon_mesh.polygons);// 2 设置 UV 映射std::vector<Eigen::Vector2f, Eigen::aligned_allocator<Eigen::Vector2f>> tex_coords;float u_0 = 0.0;float v_0 = 0.0;tex_coords.emplace_back(u_0, 1.0f - v_0); // OpenGL坐标系需要翻转Vfloat u_1 = 0.0;float v_1 = 1.0;tex_coords.emplace_back(u_1, 1.0f - v_1); float u_2 = 1.0;float v_2 = 1.0;tex_coords.emplace_back(u_2, 1.0f - v_2); float u_3 = 1.0;float v_3 = 0.0;tex_coords.emplace_back(u_3, 1.0f - v_3); simple_texture_mesh.tex_coordinates.push_back(tex_coords);// 3 设置纹理材质std::string image_path = "../image.png";cv::Mat image = cv::imread(image_path);// 设置纹理材质pcl::TexMaterial material;material.tex_file = "image.png";material.tex_name = "my_texture";  // 千万不要命名为 "texture"!// 增加漫反射强度(允许值 >1.0)material.tex_Kd.r = 1.5;material.tex_Kd.g = 1.5;material.tex_Kd.b = 1.5; // 增强环境光反射material.tex_Ka.r = 0.6; material.tex_Ka.g = 0.6; material.tex_Ka.b = 0.6;           // 添加自发光效果(模拟亮度提升)material.tex_illum = 1;simple_texture_mesh.tex_materials.push_back(material);std::string img_name_new{"image.png"};cv::imwrite(img_name_new, image);return simple_texture_mesh;
}int main()
{pcl::TextureMesh tex_mesh = generateTextureMesh();visualizeTexturedMesh(tex_mesh);
}
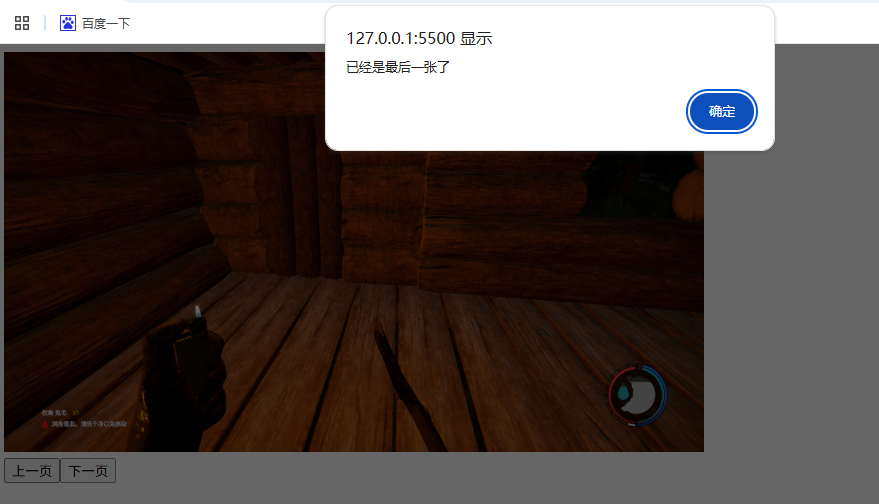
纹理原图

纹理映射后的效果

版权声明:本文为博主原创文章,遵循 CC 4.0 BY 版权协议,转载请附上原文出处链接和本声明。
本文链接:https://blog.csdn.net/woyaomaishu2/article/details/148018953
本文作者:wzf@robotics_notes
相关文章:
PCL PolygonMesh 与 TextureMesh 源码阅读与简单测试
Title: PCL PolygonMesh 与 TextureMesh 源码阅读与简单测试 文章目录 I . PolygonMesh1. PolygonMesh 结构体2. Vertices 结构体与点云索引3. 测试 PolygonMesh II. TextureMesh1. TextureMesh 结构体2. TexMaterial 结构体3. 纹理坐标与纹理坐标索引4. 测试 TextureMesh 以下…...

量子算法:开启计算新时代的技术密码
摘要 量子算法是利用量子力学特性(如叠加态、纠缠、干涉)设计的计算模型,在特定问题上相比经典算法具有指数级加速优势。本文深入探讨了量子算法的核心原理、代表性算法及其在多个领域的应用,分析了量子算法面临的挑战与未来发展…...
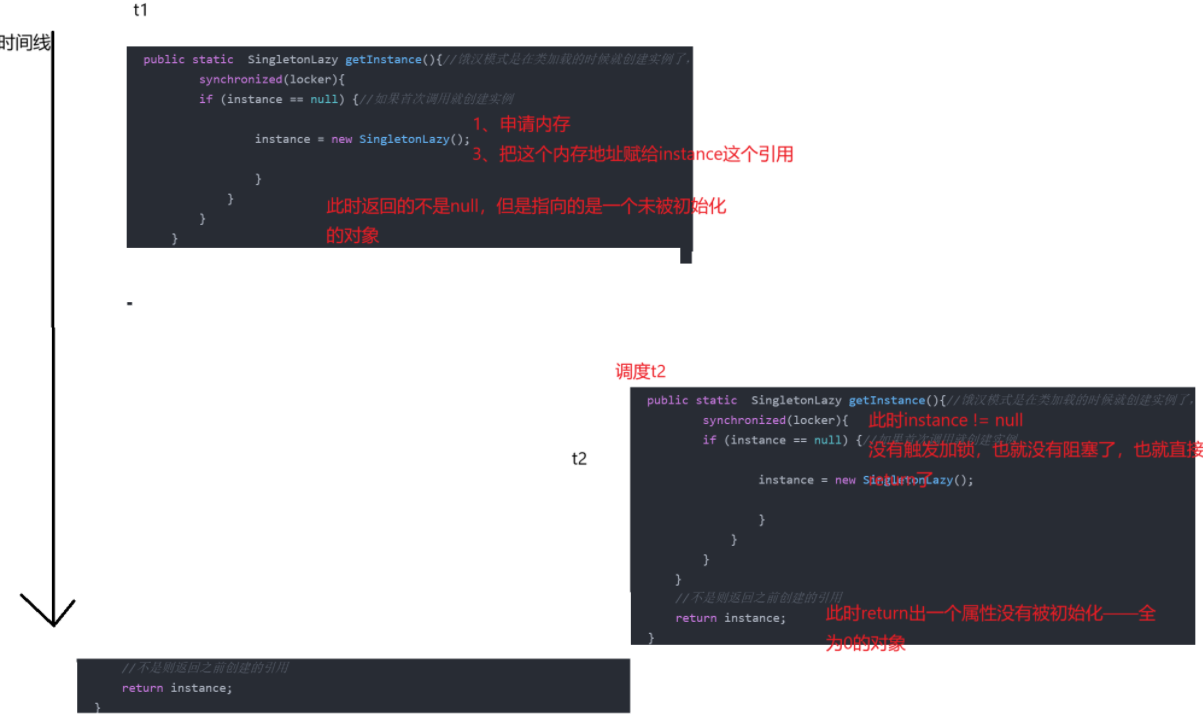
多线程代码案例-1 单例模式
单例模式 单例模式是开发中常见的设计模式。 设计模式,是我们在编写代码时候的一种软性的规定,也就是说,我们遵守了设计模式,代码的下限就有了一定的保证。设计模式有很多种,在不同的语言中,也有不同的设计…...

CSS实现文本自动平衡text-wrap: balance
不再有排版孤行和寡行 我们都知道那些标题,最后一个单词换行并单独站在新行上,破坏了视觉效果,看起来很奇怪。当然,有老式的 手动换行或将内容分成不同部分。但您听说过text-wrap: balance吗? 通过应用text-wrap: bal…...
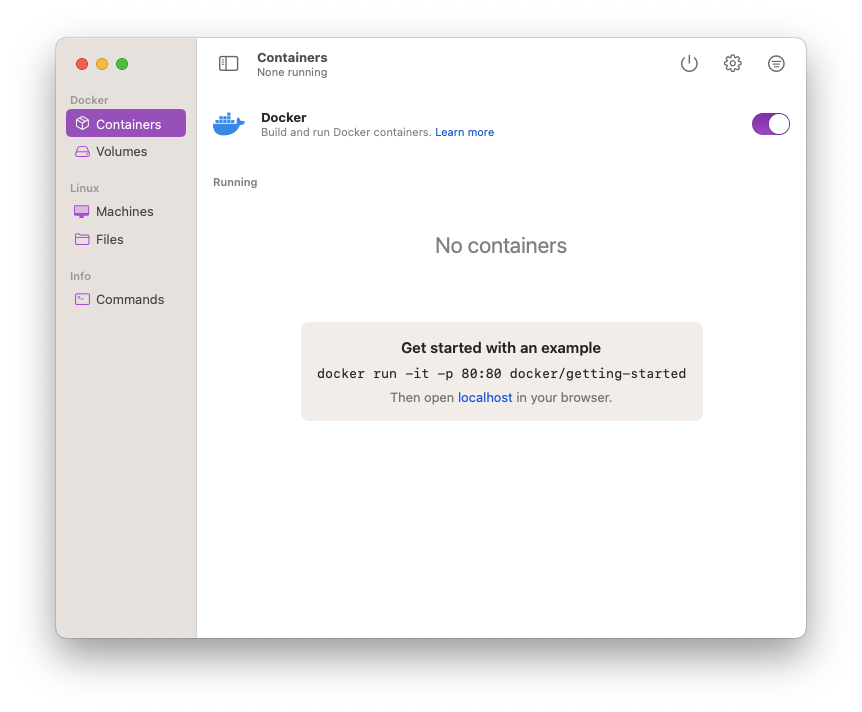
mac M芯片运行docker-desktop异常问题
虽然mac已经迭代到m4了,但官方的docker-desktop运行仍然有问题,包括但不限于: 命令行docker找不到docker-desk打不开docker-desktop闪退容器起不来 尝试不同版本后,看到了其他可以在mac跑docker的开源方法,更简单、轻…...

主流数据库运维故障排查卡片式速查表与视觉图谱
主流数据库运维故障排查卡片式速查表与视觉图谱 本文件将主文档内容转化为模块化卡片结构,并补充数据库结构图、排查路径图、锁机制对比等视觉图谱,以便在演示、教学或现场排障中快速引用。 📌 故障卡片速查:连接失败 数据库检查…...

事件响应策略规范模版
事件响应策略 一、事件分级定义 根据事件对业务的影响程度和紧急程度,将事件分为 4个等级(P1-P4),明确各级事件的判定标准:、 二、响应时效承诺 响应时间(从事件确认到首次回复) P1 事件:15 分钟内响应(724 小时电话 / 工单优先接入) P2 事件:30 分钟内响应(工…...

在哪一个终端下运行有影响吗?pip install pillow
在哪一个终端下运行有影响吗?pip install pillow -i https://pypi.tuna.tsinghua.edu.cn/simple --trusted-host pypi.tuna.tsinghua.edu.cn,需要切换到主目录吗? 1. 是否需要切换目录? 不需要切换目录 pip install 安装的包会存放…...

我用 Appuploader绕过 Mac,成功把 iOS 应用上线了 App Store
我以前总觉得,iOS 上架是 macOS Xcode 专属的领域。直到最近项目必须要上架 iOS,团队却没人用 Mac,只能临时组建了一套“跨平台上架流程”。 这篇文章记录我这个“非典型 iOS 开发者”是如何绕开传统 Xcode 流程,借助一系列工具…...

React学习———React Router
React Router React Router 是 React 应用中用于管理路由的流行库,它允许你在单页应用(SPA)中实现导航和页面切换而无需重新加载页面。 安装 npm install react-router-dom核心组件 <BrowserRouter> 使用HTML5的历史记录API&#…...

MGX:多智能体管理开发流程
MGX的多智能体团队如何通过专家混合系统采用全新方法,彻底改变开发流程,与当前的单一智能体工具截然不同。 Lovable和Cursor在自动化我们的特定开发流程方面取得了巨大飞跃,但问题是它们仅解决软件开发的单一领域。 这就是MGX(MetaGPT X)的用武之地,它是一种正在重新定…...

现在环保方面有什么新的技术动态
环保领域的技术发展迅速,尤其在“双碳”目标、数字化转型和可持续发展背景下,涌现出许多创新技术和应用。以下是当前环保领域的新技术动态(截至2024年): 一、碳中和与碳减排技术 CCUS(碳捕集、利用与封存&a…...

归并排序:分治思想的优雅实现
归并排序(Merge Sort)以简洁而高效的分治思想,在众多排序算法中占据着重要的地位。今天,就让我们一同深入探索归并排序的奥秘。 一、归并排序简介 归并排序是一种基于分治策略的排序算法。它的核心思想是将一个大的问题分解成若…...

采购流程规范化如何实现?日事清流程自动化助力需求、采购、财务高效协作
采购审批流程全靠人推进,内耗严重,效率低下? 花重金上了OA,结果功能有局限、不灵活? 问题出在哪里?是我们的要求太多、太苛刻吗?NO! 流程名称: 采购审批管理 流程功能…...

[模型部署] 3. 性能优化
👋 你好!这里有实用干货与深度分享✨✨ 若有帮助,欢迎: 👍 点赞 | ⭐ 收藏 | 💬 评论 | ➕ 关注 ,解锁更多精彩! 📁 收藏专栏即可第一时间获取最新推送🔔…...

Vue3 加快页面加载速度 使用CDN外部库的加载 提升页面打开速度 服务器分发
介绍 CDN(内容分发网络)通过全球分布的边缘节点,让用户从最近的服务器获取资源,减少网络延迟,显著提升JS、CSS等静态文件的加载速度。公共库(如Vue、React、Axios)托管在CDN上,减少…...

接触感知 钳位电路分析
以下是NG板接触感知电路的原理图。两极分别为P3和P4S,电压值P4S < P3。 电路结构分两部分,第一部分对输入电压进行分压钳位。后级电路使用LM113比较器芯片进行电压比较,输出ST接触感知信号。 钳位电路输出特性分析 输出电压变化趋势&a…...

彻底删除Docker容器中的环境变量
彻底删除Docker容器中的环境变量 前言:环境变量的重要性第一步:创建实验容器第二步:验证环境变量第三步:定位容器"身份证"第四步:修改"出生证明"(重要!)第五步:验证手术成果技术原理深度剖析更安全的替代方案常见问题解答结语:知其然更要知其所以…...
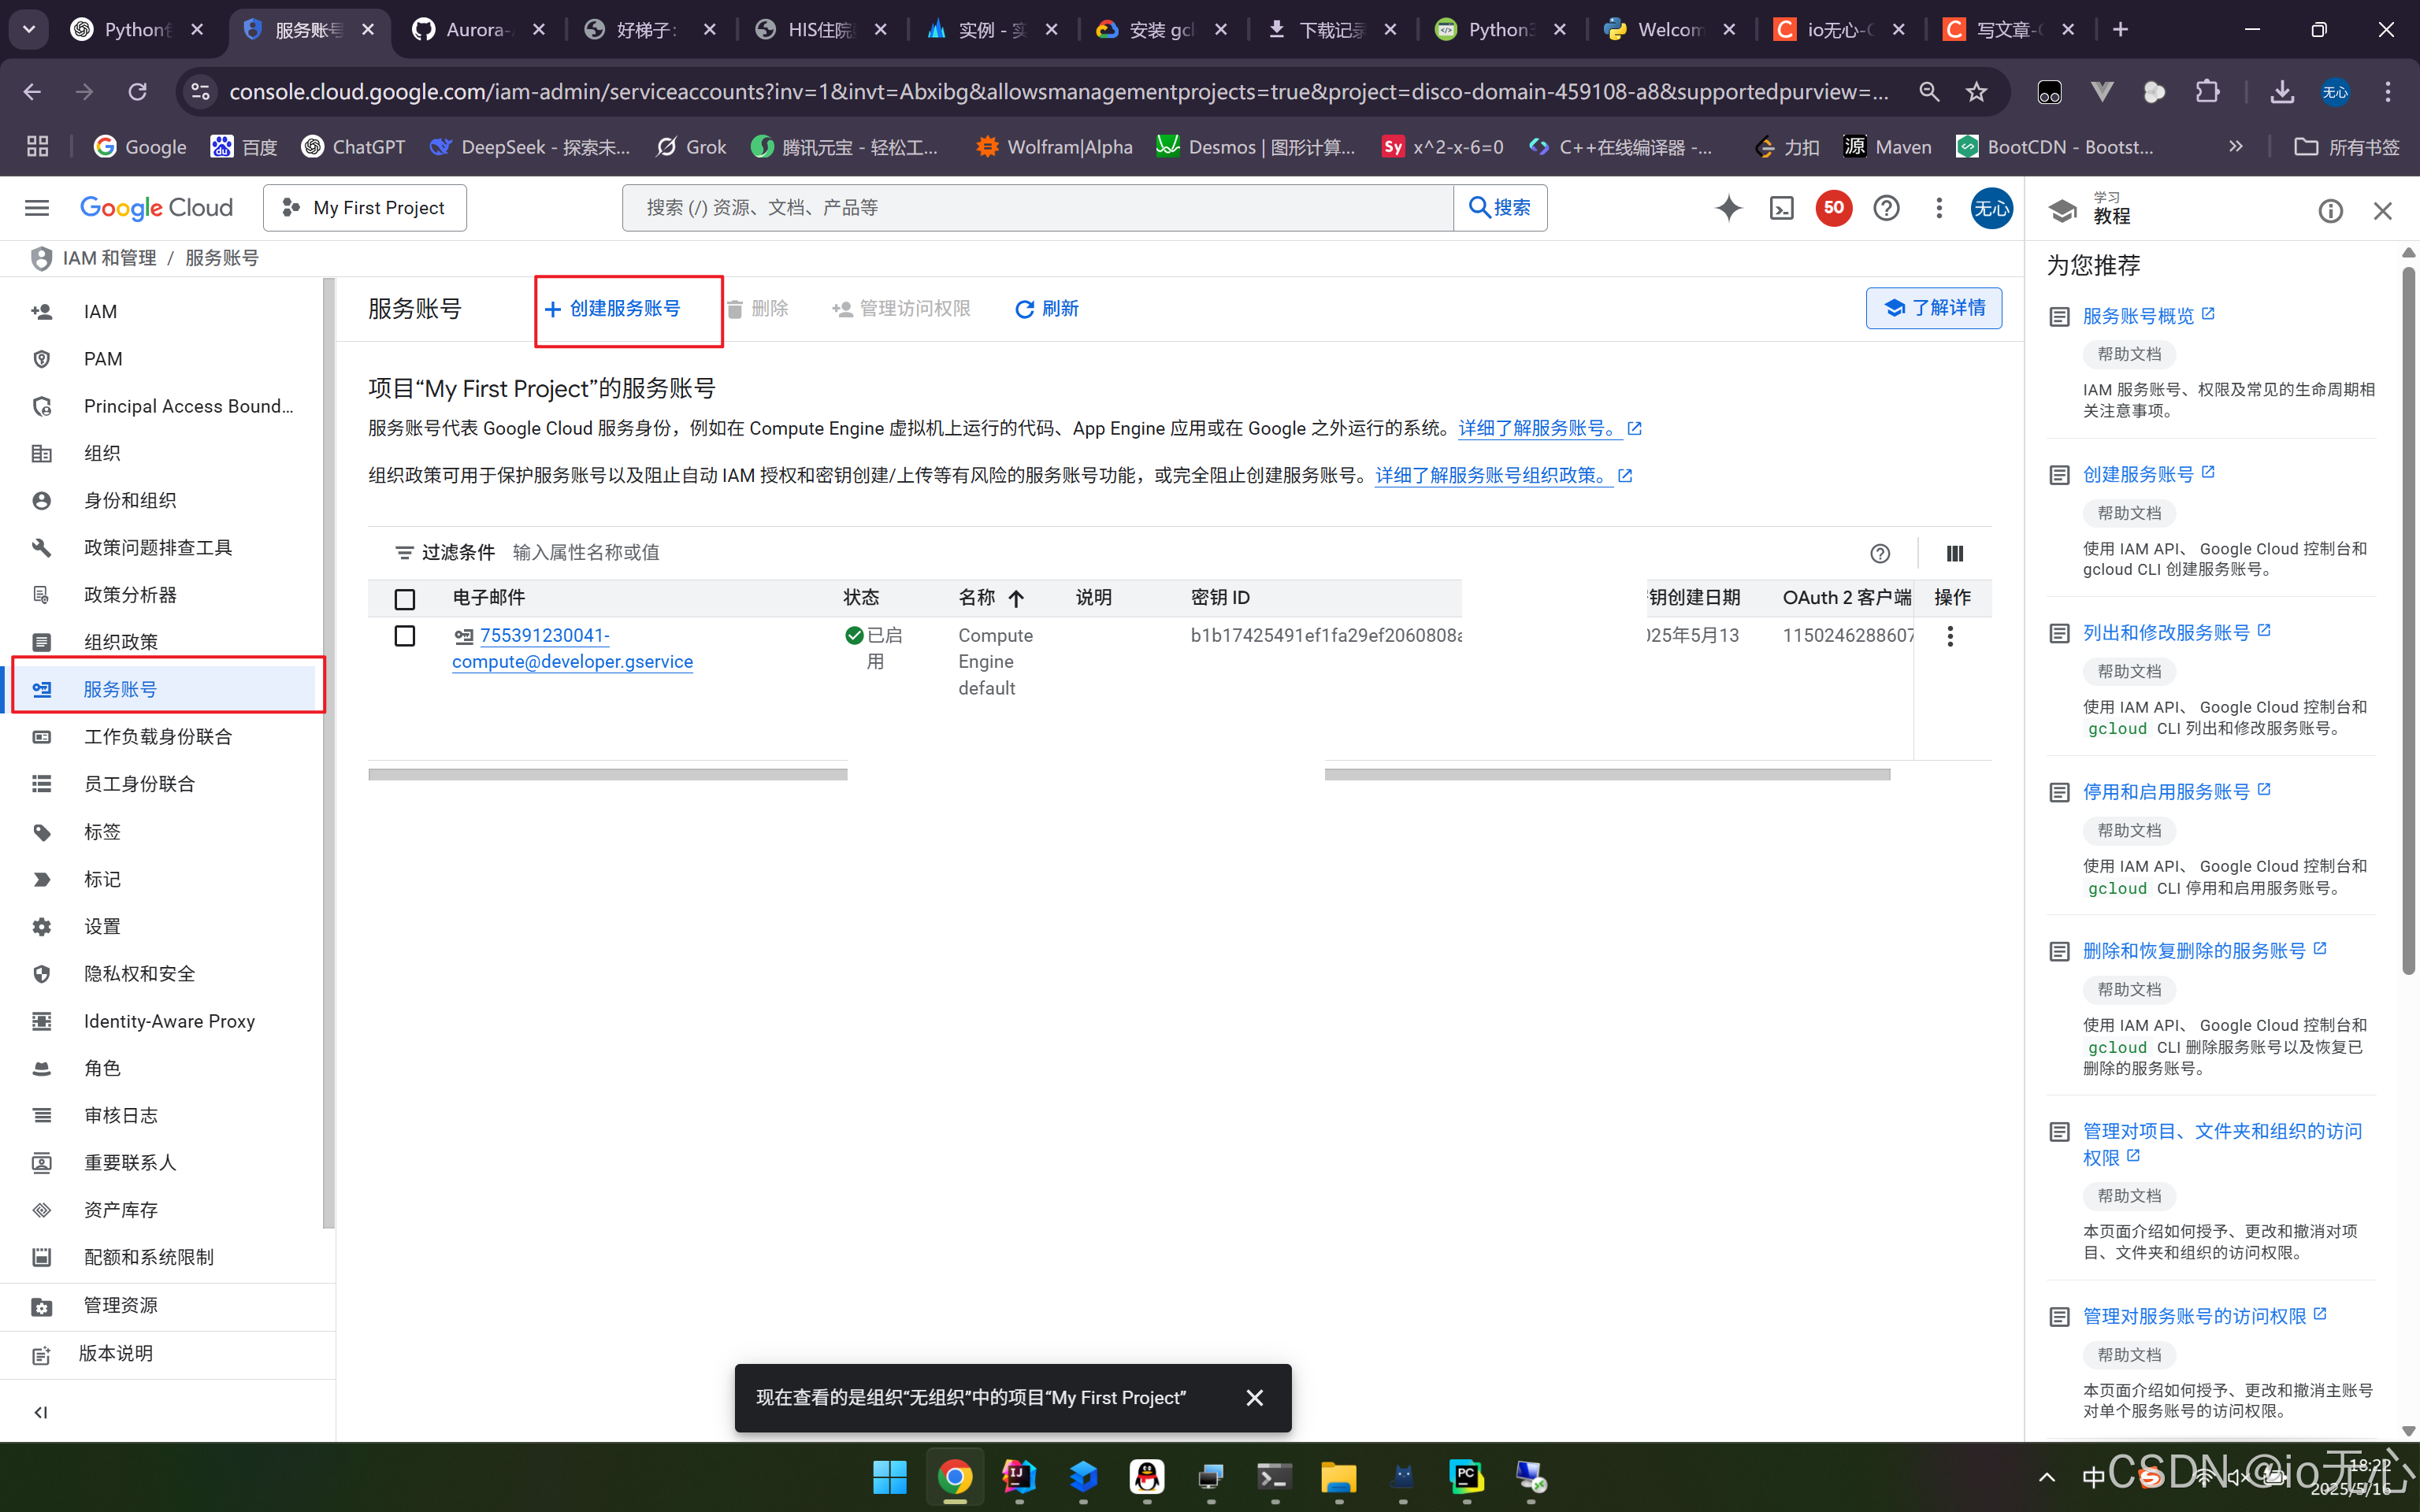
使用 gcloud CLI 自动化管理 Google Cloud 虚拟机
被操作的服务器,一定要开启API完全访问权限,你的电脑安装gcloud CLI前一定要先安装Python3! 操作步骤 下载地址,安装大概需要十分钟:https://cloud.google.com/sdk/docs/install?hlzh-cn#windows 选择你需要的版本&a…...
SQL语句,索引,视图,存储过程以及触发器
一、初识MySQL 1.数据库 按照数据结构来组织、存储和管理数据的仓库;是一个长期存储在计算机内的、有组织的、可共享的、统一管理的大量数据的集合; 2.OLTP与OLAP OLTP( On-Line transaction processing )翻译为联机事务处理&am…...

在Web应用中集成Google AI NLP服务的完整指南:从Dialogflow配置到高并发优化
在当今数字化客服领域,自然语言处理(NLP)技术已成为提升用户体验的关键。Google AI提供了一系列强大的NLP服务,特别是Dialogflow,能够帮助开发者构建智能对话系统。本文将详细介绍如何在Web应用中集成这些服务,解决从模型训练到高并发处理的全套技术挑战。 一、Dialogflow…...
7. 进程控制-进程替换
目录 1. 进程替换 1.1 单进程版: 1.2 进程替换的原理 1.3 多进程版-验证各种程序替换接口 2. 进程替换的各种接口 2.1 execl 2.2 execlp 2.3 execv 2.4 execvp 2.5 execle 1. 进程替换 上图为程序替换的接口,之后会详细介绍。 1.1 单进程版&am…...
理解 C# 中的各类指针
前言 变量可以理解成是一块内存位置的别名,访问变量也就是访问对应内存中的数据。 指针是一种特殊的变量,它存储了一个内存地址,这个内存地址代表了另一块内存的位置。 指针指向的可以是一个变量、一个数组元素、一个对象实例、一块非托管内存…...

真题卷001——算法备赛
蓝桥杯2024年C/CB组国赛卷 1.合法密码 问题描述 小蓝正在开发自己的OJ网站。他要求用户的密码必须符合一下条件: 长度大于等于8小于等于16必须包含至少一个数字字符和至少一个符号字符 请计算一下字符串,有多少个子串可以当作合法密码。字符串为&am…...

Qt图表库推荐指南与分析
目录 一、核心图表库横向对比1. Qt Charts2. QCustomPlot3. QWT (Qt Widgets for Technical Applications)4. KD Chart二、性能与功能对比矩阵三、选型策略与组合方案1. 通用型需求:2. 技术型场景:3. 企业级开发:四、未来趋势与避坑指南1. 协议风险:2. 技术兼容性:3. 性能…...

【Dv3Admin】工具视图配置文件解析
在开发后台管理系统时,处理复杂的 CRUD 操作是常见的需求。Django Rest Framework(DRF)通过 ModelViewSet 提供了基础的增删改查功能,但在实际应用中,往往需要扩展更多的功能,如批量操作、权限控制、查询优化等。dvadmin/utils/viewset.py 模块通过继承并扩展 ModelViewS…...
Vue3中实现轮播图
目录 1. 轮播图介绍 2. 实现轮播图 2.1 准备工作 1、准备至少三张图片,并将图片文件名改为数字123 2、搭好HTML的标签 3、写好按钮和图片标签 编辑 2.2 单向绑定图片 2.3 在按钮里使用方法 2.4 运行代码 3. 完整代码 1. 轮播图介绍 首先,什么是…...

C#中UI线程的切换与后台线程的使用
文章速览 UI线程切换示例 后台线程使用示例 两者对比适用场景Application.Current.Dispatcher.InvokeTask.Factory.StartNew 执行同步性Application.Current.Dispatcher.InvokeTask.Factory.StartNew 一个赞,专属于你的足迹! UI线程切换 在WPF应用程序…...
微信小程序 自定义图片分享-绘制数据图片以及信息文字
一 、需求 从数据库中读取头像,姓名电话等信息,当分享给女朋友时,每个信息不一样 二、实现方案 1、先将数据库中需要的头像姓名信息读取出来加载到data 数据项中 data:{firstName:, // 姓名img:, // 头像shareImage:,// 存储临时图片 } 2…...

优艾智合机器人助力半导体智造,领跑国产化替代浪潮
在全球半导体产业加速自动化转型的背景下,传统物流已成为制约智能化升级的关键瓶颈。作为中国移动机器人行业的领军企业,优艾智合(YOUIBOT)自2017年起就敏锐洞察到"半导体设备国产化"的紧迫需求,依托在工业移…...