在Rocky Linux 8.10上安装Nginx
如果没有配置操作系统安装源,并且不连接网络,先配置安装源。
sudo dnf install nginx
sudo systemctl enable nginx
sudo systemctl start nginx
systemctl status nginx
curl http://ip
[root@rocky810 work]# sudo dnf install nginx
Last metadata expiration check: 0:03:19 ago on Thu 22 May 2025 10:25:40 AM CST.
Dependencies resolved.
========================================================================================================================================================================= Package Architecture Version Repository Size
=========================================================================================================================================================================Installing:
nginx x86_64 1:1.14.1-9.module+el8.4.0+542+81547229 APP 566 k
Installing dependencies:
nginx-all-modules noarch 1:1.14.1-9.module+el8.4.0+542+81547229 APP 22 k
nginx-filesystem noarch 1:1.14.1-9.module+el8.4.0+542+81547229 APP 23 k
nginx-mod-http-image-filter x86_64 1:1.14.1-9.module+el8.4.0+542+81547229 APP 34 k
nginx-mod-http-perl x86_64 1:1.14.1-9.module+el8.4.0+542+81547229 APP 45 k
nginx-mod-http-xslt-filter x86_64 1:1.14.1-9.module+el8.4.0+542+81547229 APP 32 k
nginx-mod-mail x86_64 1:1.14.1-9.module+el8.4.0+542+81547229 APP 63 k
nginx-mod-stream x86_64 1:1.14.1-9.module+el8.4.0+542+81547229 APP 84 k
Enabling module streams:
nginx 1.14
Transaction Summary
=========================================================================================================================================================================Install 8 Packages
Total size: 870 k
Installed size: 2.0 M
Is this ok [y/N]: y
Downloading Packages:
Running transaction check
Transaction check succeeded.
Running transaction test
Transaction test succeeded.
Running transaction
Preparing : 1/1
Running scriptlet: nginx-filesystem-1:1.14.1-9.module+el8.4.0+542+81547229.noarch 1/8
Installing : nginx-filesystem-1:1.14.1-9.module+el8.4.0+542+81547229.noarch 1/8
Installing : nginx-mod-http-image-filter-1:1.14.1-9.module+el8.4.0+542+81547229.x86_64 2/8
Running scriptlet: nginx-mod-http-image-filter-1:1.14.1-9.module+el8.4.0+542+81547229.x86_64 2/8
Installing : nginx-mod-http-perl-1:1.14.1-9.module+el8.4.0+542+81547229.x86_64 3/8
Running scriptlet: nginx-mod-http-perl-1:1.14.1-9.module+el8.4.0+542+81547229.x86_64 3/8
Installing : nginx-mod-http-xslt-filter-1:1.14.1-9.module+el8.4.0+542+81547229.x86_64 4/8
Running scriptlet: nginx-mod-http-xslt-filter-1:1.14.1-9.module+el8.4.0+542+81547229.x86_64 4/8
Installing : nginx-mod-mail-1:1.14.1-9.module+el8.4.0+542+81547229.x86_64 5/8
Running scriptlet: nginx-mod-mail-1:1.14.1-9.module+el8.4.0+542+81547229.x86_64 5/8
Installing : nginx-all-modules-1:1.14.1-9.module+el8.4.0+542+81547229.noarch 6/8
Installing : nginx-1:1.14.1-9.module+el8.4.0+542+81547229.x86_64 7/8
Running scriptlet: nginx-1:1.14.1-9.module+el8.4.0+542+81547229.x86_64 7/8
Installing : nginx-mod-stream-1:1.14.1-9.module+el8.4.0+542+81547229.x86_64 8/8
Running scriptlet: nginx-mod-stream-1:1.14.1-9.module+el8.4.0+542+81547229.x86_64 8/8
Verifying : nginx-1:1.14.1-9.module+el8.4.0+542+81547229.x86_64 1/8
Verifying : nginx-all-modules-1:1.14.1-9.module+el8.4.0+542+81547229.noarch 2/8
Verifying : nginx-filesystem-1:1.14.1-9.module+el8.4.0+542+81547229.noarch 3/8
Verifying : nginx-mod-http-image-filter-1:1.14.1-9.module+el8.4.0+542+81547229.x86_64 4/8
Verifying : nginx-mod-http-perl-1:1.14.1-9.module+el8.4.0+542+81547229.x86_64 5/8
Verifying : nginx-mod-http-xslt-filter-1:1.14.1-9.module+el8.4.0+542+81547229.x86_64 6/8
Verifying : nginx-mod-mail-1:1.14.1-9.module+el8.4.0+542+81547229.x86_64 7/8
Verifying : nginx-mod-stream-1:1.14.1-9.module+el8.4.0+542+81547229.x86_64 8/8
Installed:
nginx-1:1.14.1-9.module+el8.4.0+542+81547229.x86_64 nginx-all-modules-1:1.14.1-9.module+el8.4.0+542+81547229.noarch
nginx-filesystem-1:1.14.1-9.module+el8.4.0+542+81547229.noarch nginx-mod-http-image-filter-1:1.14.1-9.module+el8.4.0+542+81547229.x86_64
nginx-mod-http-perl-1:1.14.1-9.module+el8.4.0+542+81547229.x86_64 nginx-mod-http-xslt-filter-1:1.14.1-9.module+el8.4.0+542+81547229.x86_64
nginx-mod-mail-1:1.14.1-9.module+el8.4.0+542+81547229.x86_64 nginx-mod-stream-1:1.14.1-9.module+el8.4.0+542+81547229.x86_64
Complete!
[root@rocky810 work]# sudo systemctl enable nginx
Created symlink /etc/systemd/system/multi-user.target.wants/nginx.service → /usr/lib/systemd/system/nginx.service.
[root@rocky810 work]# sudo systemctl start nginx
[root@rocky810 work]# systemctl status nginx
● nginx.service - The nginx HTTP and reverse proxy server
Loaded: loaded (/usr/lib/systemd/system/nginx.service; enabled; vendor preset: disabled)
Active: active (running) since Thu 2025-05-22 10:29:29 CST; 17s ago
Process: 18283 ExecStart=/usr/sbin/nginx (code=exited, status=0/SUCCESS)
Process: 18111 ExecStartPre=/usr/sbin/nginx -t (code=exited, status=0/SUCCESS)
Process: 18102 ExecStartPre=/usr/bin/rm -f /run/nginx.pid (code=exited, status=0/SUCCESS)
Main PID: 18303 (nginx)
Tasks: 5 (limit: 100490)
Memory: 11.7M
CGroup: /system.slice/nginx.service
├─18303 nginx: master process /usr/sbin/nginx
├─18304 nginx: worker process
├─18305 nginx: worker process
├─18306 nginx: worker process
└─18307 nginx: worker process
May 22 10:29:28 rocky810 systemd[1]: Starting The nginx HTTP and reverse proxy server...
May 22 10:29:28 rocky810 nginx[18111]: nginx: the configuration file /etc/nginx/nginx.conf syntax is ok
May 22 10:29:28 rocky810 nginx[18111]: nginx: configuration file /etc/nginx/nginx.conf test is successful
May 22 10:29:29 rocky810 systemd[1]: Started The nginx HTTP and reverse proxy server.
[root@rocky810 work]# curl http://10.11.13.60
<!DOCTYPE html PUBLIC "-//W3C//DTD XHTML 1.1//EN" "http://www.w3.org/TR/xhtml11/DTD/xhtml11.dtd">
<html xmlns="http://www.w3.org/1999/xhtml" xml:lang="en">
<head>
<title>Test Page for the Nginx HTTP Server on Rocky Linux</title>
<meta http-equiv="Content-Type" content="text/html; charset=UTF-8" />
<style type="text/css">
/*<![CDATA[*/
body {
background-color: #fff;
color: #000;
font-size: 0.9em;
font-family: sans-serif, helvetica;
margin: 0;
padding: 0;
}
:link {
color: #c00;
}
:visited {
color: #c00;
}
a:hover {
color: #f50;
}
h1 {
text-align: center;
margin: 0;
padding: 0.6em 2em 0.4em;
background-color: #10B981;
color: #fff;
font-weight: normal;
font-size: 1.75em;
border-bottom: 2px solid #000;
}
h1 strong {
font-weight: bold;
font-size: 1.5em;
}
h2 {
text-align: center;
background-color: #10B981;
font-size: 1.1em;
font-weight: bold;
color: #fff;
margin: 0;
padding: 0.5em;
border-bottom: 2px solid #000;
}
hr {
display: none;
}
.content {
padding: 1em 5em;
}
.alert {
border: 2px solid #000;
}
img {
border: 2px solid #fff;
padding: 2px;
margin: 2px;
}
a:hover img {
border: 2px solid #294172;
}
.logos {
margin: 1em;
text-align: center;
}
/*]]>*/
</style>
</head>
<body>
<h1>Welcome to <strong>nginx</strong> on Rocky Linux!</h1>
<div class="content">
<p>
This page is used to test the proper operation of the
<strong>nginx</strong> HTTP server after it has been installed. If you
can read this page, it means that the web server installed at this site
is working properly.
</p>
<div class="alert">
<h2>Website Administrator</h2>
<div class="content">
<p>
This is the default <tt>index.html</tt> page that is distributed
with <strong>nginx</strong> on Rocky Linux. It is located in
<tt>/usr/share/nginx/html</tt>.
</p>
<p>
You should now put your content in a location of your choice and
edit the <tt>root</tt> configuration directive in the
<strong>nginx</strong>
configuration file
<tt>/etc/nginx/nginx.conf</tt>.
</p>
<p>
For information on Rocky Linux, please visit the
<a href="https://www.rockylinux.org/">Rocky Linux website</a>. The
documentation for Rocky Linux is
<a href="https://www.rockylinux.org/"
>available on the Rocky Linux website</a
>.
</p>
</div>
</div>
<div class="logos">
<a href="http://nginx.net/"
><img
src="nginx-logo.png"
alt="[ Powered by nginx ]"
width="121"
height="32"
/></a>
<a href="http://www.rockylinux.org/"><img
src="poweredby.png"
alt="[ Powered by Rocky Linux ]"
width="88" height="31" /></a>
</div>
</div>
</body>
</html>
相关文章:

在Rocky Linux 8.10上安装Nginx
如果没有配置操作系统安装源,并且不连接网络,先配置安装源。 sudo dnf install nginx sudo systemctl enable nginx sudo systemctl start nginx systemctl status nginx curl http://ip [rootrocky810 work]# sudo dnf install nginx Last metadata …...
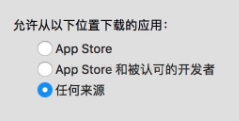
Mac如何允许安装任何来源软件?
打开系统偏好设置-安全性与隐私,点击右下角的解锁按钮,选择允许从任何来源。 如果没有这一选项,请到打开终端,输入命令行:sudo spctl --master-disable, 输入命令后回车,输入电脑的开机密码后回车。 返回“…...

YOLO学习笔记 | YOLO11对象检测,实例分割,姿态评估的TensorRT部署c++
以下是YOLOv11在TensorRT上部署的步骤指南,涵盖对象检测、实例分割和姿态评估: 1. 模型导出与转换 1.1 导出ONNX模型 import torch from models.experimental import attempt_loadmodel = attempt_load(yolov11s.pt, fuse=True) model.eval...

2025最新版Visual Studio Code for Mac安装使用指南
2025最新版Visual Studio Code for Mac安装使用指南 Installation and Application Guide to The Latest Version of Visual Studio Code in 2025 By JacksonML 1. 什么是Visual Studio Code? Visual Studio Code,通常被称为 VS Code,是由…...

机器学习第二十三讲:CNN → 用放大镜局部观察图片特征层层传递
机器学习第二十三讲:CNN → 用放大镜局部观察图片特征层层传递 资料取自《零基础学机器学习》。 查看总目录:学习大纲 关于DeepSeek本地部署指南可以看下我之前写的文章:DeepSeek R1本地与线上满血版部署:超详细手把手指南 CNN详…...

【嵙大o】C++作业合集
参考: C swap(交换)函数 指针/引用/C自带-CSDN博客 Problem IDTitleCPP指针CPP引用1107 Problem A编写函数:Swap (I) (Append Code)1158 Problem B整型数据的输出格式1163 Problem C时间:24小时制转12小时制1205…...

《算法笔记》11.8小节——动态规划专题->总结 问题 B: 拦截导弹
题目描述 某国为了防御敌国的导弹袭击,开发出一种导弹拦截系统。但是这种导弹拦截系统有一个缺陷:虽然它的第一发炮弹能够到达任意的高度,但是以后每一发炮弹都不能高于前一发的高度。某天,雷达捕捉到敌国的导弹来袭,…...

Flink 核心概念解析:流数据、并行处理与状态
一、流数据(Stream Data) 1. 有界流(Bounded Stream) 定义:有明确起始和结束时间的数据集合,数据量固定,处理逻辑通常是一次性计算所有数据。 典型场景: 历史交易数据统计…...

C++23 范围迭代器作为非范围算法的输入 (P2408R5)
文章目录 一、引言二、C23及范围迭代器的背景知识2.1 C23概述2.2 范围迭代器的概念 三、P2408R5提案的内容3.1 提案背景3.2 提案内容 四、范围迭代器作为非范围算法输入的优势4.1 代码简洁性4.2 提高开发效率4.3 更好的兼容性 五、具体的代码示例5.1 使用范围迭代器进行并行计算…...

PHP-FPM 调优配置建议
1、动态模式 pm dynamic; 最大子进程数(根据服务器内存调整) pm.max_children 100 //每个PHP-FPM进程大约占用30-50MB内存(ThinkPHP框架本身有一定内存开销)安全值:8GB内存 / 50MB ≈ 160,保守设置为100 ; 启动时创建的进程数&…...
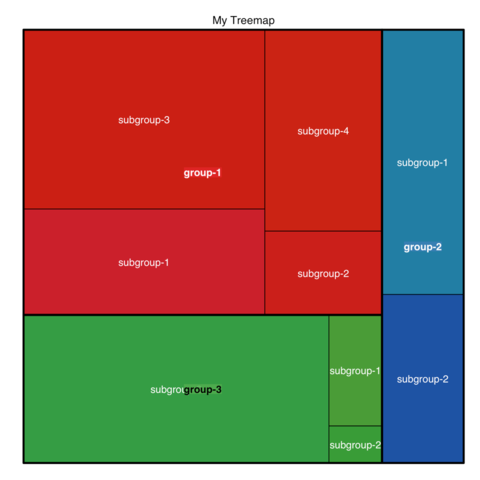
2025.05.20【Treemap】树图数据可视化技巧
Multi-level treemap How to build a treemap with group and subgroups. Customization Customize treemap labels, borders, color palette and more 文章目录 Multi-level treemapCustomization Treemap 数据可视化技巧什么是 TreemapTreemap 的应用场景如何在 R 中绘制 T…...

Elasticsearch 写入性能优化有哪些常见手段?
Elasticsearch 写入性能优化常见手段主要有以下 10 个方向,建议根据具体业务场景组合使用: 批量写入优化 使用_bulk API 批量提交文档建议每批次 5-15MB 数据量并发执行多个批量请求 索引配置调优 PUT /my_index {"settings": {"inde…...

CICD编译时遇到npm error code EINTEGRITY的问题
场景 CICD编译时抛出npm error code EINTEGRITY的错误 npm error code EINTEGRITY npm error sha512-PlhdFcillOINfeV7Ni6oF1TAEayyZBoZ8bcshTHqOYJYlrqzRK5hagpagky5o4HfCzzd1TRkXPMFq6cKk9rGmA integrity checksum failed when using sha512: wanted sha512-PlhdFcillOINfeV…...
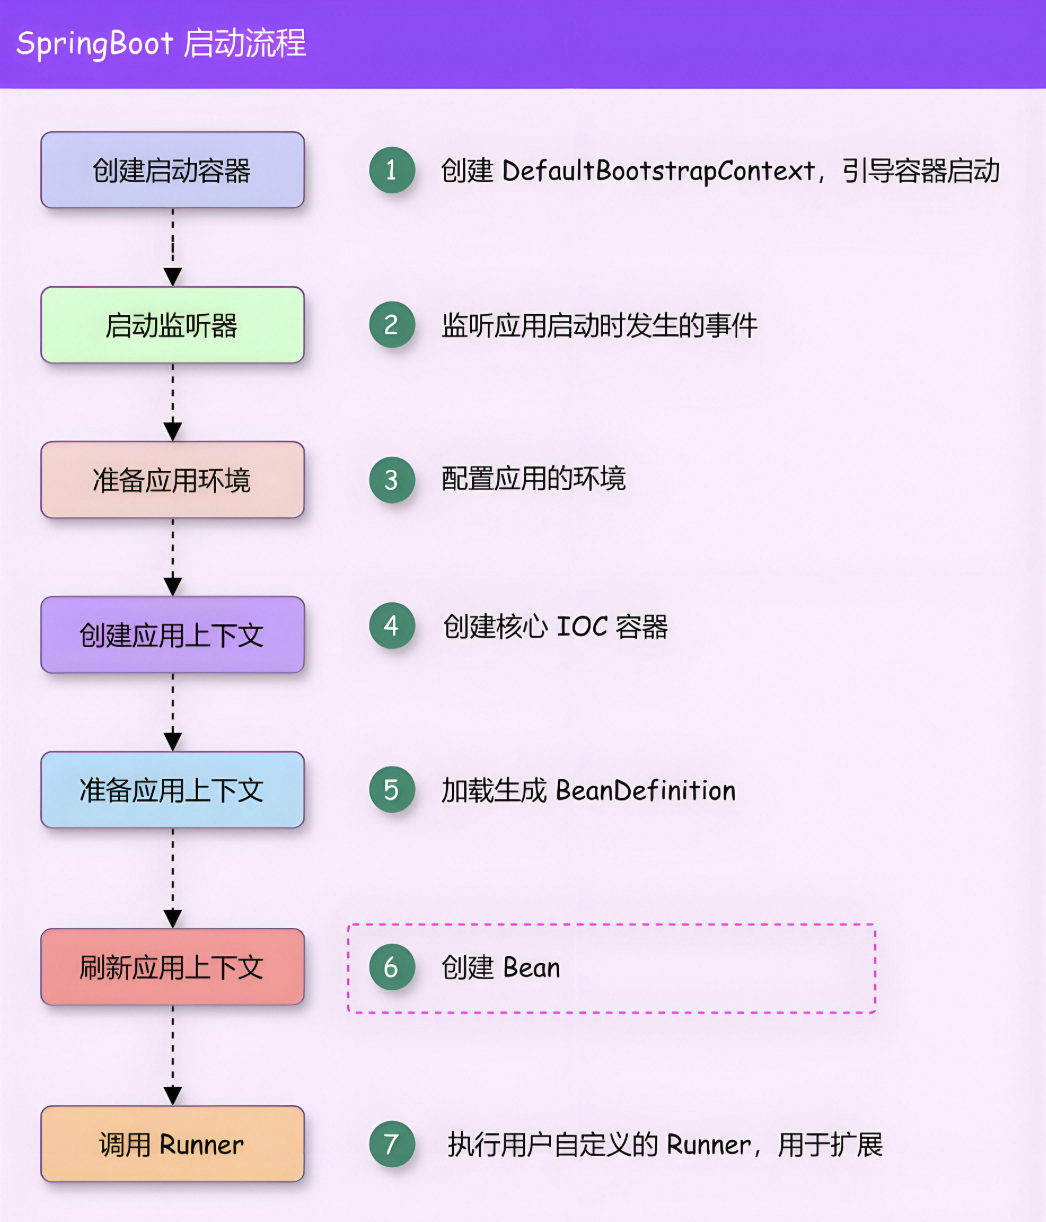
深入了解Springboot框架的启动流程
目录 1、介绍 2、执行流程 1、运行run方法 2、初始化SpringApplication对象 1、确定容器类型 3、加载所有的初始化器 4、加载Spring上下文监听器 5、设置程序运行的主类 3、进入run方法 1、开启计时器 2、Headless模式配置 3、获取并启用监听器 4、准备环境 1、设…...

DataWhale llm universe
搭建向量知识库 向量以及向量知识库 向量词与向量 词向量:是一种以单词为单位的将每个单词转化为实数向量的技术,这些实数可以被计算机更好的理解,如果是相近的理念或者相关的对象在向量空间中距离很近 词向量实际上将单词转化为固定的静态…...

LLaMA-Factory微调LLM-Research/Llama-3.2-3B-Instruct模型
1、GPU环境 nvidia-smi 2、pyhton环境安装 git clone https://github.com/hiyouga/LLaMA-Factory.git conda create -n llama_factory python3.10 conda activate llama_factory cd LLaMA-Factory pip install -e .[torch,metrics] 3、微调模型下载(LLM-Research/…...

DB-MongoDB-00002--Workload Generator for MongoDB
## DB-MongoDB-00002–Workload Generator for MongoDB 1、介绍 Workload Generator for MongoDB was designed to help MongoDB users effortlessly generate data and simulate workloads for both sharded and non-sharded clusters. The generated workloads include s…...

3.8.1 利用RDD实现词频统计
在本次实战中,我们通过Spark的RDD实现了词频统计功能。首先,准备了包含单词的文件并上传至HDFS。接着,采用交互式方式逐步完成词频统计,包括创建RDD、单词拆分、映射为二元组、按键归约以及排序等操作。此外,还通过创建…...
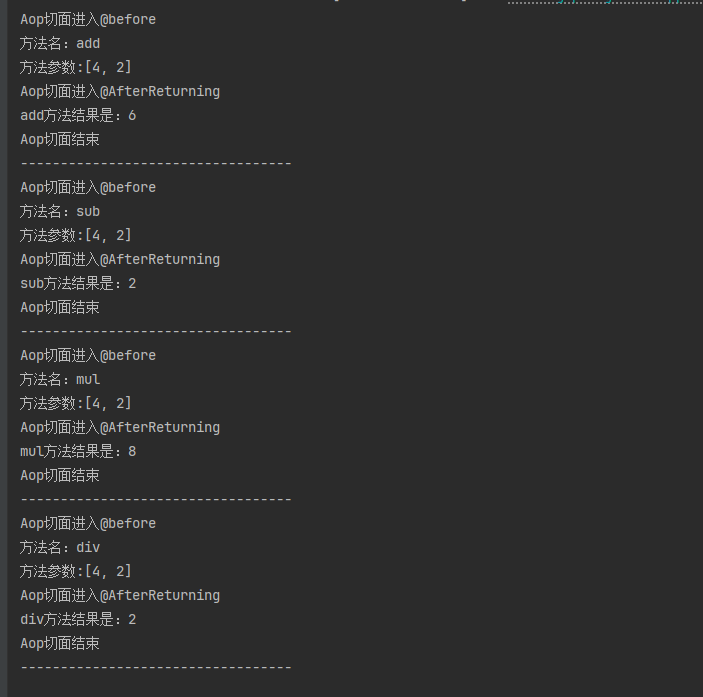
Spring Ioc和Aop,Aop的原理和实现案例,JoinPoint,@Aspect,@Before,@AfterReturning
DAY25.2 Java核心基础 Spring两大核心:Ioc和Aop IOC Ioc容器:装载bean的容器,自动创建bean 三种方式: 1、基于xml配置:通过在xml里面配置bean,然后通过反射机制创建bean,存入进Ioc容器中 …...
[解决conda创建新的虚拟环境没用python的问题]
问题复现 使用conda create -n env的时候,在对应的虚拟环境的文件里面找不到对应的python文件 为什么 首先,我们来看一下创建环境时的触发链路: 这表明当前环境中找不到Python可执行文件。 解决方法 所以很明显,我们需要指定…...

【优秀三方库研读】在 quill 开源库 LogMarcos.h 中知识点汇总及讲解
以下是LogMarcos.h中的主要知识点汇总及详细讲解: 大纲目录 编译时日志级别过滤预处理宏与条件编译可变参数处理技巧格式化字符串生成日志宏的分发机制线程本地存储(TLS)零成本抽象设计动态日志级别支持结构化日志标签日志频率限制机制1. 编译时日志级别过滤 核心宏:QUILL…...
openjdk17 c++源码垃圾回收之安全点阻塞状态线程在安全点同步中无需调用block函数的详细流程解析)
jvm安全点(五)openjdk17 c++源码垃圾回收之安全点阻塞状态线程在安全点同步中无需调用block函数的详细流程解析
关于阻塞状态线程在安全点同步中无需调用block函数的详细流程解析: 1. 安全点同步入口:SafepointSynchronize::begin() VM线程调用此函数启动安全点,核心步骤如下: 获取线程锁(Threads_lock):防…...

C++ 中的 **常变量** 与 **宏变量** 比较
🔍 C 中的 常变量 与 宏变量 比较 C 中定义不可修改值的方式主要有两种:常变量(const/constexpr) 和 宏变量(#define)。它们在机制、类型安全性、作用域和调试支持方面存在显著差异。 ✅ 1. 常变量&#x…...
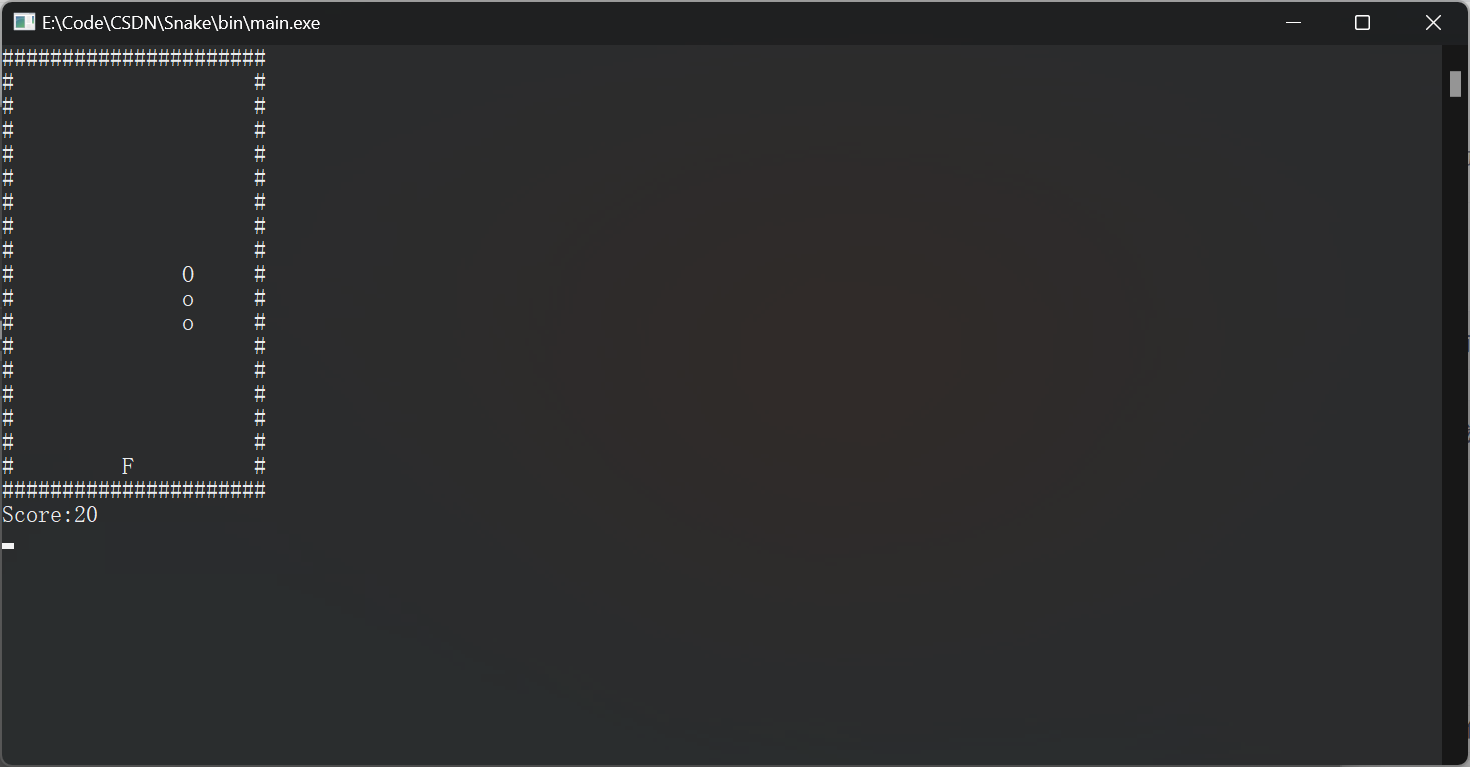
【C++】控制台小游戏
移动:W向上,S上下,A向左,D向右 程序代码: #include <iostream> #include <conio.h> #include <windows.h> using namespace std;bool gameOver; const int width 20; const int height 17; int …...
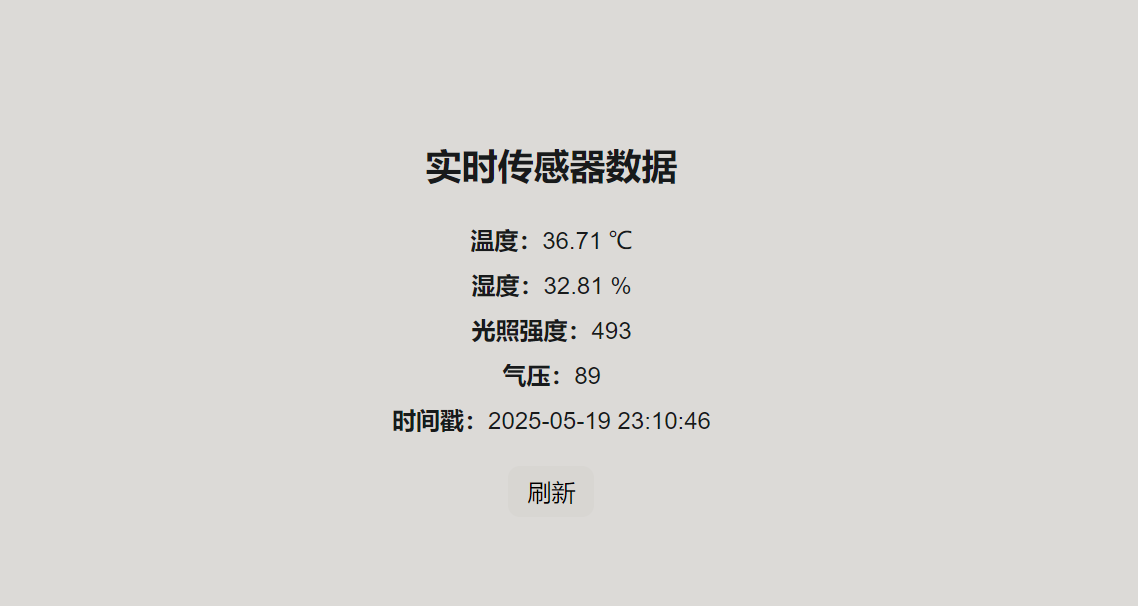
配合本专栏前端文章对应的后端文章——从模拟到展示:一步步搭建传感器数据交互系统
对应文章:进一步完善前端框架搭建及vue-konva依赖的使用(Vscode)-CSDN博客 目录 一、后端开发 1.模拟传感器数据 2.前端页面呈现数据后端互通 2.1更新模拟传感器数据程序(多次请求) 2.2🧩 功能目标 …...

React中常用的钩子函数:
一. 基础钩子 (1)useState 用于在函数组件中添加局部状态。useState可以传递一个参数,做为状态的初始值,返回一个数组,数组的第一个元素是返回的状态变量,第二个是修改状态变量的函数。 const [state, setState] useState(ini…...

springboot IOC
springboot IOC IoC Inversion of Control Inversion 反转 依赖注入 DI (dependency injection ) dependency 依赖 injection 注入 Qualifier 预选赛 一文带你快速理解JavaWeb中分层解耦的思想及其实现,理解 IOC和 DI https://zhuanlan.…...

java面试每日一背 day2
1.什么是缓存击穿?怎么解决? 缓存击穿是指在高并发场景下,某个热点key突然过期失效,此时大量请求同时访问这个已经过期的key,导致所有请求都直接打到数据库上,造成数据库瞬时压力过大甚至崩溃的情况。 解…...
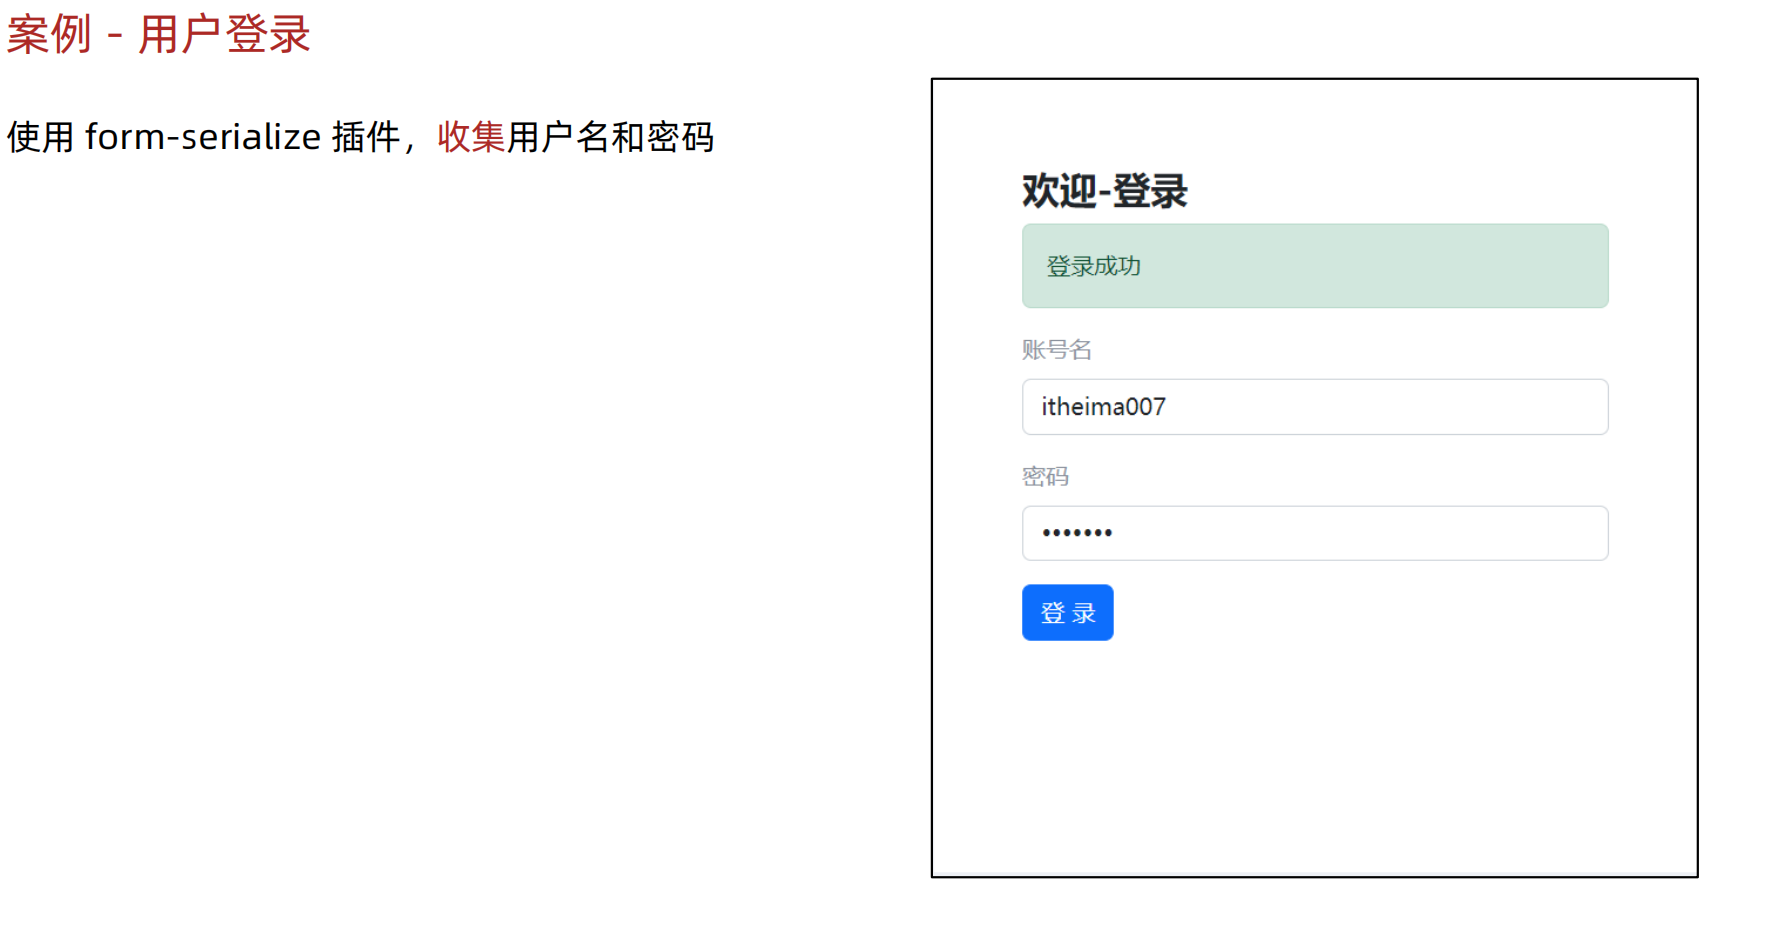
Ajax01-基础
一、AJAX 1.AJAX概念 使浏览器的XMLHttpRequest对象与服务器通信 浏览器网页中,使用 AJAX技术(XHR对象)发起获取省份列表数据的请求,服务器代码响应准备好的省份列表数据给前端,前端拿到数据数组以后,展…...
服务器增加ipv6配置方法)
(37)服务器增加ipv6配置方法
(1)172.25.38.93服务器,IPv6地址如下: IPv6地址:2405:6F00:E033:B800:0000:0000:0003:0A5D IPv6掩码:/120 IPv6网关地址:2405:6F00:E033:B800:0000:0000:0003:0AFF 配置: # 静态 IPv6 地址和前缀(根据实际情况填写) IPV6ADDR=2405:6F00:E033:B800:0000:0000:0003:0…...