【超详细】英伟达Jetson Orin NX-YOLOv8配置与TensorRT测试
文章主要内容如下:
1、基础运行环境配置
2、Torch-GPU安装
3、ultralytics环境配置
4、Onnx及TensorRT导出详解
5、YOLOv8推理耗时分析
基础库版本:jetpack=5.1.3, torch-gpu=2.1.0, torchvision=0.16.0, ultralytics=8.3.146
设备的软件开发包基础信息
需要使用的软件环境有TensorRT、CUDA、CUDNN、OpenCV。所有软件环境在JetPack镜像中已经安装完成,如下所示:

jetson资源查看命令:
jtop
jtop页面详解:Jetson Orin Nano 工具—jtop安装及页面详解

1 基础环境配置
# 1 创建用户yolo
sudo useradd -m -s /bin/bash yolo
sudo passwd yolo   #【密码:123】# 2 确认系统架构
uname -m  # 应输出 aarch64,表示ARM64架构# 3 安装miniconda
wget https://repo.anaconda.com/miniconda/Miniconda3-latest-Linux-aarch64.sh
bash Miniconda3-latest-Linux-aarch64.sh # 安装,一路yes
source ~/.bashrc  # 激活环境,失败可重启终端
conda -V # 查看版本# 4 配置镜像源
conda config --add channels https://mirrors.tuna.tsinghua.edu.cn/anaconda/pkgs/main
conda config --add channels https://mirrors.tuna.tsinghua.edu.cn/anaconda/pkgs/free
conda config --set show_channel_urls yes# 5 创建环境
conda create -n yolov8 python=3.8  # 一定要选择3.8,其他版本与其他安装包大概率不兼容
conda activate yolov8  # 激活环境
conda env remove -n <环境名> -y --all # 删除环境# 6 进入用户后,强制装在当前用户下,避免装其他用户去了
# 【注意】:先跳过这步,先安装torch-gpu,不然直接装会存在版本冲突,会装最新的torch
# pip3 install ultralytics --user #【这样默认装CPU版torch,所以需单独装】
2 Torch-GPU安装
注意:进行自己用户
(1)查看jetpack版本,如下为5.1.3,因此需装对应的Torch

2.1 装torch
安装链接:PyTorch for Jetson - Announcements - NVIDIA Developer Forums
如下,点击下载:

# 装torch【问题不大】
pip install torch-2.1.0a0+41361538.nv23.06-cp38-cp38-linux_aarch64.whl --user
# 问题导入torch报错ImportError: libopenblas.so.0: cannot open shared object file: No such file or directory
sudo apt-get install libopenblas-base
2.2 装torchvison
注意:版本必须是0.16.x,且设置FORCE_CUDA=1,否则报错NotImplementedError: Could not run ‘torchvision::nms’ with arguments from the ‘CUDA’ backend.
问题:若直接pip install torchvision==0.16.0后,导入会如下报错:

解决:采用编译安装【略久】:
可先安装 sudo apt-get install libjpeg-dev zlib1g-dev 之后,删除所有缓存和编译零时文件,再重新编译安装即可【可能再显示,退出再import导入看是否出现】
下载压缩包链接【注意版本为0.16.0】:Tags · pytorch/vision · GitHub
# 必须先设置环境变量
export BUILD_VERSION=0.16.0
export FORCE_CUDA=1  # 强制启用 CUDA 编译
export TORCH_CUDA_ARCH_LIST="8.7"  # AGX Orin 的 CUDA 架构# 验证变量是否生效
echo $FORCE_CUDA  # 应输出 1
echo $TORCH_CUDA_ARCH_LIST  # 应输出 8.7
python3 setup.py install --user

2.3 验证
import torch
print(torch.__version__)
print('CUDA available: ' + str(torch.cuda.is_available()))
print('cuDNN version: ' + str(torch.backends.cudnn.version()))
a = torch.cuda.FloatTensor(2).zero_()
print('Tensor a = ' + str(a))
b = torch.randn(2).cuda()
print('Tensor b = ' + str(b))
c = a + b
print('Tensor c = ' + str(c))import torchvision
print(torchvision.__version__)
问题:可能出现torch读取CUDA报错【重要】:

解决链接:NvRmMemInitNvmap failed with Permission denied - Jetson AGX Orin - NVIDIA Developer Forums
# 1 对当前用户添加以下链接以启用权限
usermod -aG sudo,video,i2c "$USER"
# 2 重启当前服务,如关闭终端重新打开即可
最后显示结果如下【均成功即可】:
注意:下述torchvision0.16.1也支持,但建议与文章后续的0.16.0对应.

3 安装YOLOv8依赖
3.1 ultralytics安装
# 前提已装有torch+torchvision
pip3 install ultralytics --user
pip3 list

3.2 运行测试
from ultralytics import YOLO
model = YOLO(r"yolov8n.pt")
# Predict with the model
results = model(source=r"test_img/test.avi", stream=True, save=True, project='runs')  # predict on an image
for i, out in enumerate(results):continue

4 TensorRT/ONNX导出
4.1 TensorRT配置
CSDN其他安装参考链接:Jetson nano部署YOLOv8_jetson nano yolov8
注意:原JetPack镜像已装有TensorRT,只需要在当前用户添加下trtexec工具的环境变量即可。
具体步骤如下:
# 1.打开bashrc文件
vim ~/.bashrc
# 2.按i进入输入模式,在最后一行添加如下语句
export PATH=/usr/src/tensorrt/bin:$PATH
# 3.按下esc,输入:wq!保存退出即可,最后刷新下环境变量
source ~/.bashrc
终端输入trtexec,成功显示如下:【失败显示-bash: trtexec: command not found】

4.2 TensorRT-python环境配置
CSDN其他参考链接:【B站保姆级视频教程:Jetson配置YOLOv11环境(四)cuda cudnn tensorrt配置】
TensorRT默认安装位置在/usr/lib/python3.8/dist-packages/中,若找不到trt, 则先执行以下命令,安装NVIDIA TensorRT 的 Python 3 绑定库:
sudo apt install python3-libnvinfer
Conda 虚拟Python环境中的TensorRT配置:
# 添加软链接
sudo ln -s /usr/lib/python3.8/dist-packages/tensorrt* /home/yolo/miniconda3/envs/yolov8/lib/python3.8/site-packages/# 运行测试,成功显示8.5.2.2,pip list也有显示tensorrt
python -c "import tensorrt;print(tensorrt.__version__)"
4.3 ONNX配置和导出
CSDN参考链接1:Jetson nano部署YOLOv8_jetson nano yolov8
CSDN参考链接2:【B站保姆级视频教程:Jetson配置YOLOv11环境(八)TensorRT模型导出】
4.3.1 安装onnx和onnsim
# 1 安装onnx==1.15.0
pip install onnx==1.15.0 onnxslim==0.1.54 --user -i https://pypi.tuna.tsinghua.edu.cn/simple# 2 安装onnxsim【可能出现报错,需升级camke】
pip3 install cmake==3.27.5 --user
pip3 install onnxsim --user
4.3.2 安装onnxruntime-gpu
下载网站:https://elinux.org/Jetson_Zoo#ONNX_Runtime

# 下载whl文件安装
# 【注意】onnxruntime-gpu 会自动将 numpy 恢复到最新版本。因此,需要重新安装 numpy 到 1.23.5【trt推理需要】
pip install onnxruntime_gpu-1.17.0-cp38-cp38-linux_aarch64.whl --user
4.3.3 导出infer框架onnx
注意:对应infer的trt推理框架,原YOLOv8导出的通道维度不支持,需转置处理。
转换脚本如下:
from ultralytics import YOLO
import onnx
import onnx.helper as helper
from onnxsim import simplify
import os
import argparsedef export_onnx(mode_file, width, height):pt_model = YOLO(mode_file)convert_success_path = pt_model.export(format="onnx", batch=1, imgsz=(width, height), opset=12)print(convert_success_path)return convert_success_pathdef v8trans_v8onnxsim(onnx_file):prefix, suffix = os.path.splitext(onnx_file)dst_name = prefix + "-transd-trends-sim" + suffixonnx_model = onnx.load(onnx_file)node = onnx_model.graph.node[-1]old_output = node.output[0]node.output[0] = "pre_transpose"for specout in onnx_model.graph.output:if specout.name == old_output:shape0 = specout.type.tensor_type.shape.dim[0]shape1 = specout.type.tensor_type.shape.dim[1]shape2 = specout.type.tensor_type.shape.dim[2]new_out = helper.make_tensor_value_info(specout.name,specout.type.tensor_type.elem_type,[0, 0, 0])new_out.type.tensor_type.shape.dim[0].CopyFrom(shape0)new_out.type.tensor_type.shape.dim[2].CopyFrom(shape1)new_out.type.tensor_type.shape.dim[1].CopyFrom(shape2)specout.CopyFrom(new_out)onnx_model.graph.node.append(helper.make_node("Transpose", ["pre_transpose"], [old_output], perm=[0, 2, 1]))model_simp, check = simplify(onnx_model)assert check, "Simplified ONNX model could not be Validated"print(f"yolo V8 transd-trends-sim Model save to {dst_name}")onnx.save(onnx_model, dst_name)os.remove(onnx_file)  # 删除中间onnx文件return 0def parse_args():parser = argparse.ArgumentParser(description='YOLOv8 ONNX Conversion and Simplification')parser.add_argument('--mode_file', type=str, help='Path to the YOLOv8 .pt file, pt name eg:yolov8n_person_car_boat.pt')parser.add_argument('--width', type=int, default=640, help='width of model input')parser.add_argument('--height', type=int, default=640 , help='height of model input')return parser.parse_args()def main():args = parse_args()mode_file = args.mode_filemodel_input_width = args.widthmodel_input_height = args.heightonnx_mode_path = export_onnx(mode_file, model_input_width, model_input_height)v8trans_v8onnxsim(onnx_mode_path)if __name__ == '__main__':main()
运行如下命令:
# 导出infer框架能运行的onnx【onnx结构修改】
python export_jetson.py --mode_file yolov8n.pt --width 640 --height 640# 【注意】运行过程出现下面,直接ctrl+C跳过,避免安装CPU版onnxruntime
requirements: Ultralytics requirement ['onnxruntime'] not found, attempting AutoUpdate...
4.4 TensorRT导出
4.4.1 YOLO-engine导出
# 1 普通onnx导出
yolo export model=yolo11n.pt format=onnx# 2 engine导出
# 2.1 FP32导出
yolo export model=yolo11n.pt format=engine
# 2.2 FP16导出
yolo export model=yolo11n.pt format=engine half=True
4.5 INT8导出
4.5.1 导出命令
版本:8.3.146
注意:需要校准数据集,数据集yaml中的val路径,一般500张以上。
导出脚本如下:
from ultralytics import YOLO
# trt
model = YOLO('ultralytics-main/yolov8s.pt')
# FP16
# out = model.export(format="engine", imgsz=640, dynamic=True, verbose=False, batch=1, workspace=2, half=True)
# INT8
out = model.export(format="engine", imgsz=640, dynamic=True, verbose=False, batch=1, workspace=2, int8=True, data="datasets/xxx.yaml")
导出报错:

原因与解决方法:动态范围超过边界,修改代码ultralytics-main/ultralytics/utils/export.py

5 YOLO推理耗时分析
5.1 官方代码测试
# engine模型测试
yolo predict task=detect model=yolo11n.engine imgsz=640 source=test_img/test.mp4
FP32如下:16ms左右

FP16:14ms左右

可能存在问题:推理engine报错

解决:Numpy版本过高,降低numpy版本,这里使用1.23.5
pip install numpy==1.23.5 --user -i https://pypi.tuna.tsinghua.edu.cn/simple
5.2 自定义裸代码耗时对比
官方链接测试记录:快速入门指南:NVIDIA Jetson 与Ultralytics YOLO11


测试次数:100次【热启动】
效果最佳:MAX功率+CPU,GPU 内核都以最大频率运行。
注意:下面测试的全为YOLOv8s,官方测试为YOLOv11。
5.2.1 功率:MAX
# 查询目前的板子功耗模式
sudo nvpmodel -q
# 设置MAXN功率模式
sudo nvpmodel -m 0

5.2.2 功率:15W

5.2.1 功率:MAX+开启最大频率
# 开启最大频率
sudo jetson_clocks
# 重启恢复动态频率
sudo roboot


自定义TRT测试脚本如下:
import warnings
warnings.filterwarnings("ignore", category=DeprecationWarning)import torch
import torch.nn as nn
import numpy as np
import tensorrt as trt
from collections import OrderedDict, namedtuple
import jsonimport cv2
import time# Binding 命名元组
Binding = namedtuple("Binding", ("name", "dtype", "shape", "data", "ptr"))# TensorRT -> PyTorch dtype 映射
trt_to_torch_dtype_dict = {trt.DataType.BOOL: torch.bool,trt.DataType.INT8: torch.int8,trt.DataType.INT32: torch.int32,trt.DataType.HALF: torch.float16,trt.DataType.FLOAT: torch.float32,
}# NumPy -> PyTorch dtype 映射
np_to_torch_dtype = {np.bool_: torch.bool,np.uint8: torch.uint8,np.int8: torch.int8,np.int16: torch.int16,np.int32: torch.int32,np.int64: torch.int64,np.float16: torch.float16,np.float32: torch.float32,np.float64: torch.float64
}class UnifiedTRTModel(nn.Module):def __init__(self,weights="yolo11n.engine",device=torch.device("cuda:0"),fp16=False,input_names=['images'],output_names=None,fixed_output_shapes=None):"""统一的 TensorRT 模型封装器,支持 YOLO、xfeat 等多种模型。参数:weights (str): TensorRT engine 文件路径。device (torch.device): 推理设备,默认为 cuda:0。fp16 (bool): 是否启用半精度推理。input_names (list): 输入张量名称列表。output_names (list): 输出张量名称列表(可选,自动读取)。fixed_output_shapes (dict): 固定输出 shape,如 {'output': (1000, 2)}。"""super().__init__()self.np_to_torch_dtype = np_to_torch_dtypeself.trt_to_torch_dtype = trt_to_torch_dtype_dictself.input_names = input_namesself.output_names = output_namesself.fixed_output_shapes = fixed_output_shapes or {}self.fp16 = fp16self.device = device if device.type != "cpu" else torch.device("cpu")self.stream = torch.cuda.Stream(device=device) if torch.cuda.is_available() else None# 获取权重文件路径w = str(weights[0] if isinstance(weights, list) else weights)logger = trt.Logger(trt.Logger.INFO)trt.init_libnvinfer_plugins(logger, namespace='')print(f"Loading {w} for TensorRT inference...")with open(w, "rb") as f, trt.Runtime(logger) as runtime:try:meta_len = int.from_bytes(f.read(4), byteorder="little")metadata = json.loads(f.read(meta_len).decode("utf-8"))except UnicodeDecodeError:f.seek(0)metadata = Nonemodel = runtime.deserialize_cuda_engine(f.read())context = model.create_execution_context()is_trt10 = not hasattr(model, "num_bindings")# 自动获取输出名称 & 解析绑定信息(合并版本)bindings = OrderedDict()binding_addrs = OrderedDict()dynamic = Falsefp16 = Falseoutput_names = []for i in (range(model.num_io_tensors) if is_trt10 else range(model.num_bindings)):if is_trt10:name = model.get_tensor_name(i)dtype = trt.nptype(model.get_tensor_dtype(name))if model.get_tensor_mode(name) == trt.TensorIOMode.INPUT:if -1 in tuple(context.get_tensor_shape(name)):dynamic = Truecontext.set_input_shape(name, tuple(model.get_tensor_profile_shape(name, 0)[1]))if dtype == np.float16:fp16 = Trueelif model.get_tensor_mode(name) == trt.TensorIOMode.OUTPUT:output_names.append(name)shape = tuple(context.get_tensor_shape(name))else:name = model.get_binding_name(i)dtype = trt.nptype(model.get_binding_dtype(i))if model.binding_is_input(i):if -1 in tuple(model.get_binding_shape(i)):dynamic = Truecontext.set_binding_shape(i, tuple(model.get_profile_shape(0, i)[1]))if dtype == np.float16:fp16 = Trueelif model.get_tensor_mode(name) == trt.TensorIOMode.OUTPUT:output_names.append(name)shape = tuple(context.get_binding_shape(i))# 注意:替换xfeat shape(0, 2)-->(1000, 2)if name in self.fixed_output_shapes:shape = self.fixed_output_shapes[name]# 创建 buffer 并记录地址im = torch.from_numpy(np.empty(shape, dtype=dtype)).to(self.device)bindings[name] = Binding(name, dtype, shape, im, int(im.data_ptr()))binding_addrs[name] = int(im.data_ptr())# 去重输出名称(防止重复)self.output_names = list(dict.fromkeys(output_names))# 注册变量self.model = modelself.context = contextself.bindings = bindingsself.binding_addrs = binding_addrsself.dynamic = dynamicself.is_trt10 = is_trt10def forward(self, *inputs):"""推理函数,支持多输入和手动设置输出 shape。参数:*inputs: 输入张量列表(顺序需与 input_names 一致)返回:tuple: 输出张量列表"""assert len(inputs) == len(self.input_names), \f"Expected {len(self.input_names)} inputs but got {len(inputs)}"contiguous_inputs = [x.contiguous().to(self.device) for x in inputs]for i, input_name in enumerate(self.input_names):im = contiguous_inputs[i]if self.fp16 and im.dtype != torch.float16:im = im.half()if self.dynamic and im.shape != self.bindings[input_name].shape:if self.is_trt10:self.context.set_input_shape(input_name, im.shape)self.bindings[input_name] = self.bindings[input_name]._replace(shape=im.shape)# 确保双输入尺寸对应后再修改输出尺寸if i == len(self.input_names) - 1:for name in self.output_names:# 注意:替换xfeat shape(0, 2)-->(1000, 2)if name in self.fixed_output_shapes:shape = self.fixed_output_shapes[name]self.bindings[name].data.resize_(shape)else:self.bindings[name].data.resize_(tuple(self.context.get_tensor_shape(name)))else:idx = self.model.get_binding_index(input_name)self.context.set_binding_shape(idx, im.shape)self.bindings[input_name] = self.bindings[input_name]._replace(shape=im.shape)# 确保双输入尺寸对应后再修改输出尺寸if i == len(self.input_names) - 1:for name in self.output_names:idx_out = self.model.get_binding_index(name)# 注意:替换xfeat shape(0, 2)-->(1000, 2)if name in self.fixed_output_shapes:shape = self.fixed_output_shapes[name]self.bindings[name].data.resize_(shape)else:self.bindings[name].data.resize_(tuple(self.context.get_binding_shape(idx_out)))self.binding_addrs[input_name] = int(im.data_ptr())outputs = []for output_name in self.output_names:output = self.bindings[output_name].dataself.binding_addrs[output_name] = int(output.data_ptr())outputs.append(output)if self.stream:self.context.execute_async_v2(list(self.binding_addrs.values()), self.stream.cuda_stream)self.stream.synchronize()else:self.context.execute_v2(list(self.binding_addrs.values()))return tuple(outputs) if len(outputs) > 1 else outputs[0]def from_numpy(self, x):"""将 numpy 数组转换为 PyTorch 张量。参数:x (np.ndarray): 要转换的数组。返回:(torch.Tensor): 转换后的张量"""return torch.tensor(x).to(self.device) if isinstance(x, np.ndarray) else x# 前处理,包括:resize, pad, HWC to CHW,BGR to RGB,归一化,增加维度CHW -> BCHW
def preprocess(img, model_height, model_width):"""Pre-processes the input image.Args:img (Numpy.ndarray): image about to be processed.Returns:img_process (Numpy.ndarray): image preprocessed for inference.ratio (tuple): width, height ratios in letterbox.pad_w (float): width padding in letterbox.pad_h (float): height padding in letterbox."""# Resize and pad input image using letterbox() (Borrowed from Ultralytics)shape = img.shape[:2]  # original image shapenew_shape = (model_height, model_width)r = min(new_shape[0] / shape[0], new_shape[1] / shape[1])ratio = r, rnew_unpad = int(round(shape[1] * r)), int(round(shape[0] * r))pad_w, pad_h = (new_shape[1] - new_unpad[0]) / 2, (new_shape[0] - new_unpad[1]) / 2  # wh paddingif shape[::-1] != new_unpad:  # resizeimg = cv2.resize(img, new_unpad, interpolation=cv2.INTER_LINEAR)top, bottom = int(round(pad_h - 0.1)), int(round(pad_h + 0.1))left, right = int(round(pad_w - 0.1)), int(round(pad_w + 0.1))img = cv2.copyMakeBorder(img, top, bottom, left, right, cv2.BORDER_CONSTANT, value=(114, 114, 114))  # 填充# Transforms: HWC to CHW -> BGR to RGB -> div(255) -> contiguous -> add axis(optional)img = np.ascontiguousarray(np.einsum('HWC->CHW', img)[::-1], dtype=np.single) / 255.0img_process = img[None] if len(img.shape) == 3 else imgreturn img_process, ratio, (pad_w, pad_h)# 后处理,包括:阈值过滤与NMS
def postprocess(preds, im0, ratio, pad_w, pad_h, conf_threshold, iou_threshold):"""Post-process the prediction.Args:preds (Numpy.ndarray): predictions come from ort.session.run().im0 (Numpy.ndarray): [h, w, c] original input image.ratio (tuple): width, height ratios in letterbox.pad_w (float): width padding in letterbox.pad_h (float): height padding in letterbox.conf_threshold (float): conf threshold.iou_threshold (float): iou threshold.Returns:boxes (List): list of bounding boxes."""x = preds  # outputs: predictions (1, 84, 8400)x = x.cpu().numpy()# Transpose the first output: (Batch_size, xywh_conf_cls, Num_anchors) -> (Batch_size, Num_anchors, xywh_conf_cls)x = np.einsum('bcn->bnc', x)  # (1, 8400, 84)# Predictions filtering by conf-thresholdx = x[np.amax(x[..., 4:], axis=-1) > conf_threshold]# Create a new matrix which merge these(box, score, cls) into one# For more details about `numpy.c_()`: https://numpy.org/doc/1.26/reference/generated/numpy.c_.htmlx = np.c_[x[..., :4], np.amax(x[..., 4:], axis=-1), np.argmax(x[..., 4:], axis=-1)]# NMS filtering# 经过NMS后的值, np.array([[x, y, w, h, conf, cls], ...]), shape=(-1, 4 + 1 + 1)x = x[cv2.dnn.NMSBoxes(x[:, :4], x[:, 4], conf_threshold, iou_threshold)]# 重新缩放边界框,为画图做准备if len(x) > 0:# Bounding boxes format change: cxcywh -> xyxyx[..., [0, 1]] -= x[..., [2, 3]] / 2x[..., [2, 3]] += x[..., [0, 1]]# Rescales bounding boxes from model shape(model_height, model_width) to the shape of original imagex[..., :4] -= [pad_w, pad_h, pad_w, pad_h]x[..., :4] /= min(ratio)# Bounding boxes boundary clampx[..., [0, 2]] = x[:, [0, 2]].clip(0, im0.shape[1])x[..., [1, 3]] = x[:, [1, 3]].clip(0, im0.shape[0])return x[..., :6]  # boxeselse:return np.array([])if __name__ == "__main__":# 示例用法:YOLOv8 目标检测model = UnifiedTRTModel(# weights='yolov8s_int8.engine',weights='yolov8s_fp16.engine',device=torch.device("cuda:0"),input_names=['images'],output_names=['output0'])times = []# 测试求平均推理耗时for _ in range(50):img0 = cv2.imread('test.jpg')print(img0.shape)img, ratio, (pad_w, pad_h) = preprocess(img0, 640, 640)img = torch.from_numpy(img)image = img.to(torch.device("cuda:0"))t1 = time.time()out = model(image)print('det推理时间:{:.4f}s'.format(time.time() - t1))times.append(round(time.time() - t1, 4))out = postprocess(out, img0, ratio, pad_w, pad_h, 0.25, 0.45)print('总时间:{:.4f}s'.format(time.time() - t1))for (*box, conf, cls_) in out:cv2.rectangle(img0, (int(box[0]), int(box[1])), (int(box[2]), int(box[3])),(0, 0, 255), 2, cv2.LINE_AA)print(f'平均推理时间:{round(sum(times[10:]) / len(times[10:]), 4)}ms')cv2.imwrite('res.jpg', img0)
相关文章:
【超详细】英伟达Jetson Orin NX-YOLOv8配置与TensorRT测试
文章主要内容如下: 1、基础运行环境配置 2、Torch-GPU安装 3、ultralytics环境配置 4、Onnx及TensorRT导出详解 5、YOLOv8推理耗时分析 基础库版本:jetpack5.1.3, torch-gpu2.1.0, torchvision0.16.0, ultralytics8.3.146 设备的软件开发包基础信息 需…...

Go语言学习-->项目中引用第三方库方式
Go语言学习–>项目中引用第三方库方式 1 执行 go mod tidy 分析引入的依赖有没有正常放在go.mod里面 找到依赖的包会自动下载到本地 并添加在go.mod里面 执行结果: 2 执行go get XXXX(库的名字)...

Vue Fragment vs React Fragment
文章目录 前言🧩 一、概念对比:Vue Fragment vs React Fragment📦 二、使用示例对比✅ Vue 3 中使用 Fragment✅ React 中使用 Fragment 🔍 三、差异解析1. **使用方式**2. **传递属性(如 key)**3. **插槽系…...
)
【LRU】 (最近最少使用)
LRU (最近最少使用) 文章目录 LRU (最近最少使用)一、LRU是什么?二、实现1.常规算法2.双栈更替总结 一、LRU是什么? LRU(Least Recently Used)是一种常见的缓存淘汰策略,核心思想是 “淘汰最长时间未被使用的缓存数据…...

每日Prompt:云朵猫
提示词 仰视,城镇的天空,一片形似猫咪的云朵,用黑色的简笔画,勾勒出猫咪的形状,可爱,俏皮,极简...

AI浪潮下的IT行业:威胁、转变与共生之道
目录 前言1 AI在IT行业的具体应用场景1.1 软件开发中的AI助手1.2 运维与监控的智能化1.3 测试自动化与质量保障1.4 安全防护中的智能威胁识别 2 AI对IT从业者的实际影响2.1 工作内容的结构性变化2.2 技能结构的再平衡 3 IT从业者不可替代的能力与价值3.1 复杂系统的架构与抽象能…...
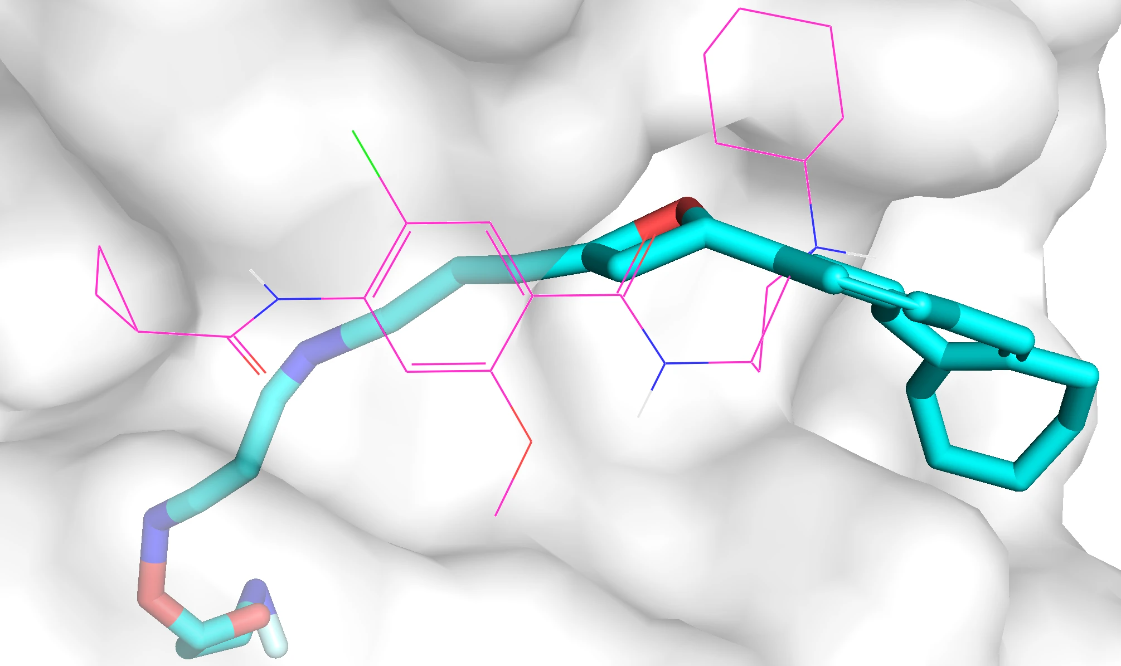
基于功能基团的3D分子生成扩散模型 - D3FG 评测
D3FG 是一个在口袋中基于功能团的3D分子生成扩散模型。与通常分子生成模型直接生成分子坐标和原子类型不同,D3FG 将分子分解为两类组成部分:官能团和连接体,然后使用扩散生成模型学习这些组成部分的类型和几何分布。 一、背景介绍 D3FG 来源…...

Python Cookbook-7.12 在 SQLite 中储存 BLOB
任务 想将 BLOB 存入一个 SQLite 数据库, 解决方案 Python的 PySQLite 扩展提供了 sqlite.encode 函数,它可帮助你在 SOLite 数据库中插入二进制串。可以基于这个函数编写一个小巧的适配器类: import sqlite,cPickle class Blob(object):自动转换二进制串def __init__(self…...

蓝耘服务器与DeepSeek的结合:引领智能化时代的新突破
🌟 嗨,我是Lethehong!🌟 🌍 立志在坚不欲说,成功在久不在速🌍 🚀 欢迎关注:👍点赞⬆️留言收藏🚀 🍀欢迎使用:小智初学…...

无人机光纤FC接口模块技术分析
运行方式 1. 信号转换:在遥控器端,模块接收来自遥控器主控板的电信号。 2.电光转换:模块内部的激光发射器将电信号转换成特定波长的光信号。 3.光纤传输:光信号通过光纤跳线传输。光纤利用全内反射原理将光信号约束在纤芯内进行…...
)
【LeetCode】3170. 删除星号以后字典序最小的字符串(贪心 | 优先队列)
LeetCode 3170. 删除星号以后字典序最小的字符串(中等) 题目描述解题思路java代码 题目描述 题目链接:3170. 删除星号以后字典序最小的字符串 给你一个字符串 s 。它可能包含任意数量的 * 字符。你的任务是删除所有的 * 字符。 当字符串还…...

Oracle 用户名大小写控制
Oracle 用户名大小写控制 在 Oracle 数据库中,用户名的默认大小写行为和精确控制方法如下: 一 默认用户名大小写行为 不引用的用户名:自动转换为大写 CREATE USER white IDENTIFIED BY oracle123; -- 实际创建的用户名是 "WHITE"…...
作为过来人,浅谈一下高考、考研、读博
写在前面 由于本人正在读博,标题中的三个阶段都经历过或正在经历,本意是闲聊,也算是给将要经历的读者们做个参考、排雷。本文写于2022年,时效性略有落后,不过逻辑上还是值得大家参考,若所述存在偏颇&#…...
立志成为一名优秀测试开发工程师(第十一天)—Postman动态参数/变量、文件上传、断言策略、批量执行及CSV/JSON数据驱动测试
目录 一、Postman接口关联与正则表达式应用 1.正则表达式解析 2.提取鉴权码。 二、Postman内置动态参数以及自定义动态参数 1.常见内置动态参数: 2.自定义动态参数: 3.“编辑”接口练习 三、图片上传 1.文件的上传 2.上传后内容的验证 四、po…...

Global Security Market知识点总结:主经纪商业务
在全球证券市场的复杂体系中,主经纪商业务(Prime Brokerage)占据着独特且关键的位置。这一业务为大型机构投资者提供了一系列至关重要的服务,极大地影响着金融市场的运作与发展。 一、主经纪商业务的定义 主经纪商业务是投资银行…...
算法练习-回溯
今天开始新的章节,关于算法中回溯法的练习,这部分题目的难度还是比较大的,但是十分锻炼人的思维与思考能力。 处理这类题目首先要注意几个基本点: 1.关于递归出口的设置,这是十分关键的,要避免死循环的产…...

AI代码助手需求说明书架构
AI代码助手需求说明书架构 #mermaid-svg-6dtAzH7HjD5rehlu {font-family:"trebuchet ms",verdana,arial,sans-serif;font-size:16px;fill:#333;}#mermaid-svg-6dtAzH7HjD5rehlu .error-icon{fill:#552222;}#mermaid-svg-6dtAzH7HjD5rehlu .error-text{fill:#552222;s…...

PTC过流保护器件工作原理及选型方法
PTC过流保护器件 (Positive Temperature Coefficient,正温度系数热敏电阻)是一种过流保护元件,其工作原理基于电阻值随温度变化的特性。当电路正常工作时,PTC的阻值很小,电流可以顺畅通过;但当…...

RabbitMQ 在解决数据库高并发问题中的定位和核心机制
RabbitMQ 在解决数据库高并发问题中的定位和核心机制 它是间接但极其有效的解决方案,以下内容聚焦如何最大化发挥 RabbitMQ 的潜力: 一、核心机制落地强化方案 1. 精准的异步化切割 关键原则:区分 “必须同步” 和 “可异步” 操作 #merma…...

VSCode主题定制:CSS个性化你的编程世界
在今天的数字世界,编程环境已成为开发者的第二大脑,而主题正是个性化你的创意空间的关键。本文将指导你如何使用CSS自定义VSCode的主题,让你的IDE不仅功能强大,更具视觉个性。 思路分析 设计思路: 创建主色调基调和…...

Windows 下彻底删除 VsCode
彻底删除 VS Code (Visual Studio Code) 意味着不仅要卸载应用程序本身,还要删除所有相关的配置文件、用户数据、插件和缓存。这可以确保你有一个完全干净的状态,方便你重新安装或只是彻底移除它。 重要提示: 在执行以下操作之前,…...

一文带你入门Java Stream流,太强了,mysqldba面试题及答案
list.add(“世界加油”); list.add(“世界加油”); long count list.stream().distinct().count(); System.out.println(count); distinct() 方法是一个中间操作(去重),它会返回一个新的流(没有共同元素)。 Stre…...

FastAPI安全异常处理:从401到422的奇妙冒险
title: FastAPI安全异常处理:从401到422的奇妙冒险 date: 2025/06/05 21:06:31 updated: 2025/06/05 21:06:31 author: cmdragon excerpt: FastAPI安全异常处理核心原理与实践包括认证失败的标准HTTP响应规范、令牌异常的特殊场景处理以及完整示例代码。HTTP状态码选择原则…...
阿里云 RDS mysql 5.7 怎么 添加白名单 并链接数据库
阿里云 RDS mysql 5.7 怎么 添加白名单 并链接数据库 最近帮朋友 完成一些运维工作 ,这里记录一下。 文章目录 阿里云 RDS mysql 5.7 怎么 添加白名单 并链接数据库最近帮朋友 完成一些运维工作 ,这里记录一下。 阿里云 RDS MySQL 5.7 添加白名单1. 登录…...

《Brief Bioinform》: 鼠脑单细胞与Stereo-seq数据整合算法评估
一、写在前面 基因捕获效率、分辨率一直是空间转录组细胞类型识别的拦路虎,许多算法能够整合单细胞(single-cell, sc)或单细胞核(single-nuclear, sn)数据与空间转录组数据,从而帮助空转数据的细胞类型注释。此前我们介绍过近年新出炉的Stereo-seq平台&…...
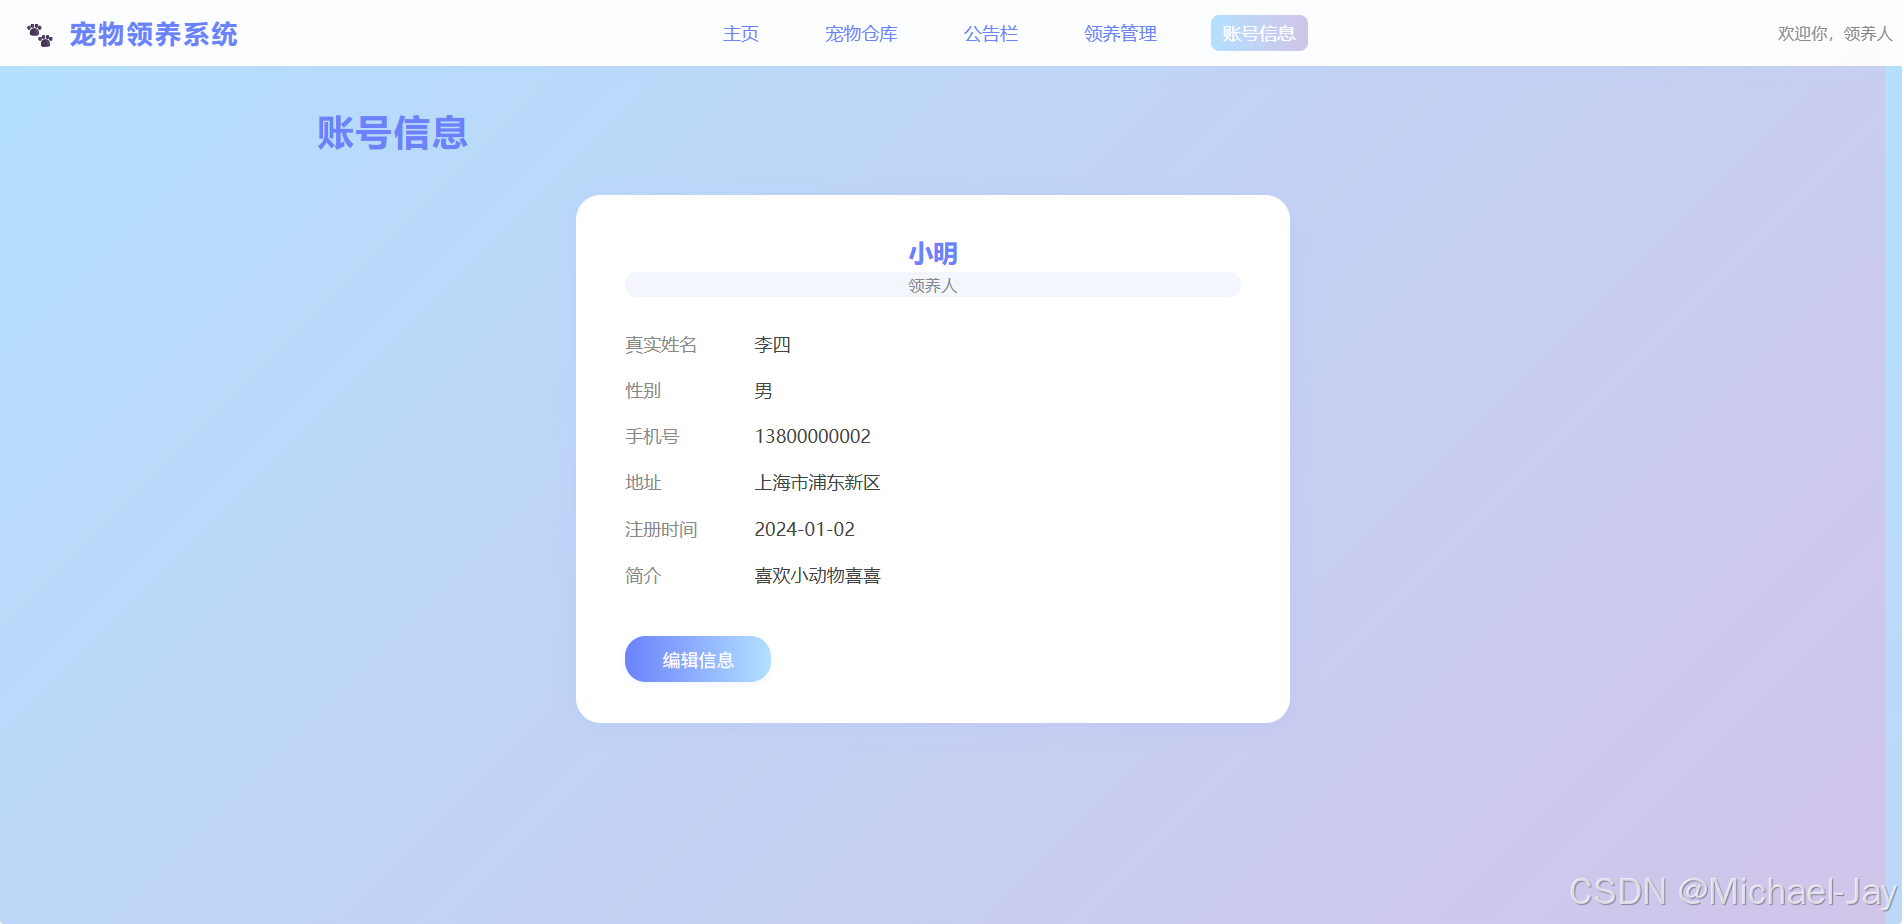
基于Springboot的宠物领养系统
本系统是一个面向社会的宠物领养平台,旨在帮助流浪宠物找到新家庭,方便用户在线浏览、申请领养宠物,并支持管理员高效管理宠物、公告和用户信息。 技术栈: -后端: Java 8Spring BootSpring MVCMyBatis-PlusMySQL 8R…...

AI API、AI 聊天助手,两大服务助力应用智能化转型
网络效应、转换成本——这些一度定义了我们这个时代商业逻辑的规则,在 AI 时代迅速崩塌。创新性功能被无差别克隆包围,差异化优势在底层能力翻新中消散…… 更别说那些决策迟缓、行动无法言出法随的“后来者”,注定与市场窗口擦身而过。唯快…...

Windows 下搭建 Zephyr 开发环境
1. 系统要求 操作系统:Windows 10/11(64位)磁盘空间:至少 8GB 可用空间(Zephyr 及其工具链较大)权限:管理员权限(部分工具需要) 2. 安装必要工具 winget安装依赖工具&am…...

蓝桥杯单片机之通过实现同一个按键的短按与长按功能
实现按键的短按与长按的不同功能 问题分析 对于按键短按,通常是松开后实现其功能,而不会出现按下就进行后续的操作;而对于按键长按,则不太一样,按键长按可能分为两种情况,一是长按n秒后实现后续功能&…...
)
如何用 pnpm patch 给 element-plus 打补丁修复线上 bug(以 2.4.4 修复 PR#15197 为例)
背景 在实际项目开发中,依赖的三方库(如 element-plus)难免会遇到 bug。有时候官方虽然已经修复,但新版本升级成本高,或者有兼容性风险。这时,给依赖打补丁是最优雅的解决方案之一。 本文以 element-plus…...