spring注解驱动开发(二)
17、Bean的生命周期
-
bean的生命周期:bean的创建—初始化—销毁的过程
-
容器负责管理bean的生命周期
-
我们可以自定义初始化和销毁方法,容器在bean进行到当前生命周期的时候来调用我们自定义的初始化和销毁方法
-
构造(对象创建)
单实例:在容器启动时创建对象
多实例:在每次获取的时候创建对象 -
初始化:
单实例:容器 关闭的时候
多实例:容器不会管理这个bean,容器不会调用销毁方法,如果需要销毁必须使用手动调用。
指定初始化和销毁方法有三种
1、使用@Bean(initMethod = “init”,destroyMethod = “destory”)
2、通过让Bean实现InitializingBean接口来定义初始化逻辑 ,DisposableBean接口来销毁bean
3、@PostConstruct、@PreDestory注解初始化和销毁方式
4、@BeanPostProcessor后置处理器,在bean初始化进行相应操作
18、@Bean(initMethod = “init”,destroyMethod = “destory”)指定初始化和销毁方式
1)指定初始化和销毁方式
使用@Bean(initMethod = “init”,destroyMethod = “destory”)
多实例bean的销毁,由用户自定义,容器不再管理
指定前
创建bean并设置初始化和销毁方法
public class Car {public Car(){System.out.println("car is constructor........");}public void init(){System.out.println("car is inited........");}public void destory(){System.out.println("car is destoried.....");}
}
创建配置类,并配置bean
@Configuration
public class MainConfigOfLifeCycle {@Beanpublic Car car(){return new Car();}
}
测试类
public class testLife {//创建ioc容器AnnotationConfigApplicationContext annotationConfigApplicationContext = new AnnotationConfigApplicationContext(MainConfigOfLifeCycle.class);@Testpublic void testLifeCycle(){System.out.println("  容器创建完成");}
}
测试结果
car is constructor........容器创建完成
指定后
创建配置类,并配置bean
注意: @Bean(initMethod = “init”,destroyMethod = “destory”)
@Configuration
public class MainConfigOfLifeCycle {@Bean(initMethod = "init",destroyMethod = "destory")public Car car(){return new Car();}
}
测试类
public class testLife {//创建ioc容器AnnotationConfigApplicationContext applicationContext = new AnnotationConfigApplicationContext(MainConfigOfLifeCycle.class);@Testpublic void testLifeCycle(){System.out.println("容器创建完成");applicationContext.close();}
}
测试结果:
car is constructor........
car is inited........
容器创建完成
car is destoried.....
19、InitializingBean接口定义初始化和销毁方式
2)通过让Bean实现InitializingBean接口来定义初始化逻辑 ,DisposableBean接口来销毁bean
创建自定义bean,并实现InitializingBean、DisposableBean接口,同时改写destory()和afterPropertiesSet()方法
@Component
public class Cat implements InitializingBean, DisposableBean {public Cat() {System.out.println("cat is generated.....");}//销毁方法@Overridepublic void destroy() throws Exception {System.out.println("cat is destoried ......");}//初始化方法@Overridepublic void afterPropertiesSet() throws Exception {System.out.println("cat is inited ......");}
}
修改配置类
@Configuration
@ComponentScan("com.atguigu")
public class MainConfigOfLifeCycle {@Bean(initMethod = "init",destroyMethod = "destory")public Car car(){return new Car();}
}
测试类
public class testLife {//创建ioc容器AnnotationConfigApplicationContext applicationContext = new AnnotationConfigApplicationContext(MainConfigOfLifeCycle.class);@Testpublic void testLifeCycle(){System.out.println("容器创建完成");applicationContext.getBean("cat");applicationContext.close();}
}
测试结果
cat is generated.....
cat is inited ......
car is constructor........
car is inited........
容器创建完成
car is destoried.....
cat is destoried ......
20、@PostConstruct、@PreDestory注解初始化和销毁方式
3)通过让Bean实现PostConstruct接口来定义初始化逻辑 ,PreDestory接口来销毁bean
@PostConstuct:在bean创建完成并且属性赋值完成初始化方法,作用在方法上
@preDestory:再容器销毁bean之前通知我们进行清理工作
比较好的一篇文章
@PostConstruct详解
**创建bean类并添加相应注解 **
@Component
public class Dog {public Dog() {System.out.println("dog is generated");}//对象创建并赋值之后调用@PostConstructpublic void init(){System.out.println("dog is constructed ......");}//容器移除对象之前@PreDestroypublic void destory(){System.out.println("dog is destoried ......");}
}
测试类
public class testLife {//创建ioc容器AnnotationConfigApplicationContext applicationContext = new AnnotationConfigApplicationContext(MainConfigOfLifeCycle.class);@Testpublic void testLifeCycle(){System.out.println("容器创建完成");//applicationContext.getBean("cat");applicationContext.close();}
}
测试结果
cat is generated.....
cat is inited ......
dog is generated
car is constructor........
car is inited........
容器创建完成
car is destoried.....
cat is destoried ......
21、@BeanPostProcessor后置处理器
4)@BeanPostProcessor后置处理器,在bean初始化进行相应操作,包括:
postProcessBeforeInitialization:在初始化之前工作
postProcessAfterInitialization:在初始化之后工作(调用)
具体来说需要事项BeanPostProcessor接口,并改写postProcessBeforeInitialization(Object o, String s)、postProcessAfterInitialization(Object o, String s)方法
创建自定义后置处理器
@Component
public class MyBeanPostProcessor implements BeanPostProcessor {@Overridepublic Object postProcessBeforeInitialization(Object bean, String beanName) throws BeansException {System.out.println("初始化完成前工作调用"+beanName+"=>"+bean);return bean;}@Overridepublic Object postProcessAfterInitialization(Object bean, String beanName) throws BeansException {System.out.println("初始化完成后工作调用"+beanName+"=>"+bean);return bean;}
}
测试类
public class testLife {//创建ioc容器AnnotationConfigApplicationContext applicationContext = new AnnotationConfigApplicationContext(MainConfigOfLifeCycle.class);@Testpublic void testLifeCycle(){System.out.println("容器创建完成");//applicationContext.getBean("cat");applicationContext.close();}
}
测试结果
初始化完成前工作调用org.springframework.context.event.internalEventListenerProcessor=>org.springframework.context.event.EventListenerMethodProcessor@4b5189ac
初始化完成后工作调用org.springframework.context.event.internalEventListenerProcessor=>org.springframework.context.event.EventListenerMethodProcessor@4b5189ac
初始化完成前工作调用org.springframework.context.event.internalEventListenerFactory=>org.springframework.context.event.DefaultEventListenerFactory@704deff2
初始化完成后工作调用org.springframework.context.event.internalEventListenerFactory=>org.springframework.context.event.DefaultEventListenerFactory@704deff2
初始化完成前工作调用mainConfigOfLifeCycle=>com.atguigu.config.MainConfigOfLifeCycle$$EnhancerBySpringCGLIB$$9bbbd82c@2b9ed6da
初始化完成后工作调用mainConfigOfLifeCycle=>com.atguigu.config.MainConfigOfLifeCycle$$EnhancerBySpringCGLIB$$9bbbd82c@2b9ed6da
cat is generated.....
初始化完成前工作调用cat=>com.atguigu.bean.Cat@59d4cd39
cat is inited ......
初始化完成后工作调用cat=>com.atguigu.bean.Cat@59d4cd39
dog is generated
初始化完成前工作调用dog=>com.atguigu.bean.Dog@1187c9e8
初始化完成后工作调用dog=>com.atguigu.bean.Dog@1187c9e8
初始化完成前工作调用mainConfig=>com.atguigu.config.MainConfig$$EnhancerBySpringCGLIB$$201ea2bd@6d7fc27
初始化完成后工作调用mainConfig=>com.atguigu.config.MainConfig$$EnhancerBySpringCGLIB$$201ea2bd@6d7fc27
初始化完成前工作调用bookController=>com.atguigu.controller.BookController@135606db
初始化完成后工作调用bookController=>com.atguigu.controller.BookController@135606db
初始化完成前工作调用bookDAO=>com.atguigu.dao.BookDAO@6c372fe6
初始化完成后工作调用bookDAO=>com.atguigu.dao.BookDAO@6c372fe6
初始化完成前工作调用bookService=>com.atguigu.service.BookService@2a3888c1
初始化完成后工作调用bookService=>com.atguigu.service.BookService@2a3888c1
初始化完成前工作调用com.atguigu.bean.Color=>com.atguigu.bean.Color@4167d97b
初始化完成后工作调用com.atguigu.bean.Color=>com.atguigu.bean.Color@4167d97b
初始化完成前工作调用com.atguigu.bean.Red=>com.atguigu.bean.Red@14fa86ae
初始化完成后工作调用com.atguigu.bean.Red=>com.atguigu.bean.Red@14fa86ae
初始化完成前工作调用com.atguigu.bean.Blue=>com.atguigu.bean.Blue@6e15fe2
初始化完成后工作调用com.atguigu.bean.Blue=>com.atguigu.bean.Blue@6e15fe2
初始化完成前工作调用com.atguigu.bean.Yellow=>com.atguigu.bean.Yellow@68f1b17f
初始化完成后工作调用com.atguigu.bean.Yellow=>com.atguigu.bean.Yellow@68f1b17f
初始化完成前工作调用female=>Person{name='wanger', age=23}
初始化完成后工作调用female=>Person{name='wanger', age=23}
初始化完成前工作调用colorFactoryBean=>com.atguigu.bean.ColorFactory@7cbd9d24
初始化完成后工作调用colorFactoryBean=>com.atguigu.bean.ColorFactory@7cbd9d24
初始化完成前工作调用rainbow=>com.atguigu.bean.RainBow@1b45c0e
初始化完成后工作调用rainbow=>com.atguigu.bean.RainBow@1b45c0e
car is constructor........
初始化完成前工作调用car=>com.atguigu.bean.Car@73a8da0f
car is inited........
初始化完成后工作调用car=>com.atguigu.bean.Car@73a8da0f
容器创建完成car is destoried.....
cat is destoried ......
22、@Value为属性赋值
在bean类的属性上直接使用@Value注解来赋值
创建bean类(pojo类)
public class Person {//value的值可以是1、基本数据类型值,2、可以写表达式如#{},3、可以用${}取出配置文件的值(在运行的环境变量中的值)@Value("张三")private String name;@Value("#{23+4}")private Integer age;public Person() {}public Person(String name, Integer age) {this.name = name;this.age = age;}public String getName() {return name;}public void setName(String name) {this.name = name;}public Integer getAge() {return age;}public void setAge(Integer age) {this.age = age;}@Overridepublic String toString() {return "Person{" +"name='" + name + '\'' +", age=" + age +'}';}
}
创建配置类
@Configuration
public class MainConfigOfPropertyValues {@Beanpublic Person person(){return new Person();}}
测试类
public class TestAno {AnnotationConfigApplicationContext applicationContext=new AnnotationConfigApplicationContext(MainConfigOfPropertyValues .class);@Testpublic void testProperty(){printBeans(applicationContext);System.out.println("====");Person person = (Person) applicationContext.getBean("person");System.out.println(person);}private void printBeans(AnnotationConfigApplicationContext applicationContext){String[] beanDefinitionNames = applicationContext.getBeanDefinitionNames();for (String name:beanDefinitionNames) {System.out.println(name);}}
}
测试结果
org.springframework.context.annotation.internalConfigurationAnnotationProcessor
org.springframework.context.annotation.internalAutowiredAnnotationProcessor
org.springframework.context.annotation.internalRequiredAnnotationProcessor
org.springframework.context.annotation.internalCommonAnnotationProcessor
org.springframework.context.event.internalEventListenerProcessor
org.springframework.context.event.internalEventListenerFactory
mainConfigOfPropertyValues
person
====
Person{name='张三', age=27}
23、@PropertySource加载外部配置文件属性赋值
需要加载外部配置文件,读取配置文件中 的k/v,保存到运行中的环境变量中
1、创建配置文件,在文件中创建若干键值对
创建文件 person.properties
person.name=zhangsanfeng
2、在配置类中使用@PropertySource指定配置文件
注意:@PropertySource(value={“classpath:/person.properties”})
//加载外部配置文件,读取配置文件中 的k/v,保存到运行中的环境变量中
@PropertySource(value={"classpath:/person.properties"})
@Configuration
public class MainConfigOfPropertyValues {@Beanpublic Person person(){return new Person();}
}
3、bean类中引用相应的值
注意:
@Value(“${person.name}”)
private String name;
public class Person {//value的值可以是1、基本数据类型值,2、可以写表达式如#{},3、可以用${}取出配置文件的值(在运行的环境变量中的值)@Value("${person.name}")private String name;@Value("#{23+4}")private Integer age;public Person() {}public Person(String name, Integer age) {this.name = name;this.age = age;}public String getName() {return name;}public void setName(String name) {this.name = name;}public Integer getAge() {return age;}public void setAge(Integer age) {this.age = age;}@Overridepublic String toString() {return "Person{" +"name='" + name + '\'' +", age=" + age +'}';}
}
4、测试类
public class TestAno {AnnotationConfigApplicationContext applicationContext=new AnnotationConfigApplicationContext(MainConfigOfPropertyValues .class);@Testpublic void testProperty(){printBeans(applicationContext);System.out.println("====");Person person = (Person) applicationContext.getBean("person");System.out.println(person);ConfigurableEnvironment environment = applicationContext.getEnvironment();String property=environment.getProperty("person.name");System.out.println(property);}private void printBeans(AnnotationConfigApplicationContext applicationContext){String[] beanDefinitionNames = applicationContext.getBeanDefinitionNames();for (String name:beanDefinitionNames) {System.out.println(name);}}
}
5、测试结果
注意:Person{name=‘zhangsanfeng’, age=27}
org.springframework.context.annotation.internalConfigurationAnnotationProcessor
org.springframework.context.annotation.internalAutowiredAnnotationProcessor
org.springframework.context.annotation.internalRequiredAnnotationProcessor
org.springframework.context.annotation.internalCommonAnnotationProcessor
org.springframework.context.event.internalEventListenerProcessor
org.springframework.context.event.internalEventListenerFactory
mainConfigOfPropertyValues
person
====
Person{name='zhangsanfeng', age=27}
zhangsanfeng
24、@Autowired&自动装配
自动装配:Spring利用依赖注入(DI),完成对IOC容器中各个组件的依赖关系赋值
1)@Autowired
一个组件需要使用到另外一个组件,直接对被使用的组件上添加@Autowired注解就可以注入这个组件。它:
- 默认优先按照类型去容器内找到对应的组件:如: BookDAO bookDAO =
applicationContext.getBean(BookDAO.class); - 如果有多个同类型的组件,再将属性名作为组件的id去容器中查找(没测试出来,总是报找到两个bean)
dao类
@Repository
public class BookDAO {
}
service类
@Service
public class BookService {@Autowiredprivate BookDAO bookDao;public void print(){System.out.println(bookDao);}
}
controller
@Controller
public class BookController {@Autowiredprivate BookService bookService;
}
配置类
@Configuration
@ComponentScan({"com.atguigu"})
public class MainConfigAutowired {
}
测试类
public class TestAuto {AnnotationConfigApplicationContext applicationContext= new AnnotationConfigApplicationContext(MainConfigAutowired.class);@Testpublic void testAutowired(){BookService bookService = applicationContext.getBean(BookService.class);BookDAO bookDAO = applicationContext.getBean(BookDAO.class);System.out.println(bookService);System.out.println(bookDAO);}
}
测试结果
com.atguigu.service.BookService@7357a011
com.atguigu.dao.BookDAO@30bce90b
25、@Qualifier&自动装配
@Qualifier明确指定需要装配哪一个组件,具体写法如:@Qualifier(“bookDAO3”)
@Configuration
@ComponentScan({"com.atguigu"})
public class MainConfigAutowired {@Qualifier("bookDAO")@Bean("bookDAO2")public BookDAO bookDAO(){BookDAO bookDAO = new BookDAO();bookDAO.setLable("2");return bookDAO;}
}
26、@Primary自动装配
如果容器内没有任何bean,单IOC自动装配默认一定要将属性装配好,否则会报错,可以使用在@Autowired(required=false),这里设置了required为非必须
以上情况可以使用@Primary来让Spring装配的时候,选择该注解的类为首选类
@Configuration
@ComponentScan({"com.atguigu"})
public class MainConfigAutowired {@Qualifier("bookDAO")@Bean("bookDAO2")public BookDAO bookDAO(){BookDAO bookDAO = new BookDAO();bookDAO.setLable("2");return bookDAO;}
}
27、@Resource自动装配
@Resource是用来 替代@Autowired的,和@Autowired一样实现自动装配,默认按照组件名称进行装配,没有能支持@Primary
@Service
public class BookService {@Resourceprivate BookDAO bookDAO2;public void print(){System.out.println(bookDAO2);}
}
28、@Inject自动装配
- 也是用来替代@Autowired的
- 需要在pom.xml中导入inject依赖
<dependency><groupId>javax.inject</groupId><artifactId>javax.inject</artifactId><version>1</version></dependency>
装配的写法
@Service
public class BookService {@Injectprivate BookDAO bookDAO2;public void print(){System.out.println(bookDAO2);}
}
29、标注在方法上方法的自动装配
默认加在ioc容器的组件,容器启动会调用无参构造器创建对象,再进行初始化等操作
- 标注在方法上,Spring容器 创建当前对象,就会调用方法,完成赋值, 方法使用的参数,自定义类型的值从ioc容易中获取
- 标注在构造方法上
- 也可以放在参数列表上
Boos类
@Component
public class Boss {private Car car;public Car getCar(){return car;}//标注在方法上,Spring容器 创建当前对象,就会调用方法,完成赋值//方法使用的参数,自定义类型的值从ioc容易中获取@Autowiredpublic void setCar(Car car){this.car=car;}@Overridepublic String toString() {return "Boss{" +"car=" + car +'}';}
}
Car类
@Component
public class Car {
}
测试 类
public class TestAuto {@Testpublic void testAutowired(){AnnotationConfigApplicationContext applicationContext= new AnnotationConfigApplicationContext(MainConfigAutowired.class);Boss Boos = applicationContext.getBean(Boss.class);System.out.println(Boos);Car car = applicationContext.getBean(Car.class);System.out.println(car);}
}
测试结果
Boss{car=com.atguigu.bean.Car@198d6542}
com.atguigu.bean.Car@198d6542ps:两个car对象的地址是一样的
- 如果只有一个有参构造器,则参数上的@Autowired可以不写,可以从组件中自动获取
30、标注在构造器位置的自动装配
- 也可以把@Autowried放在有参构造器上
@Component
public class Boss {private Car car;@Autowiredpublic Boss(Car car) {this.car = car;}public Car getCar(){return car;}//标注在方法上,Spring容器 创建当前对象,就会调用方法,完成赋值//方法使用的参数,自定义类型的值从ioc容易中获取//@Autowiredpublic void setCar(Car car){this.car=car;}@Overridepublic String toString() {return "Boss{" +"car=" + car +'}';}
}
- 还可以放在参数列表上
@Component
public class Boss {private Car car;public Boss(Car car) {this.car = car;}public Car getCar(){return car;}//标注在方法上,Spring容器 创建当前对象,就会调用方法,完成赋值//方法使用的参数,自定义类型的值从ioc容易中获取//@Autowiredpublic void setCar(@Autowired Car car){this.car=car;}@Overridepublic String toString() {return "Boss{" +"car=" + car +'}';}
}
31、Aware注入Spring底层组件
自定义组件要想使用Spring容器底层的一些组件(ApplicationContext,BeanFactory等)
- 自定义组件实现XXXAware
- 在创建对象 的时候,会调用接口规定的方法注入相应组件,
- Aware把Spring底层的一些组件注入到自定义的bean中
bean类
@Component
public class Red implements ApplicationContextAware, BeanNameAware, EmbeddedValueResolverAware {private ApplicationContext applicationContext;//获得一个注解的环境@Overridepublic void setApplicationContext(ApplicationContext applicationContext) throws BeansException {this.applicationContext=applicationContext;System.out.println(applicationContext);}//可以设置bean的名字@Overridepublic void setBeanName(String name) {System.out.println(name);}//传入String值的解析器@Overridepublic void setEmbeddedValueResolver(StringValueResolver stringValueResolver) {String osName = stringValueResolver.resolveStringValue("你好${os.name}");System.out.println(osName);}
}
测试类
public class TestAuto {@Testpublic void testAutowired(){AnnotationConfigApplicationContext applicationContext= new AnnotationConfigApplicationContext(MainConfigAutowired.class);}
}
测试结果
red
你好Mac OS X
org.springframework.context.annotation.AnnotationConfigApplicationContext@214b199c: startup date [Mon Jul 31 11:27:51 CST 2023]; root of context hierarchy
32、@Profile环境搭建
Profile是Spring为我们提供的可以根据当前环境,动态的激活和切换一系列组件(bean)的功能。
环境:开发环境,测试环境,生产环境,在不同环境下可能链接不同的数据库,因此需要可以根据当前环境,动态的激活和切换一系列组件。
如引不同的数据源,需要导入以下依赖
c3p0和mysql链接驱动
<!-- https://mvnrepository.com/artifact/com.mchange/c3p0 --><dependency><groupId>com.mchange</groupId><artifactId>c3p0</artifactId><version>0.9.2</version></dependency><!-- https://mvnrepository.com/artifact/com.mysql/mysql-connector-j --><dependency><groupId>com.mysql</groupId><artifactId>mysql-connector-j</artifactId><version>8.0.32</version></dependency>
创建dbConfig.propreties
db.user=root
db.password=xxxxxxxx
db.driverClass=com.mysql.cj.jdbc.Driver
创建配置类
@PropertySource("classpath:/dbConfig.properties")
@Configuration
public class MainConfigProfile implements EmbeddedValueResolverAware {@Value("${db.user}")private String user;//值解析器private StringValueResolver valueResolver;private String driverClass;@Bean("productDatasource")public DataSource dataSource(@Value("${db.password}") String password)  throws PropertyVetoException {ComboPooledDataSource dataSource = new ComboPooledDataSource();dataSource.setUser(user);dataSource.setPassword(password);dataSource.setJdbcUrl("jdbc:mysql://localhost8080:3306/fruitdb");//使用值解析器解析driverdataSource.setDriverClass(driverClass);return dataSource;}@Bean("testDatasource")public DataSource dataSourceTest(@Value("${db.password}") String password) throws PropertyVetoException {ComboPooledDataSource dataSource = new ComboPooledDataSource();dataSource.setUser(user);dataSource.setPassword(password);dataSource.setJdbcUrl("jdbc:mysql://localhost8080:3306/empdb");dataSource.setDriverClass(driverClass);return dataSource;}@Bean("developmentDatasource")public DataSource dataSourceDevelopment(@Value("${db.password}") String password) throws PropertyVetoException {ComboPooledDataSource dataSource = new ComboPooledDataSource();dataSource.setUser(user);dataSource.setPassword(password);dataSource.setJdbcUrl("jdbc:mysql://localhost8080:3306/userDb");dataSource.setDriverClass(driverClass);return dataSource;}@Overridepublic void setEmbeddedValueResolver(StringValueResolver stringValueResolver) {this.valueResolver=stringValueResolver;this.driverClass=this.valueResolver.resolveStringValue("${db.driverClass}");}
}
测试类
public class TestAuto {@Testpublic void testAutowired(){AnnotationConfigApplicationContext applicationContext= new AnnotationConfigApplicationContext(MainConfigProfile.class);//获取beans的类名数组String[] beanNamesForType = applicationContext.getBeanNamesForType(DataSource.class);for (String name: beanNamesForType ) {System.out.println(name);}}
}
测试结果
productDatasource
testDatasource
developmentDatasource
33、@Profile根据环境注册bean
- @Profile:指定组件在哪个环境的情况下才能被注册到容器中,不指定的话,在任何情况下都能注册组件
- 加了环境标识(@Profile)的bean,只有这个环境被激活才能注册到容器中,默认都default标识被注册
- 没有标注环境标识的bean,在任何环境下都是加载的
@Profile("default")
如何激活
1)使用命令行动态参数:在虚拟机参数位置加载-Dspring.profiles.active=test或其他标识
2)代码方式
配置类
@PropertySource("classpath:/dbConfig.properties")
@Configuration
public class MainConfigProfile implements EmbeddedValueResolverAware {@Value("${db.user}")private String user;//值解析器private StringValueResolver valueResolver;private String driverClass;@Profile("test")@Beanpublic Red red(){return new Red();}//定义生产环境@Profile("product")@Bean("productDatasource")public DataSource dataSource(@Value("${db.password}") String password)  throws PropertyVetoException {ComboPooledDataSource dataSource = new ComboPooledDataSource();dataSource.setUser(user);dataSource.setPassword(password);dataSource.setJdbcUrl("jdbc:mysql://localhost8080:3306/fruitdb");//使用值解析器解析driverdataSource.setDriverClass(driverClass);return dataSource;}//定义测试环境@Profile("test")@Bean("testDatasource")public DataSource dataSourceTest(@Value("${db.password}") String password) throws PropertyVetoException {ComboPooledDataSource dataSource = new ComboPooledDataSource();dataSource.setUser(user);dataSource.setPassword(password);dataSource.setJdbcUrl("jdbc:mysql://localhost8080:3306/empdb");dataSource.setDriverClass(driverClass);return dataSource;}//定义开发环境@Profile("development")@Bean("developmentDatasource")public DataSource dataSourceDevelopment(@Value("${db.password}") String password) throws PropertyVetoException {ComboPooledDataSource dataSource = new ComboPooledDataSource();dataSource.setUser(user);dataSource.setPassword(password);dataSource.setJdbcUrl("jdbc:mysql://localhost8080:3306/userDb");dataSource.setDriverClass(driverClass);return dataSource;}@Overridepublic void setEmbeddedValueResolver(StringValueResolver stringValueResolver) {this.valueResolver=stringValueResolver;this.driverClass=this.valueResolver.resolveStringValue("${db.driverClass}");}
}
测试类
public class TestAuto {@Testpublic void testAutowired(){//1.获取一个applicationContextAnnotationConfigApplicationContext applicationContext= new AnnotationConfigApplicationContext(MainConfigProfile.class);//2.设置激活的环境applicationContext.getEnvironment().setActiveProfiles("test","product");//设置了两个环境//3.注册住配置类applicationContext.register(MainConfigProfile.class);//4.刷新容器applicationContext.refresh();//获取beans的类名数组String[] beanNamesForType = applicationContext.getBeanNamesForType(DataSource.class);for (String name: beanNamesForType ) {System.out.println(name);}}
}
测试结果
应该出现test和product两个组件,但在执行refresh的时候报错。GenericApplicationContext does not support multiple refresh attempts: just call ‘refresh’ once
3)不仅可以写在bean上还可以写在类上
@Profile("development")
@PropertySource("classpath:/dbConfig.properties")
@Configuration
public class MainConfigProfile implements EmbeddedValueResolverAware {
表示只有环境为development的时候,只有是指定的环境的时候,整个配置类里面的所有配置才生效
相关文章:
)
spring注解驱动开发(二)
17、Bean的生命周期 bean的生命周期:bean的创建—初始化—销毁的过程 容器负责管理bean的生命周期 我们可以自定义初始化和销毁方法,容器在bean进行到当前生命周期的时候来调用我们自定义的初始化和销毁方法 构造(对象创建) 单…...

【C++】——类和对象
目录 面向过程和面向对象的初步认识类的引入类的定义类的访问限定符及封装类的作用域类的实例化this指针类的6个默认成员函数构造函数析构函数 面向过程和面向对象的初步认识 C语言是面向过程的,关注的是过程,分析求解问题的步骤,通过函数调用…...

【Docker】使用docker-maven-plugin插件构建发布推镜像到私有仓库
文章目录 1. 用docker-maven-plugin插件推送项目到私服docker1.1. 构建镜像 v1.01.2. 构建镜像 v2.01.3. 推送到镜像仓库 2. 拉取私服docker镜像运行3. 参考资料 本文描述了在Spring Boot项目中通过docker-maven-plugin插件把项目推送到私有docker仓库中,随后拉取仓…...
区块链学习笔记
区块链技术与应用 数组 列表 二叉树 哈希函数 BTC中的密码学原理 cryptographic hash function collsion resistance(碰撞抵抗) 碰撞指的是找到两个不同的输入值,使得它们的哈希值相同。也就是说,如果存在任意两个输入x和y,满足x ≠ y…...

实用上位机--QT
实用上位机–QT 通信协议如下 上位机设计界面 #------------------------------------------------- # # Project created by QtCreator 2023-07-29T21:22:32 # #-------------------------------------------------QT += core gui serialportgreaterThan(QT_MAJOR_V…...

os.signal golang中的信号处理
在程序进行重启等操作时,我们需要让程序完成一些重要的任务之后,优雅地退出,Golang为我们提供了signal包,实现信号处理机制,允许Go 程序与传入的信号进行交互。 Go语言标准库中signal包的核心功能主要包含以下几个方面…...
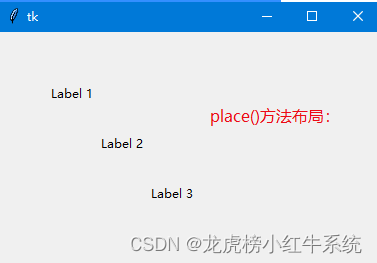
Python源码:Tkinter组件布局管理的3种方式
Tkinter组件布局管理可以使用pack()方法、grid()方法和place()方法。pack()方法将组件放置在窗口中,grid()方法将组件放置在网格布局中,place()方法将组件放置在指定位置。 01使用pack()方法布局: 在Tkinter中,pack方法用于将控…...
网络防御之VPN
配置IKE 第一阶段 [r1]ike proposal 1 [r1-ike-proposal-1]encryption-algorithm aes-cbc-128 [r1-ike-proposal-1]authentication-algorithm sha1 [r1-ike-proposal-1]dh group2 [r1-ike-proposal-1]authentication-method pre-share[r1]ike peer aaa v1 [r1-ike-peer-aaa…...

VUE使用docxtemplater导出word(带图片) 踩坑 表格循环空格 ,canvas.toDataURL图片失真模糊问题
参考:https://www.codetd.com/article/15219743 安装 // 安装 docxtemplater npm install docxtemplater pizzip --save // 安装 jszip-utils npm install jszip-utils --save // 安装 jszip npm install jszip --save // 安装 FileSaver npm install file-save…...

ubuntu 安装 Pycharm社区版
在Ubuntu中安装pycharm社区版_上玄下纁的博客-CSDN博客 里面可以创建快捷方式,蛮好用的...

IP 监控软件
IP 监控软件可帮助管理员主动监控网络资源。随着各种设备连接到网络,监控设备和接口可能很复杂,为管理员提供这些设备的IP监控,了解其各种性能指标和问题。 使用有效的 IP 监控软件的优势 使用有效的 IP 监控系统和一套全面的 IP 监控工具&…...

C#实现读写CSV文件的方法详解
目录 CSV文件标准 文件示例RFC 4180简化标准读写CSV文件 使用CsvHelper使用自定义方法总结 项目中经常遇到CSV文件的读写需求,其中的难点主要是CSV文件的解析。本文会介绍CsvHelper、TextFieldParser、正则表达式三种解析CSV文件的方法,顺带也会介绍一…...
04 http连接处理(上)
基础知识:epoll、http报文格式、状态码和有限状态机 代码:对服务端处理http请求的全部流程进行简要介绍,然后结合代码对http类及请求接收进行详细分析。 epoll epoll_create函数 #include <sys/epoll.h> int epoll_create(int size)…...
c++(强生成关键字+可变参数模板+emplace)[26]
强制生成 不生成 在C中,可以通过一些方式来控制编译器是否生成某些特殊成员函数(如默认构造函数、拷贝构造函数、拷贝赋值运算符、析构函数等)。 默认生成:如果你没有显式地定义这些特殊成员函数,编译器会自动生成它们…...
Mysql 数据库开发及企业级应用
文章目录 1、Mysql 数据库开发及企业级应用1.1、为什么要使用数据库1.1.1、数据库概念(Database)1.1.2、为什么需要数据库 1.2、程序员为什么要学习数据库1.3、数据库的选择1.3.1、主流数据库简介1.3.2、使用 MySQL 的优势1.3.3、版本选择 1.4、Windows …...

【数据结构】_6.队列
目录 1.概念 2.队列的使用 3.队列模拟实现 4.循环队列 5.双端队列 6.OJ题 6.1 用队列实现栈 6.2 用栈实现队列 1.概念 (1)队列是只允许在一端进行插入数据操作,在另一端进行删除数据操作的特殊线性表; (2&am…...
7 网络通信(上)
文章目录 网络通信概述ip地址ip的作用ip地址的分类私有ip 掩码和广播地址 linux 命令(ping ifconfig)查看或配置网卡信息:ifconfig(widows 用ipconfig)测试远程主机连通性:ping路由查看 端口端口是怎样分配的知名端口动态端口 查看…...

MFC图表控件high-speed-charting的使用
high-speed-charting是MFC上的开源图表库,Teechart的替代品。 high-speed-charting的下载地址 https://www.codeproject.com/Articles/14075/High-speed-Charting-Control 特性 High-speed drawing (when axis is fixed) which allows fast plotting of dataUnlimited number …...

Unity中常用方法
1.基础 //初始化引入 [RequireComponent(typeof(BoxCollider2D))] [RequireComponent(typeof(Rigidbody2D))]//游戏帧率设置 60帧Application.targetFrameRate 60;//获取物体对象 //获取到当前物体(根据名称,也可以根据路径)GameObject go GameObject.Find("…...

【监控系统】可视化工具Grafana简介及容器化部署实战
1.什么是Grafana 官网地址:https://grafana.com/ Grafana用Go语言开发的开源数据可视化工具,可以做数据监控和数据统计,带有告警功能。支持快速灵活的客户端图表,面板插件有许多不同方式的可视化指标和日志,官方库中…...

基于OpenHarmony的智慧农业控制系统-硬件部分【1】
1.整体设备2.硬件清单:一、主控单元(边缘网关)硬件名称型号/规格数量备注小熊派开发板BearPi-HM Nano(搭载 Hi3861 芯片,支持 OpenHarmony LiteOS)1块核心控制单元,集成 Wi-Fi,负责数…...

FastAdmin任意文件读取漏洞CVE-2024-7928深度解析与三阶段修复
1. 这个漏洞不是“能读任意文件”那么简单,而是整个FastAdmin旧版本的信任基石崩塌了你可能在安全通报里看到过CVE-2024-7928的简短描述:“FastAdmin框架存在任意文件读取漏洞”,甚至有些文章直接写成“可读取服务器任意配置文件”。但我在给…...

Unity Cardboard XR插件Android黑屏与传感器失效根因解析
1. 这不是“加个插件就跑通”的事:为什么Cardboard XR Plugin在Android上总卡在黑屏或传感器失灵 你是不是也试过在Unity里导入Google官方的cardboard-xr-plugin,照着GitHub README把Android SDK、NDK、JDK版本配齐,Build Settings里勾上ARM6…...

Firefox渗透测试插件工作流:15款高价值安全工具实战指南
1. 这不是普通浏览器插件推荐,而是一套可落地的渗透测试辅助工作流 “火狐插件”四个字在安全从业者耳中,常被默认为“轻量级、临时性、辅助性”的代名词——很多人装完Hackbar就以为自己有了渗透入口,点开FoxyProxy调个代理就当完成了环境隔…...

PaddleOCR车牌识别实战:从3万张数据集处理到模型训练部署的完整避坑指南
PaddleOCR车牌识别实战:从3万张数据集处理到模型训练部署的完整避坑指南 车牌识别作为计算机视觉领域的经典应用场景,在智慧交通、安防监控、停车场管理等行业有着广泛需求。PaddleOCR作为国内领先的OCR开源框架,凭借其优异的性能和丰富的预训…...

大模型MoE架构揭秘:为何每次只用2%参数
1. 这不是“参数越多越强”的简单故事:拆解大模型里被悄悄激活的那2% 你可能已经看过不少标题党文章,说“GPT-4有1.8万亿参数”“DeepSeek-R1有6710亿参数”,然后配上一张闪闪发光的数字图,再加一句“人类大脑才860亿神经元&#…...

别再死磕SAR ADC了!聊聊那些被低估的‘算法ADC’与‘流水线ADC’实战选型心得
算法ADC与流水线ADC实战选型指南:突破SAR ADC的思维定式 在嵌入式系统与传感器信号链设计中,模数转换器(ADC)的选择往往直接决定整个系统的性能天花板。当工程师们面对"高精度低速"、"中速中精度"和"高速高动态范围"等不同…...

Creality Print:从新手到专家的完整3D打印切片软件指南
Creality Print:从新手到专家的完整3D打印切片软件指南 【免费下载链接】CrealityPrint 项目地址: https://gitcode.com/gh_mirrors/cr/CrealityPrint 在3D打印的世界里,切片软件是连接数字模型与物理实体的关键桥梁。无论您刚刚接触3D打印&…...

Perplexity奖学金搜索仅限前500名认证用户启用的“Priority Funding Mode”,你被系统自动降权了吗?
更多请点击: https://intelliparadigm.com 第一章:Perplexity奖学金搜索的机制演进与现状剖析 Perplexity 的奖学金搜索功能并非静态工具,而是随其核心检索架构的迭代持续演进。早期版本依赖关键词匹配与结构化数据库爬取,响应延…...

科研创作提质增效|依托 PaperXie 智能写作,高效完成期刊论文全流程创作
paperxie-免费查重复率aigc检测/开题报告/毕业论文/智能排版/文献综述/期刊论文https://www.paperxie.cn/ai/journalArticleshttps://www.paperxie.cn/ai/journalArticles 一、引言 学术研究领域中,期刊论文是展现科研成果、完成学业考核、学术成果发表的核心载体。…...