Vue 整合 Element UI 、路由嵌套、参数传递、重定向、404和路由钩子(五)
一、整合 Element UI
1.1 工程初始化
使用管理员的模式进入 cmd 的命令行模式,创建一个名为 hello-vue 的工程,命令为:
# 1、目录切换
cd F:\idea_home\vue# 2、项目的初始化,记得一路的 no
vue init webpack hello-vue
1.2 安装依赖
我们需要安装 vue-router、element-ui、sass-loader 和 node-sass 四个插件
# 1、进入工程目录
cd hello-vue# 2、安装 vue-router
npm install i vue-router@3.5.2 --save-dev# 3、安装 element-ui
npm i element-ui -S# 4、安装工程依赖
npm install# 5、安装 NODE-SASS 加载器
cnpm install node-sass@4.12.0 --save-dev# 6、按照 SASS-LOADER
cnpm install sass-loader@7.3.1 --save-dev# 7、启动测试
npm run dev
1.3 npm 命令解释
npm install moduleName:安装模块到项目目录下
npm install -g moduleName:意思是将模块安装到全局,具体安装到磁盘哪个位置要看 npm config prefix 的位置。
npm install -save moduleName:--save 的意思是将模块安装到项目目录下,并在 package 文件的 dependencies 节点写入依赖,-S 为该命令的缩写。
npm install -save-dev moduleNam e:--save-dev 的意思是将模块安装到项目目录下,并在 package 文件的 devDependencies 节点写入依赖,-D 为该命令的缩写。
1.4 删除文件和目录
删除掉生成的基础工程的配置文件,目录结构和文件内容如下所示:

<template><div id="app"></div>
</template>
<script>export default {name: 'App'
}
</script>
<style>
#app {font-family: 'Avenir', Helvetica, Arial, sans-serif;-webkit-font-smoothing: antialiased;-moz-osx-font-smoothing: grayscale;text-align: center;color: #2c3e50;margin-top: 60px;
}
</style>
import Vue from 'vue'
import App from './App'Vue.config.productionTip = false/* eslint-disable no-new */
new Vue({el: '#app',components: { App },template: '<App/>'
})1.5 创建 views 组件
在 src 目录下创建 views 文件夹来存储视图类的组件,在 views 文件夹下创建两个组件: Main.vue 组件来充当首页和 Login.vue 组件来充当登录页,内容如下所示:
<template><h1>首页</h1>
</template><script>
export default {name: "Main"
}
</script><style scoped></style>
<template><div><el-form ref="loginForm" :model="form" :rules="rules" label-width="8px" class="login-box"><h3 class="login-title">欢迎登录</h3><el-form-item label="账号" prop="username"><el-input type="text" placeholder="请输入账号" v-model="form.username"/></el-form-item><el-form-item label="密码" prop="password"><el-input type="password" placeholder="请输入密码" v-model="form.password"/></el-form-item><el-form-item><el-button type="primary"v-on:click="onSubmit('loginForm')">登录</el-button></el-form-item></el-form><el-dialog title="温馨提示":visible.sync="dialogVisible"width="30%":before-close="handleClose"><span>请输入账号和密码</span><span slot="footer" class="dialog-footer"><el-button type="primary"@click="dialogVisible = false">确 定</el-button></span></el-dialog></div>
</template><script>
export default {name: "Login",data(){return {form:{username:'',password:''},rules:{username:[{required: true,message:'账号不可为空',trigger:'blur'}],password:[{required: true,message:'密码不可为空',trigger:'blur'}]},// 对话框的显示和隐藏dialogVisible:false}},methods:{onSubmit(formName){// 为表单绑定验证功能this.$refs[formName].validate((valid) => {if(valid){// 使用 vue-router 路由到指定页面,该方式称之为编程式导航this.$router.push("/main");}else{this.dialogVisible =true;return false;}});}}
}
</script><style lang="scss" scoped>
.login-box {border: 1px solid #DCDFE6;width: 350px;margin: 180px auto;padding: 35px 35px 15px 35px;border-radius: 5px;-webkit-border-radius: 5px;-moz-border-radius: 5px;box-shadow: 0 0 25px #909399;
}
.login-title{text-align: center;margin:0 auto 40px auto;color:#303133;
}
</style>
1.6 创建 router 路由
在 src 目录下创建 router 文件夹用于存储路由的配置信息,并在 router 文件夹里创建 index.js 来配置路由信息 ,内容如下所示:
import Vue from 'vue'
import Router from 'vue-router'
import Main from '../views/Main'
import Login from '../views/Login'Vue.use(Router);export default new Router({routes:[{path:'/main',component:Main},{path:'/Login',component:Login}]
})
1.7 修改 main.js 和App.vue
修改 main.js 文件,将路由信息配置进去
import Vue from 'vue'
import App from './App'
import router from './router'// 官方规定的引入写法
import ElementUI from "element-ui";
import 'element-ui/lib/theme-chalk/index.css'Vue.use(router);
Vue.use(ElementUI)new Vue({el: '#app',router,render: h => h(App)
})
修改 App.vue,添加路由的组件信息,内容如下所示:
<template><div id="app"><router-link to="/login"></router-link><router-link to="/main"></router-link><router-view></router-view></div>
</template>
<script>export default {name: 'App'
}
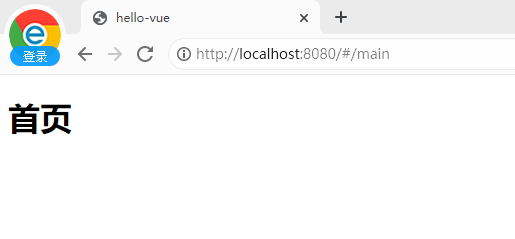
</script>1.8 测试
启动工程,如下所示:

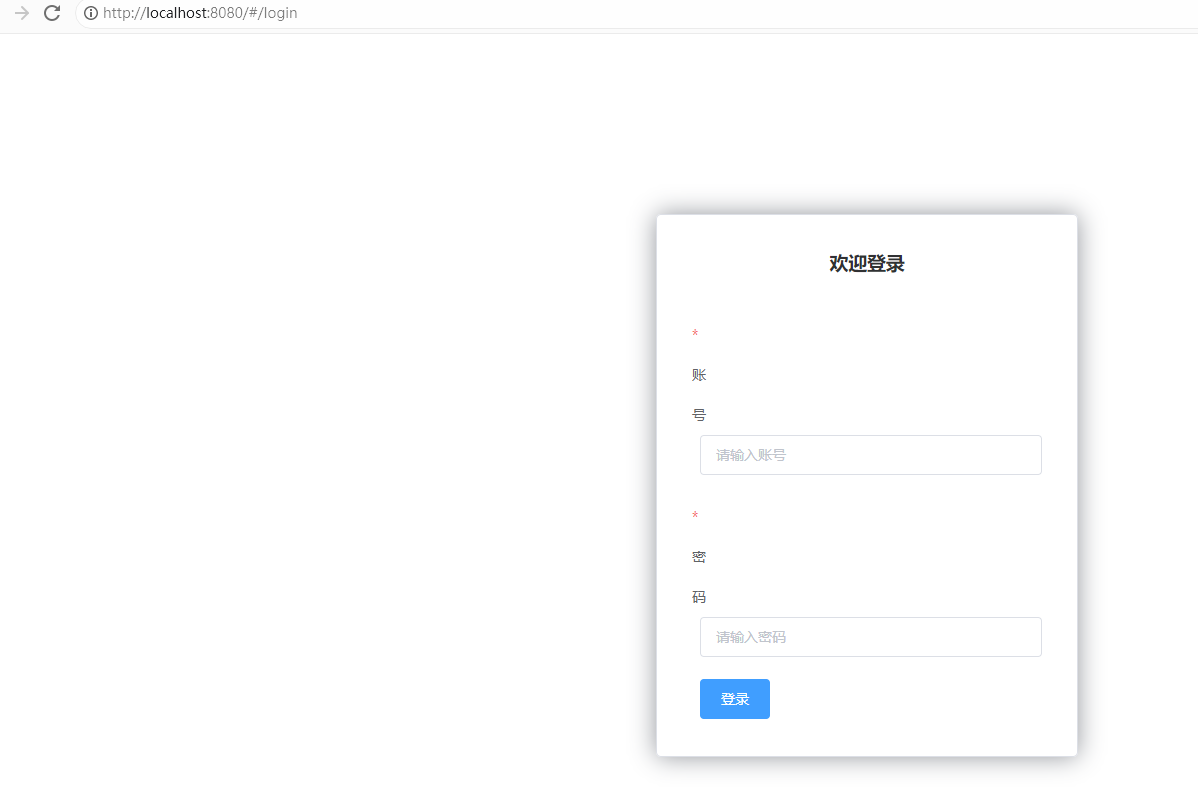
在地址栏的后缀输入login 如下所示:

随便输入账号和密码,点击登录,即可跳转到首页,如下所示:
1.9 总结
vue 整合 ElementUI,分为两步:
第一步:安装依赖
npm i element-ui -S第二步:在 main.js 中写入以下内容:
import Vue from 'vue';
import ElementUI from 'element-ui';
import 'element-ui/lib/theme-chalk/index.css';
import App from './App.vue';Vue.use(ElementUI);new Vue({el: '#app',render: h => h(App)
});
二、路由嵌套
2.1 简介
嵌套路由又称子路由,在实际应用中,通常由多层嵌套的组件组合而成。同样地,URL 中各段动态路径按某种结构对应嵌套的各层组件,说白了就是 vue 界面的部分内容发生变化,例如:

2.2 创建 user 目录
在 views 文件夹下新创建一个文件夹 user,并创建两个 vue 组件,List.vue 和 Profile.vue,内容如下所示:
<template><h1>用户列表</h1>
</template><script>
export default {name: "List"
}
</script>
<template><h1>个人信息</h1>
</template><script>
export default {name: "Profile"
}
</script>
2.3 修改 Main.vue
<template><div><el-container><el-aside width="200px"><el-menu :default-openeds="['1']"><el-submenu index="1"><template slot="title"><i class="el-icon-caret-right"></i>用户管理</template><el-menu-item-group><el-menu-item index="1-1"><router-link to="/user/profile">个人信息</router-link></el-menu-item><el-menu-item index="1-2"><router-link to="/user/list">用户列表</router-link></el-menu-item></el-menu-item-group></el-submenu><el-submenu index="2"><template slot="title"><i class="el-icon-caret-right"></i>内容管理</template><el-menu-item-group><el-menu-item index="2-1">分类管理</el-menu-item><el-menu-item index="2-2">内容列表</el-menu-item></el-menu-item-group></el-submenu></el-menu></el-aside><el-container><el-header style="text-align: right; font-size: 12px"><el-dropdown><i class="el-icon-setting" style="margin-right: 15px"></i><el-dropdown-menu slot="dropdown"><el-dropdown-item>个人信息</el-dropdown-item><el-dropdown-item>退出登录</el-dropdown-item></el-dropdown-menu></el-dropdown></el-header><el-main><router-view/></el-main></el-container></el-container></div>
</template><script>
export default {name: "Main"
}
</script><style  scoped lang="scss">
.el-header {background-color: yellow;color: blue;line-height: 60px;
}.el-aside {color: #333;
}
</style>
2.4 修改 router 路由
需要将新添加的两个 vue 组件配置到 router 的路由里面,即修改 router 文件夹下的 index.js,内容如下所示:
import Vue from 'vue'
import Router from 'vue-router'
import Main from '../views/Main'
import Login from '../views/Login'
import List from '../views/user/List'
import Profile from '../views/user/Profile'Vue.use(Router);export default new Router({routes:[{path:'/main',component:Main,// 配置嵌套路由children:[{ path:'/user/list',component:List},{ path:'/user/profile',component:Profile}]},{path:'/Login',component:Login}]
})
2.5 测试
启动工程,如下所示:
在地址栏的后缀输入 main 如下所示:

三、参数传递
3.1 修改 App.vue
<template><div><el-container><el-aside width="200px"><el-menu :default-openeds="['1']"><el-submenu index="1"><template slot="title"><i class="el-icon-caret-right"></i>用户管理</template><el-menu-item-group><el-menu-item index="1-1"><!--name 传组件名,params 传递参数,v-bind 进行对象绑定--><router-link v-bind:to="{name:'Profile222',params:{id:1}}">个人信息</router-link></el-menu-item><el-menu-item index="1-2"><router-link to="/user/list">用户列表</router-link></el-menu-item></el-menu-item-group></el-submenu><el-submenu index="2"><template slot="title"><i class="el-icon-caret-right"></i>内容管理</template><el-menu-item-group><el-menu-item index="2-1">分类管理</el-menu-item><el-menu-item index="2-2">内容列表</el-menu-item></el-menu-item-group></el-submenu></el-menu></el-aside><el-container><el-header style="text-align: right; font-size: 12px"><el-dropdown><i class="el-icon-setting" style="margin-right: 15px"></i><el-dropdown-menu slot="dropdown"><el-dropdown-item>个人信息</el-dropdown-item><el-dropdown-item>退出登录</el-dropdown-item></el-dropdown-menu></el-dropdown></el-header><el-main><router-view/></el-main></el-container></el-container></div>
</template><script>
export default {name: "Main"
}
</script><style  scoped lang="scss">
.el-header {background-color: yellow;color: blue;line-height: 60px;
}.el-aside {color: #333;
}
</style>
3.2 修改 router 路由
修改 router 文件夹下的 index.js,内容如下所示:
import Vue from 'vue'
import Router from 'vue-router'
import Main from '../views/Main'
import Login from '../views/Login'
import List from '../views/user/List'
import Profile from '../views/user/Profile'Vue.use(Router);export default new Router({routes:[{path:'/main',component:Main,// 配置嵌套路由children:[{path:'/user/list',component:List},{// 使用:id 进行参数接收path:'/user/profile/:id',name:'Profile222',component:Profile}]},{path:'/Login',component:Login}]
})
3.3 修改 Profile.vue 文件
<template><!--所有的元素必须不能在根节点下,必须被div 包裹--><div><h1>个人信息</h1>{{$route.params.id}}</div></template><script>
export default {name: "Profile"
}
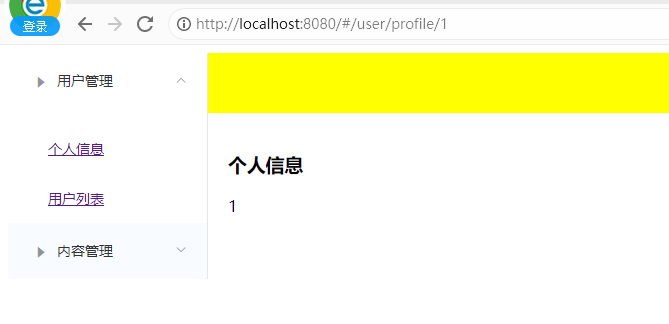
</script>3.4 测试
启动工程,如下所示:
在地址栏的后缀输入 main 如下所示:

3.5 第二种传参方式
App.vue 内容不用改动,修改 router 目录下的 index.js 内容如下所示:
import Vue from 'vue'
import Router from 'vue-router'
import Main from '../views/Main'
import Login from '../views/Login'
import List from '../views/user/List'
import Profile from '../views/user/Profile'Vue.use(Router);export default new Router({routes:[{path:'/main',component:Main,// 配置嵌套路由children:[{path:'/user/list',component:List},{// 第一种方式:使用:id 进行参数接收path:'/user/profile/:id',name:'Profile222',component:Profile,// 第二种方式:使用 props 来接收参数props:true}]},{path:'/Login',component:Login}]
})
修改 Profile.vue 文件,内容如下所示:
<template><!--所有的元素必须不能在根节点下,必须被div 包裹--><div><h1>个人信息</h1>{{id}}</div></template><script>
export default {props: ['id'],name: "Profile"
}
</script>
四、重定向
4.1 修改 Main.vue
<template><div><el-container><el-aside width="200px"><el-menu :default-openeds="['1']"><el-submenu index="1"><template slot="title"><i class="el-icon-caret-right"></i>用户管理</template><el-menu-item-group><el-menu-item index="1-1"><!--name 传组件名,params 传递参数,v-bind 进行对象绑定--><router-link v-bind:to="{name:'Profile222',params:{id:1}}">个人信息</router-link></el-menu-item><el-menu-item index="1-2"><router-link to="/user/list">用户列表</router-link></el-menu-item><!--用于测试重定向--><el-menu-item index="1-3"><router-link to="/goHome">回到首页</router-link></el-menu-item></el-menu-item-group></el-submenu><el-submenu index="2"><template slot="title"><i class="el-icon-caret-right"></i>内容管理</template><el-menu-item-group><el-menu-item index="2-1">分类管理</el-menu-item><el-menu-item index="2-2">内容列表</el-menu-item></el-menu-item-group></el-submenu></el-menu></el-aside><el-container><el-header style="text-align: right; font-size: 12px"><el-dropdown><i class="el-icon-setting" style="margin-right: 15px"></i><el-dropdown-menu slot="dropdown"><el-dropdown-item>个人信息</el-dropdown-item><el-dropdown-item>退出登录</el-dropdown-item></el-dropdown-menu></el-dropdown></el-header><el-main><router-view/></el-main></el-container></el-container></div>
</template><script>
export default {name: "Main"
}
</script><style  scoped lang="scss">
.el-header {background-color: yellow;color: blue;line-height: 60px;
}.el-aside {color: #333;
}
</style>
4.2 修改 router 路由
修改 router 文件夹下的 index.js,内容如下所示:
import Vue from 'vue'
import Router from 'vue-router'
import Main from '../views/Main'
import Login from '../views/Login'
import List from '../views/user/List'
import Profile from '../views/user/Profile'Vue.use(Router);export default new Router({routes:[{path:'/main',component:Main,// 配置嵌套路由children:[{path:'/user/list',component:List},{// 使用:id 进行参数接收path:'/user/profile/:id',name:'Profile222',component:Profile,props:true},{// 配置重定向信息path:'/goHome',redirect:'/main'}]},{path:'/Login',component:Login}]
})
4.3 测试
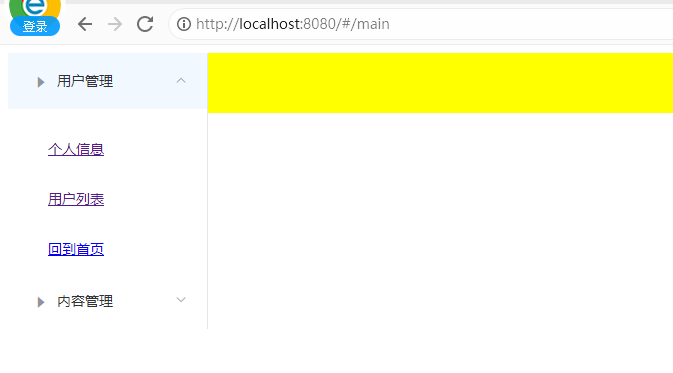
启动工程,如下所示:
在地址栏的后缀输入 main ,显示的内容如下所示,先点击个人信息,再点击回到首页,就可以发现地址栏发生了跳转。
五、显示当前登录的用户姓名
5.1 修改 Login.vue
<template><div><el-form ref="loginForm" :model="form" :rules="rules" label-width="8px" class="login-box"><h3 class="login-title">欢迎登录</h3><el-form-item label="账号" prop="username"><el-input type="text" placeholder="请输入账号" v-model="form.username"/></el-form-item><el-form-item label="密码" prop="password"><el-input type="password" placeholder="请输入密码" v-model="form.password"/></el-form-item><el-form-item><el-button type="primary"v-on:click="onSubmit('loginForm')">登录</el-button></el-form-item></el-form><el-dialog title="温馨提示":visible.sync="dialogVisible"width="30%":before-close="handleClose"><span>请输入账号和密码</span><span slot="footer" class="dialog-footer"><el-button type="primary"@click="dialogVisible = false">确 定</el-button></span></el-dialog></div>
</template><script>
export default {name: "Login",data(){return {form:{username:'',password:''},rules:{username:[{required: true,message:'账号不可为空',trigger:'blur'}],password:[{required: true,message:'密码不可为空',trigger:'blur'}]},// 对话框的显示和隐藏dialogVisible:false}},methods:{onSubmit(formName){// 为表单绑定验证功能this.$refs[formName].validate((valid) => {if(valid){// 传递当前用户输入的用户名参数this.$router.push("/main/"+this.form.username);}else{this.dialogVisible =true;return false;}});}}
}
</script><style lang="scss" scoped>
.login-box {border: 1px solid #DCDFE6;width: 350px;margin: 180px auto;padding: 35px 35px 15px 35px;border-radius: 5px;-webkit-border-radius: 5px;-moz-border-radius: 5px;box-shadow: 0 0 25px #909399;
}
.login-title{text-align: center;margin:0 auto 40px auto;color:#303133;
}
</style>
5.2 修改 router 路由
修改 router 文件夹下的 index.js,内容如下所示:
import Vue from 'vue'
import Router from 'vue-router'
import Main from '../views/Main'
import Login from '../views/Login'
import List from '../views/user/List'
import Profile from '../views/user/Profile'Vue.use(Router);export default new Router({routes:[{// 接收 login 传过来的参数path:'/main/:name',component:Main,// 允许接收参数props:true,// 配置嵌套路由children:[{path:'/user/list',component:List},{// 使用:id 进行参数接收path:'/user/profile/:id',name:'Profile222',component:Profile,props:true},{// 配置重定向信息path:'/goHome',redirect:'/main'}]},{path:'/Login',component:Login}]
})
5.3 修改 Main.vue
<template><div><el-container><el-aside width="200px"><el-menu :default-openeds="['1']"><el-submenu index="1"><template slot="title"><i class="el-icon-caret-right"></i>用户管理</template><el-menu-item-group><el-menu-item index="1-1"><!--name 传组件名,params 传递参数,v-bind 进行对象绑定--><router-link v-bind:to="{name:'Profile222',params:{id:1}}">个人信息</router-link></el-menu-item><el-menu-item index="1-2"><router-link to="/user/list">用户列表</router-link></el-menu-item><!--用于测试重定向--><el-menu-item index="1-3"><router-link to="/goHome">回到首页</router-link></el-menu-item></el-menu-item-group></el-submenu><el-submenu index="2"><template slot="title"><i class="el-icon-caret-right"></i>内容管理</template><el-menu-item-group><el-menu-item index="2-1">分类管理</el-menu-item><el-menu-item index="2-2">内容列表</el-menu-item></el-menu-item-group></el-submenu></el-menu></el-aside><el-container><el-header style="text-align: right; font-size: 12px"><el-dropdown><i class="el-icon-setting" style="margin-right: 15px"></i><el-dropdown-menu slot="dropdown"><el-dropdown-item>个人信息</el-dropdown-item><el-dropdown-item>退出登录</el-dropdown-item></el-dropdown-menu></el-dropdown><!--显示当前的用户信息--><span>{{name}}</span></el-header><el-main><router-view/></el-main></el-container></el-container></div>
</template><script>
export default {// 接收 name 参数props:['name'],name: "Main"
}
</script><style  scoped lang="scss">
.el-header {background-color: yellow;color: blue;line-height: 60px;
}.el-aside {color: #333;
}
</style>
5.4 测试
启动工程,网址后缀输入 login,并随便登录,如下所示:

六、路由钩子
相关文章:
Vue 整合 Element UI 、路由嵌套、参数传递、重定向、404和路由钩子(五)
一、整合 Element UI 1.1 工程初始化 使用管理员的模式进入 cmd 的命令行模式,创建一个名为 hello-vue 的工程,命令为: # 1、目录切换 cd F:\idea_home\vue# 2、项目的初始化,记得一路的 no vue init webpack hello-vue 1.2 安装…...

修改 Ubuntu 系统的时区
修改 Ubuntu 系统的时区 如果 Ubuntu 系统的时区设置不正确,您可以按照以下步骤进行调整: 1. 查看当前的时区设置,可以使用以下命令: timedatectl 这将显示当前系统的日期、时间和时区信息。 2. 如果时区设置不正…...

如何离线安装ModHeader - Modify HTTP headers Chrome插件?
如何离线安装ModHeader - Modify HTTP headers Chrome插件? 1.1 前言1.2 打开Chrome浏览器的开发者模式1.3 下载并解压打包好的插件1.4 解压下载好的压缩包1.5 加载插件1.6 如何使用插件? 1.1 前言 ModHeader 是一个非常好用的Chrome浏览器插件,可以用…...
在Linux中安装MySQL
在Linux中安装MySQL 检测当前系统中是否安装MySQL数据库 命令作用rpm -qa查询当前系统中安装的所有软件rpm -qa|grep mysql查询当前系统中安装的名称带mysql的软件rpm -qa | grep mariadb查询当前系统中安装的名称带mariadb的软件 RPM ( Red-Hat Package Manager )RPM软件包管理…...

python --windows获取启动文件夹路径/获取当前用户名/添加自启动文件
如何使用Python获取计算机用户名 一、Python自带的getpass模块可以用于获取用户输入的密码,但是它同样可以用来获取计算机用户名。 import getpassuser getpass.getuser() print("计算机用户名为:", user)二、使用os模块获取用户名 Python的…...

微信云托管(本地调试)⑥:nginx、vue刷新404问题
一、nginx默认路径 1.1、默认配置文件路径:/etc/nginx/nginx.conf 1.2、默认资源路径:/usr/share/nginx/html/index.html 二、修改nginx.conf配置 (注意配置中的:include /etc/nginx/conf.d/*.conf; 里面包了一个server配置文件…...

数据结构 二叉树(一篇基本掌握)
绪论 雄关漫道真如铁,而今迈步从头越。 本章将开始学习二叉树(全文共一万两千字),二叉树相较于前面的数据结构来说难度会有许多的攀升,但只要跟着本篇博客深入的学习也可以基本的掌握基础二叉树。 话不多说安全带系好&…...
-南丁格尔玫瑰图(二))
可视化绘图技巧100篇高级篇(四)-南丁格尔玫瑰图(二)
目录 前言 适用场景 不适用场景 堆积式南丁格尔玫瑰图( Nightingale Rose Diagram)...

Stable Diffusion - Candy Land (糖果世界) LoRA 提示词配置与效果展示
欢迎关注我的CSDN:https://spike.blog.csdn.net/ 本文地址:https://spike.blog.csdn.net/article/details/132145248 糖果世界 (Candy Land) 是一个充满甜蜜和奇幻的地方,由各种各样的糖果和巧克力构成。在糖果世界,可以看到&…...

ES6学习-module语法
Module语法 CommonJS模块 let { readfile } require(fs) # 等同于 let _fs require(fs) let readfile _fs.readfile //这种加载称为“运行时加载”ES6模块 import { stat, exists, readFile } from fs;这种加载称为“编译时加载”或者静态加载 静态加载带来的各种好处 …...

Flutter 实现按位置大小比例布局的控件
文章目录 前言一、如何实现?1、数值转成分数2、RowFlexible布局横向3、ColumnFlexible布局纵向 二、完整代码三、使用示例1、基本用法2、四分屏3、六分屏4、八分屏5、九分屏6、414分屏 总结 前言 做视频监控项目时需要需要展示多分屏,比如2x2、3x3、414…...

ES6 - 对象新增的一些常用方法
文章目录 1,Object.is()2,Object.asign()3,Object.getOwnPropertyDescriptors()4,Object.setPrototypeOf()和getPrototypeOf()5,Object.keys()、values() 和 entries()6,Object.fromEntries()7,…...

半导体存储电路
存储电路 存储单元:只能存储一位数据 寄存器:存储一组数据 存储单元 静态存储单元:包含锁存器和触发器,只要不断电,静态存储单元的状态会一直保持下去。 动态存储单元:利用电容的电荷存储效应来存储数据。…...

web前端之CSS操作
文章目录 一、CSS操作1.1 html元素的style属性1.2 元素节点的style属性1.3 cssText属性 二、事件2.1 事件处理程序2.1.1 html事件2.1.2 DOM0事件(适合单个事件)2.1.3 DOM2事件(适合多个事件) 2.2 事件之鼠标事件2.3 事件之Event事…...
Python SQLAlchemy ( ORM )
From Python中强大的通用ORM框架:SQLAlchemy:https://zhuanlan.zhihu.com/p/444930067Python ORM之SQLAlchemy全面指南:https://zhuanlan.zhihu.com/p/387078089 SQLAlchemy 文档:https://www.sqlalchemy.org/ SQLAlchemy入门和…...

鉴源实验室丨汽车网络安全运营
作者 | 苏少博 上海控安可信软件创新研究院汽车网络安全组 来源 | 鉴源实验室 社群 | 添加微信号“TICPShanghai”加入“上海控安51fusa安全社区” 01 概 述 1.1 背景 随着车辆技术的不断进步和智能化水平的提升,车辆行业正经历着快速的变革和技术进步。智能化…...

分布式链路追踪之SkyWalking详解和实战
SkyWalking 文章目录 SkyWalking1.SkyWalking概述2.SkyWalking架构设计3.SkyWalking部署4.应用程序接入SkyWalking5.SkyWalking配置应用告警5.1.告警规则5.2.Webhook(网络钩子)5.3.邮件告警实践 6.项目自动化部署接入SkyWalking6.1 整体思路6.2 启动参数…...

【工程实践】使用EDA(Easy Data Augmentation)做数据增强
工程项目中,由于数据量不够,经常需要用到数据增强技术,尝试使用EDA进行数据增强。 1.EDA简介 EDA是一种简单但是非常有效的文本数据增强方法,是由美国Protago实验室发表于 EMNLP-IJCNLP 2019 会议。EDA来自论文《EDA: Easy Data…...

ClickHouse(十三):Clickhouse MergeTree系列表引擎 - ReplicingMergeTree
进入正文前,感谢宝子们订阅专题、点赞、评论、收藏!关注IT贫道,获取高质量博客内容! 🏡个人主页:含各种IT体系技术,IT贫道_Apache Doris,大数据OLAP体系技术栈,Kerberos安全认证-CSDN博客 &…...

机器学习笔记之优化算法(十)梯度下降法铺垫:总体介绍
机器学习笔记之优化算法——梯度下降法铺垫:总体介绍 引言回顾:线搜索方法线搜索方法的方向 P k \mathcal P_k Pk线搜索方法的步长 α k \alpha_k αk 梯度下降方法整体介绍 引言 从本节开始,将介绍梯度下降法 ( Gradient Descent,GD ) …...
)
KAN网络实战:5分钟看懂如何用它‘可视化’发现物理定律(以安德森定域化为例)
KAN网络:用可视化方法发现物理定律的AI协作者 在科学研究的前沿,物理学家们常常需要从海量数据中识别出隐藏的规律和模式。传统的人工智能方法虽然能够提供预测结果,却往往难以解释其内部机制,这让科学家们难以信任和验证这些&quo…...

AssetStudio v0.16.5深度解析:Unity资源解包原理与工程化实践
1. 为什么你还在手动解包Unity游戏资源?AssetStudio不是“点开即用”的万能钥匙AssetStudio这个名字,听上去像某个高端建模插件,或者Unity官方出的资源管理器——其实它既不是Unity原生工具,也不带任何图形化向导。它是个开源、无…...

VHS Pro深度解析:Unity中模拟真实录像机信号链的原理与实践
1. 这不是“加个滤镜”那么简单:VHS Pro 的真实定位与行业缺口你打开 Unity Asset Store,搜“vhs”,会跳出二十多个插件。有的叫 VHS Effect,有的叫 Retro Tape,还有的直接叫 “80s Glitch”。点开预览图,全…...

技术选型翻车实录:我们选的那个框架,两年后停止维护了
一、惊魂一刻:框架停更的暴击“紧急通知,我们一直使用的XX测试框架将于本月底停止维护!”当这条消息出现在团队工作群时,整个测试部瞬间陷入死寂。作为一家中型电商企业的测试负责人,我清楚地知道,这个框架…...

画图比写论文还难?这款毕设神器直接救大命
大家好!今天给大家分享一下我用这款毕设论文画图神器的完整使用流程,从生成配图到 AI 老师解析,手把手教你,小白也能一看就会! 一、准备阶段:3 种方式提交需求,总有一种适合你 打开工具后&…...

2026网盘横评:国民级云盘领衔,这几款备选也值得一看
前言作为长期接触AI资源、代码项目、大文件存储的从业者,日常高频使用各类网盘。很多朋友都会纠结主流网盘该如何选择,不同产品的存储能力、传输表现、功能适配差距明显。本文摒弃夸张测评,以客观分享的视角,从传输、存储、功能、…...
)
软考中级《嵌入式系统设计师》全套备考资料(真题 + 教材 + 笔记)
大家好,今天给大家分享一份软考中级「嵌入式系统设计师」的完整备考资料包,从教材、真题到高频笔记全配齐,帮你省去整理资料的时间,直接进入高效备考状态! 📁 资料清单 这套资料覆盖了嵌入式系统设计师备考…...
)
ElevenLabs荷兰文语音生成速度对比实测:从4.2s→0.8s的WebSocket流式优化路径(附可复用代码片段)
更多请点击: https://intelliparadigm.com 第一章:ElevenLabs荷兰文语音生成速度对比实测:从4.2s→0.8s的WebSocket流式优化路径(附可复用代码片段) ElevenLabs 的 Dutch(nl-NL)语音合成在默认…...

多模态大模型技术入门:让 AI 看见世界
多模态大模型技术入门:让 AI 看见世界 前言 人类感知世界的方式是多模态的——我们能看到图像、听到声音、读到文字。多模态大模型(Multimodal LLM)正是让 AI 拥有类似能力的关键技术。从 GPT-4V 到 Claude 3,从开源的 LLaVA 到 C…...

知识竞赛实时排名:平分怎么处理?
知识竞赛实时排名算法:平分怎么处理?公平 精准 高效 让每一分都经得起推敲🎯 一、平分问题的核心挑战在知识竞赛中,当多位选手或队伍总分相同时,如何公平、高效地确定实时排名,是组织者面临的关键技术难…...