MySQL8.0.33二进制包安装与部署
官方文档
https://downloads.mysql.com/archives/community/https://dev.mysql.com/doc/refman/8.1/en/binary-installation.html官方文档操作步骤
# Preconfiguration setup
$> groupadd mysql
$> useradd -r -g mysql -s /bin/false mysql
# Beginning of source-build specific instructions
$> tar zxvf mysql-VERSION.tar.gz
$> cd mysql-VERSION
# Postinstallation setup
$> cd /usr/local/mysql
$> mkdir mysql-files
$> chown mysql:mysql mysql-files
$> chmod 750 mysql-files
$> bin/mysqld --initialize --user=mysql
$> bin/mysql_ssl_rsa_setup
$> bin/mysqld_safe --user=mysql &
# Next command is optional
$> cp support-files/mysql.server /etc/init.d/mysql.server
环境准备
[root@node01 ~]# yum remove mariadb
[root@node01 ~]# yum install libaio-devel -y
[root@node01 ~]# rm -rf /etc/my.cnf
创建用户组和用户
[root@node01 ~]# id mysql
id: mysql: no such user[root@node01 ~]# groupadd -g 54321 mysql[root@node01 ~]# useradd -r -g mysql -s /bin/false -u 54321 mysql
[root@node01 ~]# id mysql
uid=54321(mysql) gid=54321(mysql) groups=54321(mysql)
下载、解压缩、创建软链接
1、wget下载mysql[root@node01 ~]# wget https://downloads.mysql.com/archives/get/p/23/file/mysql-8.0.33-linux-glibc2.12-x86_64.tar2、解压缩[root@node01 ~]# tar -xf mysql-8.0.33-linux-glibc2.12-x86_64.tar
[root@node01 ~]# tar -xf mysql-8.0.33-linux-glibc2.12-x86_64.tar.xz -C /usr/local/cluster/3、创建软链接
[root@node01 ~]# ln -s /usr/local/cluster/mysql-8.0.33-linux-glibc2.12-x86_64/ /usr/local/mysql[root@node03 ~]# ll -h /usr/local/mysql/
total 292K
drwxr-xr-x  2 7161 31415 4.0K Mar 17 03:33 bin
drwxr-xr-x  2 7161 31415   38 Mar 17 03:33 docs
drwxr-xr-x  3 7161 31415  282 Mar 17 03:33 include
drwxr-xr-x  6 7161 31415  201 Mar 17 03:33 lib
-rw-r--r--  1 7161 31415 279K Mar 17 01:22 LICENSE
drwxr-xr-x  4 7161 31415   30 Mar 17 03:33 man
-rw-r--r--  1 7161 31415  666 Mar 17 01:22 README
drwxr-xr-x 28 7161 31415 4.0K Mar 17 03:33 share
drwxr-xr-x  2 7161 31415   77 Mar 17 03:33 support-files
创建数据目录
[root@node01 ~]# mkdir -p /data/mysql/3306/data
[root@node01 ~]# chown -R mysql:mysql /data/mysql/3306/data
参数配置
[root@node01 ~]# vim /etc/my.cnf[client]socket=/data/mysql/3306/data/mysql.sock
[mysql]
prompt="\\u@\\h [\\d]> "[mysqld]
basedir=/usr/local/mysql
datadir=/data/mysql/3306/data
user=mysql
port=3306
pid-file=/data/mysql/3306/data/mysql.pid
socket=/data/mysql/3306/data/mysql.sock
log-error=/data/mysql/3306/data/mysql.err
log-timestamps=systemmysqlx_port=33060
mysqlx_socket=/data/mysql/3306/data/mysqlx.sock
初始化数据库
默认使用/etc/my.cnf参数文件
[root@node01 ~]# /usr/local/mysql/bin/mysqld --defaults-file=/etc/my.cnf --user=mysql --initialize看到日志输出显示临时密码说明初始化成功
[root@node01 ~]# more /data/mysql/3306/data/mysql.err | grep temporary
2023-07-28T14:32:43.094407+08:00 6 [Note] [MY-010454] [Server] A temporary password is generated for root@localhost: d&e:Vf=ss4D<
启动数据库
[root@node01 ~]# /usr/local/mysql/bin/mysqld_safe --defaults-file=/etc/my.cnf &
[1] 77851
[root@node01 ~]# 2023-07-28T06:33:14.981353Z mysqld_safe Logging to '/data/mysql/3306/data/mysql.err'.
2023-07-28T06:33:15.026927Z mysqld_safe Starting mysqld daemon with databases from /data/mysql/3306/data[root@node01 ~]# ps -ef |grep mysql | grep -v grep
root      77851  69072  0 14:33 pts/1    00:00:00 /bin/sh /usr/local/mysql/bin/mysqld_safe --defaults-file=/etc/my.cnf
mysql     78013  77851 11 14:33 pts/1    00:00:03 /usr/local/mysql/bin/mysqld --defaults-file=/etc/my.cnf --basedir=/usr/local/mysql --datadir=/data/mysql/3306/data --plugin-dir=/usr/local/mysql/lib/plugin --user=mysql --log-error=/data/mysql/3306/data/mysql.err --pid-file=/data/mysql/3306/data/mysql.pid --socket=/data/mysql/3306/data/mysql.sock --port=3306
配置环境变量
[root@node01 ~]# vim .bash_profile
# .bash_profile# Get the aliases and functions
if [ -f ~/.bashrc ]; then. ~/.bashrc
fi# User specific environment and startup programsPATH=$PATH:$HOME/binexport PATHexport JAVA_HOME=/usr/local/cluster/jdk
export PATH=$PATH:$JAVA_HOME/bin
export MYSQL_HOME=/usr/local/mysql
export PATH=$PATH:$MYSQL_HOME/bin[root@node01 ~]# source .bash_profile
登录测试
登录成功
[root@node01 ~]# mysql -uroot -p -S /data/mysql/3306/data/mysql.sock
Enter password:
Welcome to the MySQL monitor.  Commands end with ; or \g.
Your MySQL connection id is 8
Server version: 8.0.33Copyright (c) 2000, 2023, Oracle and/or its affiliates.Oracle is a registered trademark of Oracle Corporation and/or its
affiliates. Other names may be trademarks of their respective
owners.Type 'help;' or '\h' for help. Type '\c' to clear the current input statement.
修改密码
[root@node01 ~]# mysql -uroot -p -S /data/mysql/3306/data/mysql.sock
Enter password:
Welcome to the MySQL monitor.  Commands end with ; or \g.
Your MySQL connection id is 8
Server version: 8.0.33Copyright (c) 2000, 2023, Oracle and/or its affiliates.Oracle is a registered trademark of Oracle Corporation and/or its
affiliates. Other names may be trademarks of their respective
owners.Type 'help;' or '\h' for help. Type '\c' to clear the current input statement.root@localhost [(none)]> select * from mysql.user\G
ERROR 1820 (HY000): You must reset your password using ALTER USER statement before executing this statement.
root@localhost [(none)]> alter user 'root'@'localhost' identified by 'oracle';
Query OK, 0 rows affected (0.00 sec)
使用配置文件启动
修改配置文件/usr/local/mysql/support-files/mysql.server通过查看配置文件/usr/local/mysql/support-files/mysql.server
basedir默认/usr/local/mysql
datadir默认/usr/local/mysql/data,修改为/data/mysql/3306/data
配置文件默认是/etc/my.cnf,不需要修改经过测试datadir不需要修改,因为配置文件默认是/etc/my.cnf,参数中指定了datadir的具体值[root@node01 ~]# vim /usr/local/mysql/support-files/mysql.serverbasedir=/usr/local/mysql
datadir=/data/mysql/3306/dataif test -z "$basedir"
thenbasedir=/usr/local/mysqlbindir=/usr/local/mysql/binif test -z "$datadir"thendatadir=/data/mysql/3306/datafisbindir=/usr/local/mysql/binlibexecdir=/usr/local/mysql/bin
elsebindir="$basedir/bin"if test -z "$datadir"thendatadir="$basedir/data"fisbindir="$basedir/sbin"libexecdir="$basedir/libexec"
fi使用配置文件/usr/local/mysql/support-files/mysql.server启动[root@node01 ~]# /usr/local/mysql/support-files/mysql.server start
Starting MySQL................ SUCCESS![root@node01 ~]# /usr/local/mysql/support-files/mysql.server statusSUCCESS! MySQL running (102015)[root@node01 ~]# /usr/local/mysql/support-files/mysql.server stop
Shutting down MySQL... SUCCESS!
配置systemctl服务
[root@node01 ~]# vim /usr/lib/systemd/system/mysqld.service[Unit]
Description=MySQL Server
Documentation=man:mysqld(8)
Documentation=http://dev.mysql.com/doc/refman/en/using-systemd.html
After=network.target
After=syslog.target[Install]
WantedBy=multi-user.target[Service]
User=mysql
Group=mysql
Type=notify
TimeoutSec=0# Execute pre and post scripts as root
PermissionsStartOnly=true# Start main service
#ExecStart=/usr/local/mysql/support-files/mysql.server start
ExecStart=/usr/local/mysql/bin/mysqld --defaults-file=/etc/my.cnf $MYSQLD_OPTS# Use this to switch malloc implementation
#EnvironmentFile=-/etc/sysconfig/mysql# Sets open_files_limit
@LimitNOFILE = 5000Restart=on-failure
RestartPreventExitStatus=1PrivateTmp=false加载服务
[root@node01 ~]# systemctl daemon-reload
设置开机自启
[root@node01 ~]# systemctl enable mysqld.service[root@node01 ~]# systemctl start mysqld.service
[root@node01 ~]# systemctl status mysqld.service
[root@node01 ~]# systemctl stop mysqld.service[root@node01 ~]# systemctl disable mysqld.service
[root@node01 ~]# systemctl is-enabled mysqld.service[root@node01 ~]# systemctl status mysqld.service
● mysqld.service - MySQL ServerLoaded: loaded (/usr/lib/systemd/system/mysqld.service; disabled; vendor preset: disabled)Active: inactive (dead)Docs: man:mysqld(8)http://dev.mysql.com/doc/refman/en/using-systemd.htmlJul 27 19:20:44 node01 systemd[1]: [/usr/lib/systemd/system/mysqld.service:28] Unknown lvalue '@LimitNOFILE' in section 'Service'启动mysql
[root@node01 ~]# systemctl start mysqld.service
[root@node01 ~]# systemctl status mysqld.service
● mysqld.service - MySQL ServerLoaded: loaded (/usr/lib/systemd/system/mysqld.service; disabled; vendor preset: disabled)Active: active (running) since Thu 2023-07-27 19:24:00 CST; 2s agoDocs: man:mysqld(8)http://dev.mysql.com/doc/refman/en/using-systemd.htmlProcess: 113461 ExecStart=/usr/local/mysql/support-files/mysql.server start (code=exited, status=0/SUCCESS)Main PID: 113725 (mysqld)Tasks: 39Memory: 291.3MCGroup: /system.slice/mysqld.service├─113474 /bin/sh /usr/local/mysql/bin/mysqld_safe --datadir=/data/mysql --pid-file=/data/mysql/mysql.pid└─113725 /usr/local/mysql/bin/mysqld --basedir=/usr/local/mysql --datadir=/data/mysql --plugin-dir=/usr/local/mysql/li...Jul 27 19:23:59 node01 systemd[1]: Starting MySQL Server...
Jul 27 19:24:00 node01 systemd[1]: mysqld.service: Supervising process 113725 which is not our child. We'll most likely no... exits.
Jul 27 19:24:00 node01 systemd[1]: Started MySQL Server.
Hint: Some lines were ellipsized, use -l to show in full.[root@node01 ~]# ps -ef |grep mysql
mysql    113474      1  0 19:23 ?        00:00:00 /bin/sh /usr/local/mysql/bin/mysqld_safe --datadir=/data/mysql --pid-file=/data/mysql/mysql.pid
mysql    113725 113474  4 19:23 ?        00:00:00 /usr/local/mysql/bin/mysqld --basedir=/usr/local/mysql --datadir=/data/mysql --plugin-dir=/usr/local/mysql/lib/plugin --log-error=/data/mysql/mysql.err --pid-file=/data/mysql/mysql.pid --port=3306
root     113895 107141  0 19:24 pts/1    00:00:00 grep --color=auto mysql
配置文件最终版
[root@node01 ~]# more /usr/lib/systemd/system/mysqld.service
[Unit]
Description=MySQL Server
Documentation=man:mysqld(8)
Documentation=http://dev.mysql.com/doc/refman/en/using-systemd.html
After=network.target
After=syslog.target[Install]
WantedBy=multi-user.target[Service]
User=mysql
Group=mysql
Type=notify
TimeoutSec=0# Execute pre and post scripts as root
PermissionsStartOnly=true# Start main service
ExecStart=/usr/local/mysql/bin/mysqld --defaults-file=/etc/my.cnf $MYSQLD_OPTS# Use this to switch malloc implementation
#EnvironmentFile=-/etc/sysconfig/mysql# Sets open_files_limit
@LimitNOFILE = 5000Restart=on-failure
RestartPreventExitStatus=1PrivateTmp=false
相关文章:

MySQL8.0.33二进制包安装与部署
官方文档 https://downloads.mysql.com/archives/community/https://dev.mysql.com/doc/refman/8.1/en/binary-installation.html官方文档操作步骤 # Preconfiguration setup $> groupadd mysql $> useradd -r -g mysql -s /bin/false mysql # Beginning of source-build…...

RocketMQ发送消息失败:error CODE: 14 DESC: service not available now, maybe disk full
在执行业务时,发现MQ控制台没有查询到消息,在日志中发现消息发送失败,报错error CODE: 14 DESC: service not available now, maybe disk full 分析报错应该是磁盘空间不足,导致broker不能进行正常的消息存储刷盘,去查…...

1.Fay-UE5数字人工程导入(UE数字人系统教程)
非常全面的数字人解决方案(含源码) Fay-UE5数字人工程导入 1、工程下载:xszyou/fay-ue5: 可对接fay数字人的ue5工程 (github.com) 2、ue5下载安装:Unreal Engine 5 3、ue5插件安装 依次安装以下几个插件 4、双击运行工程 5、切换中文 6、检…...

Linux 终端操作命令(2)内部命令分类
Linux 终端操作命令 也称Shell命令,是用户与操作系统内核进行交互的命令解释器,它接收用户输入的命令并将其传递给操作系统进行执行,可分为内部命令和外部命令。内部命令是Shell程序的一部分,而外部命令是独立于Shell的可执行程序…...

【数据结构与算法】十大经典排序算法-插入排序
🌟个人博客:www.hellocode.top 🏰Java知识导航:Java-Navigate 🔥CSDN:HelloCode. 🌞知乎:HelloCode 🌴掘金:HelloCode ⚡如有问题,欢迎指正&#…...

如何使用PHP Smarty进行条件判断和循环?
欢迎来到PHP Smarty的世界!如果你想要在Smarty中执行条件判断和循环,那么你需要了解一些基本的语法和结构。 首先,让我们从条件判断开始吧!在Smarty中,你可以使用{if}、{elseif}和{else}语句来进行条件判断。这些语句的…...

使用svg生成图像
使用svg生成图像 每个HTML开发人员都应该对可伸缩的向量图形有一个基本的理解。本文会通过使用svg创建一个雨伞图像来介绍一下svg的基本知识。 svg介绍 SVG 意为可缩放矢量图形(Scalable Vector Graphics)。是一种可以在HTML中创建图像的方式。 我们…...

DNS、ARP
目录 DNS以及它的用途 DNS的解析方式 DNS的查询方式 DNS使用TCP/UDP DNS劫持 常见的DNS劫持现象 DNS劫持与HTTP劫持的不同 处理DNS劫持 DNS缓存 DNS实现负载均衡 ARP以及他的工作原理 DNS以及它的用途 DNS是域名解析服务器,用来将域名解析成IP。DNS工作在…...
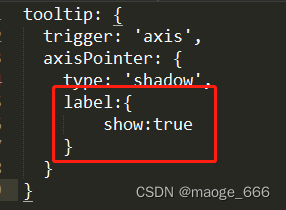
uniapp 微信小程序 echarts地图 点击显示类目
效果如图: 在tooltip内axisPointer内添加 label:{show:true} 即可显示“请求离婚”的标题...

速刷算法#Day-02
有序数组的平方 方法一:暴力求解 排序 暴力先求平方,然后NT直接用sort这个方法首先对数组中的每个元素求平方,然后进行排序。下面是对应的C代码: class Solution { public:vector<int> SortedSquare(vector<int>&…...

Java怎么手动将对象注入到springboot
在Java中,可以使用Spring的ApplicationContext来手动将对象注入到Spring Boot中。 1. 首先,确保你已经在Spring Boot应用程序中引入了Spring的依赖,比如 spring-boot-starter 。 2. 在你的类中注入ApplicationContext对象: Autowi…...

twisted 18.7.0 requires PyHamcrest>=1.9.0 解决方案
大家好,我是爱编程的喵喵。双985硕士毕业,现担任全栈工程师一职,热衷于将数据思维应用到工作与生活中。从事机器学习以及相关的前后端开发工作。曾在阿里云、科大讯飞、CCF等比赛获得多次Top名次。现为CSDN博客专家、人工智能领域优质创作者。喜欢通过博客创作的方式对所学的…...

电脑关机程序
//关机程序 1、电脑运行起来后,1分钟内关机。 2、如果输入:我是猪。就取消关机。 #include<stdio.h> #include<string.h> int main() { char input[20] { 0 }; system("shutdown -s -t 60"); again: printf(&quo…...

构建之法 - 软工教学:每天都向前推进一点点
作者:福州⼤学 汪璟玢⽼师 汪老师:每次都向前推进一点点,哪怕只有一点点,也好过什么都不做。 邹老师:对,几个学期下来,就已经超过那些“空想”的团队很远了。坚持下去! 汪老师&…...

基于Qlearning强化学习的路径规划算法matlab仿真
目录 1.算法运行效果图预览 2.算法运行软件版本 3.部分核心程序 4.算法理论概述 4.1 Q值更新规则 4.2 基于Q-learning的路径规划算法设计 4.3 Q-learning路径规划流程 5.算法完整程序工程 1.算法运行效果图预览 2.算法运行软件版本 MATLAB2022A 3.部分核心程序 ..…...

ASL国产CS5213 转VGA信号输出音频 替代AG6200安格芯片 HDMI to VGA(带音频)方案设计原理图
CS5213功能:HDMI转VGA带音频输出,专注于设计HDMI转VGA带音频输出。可替代AG6200 AG6201。 CS5213芯片是一个HDMI(高清多媒体接口)到VGA桥接芯片。 它将HDMI信号转换为标准VGA信号它可以在适配器、智能电缆等设备中设计。 Capst…...
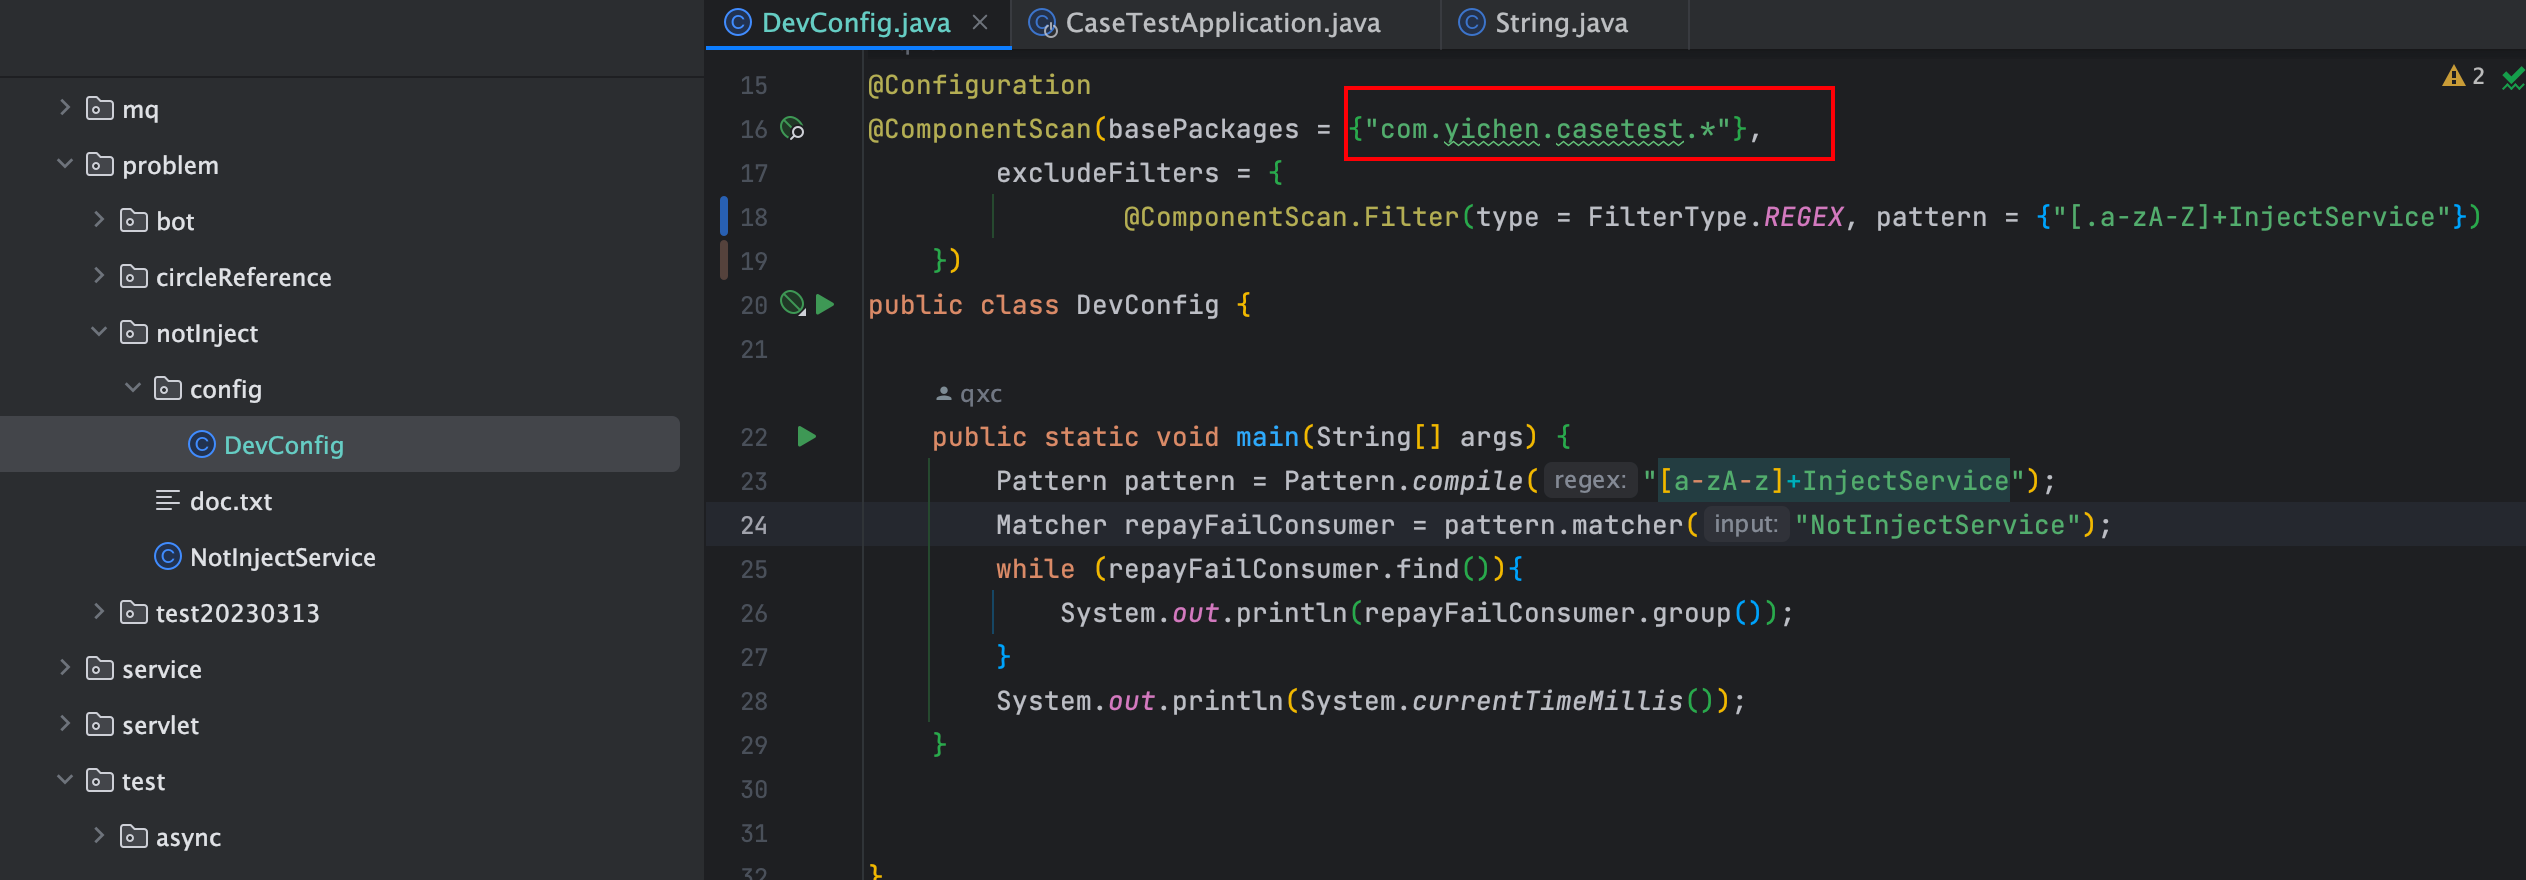
springboot启动忽略某些类
springboot启动忽略某些类 描述解决方案单拉一个提交,把所有的涉及kafka消费的都不注入容器通过配置ComponentScan的excludeFilters配置了不生效后续处理改之前改之后解释 总结 拆分环境 感触解决实现demo参考 描述 目前我这的开发环境和测试环境数据库是两份&#…...

HCIA VLAN配置
目录 一、VLAN(虚拟局域网 ) 二、VLAN配置思路 三、配置命令 1、创建vlan 单个创建: 批量创建: 2、交换机上的各个接口划分到对应的vlan中 单个操作: 批量操作: 3、trunk…...

微信小程序--原生
1:数据绑定 1:数据绑定的基本原则 2:在data中定义页面的数据 3:Mustache语法 4:Mustache的应用场景 1:常见的几种场景 2:动态绑定内容 3:动态绑定属性 4:三元运算 4&am…...

Django快速上手
1. 安装Django Django 4.x的版本只支持MySQL8及以上的版本了。如果mysql版本比较老,需要使用老版本的django。此处指定django版本为3.2.20 pip install -i https://pypi.tuna.tsinghua.edu.cn/simple django3.2.202. 创建项目 创建项目 在指定目录使用命令行创建项…...

终极指南:如何高效使用Audio Slicer实现智能音频分割
终极指南:如何高效使用Audio Slicer实现智能音频分割 【免费下载链接】audio-slicer A simple GUI application that slices audio with silence detection 项目地址: https://gitcode.com/gh_mirrors/aud/audio-slicer 你是否曾为处理长音频文件而烦恼&…...

React Native Decompiler:解密打包代码的3个核心优势
React Native Decompiler:解密打包代码的3个核心优势 【免费下载链接】react-native-decompiler Decompile React Native bundles 项目地址: https://gitcode.com/gh_mirrors/rea/react-native-decompiler 你是否曾经面对React Native打包后的代码感到无从下…...

BetterGI原神AI助手:300%效率提升的终极自动化游戏指南
BetterGI原神AI助手:300%效率提升的终极自动化游戏指南 【免费下载链接】better-genshin-impact 📦BetterGI 更好的原神 - 自动拾取 | 自动剧情 | 全自动钓鱼(AI) | 全自动七圣召唤 | 自动伐木 | 自动刷本 | 自动采集/挖矿/锄地 | 一条龙 | 全连音游 - …...

显微图像拼接的三大困境与MIST的突破性解决方案
显微图像拼接的三大困境与MIST的突破性解决方案 【免费下载链接】MIST Microscopy Image Stitching Tool 项目地址: https://gitcode.com/gh_mirrors/mist3/MIST 你是否曾经面对数百张高分辨率显微图像,却苦于找不到一个既快速又精准的拼接工具?当…...

突破Cursor API限制:cursor-free-vip架构解密与设备指纹重构技术深度解析
突破Cursor API限制:cursor-free-vip架构解密与设备指纹重构技术深度解析 【免费下载链接】cursor-free-vip [Support 0.45](Multi Language 多语言)自动注册 Cursor Ai ,自动重置机器ID , 免费升级使用Pro 功能: Youv…...

终极电路设计解决方案:如何用Draw.io ECE库高效绘制专业电路图
终极电路设计解决方案:如何用Draw.io ECE库高效绘制专业电路图 【免费下载链接】Draw-io-ECE Custom-made draw.io-shapes - in the form of an importable library - for drawing circuits and conceptual drawings in draw.io. 项目地址: https://gitcode.com/g…...

使用Spring AI Alibaba构建智能体Agent妒
背景 在软件开发的漫长旅途中,"构建"这个词往往让人又爱又恨。爱的是,一键点击,代码变成产品,那是程序员最迷人的时刻;恨的是,维护那一堆乱糟糟的构建脚本,简直是噩梦。 在很多项目中…...

RAG 还是 Lucene:私有化部署客服系统的 AI 知识库架构选型窗
在之前的文章中,我们花了大量的篇幅,从记录后端pod真实ip开始说起,然后引入envoy,再解决了各种各样的需求:配置自动重载、流量劫持、sidecar自动注入,到envoy的各种能力:熔断、流控、分流、透明…...

Android开发实战:利用BluetoothDevice精准获取蓝牙设备地址
1. 蓝牙设备地址的基础认知 在开始动手写代码之前,我们先要搞清楚蓝牙设备地址到底是什么。简单来说,蓝牙设备地址就像是每个蓝牙设备的身份证号码,全球唯一且不会重复。它由6个字节组成,通常表示为12个十六进制数字,中…...

ESP居然能当 DNS 服务器用?内含NCSI欺骗和DNS劫持实现肚
前言 Kubernetes 本身并不复杂,是我们把它搞复杂的。无论是刻意为之还是那种虽然出于好意却将优雅的原语堆砌成 鲁布戈德堡机械 的狂热。平台最初提供的 ReplicaSets、Services、ConfigMaps,这些基础组件简单直接,甚至显得有些枯燥。但后来我…...