Elasticsearch安装,Springboot整合Elasticsearch详细教程
Elasticsearch 是一个分布式、RESTful 风格的搜索和数据分析引擎,能够实现近乎实时的搜索。
Elasticsearch官网![]() https://www.elastic.co/cn/
https://www.elastic.co/cn/
这篇文章主要简单介绍一下Elasticsearch,Elasticsearch的java API博主也在学习中,文章会持续更新~
目录
第一步:下载Elasticsearch
下载7.6.2版本
下载其他版本
第二步:安装Elasticsearch
第三步:安装kibana
第四步:Springboot整合Elasticsearch
1、创建springboot项目
2、在pom.xml中添加依赖
3、修改配置文件
4、创建数据库和es的实体类
5 、创建mapper接口及映射文件
6、创建Elasticsearch的查询接口
7、开启mapper包扫描
第五步:从mysql导入数据到es
第六步:学习DSL
1、无条件查询,默认返回10条数据
2、指定返回的数据条数
3、指定查询字段
4、分页查询
5、查询指定ID的数据
6、删除索引
7、条件查询
第七步:在java中使用Elasticsearch
1、通过ElasticsearchRepository
2、通过ElasticsearchRestTemplate
3、通过RestHighLevelClient
第一步:下载Elasticsearch
下载7.6.2版本
文章中使用的Elasticsearch版本是7.6.2,可以通过以下网盘链接下载,里面有7.6.2版本的ik分词器,链接永久有效。
elasticsearch7.6.2下载![]() https://pan.baidu.com/s/1D_HS8w_WW3dfQllGzNGv8A?pwd=p3aa
https://pan.baidu.com/s/1D_HS8w_WW3dfQllGzNGv8A?pwd=p3aa
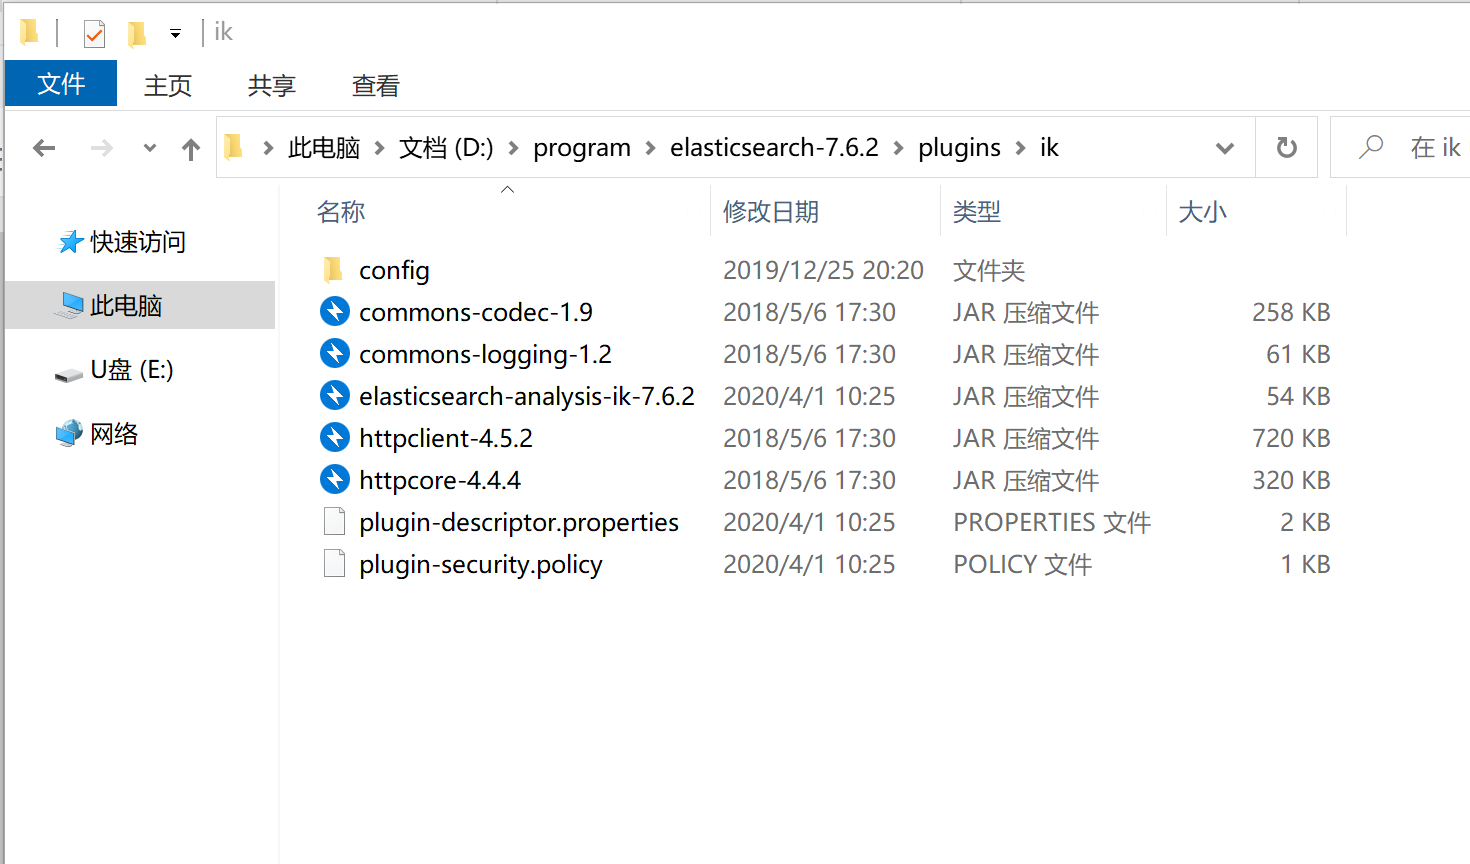
下载完成后,把下面选中的Elasticsearch压缩文件解压到D盘

然后把ik分词器解压到Elasticsearch的plugins目录下,并把文件夹名称修改为ik。
下载其他版本
如需安装其他版本,可自行在官网下载。
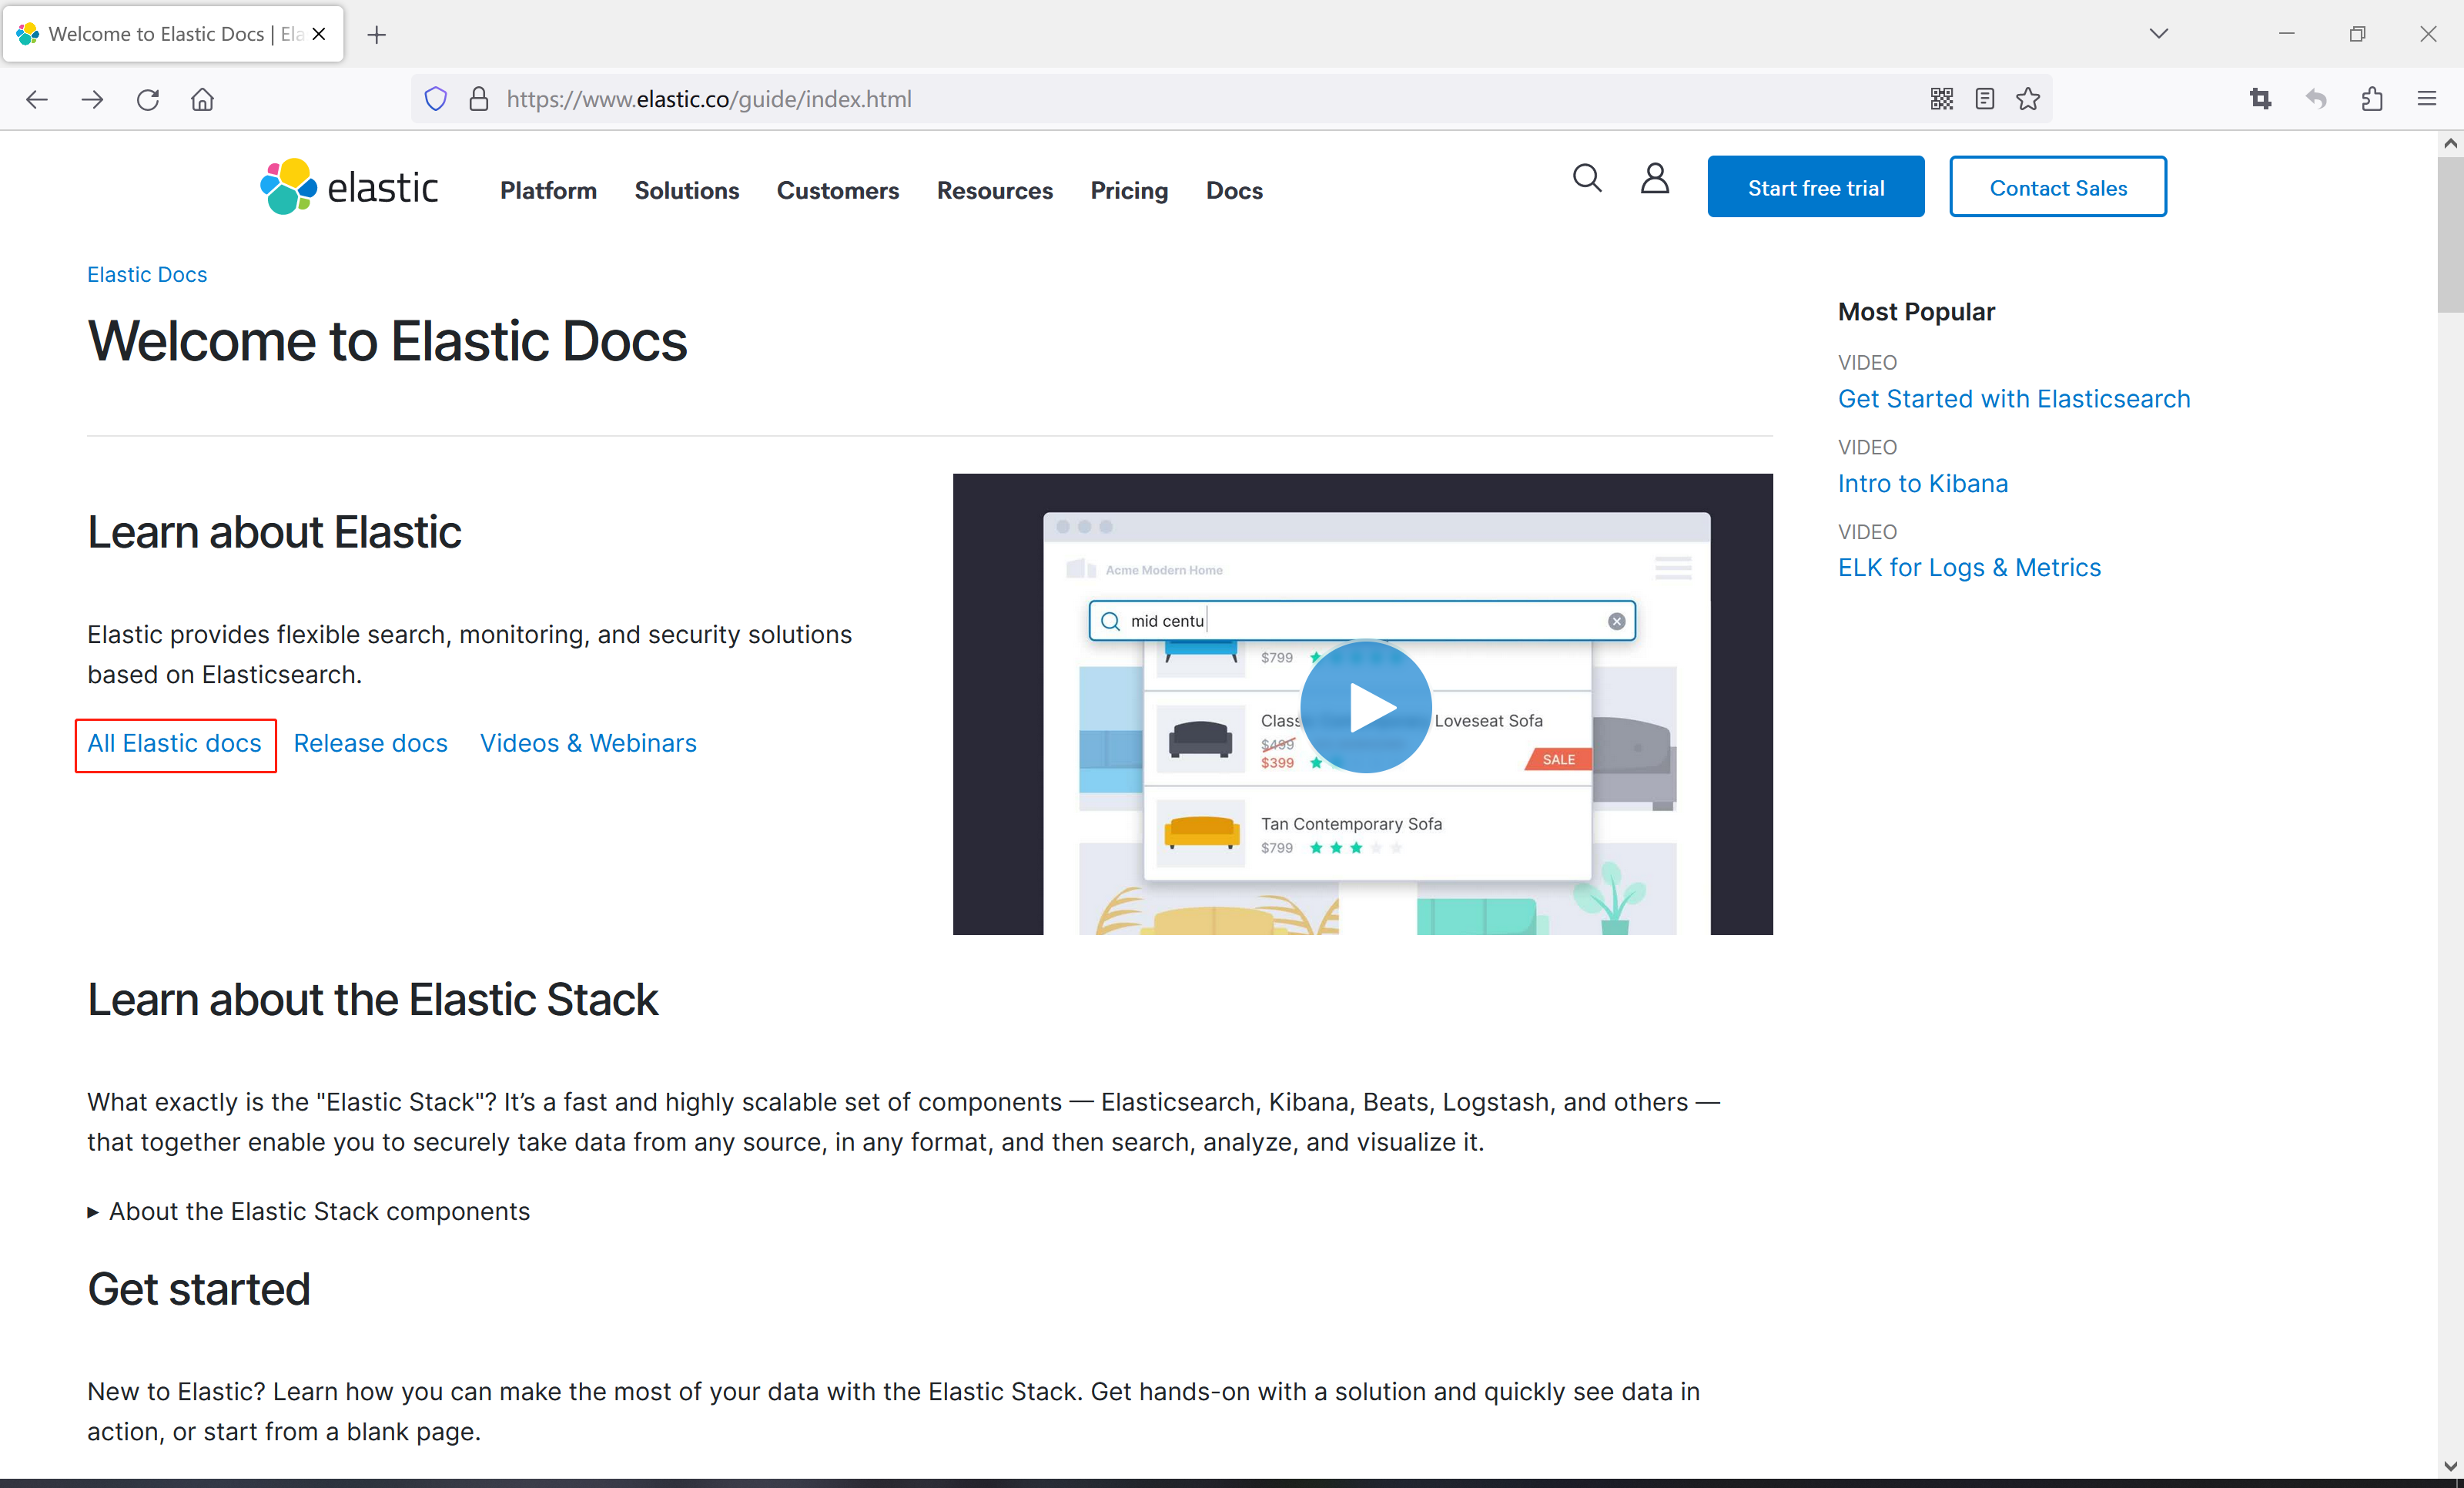
1、访问官网,在首页点击页面上方的【文档】

2、点击All Elastic docs
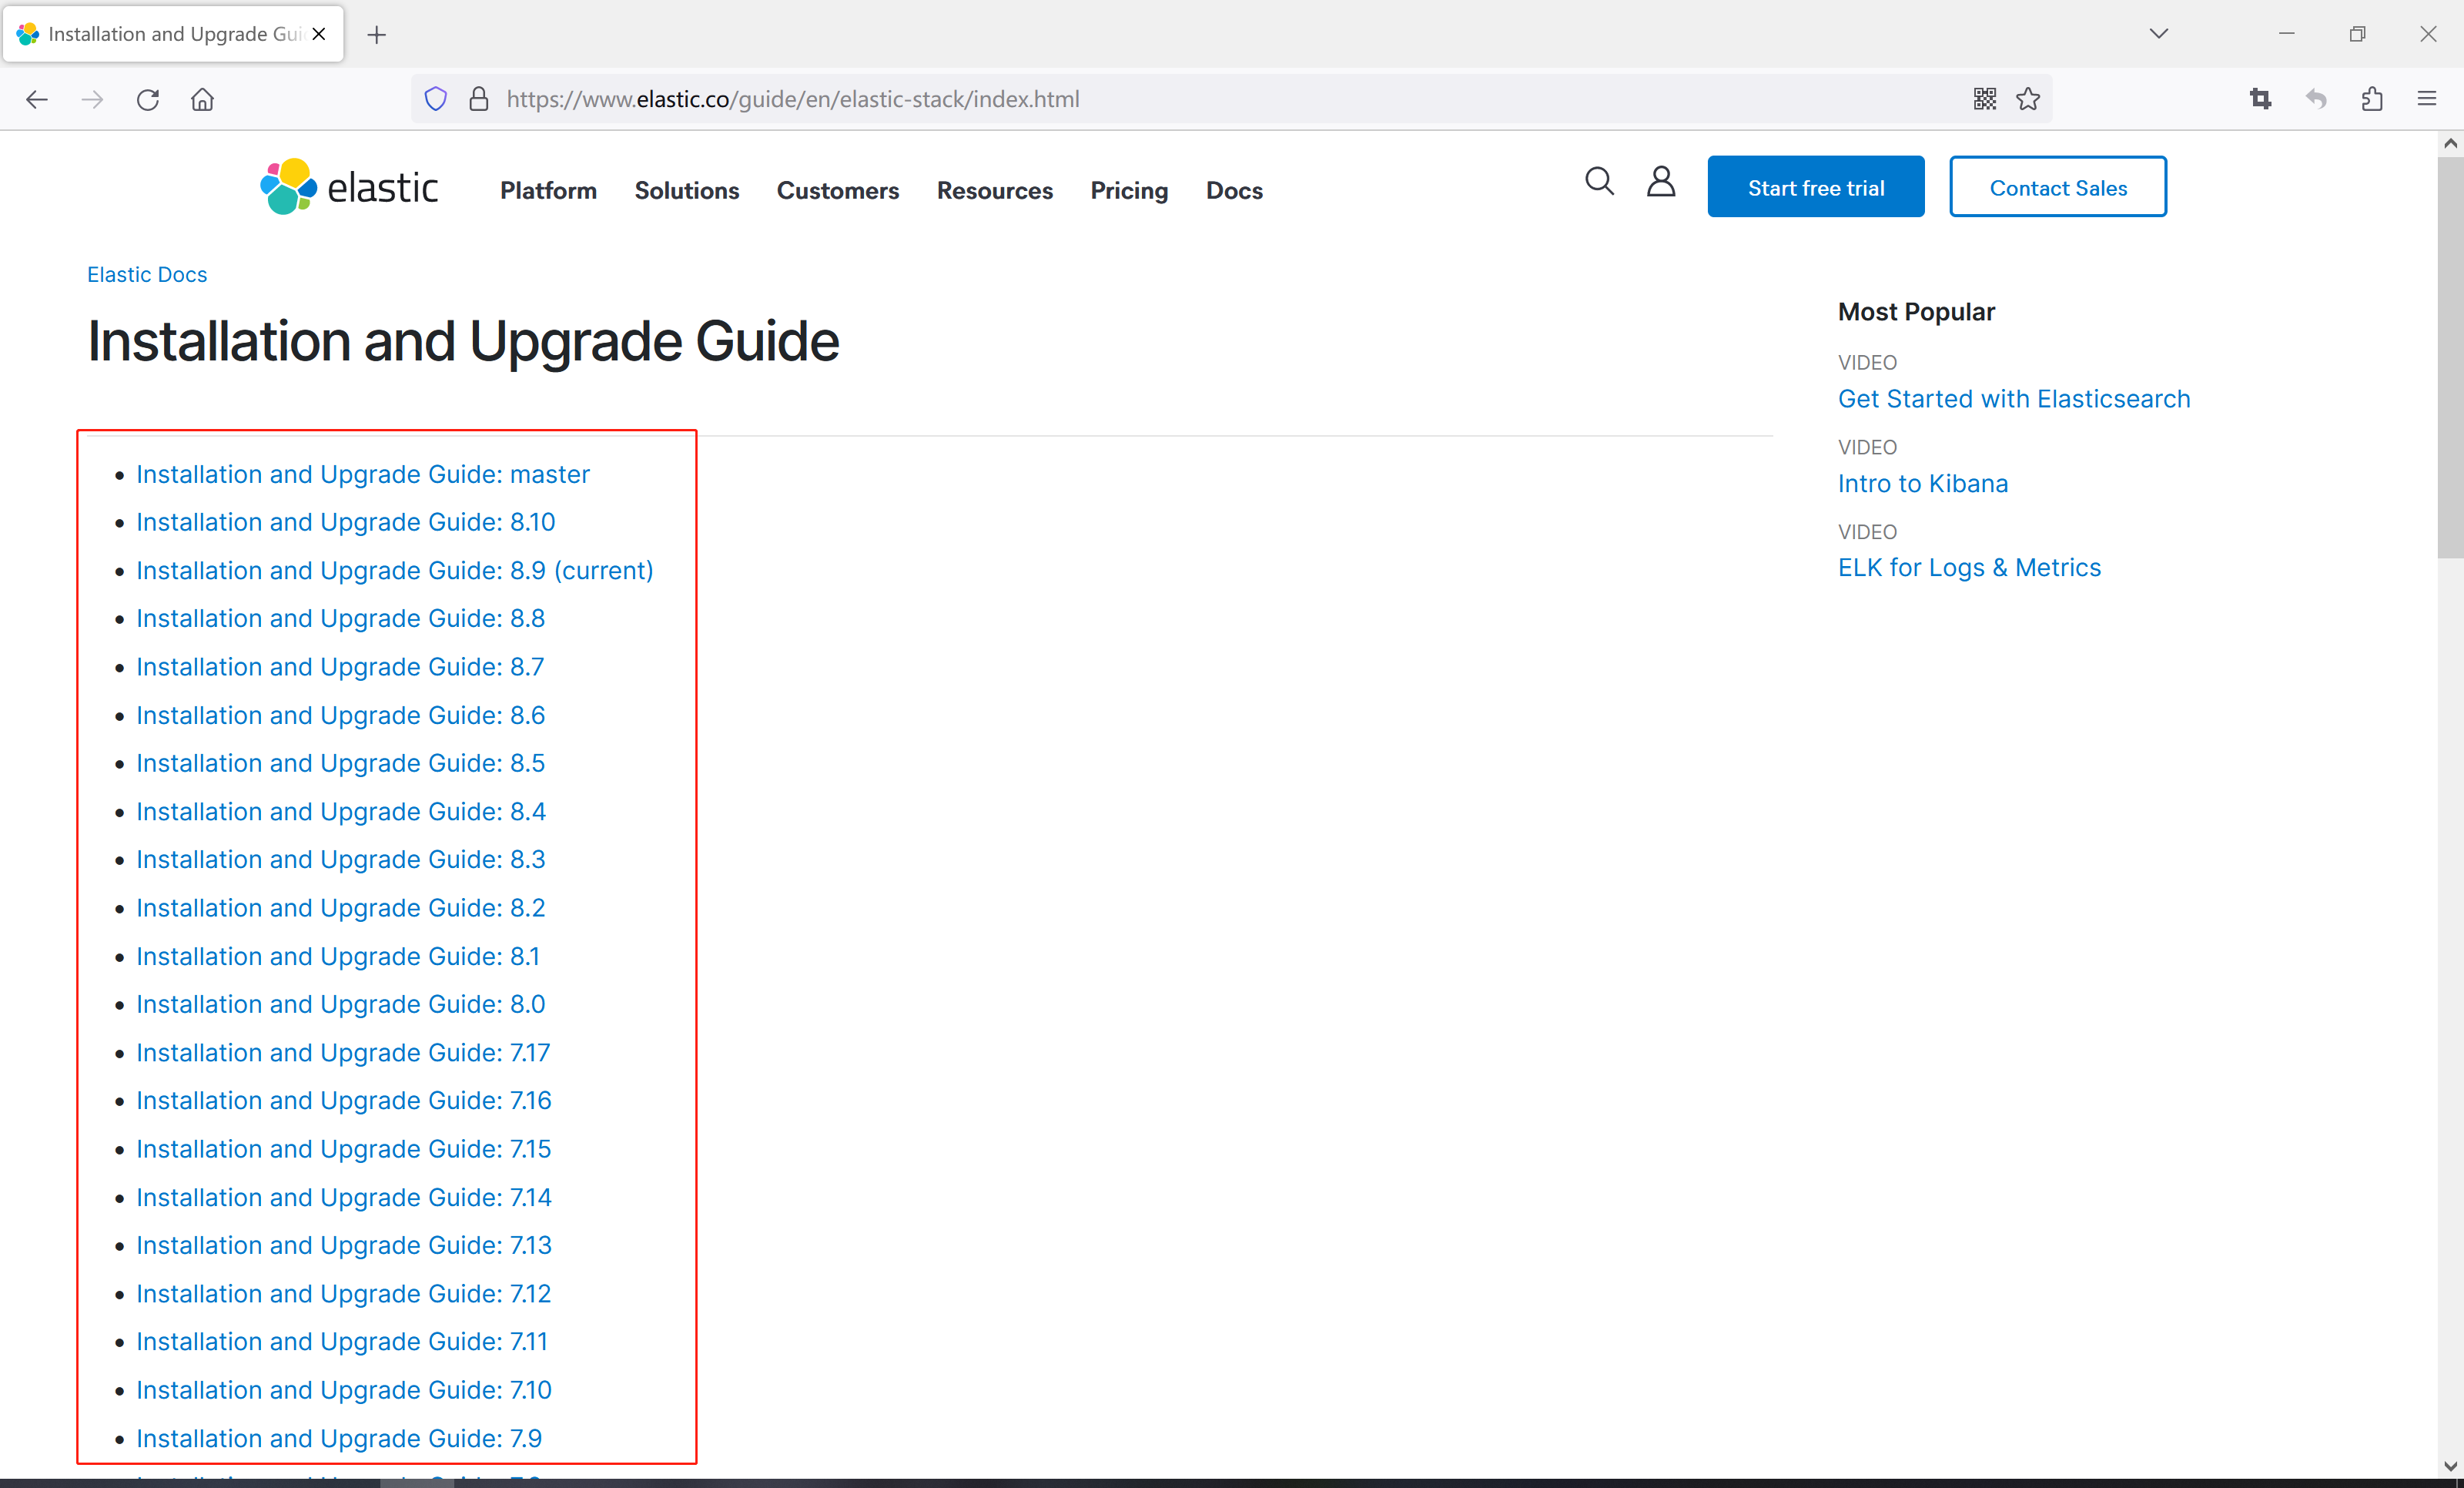
3、点击选择other versions

4、在左侧版本列表选择对应的版本,点击对应链接,比如选择7.6.2版本
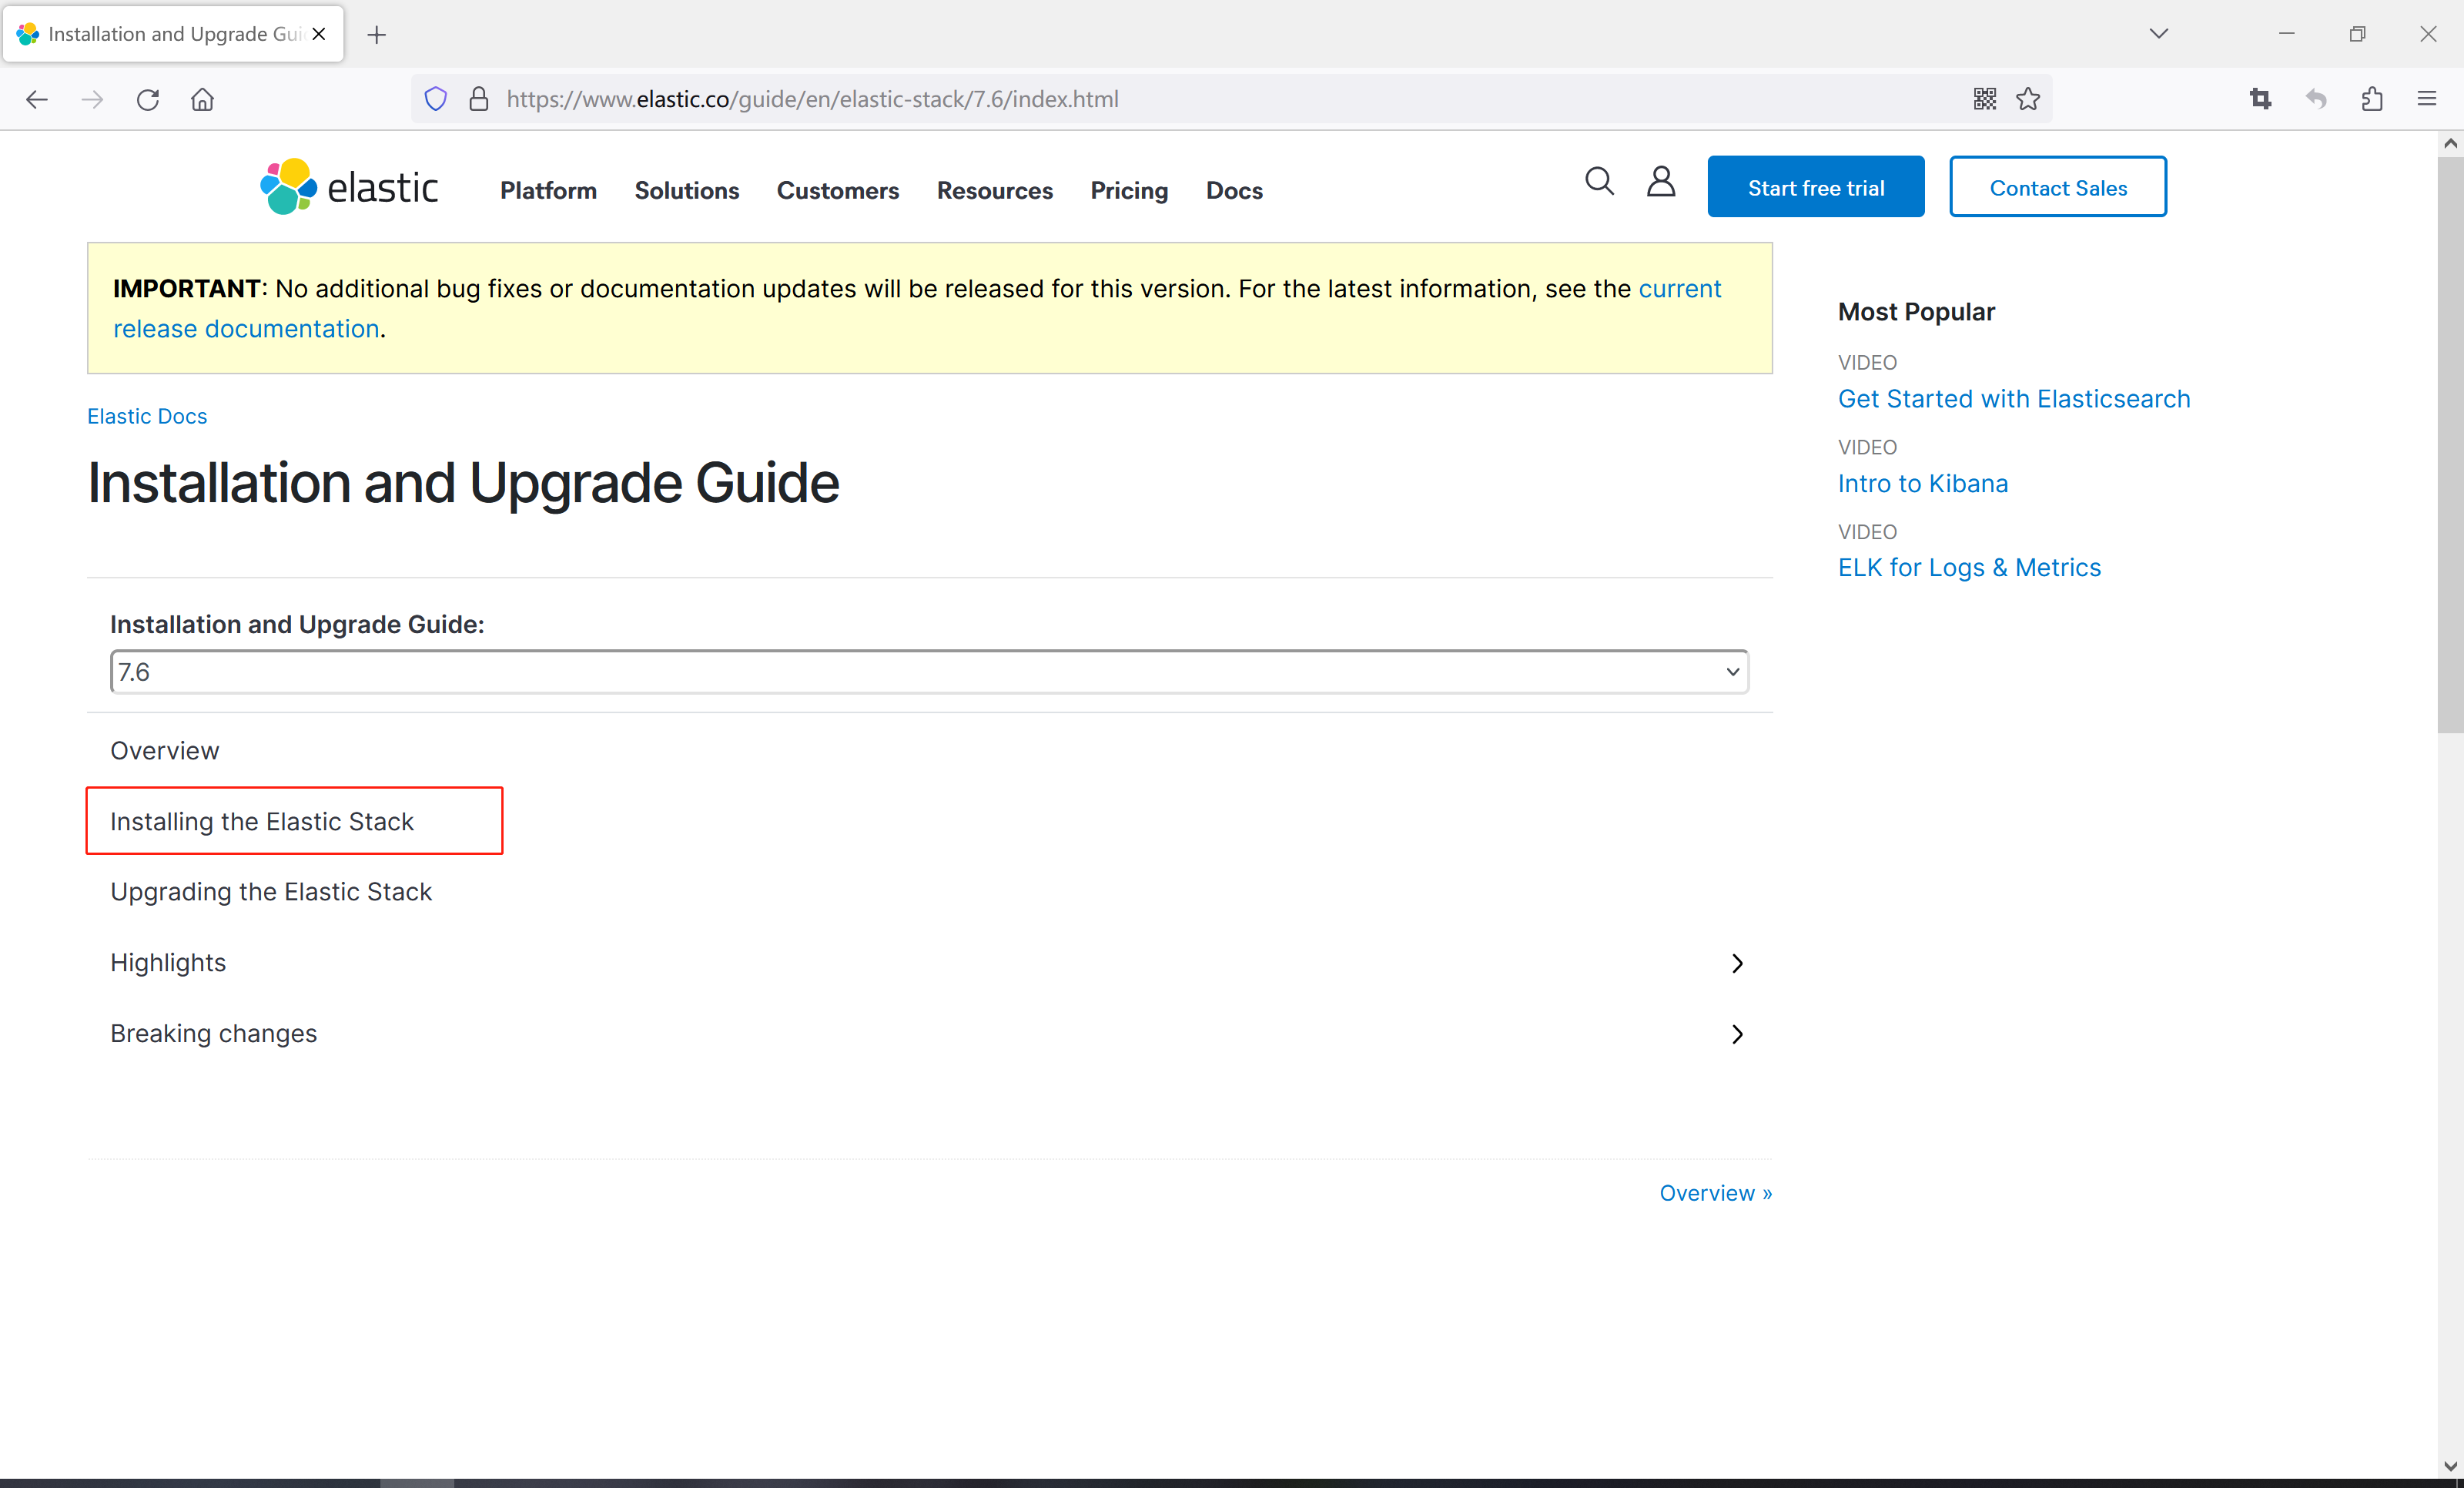
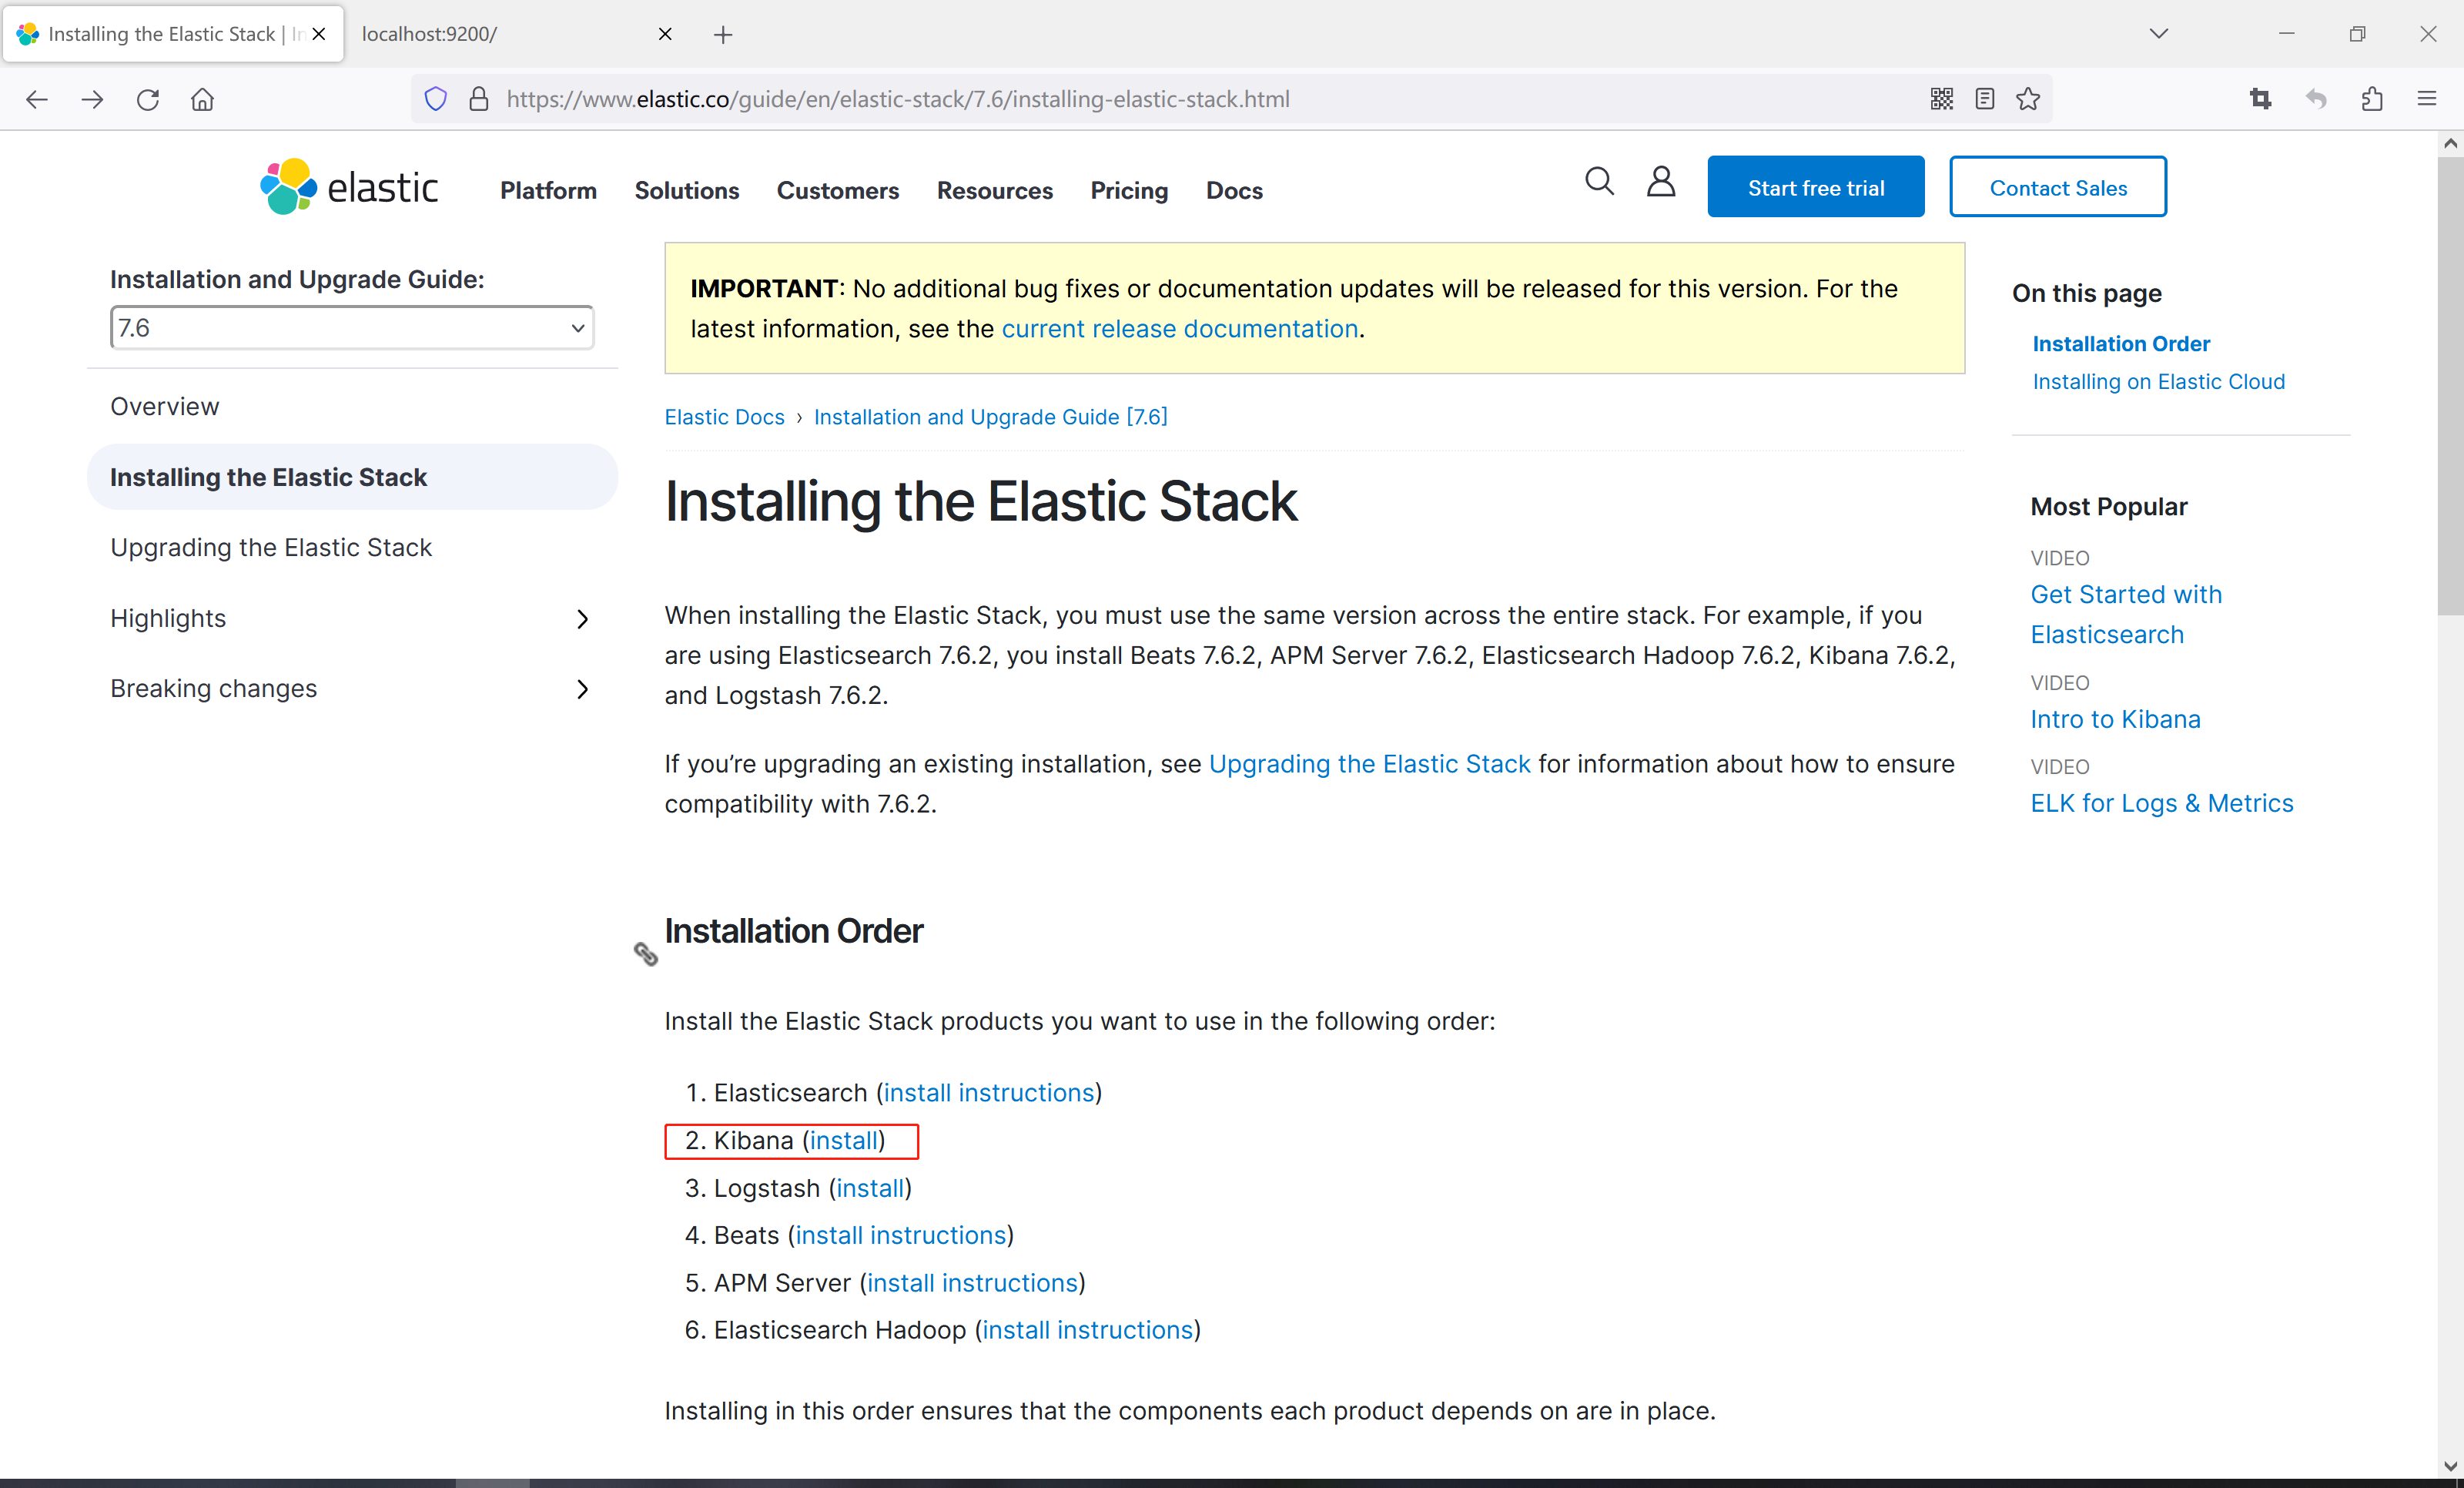
5、然后点击Installing the Elastic Stack
6、 在页面找到Elasticsearch,点击后面的install instructions(安装说明)

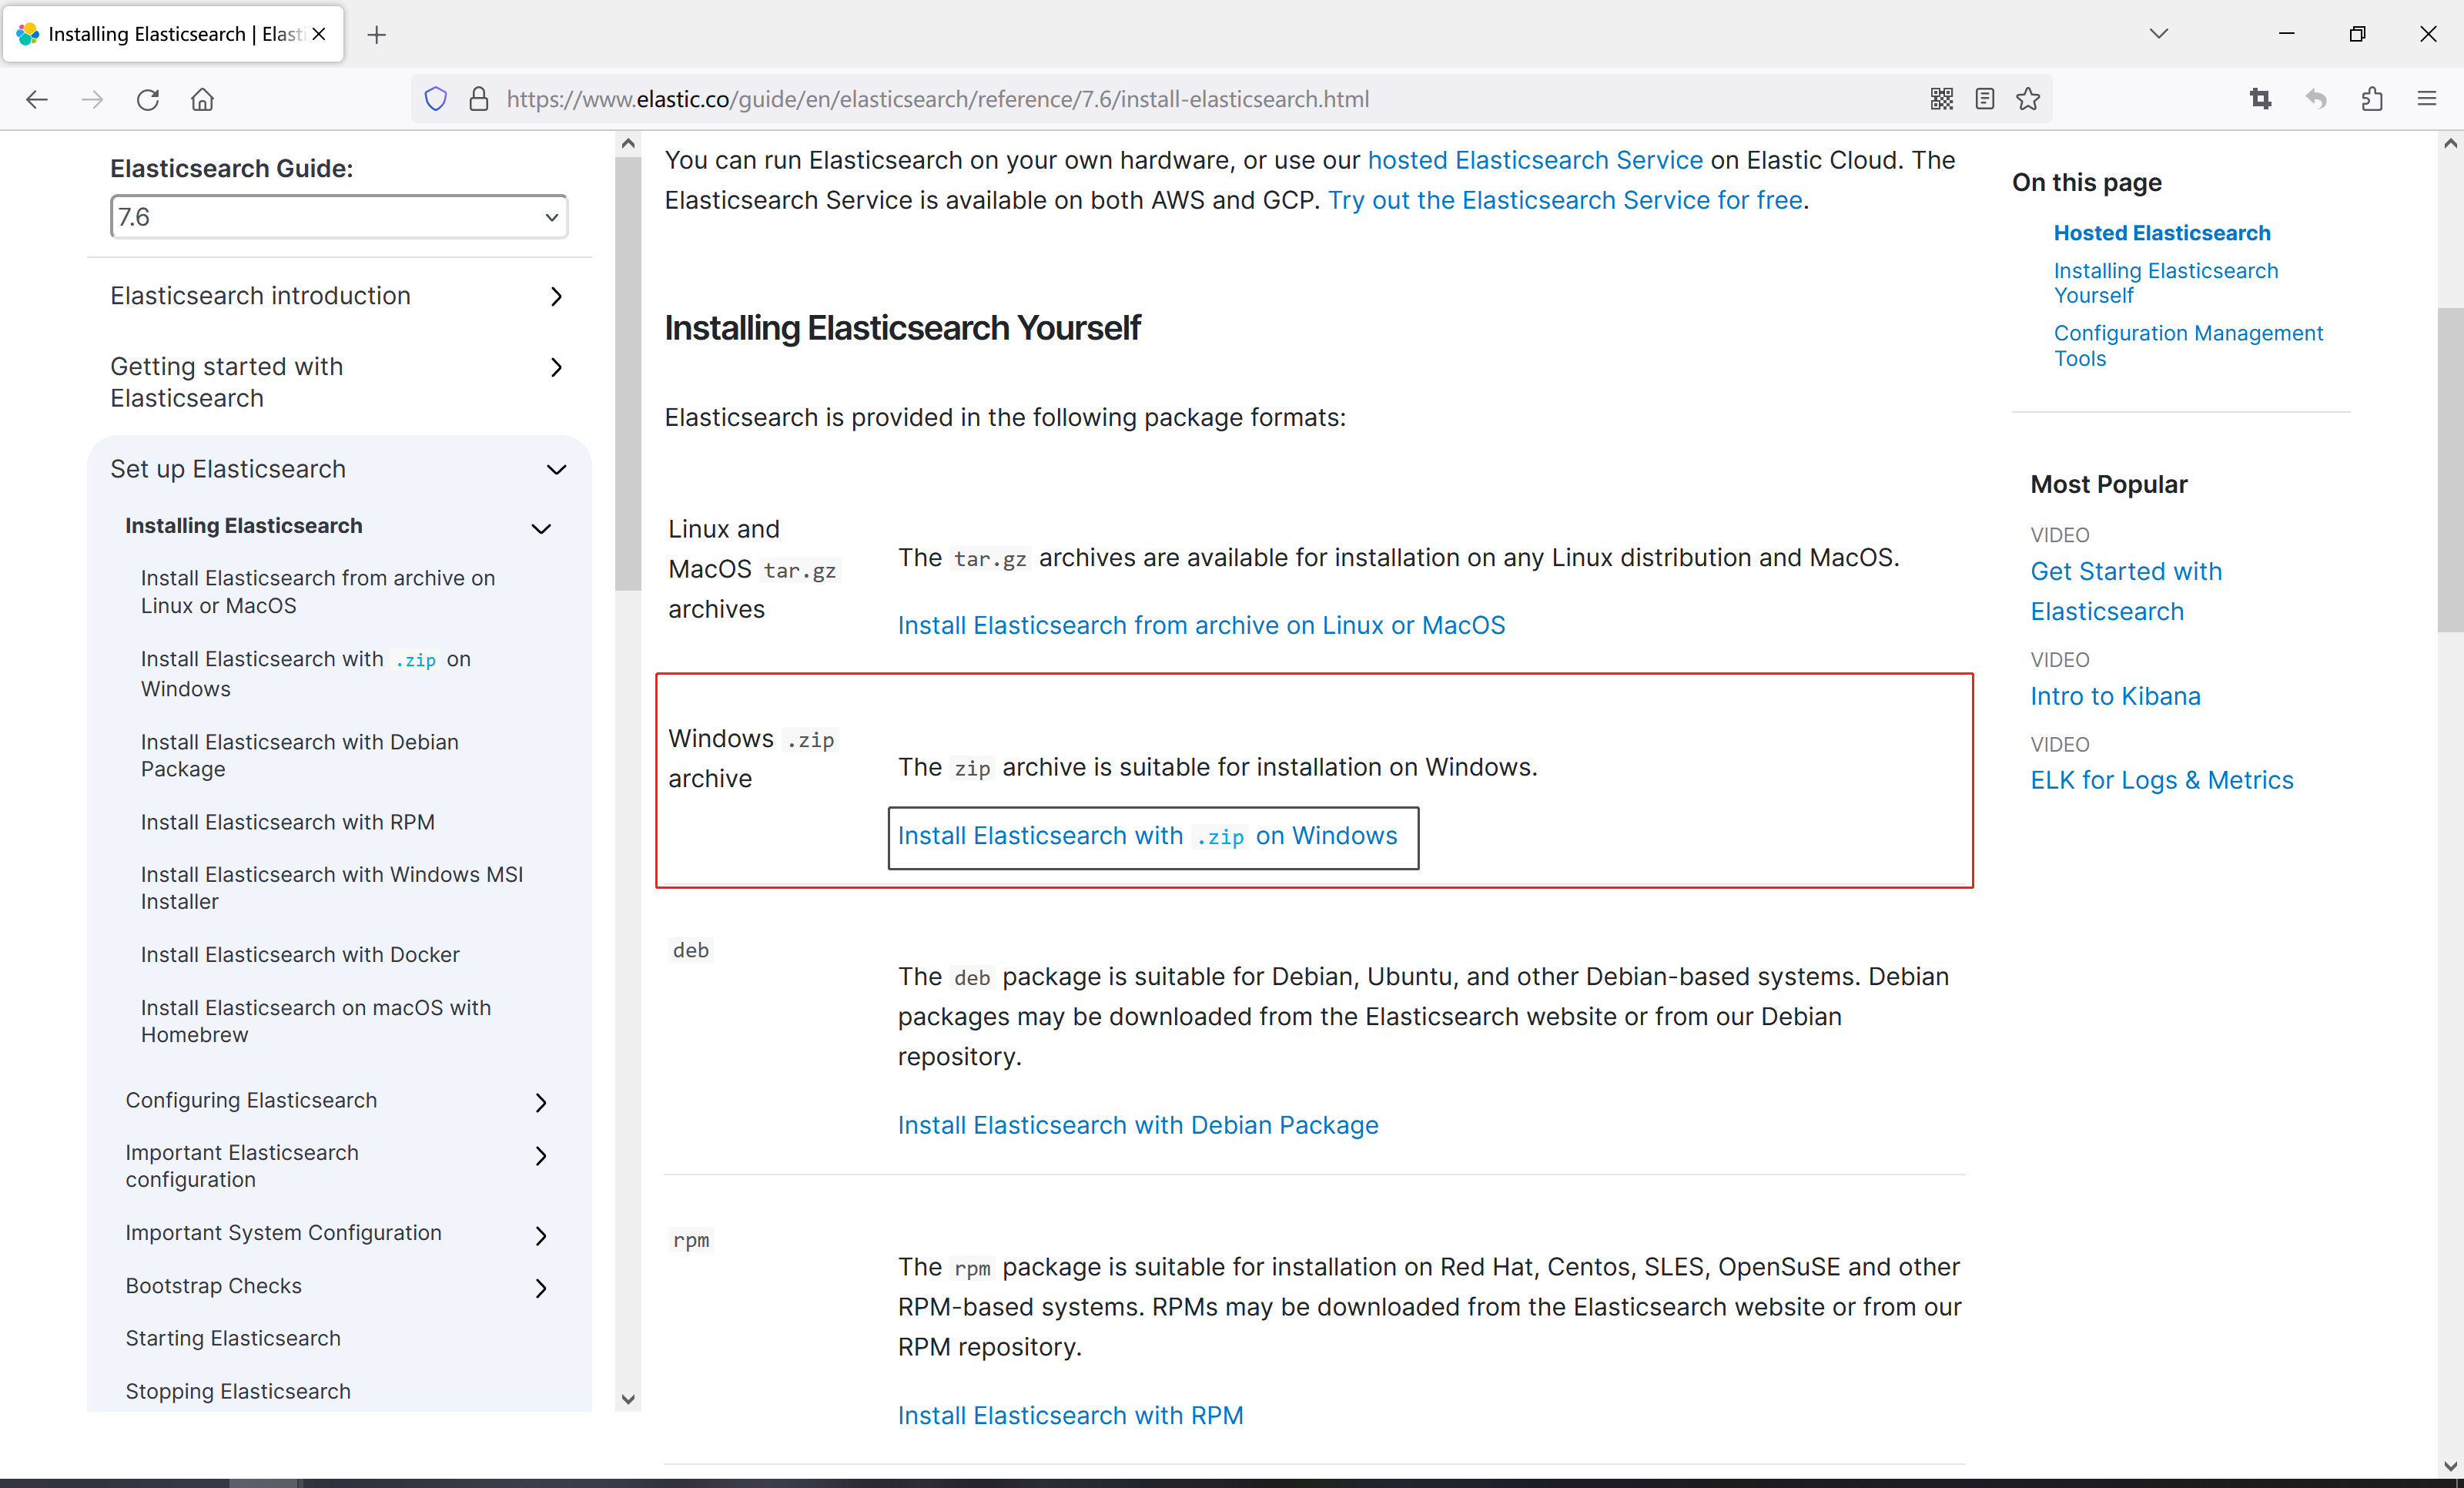
7、然后找到对应操作系统,比如windows,只需要点击Install Elasticsearch with .zip on Windows
8、在打开的页面向下滚动,找到Download and install the .zip package
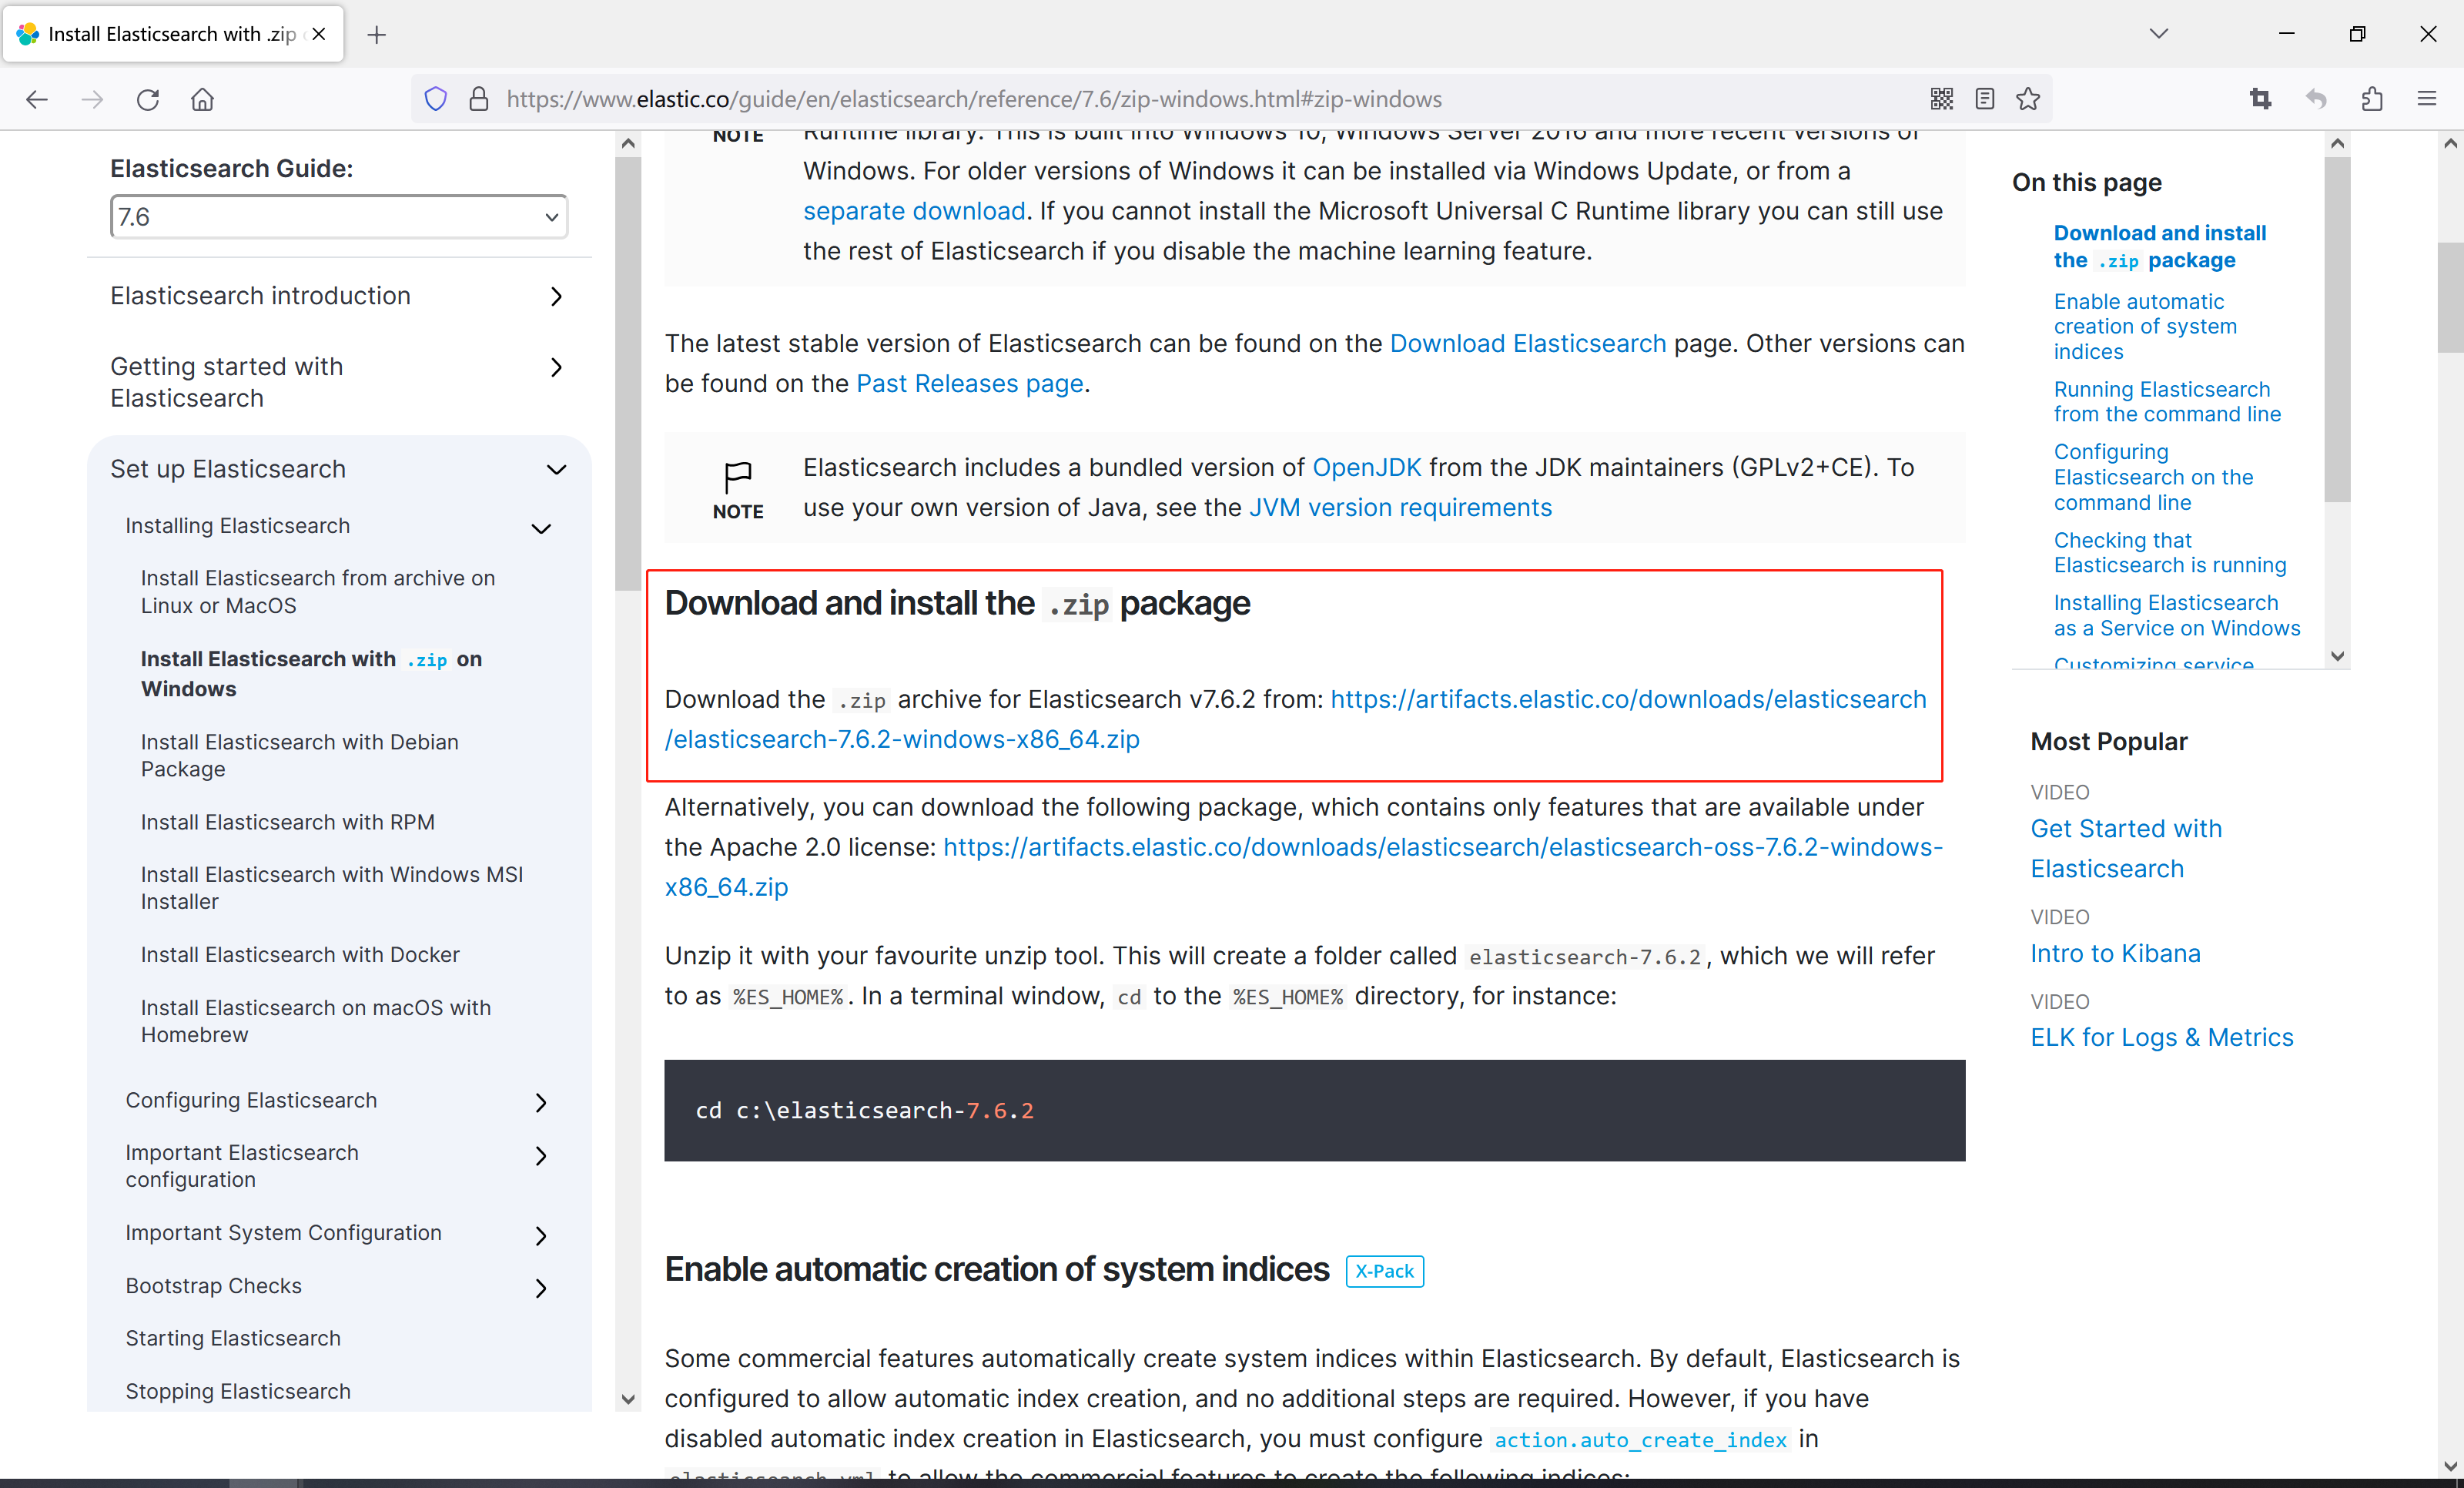
9、点击后面的zip压缩文件链接开始下载https://artifacts.elastic.co/downloads/elasticsearch/elasticsearch-7.6.2-windows-x86_64.zip

第二步:安装Elasticsearch
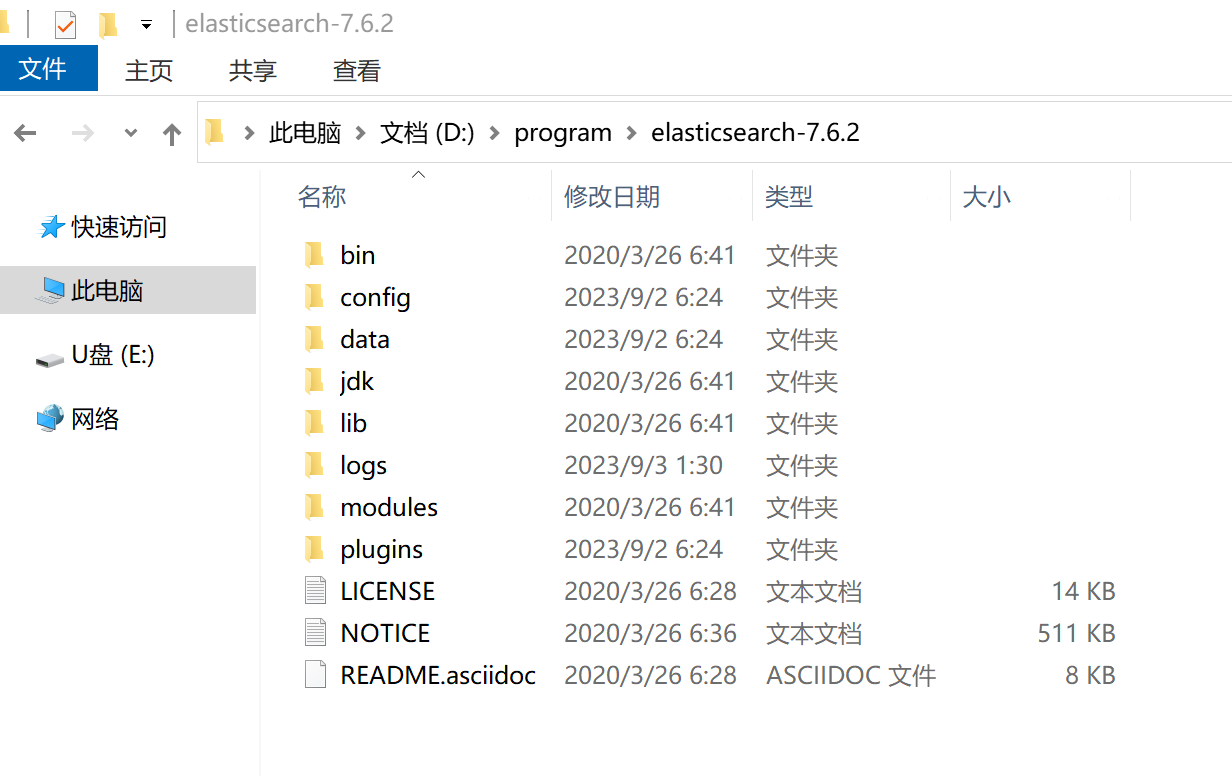
把下载下来的压缩包解压到系统盘,建议解压到D盘,如图
打开bin目录,双击下面的文件启动Elasticsearch
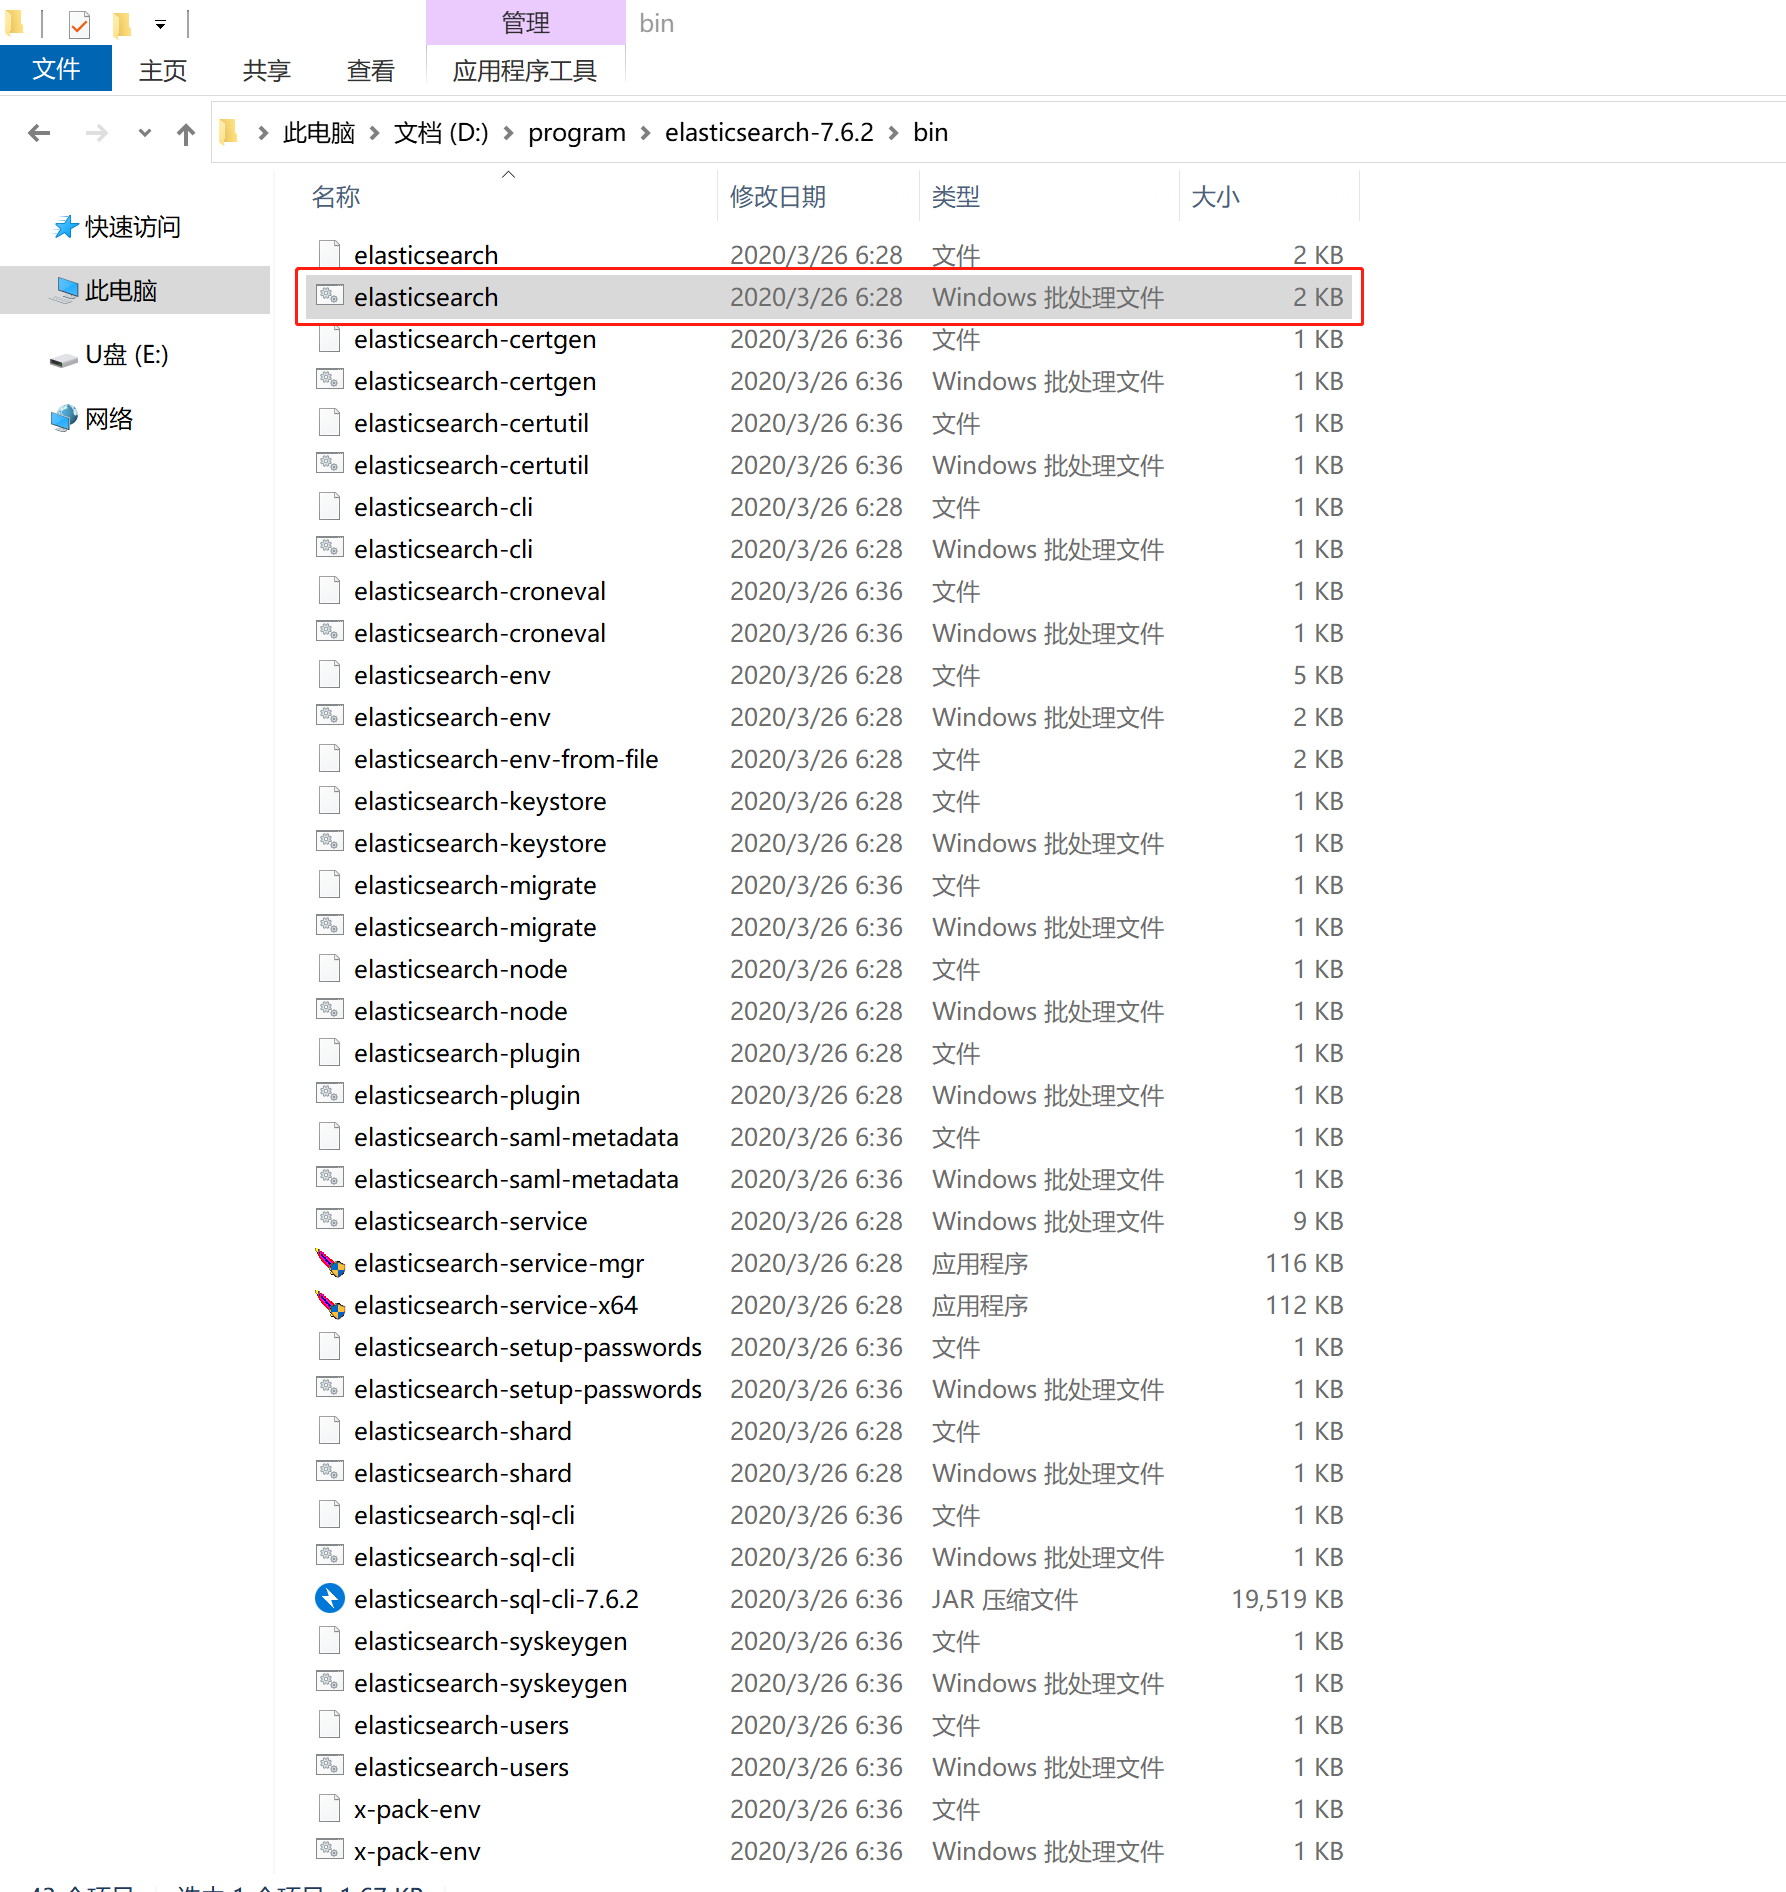
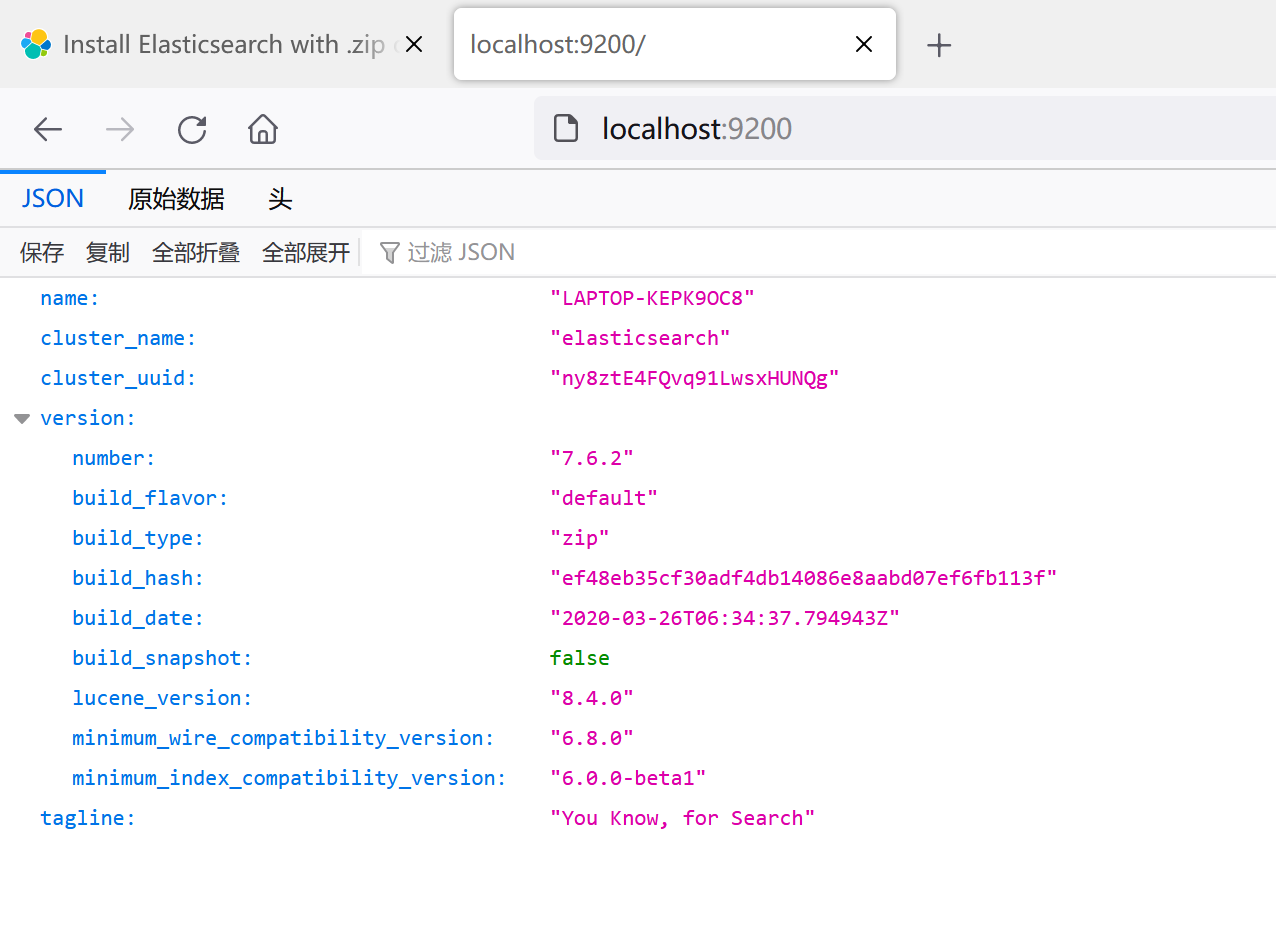
稍微等一下,启动完成后访问localhost:9200,如果返回了以下格式的数据,说明elasticsearch到此安装完成
第三步:安装kibana
问了方便使用elasticsearch的Query DSL(Domain Specified Language,领域专用语言),需要安装一下Elasticsearch的Kibana可视化控制台管理工具。
安装步骤和第二步类似,这里就不赘述了,安装完成后,还是解压到D盘
然后修改一下config目录下的kibaba.yml配置文件
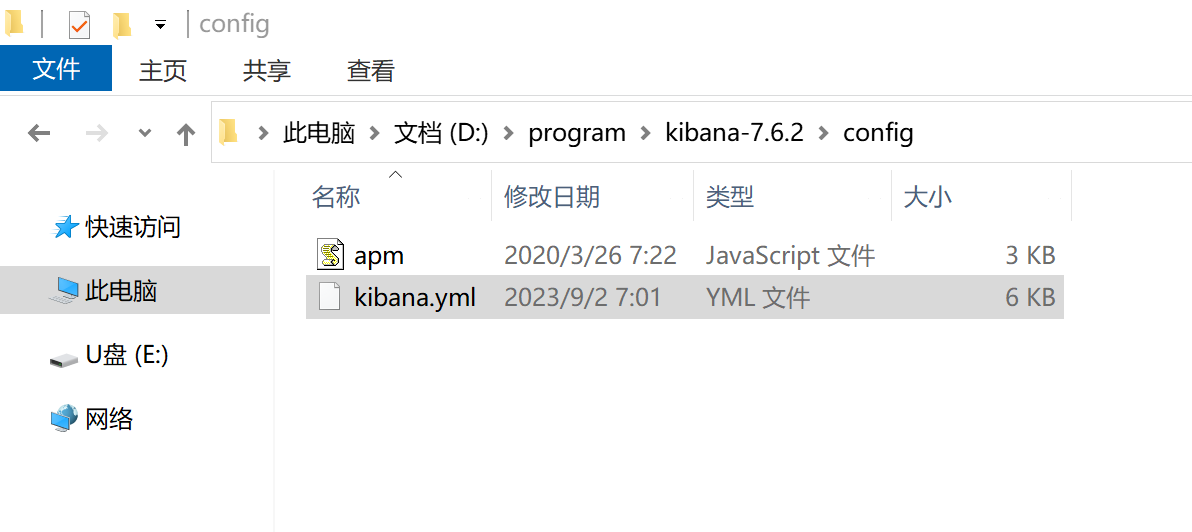
使用文本编辑器打开yml文件,找到以下内容并取消注释,修改为对应的值
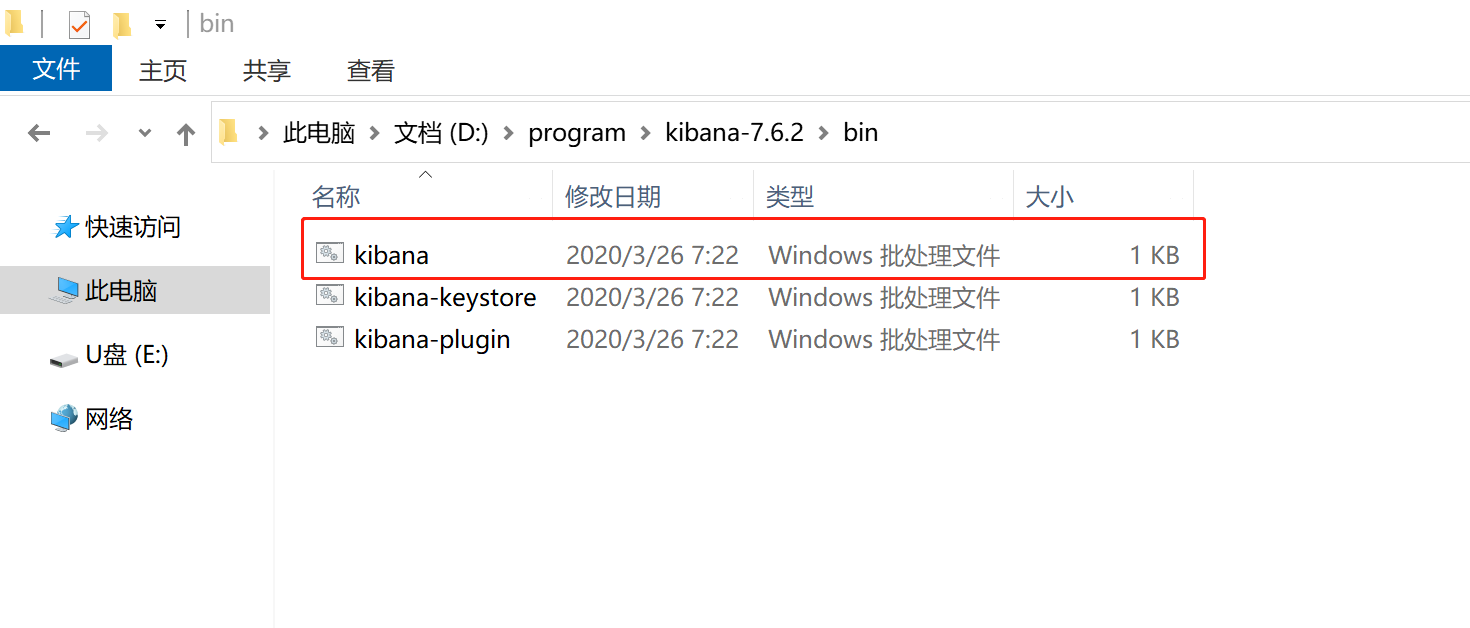
server.port: 5601server.host: "localhost"server.name: "heyunlin" # 这个可以随意取名elasticsearch.hosts: ["http://localhost:9200"] # elasticsearch服务器的地址i18n.locale: "zh-CN" # 页面使用中文最后打开bin目录,双击kibaba.bat启动kibaba
启动完成后,在浏览器地址栏输入http://localhost:5601/app/kibana#/dev_tools/console

然后就可以在左边写我们的DSL了,点击右边的运行按钮即可直接执行查询语句。
第四步:Springboot整合Elasticsearch
这一步是java程序员最注重的,怎么在java中使用elasticsearch。
1、创建springboot项目
首先,创建一个springboot项目elastic
2、在pom.xml中添加依赖
提供了完整的pom文件,可直接复制。
<?xml version="1.0" encoding="UTF-8"?>
<project xmlns="http://maven.apache.org/POM/4.0.0" xmlns:xsi="http://www.w3.org/2001/XMLSchema-instance"xsi:schemaLocation="http://maven.apache.org/POM/4.0.0 https://maven.apache.org/xsd/maven-4.0.0.xsd"><modelVersion>4.0.0</modelVersion><parent><groupId>org.springframework.boot</groupId><artifactId>spring-boot-starter-parent</artifactId><version>2.3.4.RELEASE</version><relativePath/></parent><groupId>com.example</groupId><artifactId>elastic</artifactId><version>0.0.1-SNAPSHOT</version><properties><java.version>1.8</java.version><druid.version>1.1.21</druid.version><mysql.version>8.0.28</mysql.version><lombok.version>1.18.22</lombok.version><mybatis.version>2.2.2</mybatis.version></properties><dependencies><dependency><groupId>org.springframework.boot</groupId><artifactId>spring-boot-starter-web</artifactId></dependency><dependency><groupId>org.springframework.boot</groupId><artifactId>spring-boot-starter-test</artifactId><scope>test</scope></dependency><dependency><groupId>mysql</groupId><artifactId>mysql-connector-java</artifactId><version>${mysql.version}</version></dependency><dependency><groupId>org.projectlombok</groupId><artifactId>lombok</artifactId><version>${lombok.version}</version></dependency><dependency><groupId>com.alibaba</groupId><artifactId>druid</artifactId><version>${druid.version}</version></dependency><dependency><groupId>org.mybatis.spring.boot</groupId><artifactId>mybatis-spring-boot-starter</artifactId><version>${mybatis.version}</version></dependency><dependency><groupId>org.springframework.boot</groupId><artifactId>spring-boot-starter-data-elasticsearch</artifactId></dependency></dependencies><build><plugins><plugin><groupId>org.springframework.boot</groupId><artifactId>spring-boot-maven-plugin</artifactId></plugin></plugins></build>
</project>
3、修改配置文件
修改elastic.yml,复制以下内容
spring:# 数据库配置datasource:username: rootpassword: rooturl: jdbc:mysql://localhost:3306/elastictype: com.alibaba.druid.pool.DruidDataSourceserver:port: 9021mybatis:mapper-locations: classpath:mapper/*Mapper.xml4、创建数据库和es的实体类
创建entity包,然后创建Song.java,@Document(indexName = "songs")注解指定索引名为songs,@Field注解配置字段的类型,只有text类型的字段会被分词。
package com.example.elastic.entity;import lombok.Data;
import org.springframework.data.annotation.Id;
import org.springframework.data.elasticsearch.annotations.Document;
import org.springframework.data.elasticsearch.annotations.Field;
import org.springframework.data.elasticsearch.annotations.FieldType;/*** 歌曲* @author heyunlin* @version 1.0*/
@Data
@Document(indexName = "songs")
public class Song {@Id@Field(type= FieldType.Keyword)private String id;/*** 歌曲名*/@Field(type= FieldType.Text, analyzer = "ik_max_word")private String name;/*** 歌手*/@Field(type= FieldType.Text, analyzer = "ik_max_word")private String singer;/*** 描述信息*/@Field(type= FieldType.Text, analyzer = "ik_max_word")private String note;/*** 歌曲文件*/private String url;/*** 歌曲文件是否存在/是否已上传*/@Field(type= FieldType.Long)private Integer uploaded;//    /**
//     * 最后一次修改时间
//     */
//    @DateTimeFormat(pattern = "yyyy-MM-dd HH:mm:ss")
//    @JsonFormat(pattern = "yyyy-MM-dd HH:mm:ss", timezone = "GMT+8")
//    private LocalDateTime lastUpdateTime;
}
5 、创建mapper接口及映射文件
创建mapper包,创建一个接口SongMapper.java
package com.example.elastic.mapper;import com.example.elastic.entity.Song;
import org.springframework.stereotype.Repository;import java.util.List;/*** @author heyunlin* @version 1.0*/
@Repository
public interface SongMapper {List<Song> selectAll();
}
在resources目录下创建mapper包,然后创建SongMapper.xml
<?xml version="1.0" encoding="UTF-8" ?>
<!DOCTYPE mapper PUBLIC "-//mybatis.org//DTD Mapper 3.0//EN" "http://mybatis.org/dtd/mybatis-3-mapper.dtd"><mapper namespace="com.example.elastic.mapper.SongMapper"><resultMap id="resultMap" type="com.example.elastic.entity.Song"><result property="id" column="id" /><result property="name" column="name" /><result property="note" column="note" /><result property="singer" column="singer" /><result property="url" column="url" /><result property="uploaded" column="uploaded" />
<!--        <result property="lastUpdateTime" column="last_update_time" />--></resultMap><select id="selectAll" resultMap="resultMap">select * from song</select>
</mapper>
6、创建Elasticsearch的查询接口
创建一个接口继承ElasticsearchRepository<E, T>接口,该接口的第一个参数类型为实体类型,二个参数类型是实体类的ID属性的数据类型,在这里是String。
package com.example.elastic.repository;import com.example.elastic.entity.Song;
import org.springframework.data.elasticsearch.repository.ElasticsearchRepository;
import org.springframework.stereotype.Repository;/*** @author heyunlin* @version 1.0*/
@Repository
public interface SongRepository extends ElasticsearchRepository<Song, String> {}
7、开启mapper包扫描
创建一个配置类MybatisConfig,在类上面使用@Configuration将该类声明为配置类,通过@MapperScan注解指定mapper包扫描路径。
package com.example.elastic.config;import org.mybatis.spring.annotation.MapperScan;
import org.springframework.context.annotation.Configuration;/*** Mybatis配置类* @author heyunlin* @version 1.0*/
@Configuration
@MapperScan(basePackages = "com.example.elastic.mapper")
public class MybatisConfig {}
第五步:从mysql导入数据到es
通过上一步骤,已经成功完成es的整合,接下来查询mysql数据库,把mysql的数据保存到es中。
接下来,需要创建数据库elastic,然后运行sql脚本,SQL脚本文件在文章末尾的项目链接对应项目上,在这里就不贴出来了,太长了。
修改测试类,运行initData()方法
package com.example.elastic;import com.example.elastic.entity.Song;
import com.example.elastic.mapper.SongMapper;
import com.example.elastic.repository.SongRepository;
import org.junit.jupiter.api.Test;
import org.springframework.beans.factory.annotation.Autowired;
import org.springframework.boot.test.context.SpringBootTest;import java.util.List;@SpringBootTest
class ElasticApplicationTests {@Autowiredprivate SongMapper songMapper;@Autowiredprivate SongRepository repository;@Testvoid initData() {List<Song> list = songMapper.selectAll();for (Song song : list) {repository.save(song);}}}
第六步:学习DSL
完成第五步之后,我们的es里已经有了803条歌曲的数据了,接下来学习DSL的使用,DSL就是Elasticsearch特有的查询语言。
DSL的格式:
其中index_name指的是Elasticsearch中的索引名,我们歌曲对应的索引名通过@Document注解指定为了songs
GET /index_name/_search {json请求体数据}接下来介绍一下Elasticsearch中常用的DSL
1、无条件查询,默认返回10条数据
GET /songs/_search
{"query": {"match_all": {}}
}
返回的数据格式:为了避免太占位置,只查询了5条记录。
hits里是查询结果信息,hits.total.value表示符合查询条件的总记录数,hits.hits表示的是返回的数据,_source里是具体的数据。
{"took" : 2,"timed_out" : false,"_shards" : {"total" : 1,"successful" : 1,"skipped" : 0,"failed" : 0},"hits" : {"total" : {"value" : 808,"relation" : "eq"},"max_score" : 1.0,"hits" : [{"_index" : "songs","_type" : "_doc","_id" : "20210522154945","_score" : 1.0,"_source" : {"_class" : "com.example.elastic.entity.Song","id" : "20210522154945","name" : "诺言","singer" : "陈洁丽","note" : "《百变机兽之洛洛历险记》动画ED","uploaded" : 0}},{"_index" : "songs","_type" : "_doc","_id" : "20210522155349","_score" : 1.0,"_source" : {"_class" : "com.example.elastic.entity.Song","id" : "20210522155349","name" : "快乐星猫","singer" : "牛奶咖啡","note" : "《快乐星猫》动画主题曲","uploaded" : 0}},{"_index" : "songs","_type" : "_doc","_id" : "20210522155118","_score" : 1.0,"_source" : {"_class" : "com.example.elastic.entity.Song","id" : "20210522155118","name" : "无别","singer" : "张信哲","note" : "《天官赐福》动画OP","uploaded" : 0}},{"_index" : "songs","_type" : "_doc","_id" : "20210522154331","_score" : 1.0,"_source" : {"_class" : "com.example.elastic.entity.Song","id" : "20210522154331","name" : "爱一点","singer" : "王力宏、章子怡","note" : "","uploaded" : 0}},{"_index" : "songs","_type" : "_doc","_id" : "20210522154139","_score" : 1.0,"_source" : {"_class" : "com.example.elastic.entity.Song","id" : "20210522154139","name" : "多肉少女","singer" : "赵芷彤Cassie","note" : "","uploaded" : 0}}]}
}
2、指定返回的数据条数
通过size指定需要返回的结果数,以下查询语句将会返回20条数据,而非默认的10条
GET /songs/_search
{"query": {"match_all": {}},"size": 20
}
3、指定查询字段
_source是一个数组,指定需要返回哪些字段,设置为false则不会返回数据。
GET /songs/_search
{"query": {"match_all": {}},"size": 5, "_source": ["name", "singer", "note"]
}
4、分页查询
通过from+size实现分页查询,下面查询了第6-10条记录,相当于mysql中的limit 5, 5(和mysql类似,from默认为0)
GET /songs/_search
{"query": {"match_all": {}},"from": 5,"size": 5
}
5、查询指定ID的数据
GET /songs/_doc/202105221553496、删除索引
发送路径为/songs的delete请求即可删除songs这个索引。
DELETE /songs7、条件查询
以下是查询歌曲名中包含“爱”字的歌曲,不指定返回的结果数则默认返回前10条。
GET /songs/_search
{"query": {"match": {"name": "爱"}}
}
第七步:在java中使用Elasticsearch
这个章节会介绍三种通过java操作Elasticsearch的方式,提供了简单的使用案例代码。
1、通过ElasticsearchRepository
ElasticsearchRepository有一套标准的方法命名规范,符合规范的方法名在输入的时候就会有提示,比如findByXxx(),ElasticsearchRepository会自动为其实现类中符合命名规范的方法生成对应的DSL语句。
我们在之前的SongRepository接口中声明一个findByName()方法,根据歌曲名查询歌曲列表。
package com.example.elastic.repository;import com.example.elastic.entity.Song;
import org.springframework.data.elasticsearch.repository.ElasticsearchRepository;
import org.springframework.stereotype.Repository;import java.util.List;/*** @author heyunlin* @version 1.0*/
@Repository
public interface SongRepository extends ElasticsearchRepository<Song, String> {List<Song> findByName(String name);}
然后通过测试类测试该方法
package com.example.elastic;import com.example.elastic.entity.Song;
import com.example.elastic.repository.SongRepository;
import org.junit.jupiter.api.Test;
import org.springframework.beans.factory.annotation.Autowired;
import org.springframework.boot.test.context.SpringBootTest;import java.util.List;
import java.util.Optional;/*** @author heyunlin* @version 1.0*/
@SpringBootTest
public class ElasticsearchRepositoryTests {@Autowiredprivate SongRepository songRepository;@Testvoid testFindByName() {List<Song> list = songRepository.findByName("雨爱");System.out.println("共查询到" + list.size() + "条记录。");System.out.println("~~~~~~~~~~~~~~~~~~~~~~~~~~~~~~~~");for (Song song : list) {System.out.println(song);}}@Testvoid testSave() {Song song = new Song();song.setId("2023");song.setName("雨爱");song.setNote("雨爱");Song save = songRepository.save(song);System.out.println("save = " + save);}@Testvoid testDelete() {Song song = new Song();song.setId("2023");song.setName("雨爱");song.setNote("雨爱");songRepository.delete(song);}@Testvoid testDeleteById() {songRepository.deleteById("2023");testFindByName();}@Testvoid testDeleteAll() {songRepository.deleteAll();}@Testvoid testExistsById() {songRepository.existsById("2023");}@Testvoid testFindById() {testSave();Optional<Song> optional = songRepository.findById("2023");if (optional.isPresent()) {Song song = optional.get();System.out.println(song);}}@Testvoid testCount() {long count = songRepository.count();System.out.println(count);}}
如图,查询出来73首符合条件的歌曲。

2、通过ElasticsearchRestTemplate
下面通过简单的案例来介绍ElasticsearchRestTemplate的使用,相关的API博主也在学习中。
package com.example.elastic;import com.example.elastic.entity.Song;
import org.junit.jupiter.api.Test;
import org.springframework.beans.factory.annotation.Autowired;
import org.springframework.boot.test.context.SpringBootTest;
import org.springframework.data.elasticsearch.core.ElasticsearchRestTemplate;
import org.springframework.data.elasticsearch.core.IndexOperations;
import org.springframework.data.elasticsearch.core.SearchHit;
import org.springframework.data.elasticsearch.core.SearchHits;
import org.springframework.data.elasticsearch.core.query.Query;import java.util.List;/*** @author heyunlin* @version 1.0*/
@SpringBootTest
public class ElasticsearchRestTemplateTests {@Autowiredprivate ElasticsearchRestTemplate elasticsearchRestTemplate;@Testvoid test() {SearchHits<Song> search = elasticsearchRestTemplate.search(Query.findAll(), Song.class);List<SearchHit<Song>> searchHits = search.getSearchHits();for (SearchHit<Song> searchHit : searchHits) {System.out.println(searchHit);}}@Testvoid testIndexOps() {IndexOperations indexOperations = elasticsearchRestTemplate.indexOps(Song.class);System.out.println(indexOperations.exists());}}
3、通过RestHighLevelClient
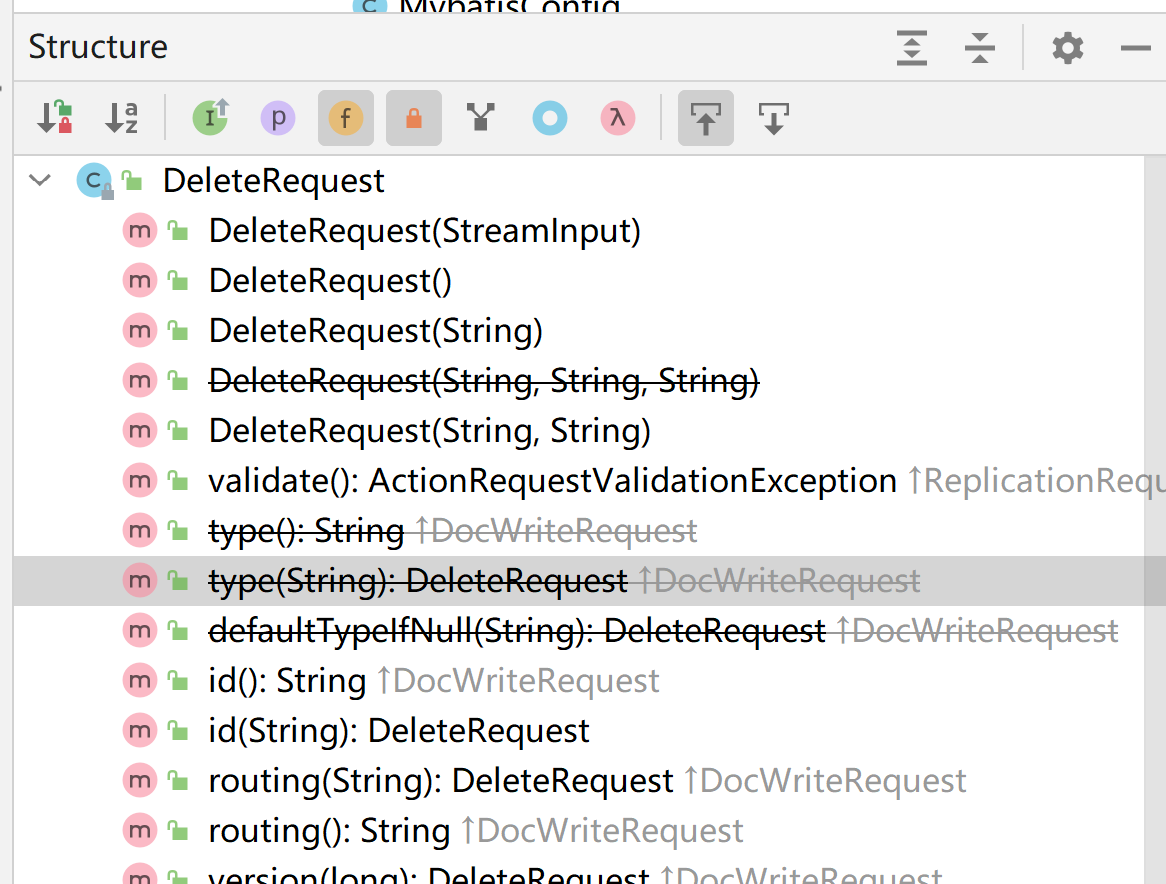
例如,下面代码删除了songs索引中ID为2023的文档。
package com.example.elastic;import org.elasticsearch.action.delete.DeleteRequest;
import org.elasticsearch.action.delete.DeleteResponse;
import org.elasticsearch.client.RequestOptions;
import org.elasticsearch.client.Requests;
import org.elasticsearch.client.RestHighLevelClient;
import org.junit.jupiter.api.Test;
import org.springframework.beans.factory.annotation.Autowired;
import org.springframework.boot.test.context.SpringBootTest;import java.io.IOException;/*** @author heyunlin* @version 1.0*/
@SpringBootTest
public class RestHighLevelClientTests {@AutowiredRestHighLevelClient restHighLevelClient;@Testvoid test() throws IOException {DeleteRequest songs = Requests.deleteRequest("songs");songs.id("2023");DeleteResponse deleteResponse = restHighLevelClient.delete(songs, RequestOptions.DEFAULT);int status = deleteResponse.status().getStatus();System.out.println(status);}}
DeleteRequest表示一次删除请求,必须通过id()方法设置文档ID,否则会抛出异常,执行delete()方法会得到一个删除操作的响应对象,可以通过getStatus()得到响应状态码,就和我们的http请求响应状态码一样。
因为type这个概念在Elasticsearch7.x版本已经被弃用了,所以type()这个方法也被声明了已废弃。
那么DeleteRequest又要通过什么方式得到呢?
点开DeleteRequest的源码,在类的注释上已经告诉我们最好的创建方式是通过Requests.deleteRequest()方法。

然后我们点开这个方法,这个方法的参数是String类型,变量名为index,很显然这就是我们需要操作的索引的名字。这个方法的注释上说了必须设置id和type,因为type的概念已经被删除,则需要设置id,这个id顾名思义就是文档ID。
/*** Creates a delete request against a specific index. Note the {@link DeleteRequest#type(String)} and* {@link DeleteRequest#id(String)} must be set.** @param index The index name to delete from* @return The delete request* @see org.elasticsearch.client.Client#delete(org.elasticsearch.action.delete.DeleteRequest)*/
public static DeleteRequest deleteRequest(String index) {return new DeleteRequest(index);
}
好了,文章就分享到这里了,看完不要忘了点赞+收藏哦~
项目已开源,可按需获取:
Springboot整合Elasticsearch![]() https://gitee.com/he-yunlin/elastic.git
https://gitee.com/he-yunlin/elastic.git
相关文章:
Elasticsearch安装,Springboot整合Elasticsearch详细教程
Elasticsearch 是一个分布式、RESTful 风格的搜索和数据分析引擎,能够实现近乎实时的搜索。 Elasticsearch官网https://www.elastic.co/cn/ 这篇文章主要简单介绍一下Elasticsearch,Elasticsearch的java API博主也在学习中,文章会持续更新~ …...
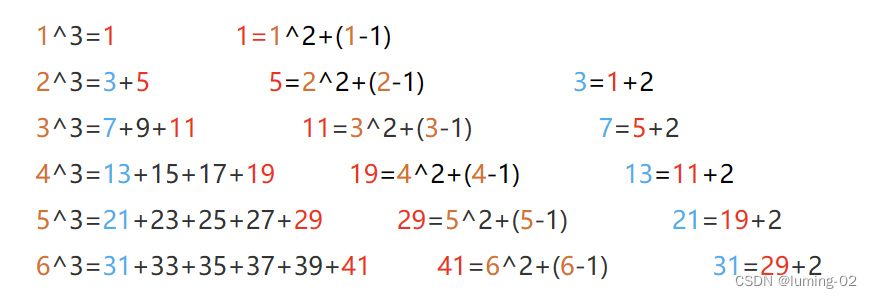
OJ题库:计算日期到天数转换、打印从1到最大的n位数 、尼科彻斯定理
前言:在部分大厂笔试时经常会使用OJ题目,这里对《华为机试》和《剑指offer》中的部分题目进行思路分析和讲解,希望对各位读者有所帮助。 题目来自牛客网,欢迎各位积极挑战: HJ73:计算日期到天数转换_牛客网 JZ17:打印…...

混合动力汽车耐久测试
一 背景 整车厂可通过发动机和电机驱动的结合为多款车型提供混合动力驱动技术。汽车集成电机驱动可大大减少二氧化碳的排放,不仅如此,全电动驱动或混合动力驱动的汽车还将使用户体验到更好的驾驶感受,且这种汽车可通过电动机来实现更快的加速…...
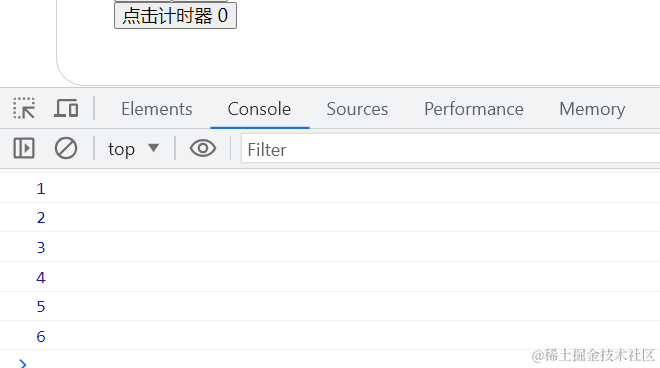
useRef 定义的 ref 在控制台可以打印但是页面不生效?
useRef 是一个 React Hook,它能让你引用一个不需要渲染的值。 点击计时器 点击按钮后在控制台可以打印但是页面不生效。 useRef 返回的值在函数组件中不会自动触发重新渲染,所以控制台可以显示变化而按钮上无法显示 ref.current的变化。 import { use…...
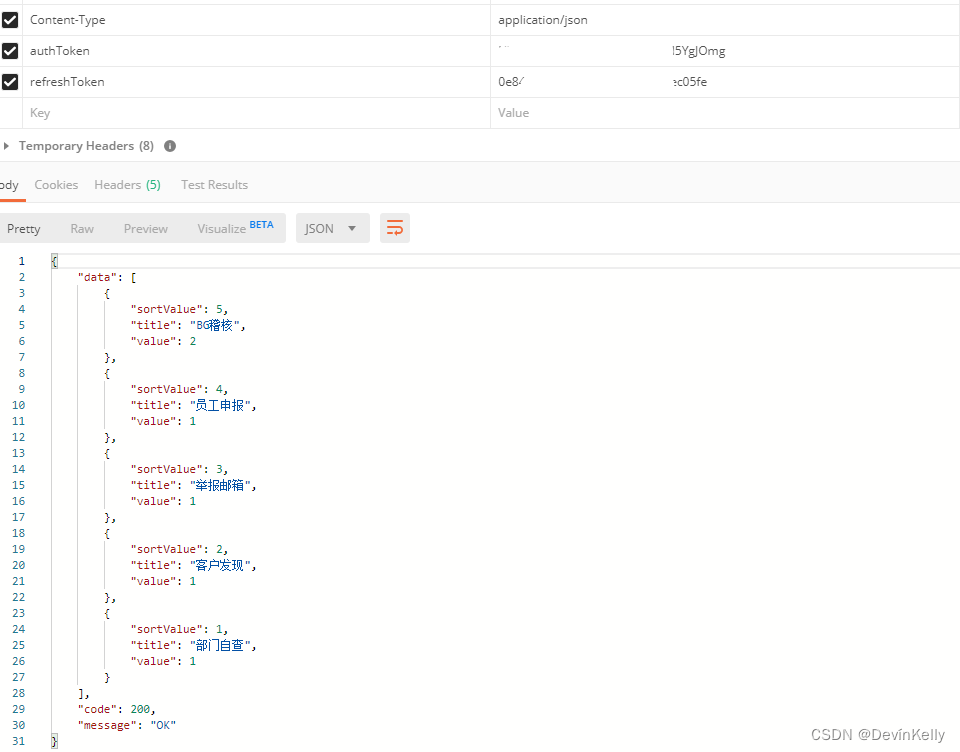
【Java 动态数据统计图】动态数据统计思路案例(动态,排序,动态数组(重点推荐))七(129)
需求:前端根据后端的返回数据:画统计图; 说明: 1.X轴为地域,Y轴为地域出现的次数; 2. 动态展示(有地域展示,没有不展示,且高低排序) Demo案例: …...

Cell Reports | 揭开METTL14在介导m6A修饰中的神秘面纱
m6A被认为是最丰富的mRNA修饰,广泛分布在大多数真核生物中,包括哺乳动物、植物、昆虫、酵母和某些病毒。m6A修饰的沉积和去除之间的动态平衡对于正常的生物过程和发育至关重要,如失调通常与癌症等疾病有关。m6A修饰由m6A甲基转移酶复合物&…...

297. 二叉树的序列化与反序列化
题目描述 序列化是将一个数据结构或者对象转换为连续的比特位的操作,进而可以将转换后的数据存储在一个文件或者内存中,同时也可以通过网络传输到另一个计算机环境,采取相反方式重构得到原数据。 请设计一个算法来实现二叉树的序列化与反序…...
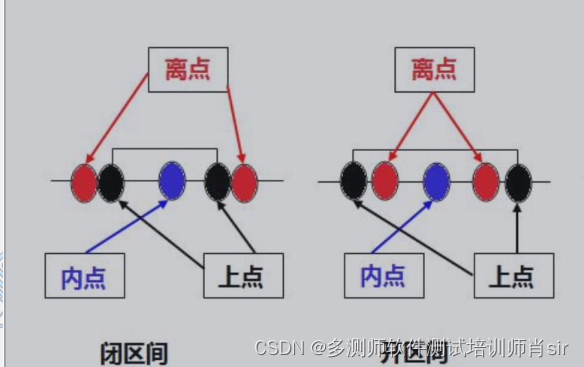
肖sir__设计测试用例方法之边界值03_(黑盒测试)
设计测试用例方法之边界值 边界点定义 上点:边界上的点 离点:离上点最近的点(即上点左右两边最邻近的点) 内点:在域范围内的点 案例:qq号:5-12位 闭区间: 离点:5 位 &…...
功能测试常用的测试用例大全
登录、添加、删除、查询模块是我们经常遇到的,这些模块的测试点该如何考虑 1)登录 ① 用户名和密码都符合要求(格式上的要求) ② 用户名和密码都不符合要求(格式上的要求) ③ 用户名符合要求,密码不符合要求(格式上的要求) ④ 密码符合要求,…...

css利用flex分配剩余高度出现子组件溢出问题
1.利用flex分配剩余高度/宽度 情景:父组件高度一定,子组件中,其他子组件高度固定,一个子组件高度不确定(页面滚动列表) .father{display: flex;flex-direction: column;.son1{height: 200px;}.son2{//或 …...
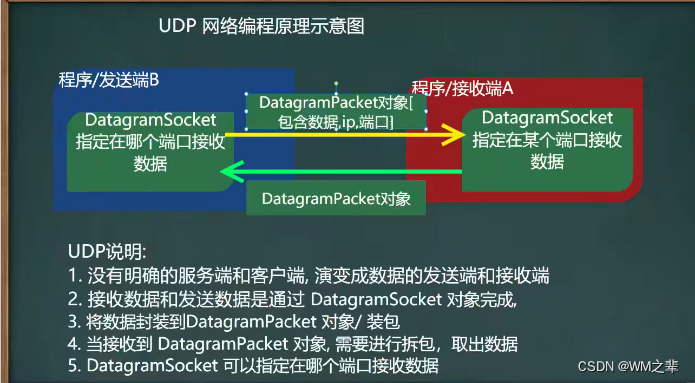
Java中的网络编程------基于Socket的TCP编程和基于UDP的网络编程,netstat指令
Socket 在Java中,Socket是一种用于网络通信的编程接口,它允许不同计算机之间的程序进行数据交换和通信。Socket使得网络应用程序能够通过TCP或UDP协议在不同主机之间建立连接、发送数据和接收数据。以下是Socket的基本介绍: Socket类型&…...

【【STM32-29正点原子版本串口发送传输实验】
STM32-29正点原子版本串口发送传输实验 通过串口接收或发送一个字符 例程目的 开发板上我们接入的是实现异步通信的UART接口 USB转串口原理图 我们一步步分析 PA9是串口1 的发送引脚 PA10是串口1 的接受引脚 。因为我们现在只是用到异步收发器功能,所以我们现…...

【面试题精讲】什么是websocket?如何与前端通信?
有的时候博客内容会有变动,首发博客是最新的,其他博客地址可能会未同步,认准https://blog.zysicyj.top 首发博客地址 系列文章地址 什么是WebSocket? WebSocket是一种在Web应用程序中实现双向通信的协议。它允许在客户端和服务器之间建立持久…...
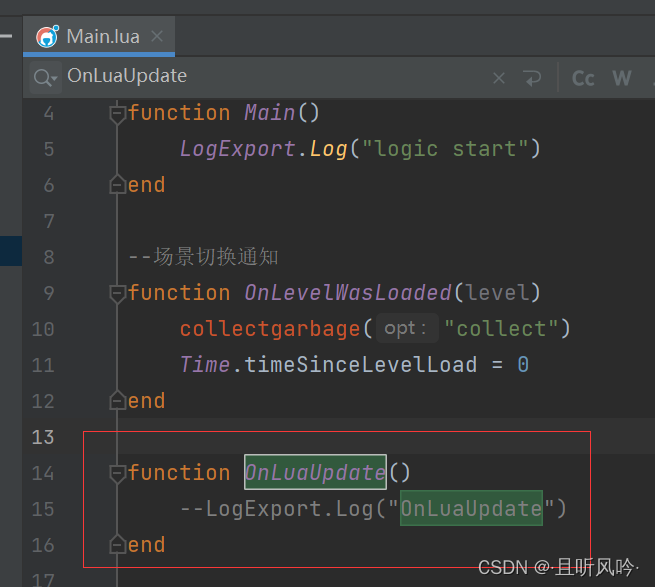
unity tolua热更新框架教程(2)
Lua启动流程 增加脚本luamain,继承luaclient 建立第一个场景GameMain,在对象GameMain挂载脚本LuaMain,启动场景 看到打印,lua被成功加载 lua入口及调用堆栈 这里会执行main.lua文件的main函数 C#接口导出 在此处配置C#导出的代码 …...
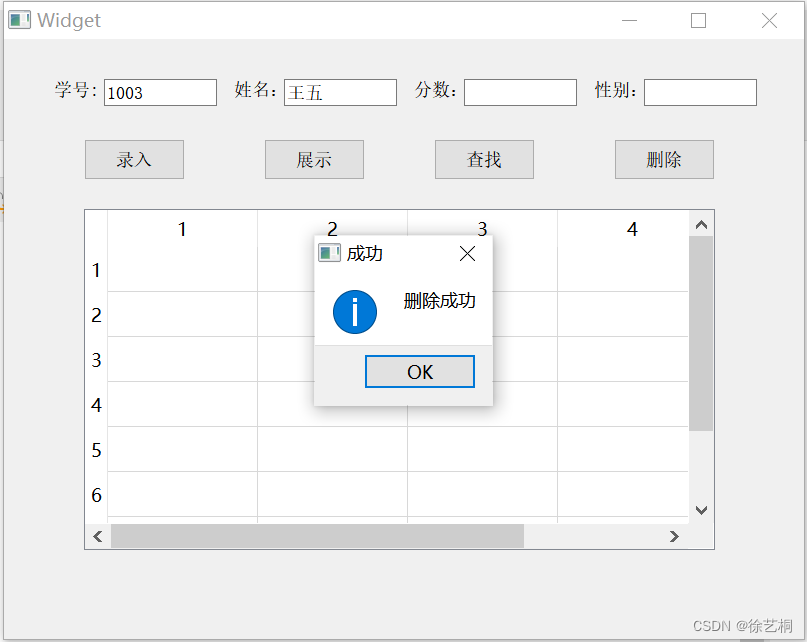
【0904作业】QT 完成登陆界面跳转到聊天室+完成学生管理系统的查找和删除功能
一、完成登陆界面跳转到聊天室 1> 项目结构 2> 源码 ① .pro ②main #include "mywnd.h" #include"chatCli.h" #include <QApplication>int main(int argc, char *argv[]) {QApplication a(argc, argv);MyWnd w;w.show();Form f;QObject::co…...

ceph源码阅读 buffer
ceph::buffer是ceph非常底层的实现,负责管理ceph的内存。ceph::buffer的设计较为复杂,但本身没有任何内容,主要包含buffer::list、buffer::ptr、buffer::hash。这三个类都定义在src/include/buffer.h和src/common/http://buffer.cc中。 buffe…...

基本介绍——数据挖掘
1.数据挖掘的定义 数据挖掘是采用数学的、统计的、人工智能和神经网络等领域的科学方法,如记忆推理、聚类分析、关联分析、决策树、神经网络、基因算法等技术,从大量数据中挖掘出隐含的、先前未知的、对决策有潜在价值的关系、模式和趋势,并…...

Navicat连接postgresql时出现‘datlastsysoid does not exist‘报错
当使用 Navicat 连接 PostgreSQL 数据库时出现 ‘datlastsysoid does not exist’ 的错误报错,这可能是由于 Navicat 版本与 PostgreSQL 版本不兼容所致。 这是因为在较新的 PostgreSQL 版本中移除了 ‘datlastsysoid’ 列,但可能较旧版本的 Navicat 尚…...

冯诺依曼体系结构/什么是OS?
一、体系结构图 示意图 控制器可以控制其它4个硬件,四个硬件直接可以进行数据传输。 5大硬件 但是这些个体需要用“线”连接。 为什么要有存储器? 如果没有,实际速度则为输入、输出设备的速度。 加上后,变为内存的速度。&#…...

SD卡/TF卡简记
文章目录 MicroSD卡与SD卡关系与区别对比NM卡、XQD卡、CFexpress卡SD规格标识FAQ拍摄1080p或2k视频需要什么速度的sd卡?拍摄4k视频需要什么速度的sd卡?拍摄8k视频需要什么速度的sd卡? MicroSD卡与SD卡关系与区别 MicroSD卡原名为Trans-flash…...

深入解析RoboMaster电机数据包:从CAN原始字节到速度、角度、电流的转换全流程
深入解析RoboMaster电机数据包:从CAN原始字节到速度、角度、电流的转换全流程 在机器人竞赛和工业控制领域,CAN总线通信因其高可靠性和实时性成为电机控制的黄金标准。大疆RoboMaster系列电机通过CAN协议传递的8字节数据包,就像一串精心设计的…...

Obsidian 完整使用手册 — 目录与索引
Obsidian 完整使用手册 — 目录与索引 一份从入门到精通的 Obsidian 全面指南,涵盖基础操作、核心功能、插件生态、同步备份与进阶技巧。 手册列表 编号手册名称内容概要01基础入门篇软件安装、界面布局、库管理、核心设置02Markdown 语法篇格式化语法、扩展语法、…...

手把手教你定制专属标注工具:基于Python3+Tkinter打造你的实体关系标注器
从零构建领域专用标注工具:Python3Tkinter实战指南 在自然语言处理项目中,高质量标注数据是模型效果的基石。当面对法律条文、医疗报告等专业领域时,通用标注工具往往难以满足特定实体关系和输出格式需求。本文将带你深入开发一个完全可控的实…...

5元级MCU Air601实战评测:硬件兼容、LuatOS开发与ESP12F迁移指南
1. 项目概述:一颗5元级MCU的“越级”挑战最近在捣鼓一个智能家居的小玩意儿,原本计划用ESP12F(也就是我们常说的ESP8266模组)来做,毕竟它生态成熟,资料遍地都是。但在采购物料时,偶然瞥见了合宙…...

别再手动转换时间了!用Jackson和Spring的这两个注解,搞定Java日期序列化所有坑
彻底告别Java日期转换噩梦:Jackson与Spring注解实战指南 如果你曾在Java项目中处理过日期时间转换,一定对以下场景不陌生:前端传过来的字符串日期需要手动解析成Date对象,返回给前端的日期格式乱七八糟,时区问题导致时…...

巡检记录分析不全面,导致安全隐患遗漏频发怎么办?揭秘实在Agent非侵入式提效方案
摘要:在2026年工业4.0与智慧安全深度融合的背景下,许多企业仍面临“巡检记录分析不全面,安全隐患遗漏频发”的顽疾。传统的纸质记录或初级数字化巡检,往往因数据孤岛、老旧系统无API接口、以及AI无法触达内网执行层等问题…...
)
解放双手!用STAR-CCM+的3D-CAD模块快速清理与简化仿真几何(保姆级教程)
解放双手!用STAR-CCM的3D-CAD模块快速清理与简化仿真几何(保姆级教程) 在CAE仿真领域,几何模型的质量往往直接决定仿真效率与结果可靠性。许多工程师都有过这样的经历:从设计部门拿到一个细节完美的CAD模型,…...

taotoken用量看板如何帮助项目管理者精细化追踪api成本
🚀 告别海外账号与网络限制!稳定直连全球优质大模型,限时半价接入中。 👉 点击领取海量免费额度 taotoken用量看板如何帮助项目管理者精细化追踪api成本 对于依赖大模型API进行开发的项目团队而言,成本控制始终是一个…...

CANN/catlass精度分析基础
精度分析基础 【免费下载链接】catlass 本项目是CANN的算子模板库,提供NPU上高性能矩阵乘及其相关融合类算子模板样例。 项目地址: https://gitcode.com/cann/catlass 写在前面 该文档主要说明CATLASS样例开发中精度分析的基础知识,包括样例精度…...

iOS种子下载终极指南:iTorrent让你的iPhone变身专业下载中心
iOS种子下载终极指南:iTorrent让你的iPhone变身专业下载中心 【免费下载链接】iTorrent Torrent client for iOS 16 项目地址: https://gitcode.com/gh_mirrors/it/iTorrent 还在为iPhone无法下载种子文件而烦恼吗?iTorrent这款专业的iOS种子客户…...