threejs-开发入门与调试设置
近年来web得到了快速的发展。随着HTML5的普及,网页的表现能力越来越强大。网页上已经可以做出很多复杂的动画,精美的效果。还能通过WebGL在网页中绘制高性能的3D图形。 学习资料来源:https://www.three3d.cn/threejs/01-%E5%BC%80%E5%8F%91%E7%8E%AF%E5%A2%83%E6%90%AD%E5%BB%BA/01-%E5%89%8D%E7%AB%AF3D%E5%8F%AF%E8%A7%86%E5%8C%96Three.js%E5%AD%A6%E4%B9%A0%E8%B7%AF%E7%BA%BF.html
一、threejs简介
随着浏览器性能和网络带宽的大幅度提升,以及WebGL的实现,使得3D技术不再是桌面程序的专利,越来越多的Web应用使用3D技术。
对网站而言,Web3D技术运用,实现企业网站三维呈现,让企业形象更直观、更立体地展现给客户,打破传统平面展示模式,打造智慧、个性、创新的企业形象。目前政府有大量的新基建项目,如数字孪生、智慧城市、智慧园区、智慧工厂等等都涉及到了3D可视化技术。
今天就来给大家讲讲如何系统的学好WEB 3D可视化技术。
我们可以先从threejs库入手。threejs是一个让用户通过javascript入手进入搭建webgl项目的类库。众所周知学习webgl需要图形学知识,而webgl需要通过js和glsl两种语言。
如果我们不通过threejs使用webgl势必逃不过底层知识:你必须全面了解着色器语法和自己编写顶点着色片元着色;但你使用了threejs显然可以便捷的逃过这些难懂的底层,对于传统js从业人员直接挑战的shader确实是有难度的。
学习three.js首先掌握基础概念什么是点、线、面、几何体、材质、物体、场景、相机、渲染器、动画、控制器等基础概念,搞定一个最基础的场景和3d物体的显示。接着学会调试3D开发代码。接着即可深入上诉概念的每一个概念,详细了解官网文档该类的各种属性与概念。
接着3d渲染要真实性,肯定离不开PBR,详细了解什么是PBR,PBR基于物理的光照原理的渲染,。掌握什么是环境贴图、凹凸贴图、置换贴图、放射光、,环境贴图、金属贴图、粗糙度贴图等等,去打造真实的物体显示效果。接着掌握如何绘制粒子群,来绘制雨雪、落叶、星河等各种粒子效果,甚至产品的粒子效果。

掌握了这些,基本就算入了个小门了,接着就是要实现能和物体进行交互,如何选中与场景中的物体进行交互。而且还要能够掌握物理引擎让物体有真实的物理效果,例如重力,反弹、摩擦力等这样物体相互作用会更加真实。
接着就要开始真正进入WEBGL魔力的世界,掌握着色器语言,控制GPU渲染,掌握实现three.js底层封装的原理,能够图形渲染原理,掌握编写顶点着色器和片元着色器,来绘制动态飘扬的旗帜。以及编写动态的烟雾和乌云,水纹。
掌握了这些就可以写节日酷炫的烟花了,接着可以继续掌握各种后期合成效果,对整个渲染画面进行调整,例如打造闪烁的画面,雪花感的陈旧电视画面,又或者通过编写着色器,打造出水底世界的效果。
接着掌握曲线和物体运动的结合,在加上着色器编写,即可实现各种飞线、雷达、光墙特效。通过地理信息数据,获取建筑信息,可以生成建筑的框架和高度渲染出数字城市。当然日常网页也或有一些文字信息标识,想要文字标识也加上3d效果,就需要掌握css3d的渲染器来渲染。
当然如果需要掌握渲染精美真实的智慧园区的,就需要掌握建模技术,例如学习blender软件搭建模型和优化模型,才能最终输出到网页中,包括动画也可以先用blender做好在输出到网页中,不用辛苦的进行复杂动画的编写,可以可视化的制作。
二、本地搭建threejs网站
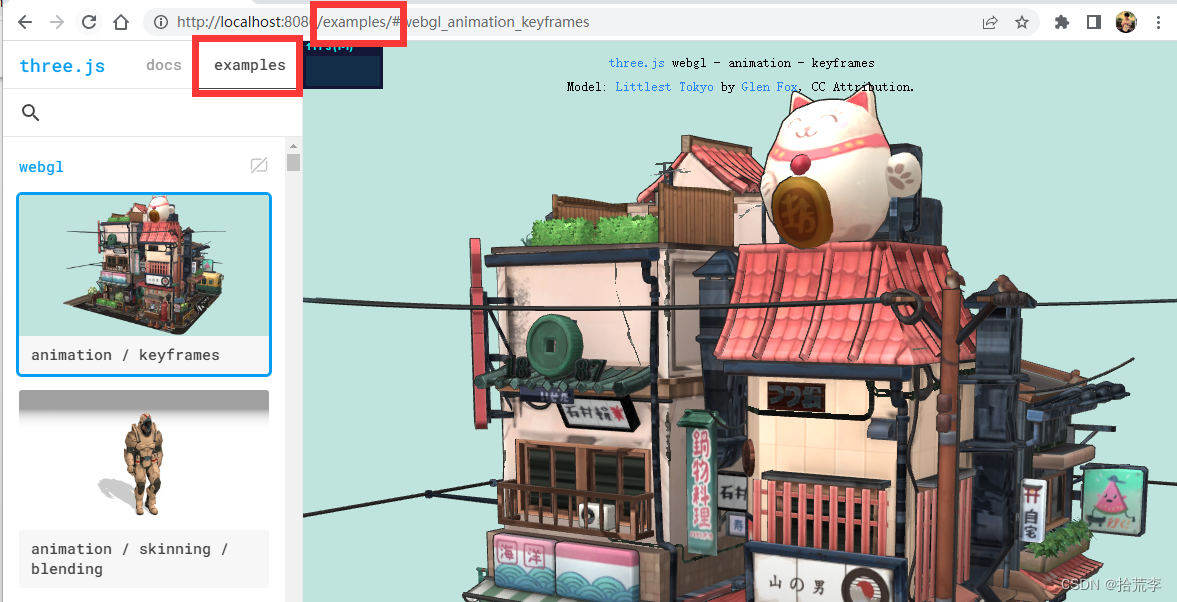
因为Three.js官网是国外的服务器,所以为了方便学习和快速的查阅文档,我们可以自己搭建Three.js官网和文档,方便随时查看案例和文档内容进行学习。
1、首先进入threejs库GitHub地址:https://github.com/mrdoob/three.js
2、下载完整代码
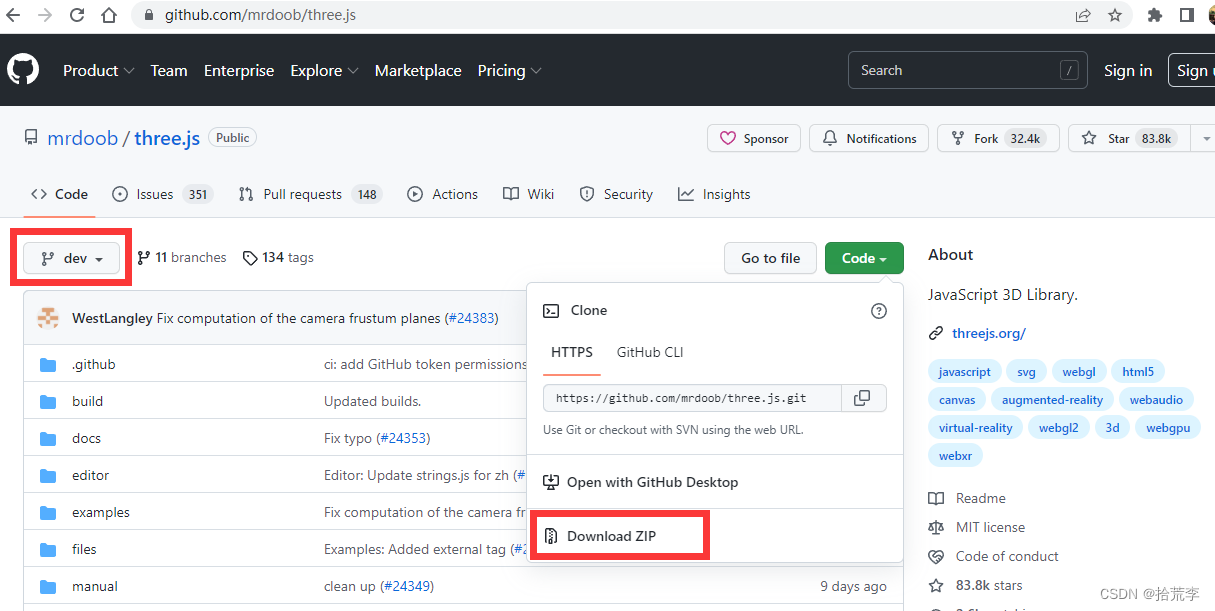
3、项目文件解压缩
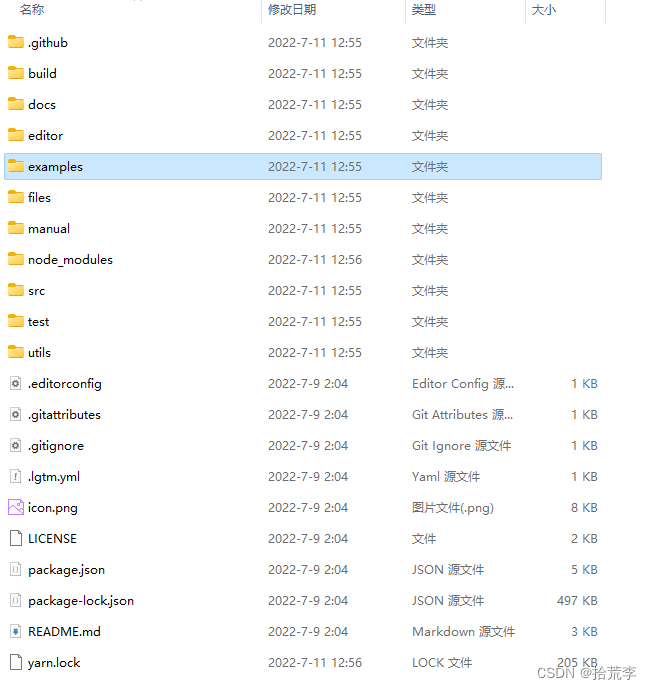
4、命令行安装依赖
一般安装可以用npm、yarn等包管理工具,课程以yarn举例,如果没有安装可以用npm install yarn -g进行安装。
yarn install
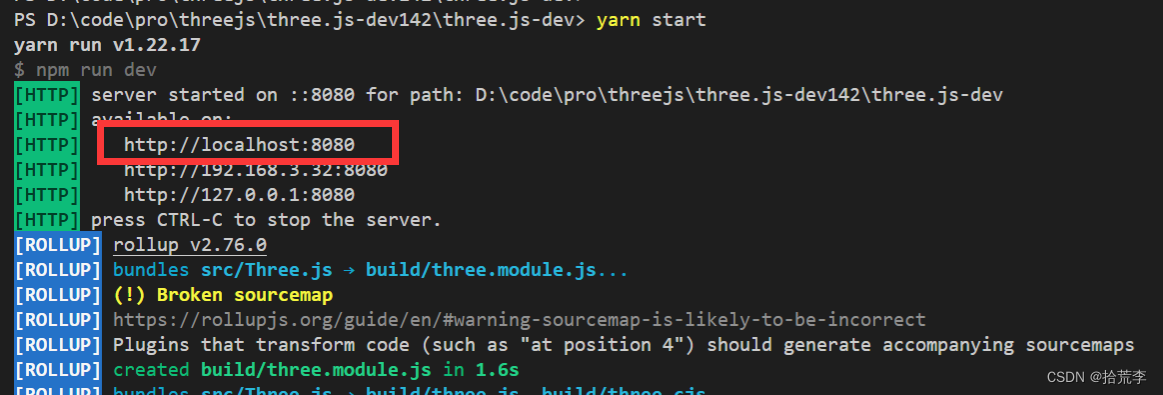
5、启动项目
yarn start
6、文档目录介绍

build目录:
三、threejs第一个3d页面
版本
{"name": "01-startapp","private": true,"version": "0.0.0","type": "module","scripts": {"dev": "vite","build": "vite build","preview": "vite preview"},"devDependencies": {"vite": "^4.3.9"},"dependencies": {"three": "^0.153.0"}
}
// 导入threejs
import * as THREE from "three";// 创建场景
const scene = new THREE.Scene();// 创建相机
const camera = new THREE.PerspectiveCamera(45, // 视角window.innerWidth / window.innerHeight, // 宽高比0.1, // 近平面1000 // 远平面
);// 创建渲染器
const renderer = new THREE.WebGLRenderer();
renderer.setSize(window.innerWidth, window.innerHeight);
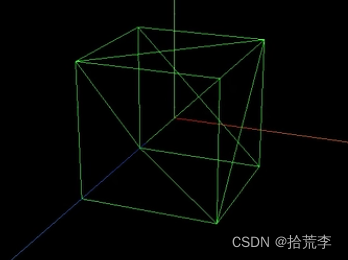
document.body.appendChild(renderer.domElement);// 创建几何体
const geometry = new THREE.BoxGeometry(1, 1, 1);
// 创建材质
const material = new THREE.MeshBasicMaterial({ color: 0x00ff00 });
// 创建网格
const cube = new THREE.Mesh(geometry, material);// 将网格添加到场景中
scene.add(cube);// 设置相机位置
camera.position.z = 5;
camera.lookAt(0, 0, 0);// 渲染函数
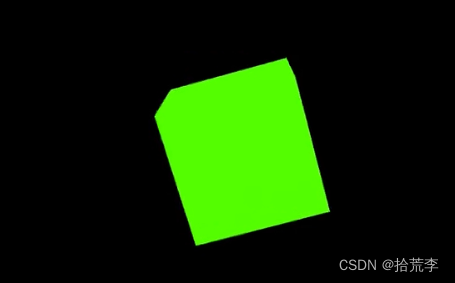
function animate() {requestAnimationFrame(animate);// 旋转cube.rotation.x += 0.01;cube.rotation.y += 0.01;// 渲染renderer.render(scene, camera);
}
animate();效果
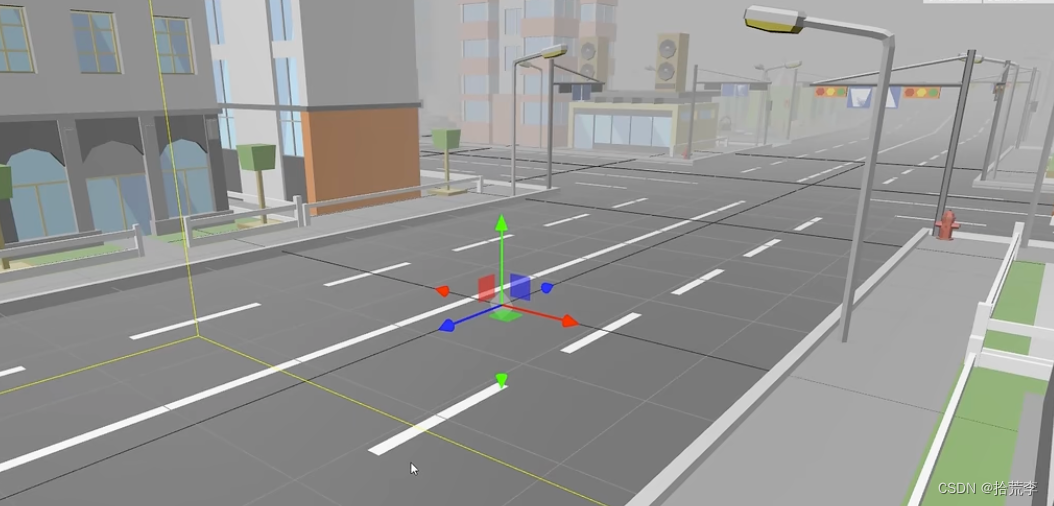
四、坐标辅助器与轨道控制器
// 导入threejs
import * as THREE from "three";
// 导入轨道控制器
import { OrbitControls } from "three/examples/jsm/controls/OrbitControls.js";// 创建场景
const scene = new THREE.Scene();// 创建相机
const camera = new THREE.PerspectiveCamera(45, // 视角window.innerWidth / window.innerHeight, // 宽高比0.1, // 近平面1000 // 远平面
);// 创建渲染器
const renderer = new THREE.WebGLRenderer();
renderer.setSize(window.innerWidth, window.innerHeight);
document.body.appendChild(renderer.domElement);// 创建几何体
const geometry = new THREE.BoxGeometry(1, 1, 1);
// 创建材质
const material = new THREE.MeshBasicMaterial({ color: 0x00ff00 });
// 创建网格
const cube = new THREE.Mesh(geometry, material);// 将网格添加到场景中
scene.add(cube);// 设置相机位置
camera.position.z = 5;
camera.position.y = 2;
camera.position.x = 2;
camera.lookAt(0, 0, 0);// 添加世界坐标辅助器
const axesHelper = new THREE.AxesHelper(5);
scene.add(axesHelper);// 添加轨道控制器
const controls = new OrbitControls(camera, document.body);
// 设置带阻尼的惯性
controls.enableDamping = true;
// 设置阻尼系数
controls.dampingFactor = 0.05;
// 设置旋转速度
controls.autoRotate = true;// 渲染函数
function animate() {controls.update();requestAnimationFrame(animate);// 旋转// cube.rotation.x += 0.01;// cube.rotation.y += 0.01;// 渲染renderer.render(scene, camera);
}
animate();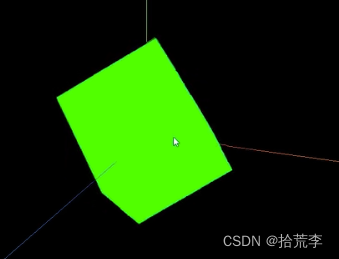
五、物体移动与父子元素
前面我们创建了物体,为了让物体移动起来。我们可以设置它的position属性进行位置的设置。
相机和立方体都是物体。每个物体都是1个对象。
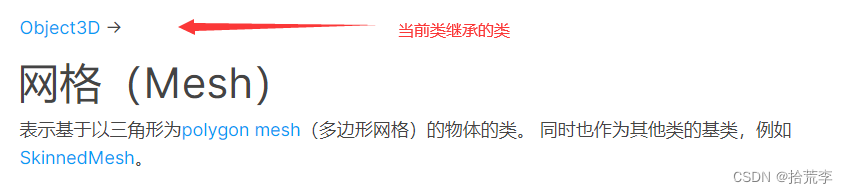
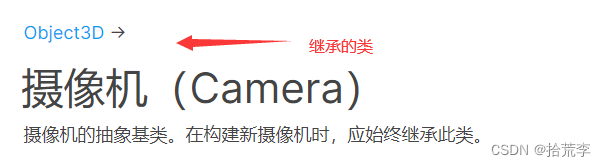
在官方文档里,我们可以看到相机camera和物体mesh都继承Object3D类。所以camera、mesh都属于3d对象。从3d对象的官方文档里,我们可以找到position属性,并且该属性一个vector3对象。因此通过官方vector3类的文档,我们可以简单使用下面2种方式来修改position位置,当然后面还会讲解更多的方式。
//设置该向量的x、y 和 z 分量。
mesh.position.set(x,y,z);
//直接设置position的x,y,z属性
mesh.position.x = x;
mesh.position.y = y;
mesh.position.z = z;
官方文档:https://threejs.org/docs/index.html?q=vect#api/zh/math/Vector3

例如,每一帧让立方体向右移动0.01,并且当位置大于5时,从0开始。那么可以这么设置。
function render() {cube.position.x += 0.01;if (cube.position.x > 5) {cube.position.x = 0;}renderer.render(scene, camera);//   渲染下一帧的时候就会调用render函数requestAnimationFrame(render);
}render();
// 导入threejs
import * as THREE from "three";
// 导入轨道控制器
import { OrbitControls } from "three/examples/jsm/controls/OrbitControls.js";// 创建场景
const scene = new THREE.Scene();// 创建相机
const camera = new THREE.PerspectiveCamera(45, // 视角window.innerWidth / window.innerHeight, // 宽高比0.1, // 近平面1000 // 远平面
);// 创建渲染器
const renderer = new THREE.WebGLRenderer();
renderer.setSize(window.innerWidth, window.innerHeight);
document.body.appendChild(renderer.domElement);// 创建几何体
const geometry = new THREE.BoxGeometry(1, 1, 1);
// 创建材质
const material = new THREE.MeshBasicMaterial({ color: 0x00ff00 });
const parentMaterial = new THREE.MeshBasicMaterial({ color: 0xff0000 });
// 创建网格
let parentCube = new THREE.Mesh(geometry, parentMaterial);
const cube = new THREE.Mesh(geometry, material);
parentCube.add(cube);
parentCube.position.set(-3, 0, 0);// cube.position.x = 2;
cube.position.set(3, 0, 0);// 将网格添加到场景中
scene.add(parentCube);// 设置相机位置
camera.position.z = 5;
camera.position.y = 2;
camera.position.x = 2;
camera.lookAt(0, 0, 0);// 添加世界坐标辅助器
const axesHelper = new THREE.AxesHelper(5);
scene.add(axesHelper);// 添加轨道控制器
const controls = new OrbitControls(camera, document.body);
// 设置带阻尼的惯性
controls.enableDamping = true;
// 设置阻尼系数
controls.dampingFactor = 0.05;
// 设置旋转速度
// controls.autoRotate = true;// 渲染函数
function animate() {controls.update();requestAnimationFrame(animate);// 旋转// cube.rotation.x += 0.01;// cube.rotation.y += 0.01;// 渲染renderer.render(scene, camera);
}
animate();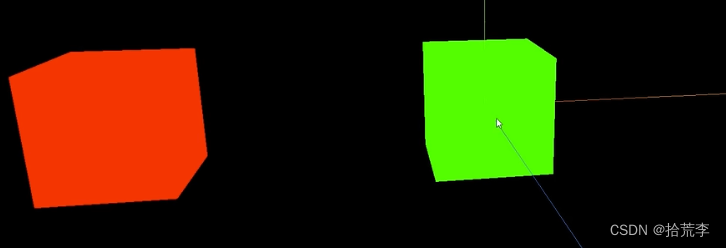
六、物体的缩放与旋转
scale设置缩放
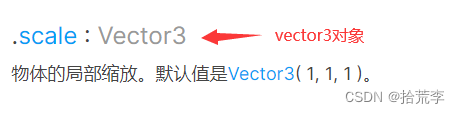
//例如设置x轴放大3倍、y轴方向放大2倍、z轴方向不变
cube.scale.set(3, 2, 1);
//单独设置某个轴的缩放
cube.scale.x = 3
rotation设置旋转
//直接设置旋转属性,例如围绕x轴旋转90度
cube.rotation.x = -Math.PI/2//围绕x轴旋转45度
cube.rotation.set(-Math.PI / 4, 0, 0, "XZY");
旋转动画
每一帧旋转弧度制的0.01角度,实现动画代码
function render() {cube.position.x += 0.01;cube.rotation.x += 0.01;if (cube.position.x > 5) {cube.position.x = 0;}renderer.render(scene, camera);//   渲染下一帧的时候就会调用render函数requestAnimationFrame(render);
}
// 导入threejs
import * as THREE from "three";
// 导入轨道控制器
import { OrbitControls } from "three/examples/jsm/controls/OrbitControls.js";// 创建场景
const scene = new THREE.Scene();// 创建相机
const camera = new THREE.PerspectiveCamera(45, // 视角window.innerWidth / window.innerHeight, // 宽高比0.1, // 近平面1000 // 远平面
);// 创建渲染器
const renderer = new THREE.WebGLRenderer();
renderer.setSize(window.innerWidth, window.innerHeight);
document.body.appendChild(renderer.domElement);// 创建几何体
const geometry = new THREE.BoxGeometry(1, 1, 1);
// 创建材质
const material = new THREE.MeshBasicMaterial({ color: 0x00ff00 });
const parentMaterial = new THREE.MeshBasicMaterial({ color: 0xff0000 });
// 创建网格
let parentCube = new THREE.Mesh(geometry, parentMaterial);
const cube = new THREE.Mesh(geometry, material);
parentCube.add(cube);
parentCube.position.set(-3, 0, 0);
parentCube.rotation.x = Math.PI / 4;
// parentCube.scale.set(2, 2, 2);// cube.position.x = 2;
cube.position.set(3, 0, 0);
// 设置立方体的放大
// cube.scale.set(2, 2, 2);
// 绕着x轴旋转
cube.rotation.x = Math.PI / 4;// 将网格添加到场景中
scene.add(parentCube);// 设置相机位置
camera.position.z = 5;
camera.position.y = 2;
camera.position.x = 2;
camera.lookAt(0, 0, 0);// 添加世界坐标辅助器
const axesHelper = new THREE.AxesHelper(5);
scene.add(axesHelper);// 添加轨道控制器
const controls = new OrbitControls(camera, document.body);
// 设置带阻尼的惯性
controls.enableDamping = true;
// 设置阻尼系数
controls.dampingFactor = 0.05;
// 设置旋转速度
// controls.autoRotate = true;// 渲染函数
function animate() {controls.update();requestAnimationFrame(animate);// 旋转// cube.rotation.x += 0.01;// cube.rotation.y += 0.01;// 渲染renderer.render(scene, camera);
}
animate();
七、设置响应式画布与全屏控制
你会发现,我们前面写好的代码,在页面尺寸发生改变的时候,并不能自适应的改变尺寸,而出现空白或者滚动条突出的情况。所以监听屏幕大小的改变,来重新设置相机的宽高比例和渲染器的尺寸大小,代码如下:
// 监听画面变化,更新渲染画面
window.addEventListener("resize", () => {//   console.log("画面变化了");// 更新摄像头camera.aspect = window.innerWidth / window.innerHeight;//   更新摄像机的投影矩阵camera.updateProjectionMatrix();//   更新渲染器renderer.setSize(window.innerWidth, window.innerHeight);//   设置渲染器的像素比renderer.setPixelRatio(window.devicePixelRatio);
});
aspect属性是设置摄像机视锥体的长宽比,通常是使用画布的宽/画布的高。camera.updateProjectionMatrix()用于更新摄像机投影矩阵,相机任何参数被改变以后必须被调用
控制场景全屏
经常我们需要全屏的展示三维场景。例如,我们想要双击,实现全屏效果,代码如下:
window.addEventListener("dblclick", () => {const fullScreenElement = document.fullscreenElement;if (!fullScreenElement) {//   双击控制屏幕进入全屏,退出全屏// 让画布对象全屏renderer.domElement.requestFullscreen();} else {//   退出全屏,使用document对象document.exitFullscreen();}
});
fullscreenElement只读属性返回当前在此文档中以全屏模式显示的元素。
如果文档当前未使用全屏模式,则返回值为null。
使用element.requestFullscreen()方法以全屏模式查看元素,exitFullscreen方法退出全屏。
八、GUI调试开发3D效果
为了开发调试方便
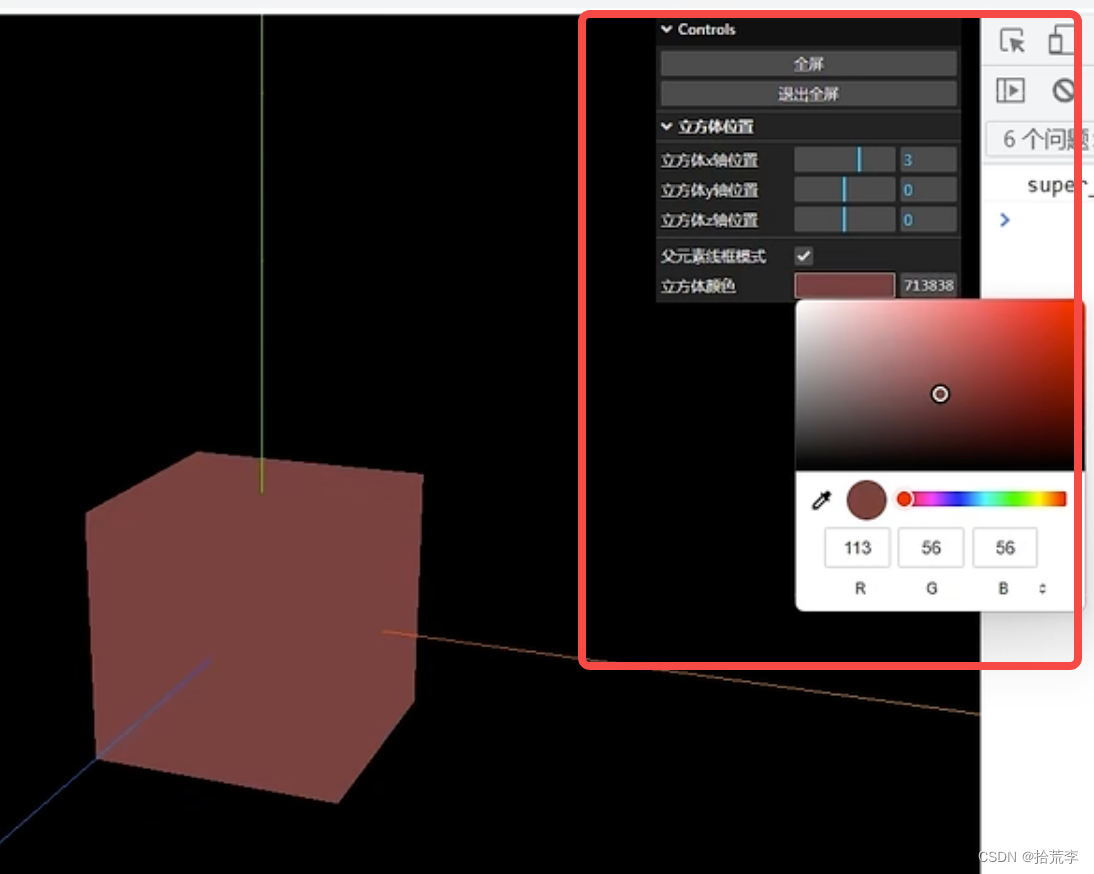
let eventObj = {Fullscreen: function () {// 全屏document.body.requestFullscreen();console.log("全屏");},ExitFullscreen: function () {document.exitFullscreen();console.log("退出全屏");},
};// 创建GUI
const gui = new GUI();
// 添加按钮
gui.add(eventObj, "Fullscreen").name("全屏");
gui.add(eventObj, "ExitFullscreen").name("退出全屏");
// 控制立方体的位置
// gui.add(cube.position, "x", -5, 5).name("立方体x轴位置");
let folder = gui.addFolder("立方体位置");
folder.add(cube.position, "x").min(-10).max(10).step(1).name("立方体x轴位置").onChange((val) => {console.log("立方体x轴位置", val);});
folder.add(cube.position, "y").min(-10).max(10).step(1).name("立方体y轴位置").onFinishChange((val) => {console.log("立方体y轴位置", val);});
folder.add(cube.position, "z").min(-10).max(10).step(1).name("立方体z轴位置");gui.add(parentMaterial, "wireframe").name("父元素线框模式");let colorParams = {cubeColor: "#00ff00",
};gui.addColor(colorParams, "cubeColor").name("立方体颜色").onChange((val) => {cube.material.color.set(val);});
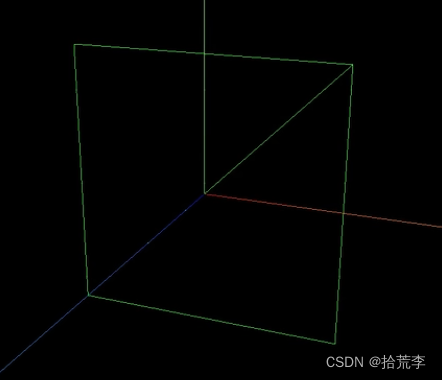
九、几何体_定点_索引_面之BufferGeometry
所有的3D图形都是由三角形构成
// 导入threejs
import * as THREE from "three";
// 导入轨道控制器
import { OrbitControls } from "three/examples/jsm/controls/OrbitControls.js";
// 导入lil.gui
import { GUI } from "three/examples/jsm/libs/lil-gui.module.min.js";// 创建场景
const scene = new THREE.Scene();// 创建相机
const camera = new THREE.PerspectiveCamera(45, // 视角window.innerWidth / window.innerHeight, // 宽高比0.1, // 近平面1000 // 远平面
);// 创建渲染器
const renderer = new THREE.WebGLRenderer();
renderer.setSize(window.innerWidth, window.innerHeight);
document.body.appendChild(renderer.domElement);// // 创建几何体
const cubegeometry = new THREE.BoxGeometry(1, 1, 1);
console.log(cubegeometry);
// // 创建材质
// const material = new THREE.MeshBasicMaterial({
//   color: 0x00ff00,
//   wireframe: true,
// });
// const cube = new THREE.Mesh(geometry, material);
// console.log(geometry);// // 将网格添加到场景中
// scene.add(cube);// 创建几何体
const geometry = new THREE.BufferGeometry();
// 创建顶点数据,顶点是有序的,每三个为一个顶点,逆时针为正面
// const vertices = new Float32Array([
//   -1.0, -1.0, 0.0, 1.0, -1.0, 0.0, 1.0, 1.0, 0.0,//   1.0, 1.0, 0, -1.0, 1.0, 0, -1.0, -1.0, 0,
// ]);
// // 创建顶点属性
// geometry.setAttribute("position", new THREE.BufferAttribute(vertices, 3));// 使用索引绘制
const vertices = new Float32Array([-1.0, -1.0, 0.0, 1.0, -1.0, 0.0, 1.0, 1.0, 0.0, -1.0, 1.0, 0,
]);
// 创建顶点属性
geometry.setAttribute("position", new THREE.BufferAttribute(vertices, 3));
// 创建索引
const indices = new Uint16Array([0, 1, 2, 2, 3, 0]);
// 创建索引属性
geometry.setIndex(new THREE.BufferAttribute(indices, 1));console.log(geometry);
// 创建材质
const material = new THREE.MeshBasicMaterial({color: 0x00ff00,// side: THREE.DoubleSide,wireframe: true,
});
const plane = new THREE.Mesh(geometry, material);
scene.add(plane);// 设置相机位置
camera.position.z = 5;
camera.position.y = 2;
camera.position.x = 2;
camera.lookAt(0, 0, 0);// 添加世界坐标辅助器
const axesHelper = new THREE.AxesHelper(5);
scene.add(axesHelper);// 添加轨道控制器
const controls = new OrbitControls(camera, renderer.domElement);
// 设置带阻尼的惯性
controls.enableDamping = true;
// 设置阻尼系数
controls.dampingFactor = 0.05;
// 设置旋转速度
// controls.autoRotate = true;// 渲染函数
function animate() {controls.update();requestAnimationFrame(animate);// 渲染renderer.render(scene, camera);
}
animate();// 监听窗口变化
window.addEventListener("resize", () => {// 重置渲染器宽高比renderer.setSize(window.innerWidth, window.innerHeight);// 重置相机宽高比camera.aspect = window.innerWidth / window.innerHeight;// 更新相机投影矩阵camera.updateProjectionMatrix();
});let eventObj = {Fullscreen: function () {// 全屏document.body.requestFullscreen();console.log("全屏");},ExitFullscreen: function () {document.exitFullscreen();console.log("退出全屏");},
};// 创建GUI
const gui = new GUI();
// 添加按钮
gui.add(eventObj, "Fullscreen").name("全屏");
gui.add(eventObj, "ExitFullscreen").name("退出全屏");
// 控制立方体的位置
// gui.add(cube.position, "x", -5, 5).name("立方体x轴位置");
十、几何体划分定点组设置不同材质
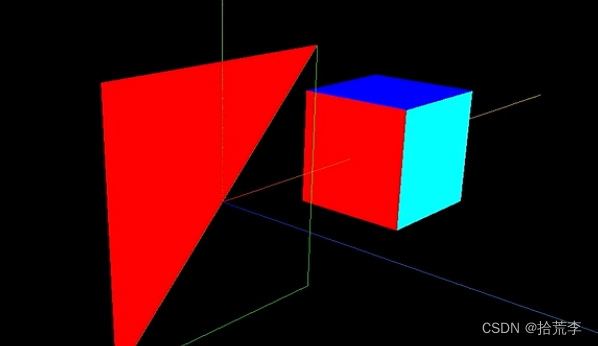
// 创建渲染器
const renderer = new THREE.WebGLRenderer();
renderer.setSize(window.innerWidth, window.innerHeight);
document.body.appendChild(renderer.domElement);// // 创建几何体
const cubegeometry = new THREE.BoxGeometry(1, 1, 1);
console.log(cubegeometry);
// // 创建材质
const cubematerial0 = new THREE.MeshBasicMaterial({color: 0x00ff00,// wireframe: true,
});
const cubematerial1 = new THREE.MeshBasicMaterial({color: 0xff0000,
});
const cubematerial2 = new THREE.MeshBasicMaterial({color: 0x0000ff,
});
const cubematerial3 = new THREE.MeshBasicMaterial({color: 0xffff00,
});
const cubematerial4 = new THREE.MeshBasicMaterial({color: 0x00ffff,
});
const cubematerial5 = new THREE.MeshBasicMaterial({color: 0xff00ff,
});
const cube = new THREE.Mesh(cubegeometry, [cubematerial0,cubematerial1,cubematerial2,cubematerial3,cubematerial4,cubematerial5,
]);
// console.log(geometry);cube.position.x = 2;// 将网格添加到场景中
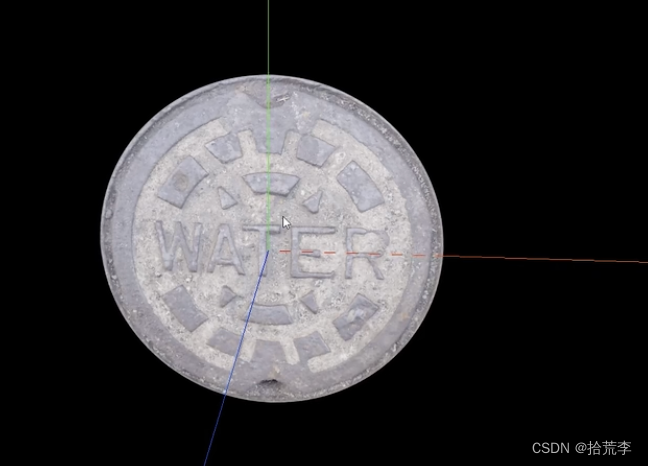
scene.add(cube);十一、基础材质纹理贴图使用
// 导入threejs
import * as THREE from "three";
// 导入轨道控制器
import { OrbitControls } from "three/examples/jsm/controls/OrbitControls.js";
// 导入lil.gui
import { GUI } from "three/examples/jsm/libs/lil-gui.module.min.js";
// 导入hdr加载器
import { RGBELoader } from "three/examples/jsm/loaders/RGBELoader.js";// 创建场景
const scene = new THREE.Scene();// 创建相机
const camera = new THREE.PerspectiveCamera(45, // 视角window.innerWidth / window.innerHeight, // 宽高比0.1, // 近平面1000 // 远平面
);// 创建渲染器
const renderer = new THREE.WebGLRenderer();
renderer.setSize(window.innerWidth, window.innerHeight);
document.body.appendChild(renderer.domElement);// 设置相机位置
camera.position.z = 5;
camera.position.y = 2;
camera.position.x = 2;
camera.lookAt(0, 0, 0);// 添加世界坐标辅助器
const axesHelper = new THREE.AxesHelper(5);
scene.add(axesHelper);// 添加轨道控制器
const controls = new OrbitControls(camera, renderer.domElement);
// 设置带阻尼的惯性
controls.enableDamping = true;
// 设置阻尼系数
controls.dampingFactor = 0.05;
// 设置旋转速度
// controls.autoRotate = true;// 渲染函数
function animate() {controls.update();requestAnimationFrame(animate);// 渲染renderer.render(scene, camera);
}
animate();// 监听窗口变化
window.addEventListener("resize", () => {// 重置渲染器宽高比renderer.setSize(window.innerWidth, window.innerHeight);// 重置相机宽高比camera.aspect = window.innerWidth / window.innerHeight;// 更新相机投影矩阵camera.updateProjectionMatrix();
});let params = {};// 创建GUI
const gui = new GUI();// 创建纹理加载器
let textureLoader = new THREE.TextureLoader();
// 加载纹理
let texture = textureLoader.load("./texture/watercover/CityNewYork002_COL_VAR1_1K.png"
);
// 加载ao贴图
let aoMap = textureLoader.load("./texture/watercover/CityNewYork002_AO_1K.jpg");// 透明度贴图
let alphaMap = textureLoader.load("./texture/door/height.jpg");// 光照贴图
let lightMap = textureLoader.load("./texture/colors.png");// 高光贴图
let specularMap = textureLoader.load("./texture/watercover/CityNewYork002_GLOSS_1K.jpg"
);// rgbeLoader 加载hdr贴图
let rgbeLoader = new RGBELoader();
rgbeLoader.load("./texture/Alex_Hart-Nature_Lab_Bones_2k.hdr", (envMap) => {// 设置球形贴图envMap.mapping = THREE.EquirectangularReflectionMapping;// 设置环境贴图scene.background = envMap;// 设置环境贴图scene.environment = envMap;// 设置plane的环境贴图planeMaterial.envMap = envMap;
});let planeGeometry = new THREE.PlaneGeometry(1, 1);
let planeMaterial = new THREE.MeshBasicMaterial({color: 0xffffff,map: texture,// 允许透明transparent: true,// 设置ao贴图aoMap: aoMap,aoMapIntensity: 1,// 透明度贴图// alphaMap: alphaMap,// 设置光照贴图// lightMap: lightMap,// 设置高光贴图specularMap: specularMap,reflectivity: 0.5,
});
// planeMaterial.map = texture;
let plane = new THREE.Mesh(planeGeometry, planeMaterial);
scene.add(plane);gui.add(planeMaterial, "aoMapIntensity").min(0).max(1).name("ao强度");
十二、纹理颜色空间

// 导入threejs
import * as THREE from "three";
// 导入轨道控制器
import { OrbitControls } from "three/examples/jsm/controls/OrbitControls.js";
// 导入lil.gui
import { GUI } from "three/examples/jsm/libs/lil-gui.module.min.js";
// 导入hdr加载器
import { RGBELoader } from "three/examples/jsm/loaders/RGBELoader.js";// 创建场景
const scene = new THREE.Scene();// 创建相机
const camera = new THREE.PerspectiveCamera(45, // 视角window.innerWidth / window.innerHeight, // 宽高比0.1, // 近平面1000 // 远平面
);// 创建渲染器
const renderer = new THREE.WebGLRenderer();
renderer.setSize(window.innerWidth, window.innerHeight);
document.body.appendChild(renderer.domElement);// 设置相机位置
camera.position.z = 5;
camera.position.y = 2;
camera.position.x = 2;
camera.lookAt(0, 0, 0);// 添加世界坐标辅助器
const axesHelper = new THREE.AxesHelper(5);
scene.add(axesHelper);// 添加轨道控制器
const controls = new OrbitControls(camera, renderer.domElement);
// 设置带阻尼的惯性
controls.enableDamping = true;
// 设置阻尼系数
controls.dampingFactor = 0.05;
// 设置旋转速度
// controls.autoRotate = true;// 渲染函数
function animate() {controls.update();requestAnimationFrame(animate);// 渲染renderer.render(scene, camera);
}
animate();// 监听窗口变化
window.addEventListener("resize", () => {// 重置渲染器宽高比renderer.setSize(window.innerWidth, window.innerHeight);// 重置相机宽高比camera.aspect = window.innerWidth / window.innerHeight;// 更新相机投影矩阵camera.updateProjectionMatrix();
});let params = {};// 创建GUI
const gui = new GUI();// 创建纹理加载器
let textureLoader = new THREE.TextureLoader();
// 加载纹理
let texture = textureLoader.load("./texture/watercover/CityNewYork002_COL_VAR1_1K.png"
);
console.log(texture);
texture.colorSpace = THREE.SRGBColorSpace;
// texture.colorSpace = THREE.LinearSRGBColorSpace;
// texture.colorSpace = THREE.NoColorSpace;// 加载ao贴图
let aoMap = textureLoader.load("./texture/watercover/CityNewYork002_AO_1K.jpg");// 透明度贴图
let alphaMap = textureLoader.load("./texture/door/height.jpg");// 光照贴图
let lightMap = textureLoader.load("./texture/colors.png");// 高光贴图
let specularMap = textureLoader.load("./texture/watercover/CityNewYork002_GLOSS_1K.jpg"
);// rgbeLoader 加载hdr贴图
let rgbeLoader = new RGBELoader();
rgbeLoader.load("./texture/Alex_Hart-Nature_Lab_Bones_2k.hdr", (envMap) => {// 设置球形贴图envMap.mapping = THREE.EquirectangularReflectionMapping;// 设置环境贴图scene.background = envMap;// 设置环境贴图scene.environment = envMap;// 设置plane的环境贴图planeMaterial.envMap = envMap;
});let planeGeometry = new THREE.PlaneGeometry(1, 1);
let planeMaterial = new THREE.MeshBasicMaterial({color: 0xffffff,map: texture,// 允许透明transparent: true,// 设置ao贴图aoMap: aoMap,aoMapIntensity: 1,// 透明度贴图// alphaMap: alphaMap,// 设置光照贴图// lightMap: lightMap,// 设置高光贴图specularMap: specularMap,reflectivity: 0.5,
});
// planeMaterial.map = texture;
let plane = new THREE.Mesh(planeGeometry, planeMaterial);
scene.add(plane);gui.add(planeMaterial, "aoMapIntensity").min(0).max(1).name("ao强度");
gui.add(texture, "colorSpace", {sRGB: THREE.SRGBColorSpace,Linear: THREE.LinearSRGBColorSpace,}).onChange(() => {texture.needsUpdate = true;});
十三、指数雾与线性雾
// 导入threejs
import * as THREE from "three";
// 导入轨道控制器
import { OrbitControls } from "three/examples/jsm/controls/OrbitControls.js";
// 导入lil.gui
import { GUI } from "three/examples/jsm/libs/lil-gui.module.min.js";
// 导入hdr加载器
import { RGBELoader } from "three/examples/jsm/loaders/RGBELoader.js";// 创建场景
const scene = new THREE.Scene();// 创建相机
const camera = new THREE.PerspectiveCamera(45, // 视角window.innerWidth / window.innerHeight, // 宽高比0.1, // 近平面1000 // 远平面
);// 创建渲染器
const renderer = new THREE.WebGLRenderer();
renderer.setSize(window.innerWidth, window.innerHeight);
document.body.appendChild(renderer.domElement);// 设置相机位置
camera.position.z = 5;
camera.position.y = 2;
camera.position.x = 2;
camera.lookAt(0, 0, 0);// 添加世界坐标辅助器
const axesHelper = new THREE.AxesHelper(5);
scene.add(axesHelper);// 添加轨道控制器
const controls = new OrbitControls(camera, renderer.domElement);
// 设置带阻尼的惯性
controls.enableDamping = true;
// 设置阻尼系数
controls.dampingFactor = 0.05;
// 设置旋转速度
// controls.autoRotate = true;// 渲染函数
function animate() {controls.update();requestAnimationFrame(animate);// 渲染renderer.render(scene, camera);
}
animate();// 监听窗口变化
window.addEventListener("resize", () => {// 重置渲染器宽高比renderer.setSize(window.innerWidth, window.innerHeight);// 重置相机宽高比camera.aspect = window.innerWidth / window.innerHeight;// 更新相机投影矩阵camera.updateProjectionMatrix();
});let params = {};// 创建GUI
const gui = new GUI();// 创建长方体
const boxGeometry = new THREE.BoxGeometry(1, 1, 100);
const boxMaterial = new THREE.MeshBasicMaterial({color: 0x00ff00,
});
const box = new THREE.Mesh(boxGeometry, boxMaterial);
scene.add(box);// 创建场景fog
scene.fog = new THREE.Fog(0x999999, 0.1, 50);
// 创建场景指数fog
// scene.fog = new THREE.FogExp2(0x999999, 0.1);
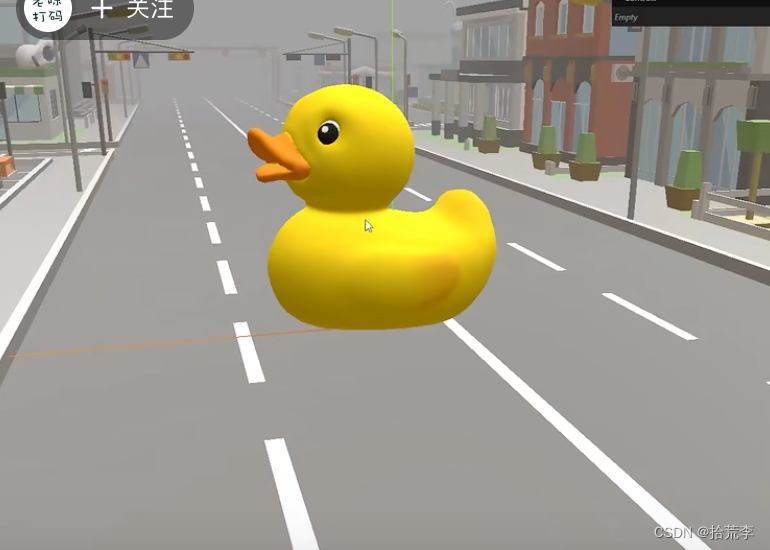
scene.background = new THREE.Color(0x999999);十四、gltf模型加载
// 导入threejs
import * as THREE from "three";
// 导入轨道控制器
import { OrbitControls } from "three/examples/jsm/controls/OrbitControls.js";
// 导入lil.gui
import { GUI } from "three/examples/jsm/libs/lil-gui.module.min.js";
// 导入hdr加载器
import { RGBELoader } from "three/examples/jsm/loaders/RGBELoader.js";
// 导入gltf加载器
import { GLTFLoader } from "three/examples/jsm/loaders/GLTFLoader.js";
// 导入draco解码器
import { DRACOLoader } from "three/examples/jsm/loaders/DRACOLoader.js";// 创建场景
const scene = new THREE.Scene();// 创建相机
const camera = new THREE.PerspectiveCamera(45, // 视角window.innerWidth / window.innerHeight, // 宽高比0.1, // 近平面1000 // 远平面
);// 创建渲染器
const renderer = new THREE.WebGLRenderer();
renderer.setSize(window.innerWidth, window.innerHeight);
document.body.appendChild(renderer.domElement);// 设置相机位置
camera.position.z = 5;
camera.position.y = 2;
camera.position.x = 2;
camera.lookAt(0, 0, 0);// 添加世界坐标辅助器
const axesHelper = new THREE.AxesHelper(5);
scene.add(axesHelper);// 添加轨道控制器
const controls = new OrbitControls(camera, renderer.domElement);
// 设置带阻尼的惯性
controls.enableDamping = true;
// 设置阻尼系数
controls.dampingFactor = 0.05;
// 设置旋转速度
// controls.autoRotate = true;// 渲染函数
function animate() {controls.update();requestAnimationFrame(animate);// 渲染renderer.render(scene, camera);
}
animate();// 监听窗口变化
window.addEventListener("resize", () => {// 重置渲染器宽高比renderer.setSize(window.innerWidth, window.innerHeight);// 重置相机宽高比camera.aspect = window.innerWidth / window.innerHeight;// 更新相机投影矩阵camera.updateProjectionMatrix();
});let params = {};// 创建GUI
const gui = new GUI();// 创建场景fog
scene.fog = new THREE.Fog(0x999999, 0.1, 50);
// 创建场景指数fog
// scene.fog = new THREE.FogExp2(0x999999, 0.1);
scene.background = new THREE.Color(0x999999);// 实例化加载器gltf
const gltfLoader = new GLTFLoader();
// 加载模型
gltfLoader.load(// 模型路径"./model/Duck.glb",// 加载完成回调(gltf) => {console.log(gltf);scene.add(gltf.scene);}
);// 实例化加载器draco
const dracoLoader = new DRACOLoader(); // 解压器
// 设置draco路径
dracoLoader.setDecoderPath("./draco/");
// 设置gltf加载器draco解码器
gltfLoader.setDRACOLoader(dracoLoader);gltfLoader.load(// 模型路径"./model/city.glb", // 做了压缩// 加载完成回调(gltf) => {// console.log(gltf);scene.add(gltf.scene);}
);// 加载环境贴图
let rgbeLoader = new RGBELoader();
rgbeLoader.load("./texture/Alex_Hart-Nature_Lab_Bones_2k.hdr", (envMap) => {envMap.mapping = THREE.EquirectangularReflectionMapping;// 设置环境贴图scene.environment = envMap;
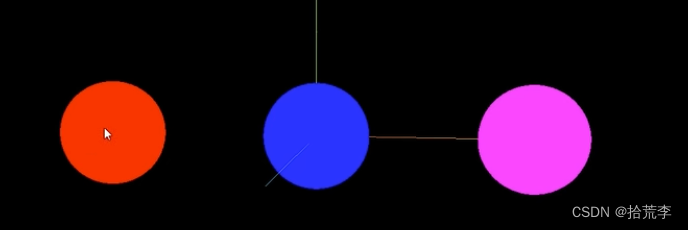
});十五、光线投射实现3d物体交互
// 导入threejs
import * as THREE from "three";
// 导入轨道控制器
import { OrbitControls } from "three/examples/jsm/controls/OrbitControls.js";
// 导入lil.gui
import { GUI } from "three/examples/jsm/libs/lil-gui.module.min.js";// 创建场景
const scene = new THREE.Scene();// 创建相机
const camera = new THREE.PerspectiveCamera(45, // 视角window.innerWidth / window.innerHeight, // 宽高比0.1, // 近平面1000 // 远平面
);// 创建渲染器
const renderer = new THREE.WebGLRenderer();
renderer.setSize(window.innerWidth, window.innerHeight);
document.body.appendChild(renderer.domElement);// 设置相机位置
camera.position.z = 15;
camera.position.y = 2;
camera.position.x = 2;
camera.lookAt(0, 0, 0);// 添加世界坐标辅助器
const axesHelper = new THREE.AxesHelper(5);
scene.add(axesHelper);// 添加轨道控制器
const controls = new OrbitControls(camera, renderer.domElement);
// 设置带阻尼的惯性
controls.enableDamping = true;
// 设置阻尼系数
controls.dampingFactor = 0.05;
// 设置旋转速度
// controls.autoRotate = true;// 渲染函数
function animate() {controls.update();requestAnimationFrame(animate);// 渲染renderer.render(scene, camera);
}
animate();// 监听窗口变化
window.addEventListener("resize", () => {// 重置渲染器宽高比renderer.setSize(window.innerWidth, window.innerHeight);// 重置相机宽高比camera.aspect = window.innerWidth / window.innerHeight;// 更新相机投影矩阵camera.updateProjectionMatrix();
});let params = {};// 创建GUI
const gui = new GUI();// 创建三个球
const sphere1 = new THREE.Mesh(new THREE.SphereGeometry(1, 32, 32),new THREE.MeshBasicMaterial({color: 0x00ff00,})
);
sphere1.position.x = -4;
scene.add(sphere1);const sphere2 = new THREE.Mesh(new THREE.SphereGeometry(1, 32, 32),new THREE.MeshBasicMaterial({color: 0x0000ff,})
);scene.add(sphere2);const sphere3 = new THREE.Mesh(new THREE.SphereGeometry(1, 32, 32),new THREE.MeshBasicMaterial({color: 0xff00ff,})
);sphere3.position.x = 4;
scene.add(sphere3);console.log(scene.children);
// 创建射线
const raycaster = new THREE.Raycaster();
// 创建鼠标向量
const mouse = new THREE.Vector2();window.addEventListener("click", (event) => {console.log(event.clientX, event.clientY);// 设置鼠标向量的x,y值mouse.x = (event.clientX / window.innerWidth) * 2 - 1;mouse.y = -((event.clientY / window.innerHeight) * 2 - 1);// console.log(mouse.x, mouse.y);// 通过摄像机和鼠标位置更新射线raycaster.setFromCamera(mouse, camera);// 计算物体和射线的焦点const intersects = raycaster.intersectObjects([sphere1, sphere2, sphere3]);if (intersects.length > 0) {// console.log(intersects[0].object);if (intersects[0].object._isSelect) {console.log(intersects[0].object._originColor);intersects[0].object.material.color.set(intersects[0].object._originColor);intersects[0].object._isSelect = false;return;}intersects[0].object._isSelect = true;intersects[0].object._originColor =intersects[0].object.material.color.getHex();intersects[0].object.material.color.set(0xff0000);}console.log(intersects);
});
十六、tween补间动画
// 导入threejs
import * as THREE from "three";
// 导入轨道控制器
import { OrbitControls } from "three/examples/jsm/controls/OrbitControls.js";
// 导入lil.gui
import { GUI } from "three/examples/jsm/libs/lil-gui.module.min.js";
// 导入tween
import * as TWEEN from "three/examples/jsm/libs/tween.module.js";// 创建场景
const scene = new THREE.Scene();// 创建相机
const camera = new THREE.PerspectiveCamera(45, // 视角window.innerWidth / window.innerHeight, // 宽高比0.1, // 近平面1000 // 远平面
);// 创建渲染器
const renderer = new THREE.WebGLRenderer();
renderer.setSize(window.innerWidth, window.innerHeight);
document.body.appendChild(renderer.domElement);// 设置相机位置
camera.position.z = 15;
camera.position.y = 2;
camera.position.x = 2;
camera.lookAt(0, 0, 0);// 添加世界坐标辅助器
const axesHelper = new THREE.AxesHelper(5);
scene.add(axesHelper);// 添加轨道控制器
const controls = new OrbitControls(camera, renderer.domElement);
// 设置带阻尼的惯性
controls.enableDamping = true;
// 设置阻尼系数
controls.dampingFactor = 0.05;
// 设置旋转速度
// controls.autoRotate = true;// 渲染函数
function animate() {controls.update();requestAnimationFrame(animate);// 渲染renderer.render(scene, camera);// 更新tweenTWEEN.update();
}
animate();// 监听窗口变化
window.addEventListener("resize", () => {// 重置渲染器宽高比renderer.setSize(window.innerWidth, window.innerHeight);// 重置相机宽高比camera.aspect = window.innerWidth / window.innerHeight;// 更新相机投影矩阵camera.updateProjectionMatrix();
});// 创建GUI
const gui = new GUI();// 创建1个球
const sphere1 = new THREE.Mesh(new THREE.SphereGeometry(1, 32, 32),new THREE.MeshBasicMaterial({color: 0x00ff00,})
);
sphere1.position.x = -4;
scene.add(sphere1);const tween = new TWEEN.Tween(sphere1.position);
tween.to({ x: 4 }, 1000);
tween.onUpdate(() => {console.log(sphere1.position.x);
});
// 设置循环无数次
// tween.repeat(Infinity);
// 循环往复
// tween.yoyo(true);
// tween.repeat(2);
// tween.delay(3000);
// 设置缓动函数
tween.easing(TWEEN.Easing.Quadratic.InOut);let tween2 = new TWEEN.Tween(sphere1.position);
tween2.to({ x: -4 }, 1000);tween.chain(tween2);
tween2.chain(tween);
// 启动补间动画
tween.start();
tween.onStart(() => {console.log("开始");
});
tween.onComplete(() => {console.log("结束");
});
tween.onStop(() => {console.log("停止");
});
tween.onUpdate(() => {console.log("更新");
});
let params = {stop: function () {tween.stop();},
};gui.add(params, "stop");
相关文章:
threejs-开发入门与调试设置
近年来web得到了快速的发展。随着HTML5的普及,网页的表现能力越来越强大。网页上已经可以做出很多复杂的动画,精美的效果。还能通过WebGL在网页中绘制高性能的3D图形。 学习资料来源:https://www.three3d.cn/threejs/01-%E5%BC%80%E5%8F%91%E…...
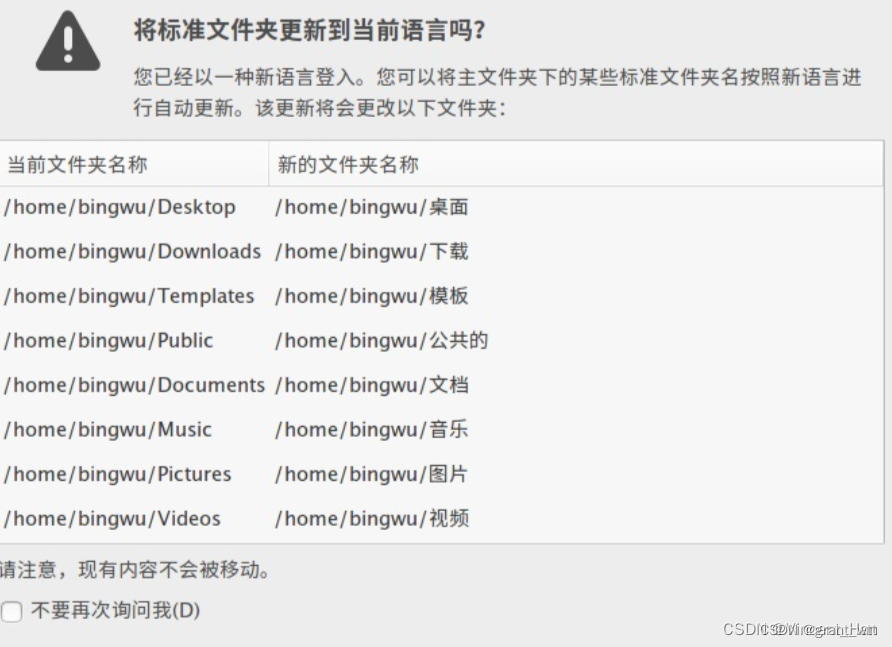
win11安装双系统Ubuntu的坎坷记录
之前一直装的都是在一个硬盘中,这是是两块盘。 我的电脑是惠普暗影精灵8Pro 一 安装前的准备工作 1.1 记得先关闭,Bitlocker 输入wins,搜索框输入:设备加密设置 1.2 BIOS设置 (惠普这电脑是开机时按 F10࿰…...

关于docker的xuexi
概念了解 1.镜像: 类似于类与实例关系中的类,也类似于系统镜像的概念,对于前端而言,镜像就是包含了代码运行所需要的一切产物、依赖、配置等。这样的话,可以保证每次程序运行的环境一致。构建镜像,一般都…...

Python接口自动化测试实战详解,你想要的全都有
前言 接口自动化测试是当前软件开发中最重要的环节之一,可以提高代码质量、加速开发周期、减少手工测试成本等优点。Python语言在接口自动化测试方面应用广泛,因为它具有简单易学、开发效率高、库丰富等特点。 一、接口自动化测试概述 接口自动化测试…...

SparkSQL 外部数据源
1.简介 1.1 多数据源支持 Spark 支持以下六个核心数据源,同时 Spark 社区还提供了多达上百种数据源的读取方式,能够满足绝大部分使用场景。 - CSV - JSON - Parquet - ORC - JDBC/ODBC connections - Plain-text files 1.2 读数据格式 所有读取 API 遵循以下调用格式: // …...

leetcode做题笔记167. 两数之和 II - 输入有序数组
给你一个下标从 1 开始的整数数组 numbers ,该数组已按 非递减顺序排列 ,请你从数组中找出满足相加之和等于目标数 target 的两个数。如果设这两个数分别是 numbers[index1] 和 numbers[index2] ,则 1 < index1 < index2 < numbers…...

[ZJCTF 2019]NiZhuanSiWei - 伪协议+文件包含+反序列化
[ZJCTF 2019]NiZhuanSiWei 1 解题流程1.1 分析1.2 解题 题目源码: <?php $text $_GET["text"]; $file $_GET["file"]; $password $_GET["password"]; if(isset($text)&&(file_get_contents($text,r)"welcome t…...
如何提升和扩展 PostgreSQL — 从共享缓冲区到内存数据网格
利用共享缓存和操作系统缓存利用 RAM Postgres 是一个基于磁盘的数据库,即使您的整个架构是围绕磁盘访问设计的,利用 RAM 也很重要。如果按照人类规模的延迟来判断,这可以将延迟从几天缩短到几分钟(图 1)。只需看一下…...
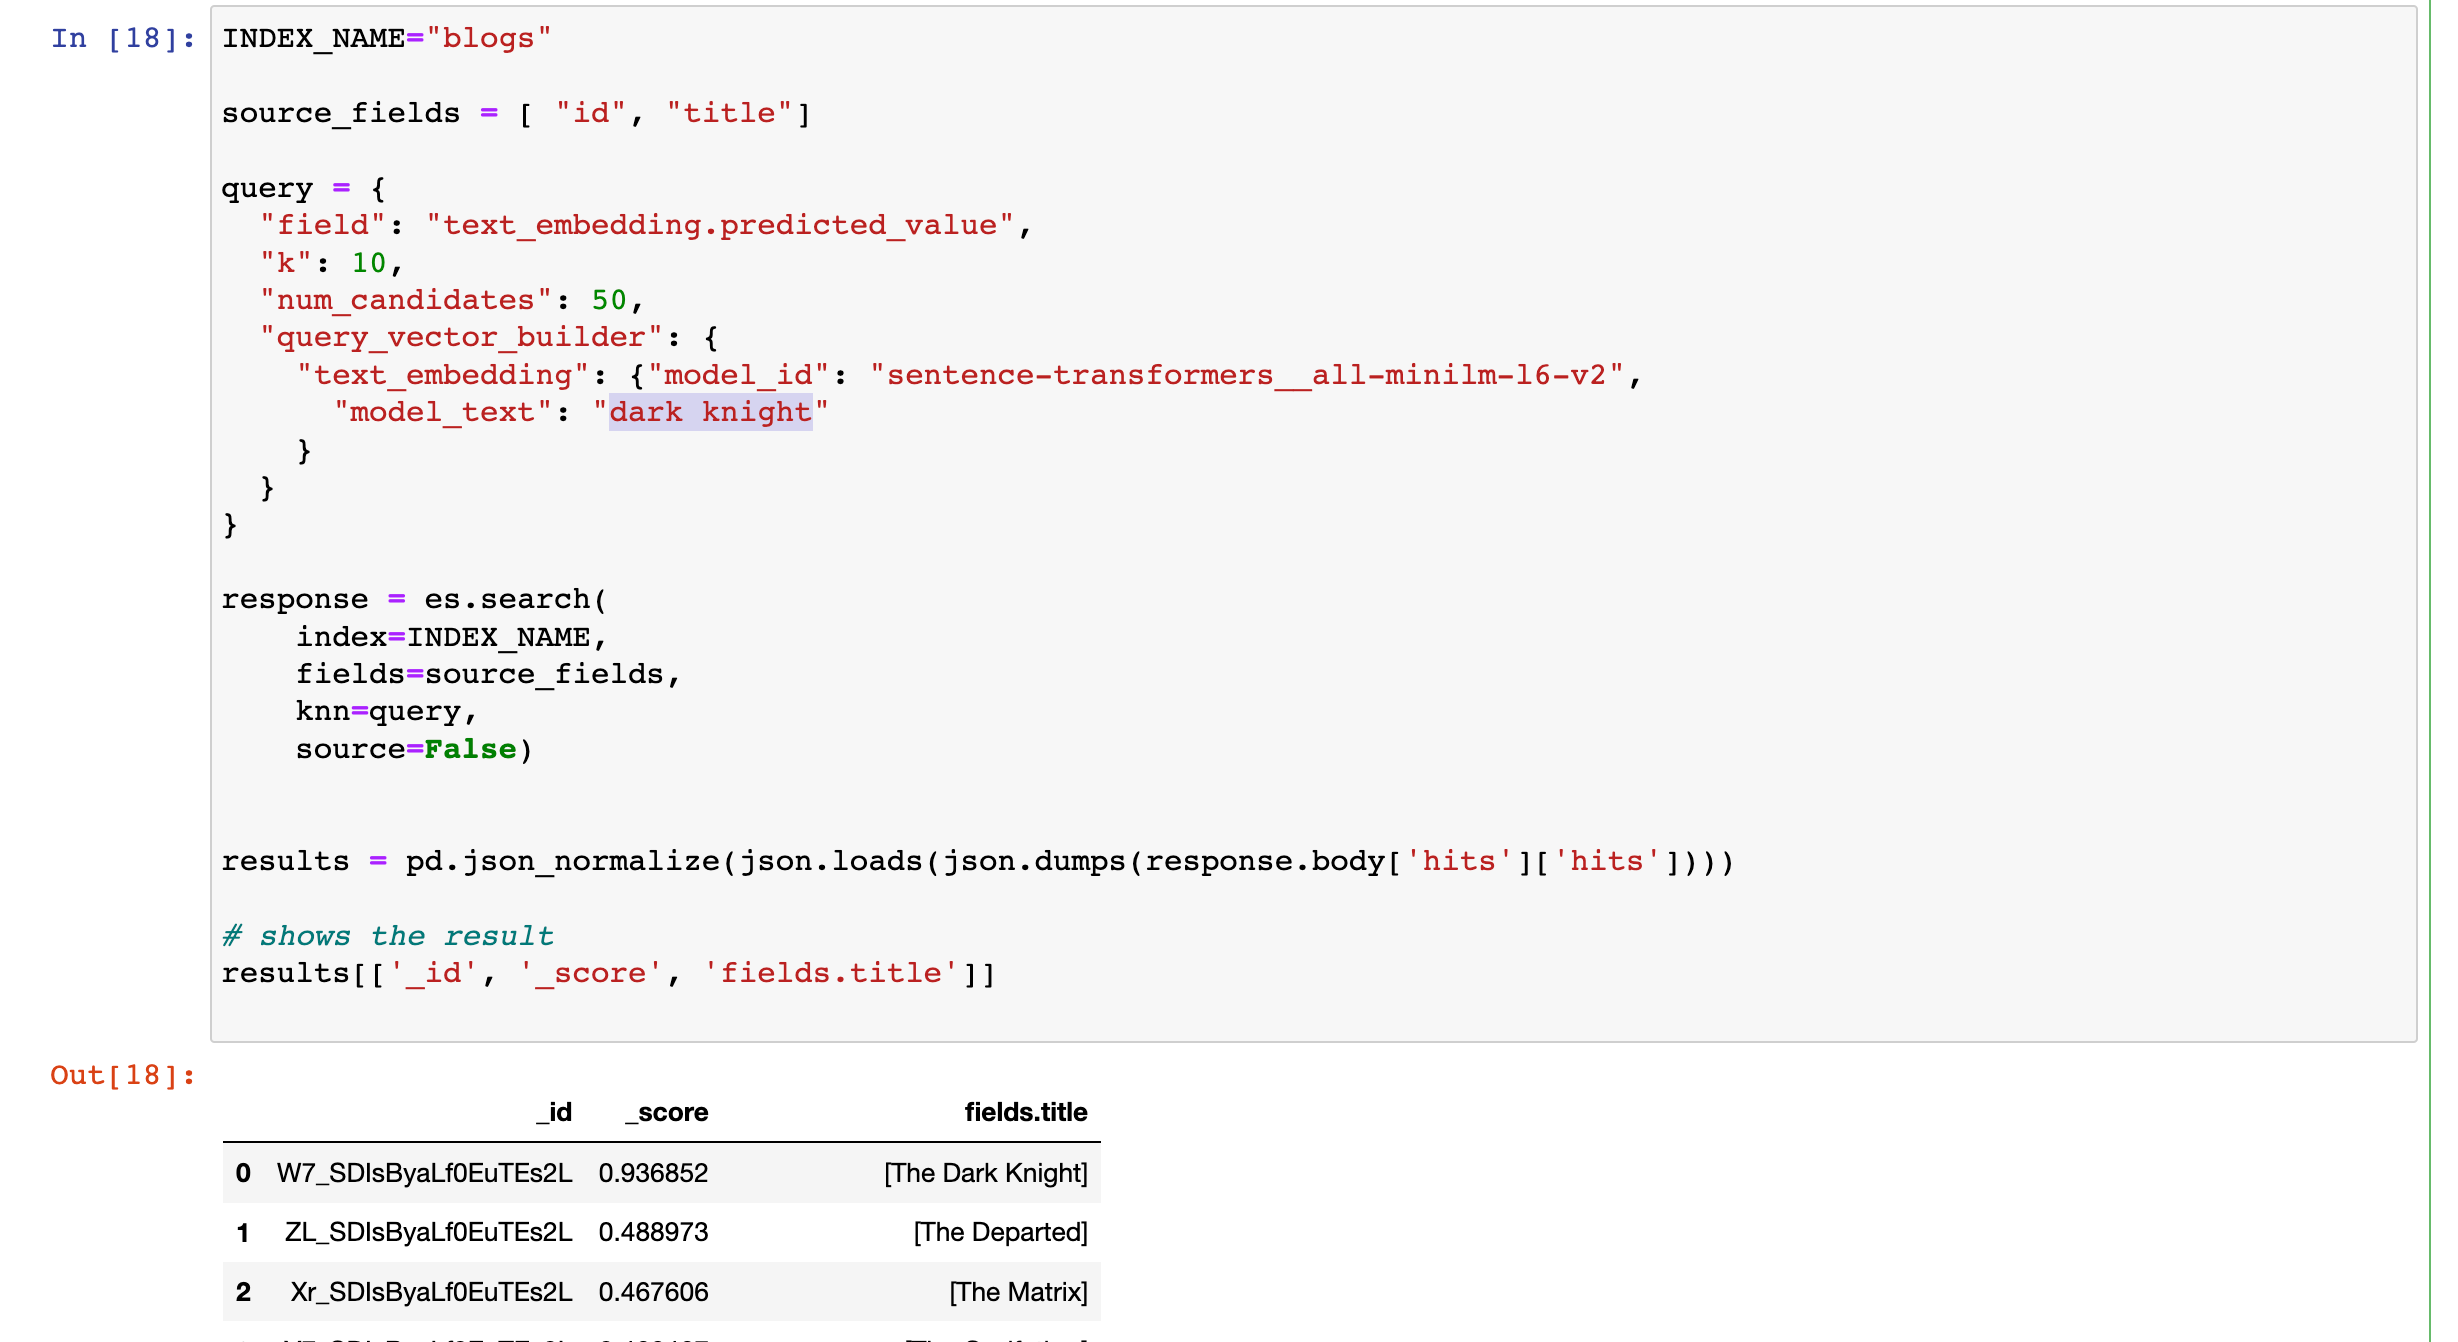
Elasticsearch:使用 huggingface 模型的 NLP 文本搜索
本博文使用由 Elastic 博客 title 组成的简单数据集在 Elasticsearch 中实现 NLP 文本搜索。你将为博客文档建立索引,并使用摄取管道生成文本嵌入。 通过使用 NLP 模型,你将使用自然语言在博客文档上查询文档。 安装 Elasticsearch 及 Kibana 如果你还没…...
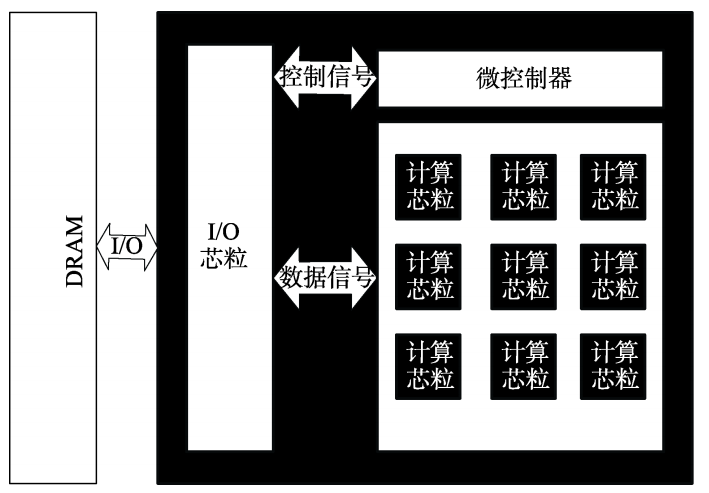
论文解析——异构多芯粒神经网络加速器
作者 朱郭益, 马胜,张春元, 王波(国防科技大学计算机学院) 摘要 随着神经网络技术的快速发展, 出于安全性等方面考虑, 大量边缘计算设备被应用于智能计算领域。首先,设计了可应用于边缘计算的异构多芯粒神经网络加速器其基本结构…...
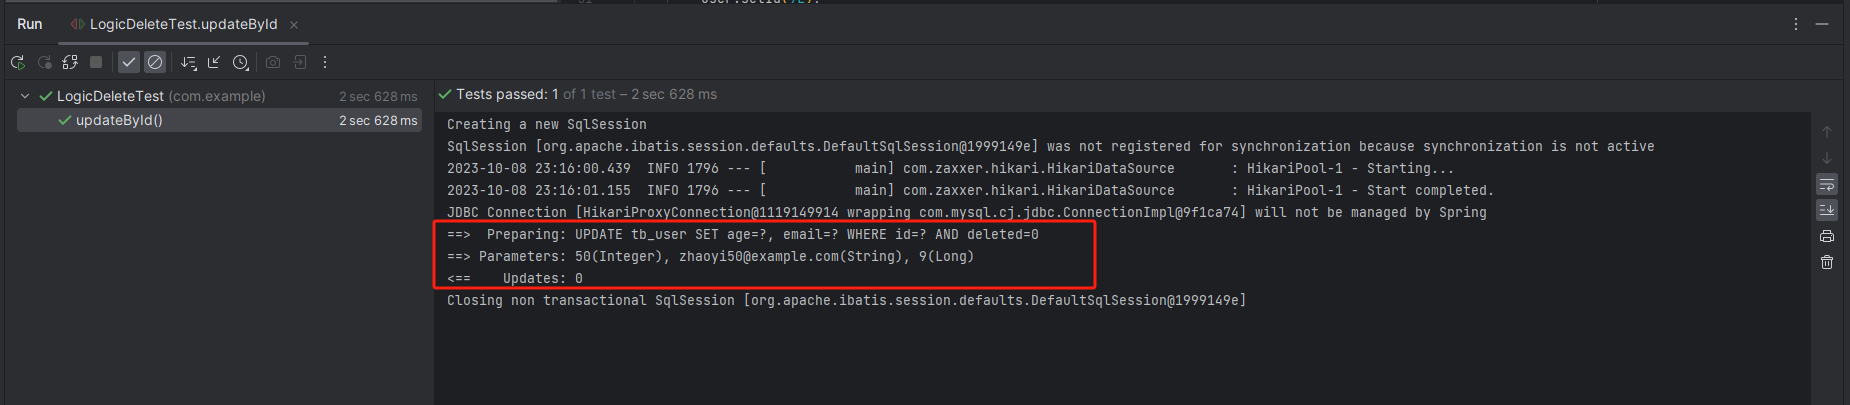
MyBatisPlus(十六)逻辑删除
说明 实际生产中的数据,一般不采用物理删除,而采用逻辑删除,也就是将一条记录的状态改为已删除。 逻辑删除,本质上是更新操作。 MyBatis Plus 框架,提供了逻辑删除功能。在配置了逻辑删除后,增删改查和统…...

基于黏菌优化的BP神经网络(分类应用) - 附代码
基于黏菌优化的BP神经网络(分类应用) - 附代码 文章目录 基于黏菌优化的BP神经网络(分类应用) - 附代码1.鸢尾花iris数据介绍2.数据集整理3.黏菌优化BP神经网络3.1 BP神经网络参数设置3.2 黏菌算法应用 4.测试结果:5.M…...

C语言基础语法复习08-位域bit-fields
在c2011 iso文档中,位域与struct、union是一起定义的: Structure and union specifiers Syntaxstruct-or-union-specifier:struct-or-union identifier opt { struct-declaration-list }struct-or-union identifierstruct-or-union:structunionstruct-d…...
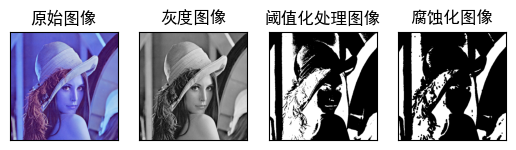
3.2.OpenCV技能树--二值图像处理--图像腐蚀与膨胀
文章目录 1.文章内容来源2.图像膨胀处理2.1.图像膨胀原理简介2.2.图像膨胀核心代码2.3.图像膨胀效果展示 3.图像腐蚀处理3.1.图像腐蚀原理简介3.2.图像腐蚀核心代码3.3.图像腐蚀效果展示 4.易错点总结与反思 1.文章内容来源 1.题目来源:https://edu.csdn.net/skill/practice/o…...
基于FPGA的数字时钟系统设计
在FPGA的学习中,数字时钟是一个比较基础的实验案例,通过该实验可以更好的锻炼初学者的框架设计能力以及逻辑思维能力,从而打好坚实的基本功,接下来就开始我们的学习吧! 1.数码管介绍 数码管通俗理解就是将8个LED(包含…...
linux centos Python + Selenium+Chrome自动化测试环境搭建?
在 CentOS 系统上搭建 Python Selenium Chrome 自动化测试环境,需要执行以下步骤: 1、安装 Python CentOS 7 自带的 Python 版本较老,建议使用 EPEL 库或源码安装 Python 3。例如,使用 EPEL 库安装 Python 3: sud…...
mysql面试题20:有哪些合适的分布式主键方案
该文章专注于面试,面试只要回答关键点即可,不需要对框架有非常深入的回答,如果你想应付面试,是足够了,抓住关键点 面试官:有哪些合适的分布式主键方案? UUID:UUID通常是由一个二进制的128位整数表示,可以保证全局的唯一性。在Java中,可以通过UUID类生成一个UUID。例…...
git的基础操作
https://blog.csdn.net/a18307096730/article/details/124586216?spm1001.2014.3001.5502 1:使用场景 SVN,如果服务器里面的东西坏掉了,那么就全线崩盘了。 1:基本配置 git config --global user.name “luka” (自己的名字就行) git co…...
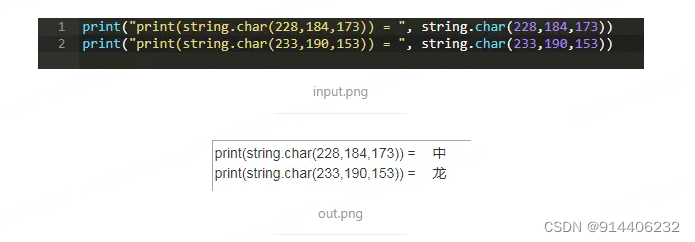
lua 中文字符的判断简介
一般在工作中会遇到中文字符的判断、截断、打码等需求,之前一直没有总结,虽然网上资料也多,今天在这里简单的总结一下。 1 .UTF-8简单描述 UTF-8 是 Unicode 的实现方式之一,其对应关系(编码规则)如下表所…...
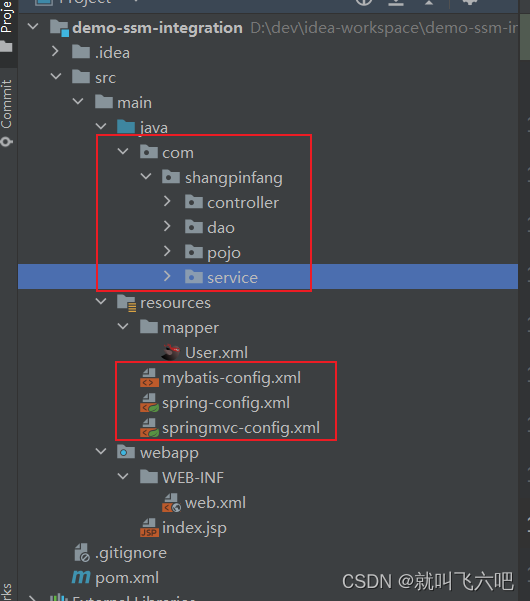
SSM-XML整合
SSM-XML整合 核心配置文件 maven坐标 <dependencies><!--数据库驱动--><dependency><groupId>mysql</groupId><artifactId>mysql-connector-java</artifactId><version>8.0.27</version></dependency><!--数据…...

基于本体论的技能知识图谱:从理论到工程实践
1. 项目概述:当技能遇上本体论最近在整理个人知识库和团队技能矩阵时,我遇到了一个老生常谈的难题:如何用一种结构化的、机器可读的方式,清晰地定义和关联“技能”这个概念?我们通常用Excel表格、标签云或者简单的列表…...

QT开发避坑指南:用setWindowFlags搞定自定义标题栏,别再为窗口移动发愁了
QT自定义标题栏实战:从事件重写到优雅封装的完整解决方案 当开发者决定为QT应用打造一套独特的视觉风格时,第一个拦路虎往往是系统默认标题栏的去除与自定义实现。这看似简单的需求背后,隐藏着窗口管理、事件处理、用户体验等一系列技术挑战。…...

抖音无水印视频批量下载终极指南:三步搞定海量内容采集
抖音无水印视频批量下载终极指南:三步搞定海量内容采集 【免费下载链接】douyin-downloader A practical Douyin downloader for both single-item and profile batch downloads, with progress display, retries, SQLite deduplication, and browser fallback supp…...

第07章 FastMCP 把检索封装成 Agent 工具
第07章 FastMCP 把检索封装成 Agent 工具 工单知识库已经能在 Python 进程内被普通函数调用,但要让外部 Agent、Web 后端或其他语言的客户端使用这份能力,函数级别的接口不够:缺少协议、缺少描述、缺少跨进程通讯。MCP(Model Cont…...

DaVinci Developer与Configurator Pro联调指南:如何高效设计SWC并集成到ECU工程
DaVinci Developer与Configurator Pro联调实战:从SWC设计到ECU集成的全流程解析 在汽车电子控制单元(ECU)开发领域,工具链的协同效率直接决定了项目进度和质量。作为Vector公司AUTOSAR工具链的核心组件,DaVinci Develo…...

百度网盘直链解析工具:3分钟突破限速实现满速下载
百度网盘直链解析工具:3分钟突破限速实现满速下载 【免费下载链接】baidu-wangpan-parse 获取百度网盘分享文件的下载地址 项目地址: https://gitcode.com/gh_mirrors/ba/baidu-wangpan-parse 你是否曾为百度网盘的下载速度而烦恼?非会员用户经常…...

OSINT自动化平台ClawShield:模块化架构与安全运营实战解析
1. 项目概述:一个面向安全运营的公开情报收集与分析平台最近在整理自己的开源项目收藏夹,发现一个挺有意思的仓库,叫SleuthCo/clawshield-public。乍一看这个名字,“ClawShield”,爪子与盾牌,就透着一股子攻…...
)
低多边形≠简陋!掌握这7个结构化Prompt技巧,3分钟产出可商用IP形象(附Figma网格对齐校验表)
更多请点击: https://intelliparadigm.com 第一章:低多边形设计的认知革命:从“简陋感”到“结构化美学” 低多边形(Low-Poly)设计曾长期被误读为建模能力不足的妥协产物,但其本质是一场对数字视觉语法的系…...

猫抓扩展完整指南:三步掌握浏览器视频嗅探与下载技巧
猫抓扩展完整指南:三步掌握浏览器视频嗅探与下载技巧 【免费下载链接】cat-catch 猫抓 浏览器资源嗅探扩展 / cat-catch Browser Resource Sniffing Extension 项目地址: https://gitcode.com/GitHub_Trending/ca/cat-catch 猫抓(Cat-Catch&#…...

Seraphine终极指南:英雄联盟智能助手如何提升您的游戏胜率
Seraphine终极指南:英雄联盟智能助手如何提升您的游戏胜率 【免费下载链接】Seraphine 英雄联盟战绩查询工具 项目地址: https://gitcode.com/gh_mirrors/se/Seraphine 在英雄联盟的激烈对局中,错过对局接受、BP阶段犹豫不决、缺乏队友对手信息&a…...