docker-compose安装ES7.14和Kibana7.14(有账号密码)
一、docker-compose安装ES7.14.0和kibana7.14.0
1、下载镜像
1.1、ES镜像
docker pull elasticsearch:7.14.0

1.2、kibana镜像
docker pull kibana:7.14.0

2、docker-compose安装ES和kibana
2.1、创建配置文件目录和文件
#创建目录
mkdir -p /home/es-kibana/config
mkdir -p /home/es-kibana/data
mkdir -p /home/es-kibana/plugins
#给挂载目录授权
chmod 777 -R /home/es-kibana/config
chmod 777 /home/es-kibana/es-data/data
chmod 777 /home/es-kibana/es-data/logs
chmod 777 /home/es-kibana/es-data/plugins
2.2、ES配置文件
1、elasticesearch.yml
cluster.name: "docker-cluster"
network.host: 0.0.0.0discovery.zen.minimum_master_nodes: 1
discovery.type: single-nodexpack.security.enabled: true #此项开启账号密码
2、jvm.options
## JVM configuration################################################################
## IMPORTANT: JVM heap size
################################################################
##
## You should always set the min and max JVM heap
## size to the same value. For example, to set
## the heap to 4 GB, set:
##
## -Xms4g
## -Xmx4g
##
## See https://www.elastic.co/guide/en/elasticsearch/reference/current/heap-size.html
## for more information
##
################################################################# Xms represents the initial size of total heap space
# Xmx represents the maximum size of total heap space-Xms1g
-Xmx1g
-XX:+IgnoreUnrecognizedVMOptions
################################################################
## Expert settings
################################################################
##
## All settings below this section are considered
## expert settings. Don't tamper with them unless
## you understand what you are doing
##
################################################################## GC configuration
-XX:+UseConcMarkSweepGC
-XX:CMSInitiatingOccupancyFraction=75
-XX:+UseCMSInitiatingOccupancyOnly## G1GC Configuration
# NOTE: G1GC is only supported on JDK version 10 or later.
# To use G1GC uncomment the lines below.
# 10-:-XX:-UseConcMarkSweepGC
# 10-:-XX:-UseCMSInitiatingOccupancyOnly
# 10-:-XX:+UseG1GC
# 10-:-XX:InitiatingHeapOccupancyPercent=75## optimizations# pre-touch memory pages used by the JVM during initialization
-XX:+AlwaysPreTouch## basic# explicitly set the stack size
-Xss1m# set to headless, just in case
-Djava.awt.headless=true# ensure UTF-8 encoding by default (e.g. filenames)
-Dfile.encoding=GBK# use our provided JNA always versus the system one
-Djna.nosys=true# turn off a JDK optimization that throws away stack traces for common
# exceptions because stack traces are important for debugging
-XX:-OmitStackTraceInFastThrow# flags to configure Netty
-Dio.netty.noUnsafe=true
-Dio.netty.noKeySetOptimization=true
-Dio.netty.recycler.maxCapacityPerThread=0# log4j 2
-Dlog4j.shutdownHookEnabled=false
-Dlog4j2.disable.jmx=true-Djava.io.tmpdir=${ES_TMPDIR}## heap dumps# generate a heap dump when an allocation from the Java heap fails
# heap dumps are created in the working directory of the JVM
-XX:+HeapDumpOnOutOfMemoryError# specify an alternative path for heap dumps; ensure the directory exists and
# has sufficient space
-XX:HeapDumpPath=data# specify an alternative path for JVM fatal error logs
-XX:ErrorFile=logs/hs_err_pid%p.log## JDK 8 GC logging8:-XX:+PrintGCDetails
8:-XX:+PrintGCDateStamps
8:-XX:+PrintTenuringDistribution
8:-XX:+PrintGCApplicationStoppedTime
8:-Xloggc:logs/gc.log
8:-XX:+UseGCLogFileRotation
8:-XX:NumberOfGCLogFiles=32
8:-XX:GCLogFileSize=64m# JDK 9+ GC logging
9-:-Xlog:gc*,gc+age=trace,safepoint:file=logs/gc.log:utctime,pid,tags:filecount=32,filesize=64m
# due to internationalization enhancements in JDK 9 Elasticsearch need to set the provider to COMPAT otherwise
# time/date parsing will break in an incompatible way for some date patterns and locals
9-:-Djava.locale.providers=COMPAT# temporary workaround for C2 bug with JDK 10 on hardware with AVX-512
10-:-XX:UseAVX=2
主要是这3个配置项

2.3、kibana配置
i18n.locale: zh-CN
server.host: "0.0.0.0"
server.shutdownTimeout: "5s"
elasticsearch.hosts: [ "http://10.1.1.197:9200" ]
monitoring.ui.container.elasticsearch.enabled: true
elasticsearch.username: "elastic"
elasticsearch.password: "xxx"
2.4、#创建docker-compose.yml文件(重要)
version: '3'services:elasticsearch:image: elasticsearch:7.14.0container_name: es7-14restart: unless-stoppedvolumes:- ./es-data/data:/usr/share/elasticsearch/data- ./es-data/logs:/usr/share/elasticsearch/logs# 挂载分词器的目录#- ./es-data/plugins:/usr/share/elasticsearch/plugins- ./config/jvm.options:/usr/share/elasticsearch/config/jvm.options- ./config/elasticsearch.yml:/usr/share/elasticsearch/config/elasticsearch.ymlports:- "9100:9100"- "9200:9200"networks:- eskibana:image: kibana:7.14.0container_name: kibana7-14ports:- "5601:5601"volumes:- ./config/kibana.yml:/usr/share/kibana/config/kibana.ymldepends_on:- elasticsearchnetworks:- esnetworks:es:driver: bridge
2.5、#自我检测自己写的有没有语法上的问题
docker-compose config -q
2.6、#启动和停止
docker-compose up -d
docker-compose down
重启
docker-compose restart 容器id
3、ES设置账号密码
3.1、检查elasticesearch.yml已配置
xpack.security.enabled: true #此项开启账号密码(只配置这项就可以了)
3.2、设置用户名和密码的命令
参考:【精选】ElasticSearch7.14设置内置用户,使用用户名密码访问
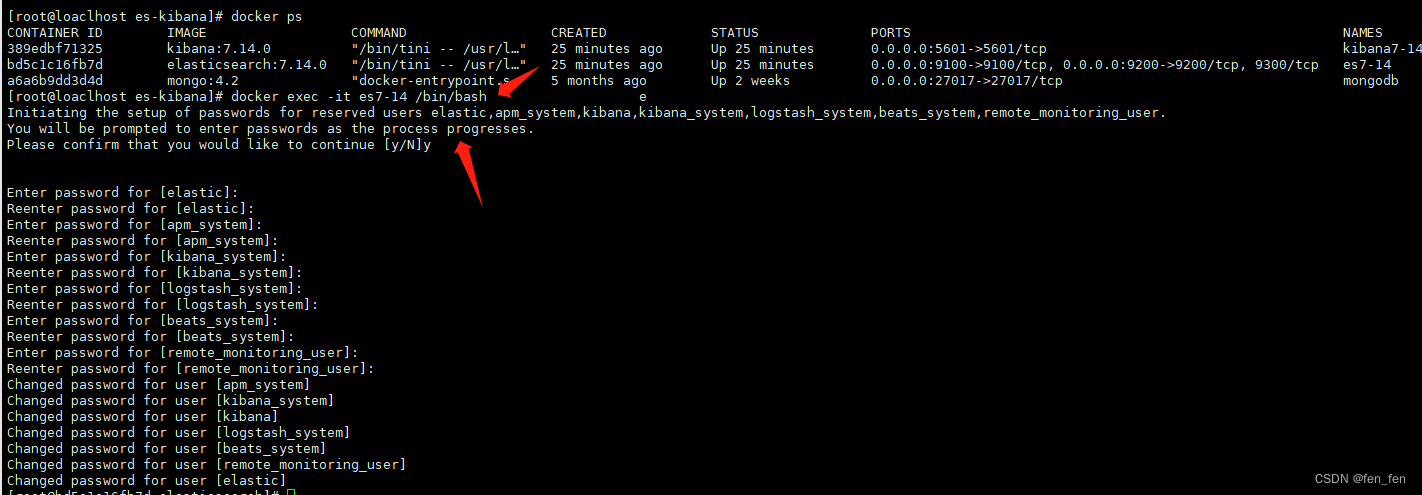
这里需要为4个用户分别设置密码,elastic, kibana, logstash_system,beats_system。(interactive 手动设置, auto 自动生成密码 )
bin/elasticsearch-setup-passwords interactive
#进入es容器操作步骤
$docker exec -it es7-14 /bin/bash
#手动创建密码
$bin/elasticsearch-setup-passwords interactive
3、访问ES和kibana
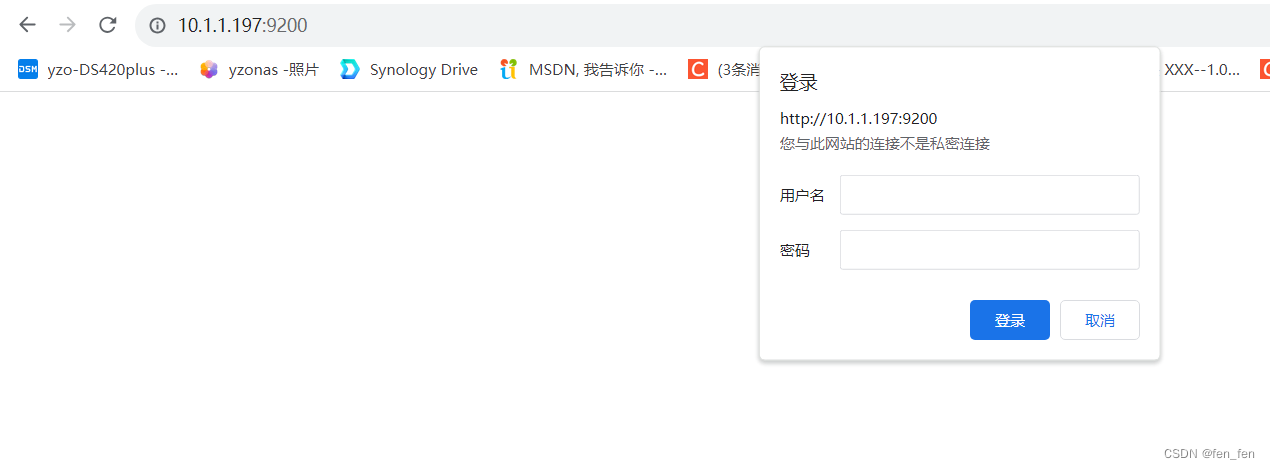
3.1、访问ES
http://10.1.1.197:9200/
需要输入账号密码即可登录
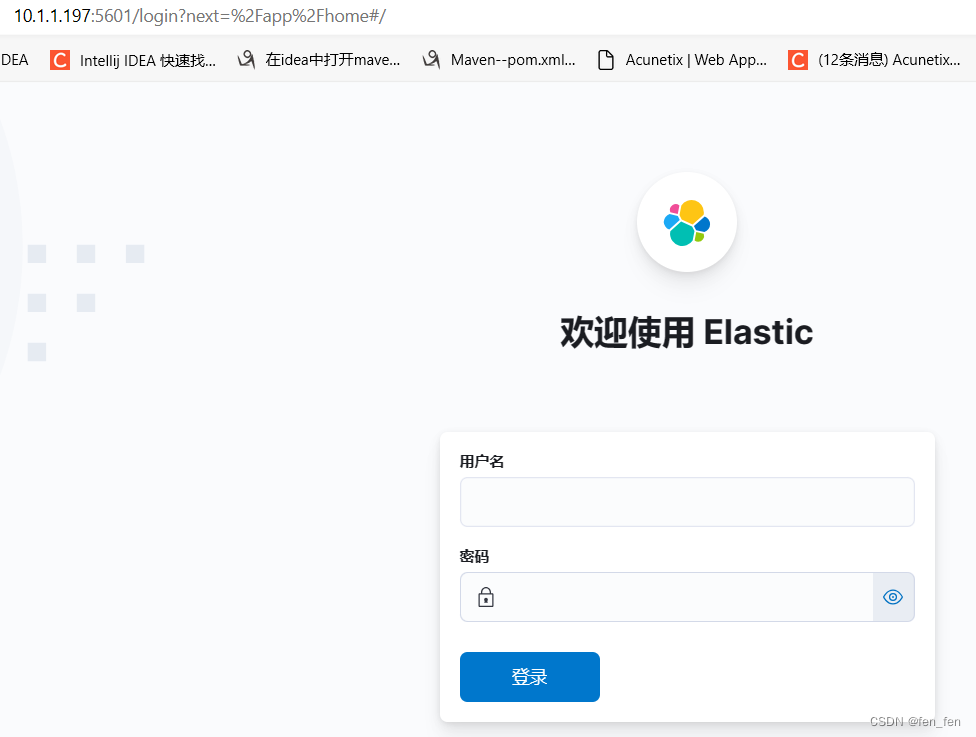
3.2、访问kibana
http://10.1.1.197:5601/
备注:
设置密码的配置文件,配置这个就可以了
xpack.security.enabled: true #此项开启账号密码(只配置这项就可以了)
然后进入容器里配置密码bin/elasticsearch-setup-passwords interactive就可用了。
相关文章:
docker-compose安装ES7.14和Kibana7.14(有账号密码)
一、docker-compose安装ES7.14.0和kibana7.14.0 1、下载镜像 1.1、ES镜像 docker pull elasticsearch:7.14.0 1.2、kibana镜像 docker pull kibana:7.14.0 2、docker-compose安装ES和kibana 2.1、创建配置文件目录和文件 #创建目录 mkdir -p /home/es-kibana/config mkdir…...

k8s-----14、controller-Job和Cronjob
Job和Cronjob 1、Job(一次性任务)2、CronJob(定时任务) 1、Job(一次性任务) [rootmaster controlleryaml]# cat job.yaml apiVersion: batch/v1 kind: Job metadata:name: pi spec:template:spec:contain…...

蓝桥杯每日一题2032.10.24
蓝桥杯大赛历届真题 - C 语言 B 组 - 蓝桥云课 (lanqiao.cn) 题目描述 题目分析 由于布局为两个字节为一行,那我们输入两个数就为一行,但是这两个数全部得用二进制进行表示使用bitset bitset:将一个数转化为二进制 bitset<8>:将一个数转化为8位…...
【AGC】更新应用信息报未知错误解决方法
【问题描述】 最近有几个开发者遇到了一个问题,他们在AGC控制台配置好应用信息的图标和截图之后,点击保存按钮会弹出“未知错误,请稍后再试”的异常报错,导致无法正确保存应用配置信息。 出错页面如图所示。 【解决方案】 …...

一个注解让 Spring Boot 项目接口返回数据脱敏
1 背景 需求是某些接口返回的信息,涉及到敏感数据的必须进行脱敏操作 2 思路 ①要做成可配置多策略的脱敏操作,要不然一个个接口进行脱敏操作,重复的工作量太多,很显然违背了“多写一行算我输”的程序员规范。思来想去ÿ…...

测试人员的KPI怎么设置
关于测试部的KPI,简单列举下自己所经历部门的考核指标: 工作量。根据平时跟踪的需求,编写的用例,提交的bug数等综合评估; 负责项目的质量。上线项目是否出现重大功能的事故, 如果出现了事故,分…...

Databend 开源周报第 116 期
Databend 是一款现代云数仓。专为弹性和高效设计,为您的大规模分析需求保驾护航。自由且开源。即刻体验云服务:https://app.databend.cn 。 Whats On In Databend 探索 Databend 本周新进展,遇到更贴近你心意的 Databend 。 特性预览&#…...

mongodb-gridfs下载文件报Sort exceeded memory limit of 104857600 bytes异常
报错详细信息 com.mongodb.MongoQueryException: Query failed with error code 292 and error message Executor error during find command :: caused by :: Sort exceeded memory limit of 104857600 bytes, but did not opt in to external sorting. on server 11.51.141.…...

分享一下微信小程序里怎么实现扫码点餐链接
在当今数字化时代,扫码点餐已经成为了餐饮行业的一种趋势。通过微信小程序,实现扫码点餐功能,可以为餐厅带来诸多便利和优势。本文将详细介绍如何在微信小程序中实现扫码点餐功能,帮助餐厅提高服务效率和质量,提升用户…...

安卓开发环境安装教程
在本教程中,我将向您介绍如何在Windows操作系统上安装Android开发环境。Android开发环境包括Java Development Kit(JDK),Android Studio IDE和相应的SDK工具。跟随以下步骤,您将能够搭建安卓开发环境并开始开发自己的应…...

深入探究Selenium定位技巧及最佳实践
在使用Selenium进行Web自动化测试时,准确地定位元素是非常重要的一步。Selenium提供了多种元素定位方法,本文将深入探究这八大元素定位方法,帮助读者更好地理解和应用Selenium的定位技巧。 1. ID定位 ID是元素在HTML中的唯一标识符ÿ…...

如何正确安装psycopg2,No module named ‘psycopg2._psycopg‘解决
二、psycopg2安装方法 psycopg2可以通过多种方式安装,我们这里介绍两种常用的方式:通过pip安装和手动安装。 1、通过pip安装psycopg2 如果已经安装了pip,那么在命令行中输入以下命令即可完成psycopg2的安装: pip install psyc…...
)
go WriteFile文件追加写入(适合小文件)
go 在做文件追加写入时一般用os.OpenFile 指定 FileMode 为 os.O_APPEND. 如官方文档示例: f, err : os.OpenFile("access.log", os.O_APPEND|os.O_CREATE|os.O_WRONLY, 0644)if err ! nil {log.Fatal(err)}if _, err : f.Write([]byte("appended some data\n&…...

history 模式上线需要注意什么事项?
结论先行: 首先,需要在服务器上对所有的路由路径进行配置,避免在访问路由时出现 404 的情况; 其次,需要特别注意安全性和兼容性问题。 因为使用 History 模式会暴露出服务器上的文件路径,因此在部署时需要…...
VMware虚拟机安装Ubuntu22.04教程(2023最新最详细)
目录 简介 1 VMware虚拟机下载与安装 2 Ubuntu操作系统安装与配置 2.1 Ubuntu虚拟机配置 2.2 Ubuntu操作系统安装 简介 Linux是一种自由和开放源代码的操作系统内核,被广泛应用于各种计算机系统中。它以稳定性、安全性和灵活性而闻名,并成为服务器…...
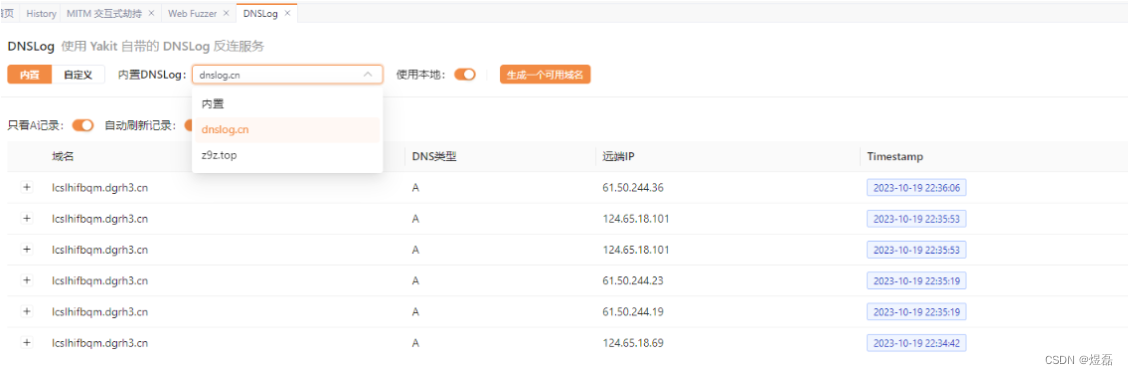
yakit使用爆破编码明文_dnslog使用
yakit使用爆破编码密码 文章目录 yakit使用爆破编码密码yakit使用1 yakit编码密码进行爆破2 准备eval.php文件放入web3 访问http://192.168.225.206/eval.php,使用bp抓包,测试后环境准本好4 使用yakit4.1 进入页面,点击这里进行配置默认端口80834.2 发送到模糊测试4…...
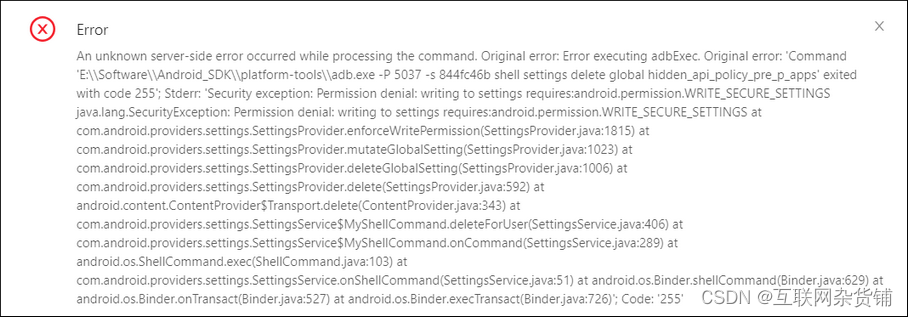
3分钟教你用Python+Appium实现自动化测试
一、环境准备 1.脚本语言:Python3.x IDE:安装Pycharm 2.安装Java JDK 、Android SDK 3.adb环境,path添加E:\Software\Android_SDK\platform-tools 4.安装Appium for windows,官网地址 Redirecting 点击下载按钮会到GitHub…...
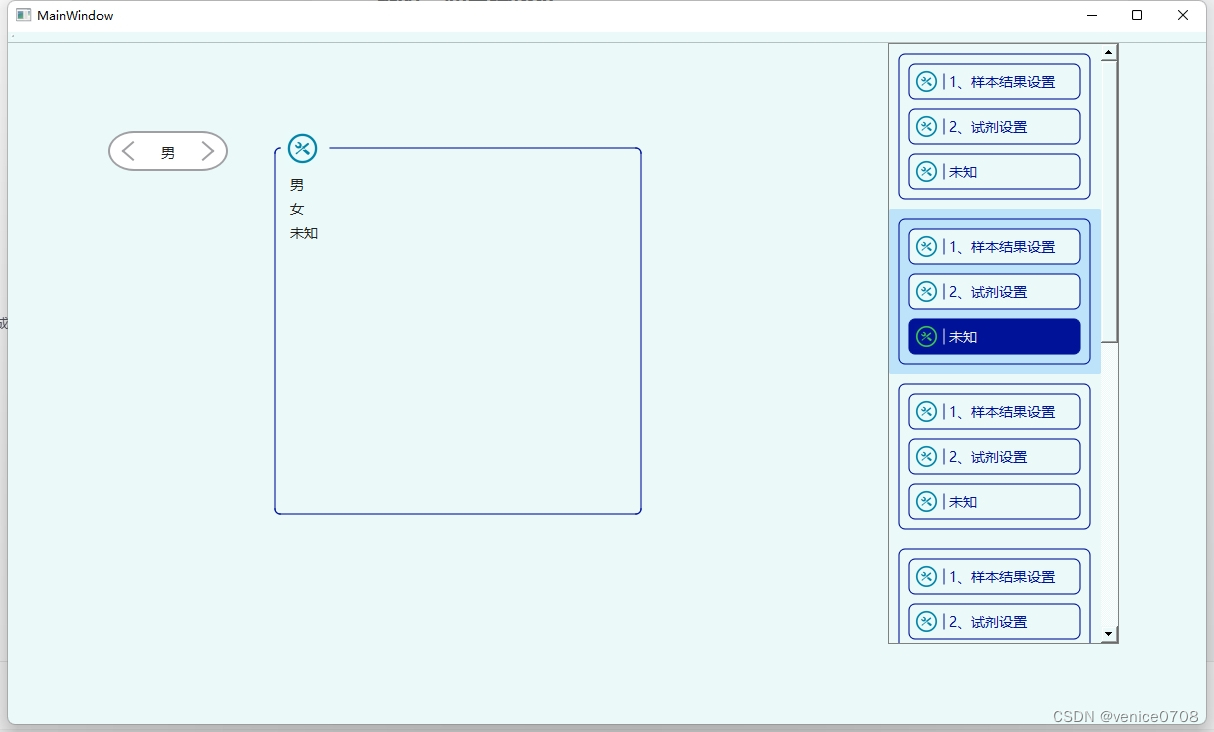
qt的一些自绘控件
https://download.csdn.net/download/venice0708/88469835...
类图表示法
设计模式,用设计图表示的话,主要用到类图。常见UML类图如下: 1、类图:矩形框,代表一个类(Class)。类图分为三层,第一层显示类的名称,如果是抽象类,则用斜体显…...

大模型训练框架
一文搞定分布式训练:dataparallel、distirbuted、deepspeed、accelerate、transformers、horovod - 知乎代码地址:taishan1994/pytorch-distributed-NLP: pytorch分布式训练 (github.com)pytorch-distributed-NLPpytorch单机多卡分布式训练-中文文本分类…...

多智能体强化学习安全约束冲突解决方案
1. 多智能体强化学习中的安全约束冲突问题解析在机器人集群协同作业、无人机编队飞行、自动驾驶车队等实际场景中,多智能体系统面临着复杂的安全挑战。想象一下繁忙机场的跑道调度场景:数十架无人机需要在有限空域内完成起降、巡航和避让,任何…...

Claude帮用户找回40万美元Bitcoin:AI在密码破解上真正擅长的是什么?
一名美国男子在2013年买了5个BTC,2015年在醉酒后修改钱包密码,忘记了新密码。 11年后,他用Claude找回了价值40万美元的资产。 网友:AI真的很神奇。 但很少有人问这个问题:Claude到底是怎么做到的,以及更重要…...

[具身智能-791]:NAV2 全局规划层 A*算法的本质是距离最短,而不是时间最短算法
核心定论A 算法本质:优先求解几何物理距离最短路径,天生不是「通行耗时最短」算法*一、直白区分A 追求目标*以栅格空间长度为核心权重,算出纯路程最短的路线,只看走了多少米,不看好不好走、堵不堵、快慢如何。时间最短…...

【BUUCTF】【WEB】ReadlezPHP
考点:打开题目,发现页面有点阴森:右键没有任何反应,那就右上角三个点:更多工具->开发者工具OK没有任何线索,那就用bp看看。拉倒最下面,发现右下角一个文件./time.php?source这可能是一个线索…...
)
告别点点点!用Ranorex Studio录制你的第一个计算器自动化测试(附详细截图)
从零开始:用Ranorex Studio实现计算器自动化测试的完整指南 第一次接触自动化测试时,那种既期待又忐忑的心情我至今记忆犹新。作为一位长期被重复性手工测试困扰的QA工程师,每天面对相同的测试用例,点击相同的按钮,验证…...

NotebookLM电影文献处理失效真相:92%研究者忽略的3类语义断层及修复方案
更多请点击: https://kaifayun.com 第一章:NotebookLM电影研究辅助 NotebookLM 是 Google 推出的基于 AI 的研究协作者,专为深度阅读与知识整合设计。在电影研究场景中,它能高效解析剧本、影评、导演访谈、学术论文等多源文本&am…...

3步高效部署AutoJs6:Android自动化开发实战指南
3步高效部署AutoJs6:Android自动化开发实战指南 【免费下载链接】AutoJs6 安卓平台 JavaScript 自动化工具 (Auto.js 二次开发项目) 项目地址: https://gitcode.com/gh_mirrors/au/AutoJs6 AutoJs6作为Android平台领先的JavaScript自动化工具,为开…...

别再让电池充不满!用CN3791芯片设计太阳能充电电路,这几个调试坑我帮你踩了
太阳能充电电路实战:CN3791芯片调试避坑指南 当阳光洒在太阳能板上,理论上我们应该获得源源不断的清洁能源。但现实往往比理想骨感得多——尤其当你发现精心设计的CN3791充电电路始终无法将锂电池充满时。这不是芯片的错,而是我们在参数设置和…...

系统级开发中的夜间MVP构建与Boneyard归档实践
1. 项目概述:一个名为“Boneyard”的夜间MVP构建最近在开源社区里,我注意到一个挺有意思的项目,叫sys-fairy-eve/nightly-mvp-2026-04-05-boneyard。光看这个标题,信息量就很大,它像是一个系统构建流水线上的一个特定快…...
气体传感器阵列与数据采集(附完整 C 语言驱动))
【嵌入式 AI 实战第 9 期】环境感知(一)气体传感器阵列与数据采集(附完整 C 语言驱动)
一、前言在物联网与人工智能快速发展的今天,环境感知能力已成为智能设备的核心功能之一。气体传感器作为环境感知的 "嗅觉器官",广泛应用于智能家居、工业安全、农业生产、医疗诊断等领域。传统的单一气体传感器只能检测特定类型的气体&#x…...