Spring Boot中RedisTemplate的使用
当前Spring Boot的版本为2.7.6,在使用RedisTemplate之前我们需要在pom.xml中引入下述依赖:
<dependency><groupId>org.springframework.boot</groupId><artifactId>spring-boot-starter-data-redis</artifactId><version>3.1.4</version>
</dependency>
同时在application.yml文件中添加下述配置:
springredis:host: 127.0.0.1port: 6379一、opsForHash
RedisTemplate.opsForHash()是RedisTemplate类提供的用于操作Hash类型的方法,它可以用于对Redis中的Hash数据结构进行各种操作,如设置字段值、获取字段值、删除字段值等。
1.1 设置哈希字段的值
import org.junit.jupiter.api.Test;
import org.springframework.beans.factory.annotation.Autowired;
import org.springframework.boot.test.context.SpringBootTest;
import org.springframework.data.redis.core.RedisTemplate;@SpringBootTest
public class DemoApplicationTests {@Autowiredprivate RedisTemplate redisTemplate;@Testvoid test(){redisTemplate.opsForHash().put("fruit:list", "1", "苹果");}
}
在上述代码能正常运行的情况下,我们在终端中执行 redis-cli 命令进入到redis的控制台中,然后执行 keys * 命令查看所有的key,结果发现存储在redis中的key不是设置的string值,前面还多出了许多类似 \xac\xed\x00\x05t\x00 这种字符串,如下图所示:

这是因为Spring-Data-Redis的RedisTemplate<K, V>模板类在操作redis时默认使用JdkSerializationRedisSerializer来进行序列化,因此我们要更改其序列化方式:
import org.springframework.context.annotation.Bean;
import org.springframework.context.annotation.Configuration;
import org.springframework.data.redis.connection.RedisConnectionFactory;
import org.springframework.data.redis.core.RedisTemplate;
import org.springframework.data.redis.serializer.RedisSerializer;
import org.springframework.data.redis.serializer.StringRedisSerializer;@Configuration
public class RedisTemplateConfig {@Beanpublic RedisTemplate<Object,Object> redisTemplate(RedisConnectionFactory redisConnectionFactory) {RedisTemplate<Object,Object> redisTemplate = new RedisTemplate<>();redisTemplate.setConnectionFactory(redisConnectionFactory);RedisSerializer stringRedisSerializer = new StringRedisSerializer();redisTemplate.setKeySerializer(stringRedisSerializer);redisTemplate.setValueSerializer(stringRedisSerializer);redisTemplate.setHashKeySerializer(stringRedisSerializer);redisTemplate.setHashValueSerializer(stringRedisSerializer);return redisTemplate;}
}
需要说明的是这种配置只是针对所有的数据都是String类型,如果是其它类型,则根据需求修改一下序列化方式。
使用 flushdb 命令清除完所有的数据以后,再次执行上述测试案例,接着我们再次去查看所有的key,这个看到数据已经正常:

接着使用 hget fruit:list 1 命令去查询刚刚存储的数据,这时又发现对应字段的值中文显示乱码:
\xe8\x8b\xb9\xe6\x9e\x9c
这个时候需要我们在进入redis控制台前,添加 --raw 参数:
redis-cli --raw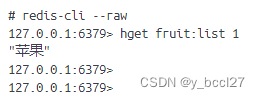
1.2 设置多个哈希字段的值
设置多个哈希字段的值一种很简单的粗暴的方法是多次执行opsForHash().put()方法,另外一种更优雅的方式如下:
import org.junit.jupiter.api.Test;
import org.springframework.beans.factory.annotation.Autowired;
import org.springframework.boot.test.context.SpringBootTest;
import org.springframework.data.redis.core.RedisTemplate;import java.util.HashMap;
import java.util.Map;@SpringBootTest
public class DemoApplicationTests {@Autowiredprivate RedisTemplate redisTemplate;@Testvoid test(){Map<String,String> map = new HashMap<>();map.put("1","苹果");map.put("2","橘子");map.put("3","香蕉");redisTemplate.opsForHash().putAll("fruit:list",map);}
}
1.3 获取哈希字段的值
import org.junit.jupiter.api.Test;
import org.springframework.beans.factory.annotation.Autowired;
import org.springframework.boot.test.context.SpringBootTest;
import org.springframework.data.redis.core.RedisTemplate;@SpringBootTest
public class DemoApplicationTests {@Autowiredprivate RedisTemplate redisTemplate;@Testvoid test(){String value = (String) redisTemplate.opsForHash().get("fruit:list","1");System.out.println(value);}
}
1.4 获取多个哈希字段的值
import org.junit.jupiter.api.Test;
import org.springframework.beans.factory.annotation.Autowired;
import org.springframework.boot.test.context.SpringBootTest;
import org.springframework.data.redis.core.RedisTemplate;import java.util.Arrays;
import java.util.List;@SpringBootTest
public class DemoApplicationTests {@Autowiredprivate RedisTemplate redisTemplate;@Testvoid test(){List<String> values = redisTemplate.opsForHash().multiGet("fruit:list", Arrays.asList("1", "2","3"));System.out.println(values);}
}
1.5 判断哈希中是否存在指定的字段
import org.junit.jupiter.api.Test;
import org.springframework.beans.factory.annotation.Autowired;
import org.springframework.boot.test.context.SpringBootTest;
import org.springframework.data.redis.core.RedisTemplate;@SpringBootTest
public class DemoApplicationTests {@Autowiredprivate RedisTemplate redisTemplate;@Testvoid test(){Boolean hasKey = redisTemplate.opsForHash().hasKey("fruit:list", "1");System.out.println(hasKey);}
}
1.6 获取哈希的所有字段
import org.junit.jupiter.api.Test;
import org.springframework.beans.factory.annotation.Autowired;
import org.springframework.boot.test.context.SpringBootTest;
import org.springframework.data.redis.core.RedisTemplate;import java.util.Set;@SpringBootTest
public class DemoApplicationTests {@Autowiredprivate RedisTemplate redisTemplate;@Testvoid test(){Set<String> keys = redisTemplate.opsForHash().keys("fruit:list");System.out.println(keys);}
}
1.7 获取哈希的所有字段的值
import org.junit.jupiter.api.Test;
import org.springframework.beans.factory.annotation.Autowired;
import org.springframework.boot.test.context.SpringBootTest;
import org.springframework.data.redis.core.RedisTemplate;import java.util.List;@SpringBootTest
public class DemoApplicationTests {@Autowiredprivate RedisTemplate redisTemplate;@Testvoid test(){List<String> values = redisTemplate.opsForHash().values("fruit:list");System.out.println(values);}
}
1.8 获取哈希的所有字段和对应的值
import org.junit.jupiter.api.Test;
import org.springframework.beans.factory.annotation.Autowired;
import org.springframework.boot.test.context.SpringBootTest;
import org.springframework.data.redis.core.RedisTemplate;import java.util.Map;@SpringBootTest
public class DemoApplicationTests {@Autowiredprivate RedisTemplate redisTemplate;@Testvoid test(){Map<String, String> entries = redisTemplate.opsForHash().entries("fruit:list");System.out.println(entries);}
}
1.9 删除指定的字段
返回值返回的是删除成功的字段的数量,如果字段不存在的话,则返回的是0。
import org.junit.jupiter.api.Test;
import org.springframework.beans.factory.annotation.Autowired;
import org.springframework.boot.test.context.SpringBootTest;
import org.springframework.data.redis.core.RedisTemplate;@SpringBootTest
public class DemoApplicationTests {@Autowiredprivate RedisTemplate redisTemplate;@Testvoid test(){Long deletedFields = redisTemplate.opsForHash().delete("fruit:list", "4");System.out.println(deletedFields);}
}
1.10 如果哈希的字段存在则不会添加,不存在则添加
import org.junit.jupiter.api.Test;
import org.springframework.beans.factory.annotation.Autowired;
import org.springframework.boot.test.context.SpringBootTest;
import org.springframework.data.redis.core.RedisTemplate;@SpringBootTest
public class DemoApplicationTests {@Autowiredprivate RedisTemplate redisTemplate;@Testvoid test(){Boolean success =  redisTemplate.opsForHash().putIfAbsent("fruit:list","4","西瓜");System.out.println(success);}
}
1.11 将指定字段的值增加指定步长
import org.junit.jupiter.api.Test;
import org.springframework.beans.factory.annotation.Autowired;
import org.springframework.boot.test.context.SpringBootTest;
import org.springframework.data.redis.core.RedisTemplate;@SpringBootTest
public class DemoApplicationTests {@Autowiredprivate RedisTemplate redisTemplate;@Testvoid test(){Long incrementedValue = redisTemplate.opsForHash().increment("salary:list", "1", 5);System.out.println(incrementedValue);}
}
如果字段不存在,则将该字段的值设置为指定步长,并且返回该字段当前的值;如果字段存在,则在该字段原有值的基础上增加指定步长,返回该字段当前的最新值。 该方法只适用于字段值为int类型的数据,因此关于哈希数据结构的value值的序列化方式要有所改变:
import org.springframework.context.annotation.Bean;
import org.springframework.context.annotation.Configuration;
import org.springframework.data.redis.connection.RedisConnectionFactory;
import org.springframework.data.redis.core.RedisTemplate;
import org.springframework.data.redis.serializer.Jackson2JsonRedisSerializer;
import org.springframework.data.redis.serializer.RedisSerializer;
import org.springframework.data.redis.serializer.StringRedisSerializer;@Configuration
public class RedisTemplateConfig {@Beanpublic RedisTemplate<Object,Object> redisTemplate(RedisConnectionFactory redisConnectionFactory) {RedisTemplate<Object,Object> redisTemplate = new RedisTemplate<>();redisTemplate.setConnectionFactory(redisConnectionFactory);RedisSerializer stringRedisSerializer = new StringRedisSerializer();redisTemplate.setKeySerializer(stringRedisSerializer);redisTemplate.setValueSerializer(stringRedisSerializer);redisTemplate.setHashKeySerializer(stringRedisSerializer);Jackson2JsonRedisSerializer jackson2JsonRedisSerializer = new Jackson2JsonRedisSerializer(Object.class);redisTemplate.setHashValueSerializer(jackson2JsonRedisSerializer);return redisTemplate;}
}
StringRedisTemplate的好处就是在RedisTemplate基础上封装了一层,指定了所有数据的序列化方式都是采用StringRedisSerializer(即字符串),使用语法上面完全一致。
public class StringRedisTemplate extends RedisTemplate<String, String> {public StringRedisTemplate() {this.setKeySerializer(RedisSerializer.string());this.setValueSerializer(RedisSerializer.string());this.setHashKeySerializer(RedisSerializer.string());this.setHashValueSerializer(RedisSerializer.string());}
}
二、opsForValue
RedisTemplate.opsForValue()是RedisTemplate类提供的用于操作字符串值类型的方法。它可以用于对Redis中的字符串值进行各种操作,如设置值、获取值、删除值等。
2.1 设置一个键值对
import org.junit.jupiter.api.Test;
import org.springframework.beans.factory.annotation.Autowired;
import org.springframework.boot.test.context.SpringBootTest;
import org.springframework.data.redis.core.RedisTemplate;import java.util.concurrent.TimeUnit;@SpringBootTest
public class DemoApplicationTests {@Autowiredprivate RedisTemplate redisTemplate;@Testvoid test(){String key = "fruit";String value = "apple";redisTemplate.opsForValue().set(key,value,30,TimeUnit.SECONDS);}
}
2.2 根据键获取对应的值
import org.junit.jupiter.api.Test;
import org.springframework.beans.factory.annotation.Autowired;
import org.springframework.boot.test.context.SpringBootTest;
import org.springframework.data.redis.core.RedisTemplate;@SpringBootTest
public class DemoApplicationTests {@Autowiredprivate RedisTemplate redisTemplate;@Testvoid test(){String value = (String) redisTemplate.opsForValue().get("fruit");System.out.println(value);}
}
相关文章:
Spring Boot中RedisTemplate的使用
当前Spring Boot的版本为2.7.6,在使用RedisTemplate之前我们需要在pom.xml中引入下述依赖: <dependency><groupId>org.springframework.boot</groupId><artifactId>spring-boot-starter-data-redis</artifactId><vers…...

GSCoolink GSV6183 带嵌入式MCU的MIPI D-PHY 转 DP/eDP
Gscoolink GSV6183是一款高性能、低功耗的MIPI D-PHY到DisplayPort/eDP 1.4转换器。通过集成基于RISC-V的增强型微控制器,GSV6183创造了一种具有成本效益的解决方案,提供了上市时间优势。MIPI D-PHY接收器支持CSI-2版本1.3和DSI版本1.3,每条通…...

Linux文件系统 struct dentry 结构体解析
文章目录 前言一、目录项简介二、struct dentry2.1 简介2.2 dentry和inode关联2.3 目录项视图2.4 目录项状态2.5 目录项特点 三、dentry cache3.1 简介3.2 dentry cache 初始化3.3 dentry cache 查看 四、dentry与mount、file的关联五、其他参考资料 前言 这两篇文章介绍了: V…...
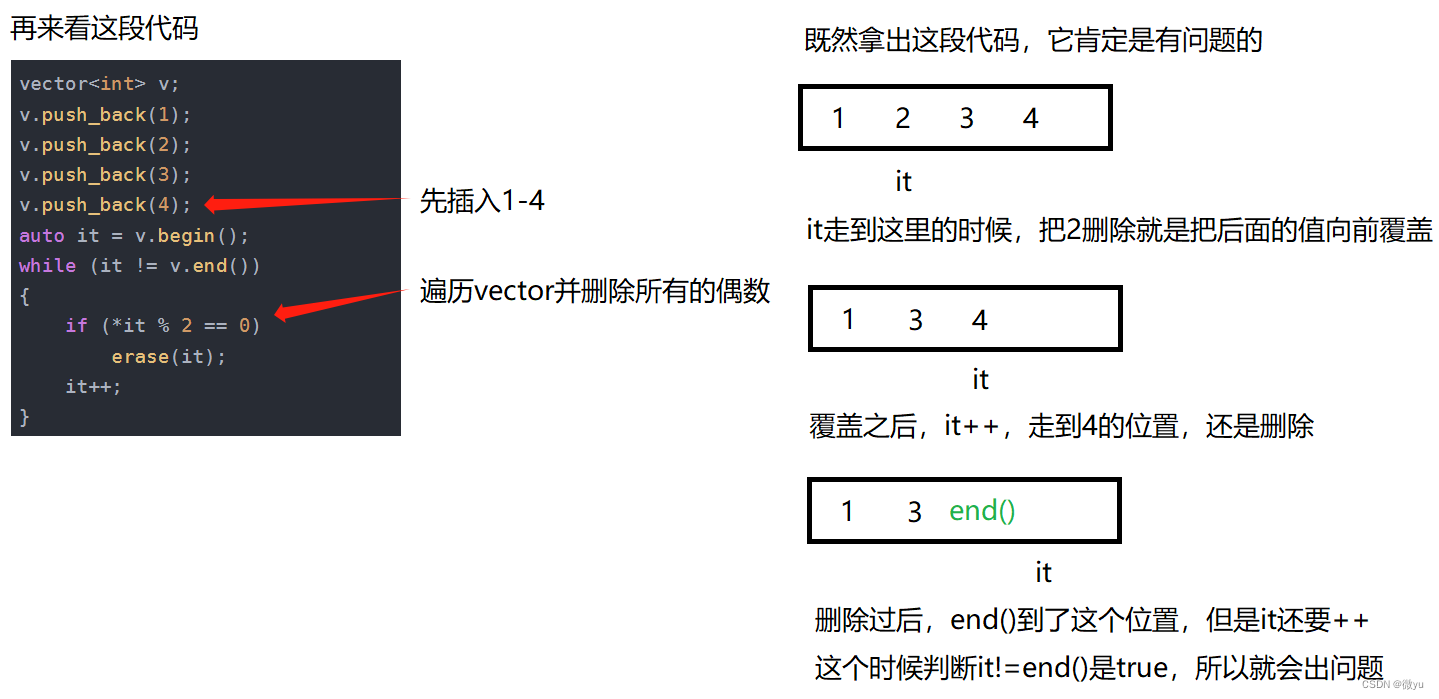
C++——vector
目录 vector vector常用接口 构造函数 operator[]size() 迭代器 范围for capacity() resize() reverse() push_back和pop_back insert erase() algorithm::sort 注意 迭代器失效 vector vector单词直译是向量的意思,这个容器可以容纳不同的类型数据&am…...
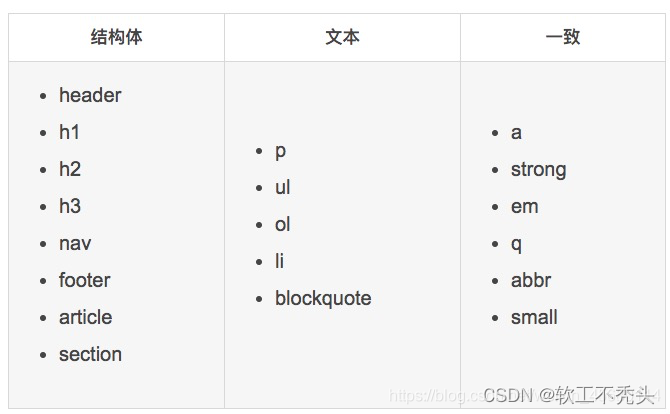
html5语义化标签
目录 前言 什么是语义化标签 常见的语义化标签 语义化的好处 前言 HTML5 的设计目的是为了在移动设备上支持多媒体。之前网页如果想嵌入视频音频,需要用到 flash ,但是苹果设备是不支持 flash 的,所以为了改变这一现状,html5 …...

SQL Server批量删除数据库中的表
如果想要删除数据库中temp 开头的中间表 1. SQL 语句实现 use [DBName] --todo go select drop table name from sys.tables where name like temp% go 将查询结果粘贴到数据库中运行 2. 数据库 单击目标数据库中的Tables ,然后按F7 键,按Name 进行排序&…...
使用SecScanC2构建P2P去中心化网络实现反溯源
个人博客: xzajyjs.cn 前言 这款工具是为了帮助安全研究人员在渗透测试过程中防止扫描被封禁、保护自己免溯源的一种新思路。其利用到了区块链中的p2p点对点去中心化技术构建以来构建代理池。 工具链接:https://github.com/xzajyjs/SecScanC2 实验过程 该工具分为…...

【API篇】七、Flink窗口
文章目录 1、窗口2、分类3、窗口API概览4、窗口分配器 在批处理统计中,可以等待一批数据都到齐后,统一处理。但是在无界流的实时处理统计中,是来一条就得处理一条,那么如何统计最近一段时间内的数据呢? ⇒ 窗口的概念&…...
软件测试面试1000问(含文档)
前前后后面试了有20多家的公司吧,最近抽空把当时的录音整理了下,然后给大家分享下 开头都是差不多,就让做一个自我介绍,这个不用再给大家普及了吧 同时,我也准备了一份软件测试视频教程(含接口、自动化、…...
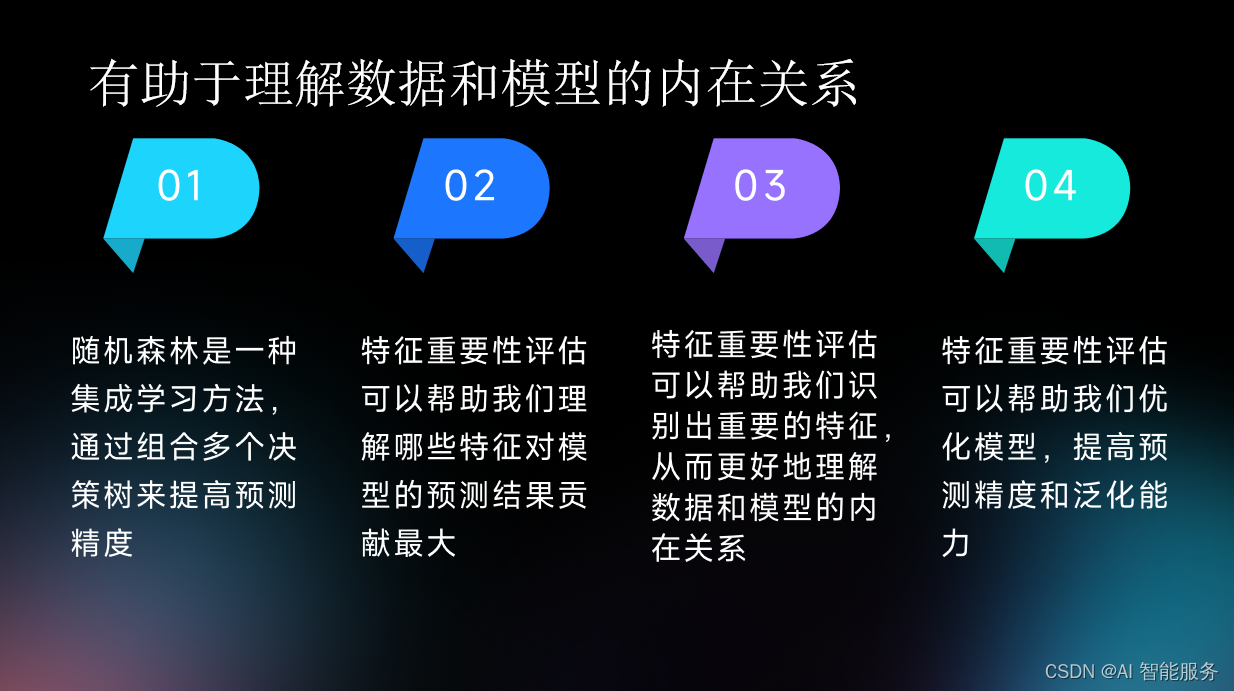
进阶课4——随机森林
1.定义 随机森林是一种集成学习方法,它利用多棵树对样本进行训练并预测。 随机森林指的是利用多棵树对样本进行训练并预测的一种分类器,每棵树都由随机选择的一部分特征进行训练和构建。通过多棵树的集成,可以增加模型的多样性和泛化能力。…...
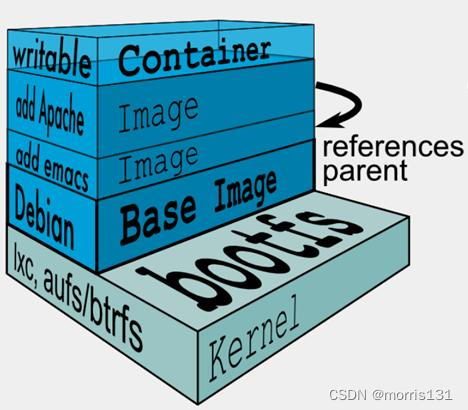
【Docker】Dockerfile使用技巧
开启Buildkit BuildKit是Docker官方社区推出的下一代镜像构建神器,可以更加快速,有效,安全地构建docker镜像。 尽管目前BuildKit不是Docker的默认构建工具,但是完全可以考虑将其作为Docker(v18.09)的首选…...
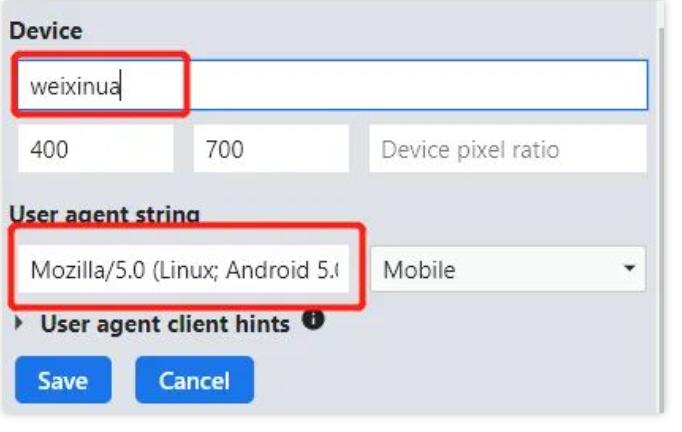
一招解决“请在微信客户端中打开链接”
一招解决“请在微信客户端中打开链接”-遇见你与你分享 在浏览器访问网站,却提示“请在微信客户端打开链接”。虽然这个情况你可能从未遇到过,但对于爱折腾的小伙伴,确是一道拦路虎 其实解决办法很简单,就是新建一个UA࿱…...
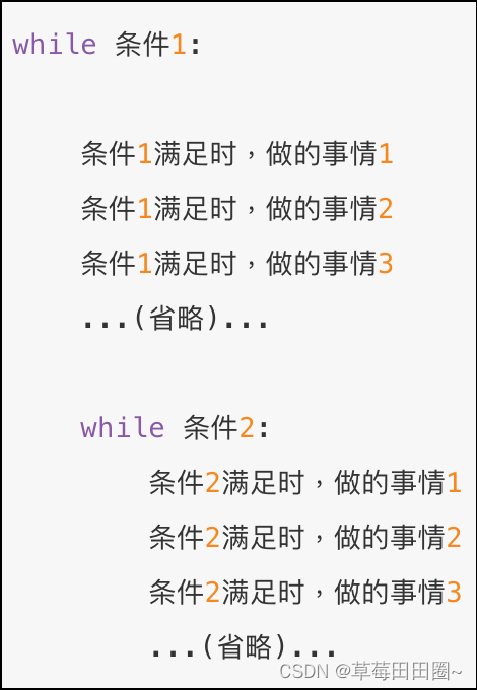
Python循环语句(一)
目录 一.while循环1.while循环的基础语法2.while循环的嵌套应用3.while循环嵌套案例 一.while循环 1.while循环的基础语法 while循环注意点 while的条件需得到布尔类型,True表示继续循环,False表示结束循环需要设置循环终止的条件,如i 1配…...
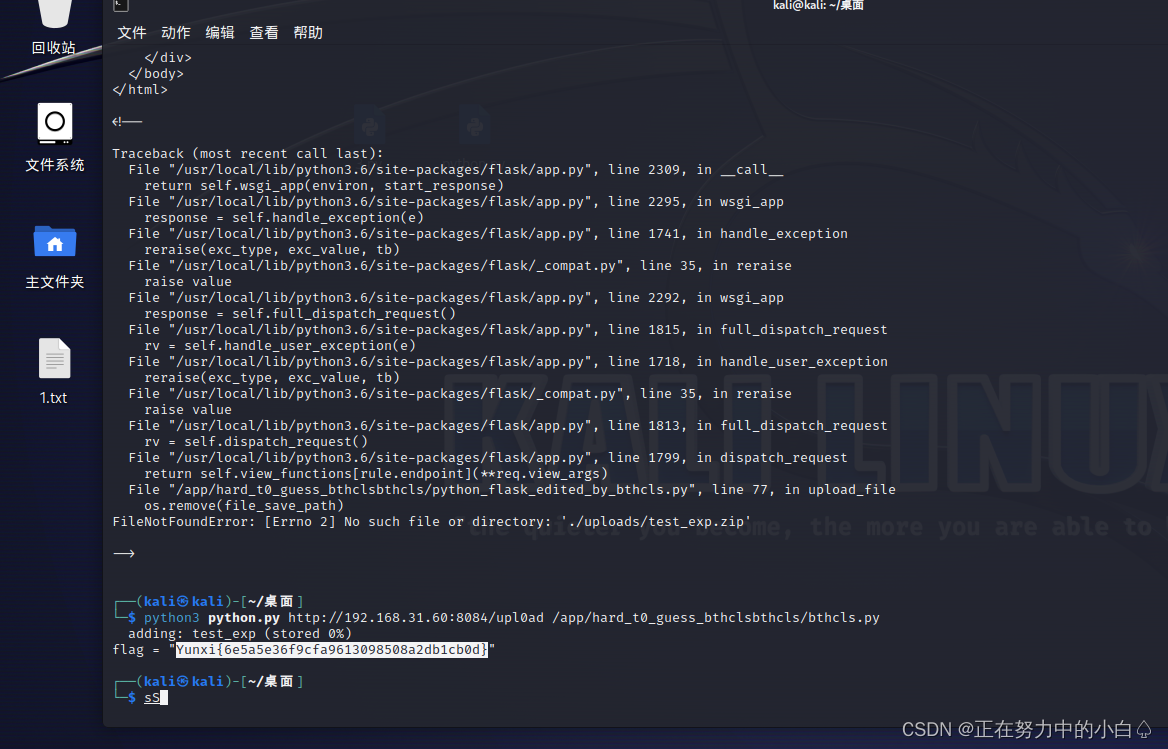
期中考核复现
web 1z_php ?0o0[]1A&OoO[]2023a include "flag.php":尝试包含名为 "flag.php" 的文件。这意味着它会尝试引入一个名为 "flag.php" 的脚本文件,其中可能包含一些敏感信息或标志。 error_reporting(0):…...
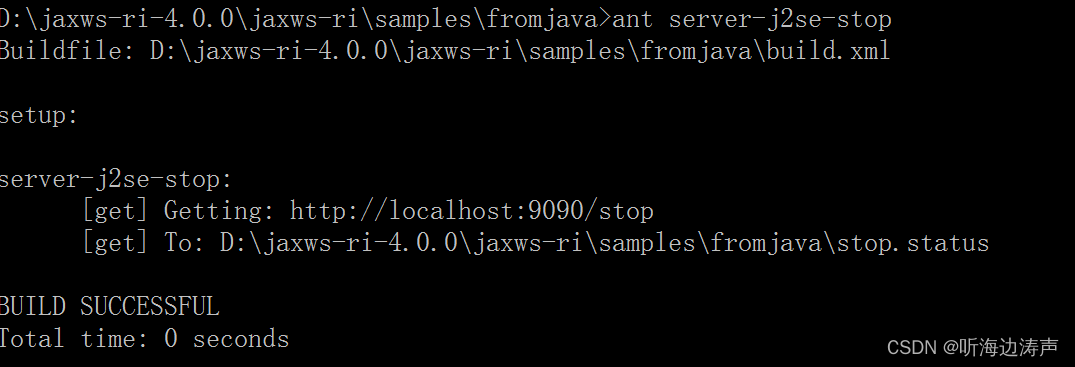
基于XML的Web服务Java接口(JAX-WS)、Jakarta XML Web Services Eclipse 实现
简介 JAX-WS(Java API for XML-Based Web Services),是创建web服务的Java编程接口,特别是SOAP服务。是Java XML编程接口之一,是Java SE 和Java EE 平台的一部分。 JAX-WS 2.0 规范是代替JAX-RPC 1.0的下一代Web服务AP…...

公网无信号区域远程抄表问题解决方案及产品选型
摘要:随着计量自动化系统的逐步完善,电网全用户表码信息采集成为系统数据得以深化应用的重要基础。利用无线公网通信是目前实现远程抄表的主要手段之一,但仍存在公网难以覆盖的偏远山区、公网信号屏蔽地下室或弱信号区域,无法实现…...
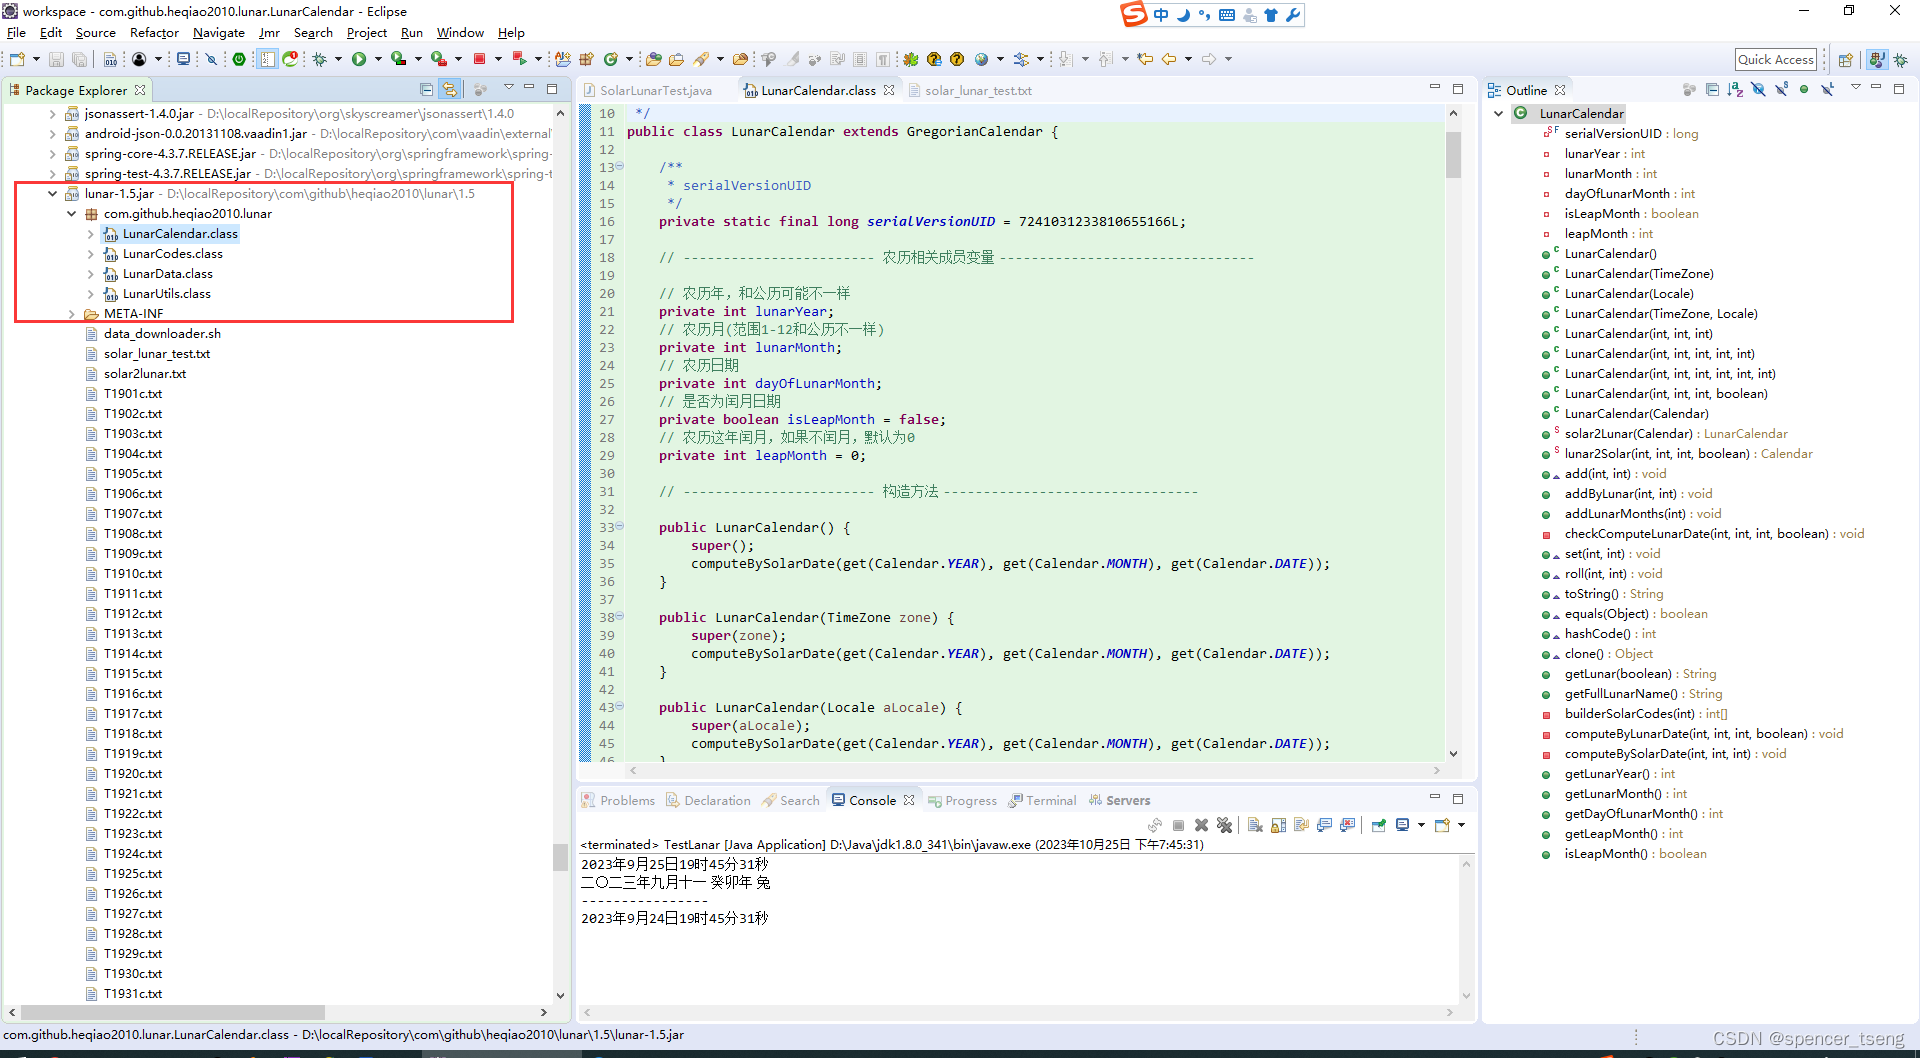
lunar-1.5.jar
公历农历转换包 https://mvnrepository.com/artifact/com.github.heqiao2010/lunar <!-- https://mvnrepository.com/artifact/com.github.heqiao2010/lunar --> <dependency> <groupId>com.github.heqiao2010</groupId> <artifactId>l…...

c++编译使用log4cplus
提示:文章写完后,目录可以自动生成,如何生成可参考右边的帮助文档 文章目录 前言一、log4cplus是什么?二、使用步骤1.下载源代码2.开始配置1.配置介绍2.开始编译 3.cmake引用4.示例 总结 前言 C很强大,但是仍然有很多…...

zookeeper源码(02)源码编译启动及idea导入
本文介绍一下zookeeper-3.9.0源码下载、编译及本地启动。 下载源码 git clone https://gitee.com/apache/zookeeper.gitcd zookeeper git checkout release-3.9.0 git checkout -b release-3.9.0源码编译 README_packaging.md文件 该文件介绍了编译zookeeper需要的环境和命…...

Github 2FA绑定中国+86手机号码实现两步验证
GitHub宣布,到 2023 年底,所有用户都必须要启用双因素身份验证 (2FA),不能只用密码. GitHub开启2FA后,除了输入密码外,还需要通过一次性密码(OTP)等方式做第二级身份验证,才能成功登…...

Synopsys工具filter命令:从数据筛选到高效IC设计的实战指南
1. 项目概述:从“大海捞针”到“精准定位”的思维转变在IC设计领域,Synopsys的工具链是我们日常工作中不可或缺的伙伴。无论是DC、ICC2、PT还是VCS,我们每天都要与海量的数据、复杂的网表和成千上万的命令打交道。很多时候,我们面…...

猫抓浏览器扩展:三步实现网页视频自由下载的完整指南
猫抓浏览器扩展:三步实现网页视频自由下载的完整指南 【免费下载链接】cat-catch 猫抓 浏览器资源嗅探扩展 / cat-catch Browser Resource Sniffing Extension 项目地址: https://gitcode.com/GitHub_Trending/ca/cat-catch 你是否经常遇到这样的情况&#x…...

Chrome 148紧急安全更新深度解析:127个漏洞背后的GPU UAF沙箱逃逸与防御实战
一、引言:史上最密集的Chrome安全更新风暴 2026年5月5日,Google紧急推送了Chrome 148稳定版的第二次安全更新(版本号Windows/Mac 148.0.7778.96/97,Linux 148.0.7778.96),一次性修复了127个安全漏洞&#x…...
)
电赛小白也能搞定的二维云台:用K210+舵机实现色块追踪(附完整代码)
电赛入门实战:K210舵机构建高响应色块追踪云台 第一次参加电子设计竞赛时,面对复杂的视觉控制项目总有种无从下手的感觉。直到发现用K210开发板配合普通舵机就能搭建出反应灵敏的二维云台系统,整个过程就像拼乐高一样充满乐趣。本文将带你从零…...

命令行故障自动修复工具 fix-my-claw:原理、插件架构与实战指南
1. 项目概述:一个修复“爪子”的实用工具最近在GitHub上看到一个挺有意思的项目,叫caopulan/fix-my-claw。光看名字,你可能会有点摸不着头脑——“爪子”是什么?需要修复什么?这其实是一个典型的、由开发者社区需求催生…...
)
NotebookLM笔记导出全链路实操指南:从Chrome插件绕过限制到API直连导出(含Python脚本)
更多请点击: https://intelliparadigm.com 第一章:NotebookLM笔记导出全链路概览 NotebookLM 是 Google 推出的基于用户上传文档构建个性化知识代理的 AI 工具,其核心价值在于语义理解与上下文生成,但原生不提供直接导出原始笔记…...

别再为WinPcap头疼了!手把手教你用SOEM 1.3.1在Windows上搞定EtherCAT主站开发环境
告别WinPcap困扰:SOEM 1.3.1在Windows下的EtherCAT主站开发全攻略 当第一次接触EtherCAT主站开发时,许多工程师都会遇到一个共同的"拦路虎"——WinPcap环境配置。这个看似简单的网络抓包工具,在实际开发中却可能耗费数小时甚至数天…...

告别盲选!Space Thumbnails让3D模型文件在Windows资源管理器中“活“起来
告别盲选!Space Thumbnails让3D模型文件在Windows资源管理器中"活"起来 【免费下载链接】space-thumbnails Generates preview thumbnails for 3D model files. Provide a Windows Explorer extensions that adds preview thumbnails for 3D model files.…...

如何快速上手ESP32物联网开发:Arduino-ESP32终极入门指南
如何快速上手ESP32物联网开发:Arduino-ESP32终极入门指南 【免费下载链接】arduino-esp32 Arduino core for the ESP32 family of SoCs 项目地址: https://gitcode.com/GitHub_Trending/ar/arduino-esp32 想要开始ESP32物联网开发却不知从何入手?…...

大模型推理全链路拆解
从 token 调度到采样输出,追踪每一步张量维度的变化,搞懂 LLM 推理到底在算什么 01 为什么需要 Continuous Batching 批处理能提升 GPU 利用率——复用权重来均摊显存访问开销。但生成式任务的输出序列长度不可预测且差异巨大,传统"齐…...