【Linux】安装使用Nginx负载均衡,并且部署前端项目
目录
一、Nginx概述
1. 什么
2. 背景
3. 作用
二、Nginx负载均衡
1. 讲述
2. 使用
1. 下载
2. 安装
3. 负载均衡
三、前端部署
1. 准备
2. 部署
一、Nginx概述
1. 什么
Nginx是一个高性能的开源Web服务器和反向代理服务器。它具有轻量级、高并发、低内存消耗的特点,被广泛用于构建高性能的Web应用和服务。
Nginx最初是由俄罗斯的工程师Igor Sysoev开发的,于2004年首次发布。它的设计目标是解决C10k问题,即同时处理上万个并发连接的问题。相比传统的Web服务器(如Apache),Nginx采用了事件驱动和异步非阻塞的处理方式,能够更高效地处理大量的并发请求。
2. 背景
Nginx的背景可以追溯到2002年,当时俄罗斯的工程师Igor Sysoev开始开发这个项目。他当时是一家俄罗斯的在线广告公司的系统管理员,面临着处理大量并发连接的问题。他发现传统的Web服务器(如Apache)在处理大量并发连接时性能下降严重,无法满足需求。
为了解决这个问题,Sysoev开始着手开发一款高性能的Web服务器。他采用了事件驱动和异步非阻塞的处理方式,以及采用单线程模型来处理并发请求。这种设计使得Nginx能够高效地处理大量的并发连接,而无需为每个连接创建一个新的线程或进程。
在2004年,Nginx首次发布,并迅速获得了广泛的关注和使用。它的高性能、低内存消耗以及简单的配置语法使得它成为了很多网站和应用的首选。随着互联网的快速发展,Nginx逐渐成为了最受欢迎的Web服务器之一。
Nginx的成功也得益于其开源的特性,使得开发者可以自由地使用、修改和分发它。这促进了Nginx的快速发展和持续改进。如今,Nginx已经成为了全球最流行的Web服务器之一,被广泛应用于各种规模的网站、应用和服务中。
3. 作用
Nginx的主要功能包括:
-
静态文件服务:Nginx可以快速地处理静态文件的请求,通过将文件缓存到内存中,减少了对磁盘的访问,提高了响应速度。
-
反向代理:Nginx可以作为反向代理服务器,将客户端的请求转发给后端的多个服务器,实现负载均衡和高可用性。
-
动态内容处理:Nginx支持通过FastCGI、uWSGI和SCGI等协议与后端应用服务器(如PHP、Python、Java)进行通信,实现动态内容的处理和渲染。
-
SSL/TLS加密:Nginx支持SSL/TLS协议,可以提供安全的HTTPS连接,保护数据的传输过程。
-
缓存:Nginx可以使用内置的缓存模块,将经常访问的内容缓存到内存中,减少对后端服务器的请求,提高性能。
-
URL重写和重定向:Nginx提供了强大的URL重写和重定向功能,可以根据规则修改URL,实现URL的美化和重定向。
-
日志记录:Nginx可以记录访问日志和错误日志,方便进行故障排查和性能分析。
总之,Nginx是一个高性能、可扩展、灵活的Web服务器和反向代理服务器,适用于构建高性能的Web应用和服务。它的简单配置和高效处理能力使得它成为了很多大型网站和应用的首选。
二、Nginx负载均衡
1. 讲述
Nginx作为一个反向代理服务器,可以实现负载均衡,将客户端的请求分发给后端的多个服务器。下面是Nginx负载均衡的一般过程:
1. 客户端发送请求:客户端发送请求到Nginx服务器。
2. Nginx接收请求:Nginx服务器接收到客户端的请求。
3. 选择后端服务器:Nginx根据一定的负载均衡算法选择一个后端服务器来处理请求。常见的负载均衡算法有轮询(round robin)、IP哈希(ip_hash)、最少连接(least_conn)等。
4. 转发请求:Nginx将客户端的请求转发给选中的后端服务器。
5. 后端服务器处理请求:选中的后端服务器接收到请求后,处理请求并生成响应。
6. 响应返回给Nginx:后端服务器将处理完的响应返回给Nginx。
7. Nginx返回响应给客户端:Nginx将后端服务器返回的响应转发给客户端。
通过这个过程,Nginx可以将客户端的请求分发给多个后端服务器,实现负载均衡。这样可以提高系统的性能和可靠性,避免单个服务器的过载和故障对整个系统的影响。
需要注意的是,Nginx还可以进行健康检查,定期检查后端服务器的状态,如果发现某个服务器不可用或负载过高,会自动将请求转发给其他可用的服务器。这样可以进一步提高系统的可用性和稳定性。
2. 使用
打开虚拟机【Linux】-Centos,进行登入,并且使用MobaXterm进行连接。
如有不清楚可以看我博客 :
【Linux】安装配置解决Centos&MobaXterm的使用及Linux常用命令&命令模式
https://blog.csdn.net/SAME_LOVE/article/details/134091961?spm=1001.2014.3001.5501
1. 下载
输入命令 : cd javaCloudJun/software 进入到资源文件目录
安装 Nginx 的4个依赖
输入命令 : yum -y install gcc zlib zlib-devel pcre-devel openssl openssl-devel
安装时需要稍等片刻。。。

安装完成后,下载Nginx 然后复制到虚拟机【Linux】-Centos中
Nginx 官网
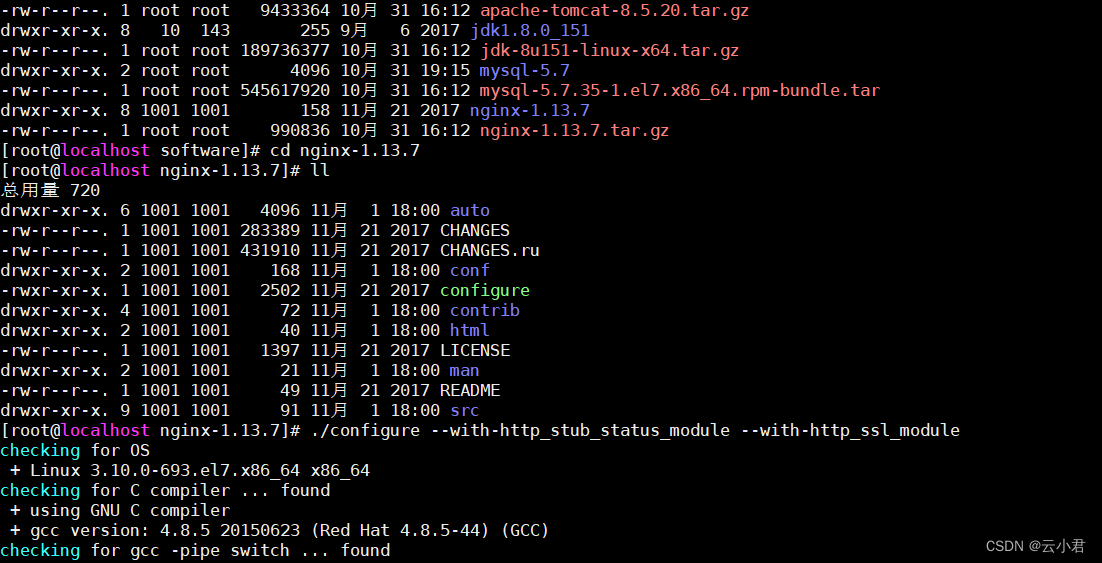
输入命令 : tar -xvf nginx-1.13.7.tar.gz ( 解压 Nginx)

解压后进入其文件
命令 : cd nginx-1.13.7
编译,执行配置: 考虑到后续安装ssl证书 添加两个模块
命令 : ./configure --with-http_stub_status_module --with-http_ssl_module
2. 安装
之后进行安装
命令 : make && make install

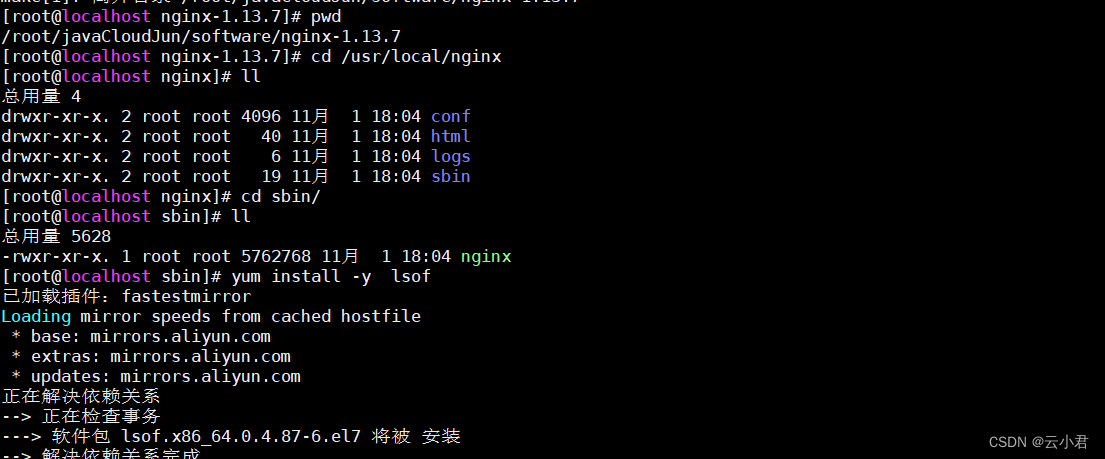
安装完后,进入该目录
输入命令 : cd /usr/local/nginx
进入 /usr/local/nginx/sbin 目录下启动:
输入命令 : cd sbin/
启动前安装 lsof 命令
输入命令 : yum install -y lsof
设置防火墙 开放 80 端口
输入命令 : firewall-cmd --zone=public --add-port=80/tcp --permanent
更新防火墙的端口并且查看已开放的端口
输入命令 : firewall-cmd --reload && firewall-cmd --list-port

# 启动
命令 : ./nginx
#查看
命令 : lsof -i:80

在浏览器中,输入虚拟机【Linux】-Centos的IP地址进行搜索
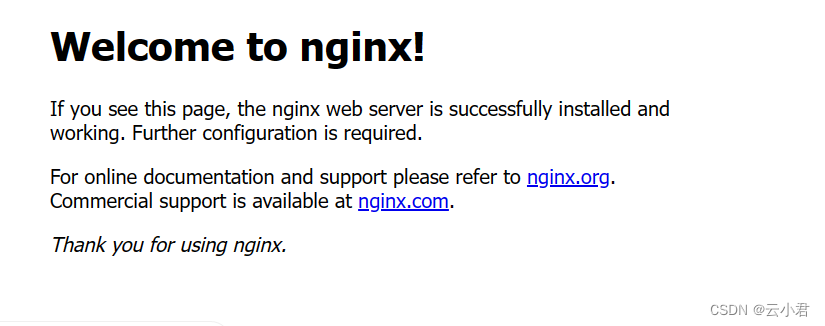
以上就是Nginx 的使用配置并且开启完成了。3.
3. 负载均衡
在资源文件夹中,创建一个tomcat文件夹,来存放Tomcat
输入命令 : mkdir tomcat
并且将tomcat服务解压到指定目录,刚刚创建的tomcat文件夹中。
输入命令 : tar -xvf apache-tomcat-8.5.tar.gz -C tomcat

进入tomcat文件夹中
命令 : cd tomcat/
复制一个tomcat,准备2个tomcat
命令 : cp -r apache-tomcat-8.5.20/ apache-tomcat-8.5.20_8081/
查看命令 : ll

将其中的一个tomcat修改端口,避免两个服务同时开启时端口被占用的情况。
命令 : cd apache-tomcat-8.5.20/conf ( 进入到tomcat的conf文件中 )
找到server.xml 文件进行修改端口
命令 : vim server.xml ( 编辑文件修改端口 )
修改后的所以代码 :
<?xml version="1.0" encoding="UTF-8"?> <!--Licensed to the Apache Software Foundation (ASF) under one or morecontributor license agreements. See the NOTICE file distributed withthis work for additional information regarding copyright ownership.The ASF licenses this file to You under the Apache License, Version 2.0(the "License"); you may not use this file except in compliance withthe License. You may obtain a copy of the License athttp://www.apache.org/licenses/LICENSE-2.0Unless required by applicable law or agreed to in writing, softwaredistributed under the License is distributed on an "AS IS" BASIS,WITHOUT WARRANTIES OR CONDITIONS OF ANY KIND, either express or implied.See the License for the specific language governing permissions andlimitations under the License. --> <!-- Note: A "Server" is not itself a "Container", so you may notdefine subcomponents such as "Valves" at this level.Documentation at /docs/config/server.html--> <Server port="8006" shutdown="SHUTDOWN"><Listener className="org.apache.catalina.startup.VersionLoggerListener" /><!-- Security listener. Documentation at /docs/config/listeners.html<Listener className="org.apache.catalina.security.SecurityListener" />--><!--APR library loader. Documentation at /docs/apr.html --><Listener className="org.apache.catalina.core.AprLifecycleListener" SSLEngine="on" /><!-- Prevent memory leaks due to use of particular java/javax APIs--><Listener className="org.apache.catalina.core.JreMemoryLeakPreventionListener" /><Listener className="org.apache.catalina.mbeans.GlobalResourcesLifecycleListener" /><Listener className="org.apache.catalina.core.ThreadLocalLeakPreventionListener" /><!-- Global JNDI resourcesDocumentation at /docs/jndi-resources-howto.html--><GlobalNamingResources><!-- Editable user database that can also be used byUserDatabaseRealm to authenticate users--><Resource name="UserDatabase" auth="Container"type="org.apache.catalina.UserDatabase"description="User database that can be updated and saved"factory="org.apache.catalina.users.MemoryUserDatabaseFactory"pathname="conf/tomcat-users.xml" /></GlobalNamingResources><!-- A "Service" is a collection of one or more "Connectors" that sharea single "Container" Note: A "Service" is not itself a "Container",so you may not define subcomponents such as "Valves" at this level.Documentation at /docs/config/service.html--><Service name="Catalina"><!--The connectors can use a shared executor, you can define one or more named thread pools--><!--<Executor name="tomcatThreadPool" namePrefix="catalina-exec-"maxThreads="150" minSpareThreads="4"/>--><!-- A "Connector" represents an endpoint by which requests are receivedand responses are returned. Documentation at :Java HTTP Connector: /docs/config/http.htmlJava AJP Connector: /docs/config/ajp.htmlAPR (HTTP/AJP) Connector: /docs/apr.htmlDefine a non-SSL/TLS HTTP/1.1 Connector on port 8080--><Connector port="8081" protocol="HTTP/1.1"connectionTimeout="20000"redirectPort="8443" /><!-- A "Connector" using the shared thread pool--><!--<Connector executor="tomcatThreadPool"port="8080" protocol="HTTP/1.1"connectionTimeout="20000"redirectPort="8443" />--><!-- Define a SSL/TLS HTTP/1.1 Connector on port 8443This connector uses the NIO implementation. The defaultSSLImplementation will depend on the presence of the APR/nativelibrary and the useOpenSSL attribute of theAprLifecycleListener.Either JSSE or OpenSSL style configuration may be used regardless ofthe SSLImplementation selected. JSSE style configuration is used below.--><!--<Connector port="8443" protocol="org.apache.coyote.http11.Http11NioProtocol"maxThreads="150" SSLEnabled="true"><SSLHostConfig><Certificate certificateKeystoreFile="conf/localhost-rsa.jks"type="RSA" /></SSLHostConfig></Connector>--><!-- Define a SSL/TLS HTTP/1.1 Connector on port 8443 with HTTP/2This connector uses the APR/native implementation which always usesOpenSSL for TLS.Either JSSE or OpenSSL style configuration may be used. OpenSSL styleconfiguration is used below.--><!--<Connector port="8443" protocol="org.apache.coyote.http11.Http11AprProtocol"maxThreads="150" SSLEnabled="true" ><UpgradeProtocol className="org.apache.coyote.http2.Http2Protocol" /><SSLHostConfig><Certificate certificateKeyFile="conf/localhost-rsa-key.pem"certificateFile="conf/localhost-rsa-cert.pem"certificateChainFile="conf/localhost-rsa-chain.pem"type="RSA" /></SSLHostConfig></Connector>--><!-- Define an AJP 1.3 Connector on port 8009 --><Connector port="8010" protocol="AJP/1.3" redirectPort="8443" /><!-- An Engine represents the entry point (within Catalina) that processesevery request. The Engine implementation for Tomcat stand aloneanalyzes the HTTP headers included with the request, and passes themon to the appropriate Host (virtual host).Documentation at /docs/config/engine.html --><!-- You should set jvmRoute to support load-balancing via AJP ie :<Engine name="Catalina" defaultHost="localhost" jvmRoute="jvm1">--><Engine name="Catalina" defaultHost="localhost"><!--For clustering, please take a look at documentation at:/docs/cluster-howto.html (simple how to)/docs/config/cluster.html (reference documentation) --><!--<Cluster className="org.apache.catalina.ha.tcp.SimpleTcpCluster"/>--><!-- Use the LockOutRealm to prevent attempts to guess user passwordsvia a brute-force attack --><Realm className="org.apache.catalina.realm.LockOutRealm"><!-- This Realm uses the UserDatabase configured in the global JNDIresources under the key "UserDatabase". Any editsthat are performed against this UserDatabase are immediatelyavailable for use by the Realm. --><Realm className="org.apache.catalina.realm.UserDatabaseRealm"resourceName="UserDatabase"/></Realm><Host name="localhost" appBase="webapps"unpackWARs="true" autoDeploy="true"><!-- SingleSignOn valve, share authentication between web applicationsDocumentation at: /docs/config/valve.html --><!--<Valve className="org.apache.catalina.authenticator.SingleSignOn" />--><!-- Access log processes all example.Documentation at: /docs/config/valve.htmlNote: The pattern used is equivalent to using pattern="common" --><Valve className="org.apache.catalina.valves.AccessLogValve" directory="logs"prefix="localhost_access_log" suffix=".txt"pattern="%h %l %u %t "%r" %s %b" /></Host></Engine></Service> </Server>注 : 将该服务器tomcat的所以端口都进行了修改,以免其他所有端口也有冲突。
并且将这个服务器的页面显示内容进行修改,访问时容易分辨是哪个tomcat端口进入的
在tomcat根目录的webapps中的ROOT目录中,找到index.jsp文件,在MobaXterm工具的左边选中这个文件,右键点击第二个进行打开文件,并且修改编辑文件。

编辑后的所有内容如下 :
<%--
Licensed to the Apache Software Foundation (ASF) under one or more
contributor license agreements.  See the NOTICE file distributed with
this work for additional information regarding copyright ownership.
The ASF licenses this file to You under the Apache License, Version 2.0
(the "License"); you may not use this file except in compliance with
the License.  You may obtain a copy of the License athttp://www.apache.org/licenses/LICENSE-2.0Unless required by applicable law or agreed to in writing, software
distributed under the License is distributed on an "AS IS" BASIS,
WITHOUT WARRANTIES OR CONDITIONS OF ANY KIND, either express or implied.
See the License for the specific language governing permissions and
limitations under the License.
--%>
<%@ page session="false" pageEncoding="UTF-8" contentType="text/html; charset=UTF-8" %>
<%
java.text.SimpleDateFormat sdf = new java.text.SimpleDateFormat("yyyy");
request.setAttribute("year", sdf.format(new java.util.Date()));
request.setAttribute("tomcatUrl", "http://tomcat.apache.org/");
request.setAttribute("tomcatDocUrl", "/docs/");
request.setAttribute("tomcatExamplesUrl", "/examples/");
%>
<!DOCTYPE html>
<html lang="en"><head><meta charset="UTF-8" /><title><%=request.getServletContext().getServerInfo() %></title><link href="favicon.ico" rel="icon" type="image/x-icon" /><link href="favicon.ico" rel="shortcut icon" type="image/x-icon" /><link href="tomcat.css" rel="stylesheet" type="text/css" /></head><body><h1>8081</h1></body></html>
返回到tomcat目录,并且开其两个服务(tomcat)
命令: cd apache-tomcat-8.5.20/bin ( 进入到tomcat的bin目录中 )
命令: ./startup.sh ( 开启服务 )

再到 nginx的目录中
命令: cd /usr/local/nginx

并且进入 : sbin目录
输入 : cd sbin
命令 : ./nginx -s reload
注 : 重新开启nginx

之后在浏览器中访问,就有两个服务在运行用一个了
如图 :
三、前端部署
1. 准备
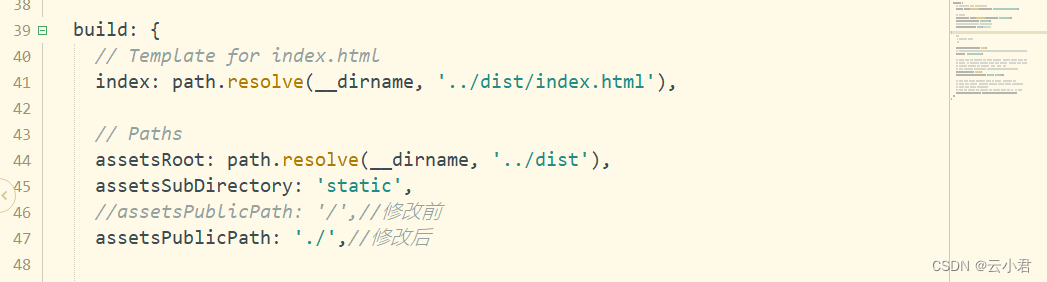
前端项目打包之前需要增加以下的设置
在前端项目中 config文件下的index.js中要增加以下代码 :
assetsPublicPath: './',//修改后
如图:
在前端项目中 build文件下的 utils.js 中增加以下代码 :
// 解决icon路径加载错误
publicPath:'../../'
如图:

在前端项目的跟目录中,cmd打开命令窗口
输入命令 : npm run build ( 进行前端项目打包 )
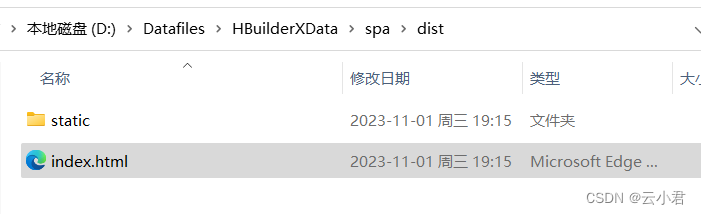
如图 :

命令执行后,会出现如图中以下文件 dist
在 /usr/local/ 目录下创建一个文件夹,为mypor ,并且进入文件夹,之后将dist文件拖入mypor文件夹中
并且选中zip解压的命令 : yum install -y unzip

将该文件进行解压
输入命令 : unzip dist.zip

2. 部署
输入命令 : cd /usr/local/nginx/conf/ 找到nginx.conf进行编辑
以下是所有代码 :
#user  nobody;
worker_processes  1;#error_log  logs/error.log;
#error_log  logs/error.log  notice;
#error_log  logs/error.log  info;#pid        logs/nginx.pid;events {worker_connections  1024;
}http {include       mime.types;default_type  application/octet-stream;#log_format  main  '$remote_addr - $remote_user [$time_local] "$request" '#                  '$status $body_bytes_sent "$http_referer" '#                  '"$http_user_agent" "$http_x_forwarded_for"';#access_log  logs/access.log  main;sendfile        on;#tcp_nopush     on;#keepalive_timeout  0;keepalive_timeout  65;#gzip  on;#服务器的集群upstream  tomcat_list {  #服务器集群名字server    127.0.0.1:8080  weight=1;   #服务器1   weight是权重的意思,权重越大,分配的概率越大。server    127.0.0.1:8081  weight=2;   #服务器2   weight是权重的意思,权重越大,分配的概率越大} server {listen       80;server_name  localhost;#charset koi8-r;#access_log  logs/host.access.log  main;location / {root   /usr/local/mypro/dist;#proxy_pass   http://tomcat_list;index  index.html index.htm;}location  ^~/api/ {#^~/api/表示匹配前缀是api的请求,proxy_pass的结尾有/, 则会把/api/*后面的路径直接拼接到后面,即移除apiproxy_pass http://tomcat_list/;}#error_page  404              /404.html;# redirect server error pages to the static page /50x.html#error_page   500 502 503 504  /50x.html;location = /50x.html {root   html;}# proxy the PHP scripts to Apache listening on 127.0.0.1:80##location ~ \.php$ {#    proxy_pass   http://127.0.0.1;#}# pass the PHP scripts to FastCGI server listening on 127.0.0.1:9000##location ~ \.php$ {#    root           html;#    fastcgi_pass   127.0.0.1:9000;#    fastcgi_index  index.php;#    fastcgi_param  SCRIPT_FILENAME  /scripts$fastcgi_script_name;#    include        fastcgi_params;#}# deny access to .htaccess files, if Apache's document root# concurs with nginx's one##location ~ /\.ht {#    deny  all;#}}# another virtual host using mix of IP-, name-, and port-based configuration##server {#    listen       8000;#    listen       somename:8080;#    server_name  somename  alias  another.alias;#    location / {#        root   html;#        index  index.html index.htm;#    }#}# HTTPS server##server {#    listen       443 ssl;#    server_name  localhost;#    ssl_certificate      cert.pem;#    ssl_certificate_key  cert.key;#    ssl_session_cache    shared:SSL:1m;#    ssl_session_timeout  5m;#    ssl_ciphers  HIGH:!aNULL:!MD5;#    ssl_prefer_server_ciphers  on;#    location / {#        root   html;#        index  index.html index.htm;#    }#}}
输入命令 : cd /usr/local/nginx/sbin/
输入命令 :./nginx -s reload 重启nginx
在将后端的war包 传入tomcat服务器中。
并且输入命令 : ./startup.sh (开启访问)

在浏览器中进行访问 使用虚拟机的IP加tomcat的端口

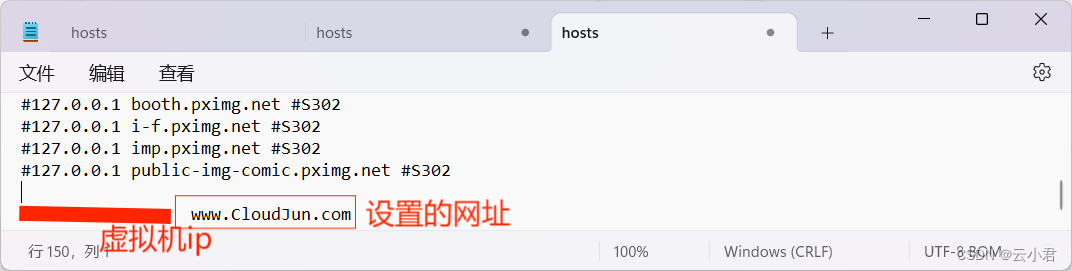
在到文件资源管理器中进入到 以下本地目录
C:\Windows\System32\drivers\etc
找到 hosts 文件进行修改IP的请求
如图 :
在进浏览器中进行访问 使用虚拟机的IP加tomcat的端口,即可。。
相关文章:
【Linux】安装使用Nginx负载均衡,并且部署前端项目
目录 一、Nginx概述 1. 什么 2. 背景 3. 作用 二、Nginx负载均衡 1. 讲述 2. 使用 1. 下载 2. 安装 3. 负载均衡 三、前端部署 1. 准备 2. 部署 一、Nginx概述 1. 什么 Nginx是一个高性能的开源Web服务器和反向代理服务器。它具有轻量级、高并发、低内存消耗的…...

k8s中 pod 或节点的资源利用率监控
pod 或节点的资源利用率监控 1 简介2 Kubectl Top介绍3 生效kubectl top命令3.1 下载配置components.yaml3.2 修改配置components.yaml参数3 kubectl top 应用3.1 查看node节点的资源占⽤率3.2 查看pod的资源占⽤率1 简介 通过Kubectl Top命令,可以查看你k8snode节点或者pod的…...
订水商城实战教程07-搜索
目录 1 创建数据源2 首页搜索功能3 创建搜索页面4 搭建搜索结果页面总结 上一篇我们讲解了店铺信息的展示功能,本篇讲解一下搜索功能。通常小程序在首页都配置了搜索的功能,输入关键词进行检索,可以在结果页上进行选购。同时还记录了用户的搜…...

stm32内 misc stm32f10x_hd stm32f10x_it stm32f10x_conf关系
STM32启动流程 初始位置 startup_stm32f10x_hd.s 查看源码 ;******************** (C) COPYRIGHT 2010 STMicroelectronics ******************** ;* File Name : startup_stm32f10x_hd.s ;* Author : MCD Application Team ;* Version :…...
树结构及其算法-二叉查找树
目录 树结构及其算法-二叉查找树 C代码 树结构及其算法-二叉查找树 二叉树在建立的过程中是根据“左子树 < 树根 < 右子树”的原则建立的,因此只需从树根出发比较键值即可,如果比树根大就往右,否则往左而下,直到相等就找…...
PHP自定义文件缓存实现
文件缓存:可以将PHP脚本的执行结果缓存到文件中。当一个PHP脚本被请求时,先查看是否存在缓存文件,如果存在且未过期,则直接读取缓存文件内容返回给客户端,而无需执行脚本 1、文件缓存写法一,每个文件缓存一…...

猫耳 Android 播放框架开发实践
概述 猫耳FM是中国最大的 95 后声音内容分享平台,是B站重要平台之一,深度合作国内顶级声优工作室,打造了数百部精品广播剧,全站播放总量超过百亿次。 MEPlayer 是猫耳 Android 技术团队研发的一款适用于音视频、直播、特效播放等…...
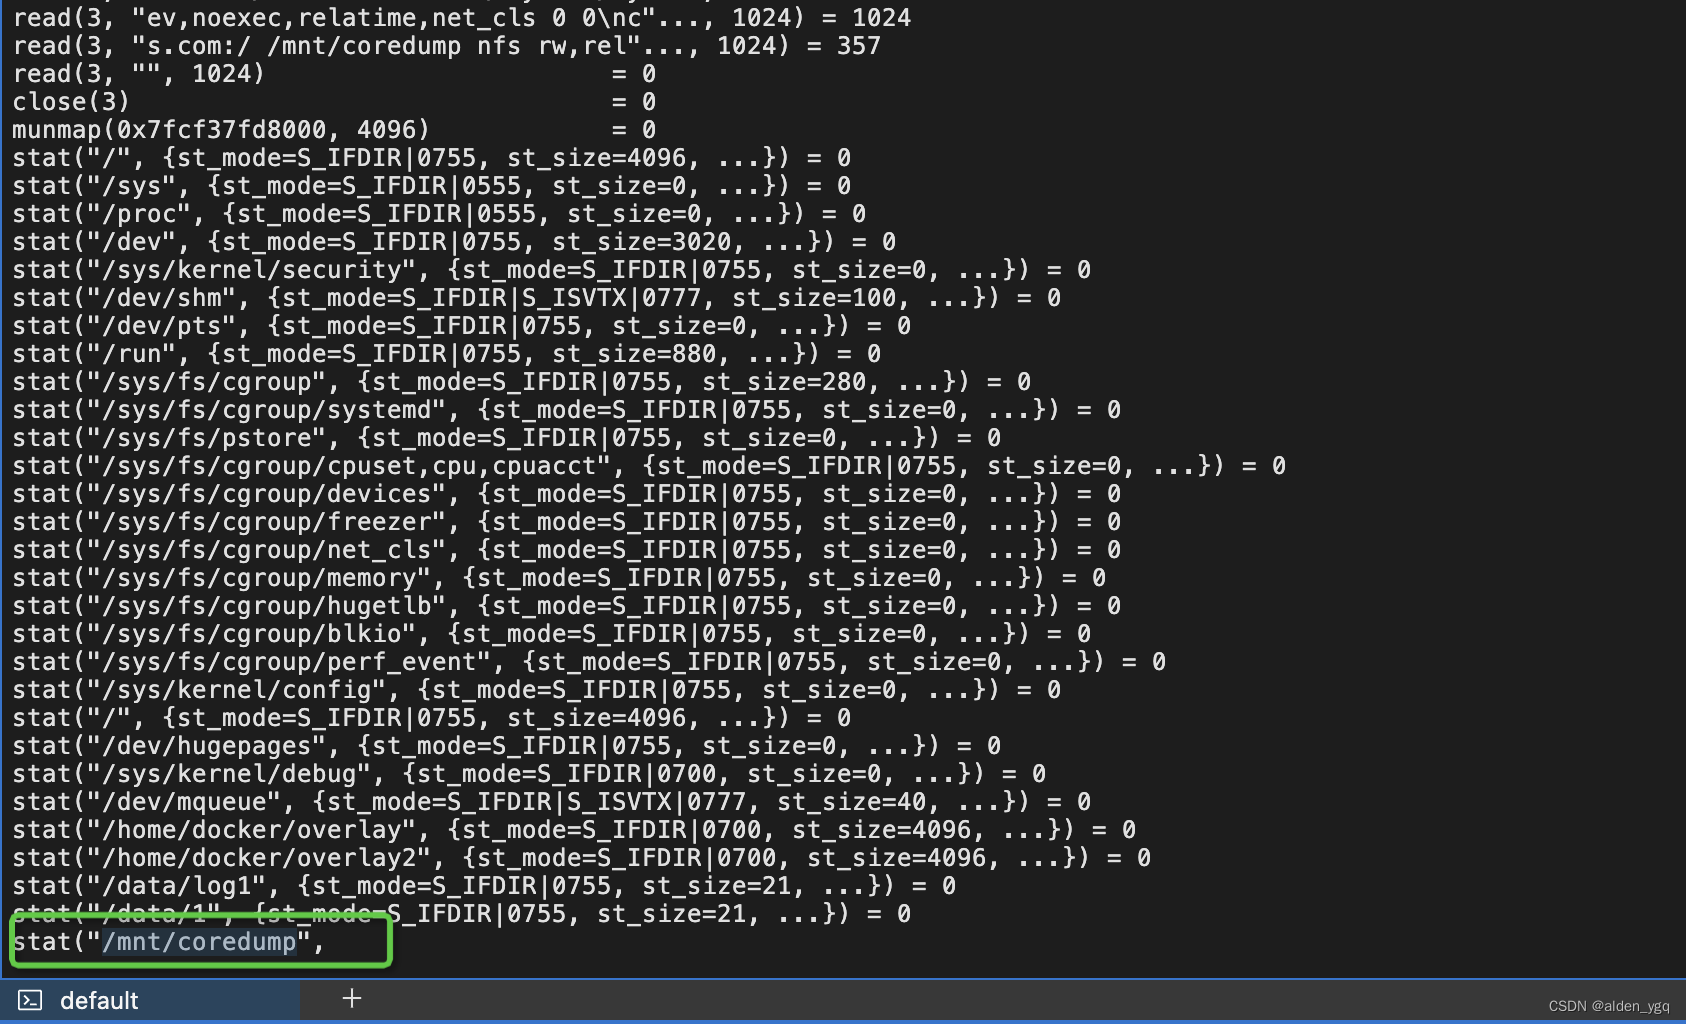
linux下df -h 命令一直卡住的解决方法
在Linux中,偶尔遇到用 df -h 查看磁盘情况时,一直卡住无法显示结果。 解决方法: 1、首先使用strace追踪到底执行到哪里卡住 $ strace df -h 2、如果没有strace命令则进行安装 $ yum install strace -y 3、显示出卡住的地方,如…...

系统架构设计热点知识
系统架构设计师考点包括以下内容: 1. 系统设计和架构思想. 了解系统设计和架构的基本概念和思想,特别是面向服务架构(SOA)、微服务架构、云架构、事件驱动架构、响应式架构等。 系统设计是指在软件项目中,确定系统结…...
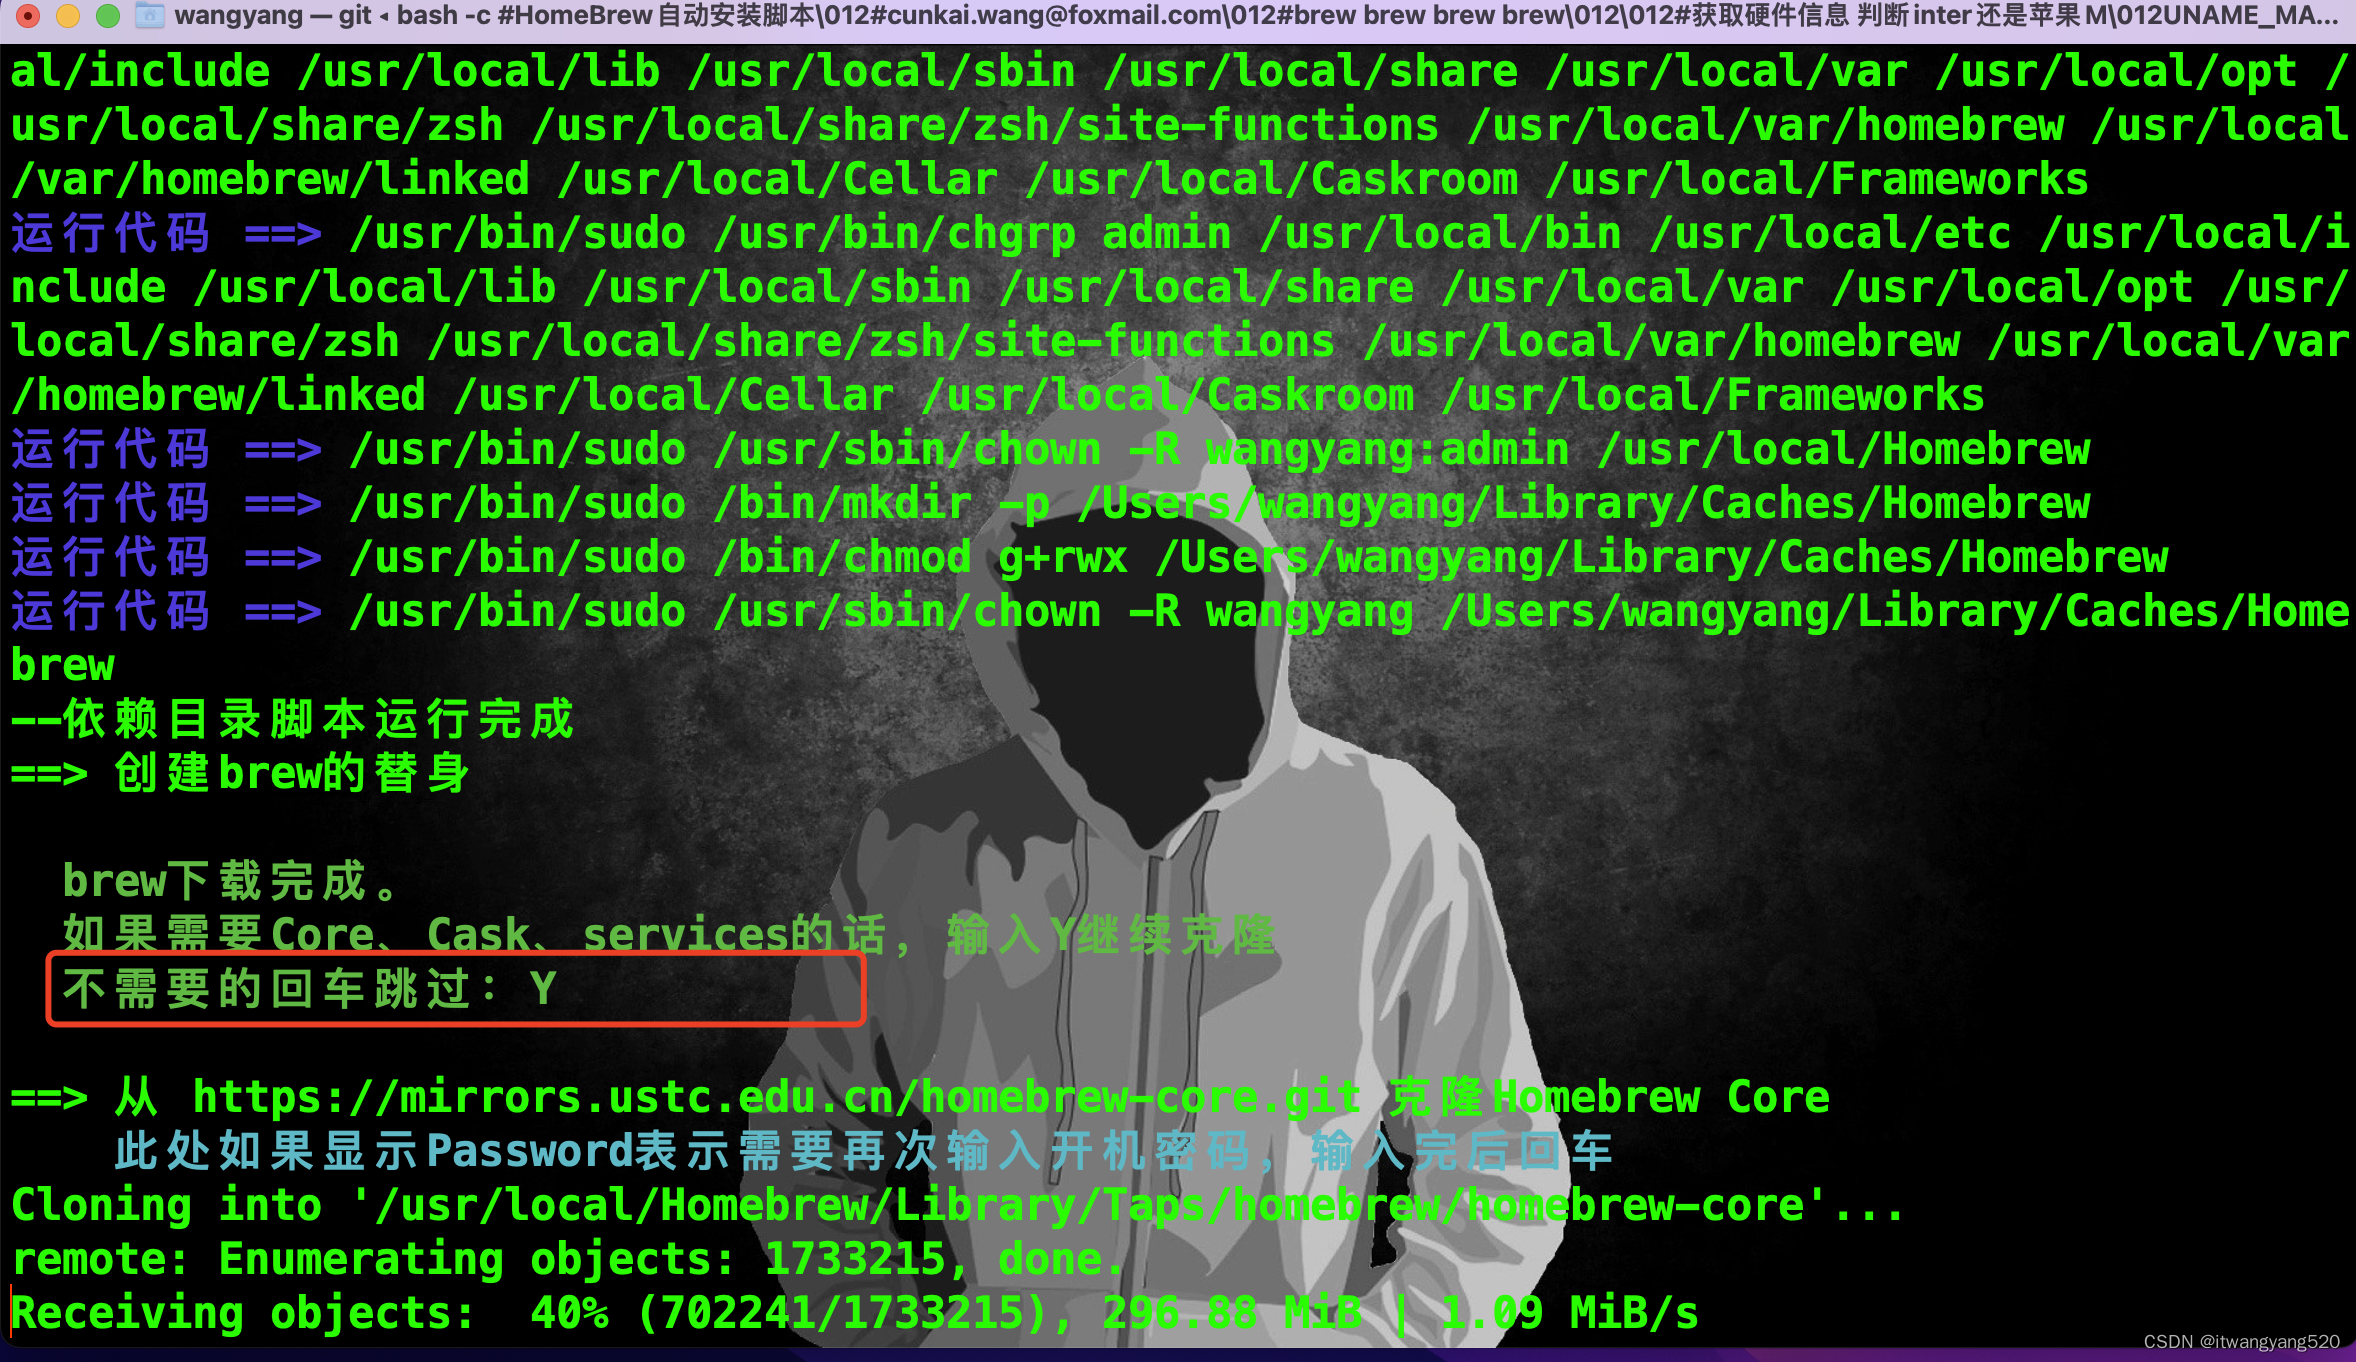
2023-在mac下安装Homebrew的国内镜像
mac安装Homebrew的国内镜像 尝试使用其他下载源:GitHub 可能会受到访问限制,尝试使用其他镜像或下载源。您可以使用清华大学、中科大或阿里云的 Homebrew 镜像,以提高下载速度和可靠性。例如,可以使用阿里云的镜像来安装 Homebre…...
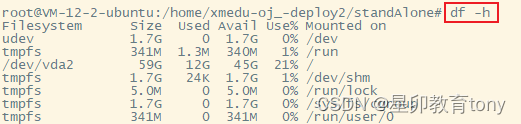
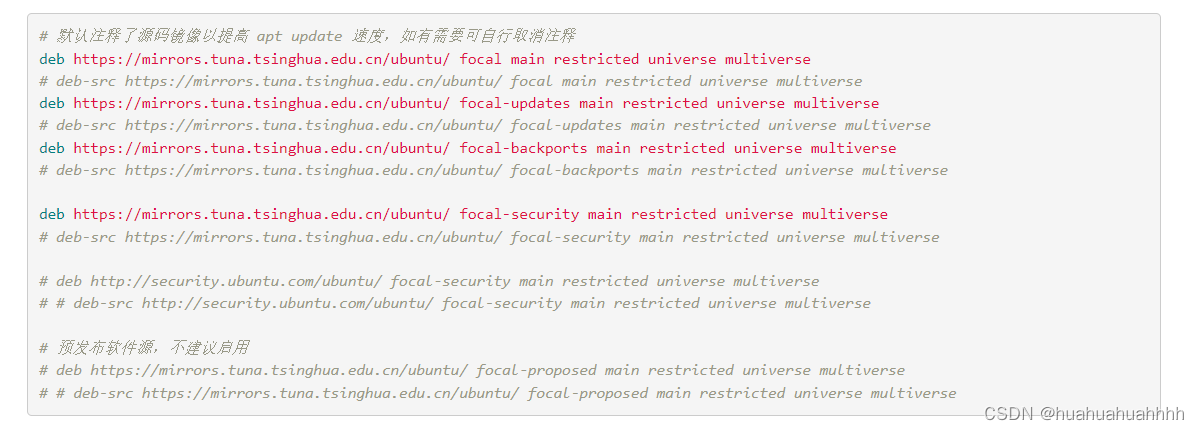
Ubuntu 20.04设置虚拟内存 (交换内存swap)解决内存不足
数据库服务器程序在运行起来之后,系统内存不足。 在系统监控中发现,当数据库服务程序启动后,占用了大量内存空间,导致系统的剩余的内存往往只有几十MB。 在ubuntu系统中,swap空间就是虚拟内存,所以考虑在磁…...
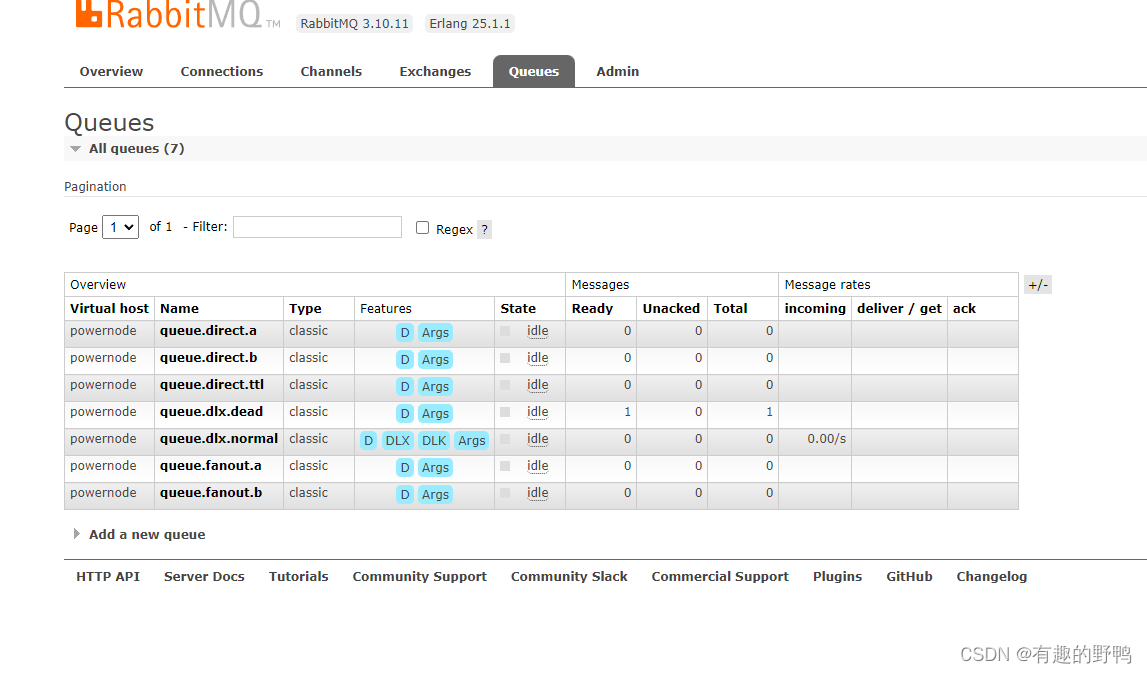
RabbitMQ-死信交换机和死信队列
1. 简介 1.1 DLX简介 DLX: Dead-Letter-Exchange 死信交换器,死信邮箱 当消息成为Dead message后,可以被重新发送到另一个交换机,这个交换机就是DLX。 如下图所示: 其实死信队列就是一个普通的交换机,有些队列的消息…...

[HNCTF 2022 WEEK2]easy_include 文件包含遇上nginx
这道纯粹记录 完全没想到 <?php //WEB手要懂得搜索if(isset($_GET[file])){$file $_GET[file];if(preg_match("/php|flag|data|\~|\!|\|\#|\\$|\%|\^|\&|\*|\(|\)|\-|\_|\|\/i", $file)){die("error");}include($file); }else{highlight_file(__…...
python中transform和apply的区别是什么
文章目录 1. 介绍transform:apply: 2. 应用示例示例数据使用transform进行向量化操作使用apply进行更复杂的操作性能比较 3. 示例输出使用 transform 进行向量化操作使用 apply 进行更复杂的操作 4. transform再举例示例数据使用transform计算平均销售额…...

TCP 协议
文章目录 协议格式1面向连接:1.1三次握手(建立连接)1.2包序管理1.2四次挥手(断开连接) 2可靠传输:一。保证数据可靠有序的到达对端:确认应答机制超时重传机制 二。提高传输效率:1.提升自身发送数据量滑动窗口机制 rwnd滑动窗口丢包…...
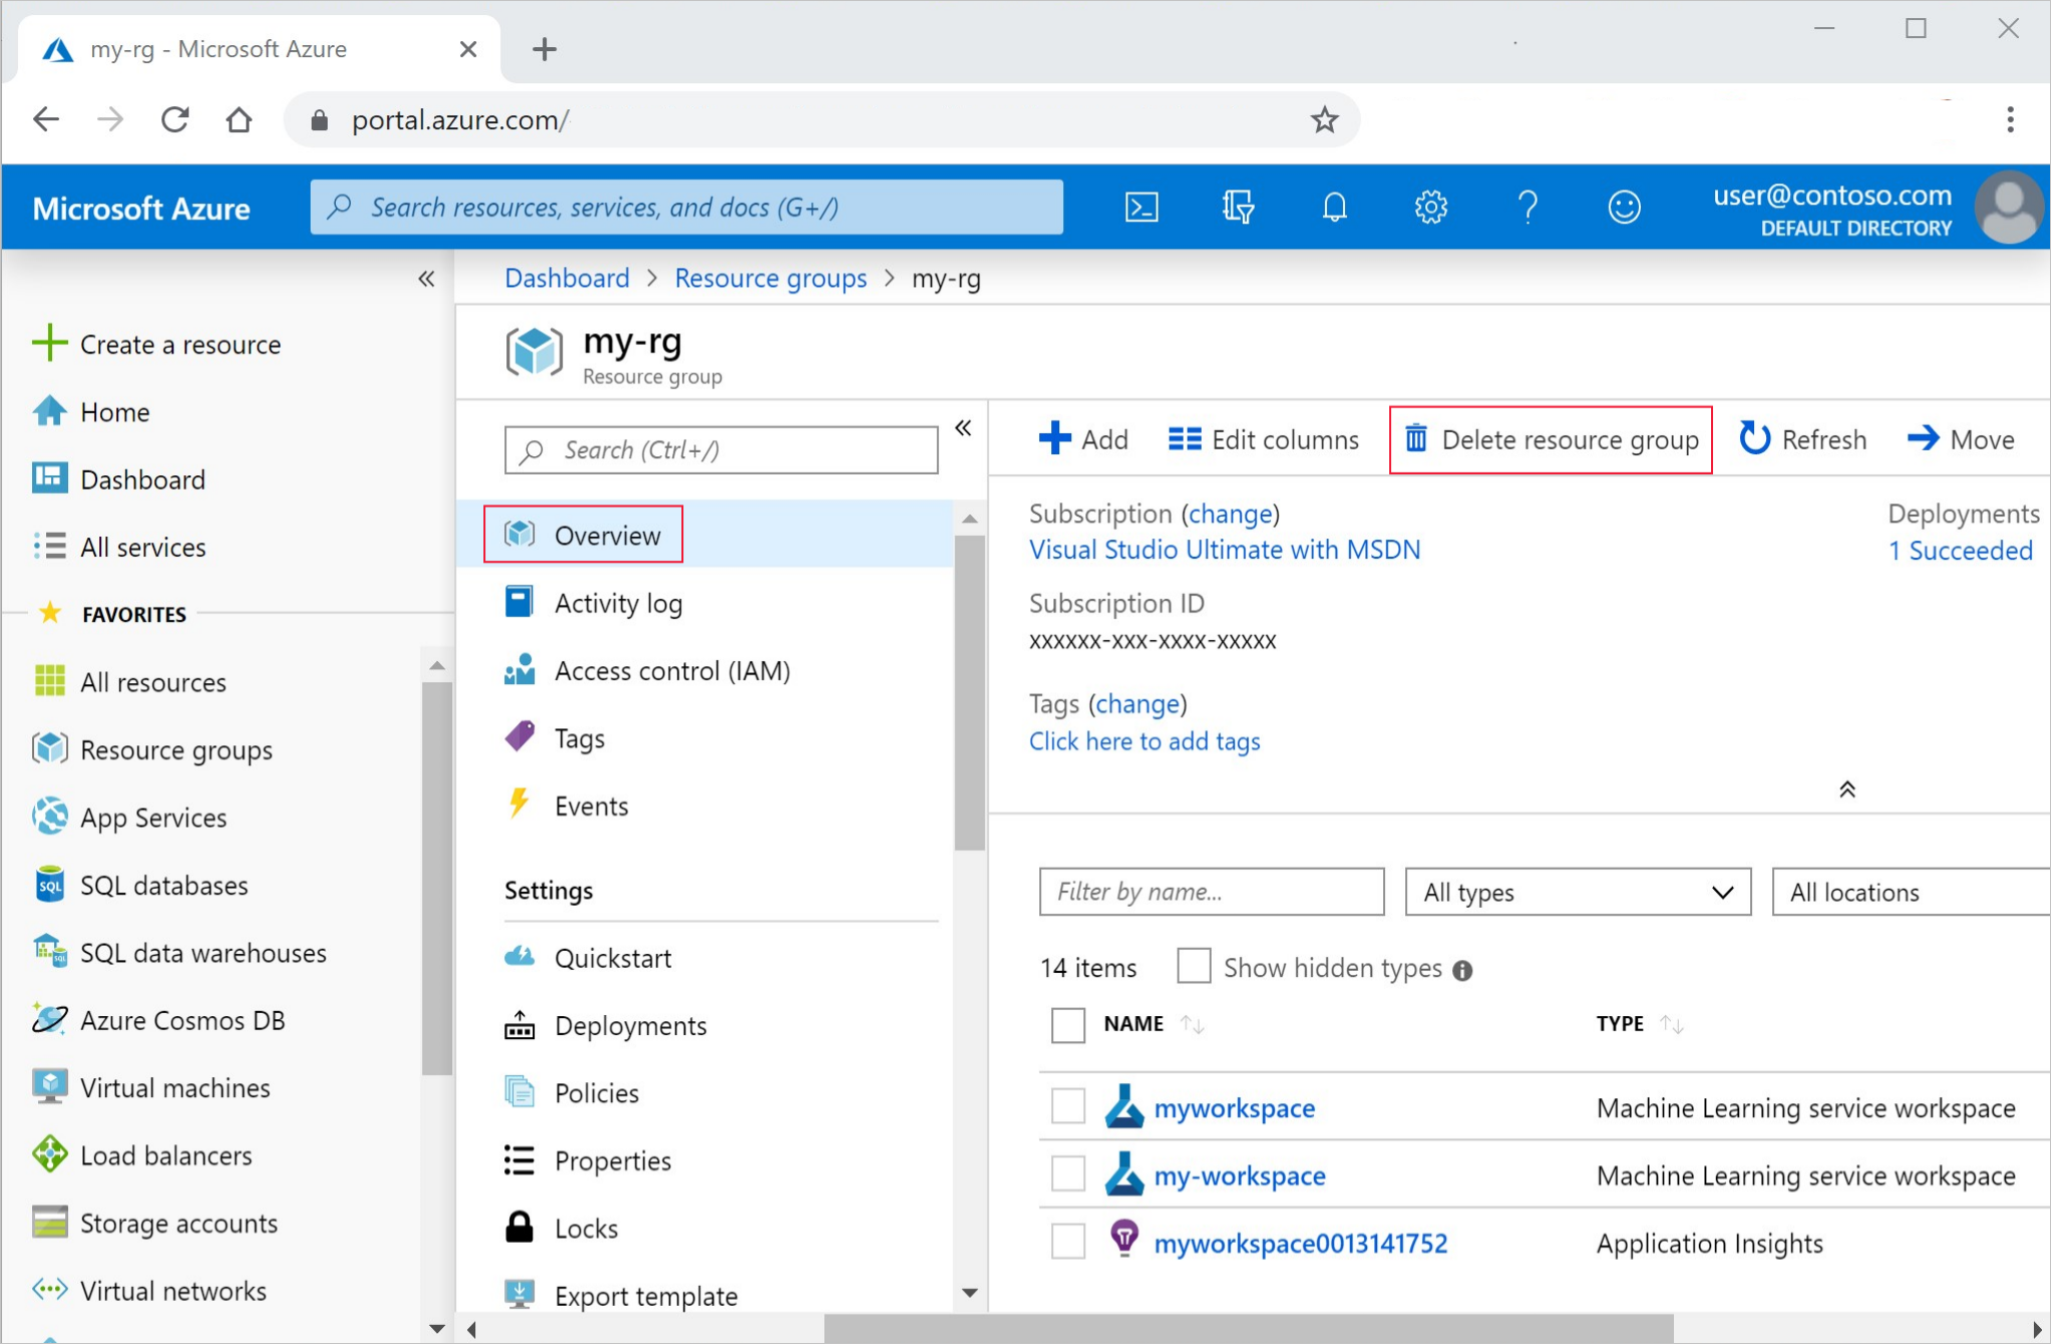
Azure机器学习 - 在 Azure 机器学习中上传、访问和浏览数据
目录 一、环境准备二、设置内核三、下载使用的数据四、创建工作区的句柄五、将数据上传到云存储空间六、访问笔记本中的数据七、创建新版本的数据资产八、清理资源 机器学习项目的开始阶段通常涉及到探索性数据分析 (EDA)、数据预处理(清理、特征工程)以…...
新建包含cuda和cudnn的docker
背景:服务器的cudnn版本太低了,没有权限去修改。故新建包含cuda和cudnn的docker 步骤 一、拉取镜像及创建docker 拉取相关的镜像 从镜像列表选出相关版本的镜像https://gitlab.com/nvidia/container-images/cuda/blob/master/doc/supported-tags.md …...
)
Opensips安装配置(以下操作均已centOS 6.3系统为准)
1. 安装依赖软件: a) Yum update //更新系统到最新 b) 安装以下所需依赖软件 gcc bison flex make openssl libmysqlclient-dev mysql-server c) 安装radiusclient: 1. wget http://pkgs.repoforge.org/radiuscli…...

第03章 用户与权限管理
第03章 用户与权限管理 1. 用户管理 1.1 登录MySQL服务器 启动MySQL服务后,可以通过mysql命令来登录MySQL服务器,命令如下: mysql –h hostname|hostIP –P port –u username –p DatabaseName –e "SQL语句"-h参数后面接主机…...

赋能制造业高质量发展,释放采购数字化新活力——企企通亮相武汉2023国际智能制造创新论坛
摘要 “为应对成本上升、供应端不稳定、供应链上下游协同困难、决策无数据依据等问题,利用数字化手段降本增效、降低潜在风险十分关键。在AI等先进技术发展、供应链协同效应和降本诉求等机遇的驱动下,采购供应链数字化、协同化成为企业激烈竞争的优先选…...

WarcraftHelper:让魔兽争霸3在现代电脑上完美运行的关键插件
WarcraftHelper:让魔兽争霸3在现代电脑上完美运行的关键插件 【免费下载链接】WarcraftHelper Warcraft III Helper , support 1.20e, 1.24e, 1.26a, 1.27a, 1.27b 项目地址: https://gitcode.com/gh_mirrors/wa/WarcraftHelper 你是否还在为《魔兽争霸3》这…...

别再只会用--nogpgcheck了!手把手教你安全修复PostgreSQL yum源的GPG密钥问题
企业级PostgreSQL部署:安全解决GPG密钥验证的完整方案 当你在生产环境中部署PostgreSQL时,遇到GPG签名验证错误直接使用--nogpgcheck绕过检查,就像因为门锁打不开就直接把门拆掉一样危险。本文将带你深入理解GPG验证机制,并提供一…...

ncmdumpGUI终极指南:3分钟搞定网易云音乐NCM文件转换
ncmdumpGUI终极指南:3分钟搞定网易云音乐NCM文件转换 【免费下载链接】ncmdumpGUI C#版本网易云音乐ncm文件格式转换,Windows图形界面版本 项目地址: https://gitcode.com/gh_mirrors/nc/ncmdumpGUI 还在为网易云音乐的NCM加密格式而烦恼吗&…...

让B站缓存视频重获自由:一个简单实用的格式转换工具
让B站缓存视频重获自由:一个简单实用的格式转换工具 【免费下载链接】m4s-converter 一个跨平台小工具,将bilibili缓存的m4s格式音视频文件合并成mp4 项目地址: https://gitcode.com/gh_mirrors/m4/m4s-converter 还记得那个周末的下午吗…...

QKeyMapper终极指南:Windows上最强大的开源按键映射工具
QKeyMapper终极指南:Windows上最强大的开源按键映射工具 【免费下载链接】QKeyMapper [按键映射工具] QKeyMapper,Qt开发Win10&Win11可用,不修改注册表、不需重新启动系统,可立即生效和停止。支持游戏手柄映射到键鼠ÿ…...

一、[特殊字符]️ 误拦噩梦:护栏上线后的真实反弹
一、🛡️ 误拦噩梦:护栏上线后的真实反弹 不少团队在 LLM 推理服务中部署输入护栏后,遇到的第一个生产事故不是攻击漏过,而是正常请求被大规模误拦。某医疗平台上线正则输入过滤后,用户咨询“心绞痛的症状”被拦截&…...
)
【限时开源】DeepSeek-VL多模态代码重构检查清单:含19个AST级检测规则+CI/CD嵌入脚本(仅剩47份可下载)
更多请点击: https://intelliparadigm.com 第一章:DeepSeek-VL多模态代码重构的背景与价值 随着视觉语言模型(VLM)在真实工业场景中加速落地,传统单模态代码架构在处理图像-文本联合推理任务时暴露出显著瓶颈…...

量子机器学习:平衡数据复杂度与电路表达力的核心策略
1. 项目概述:量子机器学习中的核心平衡艺术在量子机器学习这个前沿交叉领域摸爬滚打了几年,我越来越深刻地意识到,决定一个模型成败的,往往不是最炫酷的量子门设计,而是一个看似基础却极易被忽视的平衡问题:…...

Appium Android自动化环境四段链路深度验证指南
1. 这不是装几个软件就能跑起来的事:为什么90%的人卡在环境搭建第一步 “PythonAndroidAppium App自动化测试环境搭建”——光看标题,很多人第一反应是:不就是装Python、配JDK、下Android SDK、跑个appium命令?我试过三次&#x…...

Rockwell Studio5000 IO模块
一.型号命名规则: I:Input 输入模块 IA/IB/IC/IG/IH/IM/IN/IV O: Output 输出模块 A: AC 交流 B: DC 直流 I:Isolated 电气隔离,抗干扰强 D:Diagnostic 诊断功能,支持断线/故障诊断 F:High Speed 高速输…...