Spring Security入门教程,springboot整合Spring Security
Spring Security是Spring官方推荐的认证、授权框架,功能相比Apache Shiro功能更丰富也更强大,但是使用起来更麻烦。
如果使用过Apache Shiro,学习Spring Security会比较简单一点,两种框架有很多相似的地方。
目录
一、准备工作
创建springboot项目
pom.xml
application.yml
二、创建相关的类
UserDetailsService
SecurityConfig.java
SystemProperties.java
MybatisPlusConfig.java
三、完成登录接口
创建数据库实体类
创建持久层接口
创建登录DTO对象
创建控制器类
创建业务层类
自定义登录成功处理器
一、准备工作
创建springboot项目
首先,通过IntelliJ IDEA创建一个springboot项目,项目名为springboot-springsecurity,在pom.xml中添加相关依赖。
pom.xml
<?xml version="1.0" encoding="UTF-8"?>
<project xmlns="http://maven.apache.org/POM/4.0.0" xmlns:xsi="http://www.w3.org/2001/XMLSchema-instance"xsi:schemaLocation="http://maven.apache.org/POM/4.0.0 https://maven.apache.org/xsd/maven-4.0.0.xsd"><modelVersion>4.0.0</modelVersion><parent><groupId>org.springframework.boot</groupId><artifactId>spring-boot-starter-parent</artifactId><version>2.3.4.RELEASE</version><relativePath /></parent><groupId>com.example</groupId><artifactId>springboot-springsecurity</artifactId><version>0.0.1-SNAPSHOT</version><properties><java.version>1.8</java.version><jjwt.version>0.9.1</jjwt.version><mysql.version>8.0.28</mysql.version><druid.version>1.1.21</druid.version><lombok.version>1.18.22</lombok.version><mybatis.version>2.2.2</mybatis.version><mybatis-plus.version>3.5.1</mybatis-plus.version></properties><dependencies><dependency><groupId>org.springframework.boot</groupId><artifactId>spring-boot-starter-web</artifactId></dependency><!--validation--><dependency><groupId>org.springframework.boot</groupId><artifactId>spring-boot-starter-validation</artifactId></dependency><!--spring security--><dependency><groupId>org.springframework.boot</groupId><artifactId>spring-boot-starter-security</artifactId></dependency><!--mysql--><dependency><groupId>mysql</groupId><artifactId>mysql-connector-java</artifactId><version>${mysql.version}</version></dependency><!--druid--><dependency><groupId>com.alibaba</groupId><artifactId>druid</artifactId><version>${druid.version}</version></dependency><!--lombok--><dependency><groupId>org.projectlombok</groupId><artifactId>lombok</artifactId><version>${lombok.version}</version></dependency><!--mybatis--><dependency><groupId>org.mybatis.spring.boot</groupId><artifactId>mybatis-spring-boot-starter</artifactId><version>${mybatis.version}</version></dependency><!--mybatis-plus--><dependency><groupId>com.baomidou</groupId><artifactId>mybatis-plus-boot-starter</artifactId><version>${mybatis-plus.version}</version></dependency><!--jjwt--><dependency><groupId>io.jsonwebtoken</groupId><artifactId>jjwt</artifactId><version>${jjwt.version}</version></dependency></dependencies><build><plugins><plugin><groupId>org.springframework.boot</groupId><artifactId>spring-boot-maven-plugin</artifactId></plugin></plugins></build>
</project>
application.yml
server:port: 8080servlet:context-path: /spring:datasource:username: rootpassword: rooturl: jdbc:mysql://localhost:3306/spring_securitydriver-class-name: com.mysql.cj.jdbc.Drivertype: com.alibaba.druid.pool.DruidDataSourcemybatis-plus:mapper-locations: classpath:mapper/*Mapper.xmllogging:level:springfox: errorcom.example.security: debugsystem:login-page: /login.htmllogin-url: /user/loginindex-page: /index.htmllogout-url: /user/logoutparameter:username: usernamepassword: passwordwhite-url:- /js/**- /css/**- /images/**- /user/login- /login.html二、创建相关的类
UserDetailsService
UserDetailsService接口是Spring Security中非常重要的接口,在登录认证的时候会通过这个接口的loadUserByUsername()方法获取用户的信息,来完成登录的用户名、密码校验,完成登录流程。
我们需要创建一个UserDetailsService的实现类,并声明为Spring组件。
package com.example.security.security;import com.baomidou.mybatisplus.core.conditions.query.QueryWrapper;
import com.example.security.entity.User;
import com.example.security.exception.GlobalException;
import com.example.security.mapper.UserMapper;
import com.example.security.restful.ResponseCode;
import org.springframework.beans.factory.annotation.Autowired;
import org.springframework.security.authentication.BadCredentialsException;
import org.springframework.security.core.userdetails.UserDetails;
import org.springframework.security.core.userdetails.UserDetailsService;
import org.springframework.security.core.userdetails.UsernameNotFoundException;
import org.springframework.stereotype.Component;import java.util.ArrayList;
import java.util.List;/*** @author heyunlin* @version 1.0*/
@Component
public class UserDetailsServiceImpl implements UserDetailsService {private final UserMapper userMapper;@Autowiredpublic UserDetailsServiceImpl(UserMapper userMapper) {this.userMapper = userMapper;}@Overridepublic UserDetails loadUserByUsername(String username) throws UsernameNotFoundException {// 查询用户信息User user = selectByUsername(username);if (user == null) {throw new BadCredentialsException("登录失败,用户名不存在!");} else {List<String> permissions = selectPermissions(username);return org.springframework.security.core.userdetails.User.builder().username(user.getUsername()).password(user.getPassword()).accountExpired(false).accountLocked(false).disabled(!user.getEnable()).credentialsExpired(false).authorities(permissions.toArray(new String[] {})).build();}}/*** 通过用户名查询用户信息* @param username 用户名* @return User*/private User selectByUsername(String username) {QueryWrapper<User> wrapper = new QueryWrapper<>();wrapper.eq("username", username);List<User> list = userMapper.selectList(wrapper);if (list.size() == 1) {return list.get(0);}return null;}/*** 通过用户名查询用户权限* @param username 用户名* @return List<String>*/private List<String> selectPermissions(String username) {if (username == null) {throw new GlobalException(ResponseCode.BAD_REQUEST, "用户名不能为空");}List<String> permissions = new ArrayList<>();permissions.add("/user/login");permissions.add("/user/logout");permissions.add("/user/selectById");return permissions;}}
SecurityConfig.java
创建security的配置类
package com.example.security.config;import com.example.security.security.LoginFailHandler;
import com.example.security.security.LoginSuccessHandler;
import org.springframework.beans.factory.annotation.Autowired;
import org.springframework.context.annotation.Bean;
import org.springframework.context.annotation.Configuration;
import org.springframework.security.authentication.AuthenticationManager;
import org.springframework.security.config.annotation.web.builders.HttpSecurity;
import org.springframework.security.config.annotation.web.configuration.WebSecurityConfigurerAdapter;
import org.springframework.security.crypto.password.PasswordEncoder;/*** @author heyunlin* @version 1.0*/
@Configuration
public class SecurityConfig extends WebSecurityConfigurerAdapter {private final SystemProperties systemProperties;@Autowiredpublic SecurityConfig(SystemProperties systemProperties) {this.systemProperties = systemProperties;}@Beanpublic PasswordEncoder passwordEncoder() {return new PasswordEncoder() {@Overridepublic String encode(CharSequence charSequence) {return (String) charSequence;}@Overridepublic boolean matches(CharSequence charSequence, String s) {return charSequence.equals(s);}};}@Bean@Overridepublic AuthenticationManager authenticationManagerBean() throws Exception {return super.authenticationManagerBean();}@Overrideprotected void configure(HttpSecurity http) throws Exception {// 禁用防跨域攻击http.csrf().disable();// 配置各请求路径的认证与授权http.formLogin().loginPage(systemProperties.getLoginPage()) // 自定义登录页面的地址.loginProcessingUrl(systemProperties.getLoginUrl()) // 处理登录的接口地址.usernameParameter(systemProperties.getParameter().get("username")) // 用户名的参数名.passwordParameter(systemProperties.getParameter().get("password")) // 密码的参数名.successHandler(new LoginSuccessHandler(systemProperties))//.successForwardUrl("/index.html") // 登录成功跳转的地址.failureHandler(new LoginFailHandler()); // 登录失败的处理器// 退出登录相关配置http.logout().logoutUrl(systemProperties.getLogoutUrl()) // 退出登录的接口地址.logoutSuccessUrl(systemProperties.getLoginUrl()); // 退出登录成功跳转的地址// 配置认证规则String[] toArray = systemProperties.getWhiteUrl().toArray(new String[]{});http.authorizeRequests().antMatchers(toArray).permitAll() // 白名单,也就是不需要登录也能访问的资源.anyRequest().authenticated();}}
SystemProperties.java
package com.example.security.config;import lombok.Data;
import org.springframework.boot.context.properties.ConfigurationProperties;
import org.springframework.stereotype.Component;import java.util.List;
import java.util.Map;/*** @author heyunlin* @version 1.0*/
@Data
@Component
@ConfigurationProperties(prefix = "system")
public class SystemProperties {/*** 登录页面*/private String loginPage;/*** 登录的请求地址*/private String loginUrl;/*** 登录成功后跳转的页面*/private String indexPage;/*** 退出登录的请求地址*/private String logoutUrl;/*** 白名单*/private List<String> whiteUrl;/*** 登录的参数*/private Map<String, String> parameter;
}
MybatisPlusConfig.java
package com.example.security.config;import com.baomidou.mybatisplus.annotation.DbType;
import com.baomidou.mybatisplus.extension.plugins.MybatisPlusInterceptor;
import com.baomidou.mybatisplus.extension.plugins.inner.BlockAttackInnerInterceptor;
import com.baomidou.mybatisplus.extension.plugins.inner.PaginationInnerInterceptor;
import org.mybatis.spring.annotation.MapperScan;
import org.springframework.context.annotation.Bean;
import org.springframework.context.annotation.Configuration;/*** @author heyunlin* @version 1.0*/
@Configuration
@MapperScan(basePackages = "com.example.security.mapper")
public class MybatisPlusConfig {@Beanpublic MybatisPlusInterceptor mybatisPlusInterceptor() {MybatisPlusInterceptor interceptor = new MybatisPlusInterceptor();// 防全表更新与删除插件interceptor.addInnerInterceptor(new BlockAttackInnerInterceptor());// 分页插件interceptor.addInnerInterceptor(new PaginationInnerInterceptor(DbType.MYSQL));return interceptor;}}
三、完成登录接口
创建数据库实体类
User.java
package com.example.security.entity;import com.baomidou.mybatisplus.annotation.IdType;
import com.baomidou.mybatisplus.annotation.TableId;
import com.baomidou.mybatisplus.annotation.TableName;
import com.fasterxml.jackson.annotation.JsonFormat;
import lombok.Data;import java.io.Serializable;
import java.time.LocalDateTime;/*** 用户* @author heyunlin* @version 1.0*/
@Data
@TableName("user")
public class User implements Serializable {private static final long serialVersionUID = 18L;@TableId(value = "id", type = IdType.INPUT)private String id;/*** 姓名*/private String name;/*** 性别*/private Integer gender;/*** 用户名*/private String username;/*** 密码*/private String password;/*** 手机号*/private String phone;/*** 是否启用*/private Boolean enable;/*** 最后一次登录时间*/@JsonFormat(pattern = "yyyy-MM-dd HH:mm:ss", timezone = "GMT+8")private LocalDateTime lastLoginTime;
}
创建持久层接口
package com.example.security.mapper;import com.baomidou.mybatisplus.core.mapper.BaseMapper;
import com.example.security.entity.User;
import org.springframework.stereotype.Repository;/*** @author heyunlin* @version 1.0*/
@Repository
public interface UserMapper extends BaseMapper<User> {}
创建登录DTO对象
package com.example.security.dto;import lombok.Data;import javax.validation.constraints.NotEmpty;
import javax.validation.constraints.NotNull;
import java.io.Serializable;/*** @author heyunlin* @version 1.0*/
@Data
public class UserLoginDTO implements Serializable {private static final long serialVersionUID = 18L;/*** 用户名*/@NotNull(message = "用户名不允许为空")@NotEmpty(message = "用户名不允许为空")private String username;/*** 密码*/@NotNull(message = "密码不允许为空")@NotEmpty(message = "密码不允许为空")private String password;
}
创建控制器类
package com.example.security.controller;import com.example.security.dto.UserLoginDTO;
import com.example.security.entity.User;
import com.example.security.restful.JsonResult;
import com.example.security.service.UserService;
import org.springframework.beans.factory.annotation.Autowired;
import org.springframework.validation.annotation.Validated;
import org.springframework.web.bind.annotation.RequestMapping;
import org.springframework.web.bind.annotation.RequestMethod;
import org.springframework.web.bind.annotation.RequestParam;
import org.springframework.web.bind.annotation.RestController;/*** @author heyunlin* @version 1.0*/
@RestController
@RequestMapping(path = "/user", produces = "application/json;charset=utf-8")
public class UserController {private final UserService userService;@Autowiredpublic UserController(UserService userService) {this.userService = userService;}@RequestMapping(value = "/login", method = RequestMethod.POST)public JsonResult<Void> login(@Validated UserLoginDTO userLoginDTO) {userService.login(userLoginDTO);return JsonResult.success("登录成功");}@RequestMapping(value = "/logout", method = RequestMethod.POST)public JsonResult<Void> logout() {userService.logout();return JsonResult.success("登出成功");}@RequestMapping(value = "/selectById", method = RequestMethod.GET)public JsonResult<User> selectById(@RequestParam(value = "id", required = true) String userId) {User user = userService.selectById(userId);return JsonResult.success(null, user);}}
创建业务层类
UserService接口
package com.example.security.service;import com.example.security.dto.UserLoginDTO;
import com.example.security.entity.User;/*** @author heyunlin* @version 1.0*/
public interface UserService {/*** 登录认证* @param userLoginDTO 用户登录信息*/void login(UserLoginDTO userLoginDTO);/*** 退出登录*/void logout();/*** 通过ID查询用户信息* @param userId 用户ID* @return User 通过ID查询到的用户信息*/User selectById(String userId);
}
UserServiceImpl.java
package com.example.security.service.impl;import com.example.security.dto.UserLoginDTO;
import com.example.security.entity.User;
import com.example.security.mapper.UserMapper;
import com.example.security.service.UserService;
import org.springframework.beans.factory.annotation.Autowired;
import org.springframework.security.authentication.AuthenticationManager;
import org.springframework.security.authentication.UsernamePasswordAuthenticationToken;
import org.springframework.security.core.Authentication;
import org.springframework.stereotype.Service;/*** @author heyunlin* @version 1.0*/
@Service
public class UserServiceImpl implements UserService {private final UserMapper userMapper;private final AuthenticationManager authenticationManager;@Autowiredpublic UserServiceImpl(UserMapper userMapper, AuthenticationManager authenticationManager) {this.userMapper = userMapper;this.authenticationManager = authenticationManager;}@Overridepublic void login(UserLoginDTO userLoginDTO) {Authentication authentication = new UsernamePasswordAuthenticationToken(userLoginDTO.getUsername(),userLoginDTO.getPassword());authenticationManager.authenticate(authentication);}@Overridepublic void logout() {// todo}@Overridepublic User selectById(String userId) {return userMapper.selectById(userId);}}
自定义登录成功处理器
登陆成功直接重定向到/index.html
package com.example.security.security;import com.example.security.config.SystemProperties;
import org.springframework.security.core.Authentication;
import org.springframework.security.web.authentication.AuthenticationSuccessHandler;import javax.servlet.http.HttpServletRequest;
import javax.servlet.http.HttpServletResponse;
import java.io.IOException;/*** @author heyunlin* @version 1.0*/
public class LoginSuccessHandler implements AuthenticationSuccessHandler {private final SystemProperties systemProperties;public LoginSuccessHandler(SystemProperties systemProperties) {this.systemProperties = systemProperties;}@Overridepublic void onAuthenticationSuccess(HttpServletRequest request, HttpServletResponse response, Authentication authentication) throws IOException {response.sendRedirect(systemProperties.getIndexPage());}}
至此,springboot整合Spring Security就完成了,项目结构如下。

文章就分享到这里了,代码已开源,可按需获取~
springboot整合spring security![]() https://gitee.com/he-yunlin/springboot-springsecurity.git
https://gitee.com/he-yunlin/springboot-springsecurity.git
相关文章:
Spring Security入门教程,springboot整合Spring Security
Spring Security是Spring官方推荐的认证、授权框架,功能相比Apache Shiro功能更丰富也更强大,但是使用起来更麻烦。 如果使用过Apache Shiro,学习Spring Security会比较简单一点,两种框架有很多相似的地方。 目录 一、准备工作 …...
如何在 Unbuntu 下安装配置 Apache Zookeeper
简介 Zookeeper 是 apache 基金组织下的项目,项目用于简单的监控和管理一组服务,通过简单的接口就可以集中协调一组服务,如配置管理,信息同步,命名,分布式协调。 准备工作 Ubuntu 23.04 或者 20.04访问…...
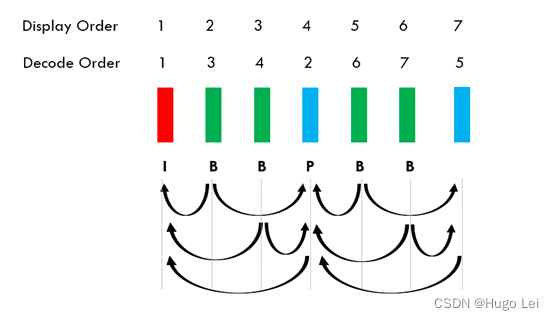
AI视觉领域流媒体知识入门介绍(二):深入理解GOP
GOP(group of pictures) 在流行的视频编码算法中,都包含GOP这个概念,例如MPEG-2, H.264, and H.265。 背景 关于视频存储和传输的“size”: Resolution 分辨率 Uncompressed Bitrate 未压缩时的比特率 1280720 (720p…...
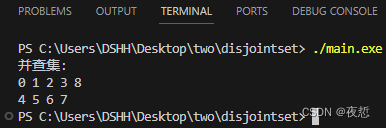
C++ 代码实例:并查集简单创建工具
文章目录 前言代码仓库代码说明main.cppMakefile 结果总结参考资料作者的话 前言 C 代码实例:并查集简单创建工具。 代码仓库 yezhening/Programming-examples: 编程实例 (github.com)Programming-examples: 编程实例 (gitee.com) 代码 说明 简单地创建并查集注…...
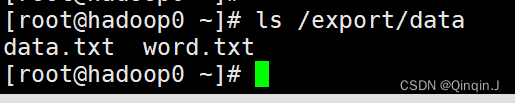
Hadoop学习总结(Shell操作)
HDFS Shell 参数 命令参数功能描述-ls查看指定路径的目录结构-du统计目录下所有文件大小-mv移动文件-cp复制文件-rm删除文件 / 空白文件夹-put上传文件-cat查看内容文件-text将源文件输出文本格式-mkdir创建空白文件夹-help帮助 一、ls 命令 ls 命令用于查看指定路径的当前目录…...

LeetCode热题100——链表
链表 1. 相交链表2. 反转链表3. 回文链表4. 环形链表5. 合并两个有序链表 1. 相交链表 给你两个单链表的头节点 headA 和 headB ,请你找出并返回两个单链表相交的起始节点。如果两个链表不存在相交节点,返回 null 。 // 题解:使用A/B循环遍…...

使用C++的QT框架实现贪吃蛇
最近刷抖音经常看到别人使用类似chatGPT的al工具实现这个贪吃蛇游戏,正好我之前也写过,那么今天看看怎么去实现这个简单的游戏 我这边使用的是C的QT框架,当然用哪些框架都可以,主要是逻辑思路 1.生成画布,开始是一些…...

如何发布自己的golang库
如何发布自己的golang库 1、在 github/gitee 上创建一个 public 仓库,仓库名与 go 库名一致,然后将该仓库 clone 到本地。 本文这里使用 gitee。 $ git clone https://gitee.com/zsx242030/goutil.git2、进入项目文件夹,进行初始化。 $ go…...

梳理自动驾驶中的各类坐标系
目录 自动驾驶中的坐标系定义 关于坐标系的定义 几大常用坐标系 世界坐标系 自车坐标系 传感器坐标系 激光雷达坐标系 相机坐标系 如何理解坐标转换 机器人基础中的坐标转换概念 左乘右乘的概念 对左乘右乘的理解 再谈自动驾驶中的坐标转换 本节参考文献 自动驾驶…...
一个可以自动把微信聊天收到的二维码图片实时提取出来并分类的软件
10-1 如果你有需要实时地、自动地把微信各个群收到的二维码图片提取出来的需求,那本文章适合你,本文章的主要内容是教你如何实现自动提取微信收到的二维码图片,助你快速扫码,永远比别人领先一步。 首先需要准备好的材料…...
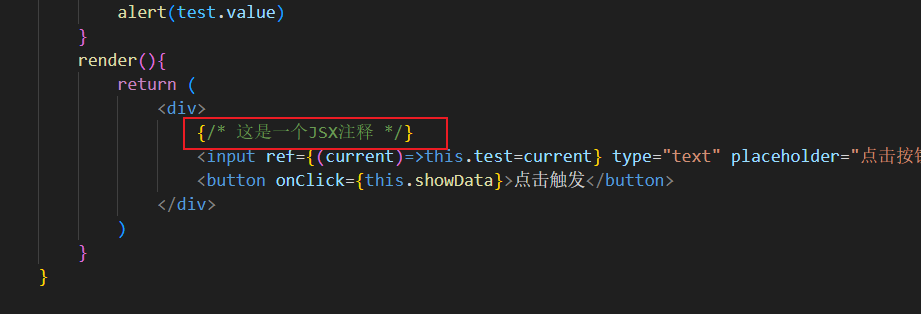
02-React组件与模块
组件与模块 前期准备 安装React官方浏览器调试工具,浏览器扩展搜索即可 比如红色的React就是本地开发模式 开启一个用React写的网站,比如美团 此时开发状态就变成了蓝色 组件也能解析出来 何为组件&模块 模块,简单来说就是JS代…...
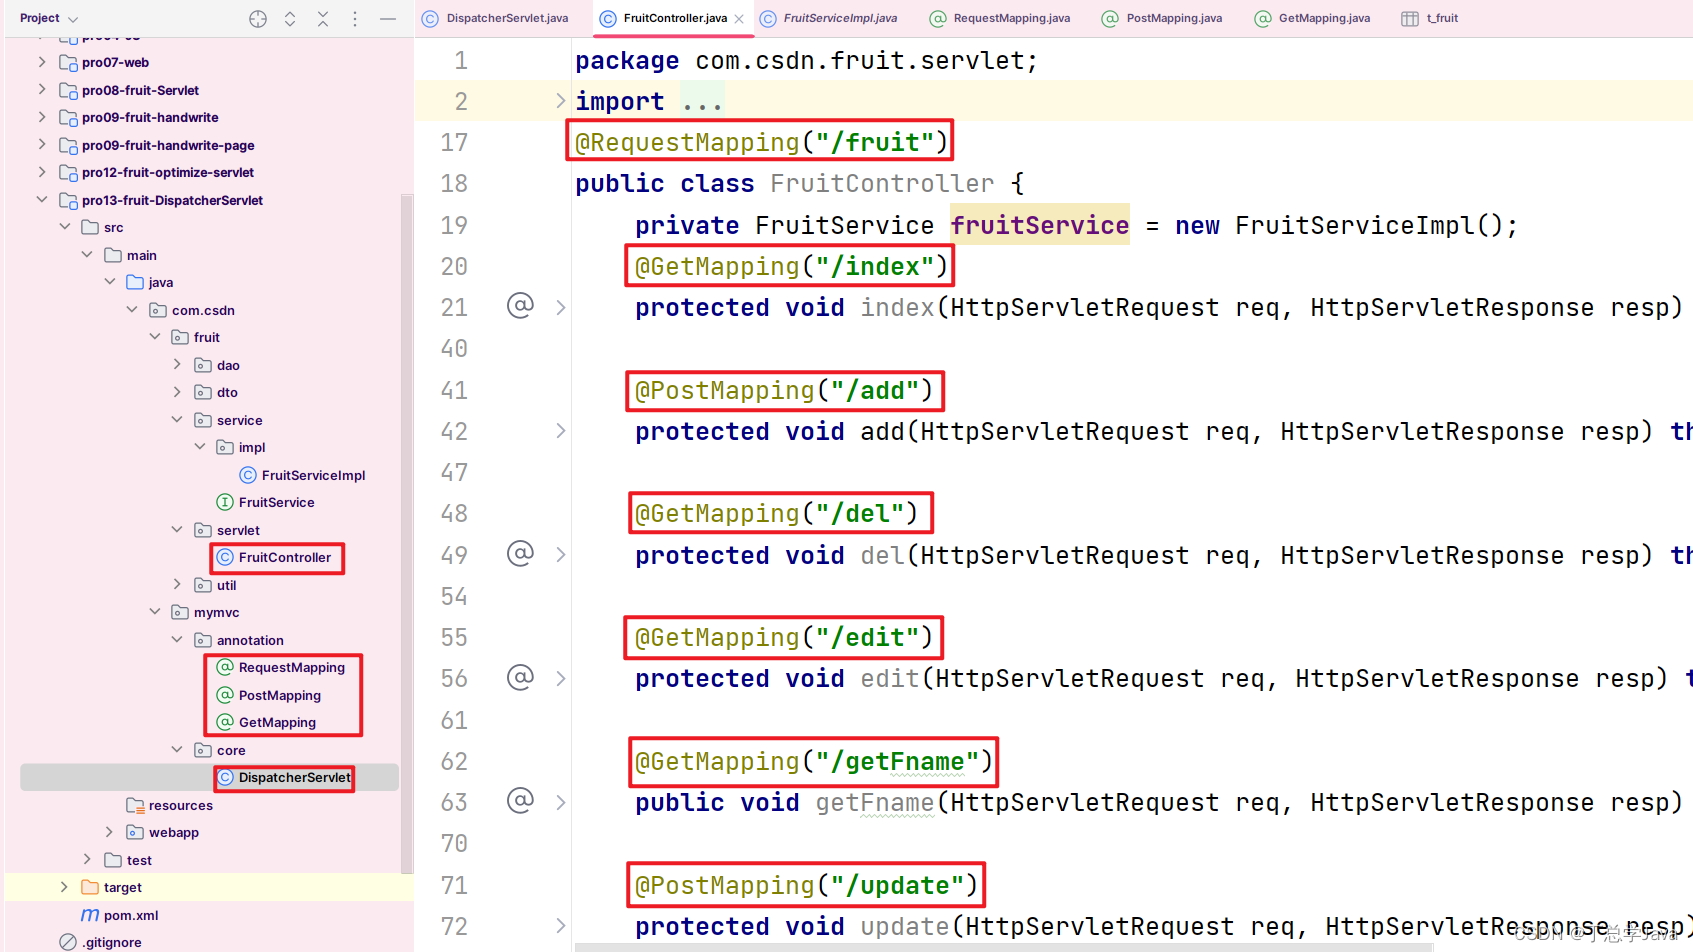
项目实战:新增@RequestMapping和@GetMapping和@PostMapping三个注解
1、RequestMapping package com.csdn.mymvc.annotation; import java.lang.annotation.*; Target(ElementType.TYPE) Retention(RetentionPolicy.RUNTIME) Inherited public interface RequestMapping {String value(); }2、PostMapping package com.csdn.mymvc.annotation; im…...
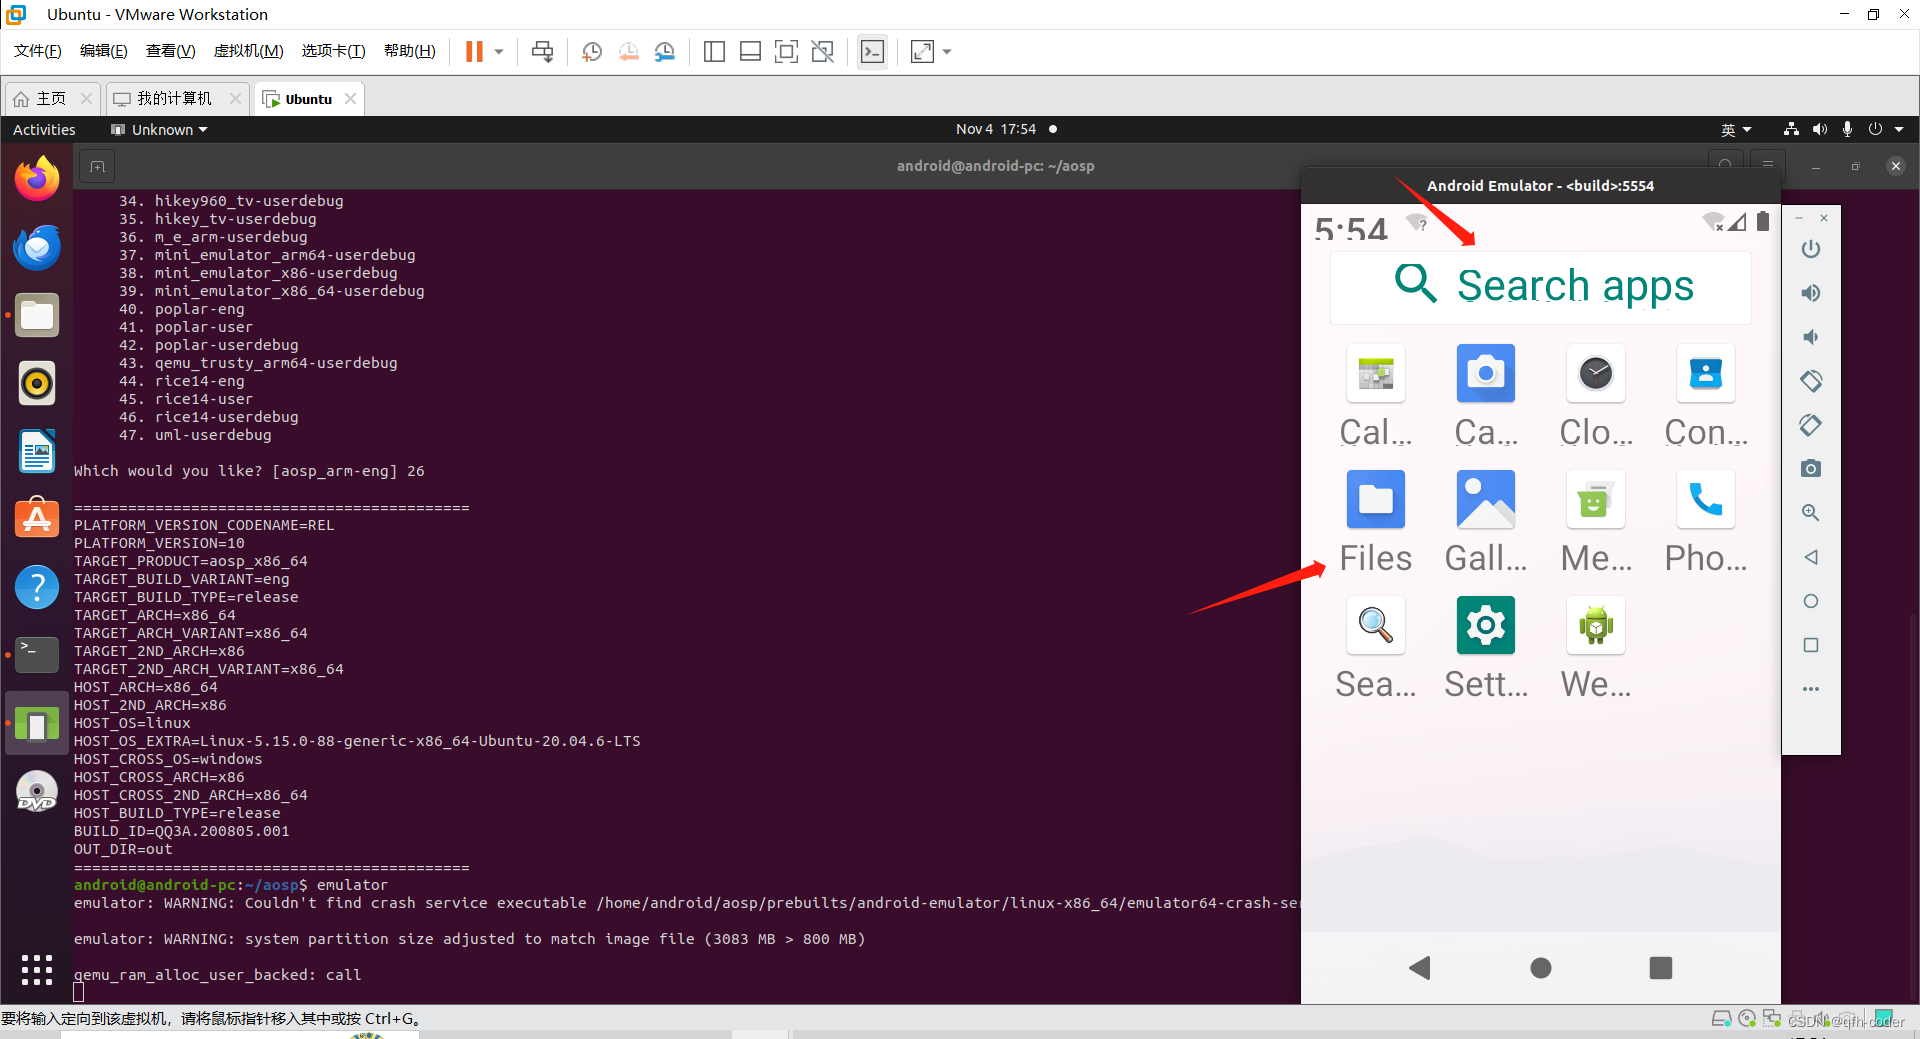
基于AOSP源码Android-10.0.0_r41分支编译,framework开发,修改系统默认字体大小
文章目录 基于AOSP源码Android-10.0.0_r41分支编译,framework开发,修改系统默认字体大小 基于AOSP源码Android-10.0.0_r41分支编译,framework开发,修改系统默认字体大小 主要修改一个地方就行 代码源码路径 frameworks/base/co…...

如何再kali中下载iwebsec靶场
这个靶场有三种搭建方法: 第一种是在线靶场:http://www.iwebsec.com:81/ 第二种是虚拟机版本的,直接下载到本地搭建 官网地址下载:http://www.iwebsec.com/ 而第三种就是利用docker搭建这个靶场,我这里是用kali进行…...
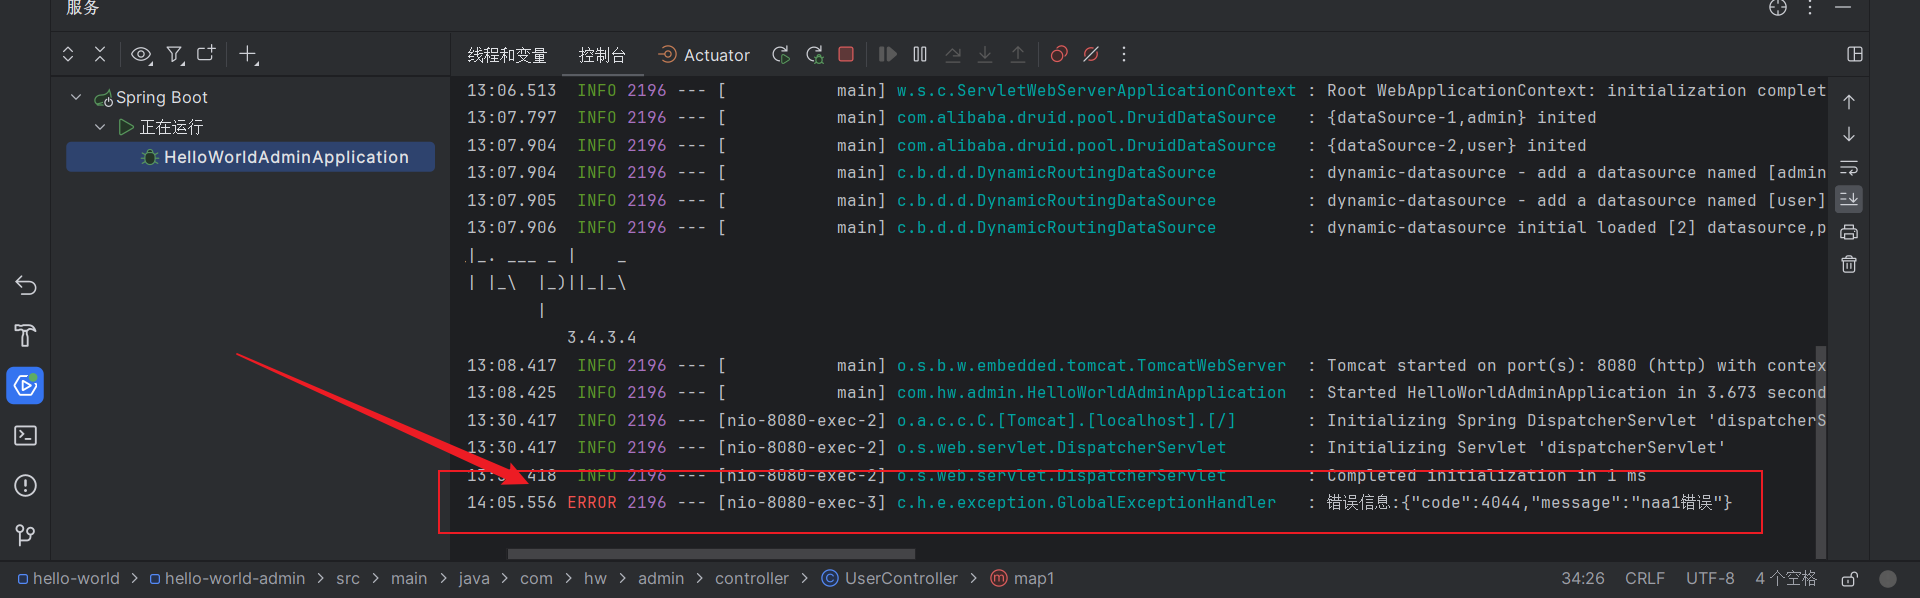
Spring Boot 使用断言抛出自定义异常,优化异常处理机制
文章目录 什么是断言?什么是异常?基于断言实现的异常处理机制创建自定义异常类创建全局异常处理器创建自定义断言类创建响应码类创建工具类测试效果 什么是断言? 实际上,断言(Assertion)是在Java 1.4 版本…...
vue基于ElementUI/Plus自定义的一些组件
vue3-my-ElementPlus 源码请到GitHub下载使用MyTable、MySelect、MyPagination 置顶|Top | 使用案例: 1.0 定义表格数据(测试使用) data() {return {tableData: [],value:[],valueList: [],}; },// 构造表格测试数据// 1 第一行…...
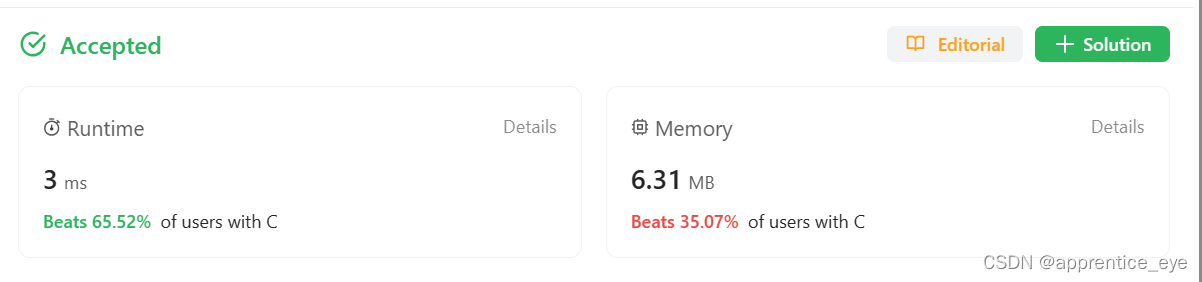
leetcode刷题日记:69.sqrt(x)
给出一个非负的整数x,返回x的平方根向下取整的结果,这个被返回的数也应该是一个非负的值。 对我们的要求是不能使用任何内置的指数函数与操作,官方还给了我们例子: 在C种不能使用pow(x, 0.5) 在python不能使用 x**0.5 既然官方已经…...
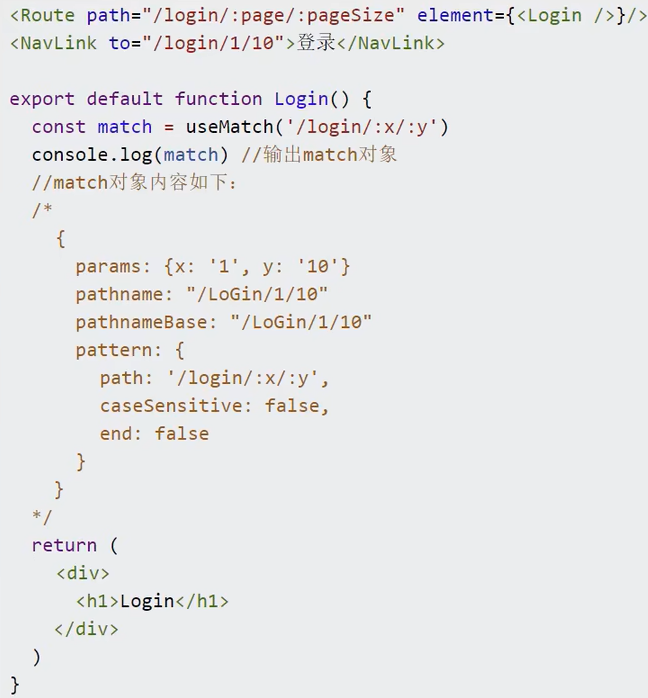
[尚硅谷React笔记]——第9章 ReactRouter6
目录: 课程说明一级路由重定向NavLink高亮useRoutes路由表嵌套路由路由的params参数路由的search参数路由的state参数编程式路由导航useRouterContextuseNavigationTypeuseOutletuseResolvedPath()总结项目地址 1.课程说明 概述 React Router以三个不同的包发布…...
强大的pdf编辑软件:Acrobat Pro DC 2023中文
Acrobat Pro DC 2023是一款强大的PDF编辑和管理软件,它提供了广泛的功能,使用户能够轻松创建、编辑、转换和共享PDF文档。通过直观的界面和先进的工具,用户可以快速进行文本编辑、图像调整、页面管理等操作,同时支持OCR技术&#…...

玩一下Spring Boot
文章目录 1 开发环境1.1 JDK1.2 IntelliJ IDEA2 Spring Boot2.1 创建项目2.2 创建模板页面2.3 创建控制器2.4 启动项目2.5 访问页面1 开发环境 1.1 JDK 安装JDK21 配置环境变量 在命令行查看JDK版本 玩一玩jshell...

Rydberg原子量子门实现原理与优化技术
1. Rydberg原子平台中的量子门实现基础1.1 Rydberg原子特性与量子计算优势Rydberg原子是指外层电子被激发到高主量子数能级的原子态,这类原子具有三个关键特性使其成为量子计算的理想平台:强偶极-偶极相互作用:当两个原子同时处于Rydberg态时…...

如何快速掌握开源UE资产编辑器:UAssetGUI完整配置与实战指南
如何快速掌握开源UE资产编辑器:UAssetGUI完整配置与实战指南 【免费下载链接】UAssetGUI A tool designed for low-level examination and modification of Unreal Engine game assets by hand. 项目地址: https://gitcode.com/gh_mirrors/ua/UAssetGUI UAss…...

2026年,揭秘那些真正安全的原生态食材厂家你不可不知的秘密
随着人们生活水平的提升以及对健康的日益重视,选择真正安全的原生态食材已经成为许多人购买食物的标准。但市场的繁杂使得甄别真正安全的食材厂家变得愈加困难。今天,我将通过几个关键角度,为大家揭秘那些真正安全的原生态食材厂家的秘密&…...

第3篇:系统透视——信息部门如何构建“税务友好型”IT架构
本篇导读:如果你是信息总监或IT负责人,请通读全文,尤其是“系统合规设计的三必须”和“现场检查SOP”;如果你是财税人员,请重点阅读“研产供销全链条的系统对接要求”和“与IT部门的协作要点”;如果你是老板…...

户外实用|艾迪欧 R6000 测评 —— 户外 / 自驾 / 露营的通讯好搭档
户外出行,通讯工具的核心是稳定、清晰、耐用、续航久、功能全。艾迪欧 R6000 作为一款兼顾专业与户外的 DMR 对讲机,全频段覆盖、双模通讯、自定义功能、长续航,完美适配自驾、露营、登山、越野等户外场景,是户外爱好者的靠谱通讯…...

为什么92%的团队用DeepSeek生成方案仍需人工重写?揭秘缺失的2个元认知层与1套校验协议
更多请点击: https://intelliparadigm.com 第一章:为什么92%的团队用DeepSeek生成方案仍需人工重写?揭秘缺失的2个元认知层与1套校验协议 当团队将DeepSeek-R1或DeepSeek-VL模型用于技术方案生成时,表面看响应迅速、逻辑连贯&…...

差分隐私GDP机制紧密度量化:从隐私剖面到∆度量的实践指南
1. 差分隐私GDP机制:从理论到实践,如何量化隐私保护紧密度在差分隐私(Differential Privacy, DP)的实际部署中,尤其是在机器学习的隐私保护训练(如DP-SGD)场景里,我们常常面临一个核…...

CUDA并行计算与FSR框架优化实践
1. CUDA并行计算与FSR框架概述在GPU加速计算领域,CUDA(Compute Unified Device Architecture)作为NVIDIA推出的并行计算平台和编程模型,已经成为高性能计算的事实标准。其核心设计理念是将计算任务分解为网格(Grid&…...

styled-theming 性能优化:如何避免主题切换时的性能瓶颈
styled-theming 性能优化:如何避免主题切换时的性能瓶颈 【免费下载链接】styled-theming Create themes for your app using styled-components 项目地址: https://gitcode.com/gh_mirrors/st/styled-theming styled-theming 是一个专为 styled-components …...

对比自行维护多个 API 源,使用 Taotoken 聚合服务在运维复杂度上的降低
🚀 告别海外账号与网络限制!稳定直连全球优质大模型,限时半价接入中。 👉 点击领取海量免费额度 对比自行维护多个 API 源,使用 Taotoken 聚合服务在运维复杂度上的降低 在构建依赖多个大语言模型的应用时,…...