使用微信小程序控制蓝牙小车(微信小程序端)
目录
- 使用接口
- 界面效果
- 界面设计
- 界面逻辑设计
使用接口
微信小程序官方开发文档
| 接口 | 说明 |
|---|---|
wx.openBluetoothAdapter | 初始化蓝牙模块 |
wx.closeBluetoothAdapter | 关闭蓝牙模块(调用该方法将断开所有已建立的连接并释放系统资源) |
wx.startBluetoothDevicesDiscovery | 开始搜寻附近的蓝牙外围设备 |
wx.stopBluetoothDevicesDiscovery | 停止搜寻附近的蓝牙外围设备。若已经找到需要的蓝牙设备并不需要继续搜索时,建议调用该接口停止蓝牙搜索 |
wx.onBluetoothDeviceFound | 监听搜索到新设备的事件 |
wx.createBLEConnection | 连接蓝牙低功耗设备 |
wx.closeBLEConnection | 断开与蓝牙低功耗设备的连接 |
wx.getBLEDeviceServices | 获取蓝牙低功耗设备所有服务 |
wx.getBLEDeviceCharacteristics | 获取蓝牙低功耗设备某个服务中所有特征 (characteristic) |
wx.readBLECharacteristicValue | 读取蓝牙低功耗设备特征值的二进制数据 |
wx.writeBLECharacteristicValue | 向蓝牙低功耗设备特征值中写入二进制数据 |
wx.showToast | 显示消息提示框 |
界面效果
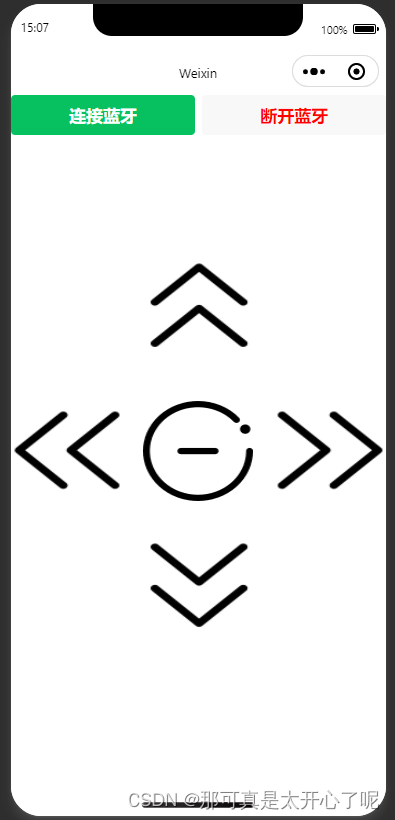
图片素材库地址
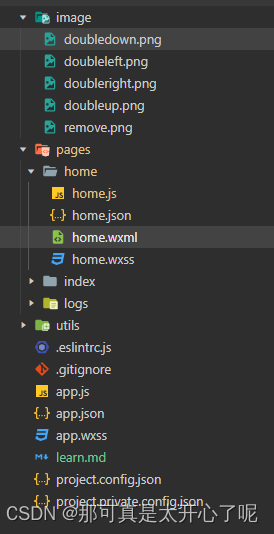
项目目录列表
界面设计
- 在
app.json中添加一个新页面"pages/home/home"
{"pages":["pages/home/home","pages/index/index","pages/logs/logs"],"window":{"backgroundTextStyle":"light","navigationBarBackgroundColor": "#fff","navigationBarTitleText": "Weixin","navigationBarTextStyle":"black"},"style": "v2","sitemapLocation": "sitemap.json"
}- 设计界面
home.wxml
<!--pages/home/home.wxml-->
<button type="primary" class = "connectBLE" bindtap = "openBluetoothAdapter">连接蓝牙</button>
<button class = "disconnectBLE" bindtap = "closeBluetoothAdapter">断开蓝牙</button>  <button class="custom-button" style="bottom: -395px" bindtap = "btnClickDown"><image class="button-image" src="/image/doubledown.png"></image>
</button><button class="custom-button" style="bottom: -15px" bindtap = "btnClickUp"><image class="button-image" src="/image/doubleup.png"></image>
</button><view><button class="custom-button" style="bottom: -60px; left: -35%" bindtap = "btnClickLeft"><image class="button-image-1" src="/image/doubleleft.png"></image></button>
</view><view><button class="custom-button" style="bottom: 40px; left: 35%" bindtap = "btnClickRight"><image class="button-image-1" src="/image/doubleright.png"></image></button>
</view><view><button class="custom-button" style="bottom: 134px; left: 0%" bindtap = "btnClickStop"><image class="button-image-2" src="/image/remove.png"></image></button>
</view>
- 画面渲染
home.wxss
/* pages/home/home.wxss */
.connectBLE {width: 49% !important;float: left;font-size: 100;
}.disconnectBLE {width: 49% !important;float: right;font-size: 100;color: red;
}.custom-button {position: relative;width: 100px;height: 100px;border: none;padding: 0;overflow: hidden;background: transparent;   /*设置背景颜色一致*/border-color: transparent; /*设置边框颜色一致*/
}.button-image {object-fit: contain;width: 75%;height: 110%;
}.button-image-1 {object-fit: contain;width: 75%;height: 110%;
}.button-image-2 {object-fit: contain;width: 60%;height: 100%;
}
界面逻辑设计
连接的目标蓝牙名称为ESP_SPP_SERVER
// pages/home/home.js
Page({/*** 页面的初始数据*/data: {connected: false,serviceId: "",},//蓝牙初始化openBluetoothAdapter() {if(this.data.connected){return}wx.openBluetoothAdapter({success: (res) => {console.log('bluetooth initialization success', res)this.startBluetoothDevicesDiscovery()},fail: (err) => {wx.showToast({title: '蓝牙适配器初始化失败',icon: 'none'})return}})},//关闭蓝牙初始化closeBluetoothAdapter() {wx.closeBluetoothAdapter({success: (res) => {console.log('bluetooth deinitialization success', res)},fail: (err) => {wx.showToast({title: '蓝牙适配器解初始化失败',icon: 'none'})return}})},//开始搜寻附近的蓝牙外围设备startBluetoothDevicesDiscovery() {wx.startBluetoothDevicesDiscovery({success: (res) => {console.log('startBluetoothDevicesDiscovery success', res)this.onBluetoothDeviceFound()},fail: (err) => {wx.showToast({title: '蓝牙适配器解初始化失败',icon: 'none'})return}})},//监听搜索到新设备的事件onBluetoothDeviceFound() {let found_device = falseconst timer = setTimeout(() => {if (!found_device) {console.error('未找到设备');wx.showToast({title: '未找到设备',icon: 'none'})}}, 2000); // 设置定时器为10秒wx.onBluetoothDeviceFound((res) => {res.devices.forEach(device => {if (device.name === 'ESP_SPP_SERVER') {console.log('find target device')found_device = true; // 找到目标设备,将标志变量设置为已找到clearTimeout(timer); // 取消定时器this.createBLEConnection(device.deviceId)}});});},//连接蓝牙低功耗设备createBLEConnection(deviceId) {wx.createBLEConnection({deviceId,success:() => {this.setData({connected: true,})console.log('connect device success')this.getBLEDeviceServices(deviceId)wx.stopBluetoothDevicesDiscovery()},fail:(err) => {wx.showToast({title: '建立蓝牙连接失败',icon: 'none'})}})},//获取蓝牙低功耗设备所有服务getBLEDeviceServices(deviceId) {wx.getBLEDeviceServices({deviceId,success:(res) => {for (let i = 0; i < res.services.length; i++) {if(res.services[i].isPrimary) {this.getBLEDeviceCharacteristics(deviceId, res.services[i].uuid)return}}},fail:(res) => {console.log('getBLEDeviceServices fail', res.errMsg)}})},//获取蓝牙低功耗设备某个服务中所有特征getBLEDeviceCharacteristics(deviceId, serviceId) {wx.getBLEDeviceCharacteristics({deviceId,serviceId,success: (res) => {for (let i = 0; i < res.characteristics.length; i++) {let item = res.characteristics[i]if(item.properties.read) {wx.readBLECharacteristicValue({deviceId,serviceId,characteristicId: item.uuid,})}if(item.properties.write){this._deviceId = deviceIdthis._serviceId = serviceIdthis._characteristicId = item.uuid}}},fail:(res) => {console.log('get characteristicId fail', res.errMsg)}})},//关闭蓝牙服务closeBluetoothAdapter() {wx.closeBLEConnection({deviceId: this._deviceId,success: (res) => {console.log('disconnect success')},fail: (res) => {console.log('disconnect fail',res.errMsg)}})wx.closeBluetoothAdapter({success: (res) => {console.log('close success')},fail: (res) => {console.log('close fail',res.errMsg)}})this.data.connected = falseconsole.log('close connection')},btnClickDown() {this.tipsBluetoothWarn()this.writeBluetoothValue('down')console.log('click down')},btnClickUp() {this.tipsBluetoothWarn()this.writeBluetoothValue('up')console.log('click up')},btnClickLeft() {this.tipsBluetoothWarn()this.writeBluetoothValue('left')console.log('click left')},btnClickRight() {this.tipsBluetoothWarn()this.writeBluetoothValue('right')console.log('click right')},btnClickStop() {this.tipsBluetoothWarn()this.writeBluetoothValue('stop')console.log('click stop')},tipsBluetoothWarn(){if(!this.data.connected){wx.showToast({title: '蓝牙未连接',icon: 'none'})}},writeBluetoothValue(value) {if(!this.data.connected){return}const buffer = new ArrayBuffer(value.length)const dataView = new DataView(buffer)for (let i = 0; i < value.length; i++) {dataView.setUint8(i, value.charCodeAt(i))}wx.writeBLECharacteristicValue({deviceId: this._deviceId,serviceId: this._serviceId,characteristicId: this._characteristicId,value: buffer,success (res) {console.log('writeBLECharacteristicValue success', res.errMsg)},fail (res) {console.log('writeBLECharacteristicValue fail', res.errMsg, res.errCode)}})},/*** 生命周期函数--监听页面加载*/onLoad(options) {},
})
相关文章:
使用微信小程序控制蓝牙小车(微信小程序端)
目录 使用接口界面效果界面设计界面逻辑设计 使用接口 微信小程序官方开发文档 接口说明wx.openBluetoothAdapter初始化蓝牙模块wx.closeBluetoothAdapter关闭蓝牙模块(调用该方法将断开所有已建立的连接并释放系统资源)wx.startBluetoothDevicesDiscovery开始搜寻附近的蓝牙…...

【react hook】react hook组件中,在forEach中使用async/awati进行异步操作,为什么后面代码没有等待直接同步运行了呢?
这是因为 forEach 方法不会等待 async/await 异步操作的完成。forEach 方法是一种同步的方法,它会在每个迭代内部同步执行一个回调函数。当遇到 await 时,会立即暂停执行,但是 forEach 方法不会等待回调函数中的 await 异步操作完成ÿ…...
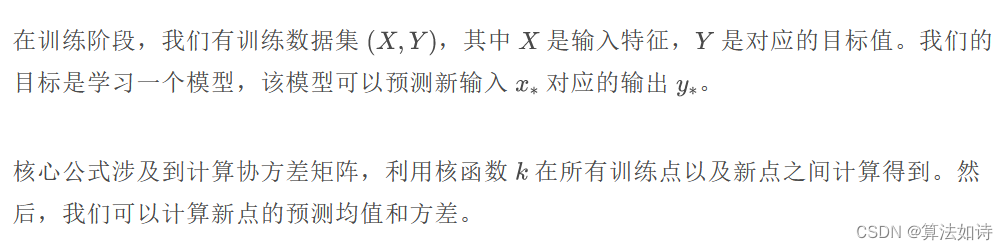
高斯过程回归 | GPR高斯过程回归
高斯过程回归(Gaussian Process Regression, GPR)是一种强大的非参数回归方法,它通过假设数据是从一个高斯过程中生成的来预测新的数据点。 高斯过程是一种定义在连续输入空间上的随机过程,其中任何有限集合的观测值都呈多变量高斯分布。 实现GPR的Python代码import numpy …...
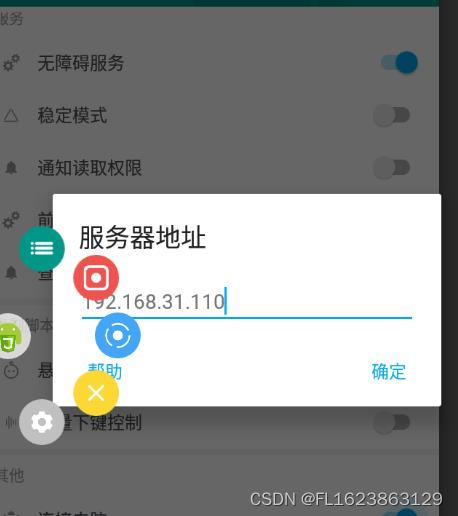
[autojs]逍遥模拟器和vscode对接
第一步:启动autojs服务 第二步:去cmd查看ip地址,输入ipconfig 第三步:打开逍遥模拟器中的sutojs-左上角- 连接电脑,然后输入WLAN或者其他ip也行,根据自己电脑实际情况确认 此时vscode显示连接成功。我们写…...

Docker 安装与优化
一、安装Docker 1、关闭防火墙 systemctl stop firewalld systemctl disable firewalld setenforce 02、安装依赖包 yum -y install yum-utils device-mapper-persistent-data lvm2#解释 yum-utils #提供了yum-config-manager工具 device mapper #是linux内核中支持逻辑卷…...
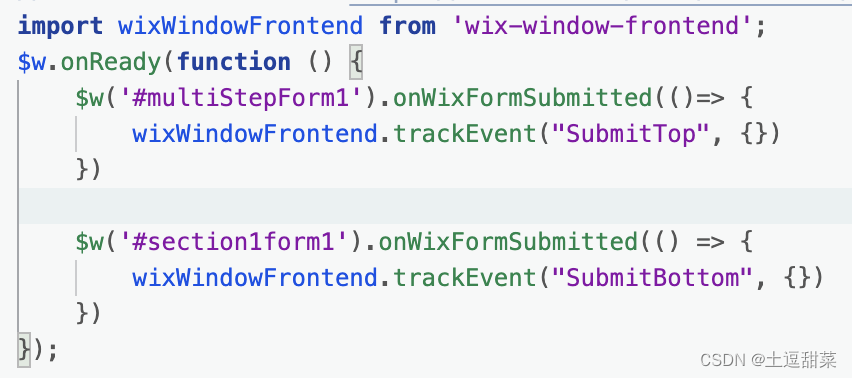
Wix使用velo添加Google ads tag并在form表单提交时向谷歌发送事件
往head里加代码时,不能看谷歌的代码,要看wix的代码,不然必定踩坑 https://support.wix.com/en/article/tracking-google-ads-conversions-using-wix-custom-code 这里的代码才对,因为wix搞了个velo,这个velo很傻x&am…...
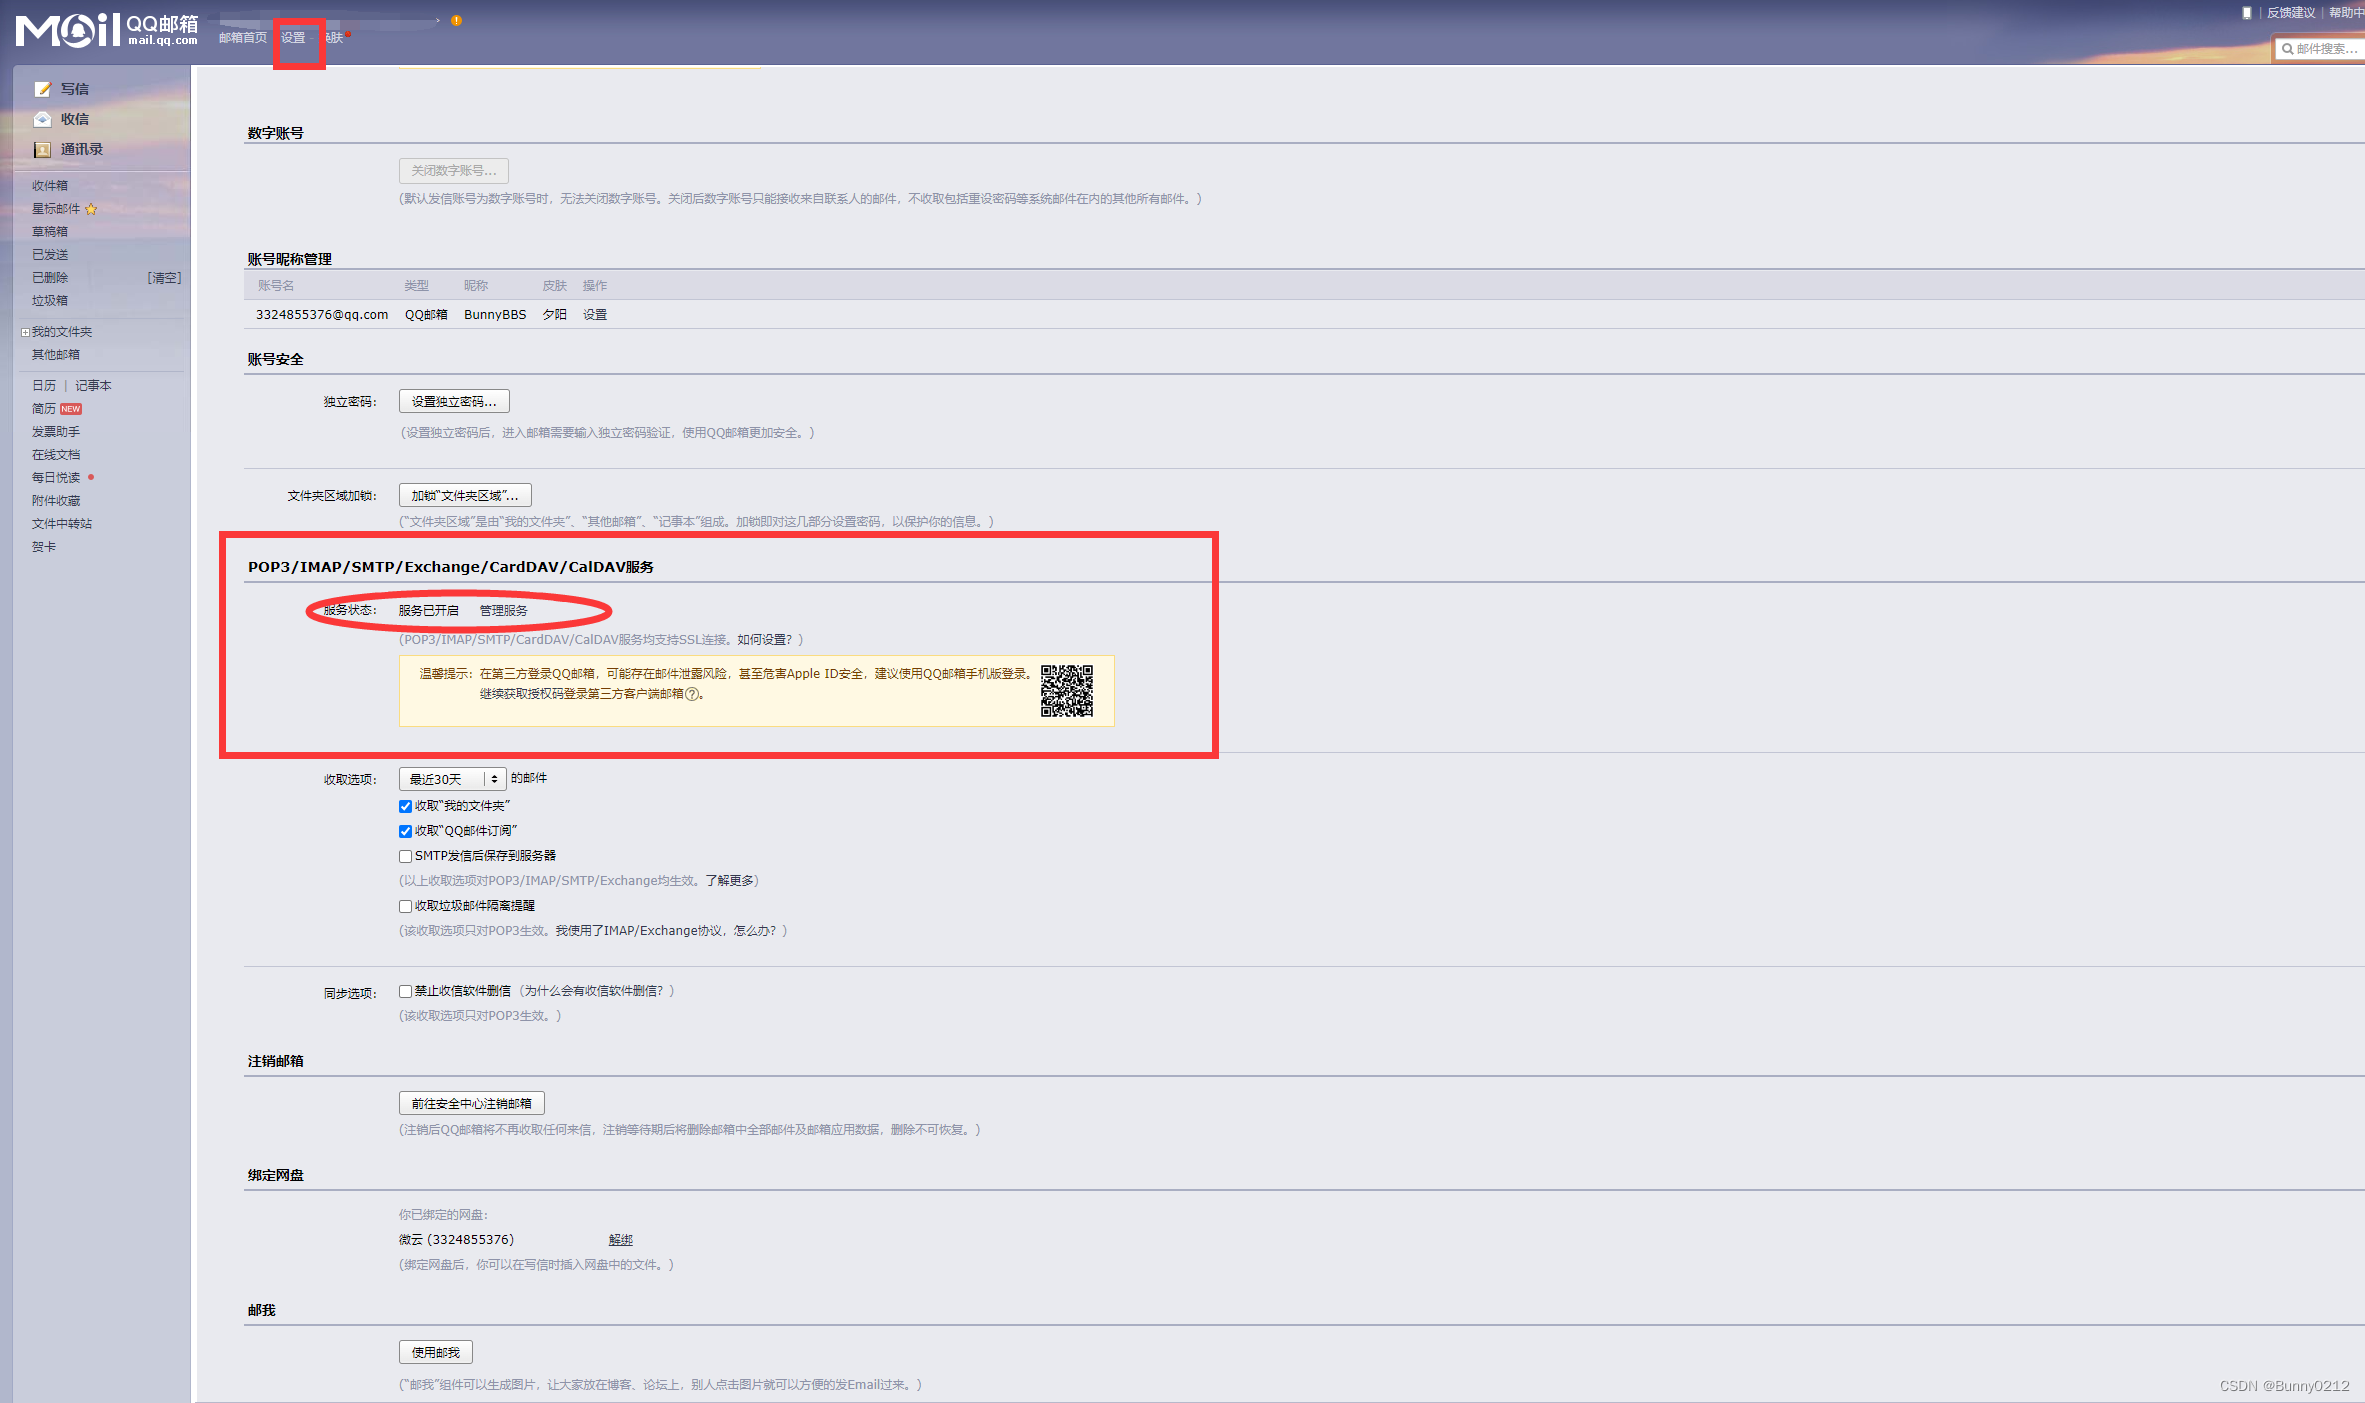
Centos配置邮件发送
在CentOS Linux上配置邮件发送 在这个指南中,我们将讨论如何配置CentOS Linux系统以通过外部邮件服务器发送电子邮件,使用自己的邮件账户进行发送。 第一步:开启SMTP授权码 首先,我们以QQ邮箱为例,需要开启SMTP授权…...

Ubuntu系统使用apt-get管理软件工具
记录一下使用Ubuntu系统的apt-get管理软件工具 先查看一下系统的版本,可以看到这里使用的是Ubuntu20.04版本,版本代号focal rootmyw:~# uname -a Linux myw 5.4.0-70-generic #78-Ubuntu SMP Fri Mar 19 13:29:52 UTC 2021 x86_64 x86_64 x86_64 GNU/L…...
带你走进Cflow (三)·控制符号类型分析
目录 编辑 1、控制符号类型 1.1 语法类 1.2 符号别名 1.3 GCC 初始化 1、控制符号类型 有人也许注意到了输出中奇怪的现象:函数_exit 丢失了,虽然它在源文件中被printdir 调用了两次。这是因为默认情况下 cflow 忽略所有的一下划线开头的符号…...
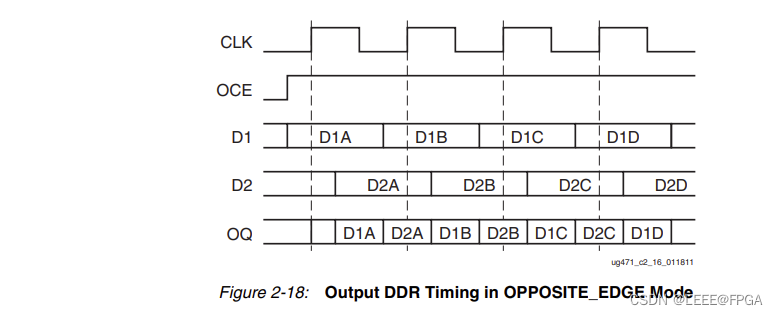
FPGA UDP RGMII 千兆以太网(3)ODDR
1 xilinx原语 在 7 系列 FPGA 中实现 RGMII 接口需要借助 5 种原语,分别是:IDDR、ODDR、IDELAYE2、ODELAYE2(A7 中没有)、IDELAYCTRL。其中,IDDR和ODDR分别是输入和输出的双边沿寄存器,位于IOB中。IDELAYE2和ODELAYE2,分别用于控制 IO 口输入和输出延时。同时,IDELAYE2 …...

OSG交互:选中场景模型并高亮显示
1、目的 可以在osg视图中选中指定模型实体,并高亮显示。共分为两种,一种鼠标点选,一种框选。 2、鼠标点选 2.1 功能说明 生成两组对象,一组cow对象可以被选中,另一组robot不能被选中;点击cow对象被选中高亮,点击robot被选中不高亮;点击空白处,弹出“select nothing!…...

农业大棚智能化改造升级与远程视频监管方案,助力智慧农业建设发展
一、需求分析 随着现代化技术的发展,农业大棚的智慧化也成为当前备受关注的智慧农业发展手段。利用先进的信息化手段来对农业大棚进行管理,采集和掌握作物的生长状况、作业监督、生态环境等信息数据,实现精准操作、精细管理,远程…...
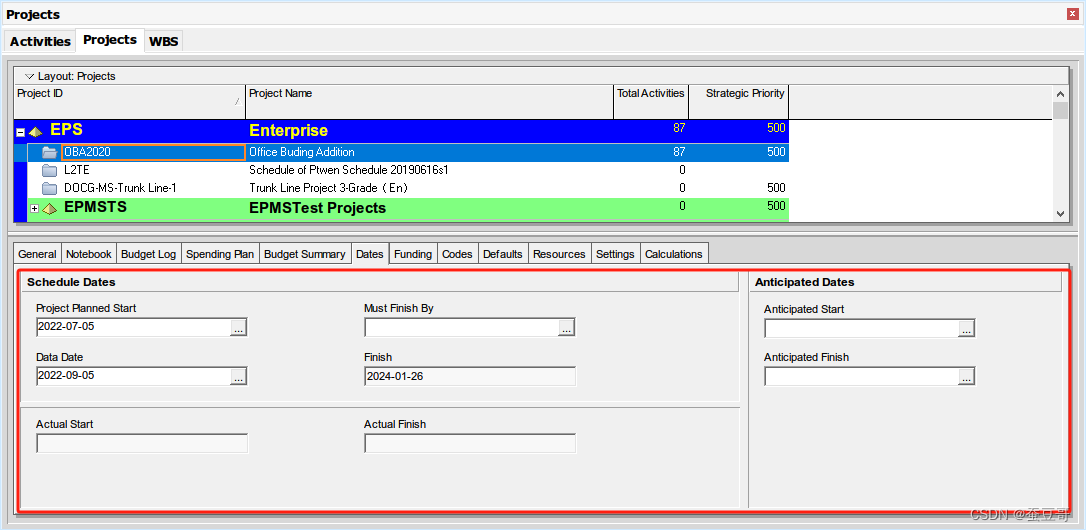
P6入门:项目初始化2-项目详情之日期Date
前言 使用项目详细信息查看和编辑有关所选项目的详细信息,在项目创建完成后,初始化项目是一项非常重要的工作,涉及需要设置的内容包括项目名,ID,责任人,日历,预算,资金,分类码等等&…...

【ubuntu20.04】win10安装ubuntu20.04双系统
win10安装ubuntu20.04双系统: 【ubuntu20.04】win10安装ubuntu20.04双系统:https://www.bilibili.com/video/BV11k4y1k7Li/?spm_id_from333.999.0.0&vd_source66a67b8a0b3c4e03915bf8b3a6ff9a74 ubuntu与windows双系统时间同步: windows认为&…...
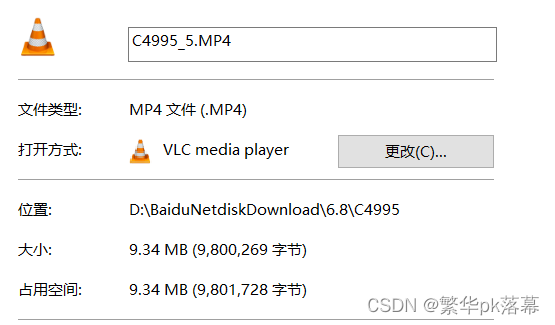
使用ffmpeg 压缩视频
我有一批1080p的视频,在网上播放占用空间太大,需要进行压缩以后再上传,下面是记录一下ffmpeg命令的使用情况 原视频大小:288mb --压缩加修改分辨率 640p ffmpeg -y -i C4995.mp4 -vcodec libx264 -crf 18 -s vga C4995\C4995_2.MP4 -y: 强制覆盖 -i :输入文件 -vcodec lib…...

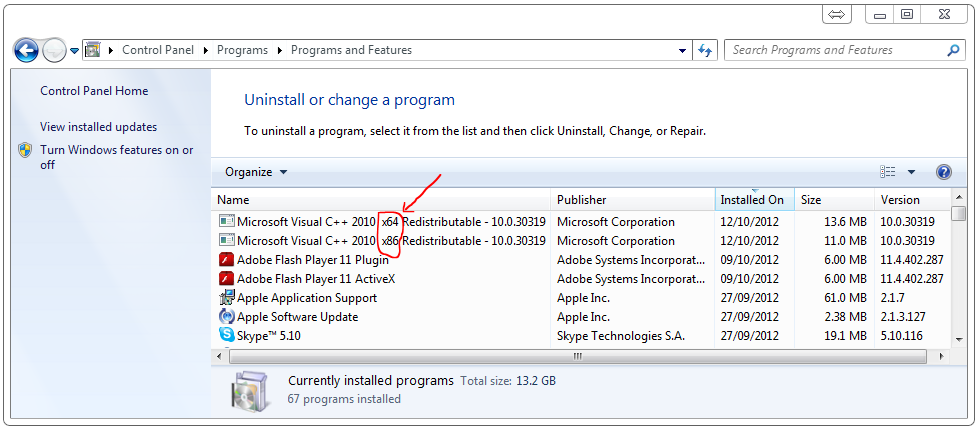
C# , .netWebApi, WPF 用特性实现类似Java 的Ioc 自动装配@Autowired
写C# 一直很羡慕Java的@Autowired 自动装配. 因为C# 必须手动在Ioc里注册 之前用接口实现了自动注册IOC, 总是觉得美中不足, 毕竟没有真正实现用注解/特性实现自动注入, 这次我们来实现一个用特性注入Ioc的扩展方法. namespace MyCode.BLL.Service.Ioc {/// <summary>/…...
3DMAX汽车绑定动画模拟插件MadCar疯狂汽车使用教程
3DMAX汽车绑定动画模拟插件MadCar疯狂的汽车,用于通过模拟控制来快速装配轮式车辆及其动画。这个新版本允许装配任何数量的车轮的车辆,以及包括摩托车在内的任何相互布置。还支持任意数量的拖车。 每个车轮和悬架都有简化的行为设置以及微调,…...
比较PID控制和神经网络控制在机器人臂上的应用
机器人臂是自动化领域中常见的机器人形式,其精确控制对于实现复杂任务具有重要意义。在机器人臂的控制中,PID控制和神经网络控制是两种常用的控制方法。本文将比较PID控制和神经网络控制在机器人臂控制方面的应用,包括控制原理、优缺点以及在…...

ubuntu16.04 交叉编译 mbedtls
在为客户交叉编译项目时需要依赖 mbedtls, 客户的机器是 arm64 的 ubuntu 16.04, 交叉编译过程中遇到几个问题。 首先, mbedtls 需要依赖 python, 在 cmake 的过程中, 如果不是使用系统默认的 cmake 可能会导致,mbedt…...
基于遗传算法优化的直流电机PID控制器设计
PID控制器是工业控制中常用的一种控制算法,通过不断调节比例、积分和微分部分来实现对系统的稳定控制。然而,在一些复杂系统中,传统的PID参数调节方法可能存在局限性。本文将介绍一种基于遗传算法优化的直流电机PID控制器设计方法,…...

解决Leaflet加载天地图的最大痛点:突破17级缩放限制的两种实战方案
突破Leaflet中天地图17级缩放限制的工程实践 第一次在项目中集成天地图时,那种流畅的加载体验让人印象深刻——直到用户突然问:"为什么这个区域无法继续放大了?"这才发现Leaflet默认的17级缩放限制成了项目交付的绊脚石。作为国内主…...

jQuery 遍历 - 后代
jQuery 遍历 - 后代元素 (Descendants) 在 jQuery 中,后代遍历用于从当前选中的元素向下查找其子元素、孙元素等所有后代节点。这是 DOM 操作中最常用的功能之一。 一、核心方法 1. children() - 获取直接子元素 只返回一级子元素(直接后代)&…...

磁轴键盘选霍尔,关键看哪几点?
工程师和厂商朋友们在选型磁轴键盘霍尔方案时,通常会关注哪些核心参数?磁轴键盘的按键性能,很大程度上取决于线性霍尔传感器的参数选型。作为将磁场变化转换为电压信号的器件,线性霍尔的上电时间、响应速度、输出底噪三项指标&…...

敏芮芯途敏宝长高奶粉,助力敏宝长高,超 90%宝妈信赖的选择!
开篇引言在 2026 年,婴幼儿特医奶粉行业呈现出诸多显著趋势。随着生活环境等因素的变化,牛奶蛋白过敏宝宝群体逐年增加,家长们在为宝宝选奶时,更加看重产品的合规性与口感。特医配方朝着精细化分级的方向发展,易吸收护…...

Keil MDK-ARM编译报错‘A Label was found which was in no AREA’?手把手教你写对INCBIN汇编文件
Keil MDK-ARM编译报错‘A Label was found which was in no AREA’?手把手教你写对INCBIN汇编文件 在嵌入式开发中,直接访问二进制数据的需求非常普遍——可能是预计算的校验表、固件镜像或是其他工具生成的配置数据。当你在Keil MDK-ARM环境中尝试用汇编…...

新消费最残酷的真相:大多数品牌从一开始就没机会
在当下,大家都会有一种很强烈的体感:市场越来越难做了。流量越来越贵,投放越来越难转化,渠道越来越挑剔,消费者也越来越不忠诚。以前一个还不错的产品,靠点渠道、投点广告、做点活动,基本还能跑…...

M9A:基于视觉感知的《重返未来:1999》智能自动化框架技术解析
M9A:基于视觉感知的《重返未来:1999》智能自动化框架技术解析 【免费下载链接】M9A 重返未来:1999 小助手 | Assistant For Reverse: 1999 项目地址: https://gitcode.com/gh_mirrors/m9/M9A 在现代策略游戏领域,玩家面临的…...

搞定海量小文件同步!15年老牌同步盘教你什么叫“开箱即用”
说句实在话,咱们搞技术的、爱折腾硬件的兄弟,谁还没吃过“跨设备传文件”的苦? 为了把电脑里的代码片段、设计素材、或者几十个G的电影无缝同步到平板和手机上,很多人周末不睡觉去折腾NAS,敲击命令行搞Rclone…...
)
C# 14原生AOT编译Dify客户端全链路优化(成本控制黄金公式首次公开)
第一章:C# 14原生AOT编译Dify客户端全链路优化概览C# 14 引入的原生 AOT(Ahead-of-Time)编译能力,为构建高性能、低延迟、零运行时依赖的 Dify 客户端提供了全新路径。与传统 JIT 编译相比,AOT 可将 C# 代码直接编译为…...

STM32新手避坑:US100超声波模块串口和电平模式到底怎么选?实测对比告诉你
STM32与US100超声波模块实战指南:串口与电平模式深度解析 刚接触STM32和超声波模块的新手开发者,面对US100模块的两种工作模式(串口与电平触发)时,往往陷入选择困难。这两种模式在硬件连接、代码复杂度、测量精度等方面…...