Github项目-CNNResnet9-残差神经网络水果多分类项目
ResNet-论文全文完整翻译+注解 - 知乎
你必须要知道CNN模型:ResNet - 知乎
#!/usr/bin/env python
# coding: utf-8
#https://github.com/SehajS/cnn-resnet-fruit-classification
# # Classifying Fruits from their Images
#
# This project aims at creating a deep learning model which predicts the names of the fruits by looking at their images.
#
# The dataset is taken from kaggle and can be accessed using this link: https://www.kaggle.com/moltean/fruits
#
# A complete walkthrough from downloading the dataset to the creating the CNN-ResNet model with extensive comments has been provided. # ## Import all the requried libraries/modules# In[1]:#import opendatasets as od
import os
import shutil
import torch
from torchvision.datasets import ImageFolder
import torchvision.transforms as tt
from torch.utils.data import random_split
from torch.utils.data import DataLoader
from torchvision.utils import make_grid
import torch.nn as nn
import torch.nn.functional as F
import matplotlib.pyplot as plt
get_ipython().run_line_magic('matplotlib', 'inline')# ## Downloading the dataset# In[2]:#dataset_url = "https://www.kaggle.com/moltean/fruits"
#od.download(dataset_url)# ## Cleaning the downloaded dataset# In[3]:data_direc = './datadev'
os.listdir(data_direc)# There are some files that one won't be needing in the project. Hence, one should remove them.# In[4]:#shutil.rmtree('./fruits/fruits-360/test-multiple_fruits')# In[5]:#shutil.rmtree('./fruits/fruits-360/papers')# In[6]:train_data_direc = "./datadev/train"
test_data_direc = "./datadev/test"# ## Import the Dataset using PyTorch# In[7]:print(f'The total number of labels is: {len(os.listdir(train_data_direc))}')# In[8]:dataset = ImageFolder(train_data_direc)
len(dataset)# In total, there are 67692 non-test images in our dataset.# Let us peek at one of the elements of the dataset. This gives further insights on the way data is stored.# In[9]:dataset[0]# In[10]:img, label = dataset[0]
plt.imshow(img)# One would now like to convert the images to tensors.# In[11]:dataset = ImageFolder(train_data_direc, tt.ToTensor())# In[12]:image, label = dataset[0]
plt.imshow(image.permute(1,2,0))# ## Training and Validation Sets# In[13]:val_pct = 0.1        # 10% of the images in Train folder will be used as validation set
val_size = int(len(dataset) * 0.1)
train_size = len(dataset) - val_size
val_size, train_size# In[14]:train_ds, val_ds = random_split(dataset, [train_size, val_size])# In[15]:len(train_ds), len(val_ds)# It is time to use Data Loaders to load the dataset in batches.# In[16]:batch_size = 64
train_dl = DataLoader(train_ds, batch_size, shuffle=True, num_workers = 4, pin_memory=True)
val_dl = DataLoader(val_ds, batch_size*2, num_workers = 4, pin_memory=True)# In[17]:def show_batch(dl):for images, labels in dl:fig, ax = plt.subplots(figsize=(12, 6))ax.set_xticks([]); ax.set_yticks([])ax.imshow(make_grid(images, nrow=16).permute(1, 2, 0))break# In[18]:show_batch(train_dl)# ## Utility Functions and Classes
#
# The creation and training of the model is done using GPU. Below are the functions that make sure that tensors and the model is using a GPU as the default device.# In[19]:def get_default_device():"""Pick GPU if available, else CPU"""if torch.cuda.is_available():return torch.device('cuda')else:return torch.device('cpu')def to_device(data, device):"""Move tensor(s) to chosen device"""if isinstance(data, (list,tuple)):return [to_device(x, device) for x in data]return data.to(device, non_blocking=True)class DeviceDataLoader():"""Wrap a dataloader to move data to a device"""def __init__(self, dl, device):self.dl = dlself.device = devicedef __iter__(self):"""Yield a batch of data after moving it to device"""for b in self.dl: yield to_device(b, self.device)def __len__(self):"""Number of batches"""return len(self.dl)# In[20]:device = get_default_device()
device# In[21]:train_dl = DeviceDataLoader(train_dl, device)
val_dl = DeviceDataLoader(val_dl, device)# ## Model and Training Utilities# In[22]:class ImageClassificationBase(nn.Module):def training_step(self, batch):images, labels = batch out = self(images)                  # Generate predictionsloss = F.cross_entropy(out, labels) # Calculate lossreturn lossdef validation_step(self, batch):images, labels = batch out = self(images)                    # Generate predictionsloss = F.cross_entropy(out, labels)   # Calculate lossacc = accuracy(out, labels)           # Calculate accuracyreturn {'val_loss': loss.detach(), 'val_acc': acc}def validation_epoch_end(self, outputs):batch_losses = [x['val_loss'] for x in outputs]epoch_loss = torch.stack(batch_losses).mean()   # Combine lossesbatch_accs = [x['val_acc'] for x in outputs]epoch_acc = torch.stack(batch_accs).mean()      # Combine accuraciesreturn {'val_loss': epoch_loss.item(), 'val_acc': epoch_acc.item()}def epoch_end(self, epoch, result):print("Epoch [{}], train_loss: {:.4f}, val_loss: {:.4f}, val_acc: {:.4f}".format(epoch, result['train_loss'], result['val_loss'], result['val_acc']))def accuracy(outputs, labels):_, preds = torch.max(outputs, dim=1)return torch.tensor(torch.sum(preds == labels).item() / len(preds))# In[23]:@torch.no_grad()
def evaluate(model, val_loader):model.eval()outputs = [model.validation_step(batch) for batch in val_loader]return model.validation_epoch_end(outputs)def fit(epochs, lr, model, train_loader, val_loader, opt_func=torch.optim.SGD):history = []optimizer = opt_func(model.parameters(), lr)for epoch in range(epochs):# Training Phase model.train()train_losses = []for batch in train_loader:loss = model.training_step(batch)train_losses.append(loss)loss.backward()optimizer.step()optimizer.zero_grad()# Validation phaseresult = evaluate(model, val_loader)result['train_loss'] = torch.stack(train_losses).mean().item()model.epoch_end(epoch, result)history.append(result)return history# In[24]:def conv_block(in_channels, out_channels, pool=False):layers = [nn.Conv2d(in_channels, out_channels, kernel_size=3, padding=1), nn.BatchNorm2d(out_channels), nn.ReLU(inplace=True)]if pool: layers.append(nn.MaxPool2d(2))return nn.Sequential(*layers)# In[25]:class ResNet9(ImageClassificationBase):def __init__(self, in_channels, num_classes):super().__init__()self.conv1 = conv_block(in_channels, 64)self.conv2 = conv_block(64, 128, pool=True)self.res1 = nn.Sequential(conv_block(128, 128), conv_block(128, 128))self.conv3 = conv_block(128, 256, pool=True)self.conv4 = conv_block(256, 512, pool=True)self.res2 = nn.Sequential(conv_block(512, 512), conv_block(512, 512))self.classifier = nn.Sequential(nn.AdaptiveAvgPool2d(1), nn.Flatten(), nn.Dropout(0.2),nn.Linear(512, num_classes))def forward(self, xb):out = self.conv1(xb)out = self.conv2(out)out = self.res1(out) + outout = self.conv3(out)out = self.conv4(out)out = self.res2(out) + outout = self.classifier(out)return out# In[26]:model = to_device(ResNet9(3, len(dataset.classes)), device)
model#
# Pass one batch of input tensor through the model.
# # In[27]:torch.cuda.empty_cache()for batch in train_dl:images, labels = batchprint('images.shape: ', images.shape)print('images.device: ', images.device)preds = model(images)print('preds.shape: ', preds.shape)break# ## Training the Model# In[28]:history = [evaluate(model, val_dl)]
history# Let us train for 5 epochs with the learning rate of 0.001. Note that we use Adam as the optimizer of choice.# In[29]:history += fit(5, 0.001, model, train_dl, val_dl, torch.optim.Adam)# The accuracy achieved on teh valiation set is very high and close to 100%, therefore, one should not train the model for any more epochs. We end the training at 5 epochs.# In[ ]:def plot_accuracies(history):accuracies = [x['val_acc'] for x in history]plt.plot(accuracies, '-x')plt.xlabel('epoch')plt.ylabel('accuracy')plt.title('Accuracy vs. No. of epochs');# In[ ]:plot_accuracies(history)# In[ ]:def plot_losses(history):train_losses = [x.get('train_loss') for x in history]val_losses = [x['val_loss'] for x in history]plt.plot(train_losses, '-bx')plt.plot(val_losses, '-rx')plt.xlabel('epoch')plt.ylabel('loss')plt.legend(['Training', 'Validation'])plt.title('Loss vs. No. of epochs');# In[ ]:plot_losses(history)# ## Testing with Individual Images
#
# Now, one would like to test outthe model that we have built in previous section on the Test dataset and see how it performs.# In[ ]:def predict_image(img, model):# Convert to a batch of 1xb = to_device(img.unsqueeze(0), device)# Get predictions from modelyb = model(xb)# Pick index with highest probability_, preds  = torch.max(yb, dim=1)# Retrieve the class labelreturn dataset.classes[preds[0].item()]# In[ ]:test_dataset = ImageFolder(test_data_direc, tt.ToTensor())# In[ ]:len(test_dataset)# In[ ]:def get_prediction(torch_ds, model):img, label = torch_dsplt.imshow(img.permute(1, 2, 0))print('Label:', dataset.classes[label], ', Predicted:', predict_image(img, model))# In[ ]:get_prediction(test_dataset[0], model)# In[ ]:get_prediction(test_dataset[-1], model)# In[ ]:get_prediction(test_dataset[999], model)# In[ ]:test_loader = DeviceDataLoader(DataLoader(test_dataset, batch_size*2), device)
result = evaluate(model, test_loader)
result# Therefore, the accuracy of the model on the test set is little above 98% which is great.
#
# Naturally, a curious mind would like to know for which items did the model perform the worst.# In[ ]:wrong_preds = []
for test_ds in test_dataset:img, label = test_dsprediction = predict_image(img, model)if dataset.classes[label] != prediction:wrong_preds.append([dataset.classes[label], prediction])# In[ ]:print(f'Therefore, there are in total {len(wrong_preds)} out of {len(test_dataset)} items in the test set for which the model has made a wrong prediction')# In[ ]:#len(wrong_labels)# Let us check what did our model predict for each of the wrongly predicted items. # In[ ]:checked = []
for item in wrong_preds:if item not in checked:checked.append(item)print(f'{item[0]} has been wrongfully predicted as {item[1]}')# ## Saving the Model# In[ ]:torch.save(model.state_dict(), '√SehajS-CNN-ResNet9-fruit-prediction.pth')
相关文章:

Github项目-CNNResnet9-残差神经网络水果多分类项目
ResNet-论文全文完整翻译注解 - 知乎 你必须要知道CNN模型:ResNet - 知乎 #!/usr/bin/env python # coding: utf-8 #https://github.com/SehajS/cnn-resnet-fruit-classification # # Classifying Fruits from their Images # # This project aims at creating a…...

学习感悟一己之言
学习感悟一己之言 学习上克服困难实际上是克服心理上或认识上的障碍的过程。所谓的理解,就是化陌生为熟悉。看不懂,一方面是因为接触的材料太陌生,即远离你当前的背景知识;另一方面是材料或讲述者的描述刻画不准确或晦涩不当。有了…...
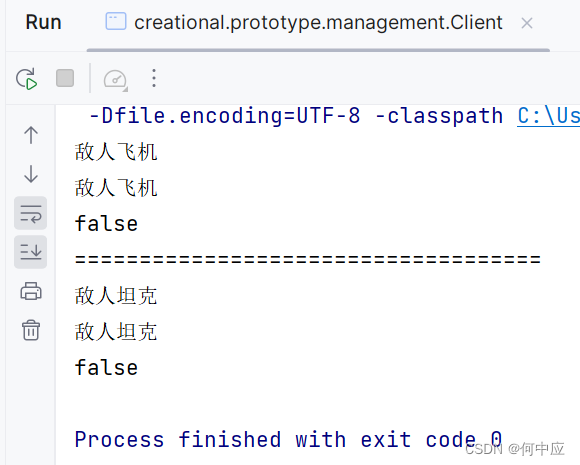
【设计模式-2.3】创建型——原型模式
说明:本文介绍设计模式中,创建型中的原型模式; 飞机大战 创建型设计模式关注于对象的创建,原型模式也不例外。如简单工厂和工厂模式中提到过的飞机大战这个例子,游戏中飞机、坦克对象会创建许许多多的实例࿰…...
)
八大插入算法(有注释)
直接插入排序 //直接插入排序 void InsertSortingDirectly(int* nums,int numsSize){int j0;for(int i1;i<numsSize-1;i){//定义一个中间变量保存当前要插入的值int tempnums[i];//在前面已排好序的序列中,找到合适的位置插入for(ji-1;j>0;j--){if(nums[j]&g…...

【2】基于多设计模式下的同步异步日志系统
6. 相关技术知识补充 6.1 不定参函数 在初学C语⾔的时候,我们都⽤过printf函数进⾏打印。其中printf函数就是⼀个不定参函数,在函数内部可以根据格式化字符串中格式化字符分别获取不同的参数进⾏数据的格式化。 ⽽这种不定参函数在实际的使⽤中也⾮常…...
npm管理发布包-创建与发布
创建与发布 我们可以将自己开发的工具包发布到 npm 服务上,方便自己和其他开发者使用,操作步骤如下 创建文件夹,并创建文件indexjs,在文件中声明函数,使用 module.exports 暴露npm初始化工具包,package.j…...

基于Spring,SpringMVC,MyBatis的校园二手交易网站
文章目录 项目介绍主要功能截图:部分代码展示设计总结项目获取方式🍅 作者主页:超级无敌暴龙战士塔塔开 🍅 简介:Java领域优质创作者🏆、 简历模板、学习资料、面试题库【关注我,都给你】 🍅文末获取源码联系🍅 项目介绍 基于Spring,SpringMVC,MyBatis的校园二…...

酒店 KPI绩效考核指标及应用
“路遥知马力,日久见人心”,目前国内各类型酒店风起云涌,大有在市场竞争中一比高下之势,各路精英受经济型酒店低投入高回报的市场利益驱动,都分分抢占市场,从而使国内经济型酒店的数量不断增加,…...

WordPress两种方法实现上传媒体图片文件自动重命名
我们发布文章时,会上传一些图片、音频之类的文件。但是WordPress没有自动 给新上传文件重命名的功能,逐个文件去重命名那就太麻烦了,那么我们改如何自动给上传的媒体文件图片重命名呢? 我在网站搜索了些上WordPress上传媒体文件自…...
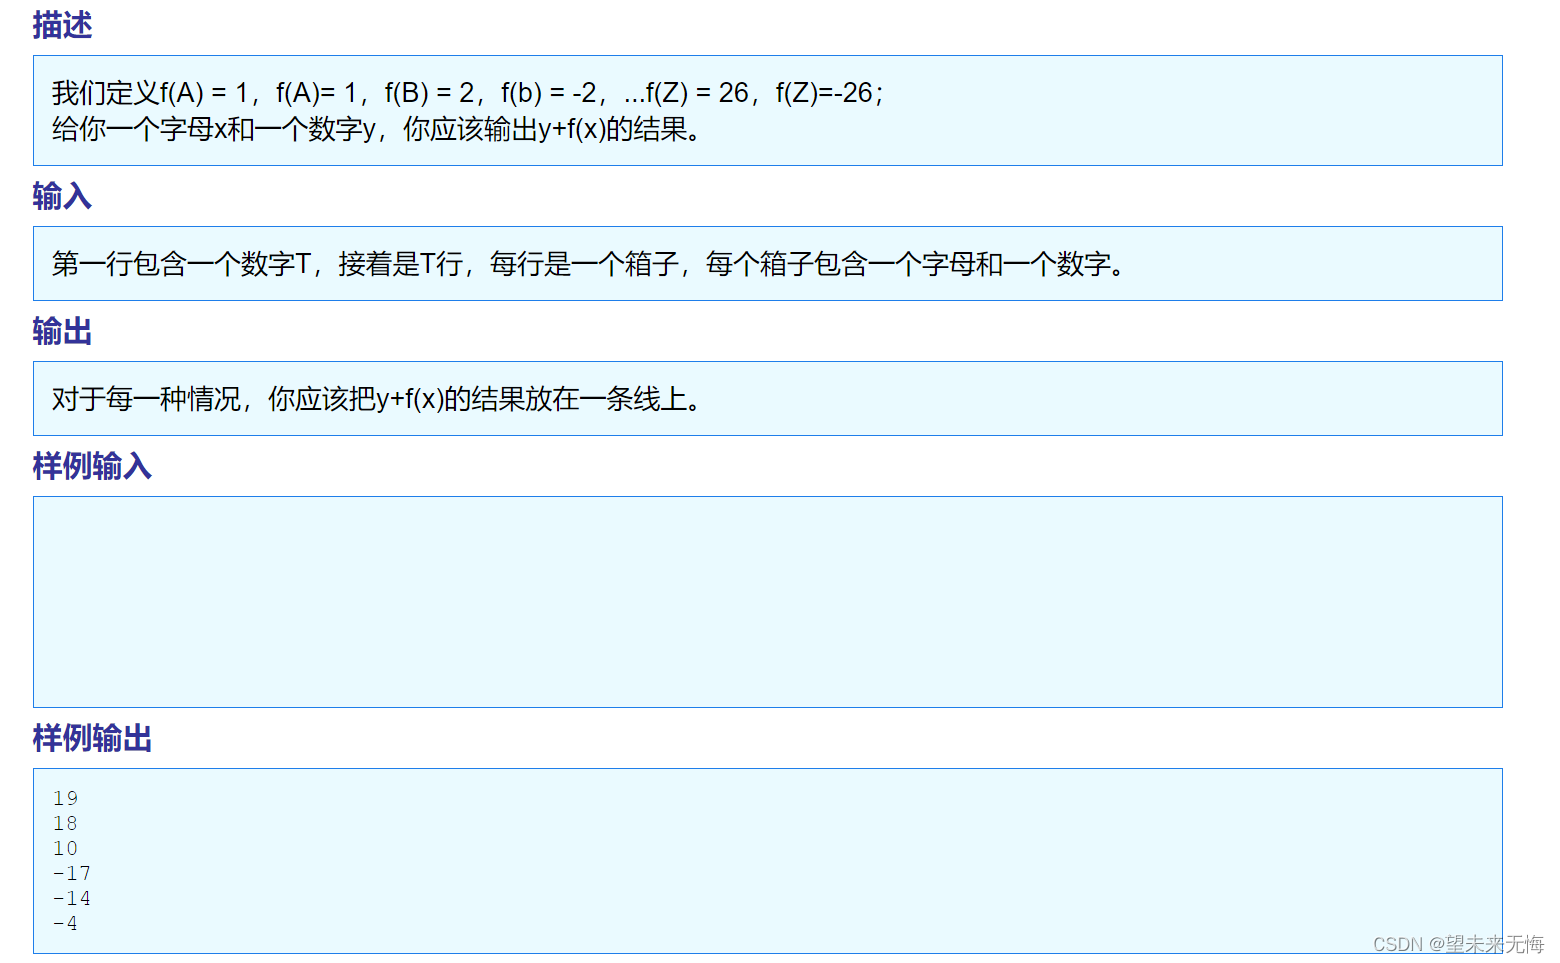
TZOJ 1405 An easy problem
翻译有些出错,但大概是那个意思 答案: #include <stdio.h> #include <ctype.h> //引用库函数isupper的头文件int main() {int T 0, i 0;scanf("%d", &T); //要输入的行数while (T--) //循环T次{char c;int y 0…...
SpringBoot+mysql+vue实现大学生健康档案管理系统前后端分离
一、项目简介 本项目是一套基于SpringBoot实现大学生健康档案管理系统,主要针对计算机相关专业的正在做bishe的学生和需要项目实战练习的Java学习者。 包含:项目源码、数据库脚本等,该项目可以直接作为bishe使用。 项目都经过严格调试&#…...
——UWB MAC时间网格同步及Hopping)
CCC联盟数字车钥匙(三)——UWB MAC时间网格同步及Hopping
本文继续上一篇UWB MAC时间网格继续介绍UWB MAC中关于时间同步相关内容。 3、MAC时间网格同步 每个测距会话的定义都基于相对的指定时钟参考 U W B t i m e 0 k UWB^k_{time0} UWBtime0k,相对于发起者的内部时钟定义。 时钟参考 U W B t i m e 0 k UWB^k_{time0} …...

一周上手 steam搬砖项目或成2024年最受欢迎副业
蒸汽砖拆除项目,兼职创业两不误,助你轻松赚钱 你是否想要找到一个既可以兼职又可以创业的项目?蒸汽砖拆除项目正逐渐崭露头角,引起了越来越多人的关注。这个项目不仅门槛低,上手快,而且不用担心卖不出去&am…...

java数据结构(哈希表—HashMap)含LeetCode例题讲解
目录 1、HashMap的基本方法 1.1、基础方法(增删改查) 1.2、其他方法 2、HashMap的相关例题 2.1、题目介绍 2.2、解题 2.2.1、解题思路 2.2.2、解题图解 2.3、解题代码 1、HashMap的基本方法 HashMap 是一个散列表,它存储的内容是键…...
快速了解ChatGPT(大语言模型)
目录 GPT原理:文字接龙,输入一个字,后面会接最有可能出现的文字。 GPT4 学会提问:发挥语言模型的最大能力 参考李宏毅老师的课快速了解大语言模型做的笔记: Lee老师幽默的开场: GPT:chat Ge…...
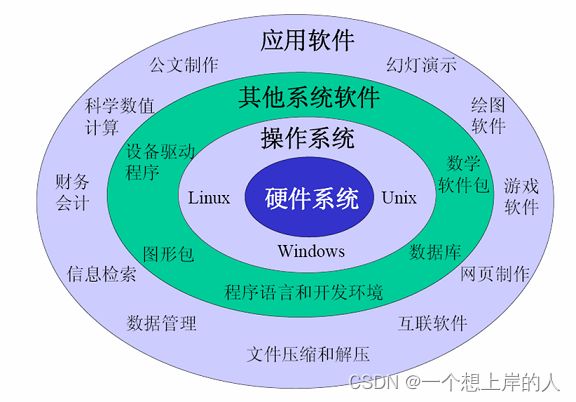
计算机软件的分类
以功能进行分类,计算机软件通常可以分为系统软件和应用软件两大类。 系统软件:系统软件是计算机运行和管理的基本软件,包括操作系统、驱动程序、系统工具和服务程序等。操作系统是系统软件的核心,负责管理计算机的硬件资源、提供用…...
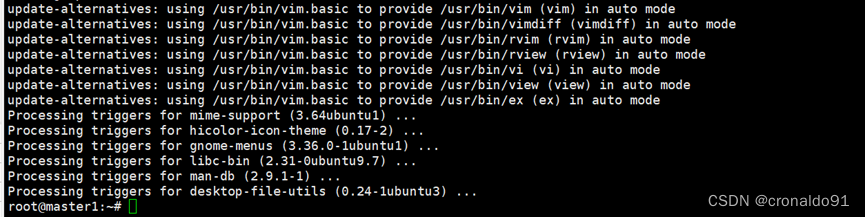
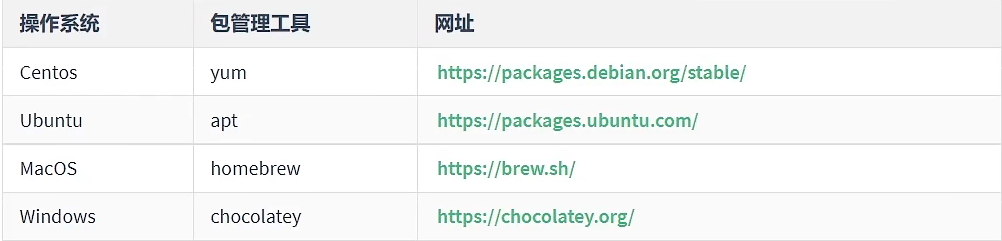
数据库应用:Ubuntu 20.04 安装MongoDB
目录 一、理论 1.MongoDB 二、实验 1.Ubuntu 20.04 安装MongoDB 三、问题 1.Ubuntu Linux的apt 包管理器更新安装软件报错 2.Ubuntu20.04安装vim报错 3.Ubuntu20.04如何更换阿里源 4.Ubuntu22.04如何更换阿里源 一、理论 1.MongoDB (1)概念 …...

服务器配置 jupyter lab,并在本地浏览器免密登陆
一、背景 快速搭建一个jupyter lab 不用每次用ssh登录输入密码 二、步骤 方法1、临时在服务器启动 jupyter lab,并在本地浏览器免密登陆 两句命令解决 pip install jupyterlabnohup jupyter lab --ServerApp.ip"*" --ServerApp.password"" -…...
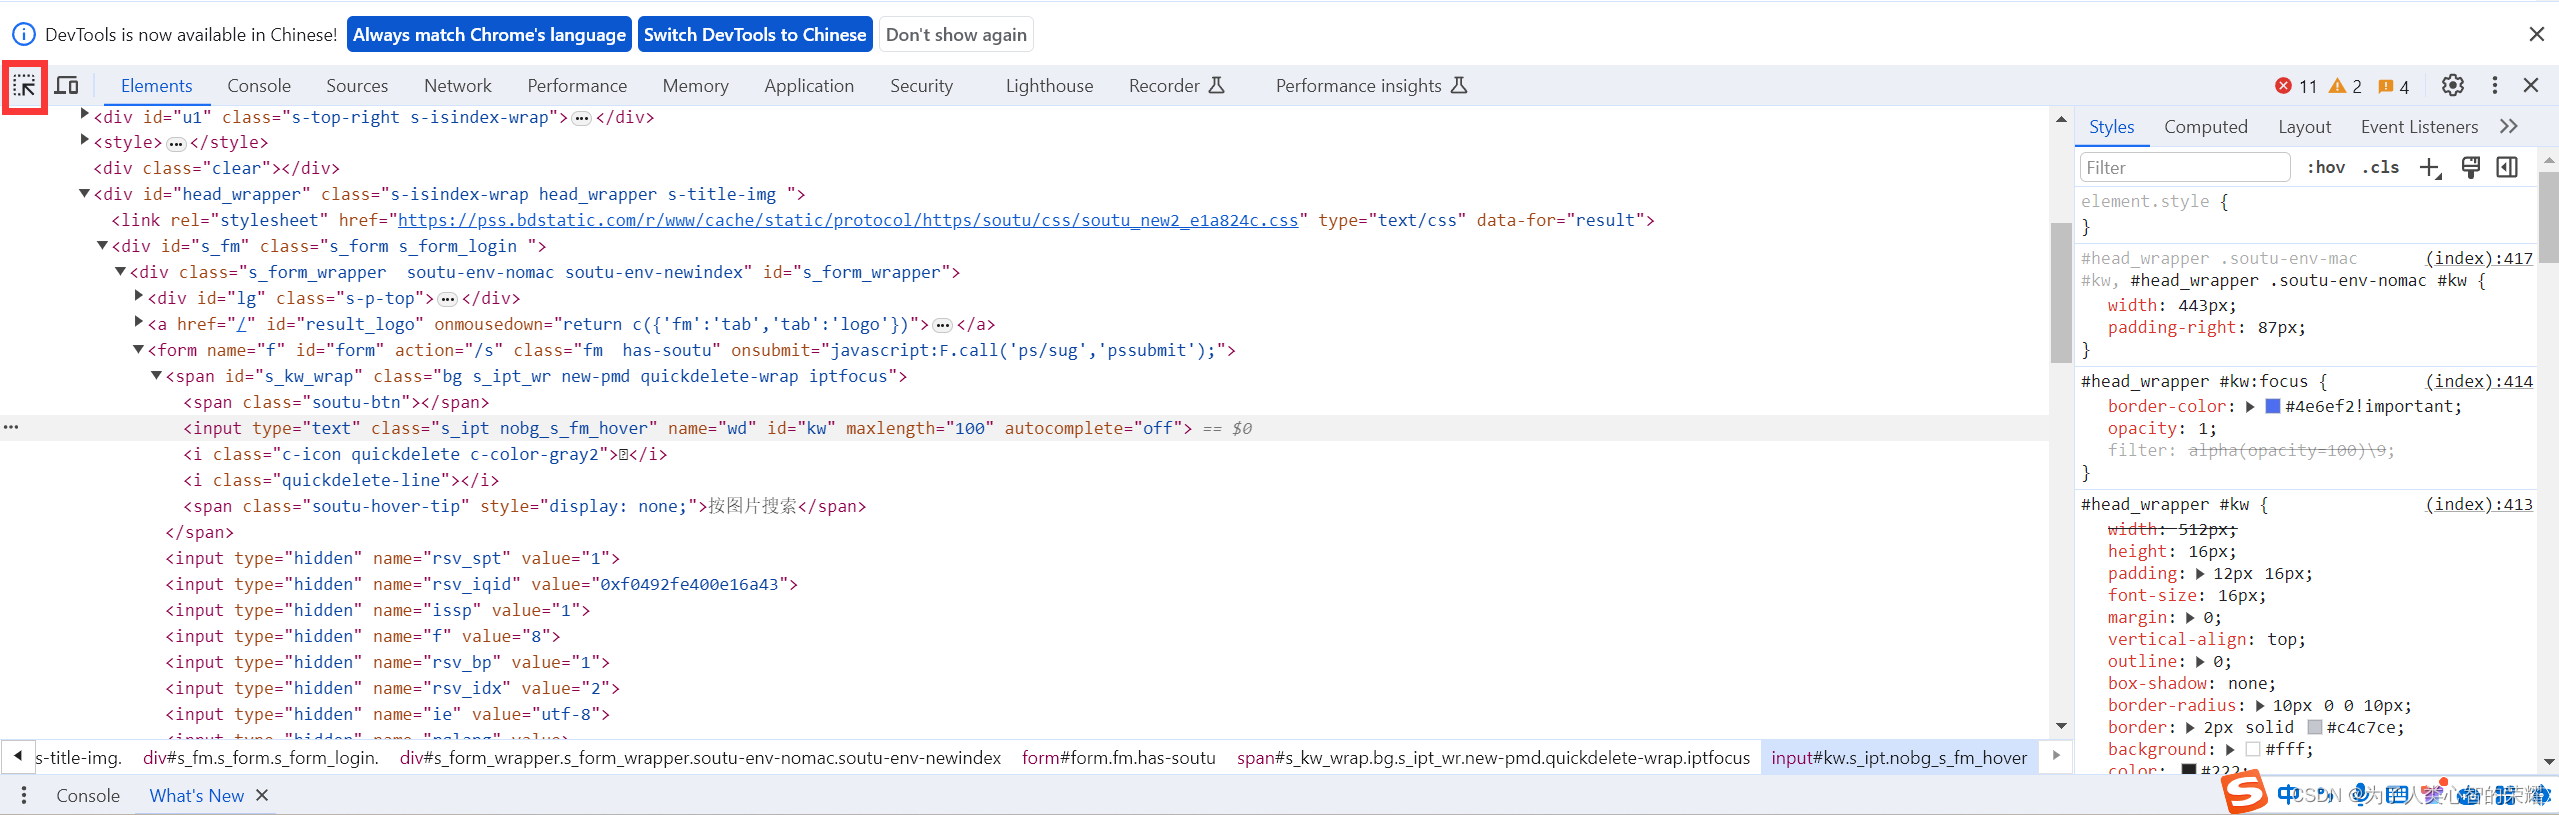
WebUI自动化学习(Selenium+Python+Pytest框架)002
新建项目 New Project 新建一个python代码文件 file-new-python file 会自动创建一个.py后缀的代码文件 注意:命名规则,包含字母、数字、下划线,不能以数字开头,不能跟python关键字或包名重复。 ********************华丽分割线********************…...

miot-plugin-sdk. npm install安装失败
miot-plugin-sdk-npm install安装失败 最紧公司要开发一台智能设备,经过同事的对比,选中了米家作为云平台,于是,我就负责开发app界面端,根据官方文档教程 下载了miot-plugin-sdk 程序,准备开始开发,结果悲…...

SQLite Viewer:3分钟学会在线查看SQLite数据库的终极方案
SQLite Viewer:3分钟学会在线查看SQLite数据库的终极方案 【免费下载链接】sqlite-viewer View SQLite file online 项目地址: https://gitcode.com/gh_mirrors/sq/sqlite-viewer 想象一下,你收到一个SQLite数据库文件,需要立即查看其…...

Wireshark提取NTLMv2 Hash与Hashcat强度验证实战
1. 这不是“黑客教程”,而是一次企业内网安全加固前的必做体检Wireshark抓NTLMv2 Hash、Hashcat暴力破解——看到这两个词,很多人第一反应是“红队操作”或“渗透测试”。但在我过去十年服务的三十多家中大型企业客户里,真正驱动这个动作的&a…...

STM32 SysTick配置详解:从原理到实践,打造精准系统时基
1. 项目概述:为什么SysTick配置是STM32开发的“心跳”起点在STM32的嵌入式开发世界里,SysTick定时器就像整个系统的心脏,它规律地跳动,为操作系统、延时函数、任务调度提供着最基础的时间基准。很多新手拿到开发板,跑完…...

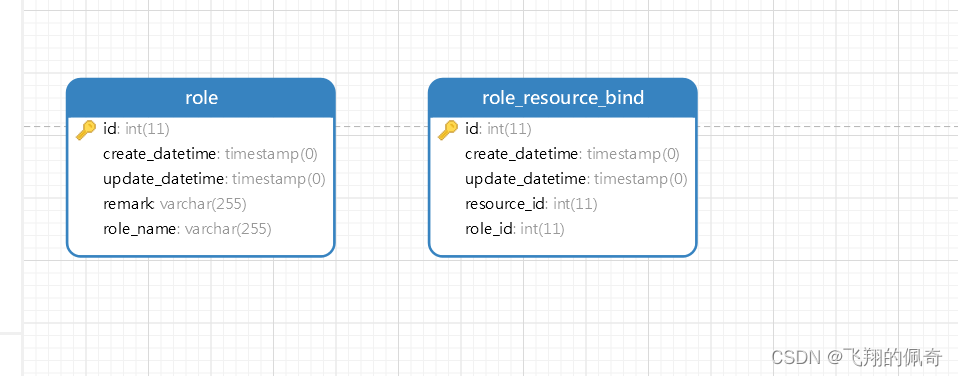
LEFT JOIN 中 ON 与 WHERE 过滤的差异
在 MySQL 数据库开发中,LEFT JOIN(左外连接)是一个最常被误用的语法。许多开发者往往习惯性地将所有过滤条件一股脑地往 ON 后面塞,或者为了排版好看将条件全部扔到 WREHRE 里面。 这种模糊的逻辑在普通内连接(INNER J…...

JLink版本不兼容?手把手教你解决APM32F003F6P6在Keil V5.14下的烧写闪退与报错
JLink与Keil版本冲突全解析:APM32F003F6P6烧写难题终极指南 当你深夜加班调试APM32F003F6P6,Keil突然弹出"Error Flash Download failed"然后闪退,JLink软件在你选择芯片型号后直接消失——这种工具链版本冲突带来的"玄学&quo…...
)
从Arduino到树莓派:手把手教你玩转IIC和SPI通信(附Python/C++代码)
从Arduino到树莓派:手把手教你玩转IIC和SPI通信(附Python/C代码) 在创客和硬件开发的世界里,IIC和SPI就像两位性格迥异的老朋友——一个温和有序,一个雷厉风行。无论你是用Arduino快速原型开发,还是在树莓派…...

UxPlay应用场景:从家庭娱乐到企业演示的全面解决方案
UxPlay应用场景:从家庭娱乐到企业演示的全面解决方案 【免费下载链接】UxPlay AirPlay Unix mirroring server 项目地址: https://gitcode.com/gh_mirrors/uxp/UxPlay UxPlay是一款功能强大的AirPlay Unix镜像服务器,它让Linux、macOS和Unix系统能…...

为什么这款文档转换工具能同时实现高效与精准?揭秘Marker的核心优势
为什么这款文档转换工具能同时实现高效与精准?揭秘Marker的核心优势 【免费下载链接】marker Convert PDF to markdown JSON quickly with high accuracy 项目地址: https://gitcode.com/GitHub_Trending/ma/marker 在当今信息爆炸的时代,处理PD…...

2026最权威一键生成论文工具榜单:这些被高校和导师偷偷推荐的软件你用了吗
一键生成论文工具正在重塑学术写作的效率与质量。随着AI技术的不断突破,越来越多高校、导师及科研机构开始关注并推荐这些高效、合规的智能写作助手。依托权威检测平台数据、多所高校实测反馈及用户真实评价,本文将为您揭晓2026年最值得信赖的一键生成论…...

C#从零开始学习笔记---第八天
大家好,欢迎来到我的频道,这里给大家先道个歉,这两天脚崴了,极度不适,所以昨天就没更新,今天的话确实也还挺不舒服的,所以今天我们的内容也不会有很多,希望大家谅解一下。那么接下来…...